The clothing is used to protect our body and the fashion is used to express who we are. If you look in nature, these two aspects are reflecting by the type of skin that we have. We can considere fashion as a second skin.
The skin is a multilayer of cells, it's breathable, it can be different colors and it protect the body.
Inspiration, the second skin
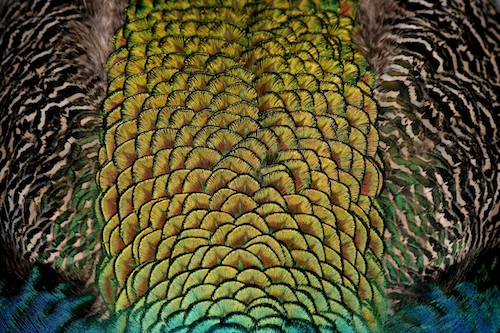
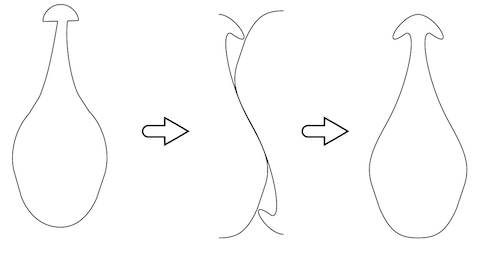
A little bit as a biomimicry process, we can look at different skins and each of them reveal different mysteries, but the nature work about tessalation and skin is definetly fascinating. All the paterns protect the body entirely, but still adapt to the shape of the animal when it moves. It also tell a story of where it come from, the color or the shape of theses scale reveal their family, their evolution. Where the human comes from? What piece of history I want to reveal?
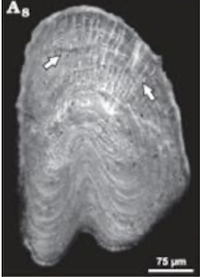
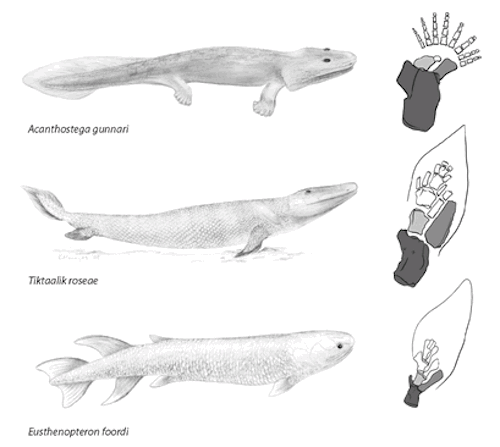
I discovered in my summer vacations that we have the Prince of Mishuaga here in Quebec. In the Escuminac in Gaspesie, we found a big and complete fossil of the Eusthenopteron foordi. This big fish is the first one who evolved enough to begin the transition to fish to terrestrial life. We can see in the last picture of the inspiration board that this fish has bones like tiny little hands in his fin. So let's be inspired by that fish and his scale and let's evolve like him.
Human

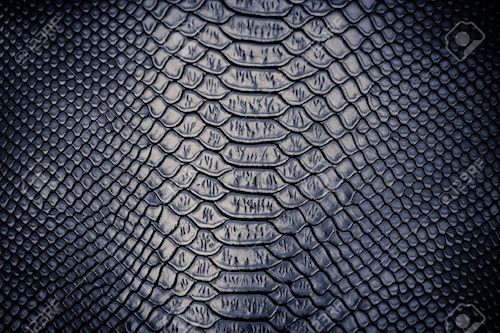
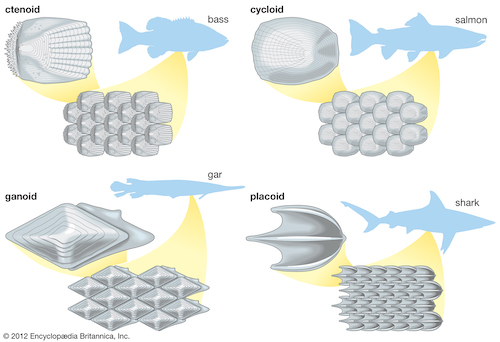
Snake
Fish

Eusthenopteron foordi scale
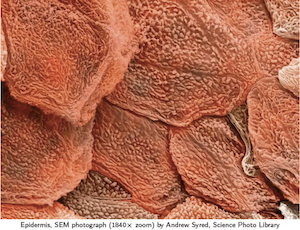
Human skin
Peacok
Type fish
Eusthenopteron foordi group scale

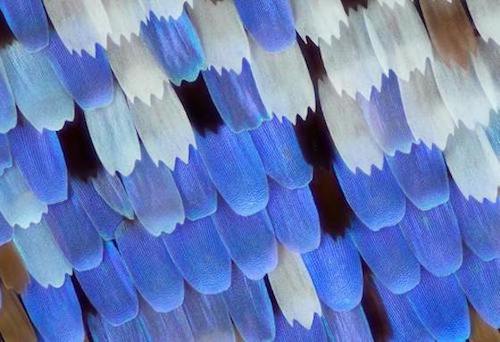
Butterfly
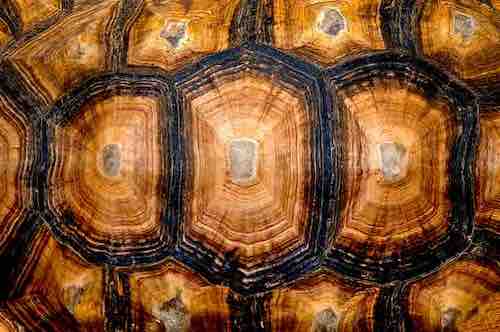
Turtle
Shark


The shape
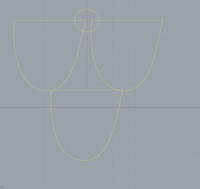
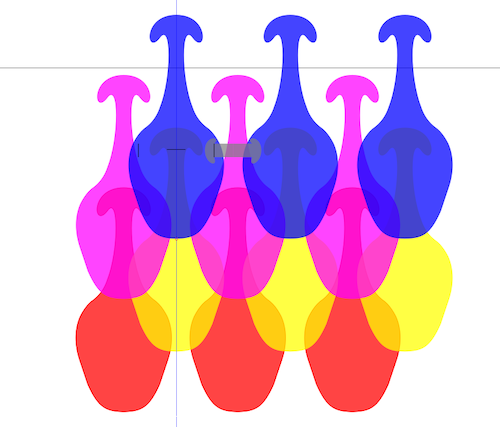
I did a quick research on tesselation and found some inspirering shape to start the shape developpement
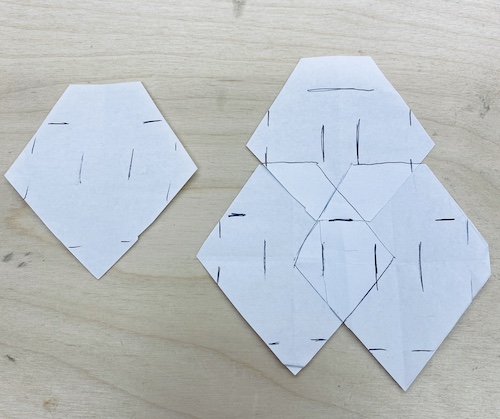
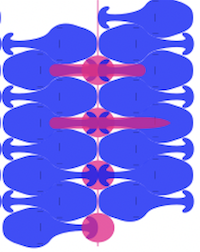
- I began with something big and and simple, the hexagone. It covers easily the surface and I can add to it some hair or fish scale or feather like real animal. So the hexagone is the skin and I can create accessories that can be changed and can be hold by a folecule for exemple.
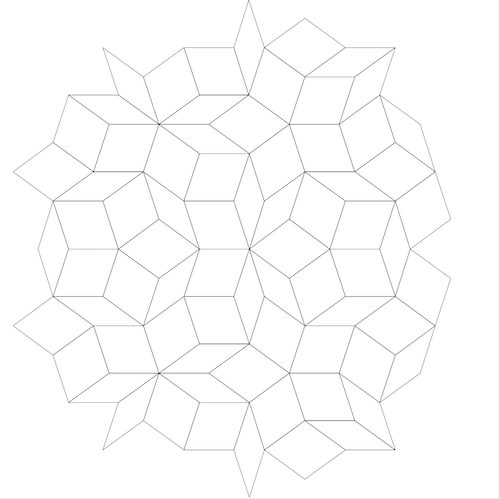
- Let's try with pentagone if it's better.... It doesn't work perfectly for covering the space but I discover something else very interesting, the Penrose tiles.
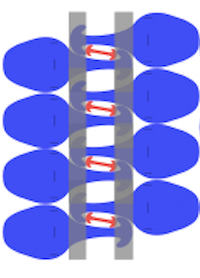
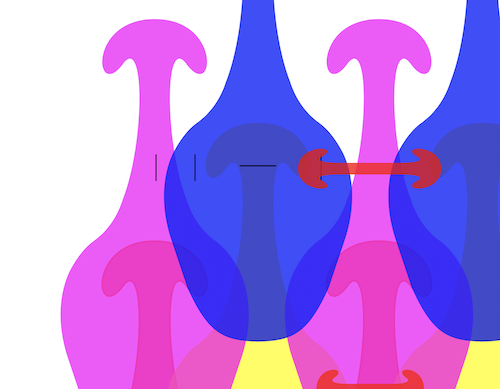
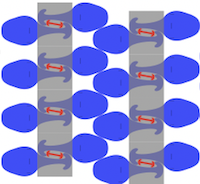
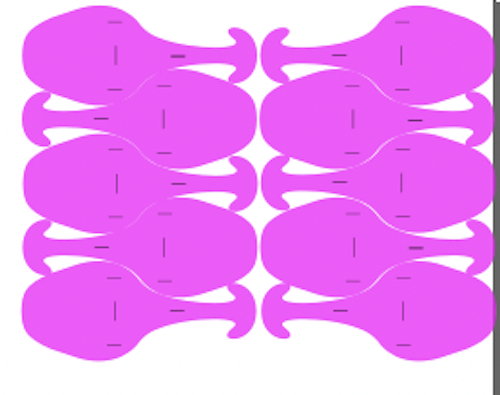
- Let's do something very different, scales of animal and the tesselation inspiration always aligns the scale in vertical lines. Try 3 is a scale connected in a vertical way.
- Ok but it needs to connect on the sides too and a real scale is actually more round.
- What if I take both try 3 and 4 and embed them together? It begins to click in my head
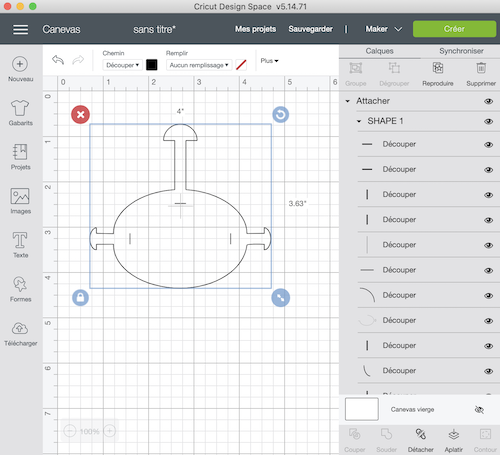
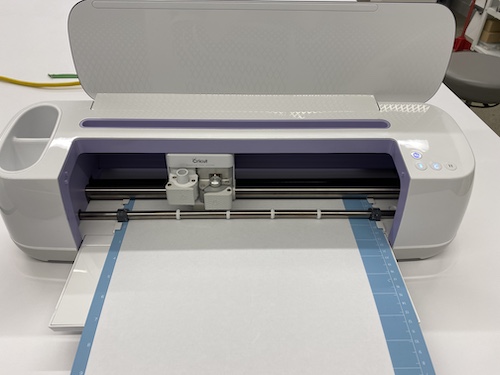
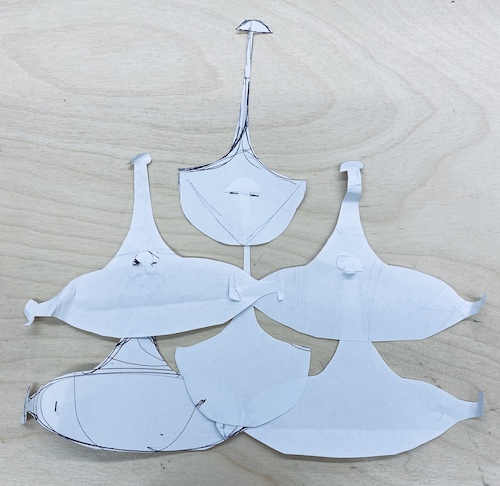
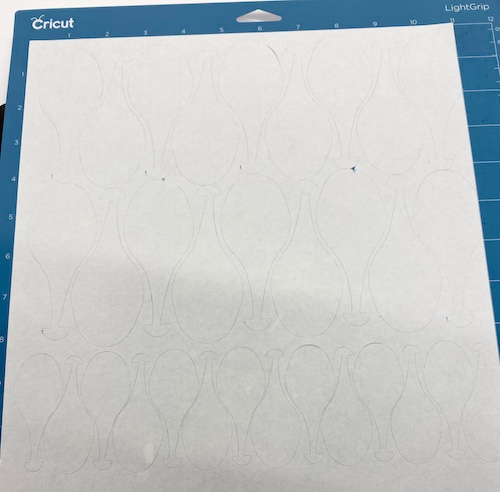
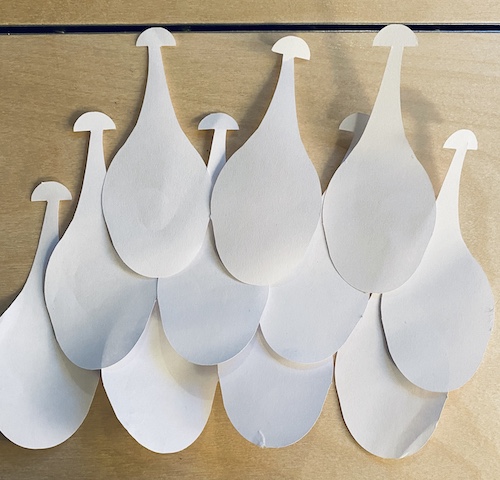
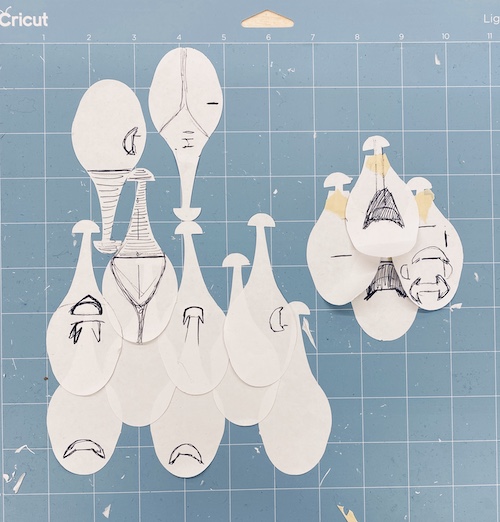
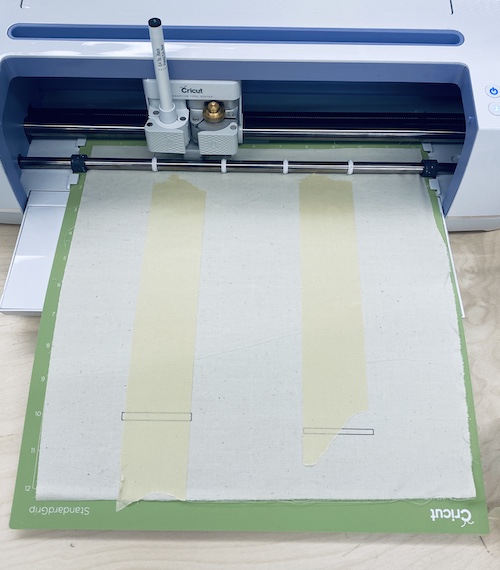
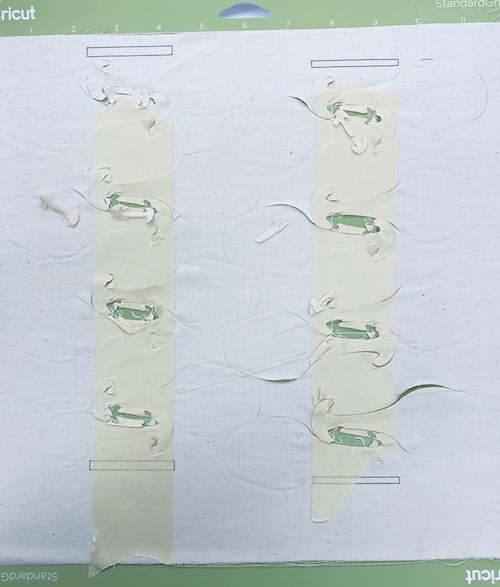
- I draw few geometric form on Inkscape and cut it on the vinyl cutter Cricut to make sure it's working. The Cricut machine is a vinyl cutter, but comes also with a variety of tool and stiky mat that allow you to cut almost any kind of thin material like paper for that proof of concept.
Inspiration tessalation
Try 1
Try 3
Cricut design space
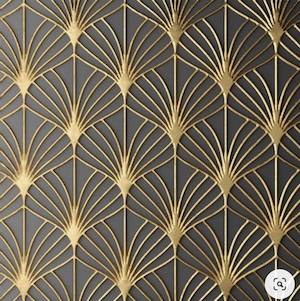
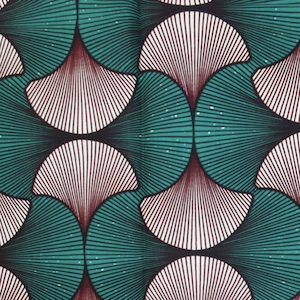
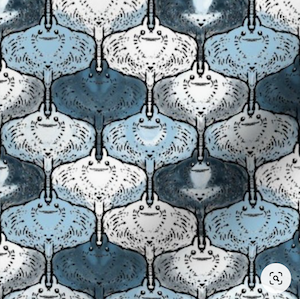
Inspiration african design
Try 2
Try 4
Cricut cut paper
Inspiration tesselation
Penrose tile
Mix 3+4
Try 5
Drawing on Rhinoceros and Inkscape
I did a quick research on tesselation and found some inspirering shape so start the shape developpement
- Choose your template (with the good unit)
- To create multiple lines, choose the command
Polyline , write the good length and click where you want to end. - Insert a picture to draw on it, command
pictureframe . - I did a lot of autocad 10 years ago and Rhinoceros is, in a way, similar (for the drawing part). You think about a fonction, you write it in the command line and press enter. Ex.: Move, enter, select what you need to move, click a reference point and move your object (any commad you have in mind it almost has it) .Trim, copy, scale...
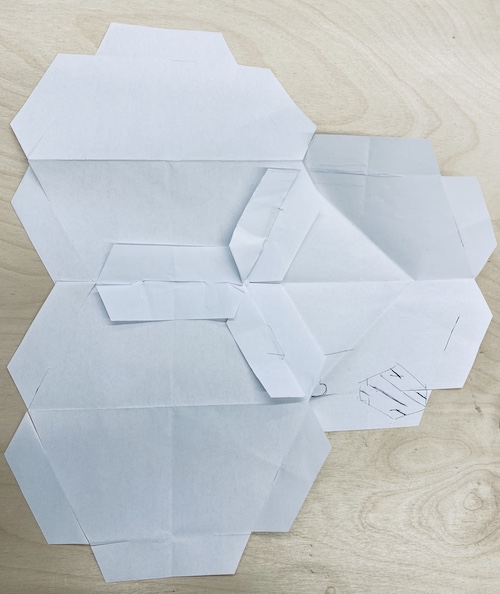
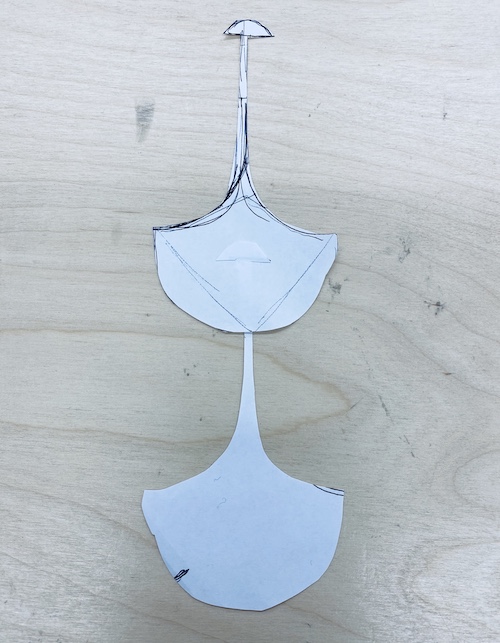
- To resume how I create the shape, I draw on the image of a Eusthenopteron foordi's scale that I found in a microanatomical stydy of this animal. Then, I place 3 of them to create the stem and the folecule, trim the rest. I align the multiple one to fit on the cricut. The file was too heavy for the cricut design space and everytime it crashes. I learn that you have to
join the shape before going on cricut design space so instead of having multiple small lines, it has one connected line. I never figured out why the dimension never follow but you can always resize it.

Virtual to physical
It's time to do some back and forth with the software and machine to go further. Play with different materials and understand the mecanic behind this skin pattern.
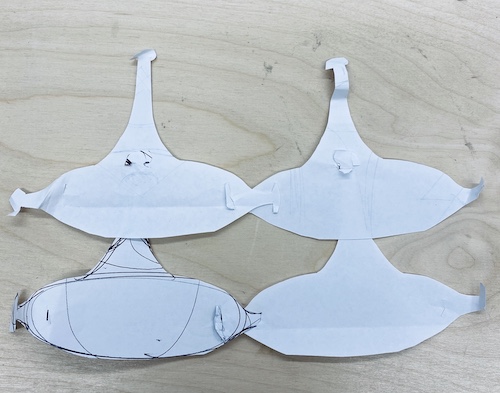
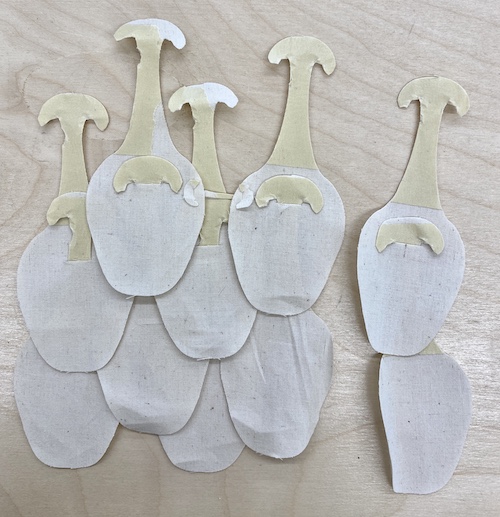
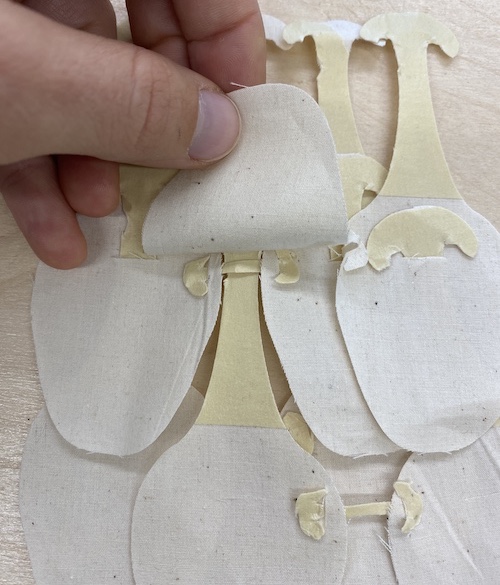
- First, I play with the paper piece and use the stiky mat to hold everything in place. On Inkscape, instead of going asymmetrical, I cut it in two, reverse it, modify the jonction of the scale and stem to fit with the curve and do a test on raw cotton.
- With different color I superpose them to figure where to add some slot to hold the material togheter like on my franksheinsteins.
- Because cotton is soft, my collegue Noemie gives me the idea to add some rectangle of interlining on the fabric. This can be very interesting, because layering differents material mean that I can have rigid area and soft one. I could make this pattern on sheer per exemple.
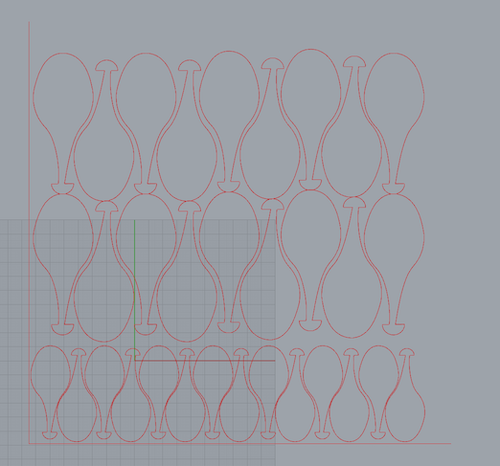
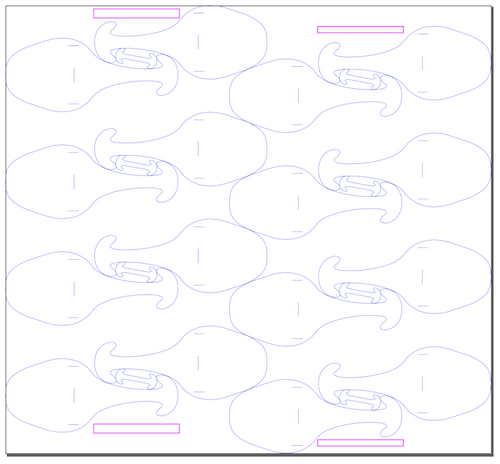
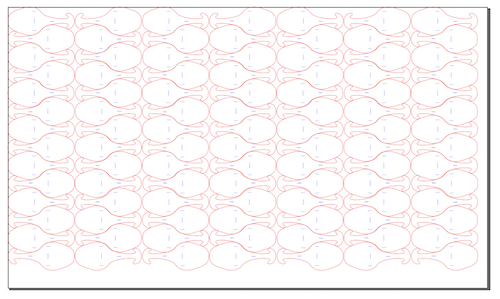
- I create a file with different ideas of how can I interlock theses shape so I can glue the second material and then laser cut on them with the smallest waist possible.
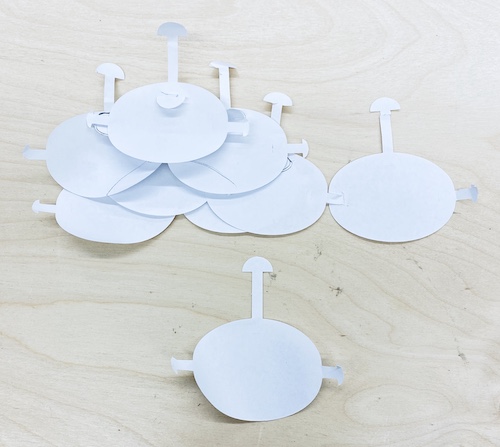
- I try the easiest one to verify the theory. On the cricut, I draw some reference point that I can use to align the second material. Then reload it and cut the fabric on top of it. You can see it's quite interesting.
- I discover that with the gravity, the folecul falls onto the little bone between each of them. I try to shorten the stem, but the esthetic is less interesting.
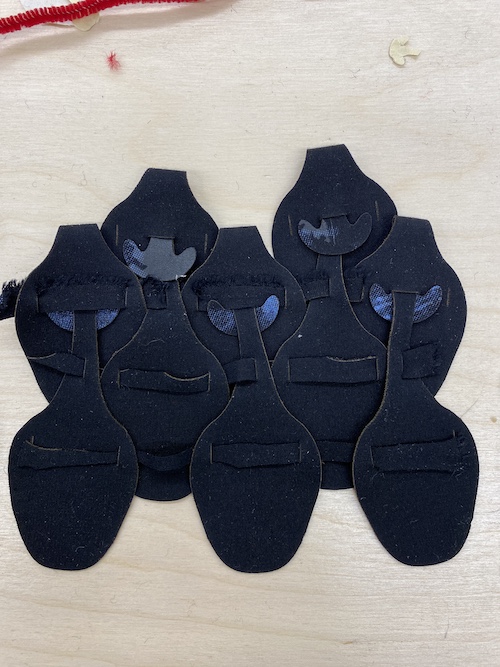
- I keep the stem like before. The small piece that attach is really small, do I really need this part? What if I take a rope or a elastic or anykind of wrire? The purpose of this week is all about doing a cloting that we can undo and fabricate other one different. So taking a rope or a type of wire can be completely reusable.
- I add slot in the stem align with the side of the next scale. But all this mecanism is hiden under the scales.
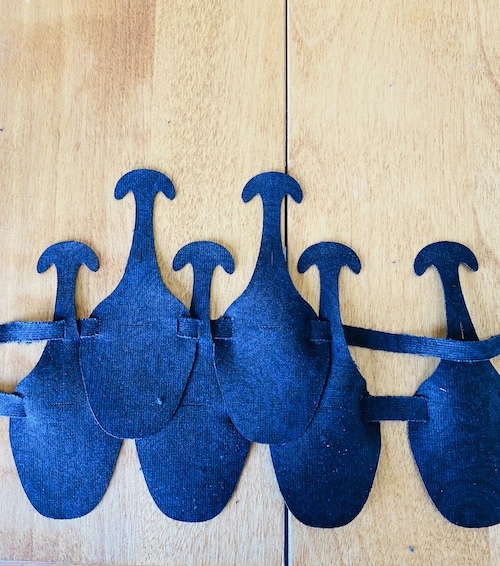
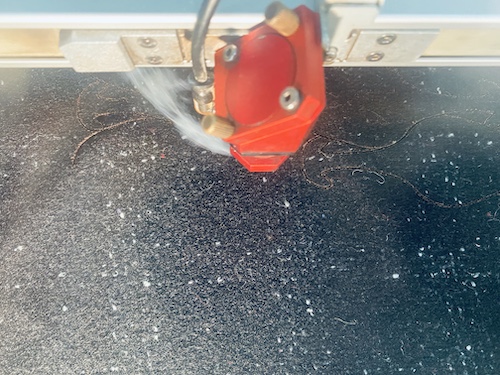
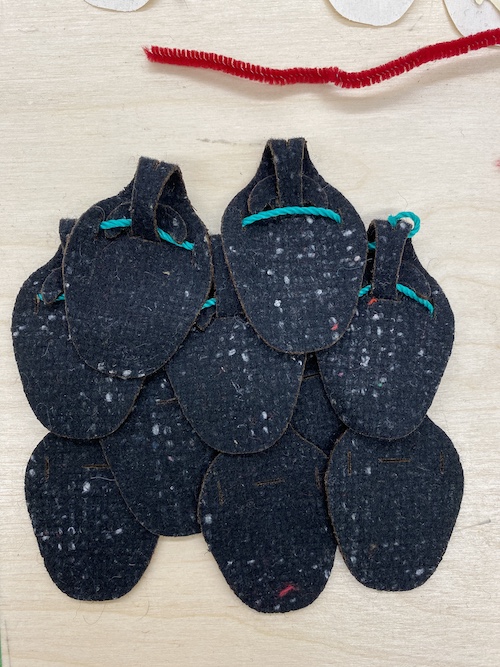
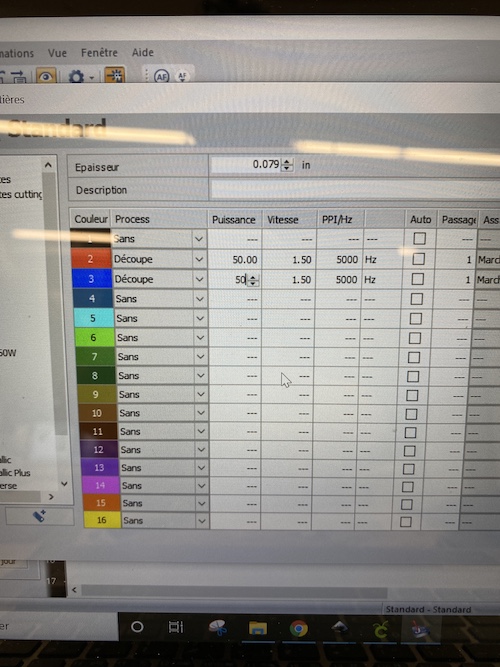
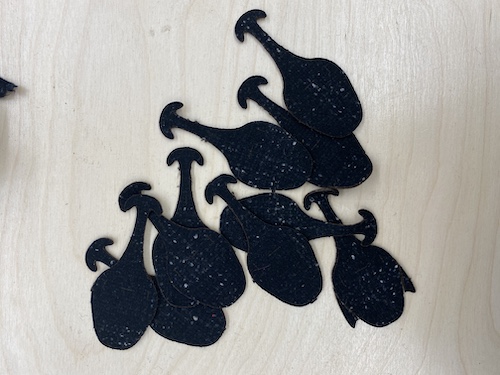
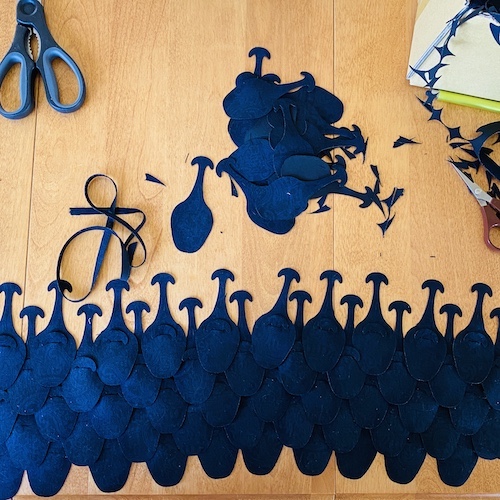
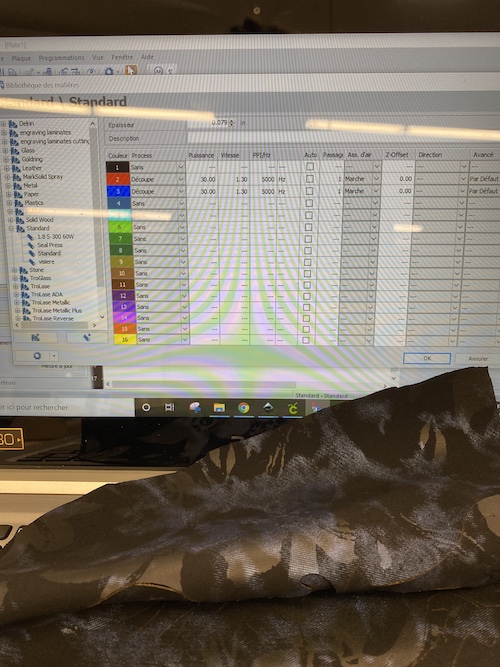
- I prepare an optimised file to cut on a little piece of wool felt. I began with a power of 10 and a speed of 1.5. It marks, but doesn't cut. I change the power to 50 and it works really well. Here is the result assembled with a green rope.
Fitting mecanism
Interlining try 1
File cricut
Pattern assemble
Correct the slots
Optimise the shape
Interlining try 2
Place the
File laser optimise


Putting the slot
Interlining try 3
Cutting result
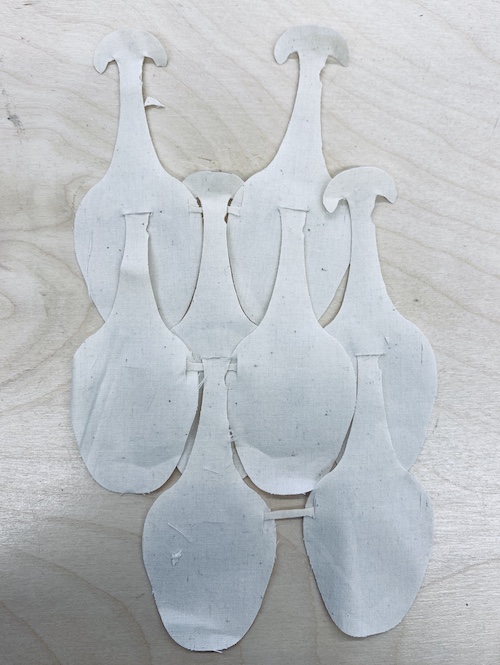
Laser parameter wool felt
Production
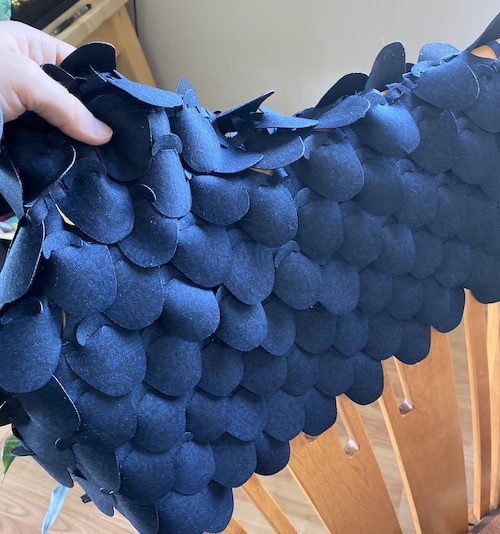
The pattern works really well and I like the way it moves. Time to experimence with different kind of textile.
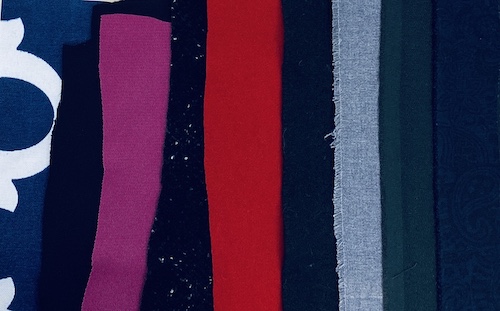
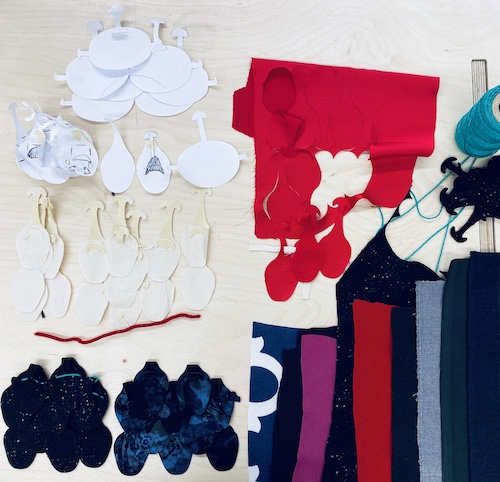
- I don't know much about textile and laser so I made a quick research on Internet and I find very versatile information so I decide to test and see. I went to a fabric shop and take sample of a litlle of everything randomly. There were actualy alot of polyester but knit or weave differently. I have some satin, something called prada, softshell, screen, felt, and other. I came back and do a flame test to make sure there was no chlorine produce by the heat and to see if the material have a tendancy to burn easily or not.
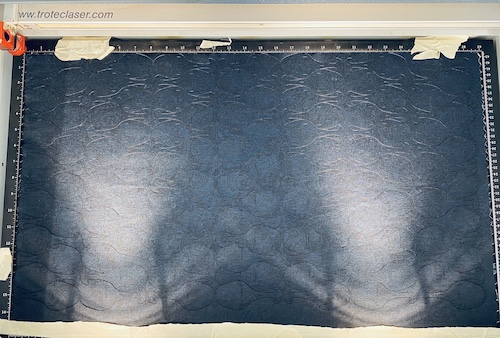
- The ones I choose cut really well around power 30 and 1.3 of speed and hz 5000.
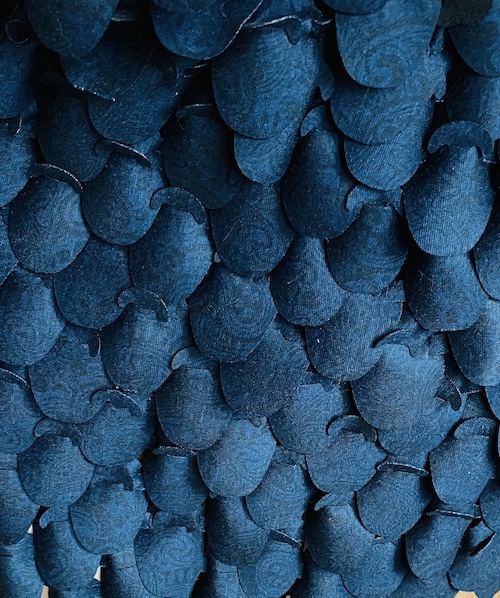
- The one I prefer has this really interesting thickness that allows me to assemble it without adding any material to make the folecule stronger.
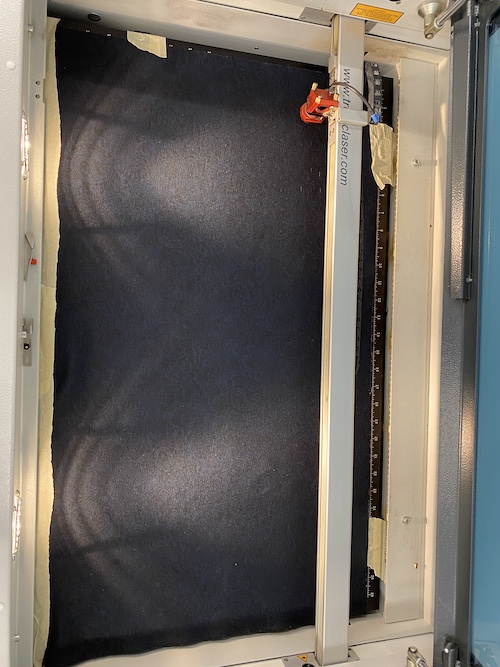
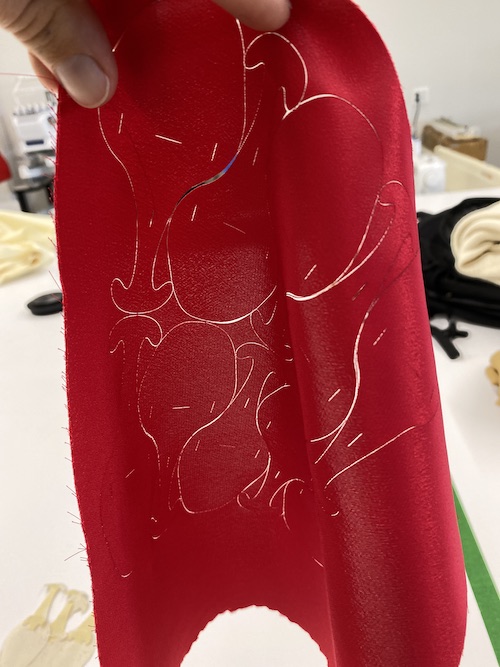
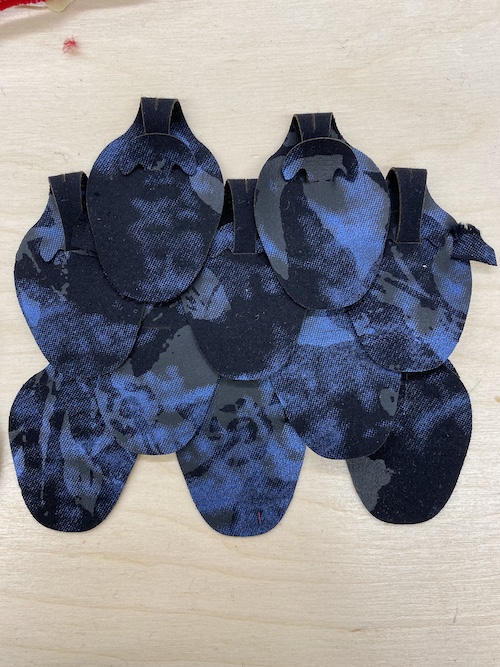
- I found the blue texture on the fabric was too much so I went back and both a similar one with a different design on it and start the big production. I discovered that if you work with a full sheet of textile, you need to tape de base of it. If not, their the air trap just in front and it push your fabric. Without it, it can not do a clean job.
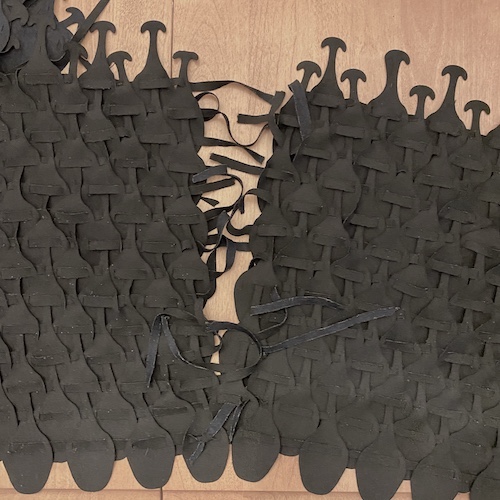
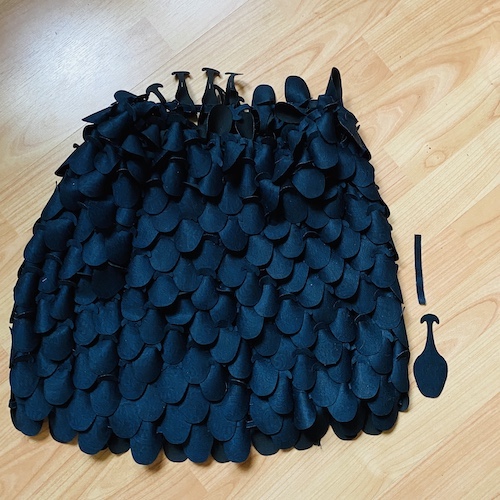
- When production is done, I need to assemble everything. I never create clothing so I decide to make it simple and create a cylinder that is narrow at the top so it will not fall has a skirt.
- As you can see on the picture, I assemble two big panels and link them togeter. It's actually more solid than I think but later on, the total weight of the material was quite impressive and I needed to stop. I can in the future explore the idea of making a laminated scale with a very lightweight one and a stronger one, that can be a possible solution.
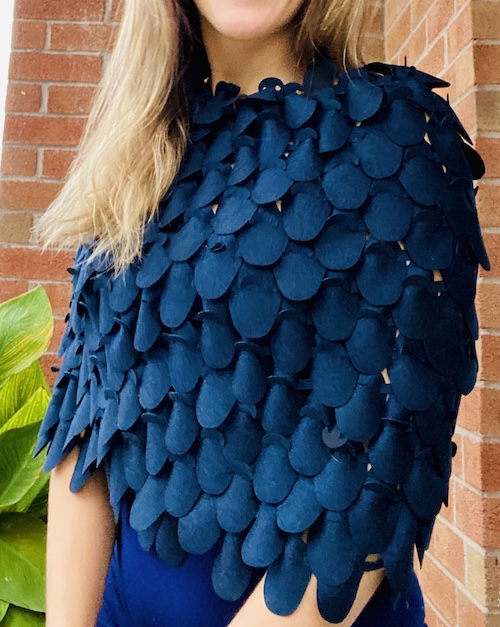
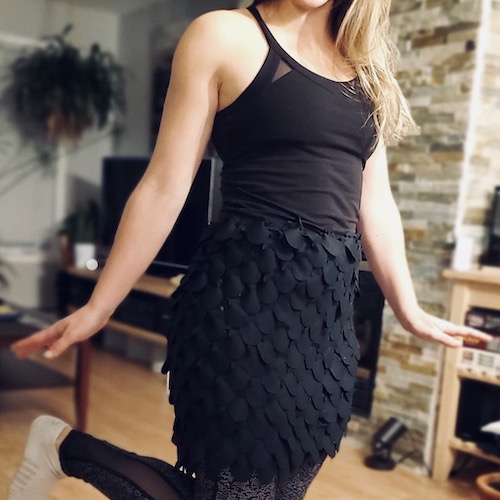
- So after 12hr, here the final result! The good news is that I can where it also has a shirt because of the big flexibility.
- Here is the production file.
- I also share this work on the Open source circular fashion website!
Samples
Satin fabric
Main tests
Production file
Final parameter
Tape the fabric