This week I will explore the true color of one very common food: the oignon. I will create dye, ink and pigment with the same main ingredient, the oignon peel. I found a very interesting study on the oignon skin dye extract on cotton. The study main focus is on the antimicrobial activity and the anti-UV protection. Also here a wiki on natural dye very usefull for the common knowledge. All the fabricademy team of echoFab create a Miro with a summary of the information.
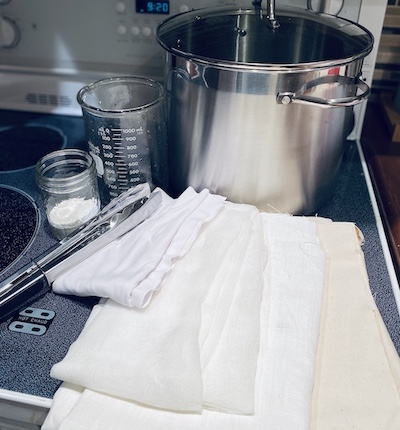
Step 1 - Prepare the fiber
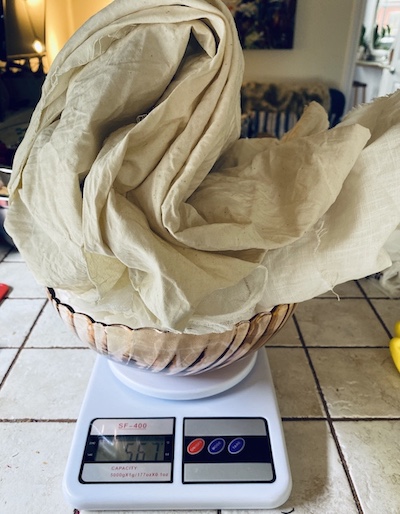
- First, divide your textile per type of mordant you will do.
- Weight each piles to have the Weight Of Material (WOF) This WOF will be your ratio guide for the amount of mordant you need later one.
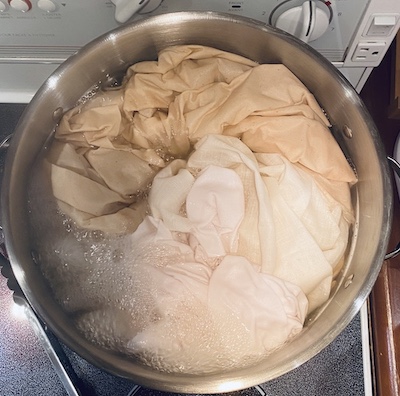
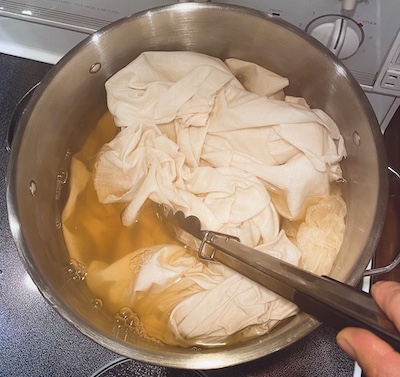
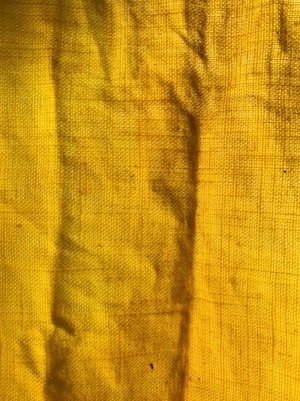
- Take all you vegetal fiber and boil it for 1 hour with a ratio of 2 tables spoon of Soda per 4 or 5 liters of water. This will take off the wax or any impurity in your fabric (If you do this process for animal fiber it will destroy everything). For this experimentation, I use 4 tables spoon in 8 liters of water...but during the boiling process with all the textile, by few time the water flew out. I think a half full pan is wise. The color of my water was quite yellow at the end.
- When it's clean, it's time for your mordant. I use only one, the Alum powder. You can use 12 to 15% of the WOF. I used 15% for this experimentation in 7 liters of water. You need to disolve the powder before putting everything in the pan. Simmer for 1 hour.(Simmer = no boiling, just the vapor goes out)
- When my vegetable fiber finish with the mordant, I take of everything and with the rest of the water I pour my animal fiber (knitting whool) in and add 2 tea spoons of cream of tartar desolve in water. Simmer for 1 hour
- When it's finish you can dry the fabric and use it later or continue the process.
Step 2- The dye
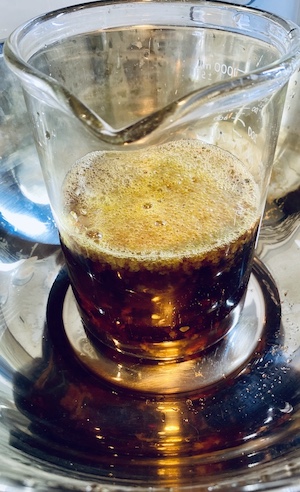
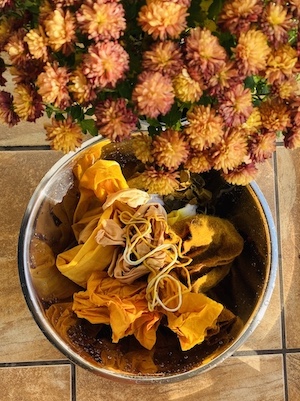
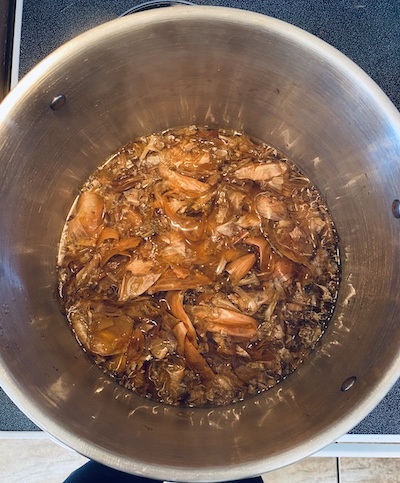
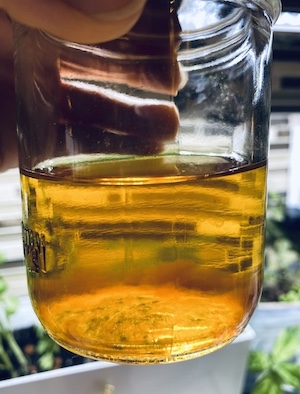
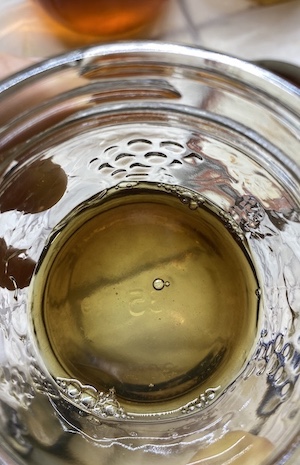
- I took my 80g of yellow oignon skin in a bowl with 3 liters of waters and let them on the counter for 2 hours. (during my mordant step)
- When my only pan was available, I por it in it and boil everything for 1 hour.
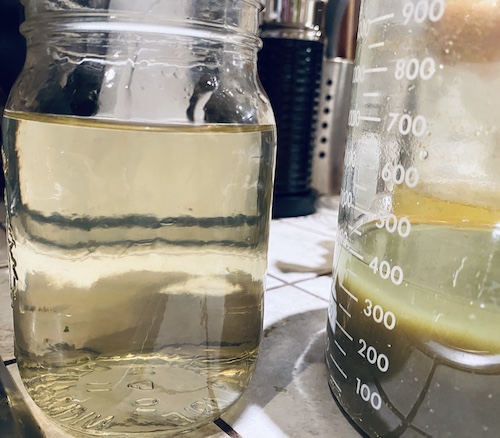
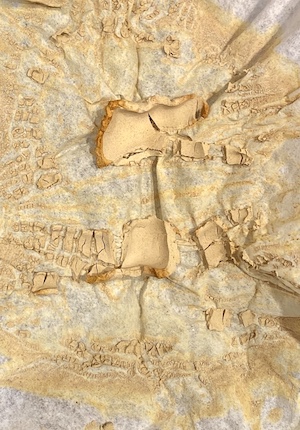
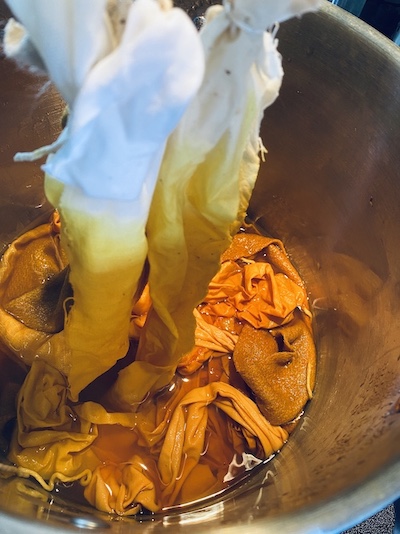
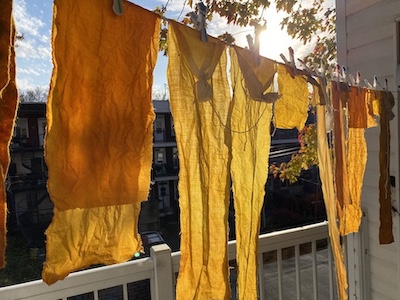
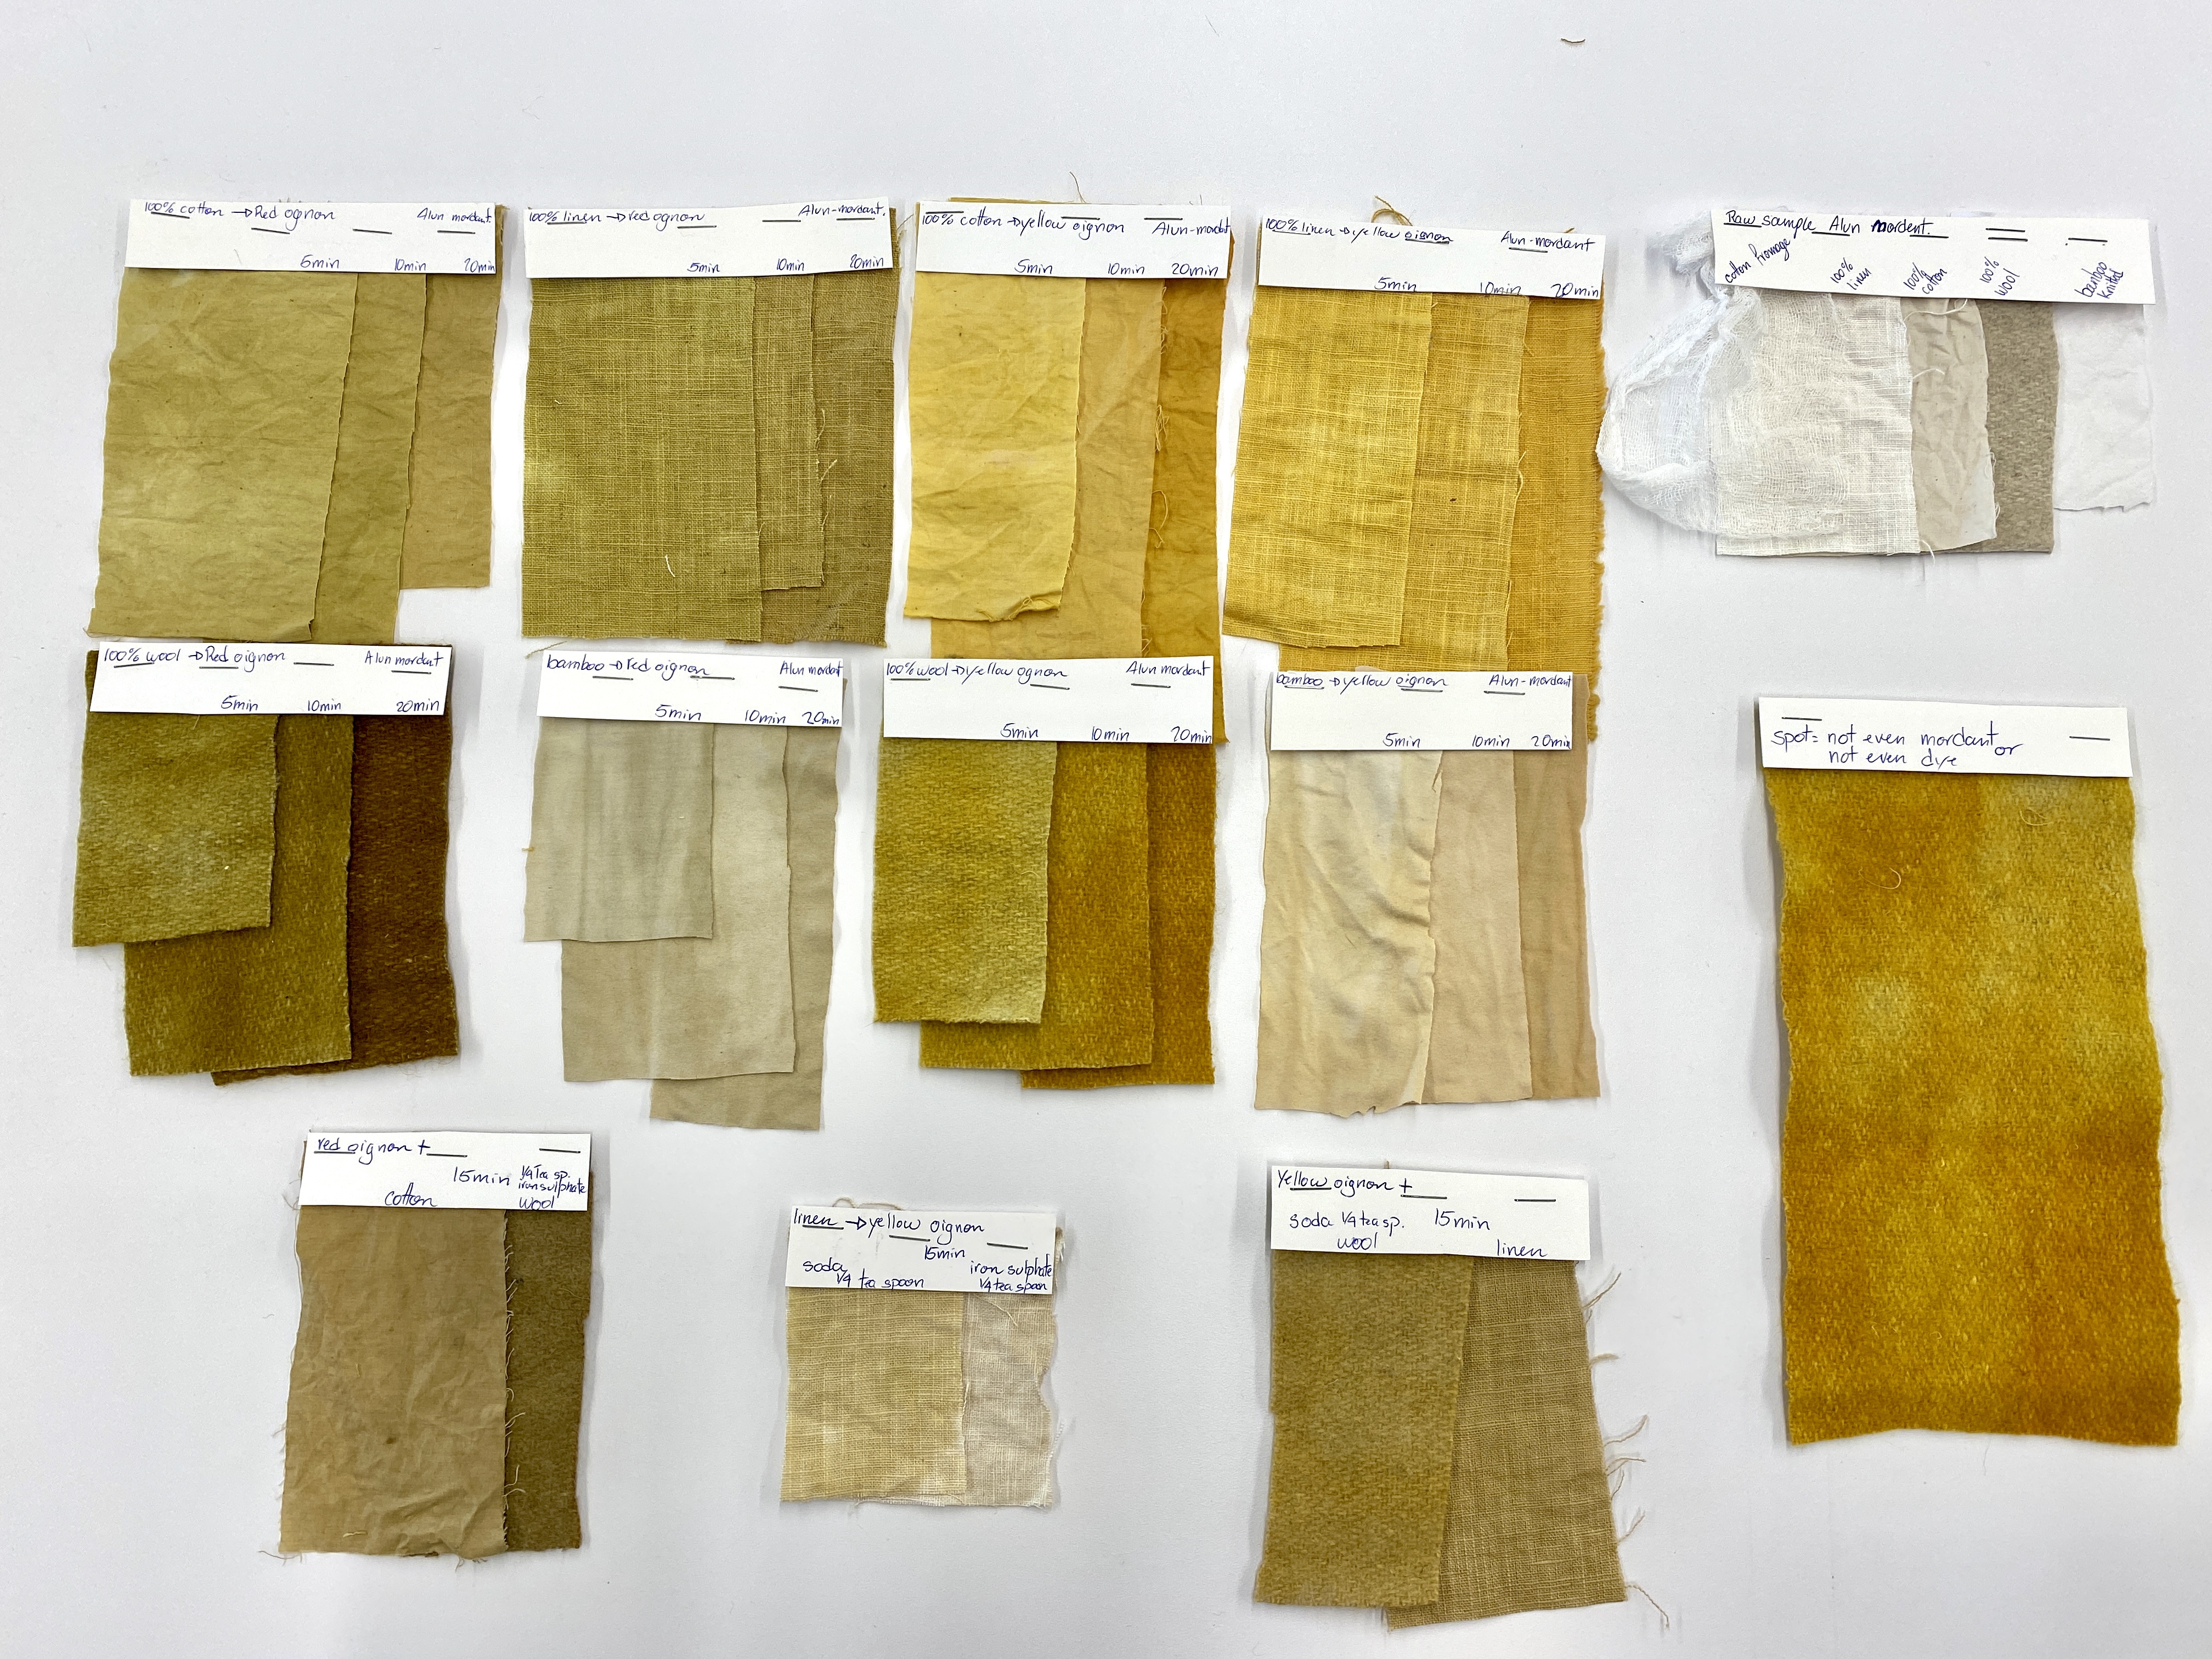
- I take of the oignon peel of the pan and put some liquid in a jar for the ink and pigment phase and I put my textile in. I put some samples immerge during 30 min and some that I hang them and at 5 min, 10 min and 20 min I pour a little bit out so I can have different shades pale to dark. Sadly I have too much fabric for the dye and it was difficult to make sure that the fabric stays evently immerged in the dye.
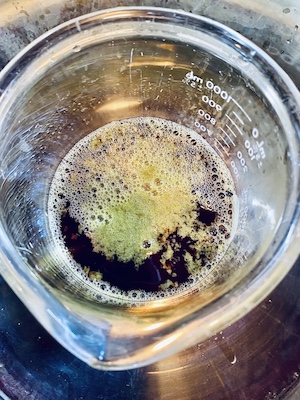
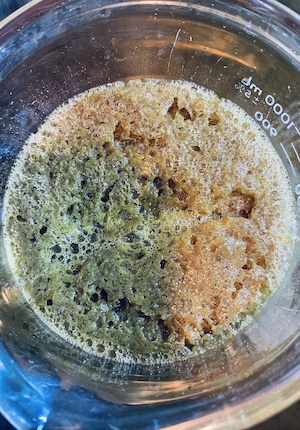
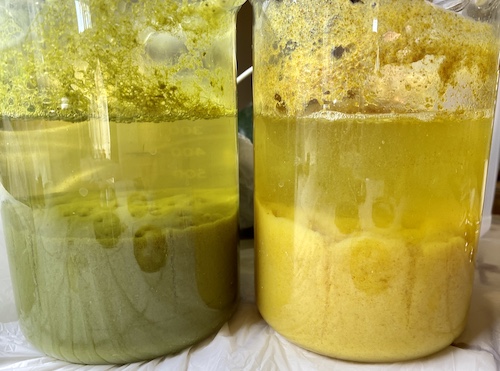
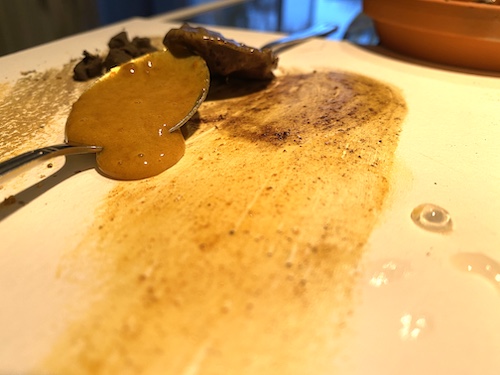
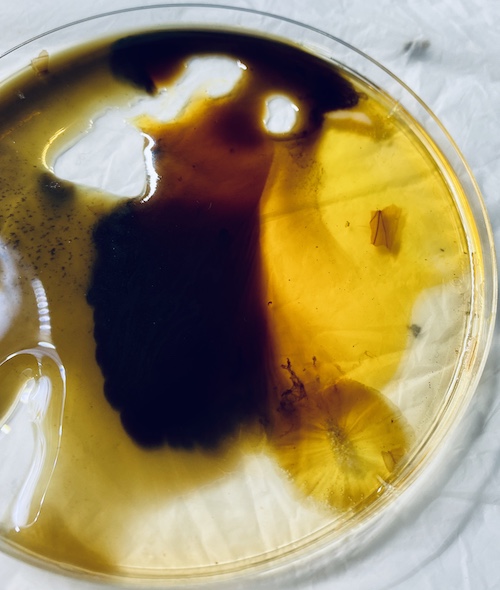
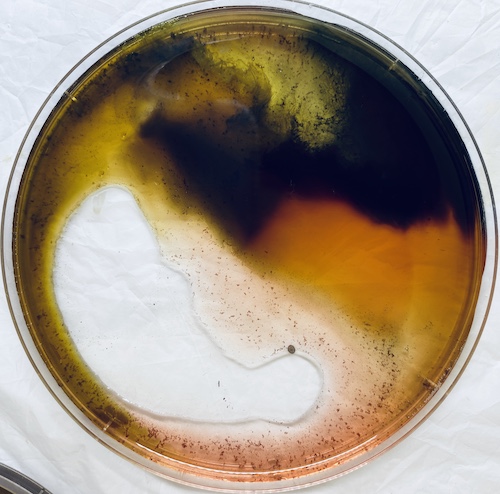
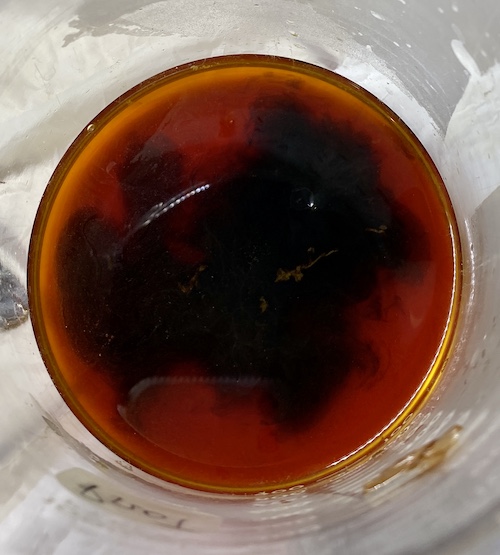
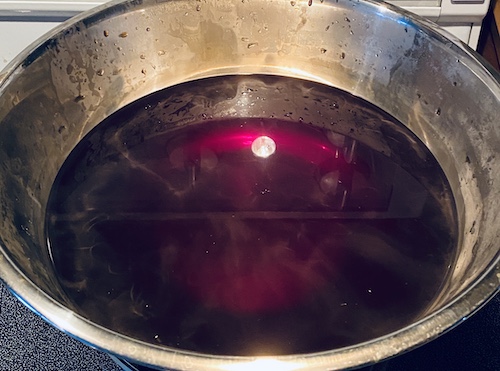
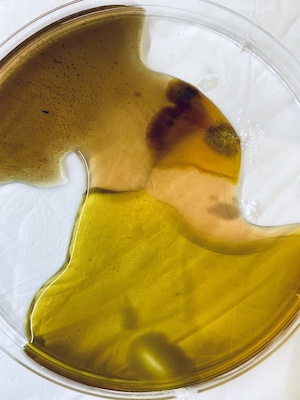
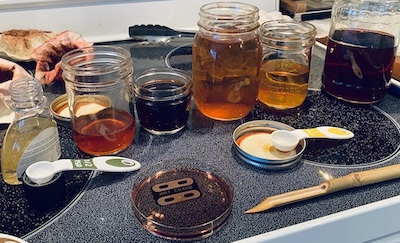
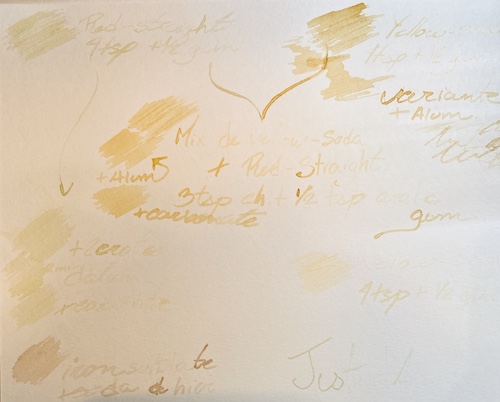
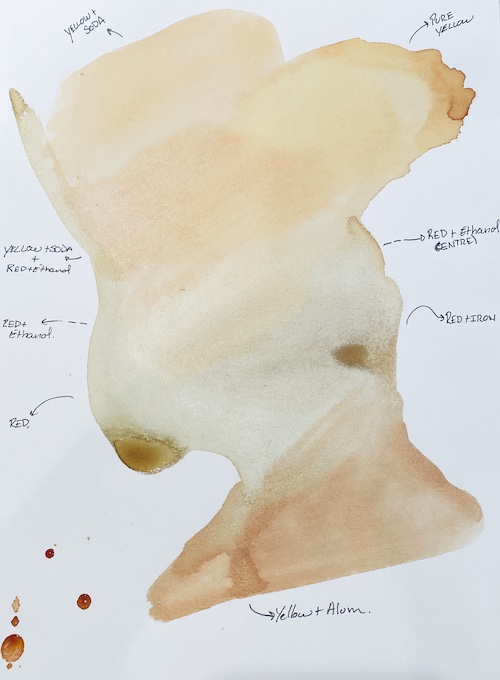
- Mean while, I took some dye in the jar and try to put some soda, acid citric, iron sulphate and alum in it to see if the color changes. I had no ph test so I can just presume that my dye was acid. The acid citrique (ph 2.4)(1/2 tea spoon in 100ml of water) did nothing, the soda (ph 8) make it bright yellow, the alum and iron sulphate (1/2 table spoon in 100ml water) make it dark greenish and the mix of soda and iron make it dark brown
- I take some dye from the jar and in one countainer 1/4 tea spoon of soda in 150ml of water and in another one 1/4 tea spoon of iron sulphate in 150ml of water. I put some fabric during 20 min.
- When everything was done, I rince the fabric with cold water and hang it outside to dry. I was very impressed of the result!
- Make sure you protect your counter and the sink...mine is yellow now... oops!!!
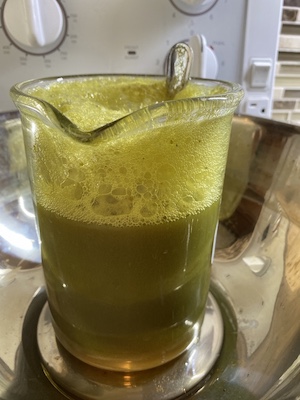
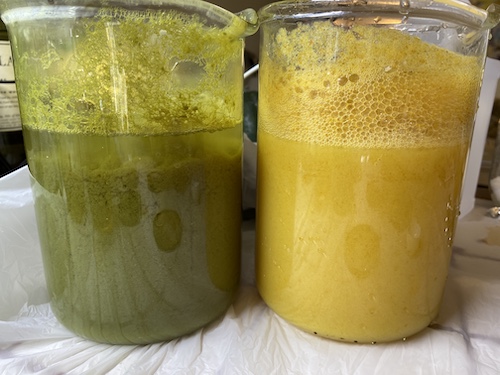
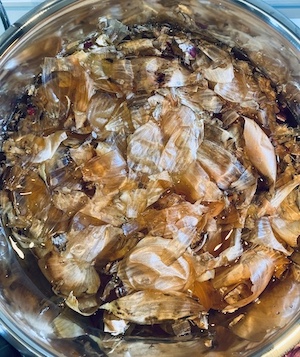
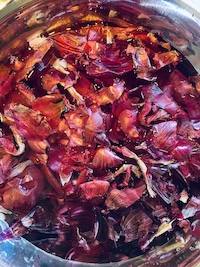
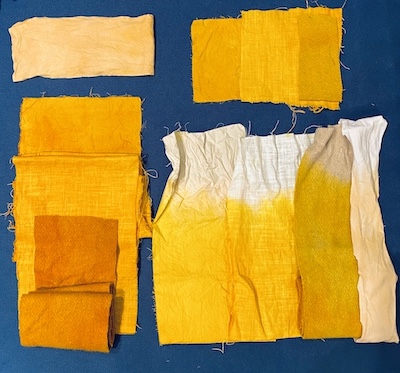
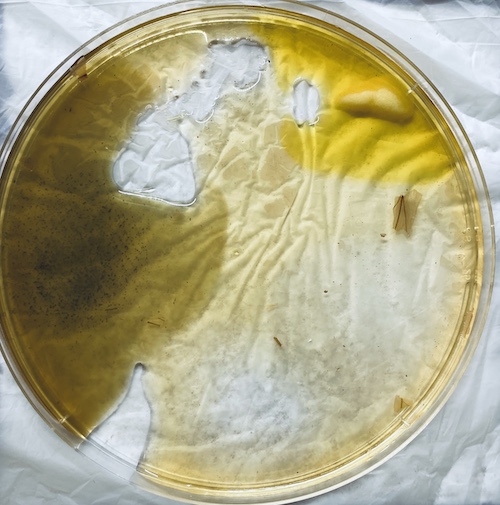
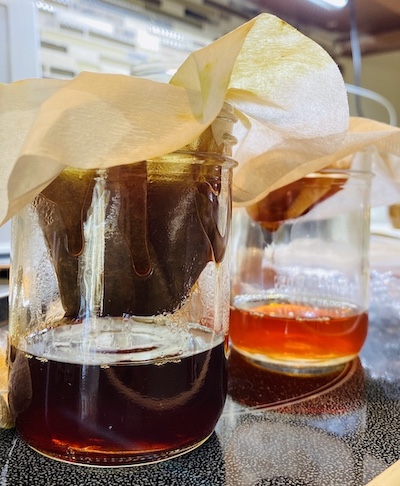
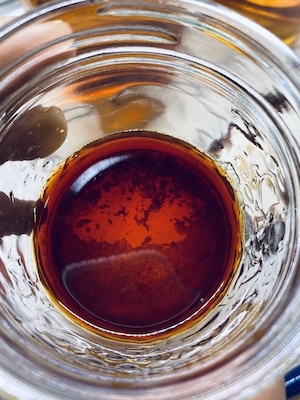
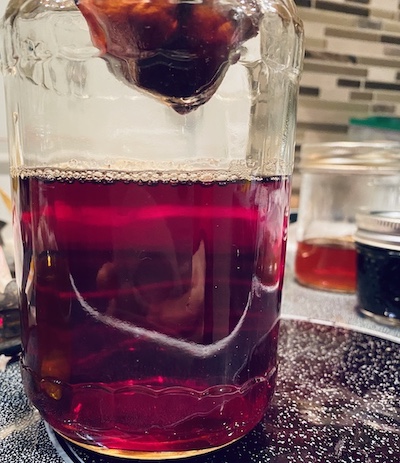
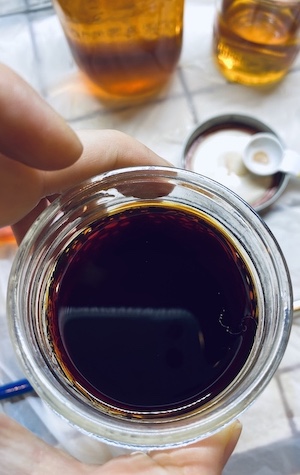
- I try after with the red oignon skin. I make the dye first and only few days later I dye my fabric. What's really long is all the step together but you can make it a different days no problem. The only thing that I found is that when the dye cool it creates a thin skin on top of it (bacterials I guess) and you can see solid particules appear on the bottom. When I dye my fabric, I heat it up a little bit and dye with no problem. I also learn from my previous experiences and put less fabric in my pan.
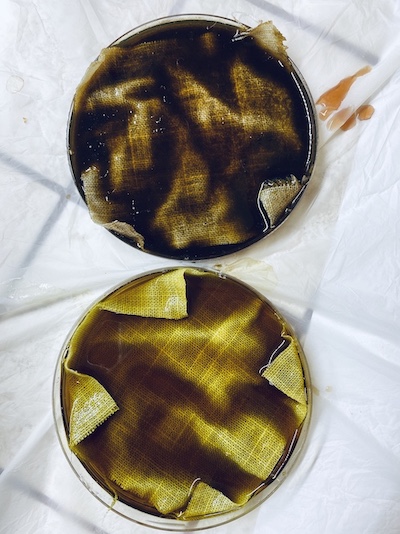
- I did exactly the same thing, play with the ink with modifyers. The soda creates a nice green the alum some orange, the sodium carbonate some brown dark orange and the iron the dark spot. When it cure a little bit the color was deeper like the previous experimentation and when the soda and the iron mix, then the black appear
- I did two little samples of fabric with soda and the other one, soda and Iron
- Few hypothesis about the result: I found some spotting on the fabric, I think during my preparation of the fiber and my mordanting, my pan was too full and influenced on the hemoginous. Also, my modifyer with iron sulphate, has not desolve completely, I should have boiled it and maybe filtered it too. All my modifiers can be liquid so no particule Next time I will also use some PH tester to controle a little bit more the color.
- For the fibers, the wool absorb the dye mutch more than the other one, it's always darker and the bamboo it the oposite side, it's always the lighter so it need to stay longer.


Step 2.5 - The ink
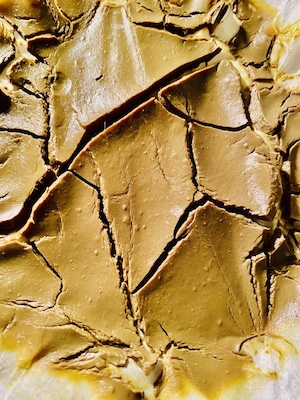
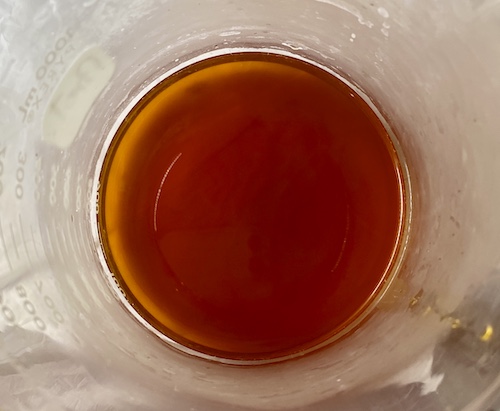
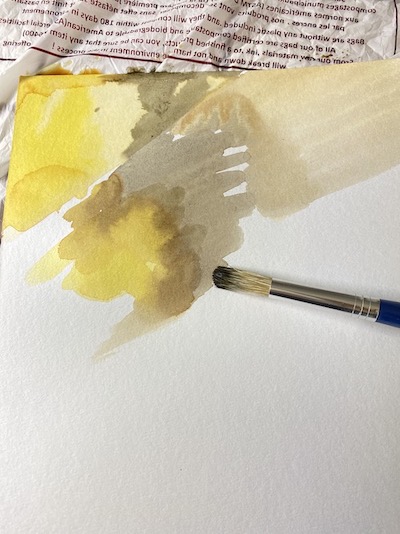
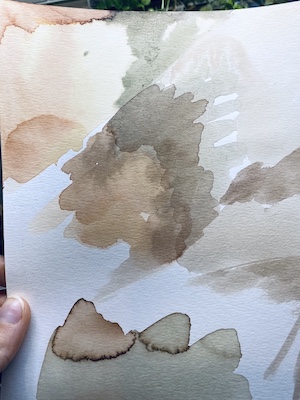
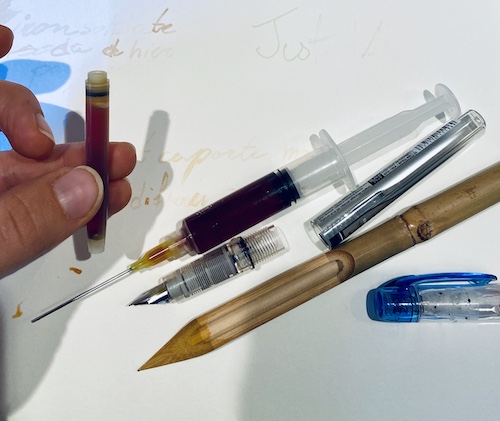
- After doing different test with modifier, I try to paint directly with the liquidbut it was like water color. The color was too diluted. When dry, the color pop out.
- The next morning I discovered also some particules in it and if you want to use the liquid as ink, you need to take them of for the healt of you pen. I filtered them few time with coffe filter and the result was stunning... a lot of particules were in there finaly, but now it's clearer.
- I start by mixing 4tsp of dye stuff with 1/2 tsp of arabic gum and test with a reed pen. This kind of tool is made in reeds and is the ancester of the fountain pen. It allow me to do some rapid test without changing my tool. It works really well, so I tested it in one of my fountain pen, but no succes. I don't know if it's my pen that is stuck or the ink who doesn't want to flow. But anyway, in watercolor is very nice and you probablly don't see it put it give a little shine to the paper, it's not completely mat like a normal watercolor.


Step 3 - The pigment
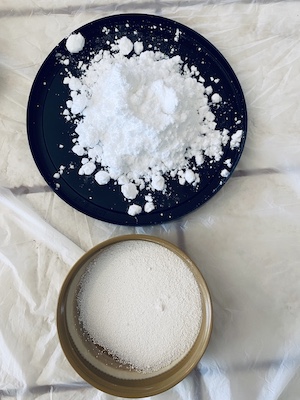
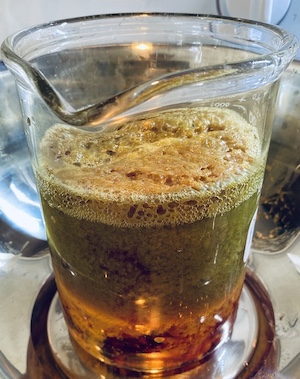
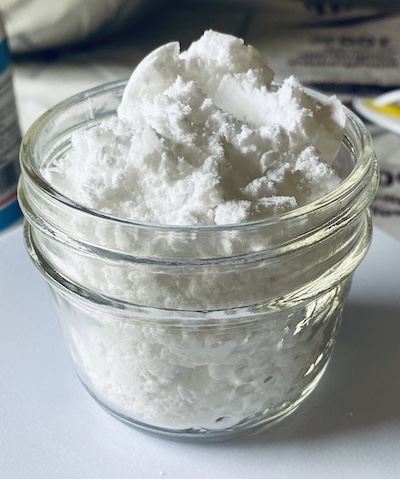
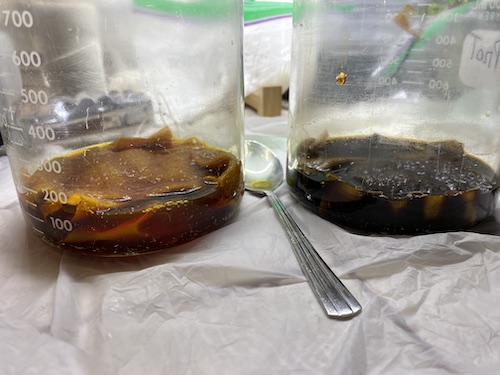
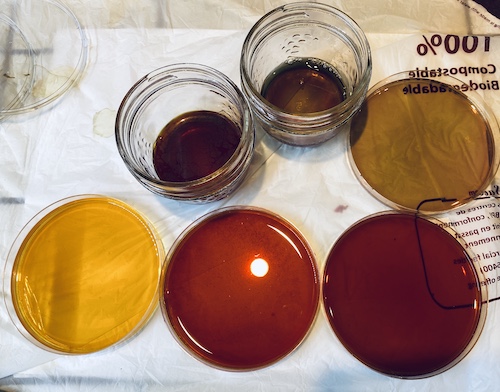
- I think it was my favorite part of this week: so satisfiying to see the precipitation of the pigment. You need to prepare 20g of alum and 5g and sodium carbonate.
- Dilute in hot water the 20g of alum and pour it in the rest of the dye that you use for dying your fabric. (Choose a high container, it will take volume)
- Then dilute in hot water your 5g of sodium corbonate and pour it very slowly in the dye too. When you add this sodium carbonate, it will create a chemical reaction with the alum and start bubbling and create some solid. Stir to make coagulate all the liquid. (I make this step with a glass container in a bowl so if the volcano is too heavy it will go in the bowl.
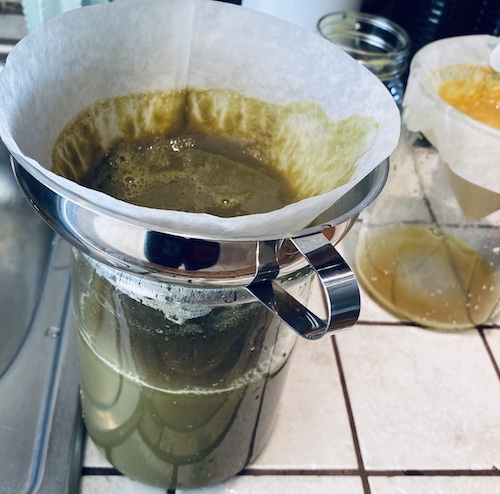
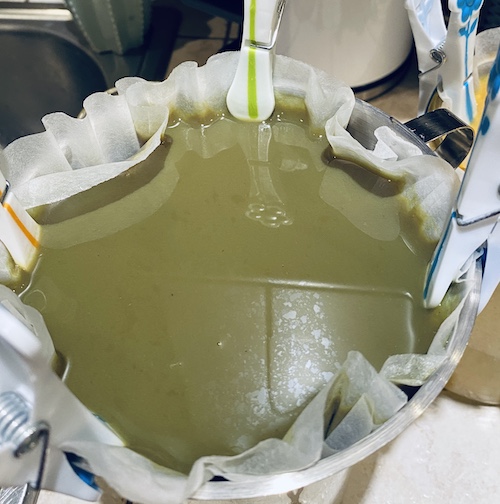
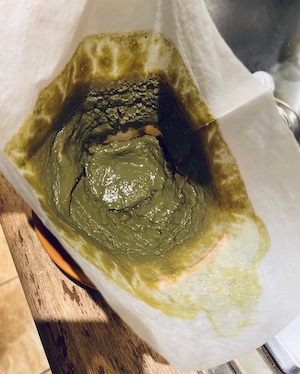
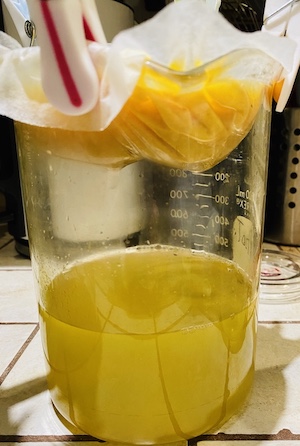
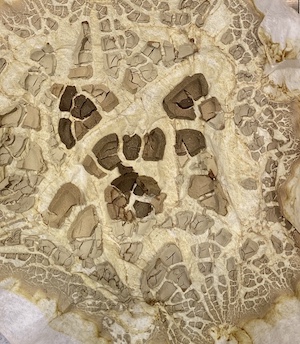
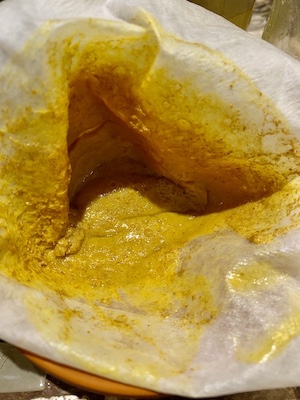
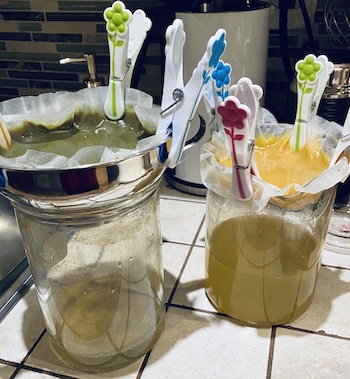
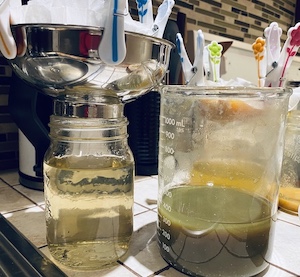
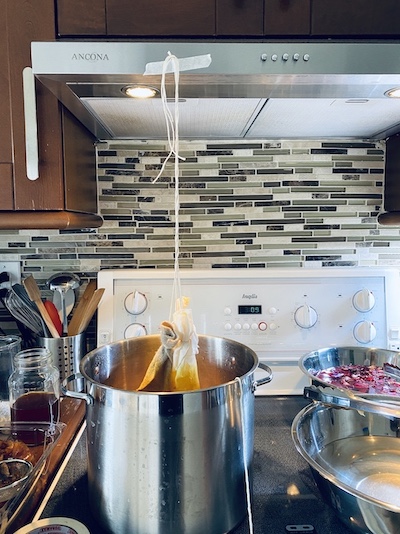
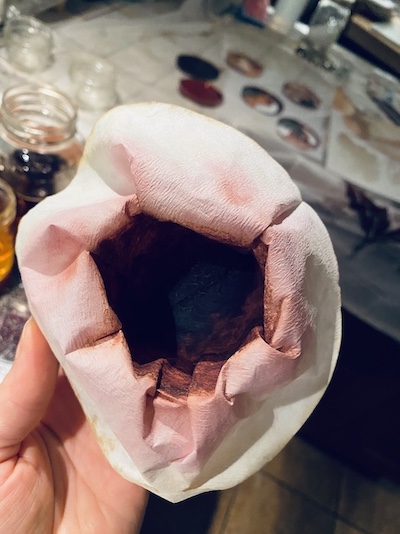
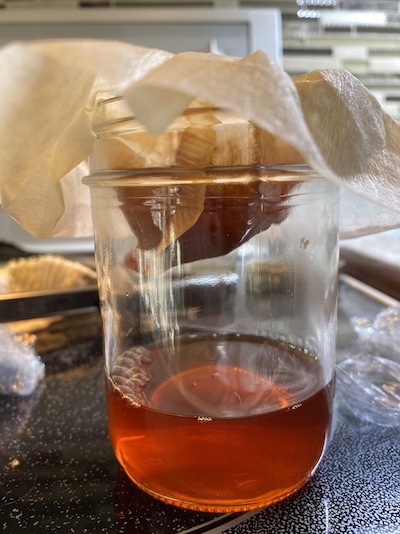
- Let it sit for a while and let the gravity do it's magic. You will see the solid go in the bottom. Prepare a coffee filter in a funnel and when the water seperates, pour the liquid slowly in the filter. The pigment should stay in the filter.
- After the first filtering process, I saw that the water who was coming out was still opaque and so full of pigment. I did another filtering process and look at this transparent yellowish water that comes out! BOOMM good job Annie!
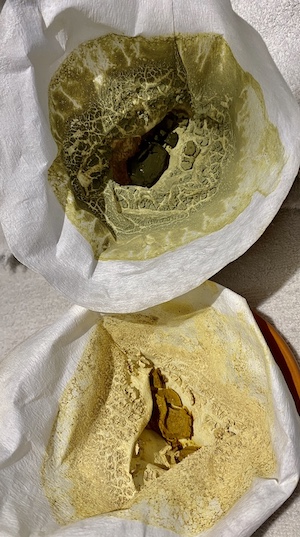
- Now we let the pigment dry completly.
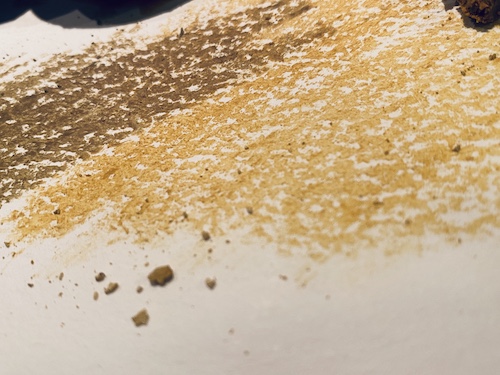
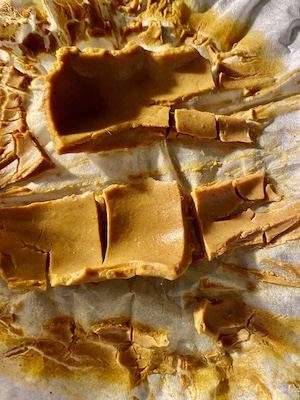
- The pigment in the first batch is thinner and dry well, but the second batch is quite wet so I put it in my oven with the lowest temperature I could to accelerate the process.
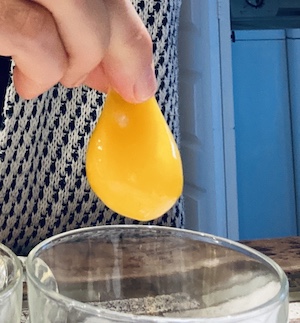
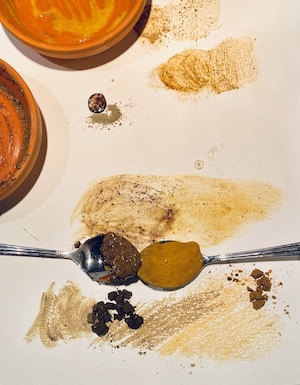
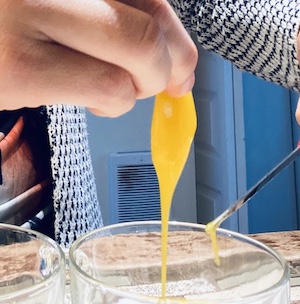
- I ground the result with a spoon and mix it with a big drup of arabic gum. It didn't work really well because the pigment was still too big. I grind it again and mix it with a egg yolk like the painters in the old time and I start to see and feel the paint texture and result. Next time buy a grinder.
- I also try to draw with somes pieces that was not completely dry and it feesl like oil pastel, that paste can be mold for sure and the drawing result is impressive.