1. State of the art, project management and documentation
This week I worked on my website and started to getting used to the documentation process.
- Build a documentation website describing yourself and your motivation for the textile-academy, including your previous work
- Upload the documentation to your project page on class.textile-academy.org
- Add references and research based on the topics of your interest
- Learn how to upload images, videos, references and how to use markdown and gitlab
- EXTRA POINT Customize your website and document how you did it
Theme
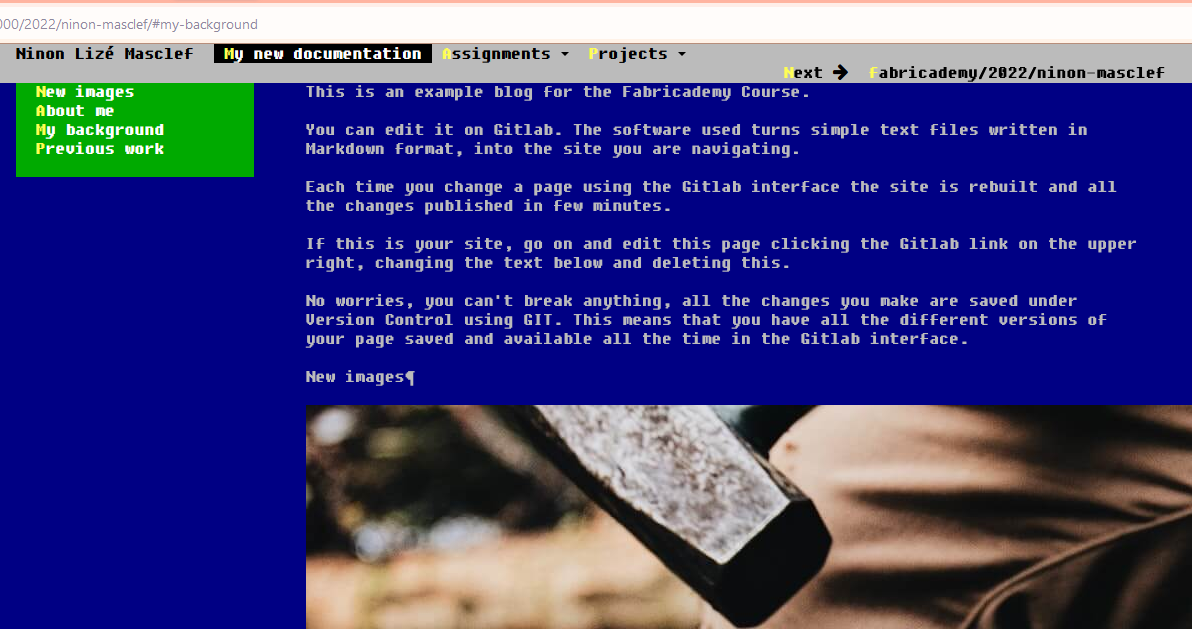
At first, I experimented with different mkdocs themes. I wanted to created a old computer interface. Below is an example of a retro theme.
Eventually, for the sake of clarity, I decided to keep a minimal theme but with special font.
Font
I created my custom font with the software FontForge It allows you to modify an existing font or to create one from scratch.

CSS customization
I added a css file to customize my theme, namely to include the custom font :
@font-face {
  font-family: "myfont";
  src: url("Coder's-CruxFR.ttf");
}

body{
  font-family: "myfont";
  color:  blue;
  background: white;
  font-size: 1px;

}
And to change the color palette :
.md-header, .md-tabs, footer{
  background: blue;
}


a:hover{
  color : orchid  !important;
}


.md-nav__list:li:a:link, .md-nav__list:li:a:visited, .md-nav__link[data-md-state=blur] {

  color : blue !important;
}


a:link:not(.md-nav__link), .md-nav__link--active{
  color : mediumorchid !important;
}
Moreover, I changed the size of different DOM element, such as images or header. For instance, to change the height of the header, I add this code in the custom css file :
header{
  height: 70px;
}
To modify the size of an element locally, instead of using the .css file, I set the size of the element directly in the .md file. Generally, I prefer to make my website using HTML syntax rather than Markdown because I find it easier to customize it. Here is how to add an image, centered on the page, with a width relative to the size of the DOM, in this case 50% of its container :
<center>
  <img width="50%" src="../../images/image.jpg">
</center>
Below is an example to add 3 images next to each other and centered horizontally, by setting their width to 1/3 of the space available. The sum of the widths equals 90 and not 100 because there is already a 5% margin on both sides of the page that has to be taken into account to place the 3 images on the same line.
<center>
  <img width="30%" src="../../images/image1.jpg">
  <img width="30%" src="../../images/image2.jpg">
  <img width="30%" src="../../images/image3.jpg">
</center>
Finally, I replaced the svg vector logo by a circuit pattern :
The website is not 100% responsive, but I will improve this in the next days.
Embed a video
To embed a video in the HTML syntax, create an iframe with the video you like as a source url. Set the width and height parameters and center the iframe on the page :
<center>
<iframe src="https://player.vimeo.com/video/452557538?h=d405a84fee" width="640" height="360"></iframe>
</center>
Custom display of a 3D model on the web
During week 2, I displayed a 3D model in a rounded iframe. Rather than using online hosting server, I like to reinvent the wheel and display from scratch the 3D model in Javascript. For basic purpose of 3D model displaying it may be useless, but if you want to customize the 3D scene with lights, shaders etc, it can have an interest. To do so, I use the JS library Three.js. Three.js is a library built on the top of WebGL, and allow for custom GLSL code, namely custom textures, lights, geometry, etc. Basically, you can create 3D models and customize everything with code. This library is well documented, with an active community and provides a large range of working examples.
Yay, I love Three.js !
In order to display a 3D model on the web, here is a basic example, taken from the official Three.js documentation.
Step one : create an HTML file i.e.
<html>
  <body>
  </body>
</html>
Step two : include the Three.js library.
<script src="https://threejs.org/build/three.min.js"></script>
Step three : create the scene, camera and renderer
To display something in Three.js (and any other 3D engine), you need a scene, a camera and a renderer. Let's create those 3 elements in a JS script :
    <script>

      // Create the scene
      const scene = new THREE.Scene();

      // Create the camera
      const camera = new THREE.PerspectiveCamera( 75, window.innerWidth / window.innerHeight, 0.1, 1000 );

      // Create the renderer
      const renderer = new THREE.WebGLRenderer();
      renderer.setSize( window.innerWidth, window.innerHeight );
      document.body.appendChild( renderer.domElement );

    </script>
Step four : create our 3D object
In Three.js, a 3D object is parametrized by a geometry and a material.
Three.js contains various geometry primitives, from simple geometries such as BoxGeometry for rectangular shapes or SphereGeometry for spheres, to more complex ones like BufferGeometry (completely custom).
Regarding material, this is what defines the appearance of your object in terms of color, texture, etc.
Geometry and material are mandatory parameters to create an object. If you don't set both, there will be an error.
Let's create a basic cube, with a green color. To create our 3D object, we create separately the geometry and the material, that we finally give to the constructor of the Mesh :
      const geometry = new THREE.BoxGeometry();
      const material = new THREE.MeshBasicMaterial( { color: 0x00ff00 } );
      const cube = new THREE.Mesh( geometry, material );
We used as a geometry BoxGeometry, and as a material MeshBasicMaterial, with the value of the color lime green in hexadecimal passed through the constructor of the material.
Step five : add the 3D object to our scene
The 3D object was created but it is still not placed on our 3D scene. We have to add it to the scene.
scene.add( cube );
Step six : create the rendering loop
Our 3D object in on the scene but nothing is visible. In order to display something, we have to create something like an infinite loop, which shows on the screen what we want. This is the rendering loop. At the end of our JS script, we add a function called animate, which updates the scene and the camera through time. This function calls itself ad infinitum, so as to display our 3D model all the time.
      const animate = function () {
        requestAnimationFrame( animate );
        renderer.render( scene, camera );
      };

      animate();
Here is the final code with all steps :
<html>
  <body>
    <script src="https://threejs.org/build/three.min.js"></script>
    <script>
      const scene = new THREE.Scene();
      const camera = new THREE.PerspectiveCamera( 75, window.innerWidth / window.innerHeight, 0.1, 1000 );

      const renderer = new THREE.WebGLRenderer();
      renderer.setSize( window.innerWidth, window.innerHeight );
      document.body.appendChild( renderer.domElement );

      const geometry = new THREE.BoxGeometry();
      const material = new THREE.MeshBasicMaterial( { color: 0x00ff00 } );
      const cube = new THREE.Mesh( geometry, material );
      scene.add( cube );

      camera.position.z = 5;

      const animate = function () {
        requestAnimationFrame( animate );
        renderer.render( scene, camera );
      };

      animate();
    </script>
  </body>
</html>
You can see the result live here. If you want to display an imported 3D mesh, you should have a look to Three.js loaders. There is a loader for several 3D formats such as OBJ, GLTF and 3DM.
Development and continuous integration
I am developing my website locally, by running the built-in dev-server of mkdocs in order to preview my documentation. I created an access token so as to remotely push on my repository
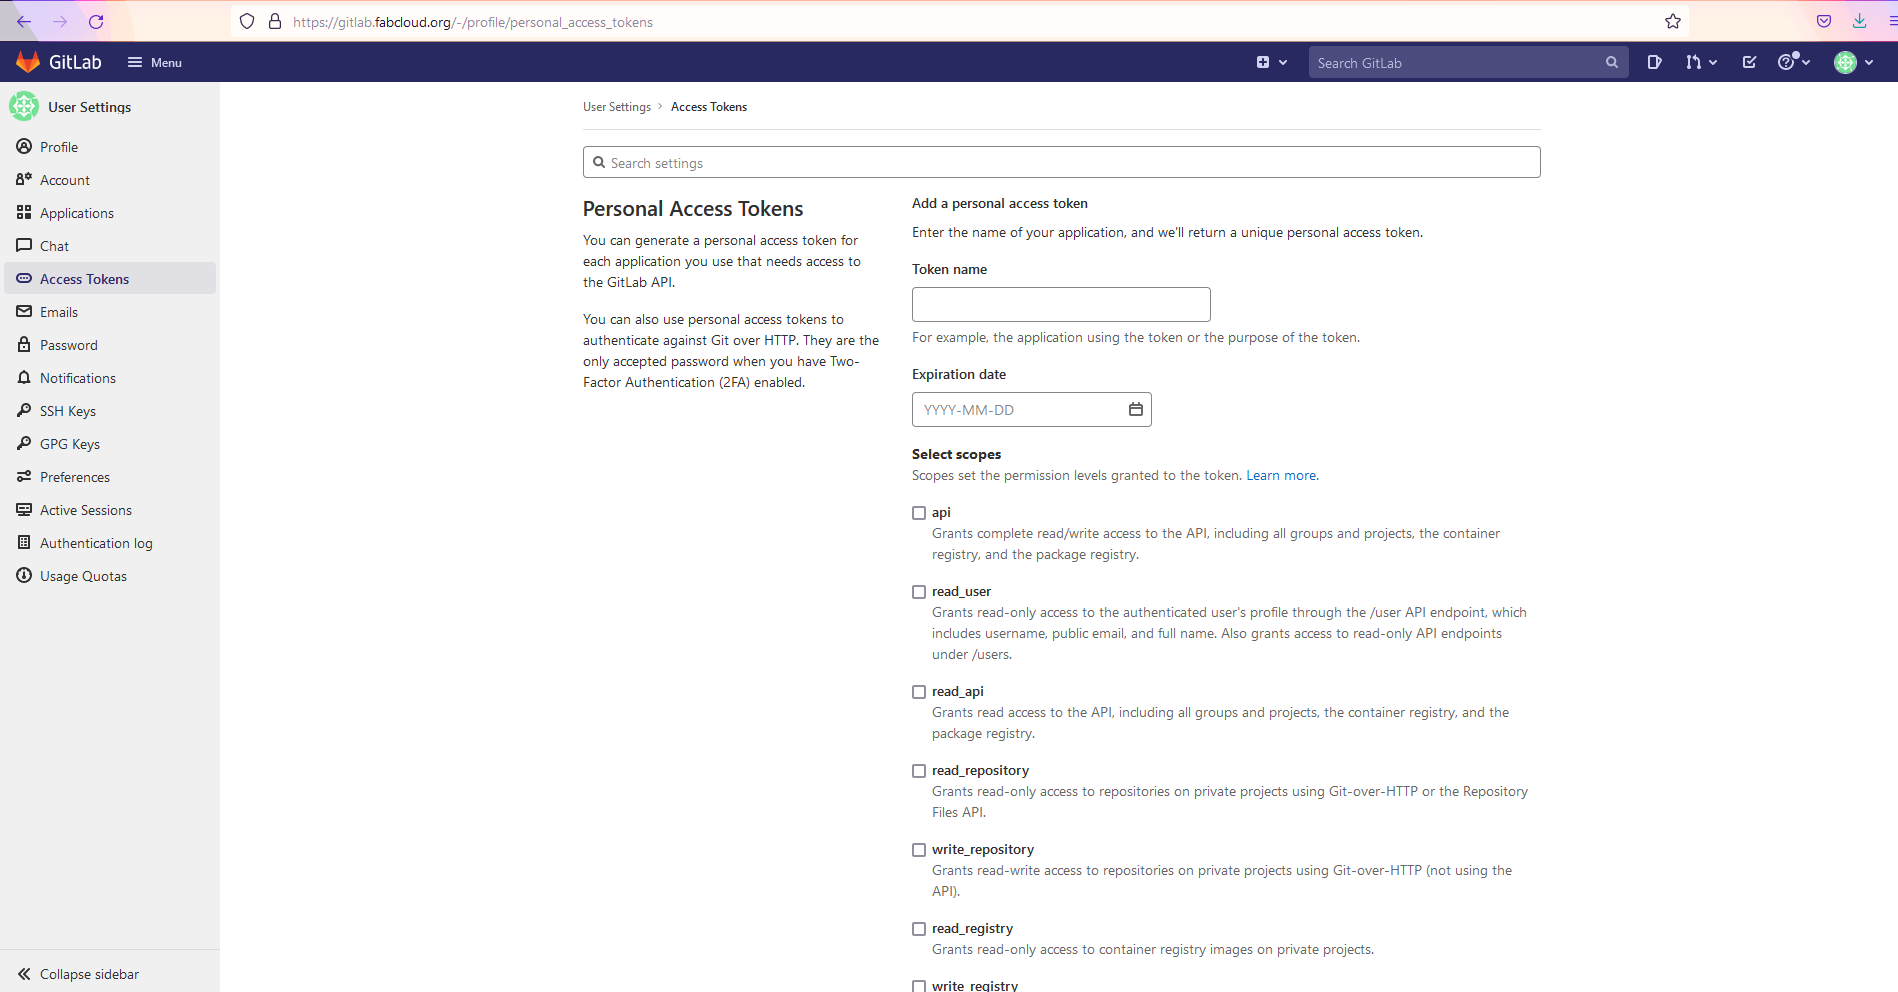
The deployment is done automatically when a commit is pushed on the master branch.