8. Wearables
This week I worked on creating a wearable object with embedded electronics.
- Document the concept, sketches, references also to artistic and scientific publications
- Create a swatch using an ATtiny with one input and one output, using hard-soft connection solutions and battery
- Create 2 actuator swatches. Test them with the Arduino or ATtiny.
- Learn how to program and ATTiny , add the libraries and links used for the code
- Document the schematic and the programming code, the libraries added and the power requirements
- Upload a small video of your object working
- EXTRA POINT Integrate it to a project
Research
Wifi Tapestry from R Vijgen on Vimeo.
I really like the aesthetics of the Wifi Tapestry from R. Vijgen. Moreover, what I like the most in conceptual art is to mix a traditionnal technique, such as tapestry, and new technology. It brings together two different temporalities of technics, which I find very interesting to question how tech is reshaping our traditions.
Mutate from knitted forms on Vimeo.
I have already created a costume item with neopixel ws2812b adressable led strip (see below). As a consequence, I wanted to experiment with other things than lights, namely other visuals and sound.
Soft Speaker
I made a very cheap speaker with magnet and copper coil. To be precise, I used 1 meters of 0.5mm QA-1-155 Polyurethane enameled copper wire. To create the speaker, I wound the copper wire to form a coil, keeping a piece of wire from both ends. I removed the insulation on these ends using a lighter. Then, with tape I fix the coil on a plastic cap to add resonance to the sound. I place a magnet in the middle of the coil. Using alligator clips, I connect one end of the copper wire to the + terminal of a jack to mini jack cable plugged into my computer. I connect the other end to the terminal -. Finally, I listen to a piece of music on my computer, setting the mini jack as an audio output.
The sound is very low since I am not using any amplifier. Later on, I decided to enhance this speaker by adding and amplifier. I bought a PAM8302A audio amplifier module from Adafruit and I looked at its datasheet.
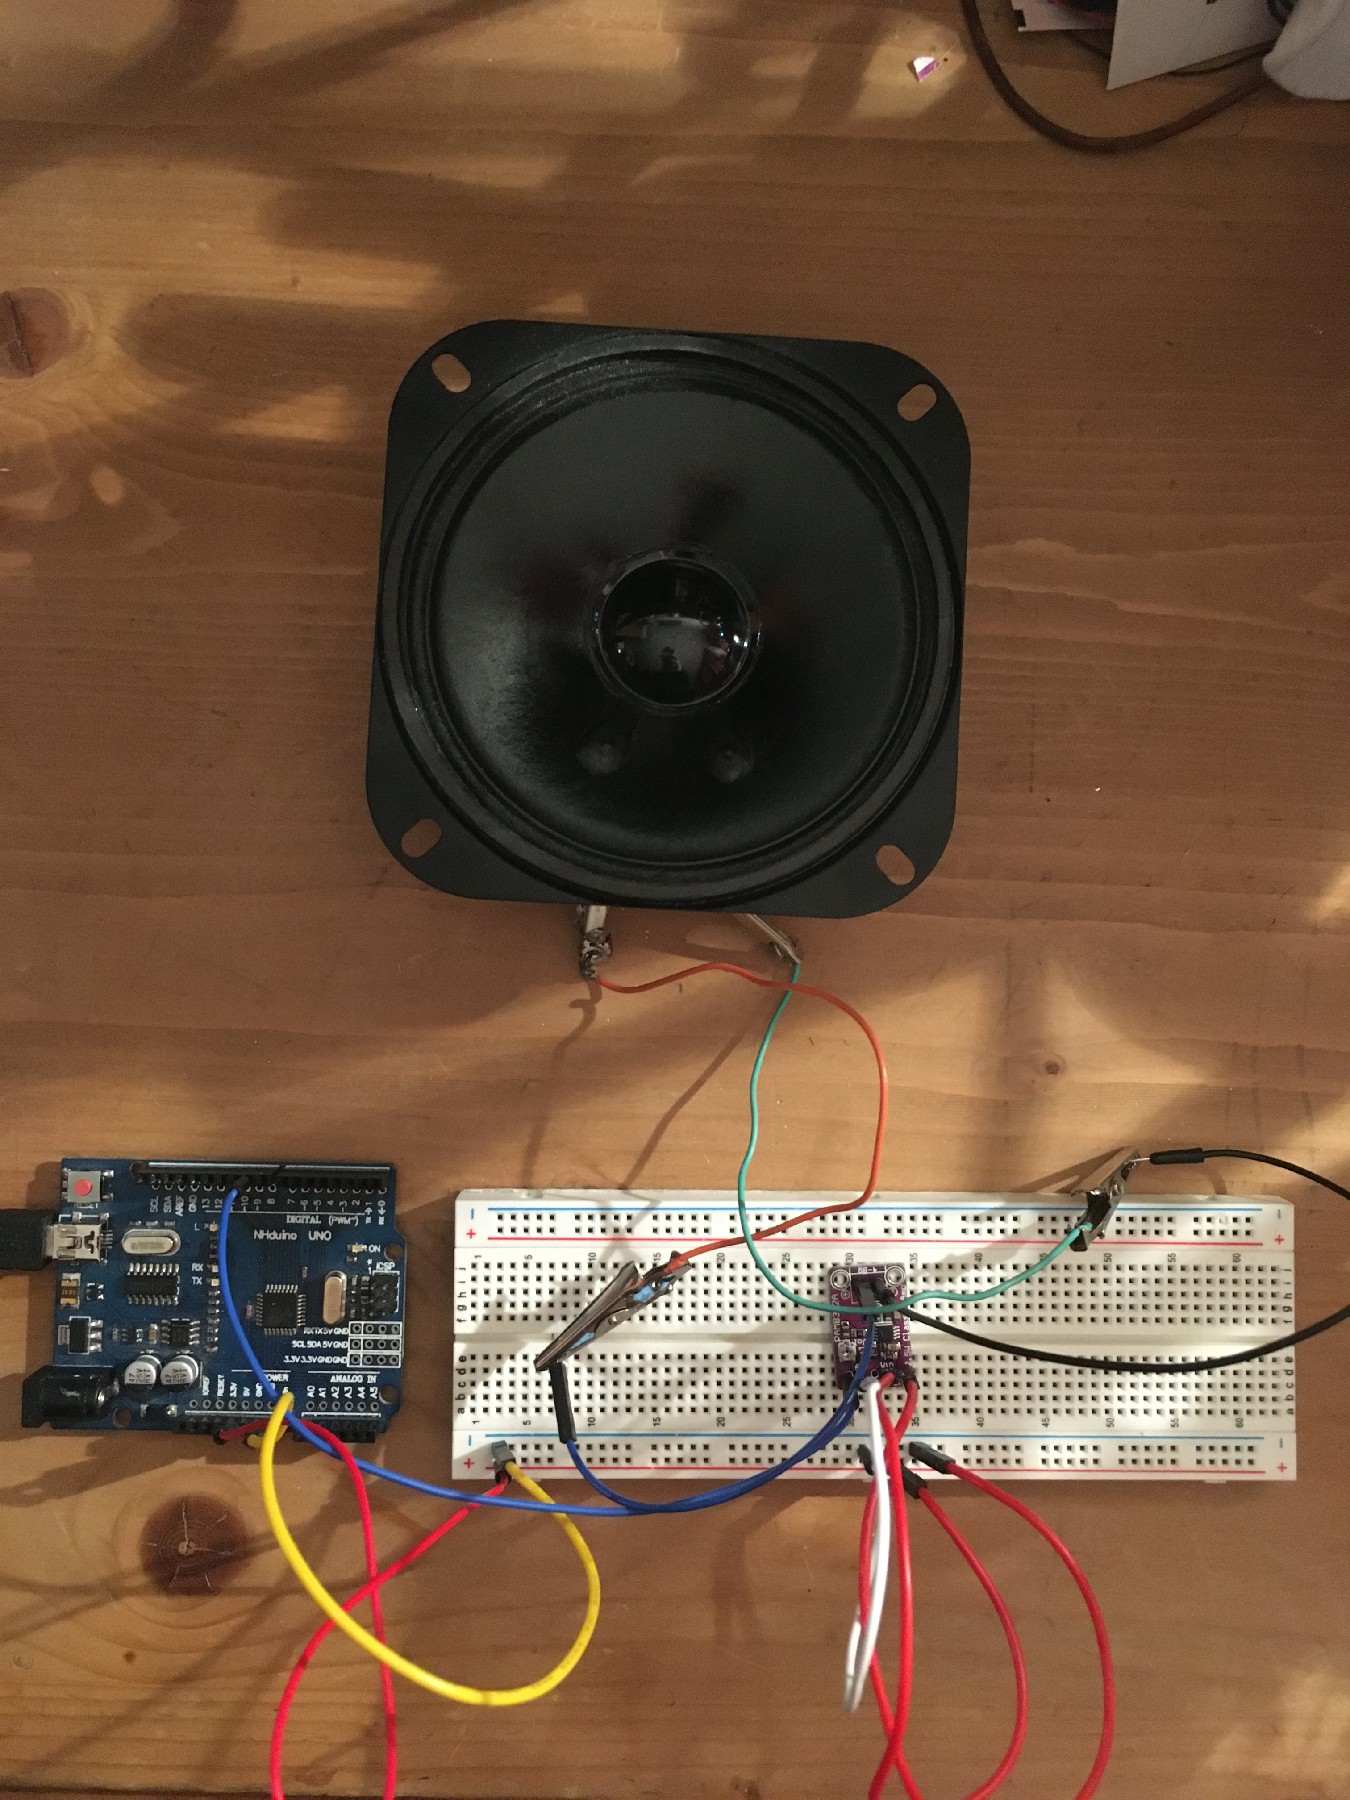
Oddly, I found very few tutorials of this module with Arduino (here is one). I tested the ampl module with a real speaker first. I generate sound with the function tone(). Here is the wiring :
The code for a simple beep :
const int audioPin = 9;

void setup()
{
    pinMode(audioPin, OUTPUT);
}

void loop()
{

  tone(audioPin, 800, 100);
  delay(100);

}
Then, let's move on to a more complex melody. Below is the code to make the Star Wars tone. The code for the melody was found in this tutorial.
const int c = 261;
const int d = 294;
const int e = 329;
const int f = 349;
const int g = 391;
const int gS = 415;
const int a = 440;
const int aS = 455;
const int b = 466;
const int cH = 523;
const int cSH = 554;
const int dH = 587;
const int dSH = 622;
const int eH = 659;
const int fH = 698;
const int fSH = 740;
const int gH = 784;
const int gSH = 830;
const int aH = 880;

const int audioPin = 9;
const int ledPin1 = 12;
const int ledPin2 = 13;

int counter = 0;

void setup()
{
  //Setup pin modes
  pinMode(audioPin, OUTPUT);
  pinMode(ledPin1, OUTPUT);
  pinMode(ledPin2, OUTPUT);
}

void loop()
{

  //Play first section
  firstSection();

  //Play second section
  secondSection();

  //Variant 1
  noise(f, 250);
  noise(gS, 500);
  noise(f, 350);
  noise(a, 125);
  noise(cH, 500);
  noise(a, 375);
  noise(cH, 125);
  noise(eH, 650);

  delay(500);

  //Repeat second section
  secondSection();

  //Variant 2
  noise(f, 250);
  noise(gS, 500);
  noise(f, 375);
  noise(cH, 125);
  noise(a, 500);
  noise(f, 375);
  noise(cH, 125);
  noise(a, 650);

  delay(650);
}

void noise(int note, int duration)
{
  //Play tone on audioPin
  tone(audioPin, note, duration);
  //tone(A0, note, duration);
  //tone(A1, note, duration);

  //Play different LED depending on value of 'counter'
  if(counter % 2 == 0)
  {
    digitalWrite(ledPin1, HIGH);
    delay(duration);
    digitalWrite(ledPin1, LOW);
  }else
  {
    digitalWrite(ledPin2, HIGH);
    delay(duration);
    digitalWrite(ledPin2, LOW);
  }

  //Stop tone on audioPin
  noTone(audioPin);

  delay(50);

  //Increment counter
  counter++;
}

void firstSection()
{
  noise(a, 500);
  noise(a, 500);
  noise(a, 500);
  noise(f, 350);
  noise(cH, 150);
  noise(a, 500);
  noise(f, 350);
  noise(cH, 150);
  noise(a, 650);

  delay(500);

  noise(eH, 500);
  noise(eH, 500);
  noise(eH, 500);
  noise(fH, 350);
  noise(cH, 150);
  noise(gS, 500);
  noise(f, 350);
  noise(cH, 150);
  noise(a, 650);

  delay(500);
}

void secondSection()
{
  noise(aH, 500);
  noise(a, 300);
  noise(a, 150);
  noise(aH, 500);
  noise(gSH, 325);
  noise(gH, 175);
  noise(fSH, 125);
  noise(fH, 125);
  noise(fSH, 250);

  delay(325);

  noise(aS, 250);
  noise(dSH, 500);
  noise(dH, 325);
  noise(cSH, 175);
  noise(cH, 125);
  noise(b, 125);
  noise(cH, 250);

  delay(350);
}
And the result :
Afterwards, I try with my homemade speaker with the copper coil :

And it works !
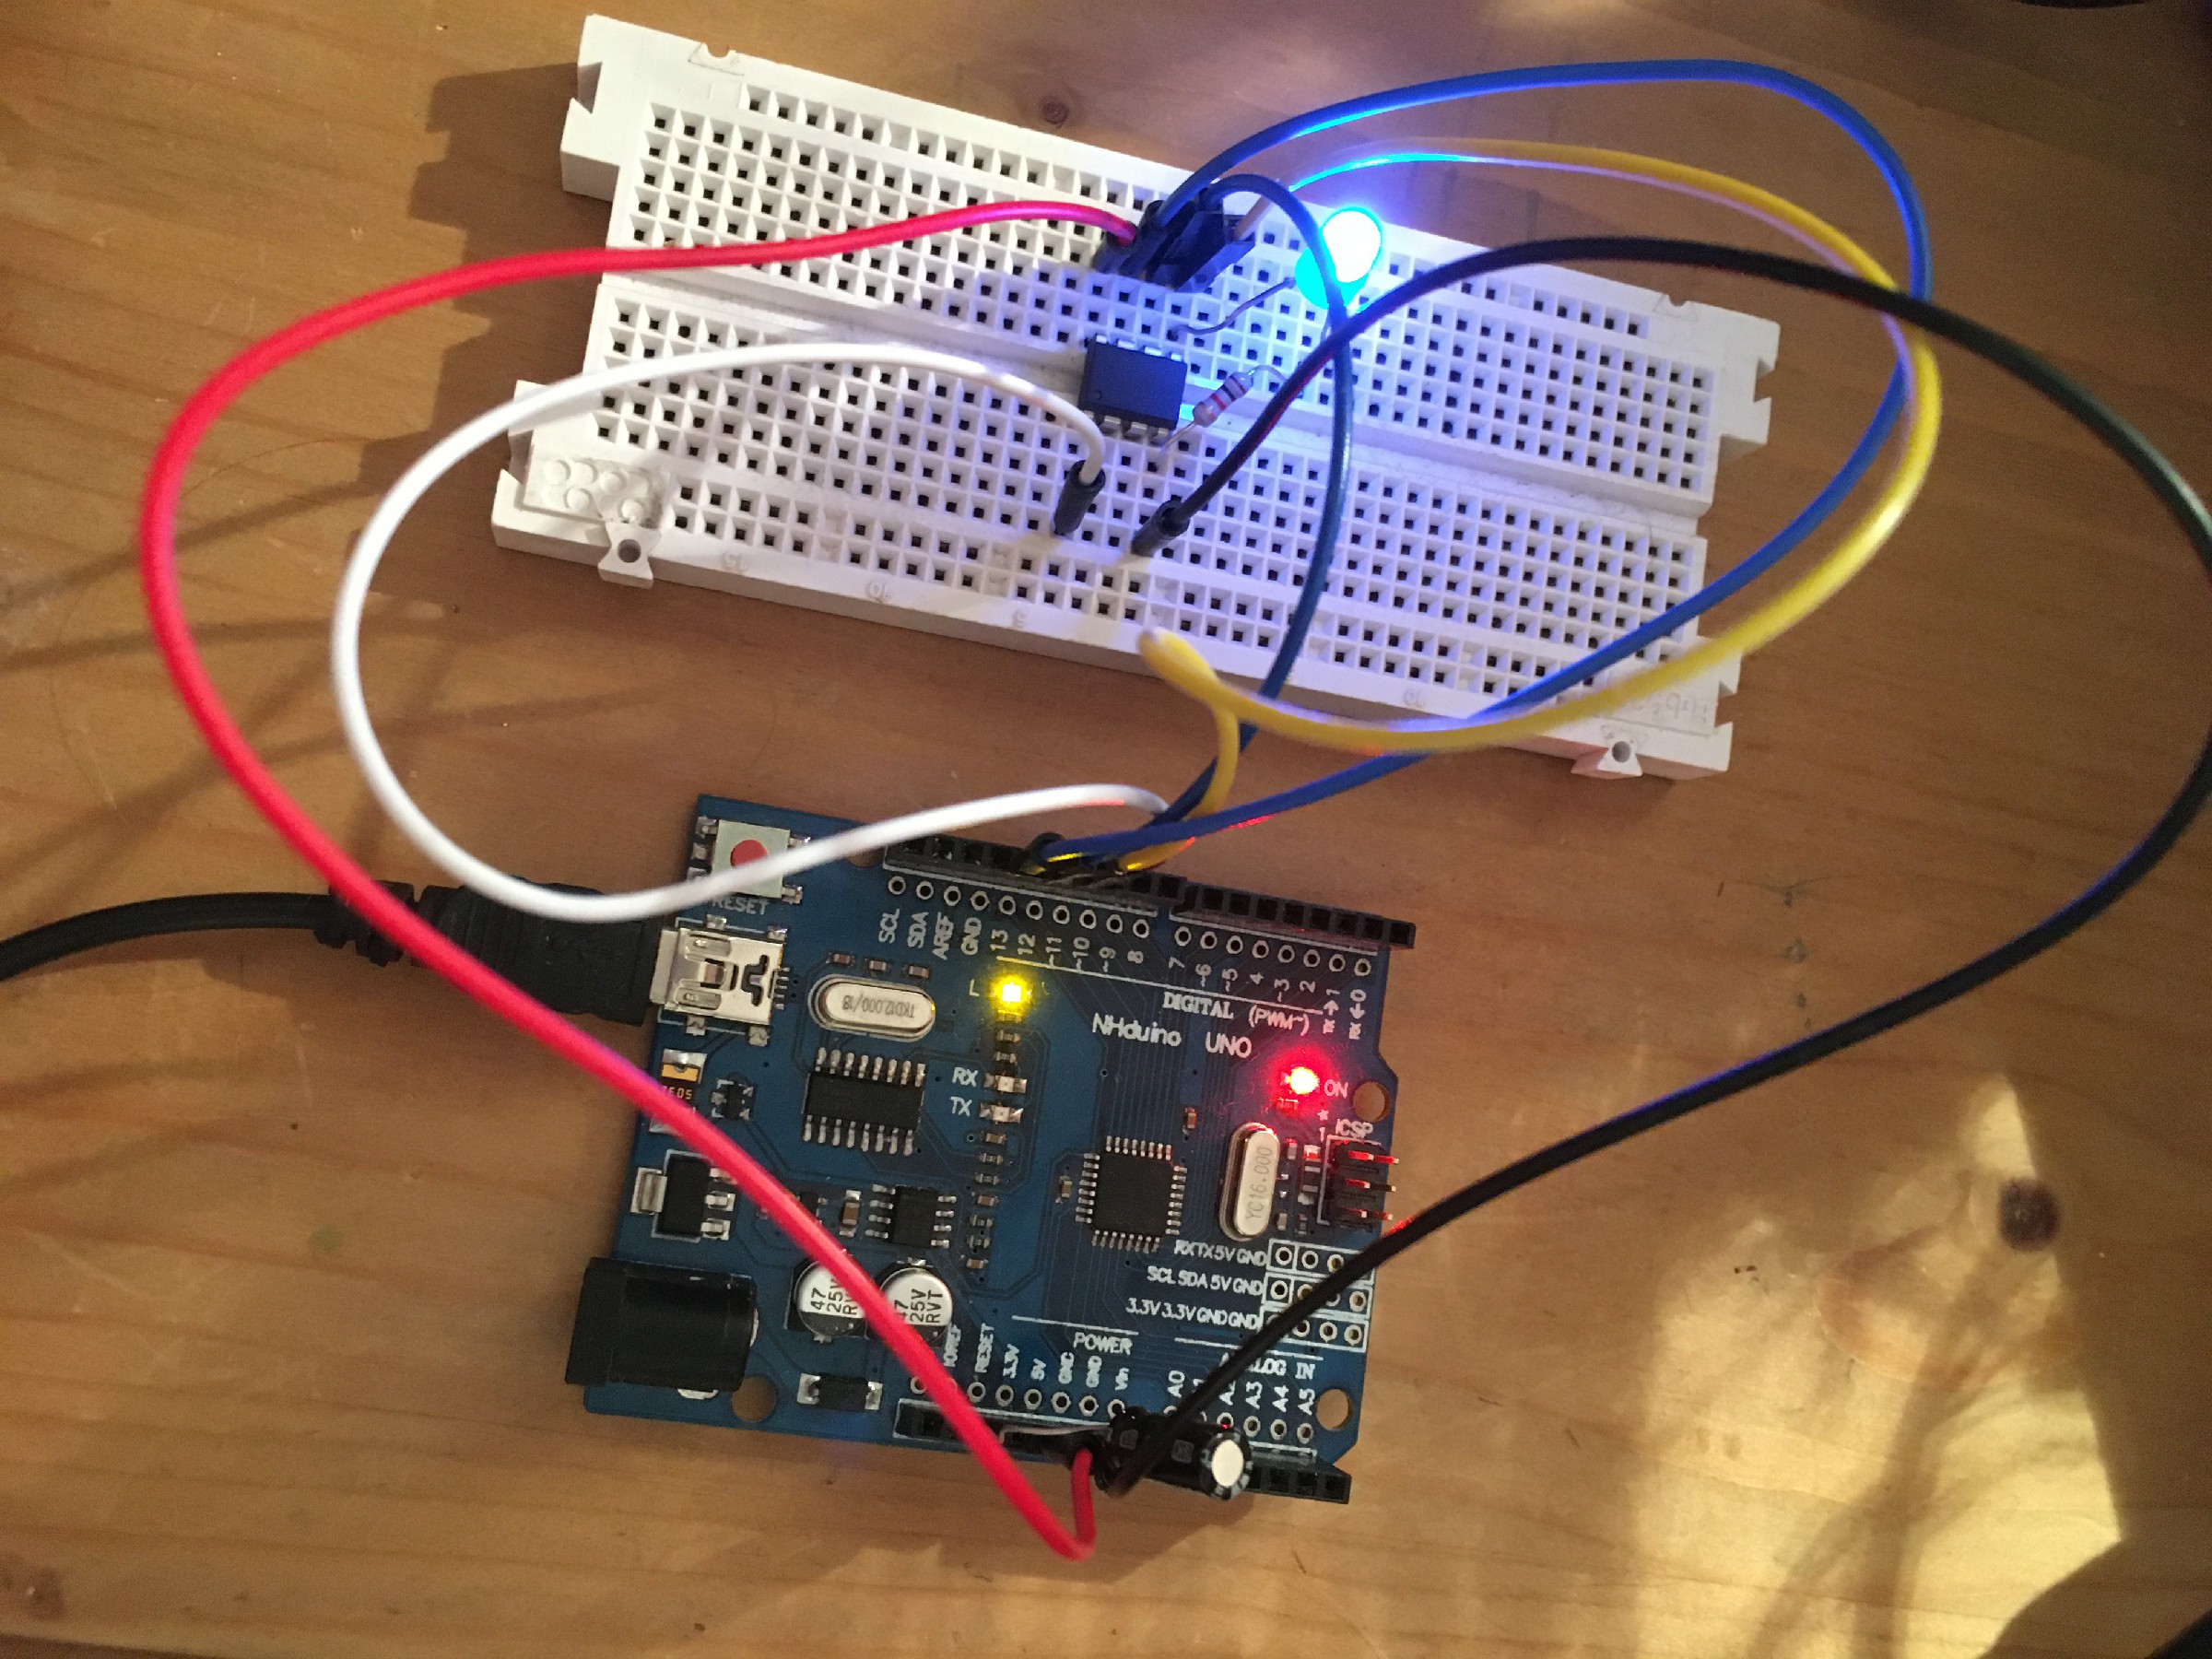
Program the Attiny85
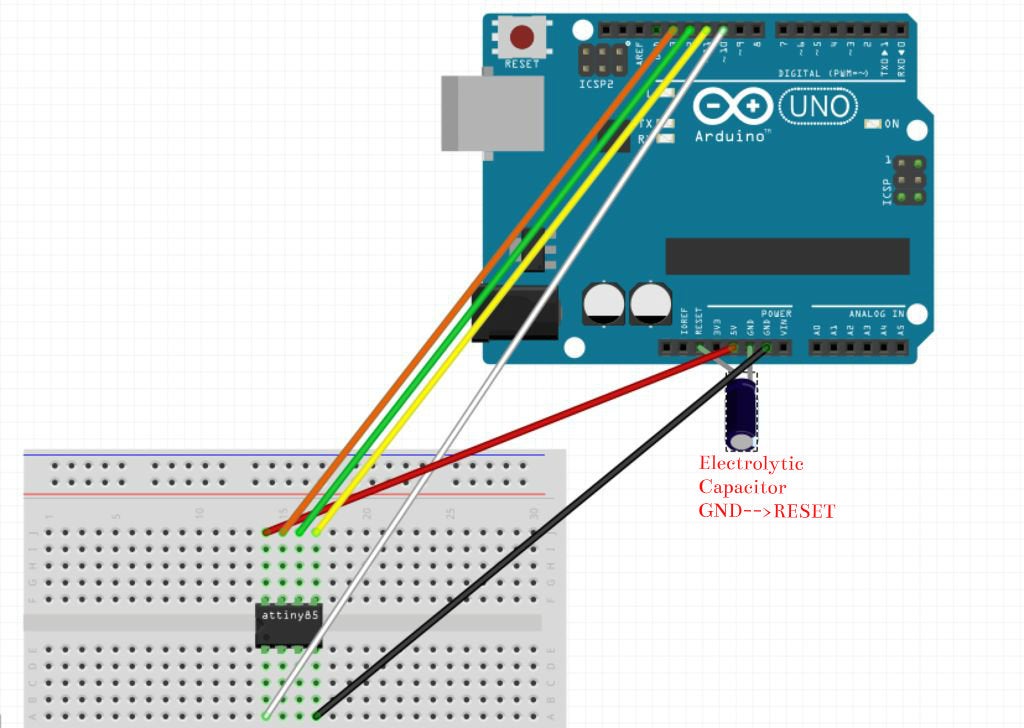
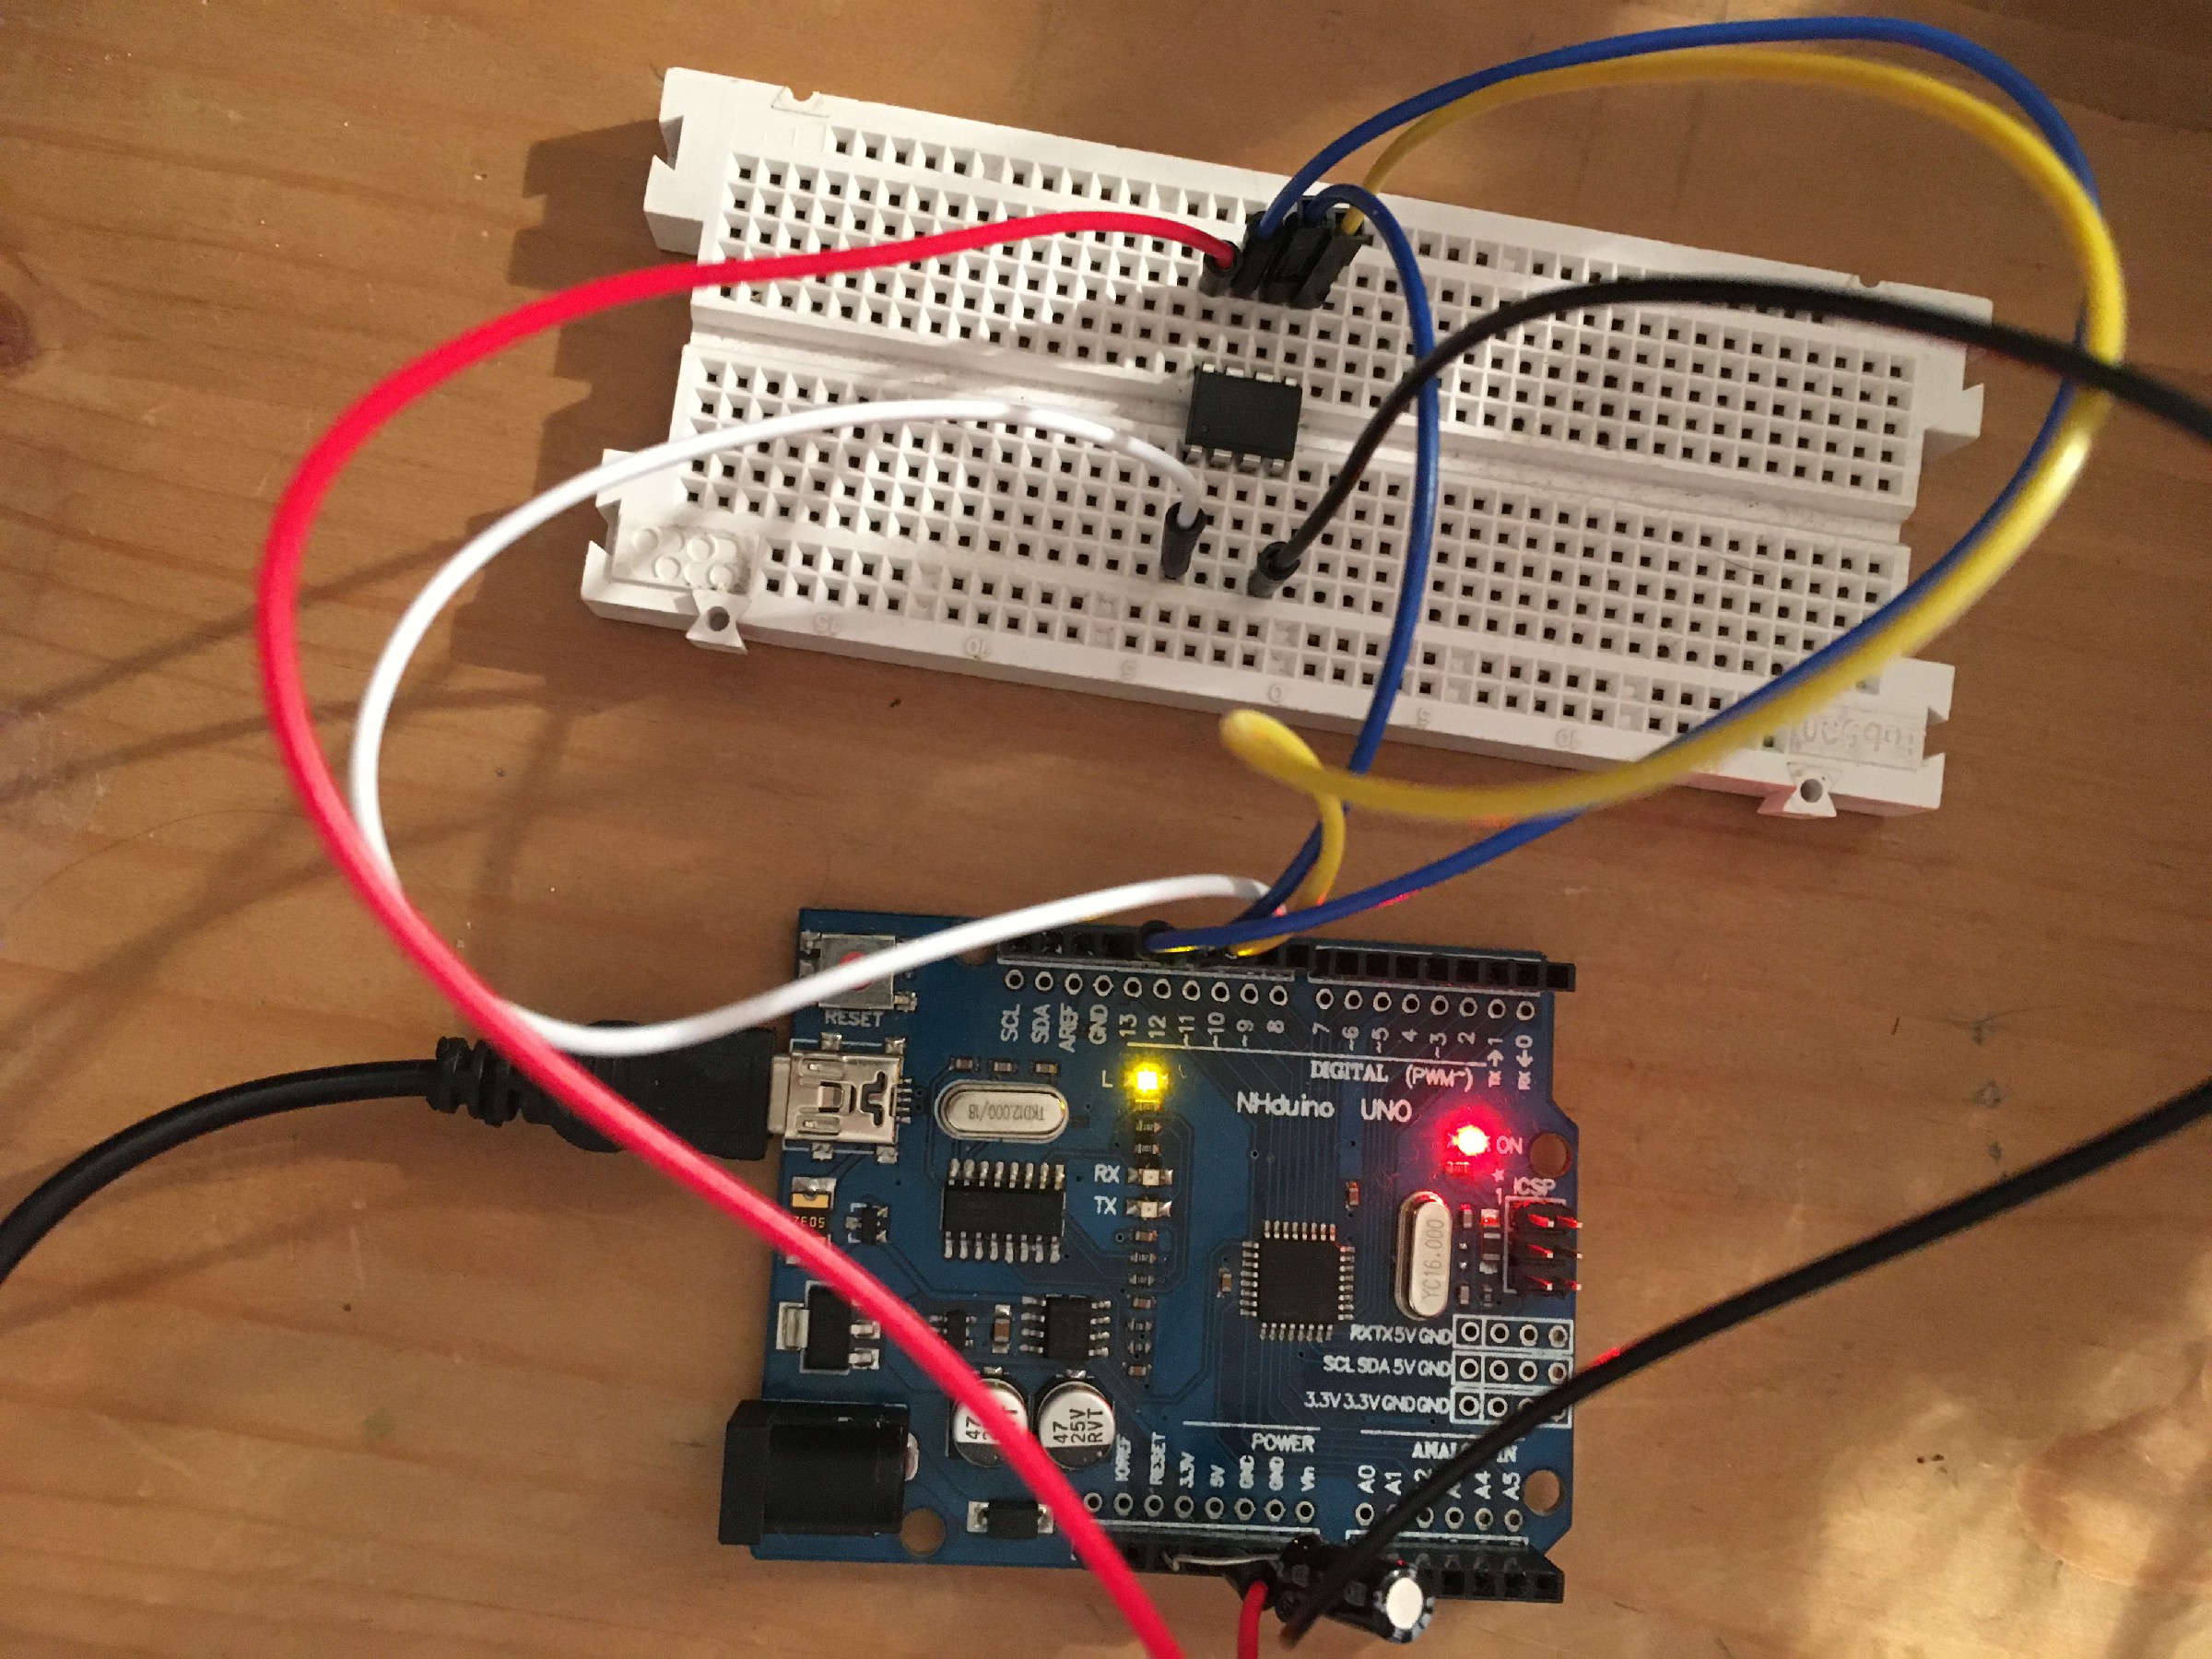
I programmed an Attiny85 via ISP by using an Arduino Uno. I followed this tutorial from Instructable. The first step is to wire the Attiny85 to the Arduino via ISP. A 10uF capacitor is used to avoid reset problems of the Arduino while bootloading.
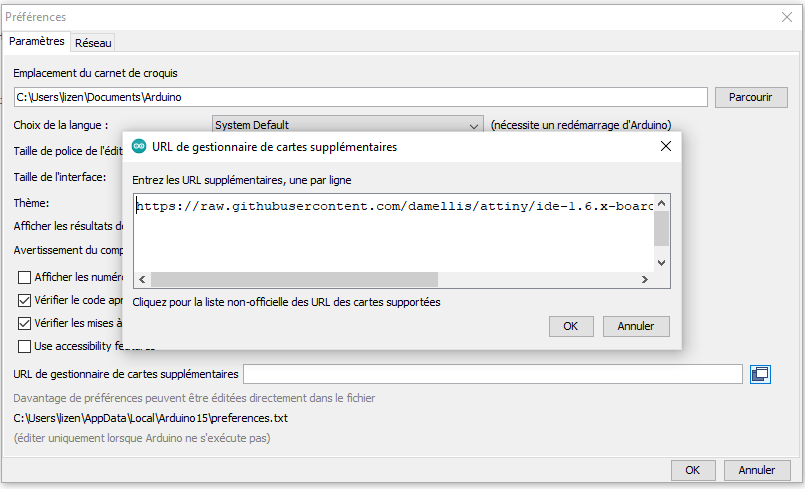
add external boards support |
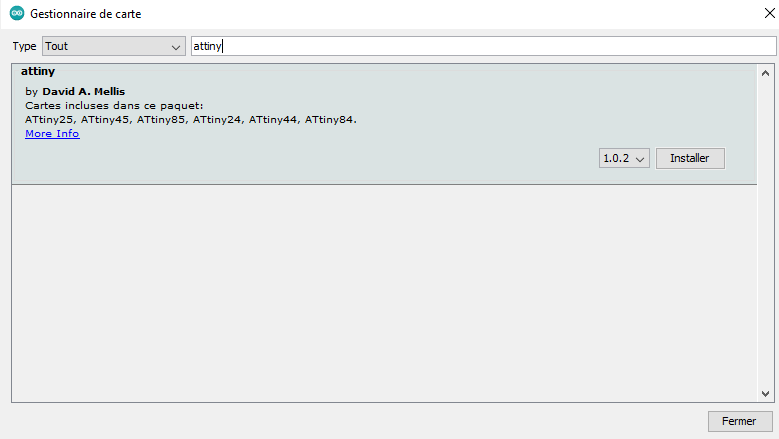
download the attiny support |
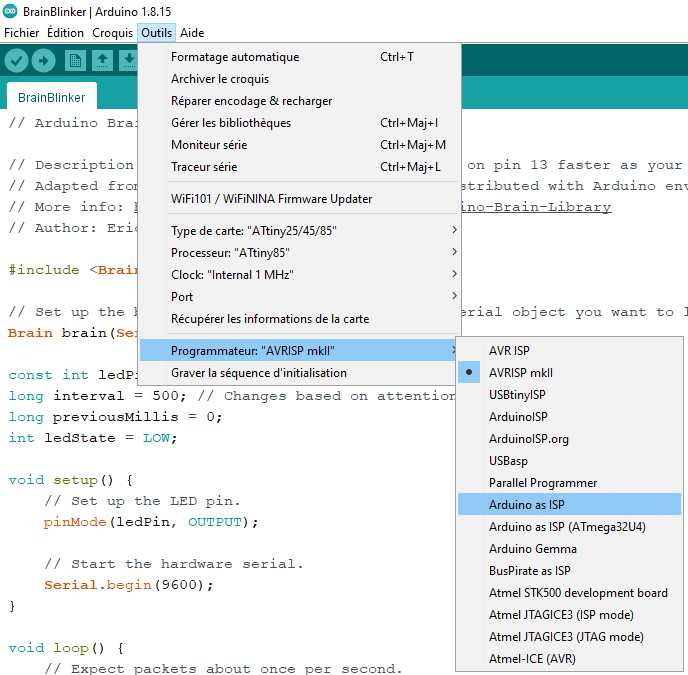
set Arduino as ISP |
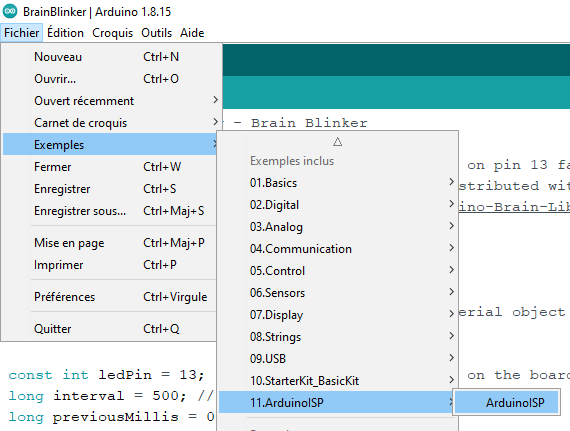
load the ArduinoISP example |
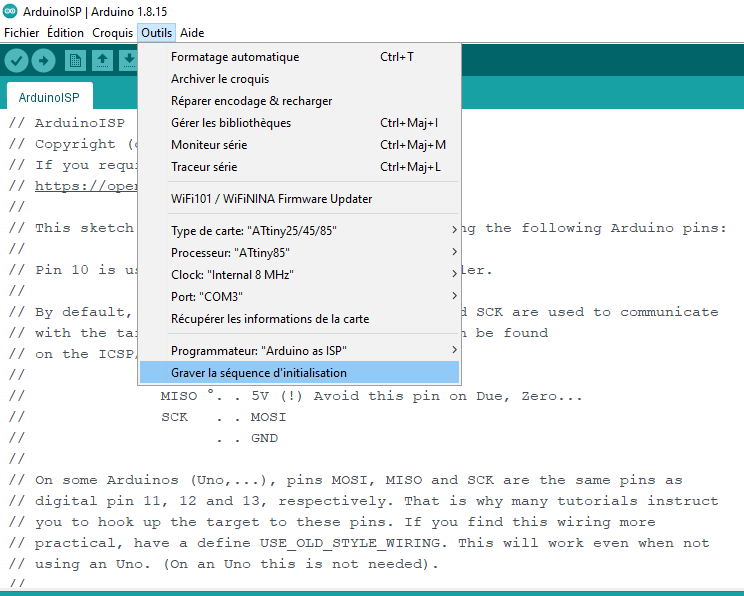
burn bootloader |
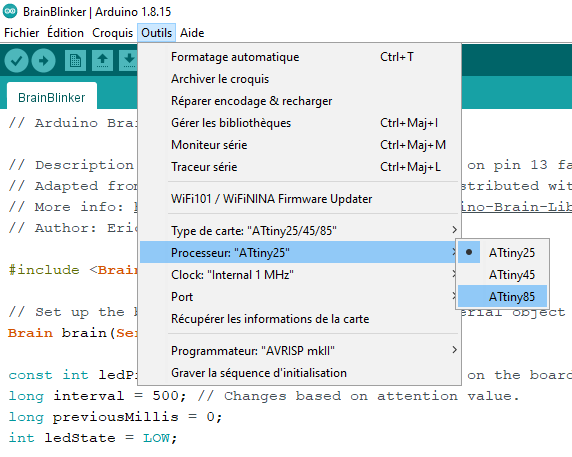
set the board as Attiny85 |
Hello world
After having bootloaded the Attiny85, I am able to upload sketches on this board. I tried the LED blink example to check that everything was working.
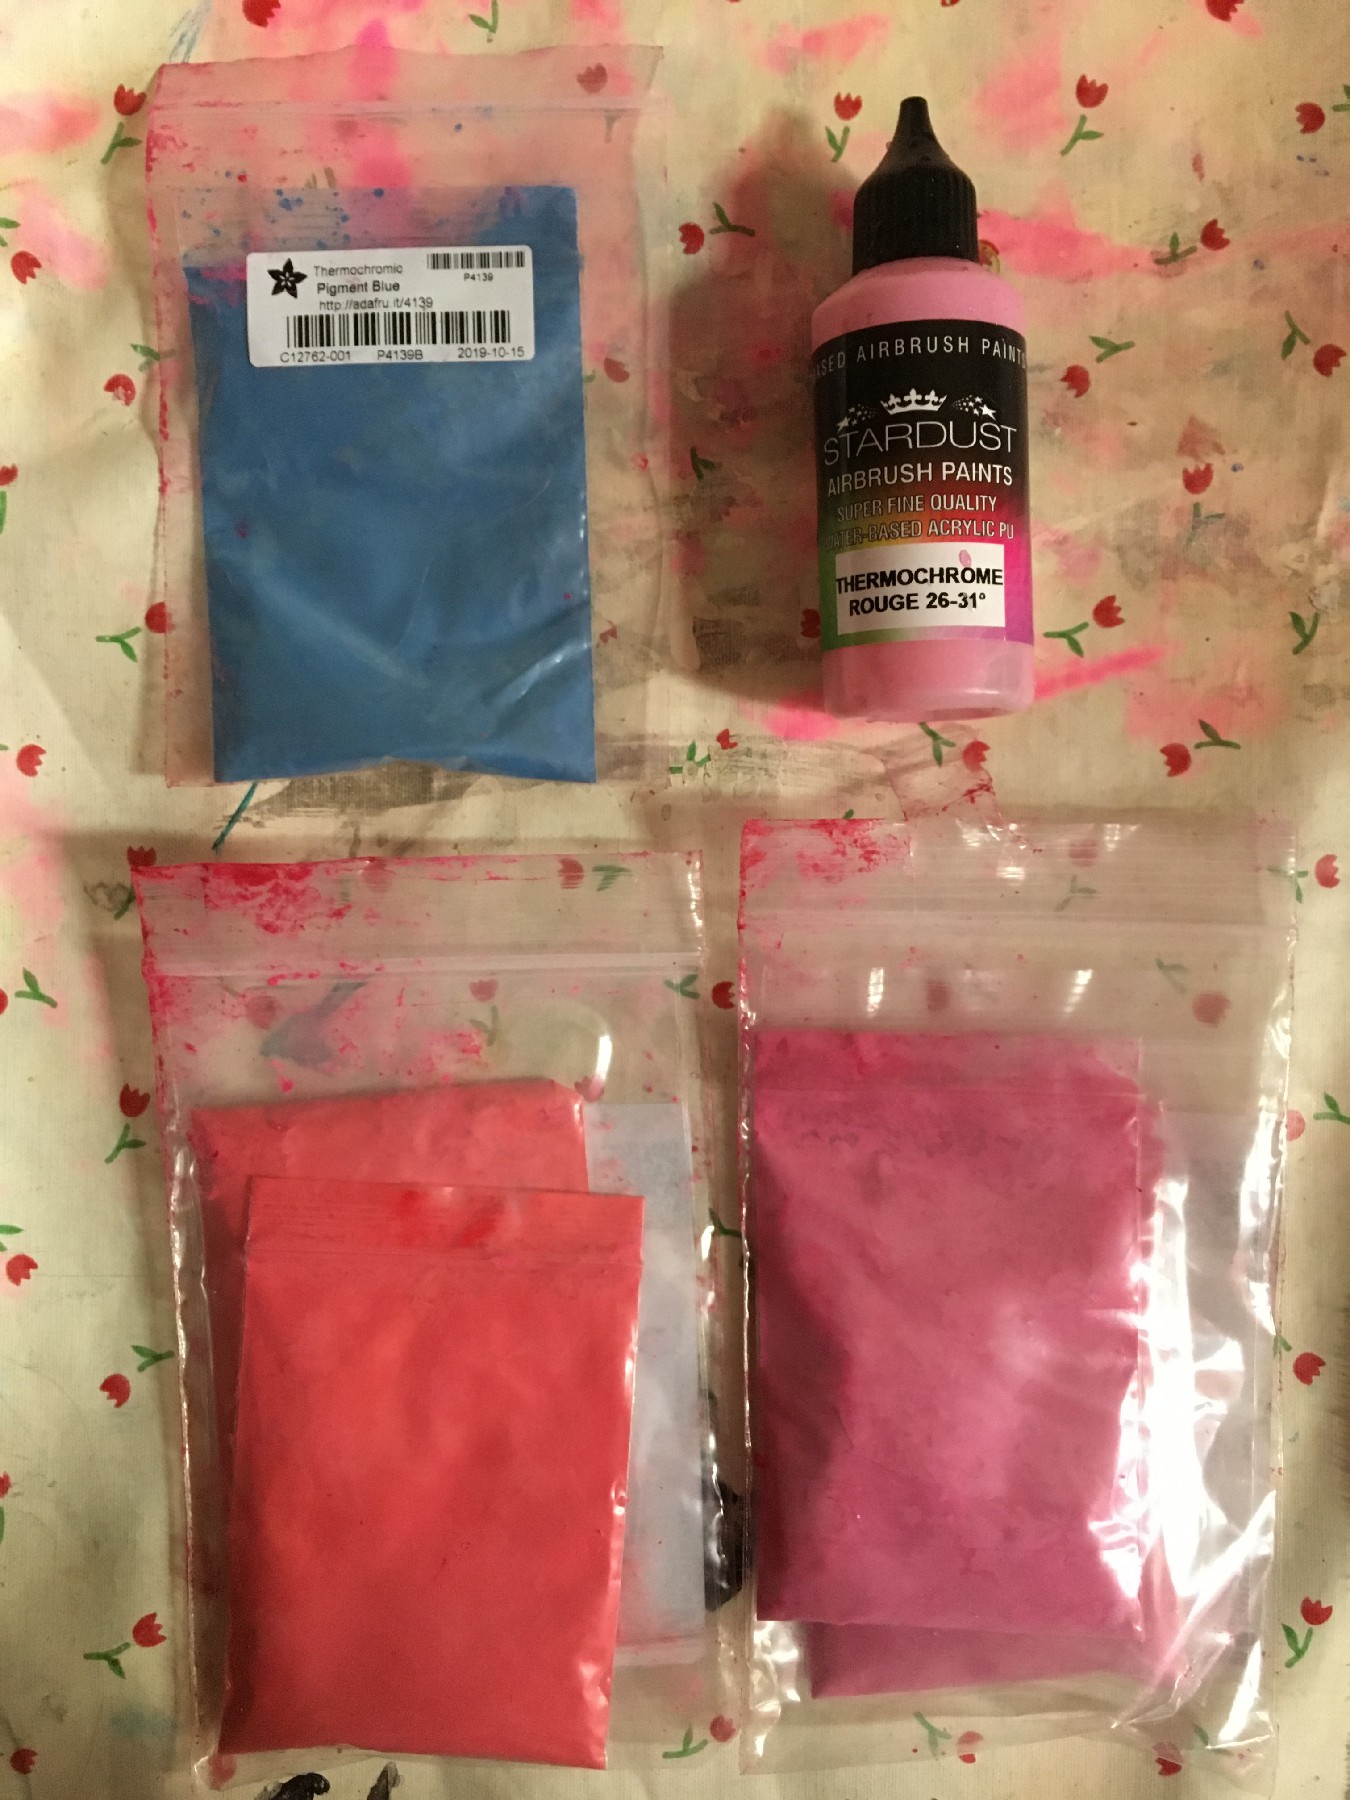
Thermochromic paint
At home, I had several thermochromic pigments and paints. It includes blue, red and pink thermochromic pigments from Adafruit bought on Mouser, as well as pink thermochromic paint from Stardust bought on Phosphorescent.fr. Those are all thermochromic colours that fade at the 31 °C level. The paint is a bit old and seems to react less... Fortunately I had an old sample that I did with this paint.
I diluated the pigment in water, and painted with it small rectangles of cotton fabric.
I tested the heta effect with an hair dryer :
Then, I sewed a pattern with conductive thread from Adafruit. Its resistance is
10 ohm per foot, 0.85 Ohm per inch and 1.7 Ohms per 5cm. I made a circuit with a n-channel MOSFET to generate heat in the thread. I wired the two ends of the thread to an Arduino. Obviously, it didn't work because there was not enough power. I will try tomorrow at the fablab with laboratory power supply.
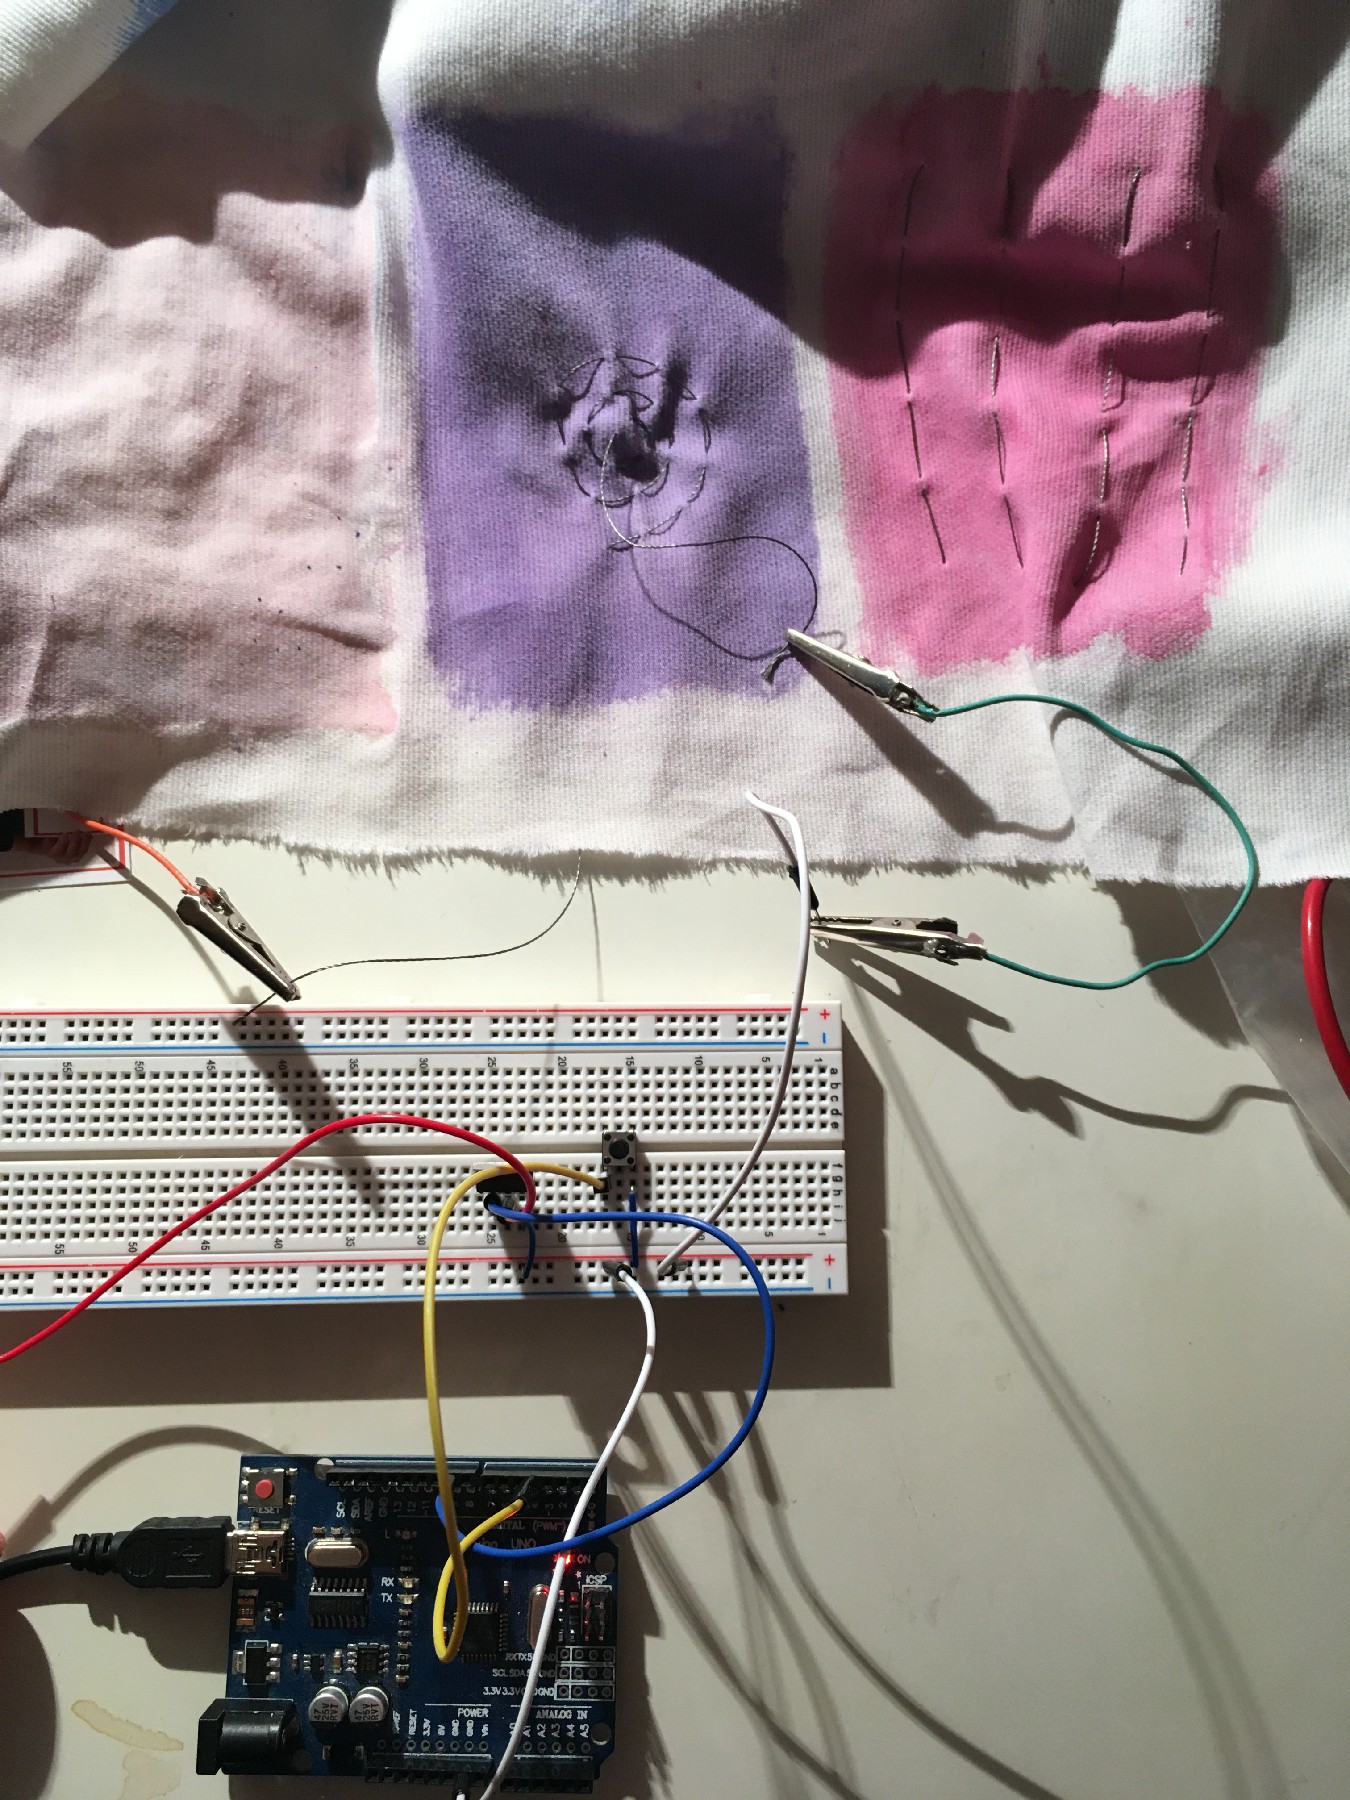
Surprisingly (or not!) when I wired my conductive thread to the amplifying circuit that I used for the speaker, it heated very well ! I suppose that the amplifying module is based on transitors, so it is doing what I was trying to achieve with the MOSFET.
Shape Memory Alloy
Nitinol is a Shape Memory Alloy (SMA), i.e. it has the ability to bend, stretch and return to a previous shape when heated. This metal, which is made out of different metals combined : nickel and titanium. It acts like a muscle and can power quick movements, using just a battery and a heating circuit on paper. I decided to reuse the heating circuit made for the thermochromic paint so as to make a prosthetic hand animate.
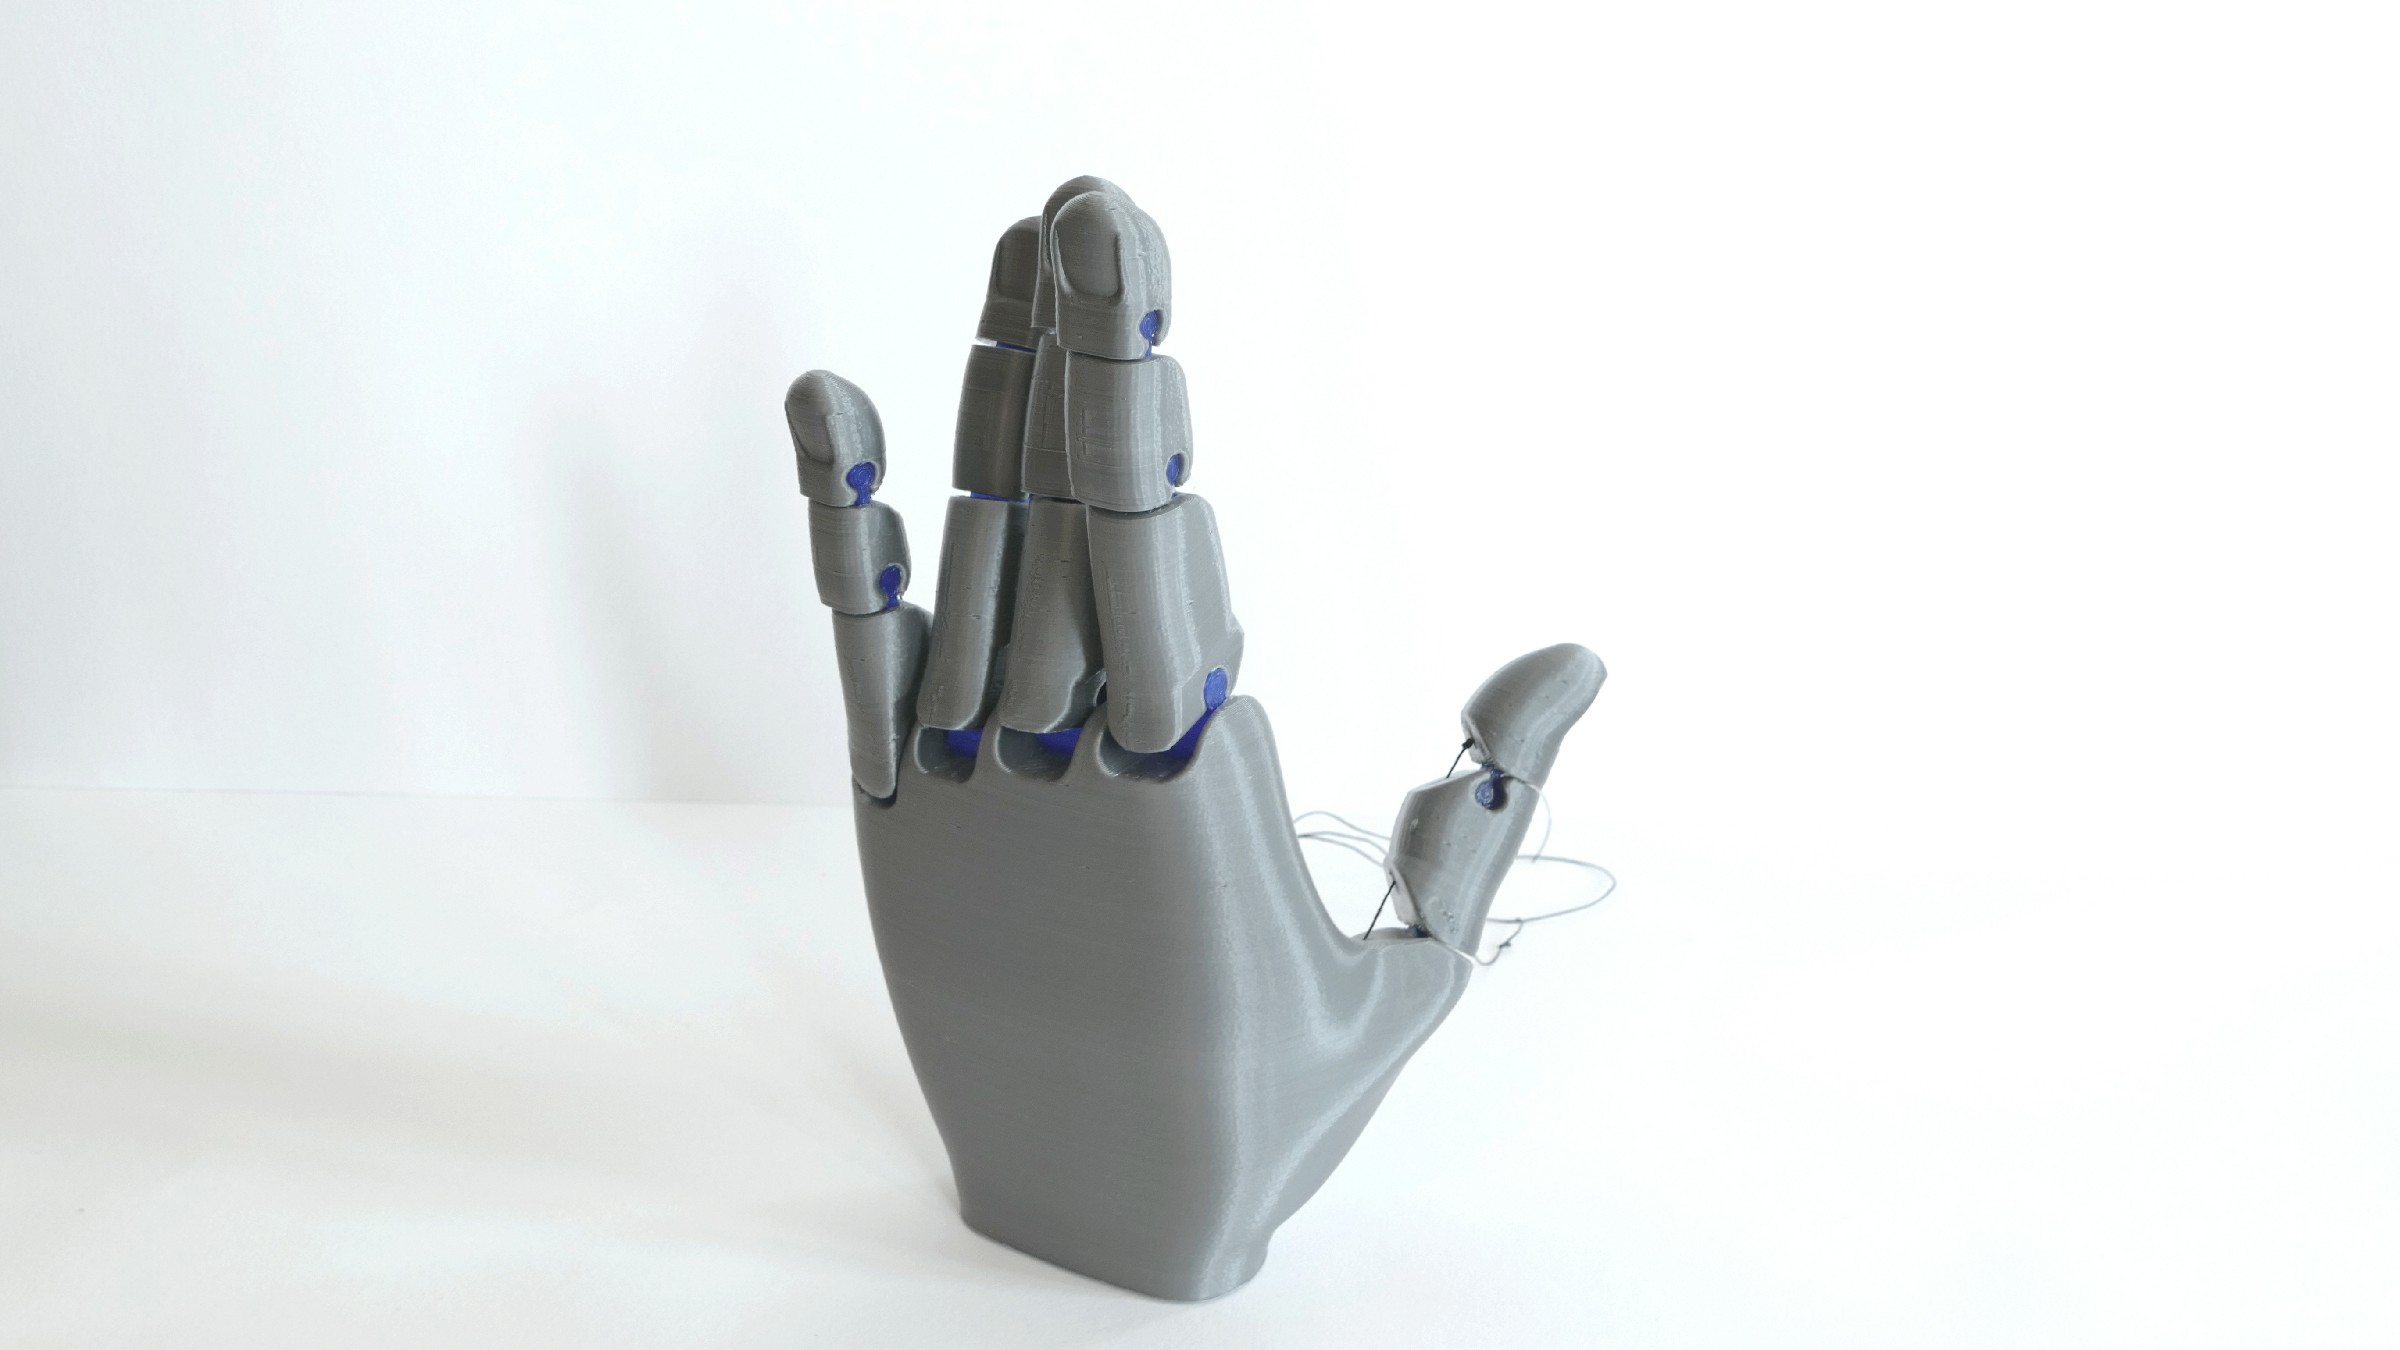
The hand is 3D printed in PLA and TPU. The 3D model is available here. I spent a hard type assembling the model because the TPU used for the "hinges" of the hand was not as flexible as the filament used by the designer of the model. I used a flat screw driver to push the flexible part inside the holes in the PLA. Afterwards, I inserted rigid nylon threads in the hole of each finger of the hand. The thread is then wired with the Nitinol wire. Thanks to Nitinol, nylon ligaments of the hand move :