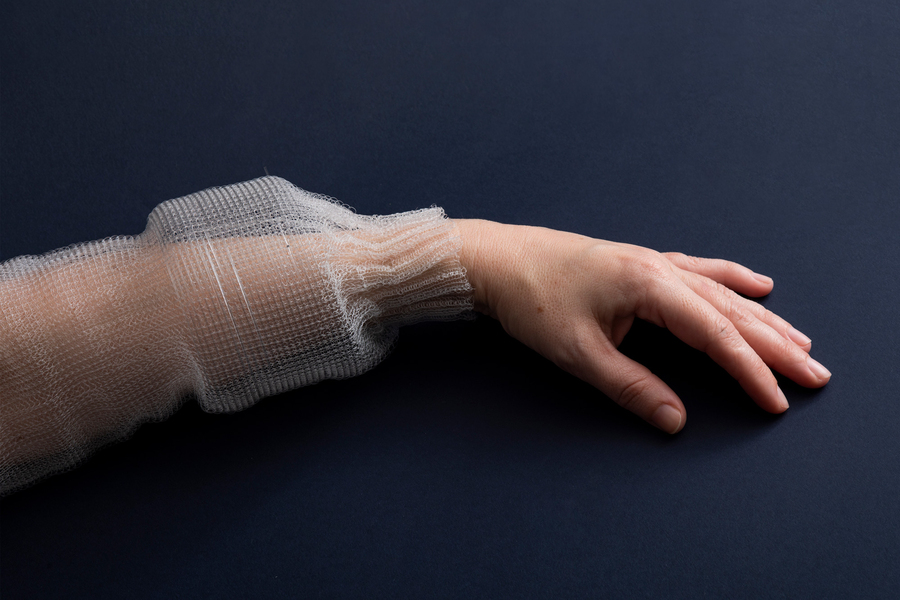
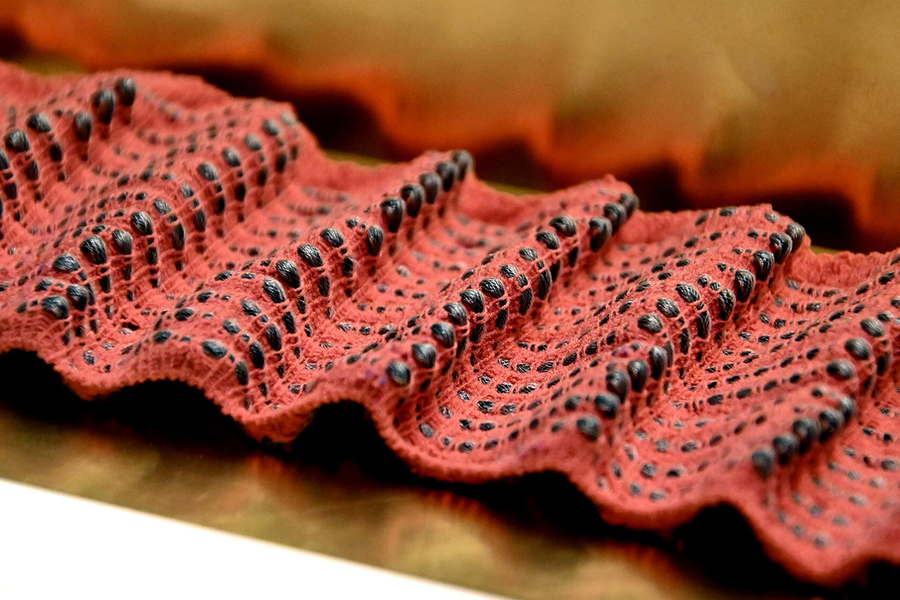
E-textiles
Engineers create a programmable fiber In a first, the digital fiber contains memory, temperature sensors, and a trained neural network program for inferring physical activity
New fibers can make breath-regulating garments “Robotic” textiles could help performers and athletes train their breathing, and potentially help patients recovering from postsurgery breathing changes.
Conductive fabrics
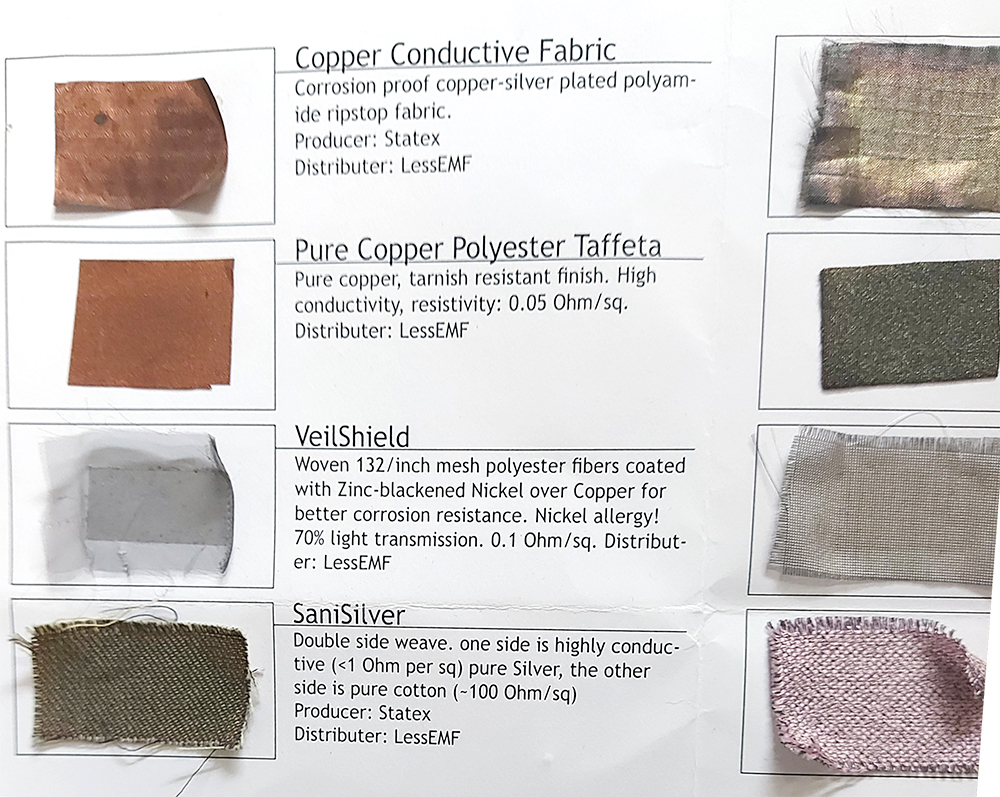

Available at Fab Lab BCN

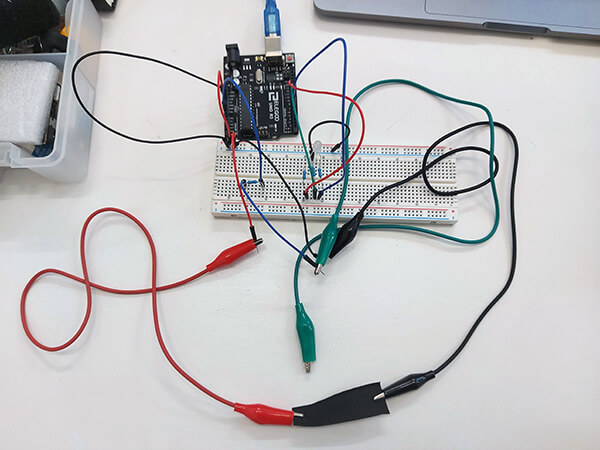
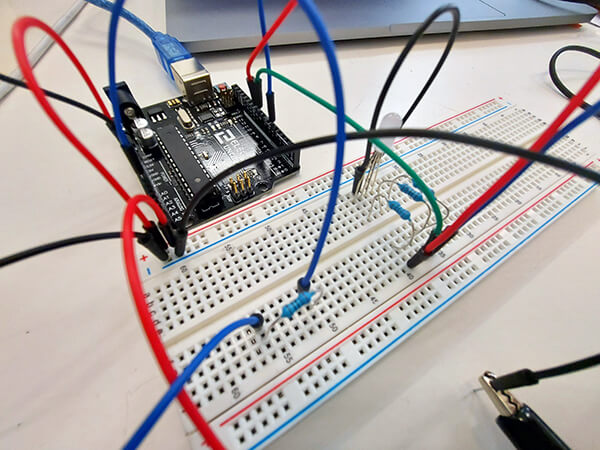
Analog Sensor
based on a project by Ana Correa Ana Correa Analog Tilt Sensor
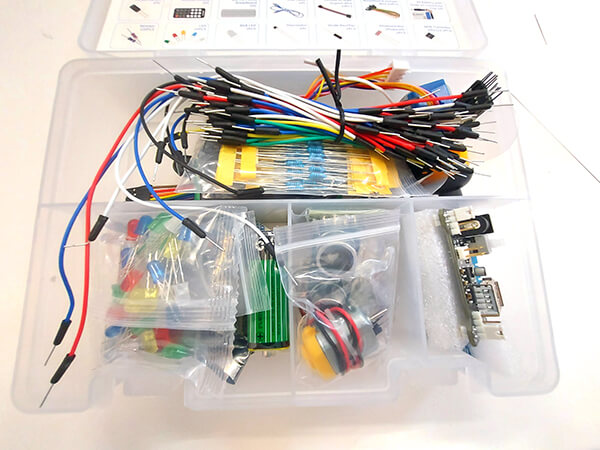
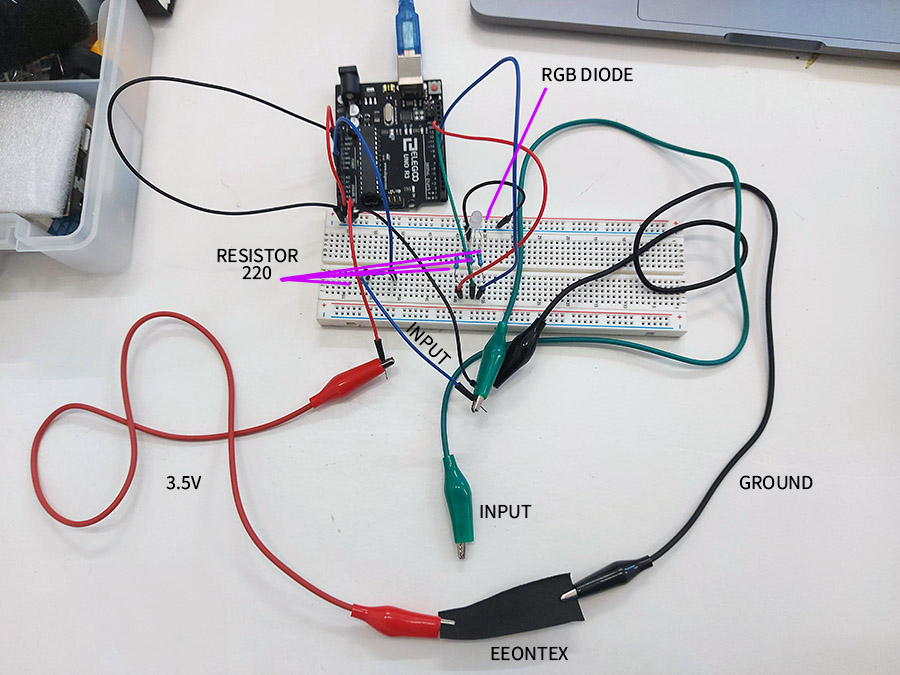
Circuit Prototype
Code
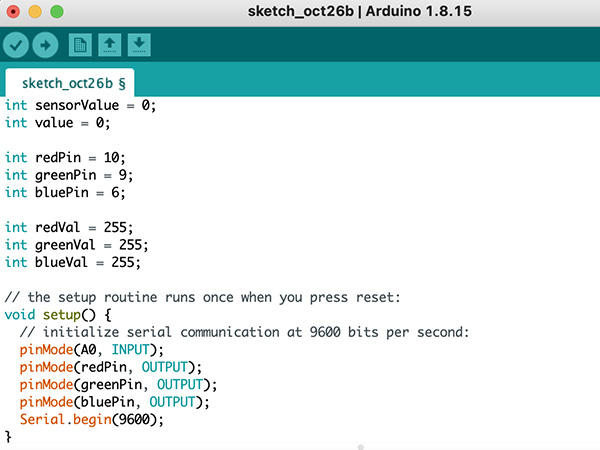
 int sensorValue = 0;
int value = 0;

int redPin = 10;
int greenPin = 9;
int bluePin = 6;

int redVal = 255;
int greenVal = 255;
int blueVal = 255;

// the setup routine runs once when you press reset:
void setup() {
  // initialize serial communication at 9600 bits per second:
  pinMode(A0, INPUT);
  pinMode(redPin, OUTPUT);
  pinMode(greenPin, OUTPUT);
  pinMode(bluePin, OUTPUT);
  Serial.begin(9600);
}

// the loop routine runs over and over again forever:
void loop() {
  // read the input on analog pin 0:
  int sensorValue = analogRead(A0);
  // print out the value you read:

  sensorValue = constrain(sensorValue, 150, 400);

  // Go from white to Cyan
  if (sensorValue >= 0 && sensorValue <= 150);
  {
    int CyanColor = map (sensorValue, 0,150,0,255);
     redVal = 255 - CyanColor;
     greenVal = 255;
     blueVal = 255;
     // CyanColor rgb ( 0, 255, 255) 0 to 300
  }

  // Go from Cyan to Green
   if(sensorValue > 150 && sensorValue <= 200){
      int GreenColor = map(sensorValue, 200,300,0,255);
      redVal = 0;
      greenVal = 255;
      blueVal = 255 - GreenColor;
      // GreenColor  rgb(0,255,0)  300 -  450
 }

// Go from Green to Yellow
   if(sensorValue > 200 && sensorValue <= 250){
    int YellowR = map(sensorValue, 300,400,0,255);
    redVal = YellowR;
    greenVal = 255;
    blueVal = 0;
    // yellow rgb(255,255,0) 450 to 600
 }


   // Go from Yellow to Magenta
   if(sensorValue > 250 && sensorValue <= 300){
    int MagentaR = map(sensorValue, 400,500,0,255);
    redVal = 255;
    greenVal = 255 - MagentaR;
    blueVal = MagentaR;
    // Magneta rgb(255,0,255) 600 to 750
 }

  // Go from Magenta to Red
   if(sensorValue > 300 && sensorValue <= 350){
    int RedR = map(sensorValue, 500,550,0,255);
    redVal = 255;
    greenVal = 0;
    blueVal = 255 - RedR;
    // Red rgb(255,0,0) 750 to 850
 }


analogWrite(redPin, redVal);
analogWrite(greenPin, greenVal);
analogWrite(bluePin, blueVal);


Serial.print("sensorValue = ");Serial.print(sensorValue);Serial.print(" | ");
Serial.print("RedVal = ");Serial.print(redVal);Serial.print(" | ");
Serial.print("GreenVal = ");Serial.print(greenVal);Serial.print(" | ");
Serial.print("BlueVal = ");Serial.println(blueVal);

  delay(10);        // delay in between reads for stability

}
Input Values Range and Mapping
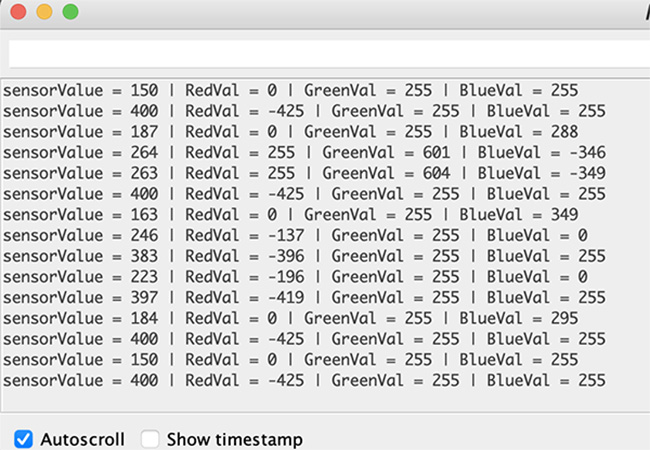
The input data range was around 150-350. Therefore the output LED Diode light frequency was divided in 5 equal parts to map the color from red to cyan.
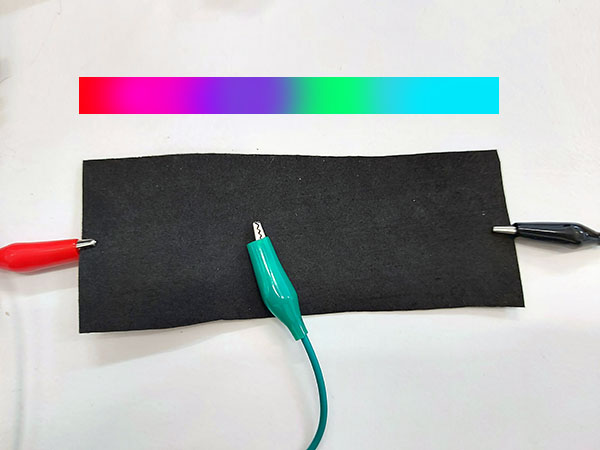
Analog slider
Links
- Exploring Bio-Inspired Fluidic Soft Actuators and Sensors for the Design of Shape Changing Tangible User Interfaces
- Integration of Conductive Materials with Textile Structures, an Overview
- KOBAKANT DIY WEARABLE TECHNOLOGY DOCUMENTATION
- Digital electronics in fibres enable fabric-based machine-learning inference
- Gaddis, Rebecca (May 7, 2014). “What Is The Future Of Fabric? These Smart Textiles Will Blow Your Mind”. Forbes.
-
Cords and
Chords:
Exploring the Role of E-Textiles in Computational Audio
- Koncar, V. Introduction to smart textiles and their application. In Smart Textiles and Their Application, 1st ed.; Koncar, V., Ed.; Woodhead Publishing: Cambridge, UK, 2016, pp. 1–8.
- Schwarz, A.; van Langenhove, L.; Guermonprez, P.; Deguillemont, D. A roadmap on smart textiles. Text. Prog. 2010, 42, 99–180.
- Smart fabric sensors and e-textile technologies: a review
- Smart textiles respond to human emotions
- Wearable Electronics and Smart Textiles: A Critical Review by Matteo Stoppa andAlessandro Chiolerio
- Smart fabric sensors and e-textile technologies: a review Lina M Castano1 and Alison B Flatau1
- 25th Anniversary Article: A Soft Future: From Robots and Sensor Skin to Energy Harvesters
- New fibers can make breath-regulating garments
- Recent Advances in Wearable Devices for Non-Invasive Sensing
- Low-Cost Wearables Manufactured By Hybrid 3D Printing
- Great way of tracking and visualizing dancers movements
- Free online Arduino simulator
Back