Open Source Hardware
From fibers to fabrics

This week's project was a teamwork with PETRA GARAJOVÁ, make sure to check out her amazing documentation and projects!
Also, most of the documentation you can see below is done by her!
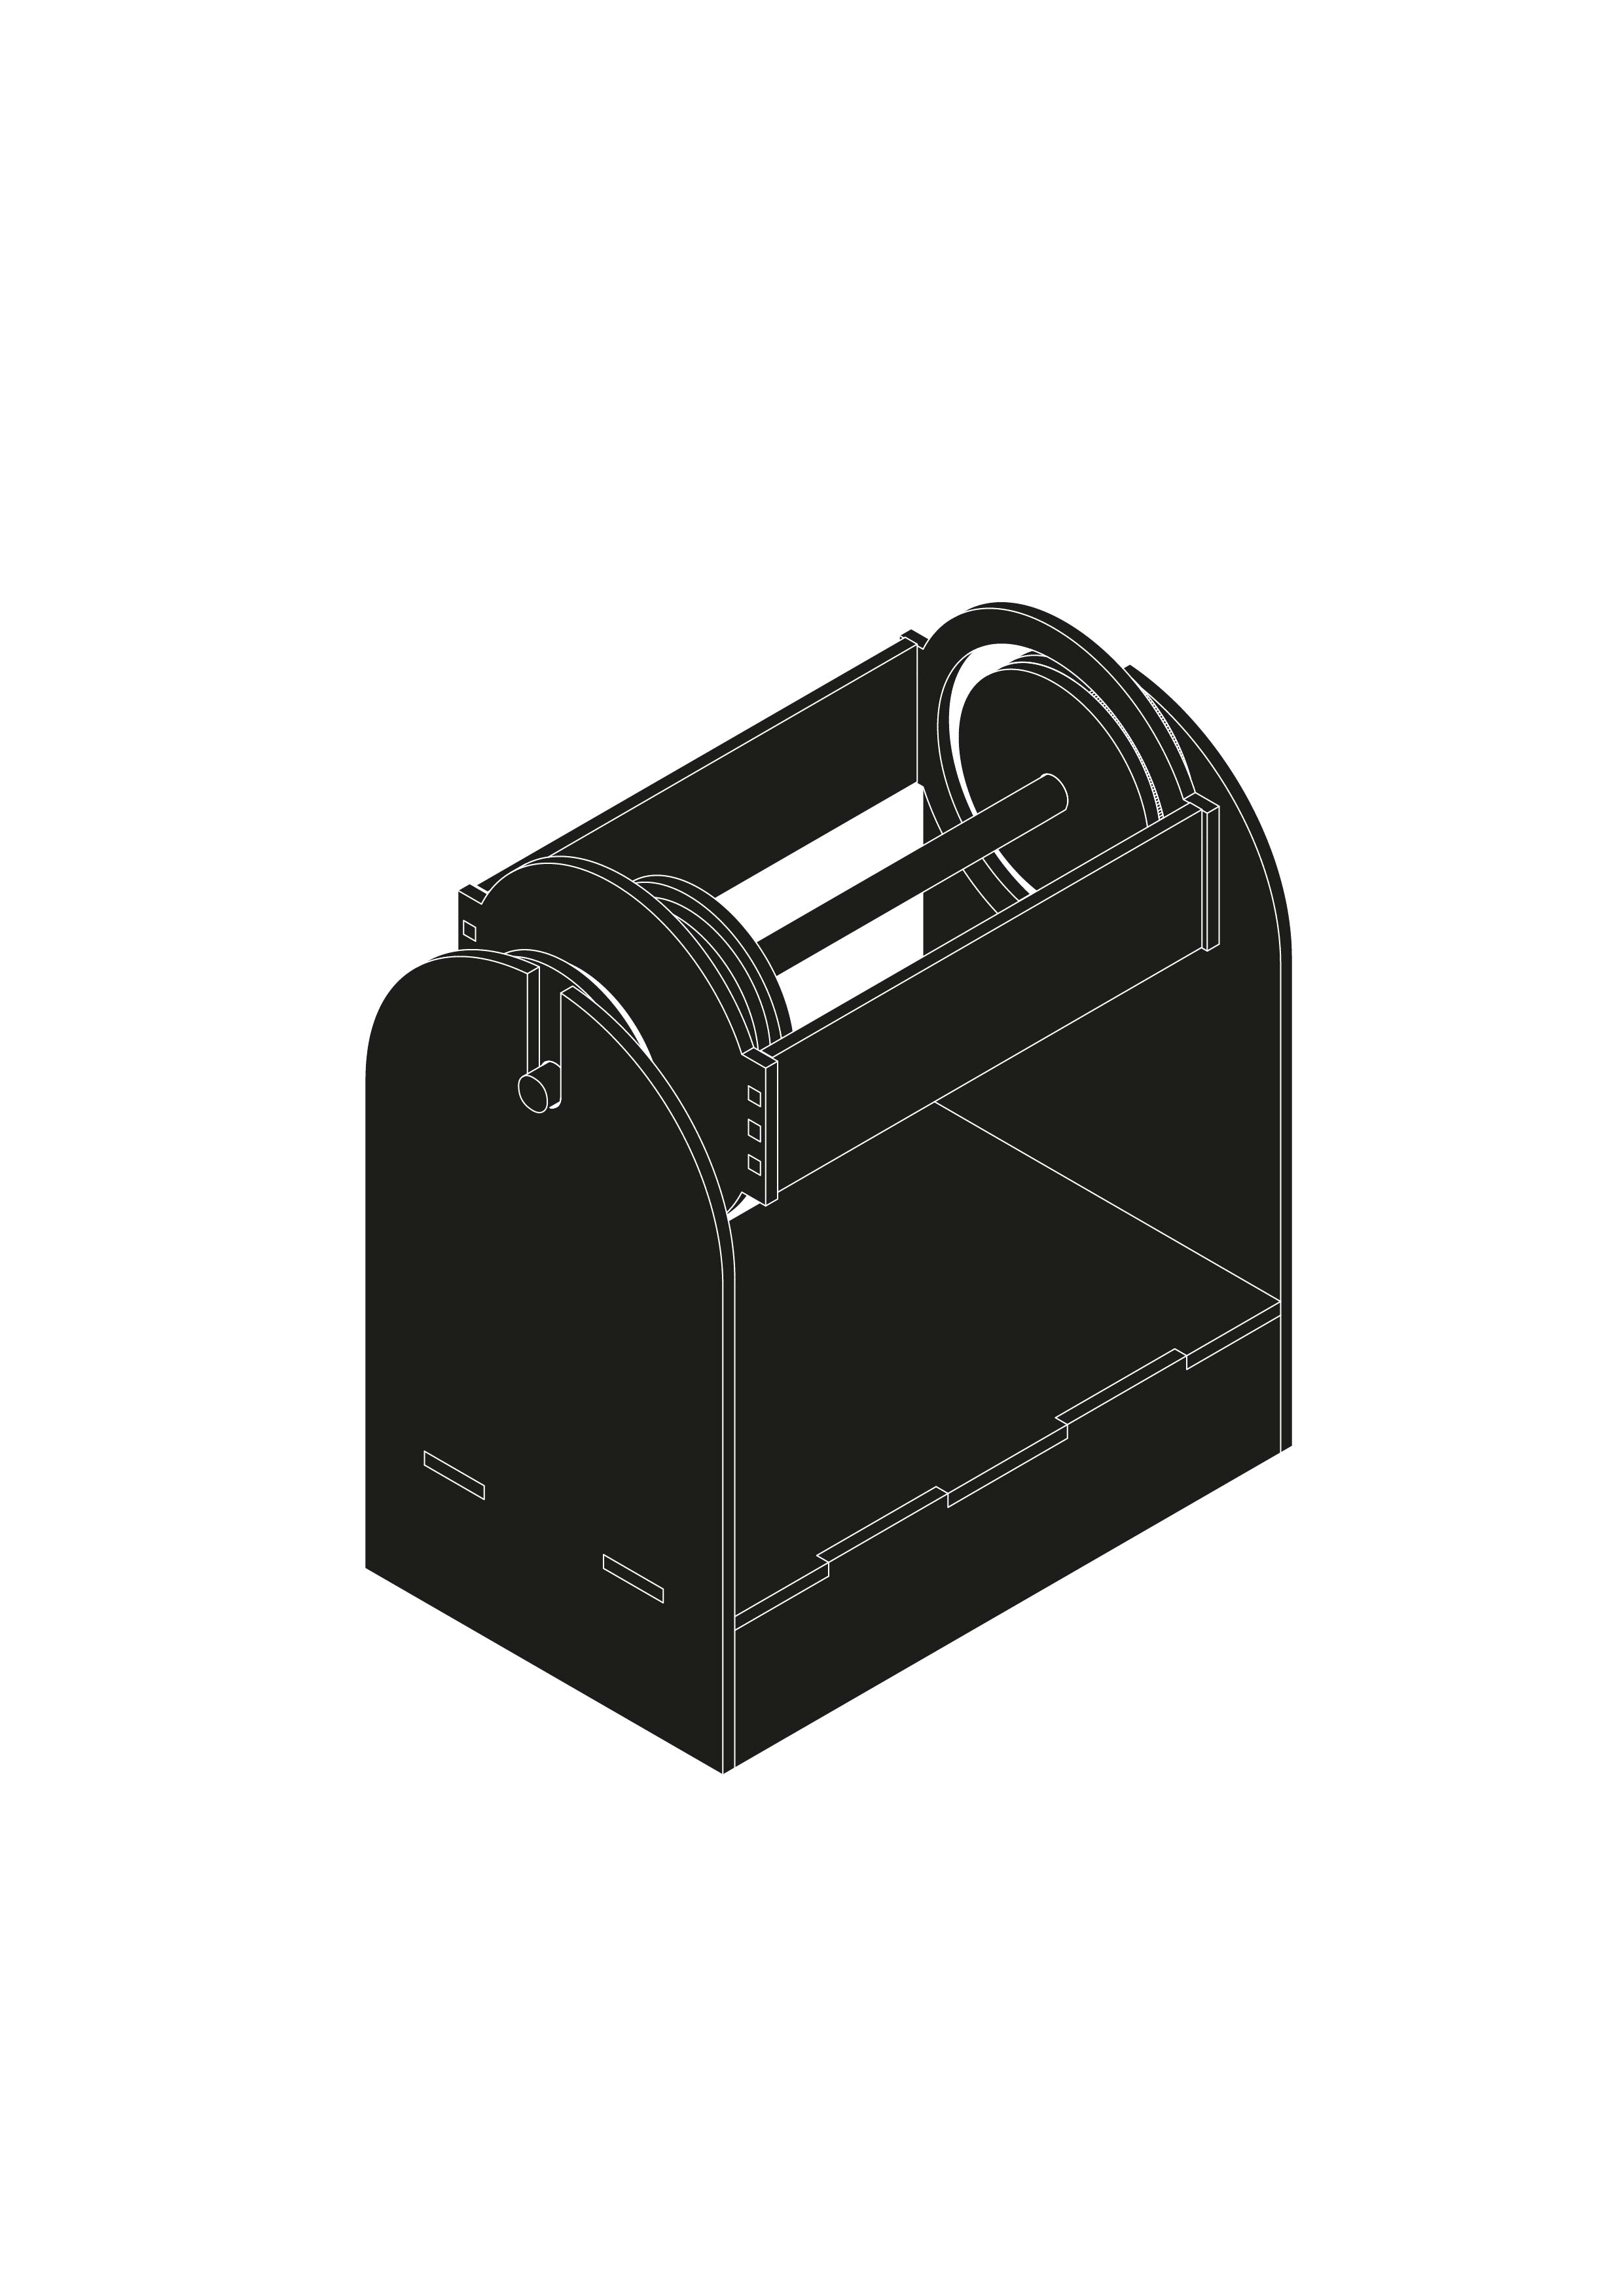
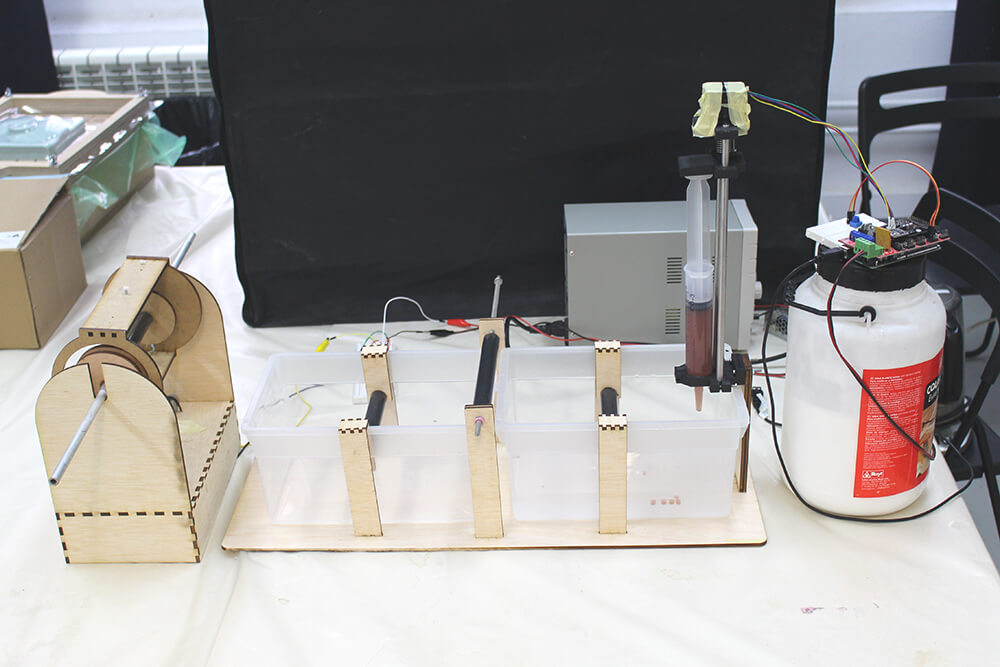
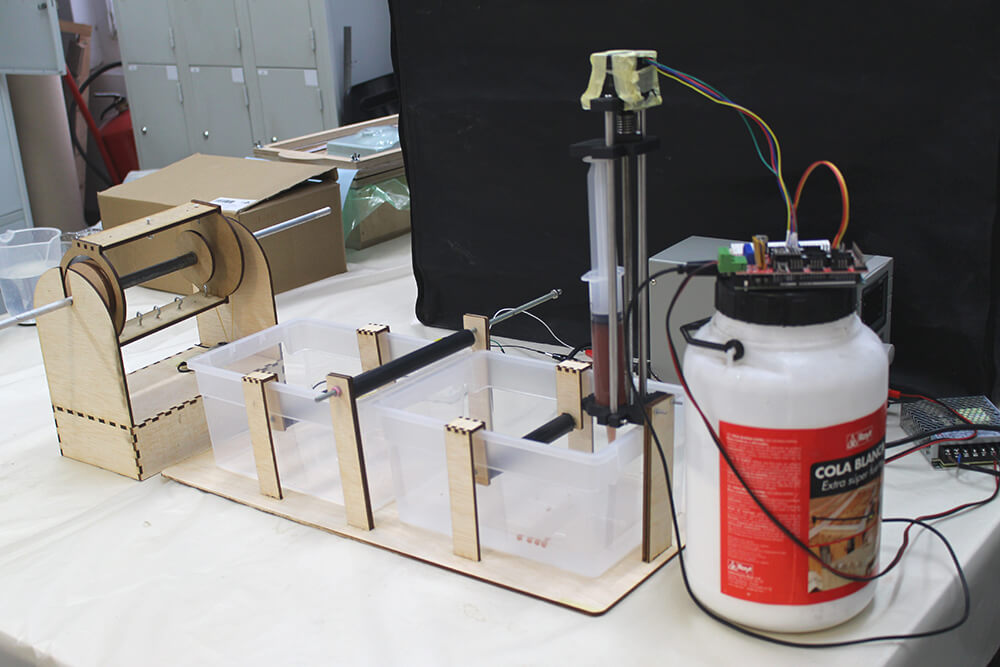
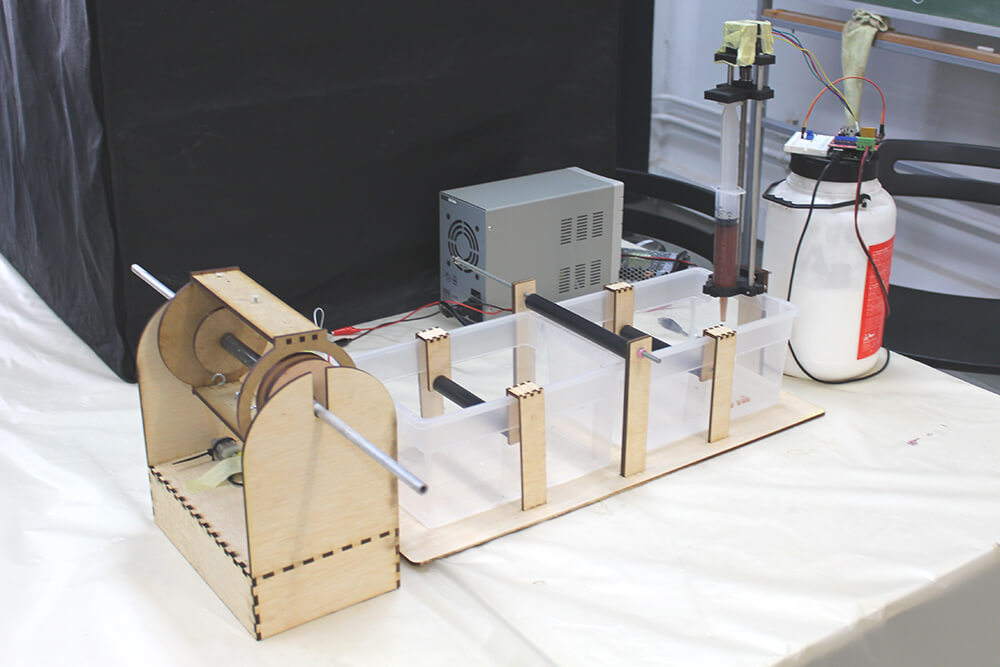
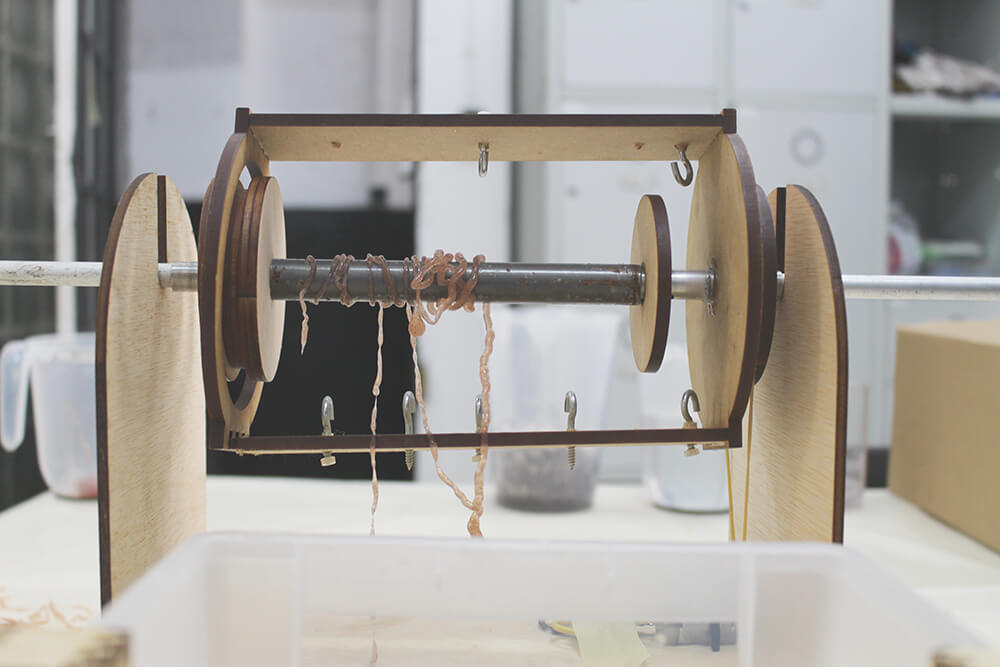
Hilo spinning machine
Spinning across centuries


- HILO Spinning Machine
- Cathrine Euale, Hilo Spinning Machine DIY
- Cathrine Euale, Alginate Bioyarn Extruder
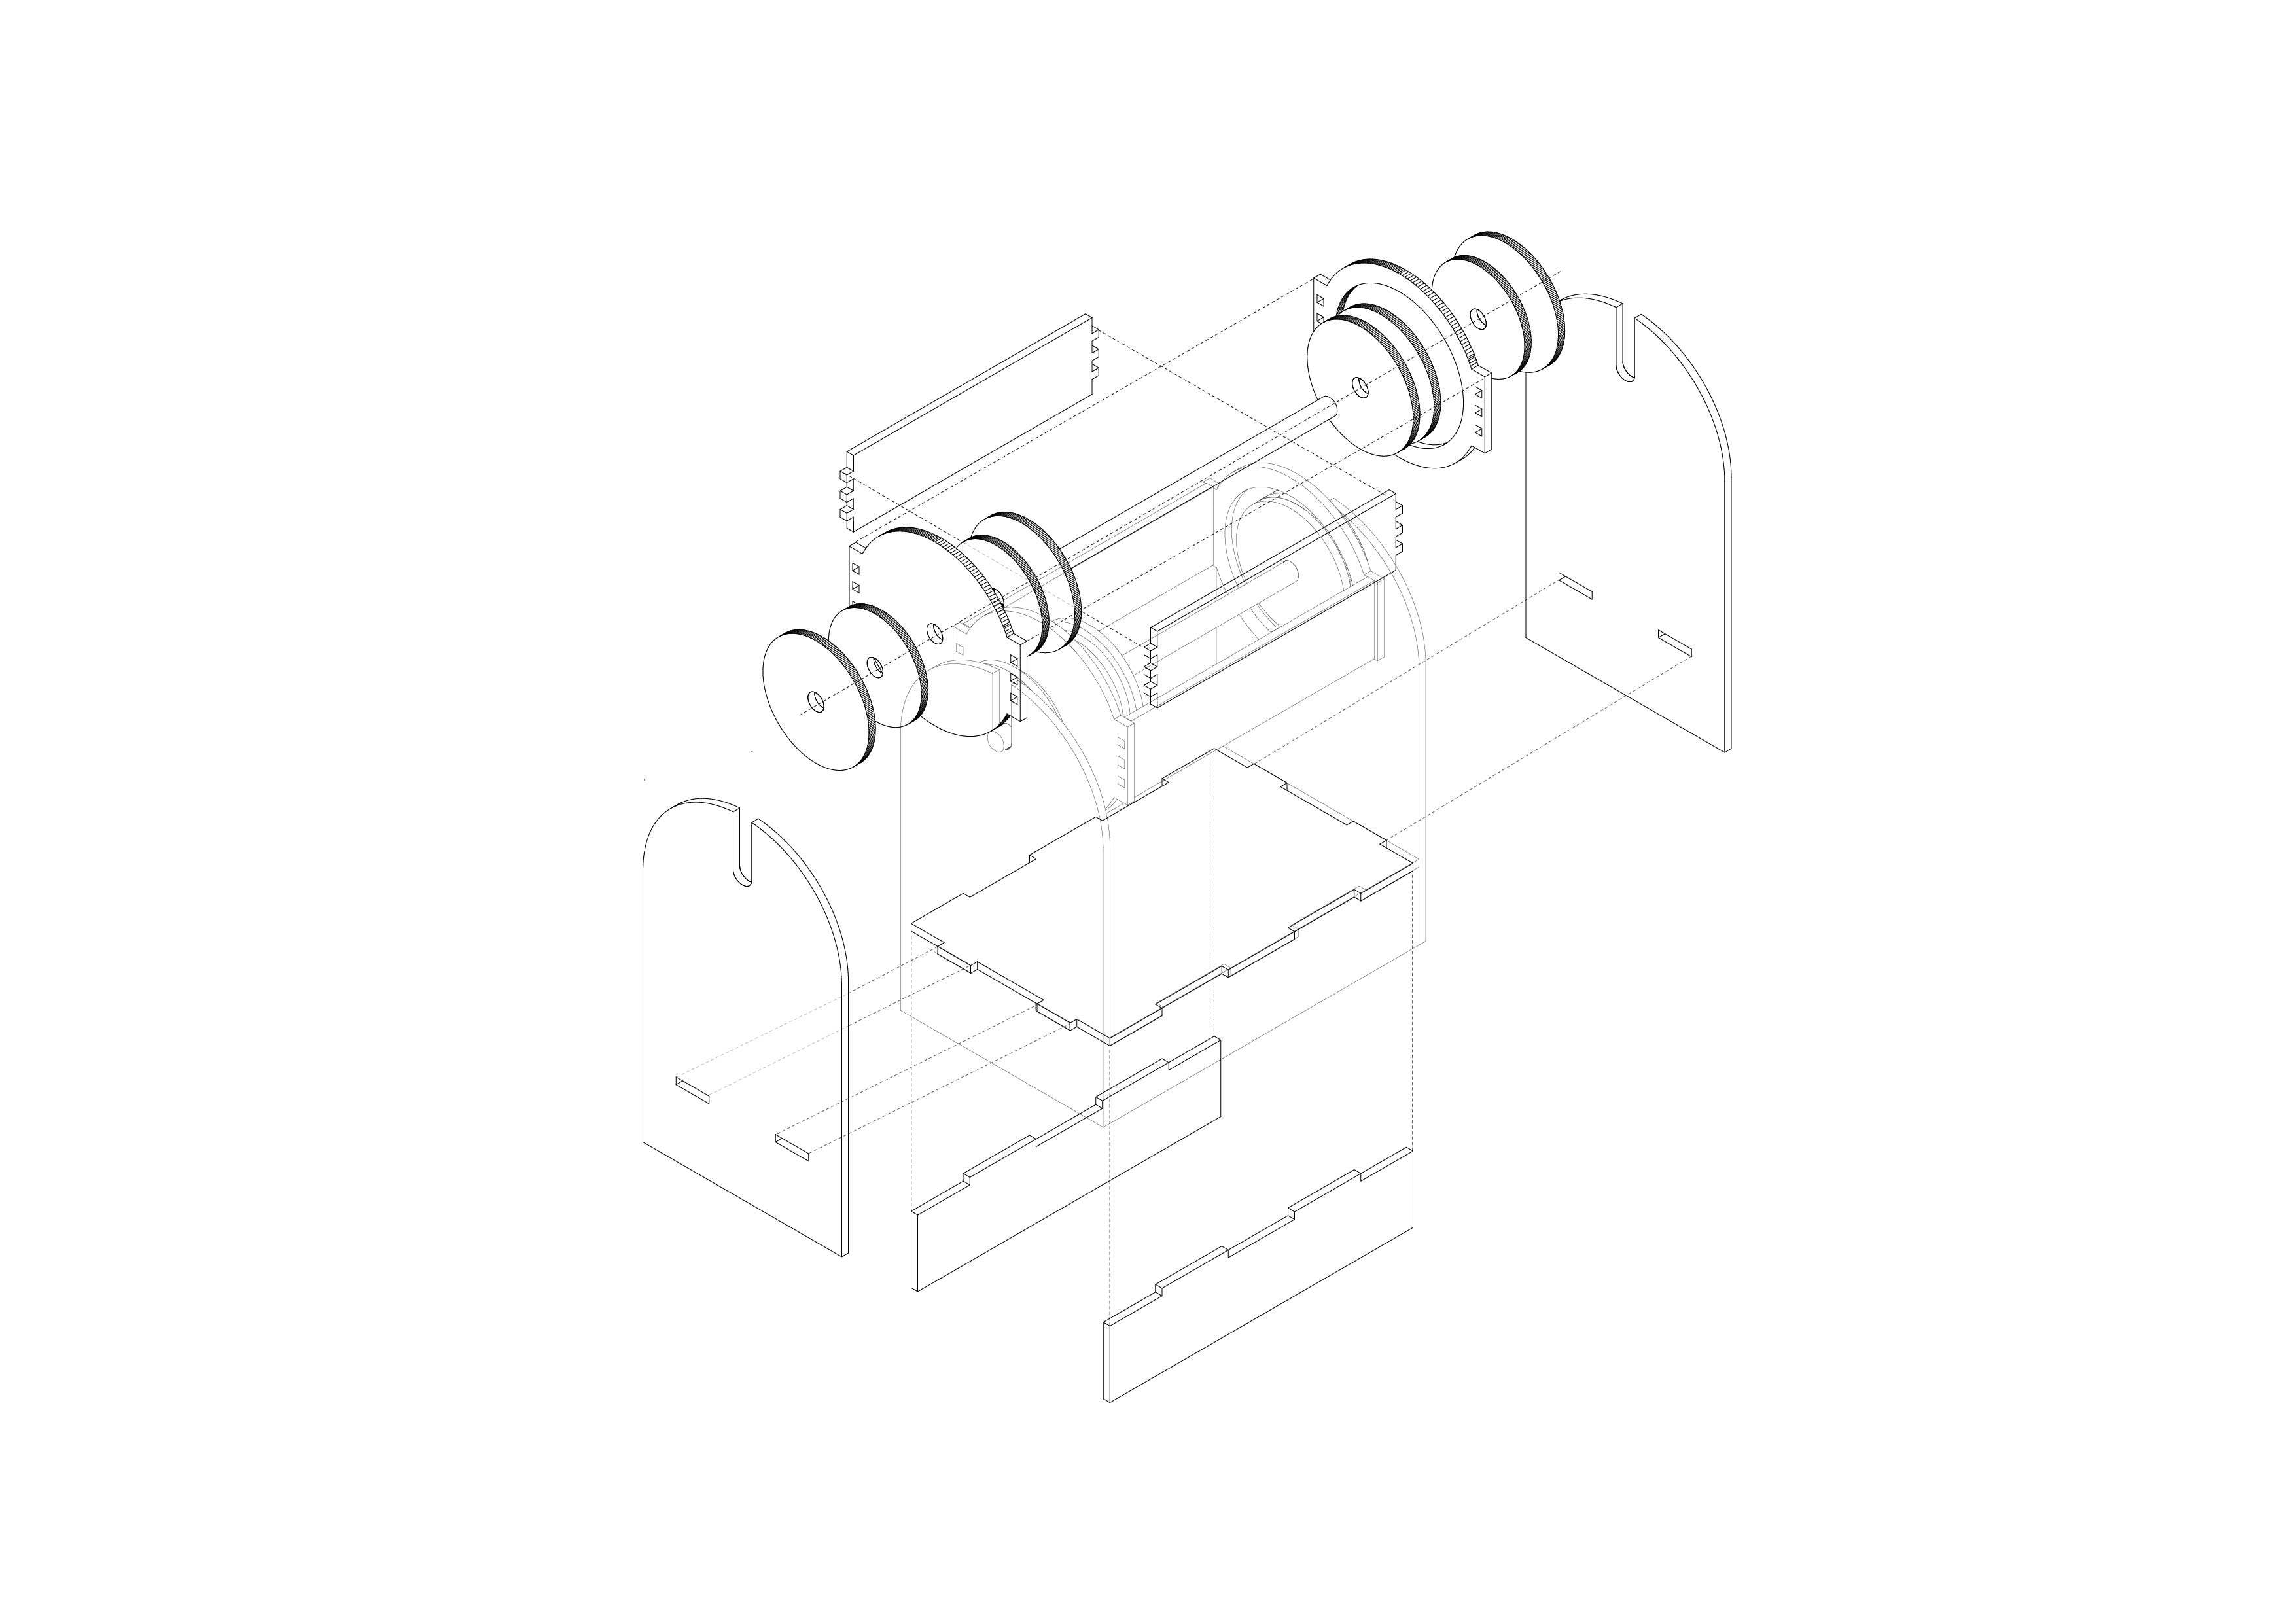
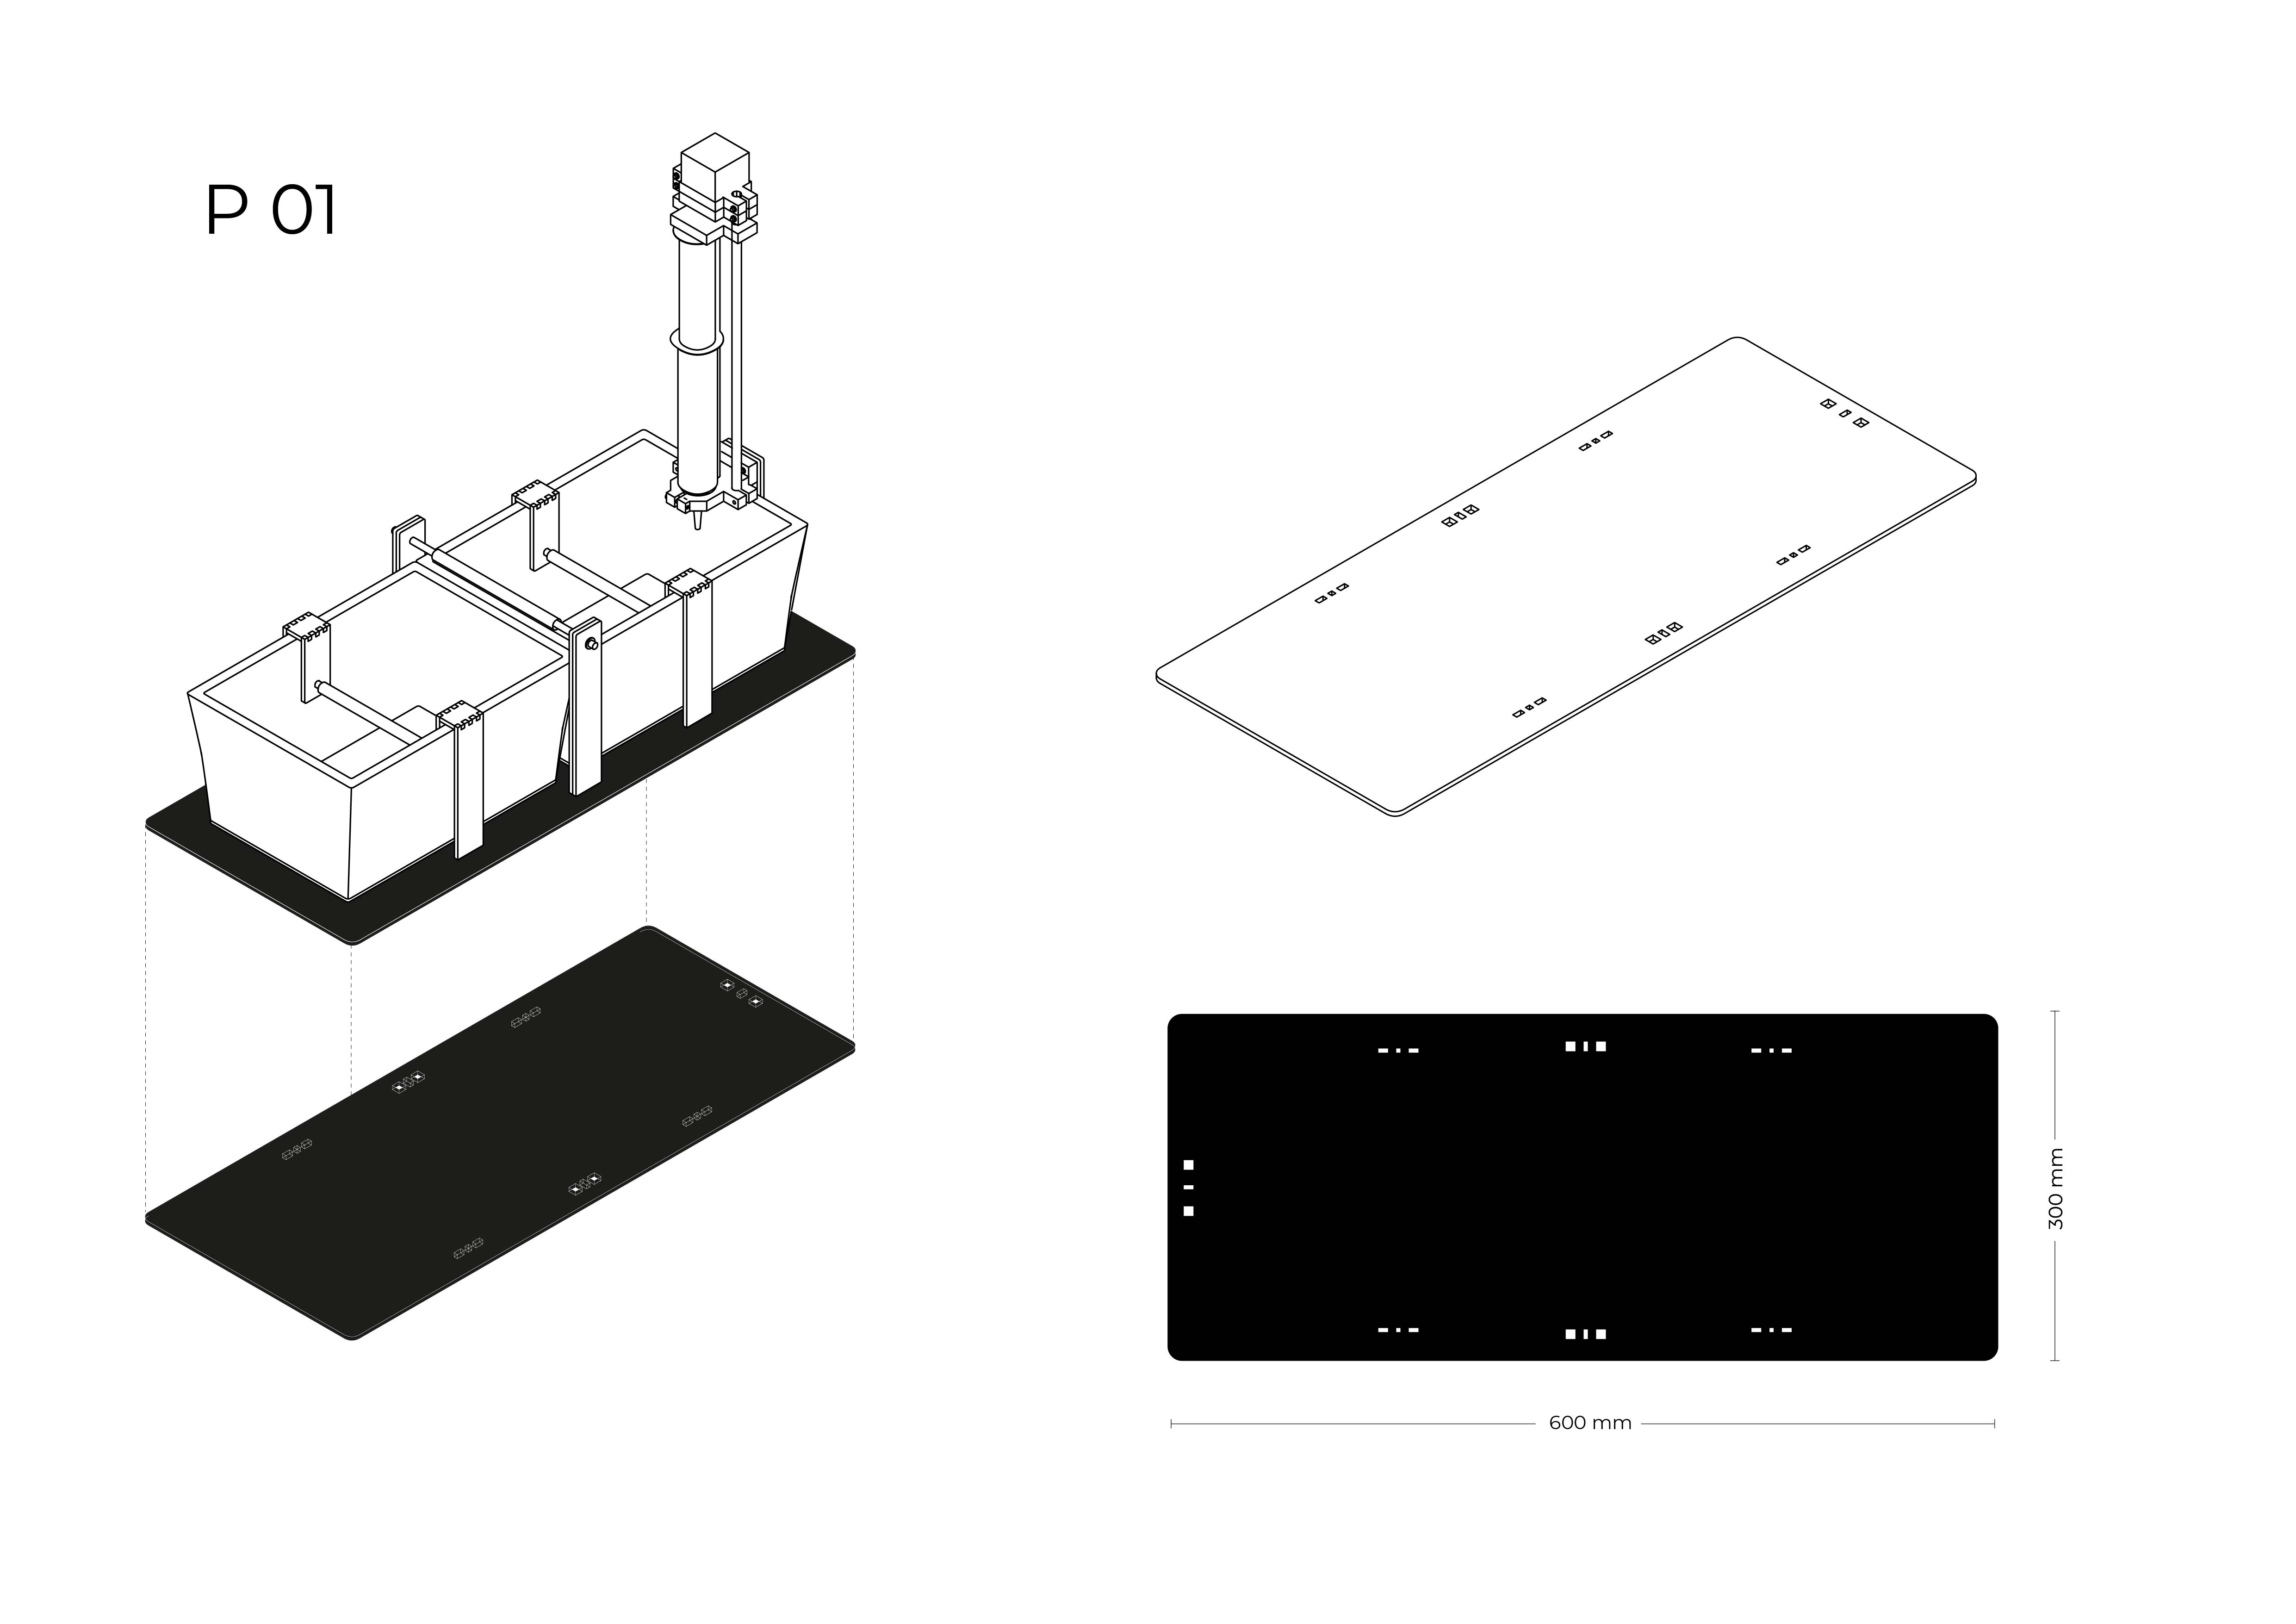
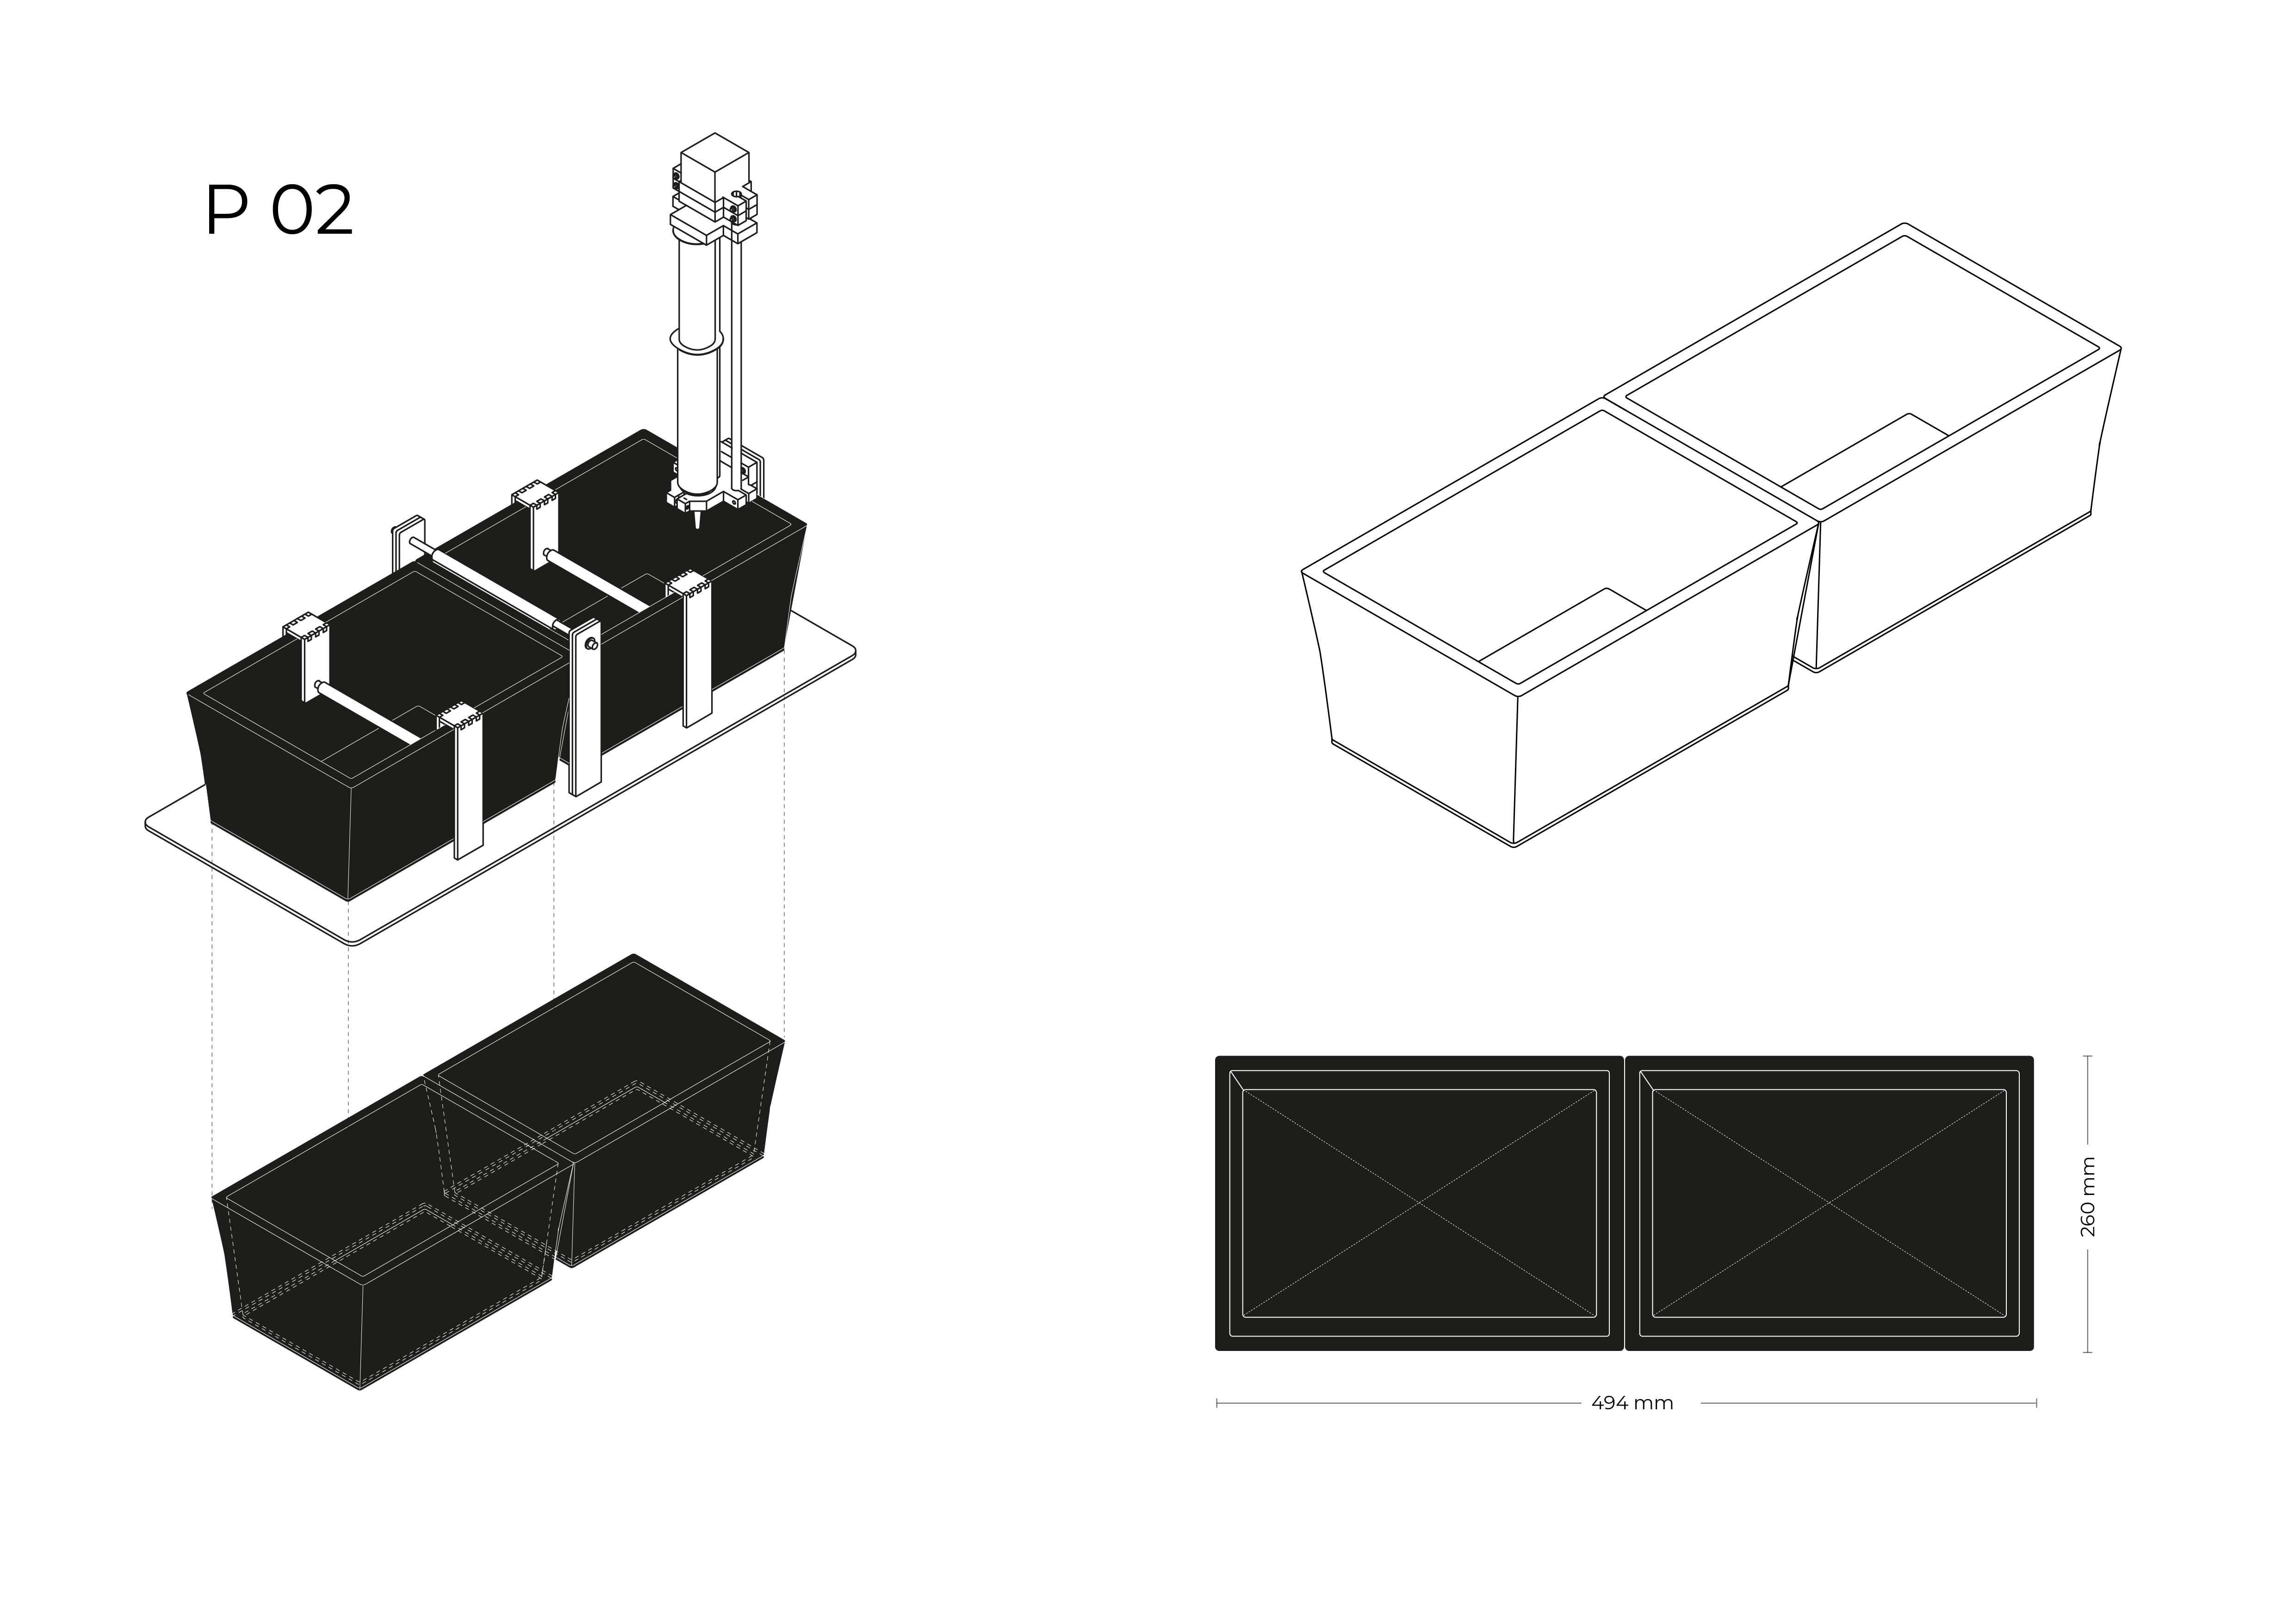
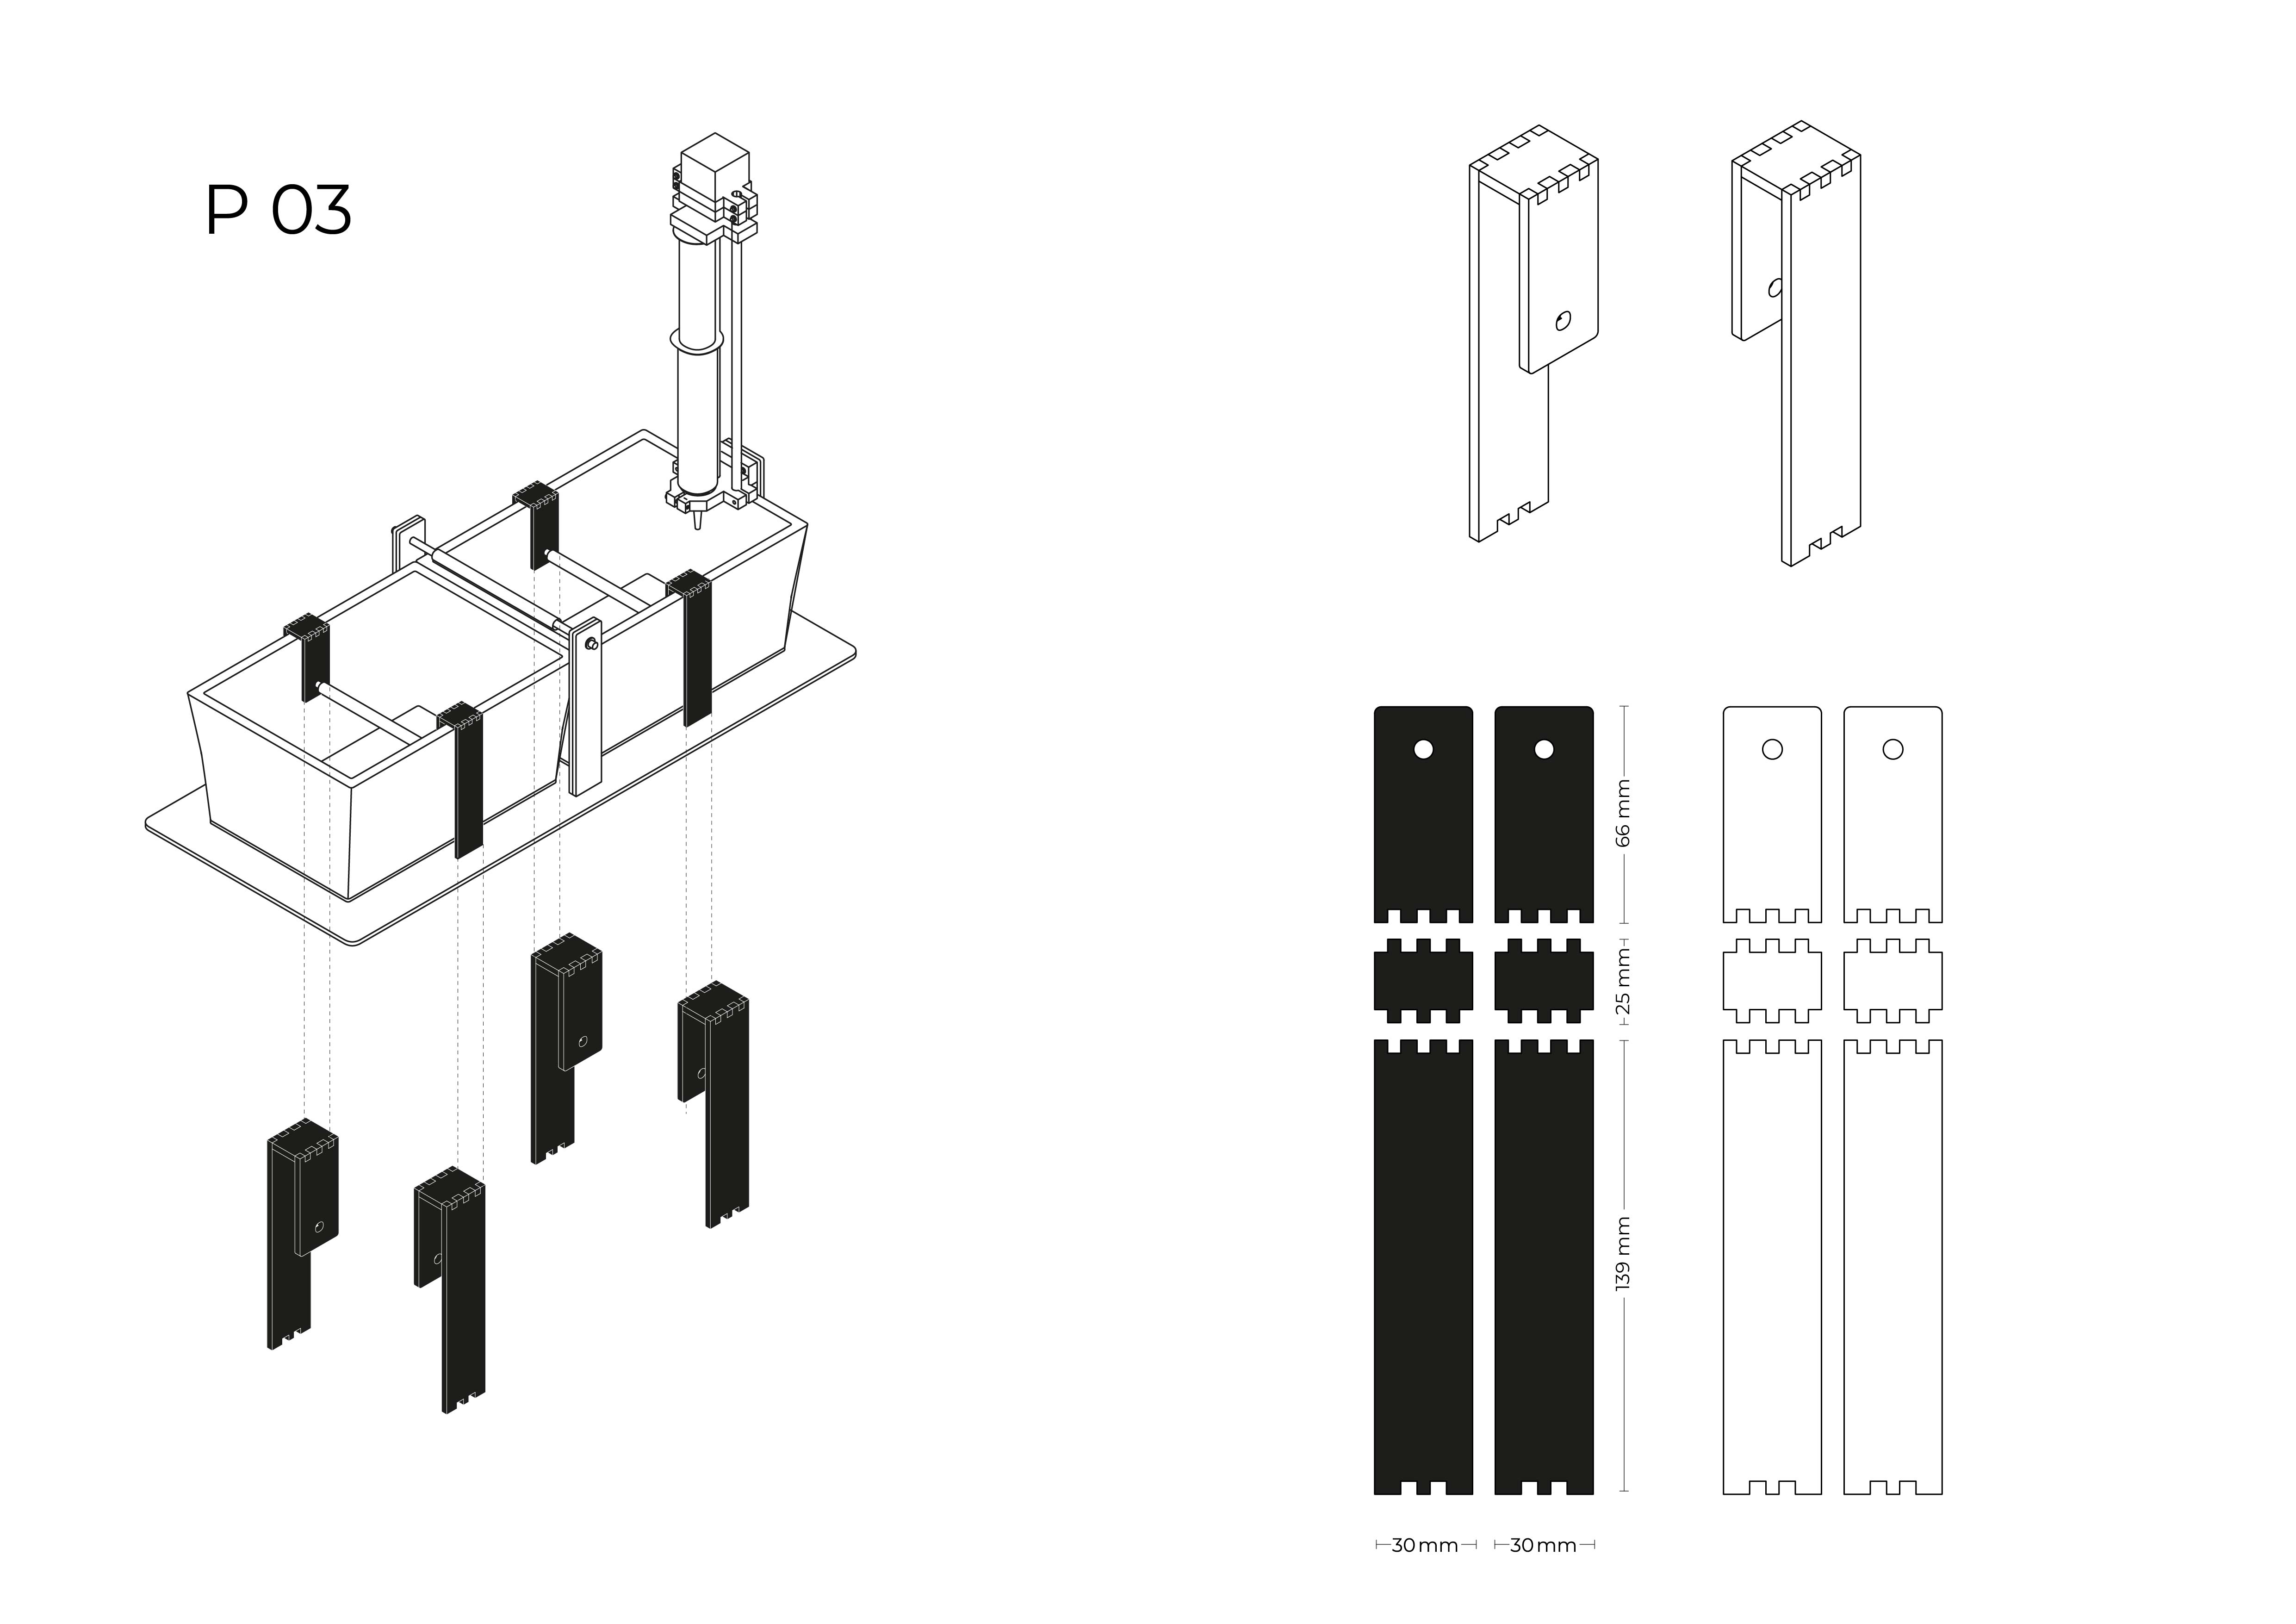
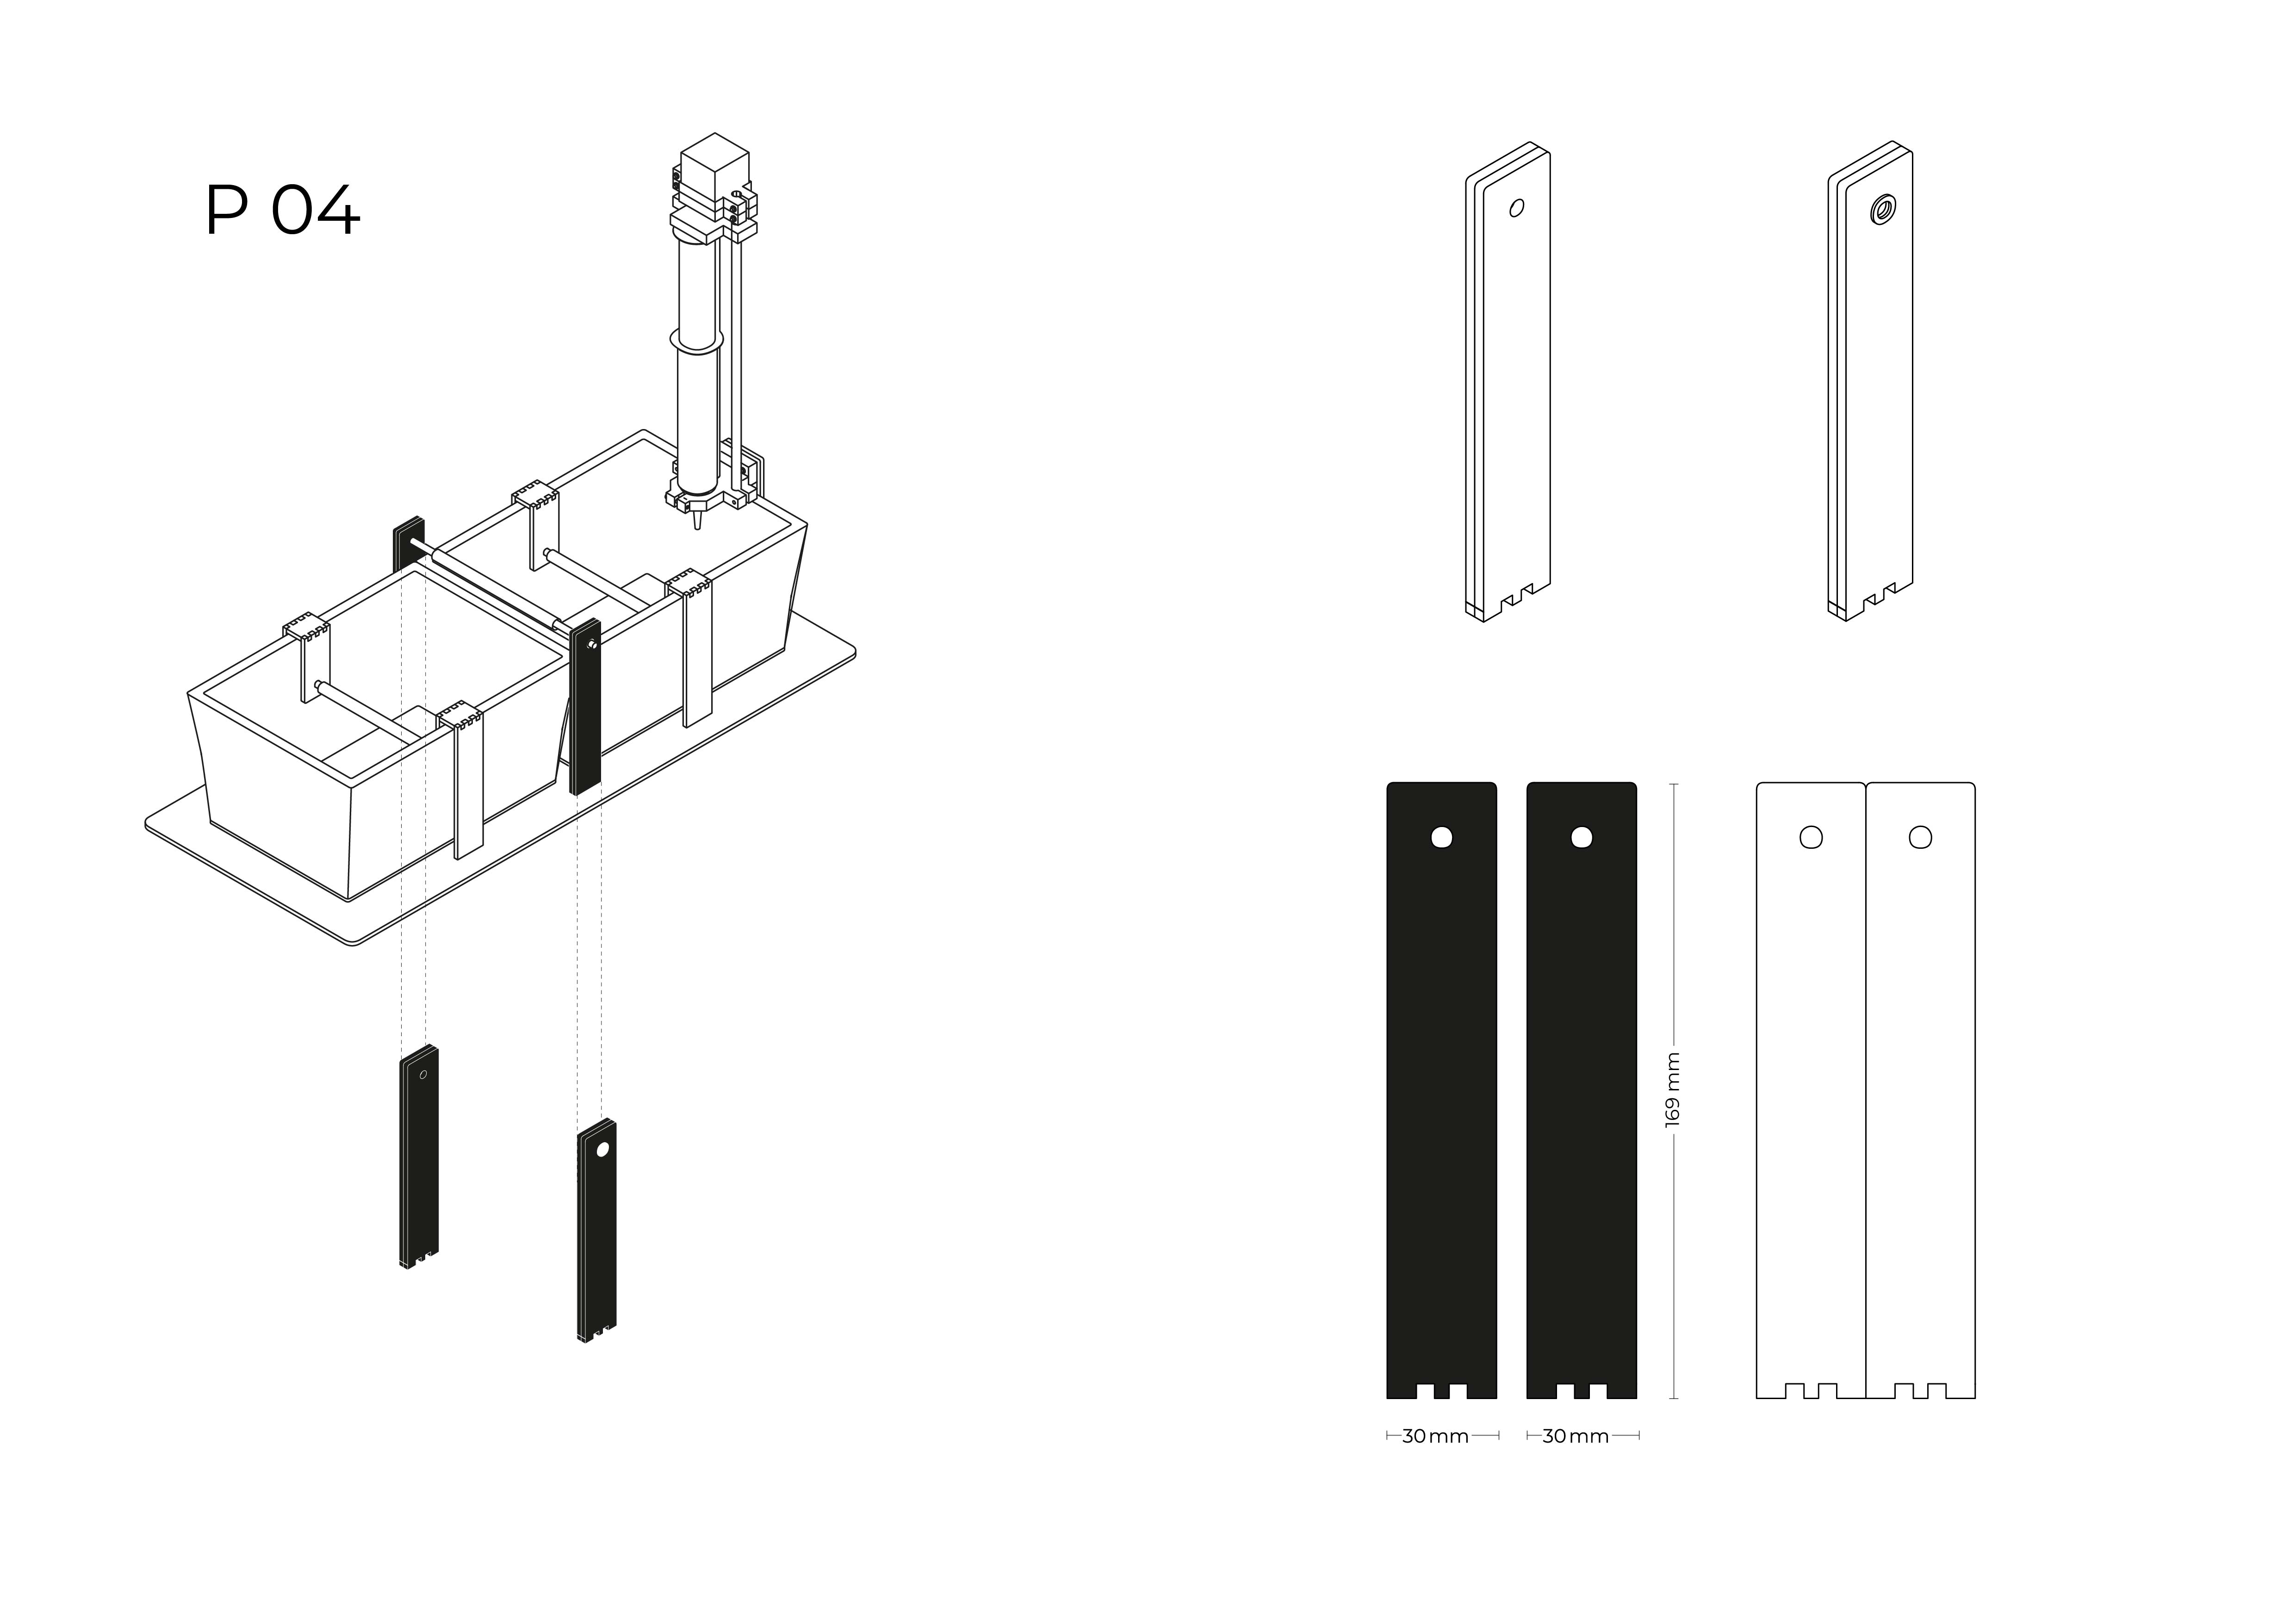
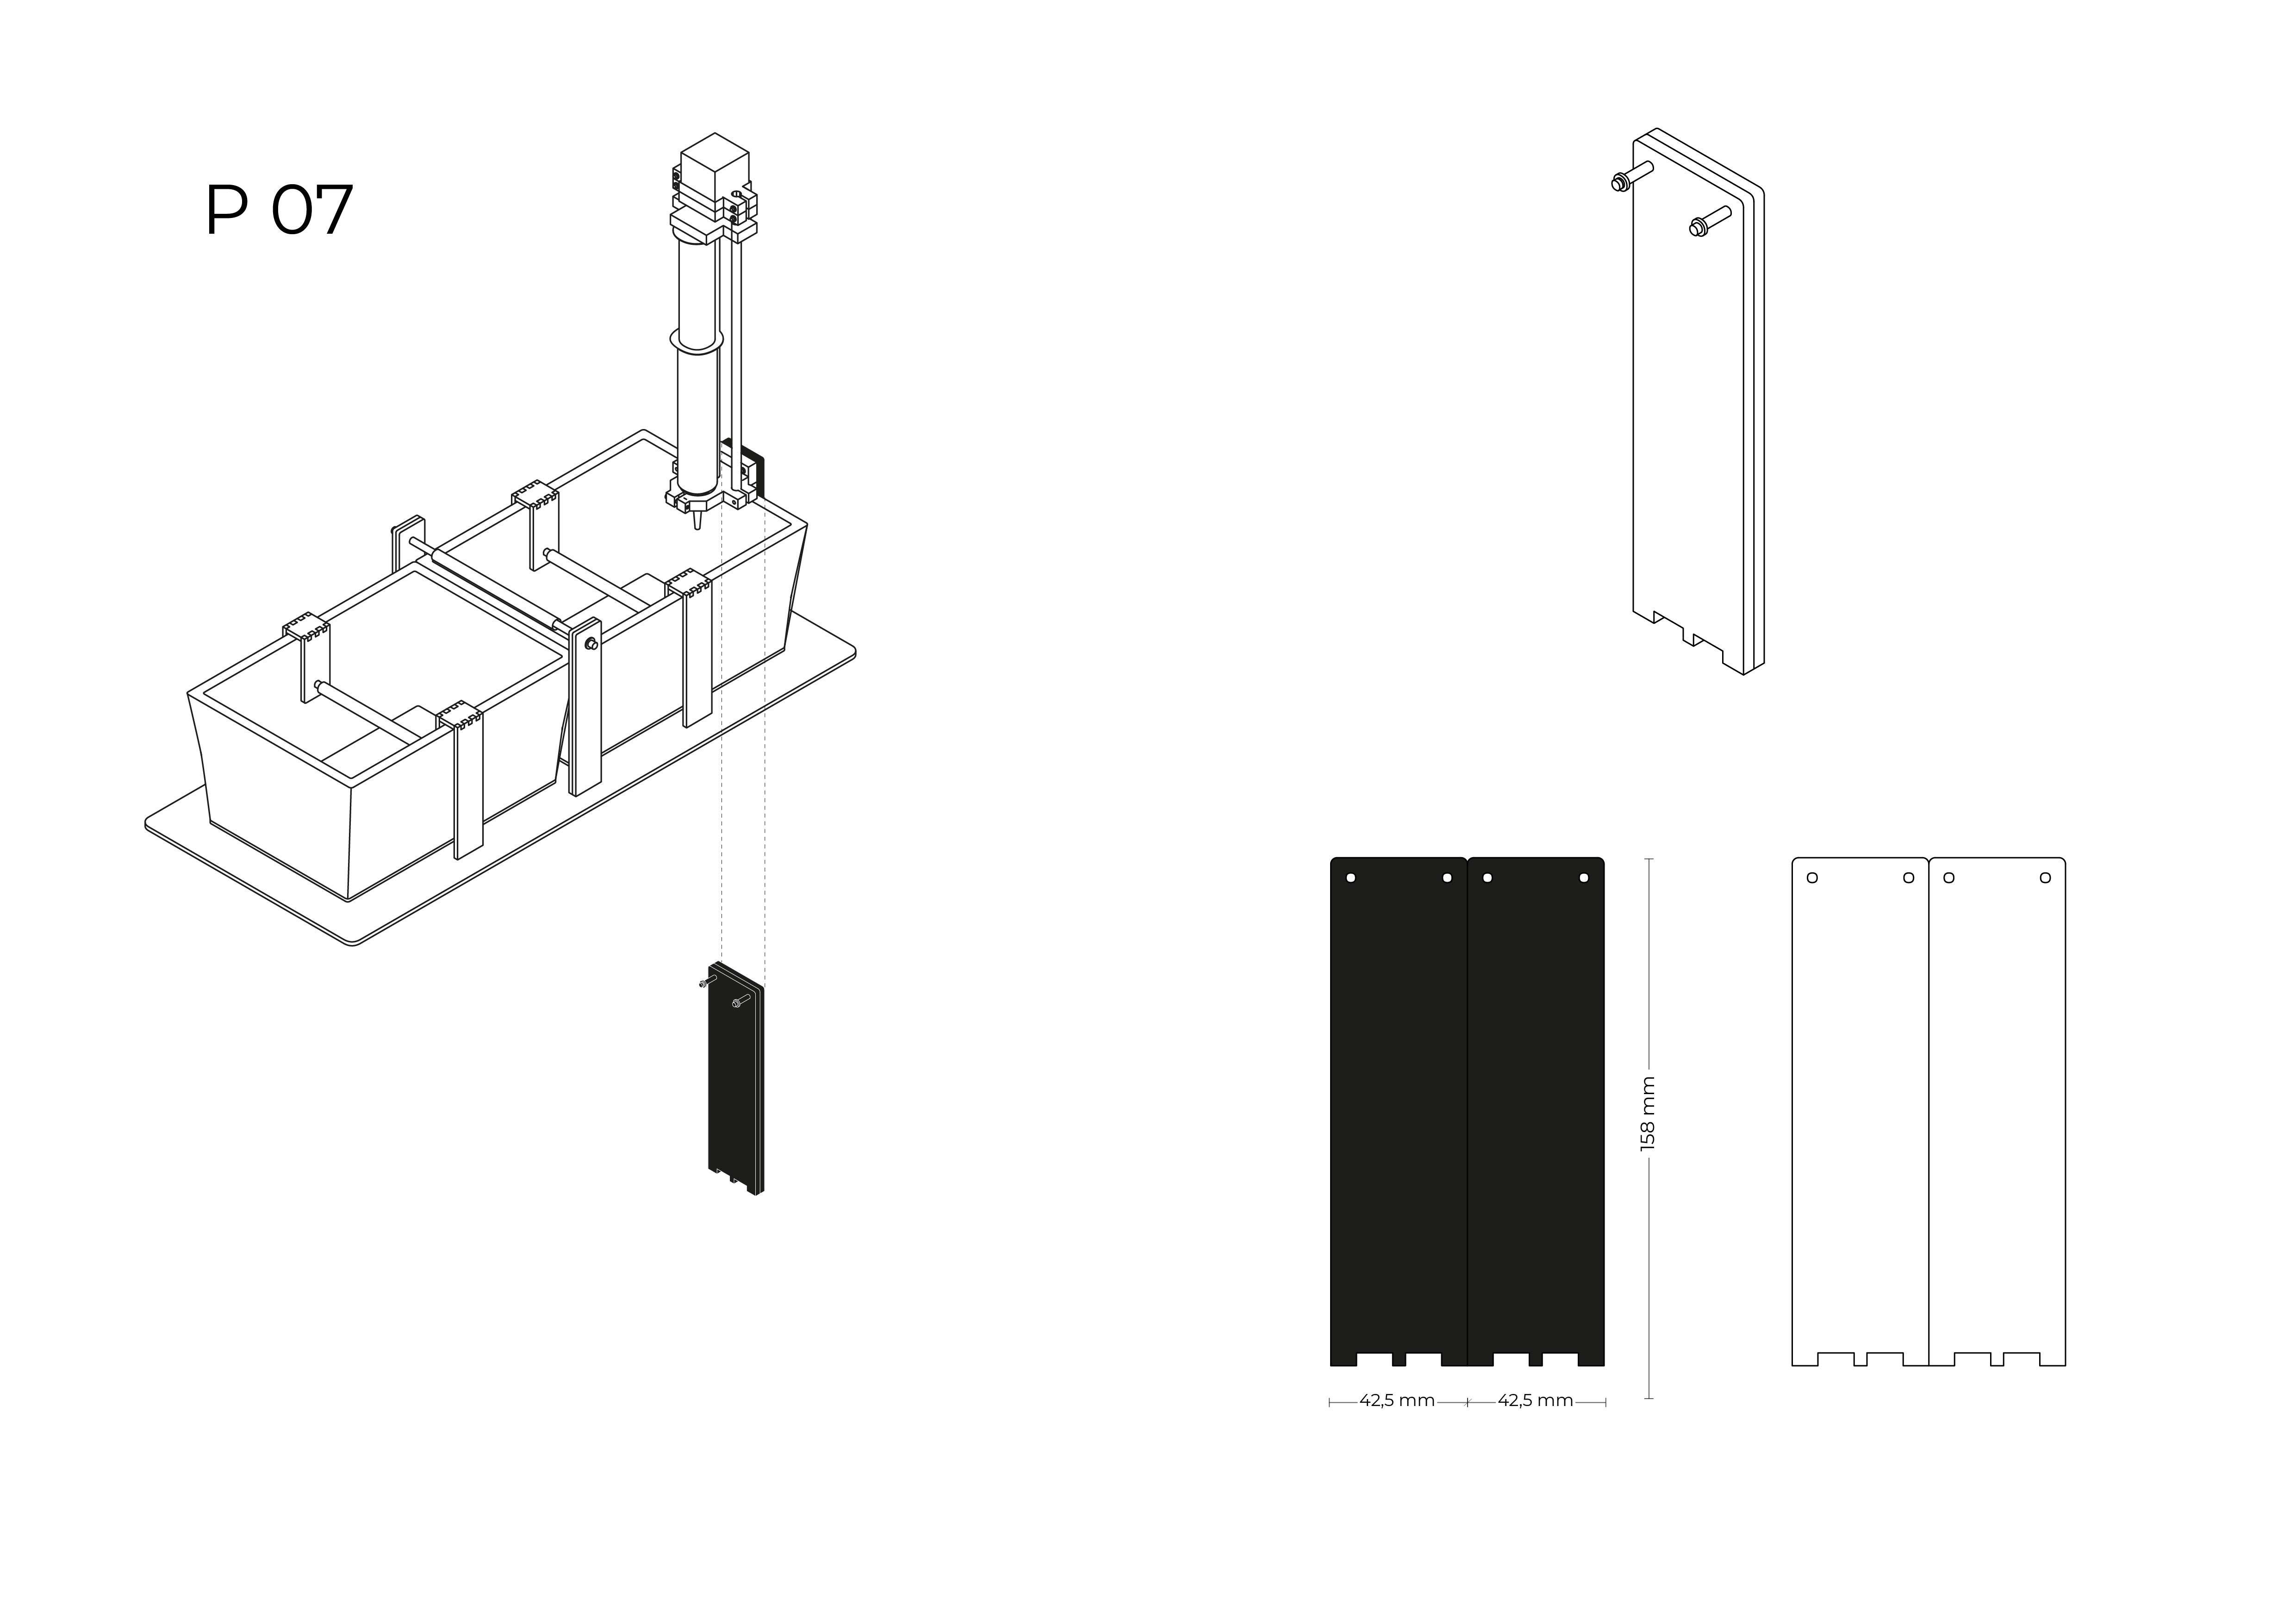
Materials list
- Plywood 4 mm 1 board
- Hook screw 20 mm long 8 pieces
- Aluminium tube 240 mm, ∅ 15 mm 2 pieces
- Aluminium tube 165 mm, ∅ 12 mm 1 piece
- 6V DC Motor 1 piece
- 10K Potentiometer 1 piece
- C2625 Transistor 1 piece
- Alternate Current Adapter 1 piece
Electronics - dc motor + potentiometer
hardware
DC Motor circuit
- DC motor
- IRF540N MOSFET(N) Transistor
- Potentiometer 10kΩ
- Power supply of 5V or more, depending on the motor

Arduino + DC Motor + Potentiometer Tutorial
software
Arduino is not necessary to control DC motor with a potentiometer, it just gives more control options thank to the mapping option. DC motor + Mosfet + potentiometer could work alone though.
		// code necessary only for Arduino option

int pot;        //variable to which we save the potentiometer value
int motorSpeed;     //variable to which we save motor speed
int motorPin=5; //pin to which we connect the gate of MOSFET

void setup() {
  pinMode(motorPin,OUTPUT);  //defining pin to which we connect MOSFET as an OUTPUT
  digitalWrite(motorPin, LOW); //turning the motor off
  Serial.begin(9600);
}

void loop() {
  pot=analogRead(A0);  //from the analog input A0 we read the potentiometer values
  Serial.println(pot);
  motorSpeed=map(pot,0,1023,0,255); //variable pot which has values from 0 to 1023 is turned into variable speed with values from 0 to 255
  Serial.print("mapped value:  ");
  Serial.println(motorSpeed);
  analogWrite(motorPin,motorSpeed); // set the value speed to motorPin to which we have connected MOSFET
  delay(1000);
}
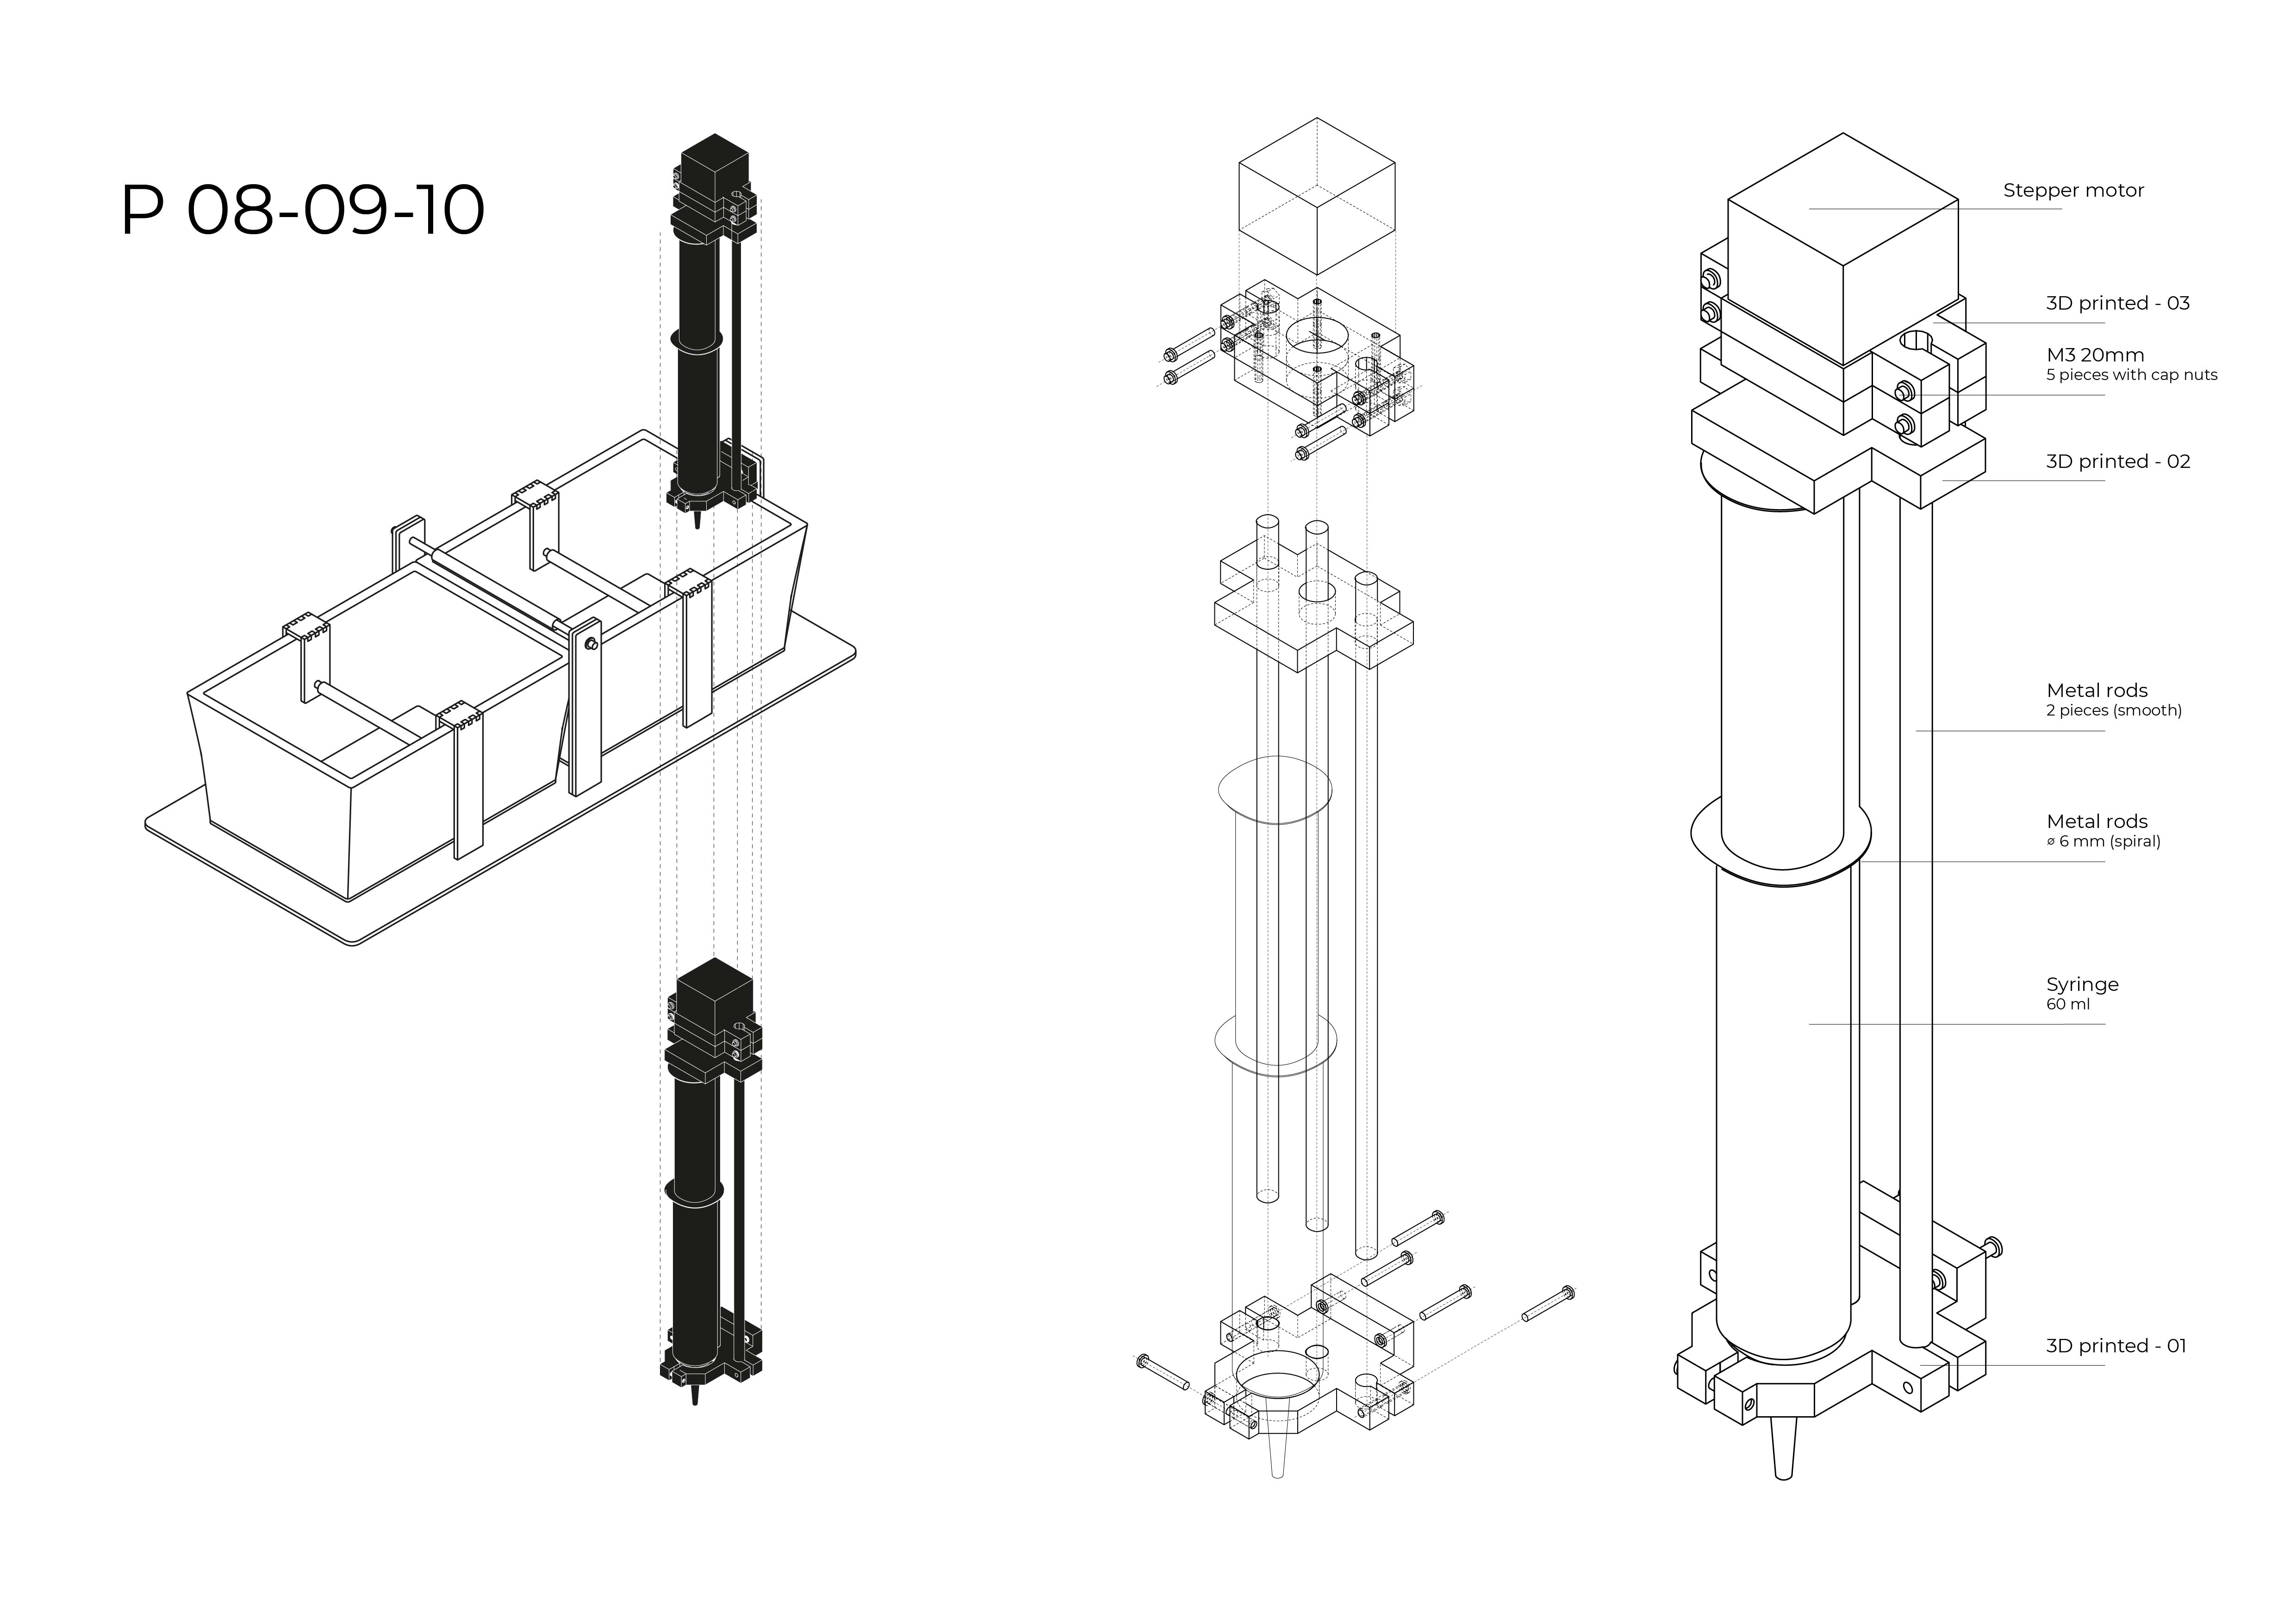
Alginate bioyarn extruder
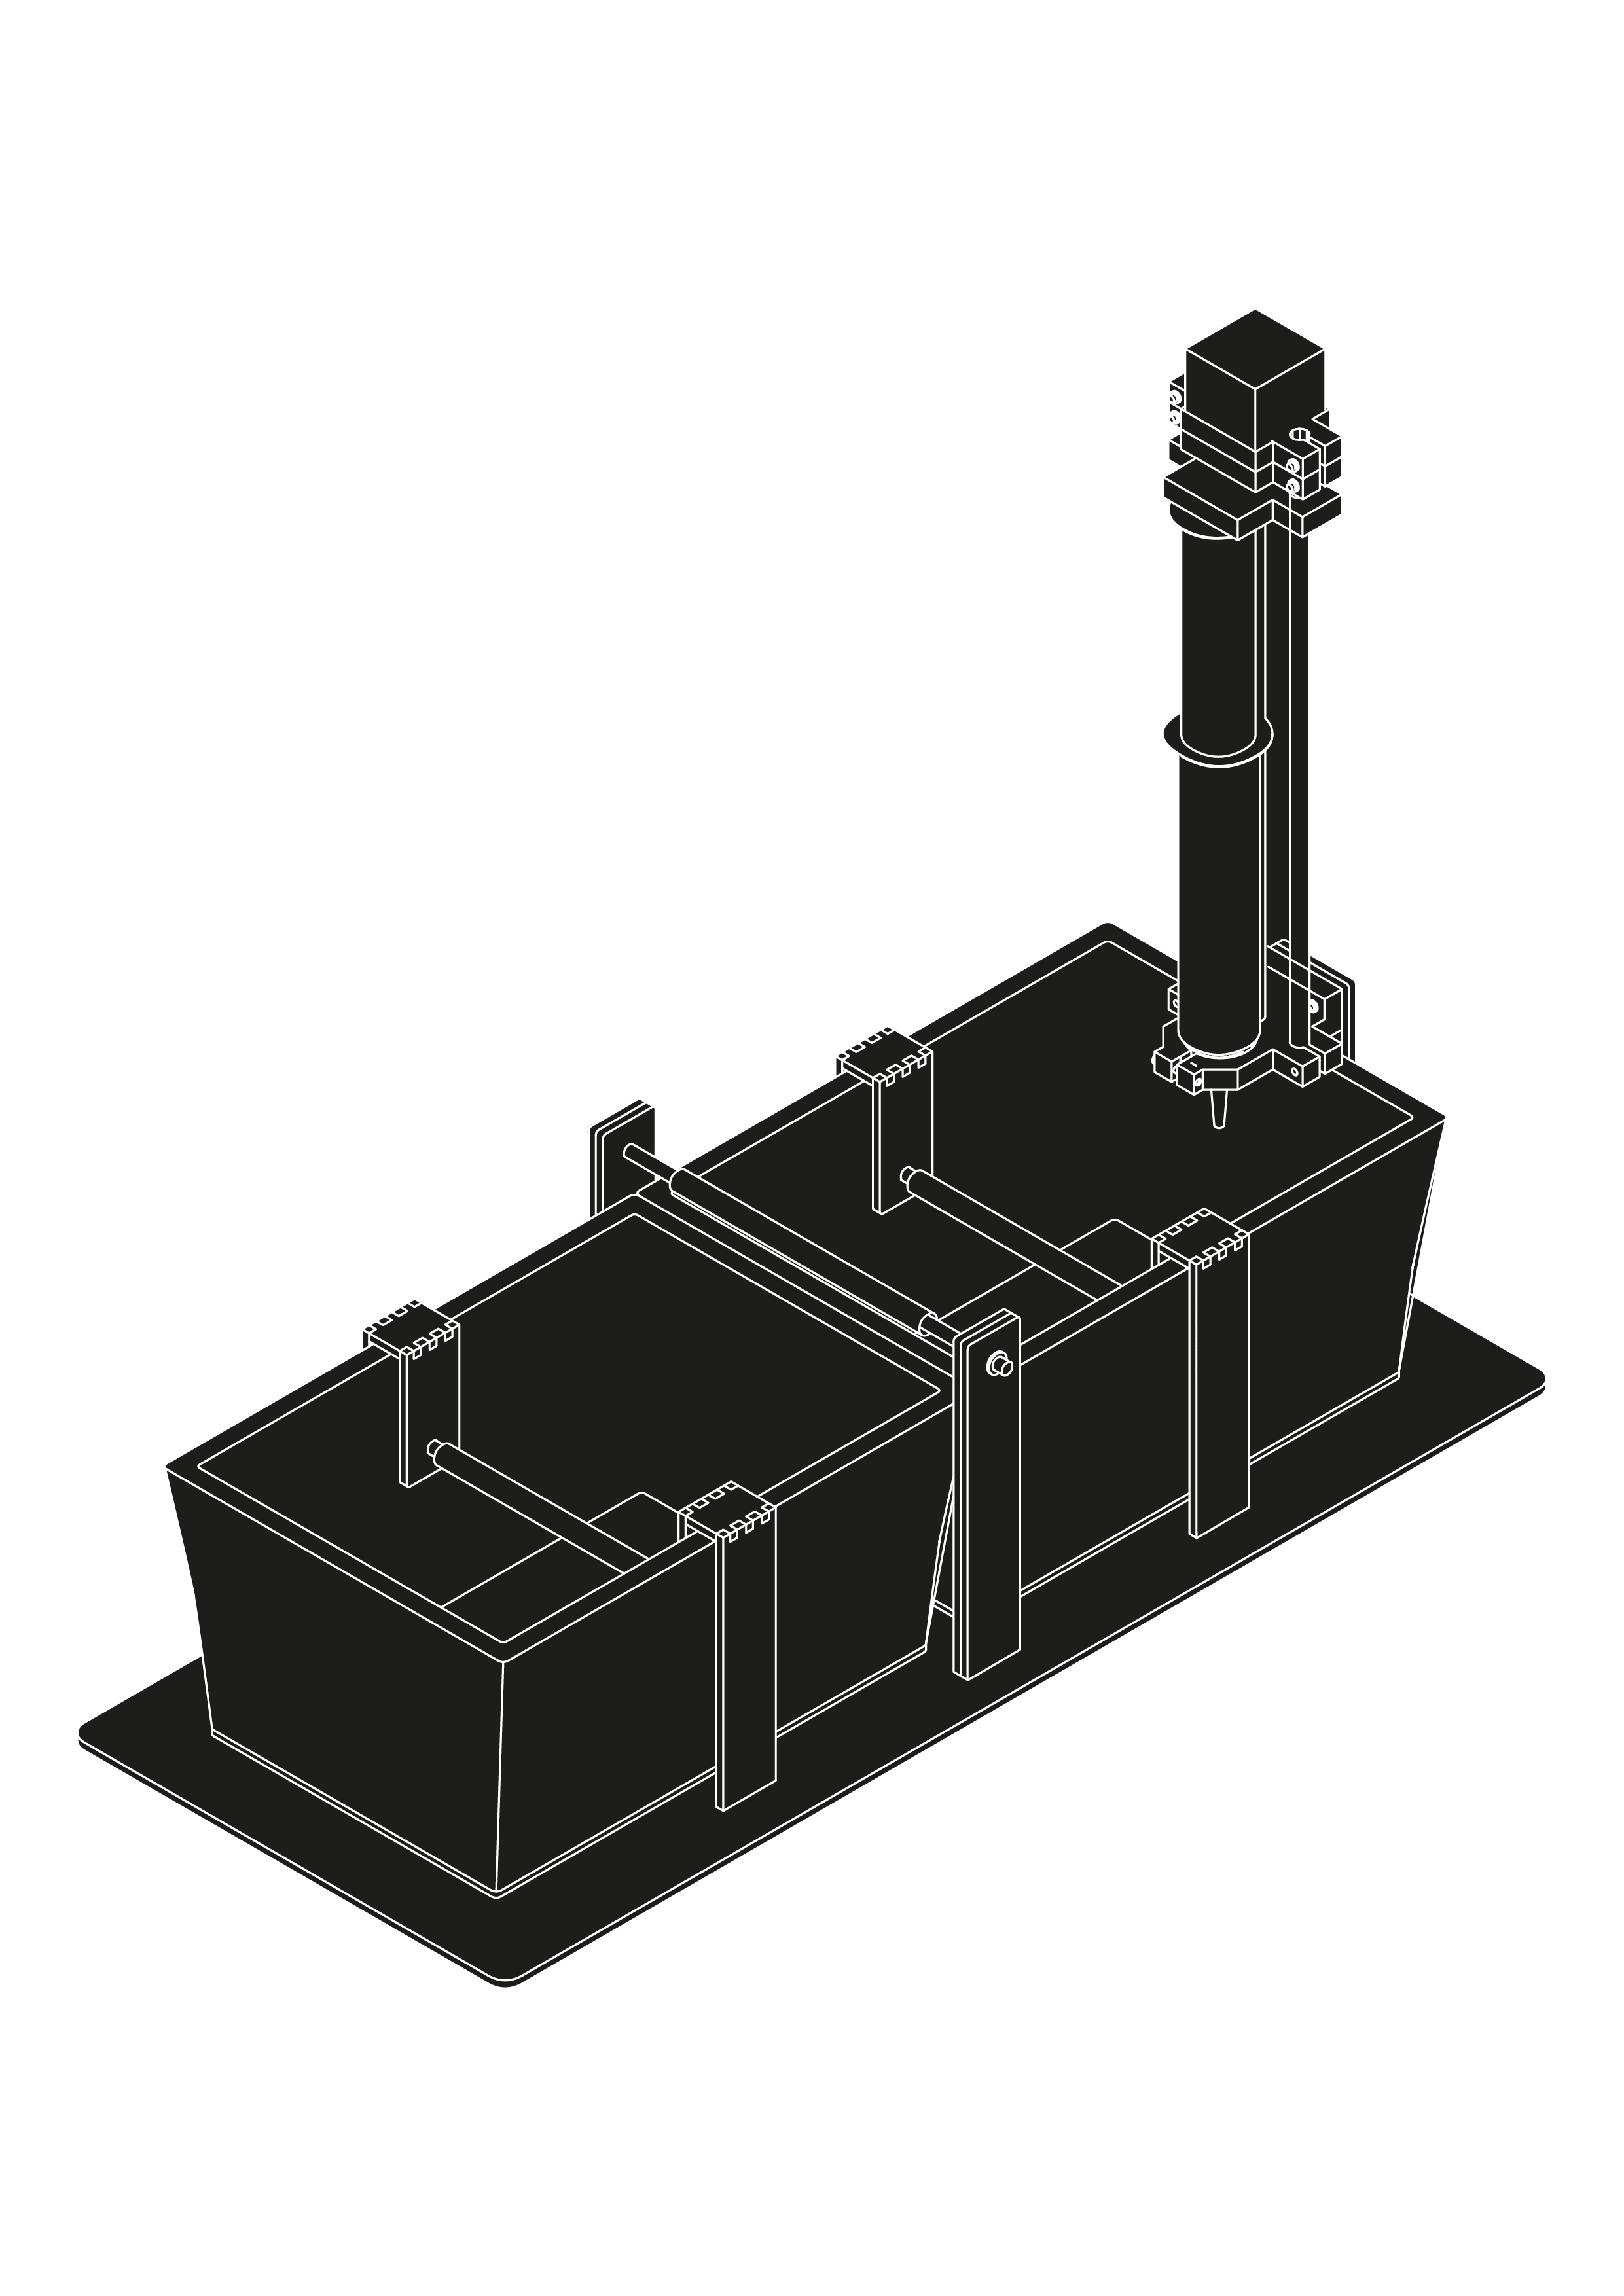
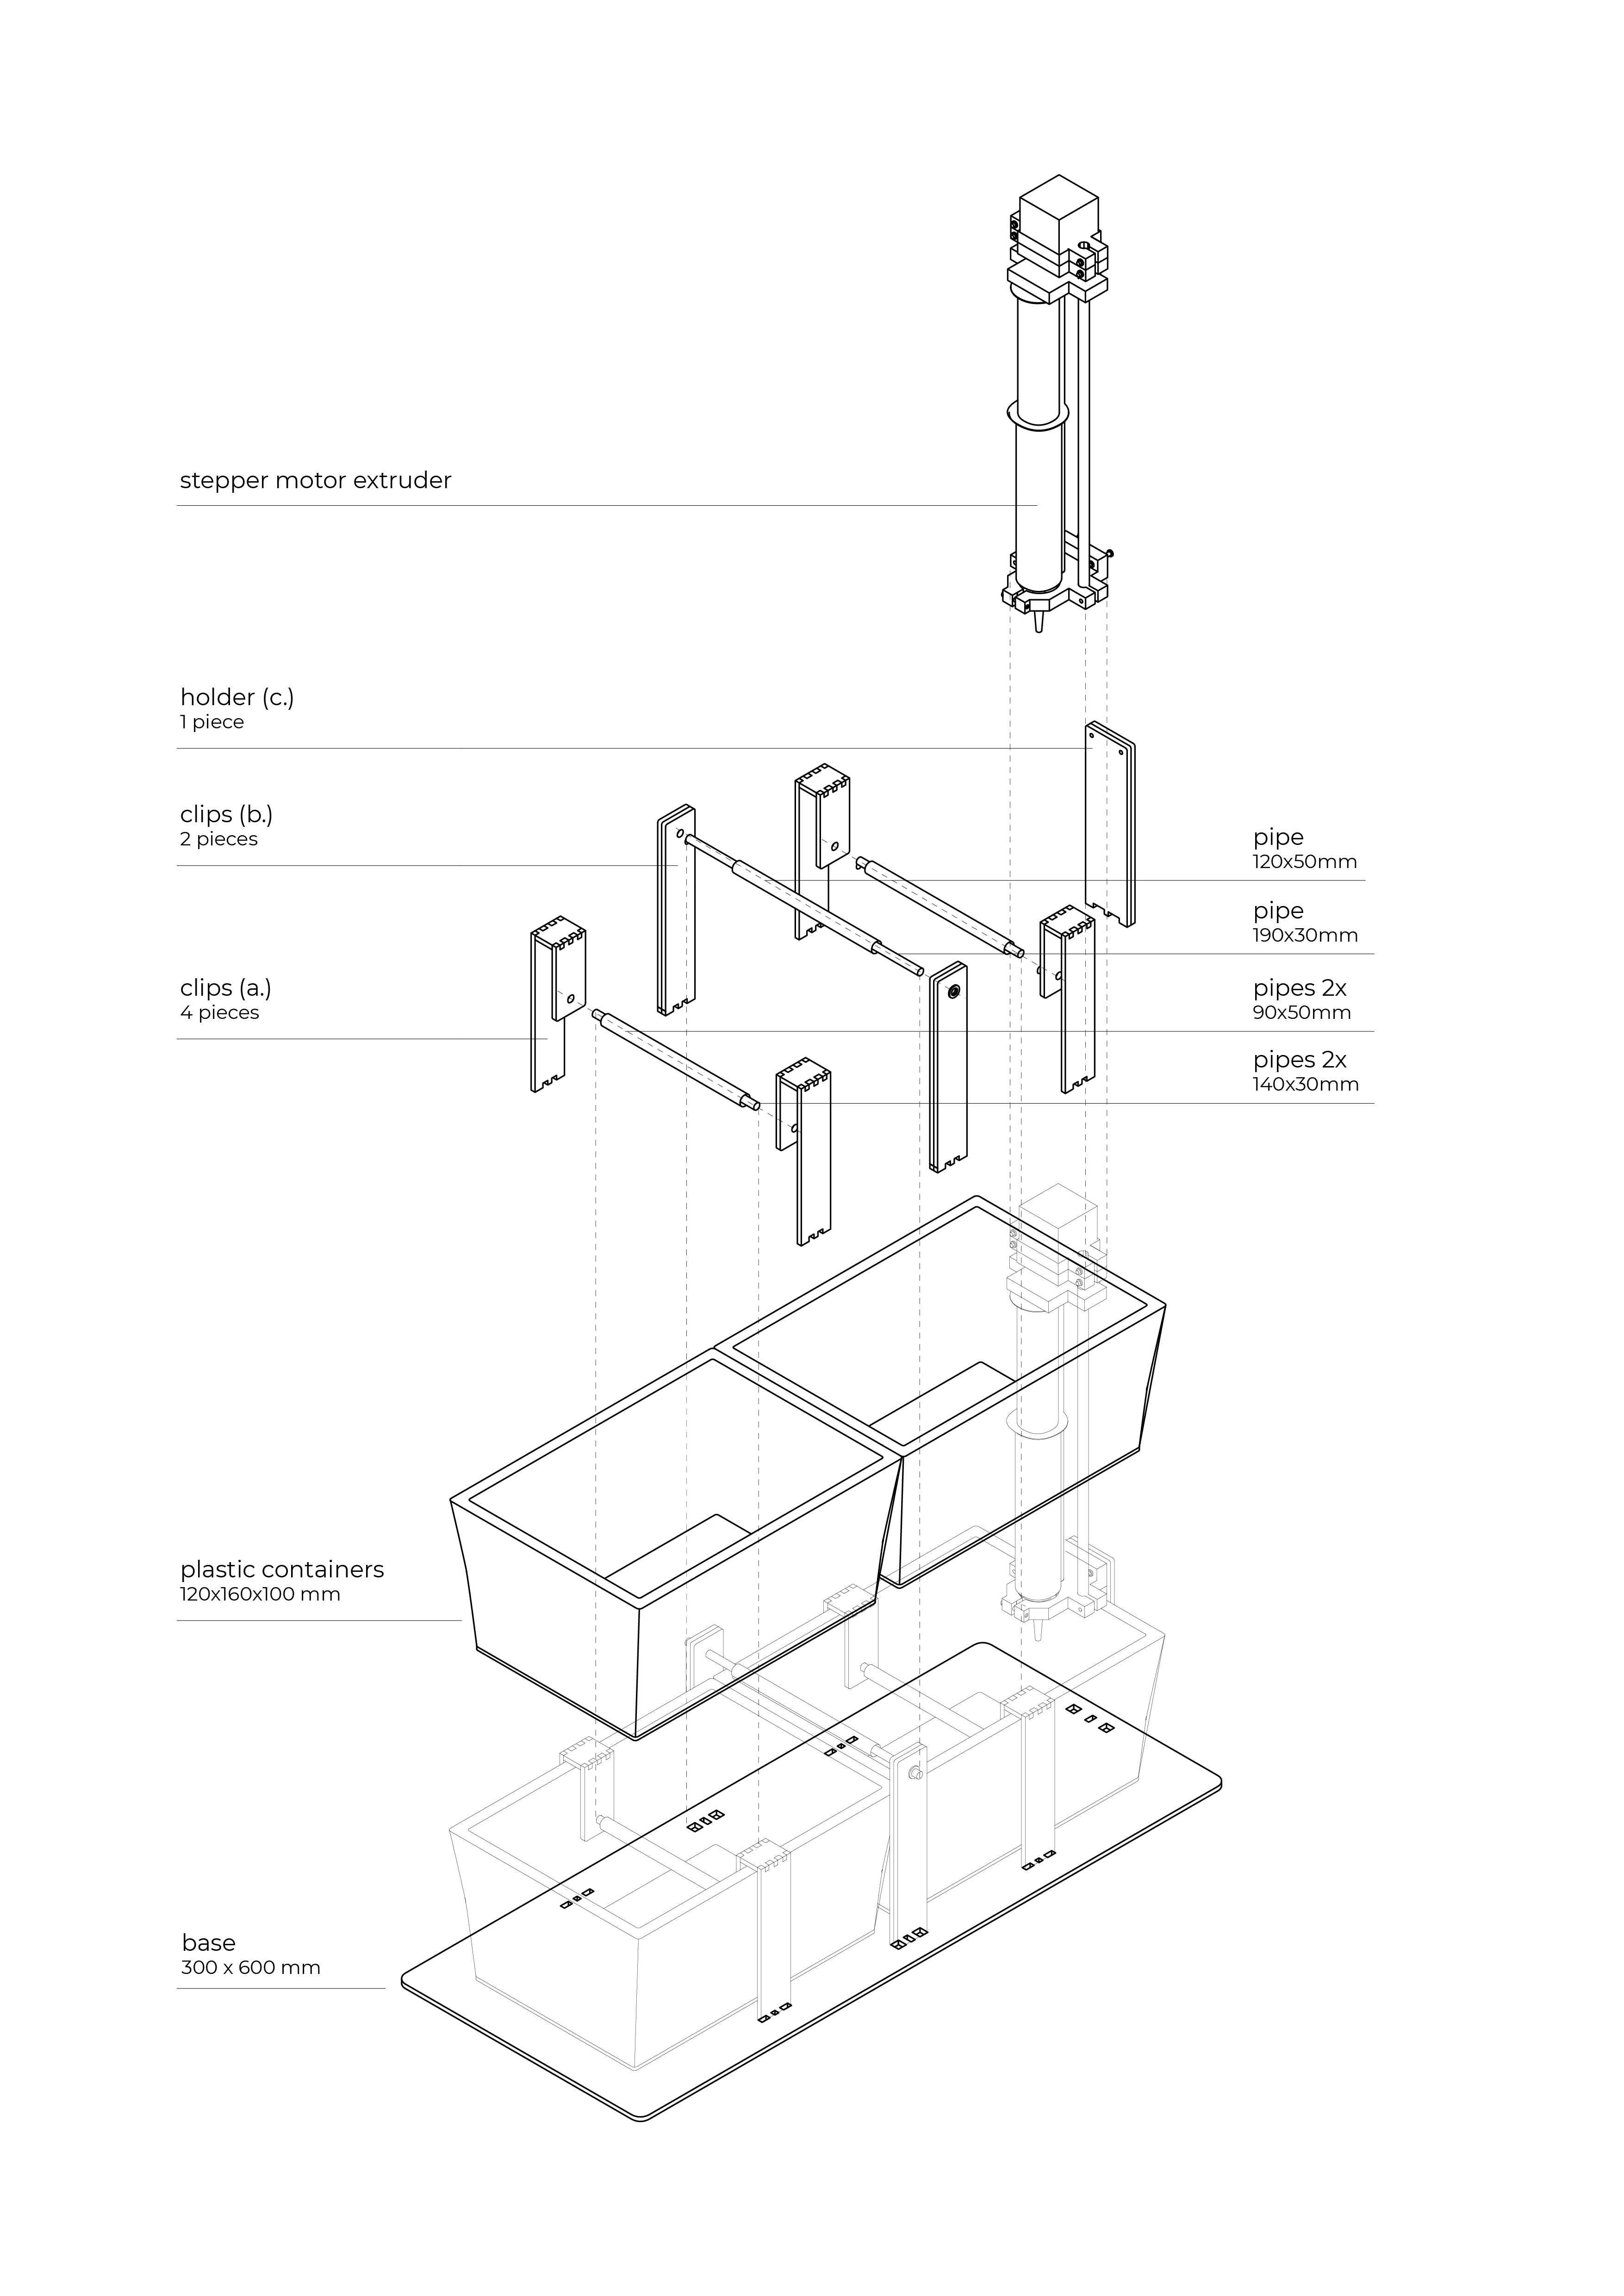
Materials list
- Syringe 60 ml 1 board
- 3D printed parts 4 pieces
- Metal rods (smooth) 300 mm, ∅ 7 mm 2 pieces
- Metal rod (spiral) 300 mm, ∅ 7 mm 1 piece
- Plywood 4 mm 1 piece
- M3 20 mm screws 5 pieces
- Cap nuts 5 pieces
- Aluminium tube 3 pieces
- Plastic tube 3 pieces
- Stepper motor 1 piece
- Arduino Microcontroller piece
- Arduino CNC Shield 1 piece
- Power supply 1 piece
- Alternate Current Adapter 1 piece

Electronics
hardware - stepper motor + Arduino
Stepper Motor circuit
- Arduino Mega
- RAMPS 1.4 RepRap Shield
- Nema 17 Stepper Motor
- Stepper Motor Driver
- Potentiometer 10kΩ
- Power supply
RAMPS 1.4 configuration
by Eduardo Chamorro Pin definition
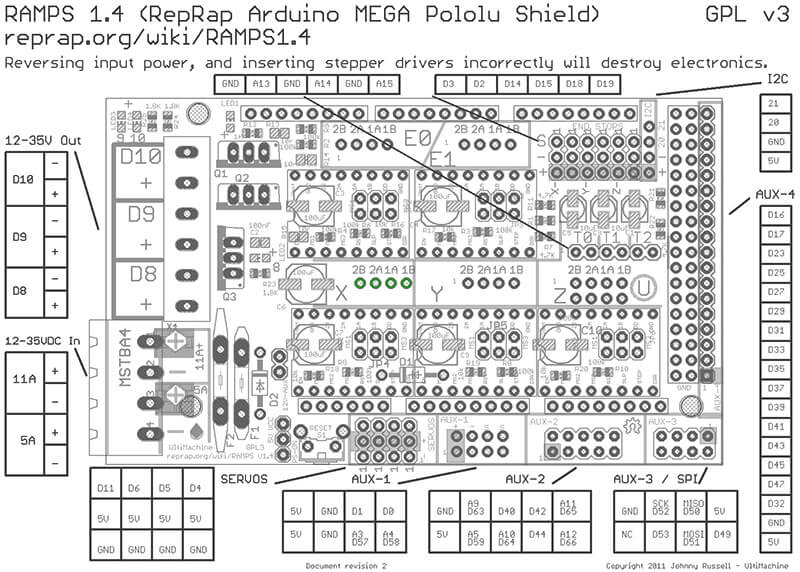
 RAMPS 1.4
//
#define X_MIN_PIN           3
#define X_MAX_PIN           2
#define Y_MAX_PIN          15
#define Z_MIN_PIN          18
#define Z_MAX_PIN          19
#define Z_MIN_PROBE_PIN    32
1:24
// Steppers
//
#define X_STEP_PIN         54
#define X_DIR_PIN          55
#define X_ENABLE_PIN       38
  #define X_CS_PIN         53
#define Y_STEP_PIN         60
#define Y_DIR_PIN          61
#define Y_ENABLE_PIN       56
  #define Y_CS_PIN         49
#define Z_STEP_PIN         46
#define Z_DIR_PIN          48
#define Z_ENABLE_PIN       62
  #define Z_CS_PIN         40
#define E0_STEP_PIN        26
#define E0_DIR_PIN         28
#define E0_ENABLE_PIN      24
  #define E0_CS_PIN        42
#define E1_STEP_PIN        36
#define E1_DIR_PIN         34
#define E1_ENABLE_PIN      30
  #define E1_CS_PIN        44
Stepper Motor calibration
Stepper Current = VREF × Max RMS
The maximum settable stepper current for NEMA 17 stepper motor is 2.0A according to the datasheet
FUll Stepper Motor calibration tutorialsoftware
Marlin Firmware int enablePin = 38;
int dirPinM1 = 55;
int Pulse = 54;
int POT = A5;
//int oldstepDelay = 0;
int stepDelay = 0;
bool start = true;
bool dir = false;
bool enableMot = 1;
int maxdelay = 3000;
int mindelay = 250;
void setup() {
// put your setup code here, to run once:
//Serial.begin(115200); if uncommented the motors runs slower due to serial wait timings
pinMode(POT, INPUT);
pinMode(enablePin, OUTPUT);
pinMode(dirPinM1, OUTPUT);
pinMode(Pulse, OUTPUT);
start = 0;
// Serial.println("Starting");
}
void loop() {
if (start == 1) {
digitalWrite(enablePin, LOW);
digitalWrite(dirPinM1, dir);
}
if (start == 0) {
digitalWrite(enablePin, HIGH);
}
int potPos = analogRead(POT);
// Serial.println(potPos);
//stepdelayMicroseconds = map(analogRead(POT),0,1024,1,maxdelayMicroseconds);
// make the motors move both irections depending on pots position
if (potPos < 500) {
start = 1;
digitalWrite(dirPinM1, HIGH);
stepDelay = map(potPos, 0, 500, mindelay, maxdelay);
//Serial.println("clockwise");
//Serial.println(stepDelay);
}
else if (potPos > 600) {
start = 1;
digitalWrite(dirPinM1, LOW);
stepDelay = map(potPos, 600, 1023, maxdelay, mindelay);
//Serial.println("counterclockwise");
//Serial.println(stepDelay);
}
else {
start = 0;
}
motorStep();
}
void motorStep() {
//if(start == 1){
digitalWrite(Pulse, HIGH);
delayMicroseconds(stepDelay);
digitalWrite(Pulse, LOW);
// }
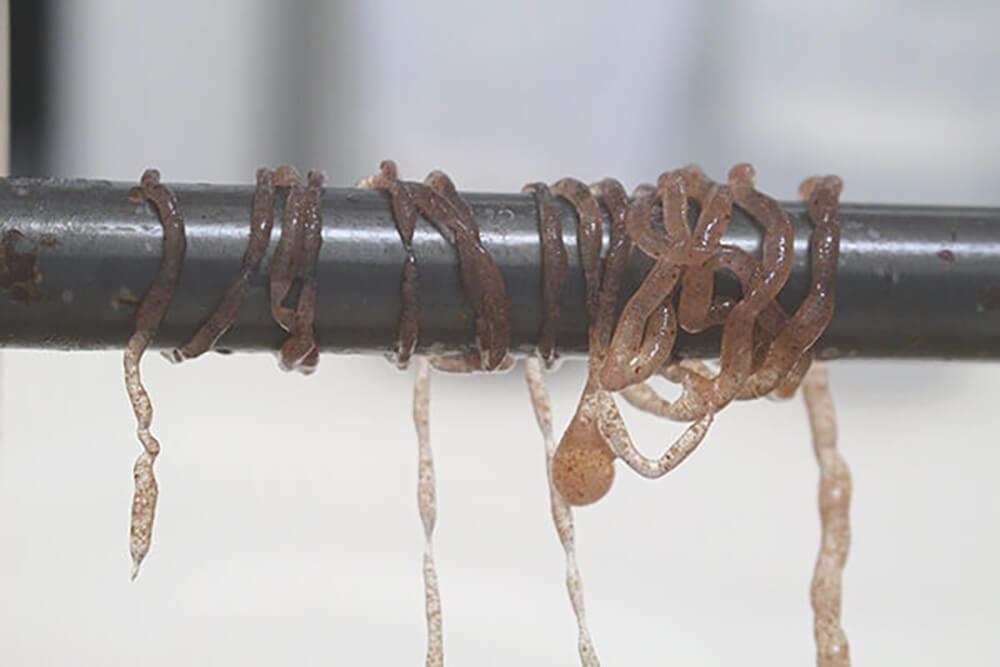
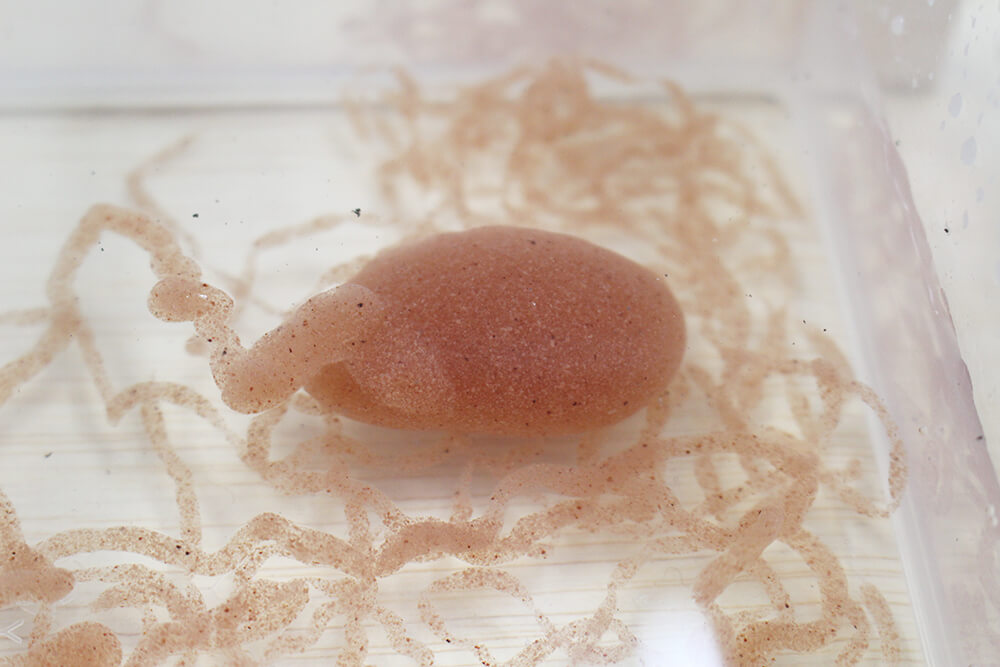
} Biomaterial yarn by Petra
Petra Garajova preapred the biomaterial for extrusion with the machine. Check out more here - CELLULOSE EXTRACTION FROM AVOCADO WASTE

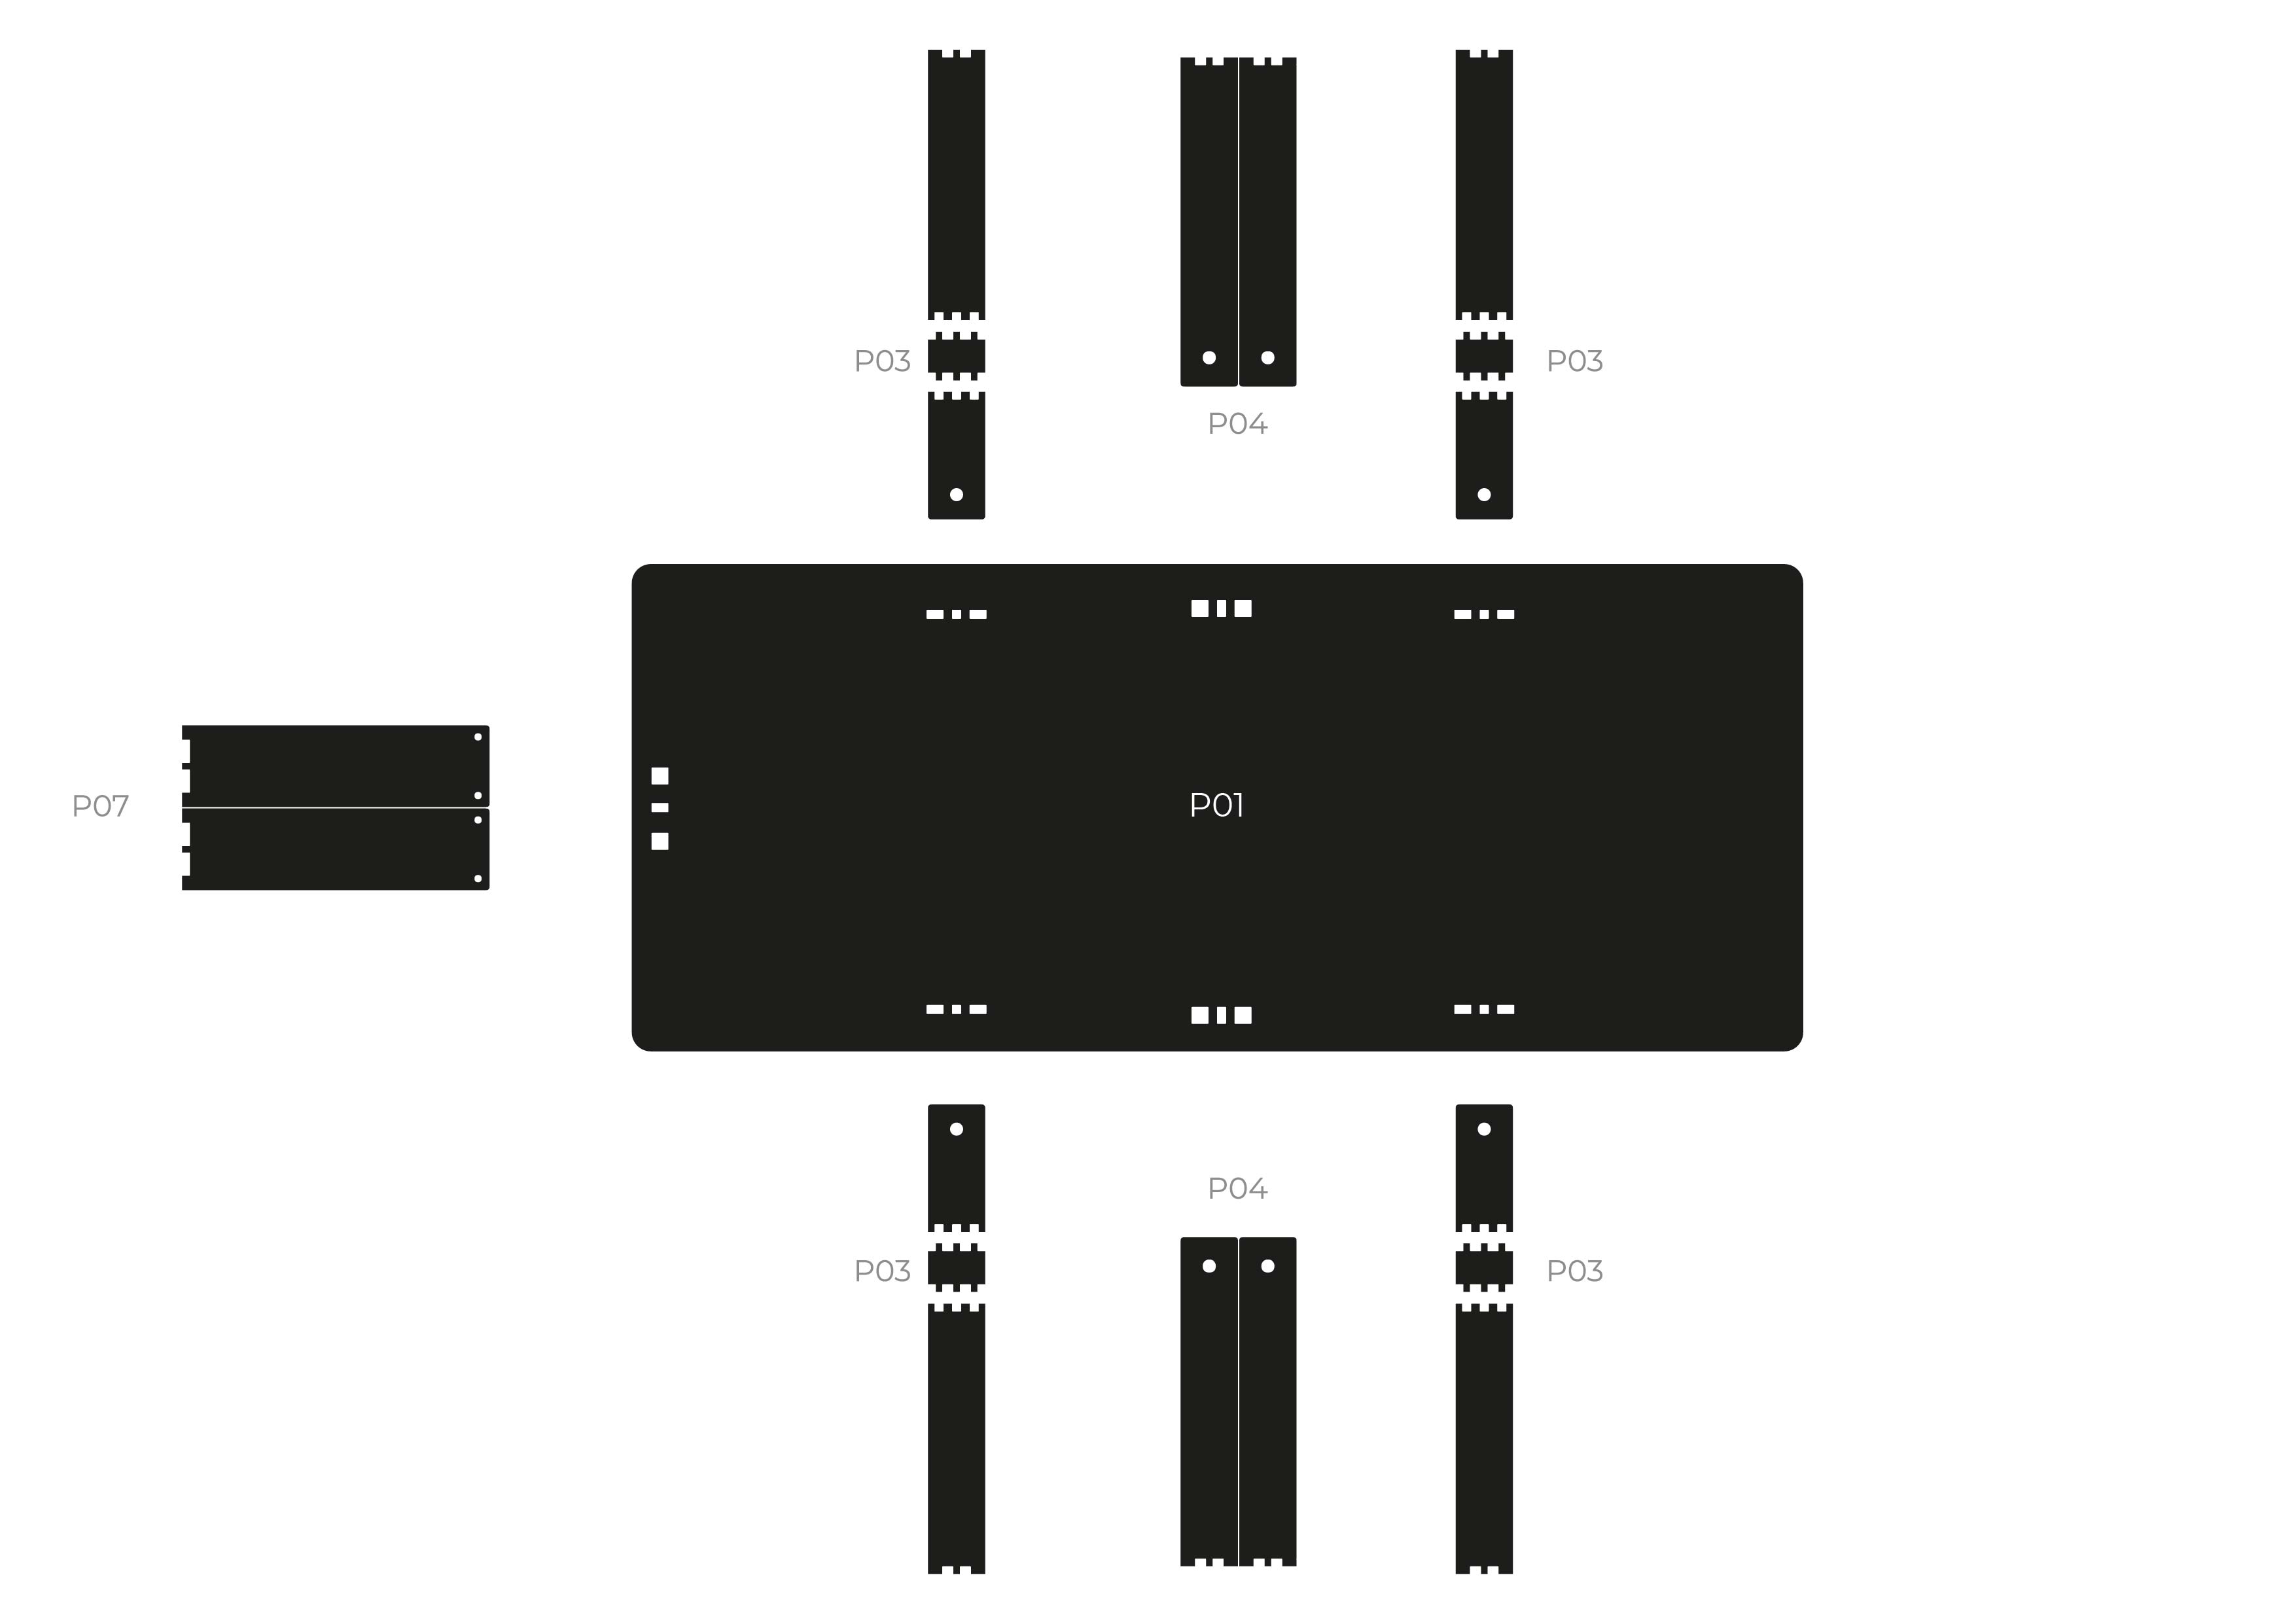
Assembly


Back