10. Open Source Hardware
I LOVED THIS WEEK! It was exactly the kind of week I was waiting for : we discovered how to use a knitting machine, Pauline shoewd us her emotional fabric machine and we create a wealing loom... what a dream!
Well, this week was about creating a machine, using an open source document and making it work manually or thanks to arduino.
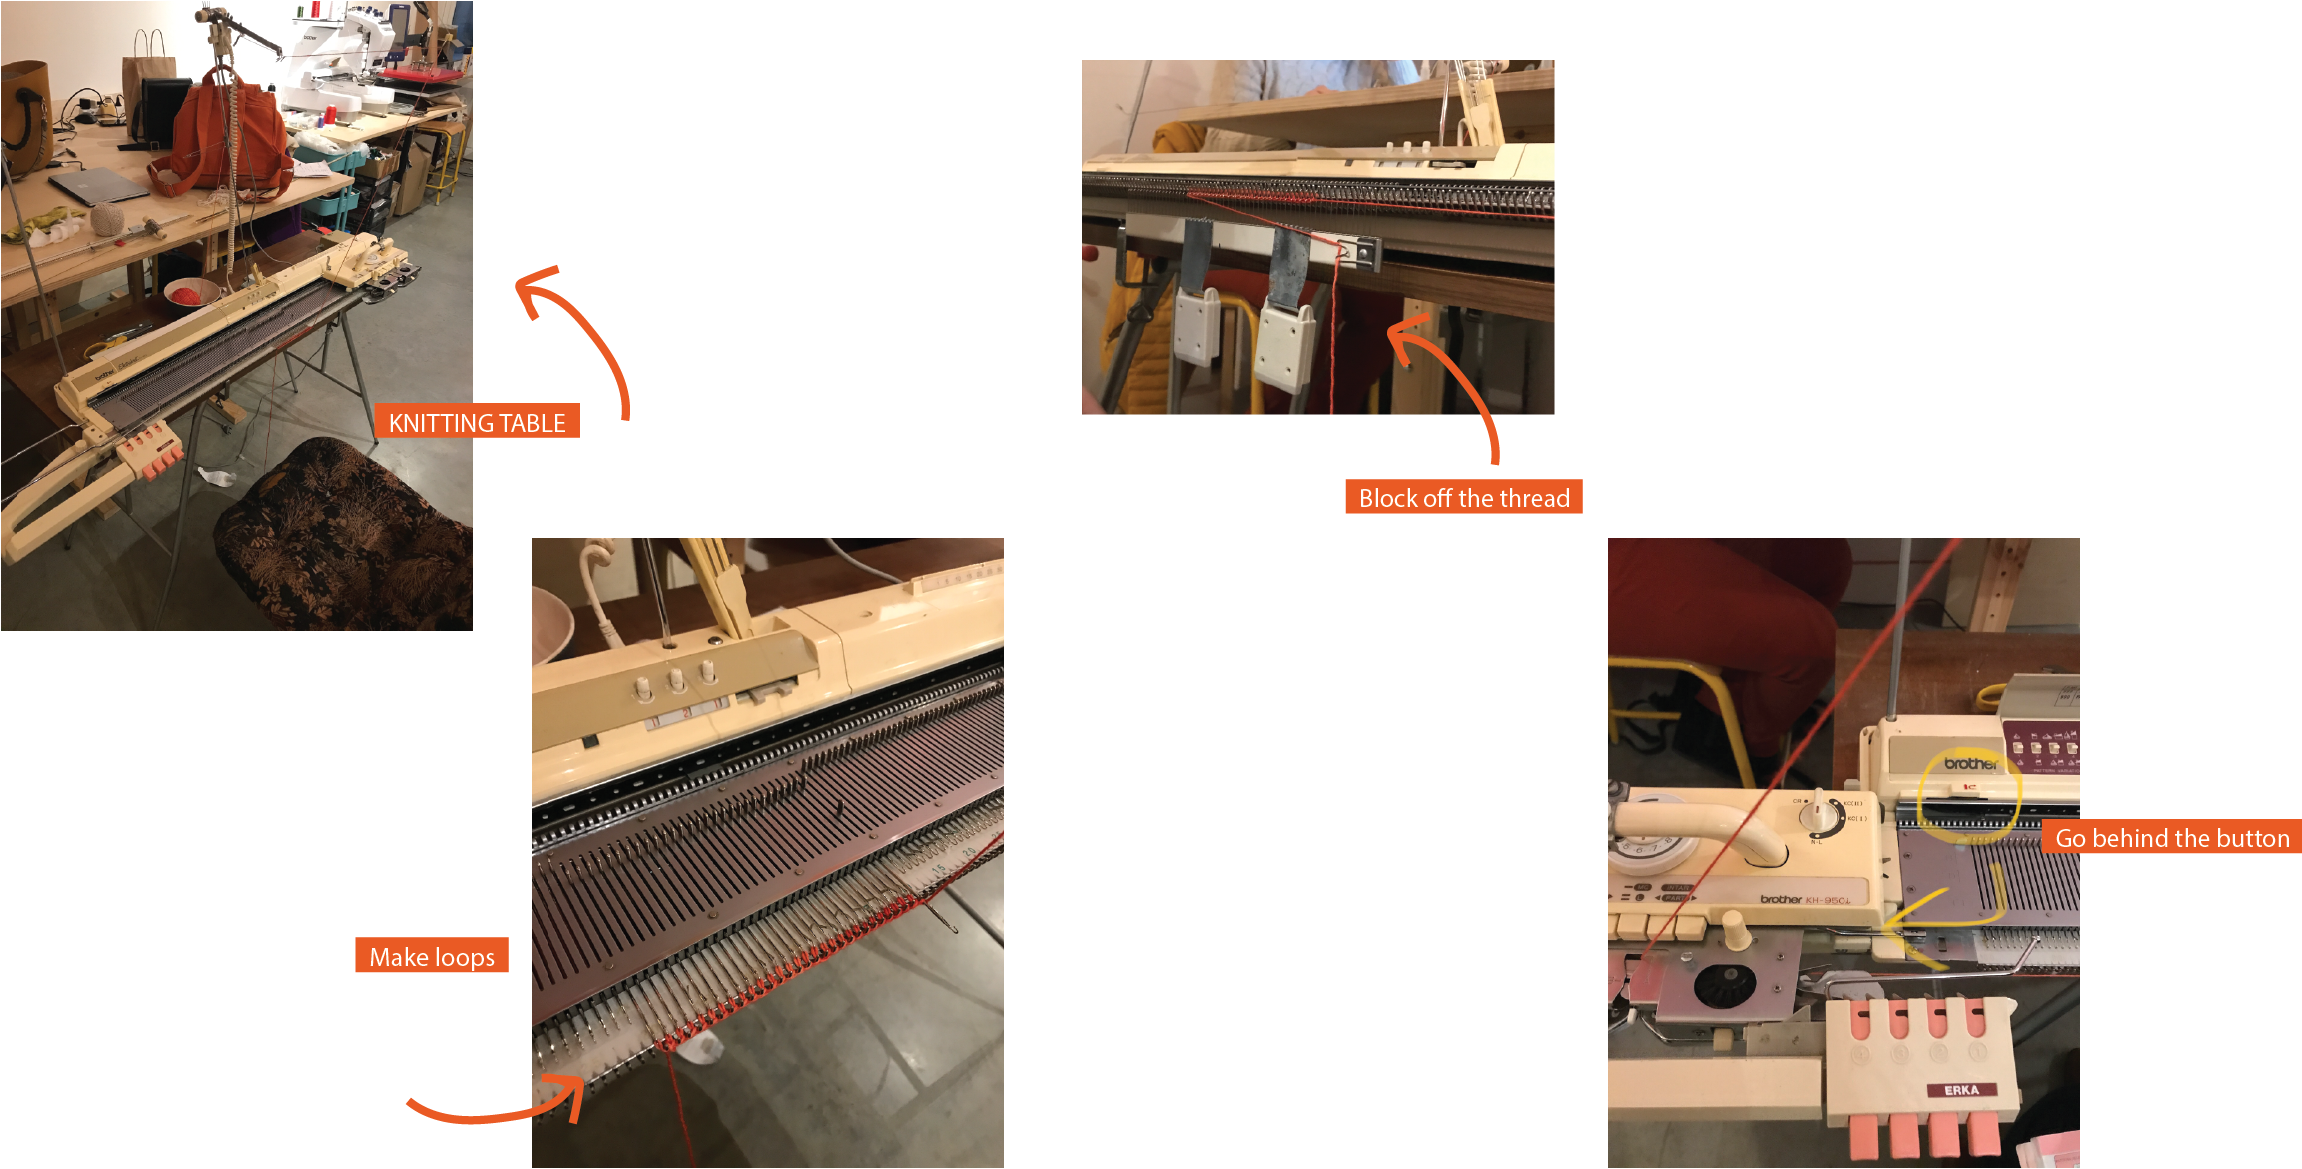
KNITTING TABLE
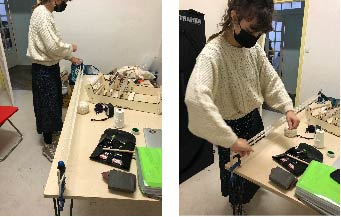
I was very curious to learn how to use it. Pauline showed us on Monday :)
Manual knitting machine
Some notes :
-
Wool we can use : 2,5 and 3 mm
-
Don't tighten too much the thread, it has to be between smooth but not loose
-
Put the weights on the comb --> it has to be straight
-
block off the thread and securize the other one
-
first row with tension 10 / the others ones with tension 6
-
"N-L" button = jersey
-
"KC" button = when I want to do a programation (go behind the button, see last picture)
Attention : push twice the button M to make the programation works + push button "tuck patterns"
Create a dicrease
Always from the thread side
2 possibilities :
-
with 1 needle
-
with 2 needles (best option)
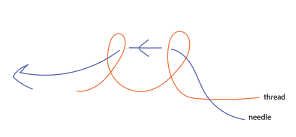
Finalize our sample
With a needle, respect this pattern :
-
1-2 (always to start)
-
1-3
-
2-4
-
3-5 ect
Hacked knitting machine + AYAB software
Pauline hacked this brother 950i machine with Arduino and AYAB.
- Verify connections
- switch the machine on
In Ayab :
- load the machine with Arduino
- upload the png image (white parts on the drawing represent the main thread)
- 1 pixel = 1 link on the photoshop drawing (180 links in total)
- single bed
- there are 40 links so they are on each side of the ZERO --> 20/20
On the knitting machine :
- KC2 + cart at left
- create a row
- put the second thread, block off it in "B" and press "MC color buttons", keep the thread in hands until first row
Lost link
- Recover from behind the link
- Recover in front of the link --> create a rib
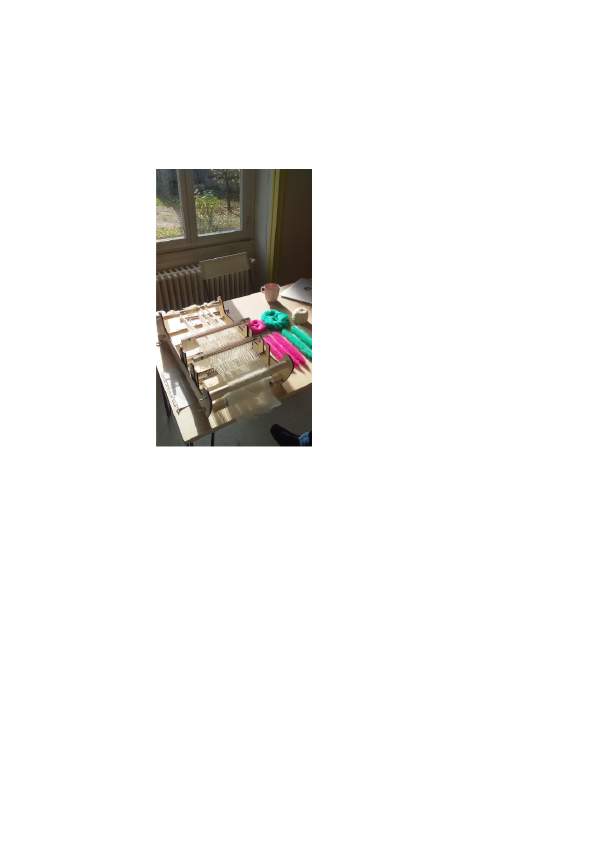
WEAVING LOOM
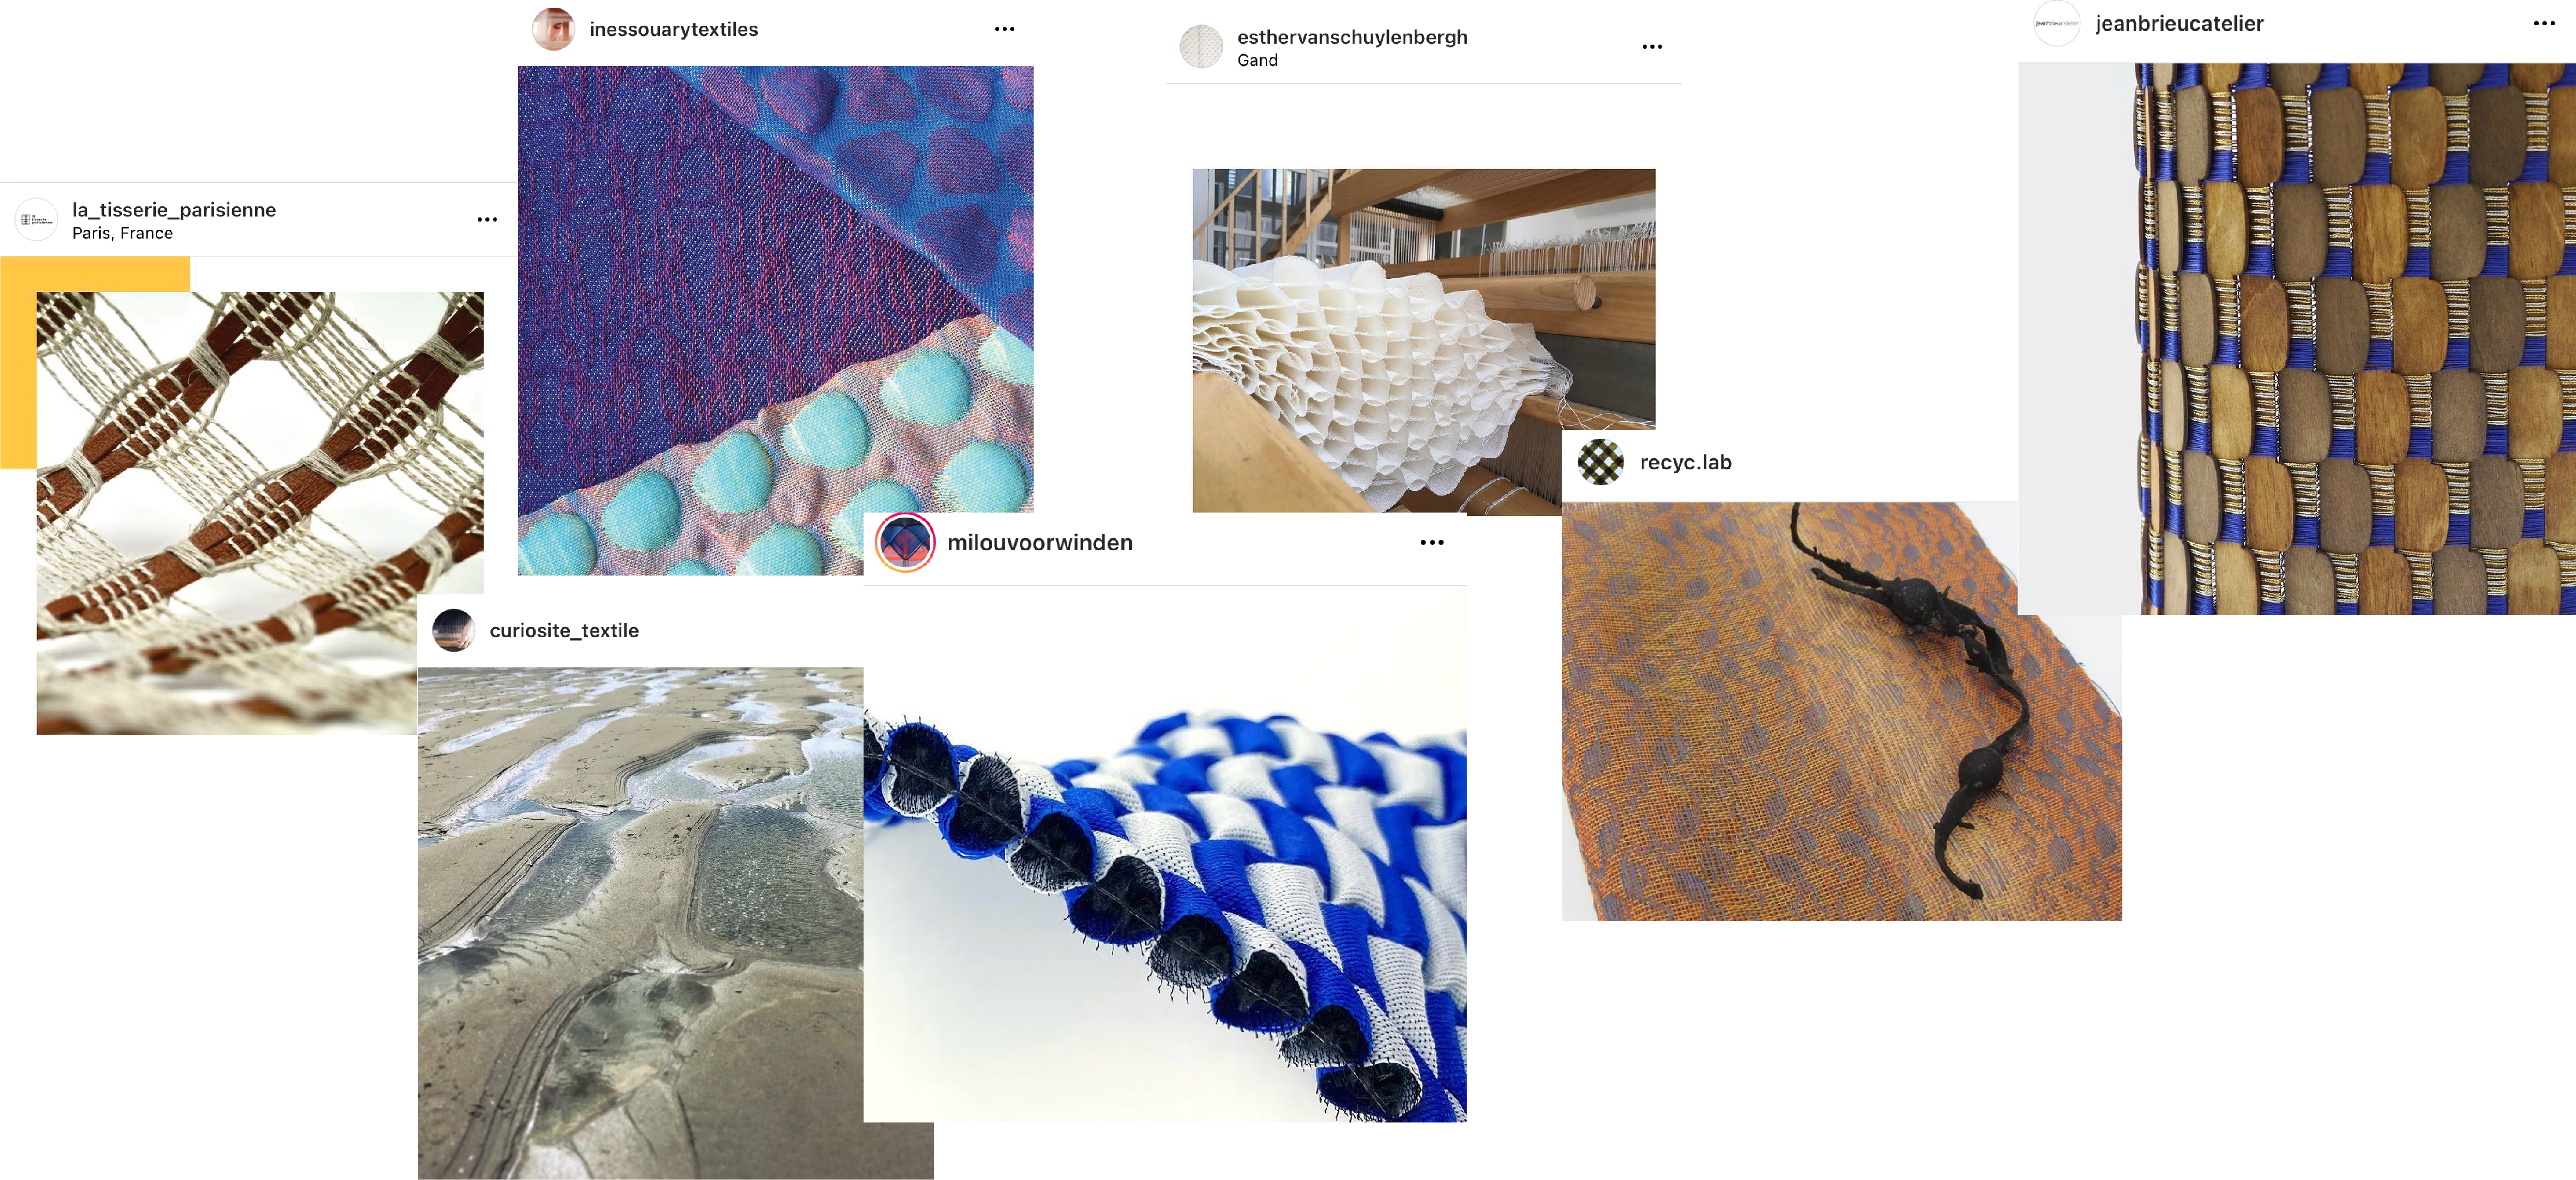
Inspirations and creations
Silk in lyon Exhibition

My revelations
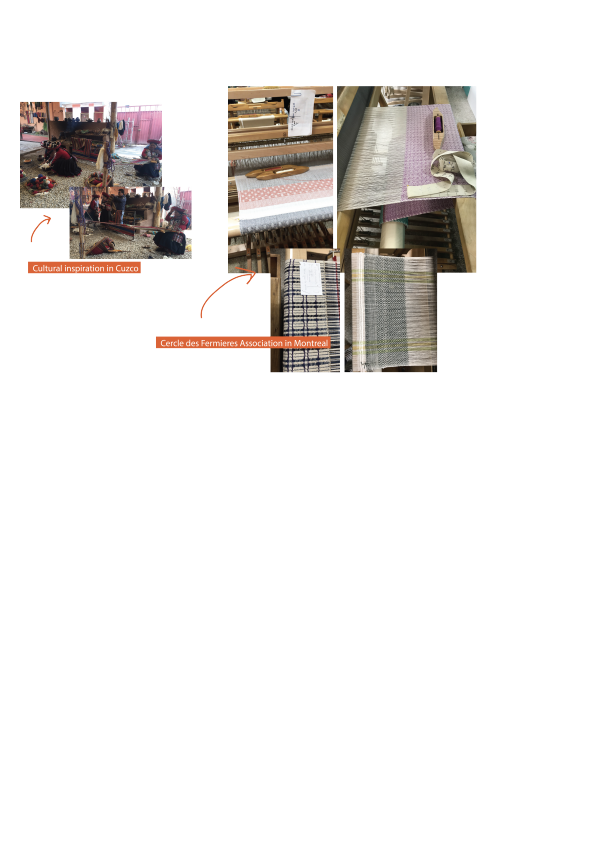
My new desires
With Louise and Surzhana, we were very excited about creating our own weaving loom. We based our work on this open source resources called DIY Laser Cut Rigid Heddle Loom - Part 1: Building the Loom. This link is great, all informations and process are there so it was really fun to make it real :)
BOM of the machine
Materials :
-
6mm MDF - 600mm x 400mm
-
3mm perspex or MDF - 300mm x 150mm
-
1mm MDF or thick card - 50mm x 170mm
-
4 x 25mm Dowling cut into 300mm lengths
-
2 x 9mm Dowling - cut to 280mm lengths
-
8 x Machine Thread to Wood Thread Dowel Screws - M8 x 75mm
-
4 x M8 Wingnuts
-
4 x M8 Hex Nuts
-
8 x M8 Washers
-
4 x 40mm M6 Bolts
-
4 x M6 Hex nuts
-
4 x 20mm M4 Bots
-
4 x M4 Nuts
-
2mm Nylon cord
-
6 x flat head drawing pins or thumbtacks
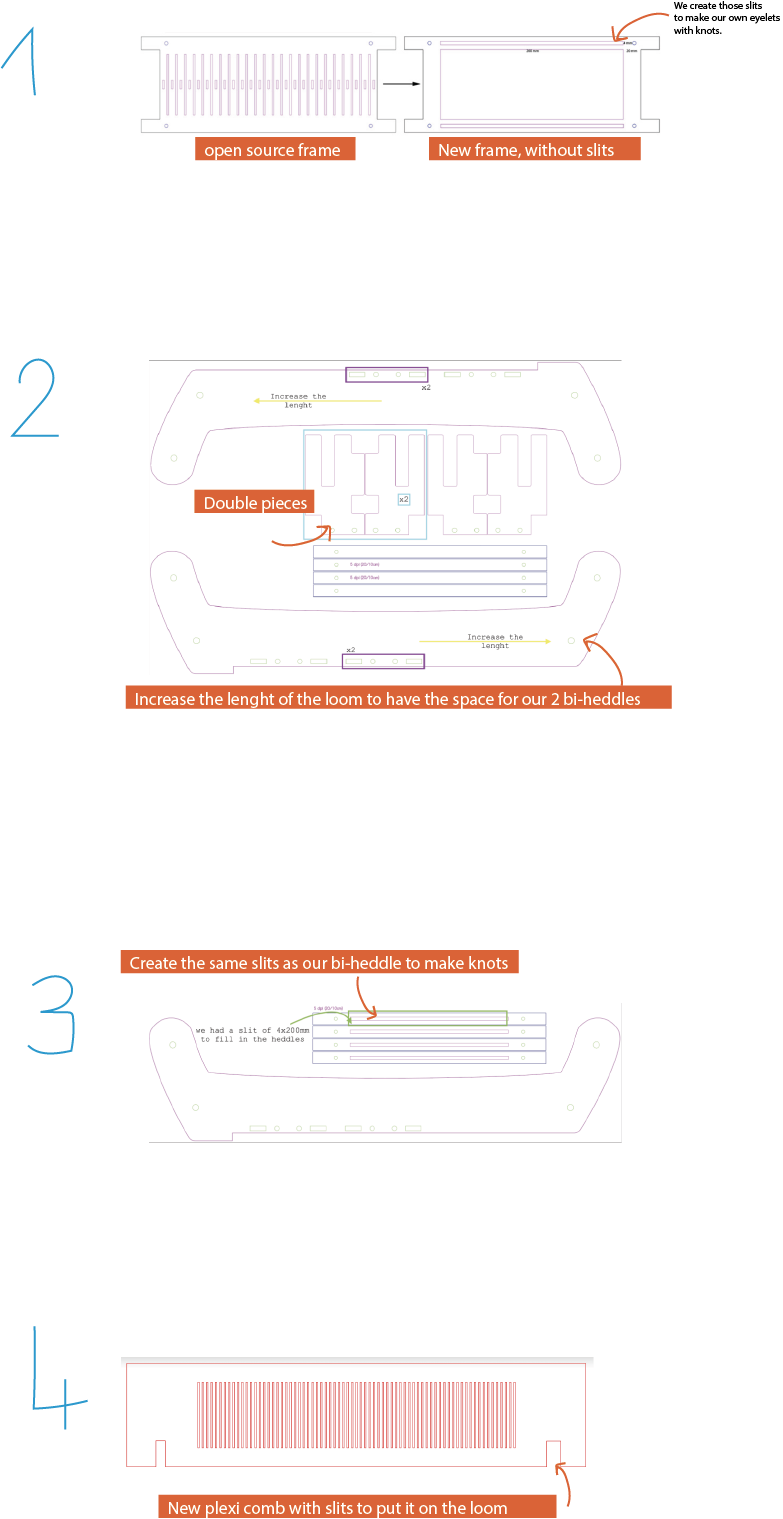
Modify open source files
In the document, there is only one heddle (with 2 heddles in it, so we called it "bi-heddle"). But we wanted to have 4 heddles in order to diversify our patterns (and to complexify our life aha). That is why we made some modifications in illustrator.
We also decided to create the eyelets with threads and knots in order to change the densitiy of the weaving. That is why we remove the slits from the open source document.
Steps
-
Translating the materials so that we know what to buy
-
Modifying the files of Instructables to add a second bi-heddle
-
Laser cutting the pieces we need
-
Preparing the others (drilling holes, adding cords...) following the tutorial from Instructables
-
Assembling all the parts together
-
Setting up the warp
-
Laser cutting the comb
-
Time to test the machine and weave :)
You can download the files here.
Laser cut machine
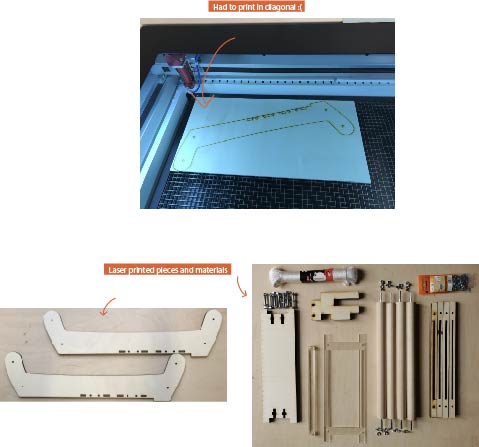
Most of the loom is made of 6 mm wood PLA. Comb, shuttles and the 2 bi-heddles are made in 3mm plexi.
We had a problem printing the big part of the loom. I don't know why but in Inkscape Software, the shape didn't appear. So I had to print in diagonal.... create waste but only way to have the entire shape.
Type of laser cut machine : Rayjet r400.
Prepare pieces and build the loom
Eyelets
Because we choose to create eyelets with thread, we had to sand all wood pieces to avoid stucked thread.
It is a long and very meticulous process but the result is nice and allow more density than if it was rigid.
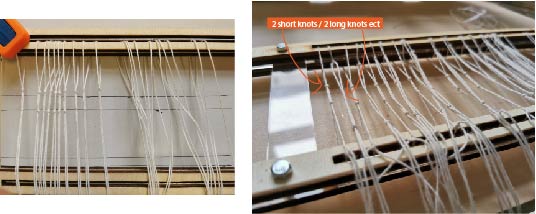
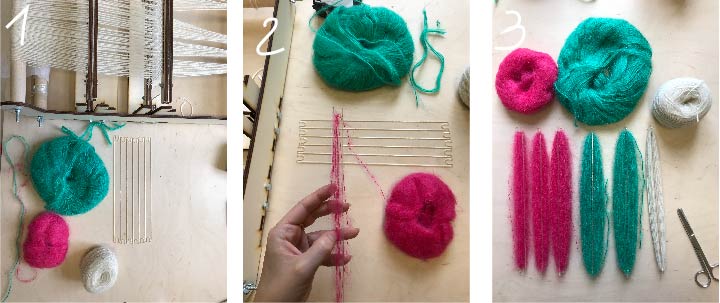
How to set up the warp
Chosen thread is 6 threads / cm
We have 1 thread = 1 eyelet and 80 eyelets ([EN] eyelet = lice [FR]) on the two bi-heddles
We want a warp of 13 cm width
6 (threads/cm) x 13(cm) = 78 (good because we have 80 eyelets)
We need to make a warp of 78 threads, we decided to make them 150cm long (our table length).
Tension
- Put one end loop of the warp on the back beam
- Wrap the warp around the beam making sure the tension is homogenous
Threading

- Threading time ! Each thread go to an eyelet
- Put the threads in the comb
- Attach the warp on the front beam making sure the tension is good
Shuttle
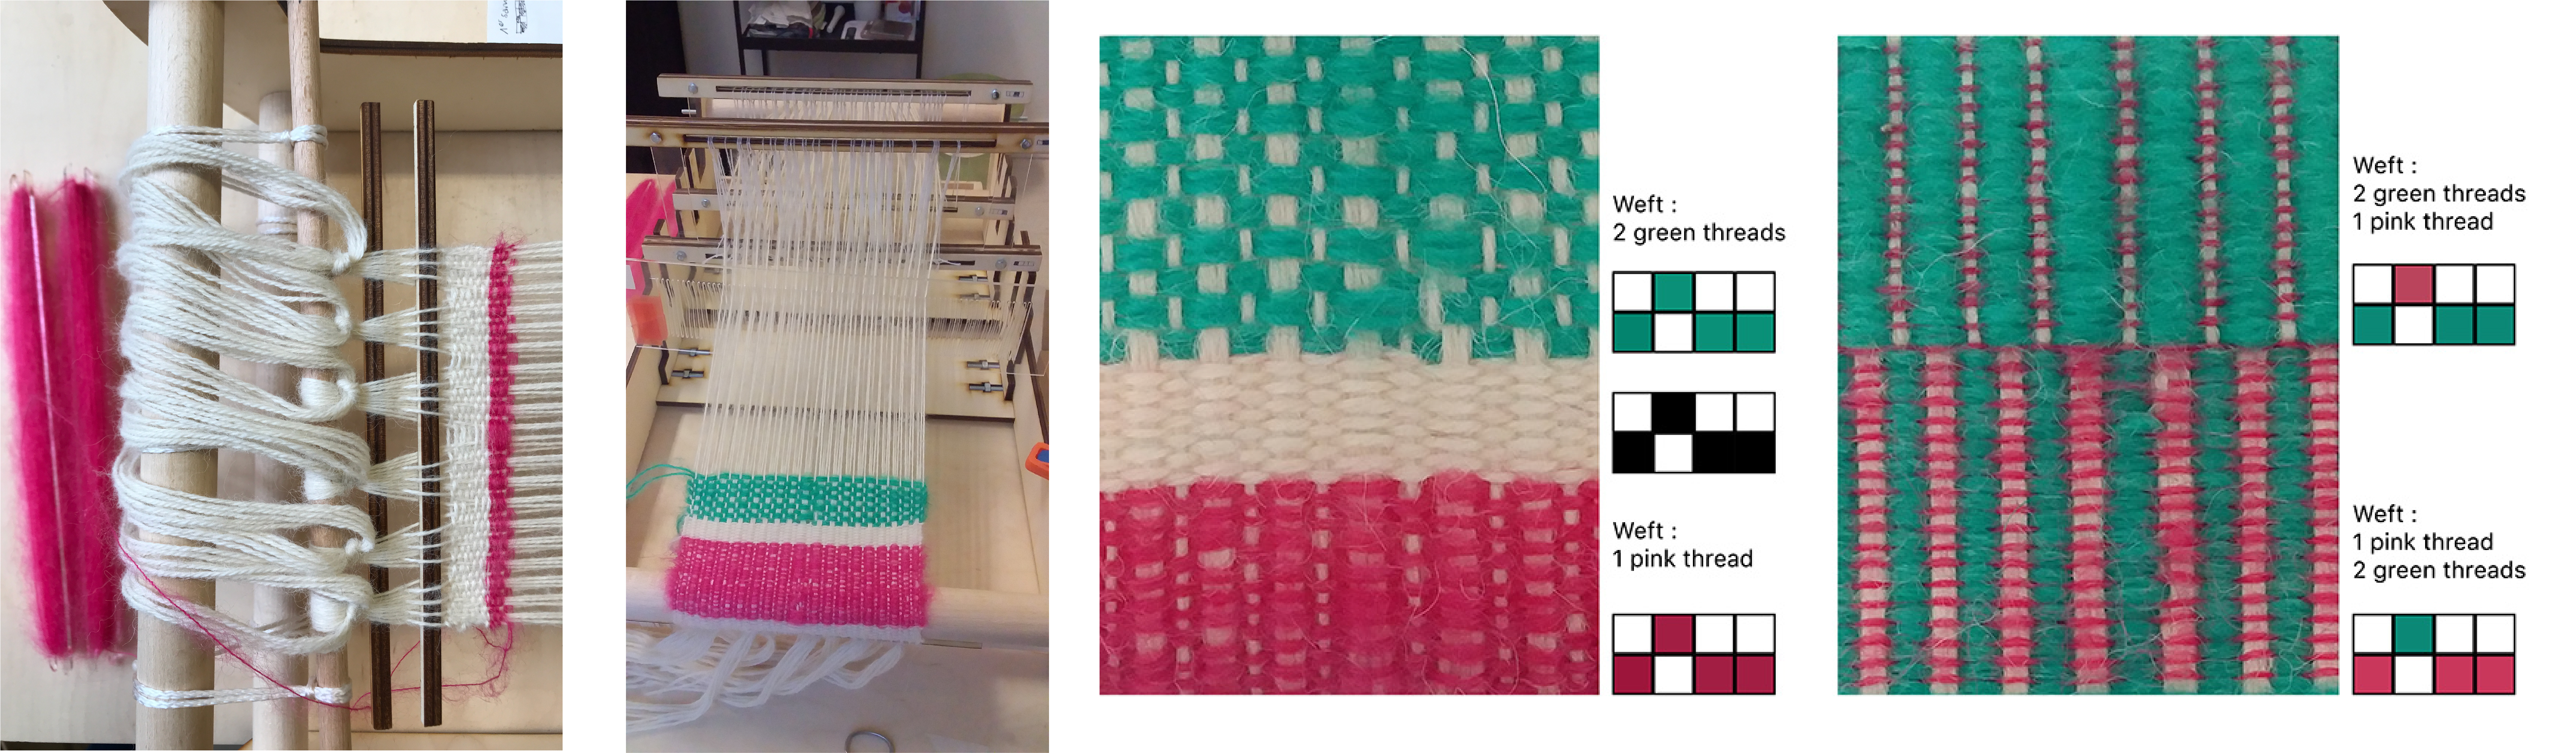
WEAAAAAVE
How we can improve it
Louise made this incredible board!
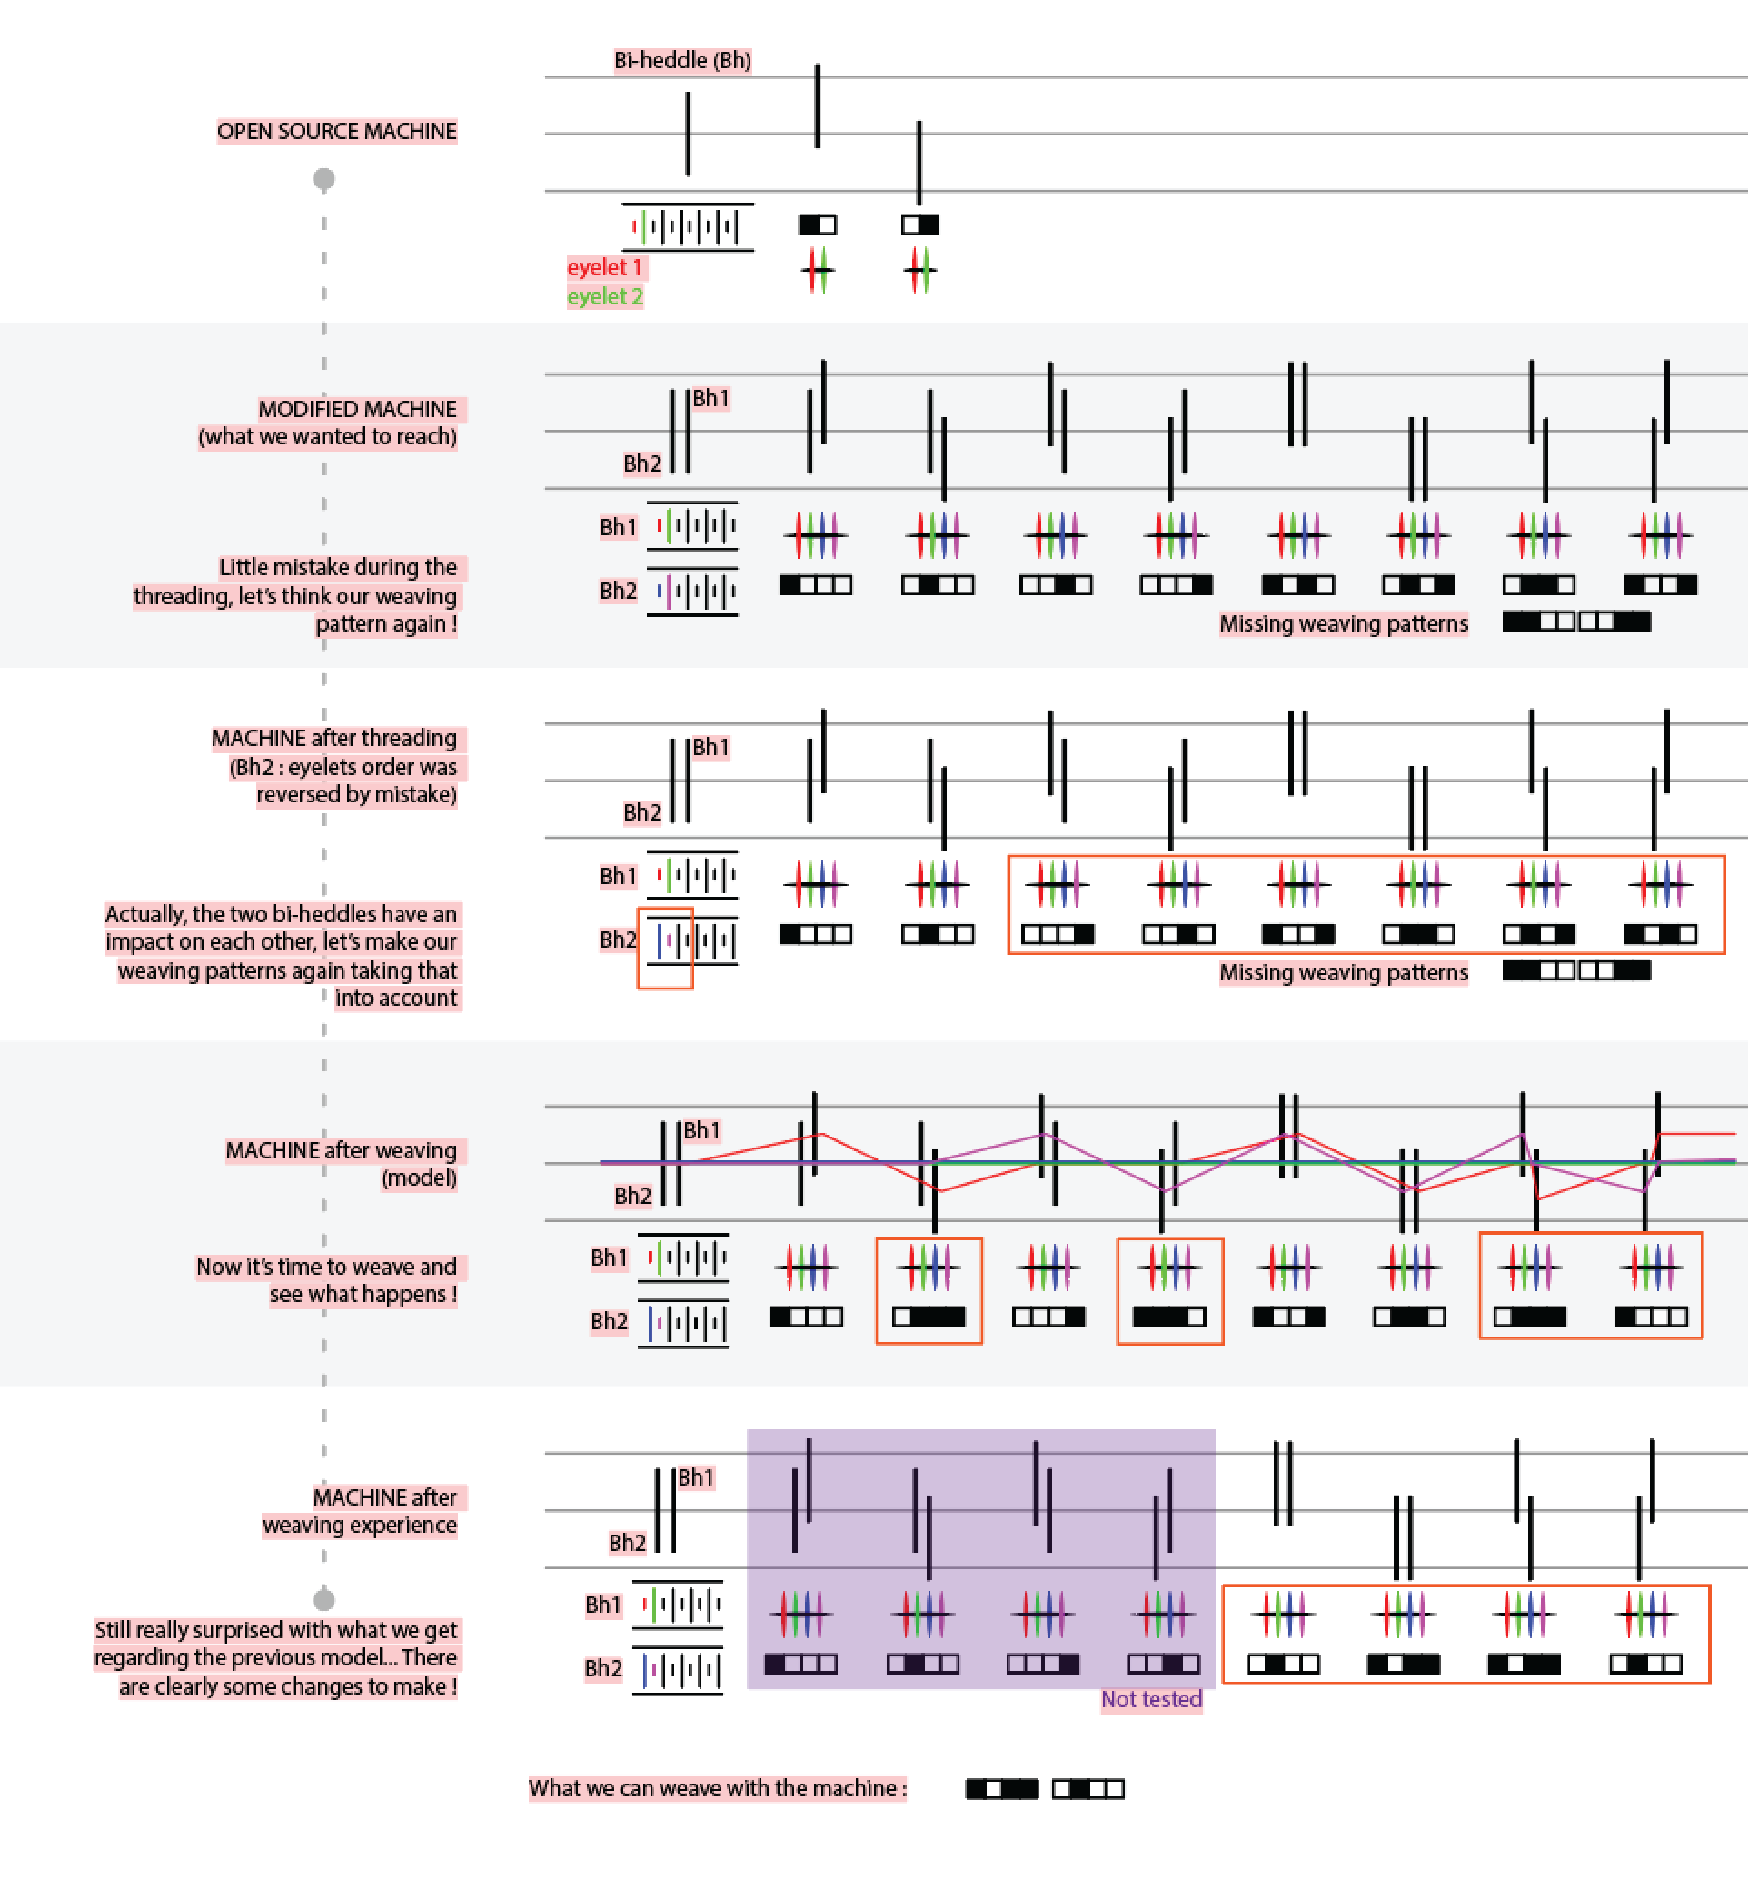
Solutions we have to try to achieve our first goal :)
- The distance between the 2 bi-heddles could be reduce
- To minimize the impact of the first bi-heddle on the second maybe the first could be bigger in height than the second ?
- The loom frame could be longer and higher to be able to move the bi-heddles with more extent.
- Be careful that all the bi-heddles start with the same type of eyelet (short or long)