WEEK 2 - DIGITAL BODIES
Last Update: Nov 8, 2021
September 27-October 3, 2021
This week I learned how to use various apps and programs to simulate 3D models of human bodies and then utilize them to either make virtual modifications or create stereolitography files for laser cutting purposes. I also learned the plethora of programs and devices that exist to make 3D models of my own body such as Magic Weaver, which I actually downloaded and played around with.
Keywords: documentation, git push, 3D scanning, MakeHuman, Capture, Magic Weaver, apps, Rhino 3D, Slicer, laser cutting, Canva, mannequin, digital, virtual, 3D modeling, Glowforge
Quick Summary
 Tools Learned:
- MakeHuman Version 1.2.0 - An open source 3D modeling software for protoyping digital characters
- Rhino 3D Version 7 Evaluation - A 3D CAD and graphics program
- Slicer for Fusion 360 Version TBD - A software tool to convert 3D models into 2D patterns that can be cut and assembled into the 3D model
- Magic Weaver Version TBD - An AI-based 3D body scanning and measuring app
- Capture Version TBD - An AI-based 3D scanning app for objects and bodies
- Glowforge Desktop App
- Glowforge
 Tools Refined:
- Visual Studio Code Version 1.61 - a source code editor I'm now using to document and edit my documentation website locally on my desktop
- Adobe Illustrator Version 2021 - a photo editing program
- Pinterest: a photo sharing and saving platform
- Canva: a graphic designing platform
 What I still want to learn better:
- How to cut/trim a curved plane as opposed to a flat plane in Rhino
Research and Inspiration
My biggest inspiration for building a mannequin was the Olympics and the Olympic athletes who compete at this huge event. Every four years I look forward to seeing the next wave of incredible athletic performance and the new limitations of humean physical ability. What's even more impressive to me is the variation in body type and build across the various sports (see image below).
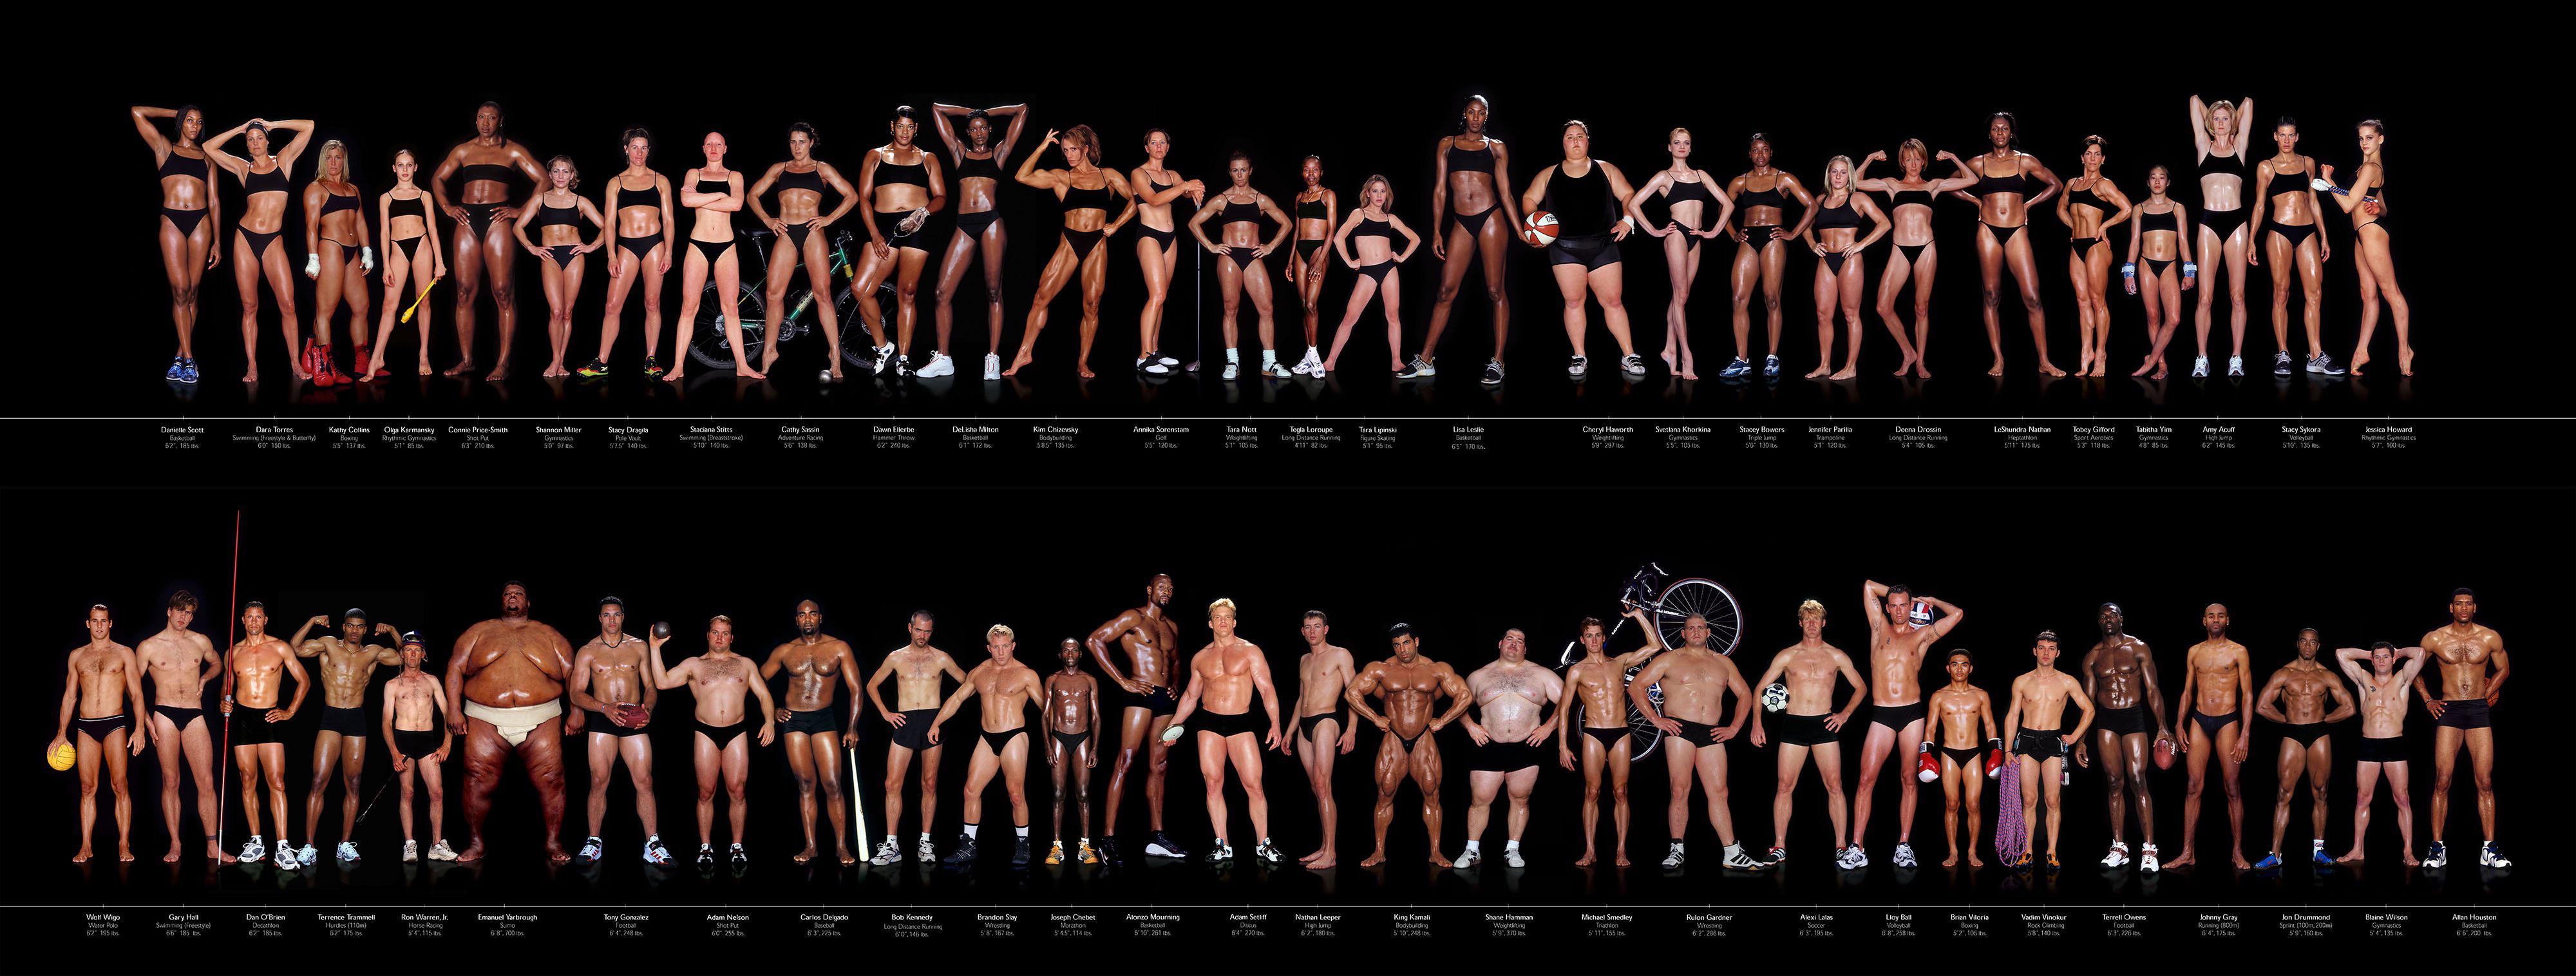
Source: Reddit
Storytime
Growing up, I trained and competed as a swimmer and was heavily devoted to the sport. Even today, I continue working as a swim coach. So, my connection to athletics is deeply rooted in me and very personal. However, I rarely saw other Asian women as athletic as I was. Many of the Asian friends I had, or the Asian celebrities I'd follow from overseas, were much thinner, shorter, and softer than me. I felt a little bit of an outlier compared to my friends, being slightly larger and not as photogenic as them. Over time, I learned to be grateful for my body and the hard work I put into building it. As a result, I want to be able to honor and celebrate other female Asian athletes.
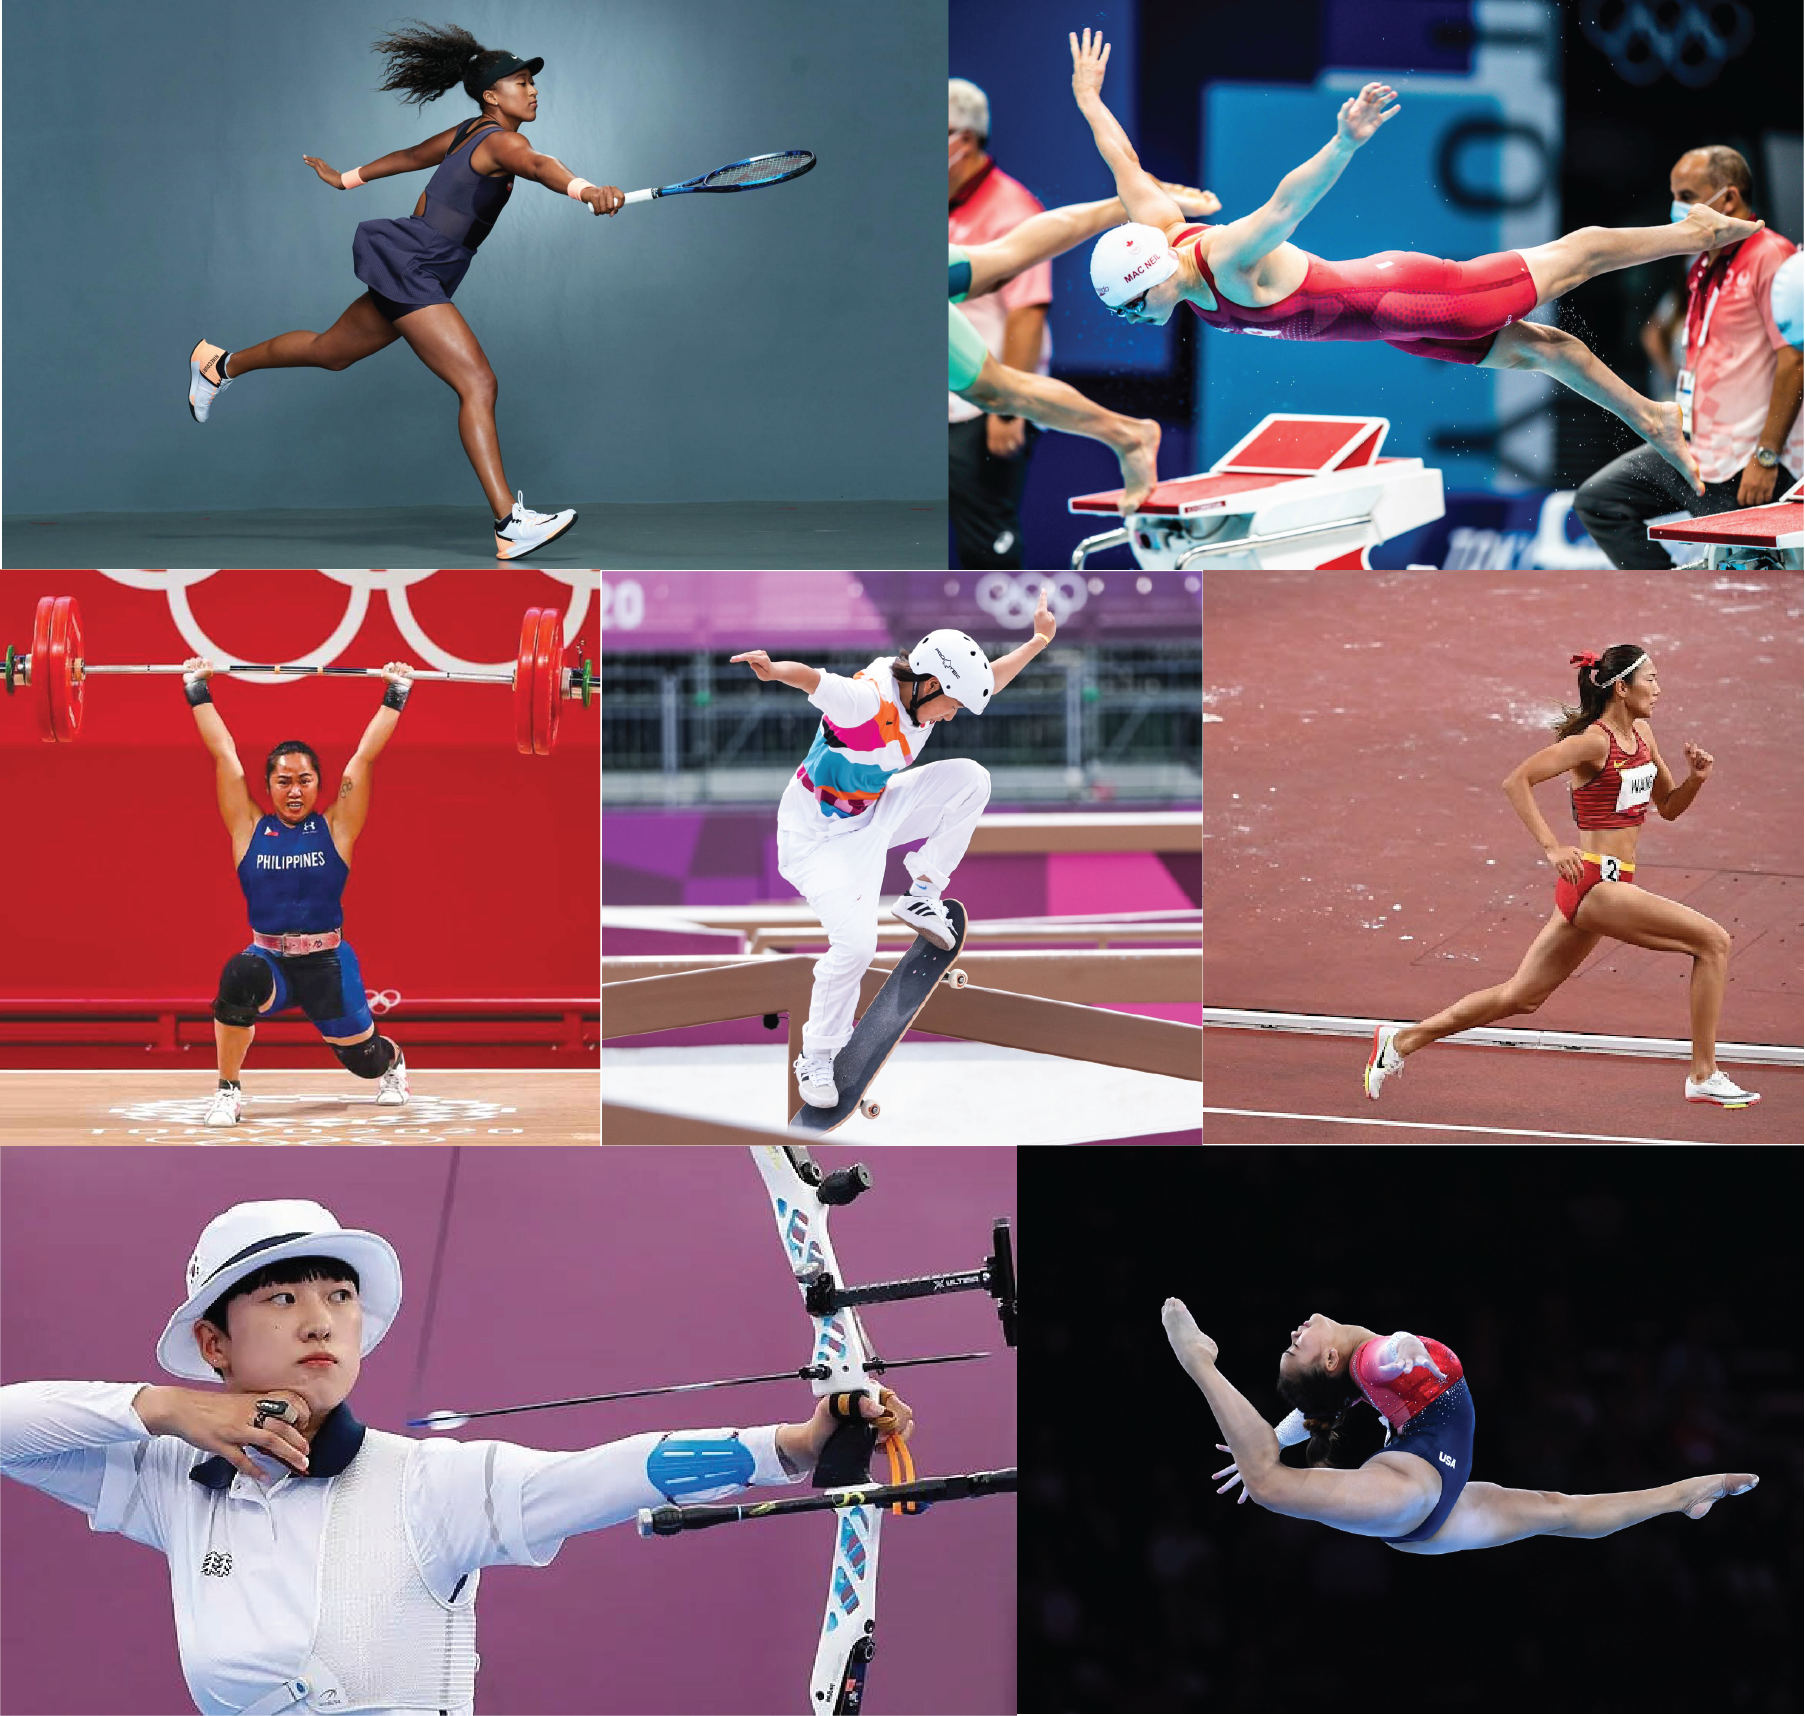
From top to bottom, left to right: Naomi Osaka, Maggie MacNeil, Hidilyn Diaz, Momiji Nishiya, Wang Chunyu, An San, Sunisa Lee
For this reason, my goal for this week is to design a mannequin that has an athletic figure and is able to show mobility - primarily rotation along a vertical axis. This feature is particularly important to me because rotation is essential to power and efficiency in swimming freestyle and backstroke.
3D Scanning (Magic Weaver, Capture)
I downloaded two smartphone apps to try 3D scanning my body: Magic Weaver and Capture.
Magic Weaver
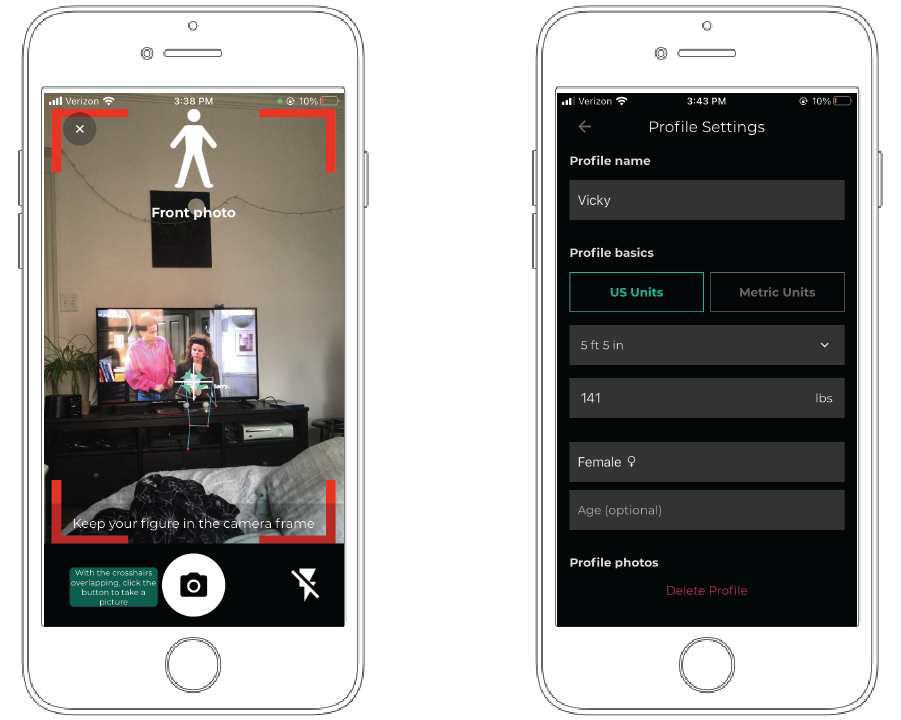
To start using this app, I tapped on "New Size Profile" and followed the subsequent instructions.
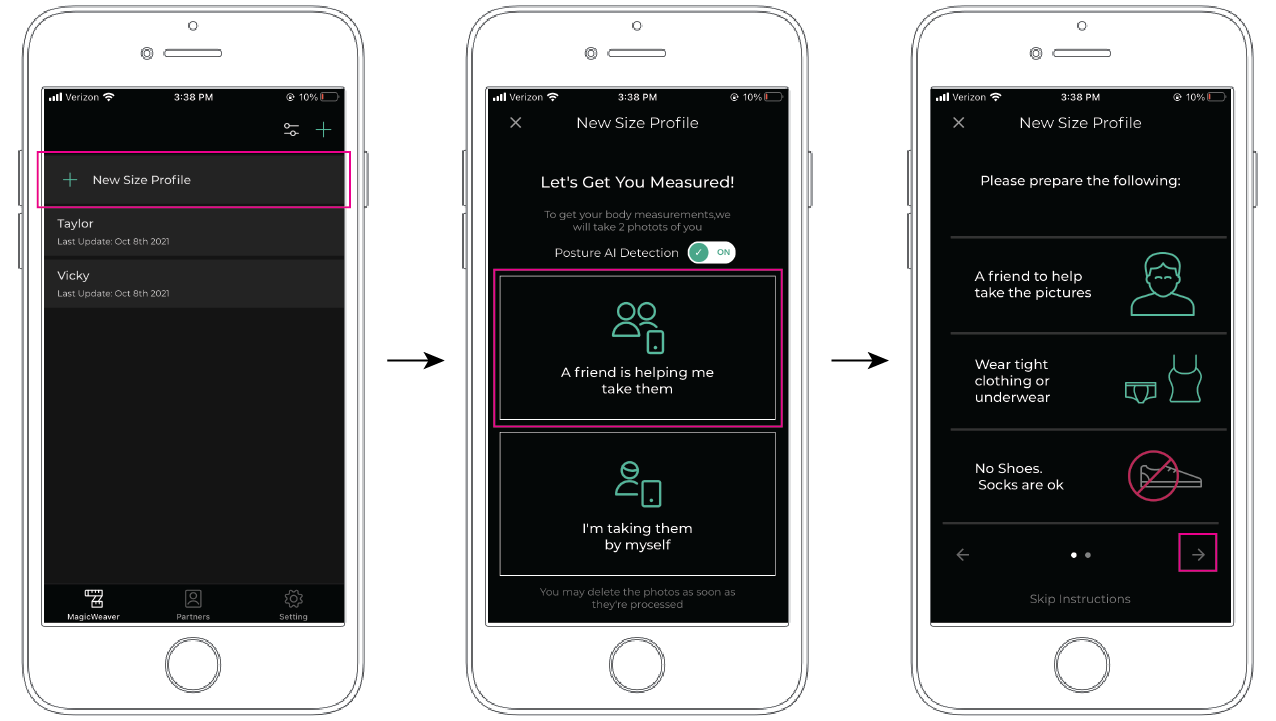
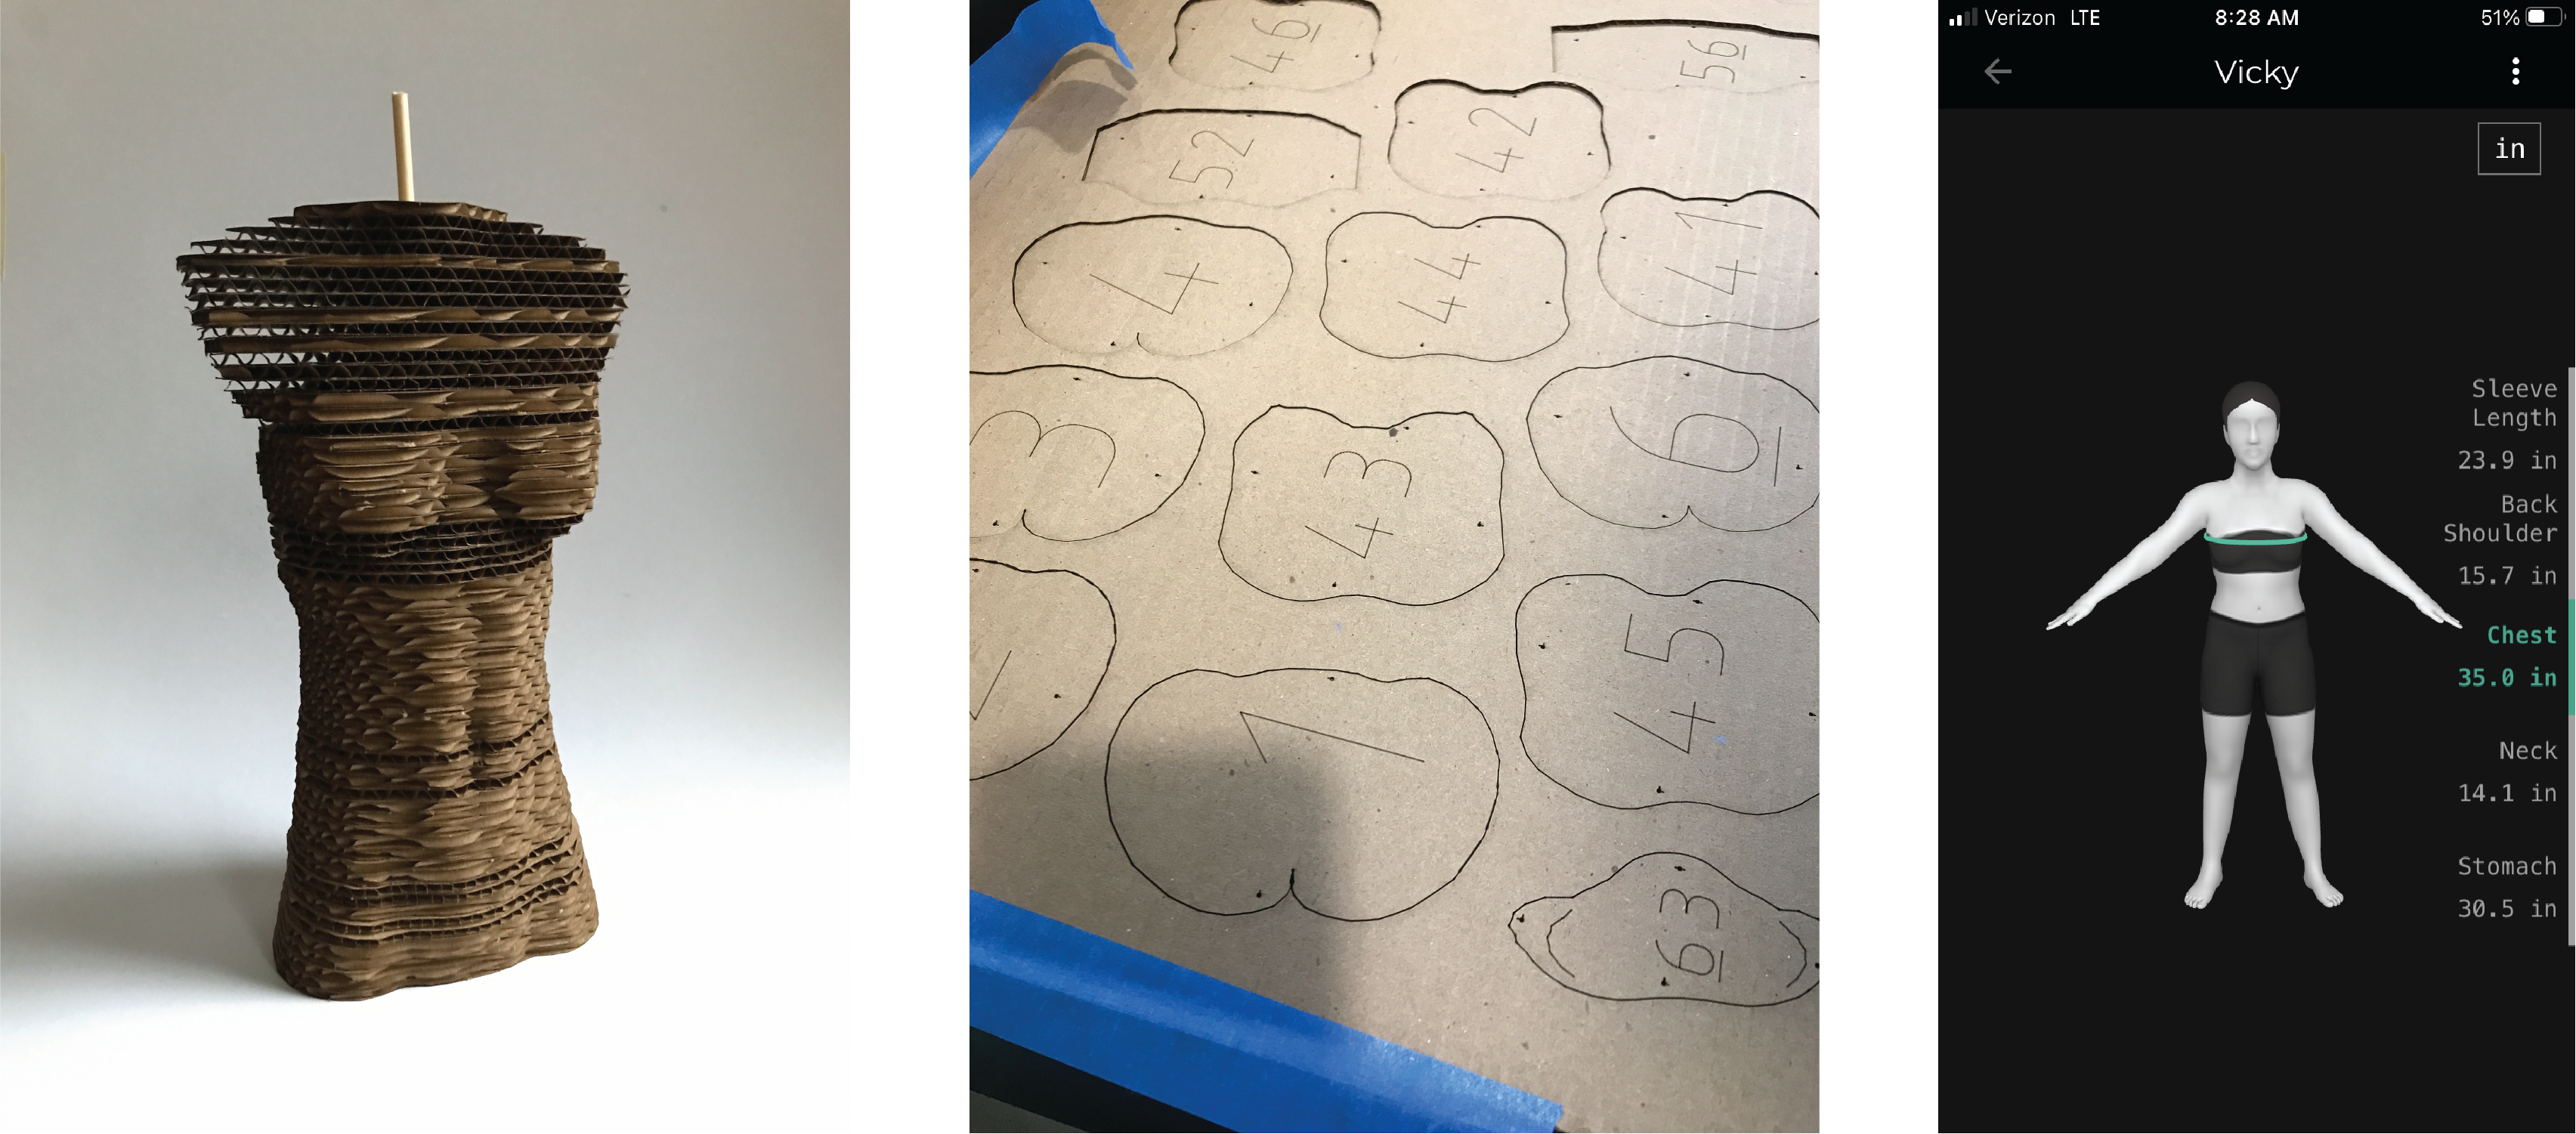
After going through the instructions, the app takes you to the camera and lets you match a skeleton outline to the body. Below is an example using two characters from the TV Show Seinfeld (left photo). With assistance, I had my body "scanned" getting a photo taken from the front and a photo taken from the side. The photos were then processed, during which I could edit some extra information about my profile such as height, weight, and gender (right photo).
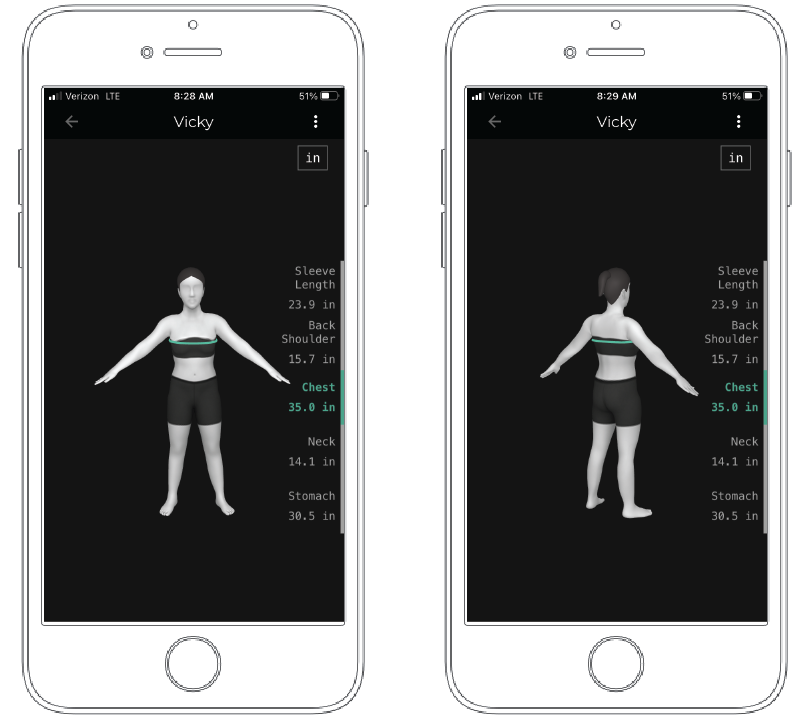
After the app finished processing the photos, it generated a 3D model of my body.
One downside to this app, however, turned out to be the processing time. After taking the photos, the app proceeded to process the photos and turn them into a 3D model, which ended up taking at least 48 hours. Another downside to this program was the inability to export the model into a workable file for other software programs.
Capture
 Unfortunately, because my smartphone is an iPhone 7, I wasn't able to use Capture so I had to borrow someone else's iPhone X to download and use the app.
Once I open the Capture app, I'm able to take a panorama selfie (the app is not able to support rear camera footage yet) from the right side of my face to my left side.
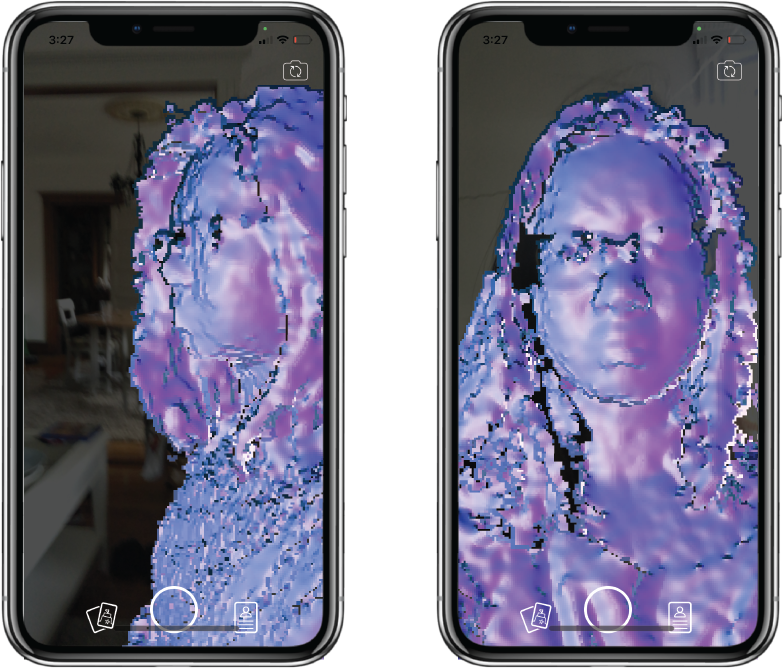
Once captured (pun unintended), a 3D model is generated that looks more like a skin or shell-like version of my head.
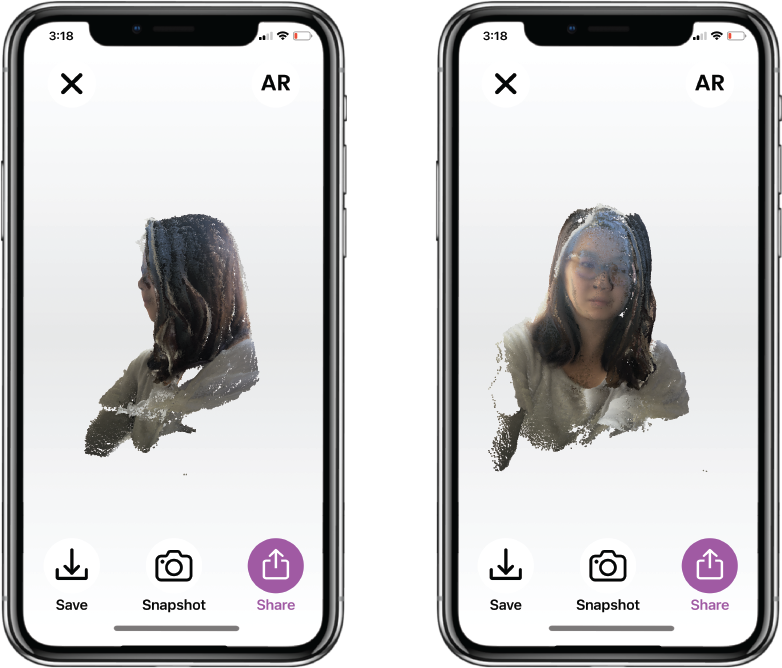
Similar to Magic Weaver, however, I'm not able to export a workable file from this app... at least not yet. The app did give a notice that that feature will become available soon.
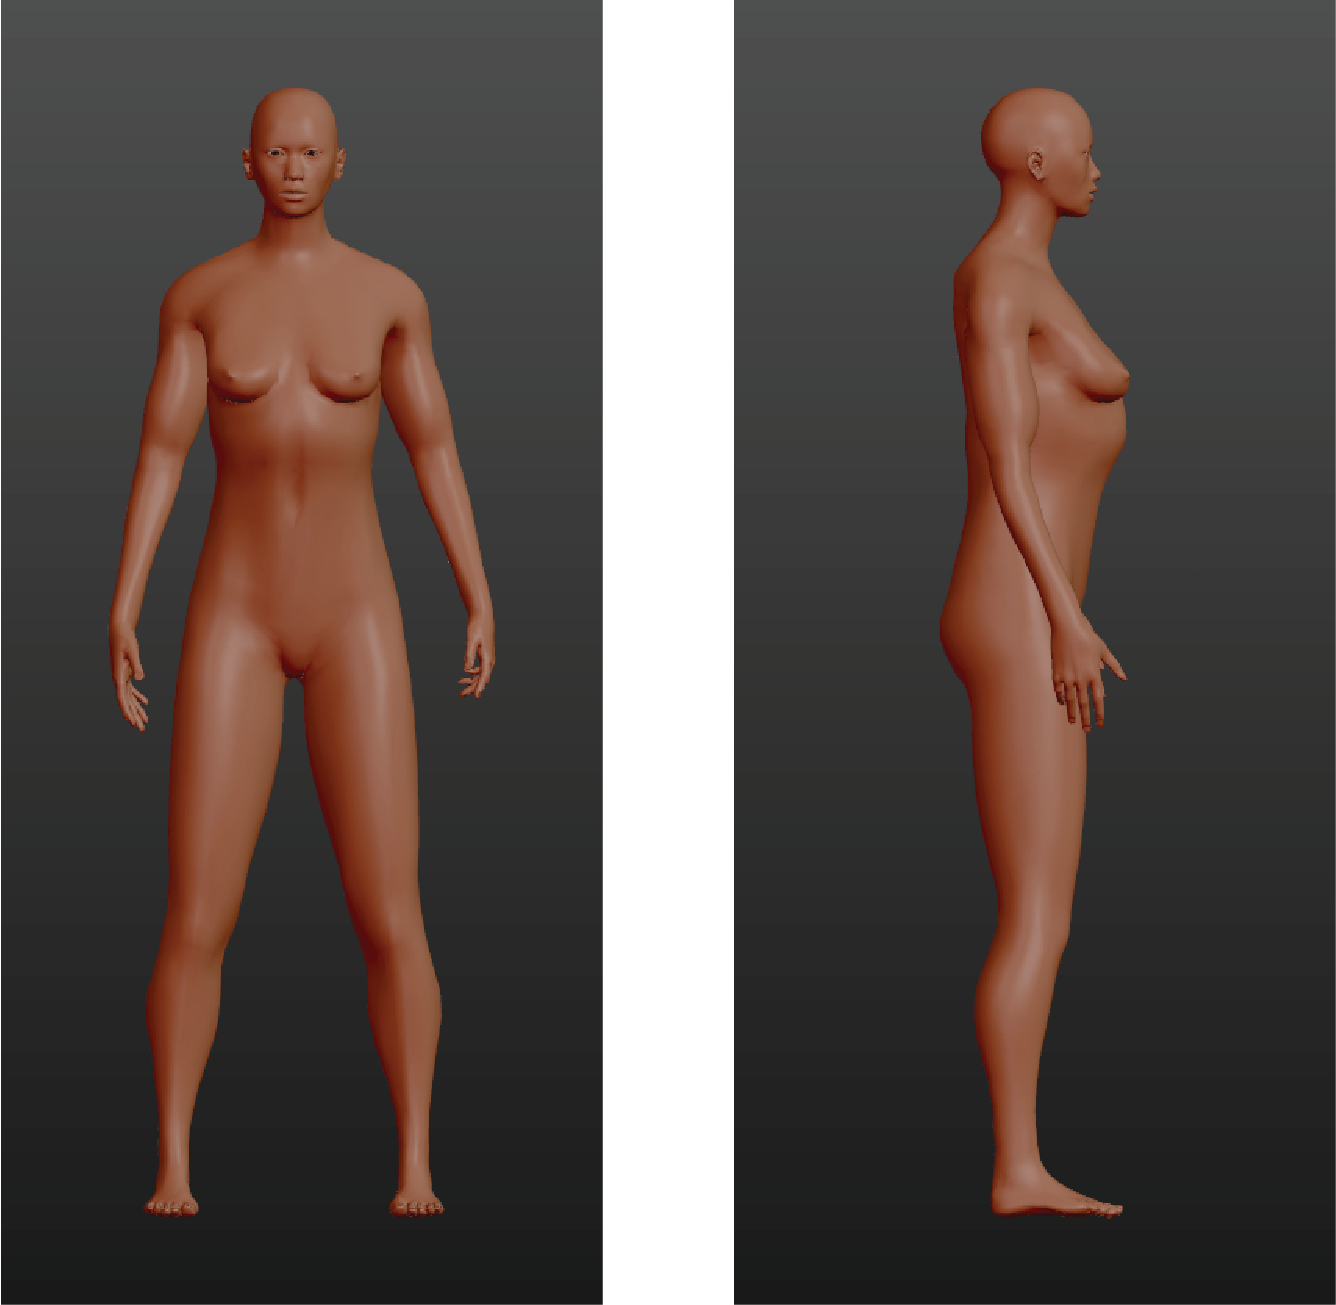
3D Modeling (MakeHuman)
Physical Features
Based on the body types I was researching, I created various body types on a program called MakeHuman. With this program, I was able to vary physical features as broad as height or weight, and as specific as finger diameter or eyebag depth.
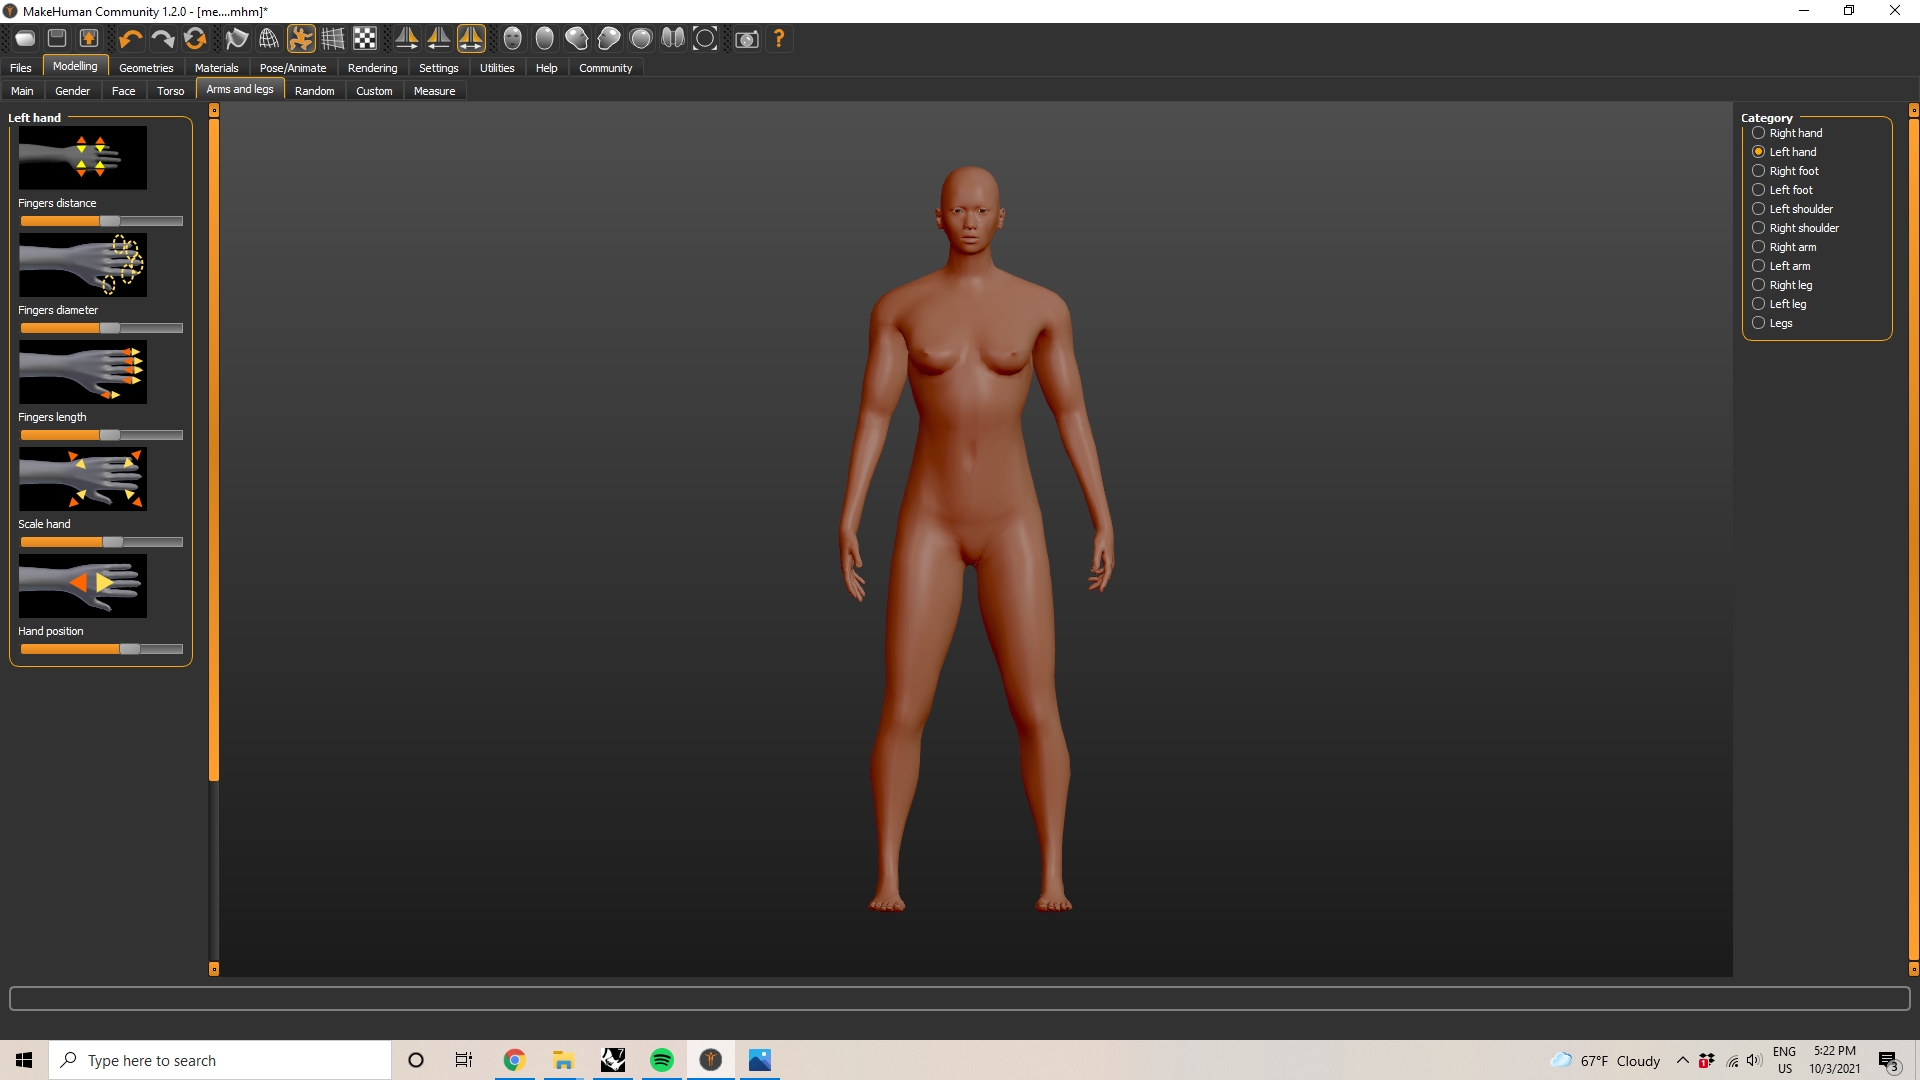
To change physical features, I can select the "Modelling" tab first and then choose which body part to modify from one of the specified tabs below.

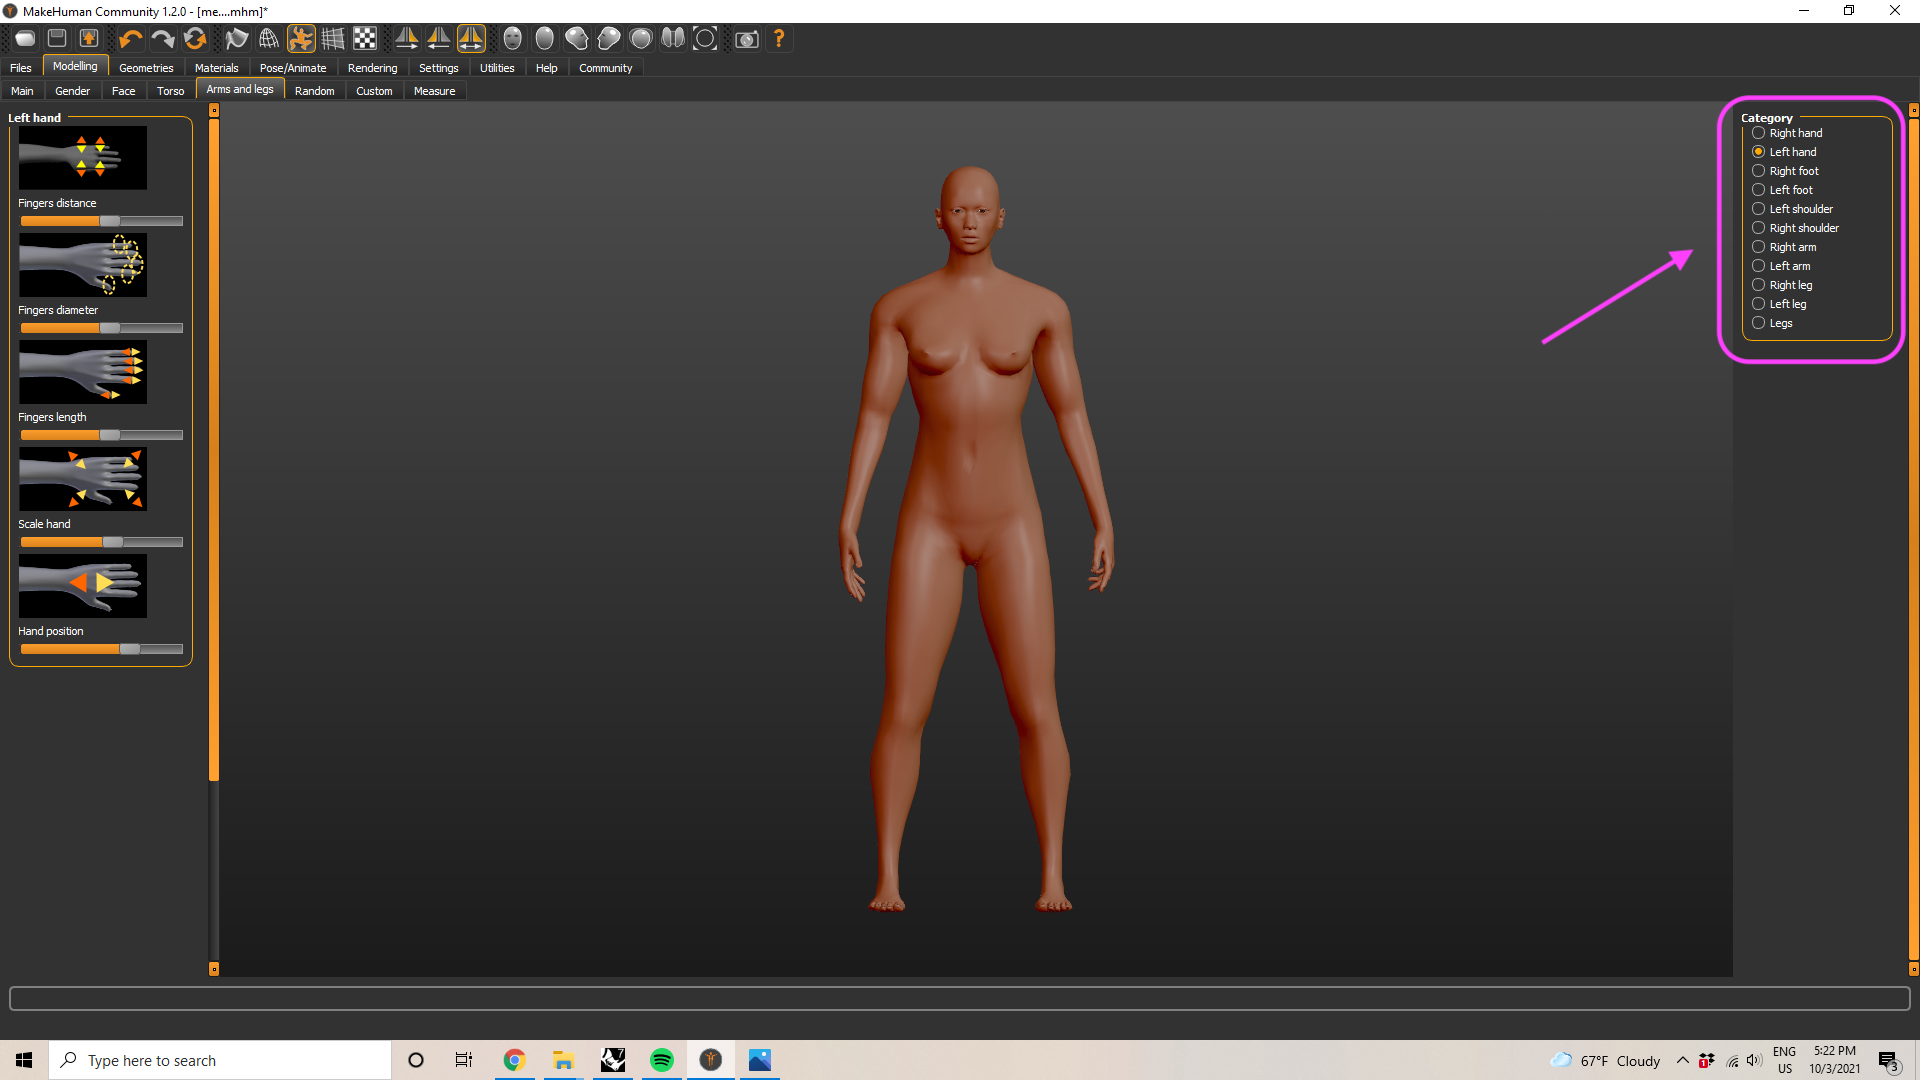
To change even more specific features, I can select one of the options under "Category" on the right-hand column.
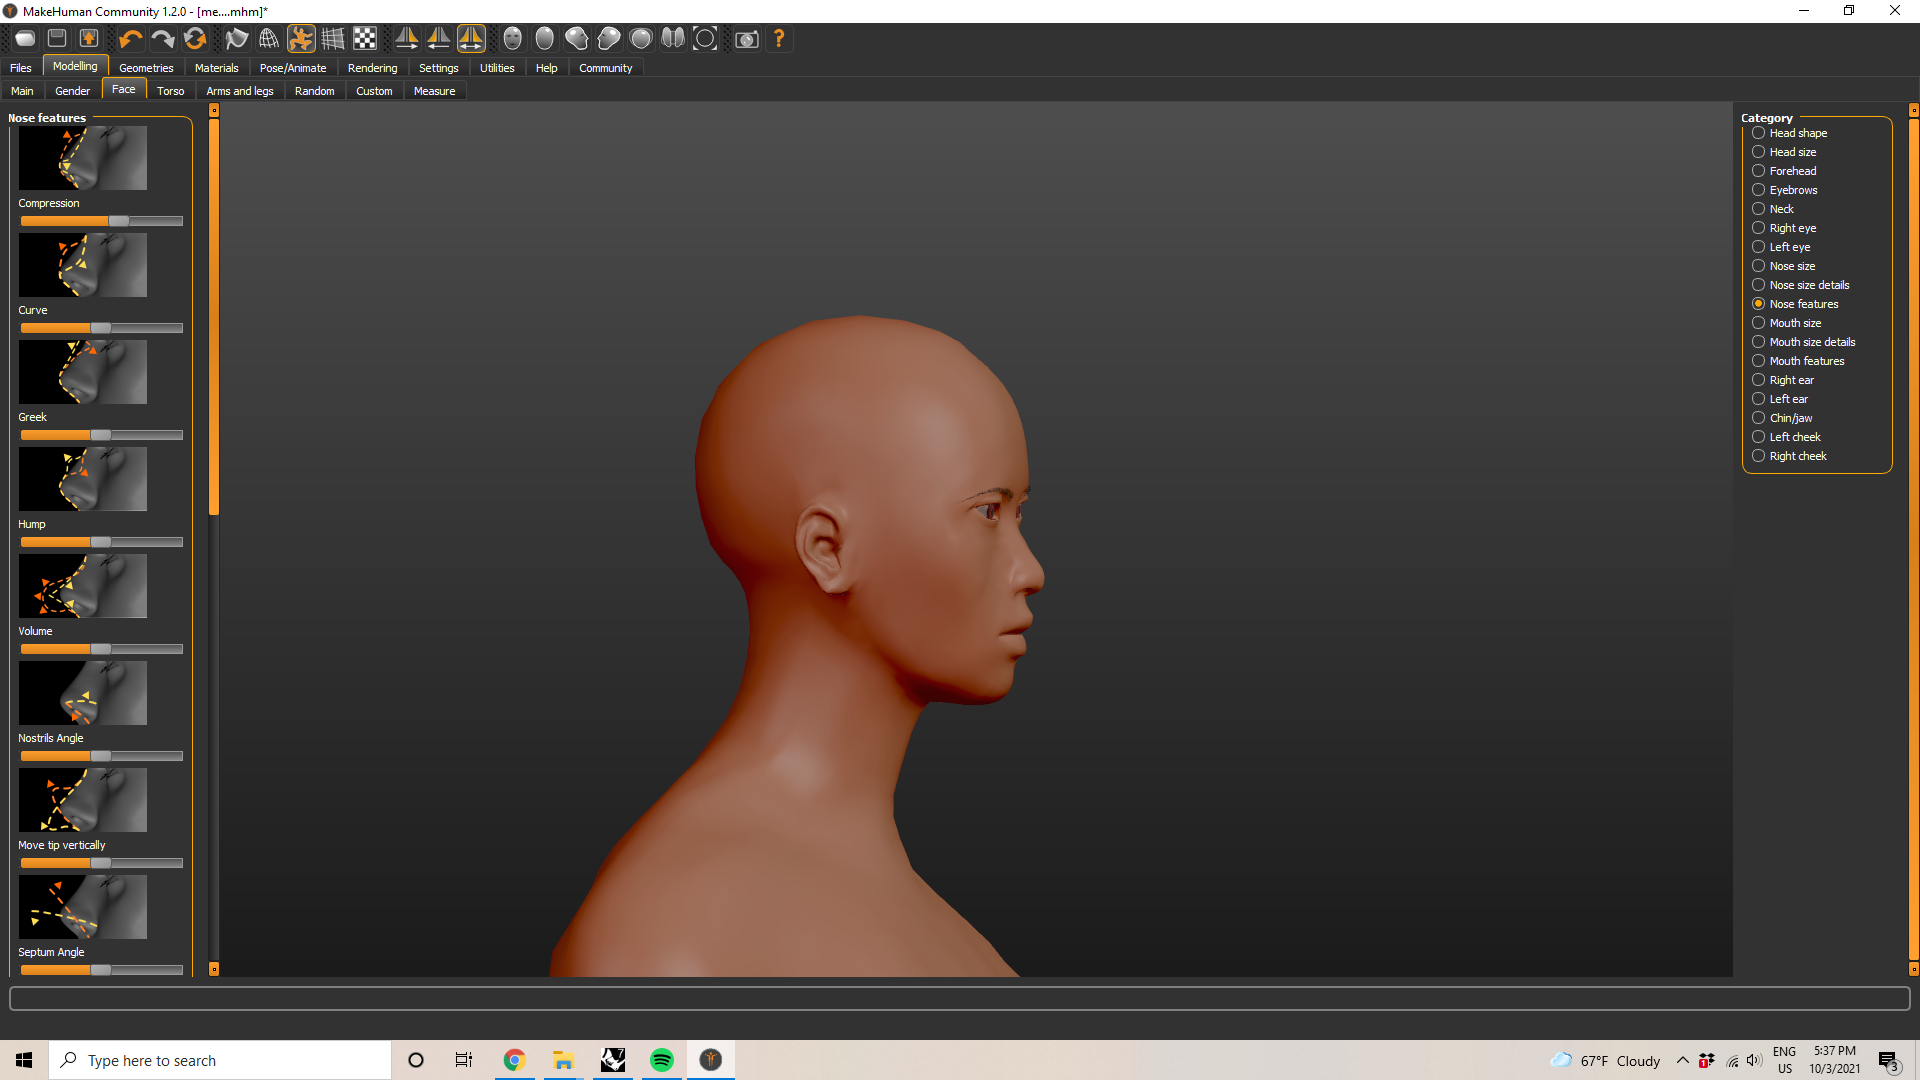
This can also be applied for very specific facial features such as nose hump size and nostril flares!
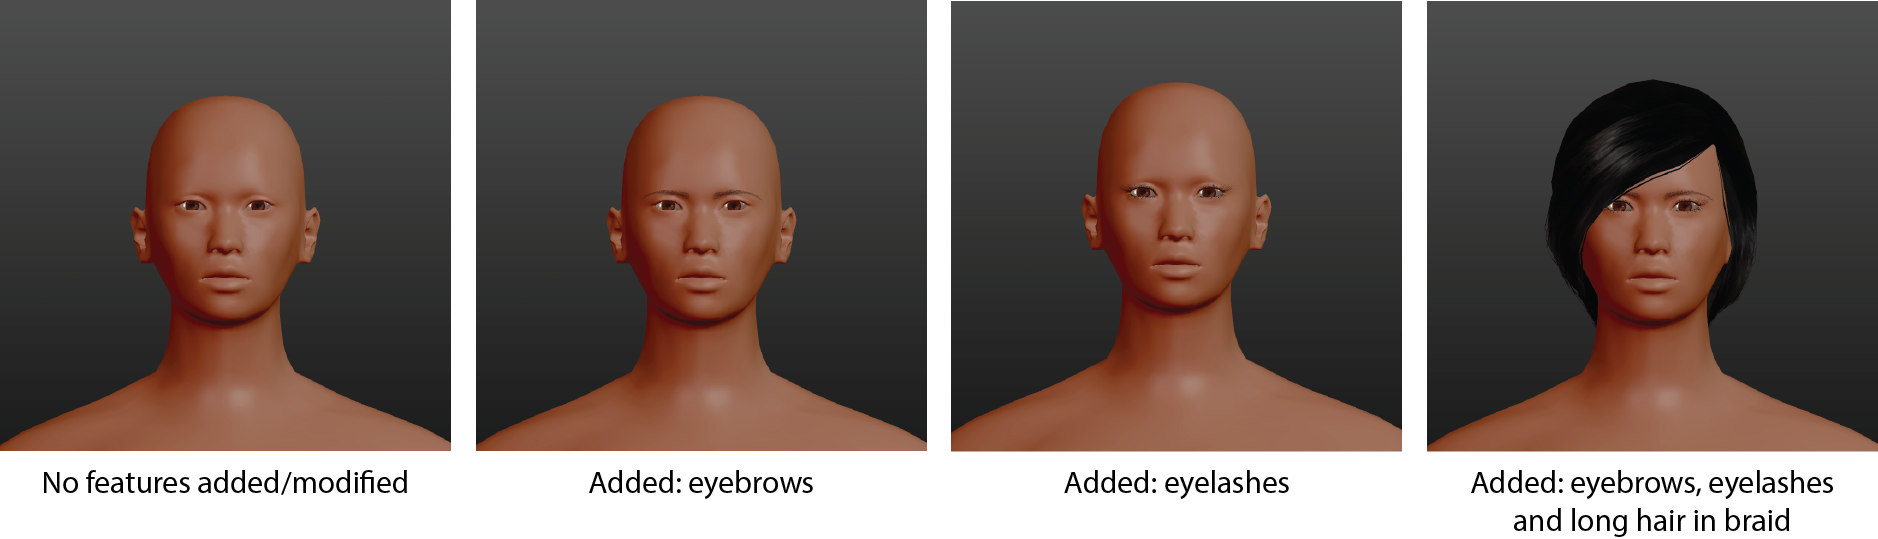
Not only am I able to change features, but I was also able to zoom in and add facial elements such as eyebrows, eyelashes, and hair.
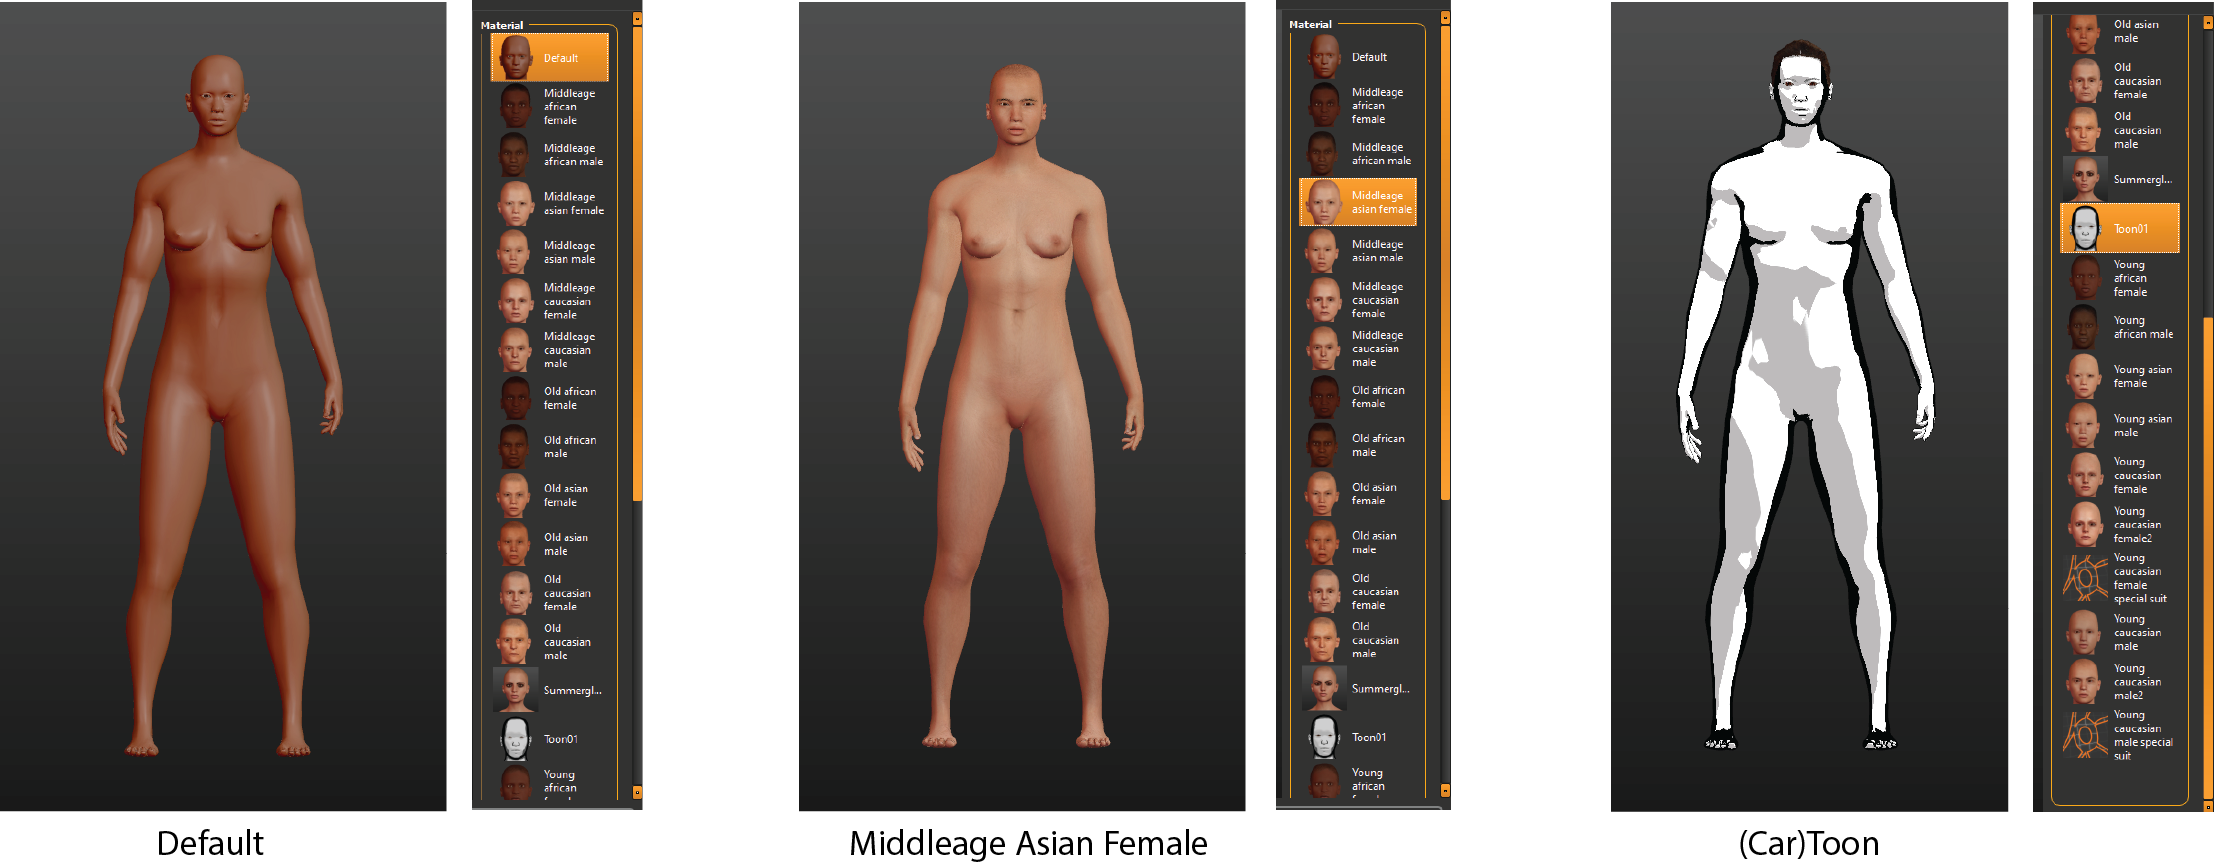
Another example of features I was able to change was the skin color by going to the "Materials" tab and then the "Skin/Materials" sub tab.

From the options on the right hand column, I was able to choose a skin tone roughly categorized by ethnicity and age...and cartoon 
Clothes, Poses and Backgrounds
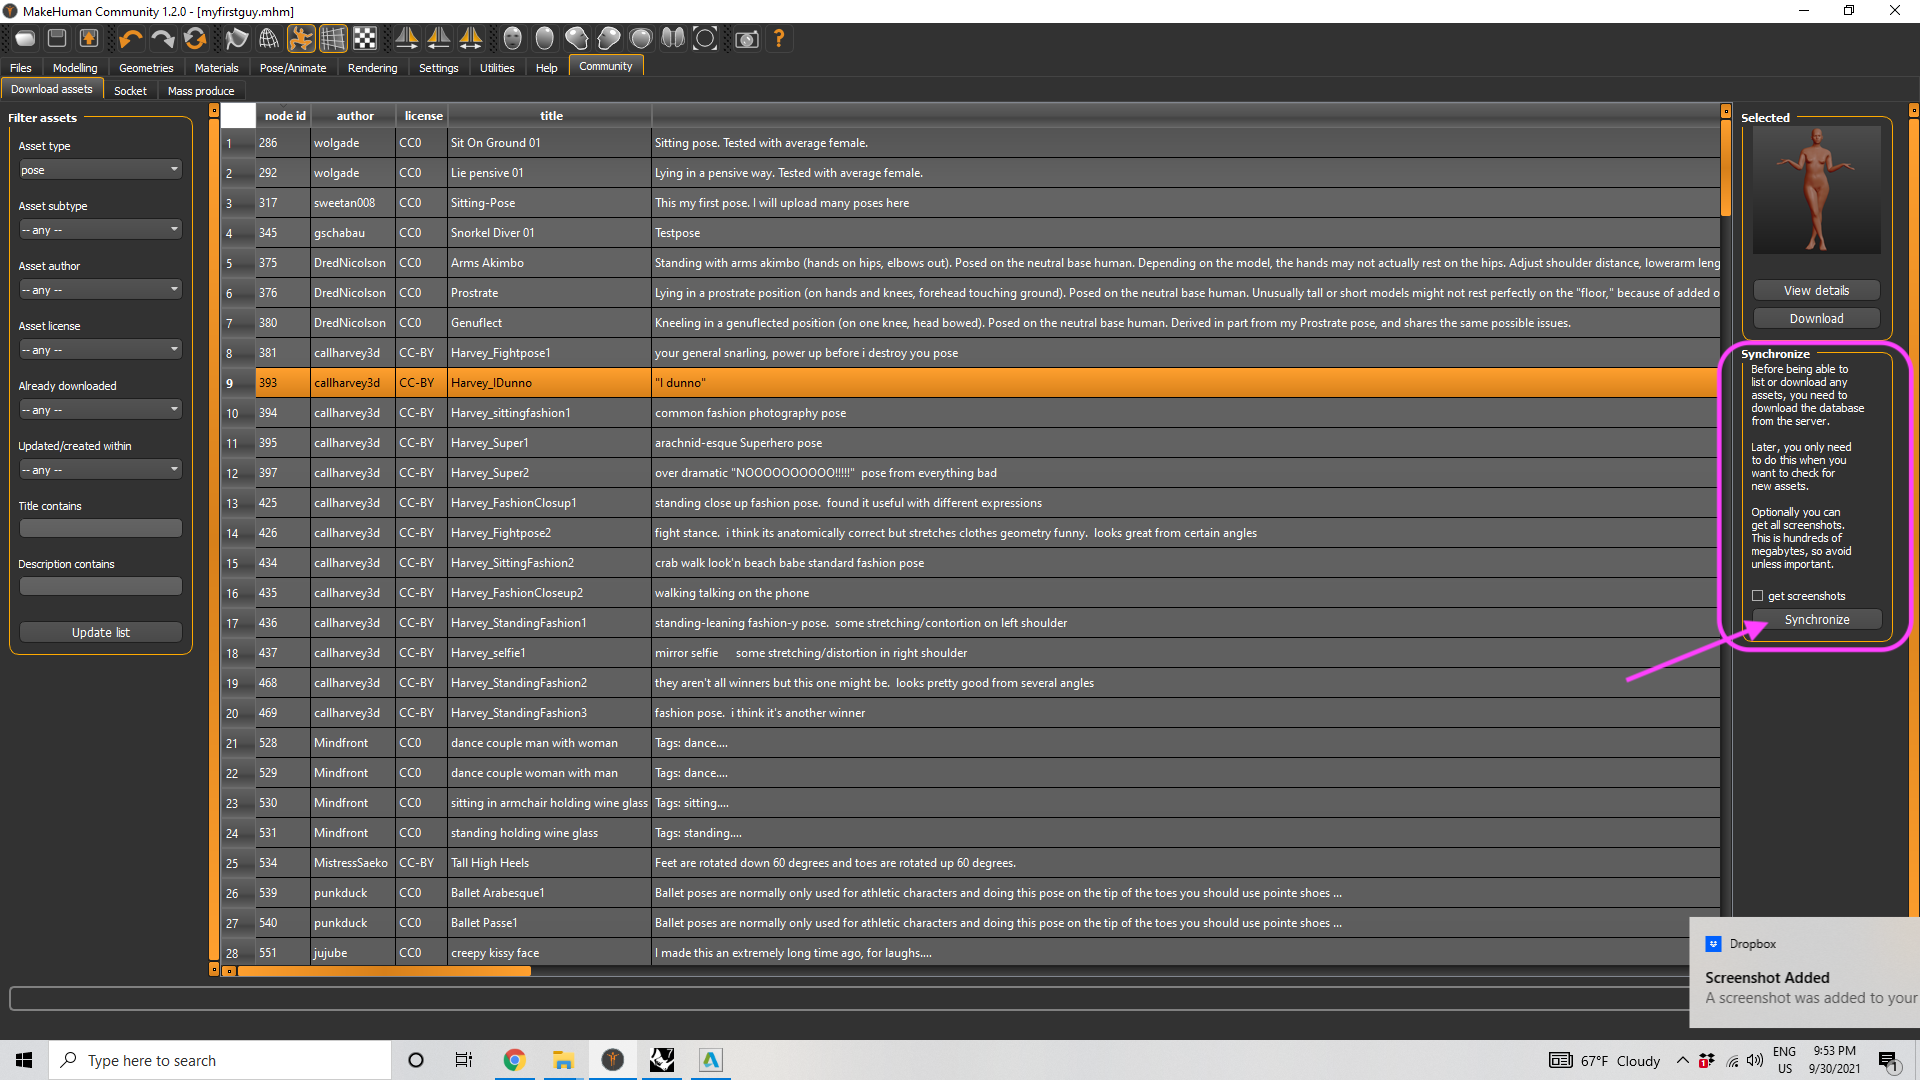
To add some more fun to my human, I'm able to add clothes/shoes/accessories, have him or her stand in a specific pose and with a custom background. A major utility that helped me with expand these selections was accessing the community library where other users of MakeHuman have shared their creations for use. To access this, I go to the "Community" tab and make sure I'm on the "Download assets" sub tab.

On the right hand column, I click "Synchronize". After a few minutes or so, I'm able to access a whole library of selections for the asset type I've chosen on the left-hand column (in this case below, it is set to 'Pose').
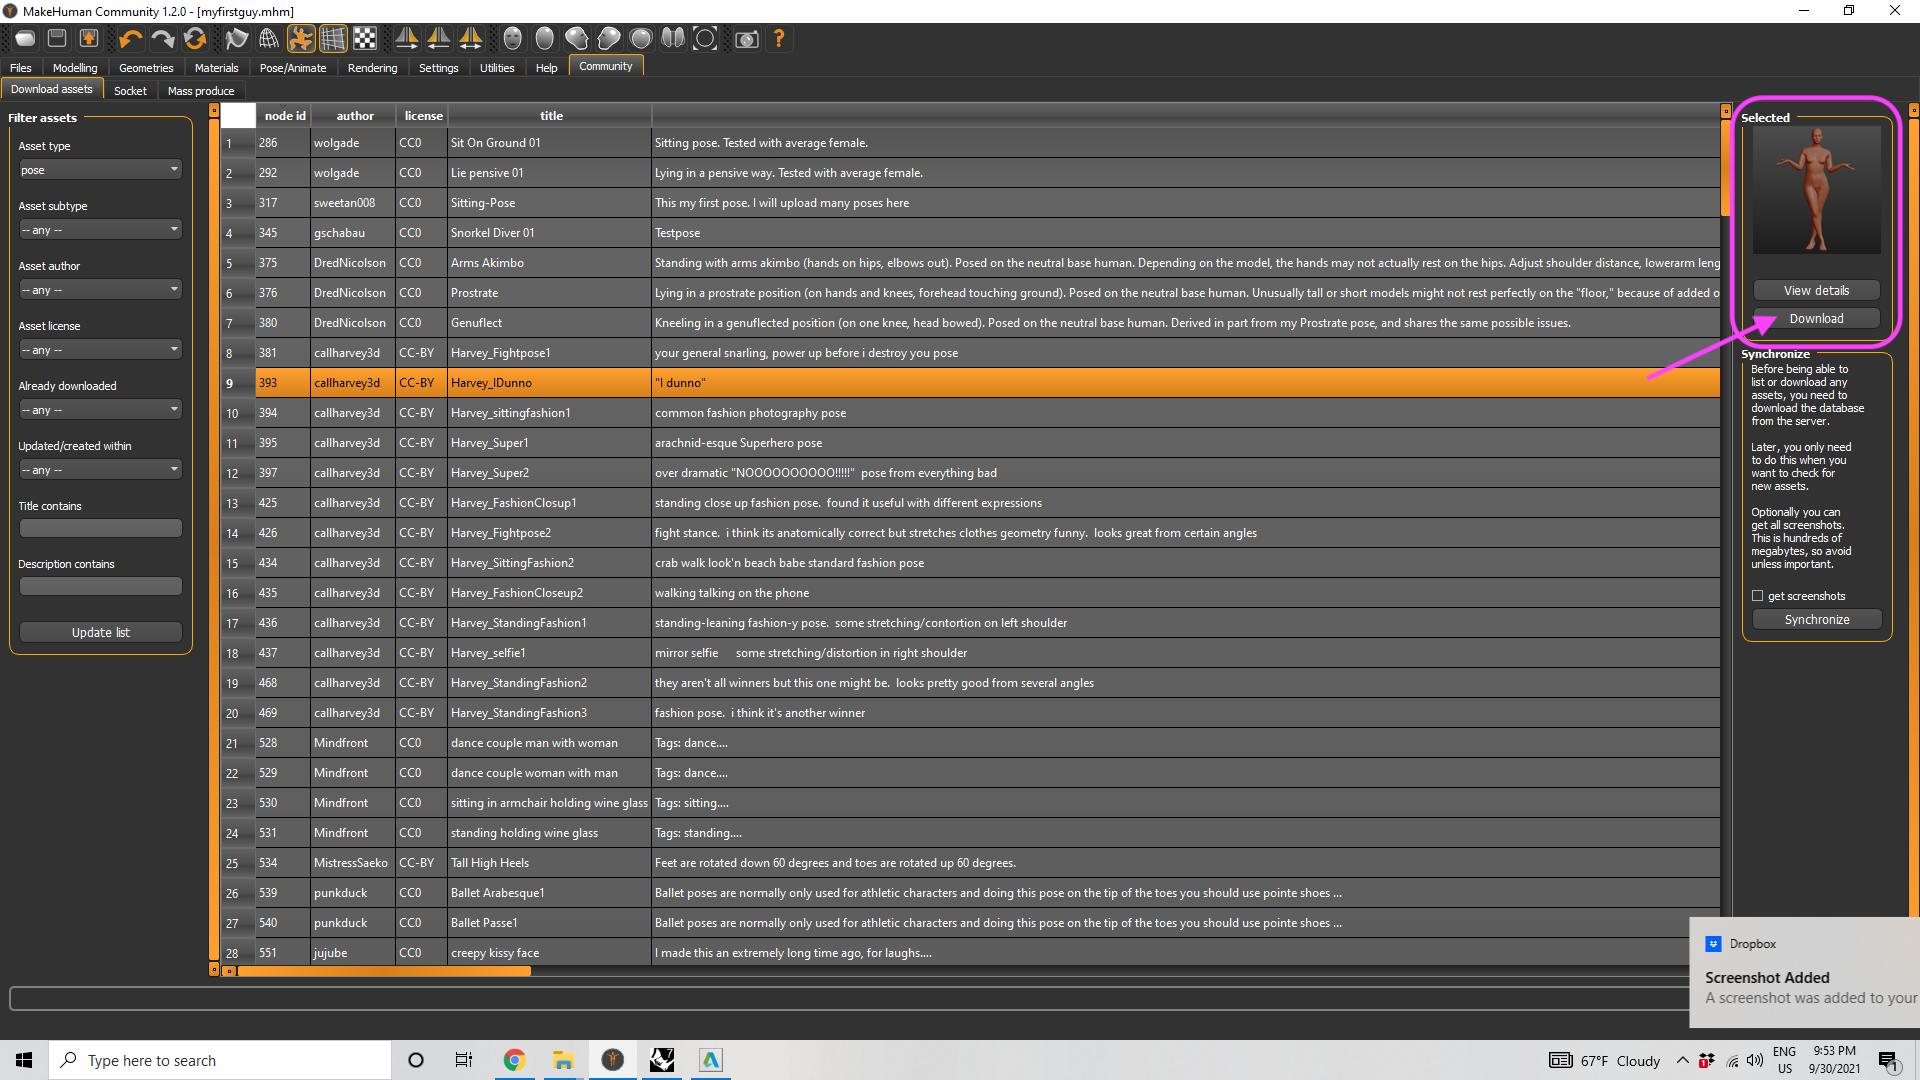
From this library, and thanks to its contributors, I'm able to choose an asset, preview it and click on "Download" on the top right to obtain it.
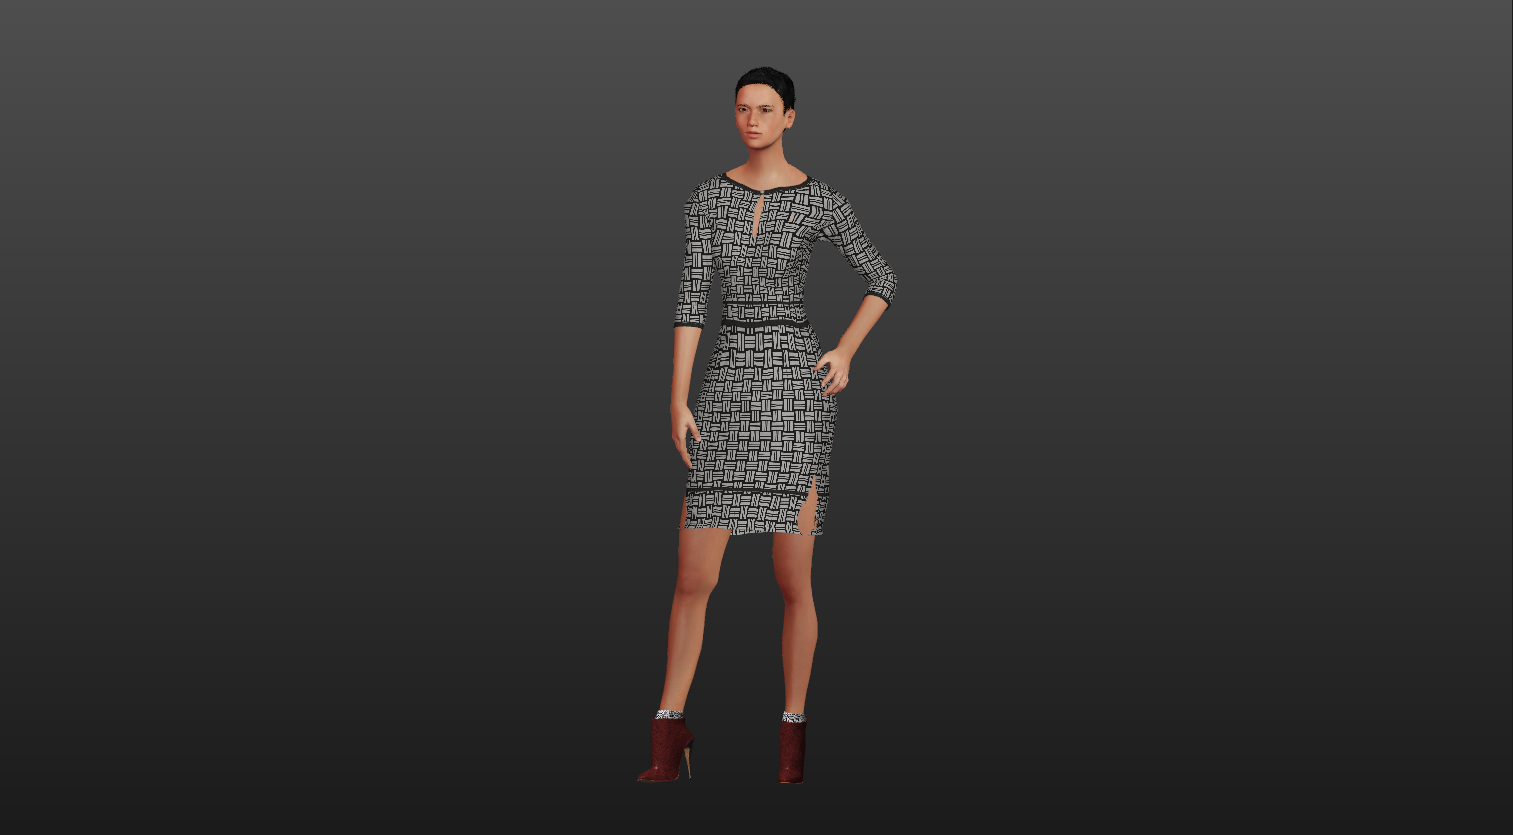
For example, finding a cute dress and shoes helped me make Betty Crystal here:
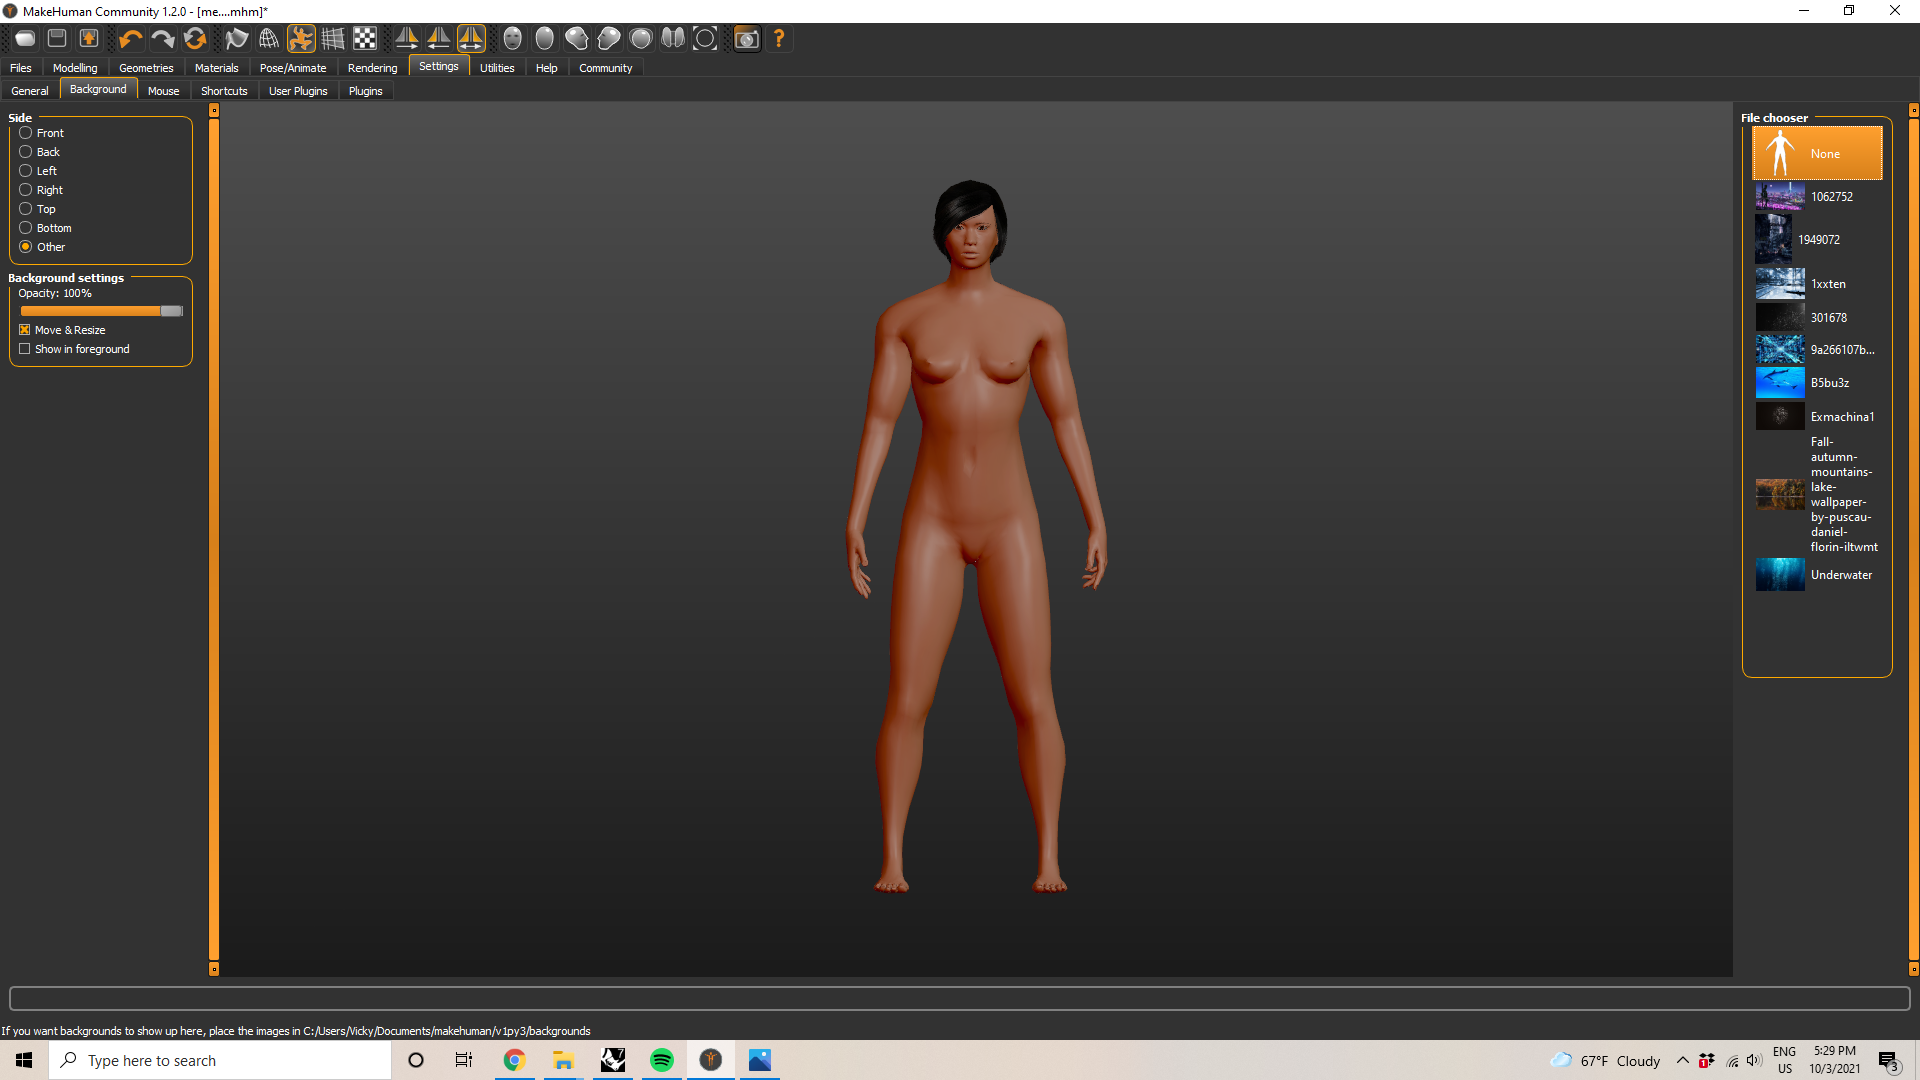
With respect to backgrounds, I had to have a .jpg/.jpeg/.png file in hand to be stored in my "/makehuman/v1py3/backgrounds" folder. To access these images in MakeHuman, I go to the "Settings" tab and then the "Backgrounds" sub tab.
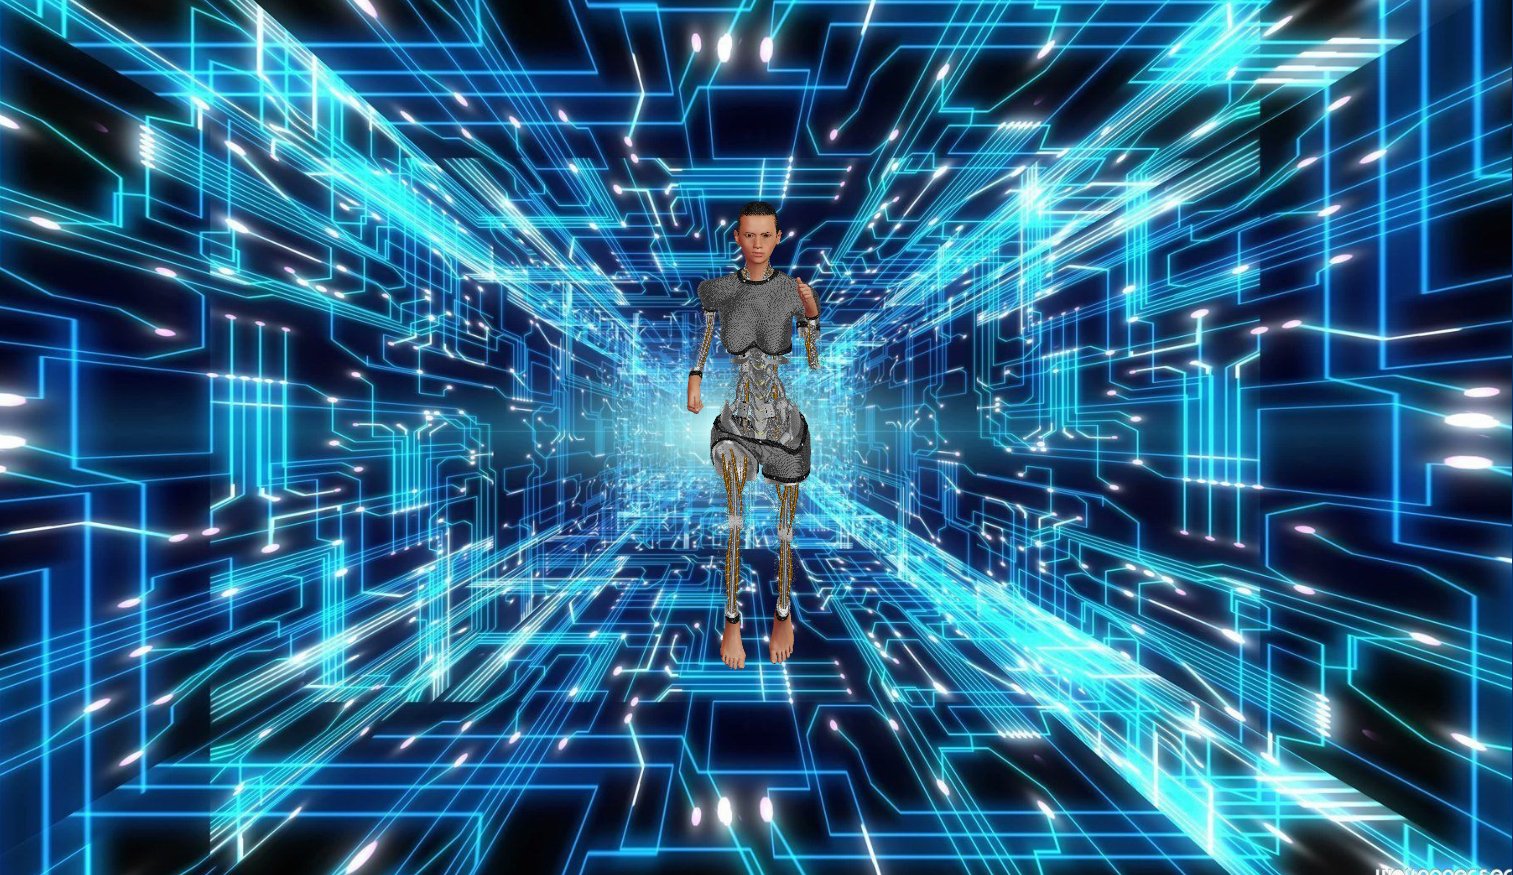
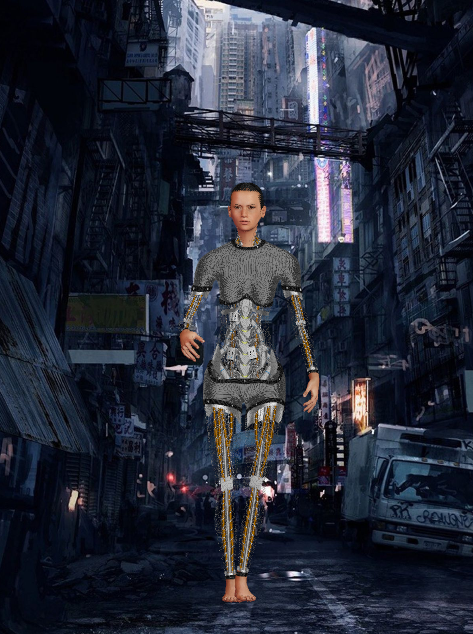
Examples
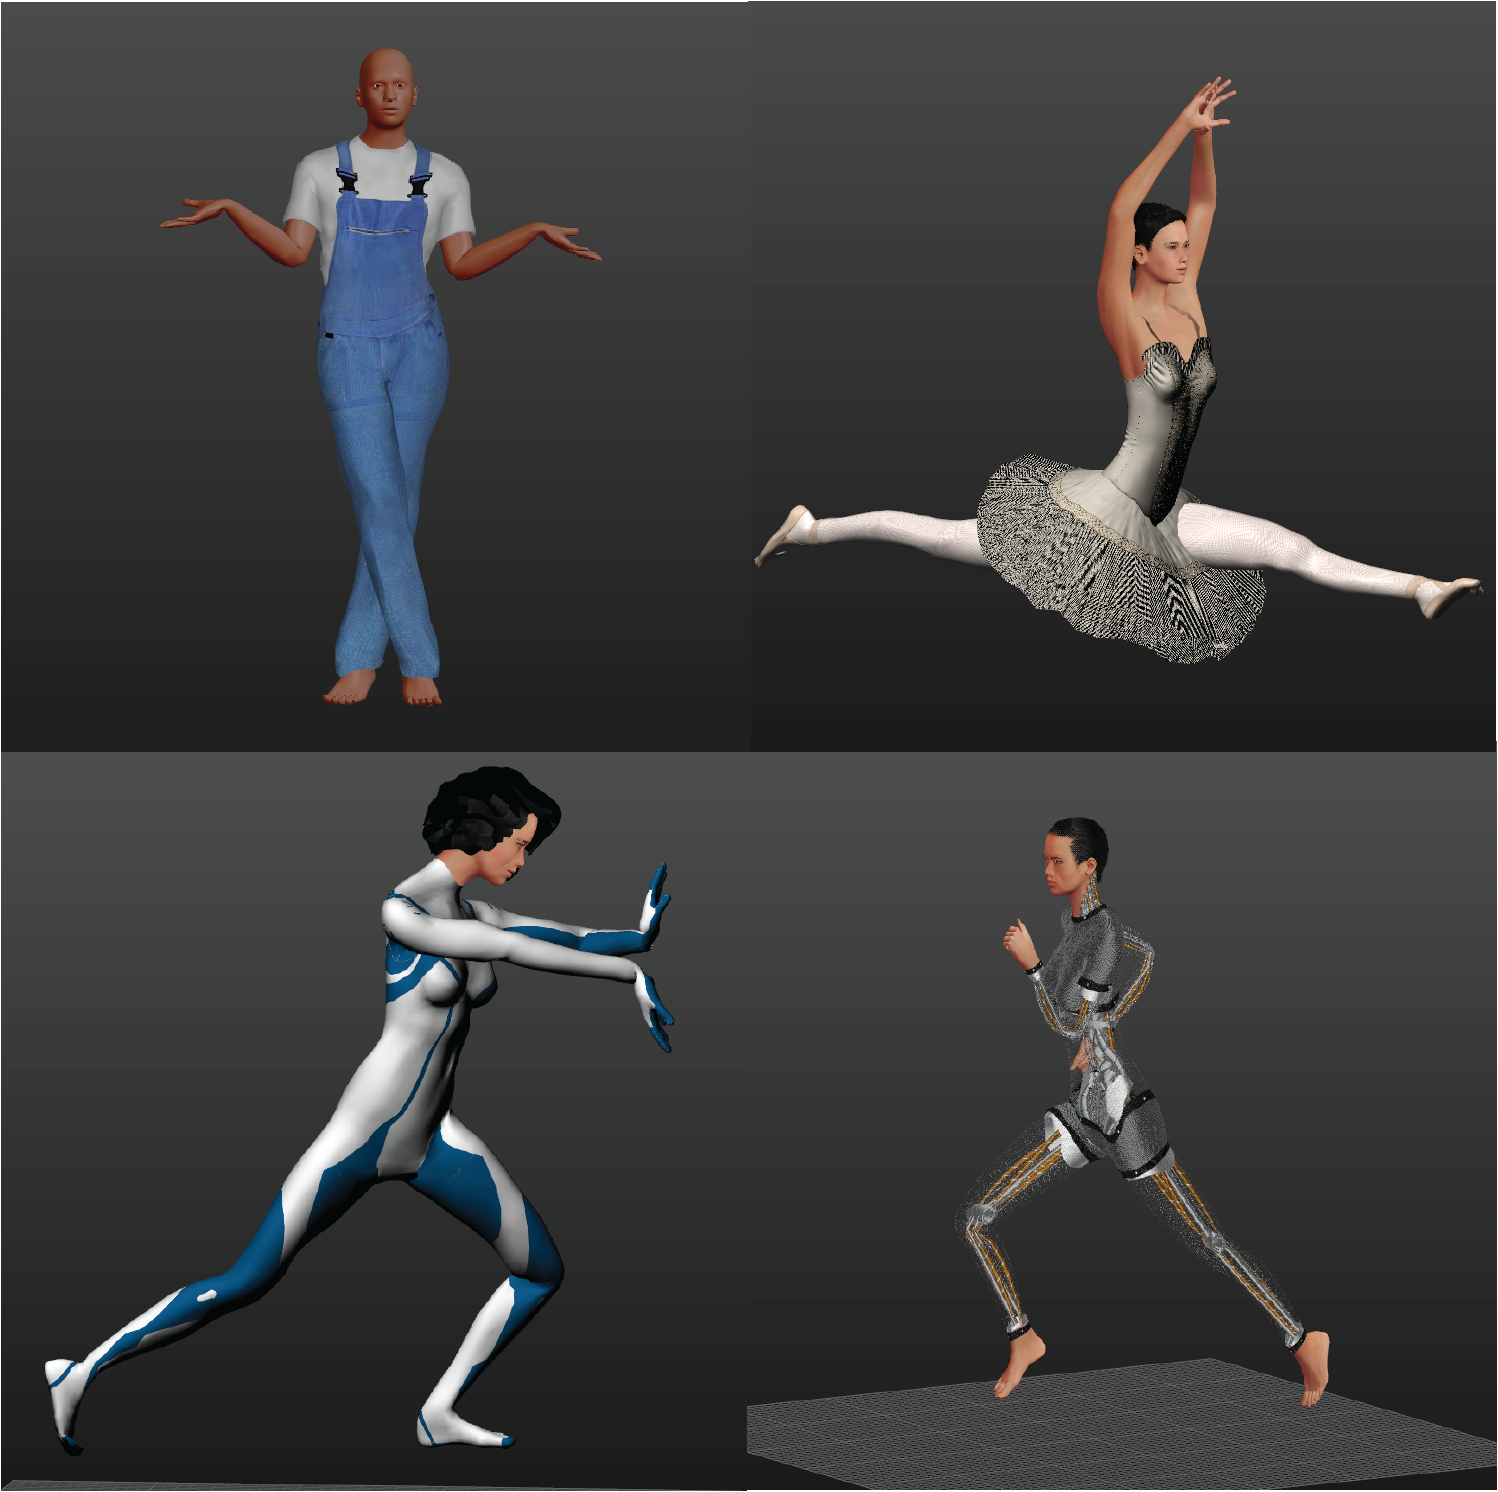
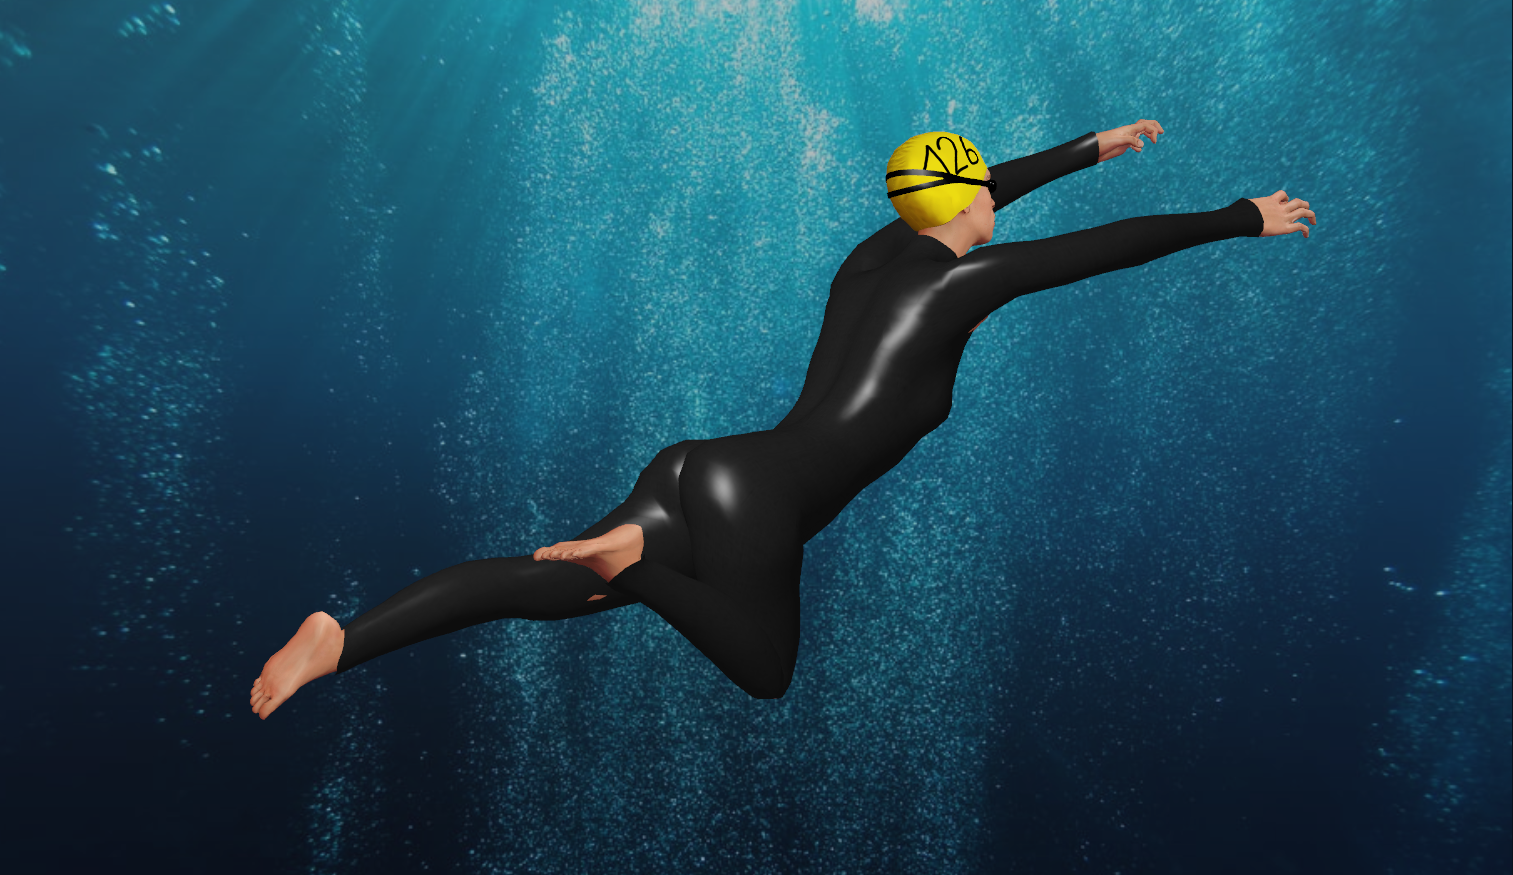
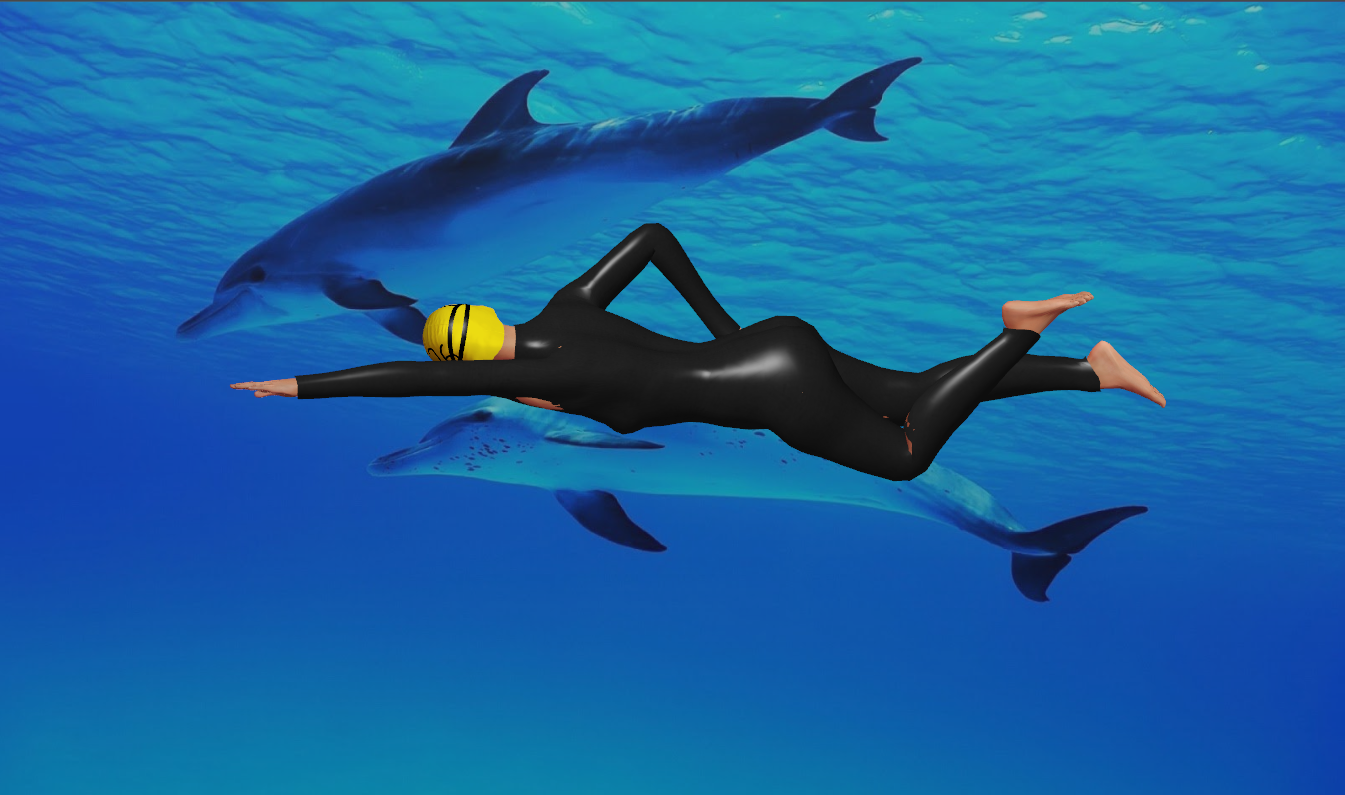
With all of these aspects put together, I was able to have a lot of fun putting together a variety of avatars/characters.
3D CAD (Rhino)
Due to limited time and access to a laser cutter, I scaled down my model to roughly 6x smaller than my real-life size (I am 5'6" or 167cm). In other words, rather than a 1:1 scale, it was more like 6:1.
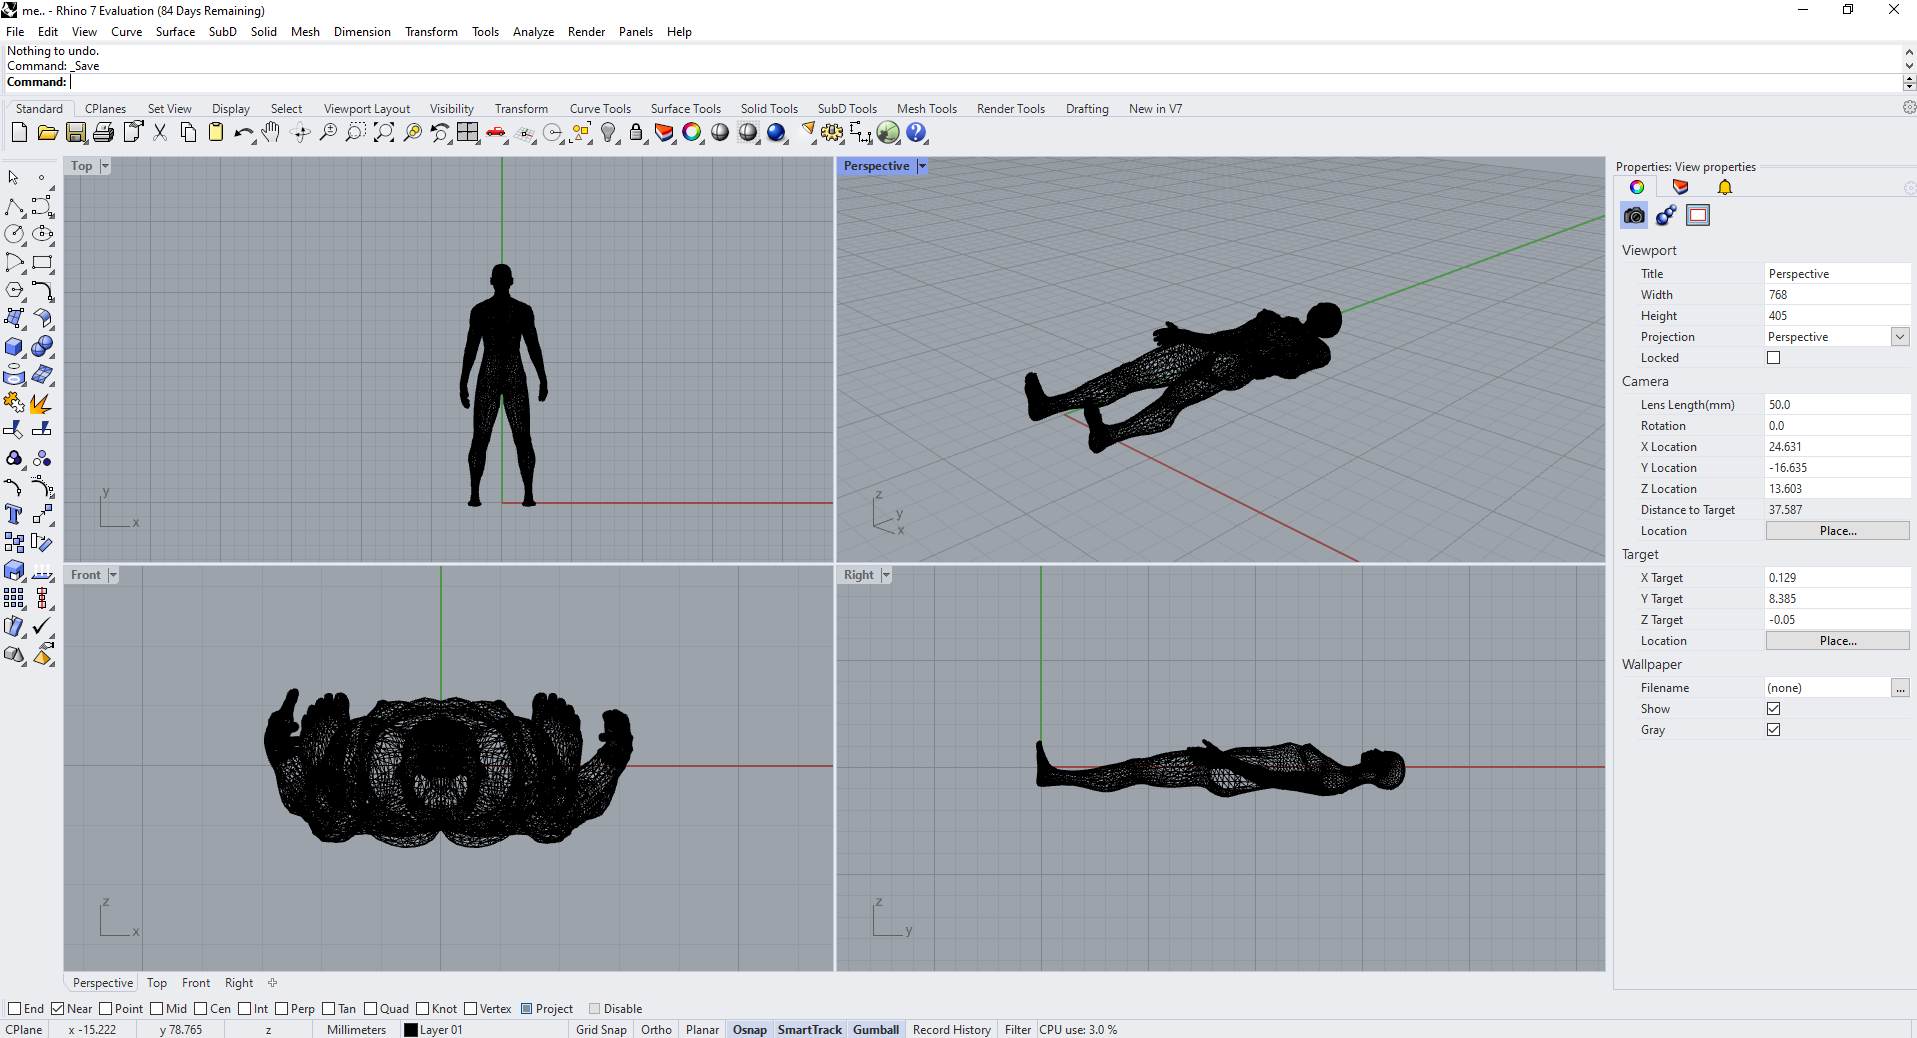
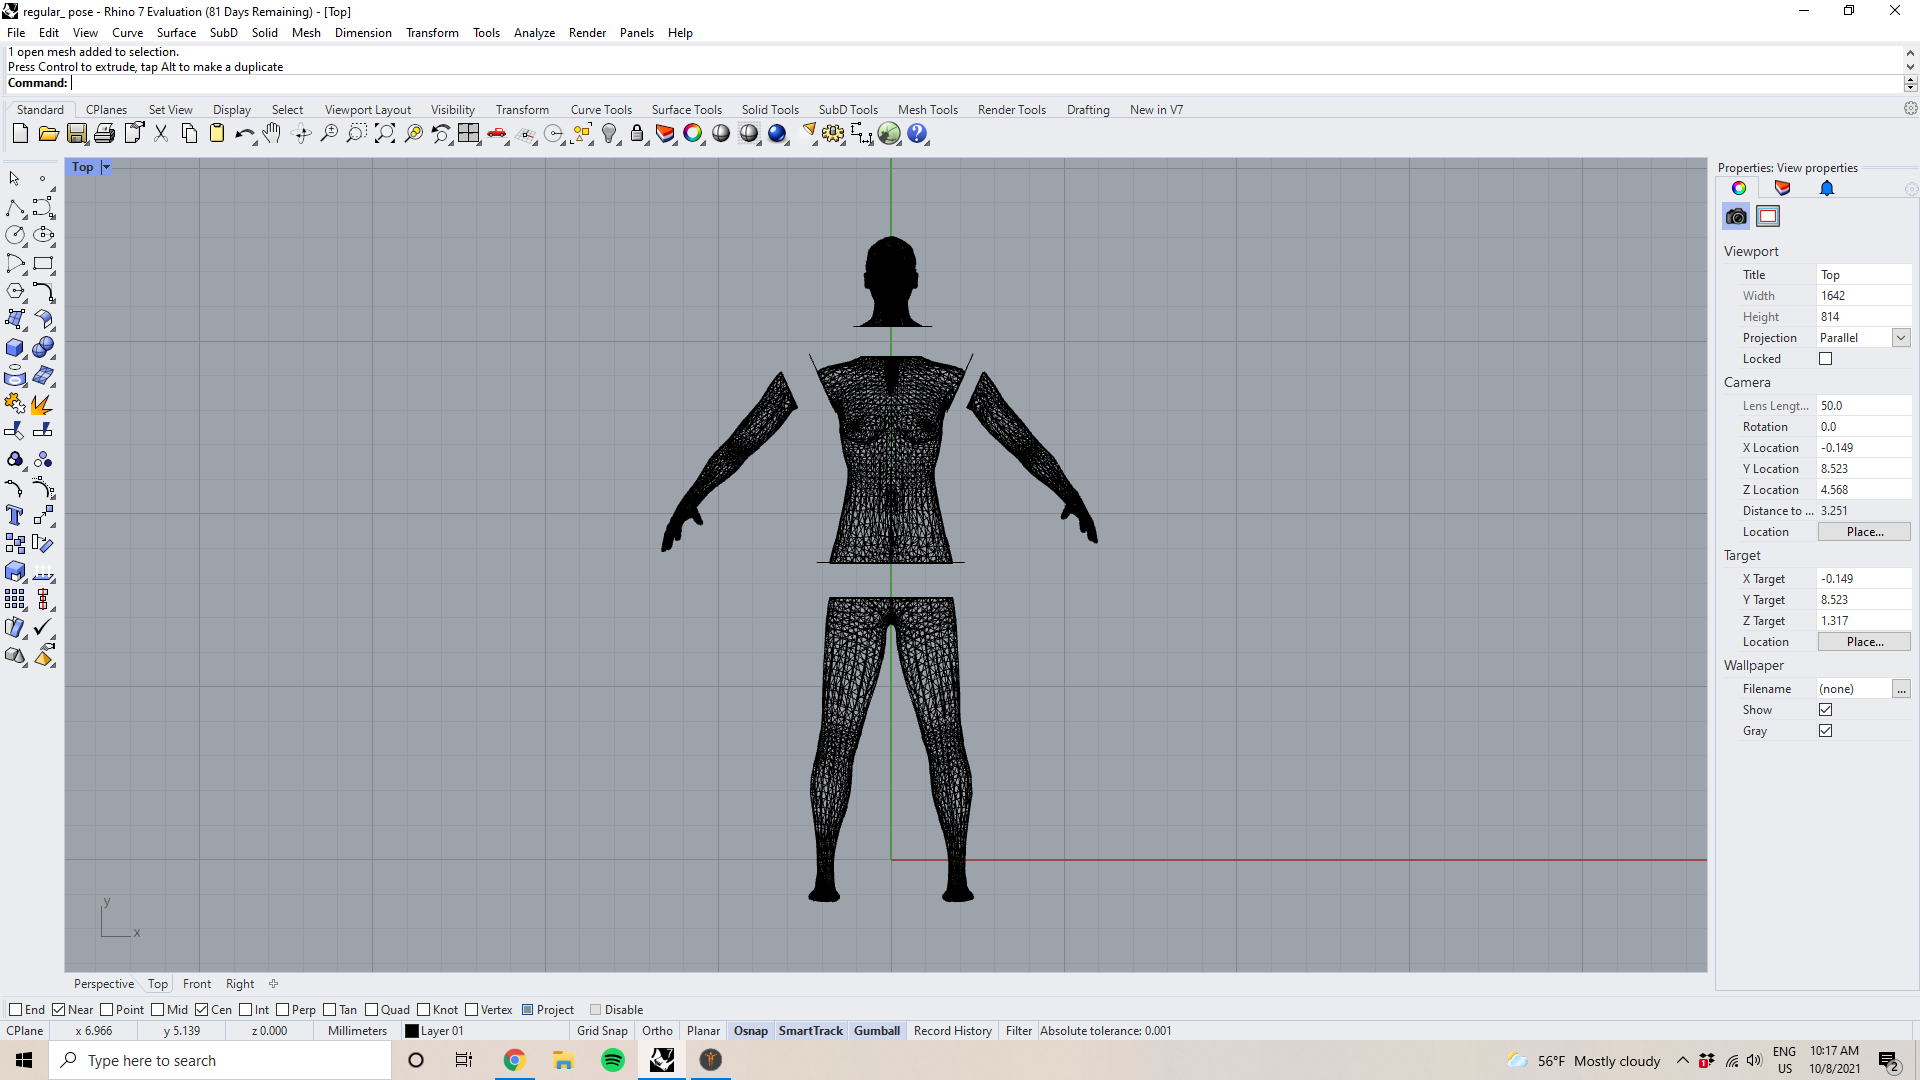
Before preparing files for laser cutting, I took the .stl or .obj files I created from MakeHuman and imported them to Rhino 3D.
Once imported, I can see my model from four different views/angles in Rhino: Front, Top, Right and Perspective, which I can rotate in three dimensions with my mouse.
For this week's assignment, I decided to prepare a torso for laser cutting and assembly.
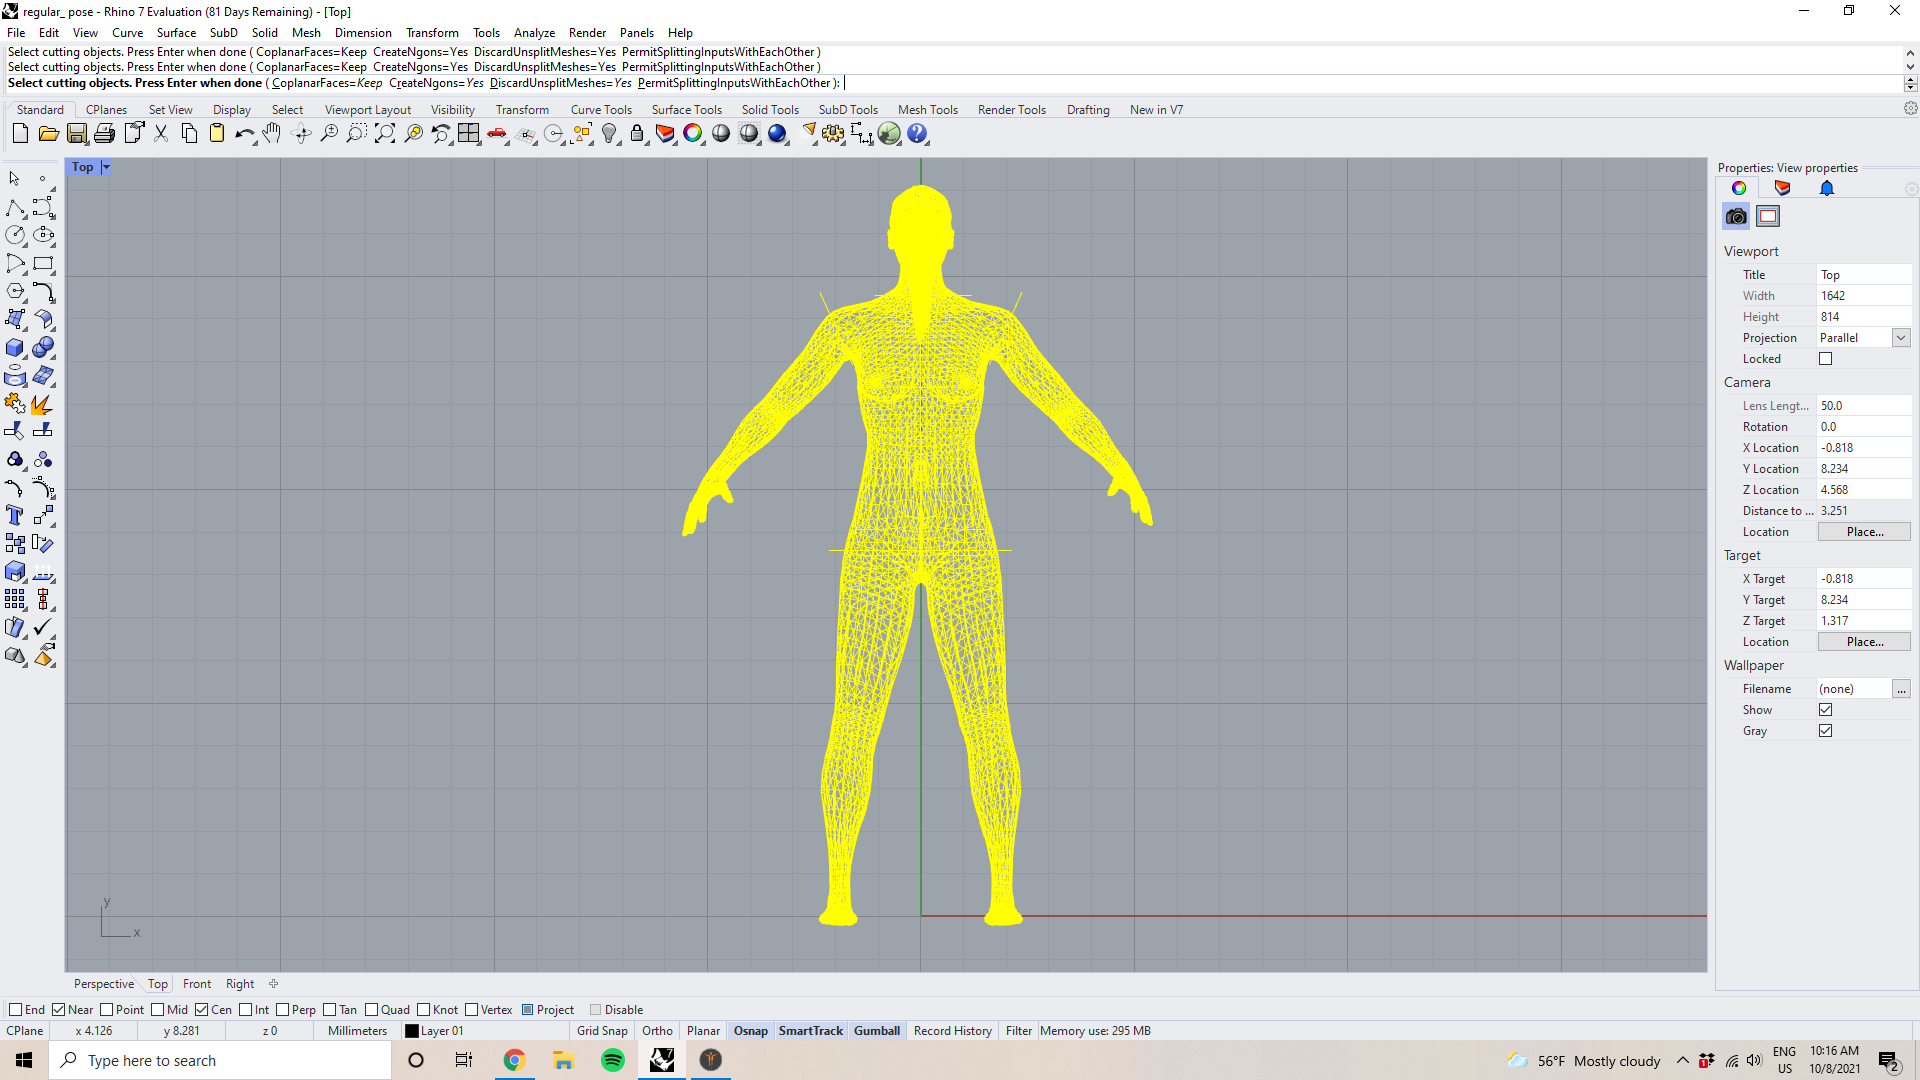
To do this, I used the Command tool "MeshSplit". Before typing that in the command line however, I drew a line using the polyline tool, which I click on from the left-hand column of icons, right across the body where I want my bust bottom to be

Then I go to the top and type "MeshSplit" in the Command bar. Following the commands from Rhino, I then select the object I'm cutting, which in this case is the body, by using my mouse and clicking and dragging a box around my figure. As a result, the mesh of the body turns yellow. Next I choose the object I'm using to "cut" this object, which in this case are my polylines. This should also make the lines turn yellow.
Once chosen, I hit Enter on my keyboard and it should successfully cut my body. I then highlight the bust I made and drag it away from my body to confirm (brutal!).
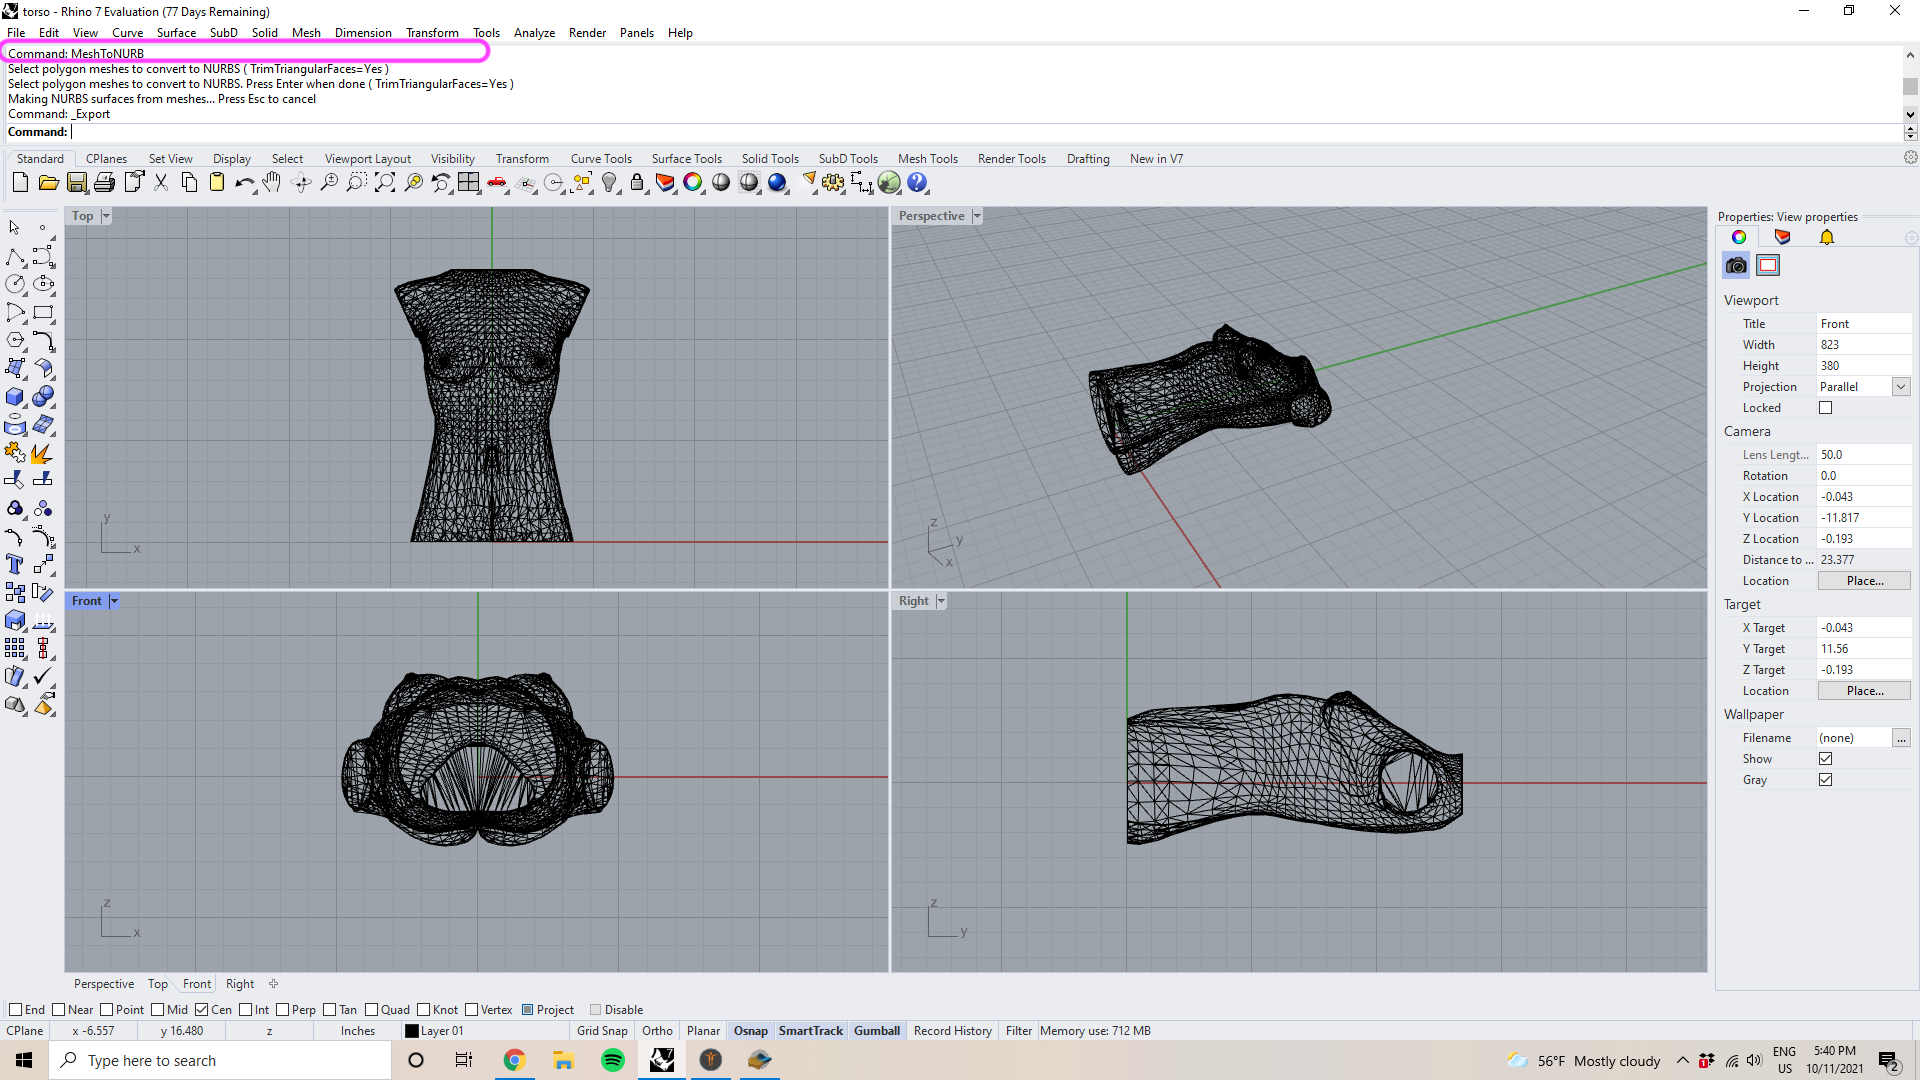
Before exporting, I turned the mesh into a solid by typing "MeshtoNURB" in the Command line. This will allow Slicer to identify the file as a solid object as opposed to a hollow one.
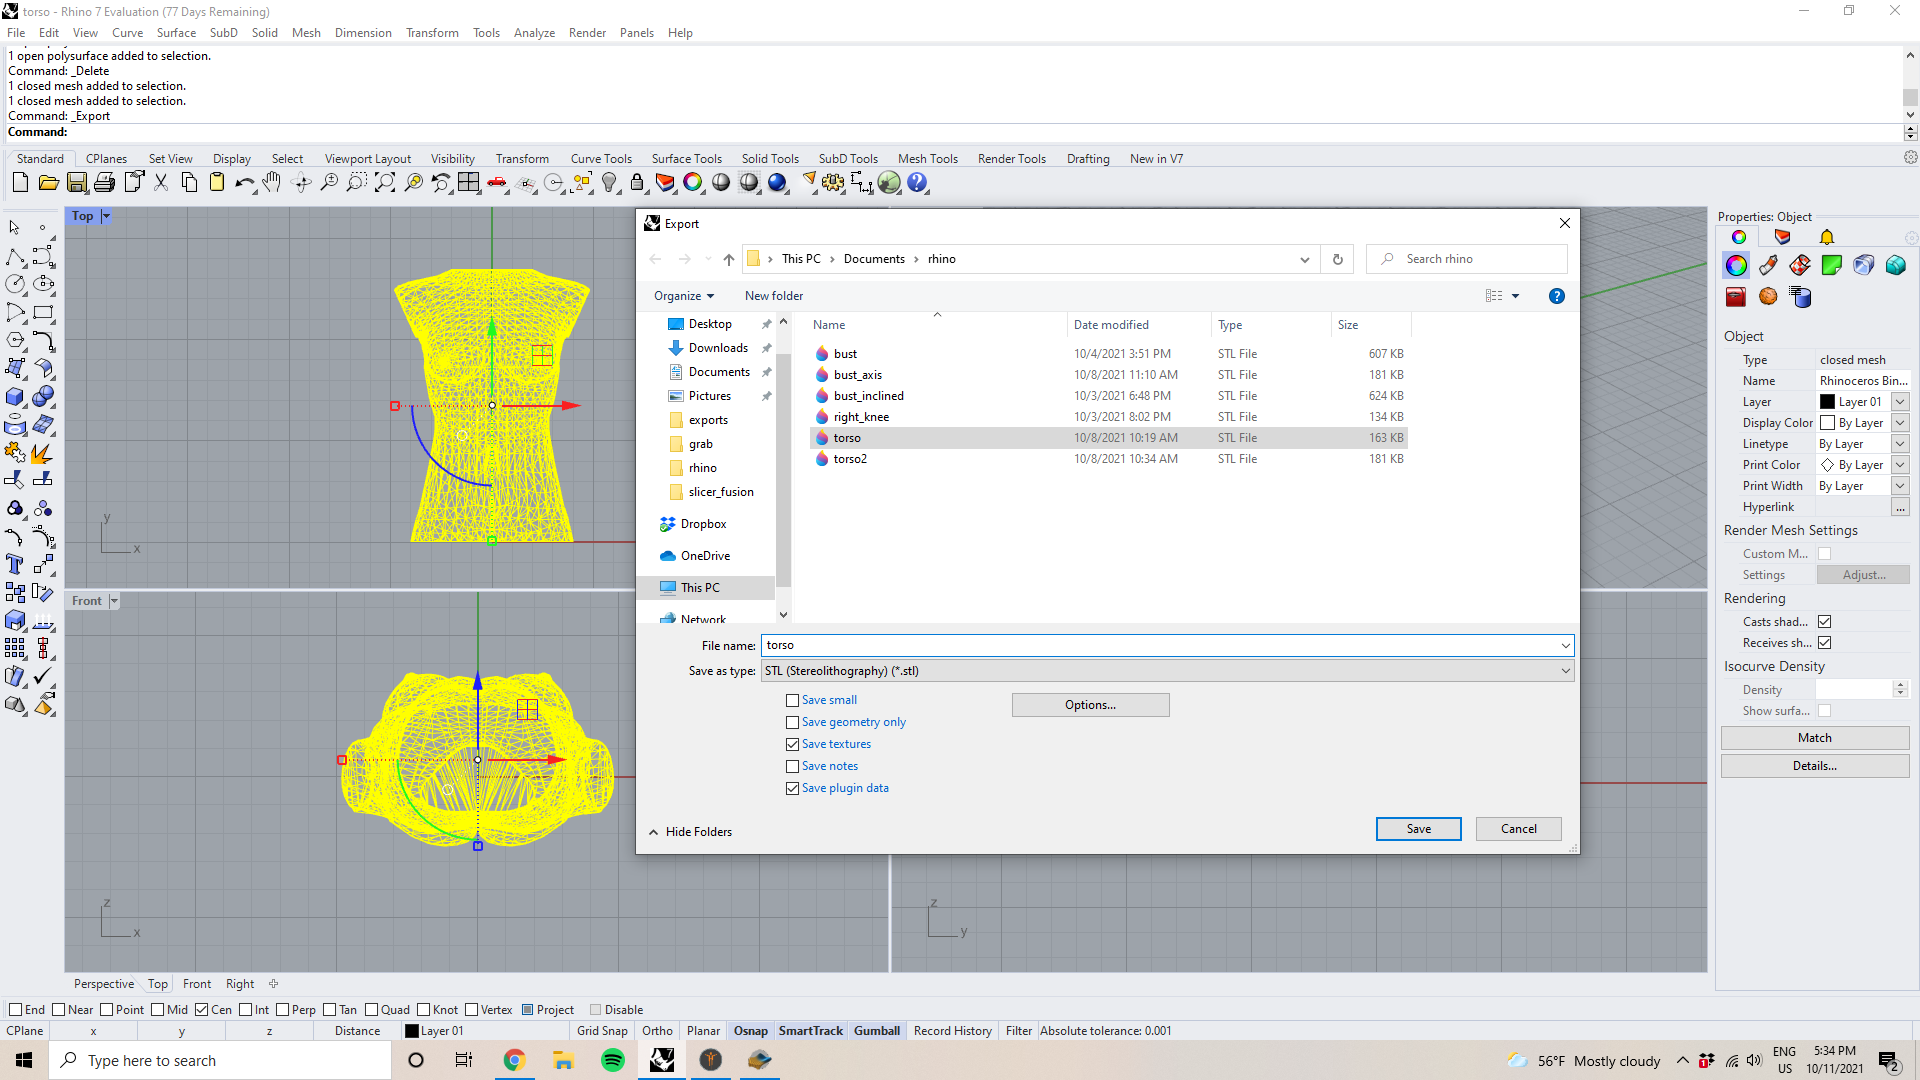
While keeping the torso piece highlighted, I go to the top left corner and hit "File > Export Selected..." and then export the bust as an .stl or *.3dm file to be used in Slicer Fusion 360. This creates a separate file for the torso specifically.
Laser Cutting Prep (Slicer)
To build our torso mannequin, I used a laser cutter to produce thin slices derived from my digital 3D model that, when assembled, will collectively become a physical version of my model. The program I used to virtually produce these slices is called Slicer for Fusion 360.
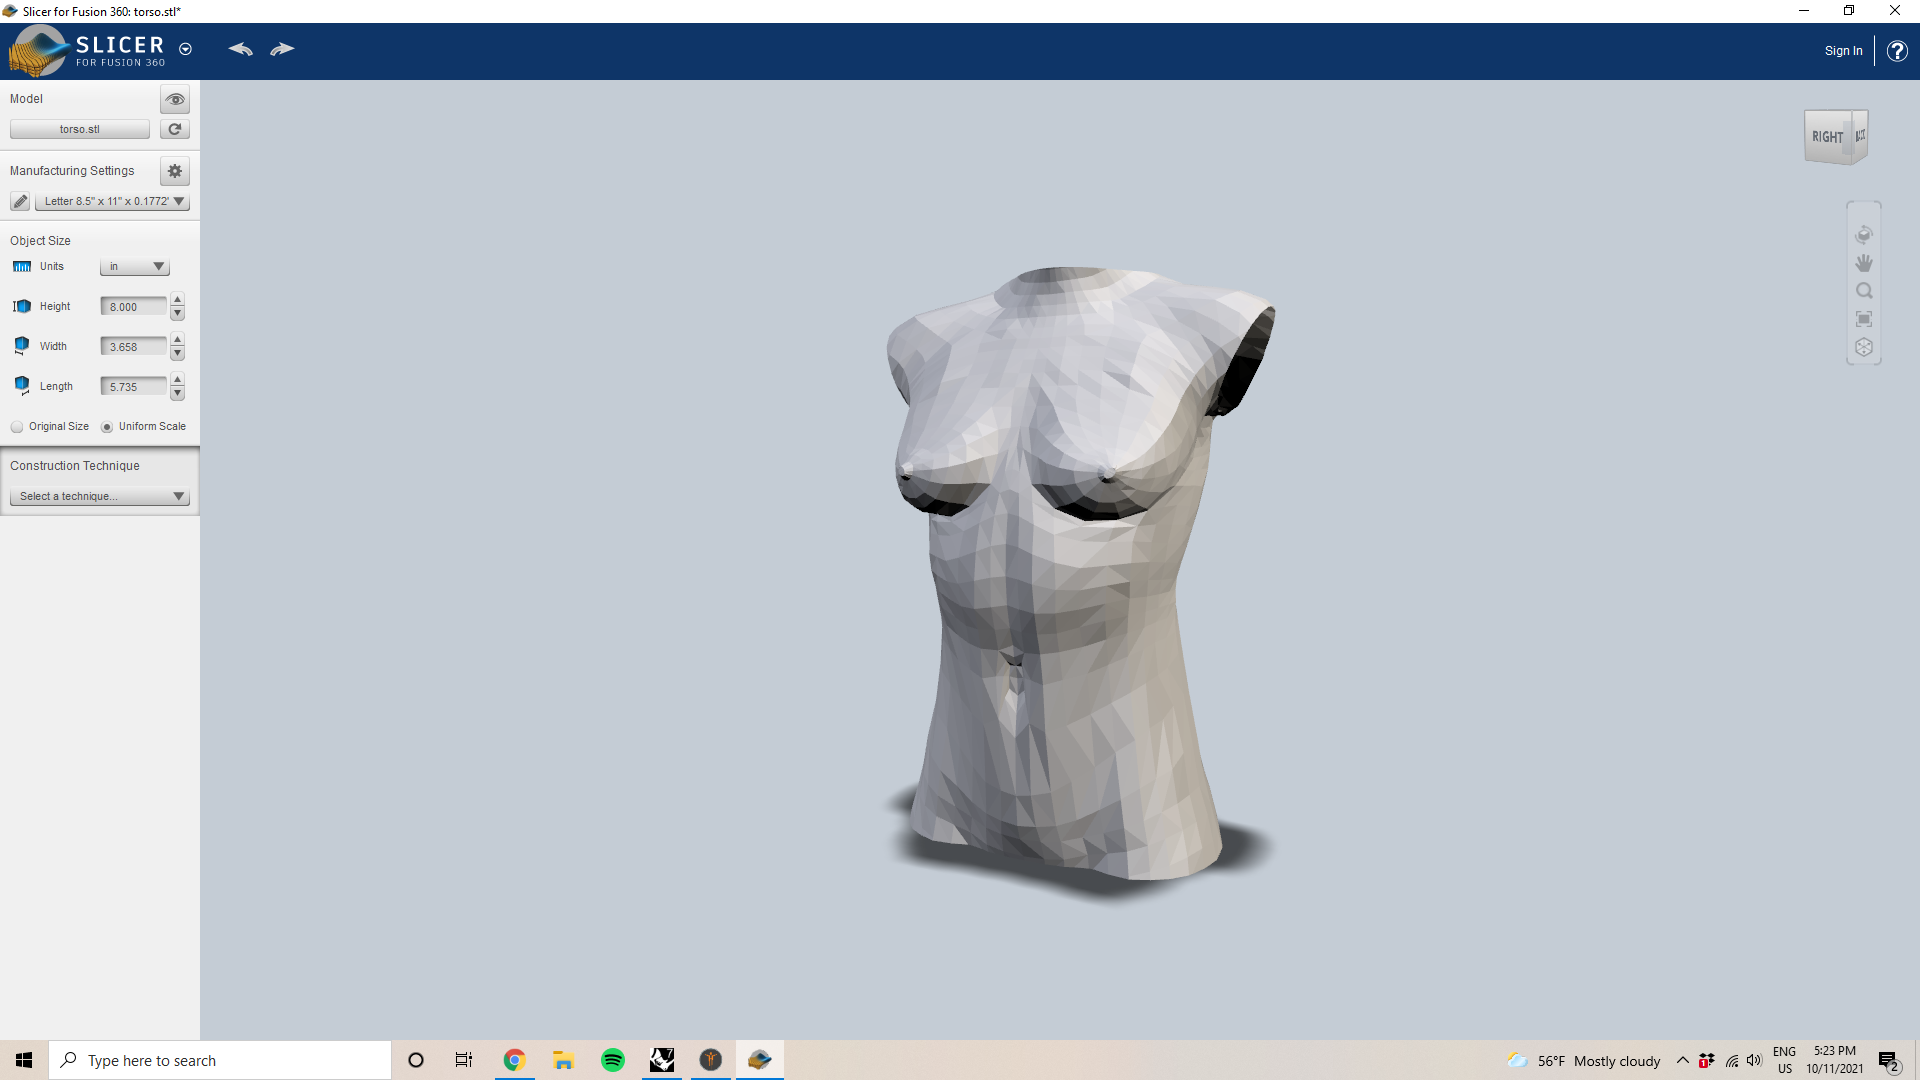
First, I import the .stl file created from Rhino (in this case my file is called "torso.stl").
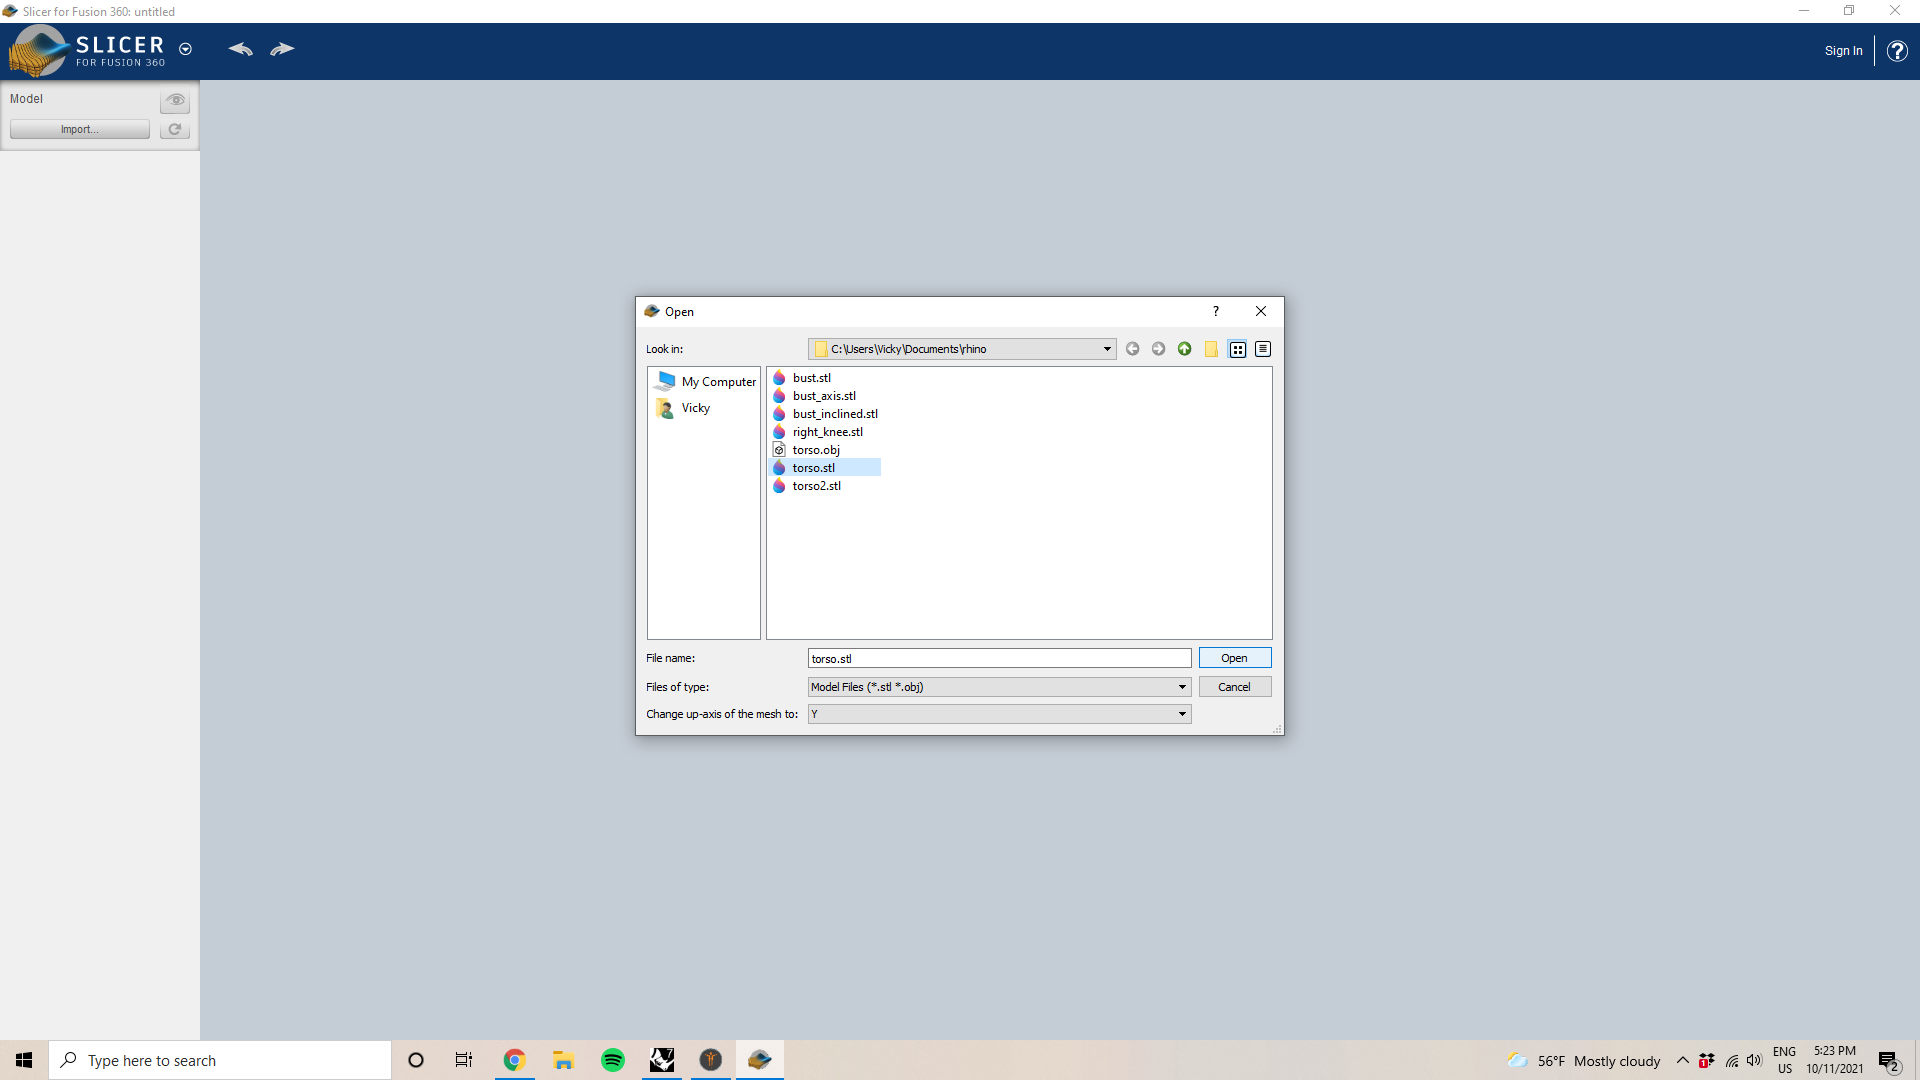
This automatically shows my torso figure as a 3D model.
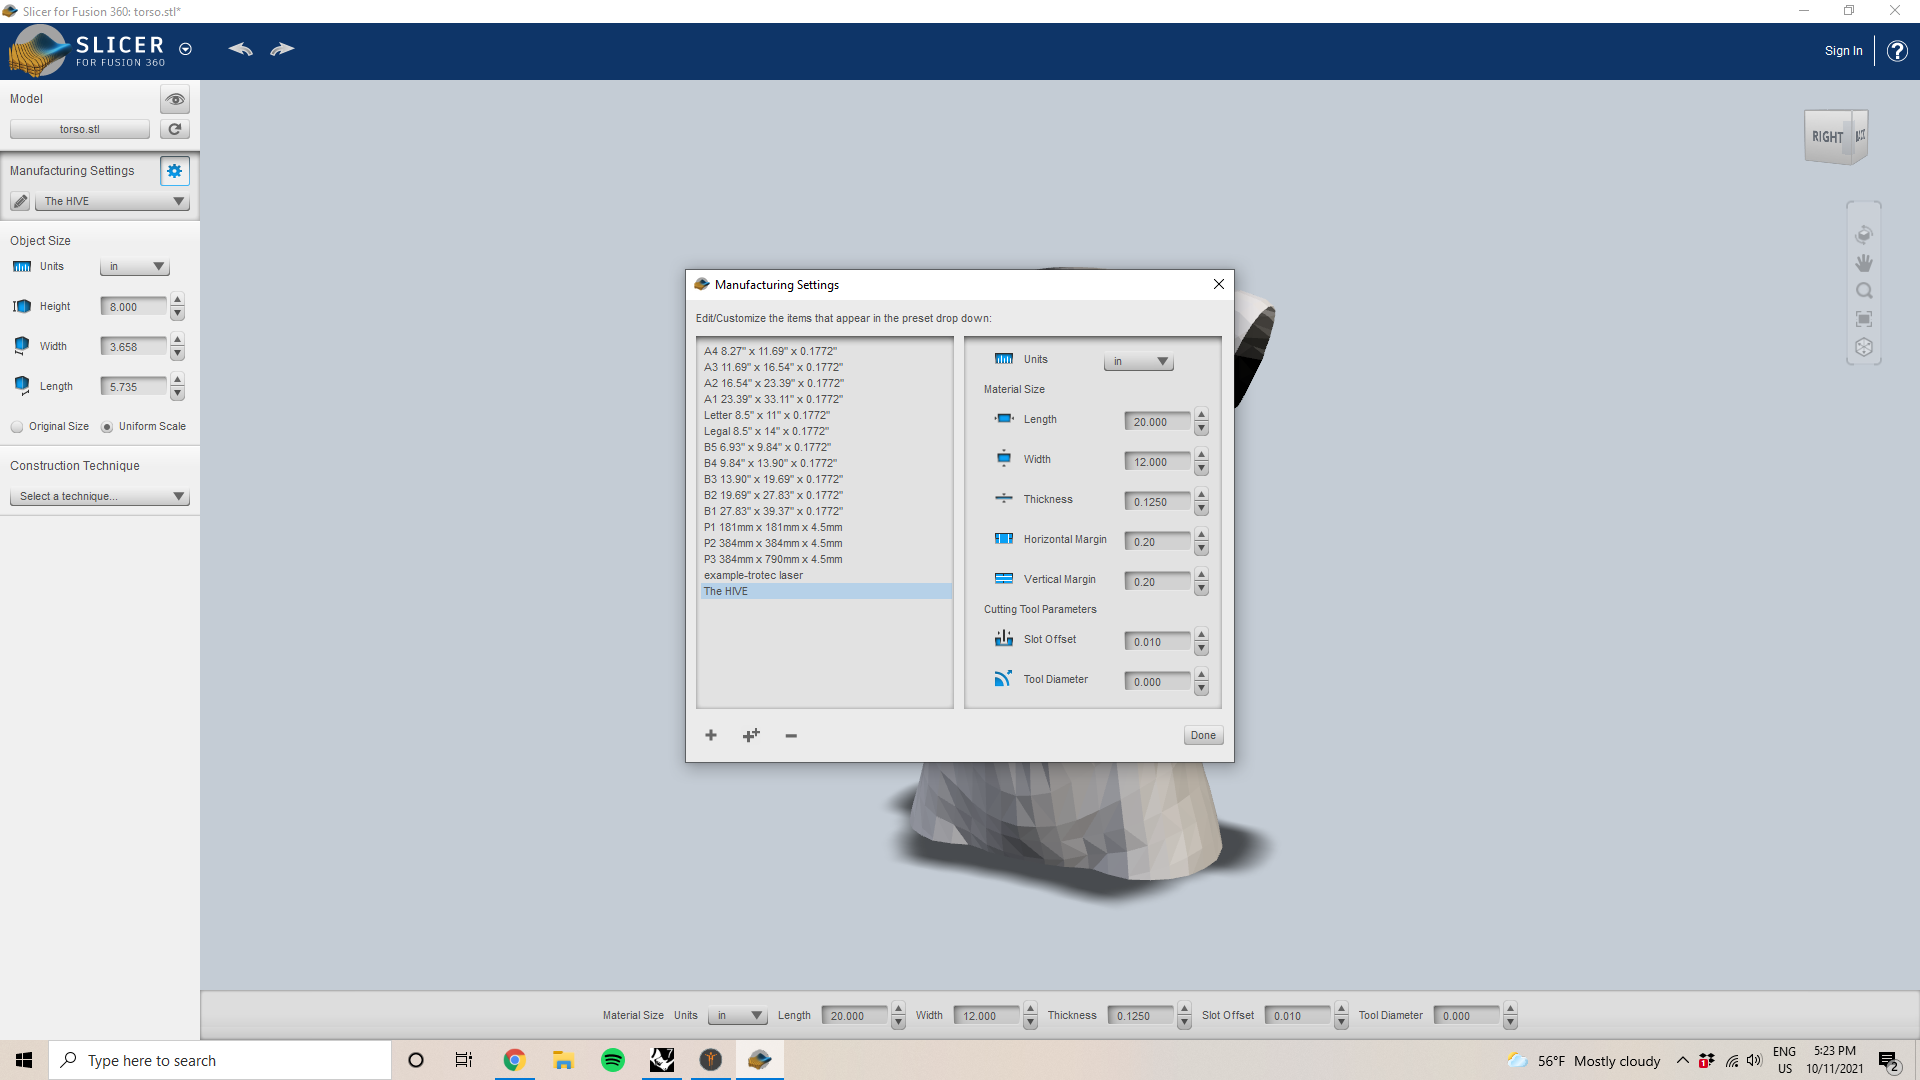
Then I adjust the manufacturing settings on the left column according to the bed size of the laser cutter I'll be using (see next Section for laser cutter settings).
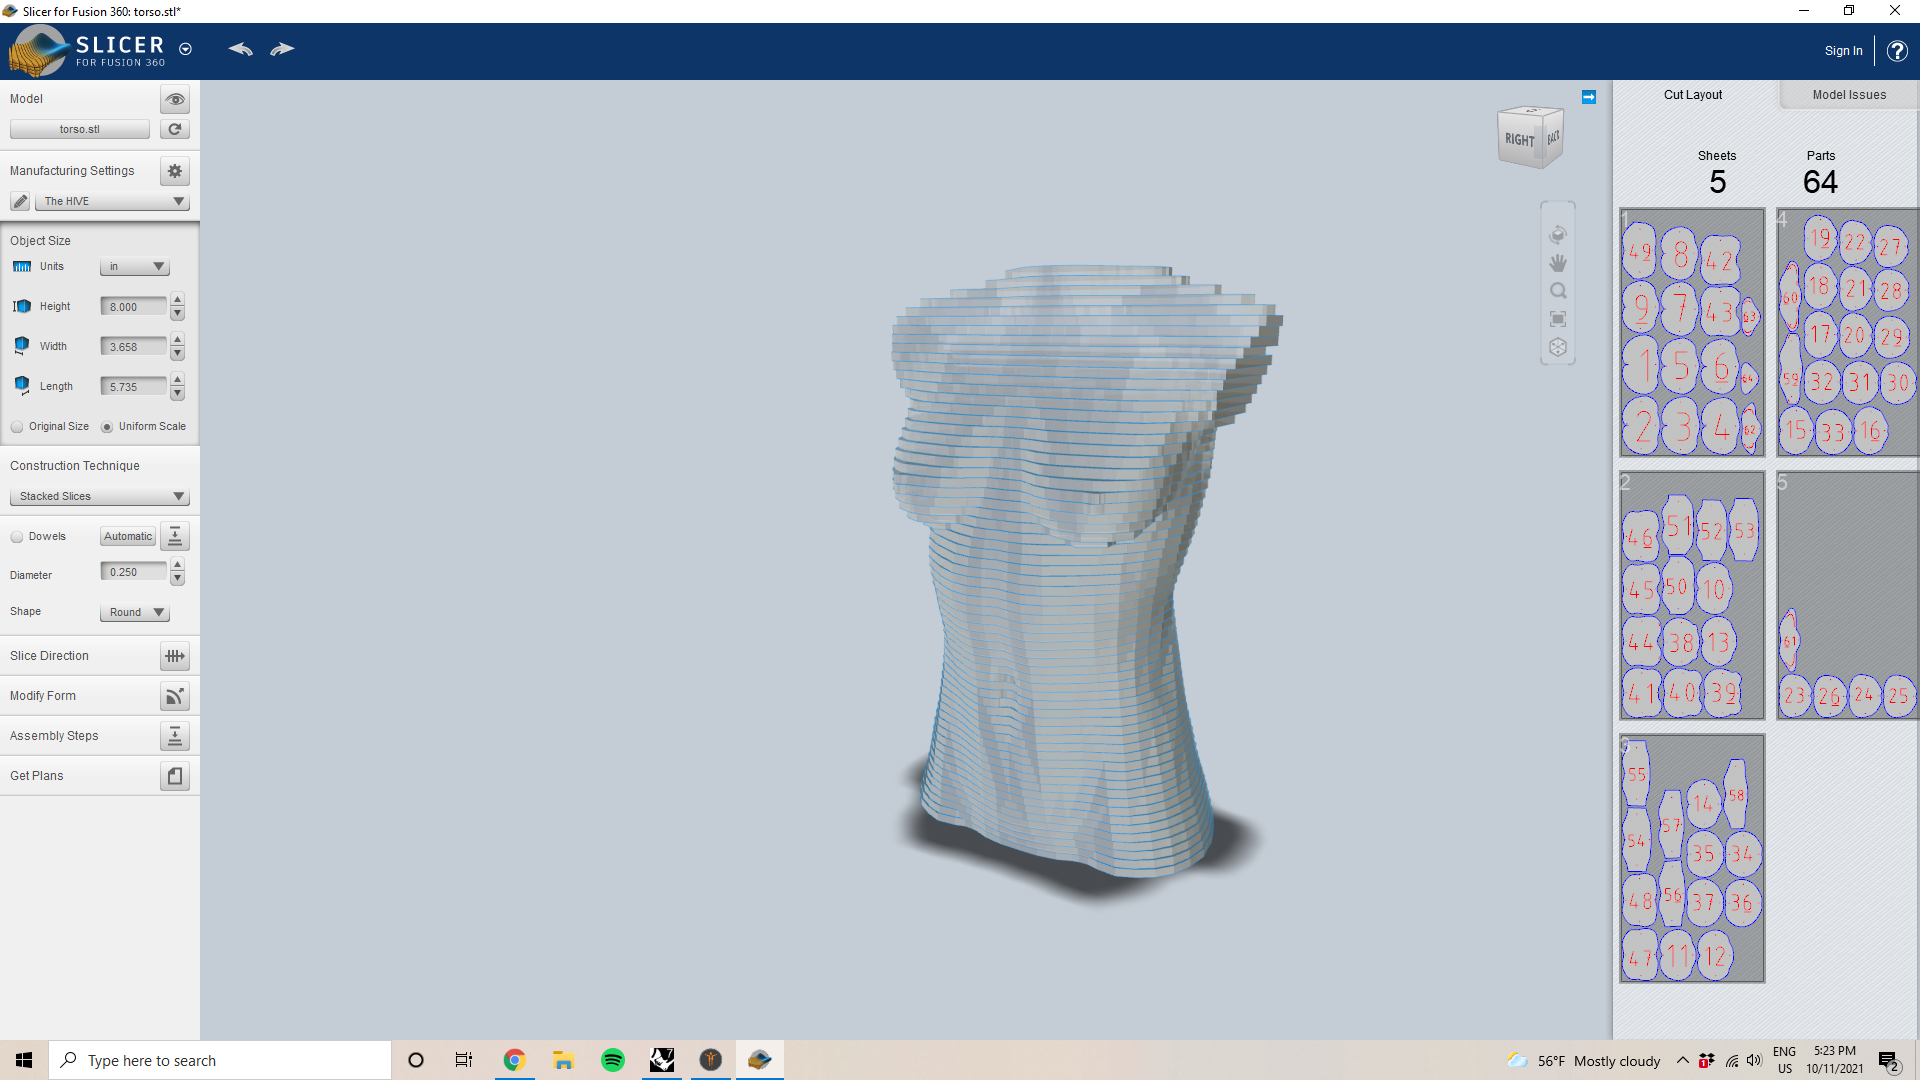
Once set, I go to the left-hand column and click on the dropdown menu under "Construction Techniques" and choose "Stacked Slices".
Note: This is the version of the final mannequin I made. The following steps were extra simulations I made for fun!
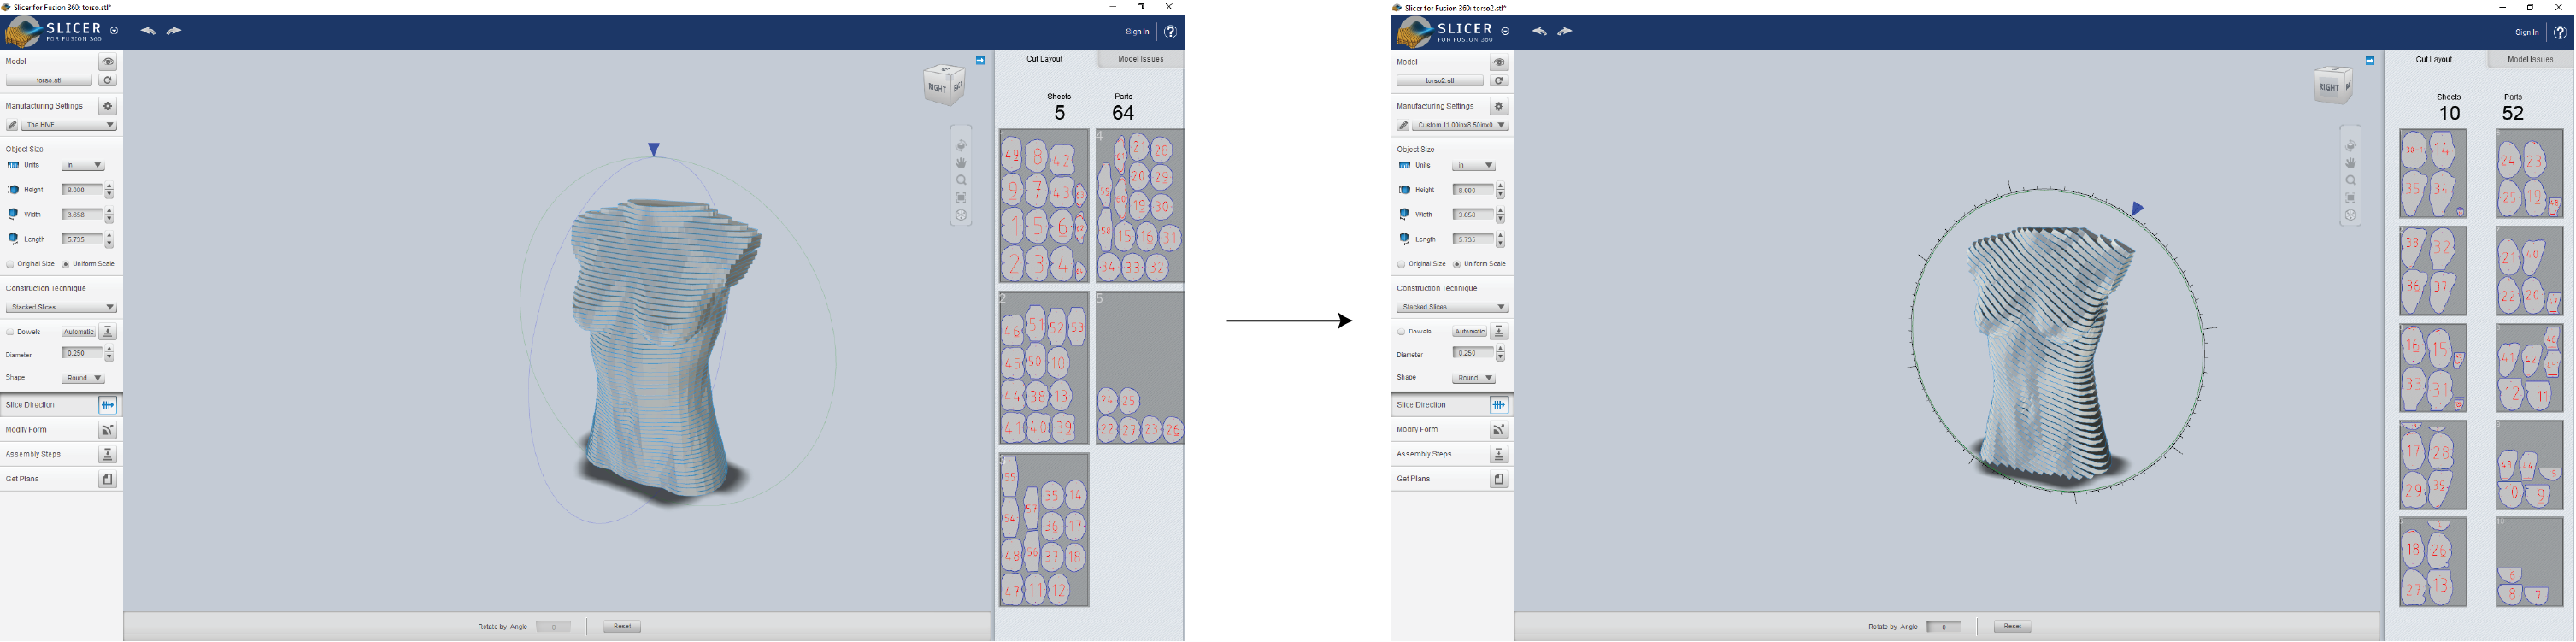
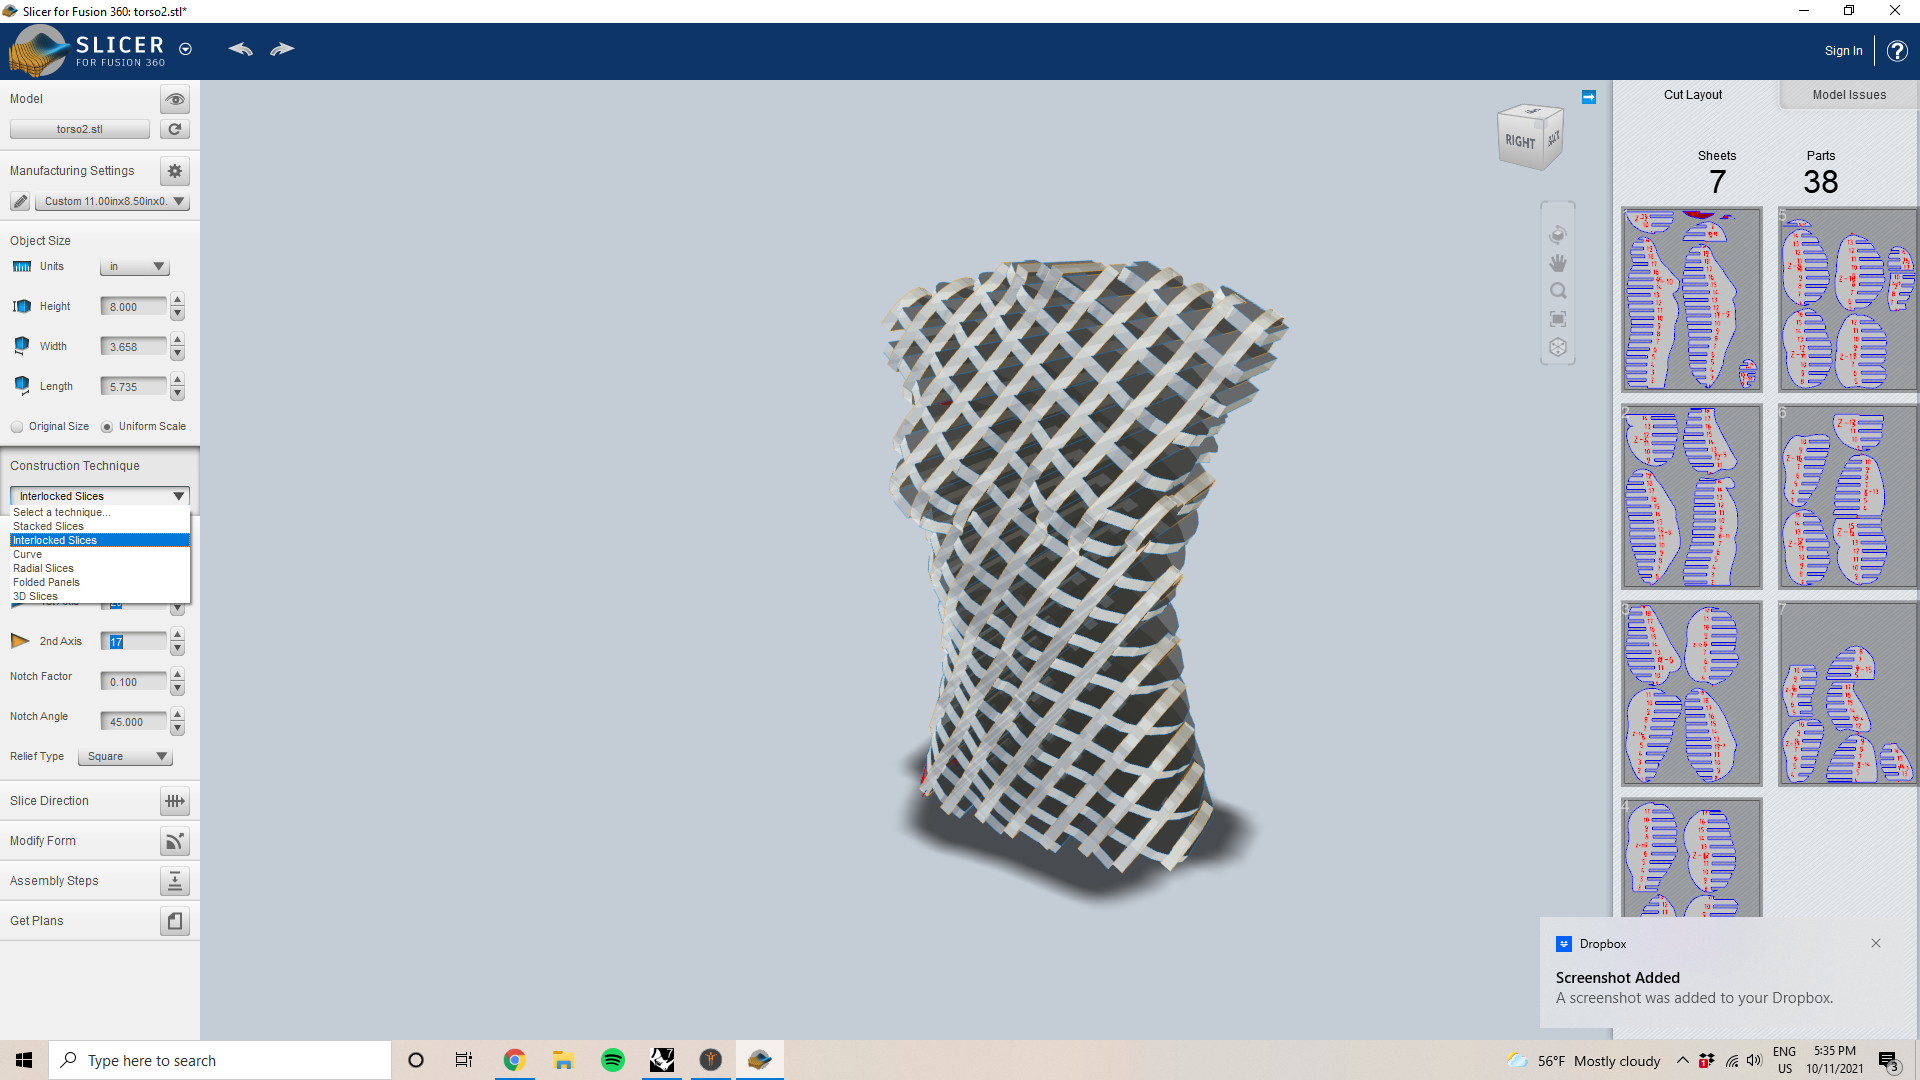
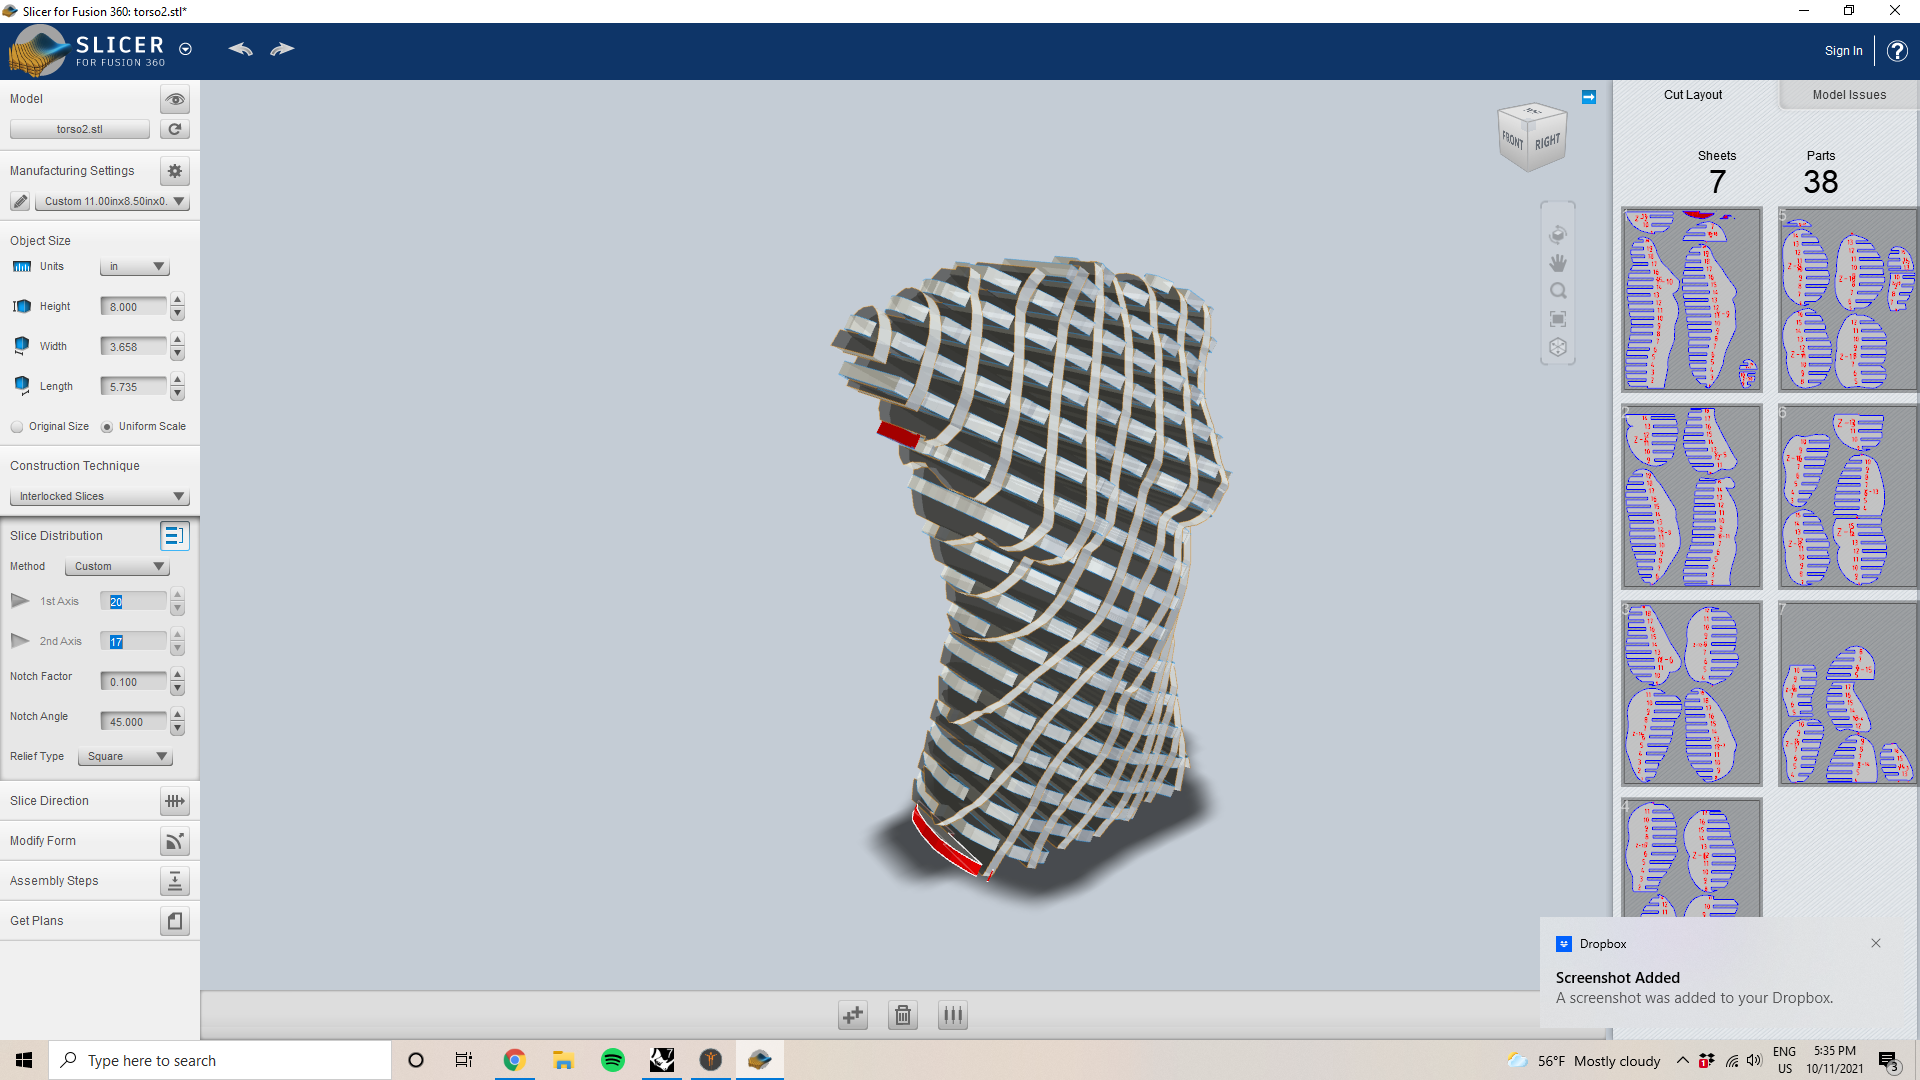
When I played around with slice direction and interlocked slices, I realized I imported the wrong file. My "torso.stl" file was the hollow version of my torso and "torso2.stl" was my solid one (see Rhino section above on how I converted the mesh to a solid).
Once I corrected which file I imported, I was able to play around with the "Slice Direction" feature on the left-hand column. By dragging the blue cone on the circle hovering around the figure, I can change the direction/angle of the slices.
To make interlocking slices, I went to the left-hand column and chose "Interlocked Slices" under the "Construction Techniques" dropdown menu. By choosing "By Count" for the Slice Distribution "Method", I was able to choose how many slices would be interlocked in each section/axis.
Laser Cutting (Glowforge)
Laser Cutter Settings:
  Brand: Glowforge
  Bed Size: 12"x20"
  Material: 1/8" Corrugated Cardboard
  Speed: 500
  Precision Power: 1
  No. of Passes: 1
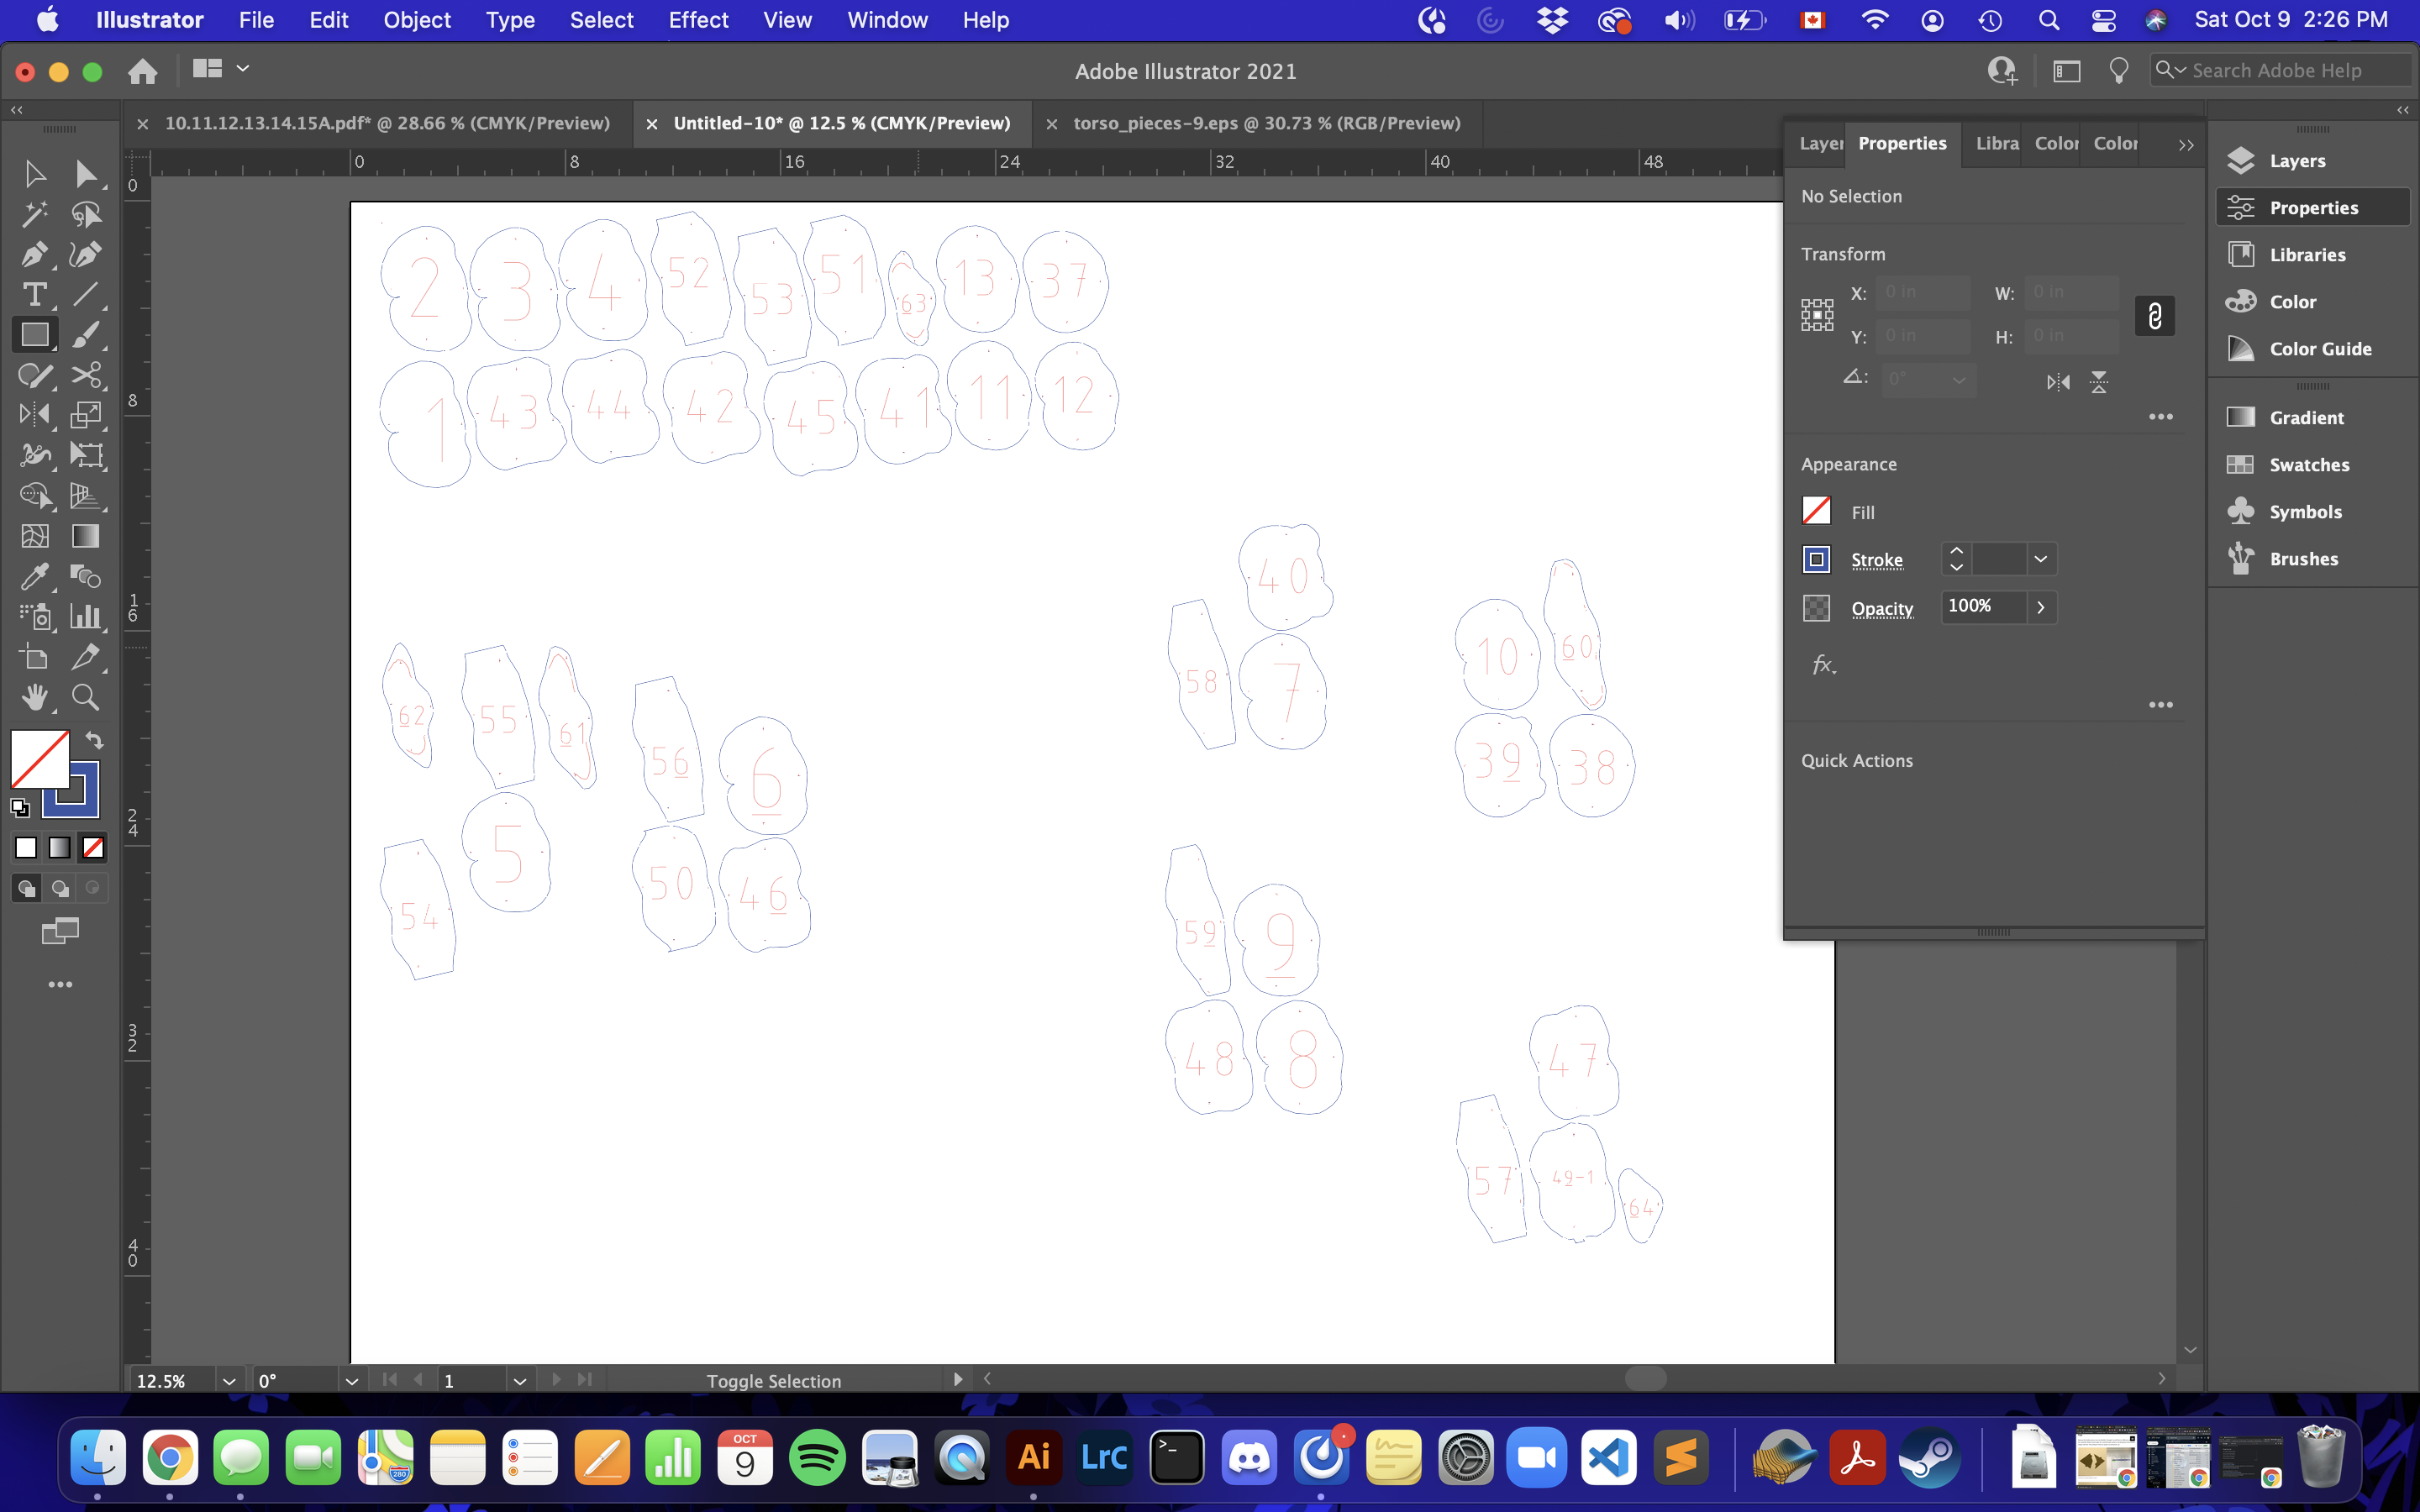
Before using the laser cutter, I had to create a .pdf file that compiled mulitiple slices into one document (.png, .jpg, .jpeg, and .svg were all also acceptable). Fortunately, because this laser cutter has a camera and the capability for me to move the pieces to cut in their web-based software, I just put as many pieces as I predicted to fit onto the piece of substrate I'd cut into. To do this, I used Adobe Illustrator.
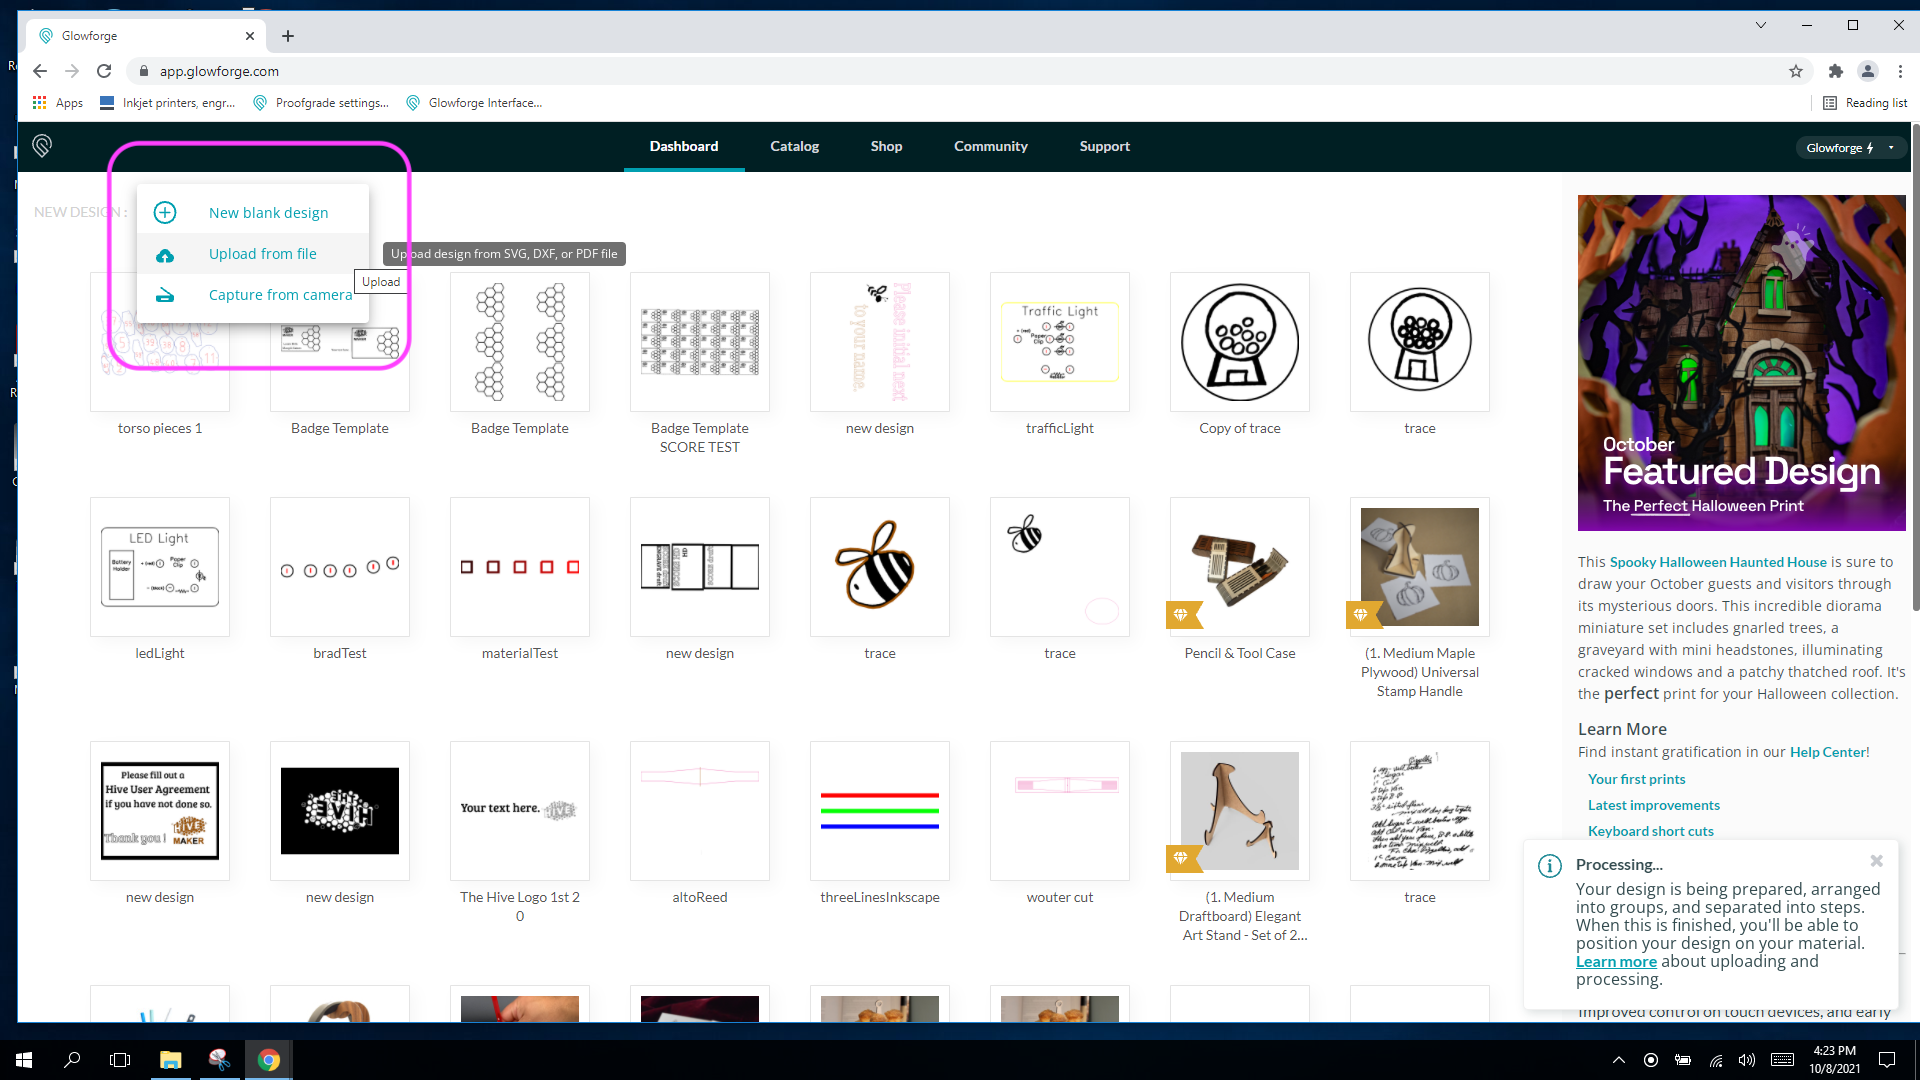
Once I've exported this file into an Adobe .pdf file, I import it into the Glowforge software, which was on the computer connected to the cutter. From the dashboard page, I click on "Create" in the top left and then "Upload from file".
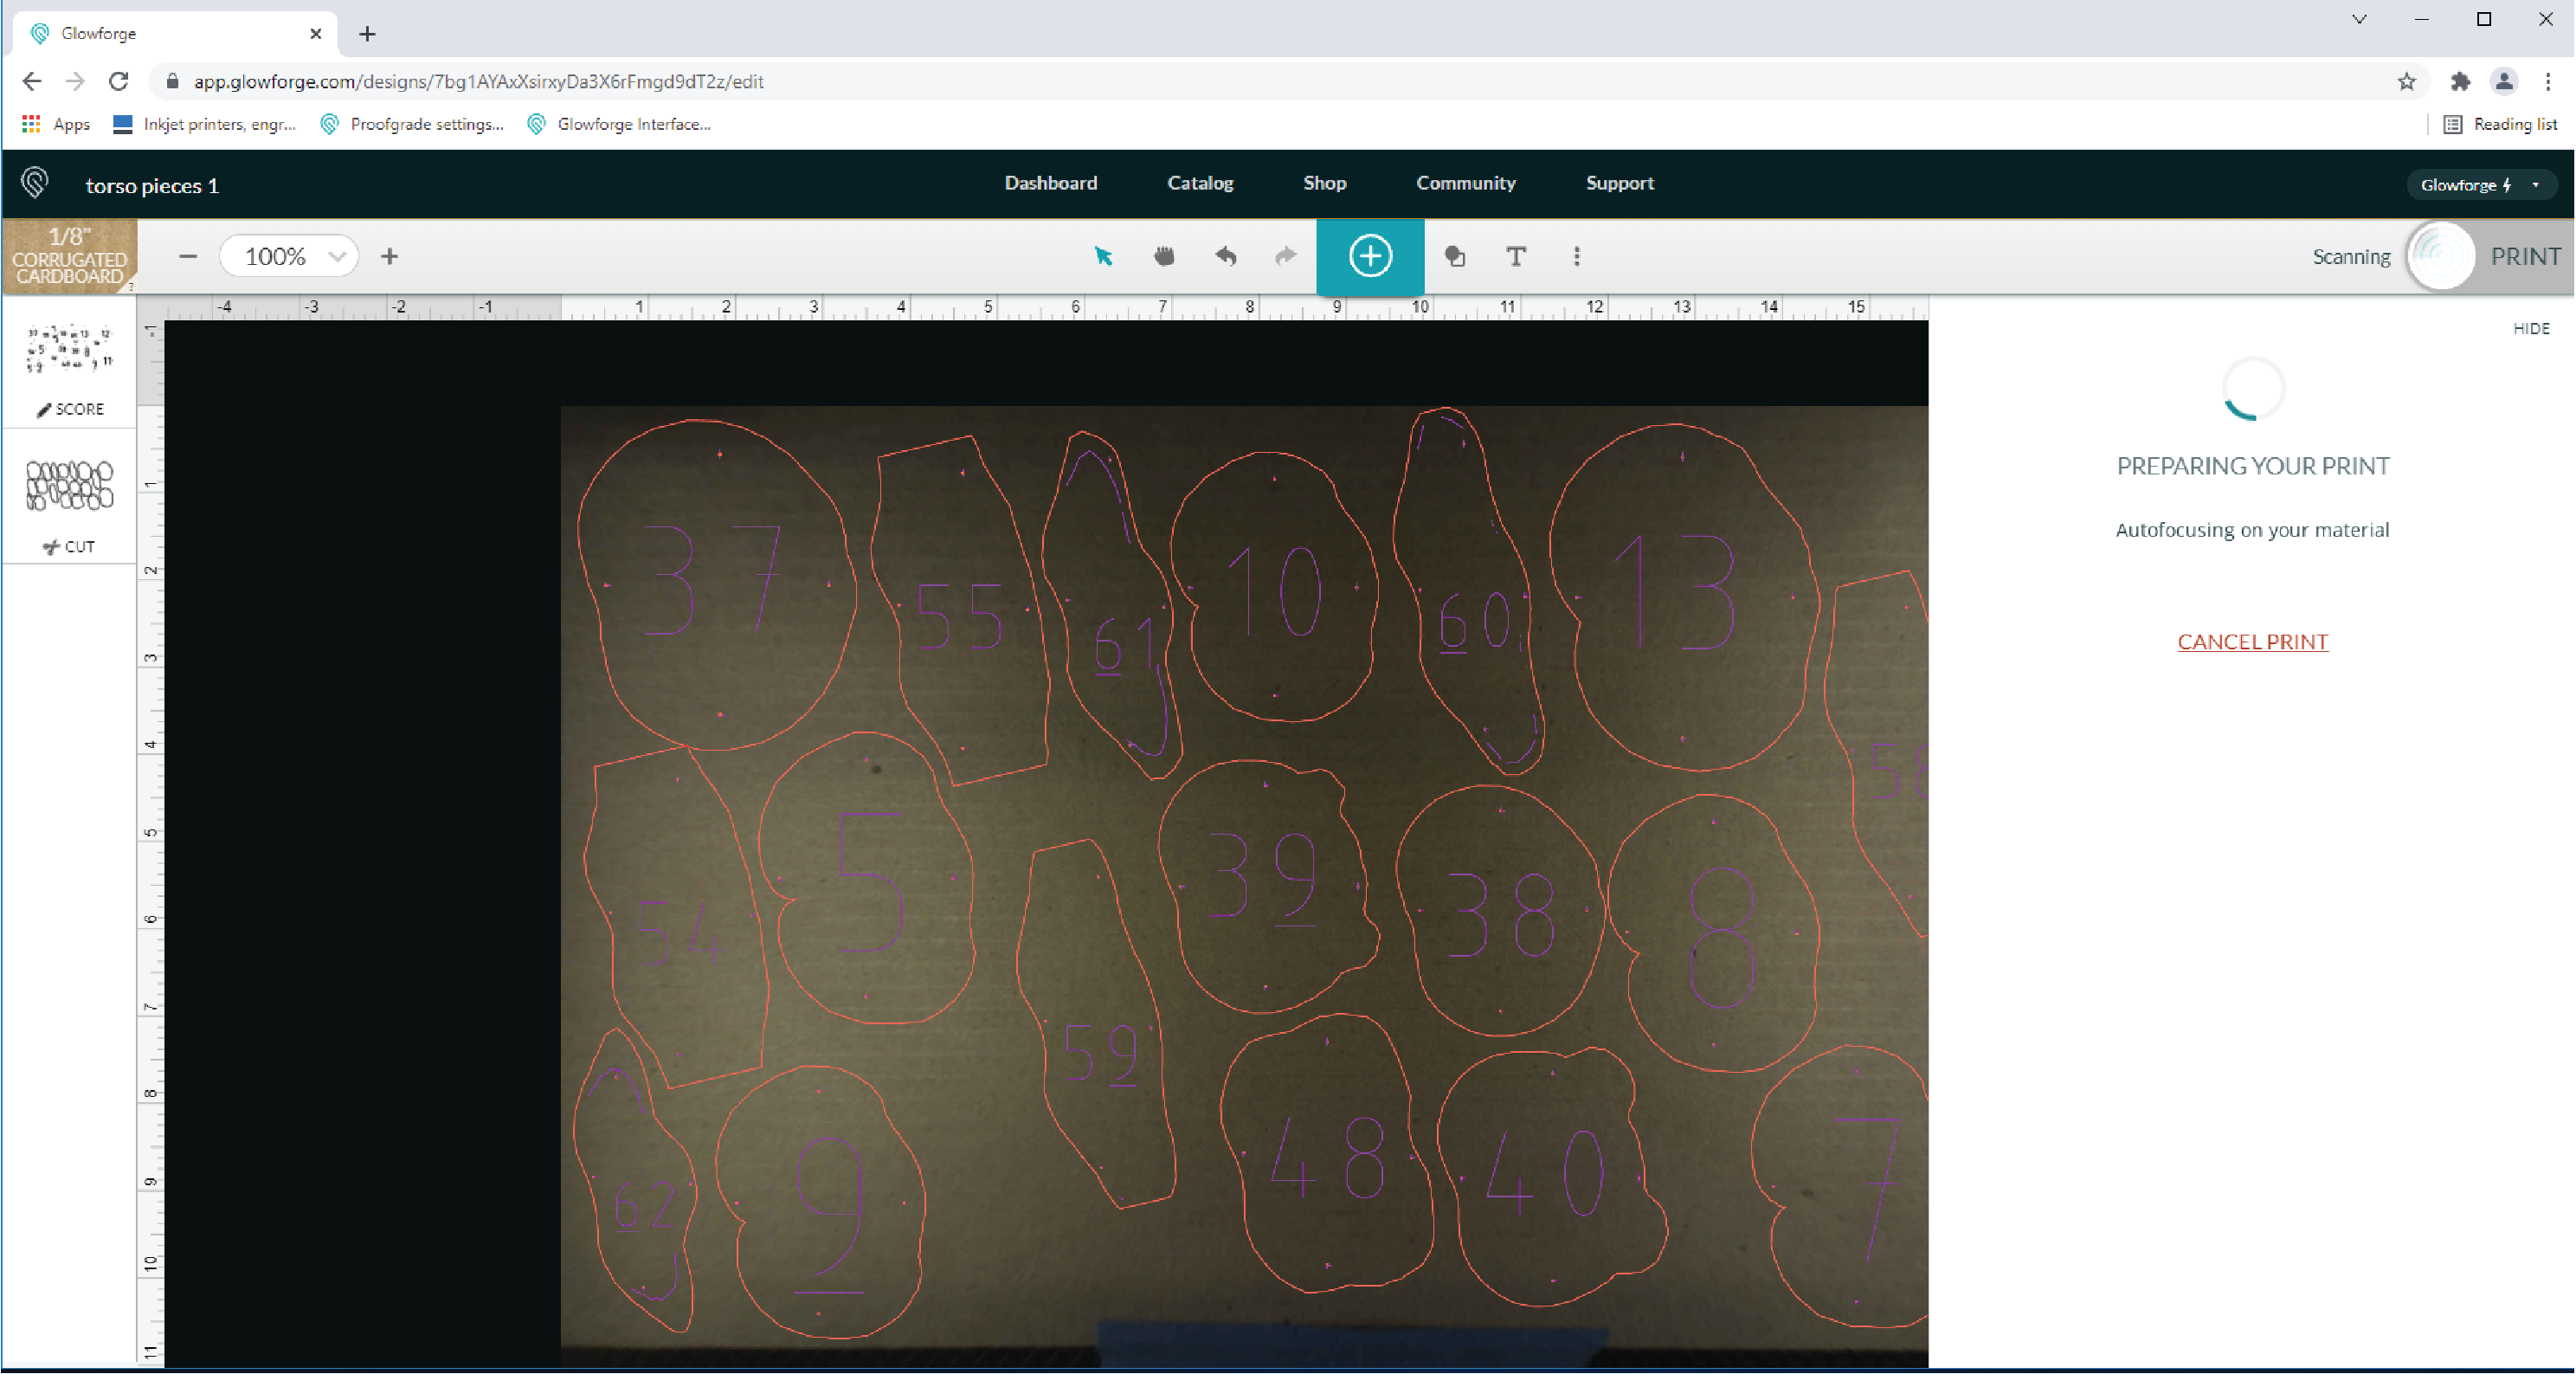
The main page I'm taken to next has a preview of what the camera inside the laser cutting machine sees and where my substrate is. The file I imported can be seen in this window and I'm able to move the pieces in this file around.
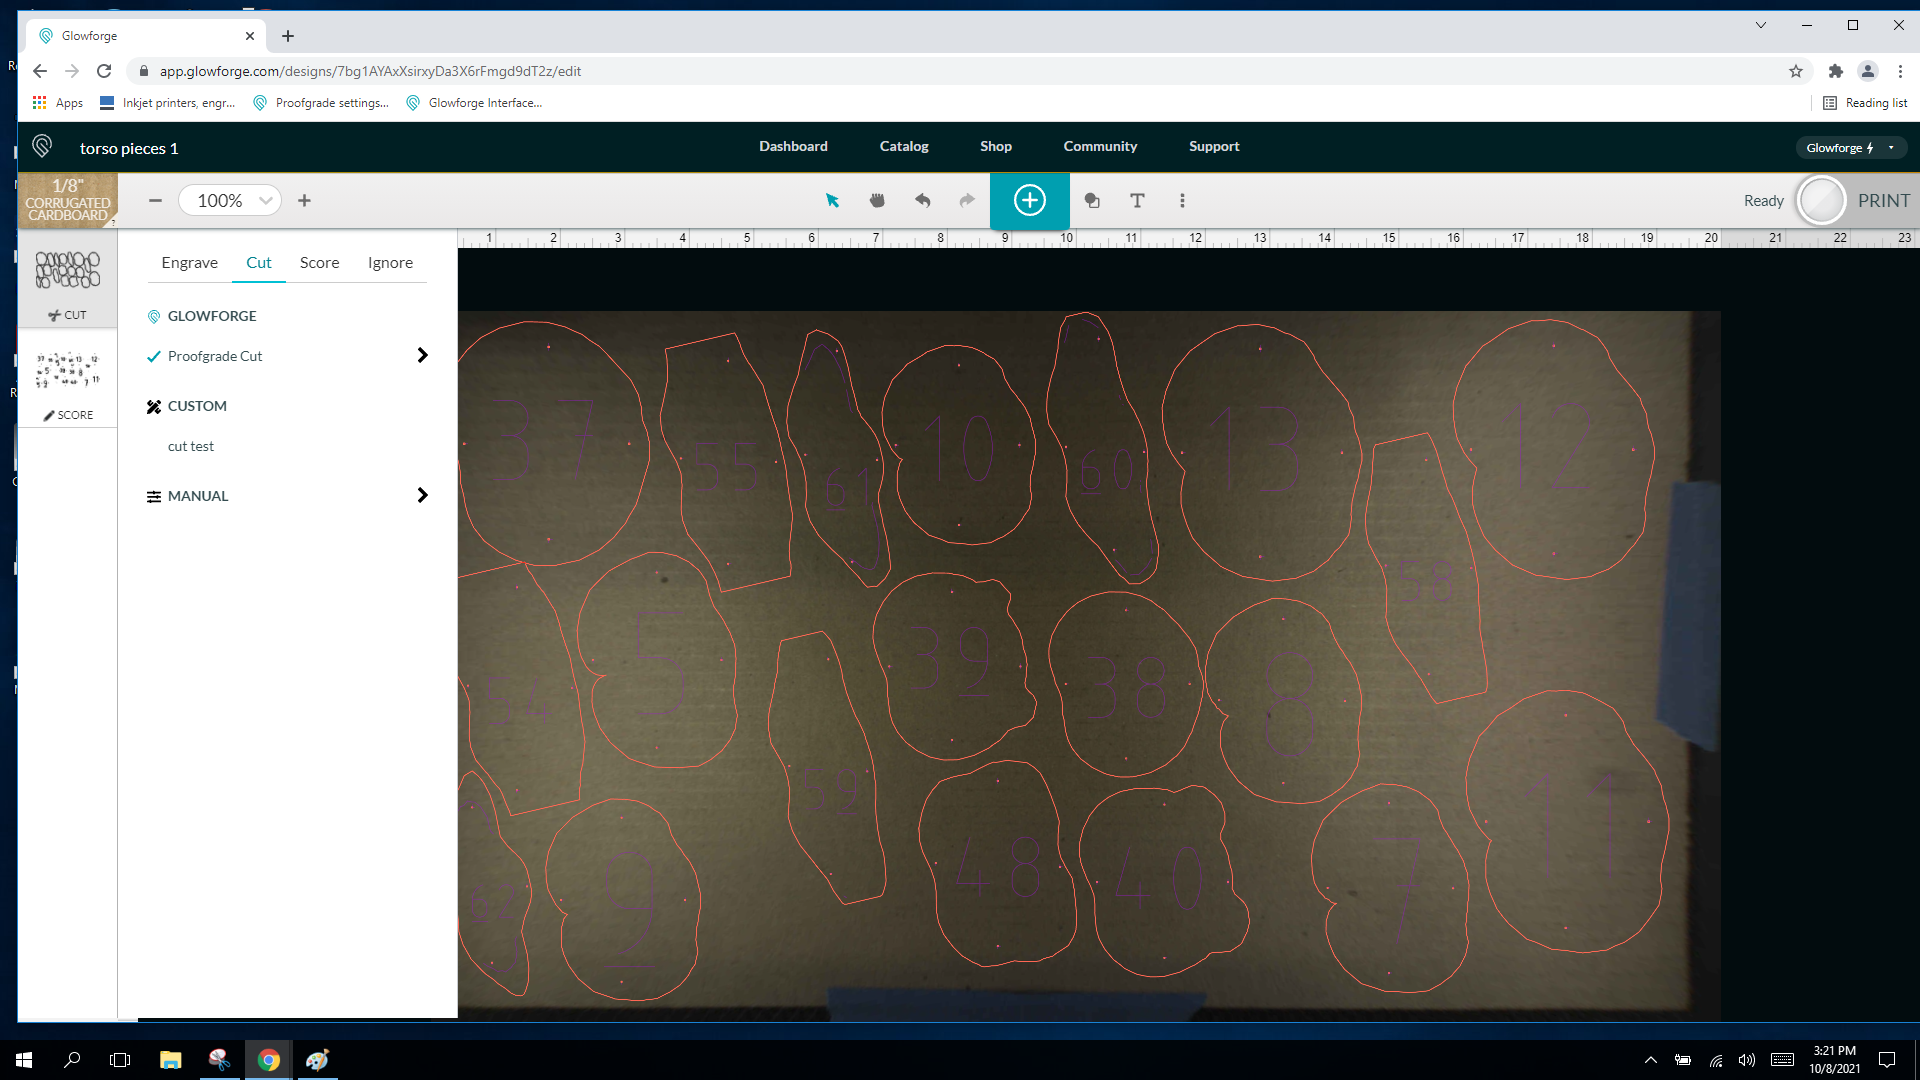
Also in this software, I am able to choose the cutting method for the numbers separately from the edges of the pieces. In this case, I chose to 'Score' the numbers (purple) and 'Cut' the edges (orange) (see left-hand column). The order in which these methods are listed is the order in which the cutting are done. Once I'm ready for the cut to begin, I click on the white circle in the top right corner.
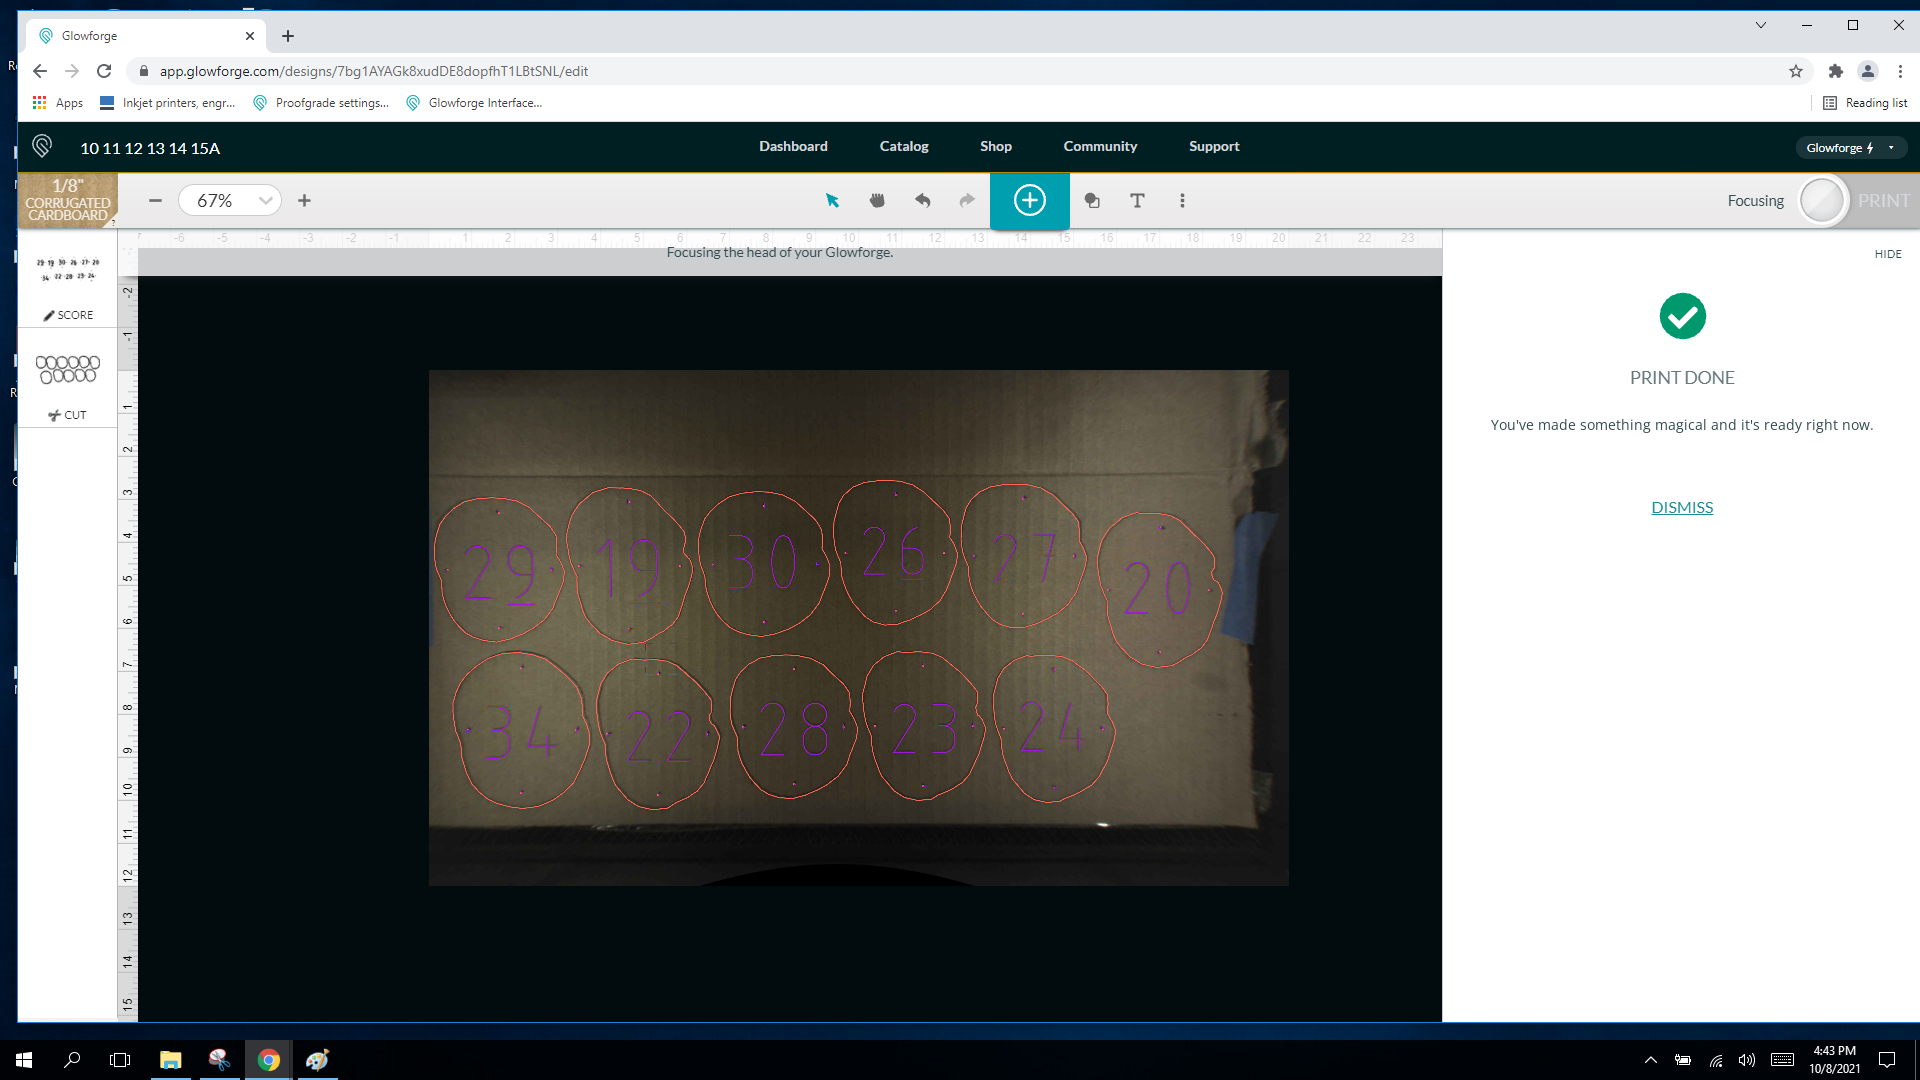
Once the program is ready for the cut, I push the button the machine and the cutting begins. As soon as the machine has cooled and finished the cut, the right hand banner will confirm the print completion.
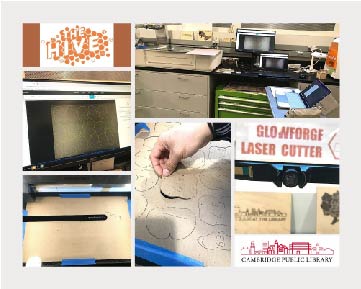
The laser cutter I used was at the HIVE in the Cambridge Public Library at Massachusetts, USA. Here are some snapshots of the workspace for this laser cutter.
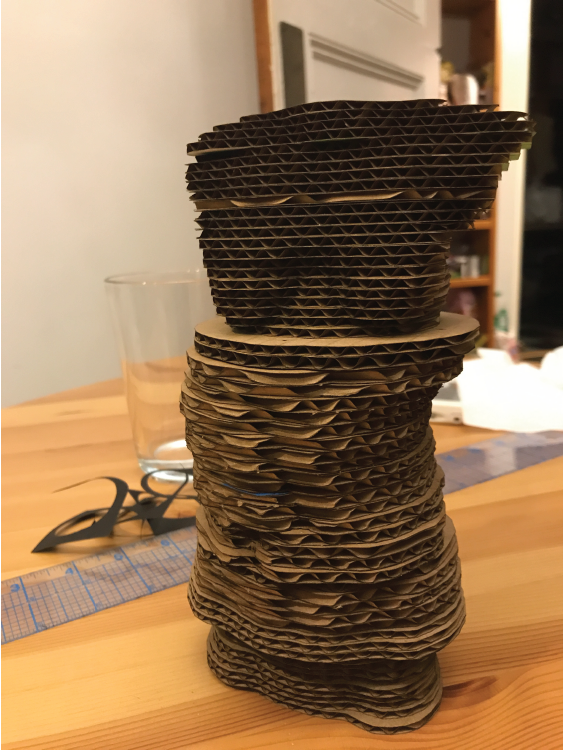
Mannequin Assembly
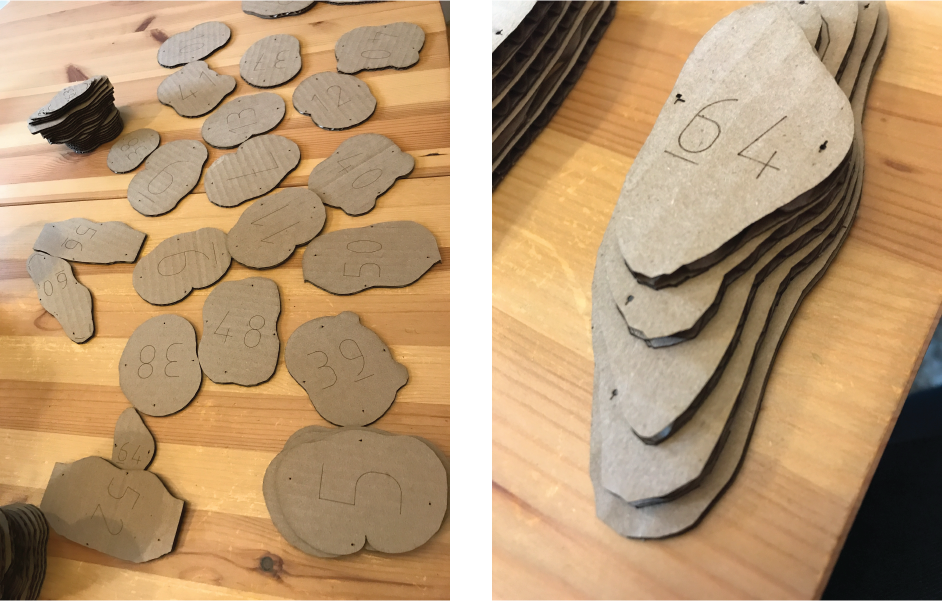
Once I collected all the laser cut pieces, I proceeded to stack the pieces with the lowest numbers at the bottom and the highest numbers at the top.
However, because I wanted the pieces to be stacked and assembled together along a vertical axis, I had to punture a hole through all the pieces first. To do this I used an awl with 3/16"-¼" diameter.

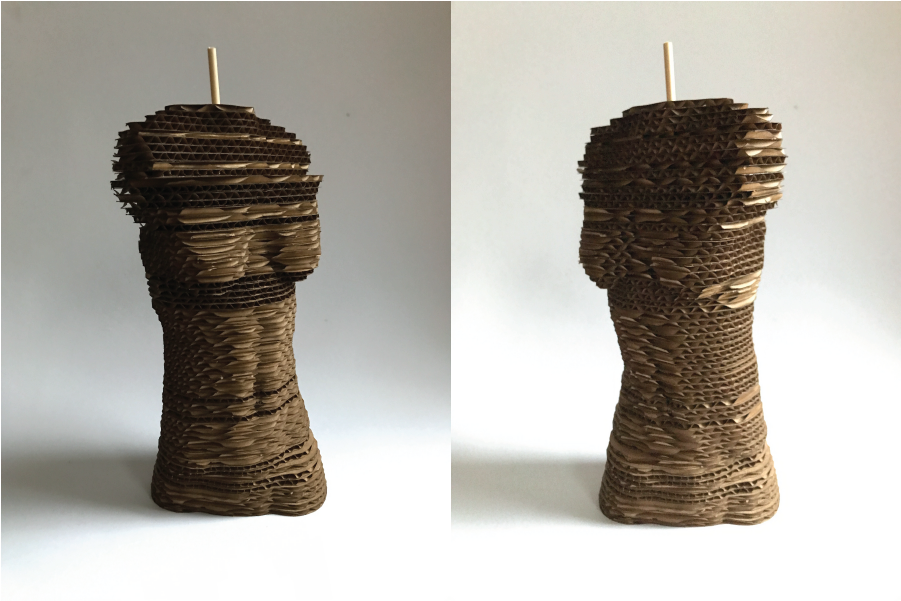
Once all the pieces were properly punctured, I pushed a wooden rod (3/16" diameter) through all the centralized holes of the pieces. Here is how the assembly looked as a final result (left to right: front view, ¾ view, side view, back view)
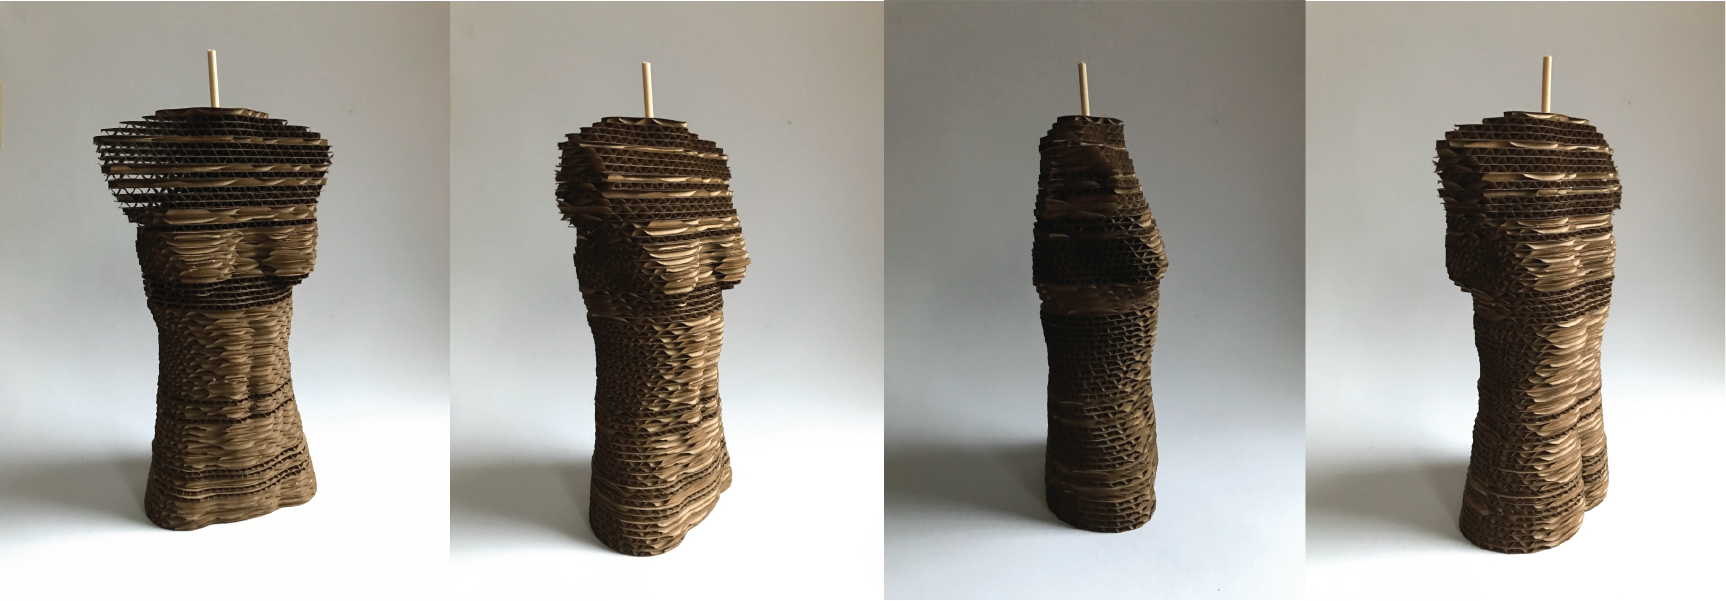
I chose this assembly method because it allowed me to twist the mannequin as if the rod was its spine.
Problem Areas
Git Push Fail
Problem
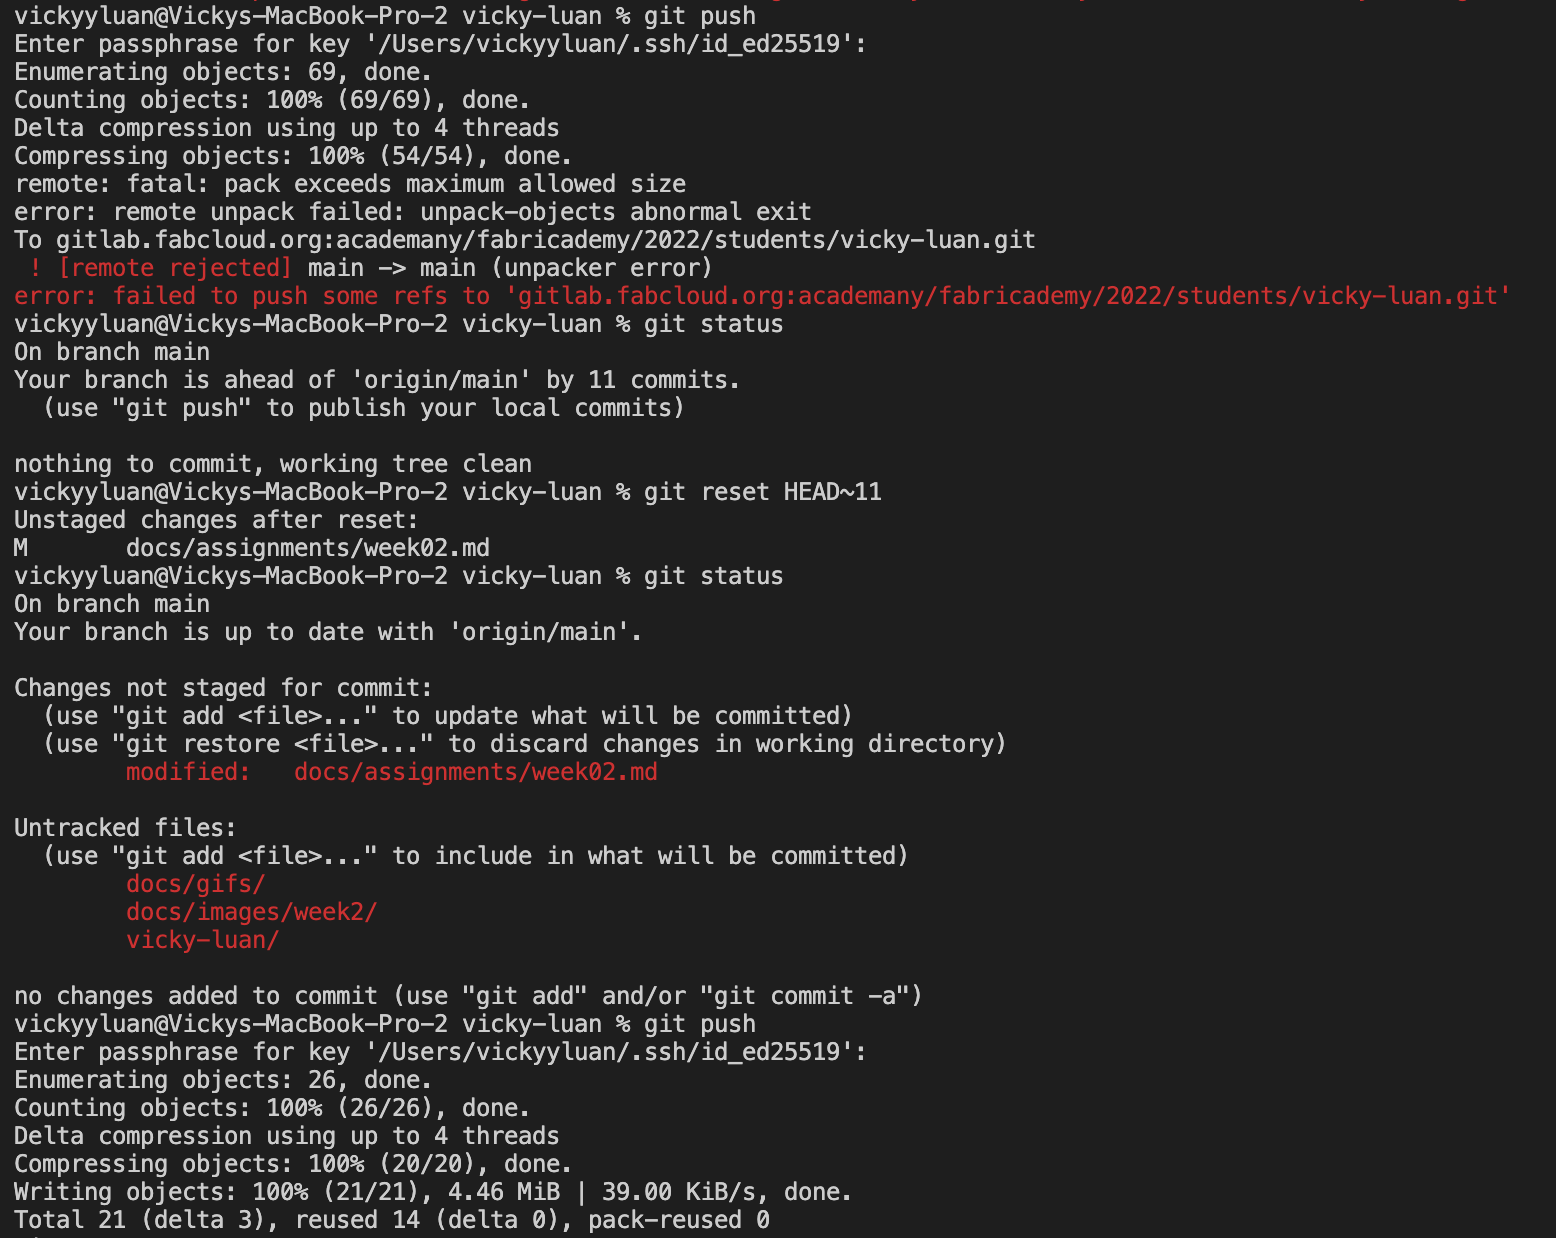
When I got too ambitious documenting this week, I committed and pushed too many changes that exceeded the combined total size. As a result I received the error:
remote: fatal: pack exceeds maximum allowed size
error: remote unpack failed: unpack-objects abnormal exit
To gitlab.fabcloud.org:academany/fabricademy/2022/students/vicky-luan.git
 ! [remote rejected] main -> main (unpacker error)
error: failed to push some refs to 'gitlab.fabcloud.org:academany/fabricademy/2022/students/vicky-luan.git'
Solution
1) I checked the git status
git status
and received an output of
On branch main
Your branch is ahead of 'origin/main' by 11 commits.
  (use "git push" to publish your local commits)

nothing to commit, working tree clean
2) New input:
git reset HEAD~11
3) Retried git push and solved the issue
Slicer Pieces
Problem
When interlocked slices turn red, it's usually an indicator of some connection error.
Solution
This can be easily corrected by using the mouse cursor to move the error piece around until the red highlight is gone.

Download Links
Click the following links to download their respective files:
MakeHuman
Generic Guy (.stl)
Generic Guy (.obj)
Generic Gal (.stl)
Generic Gal (.obj)
Ex-machina (.stl)
Ex-machina (.obj)
Rhino 3D
Bust (.stl)
Bust - inclined (.stl)
Slicer for Fusion 360
Bust (.3dmk)
Bust (.zip)
Bloopers
MakeHuman
Not every program is perfect (amirite?). Here are some of the minor blips I ran into while playing with MakeHuman.
I also tried building a character that matched my own body measurements. Embarrassingly, some measurements were not even on the scale that I could use. Regardless, I got to a body shape as close to mine as possible. When turned to a side view, it looked incredibly silly but I supposed that's how I would look if my back was in a proper posture and not as hunched as I normally am.
Laser Cutting
During my first attempt at laser cutting, I wanted to scale down my mannequin by 75% but accidentally forgot to scale some of the pieces in Illustrator and ended up with half of the pieces being at 75% and the other half at its original size. Once stacked, this is how the mannequin looked.
The simplest solution to this was deciding to go with the original size and recutting the smaller pieces to match this scale.
At the end of the day, making characters can be very fun despite the hysterical glitches.