WEEK 10 - OPEN SOURCE HARDWARE
Last Update: Jan 12, 2022
November 22-29, 2021
This week I learned how to create an open source hardware/machinery for knitting, weaving, and/or sewing processes. I completed two projects for this assigment - one that repurposed a device into another usage and one that automated a device. More specifically, I turned a lint remover into a bobbin threader and I automated a cord knitting gadget (replaced a hand crank into a motor).
I was also pleased to finally, with success, repair a 3D printer that was given to me by a friend. It was broken with no certainty for the cause but as of Jan 12, it was successfully fixed by setting adjustments and hardware changes. See my "blog" post on my repairing journey here.
Keywords: hacking, open source, hardware, tools, supplies, bobbin threader, tension, lint remover, cord knitting, automation, motor, 3D modeling, 3D printing, Rhino 7, Ender 3, Ultimaker Cura, stl, gcode, files, documentation
Quick Summary
 Tools/Resources Learned:
- Creality Ender 3 - an open-source 3d printer with amazing printing precision and affordable price
- Ultimaker Cura - an open source slicing application for 3D printers
- SketchFab - a platform to publish, share, discover, buy and sell 3D, VR and AR content
 Tools Refined:
- Rhino 3D- 7 Version 7.13 Evaluation - A 3D CAD and graphics program
- Visual Studio Code: a source code editor I'm now using to document and edit my documentation website locally on my desktop
 What I still want to learn better:
- how to hack a device without purchasing any new materials or tools
Research and Inspiration
Fabricademy Guidance
Going into this week I had no idea what open source hardware meant.. at all. It all really made sense when I watched the global lecture recording and spoke with my instructor Nuria, who gave me ideas on what to do. One particular suggestion she made stuck with me and that was automating a handheld cord weaver.
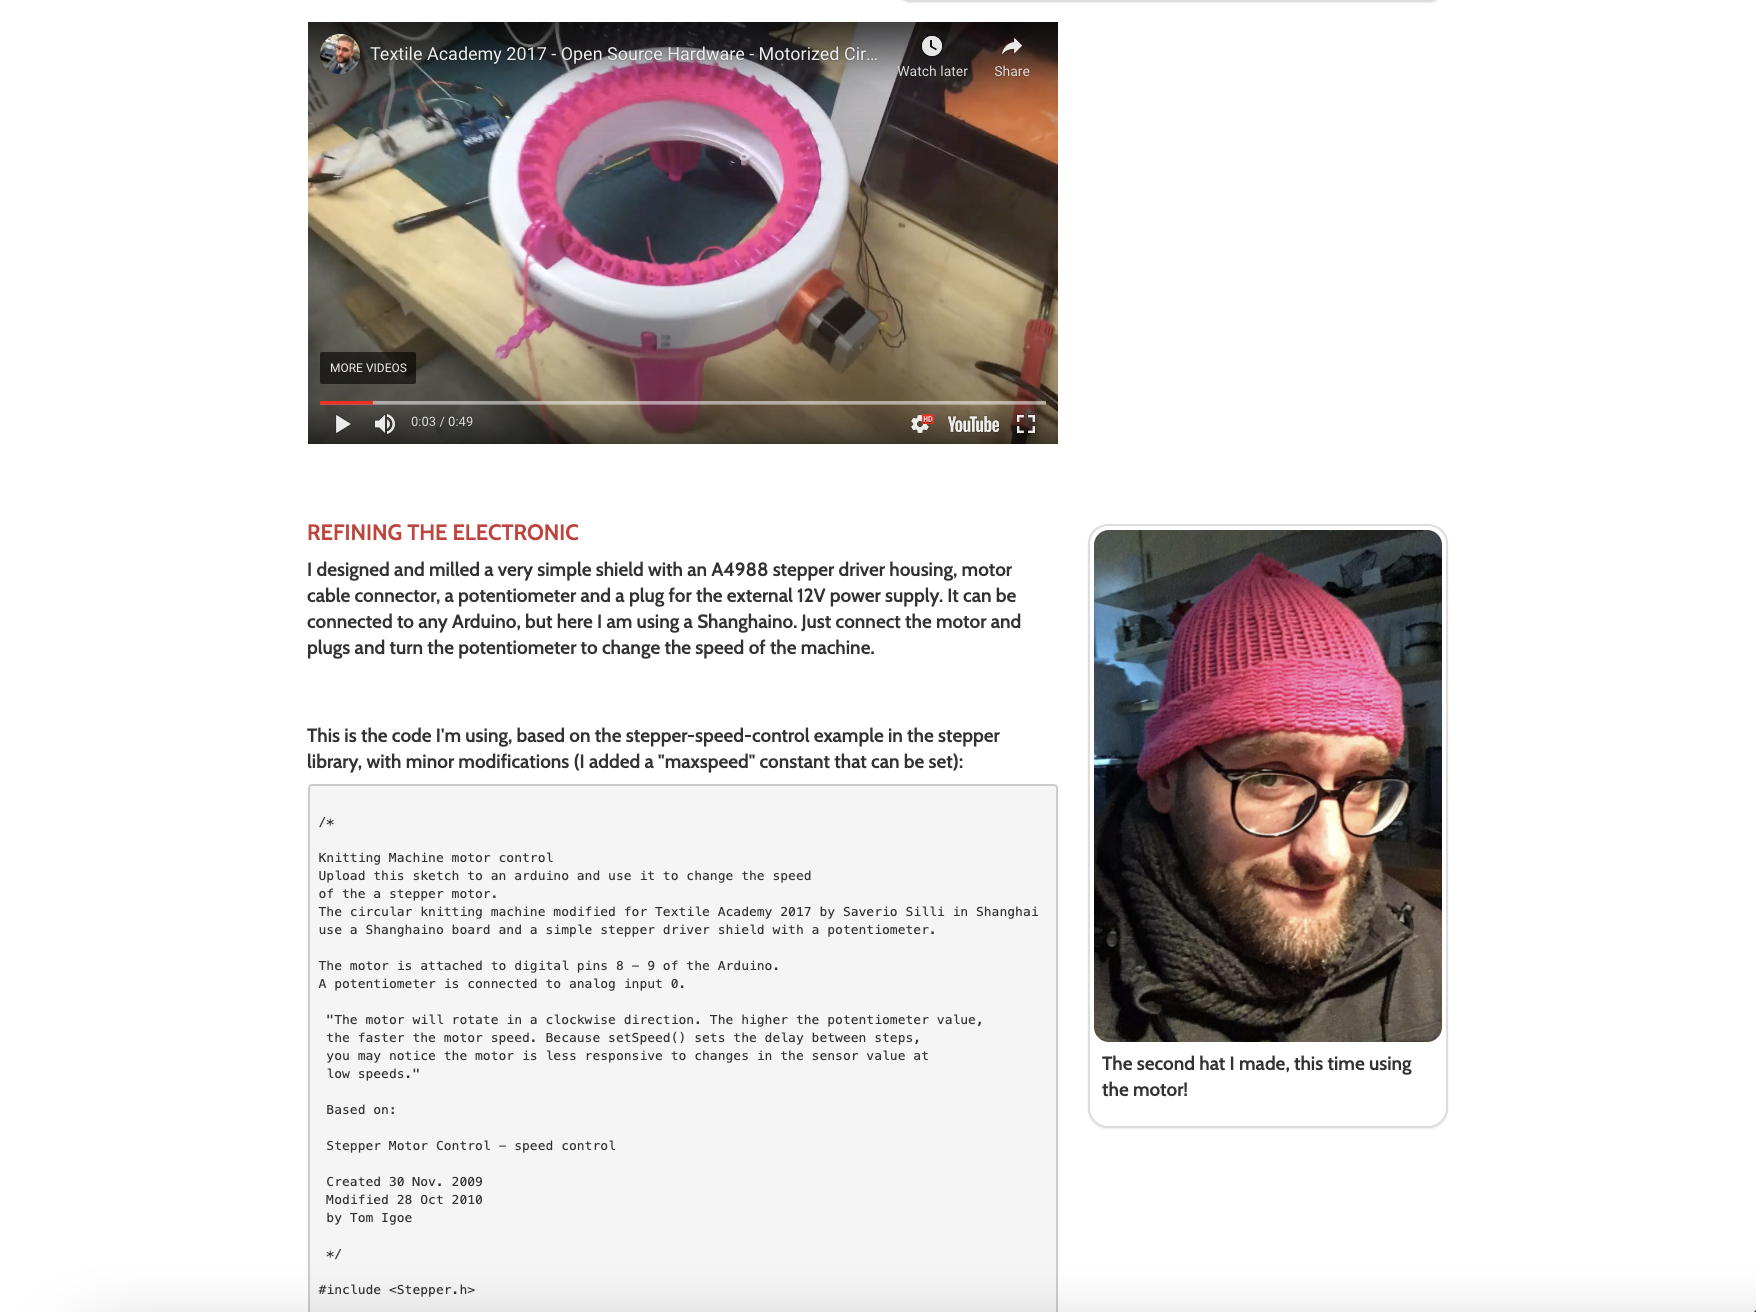
This project was originally inspired by a former Fabricademy student, Saverio Silli, who automated a circular knitting machine that was originally handheld. He did this by 3D printing complementary (but necessary) bevel gears and connecting it to a motor. The motion was then controlled with an Arduino. (So Cool)
I also attended Sara Davis' Hilo Machine tutorial but when I realized I didn't have the materials to follow, I... left... but! I'm going reference her spreadsheet of parts here so I have it for future reference.
Personal Brainstorming
I had a lot of ideas pop up in my head about this topic and am still deciding on which one to pursue... some of these ideas that came up were
- Hand drill bobbin threader
- Pin needle straightener
- Needle threader (inspired by Machine Needle Threader)
- Fabric weave identifier (inspired by myWeave app)
In the end, I decided to try the portable bobbin threader and the automatic cord weaver.
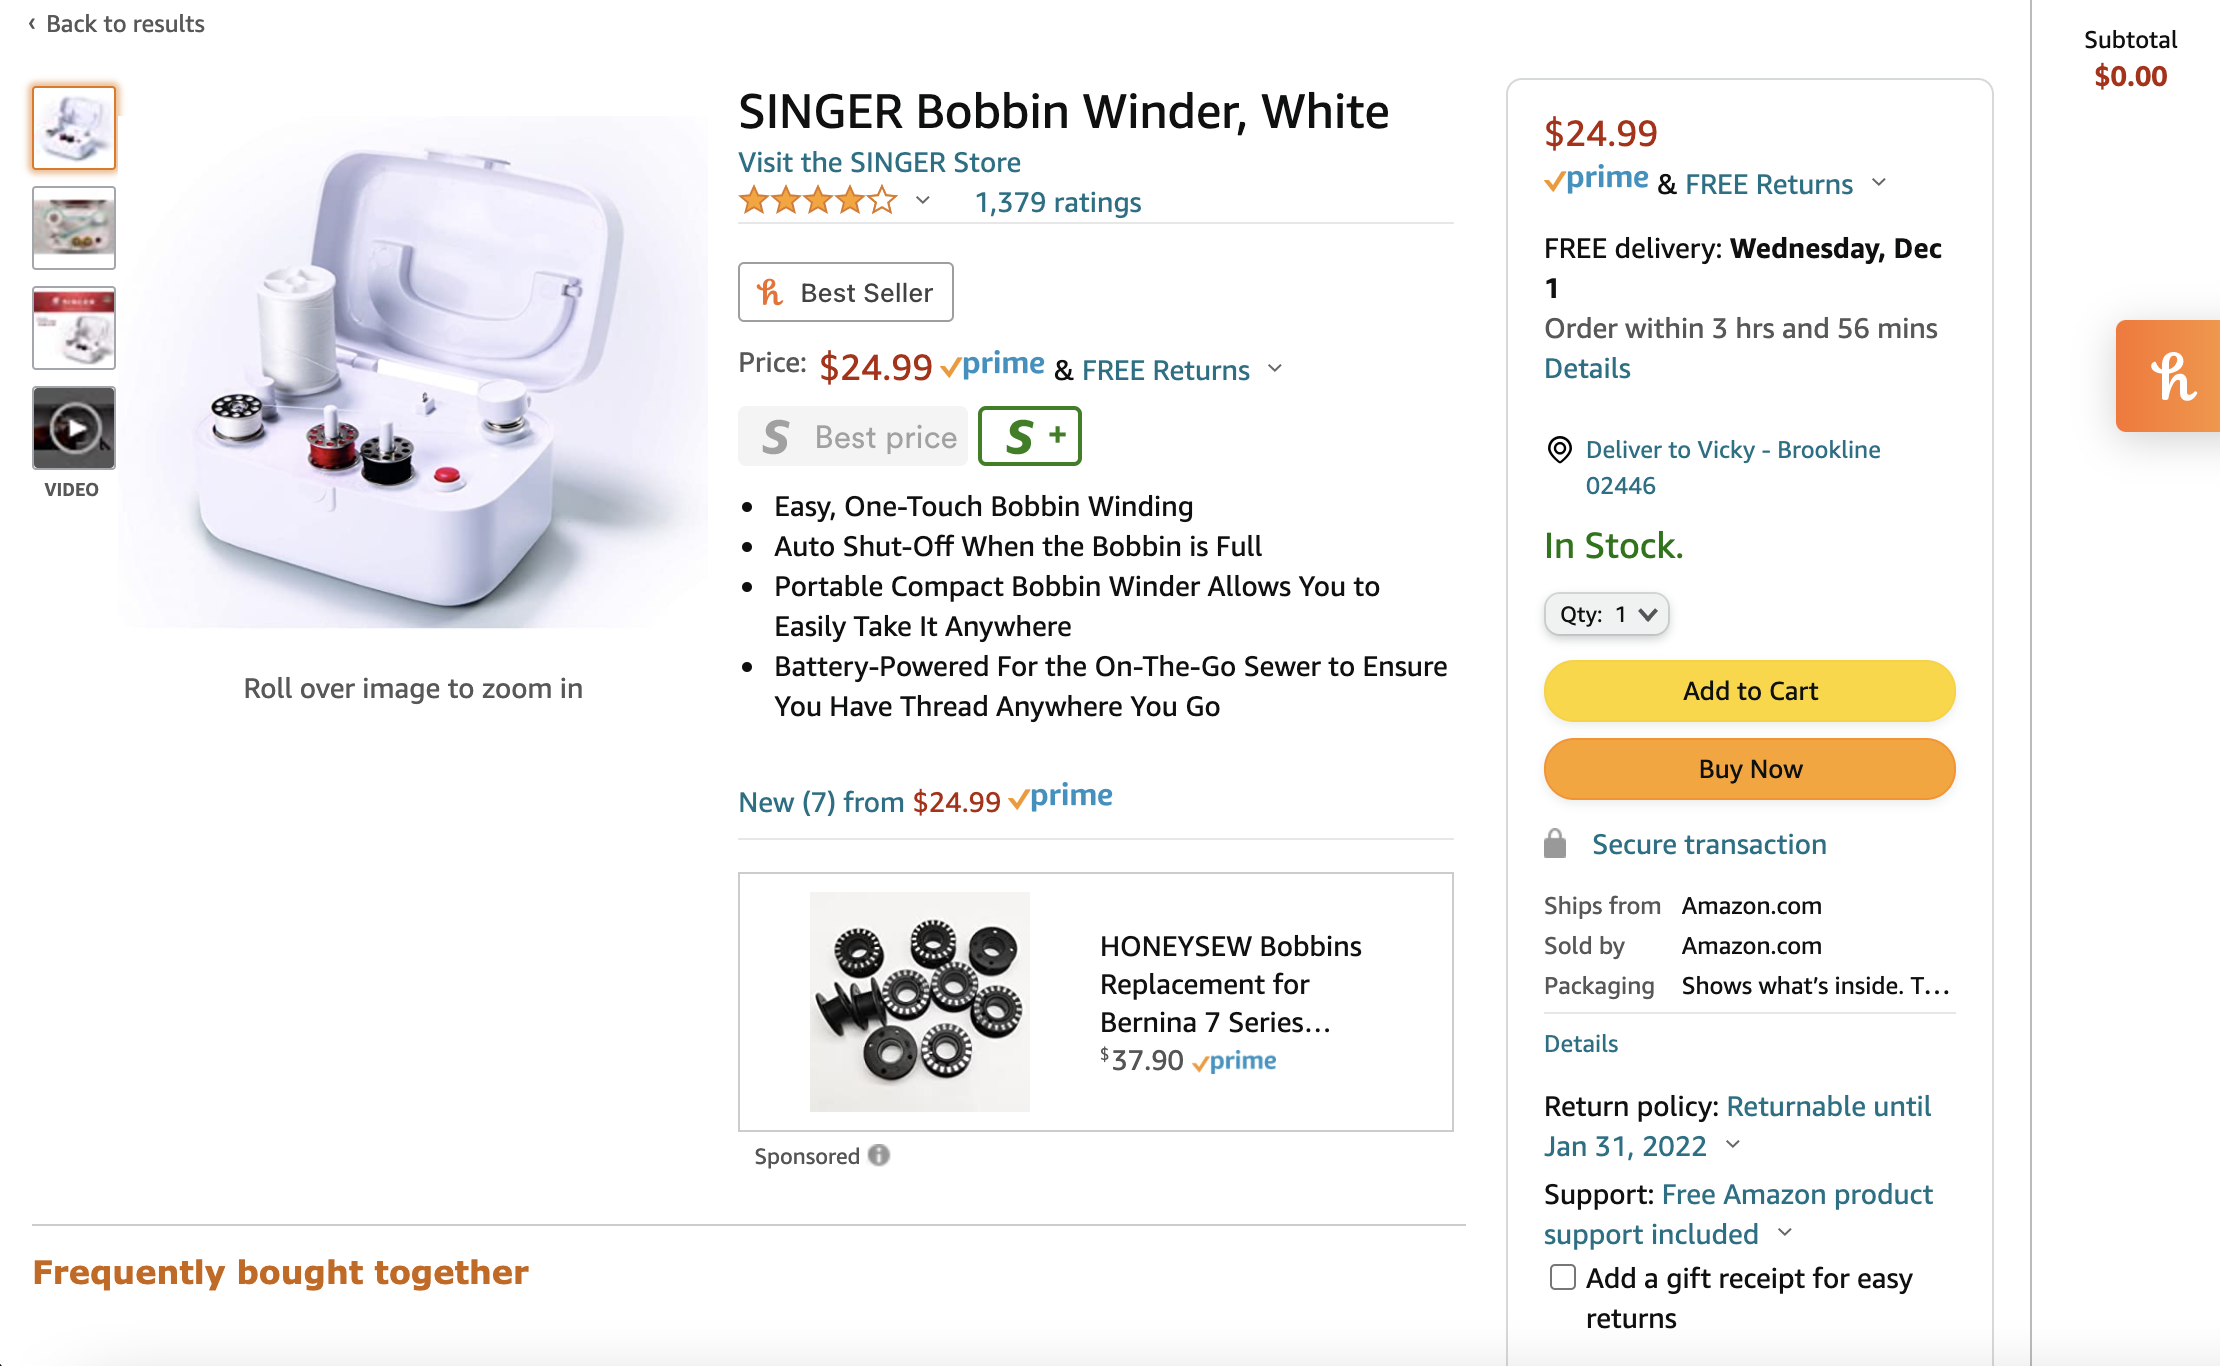
To convince myself that a portable bobbin threader was possible, I did some research online to find similar products already made such as this Singer one from Amazon
Portable Bobbin Threader
Motivation
A minor inconvenience I often despise while sewing is when the bobbin runs out of thread and I have to take the top thread out of its path and re-thread it in a separate path and into the bobbin to thread. My sewing machine (Brother XM2701) also doesn't have a separate spool holder or function to be able to wind a bobbin simultaneously to sewing - like some industrial machines could.
For this reason, I wanted to explore ways to make a handheld portable bobbin threader.
Dismantling the Tool
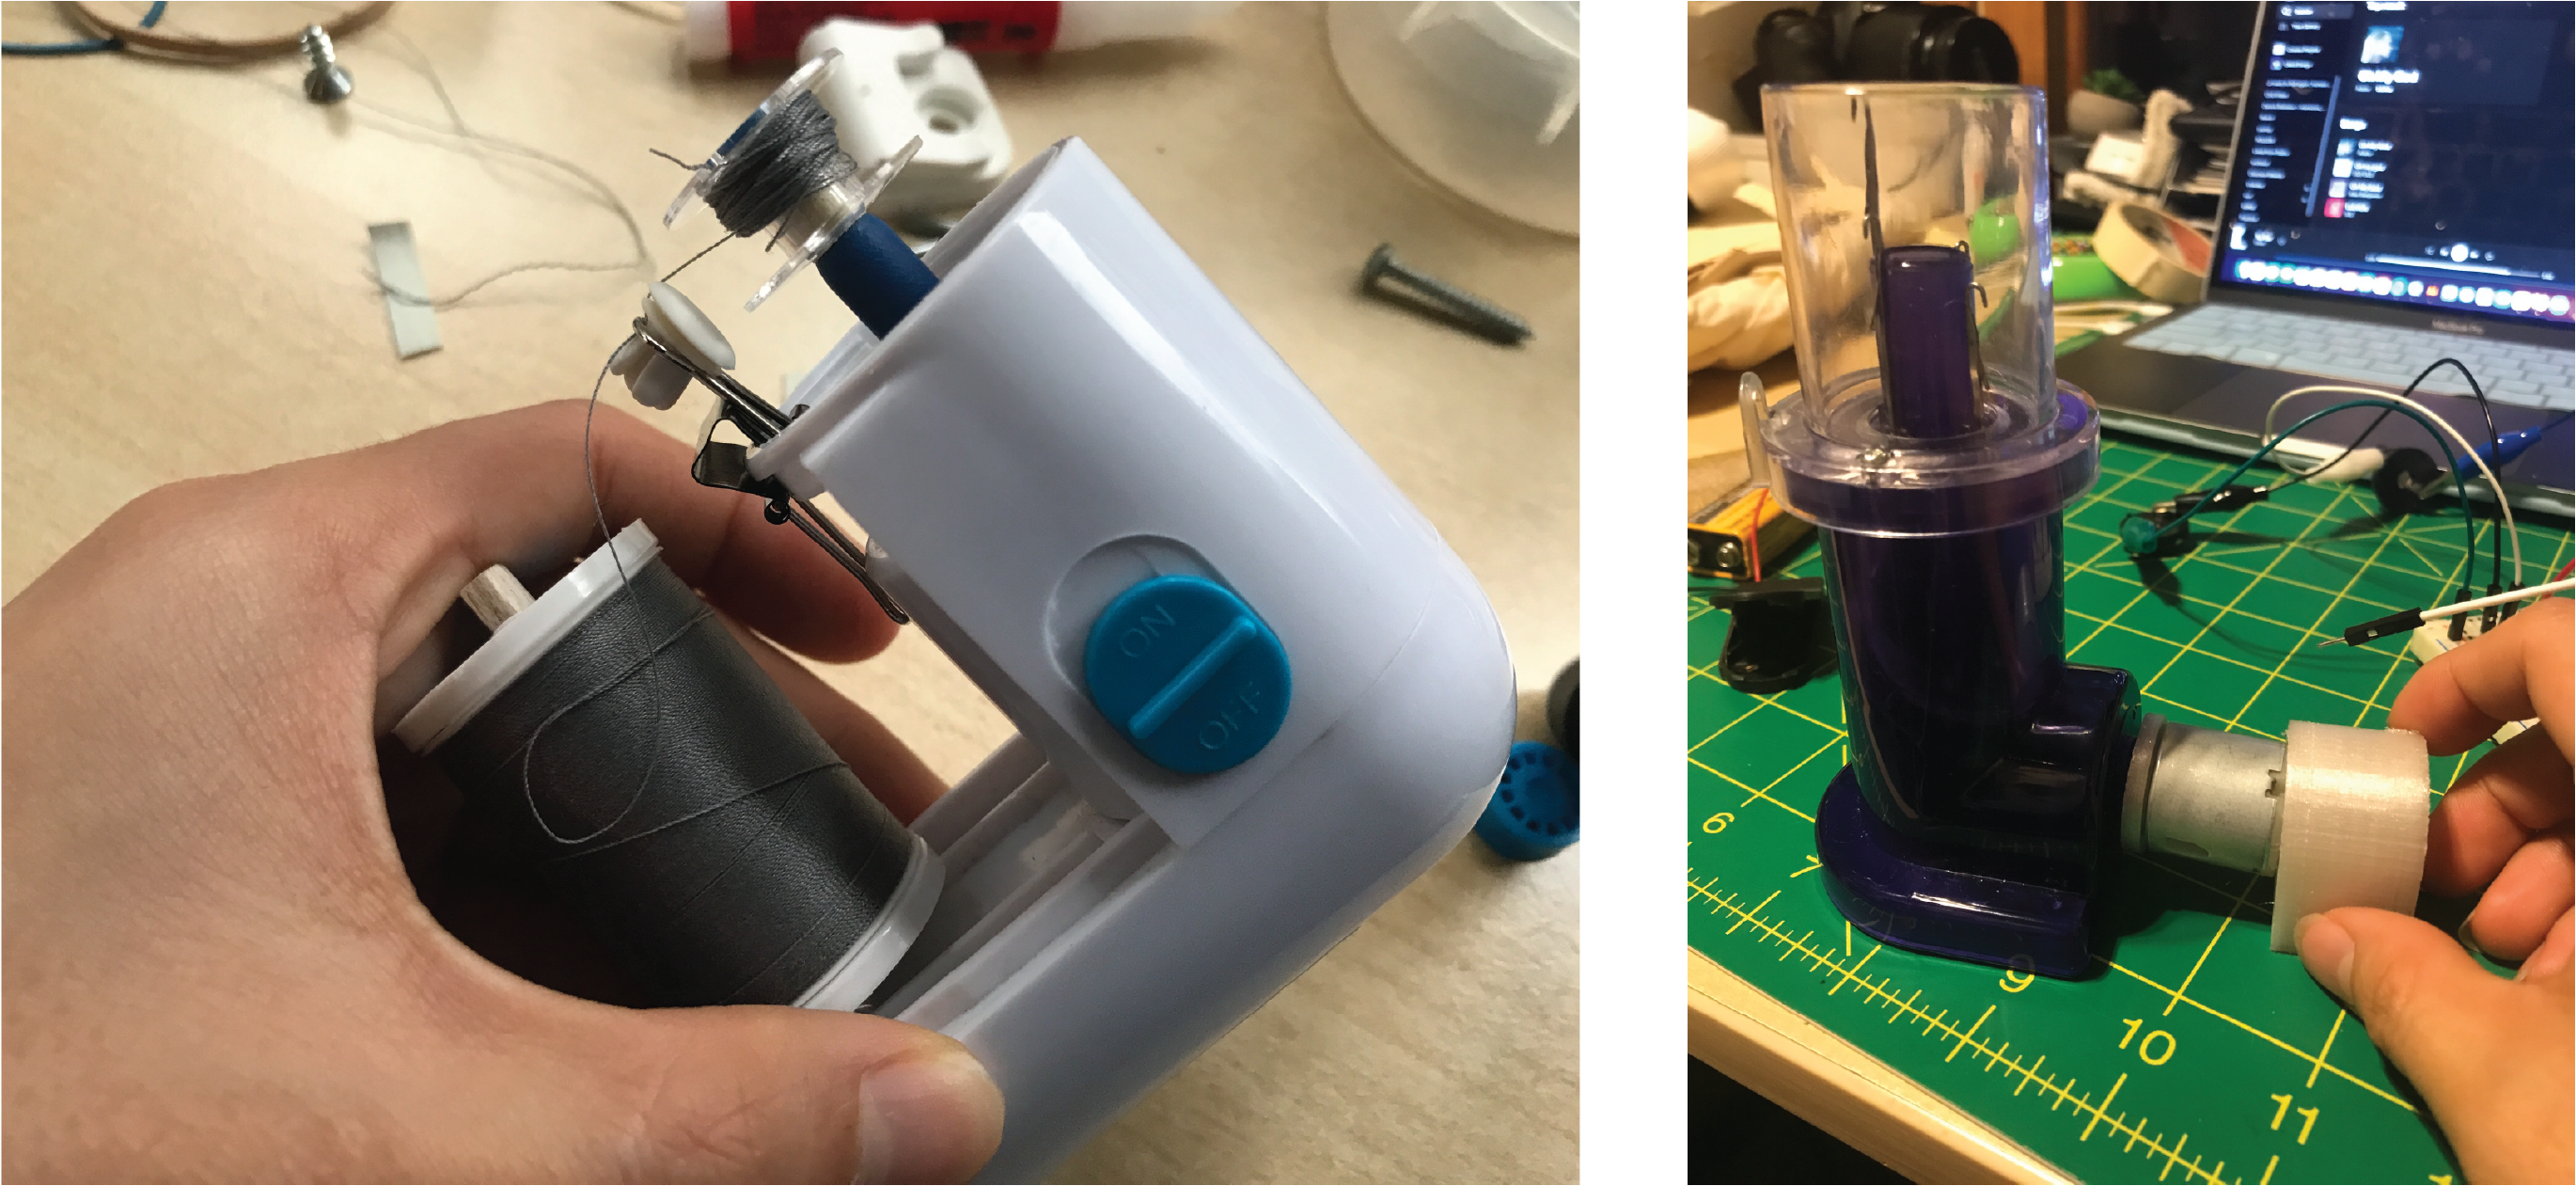
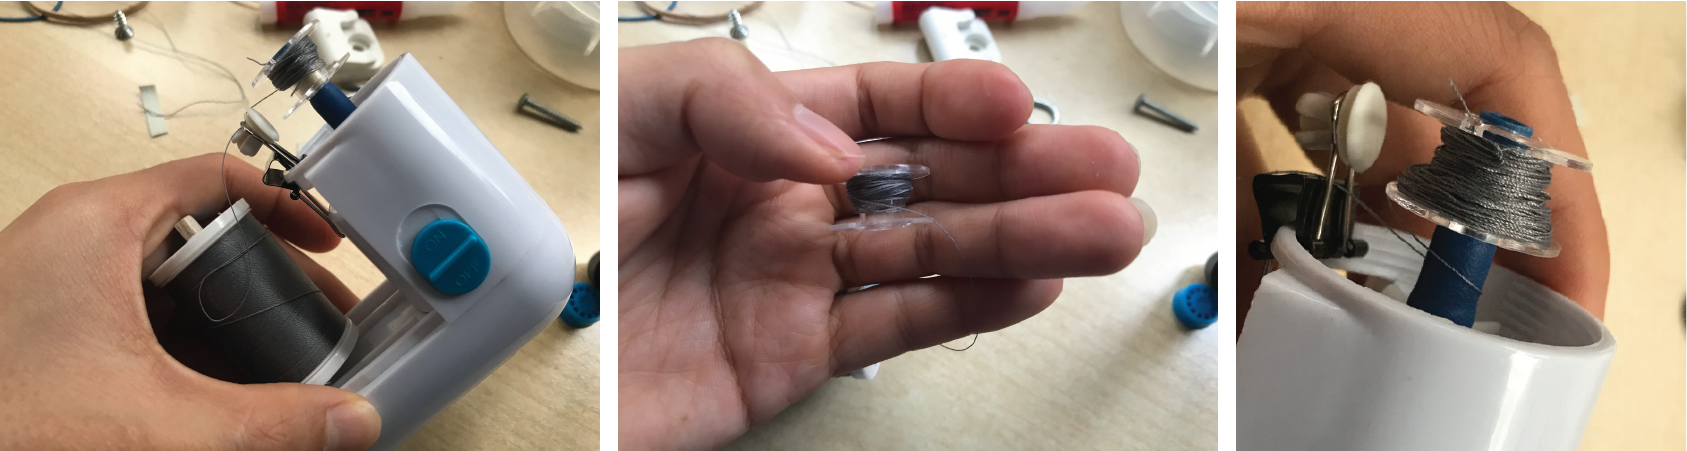
I started with an already existing tool that I think is called a "Lint/Pill Remover", which in my case is battery-operated (2 x 1.5V AA batteries).
I then took apart the lint collector/tank, the filter lid, and the blade holder to reveal just the rotating fan, that was tightly connected to the motor inside.
Attaching Random Objects
I made a quick trip to a local hardware store to find what kind of objects I could stick to this pill remover that would be able to hold a spool of thread, a bobbin, and something that could give the thread some tension. In the end these are the objects I used:
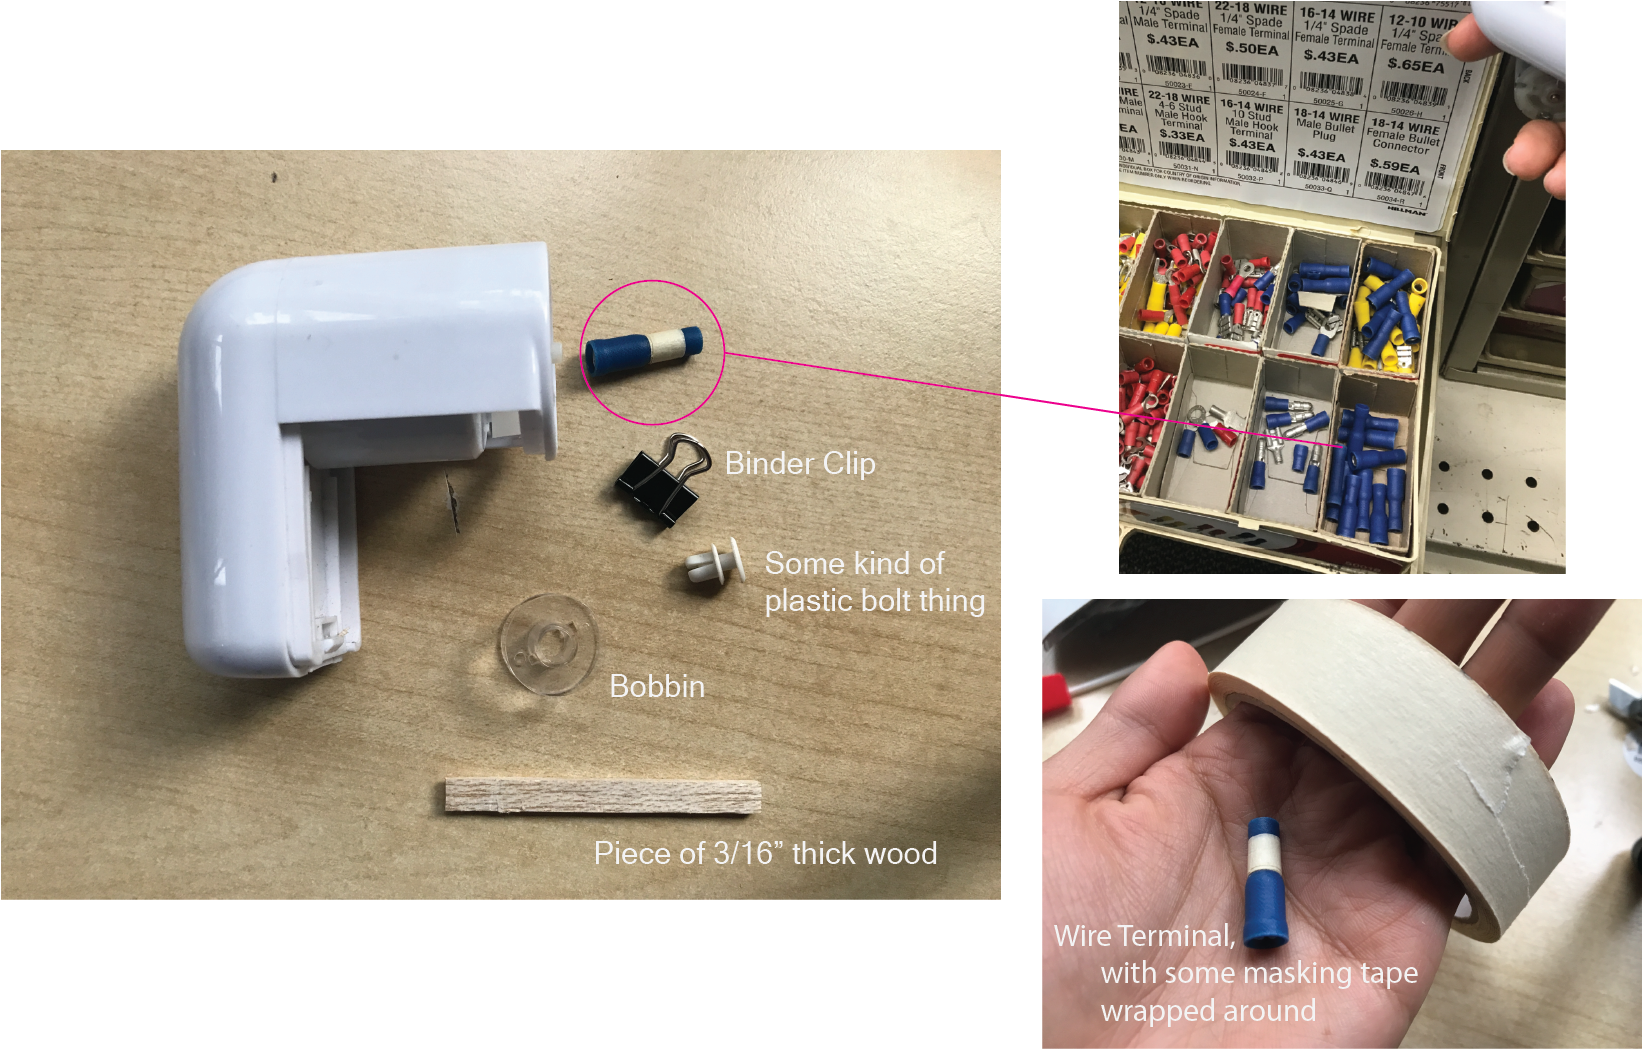
Pretty unconventional method of assembly but.. some results came out of this.
Running the Threader
In the end, the threader was a partial success.
The good part: the bobbin spun securely as did the spool. The thread was led in the correct path and threaded entirely on the bobbin (it didn't run off the bobbin onto the blue shaft)
The to-be-improved part: the thread tension still needs to be increased by some means of assembly of the plastic pin in the binder clip... or a re-design of its attachment.
Automatic Cord Weaver
Motivation
To be honest, I had never heard or seen (let alone used) a cord weaver before this week at all. I ordered it on Amazon for $17 and received it on Mon Nov 29.
Before attempting to connect a motor, I had to try using the tool at all!
Dismantling the Tool
At first I thought I had to unscrew the 3 screws at the bottom to get to the handle. It turned out that I just needed to pull the handle out to reveal its square slot.
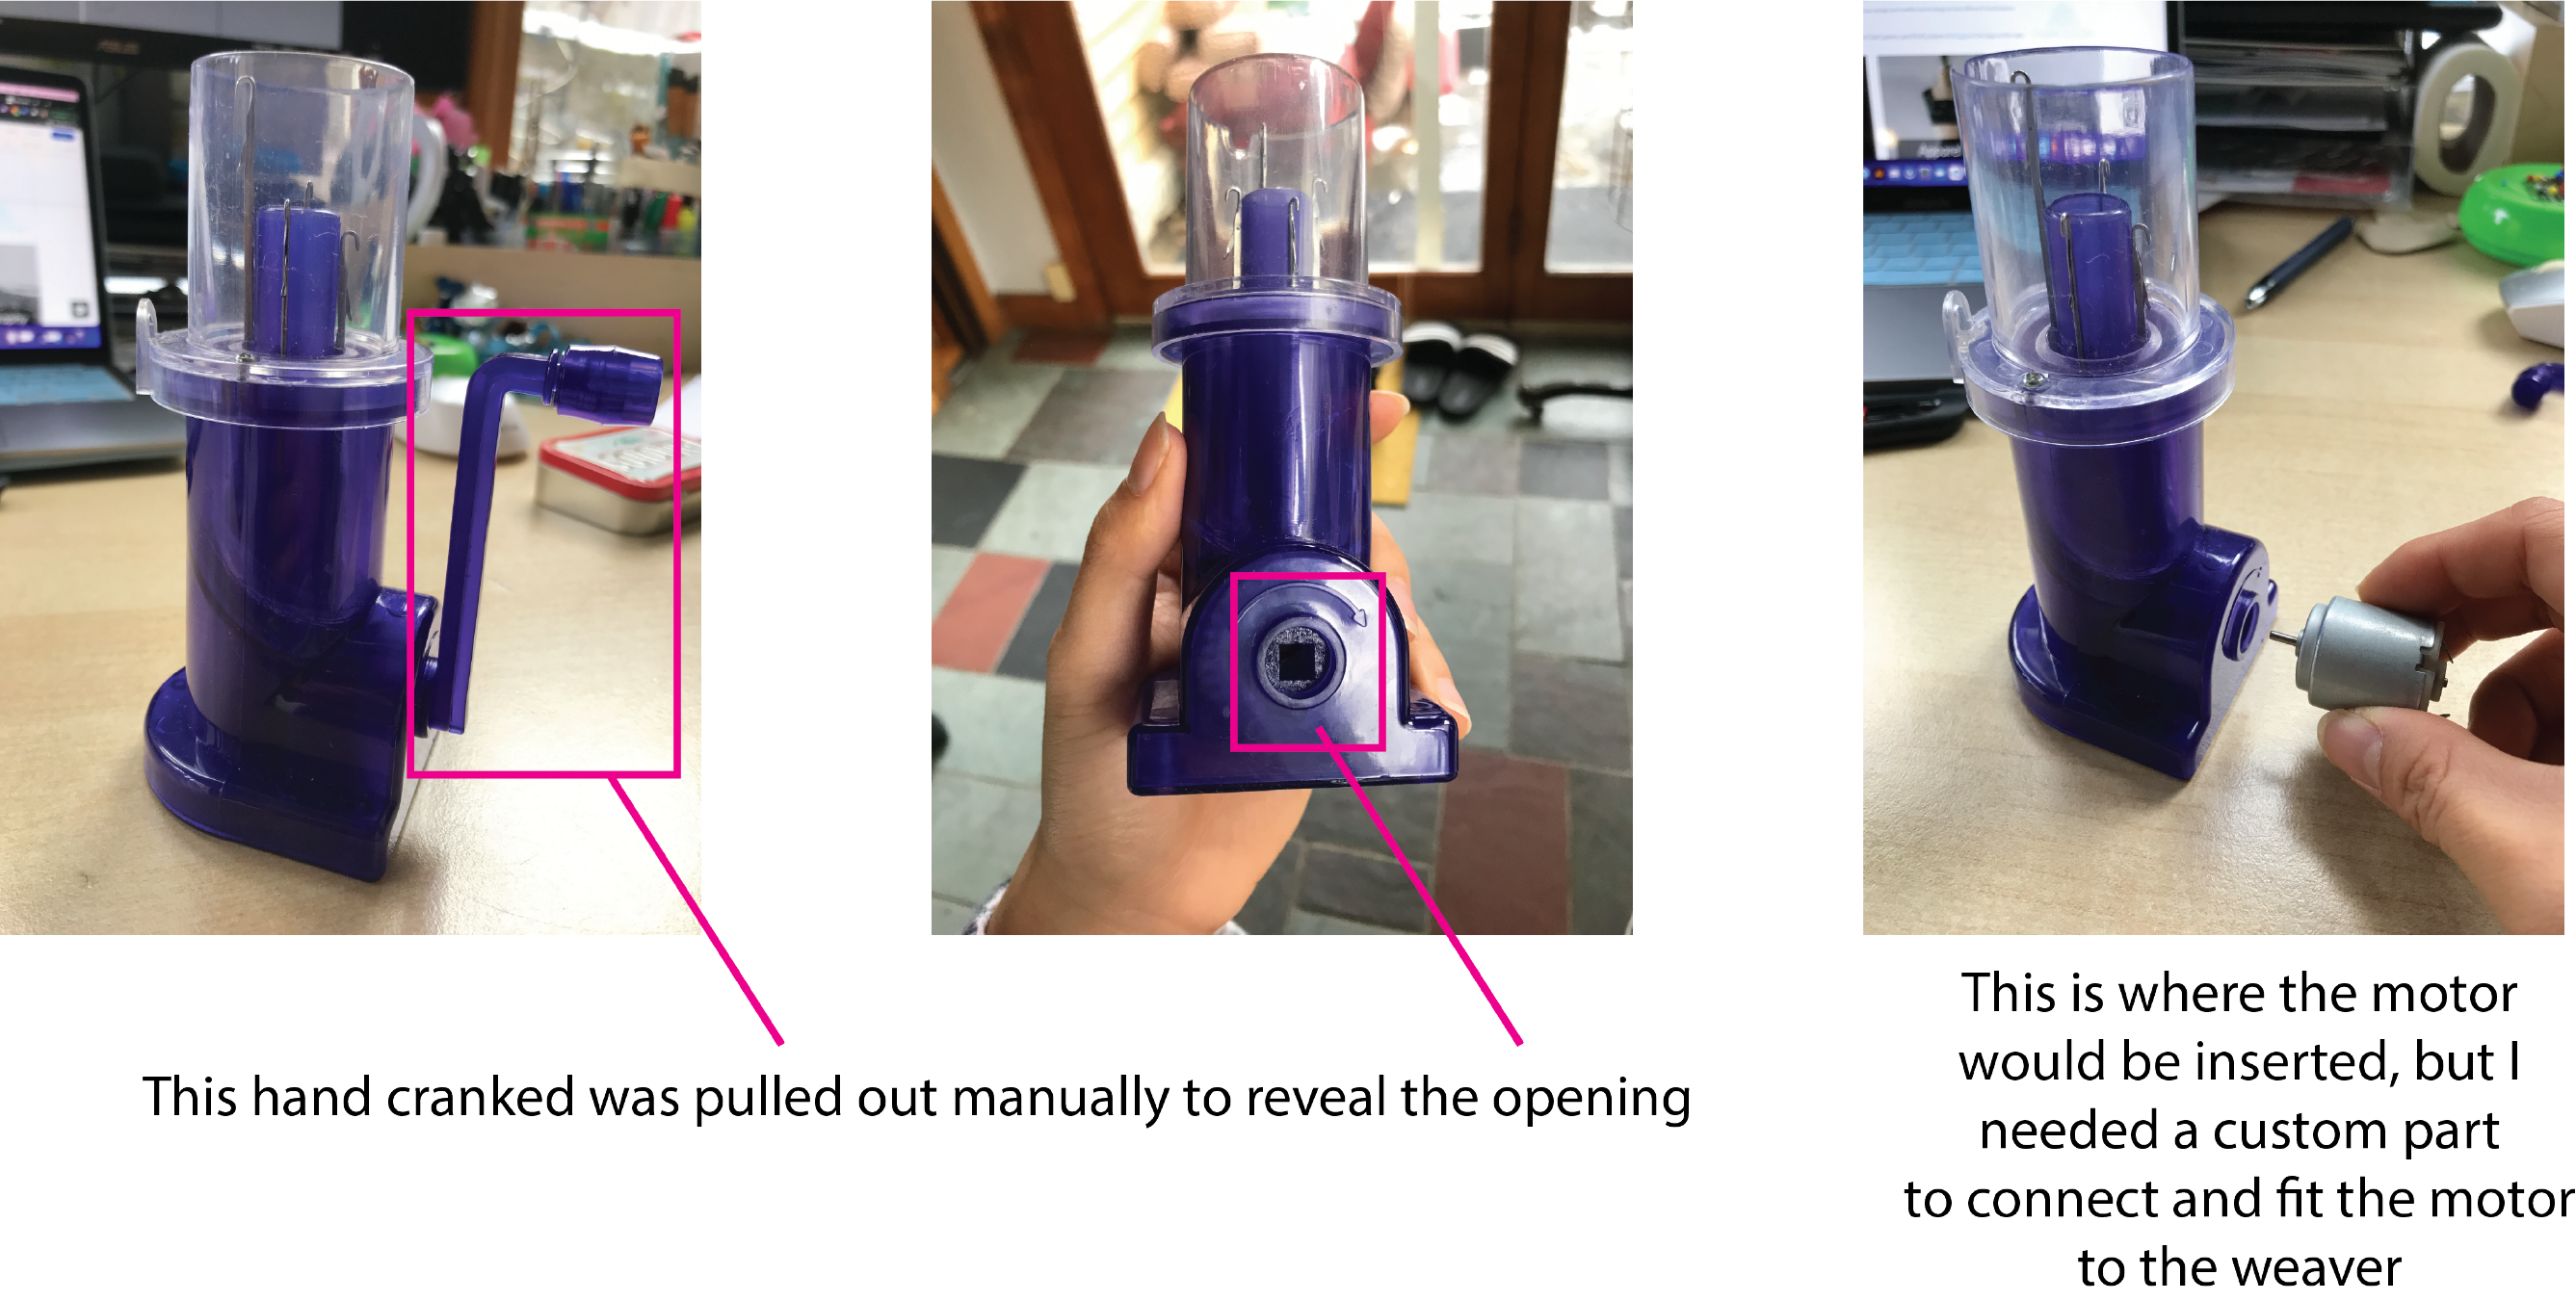
Creating a Custom Part
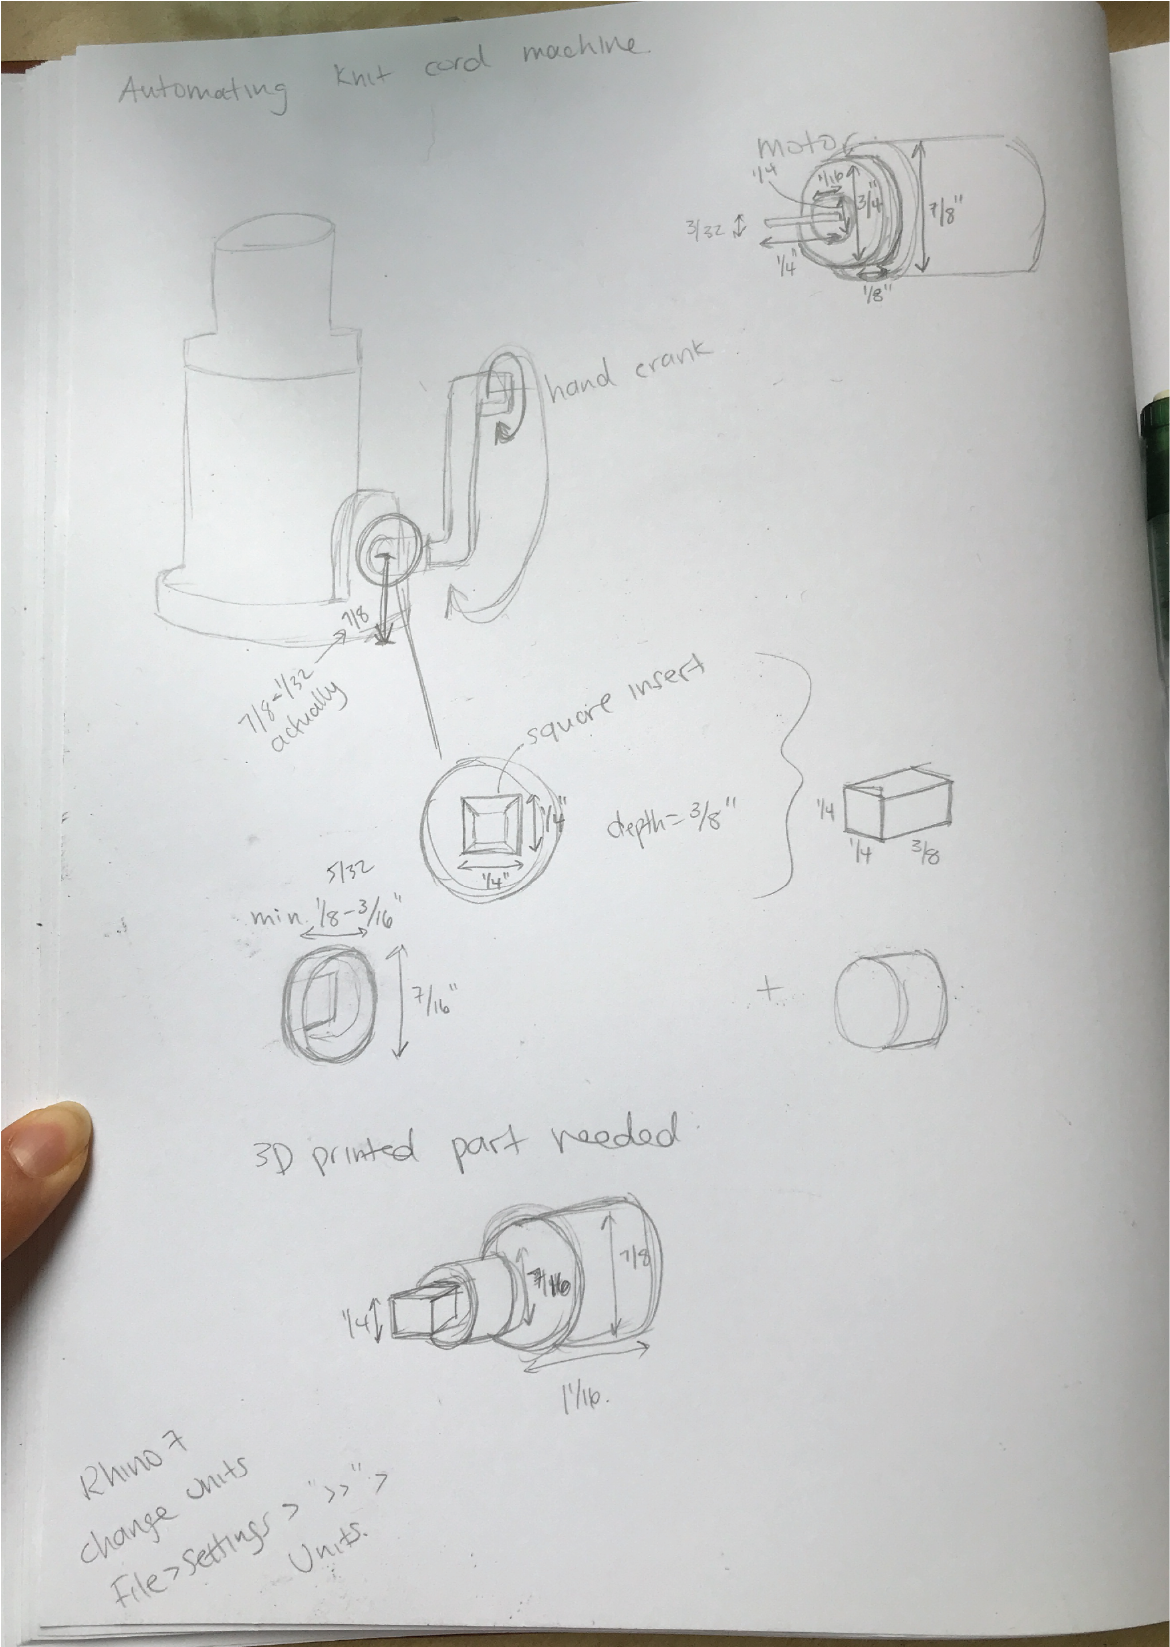
3D Modeling
To connect a DC motor to the weaver, I needed a housing unit that would hold the motor and be inserted into the weaver where the hand crank used to go. I started by sketching out this area and measuring the dimensions of this opening.
I then used Rhino 7 to create this housing unit.
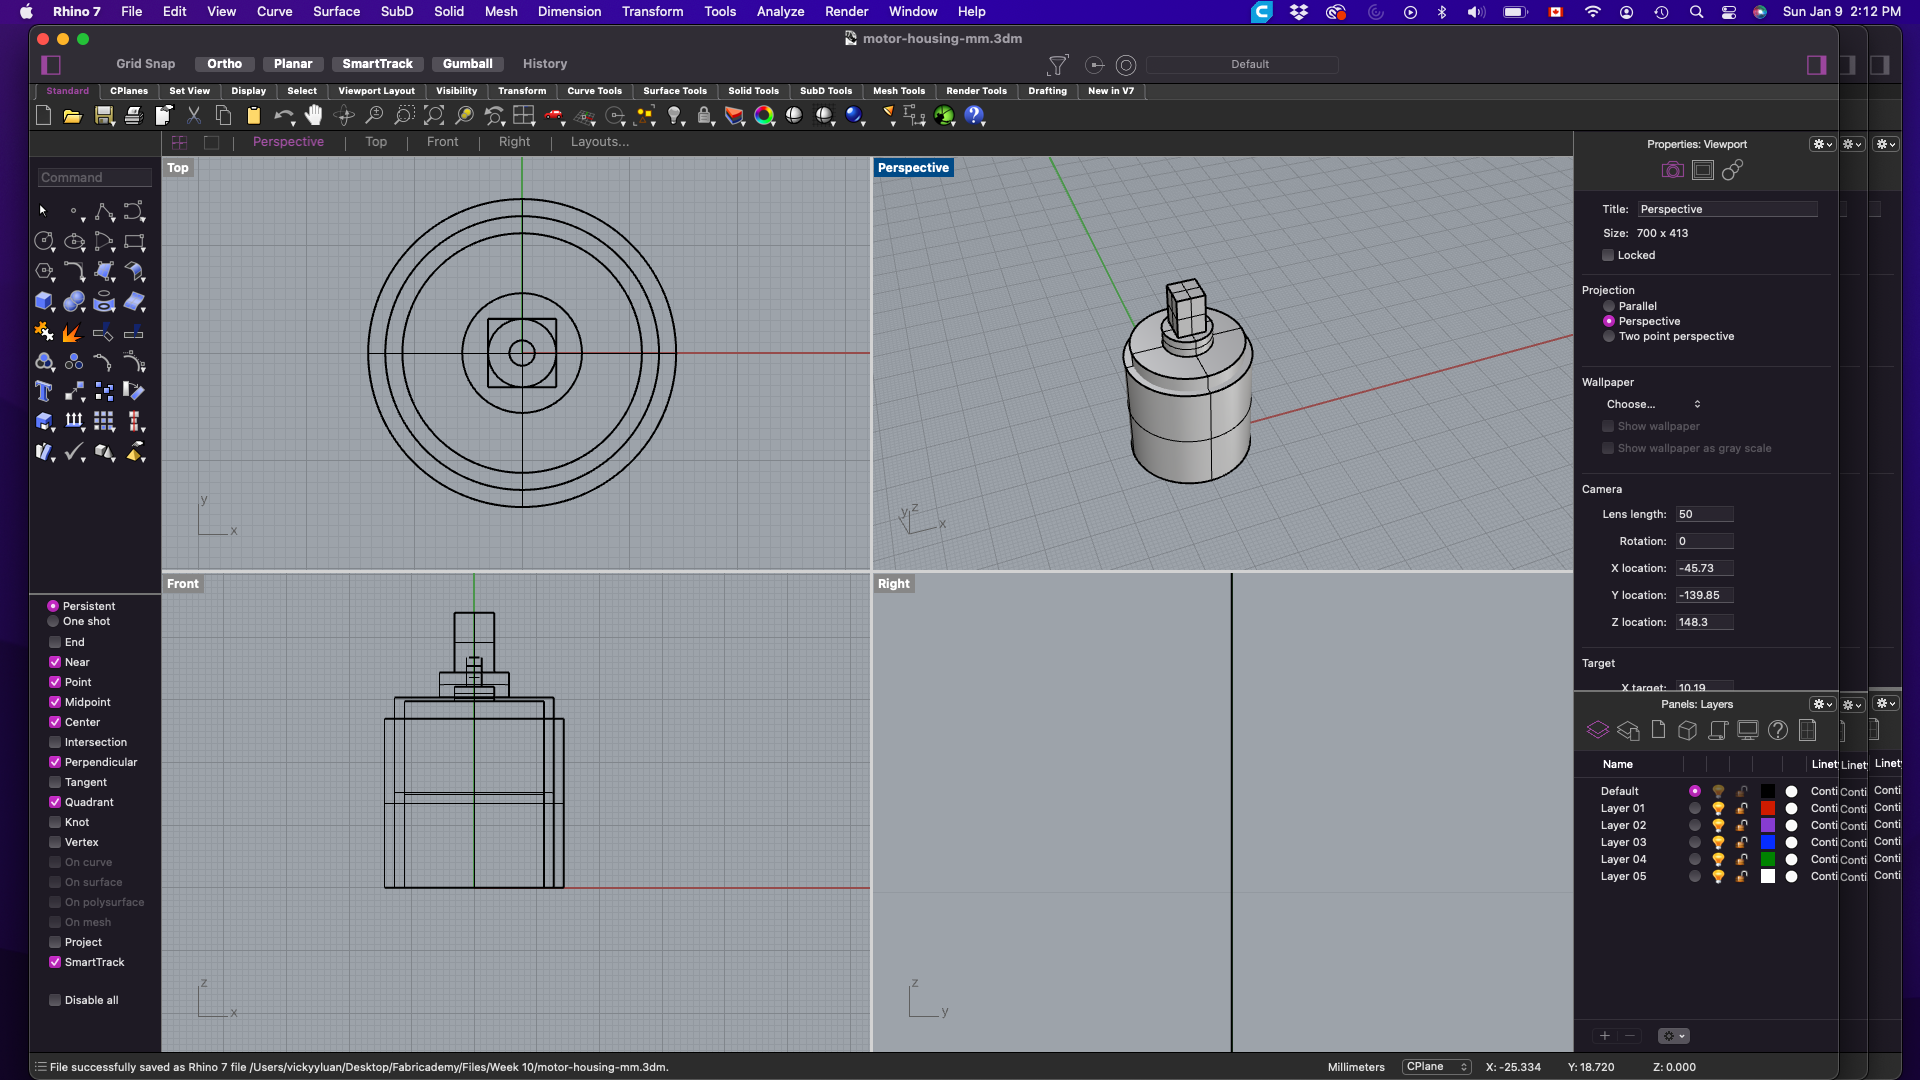
The file was then exported into an .stl file (see "Download Links" below to download)
3D Printing
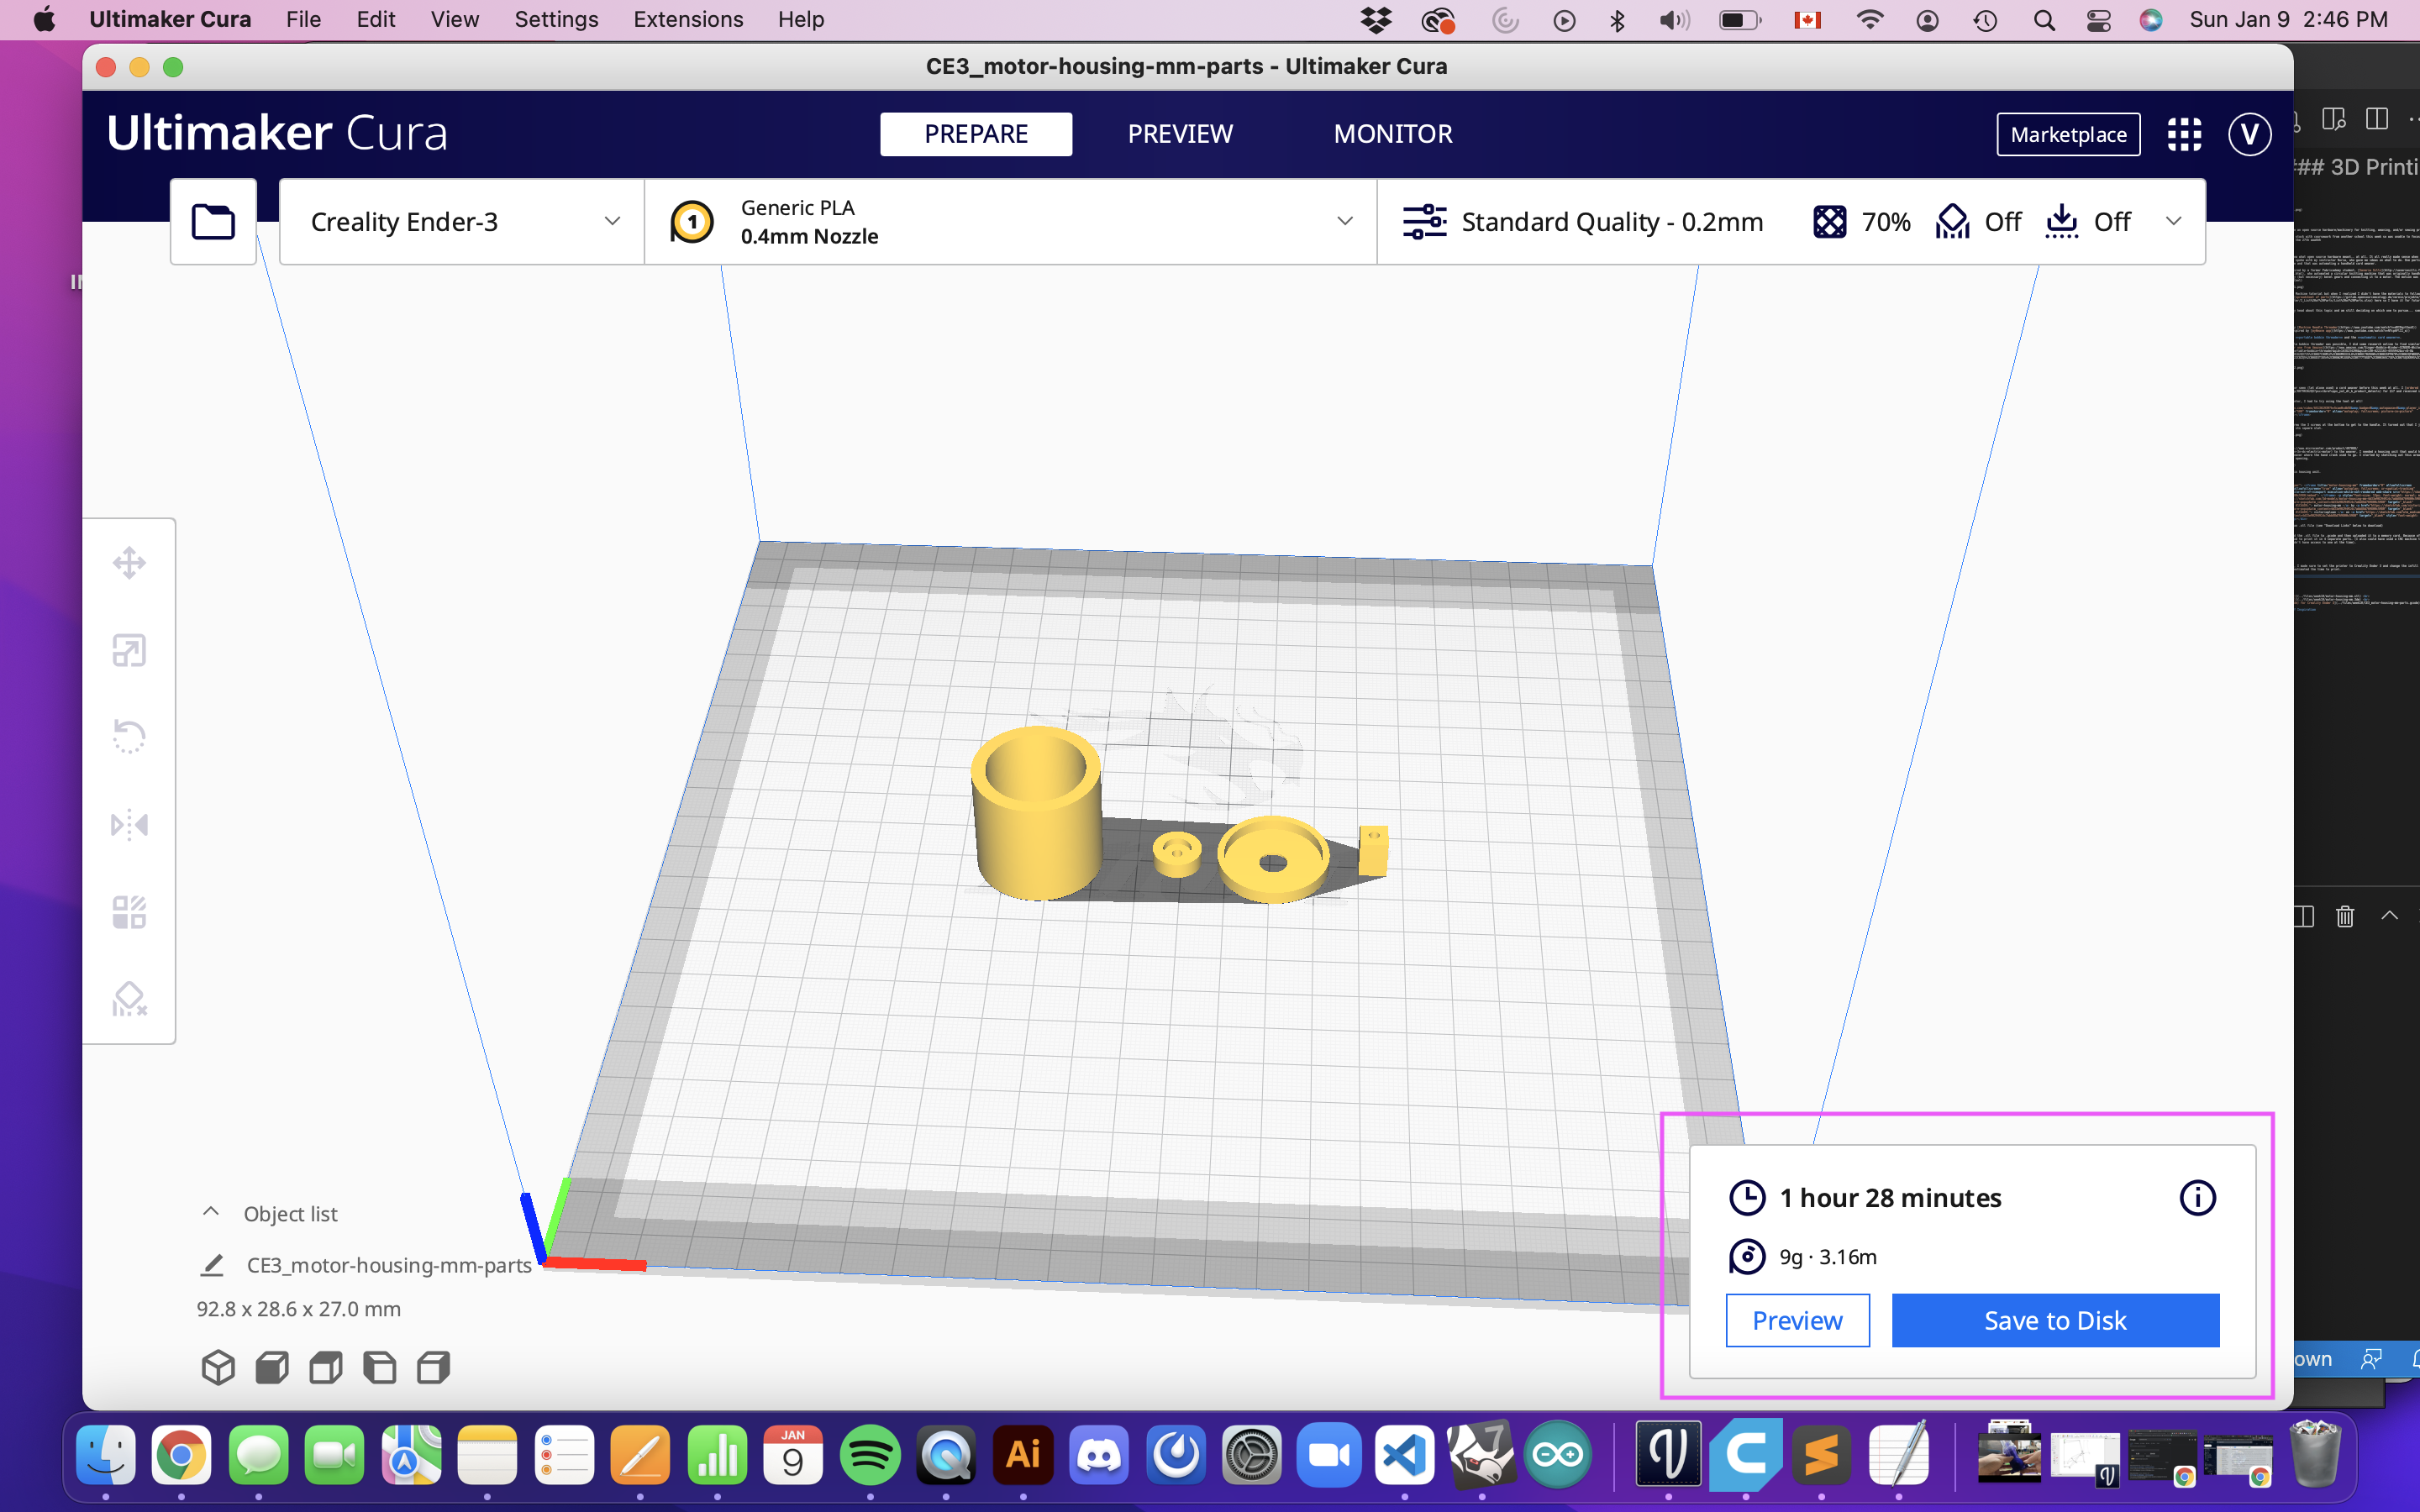
Using Ultimaker Cura, I converted the .stl file to .gcode and then uploaded it to a memory card. Because of the shape of the housing unit however, I had to print it in 4 separate parts. (I also could have used a CNC machine to create the divets of the part, but I didn't have access to one at the time).
Here's how I did this:
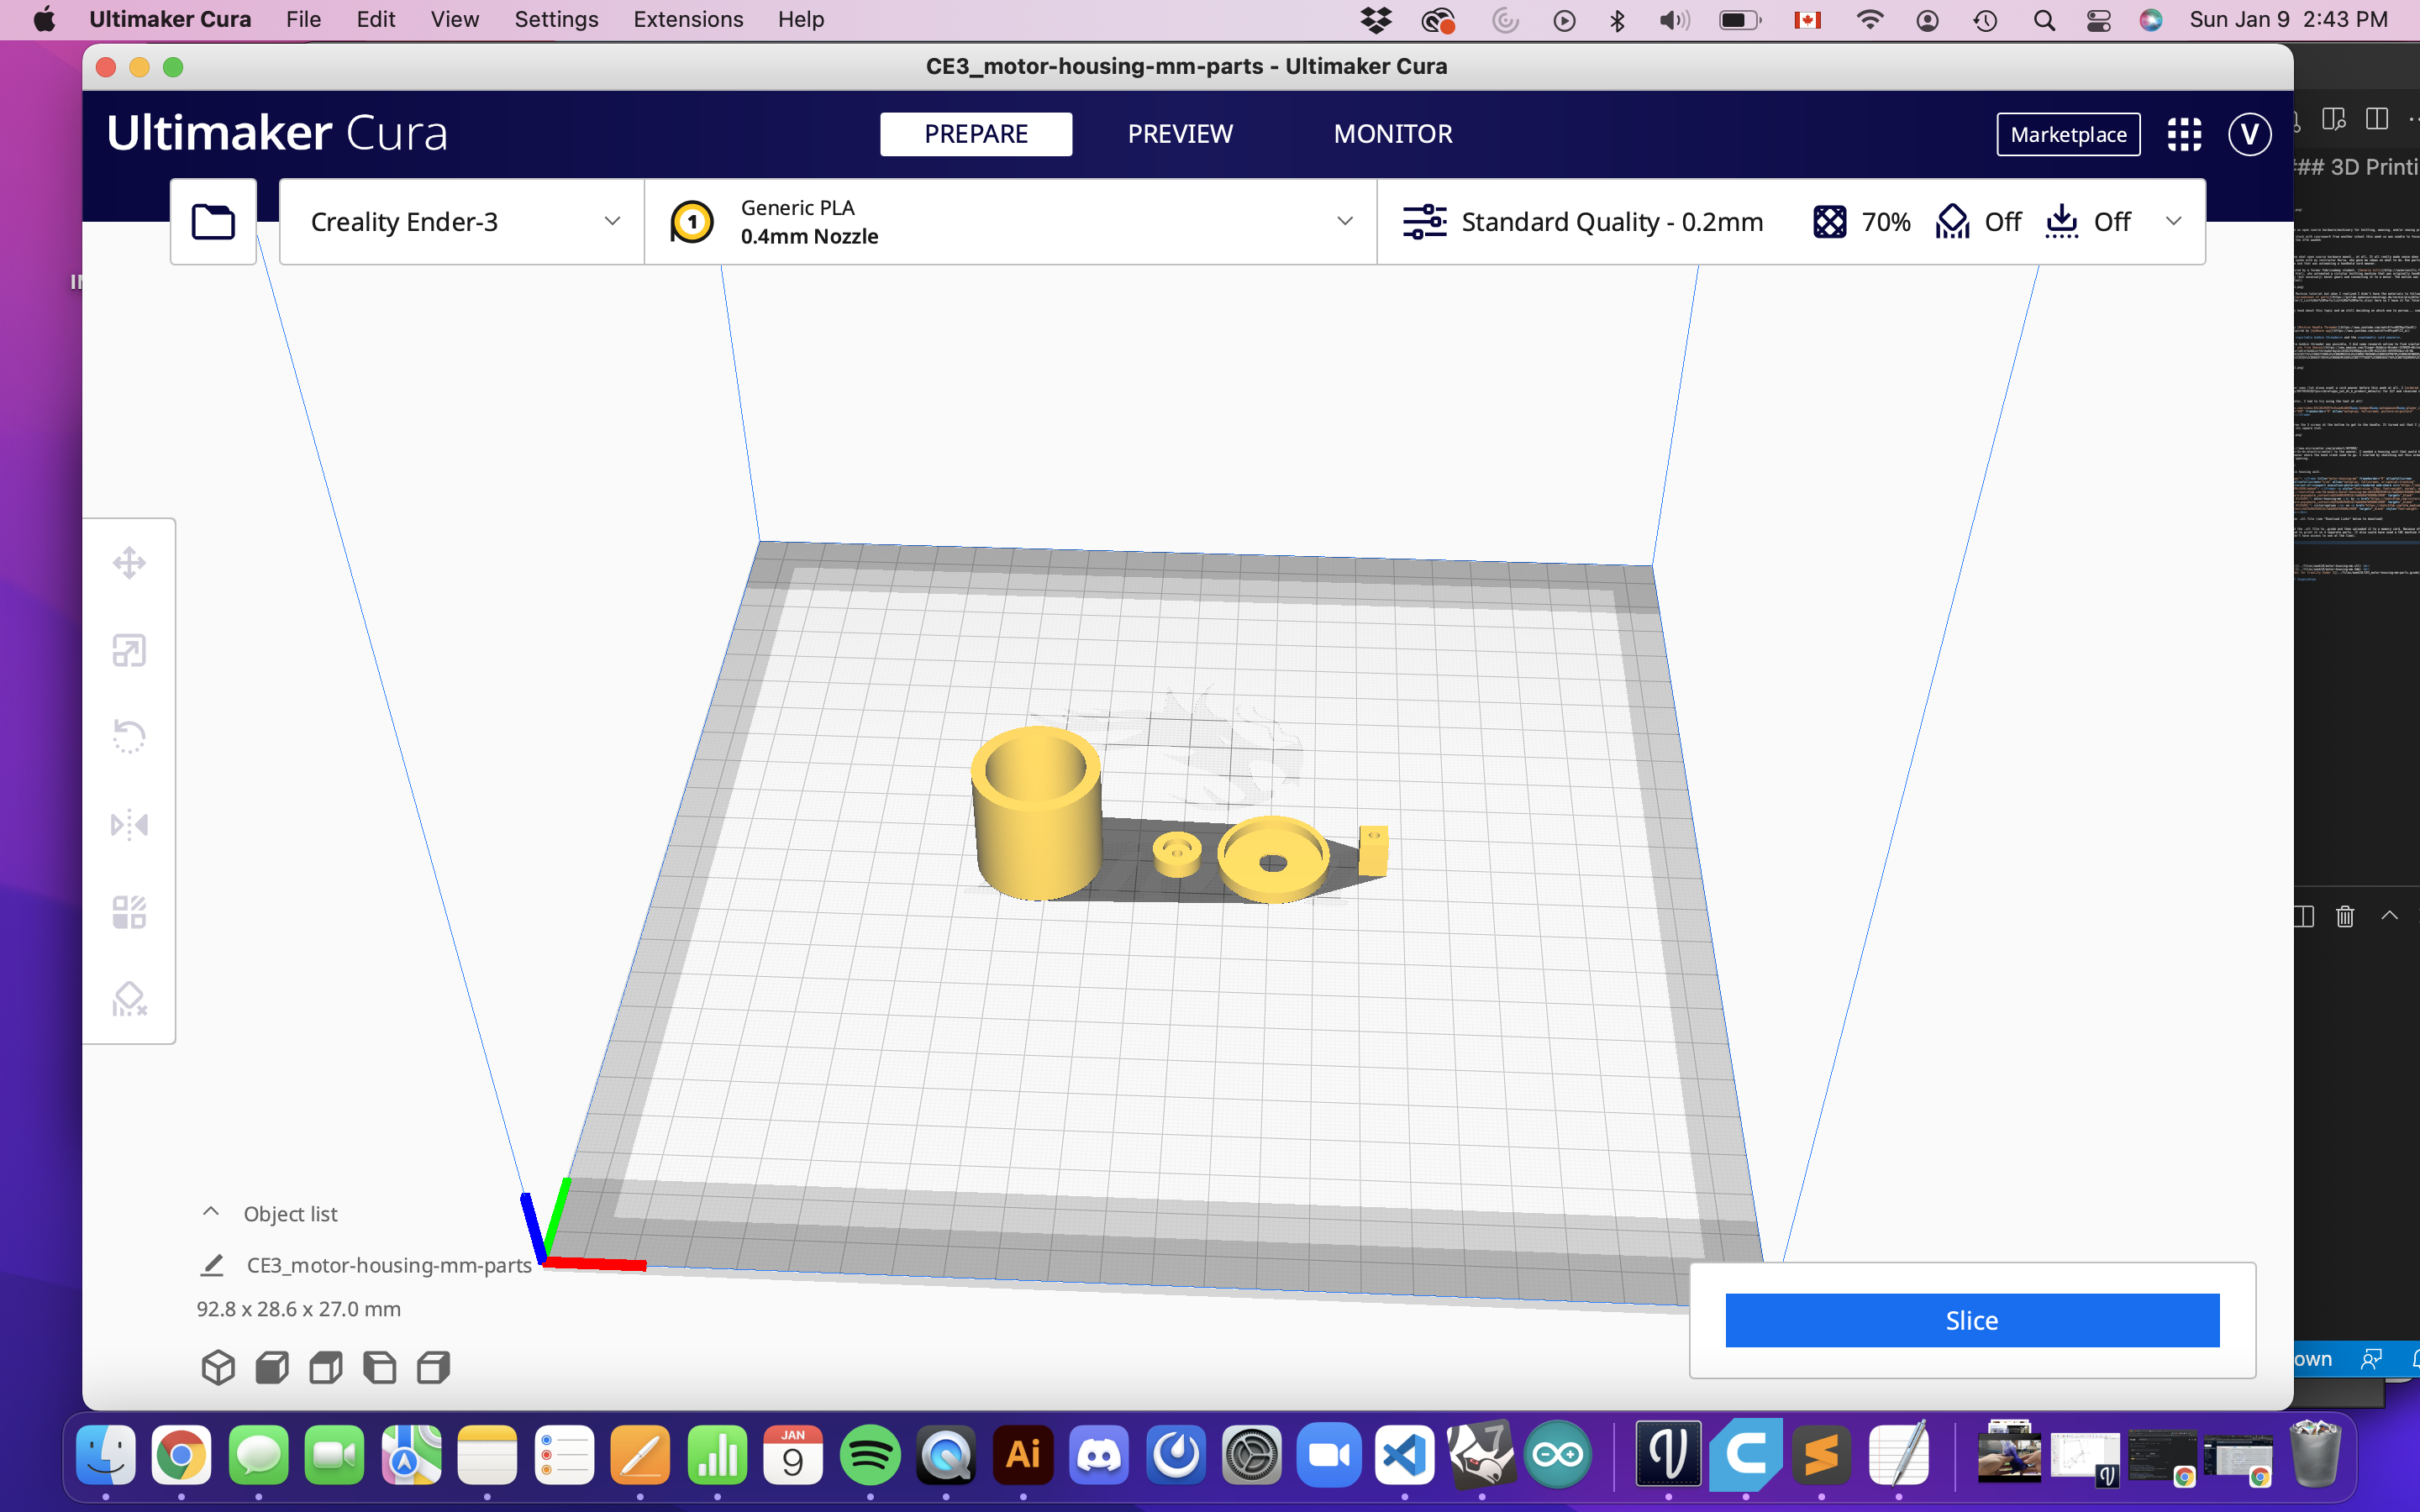
Once the file was opened in Cura, I made sure to set the printer to Creality Ender 3 and change the infill to 70%. Then I clicked on "Slice" which estimated the time to print and then Save to Desk as a ".gcode".
The following video is a compilation of the printing, sanding and assembly process.
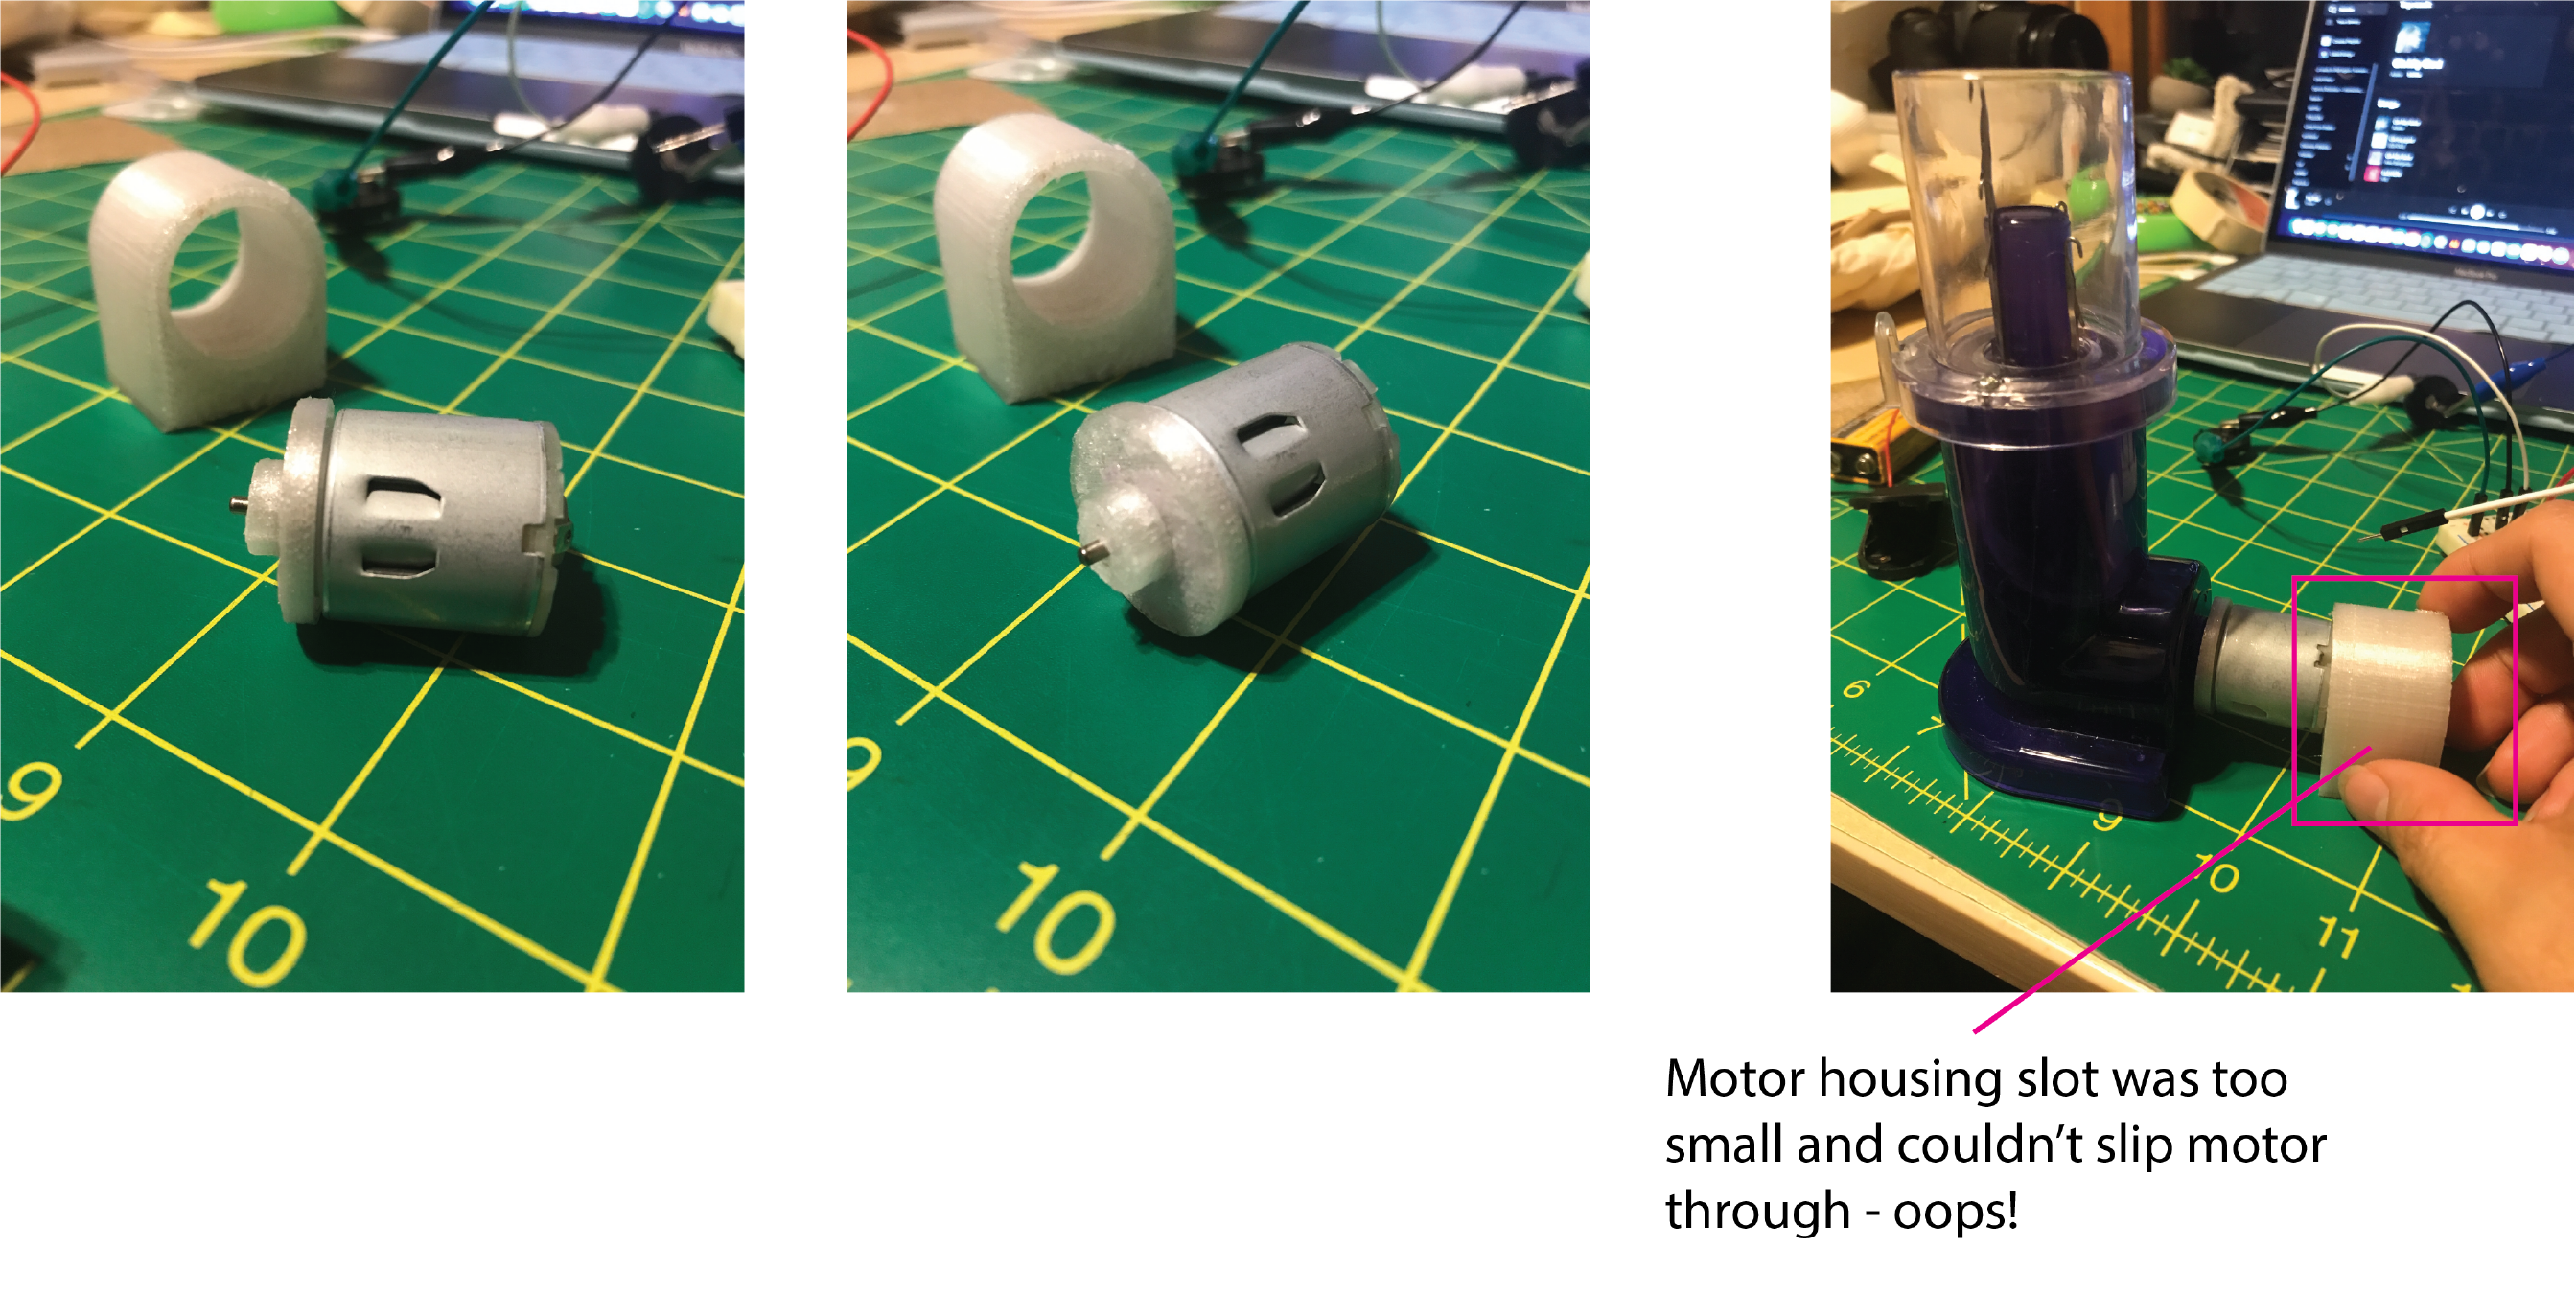
While the print was roughly a success and the parts fit on the motor, I realized that the motor could not turn the actual part because it didn't have enough power and would stop turning as soon as a restraining force was applied. Moreover, the actual housing compartment for the motor printed with a smaller diameter than intended so I couldn't slip the motor through to fit.
Bill of Materials
Bobbin Threader
| Item | Unit Cost | Source |
|---|---|---|
| Bobbin | $0.17 | Amazon |
| Adapter | $0.09 | Hardware store |
| Stick | $0.32 | Hardware store |
Cord Weaver
| Item | Unit Cost | Source |
|---|---|---|
| Cord Weaver | $17.63 | Amazon |
| DC Motor | $2.99 | Micro Center |
| Custom Part | n/a | PLA given by friend |
| Wool Yarn | n/a | Joann's from a year ago |
Problem Areas
Securing the bobbin
Problem
Sliding the bobbin onto the wire terminal shaft directly led to instability when spun and did not hold the bobbin securely.
Solution
Attaching some masking tape to the shaft of the blue wire terminal helped this right away! I cut some to match the width of the narrowest part of the shaft and wrapped it around 2-3 times.
Cord Weaving
Problem
Perhaps it was my inability to read or understand the instructions that came with the box... lol but I could not for the life of me get the cord started correctly in the beginning
Solution 1
The area I had to pay attention to was the latch that caught the yarn the first time and find the stitch that needed to slip off of the latch.
Anyway this Youtube video helped me a lot
Solution 2
I also switched from a medium weight yarn to a light weight yarn that I think helped a lot.
Download Links
Custom Motor Housing Unit (.stl)
Housing Parts 1 (.stl)
Housing Parts 2 (.stl)
with modified motor stand and adjusted square piece
Custom Motor Housing Unit (.3dm)
Custom Motor Housing Unit (.gcode) for Creality Ender 3
Other Resources and Sources of Inspiration
- myWeave app
- Singer Portable Bobbin Winder $25 USD
- Electric Bobbin Winder $69 USD
- Machine Needle Threader
- Magpie Spinning Wheels
- Rhino 7 Tutorial: creating a hole/tube
- Rhino 7 Tutorial Course