5. E-textiles
Research

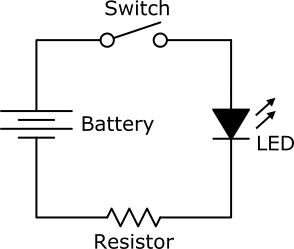
An electric circuit is a path for transmitting electric current. An electric circuit includes a device that gives energy to the charged particles constituting the current, such as a battery or a generator; devices that use current, such as lamps, electric motors, or computers; and the connecting wires or transmission lines.
References & Inspiration

Process and workflow
This week we worked as a group, mentored by Marius - our local instructor in electronics. Because we did not have the conductive thread, we started by testing different types of wires.

Simple circuit and Arduino

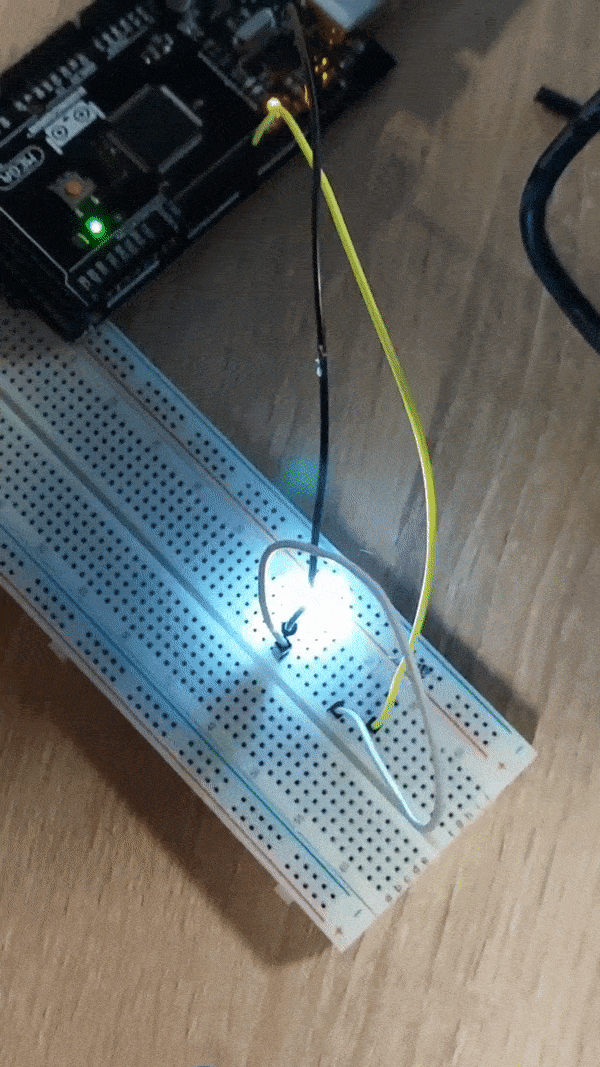
We started by creating a simple circuit on the breadboard, to light up a led. After that we connected it to the Arduino and wrote the following code.
#define ledPin 7


void setup() {

  // initialize digital pin LED_BUILTIN as an output.
  pinMode(ledPin, OUTPUT);
  pinMode(2,INPUT_PULLUP);
  Serial.begin(9600);


}

// the loop function runs over and over again forever
void loop() {
 if (digitalRead(2) == HIGH);
 {
    digitalWrite(ledPin, HIGH);
    Serial.println(digitalRead(2));
}
else
{
    digitalWrite(ledPin, LOW);
    Serial.println(digitalRead(2));
  }
}


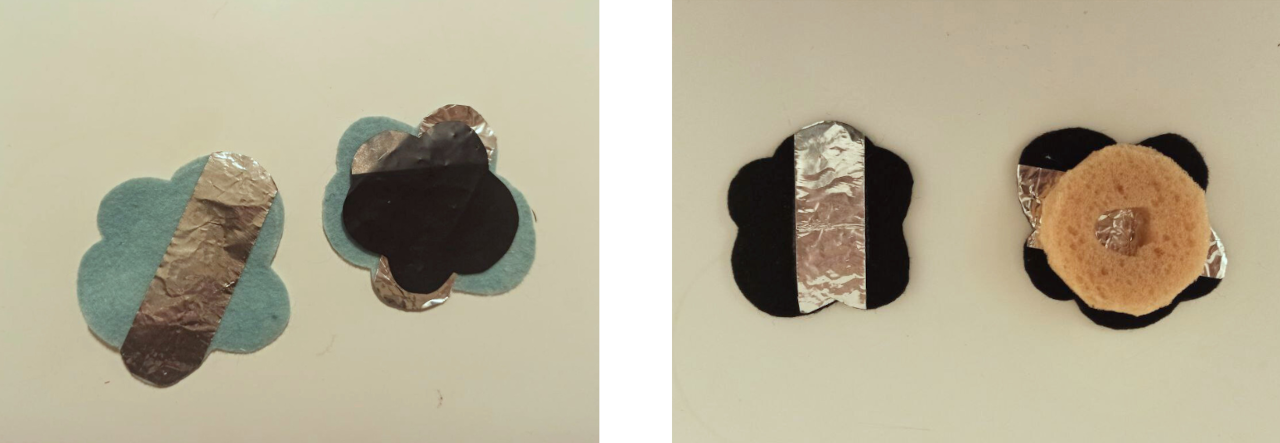
Next, we created an analog sensor, using: felt, conductive tape and velostat.

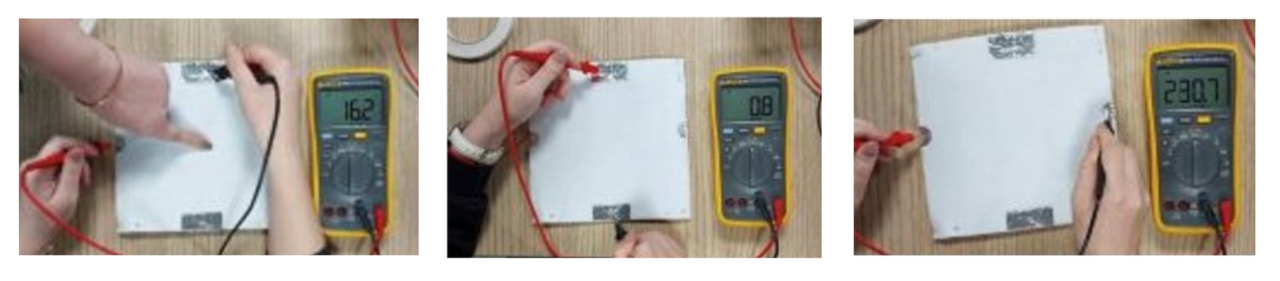
After that - a digital sensor


Personal project
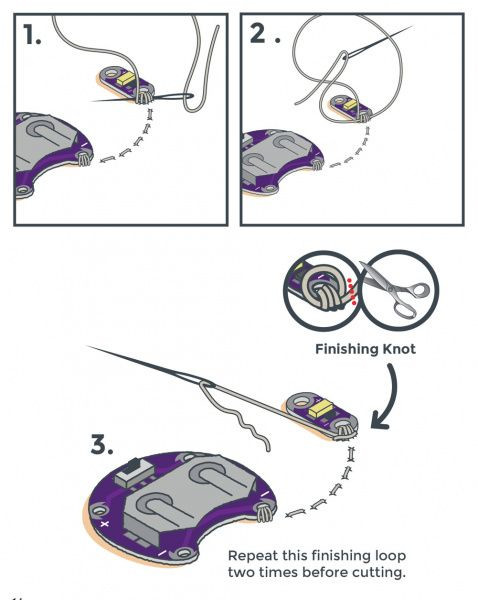
For the personal project, I decided to do a piece of jewelry, with a led that was going to blink synchronized with the heart beat. After exploring some possibilities, as a necklace with a pendant, earings, a ring, me and Marius finally agreed that the choker would be the best choice, because it is tight and it was the best option for the pulse meter. I scketched a simple design, in a way to integrate: the led, the resistor, the battery, the pulse meter and the LilyPad, so that they still look pretty, on the neck.
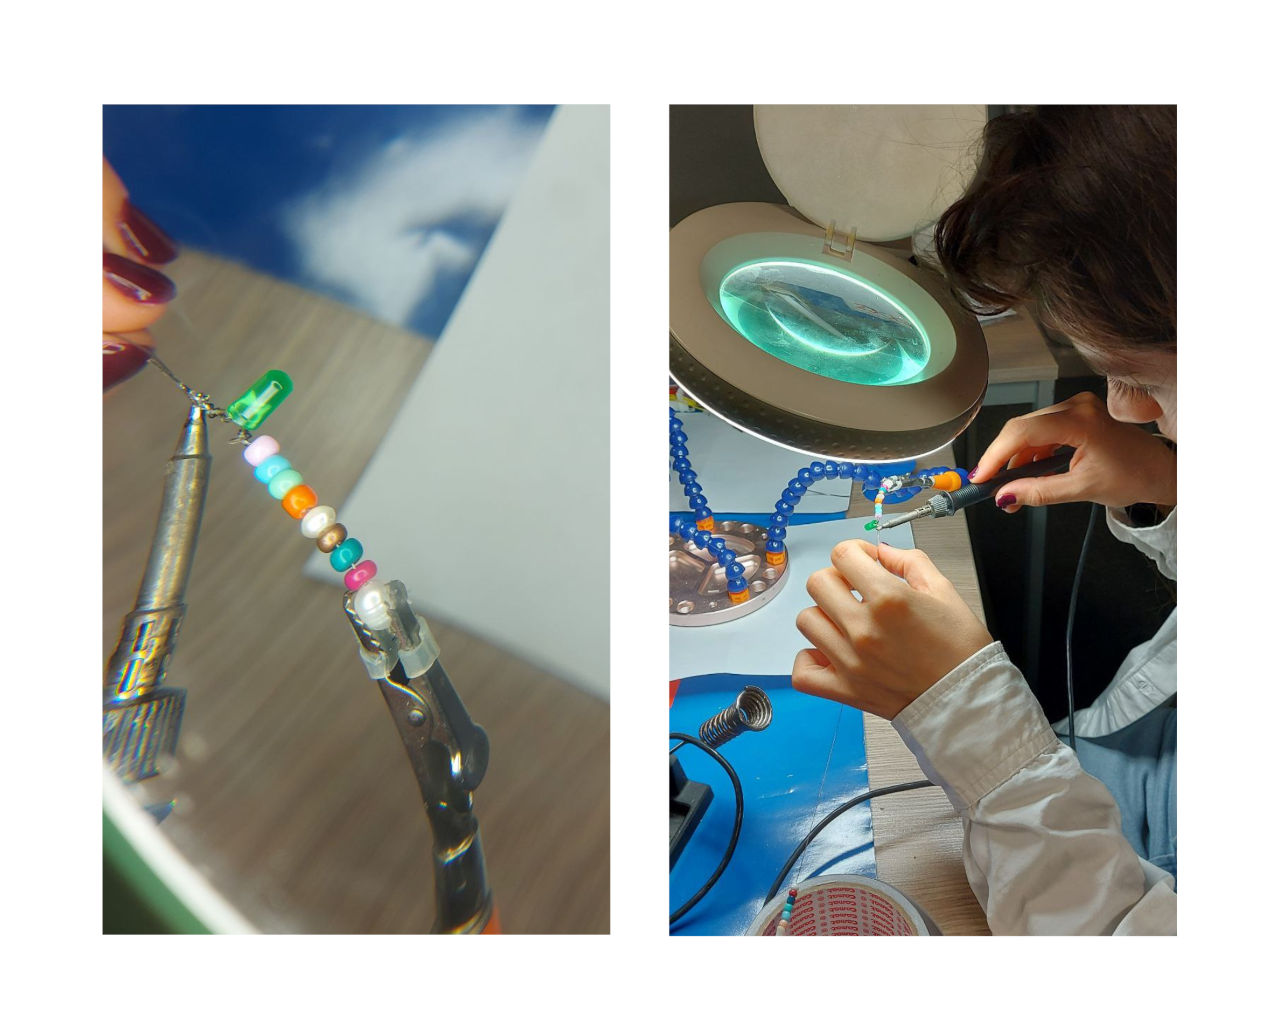
Unfortunately, there were some problems with the pulse meter. It was not showing the pulse accurately. And in the end it I accidentally I broke it :) After that I understood that I had to isolate it.
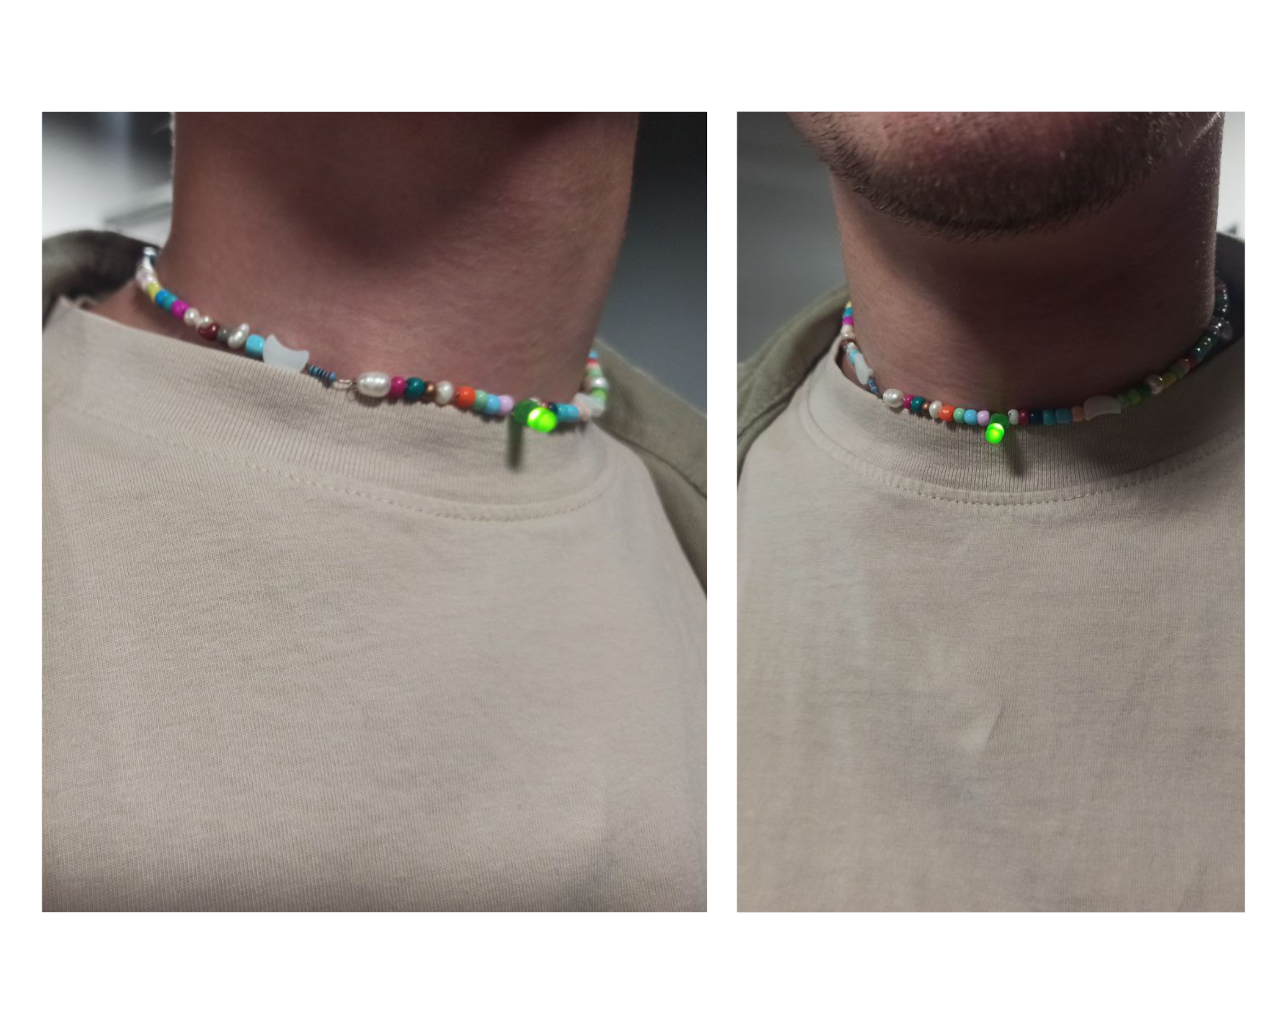
There are some photos I managed to take before it got broke.
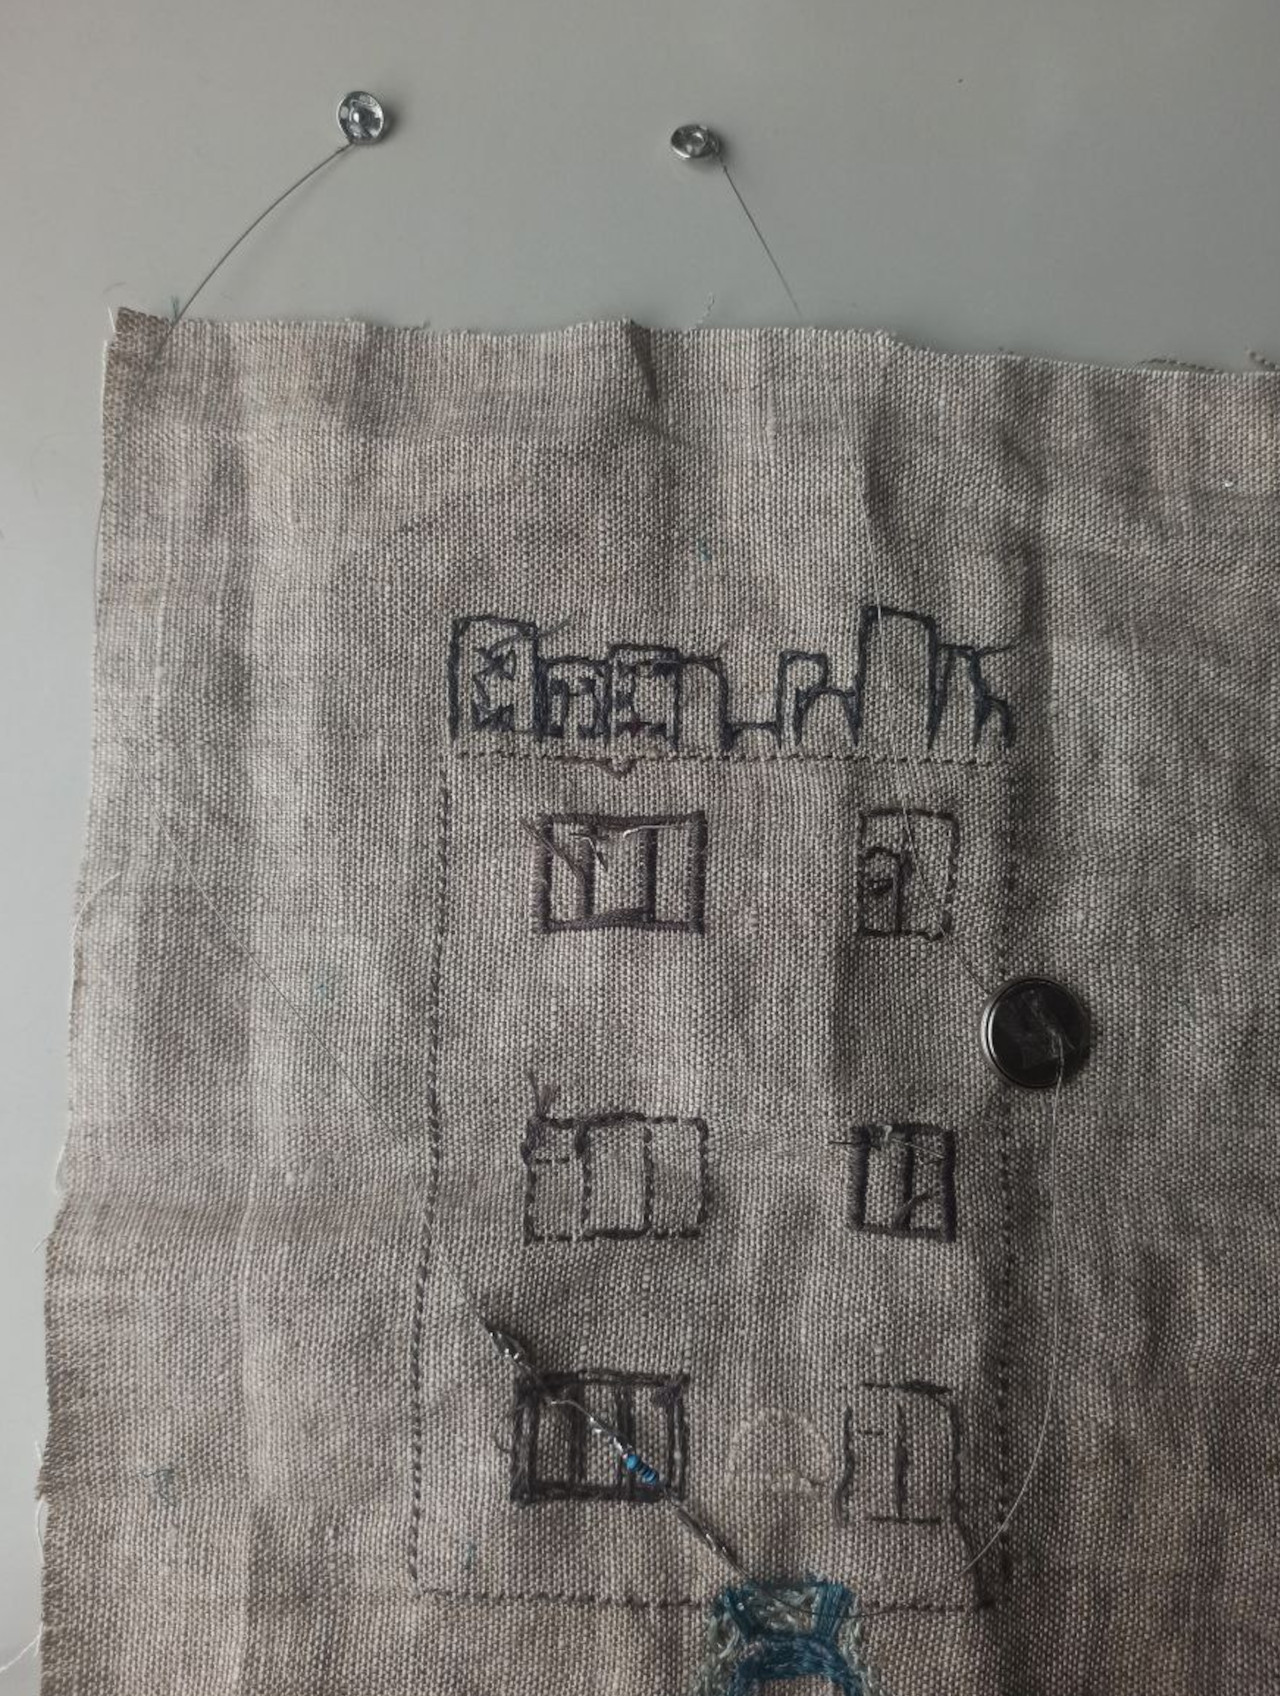
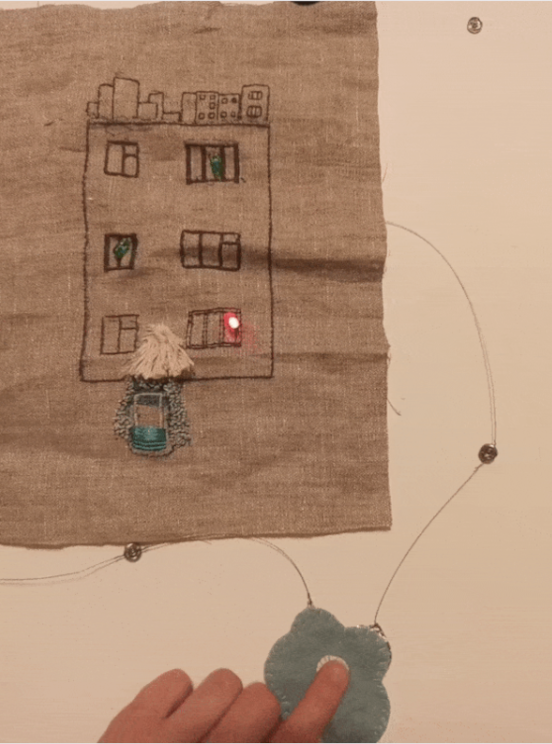
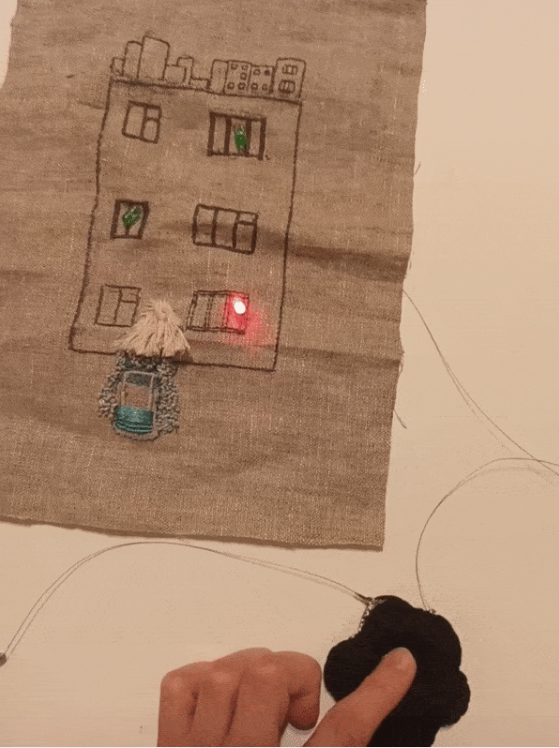
I felt like my assignment was not complete and also was inspired to make something more. So I decided to create this embroidery, inspired by the city I live in - Chișinău. This work tells the story is of a girl whose dreams are too big and too colorful, for the grey world she lives in.
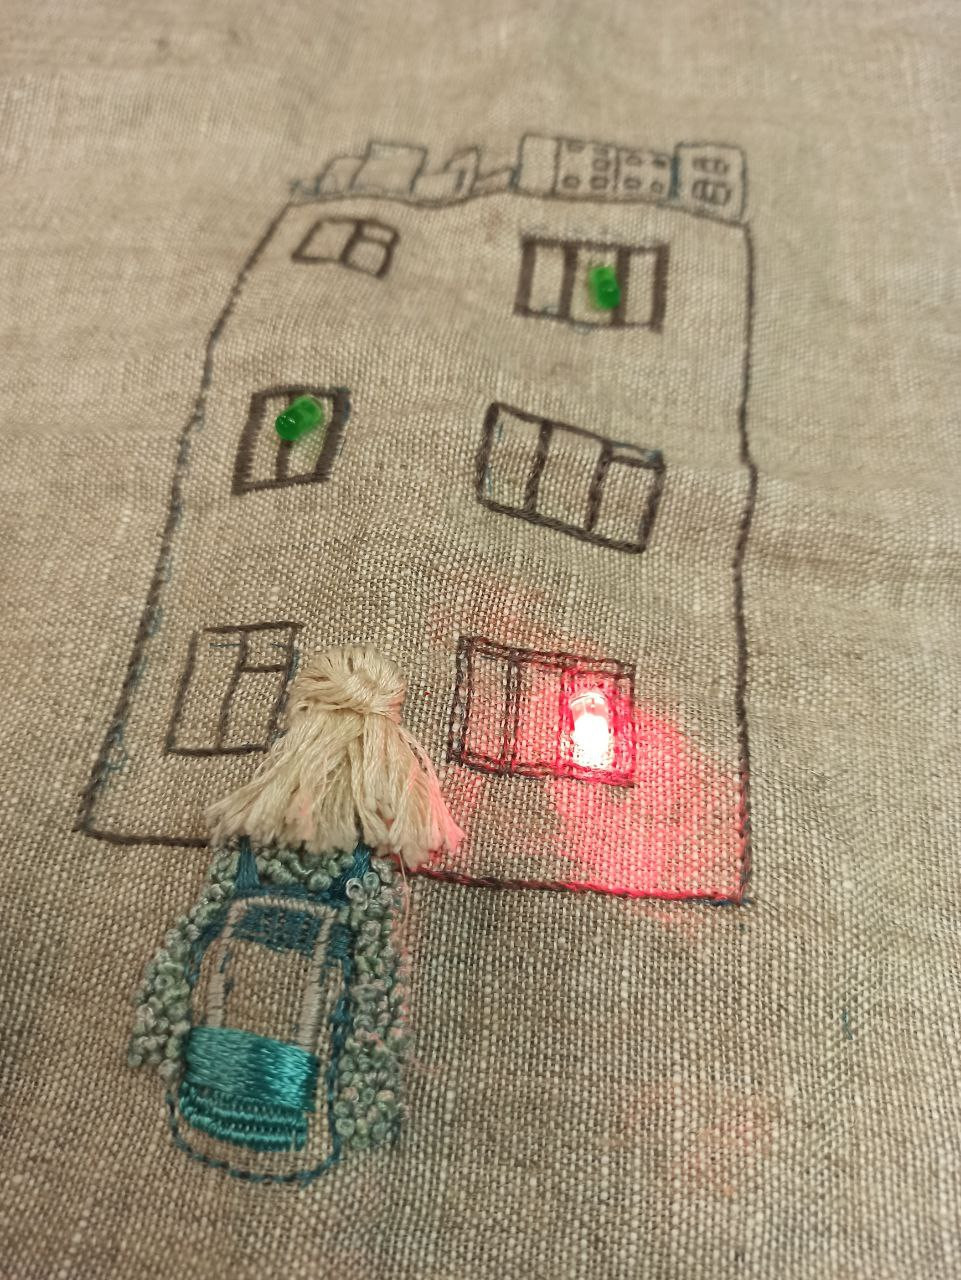
Here is the schematic circuit, placed on the verso of the embroidery.
My next step was to create an analog and a digital sensor.

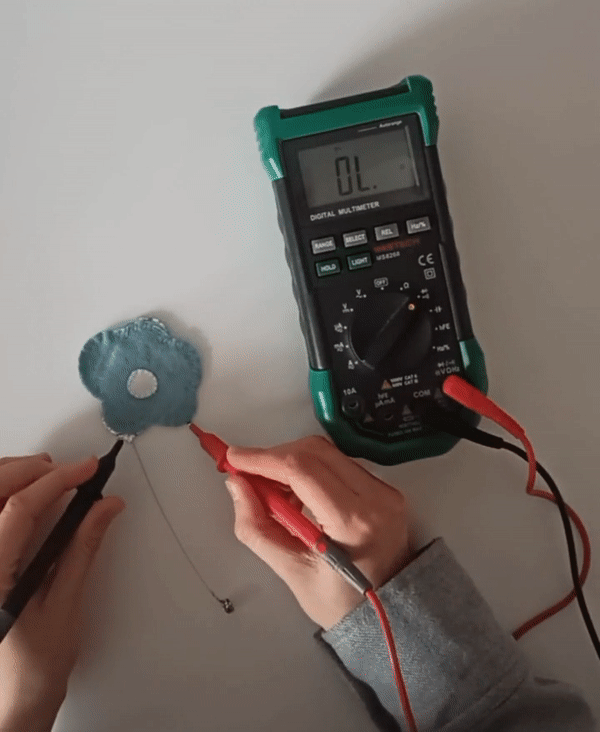
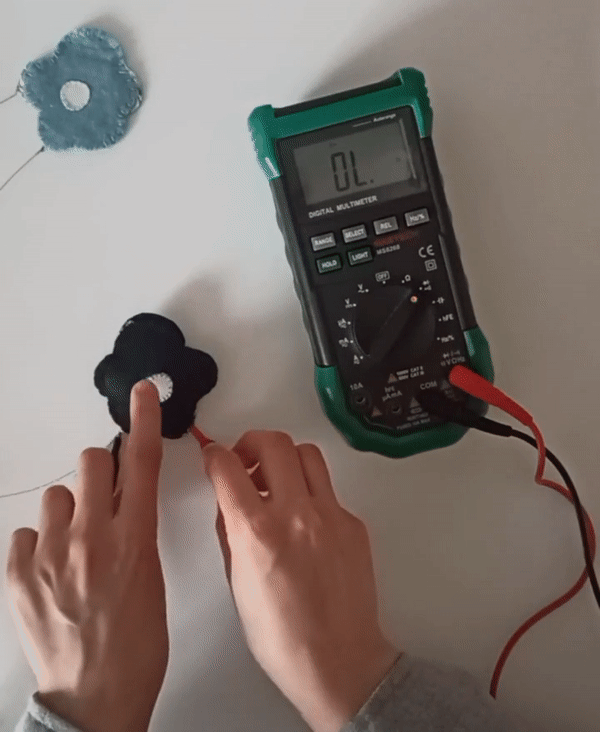
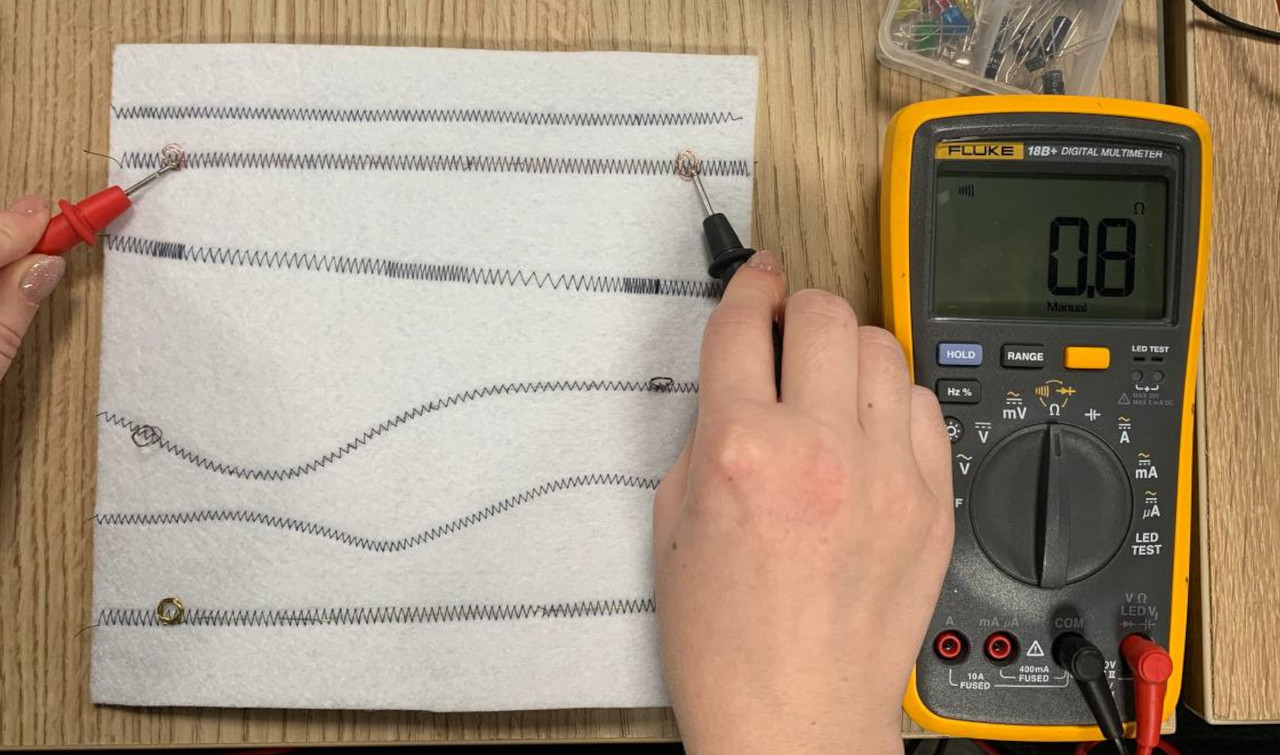
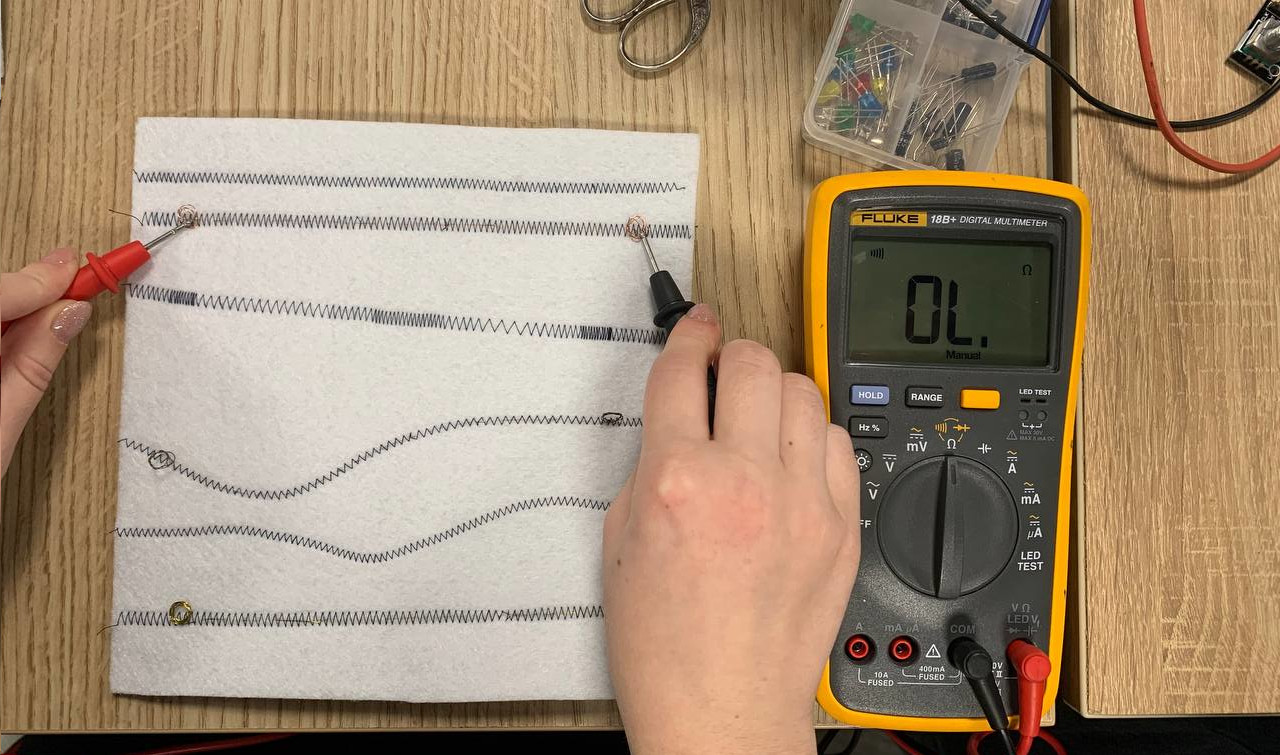
After testing the sensors with the multimeter, I conected the sensors to my circuit.
Below, there are the readings got from the AnalogRead of Arduino.
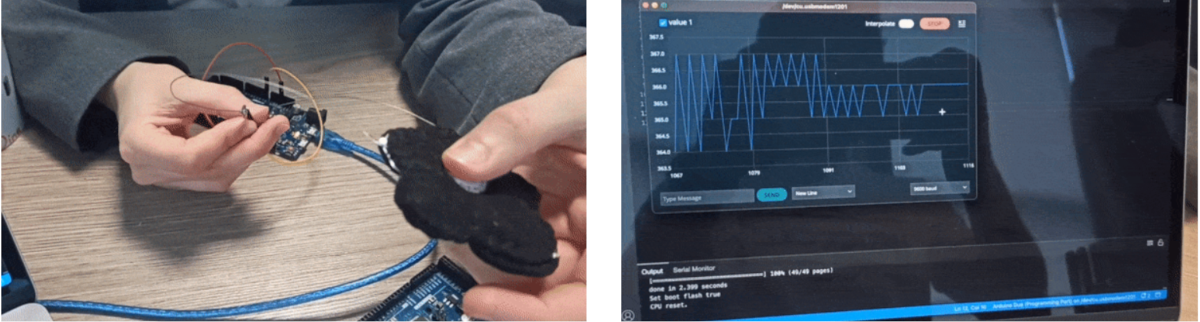

And here is the code used in Arduino to read the data from the sensor.
void setup() {
  // initialize serial communication at 9600 bits per second:
  Serial.begin(9600);
}

void loop() {
  // read the input on analog pin A1:
  int sensorValue = analogRead(A1);
  // print out the value you read:
  Serial.println(sensorValue);
  // delay in between reads for stability:
  delay(50);
}