10. Open Source Hardware - From Fibers to Fabric
Research & Ideation
For this assignment, we worked as a group. We started by brainstorming on the machine we would work on. As this is our first experience, we decided to begin with the spinning machine, because it seemed easier.
References & Inspiration
The main inspiration for this week, personally for me, was the page of Olatz Pereda. In her documentation, she explains the process, in a very plain and clear way.
Tools
- Rhinoceros
- Adobe Illustrator
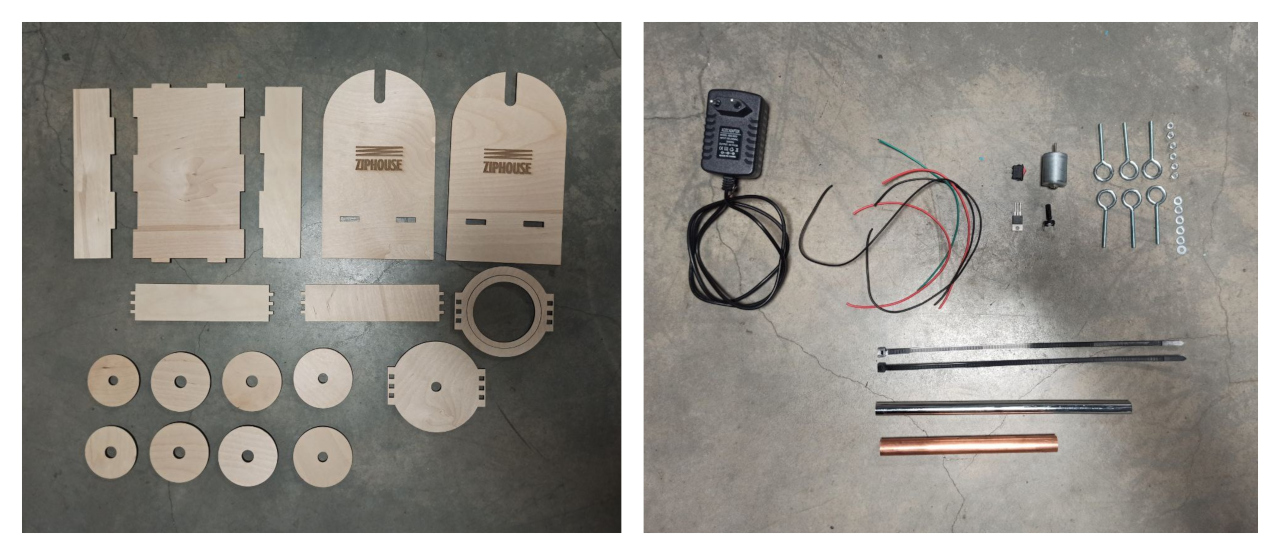
Materials
| Qty | Description | Price | Notes |
|---|---|---|---|
| 1 | Plywood 6mm | 15.00 $ | |
| 1 | Wood glue | 10.00 $ | |
| 2 | Metal tubes | 15.00 $ | 12 mm; 15mm |
| 7 | Screw with hook | 2.00 $ | |
| 1 | Power Source | 2.00 $ | 220V |
| 1 | Motor | 4.00 $ | 6V DC |
| 1 | Potentiometer | 1.00 $ | 10K |
| 1 | Transistor | 1.00 $ | C2625 |
| 1 | Conductive wires | 1.50 $ | 220V |
| 1 | Plastic clamps | 2.00 $ | 6V DC |
Process
We distributed the work through our group, as following: - Elena Bannaia - gathering of the materials, laser cutting; - Valentina Frunze - circuit connection; - Elena Rotaru - photo video documenting; - Elena Florea-Burduja - improvement of the pattern in rhino, parametric change; - Aliona Raru - preparing of the fibers to spin; And then we assembled the machine together.
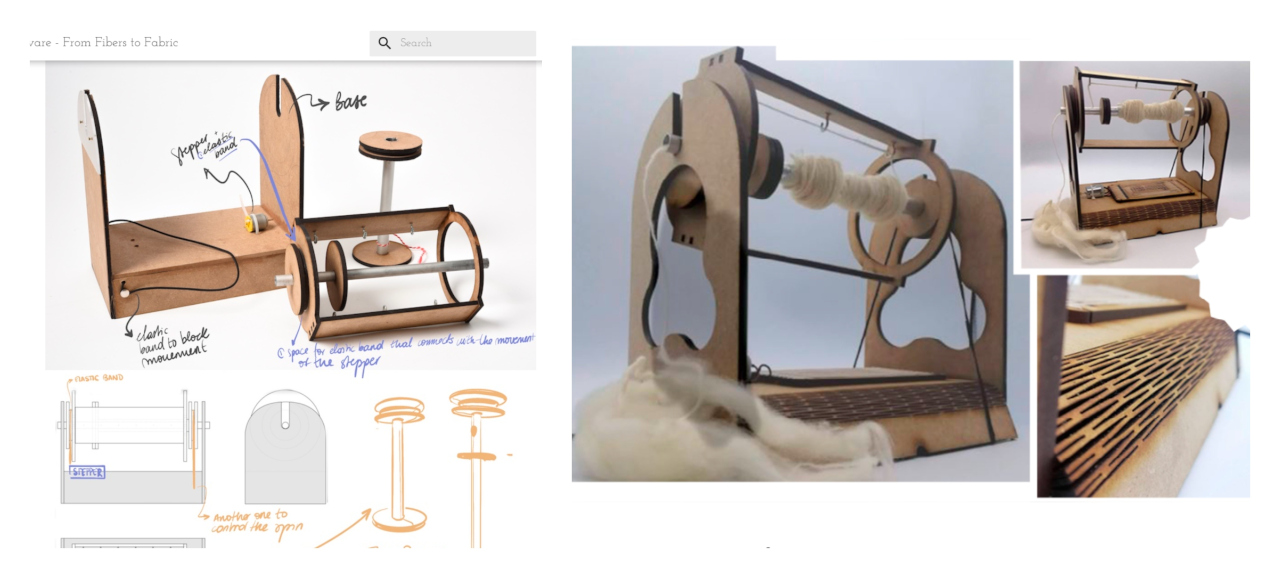
We took the existing pattern of the spinning machine on Lara Campos' page, but we made some modifications to enable easier assembly of the machine. The needed changes were made by Elena Florea.
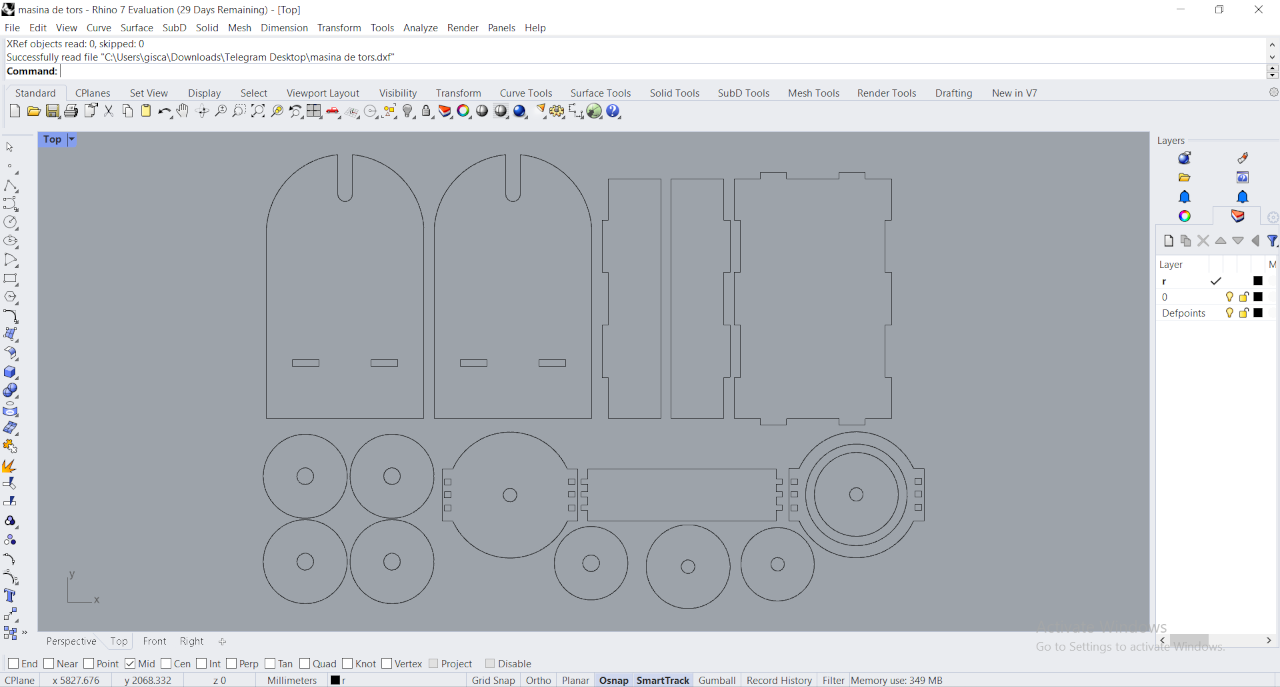
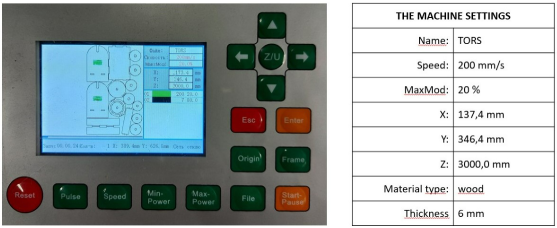
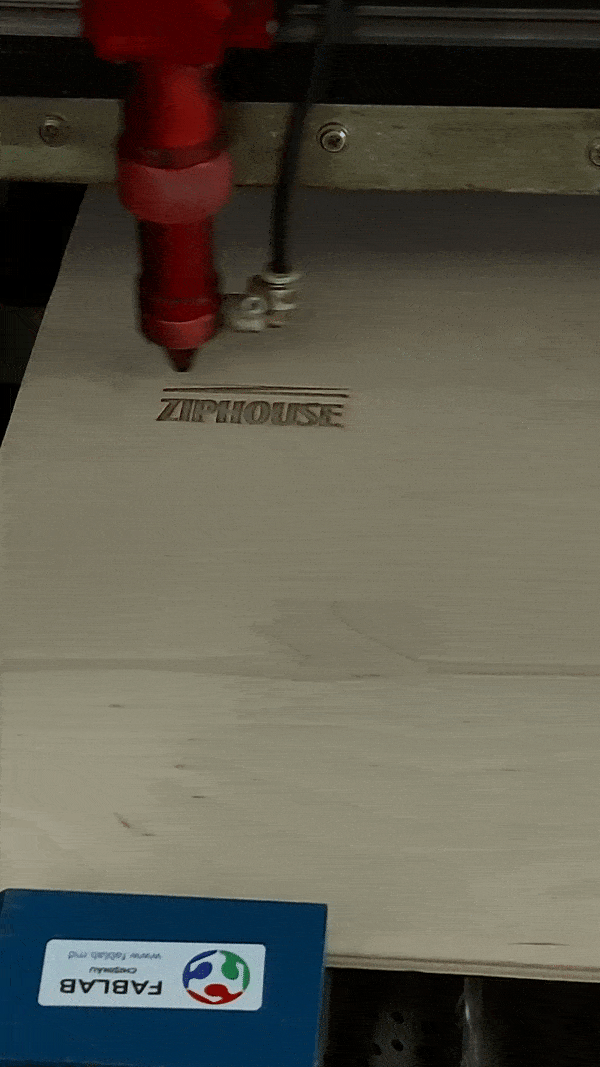
Assisted by the local instructor, Elena Bannaia cut the necessary components for the project. Additionally, she incorporated some customization to the document by imprinting Ziphouse's logo with a laser engraving.
Steps
We assembled the machine together. But while taking part in that process, I was also trying to keep up with the photo and video documenting. My colleagues were amazing to complete with the parts I my have missed.
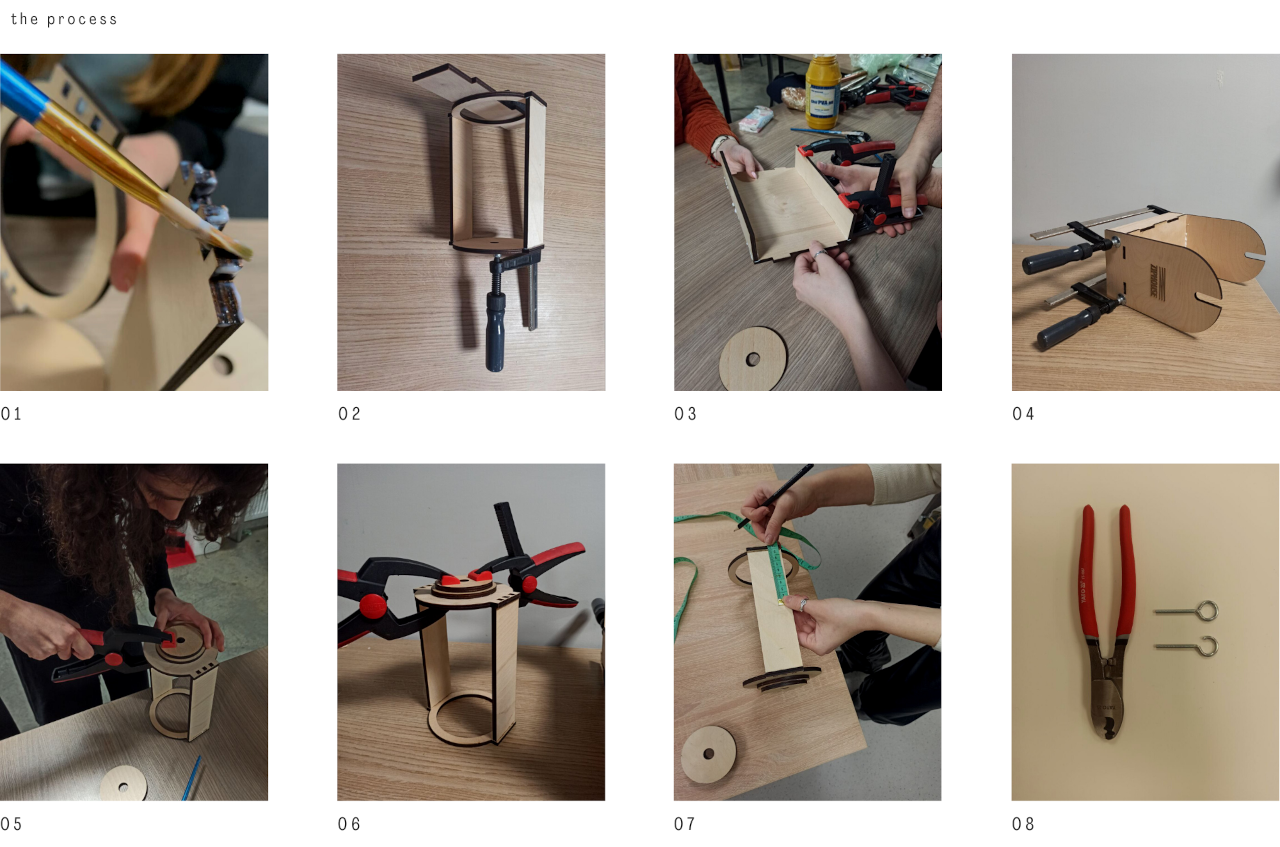
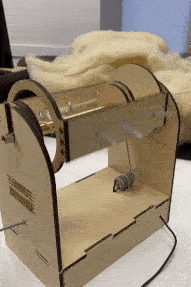
To diversify from the basic spinning machine, we opted to incorporate a switch that would allow us to easily turn the machine on/off, without the need to repeatedly plug/unplug it. Valentina was responsible for this part.
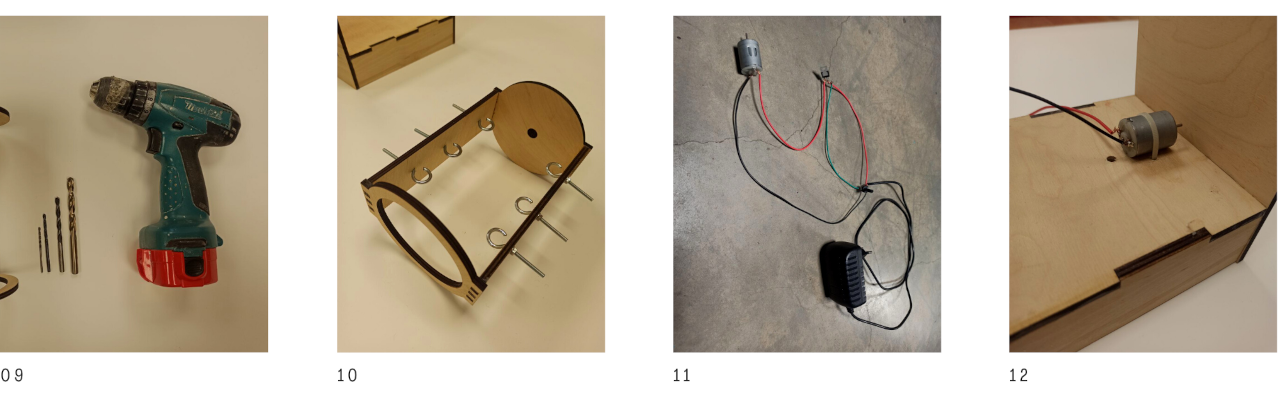
The assembling part was quite challenging as we had to determine what and how to put all the pieces. Initially, we were unsure whether to glue the circles to the metal bars or not. However, after consulting the pages of Olatz Pereda, once again, we discovered that everything needed to be glued together to prevent any looseness and ensure proper functioning.
Aliona Raru was in charge of the last step. She brushed the wool and created a thread ready to enter the machine.

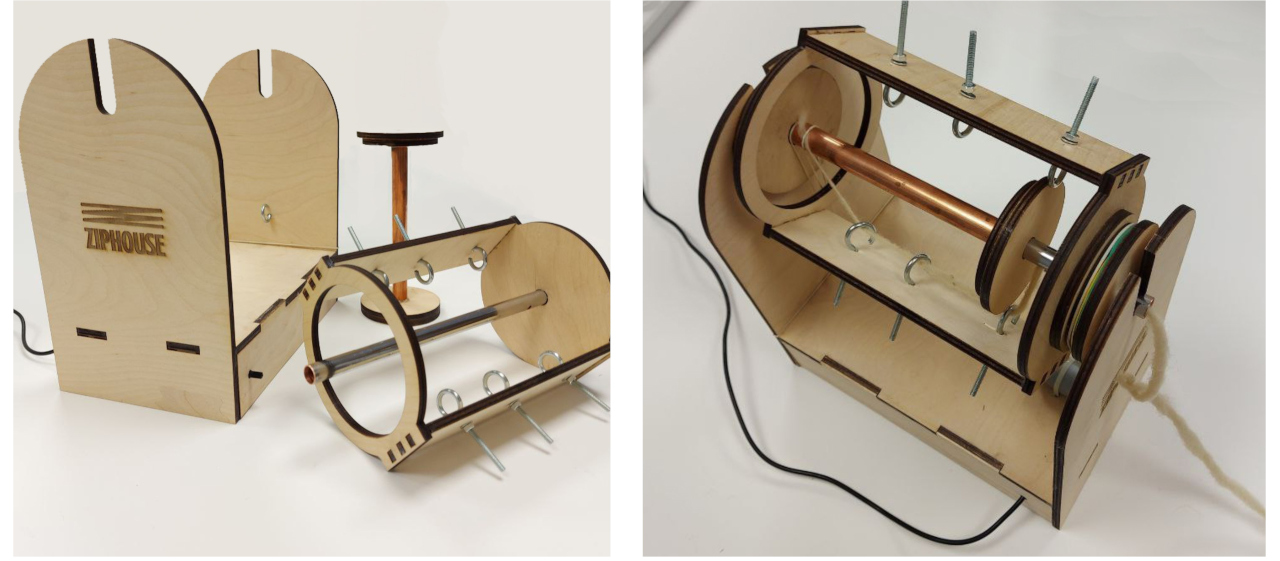
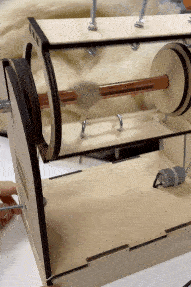
Result
This is the final result. Our machine is wooorking!
Fabrication files
-
File: Spinning Machine ↩