8. Wearables
References & Inspiration
I started by reaserching the subject of Wearables. Then I went looking for some inspiration on Pinterest
Process and workflow
Firstly, we worked as a group, with the girls and our local instructor, Marius. We made: 1. a neopixel strip + a digital sensor 2. a neopixel strip + an analog sensor 3. a motor
Code - Neopixel Strip
#include <FastLED.h>

#define LED_PIN     5
#define NUM_LEDS    50
#define BRIGHTNESS  64
#define LED_TYPE    WS2811
#define COLOR_ORDER GRB
CRGB leds[NUM_LEDS];

#define UPDATES_PER_SECOND 100

// This example shows several ways to set up and use 'palettes' of colors
// with FastLED.
//
// These compact palettes provide an easy way to re-colorize your
// animation on the fly, quickly, easily, and with low overhead.
//
// USING palettes is MUCH simpler in practice than in theory, so first just
// run this sketch, and watch the pretty lights as you then read through
// the code.  Although this sketch has eight (or more) different color schemes,
// the entire sketch compiles down to about 6.5K on AVR.
//
// FastLED provides a few pre-configured color palettes, and makes it
// extremely easy to make up your own color schemes with palettes.
//
// Some notes on the more abstract 'theory and practice' of
// FastLED compact palettes are at the bottom of this file.


CRGBPalette16 currentPalette;
TBlendType    currentBlending;

extern CRGBPalette16 myRedWhiteBluePalette;
extern const TProgmemPalette16 myRedWhiteBluePalette_p PROGMEM;


void setup() {
    delay( 3000 ); // power-up safety delay
    FastLED.addLeds<LED_TYPE, LED_PIN, COLOR_ORDER>(leds, NUM_LEDS).setCorrection( TypicalLEDStrip );
    FastLED.setBrightness(  BRIGHTNESS );

    currentPalette = RainbowColors_p;
    currentBlending = LINEARBLEND;
}


void loop()
{
    ChangePalettePeriodically();

    static uint8_t startIndex = 0;
    startIndex = startIndex + 1; /* motion speed */

    FillLEDsFromPaletteColors( startIndex);

    FastLED.show();
    FastLED.delay(1000 / UPDATES_PER_SECOND);
}

void FillLEDsFromPaletteColors( uint8_t colorIndex)
{
    uint8_t brightness = 255;

    for( int i = 0; i < NUM_LEDS; ++i) {
        leds[i] = ColorFromPalette( currentPalette, colorIndex, brightness, currentBlending);
        colorIndex += 3;
    }
}
Results
![]()
Code - Motor
{

int motorSpeedPin = 7;

void setup()

{
  Serial.begin(9600);
}

/******************************************/

void loop()

{
  digitalWrite(motorSpeedPin, HIGH);
}
}
Results
Personal project - TAKE 1
Often, I am getting too enthuziastic and ambitious about something. The problem is that this happens even when I lack expertise in an area.
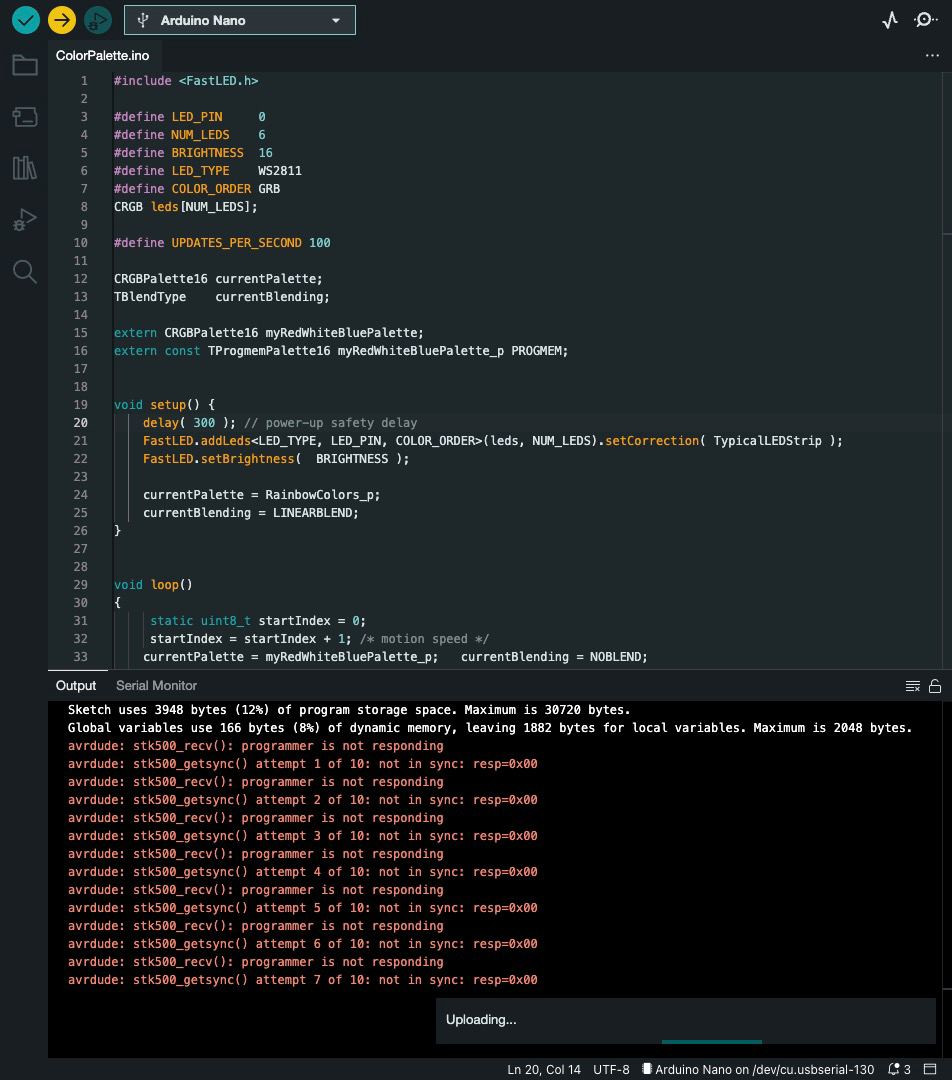
So my first thought was to create a Cyclist's Safety Vest with Direction Indicator. Our local instructor - Marius, mentored me throush the steps and helped me with the code. We decided to make it with the help of an Arduino Nano, so that it would be more compact and easy integrate on a piece of clothing.
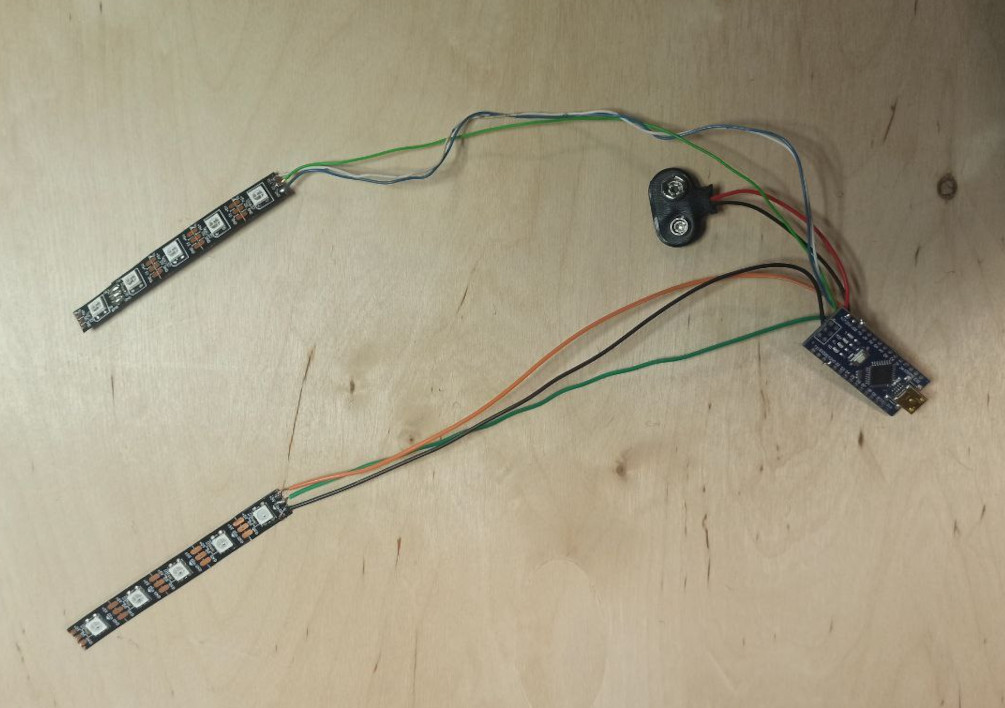
Marius helped with the code for the Arduino.
#include <FastLED.h>

#define LED_PIN     0
#define NUM_LEDS    6
#define BRIGHTNESS  128
#define LED_TYPE    WS2811
#define COLOR_ORDER GRB
CRGB leds[NUM_LEDS];

#define UPDATES_PER_SECOND 100

CRGBPalette16 currentPalette;
TBlendType    currentBlending;

extern CRGBPalette16 myRedWhiteBluePalette;
extern const TProgmemPalette16 myRedWhiteBluePalette_p PROGMEM;


void setup() {
    delay( 300 ); // power-up safety delay
    FastLED.addLeds<LED_TYPE, LED_PIN, COLOR_ORDER>(leds, NUM_LEDS).setCorrection( TypicalLEDStrip );
    FastLED.setBrightness(  BRIGHTNESS );

    currentPalette = RainbowColors_p;
    currentBlending = LINEARBLEND;
}


void loop()
{
     static uint8_t startIndex = 0;
     startIndex = startIndex + 1; /* motion speed */
    currentPalette = myRedWhiteBluePalette_p;   currentBlending = NOBLEND;

    FillLEDsFromPaletteColors( startIndex);

    FastLED.show();
    FastLED.delay(1500 / UPDATES_PER_SECOND);
}

void FillLEDsFromPaletteColors( uint8_t colorIndex)
{
    uint8_t brightness = 255;

    for( int i = 0; i < NUM_LEDS; ++i) {
        leds[i] = ColorFromPalette( currentPalette, colorIndex, brightness, currentBlending);
        colorIndex += 3;
    }
}

const TProgmemPalette16 myRedWhiteBluePalette_p PROGMEM =
{
    CRGB::Orange,
    CRGB::Black,
    CRGB::Orange,
    CRGB::Black,
    CRGB::Orange,
    CRGB::Black,
    CRGB::Orange,
    CRGB::Black,
    CRGB::Orange,
    CRGB::Black,
    CRGB::Orange,
    CRGB::Black,
    CRGB::Orange,
    CRGB::Black,
    CRGB::Orange,

};
It was weird and sad, but I thought that this is also a result, and a part of the work has already been done, and better than not having anything to show, we could at least create the prototype. And in the meantime try to find another solution.
I had to desolder everything back, then to create the circuit for the button.

Then we put everything into place and got the prototype ready.
Personal project - TAKE 2
I did not manage to finish my wearables project, that week. And as the time went on, I was feeling more anxious about it, because electronics was the part I felt least good at.
The stars aligned in a way where I chose my final project idea in the wearables area. So I had more time to research, test and learn.
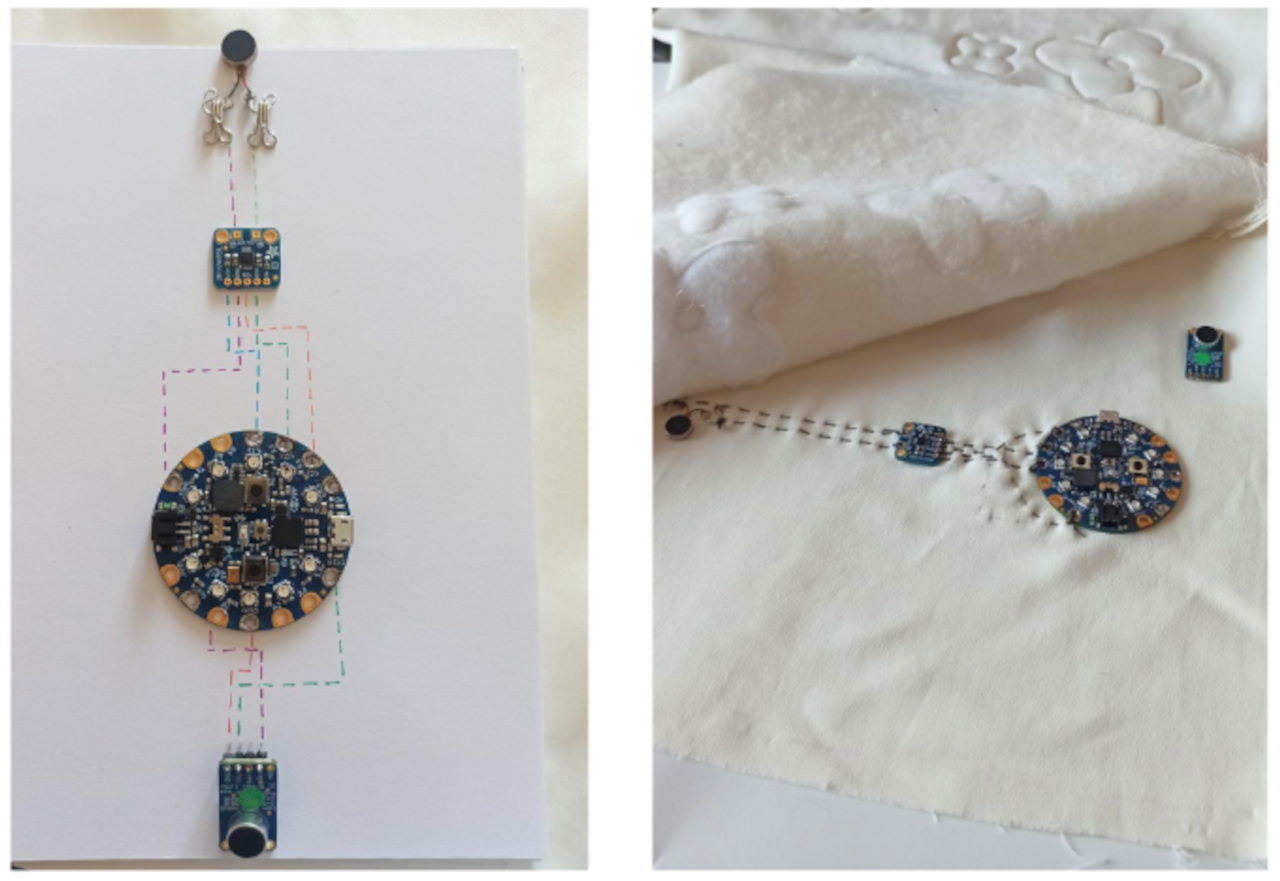
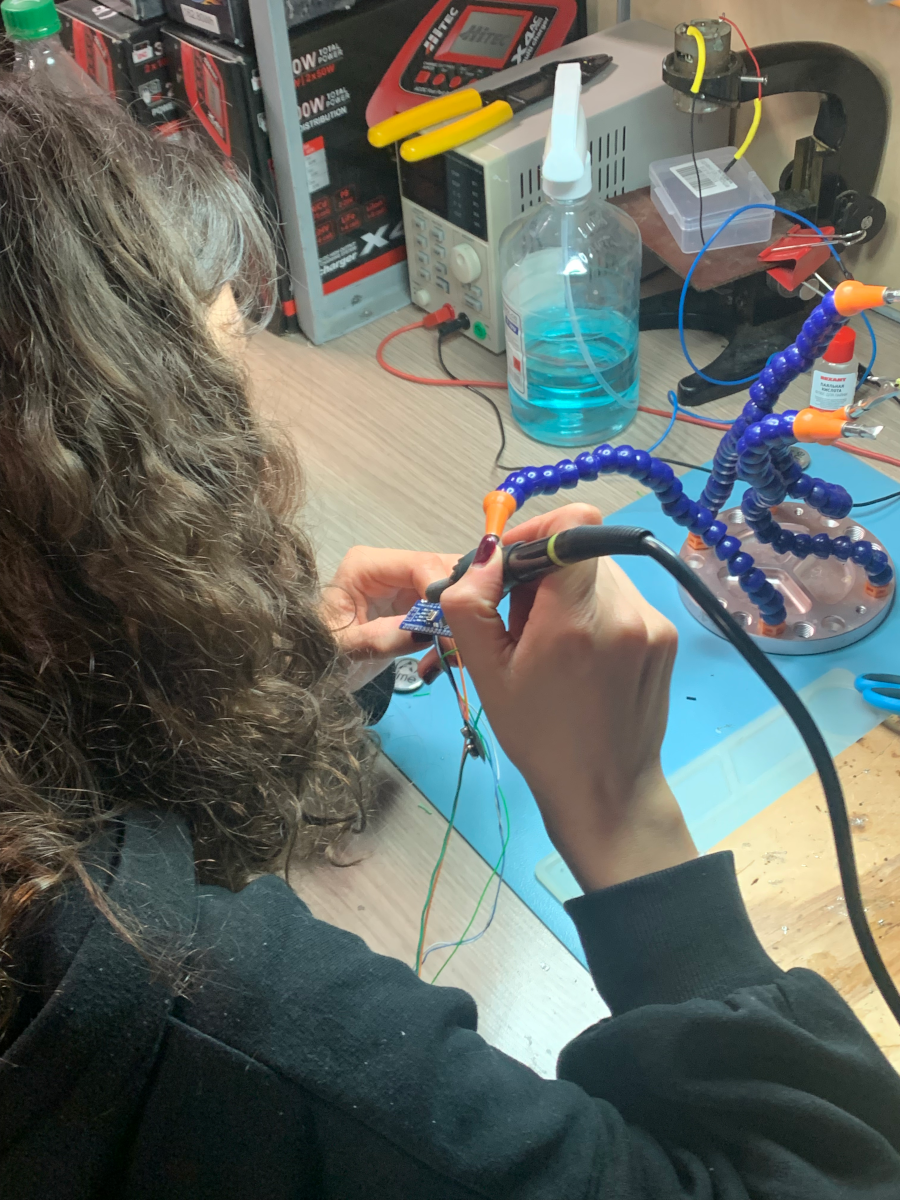
For my project I created a garment that converts the sound of the music into vibrations on the body for people with hearing impairments.
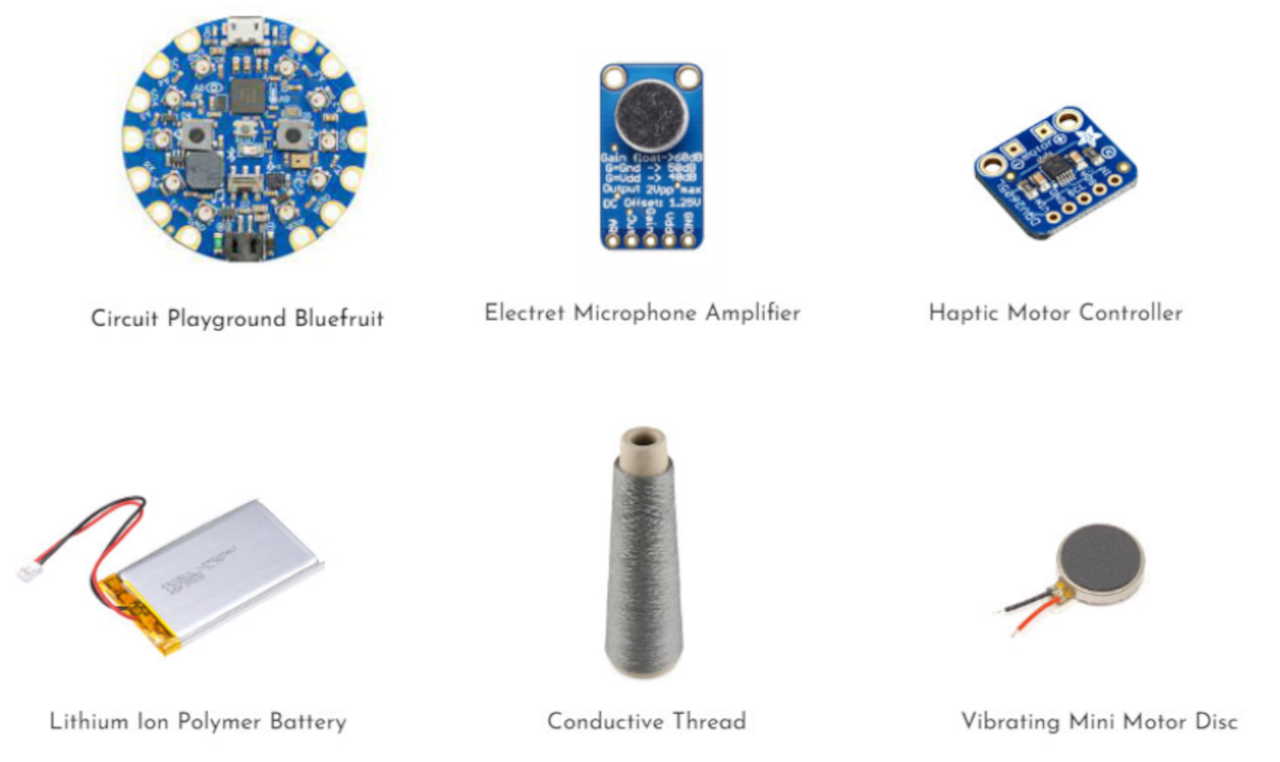
Tools
Process and workflow
#include <Wire.h>
#include "Adafruit_DRV2605.h"

Adafruit_DRV2605 drv;

#define MIC_MAX9814_PIN A1

unsigned int sample;
const int sampleWindow = 60;

void setup() {
  Serial.begin(9600);
  drv.begin();
  drv.setMode(DRV2605_MODE_REALTIME);
}

void loop() {
  unsigned long startMillis= millis();
  unsigned int peakToPeak = 0;
  unsigned int signalMax = 0;
  unsigned int signalMin = 1024;

   while (millis() - startMillis < sampleWindow)
   {
      sample = analogRead(MIC_MAX9814_PIN);
      if (sample < 1024)
      {
         if (sample > signalMax)
         {
            signalMax = sample;
         }
         else if (sample < signalMin)
         {
            signalMin = sample;
         }
      }
   }
   peakToPeak = signalMax - signalMin;
   double volts = (peakToPeak * 5.0) / 1024;

// Need to be adjusted with the correct values obtained from the microphone. Also a better filter algorithm
   int mappedVolt = map(volts, 0, 4, 0, 100);

  if (mappedVolt > 0) {
    drv.setRealtimeValue(mappedVolt);
  } else {
    drv.setRealtimeValue(0x00);
  }
}

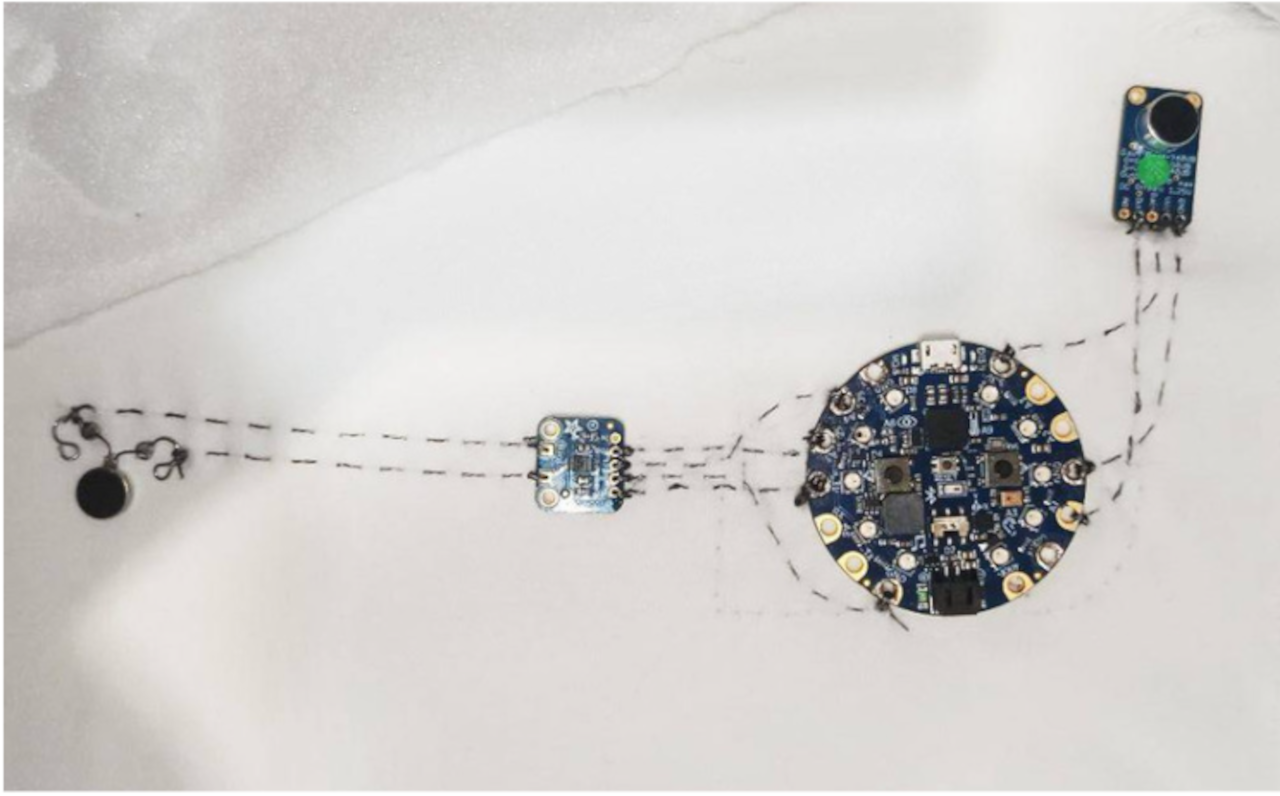
After testing the code on the prototype, I drew the circuit on paper, trying to imitate the stitchings. Only after that, I felt prepared to sew it on into the garment.