4. BioChromes
Research
Eventhough color has been around us for a very long time, we still have shades to discover. Technology, science but also history has enabled us to enlarge our colour palettes and create colours we would have never been able to do. For this week I have choosen two "new" colors I have been fascinated by Venta Black and YInMn Blue.
VantaBlack
The first moment that I have heared about Vantablack, I was absolutelly obsesed with the colour. Vantablack was the darkest colour we have been able to create, it simulates absolute absence of light. What I have found the most intriging about the colour was its usage in astronomy. The shield covered with vantablack can absorb light and that enables us to the most mesmarising space pictures.
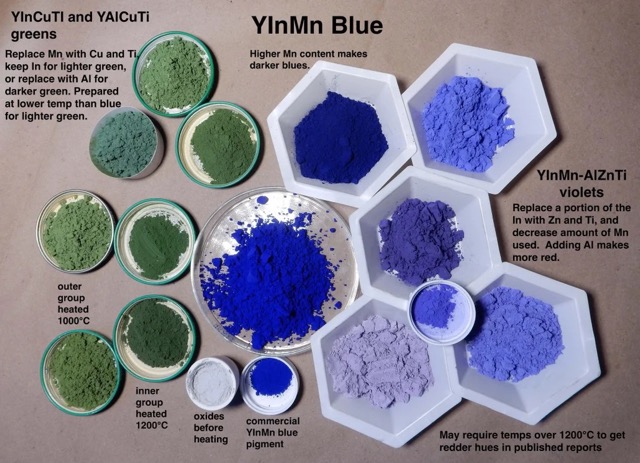
YInMn Blue
There is a lot of beauty in YInMn Blue. It is an anorganic blue color discovered in 2009 accidentally by Professor Mas Subramanian and his (then) graduate student, Andrew E. Smith. Why is this interesting? Creating a vibrant perfect blue color is actually very hard. YInMn Blue is considered to be the almost perfect blue color. YInMn Blue has enabled more reasearch around different types of colours. I have found link on instructables, where you can make your own YInMn Blue, but the color is not organic.
Tools
Bacterial Dye
- Presure Cooker
- Petridishes
- Propanebutane Gas Cylinder
- Ethanol Bottle
- Screw Top Bottle with Luria Broth Liquid
- Screw Top Bottle with Standard I Nutrient Agar Liquid
- Prepared Bateria to Multiply (f.e. Serratia Marcescenze, Janthinobacterium Lividum)
- Inaculating Loom
- Incubator
- Gloves
- Lab Coats
- Tissues
- Fabrics (Silk)
- Needles with Threads
- Pins
Natural Dye
- Pots
- Wire Whisk
- Wooden Spoon
- Spoon
- Scale
- Petridishes
- Measuring Cup
- Bowls (Glass and )
- Funnel
- Filters
- Mortar
- Beaker
- Tannin
- Alumn
- Cream of Tartar
- Soda
- Iron
- Acid
- PH Strips
- Fabrics (Silk, Wool, Jersey/Cotton - Bleached and Natural, Linnen - Bleached and Natural)
Process and workflow
This week we have experienced many different ways how to naturally create a different colour. The most interesting part is that there are different ways to achieve it. You can dye fabrics with bacterias, molds, insects, different plants and their fruits etc. In this sections I would like to point out mostly the bacterial dye and the natural dyes from plants.
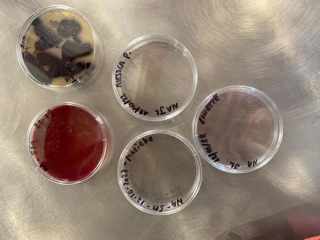
Bacterial Dye
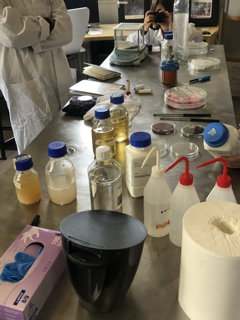
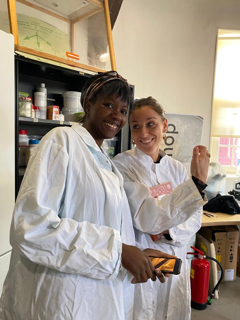
To prepare Bacterial Dye[1] We have been working in a DYI lab, with the equipment listed above. So you can create your own Lab at home. It is always import to remember the safety procedures for the lab f.e.:
- cover you entire body with textile (lab coat)
- tie your hair
- santize and wash your hands (and your phone/camera) before and after every procedure
- try to keep the environment stable (avoid sudden temperature changes, wind...)
- use bacteria for with Lab Safety I
- if the bacterie looks weird - kill it
Preparation
At the begining you need to prepare the food for the bacteria and sterilize the equipment and the fabrics you are going to use. Firstly lets prepare the food for bacteria to reproduce in (Standard I Nutrient Agar) and the luquid (Luria Broth) to help spread the bacterie all over the fabrics. In some cases, if you need a cheaper version of food for the bacteria, you can create your own food with water and peanutbutter extract. The peanutbutter watter works really well with the Pink Bacteria, but not so well with the Purple one.
Prepare Luria Broth
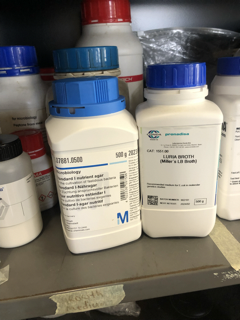
- Messure 6.25g of LB powder
- Messure 250ml of clean watter
- Mix the LB powder and the watter together in Screw Top Bottle
- Check that the bottle is not tightly closed, leave the bottle unscrewed
- Mark your bottle with the name and date
- Stick a autoclave tap on the top of the bottle (will help you check the process in the pressure cooker)
Prepare Standard I Nutrient Agar
- Messure 9.25g of Nutrient Agar powder

- Messure 250ml of clean watter
- Mix the NA powder and the watter together in Screw Top Bottle
- Check that the bottle is not tightly closed, leave the bottle unscrewed
- Mark your bottle with the name and date
- Stick a autoclave tap on the top of the bottle (will help you check the process in the pressure cooker)
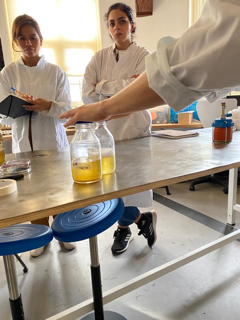
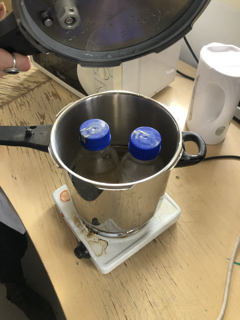
Cooking your Food
Put both of the bottle in a pressure cooker. Add enough water but make sure it does not pass the liquids in our bottles. The bottles should not sit on the pressure cooker, there should be always something between the bottles and the bottom of the pressure cooker. Close your pressure cooker and let the cooker do its magic. When the button of the cooker comes out, wait for 15 minutes, and then open the lid of the cooker. Check if the tape has black marks. If yes, the pressure and temperature has been correct and you can proceed with your prepared food. If not, try the process again. When removing your bottles, make sure not to burn your hands.
Preparing your Fabrics
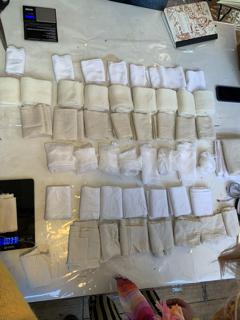
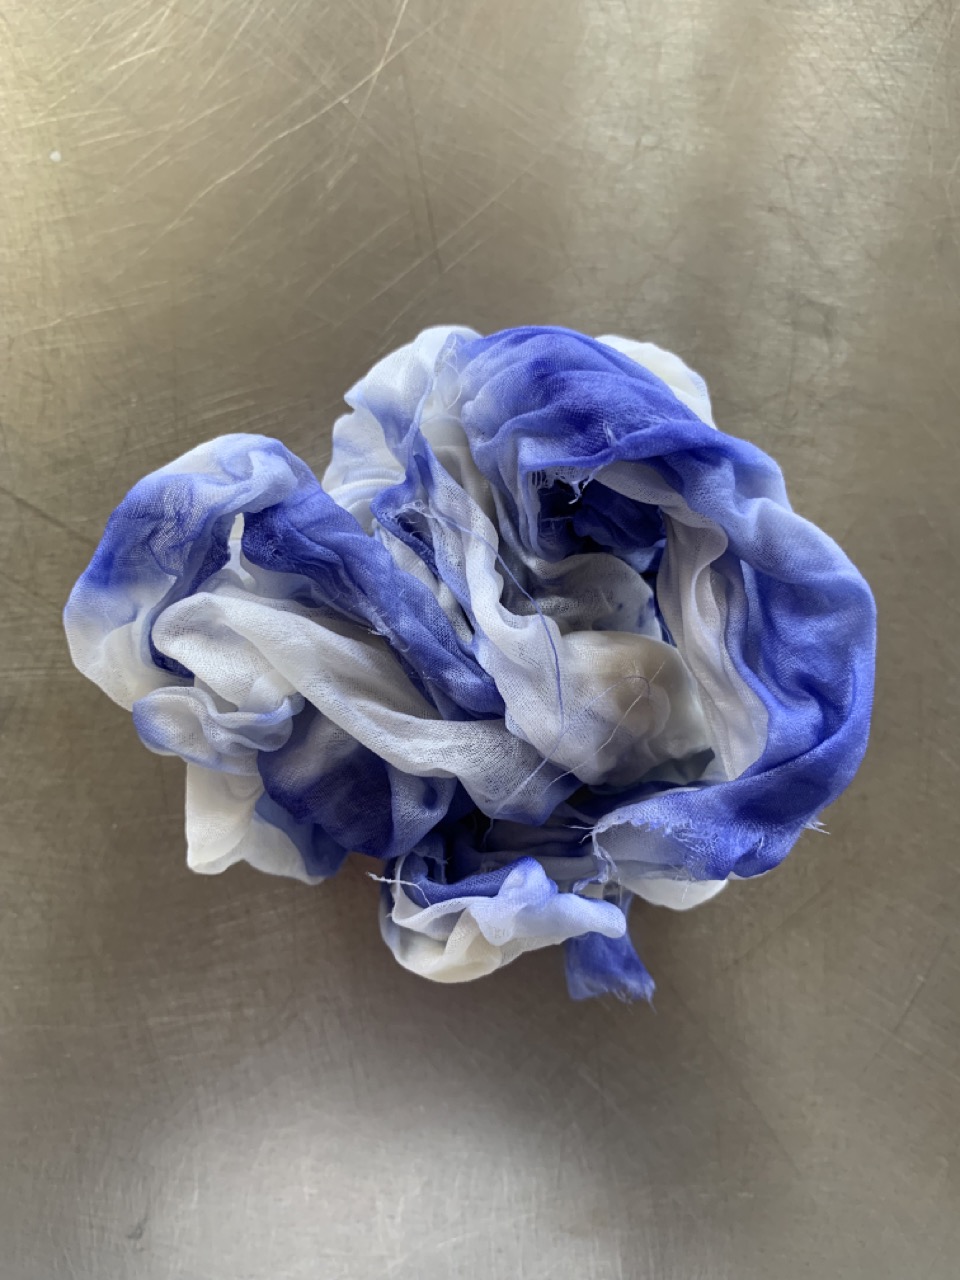
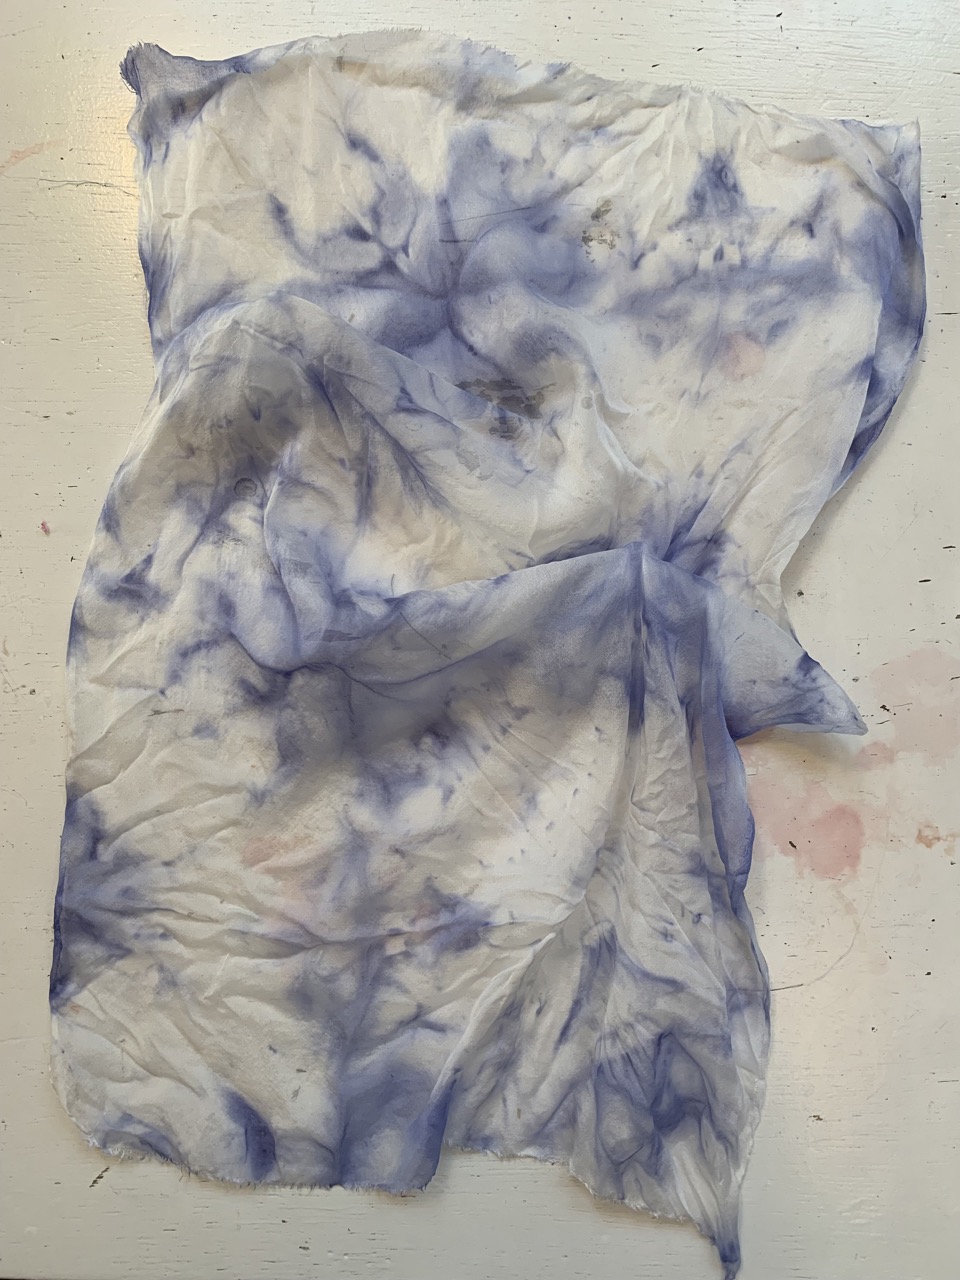
The process of dying with bacteria is a cooperative work between you and your bacteria. You can guide your bacteria to create different symetric of asymetric shapes based on the way you fold your fabrics. You can decide to fold the fabrics in different ways. When you are happy with your folded pattern check that the hight of your fabrics and petridished. If your fabrics touches the top of the dish, try to stich it together so it won't touch the lid. Otherwise the bacteria won't spread on the top of the fabrics. For this experiment, I have used silk, but you can use any fabric you please. It is important to remember, that the denser is the structure of the fibric fiber, the longer it might take for the bacteria to spread over.
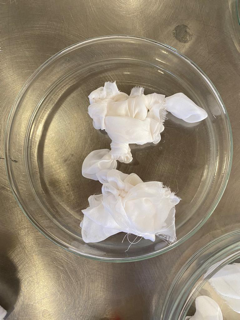
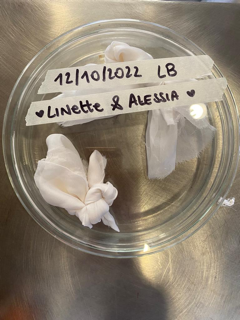
Sterilization of Fabrics & Equipment
Before colouring the fabrics cover your petridished with the fabric inside and put it in the pressure cooker. Make sure to add enough water, but make sure it does not pass the petridishes. The petridishes should not sit on the pressure cooker, there should be always something between the dishes and the bottom of the pressure cooker. Close your pressure cooker and let the cooker do its magic. When the button of the cooker comes out, wait for 15 minutes, and then open the lid of the cooker. When removing your bottles, make sure not to burn your hands. Use spoon or any other means to help you take the petridished out.
Colouring
Since you will be working a lot with your bacteria, remember to cultivate your bacteria and always multiply them, so you always have a new intact batch of your bacteria, in case you infect your previous one.
Proliferating Bacteria
To multiply your bacteria batches follow these steps.
Firstly prepare the food for the bacteria:
- Sanitaze your hands with Ethanol
- Prepare your Gas Cylinder
- Pour Ethanol Around Gas Cylinder
- Put your Ethanol Away and Make sure your Ethanol is not facing the Gas Cylinder
- Light your Gas Cylinder
- Make sure your Nutrien Agar liguid is warm (in liquid state)
- Hold your breath and don't talk
- Open your bottle with Nutrient Agar and burn the top edge of the bottle with fire
- Open your petridish and pour the liquid in the petridish, until it cover the bottom of the dish
- Cover your petridish
- Burn the top of the bottle and close your bottle
- You can breath now
- Sanitize your hands
- Turn off the Gas Cylinder
Leave your petridishe aside for while to cool down. Once cool, you can proceed with the proliferation:
- Sanitaze your hands with Ethanol
- Prepare your Gas Cylinder
- Pour Ethanol Around Gas Cylinder
- Put your Ethanol Away and Make sure your Ethanol is not facing the Gas Cylinder
- Light your Gas Cylinder
- Burn the edges of Inaculating Loom
- Hold your breath
- Open the lid of the petridish with your bacteria
- Find a space in the petridish (where is no bacteria) to cool down the Inaculating Loom
- Scrape the top of the bacteria
- Close the petridish
- Open the lid of the petridish with your Nutrient Agar and scrape the top of the agar
- Close the petridish
- Breath out
- Repeat steps 7 - 15 if needed
- Sanitize your hands
- Turn off the Gas Cylinder
- Name your petridish with name, date, nutrient and bacteria
- Sanitize your hands
Colouring the Fabrics
When you have your batches prepared. Now you can proceed to colour your fabrics:
- Sanitaze your hands with Ethanol
- Prepare your Gas Cylinder
- Pour Ethanol Around Gas Cylinder
- Put your Ethanol Away and Make sure your Ethanol is not facing the Gas Cylinder
- Light your Gas Cylinder
- Hold your breath and don't talk
- Open your bottle with LB and burn the top edge of the bottle with fire
- Open your petridish with your fabrics and pour the liquid in the petridish, until it cover the bottom of the dish and pour over your fabrics
- Cover your petridish
- Burn the top of the bottle and close your bottle
- You can breath now
- Sanitize your hands
- Burn the edges of Inaculating Loom
- Hold your breath
- Open the lid of the petridish with your bacteria
- Find a space in the petridish (where is no bacteria) to cool down the Inaculating Loom
- Scrape the top of the bacteria
- Close the petridish
- Open the lid of the petridish with your fabrics and LB and scrape the top of the fabrics and the LB
- Close the petridish
- Breath out
- Repeat steps 15 - 22 if needed
- Sanitize your hands
- Turn off the Gas Cylinder
- Name your petridish with name, date, nutrient, bacteria and fabrics
- Sanitize your hands
Overdying your Fabrics
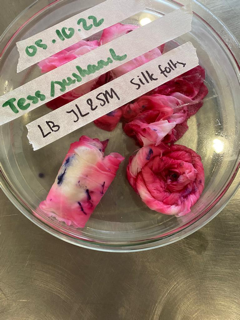
If you would like to put multiple colours in your fabrics, you need to always firstly dye with one bacteria, kill it and overdye with othe bacterie. When you put the bacteria together, you create a fighting zone and some of the bacteria won't catch at all or just a little.
Preservation
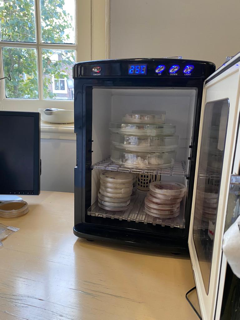
It takes some time for the bacteria to spread all over your fabrics. Depending on your type of bacteria, you might need to wait 3 - 5 days to see the result. The pink bacteria are the opportunistic bacteria, so they spread quickly. The purple is a bit slower and takes more time. To keep you bacteria safe, you need to cover the petridishes with a stretch film tape. Cut a very small piece and strech all over the petridish. Write your name, type of bacteria, date on the petridish and put your bacteria into your incubator (or keep them in a warm stable place f.e. near your heater) in slightely higher room temperature around 25°C. Put your LB and NA in a refrigirator.
Killing the Bacteria
Killing the bacteria is easy, I have just put the petridishes in a the pressure cooker. Once the red button goes up, it is done and the bacteria are killed.
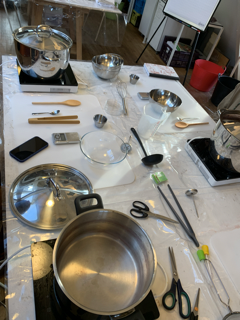
Natural Dye
Scouring
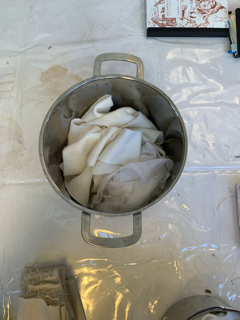
Before staring the dye process we have to prepare the fabrics to help them absorb the colour. To score your fabrics, you need to weight the amount of the fabrics that goes into the pot and add the needed amount of scouring agent. Add the soda powder into a hot water, let is bubble, not boil and the and the fibers. When the process is done, you rinse the fabrics in the clean water.
Mordanting
There is a difference between protein animal fibers and vegetable fibers in a process of mordanting. When mordanting cellulose-based fabrics, you need start with tannin and then proceed with a same process. For my experiment, I have been using protein fabrics - silk and wool.
- Protein Fabrics (Silk, Wool)
- Cellulose-Based Fabrics (Jersey, Linnen)
Follow these steps with Protein Fabrics:
- Weight all the fabrics
- In seprate bowl weight 15% of Alumn and 5% of Cream of Tartar
- Dissolve the powders in hot water
- Stir until there are no crystals
- Add more water (the amount should be enough to leave the fibers flow)
- Add you fibres
- Leave the pot simmering (not boiling) - the temperature should be between 60°C - 80°C
- Take out the fibres and rinse them with cold water
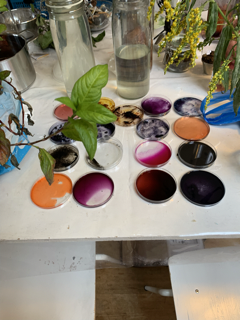
Preparation of the Dye
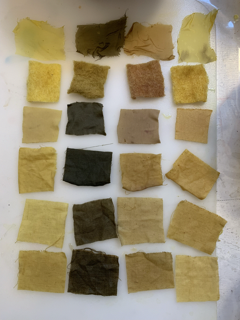
We have all choosen a different colour to prepare, at the end there were: Annatto, Alkanet, Weld, Onion, Walnuts and Buckthorne.
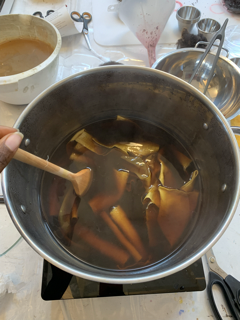
I have choosen Buckthorne, because I was looking for a yellow color. Buckthorn creates a beautiful yellow - green colour. To prepare the colour. To prepare Buckthorn colour:
- Weight 55g of Buckthorne
- Cover it with hot water and let is soak in for 10 minutes
- Take of the seeds and crush the Buckthorne seeds in mortar
- Pour the crushed seeds back into the water (don't change the water)
- Let it boil for 90 minutes
- Seperate the seeds and the dye
- Soak your fibers
- Put them into the pot with the dye
- Simmer for 20 minutes
Coloring modifications
My colour was not able to be modified by any acid or soda, since I have Buckthorne is not PH sensitive. I did overdie my colour with annatto, alkanet and dipped the fabrics in iron.
Biochromes results by Linette Manuel
Madder, Campeche, Alkanet and Cochineal are colour that are PH sensitive.
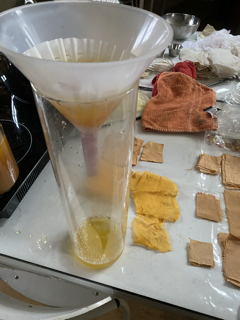
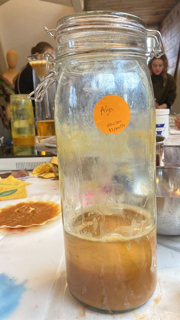
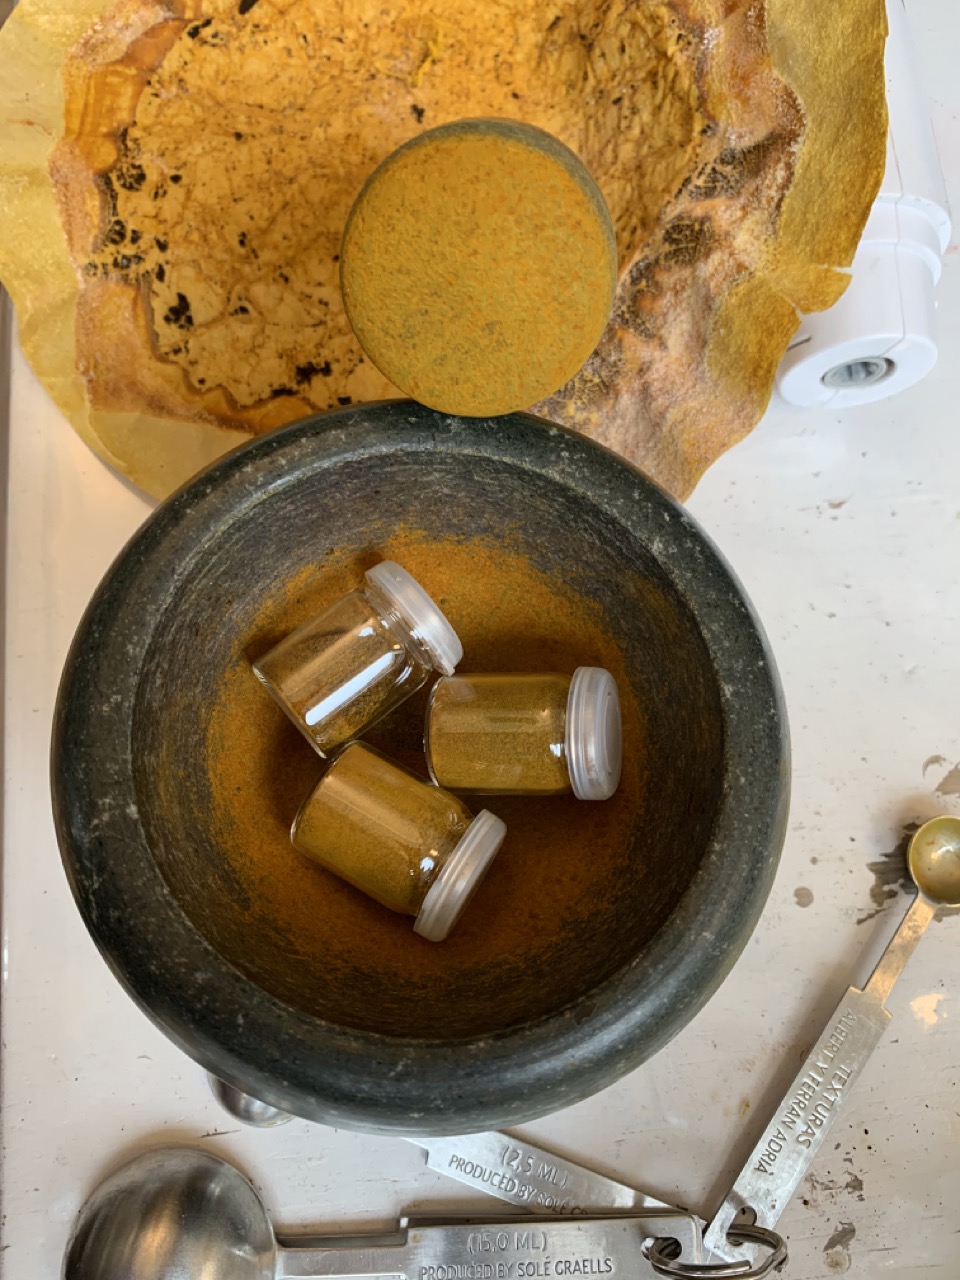
Extracting Pigment
- Dissolve 30g alumn and 15g soda in little amount of water
- Check the PH of your colour, at the end you want your fluid to be neutral
- Pour the liquid into the colour (make sure to do it in a tall jar)
- Wait till the pigment and color seperate
- Filtr the dye from the pigment
Recipes
-
recipe: Bacterial Purple ↩
-
recipe: Buckthorn Yellow - Green ↩