7. Computational Couture
Research & Ideation
I follow a lot of great people, that do absolutelly amazing work in the are od 3D printing and fashion.
Stephanie Santos - 3D Printed Lingerie
Paraprint - alumni of Fabricademy
Brigitte Kock - Alumni of Fabricademy 2017
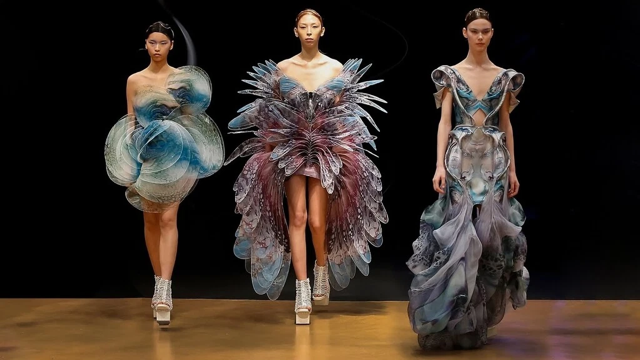
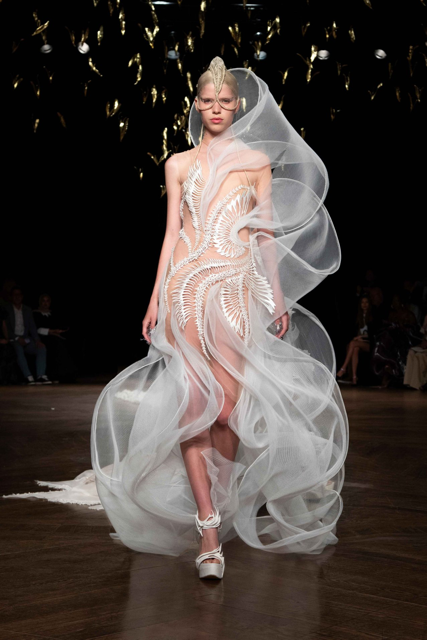
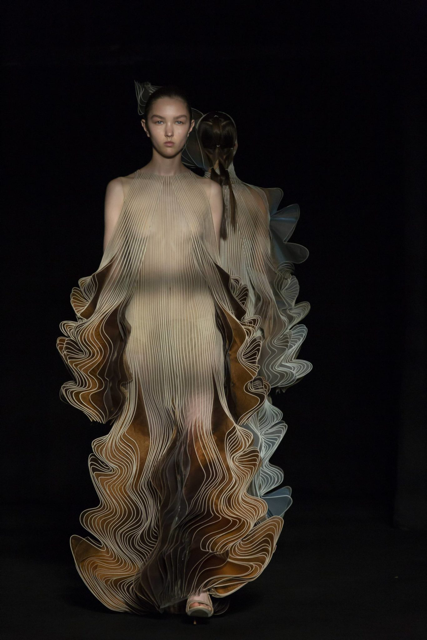
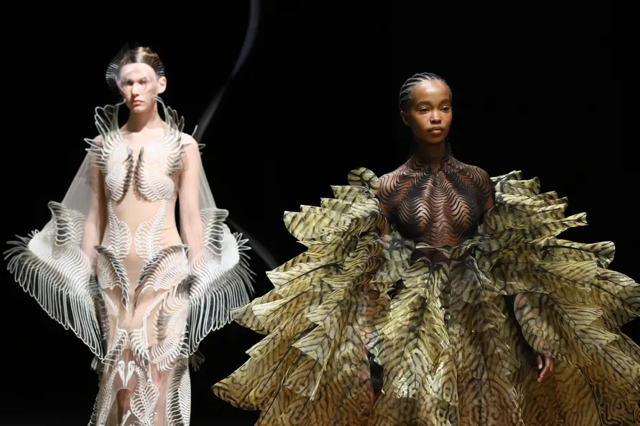
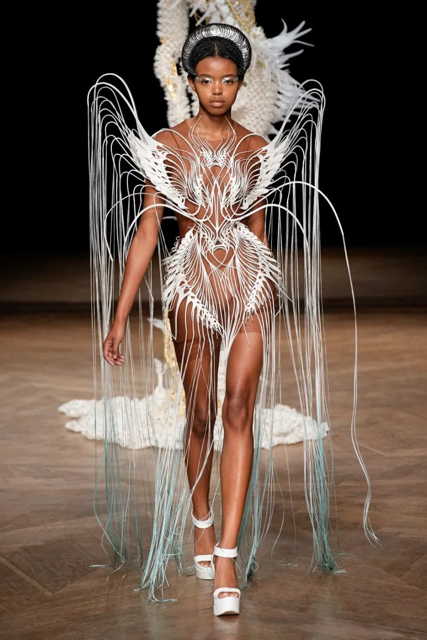
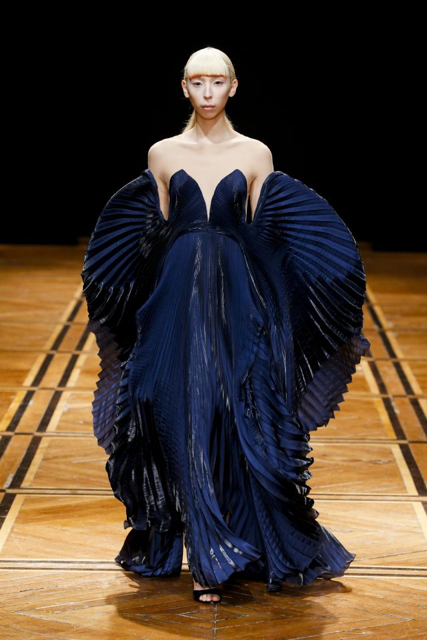
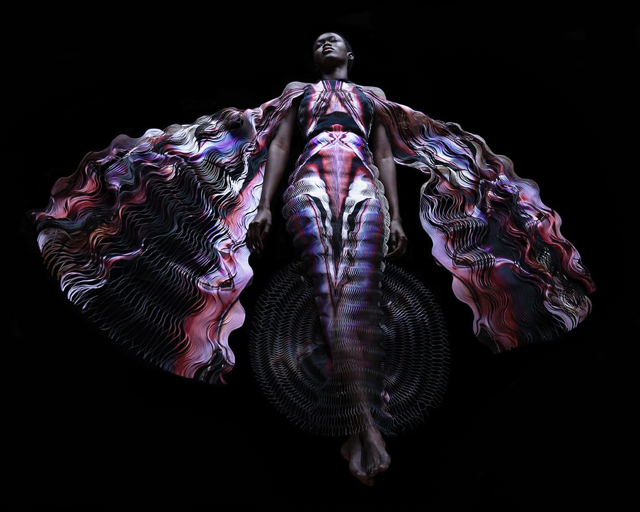
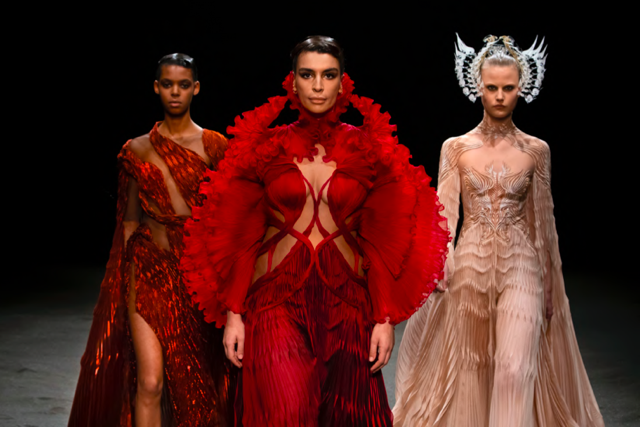
Iris Van Harpen
I absolutely love the work of Iris Van Herpen. She usesed diffent means of technologies, 3D printed fabrics, laser cutting and embrodiery to create the most asthounishing dresses.
I believe that 3D printed dresses are the future of clothing. Using recyclable filaments or filaments made out of degradable materials can help a lot with current situation in fashion.
Danit Peleg
Sew printed
Sophy Wong
Idea
I have done my parametric design in the week 2 for my digital body, so if you need more info about that, you can check my week two. I adore 3D printed fabrics and 3D printing on fabrics. I wanted to make different samples and test in this week, I continued to 3D print even after this week, because I just simply really like it. :D
Tools
For this week I have used these main tools:
- [Rhino3D](https://www.rhino3d.com)
- [TinkerCAD](https://www.tinkercad.com)
- [Ultimaker](https://ultimaker.com)
- [PrusaSlicer](https://www.prusa3d.com/page/prusaslicer_424/)
3D Printed Fabrics Samples
I have decided to make 4 samples of different infill patterns as very easy starting point for anyone interested in 3D printed fabrics. Different infills influece different properties of the 3D printed fabrics mainly: breathability, speed of printing, smoothness, amount of the material you have to use print, flexibility, how the material feels and how prone it is to make a mistake during the print (in other words, how hard it is to print). I have created four 70x70x10mm samples. You can check lower to see the results.
Process and workflow
- Make the desing (stl or obj) I used tinkerCAD to create it
- Import the file to slicer to convert the files to gcode
- Adjust printing settings
- Preheat the 3D printer (60° C -  bed, 225 °C - nozzle )
- Load the filament
- Check the first layer of the print (on Prusa, you can make the first layer test)
- Adjust Z axis
- Print
- Remove the print
- Repeat
Results
Here you can see all of the result of my prints. I have printed them all with same temperature as the filament on the box suggested, but I like to use a slightly higher heat on the bed, to make sure that the first layer really sticks. Also I have printed the first layer with thinner width and took the bottom layer and the top layer of.
Honeycomb and gyroid infill - 3D printed Fabrics by Linette Manuel
Triangles and rectilinear 3D printed Fabrics by Linette Manuel
3D Printing on Fabrics
I have tried two different ways you can 3D print on fabrics. 3D printing on tulle and 3D printing on stretch fabrics.
3D Printing on stretch fabrics
Process
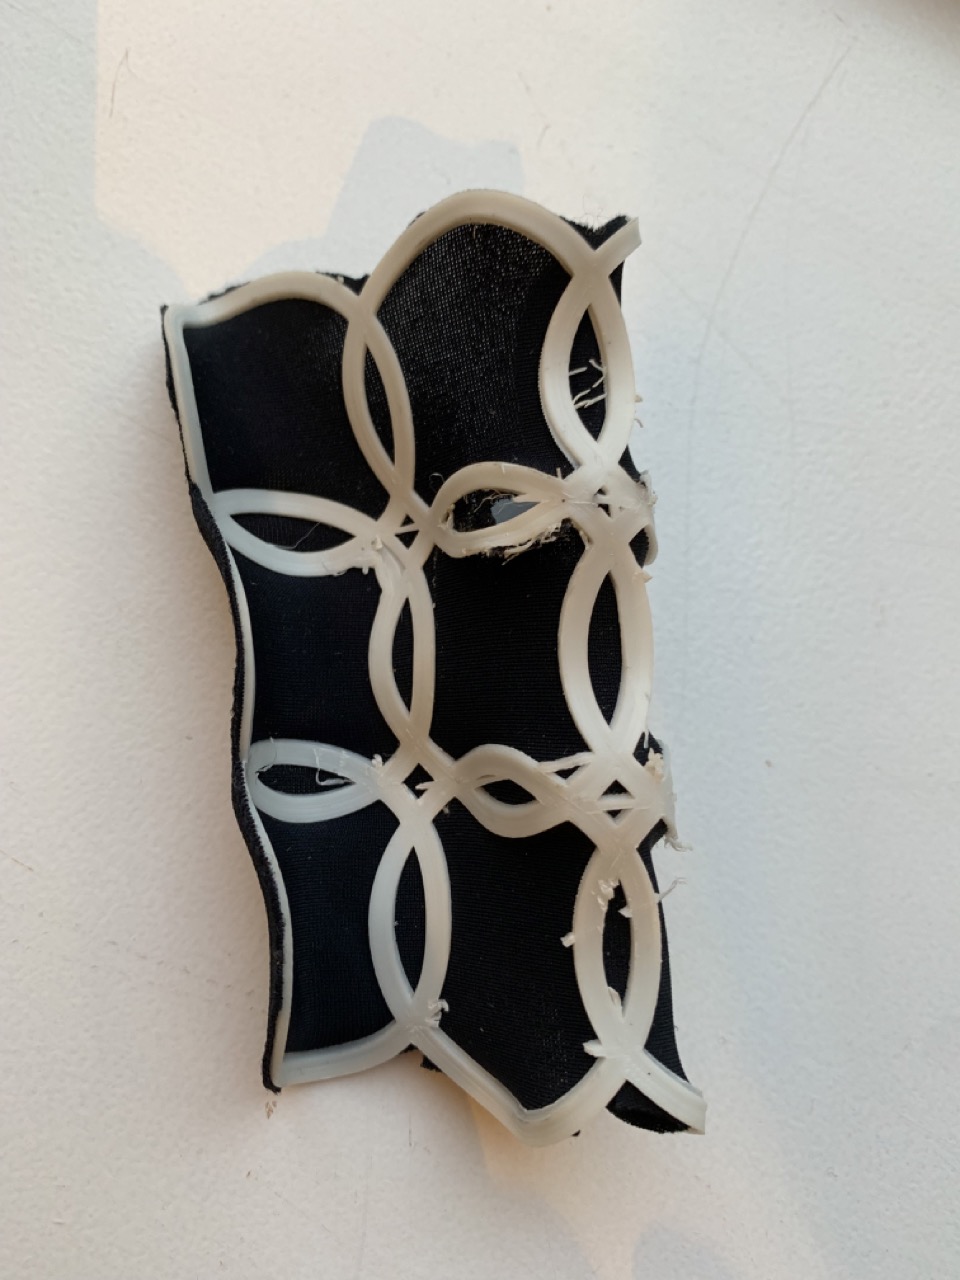
3D printing on stretch fabrics was a nightmare for me. I have tried twice and to make an easy print and it did not work for me. I figured that you need to have fabrics that strechtes in both directions. I have bought the wrong fabrics that only streched in one direction. I also made a mistake not to strech the fabrics enough so the fabrics did not stretch enough to make a nicer design.
Here are the steps to follow: - Prepare your design in as obj. or stl. file - Cut your fabrics slightly smaller than your bedsheet (1 - 2 centimeters from both sides) - Strecht the fabrics as much as you can and tape or clip it (Clipping works much better, but don't forget to take away the steel part of the file clippers, so you doesn't get in the way of the printer) - Choose your filement (I have used PLA for this case) - Prepare the gcode for the printer - Download the gcode to usb or SDcard - depending on the printer - Load your file - Preheat the printer - Load your desired filament - Print - Unclip your fabrics soon after the print is done (be careful not to burn your hands, if you are using clippers, put the steel clippers on to help you unclip them) - See what results you got
Results
3D Printing on tulle
I have 3D printed on tulle before, so it was a it easier for me. I really like this technique, because it enables to create beautiful things, that you would normally need to glue on the top of the fabrics. I usually. My friend was having a halloween party and asked me, if I could help her make a madonna style top with pointy bra. I was searching for ways how to make gemstones at the top of the bra to make it a bit different, but then I have decided to print it on tulle and just sew it in.
Process
To 3D print on tulle I followed this steps:
- Prepare your design in as obj. or stl. file
- Cut your tulle slightly bigger than your bedsheet (1 - 2 centimeters from both sides)
- Choose your filement (I have used PLA for this case)
- Prepare the gcode for the printer
- Download the gcode to usb or SDcard - depending on the printer
- Load your file
- Preheat the printer
- Load your desired filament
- Print first layer of the filament and pause your print (You can either check in your slicer how long will it take to print the first layer and pause when the time comes, but if you are a pro, you can adjust your gcode to stop the print after the first layer)
- Adjust your Z axis (this step is voluntary, I don't usually do it, because I use a very fine tulle, but you have to check, that you nozzle is not rubbing your fabrics too hard)
- Resume the print
- Unclip your fabrics soon after the print is done (be careful not to burn your hands, if you are using clippers, put the steel clippers on to help you unclip them)
- See what results you got
Results
3D printing on tulle by Linette Manuel
3D Printed Ring
I wanted to try to 3D print some rings as well, but I we did not manage to print on the SLA 3D printer, that is much more suitable to 3D printing jewellery. I still wanted to try to print small rings, just to see, how it will end. Unfortunatelly or fortunatelly even with the most detailed settings I wasn't able to get the result I wanted. The stones bares created a very weird structure - but it had its own charm, so I used the rings anyways. Not including the steps, because I would not recommend anybody to print jewellery on FDM printers.
Results
3D printed rings on FDM printer by Linette Manuel