7. Computational Couture
My interest in 3D Printing falls in a couple of different categories.
Medical
De-Industrializing Medicine
As medical device designer the use of 3D printing while frought with challenges in real life contexts of production - has many possiblities to help people feel more personally identified by their decive, much in the same way glasses have become. What I'm keen to seen about the Shapeways solutions is their use of unique mixes of materials that can better support a user - multi material is very exciting to me. Renee Verhoeven while not 3D printed sparks hints at aesthetic possiblities.
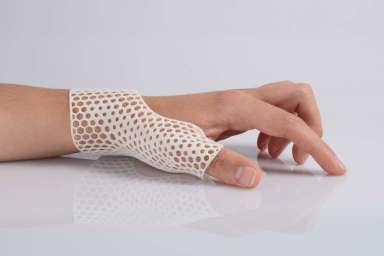
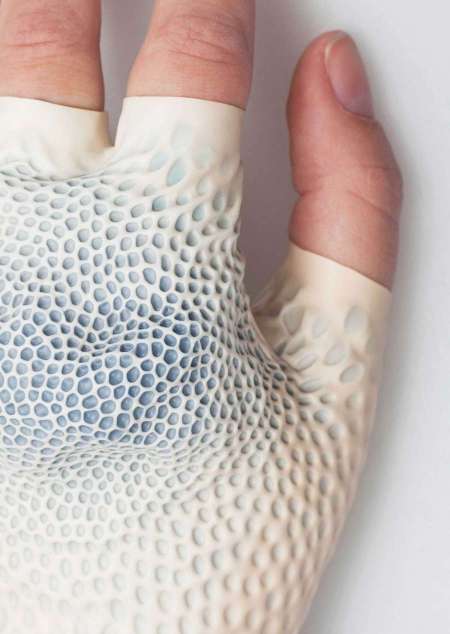
Similarly on an aesthetic level, I'm curious about how we can humanize and naturalize medical instruments, devices and environments. The use of flexible printed silicones offer really exciting opportunities in inflatables and in tools used in hospitals.

3D Printing in Prosthetics
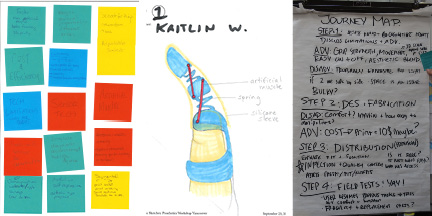
I ran a series of workshops in Munich and Vancouver which brought together Amputees, Prosthetists, prosthetic component manufacturers, 3D printing companies, and manufacturers of prosthetic components in a co-design session. In these sessions people from all angles of 3D printing in prostetics worked together in order to better understand how 3D printing could be implemented within a real world setting.
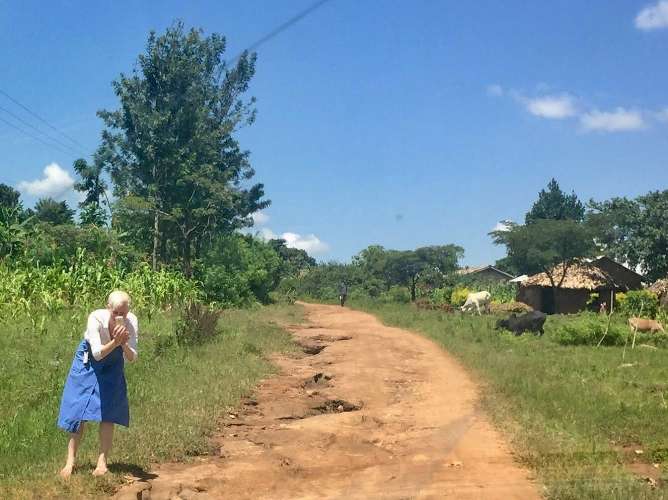
Low Resource Settings Most importantly to me in the medical space, is that 3D printing represents and opportunity to provide resources to folks in low resources settings. I worked for a Ugandan Research Centre SAfri and recognize how the production of supplies and tools onsite could save lives and create local business for people in areas that are hard to reach and people who are rich with creativity.
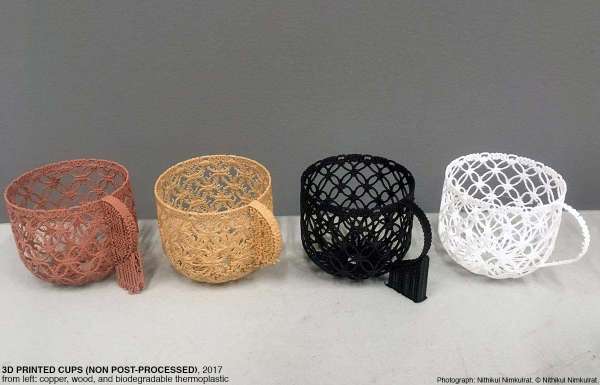
Craft + Play Integrating craft practice into technical fields has long been an interest of mine since my support of the research created out of the Matterial Matters Lab at Emily Carr University with inspired works from Thai Designer Nithikul Nimkulrat in her prokect "Hand-crafting through digital means" connecting traditional textile works with 3D printing in different mediums.
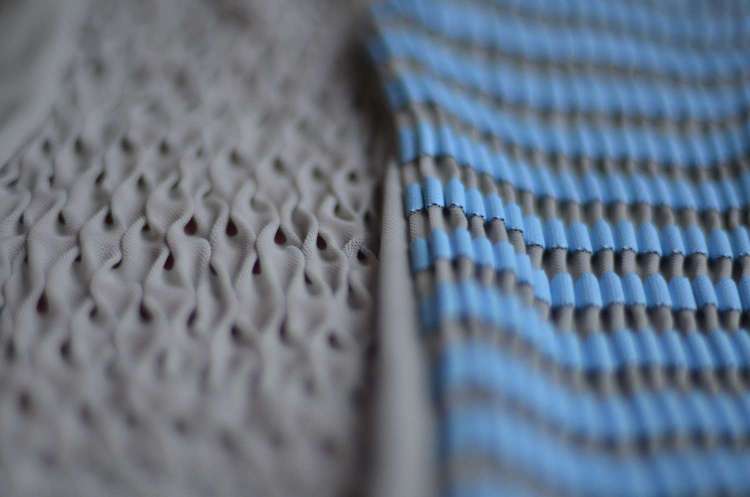
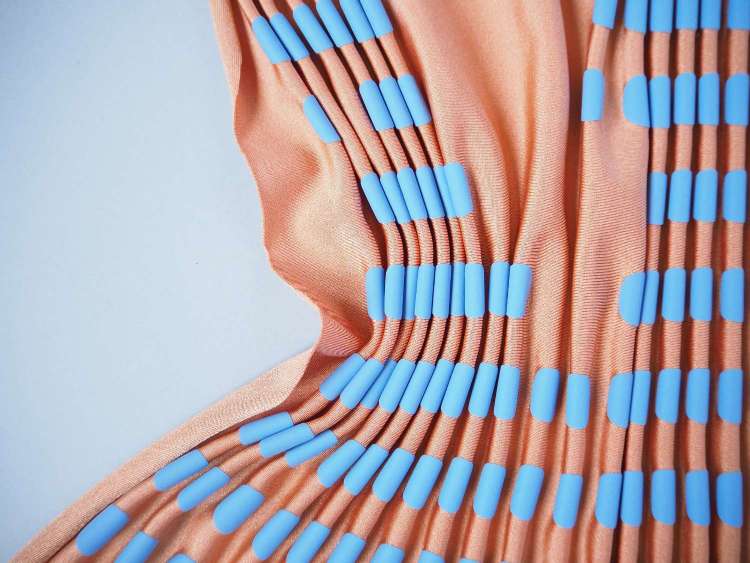
I was lucky to be selected as part of the Canadian Delegation to the Dutch Government at Dutch Design week in 2019 where I encountered the work of Robin Pleun whose work with textile and knit technologies have been incredibly insprational. These particular ones use globs of ... well what could be paint possibly - but hold the same potential as 3D prints in creating textile shape in a new way. Arguably, knitting could be considered an additive manufacturing process when mechanized anyway ;)
3D Printing in Clay
We're fortunate to have a designer that works with printing in clay supporting the BDC, Julian. Julian has been working in some wild spaces on that I found especially inspiring was his project called SymbioticSpaces. The research team describes the project as a "Multispecies habitats for urban wildlife, 3D printed in clay. Ceramic modules, “growing” from the water to the ground and into the air, offering housing opportunities to a broad variety of species: water animals, maller mammals, wild insects and birds. The first model temporarily installed in Hildesheim, Germany.
Film By: Paul Knopp
Julian walked us through the use of the Delta WASP 2040 which has a 40cm high 20cm print envelope within which to play. It is able to print clay, porcelain, gres and earthenware but no fun stuff like silicone or bioplastics. The Wasp is constrained by the following print limitations:
- Printing volume: Ø200mm x h400 mm;
- Minimum layer height: 0,5 mm;
- Maximum print speed: 150 mm/s;
- Maximum travel speed: 150 mm/s;
- Acceleration: 500 mm/s2
Machinery
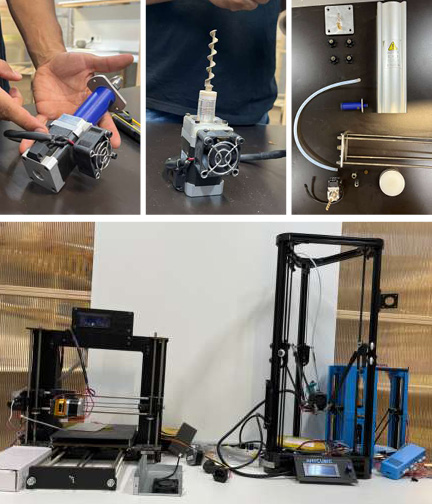
All elements of the machine must be kept incredibly clean in order to prevent miss-prints, contamination and short circuits cause by water. Key Elements:
- Extruder: the extruder has many different nozzled which allow you to control the diameter of the material printed
- Screw: The screw is what drives the clay into the extruder
- Tank: The long aluminum channel is the tank within which the Clay is compressed
- Plastic Tube: is what carries the clay from the tank and into the screw/extruder
- Air Compressor: Not pictured but critical in order to get that clay movin'
The two pictures of printers describe two different methods of printing.
- Cartesian: Each axis moves independantly in x, y and z beginning at 0,0,0, Heat is required in order to set it's outputs
- Delta: The position of machine determined by Pythagoras theorem (starting point is the middle) - can print things that don’t require heat.
Cartesian: each axis moves independently X, y, x (cubic) need heat in order to set
Clay Printing Process
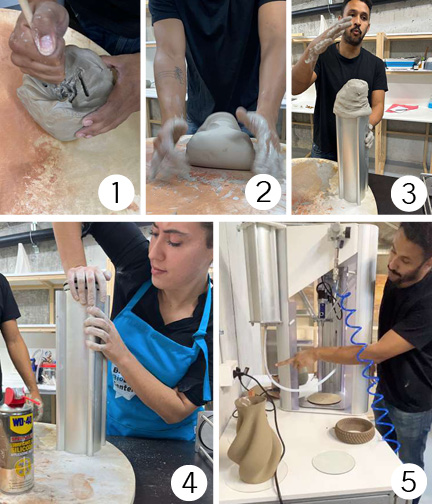
- 5% of the weight of the clay is added in water* & 28-30% water content is the ideal ratio to load into the machine.. (I call the Peanut Butter Jar method, trying to keep the wet inside the container while you mix to the perfect consistency)
- Use the "Bulls Head" method, traditional clay kneading in order to improve water integration and remove bubbles
- SMACK it down fat on top to avoid the entry of extra air. Squish straight down, rip away the sides, create a new ball and slap it down again.
- The tank is lubricated with a silicone spray and the machine is re-assembled with the clay loaded tank.
- The the air pressure is engaged and to watch for the clay to start to move at the perfect speed (slow)
- The machine is set using a roatary interface - old school. After an SD cads is entered and the GCode is selected to print. The following commands are entered: * Prepare * Auto home (Machine is already aware of its limits) * Machine assesses max height * Modify “z” max (alters depending on nozzle) navigate down until the nozzle touches the board. * Material extrusion within menu in order to get clay feeding into screw chamber of extruder
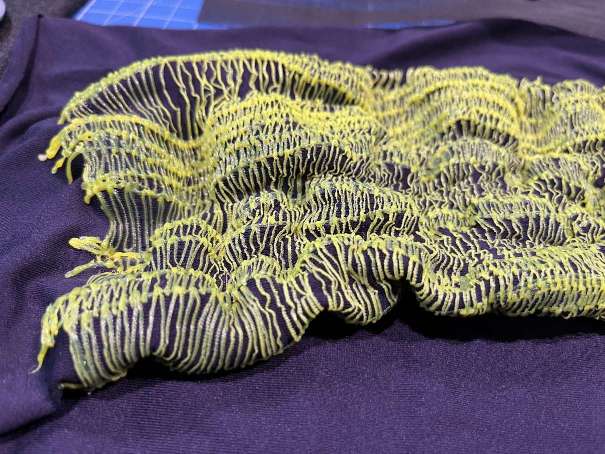
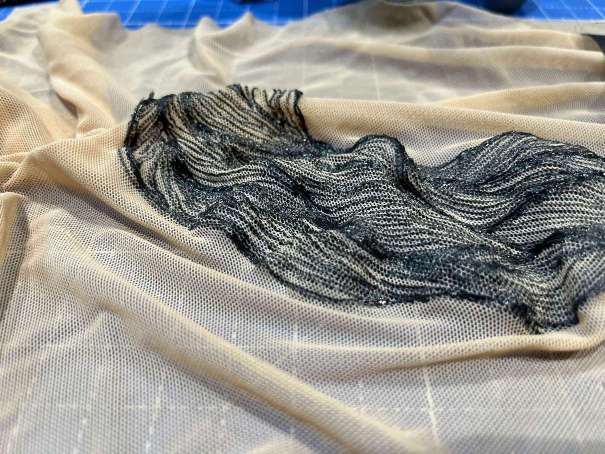
3D Printing with Pen
Using a 3D printing pen across a stretch textiles can offer yet another layer of the blend of craft and technology. As you'll see below from the Basque BioDesign Centre, these examples demonstrate the structure, texture and contrast of illustration across a fabric.
Grasshopper3D
Grasshopper is introduced in an intentionally confusion fashion at Fabricademy and so let me help you out with some core basics that will get you on your way.
Resources:
- Grasshopper Docs describes exactly what all the components do and how they operate.
- Grasshopper Forum many questions have already been answered for you here when you feel lost
- Rhino Forum also helpful with some elements
- Food4Rhino has all the plug-ins that you can't find in Rhino's PackageManager (see below)
Set-Up Tips
- Screen Set up: Open Rhino and then open grasshopper from within it. Set your screen up half-and-half with Rhino open on one side and grasshopper on the other.
- Download plug-ins: the easiest way to do this is through the command "PackageManager" in Rhino. This will create a pop up window within which you can find most plug-ins.
- Selecting for components: items from the top menu in Grasshopper and clicking on the interface will make them appear
- Searching for components: Clicking the space bar will allow for a search menu to come up within which you can also find any function that appears above in the visual menu
- Visual descriptions: * Download "Bifocals" plug in to have all components labled in a speech bubble * Display Options: Draw Icons + Draw full names in the display menu make understanding the components much easier. "Draw fancy wires" under the same menu gives you a visual indicator of how information is moving. *Clicking Command+Option (Mac) or Alt+CTRL (PC) allows you to understand where in the interface you can find a component
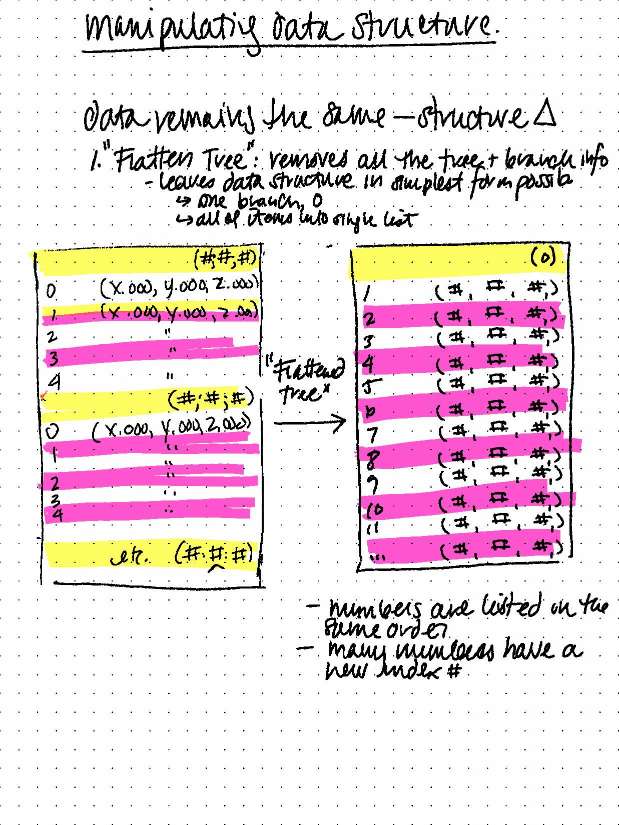
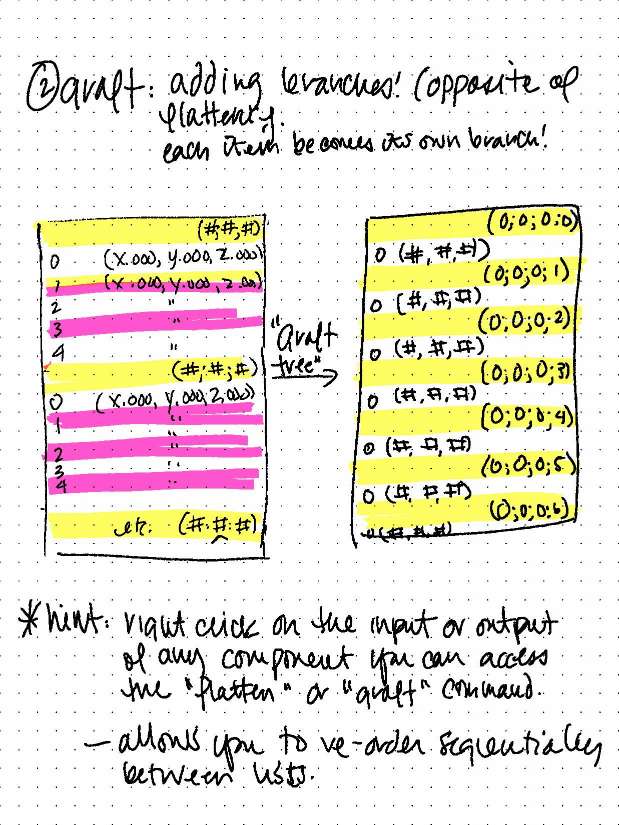
Parameters
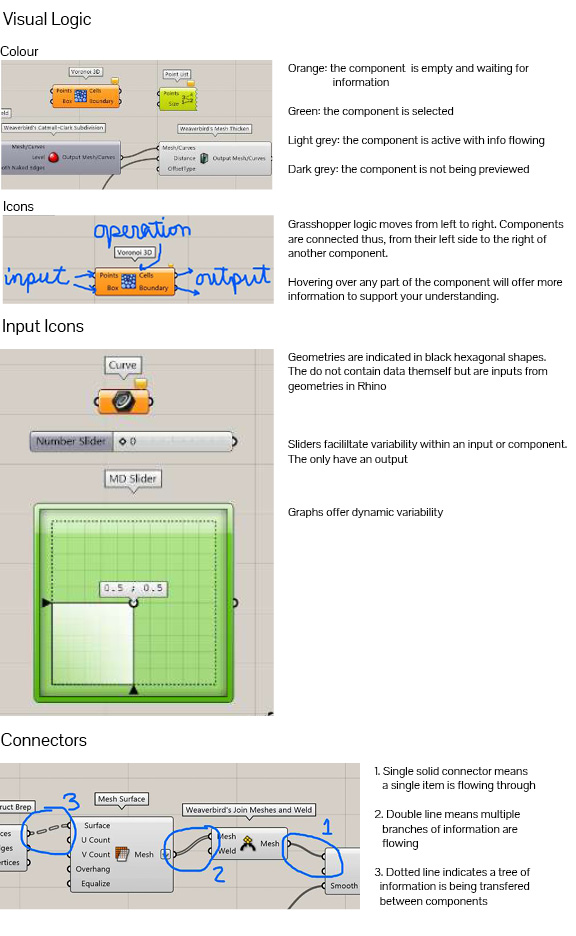
Understanding Data
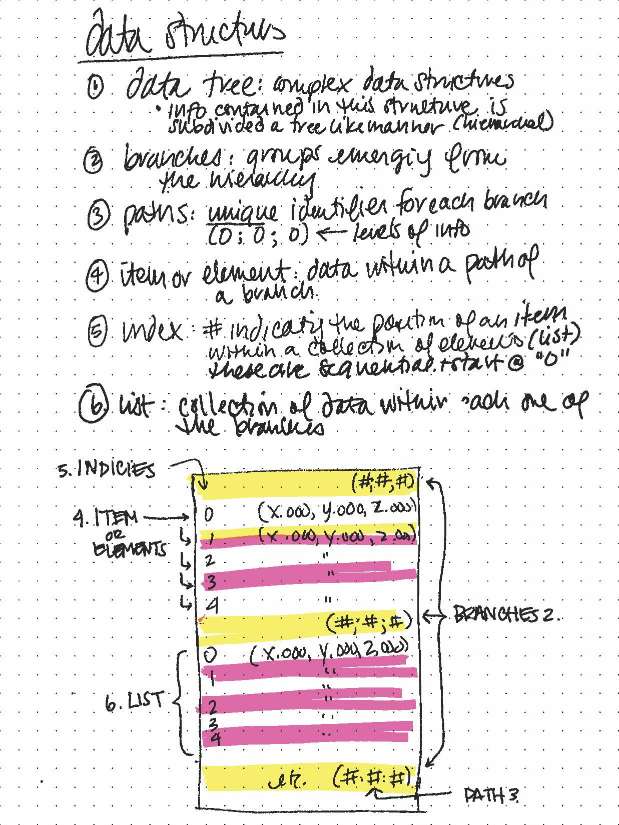
Example
Its been a dark and rainy week here in Bilbao... so for me - this was inspirational...
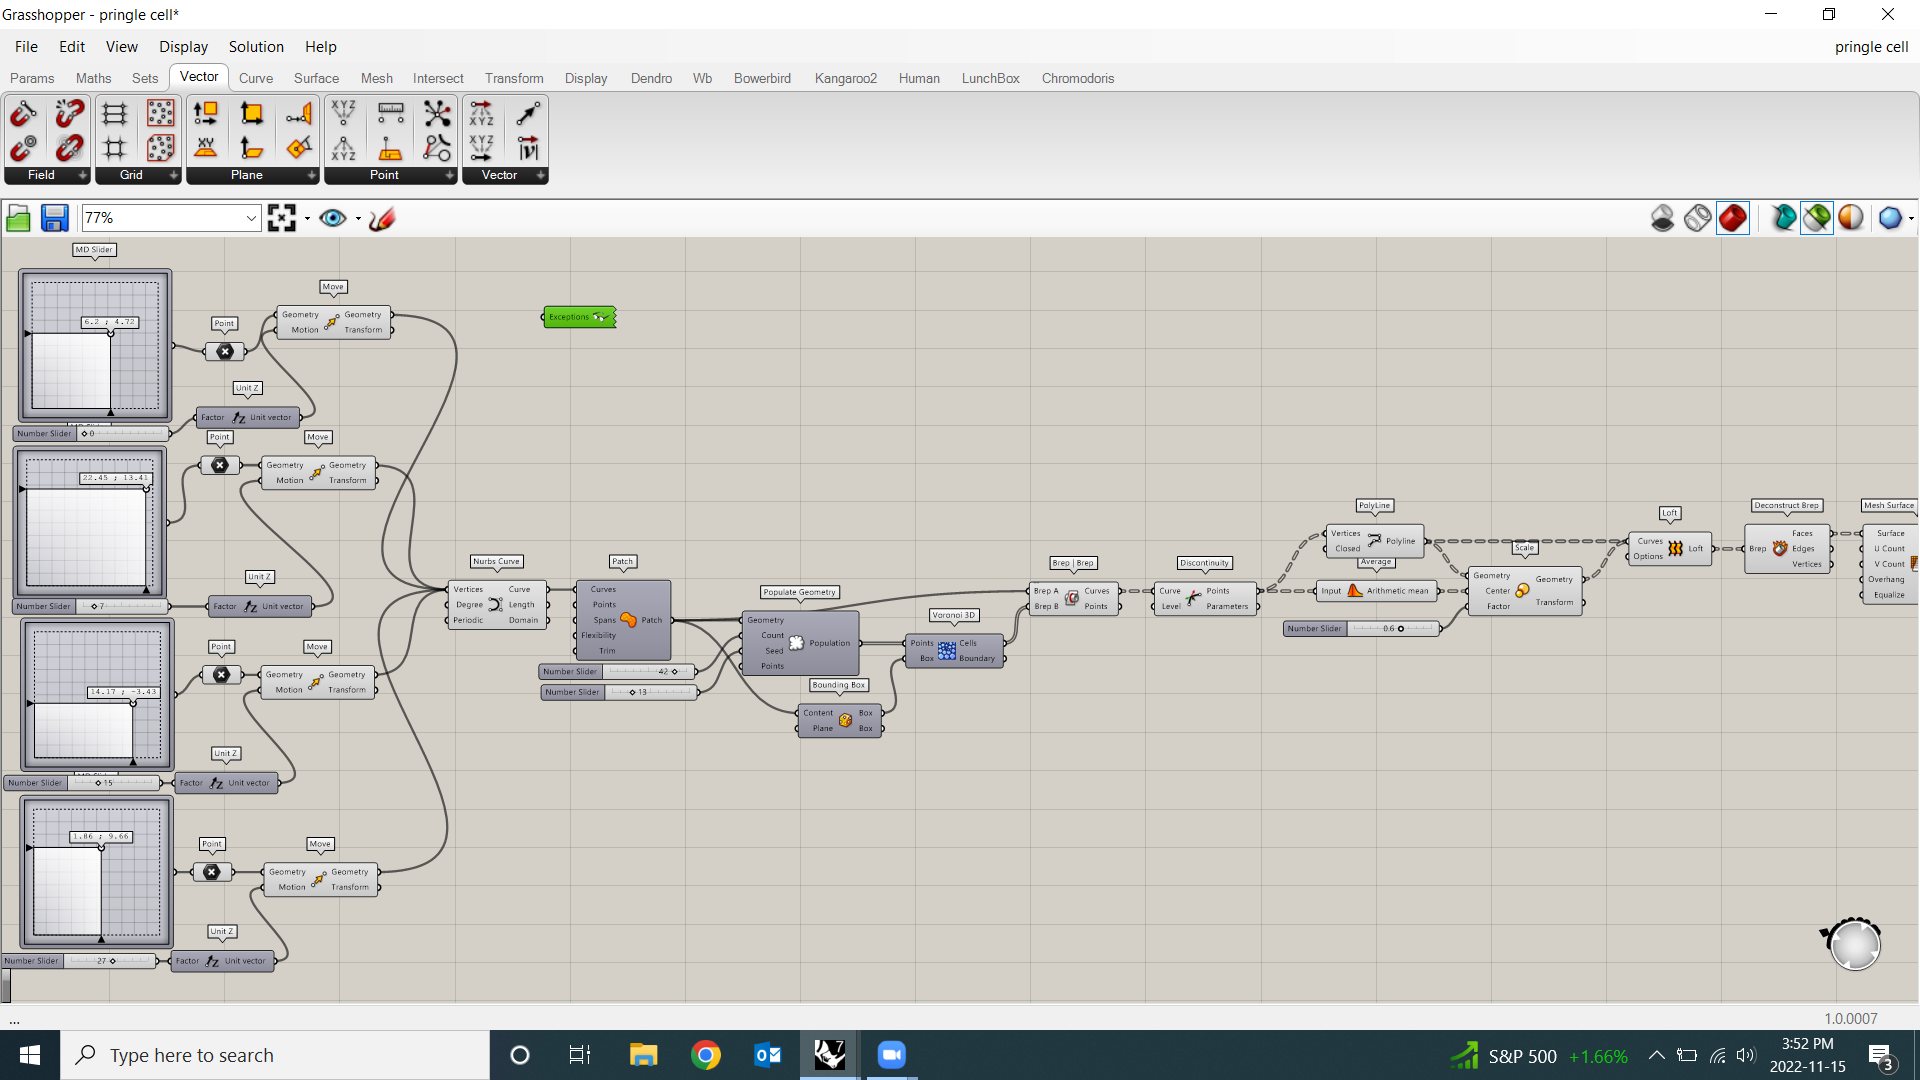
My recommendation in learning how to use Grasshopper is to start by copying exactly what you see. Follow exacly my workflow using the above legend to tell you what each element means, and how it functions.
I followed this online example in order to try working on my own model as a starting point in order to better understand the possiblities within Grasshopper
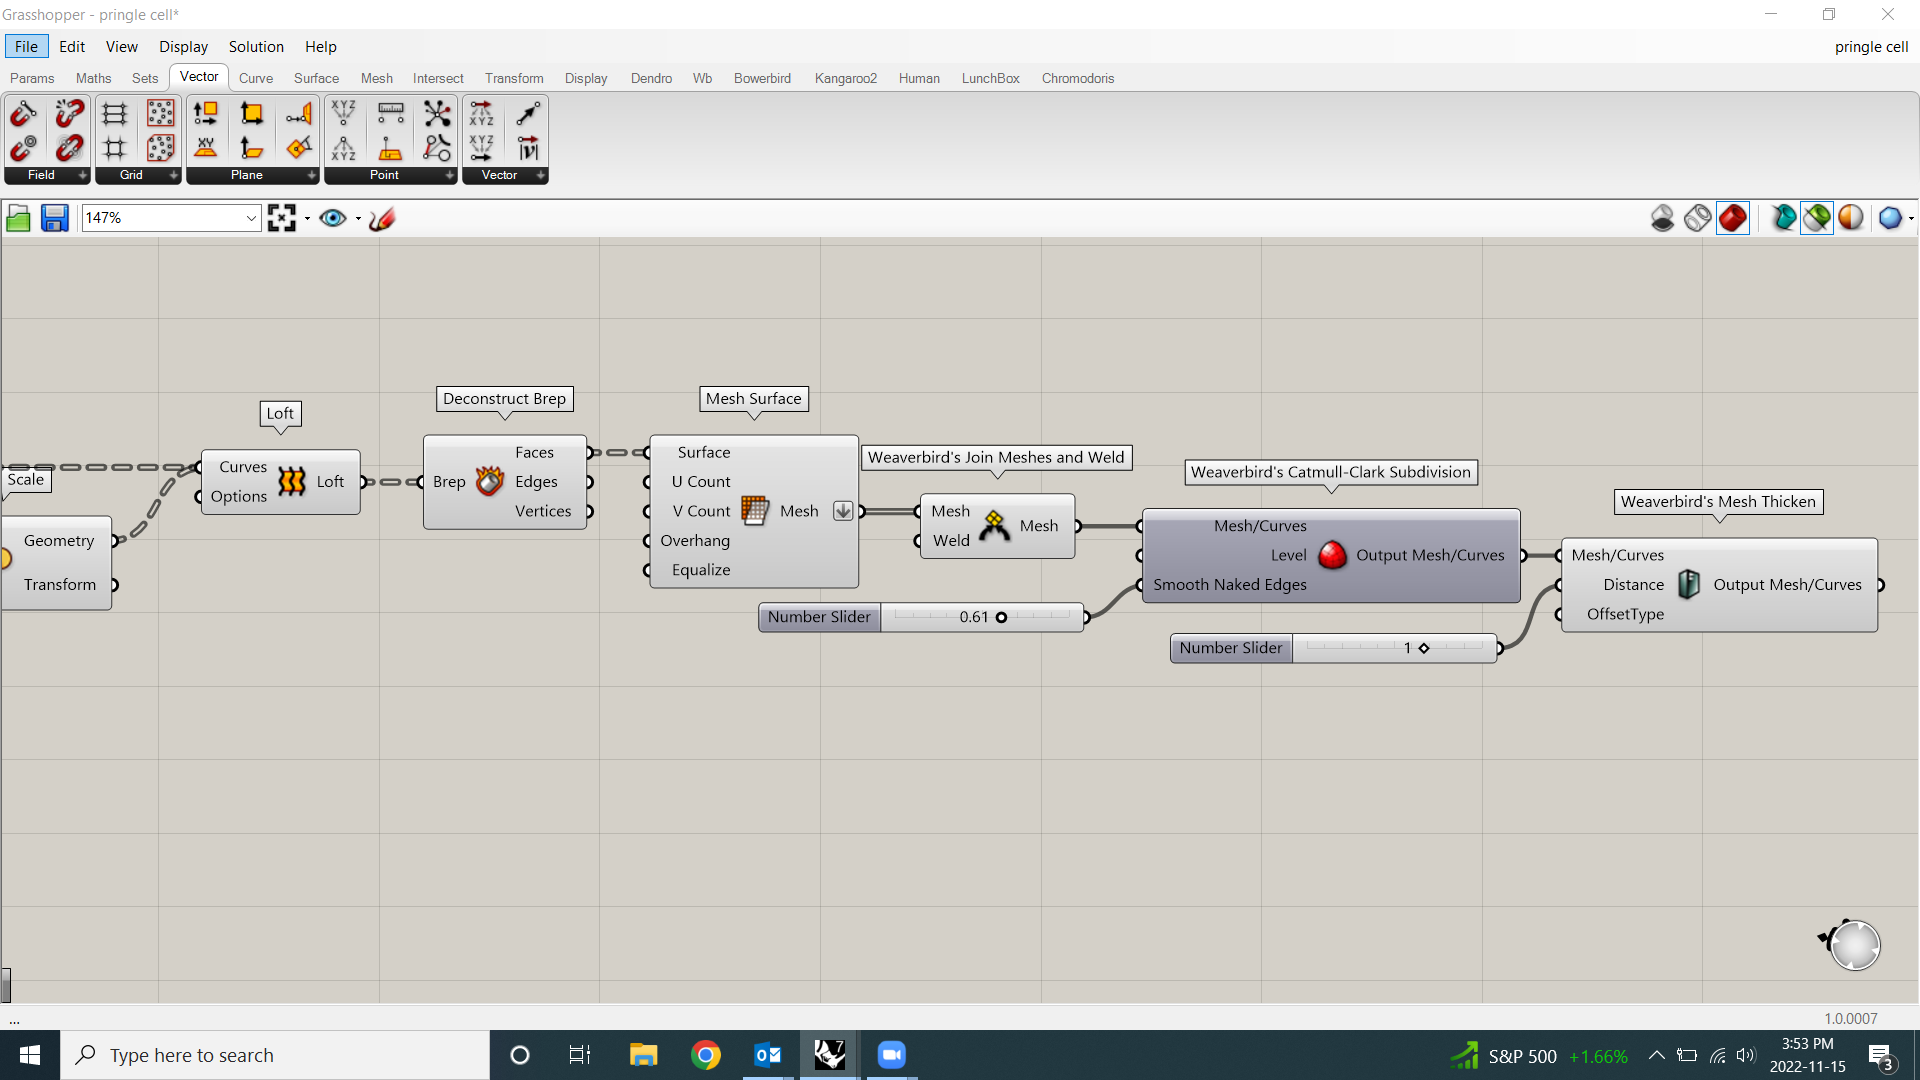
STEP ONE: Prepare your resources In order to break down the meaning of what each component means Please go to our shared Google Sheet. Image of my Grasshopper workflow. Our node has started this sheet in order to support new learners in figuring out what elements me. What goes in, what happens inside and what comes out. Open this in a seperate tab such that you can easily switch between your grasshopper and the definitions.
STEP TWO: Duplicate Algorithm Open Rhino then follow the steps in the Youtube Tutorial exactly OR simply use my Grasshopper file as a guide and copy it exactly, referencing the matrix of meaning I have created in Google Drive. Finally open my Grasshopper file here.
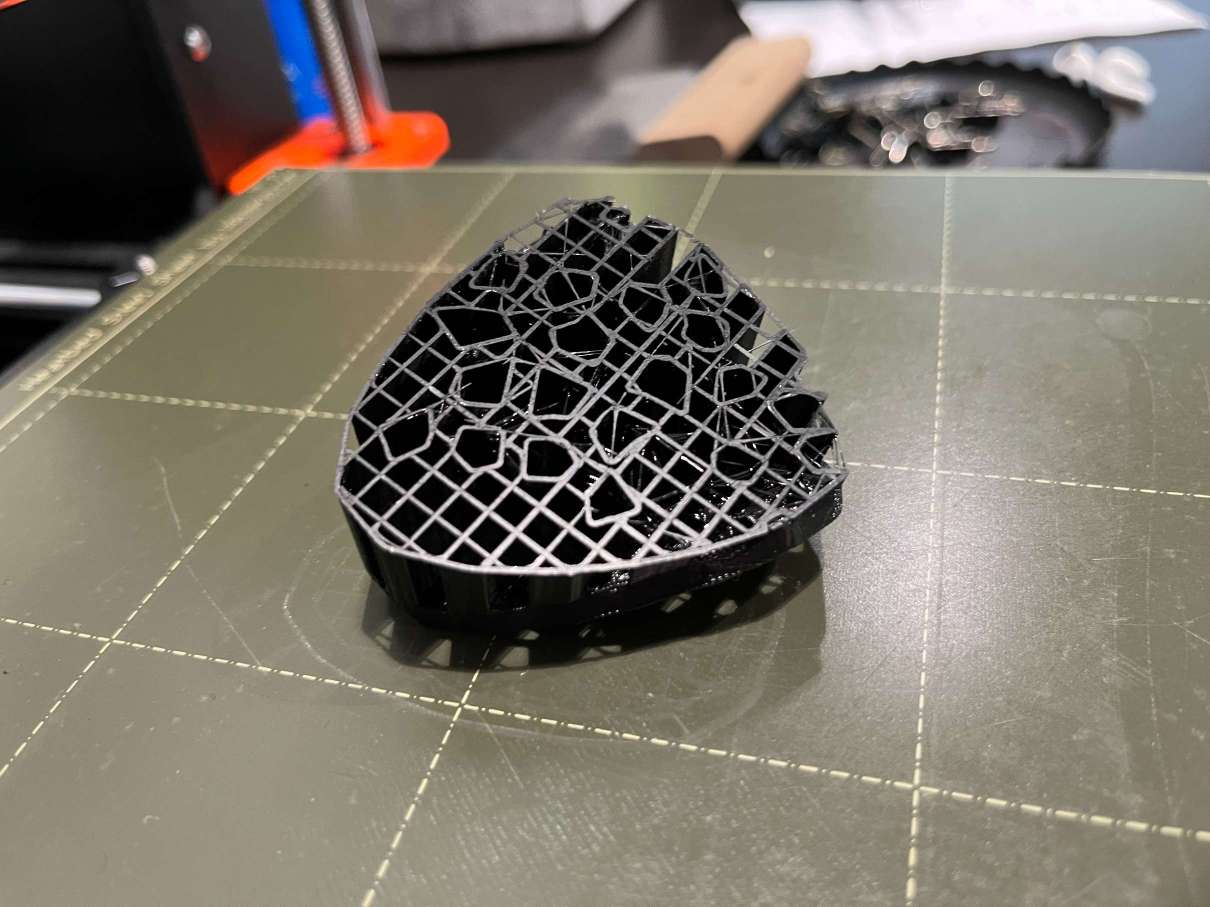
STEP THREE: Prepare to Print To get from Grasshopper into a format to print use the following steps: * "Bake" your mesh making sure to select the central icon within the component. This will make your object real in Rhino * Orient your object in a fashion that will reduce the need for support material * Export your Rhino file to an STL in order to load into Cura.
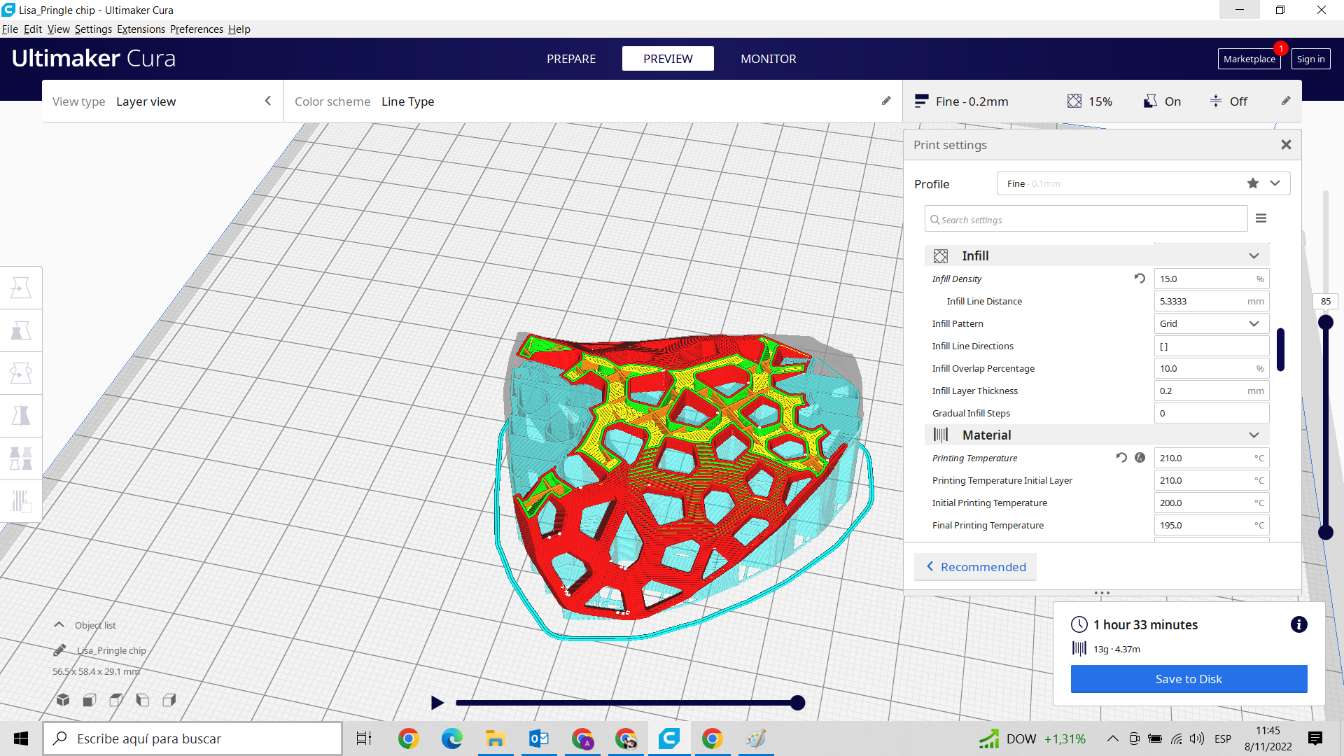
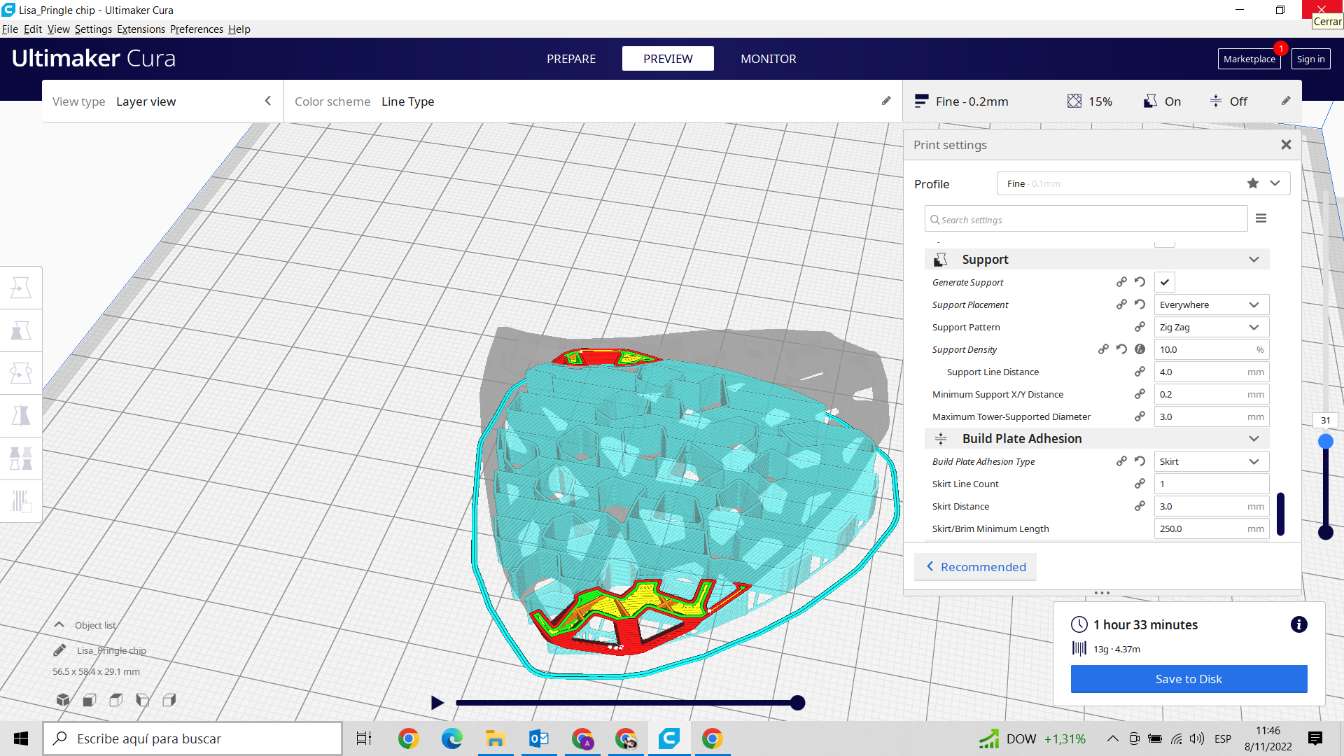
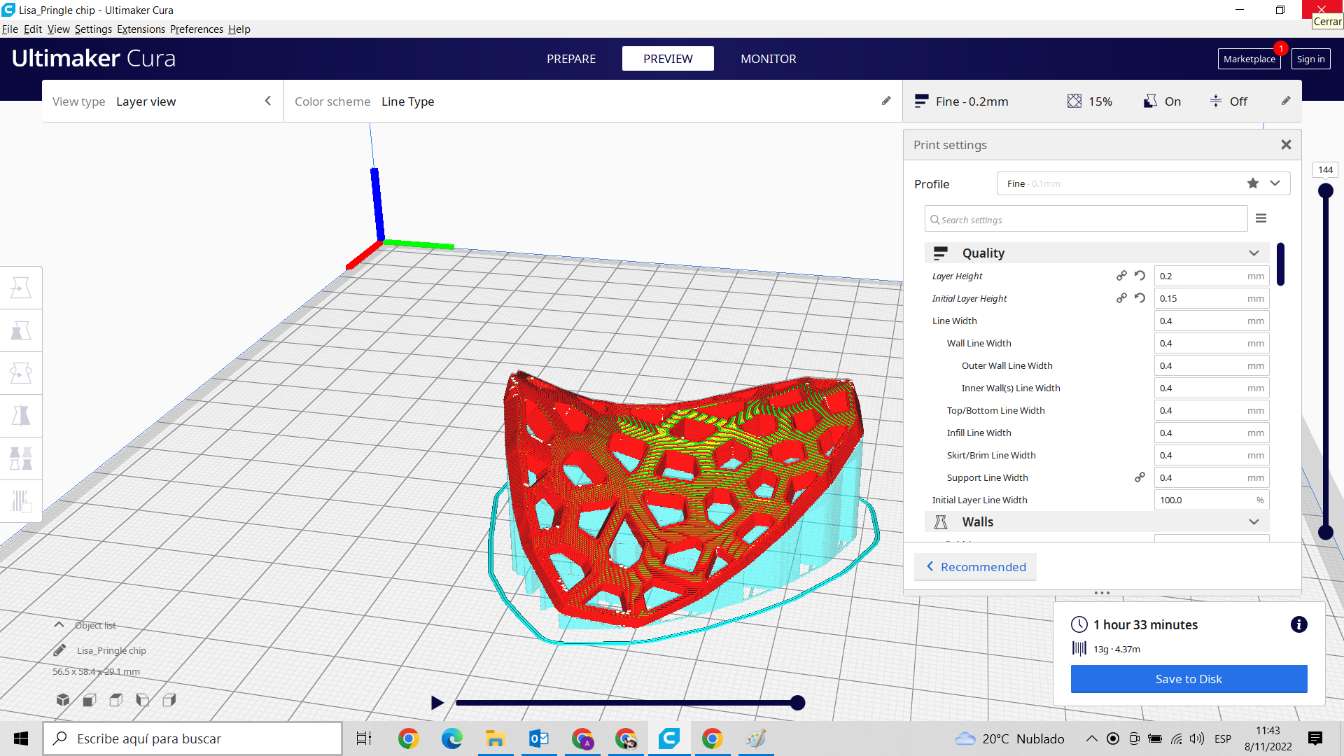
We use the application Cura, and open source softward in order to create GCode and set up our printing parameters. Use the following steps in order to set up your file to print from Cura
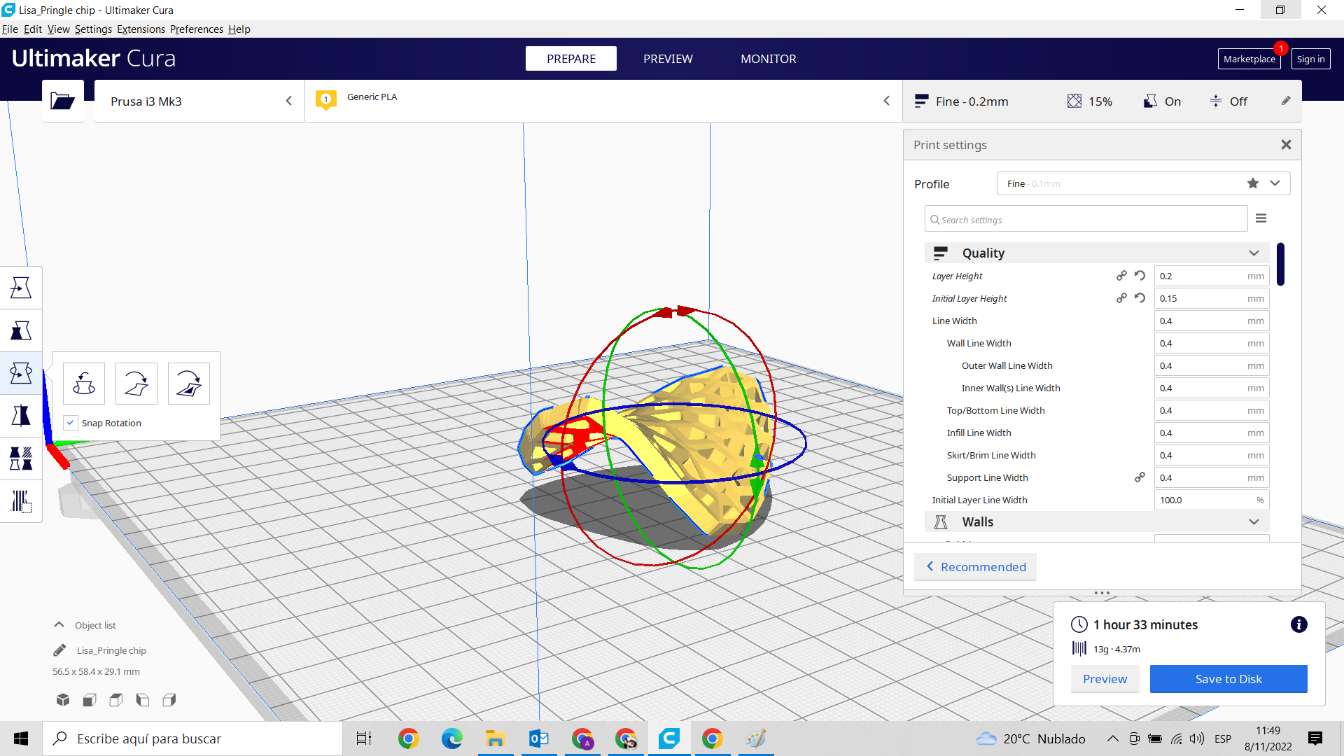
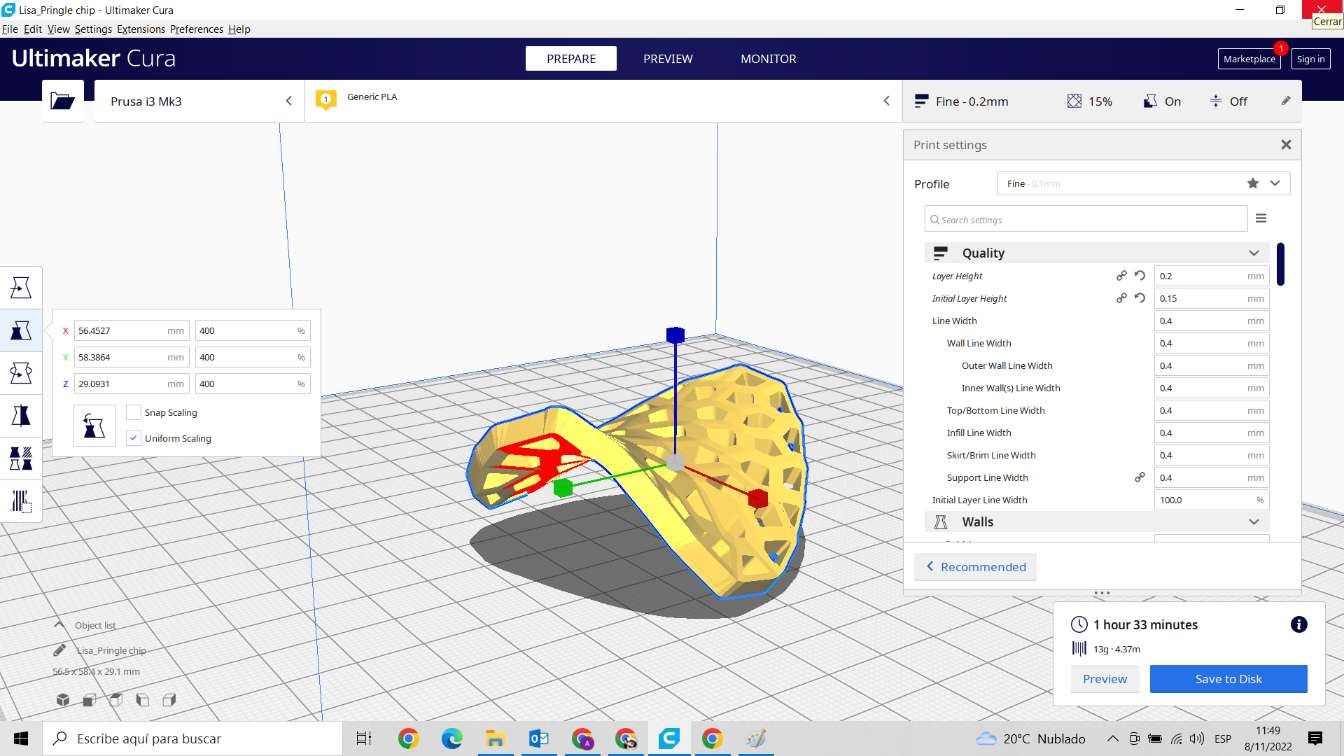 Orient your model for the final time inorder to reduce print time and support material required
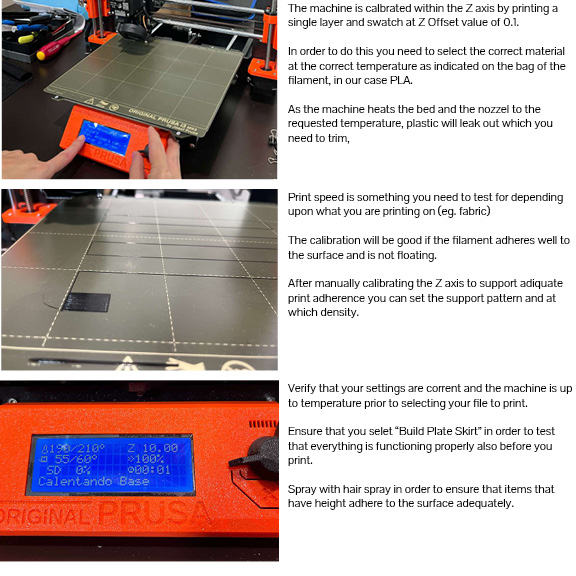
STEP FOUR: Print Here at the BDC we print on a Prusa Original 3D printer. Technical specs associated with this machine for your reference can be found here.

If you'd like to play with the STL file itself in Rhino you can find that right here Associated Grasshopper Code as above can be found here
Tools
- [Grasshopper](https://www.grasshopper3d.com)
- [Rhino3D](https://www.rhino3d.com)