14. CLO
Dipping my Toe into CLO
As you'll see from my documentation I only had a brief play with CLO feeling overwhelmed by the Fab workload, starting late and with my job outside of school - unfortunately this segment took the hit.
First Exercise
In the first week of Clo we first made a very simple garment using a circle and some squares. The interface is quite intutitive and mirrors a lot fo what you might be familiar with from Illustrator.
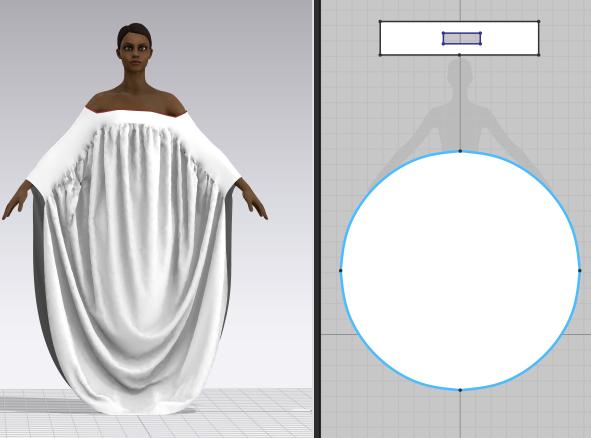
I took the following steps to create this simple outfit: Creating pattern pieces:
- Select a model from the Avatar menu on the right.
- Draw the rectangle on the left hand plane after selecting this shape on the left
- Draw a large circle underneath the rectangle
- CTRL C and CTRL V to copy and paste another circle. you can also right click and select "clone pattern and link editing. symmetric patterning" - in order to ensure formatting maps between pieces.
- Right click and select "flip normal" such that the insides of the cirles face each other.
- Position the circles such that they mirror each other from the waist to the knee
- Position the rectangle above the head - like a ceiling
- Select Polygon: Inter-line (shortcut G) allows you to draw internal line within the pattern and is Red. Create a small rectangle inside of the rectangle over the head in order to make a shape for the neck hole.
- Select the internal rectangle. Right click and select "Cut"
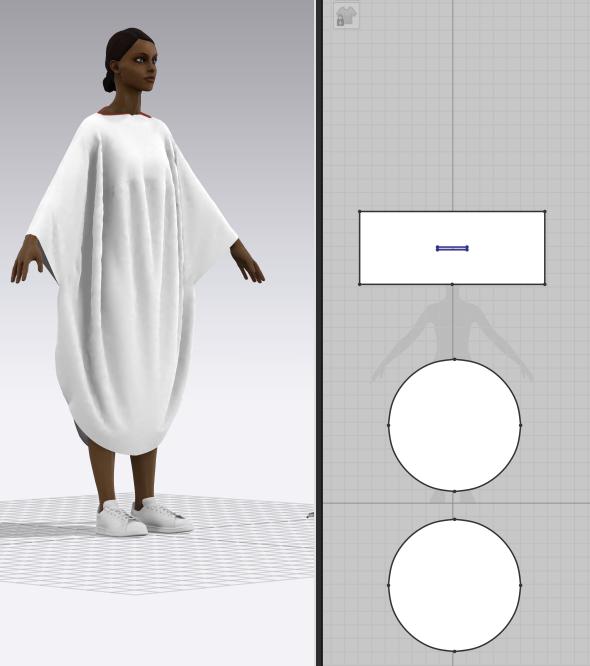
Sewing:
- Select "Free sew"
- Select a segment of one of your pattern pieces
- Select a segment on another pattern piece in order to connect
- Click the space bar in order to create the simulated garment
- Contiune to sew segments in order to create sleeves
- Click space to simulate again
- Adjust the pattern using control boxes on the left and re-simulate on the right
Changing textile properties:
- Again on the left of the screen you will see a panel where fabrics can be selected
- Select and name a fabric
- On the lower left, the properties manager has an endless array of styling options to add, in my piece I simply changed the colour and opacity under the "materials" drop down menu
- Drag the "fabric" you have created and drop it onto any of the pattern pieces to apply
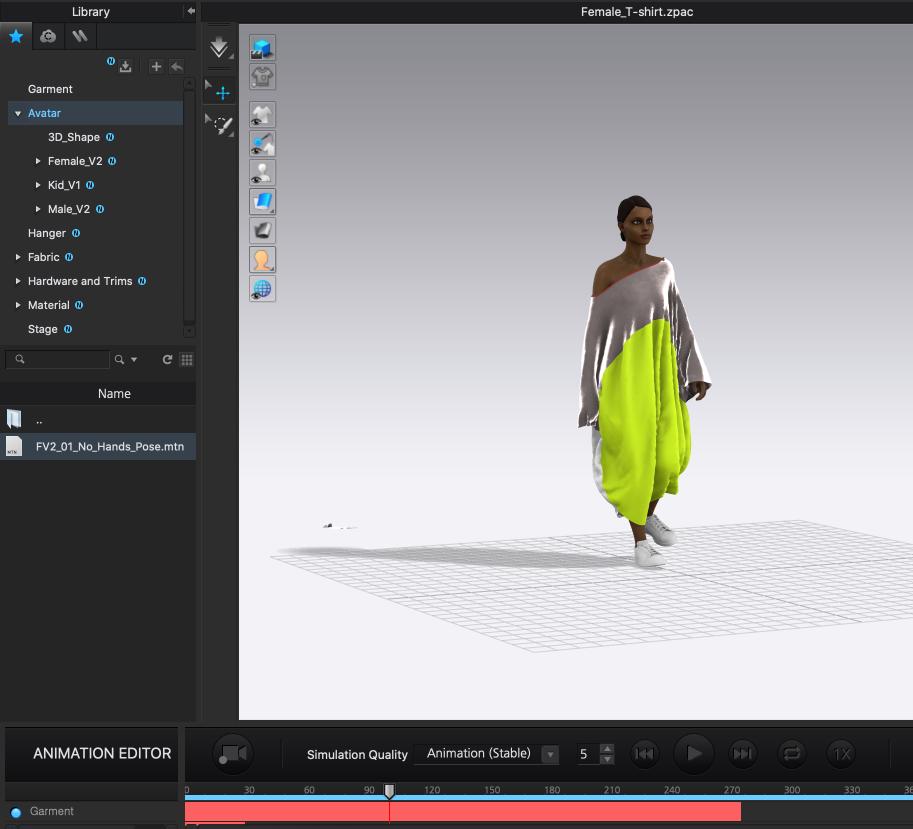
Mode: Animation
- Top Right hand corner select the mode "Animation"
- Go into "Motion" library in the left hand menu and select your motion of choice
- Select the "Cache" button, a small camera with a red light on it in order to apply the garment to the model and render all the light angles and textile motions
- Wait for cache to complete before actioning anything
- Press play in order to understand the motion
Tips:
- Press 1, 2, 3, 4 etc in order to view your model from different angles (model side.) and "]" symbole will bring things back into view on the left hand side.
- the back of the fabric is indicated in a grey colour the front in white or a colour of your selection
- If your sewing lines are crossed you can always right click and select "reverse sewing" to correct.
- only one textile can be applied per pattern piece
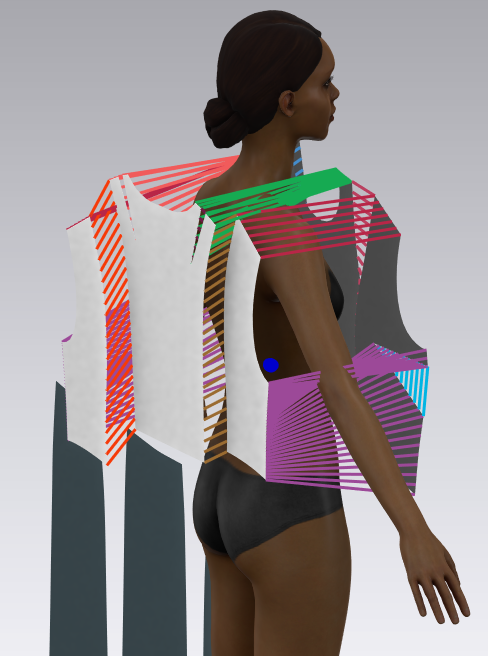
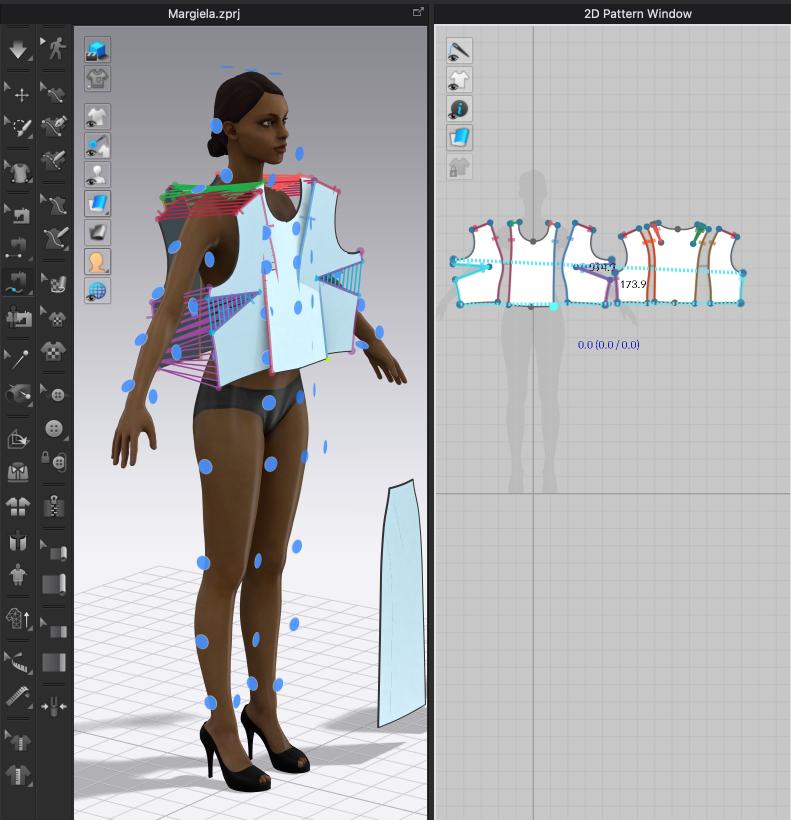
Margiela Top Exercise
Working with an existing pattern, in my homework I attempted to re-create it a pattern place it on the model using the steps described above

Tool
Last update:
2023-01-09