6. BioFabricating Materials
Inspiration
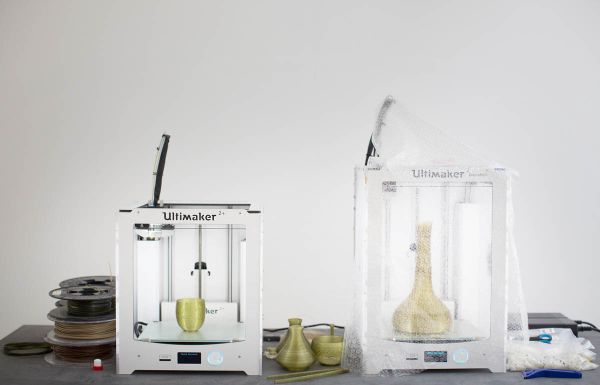
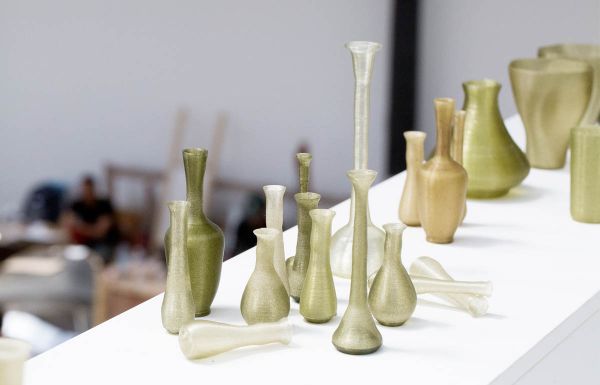
Klarenbeek and Dros are doing some really wonderdful work that is seaweed and mycelium based. The work that stands out the most to me is their alge based filament for 3d printing. (Photo by Antoine Raab courtesy of Luma)
Similarly, Julia Lohmann's Department of Seaweed had me thinking about the bull kelp back home. It's unclear to me whether she is simply using the seaweek itself of if this has been re-created into a form of Bio-leather.
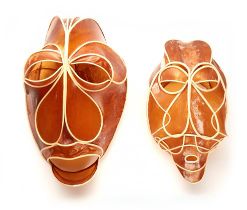
Masks made by Marcis Ziemins and Lenka Dobranska
Photography Petr Krejci
Finally, within Fabricademy I am impressed by the creativity and applications of Amanda Jarvis's gelatin sequins and use of refelctive services in order to create new aesthetics.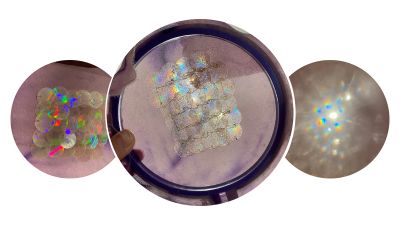
Research
My goal in my research was simply to play as hard as I can. Thus, I'll start by sharing the simple recipes I used as bases for my experimentation and then review what I leared when I pushed these parameters further in my results below.
The materials I played with followed recipes found in the Fabricademy Slides for this week
Bioplastic Recipes
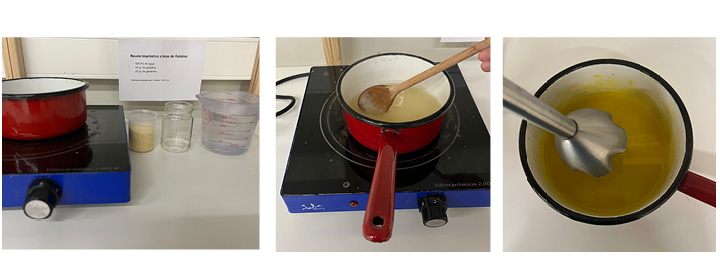
Agar: Red Algae
Not very waterproof or heat proof. High shrinkage and warpage.
- 4g agar
- 2.5g glycerine
- 400ml water
- enamel pot
- silicone spoon
- textiles
- linen + wool swatches
- 20x35cm mould
- warm water without boiling it
- add glycerine to water first always
- add geletin
- stir continuously until crystals disolve
- simmer for 15-30min but no more.
- pour into mould while warm
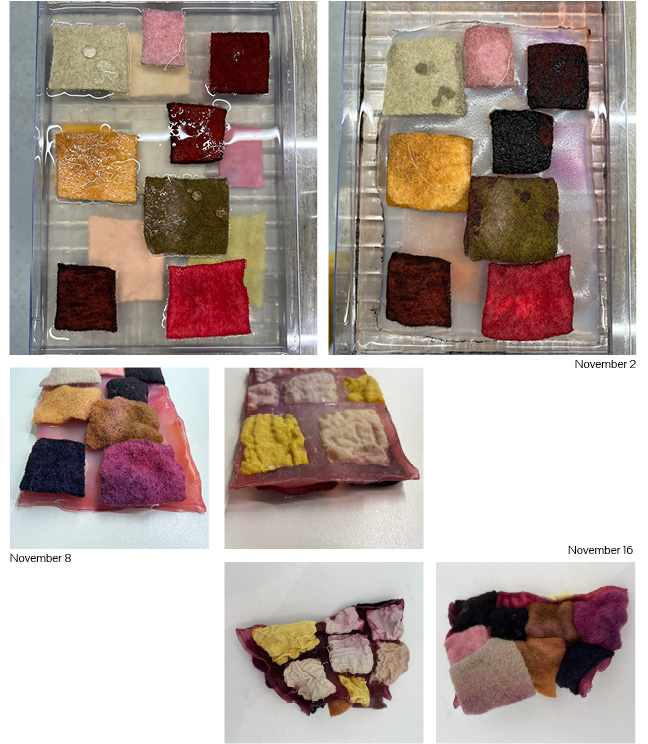
Material response after 6 days of drying
Material response after 14 days of drying
Algenate: Brown Algae
High water and heat resistance. High shrinkage and warpage.
- 6g Alginate
- 10g glycerine
- 200mL water
- 10ml Sodium Cloride Hydrate
- 100ml water
- blender
- silicone spoon
- wool swatches
- 20x35cm mould
- large syringe
- hand loom
- Alginate: mix alginate, glycerine and water in a blender
- add colorant if desired
- in a seperate container mix Sodium Cloride with water
- extrude or pour alginate into a form
- Cure Solution: apply Sodium Cloride either with a spray bottle or immerse alginate within it.
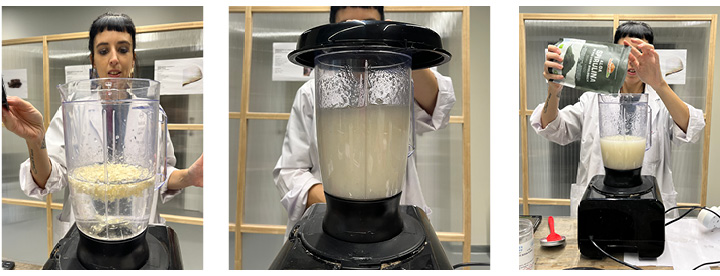
In the example below, you'll see Paula Franco creating Algenate yarn by squirting the material into a Sodium Cloride mixture using a large cut off syringe.
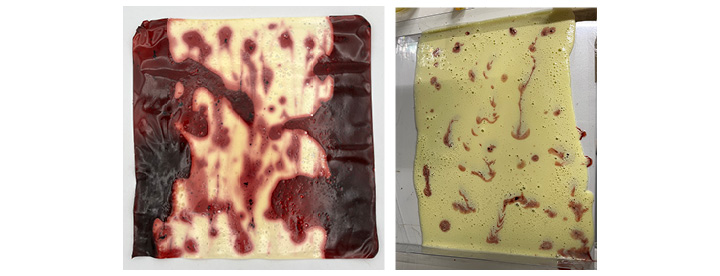
Gelatin: Animal (often bovine) collagen + Cochineal Dye
Low water resistance (especially when hot) Low heat resistance
- 25g glycerine
- 500ml water
- 50g gelatin
- (add 10ml soap for foam)
- enamel pot
- silicone spoon
- mould
- warm water and add glycerine (more glycerine,more stretch)
- slowly stir in glycerine and stir continuously
- simmer for 15-30 minutes (no more)
- pour into mould while still warm
- want foam? add the soap and hand blend before pouring into the mould
Gelatin: Animal (often bovine) collagen + Eggshell
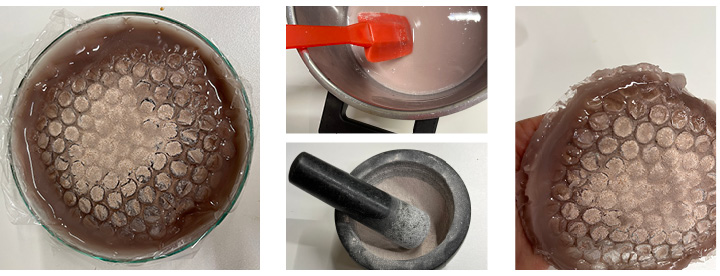
In this experiment I followed the work of Gülsüm Koç using the following recipe:
- 5ml glycerine
- 5mg salt
- 30g ground eggshell (filtered + boiled)
- 30g gelatin
- 250mL water
- enamel pot
- silicone spoon
- bubble wrap
- tape
- petri dish
- boil eggshells to reduce the chance of moulding
- once dry grind eggshells into fine powder and filter
- warm water without boiling it
- add geletin
- stir continuously until crystals disolve
- add salt and ground eggshells
- add glycerine and stir
- pour into mould while warm
As you'll note from the image above my result was not very successful. Using the bubblewrap to create a texture was ineffective as the heat of the material caused it to bubble up.
The resulting texture was very jelly like. I let the material rest to see if it would come into more solid form however it moved to a moldy state quite quickly.
Gelatin: Orange Crush
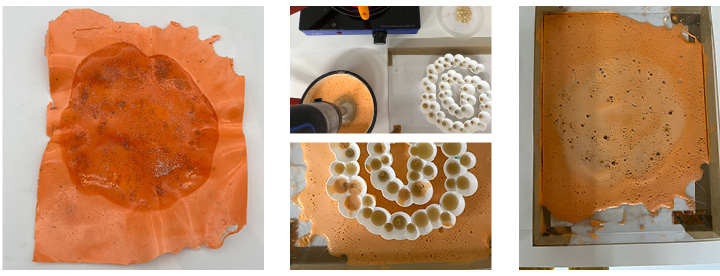
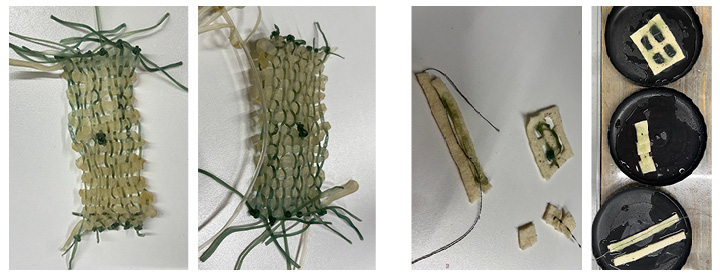
In the above experiment a frothed the orange gelatine then attempted to embed orange peel which I ground into it in the radial pattern with clear gelatine. The 3D printed form did not constrain the hot clear gelatin enough which ultimately just spread out into the blob depicted above.
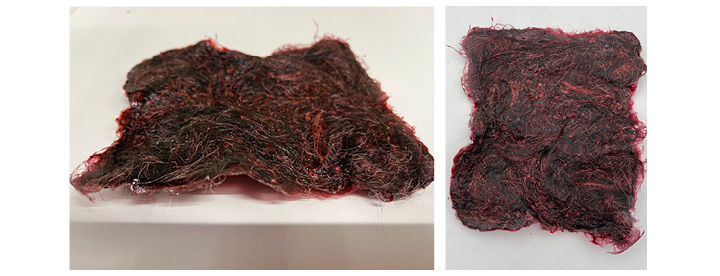
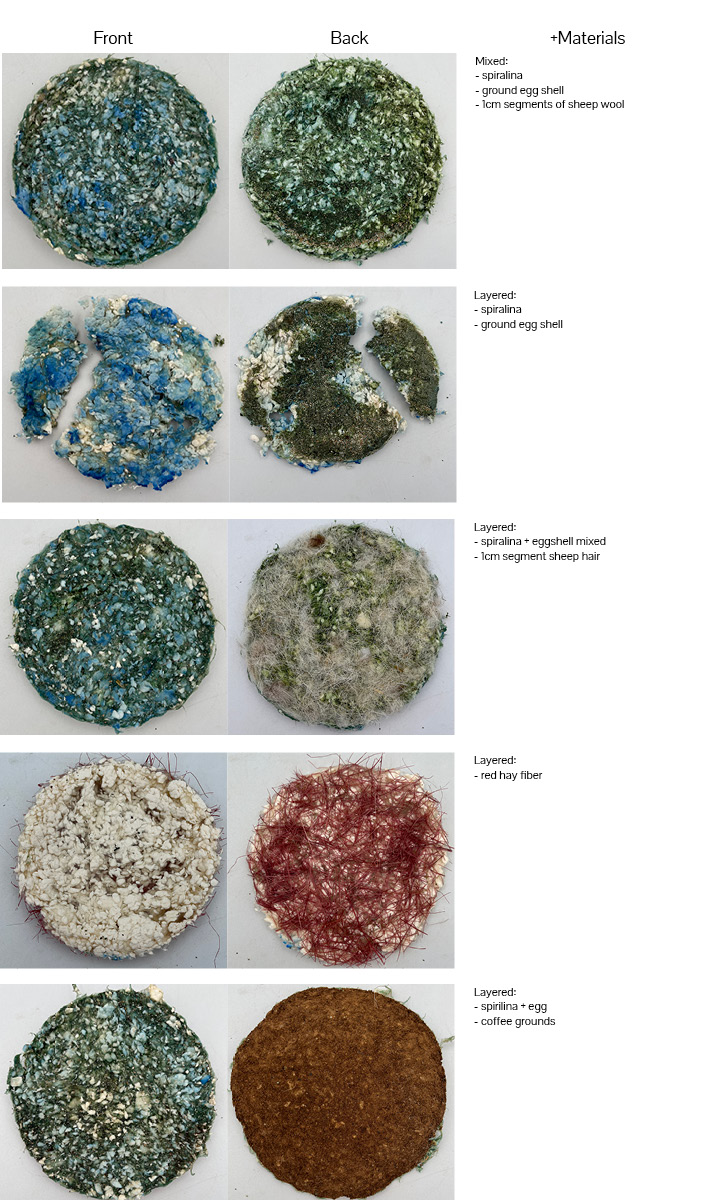
I was curious just to play with natural textures and undestand the affects when blended with gelatin. What I learned was the wool and dried mediums suck up a lot of gelatin. The means that I'd need to use the more sparesly or with a different intent for use.
What I also learned was that adding these fibres makes for a very strong, flexible material which had limited warpage.
Potato Paper
- 60g potato starch
- 60ml glycerine
- 300ml water
- 100ml paper
- enamel pot
- silicone spoon
- sometimes blender if chunky
- mould
- warm water without boiling it
- add glycerine to water
- add potato starch
- stir continuously at a lower temperature
- stir in paper
- pour into mould and move around until flat
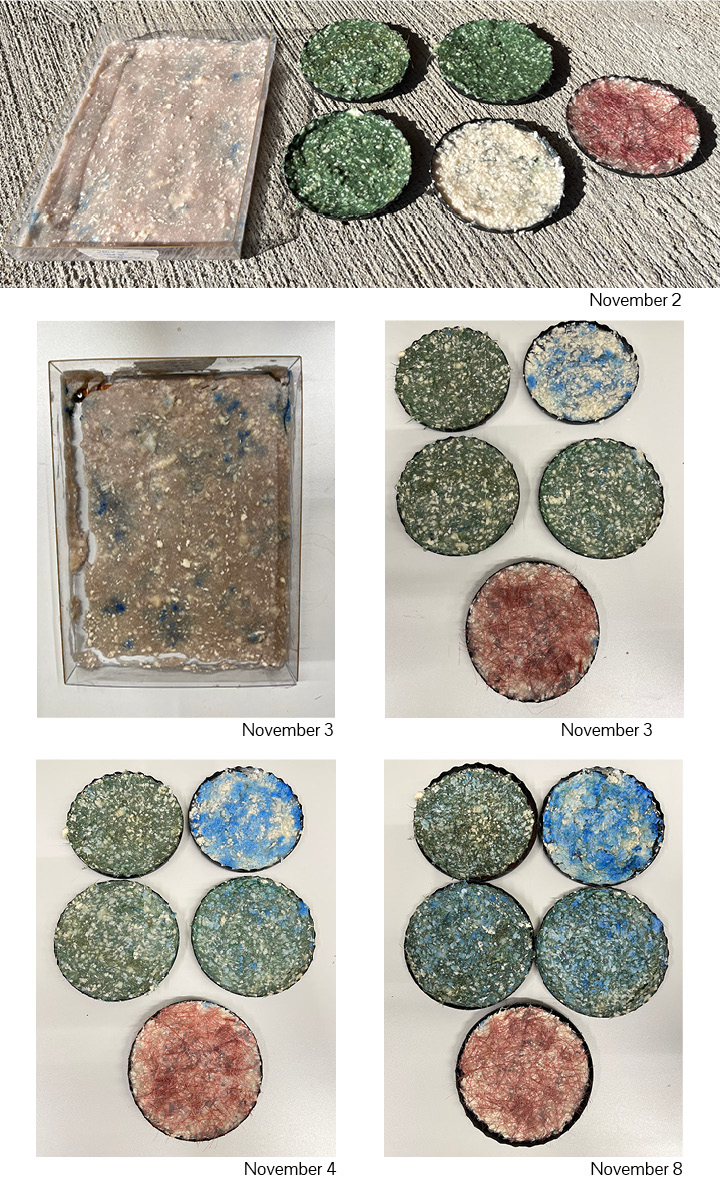
In my potato paper I experimented with layering and mixing of biomatials to understand their properties: My general findings were as follows: - adding a thick later at the bottom which is dry allows for ease of mold release and faster drying. - thick large layers are prone to cracking - the interaction between spirilina if simply speckled across the bottom of a mould creates an emergent blue patter which I found interesting
Bioleather Recipes
Kombucha leather: Symbiotic culture of bacterial yeast (SCOBY) cellulose
- 1.75L water
- 250g sugar
- 4 black teabags
- 40g dried hibiscus flakes
- large container
- kettle
- existing SCOBY or Kombucha
- boil water and pour into large container
- add teabags sugar and colorant if desired
- stir until sugar is dissolved
- allow to cool to room temperature
- add SCOBY
- allow to rest for several weeks and remove SCOBY once at desired thickness
- clean scoby with soapy water
- allow to dry on a wooden surface if possible
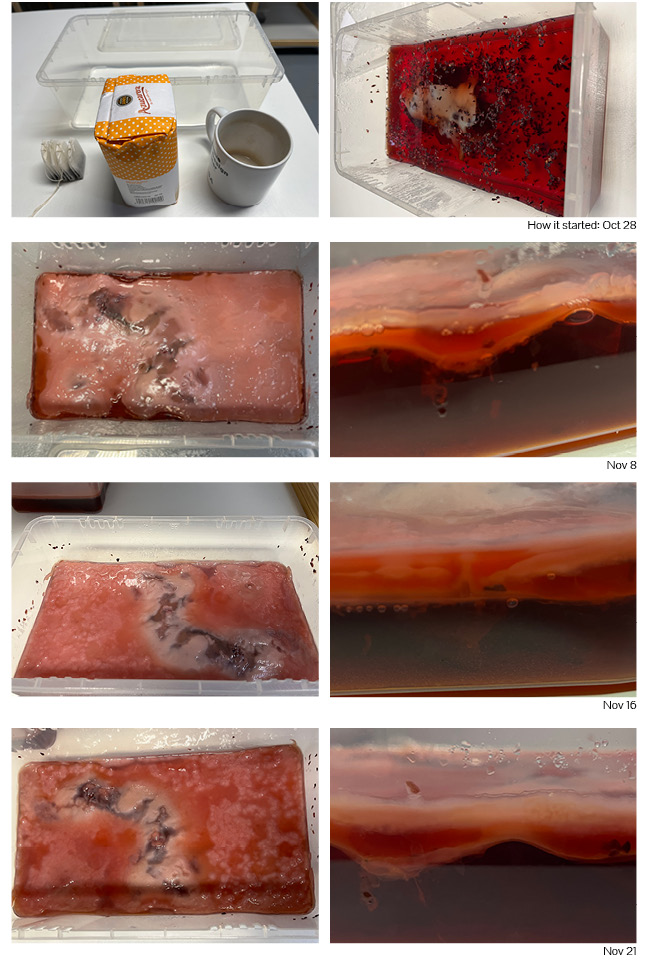
To see where Larry the Kombucha ended up - check out my work in the [Textile Scaffold] week where I use Larry as my material in a CNC moulding process!
Sensory Review: Biomaterials
| Material Name | Transparency | Elasticity | Flexiblity | Smell | Texture |
|---|---|---|---|---|---|
| Agar | medium | low | medium/low | none | rough + distored |
| Algenate | medium | low | medium | none | stringy |
| Gelatin: Cochineal | high (low foam) | medium | high | hoofy | smooth + frothy |
| Gelatin: Egg | low | medium | high | dusty hoof | jelly |
| Gelatin: Orange | low | med | high | orange hoof | smooth |
| Potato Papers | low | low | low | earth | chunky + crumbly |
| Kombucha | medium | medium | high | vinager | leather |