9. Textile Scaffold
References & Inspiration
I decided to emphasize some local Vancouver companies for my references this week.
Molo uses a honeycomb paper structure to make a variety of designs. I appreciate how far they have pushed this one material form to create a successful company:
Omer Arbel is one of our most well reputed designers in Vancouver, originally trained as an architect, moved into glass light works and now seems to be returning onnce again to architectures. What I like about this work is the juxtoposition of the linear form with organic curves seldom emphasized in this very organic bespoke form in architecture using fabrics with cement.
BioComposites: Myco-Materials
How do they work? The following information was gleaned from the presenation of Jessica Dias, who is also co-founder with Catherine Euale of ss-biotica/Biobabes
Mycelium releases enzymes to digest organic matter - it is able to fuse together natural substraits - like a natural glue or binder. This Kingdoms cycle operates starting with spores, then spore germination, mycelium, mycelium primordia, and finally growing to generate a (moist, cool, dark optimized consitions) fruiting body - the mushroom!
Different Strains for different things:
- Oyster Mushroom (Pleurotus Ostereatus): Edible, easy to cultivate, consumes almost anything. decomposes quickly
- Reishi (ganderma lucidum) Polypore mushroom, makes myco-composites and leather like materials, health benefits in tea!
- Horse Hood (fomes fomentarius): very strong material, amadou material (mushroom part) - felt like texture. Takes a long time to decompose.
- Peasant back: PolyPore(grows on trees), makes mycelium foam, grows vertically and then is compressed to make a sheet.
Companies/Products
Evocative: Product Design
Mycoworks: Mushroom Leathers
Eric Klarenbeek: Industrial Design
Mylo bag: Mushroom Leatherwares
Officina Corpuscoli: Product Design
Carracara collective: Product Design
Mogu: Installation Panels
NYC Studio: The living: HyFi
Blast Studio: 3D printing Myceliym
Properties of MycoComposites:
* Excellent insulators
* Resistant to moisture once dry
* Fire resistant
* Biodegradable + compostable
* Stronger than concrete pound for point
* Non toxic
* Scalable
* Versitile (foam, bricks, textiles)
Process for biofabricating Mycocomposites (approximately 1 month):
* 1 cultivate in agar plates (2 weeks)
* Transfer to grain jars - spawning  (3 weeks) (optional)
* Transfer to bulk substrate (2 weeks)
* Mould Design (few hours)
* deposit into mould (one week)
* Dehydrate (few hours)
Equipment tools
* Pressure cooler
* Sterile workplace
* Agar agar
* Malt extract syrup or powder
* Petri plates
* Scalpel
* Open dlam/bunsens burner
* Gloves
* Alcohol
* Mushroom grow bags
* Ziplock bags
* Aquarium heater (optional)
* Plastic wrap
* Mircopore or parafilm
* Large container
Substrates
There are an endless supply of substrates, most organic materials really, however, key conditions must be present for them to be effective:
* Needs to be pasturized not sanitized (70/80*c for an hour in a boiling pot, in the oven or with steam)
* Humidity/moisture content: maintain 70% (use squeeze test - if it drips, it's too much!)
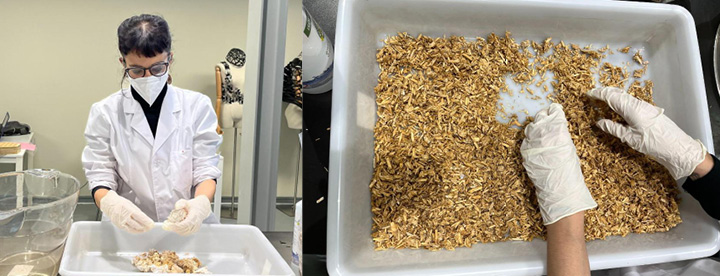
Detailed process:
Our substrate was store purchased making the processs a little more fool-proof. After following the below proceedure we broke apart the large volume of substrate into the smallest pieces possible in order to have a more flexiblematerial to stuff into our moulds.
* Decontaminate everything in pressure cooker
* sanitize surfaces with alcohol use bunsen burner to create steryl space
* Make malt extract agar: 200ml DIstilled water, 4g agar, 4g malt extract, 0.5g charcol (optional)
* Mycelium transfer into cooled MEA
* Seal plates then lable (date, strain and type of media)
* Incubation: 24/25*, fresh clean aire, controlled humdity, Sterile Environment
Mould design
Key pointers in my consideration for my mould design were:
* Flexible shiney smooth surfaces are best
* Model much be easily released from mould
* Ensure airflow in larger models by applying holes
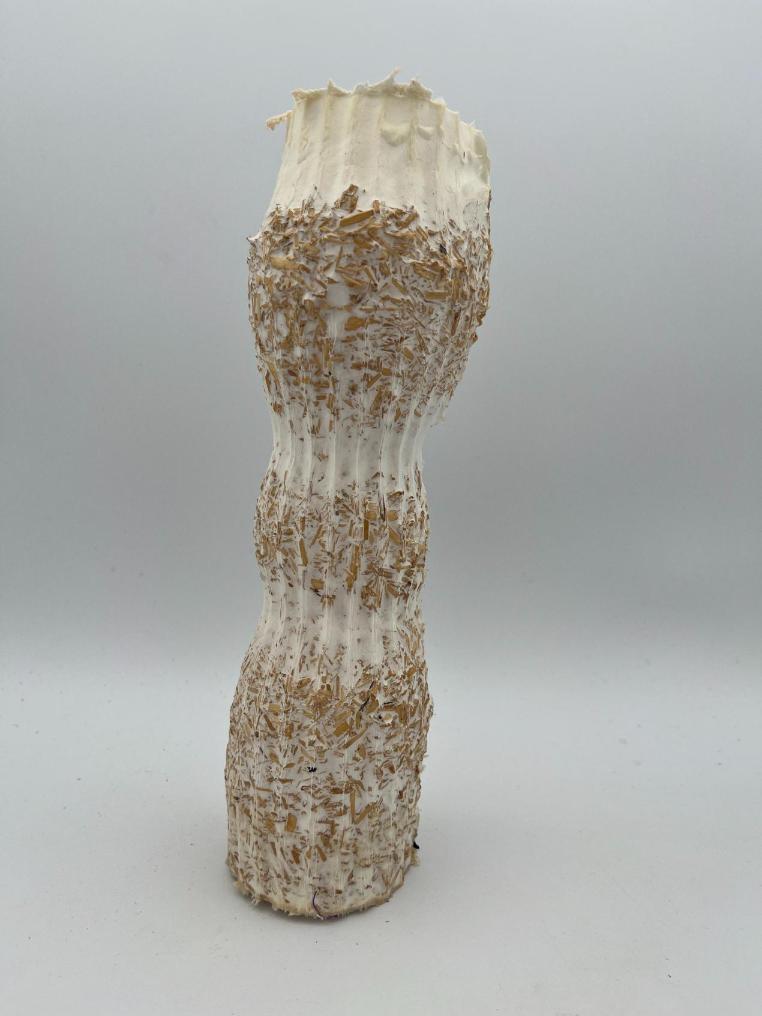
My mould was composed of a squishy and flexible remnant from a pilates mat which I stitched together then taped. After sanitizing and oiling the inside of the form, substrate was stuffed then tied off in order to create the bulbus form of what I'd hoped to be a candle stick.

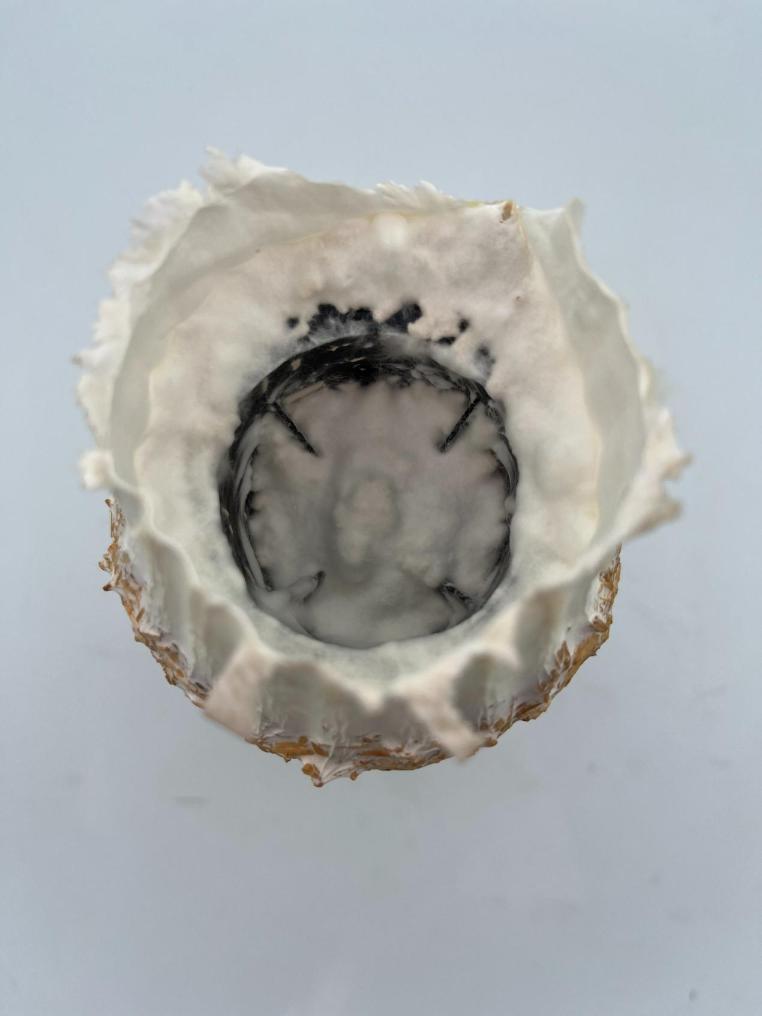
Dehydration
- Remove once white and fluffy
- Smaller samples dehydrate 50-70*C for 1-2 hours, larger in the sun with airflow
- Volume reduces by 10% as a result of water loss
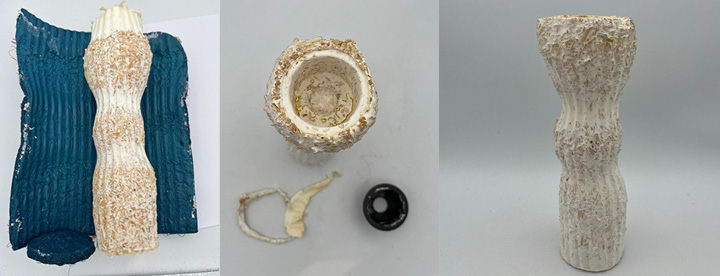
Ultimately I decided to cut off the 100% mycelial frill at the top but I am curious about design possiblities in future with the pure mycelial matieral:
Moulded Materials
Using a CNC
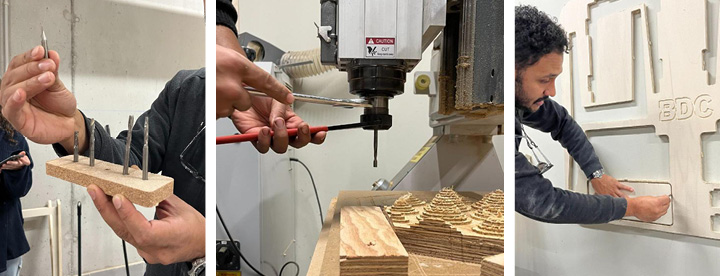
Prior to generating a form we had a machine intro. The CNC machine uses a subtractive process, our Machine Fresadora operating in 2 axis, while other machines can offer multiple angles of extraction. The technician operating the machine selects different milling bits for different phases of material subtraction often from rougher cuts to more fine milling.
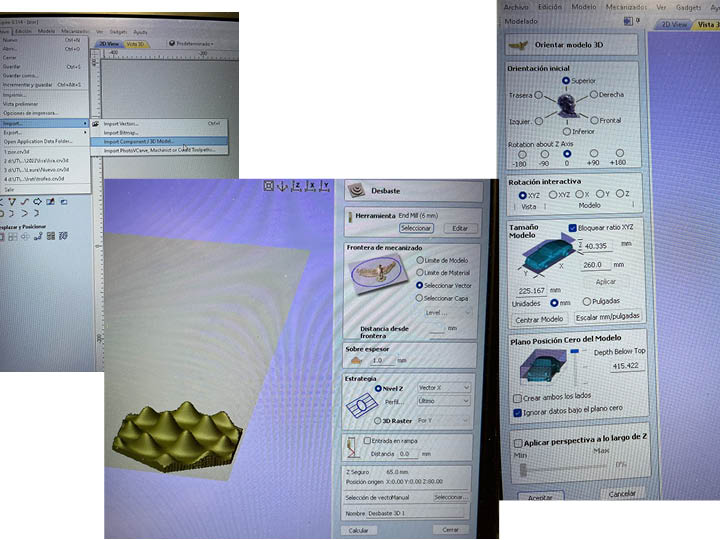
In order to operate the machine an STL file is translated into G-Code using, in our case, the application Aspire.
The following steps are followed in the process of using the CNC machine:
* Material is placed on the cutting plane
* Vaccum system is turned on holding the material in place
* An origin point is selected within the cutting plane + material
* The converted STL -> GCode file is uploaded to the machine
* The extractor is turned on in order to suck away dangerous dust in the air
* Press "Start"
* Important: Ear and eye protection is mandatory. Clothing and Hair should be managed to reduce risk.
Creating a digital mould form
In our tutorial this week I was most imspired by the research of Nicholas Olmos's work in Phi
Thus I set to work making any number of shell/bug like forms working within the limiations of our 2 axis CNC meant that I was challenged by the under-cuts created in Nicolas' forms.
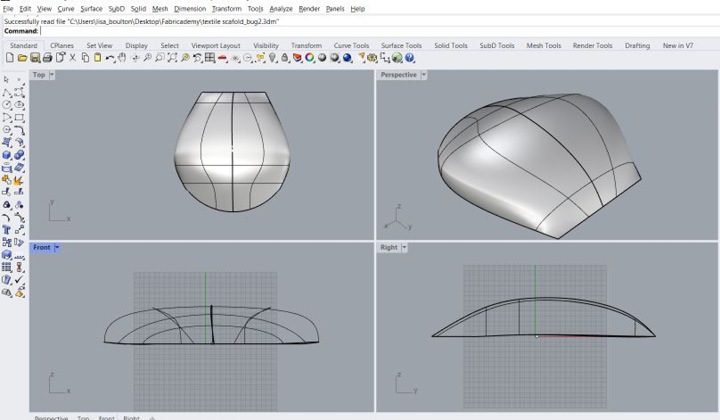
In my first iterations I created a series of splines lofted over a plane. My intention was to create a texture upon these surfaces using grasshopper. However, after chatting with Julian our CNC tech, it was clear these would create impossible to cut forms.
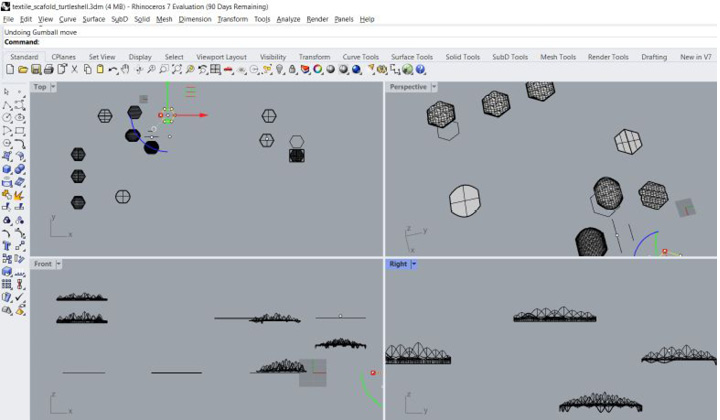
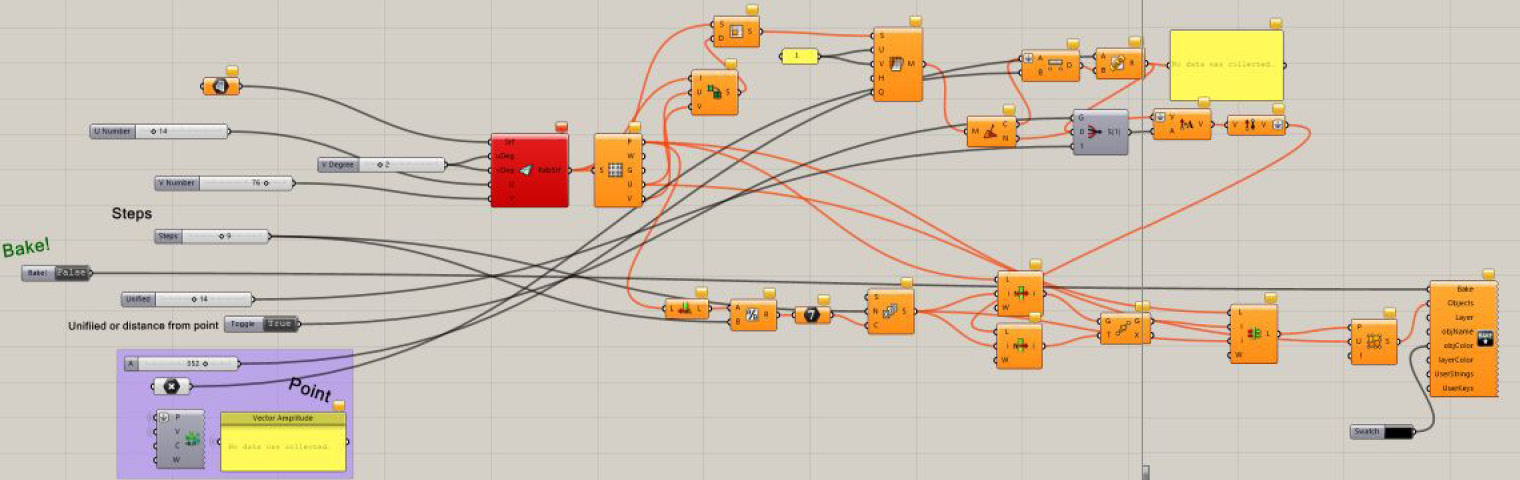
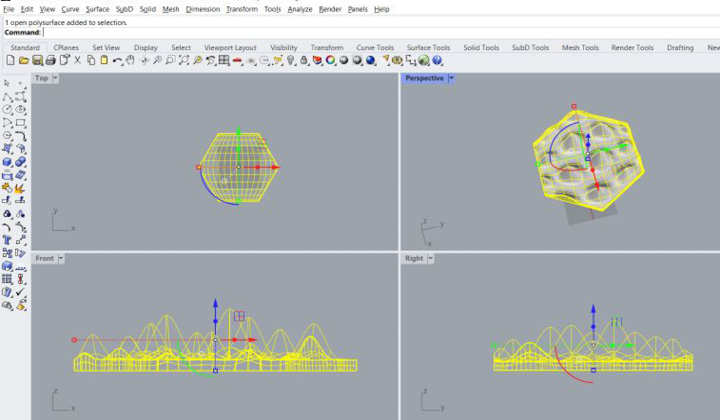
Ultimately I decided to work with some opensource Grasshopper code I found online which allowed me to alter the texture of a hexagonal template form provided by the BDG.
Associated code for this can be found here. The Lunchbox plug-in is required for this to operate properly. Model in Rhino for this model can also be found right here
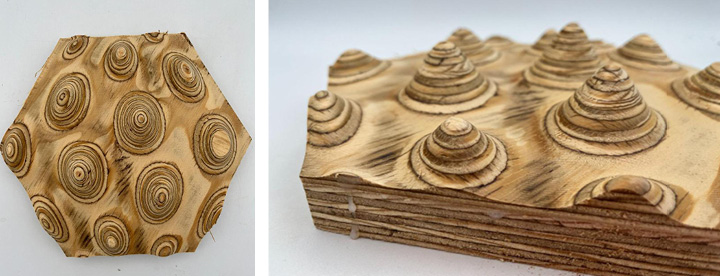
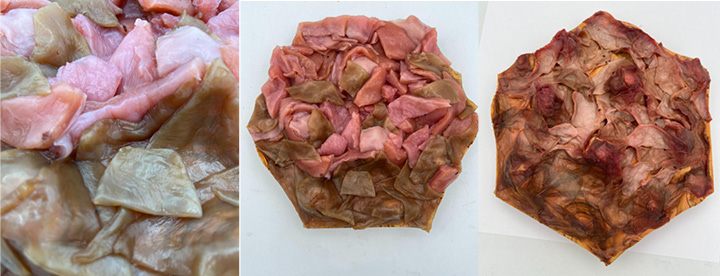
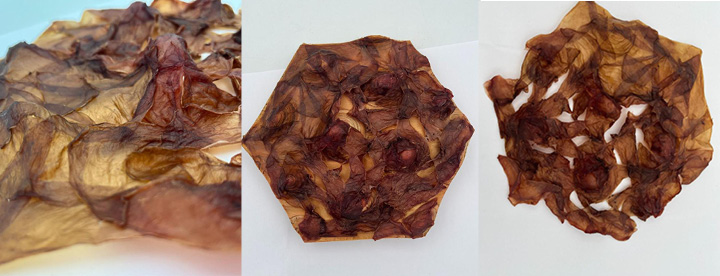
Moulding Material
I was hesitant but Betiana encouraged me to cut up my Hibiscus SCOBY, Larry. Experimenting is always worth it so I went for it! Because Larry was irregular in thickness he had a real meaty texture. Not having enough to cover the whole surface we decided to cut him up in to little pieces and added another SCOBY made of black tea for coverage.
Because the SCOBYs would need to dry we did not varnish the surface of the mould, supporting a more rapid drying process. Should this be laminated with other materials it would be beneficial to varnish it. Also, if a vaccuform were to be used, adding air holes to the design would allow for a more effective suction.
As you'll see in the images below; despite having good coverage initially, the multiple thicknesses caused a range of drying shrinkages resulting in some areas being uncovered. The wetness of the SCOBY caused parts of the plywood to lift and separate as well so that is something to be aware of.
Digital files (Rhino + Aspire) to create this form can be found here
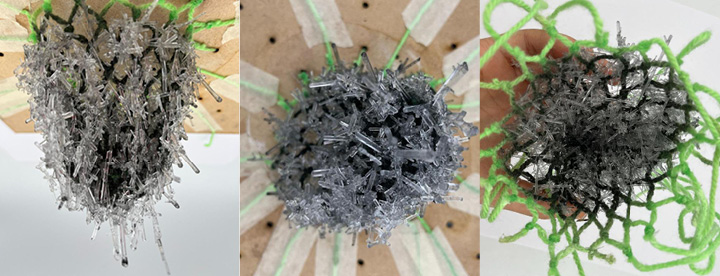
Growing Crystals
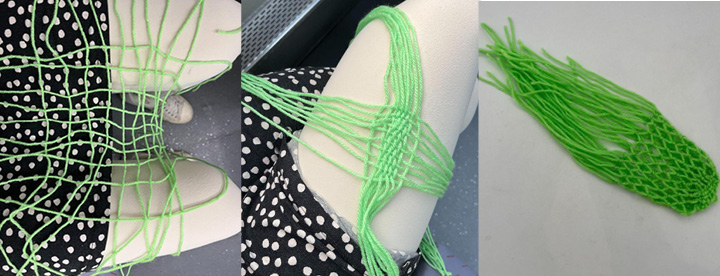
Strangely, this seeminly simple textile scaffold was the most challenging for me. My crystals just didn't want to grow! My inspiration here stemmed from all the salted Cod I see in the shops here in Bilbao. It had me thinking, could we use salt crystals and bag forms to support fermentation or food preservation systems?
So I set to work creating a macrame shopping or fishnet bag form on my commute out to school everyday on the train.
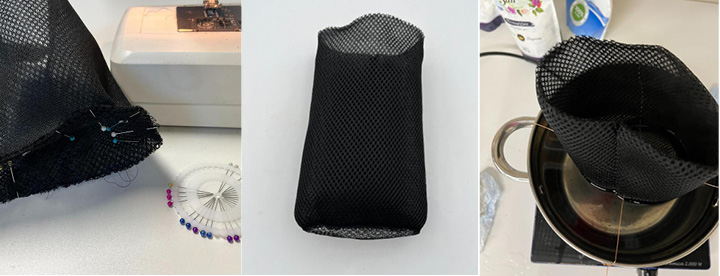
At the BDC I selected 2 different kinds of mesh and sewed them into a simple form that might live in a kitched cupboard.
Recipes
Salt
In the black bag I opted to go for simple table salt in order to create a preservation/fermentation bag. In my research since I have learned that creating crystals with Iodenized table salt can actually be one of the tricker crytals to create. Ultimately my solution never formed crystals despite 2 attempts to add more salt to the solution. However I using to following process.
* warm water to just below boiling point
* Add salt until it will no longer dissolve (about 0.25cups of salt to 1.5cups of water)
* Place form within salt bath ensuring that it doesnt touch the sides or bottom such that it doesnt attach permenantly
* Allow to cool and within days crytals **should** appear. If not, try adding  more salt
Epsom Salt
Again initial tests with multiple items were unsuccessful. Despite following the recipe advised. Concerned that perhaps there were too many items I removed my additional experiments and focued on trying to crystalize the net! Ultimately my recipe was as follows:
* 3.6L H20
* 1tbsp Charcol
* 850g Epsom Salt