9. Soft robotics
Research and Planning
The lecture about softrobotics was once again inspiring. It stays exciting and challenging and very relevant to my focus on applying this knowledge to the Amazon Rainforest.
The plan
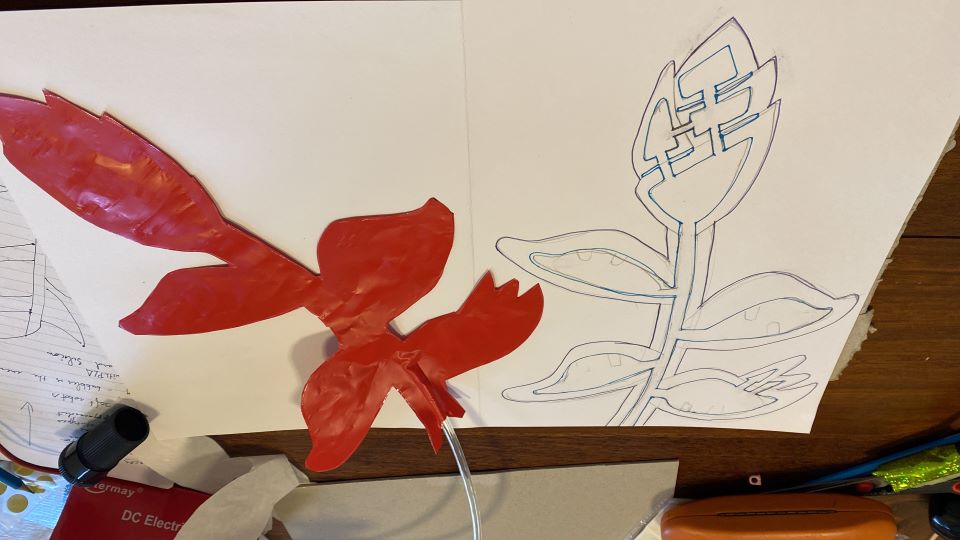
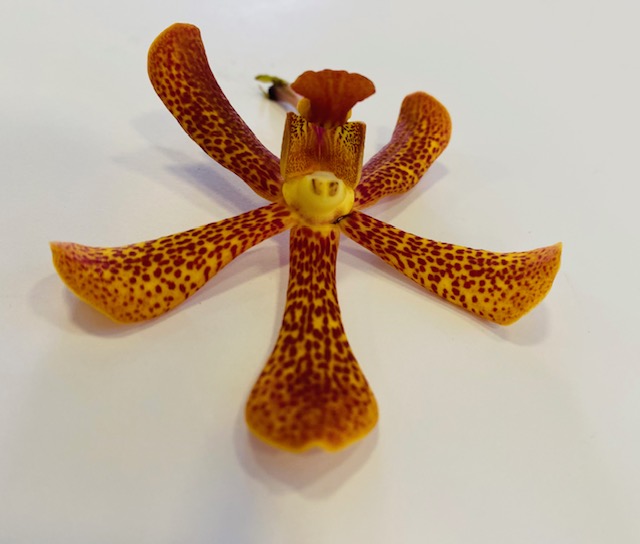
My initial idea is to create inflatable flowers inspired by the orchid and heliconia from the rainforest.
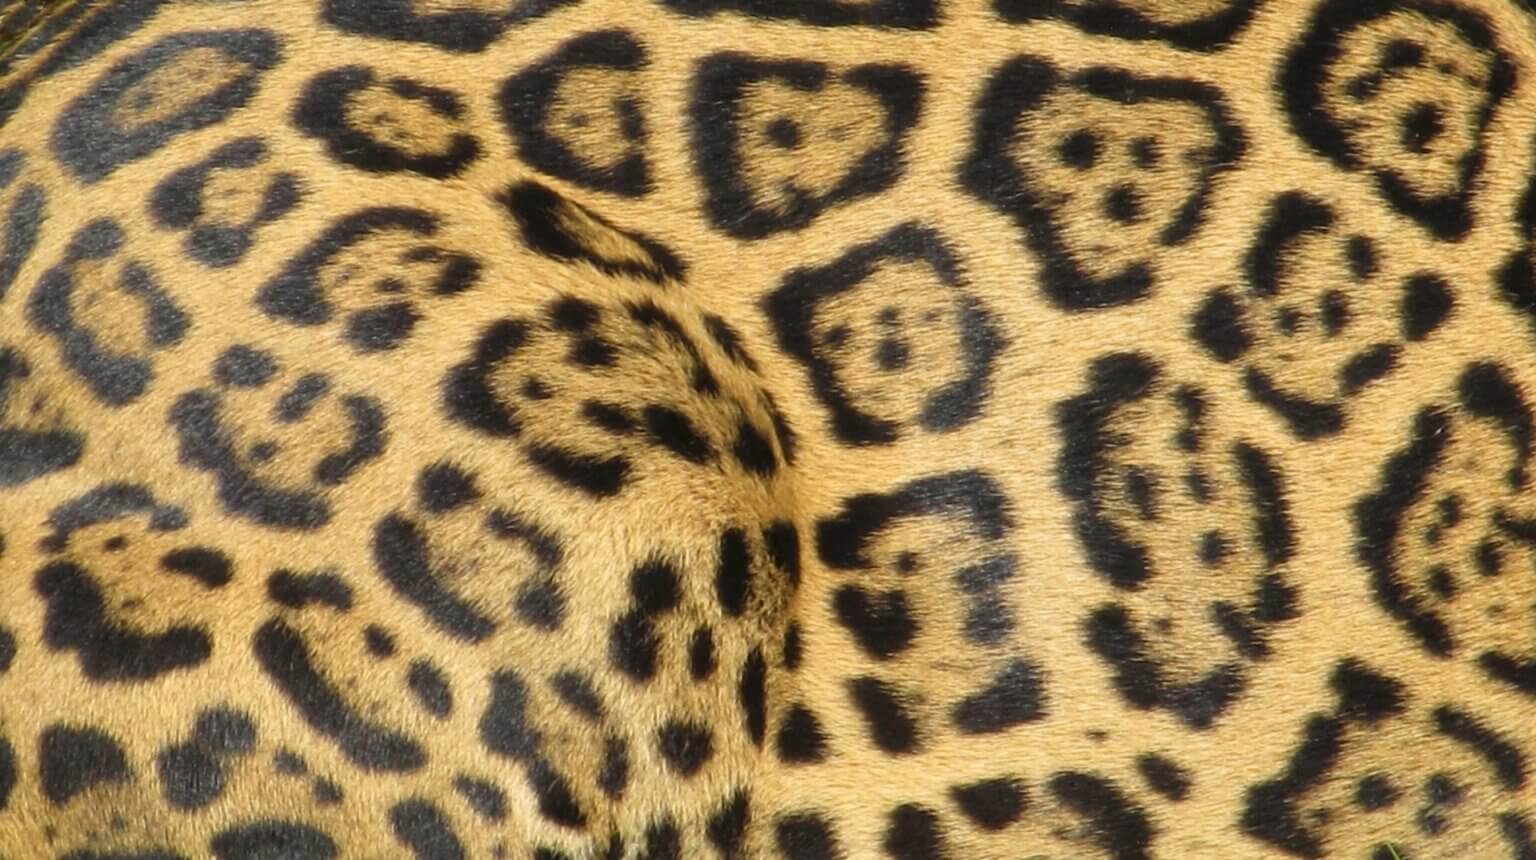
In addition there is also a new opportunity to create something with the jaguar spots.


I will do this with different materials vynil and other and will also upcycle disposable plastic packaging.
Regarding the assignment of the soft tentacles I'll make a mold with the lasercutter and do an attempt to pour with a recommended bio resin from earlier recorded successes by Fabricademy alumni.
Resources
My first resource is ofcourse the lecturematerial in general. Special focus on tutorial by Adriana Cabrera Tutorial for softrobotic gripper and also the Fab Montreal 2021 tutorial video from Soft Robotics to Biobotics demonstrating a bio silicone formula appropriate for pouring into a soft robot mold Fab Montreal tutorial video on biobotics
Tasks and assignment for Soft robotics
The weekly assignment for soft robotics
Learning outcomes
-
Research skills: the participant has acquired knowledge through references and Concept development
-
Design skills: the participant has learnt through sketches, 2D and 3D modeling, Parametric modeling and electronic skills, simulation
-
Fabrication skills: the participant is able of executing from file to production workflow, molding and casting, vinylcutting, laser cutting
-
Documentation: Anyone can go through the process, understand it and reproduce it
-
Final outcome: Is the project assembled, functioning and complete
-
Originality: Has the design been thought through and elaborated?
Student checklist
-
Document the concept, sketches, references also to artistic and scientific publications? Make a soft robotic sample, develop the pattern for the Inflatable and draw a sketch of the air flow:
-
build a pneumatic wrist brace (basic level) or
- build a Soft Gripper (intermediate level) or
- build and document a Pneumatic, digitally controlled system, electronics schematic, electronic control and code (advanced level)
-
design your own version of an inflatable / soft robot
-
Experiment with different materials, such as silicones, 3d printing, parchment paper, thermoadesive vynil, TPU fabrics, bioplastic, document your achievements and unexpected outcomes
-
Make a small video of your inflatable/soft robot working
-
Upload your digital design files (if any)
-
Build the electronic circuit to control your inflatable/soft robot (extra credit)
Vynil, Bio silicone and Ecoflex-30 soft robotic models
Vynil soft bots
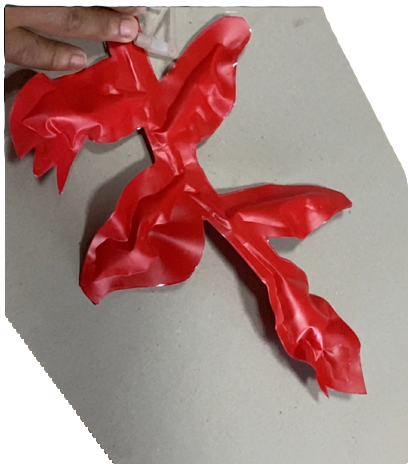
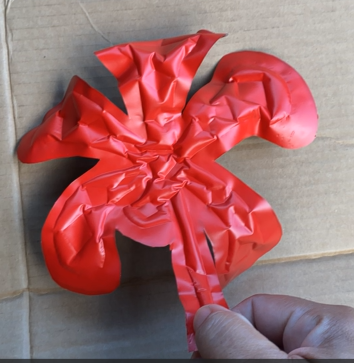
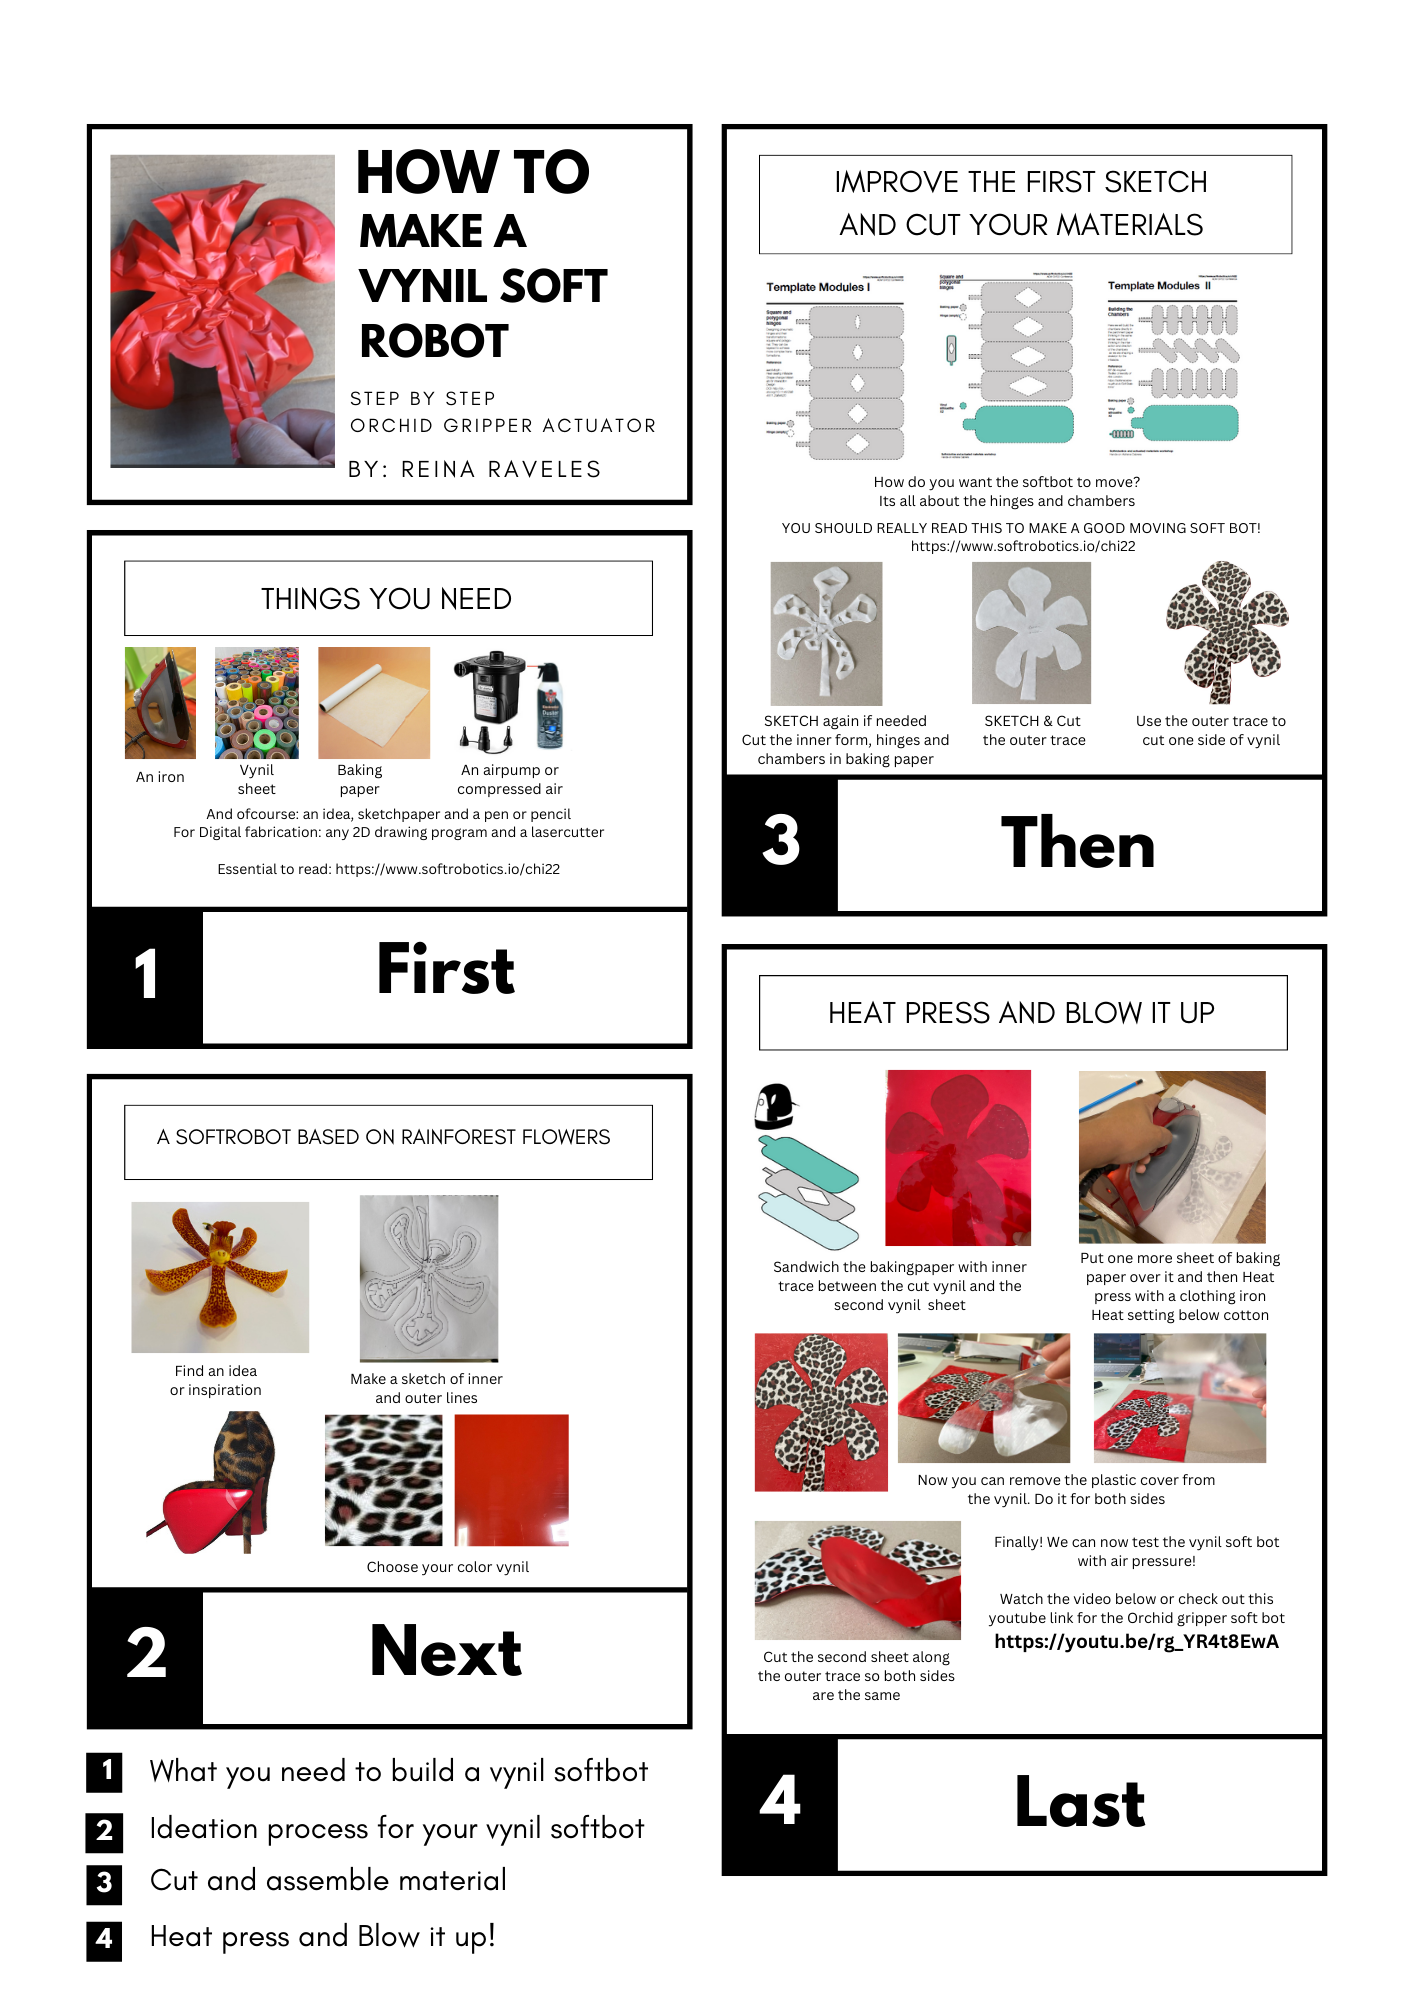
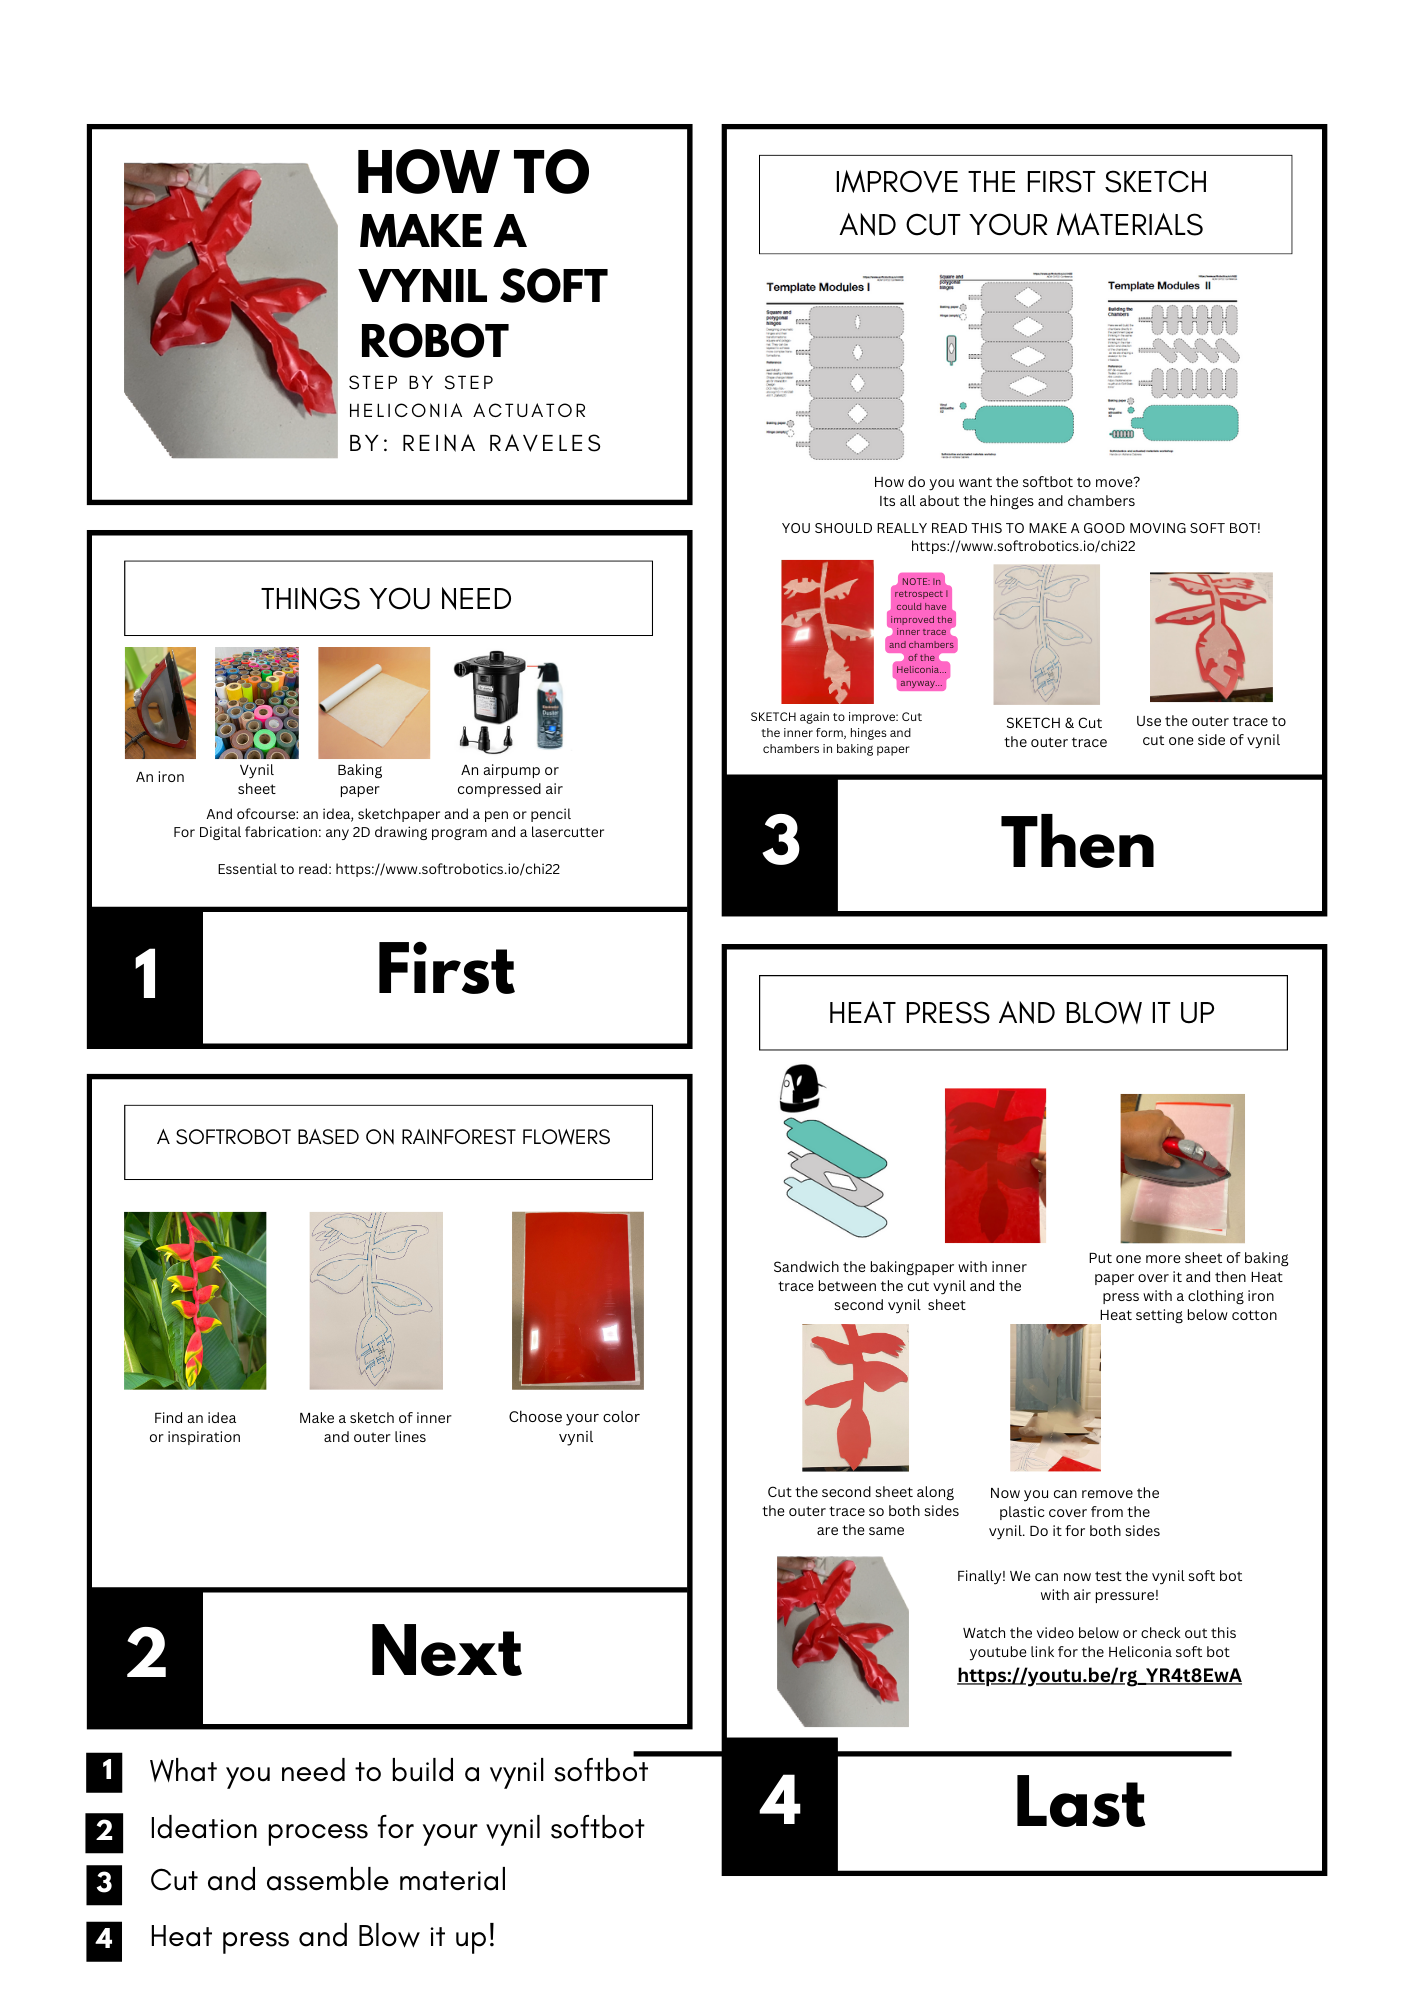
Regarding the experiments with materials, I first started with soft robots in vynil, inspired by Amazon flowers a heliconia and an orchid. The orchid movement is like a soft gripper based on the mechanism and chambers formed in it. These pictures show the final result:
You can find the process how these were made in the developed tutorial workflow:
Process and workflow
HOW to make a vynil soft robotic Orchid gripper
- Orchid Gripper actuator
- Heliconia Actuator
Making the mold for biosilicon and ecoflex soft bots
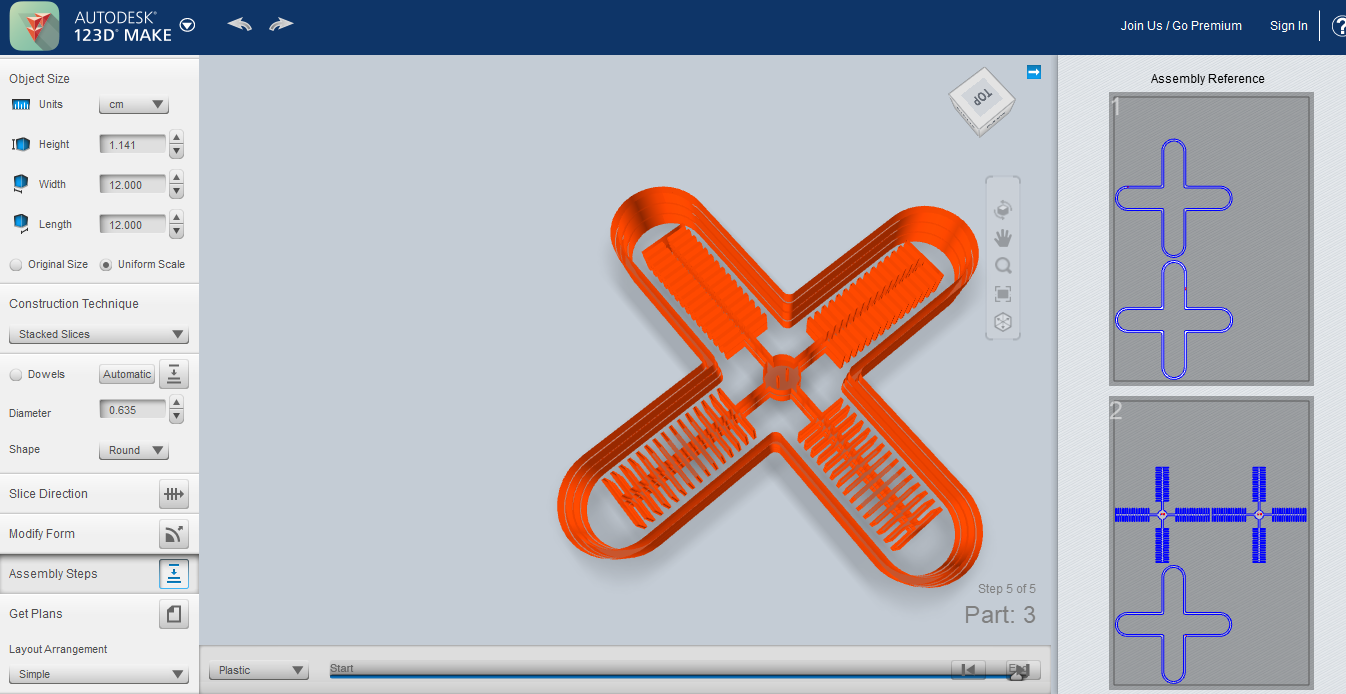
For the next two methods of creating a softbot actuator a mold is needed. I tried creating a lasercut mold at first but the lasercutter was giving some trouble to cut through the materials so I decided to 3D print the mold instead.
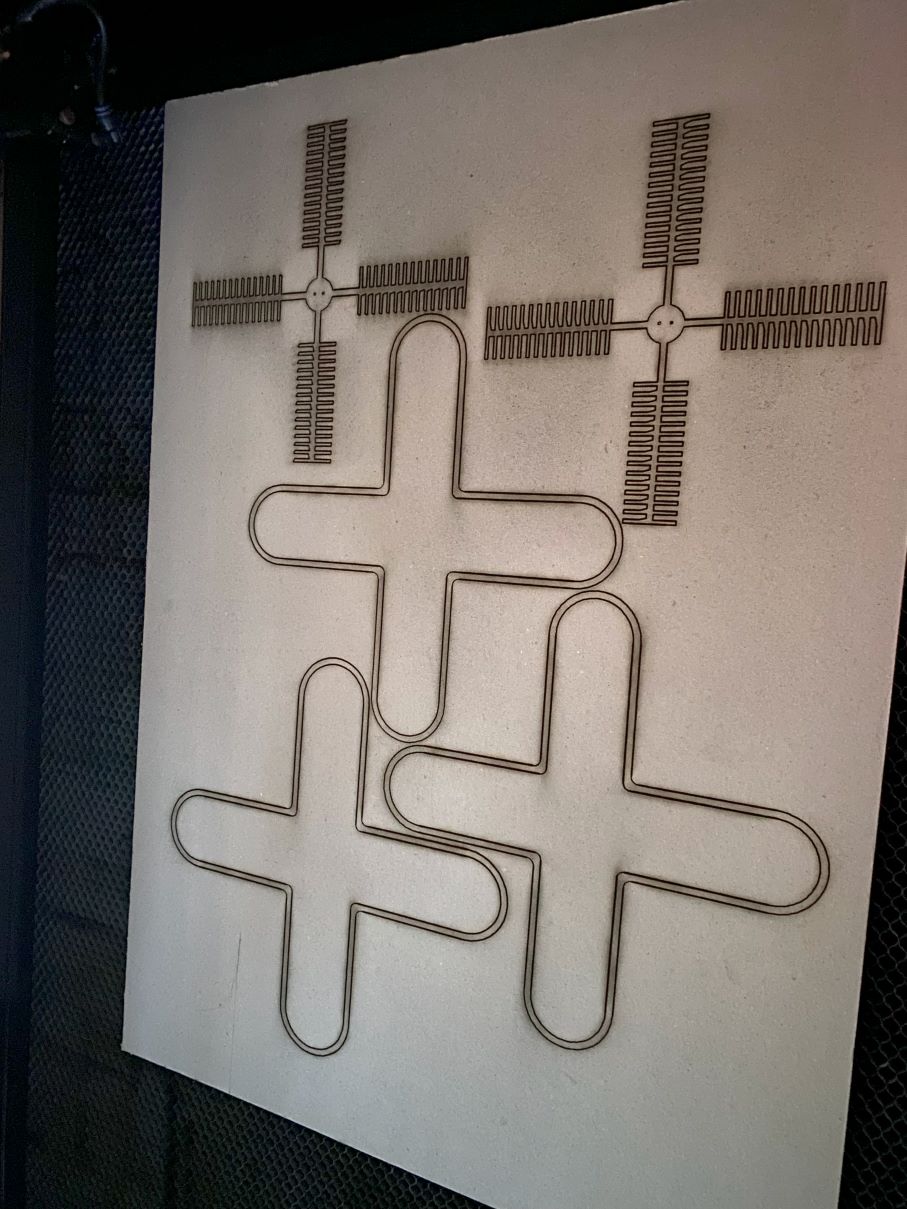
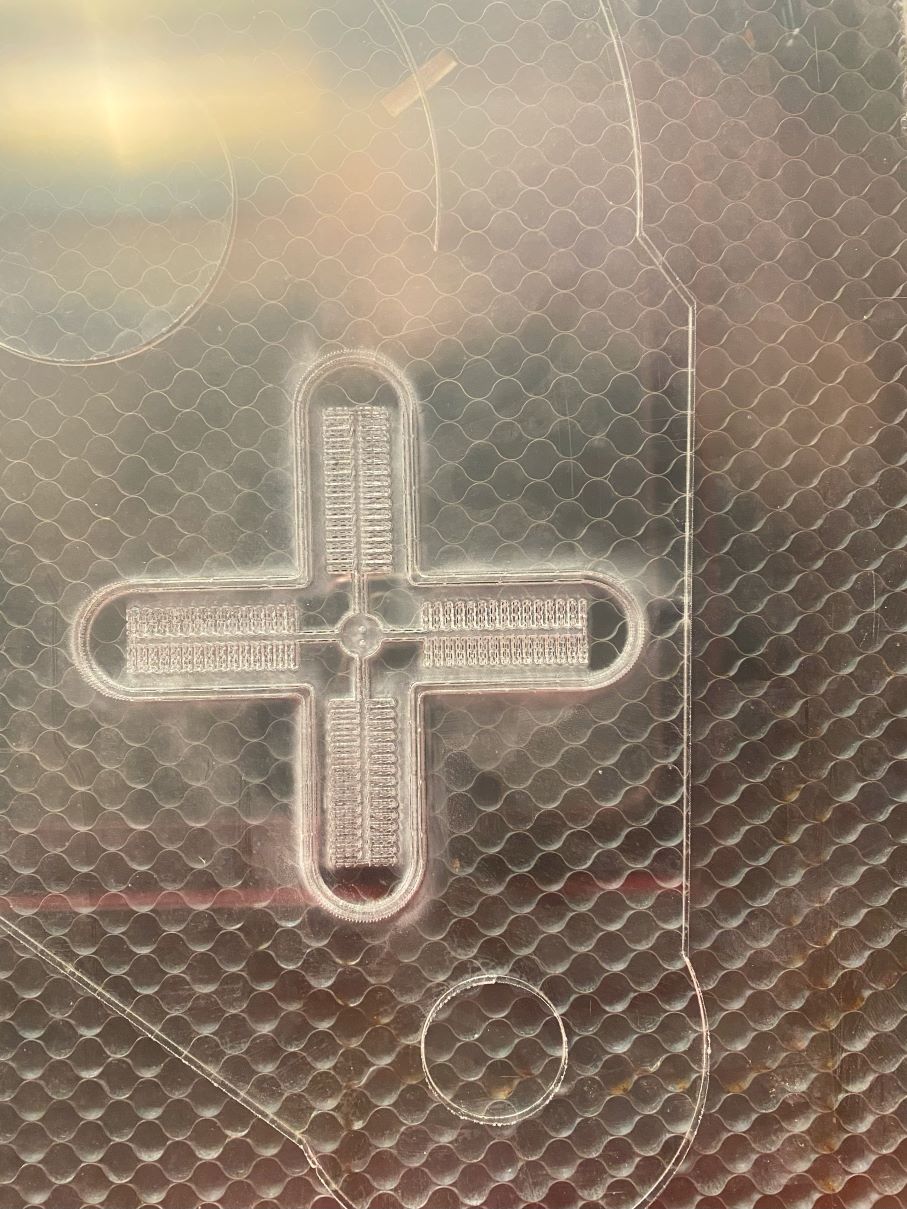
Here are screenshots of the 3D mold SVG 3D model and the slicer to a lasercut plan in DFX or PDF file

Unfortunately the laser couldn't cut through both materials we tried. Most probably the lens was dirty because there had been lasered the whole afternoon.
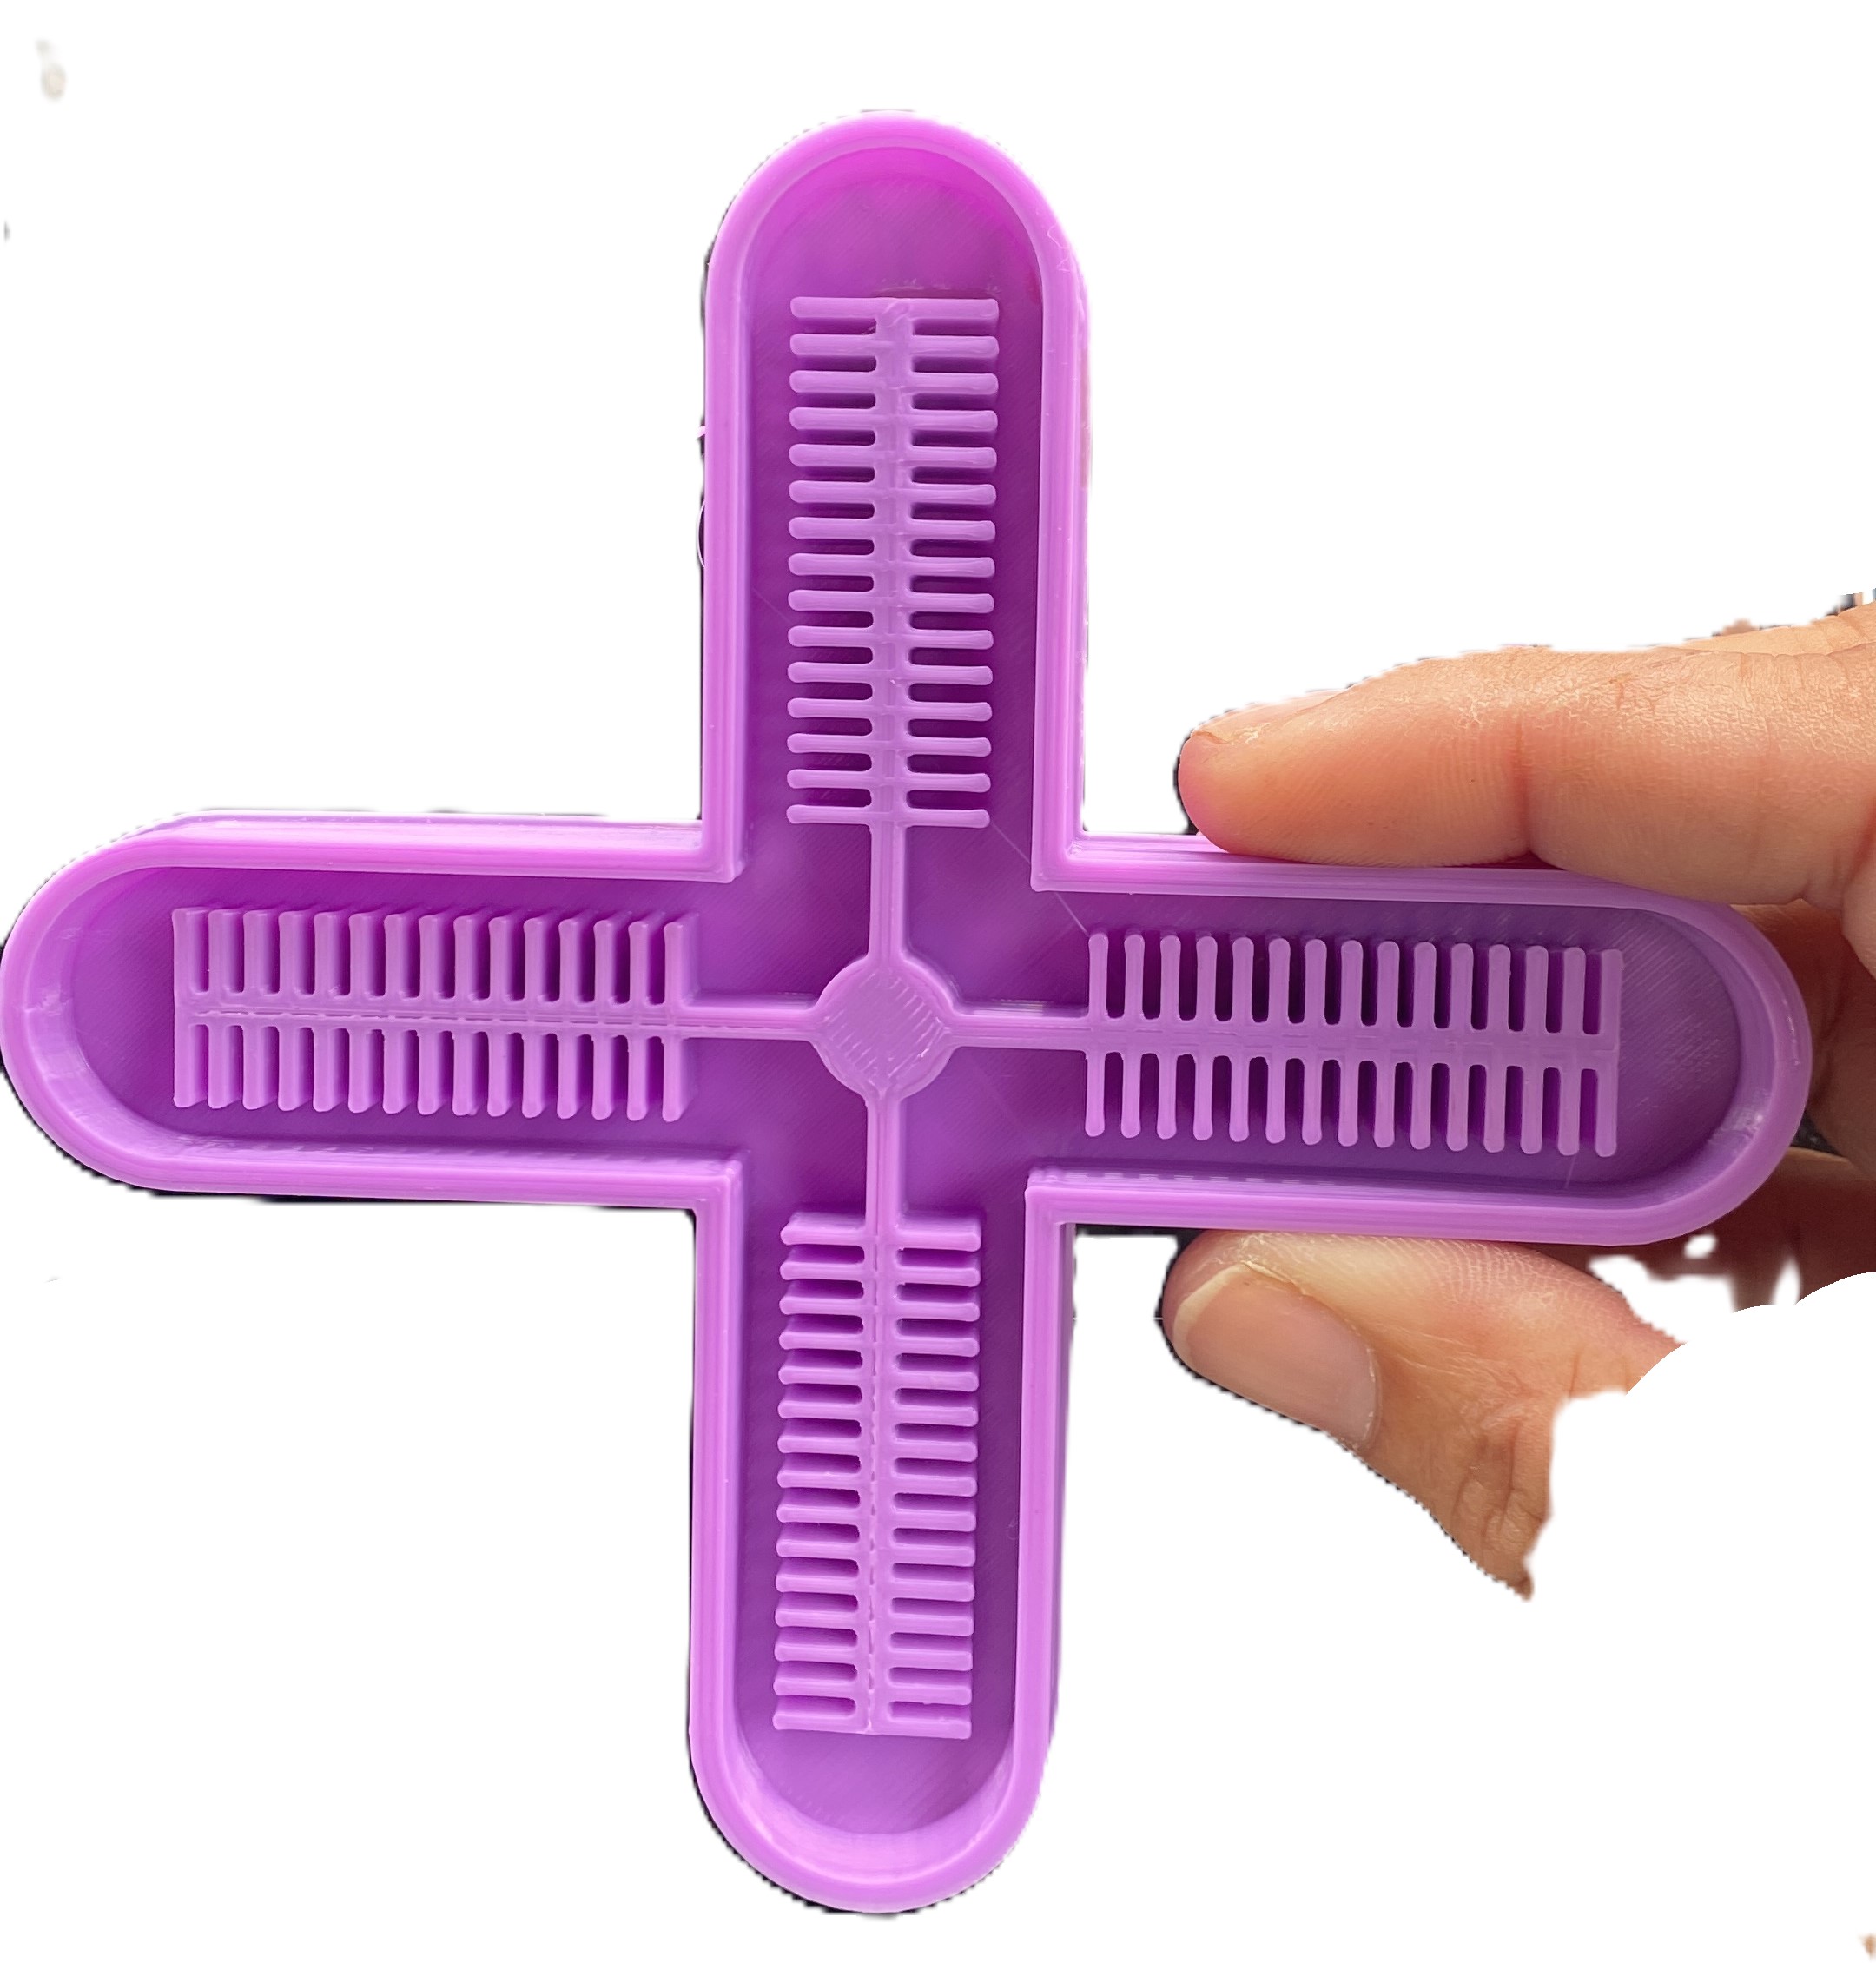
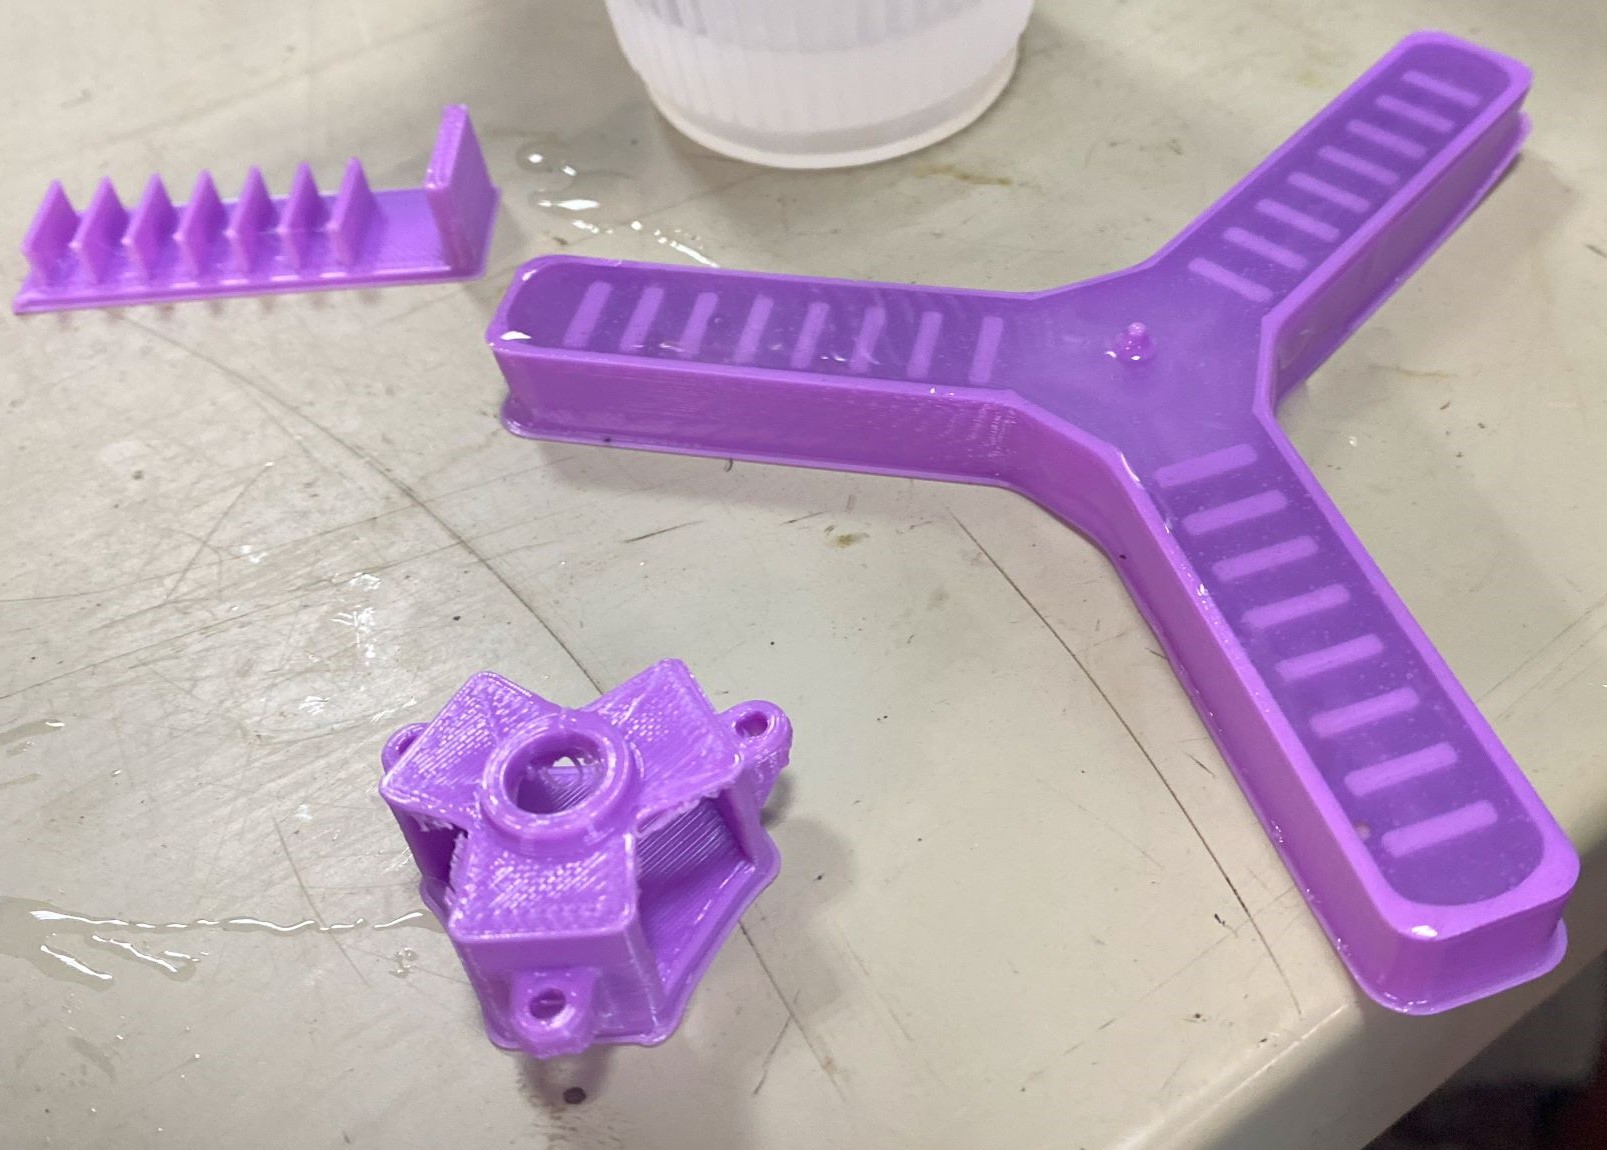
We 3D printed the mold on a later date instead. This was done on a Flash forge 3D printer with purple PLA filament.
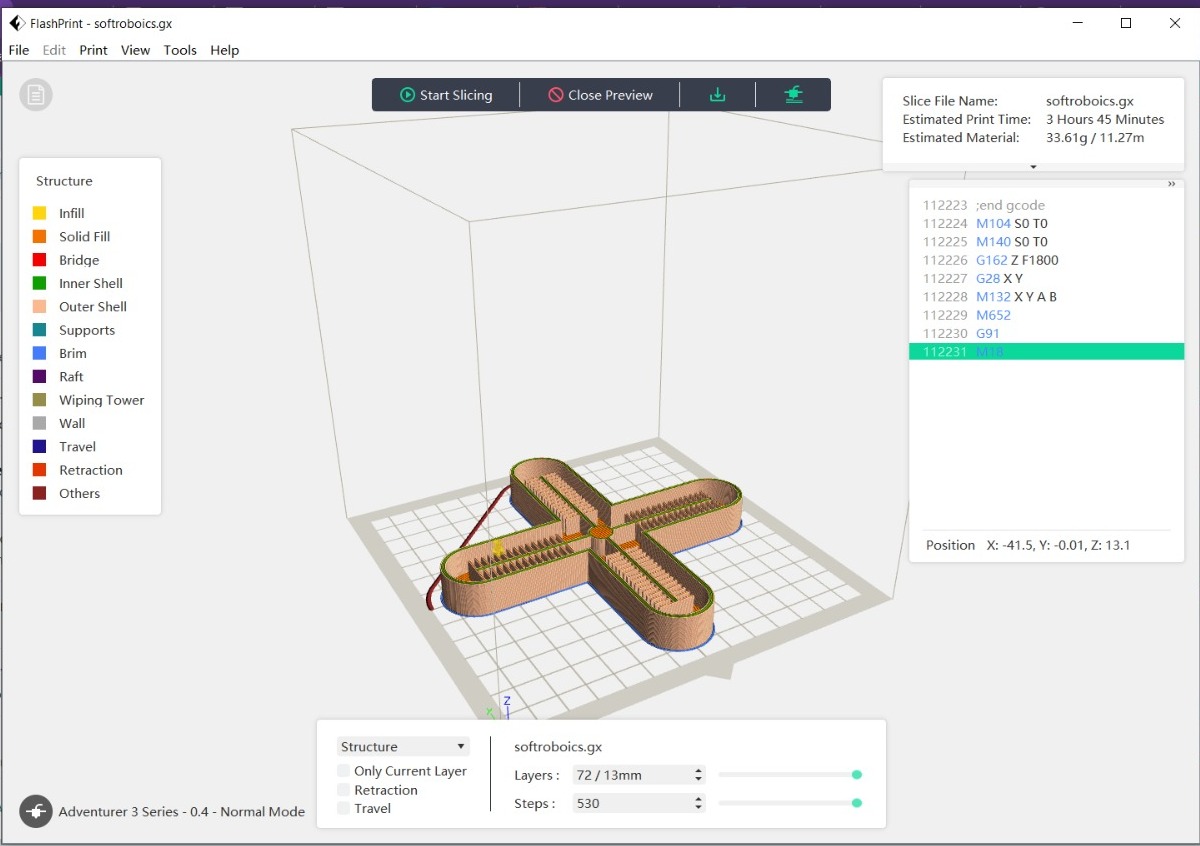
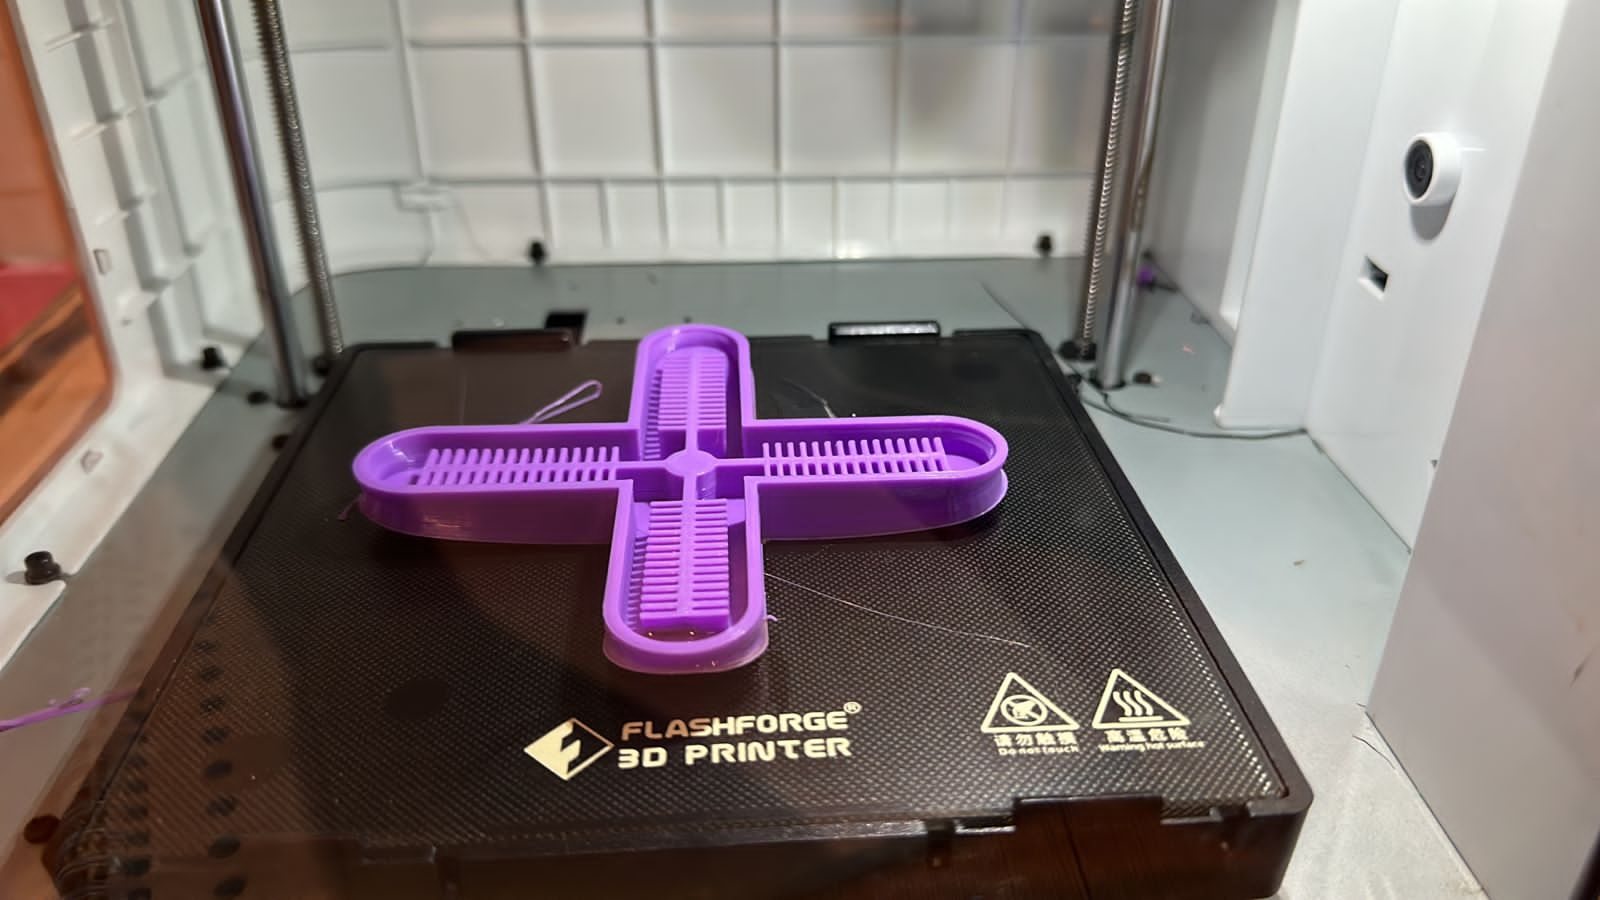
The mold is not my own design but downloaded from Instructables. You can find the link here Instructables air powered soft robotic gripper
Bio silicone soft bots
Secondly I experimented with a soft bot made of bio silicone. I used a recommended formula in the tutorial From Soft Robotics to Biobotics, by Adriana Cabrera and Anastatia Pistofidou. You can find the link here:
Tutorial from Soft robotics to Biobotics
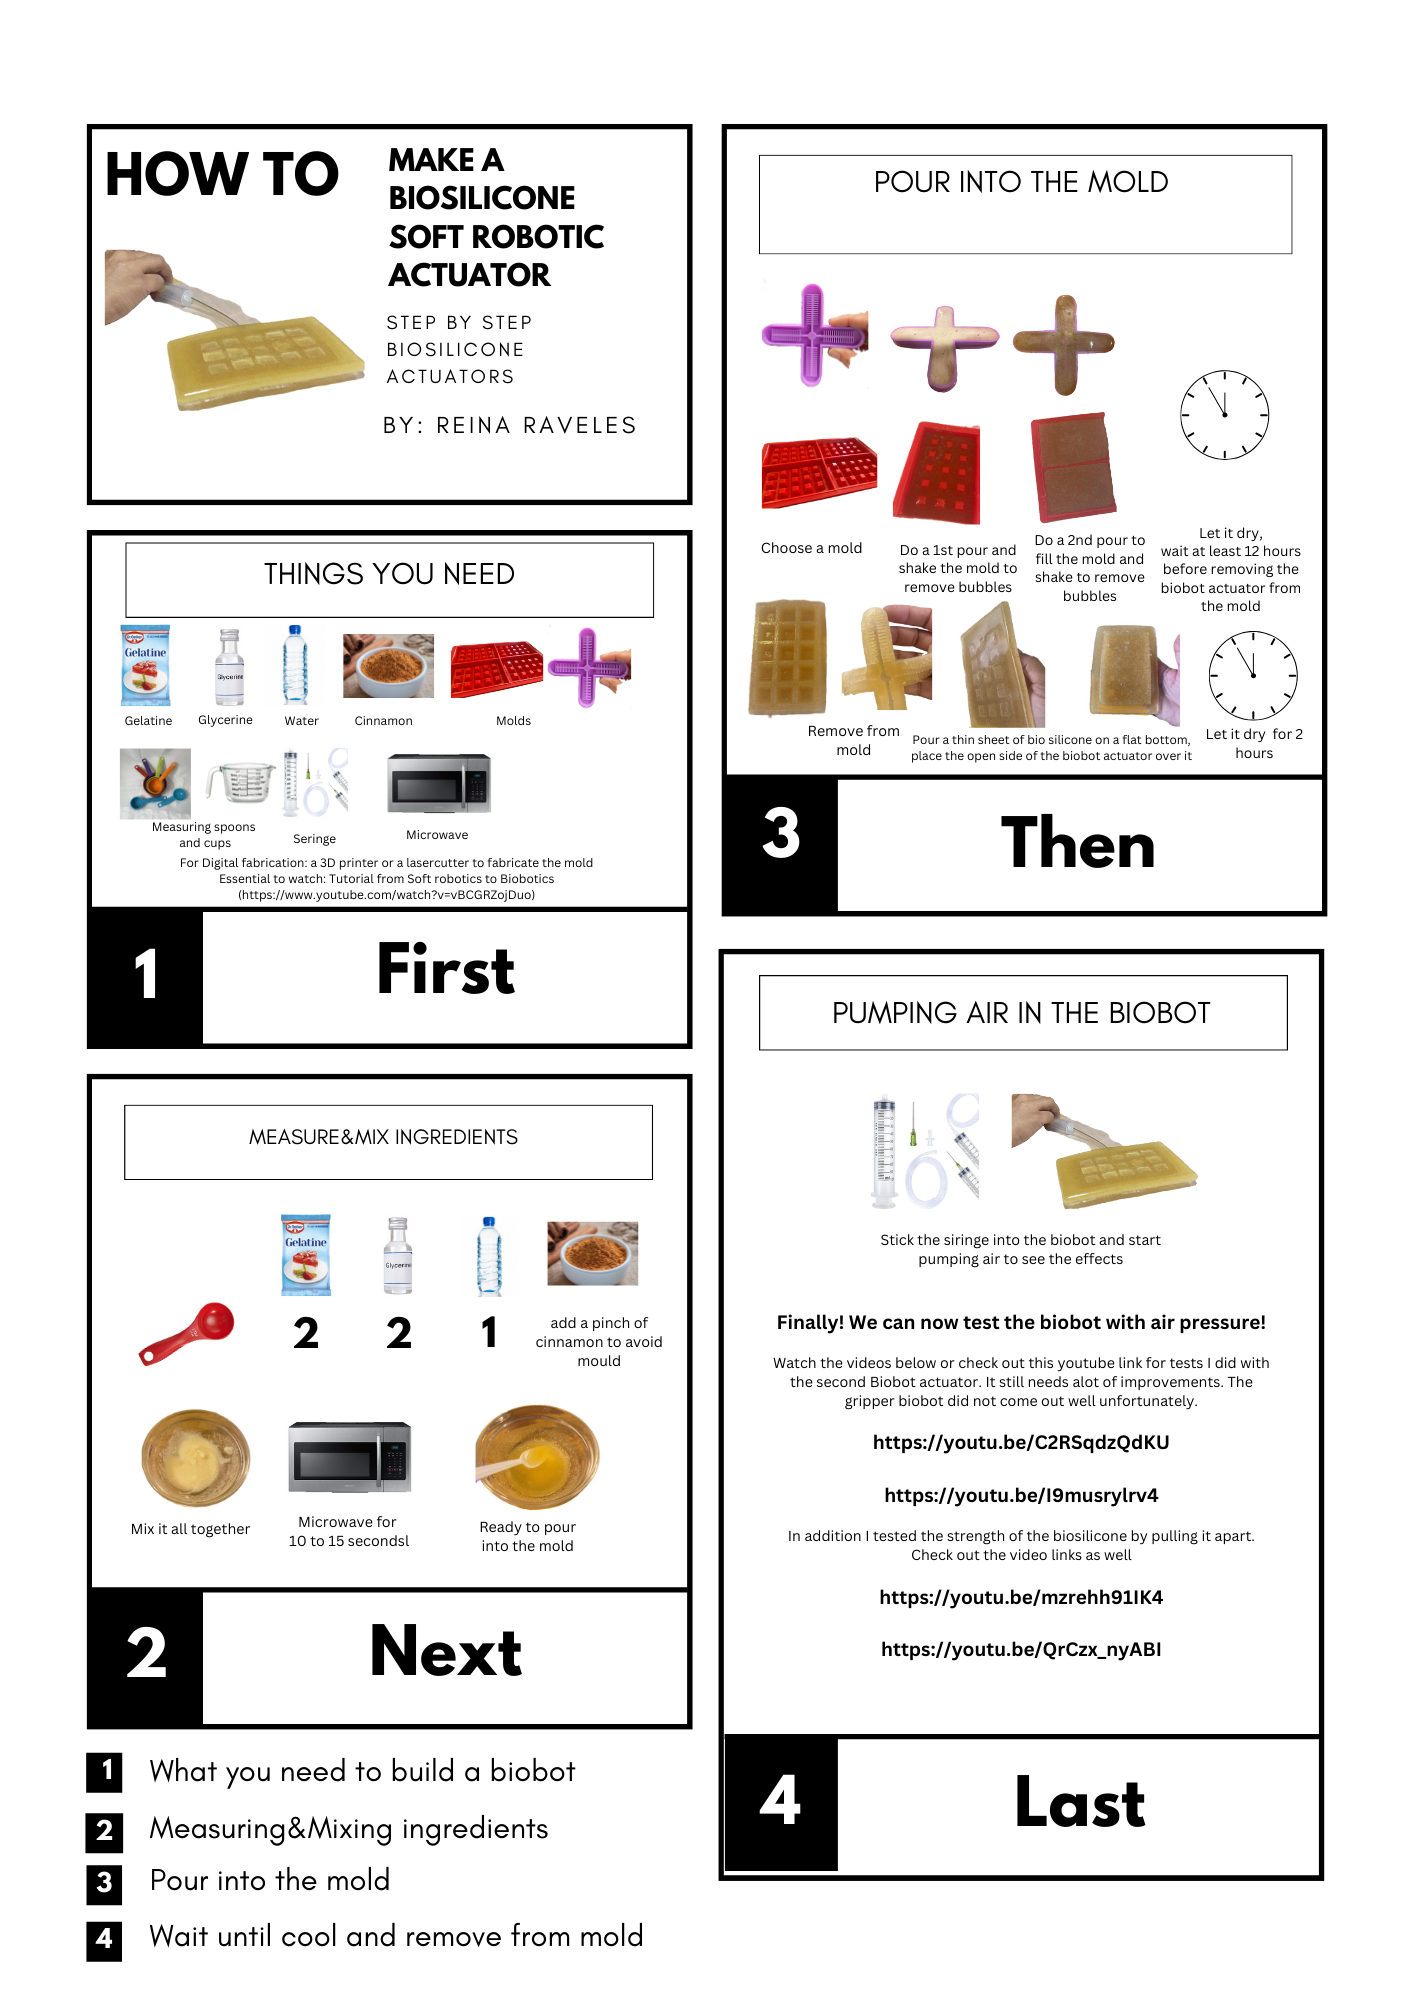
Formula for biosilicone:
-
Water 1 part
-
Gelatin 2 parts
-
Glycerin 2 parts
Steps:
-
Mix all ingredients together
-
Put in the microwave for 10 seconds
-
Pour into the mold
-
Wait overnight for the silicone to dry and get sturdy
-
Prepare a little bit more to glue the dry parts together in a later stage
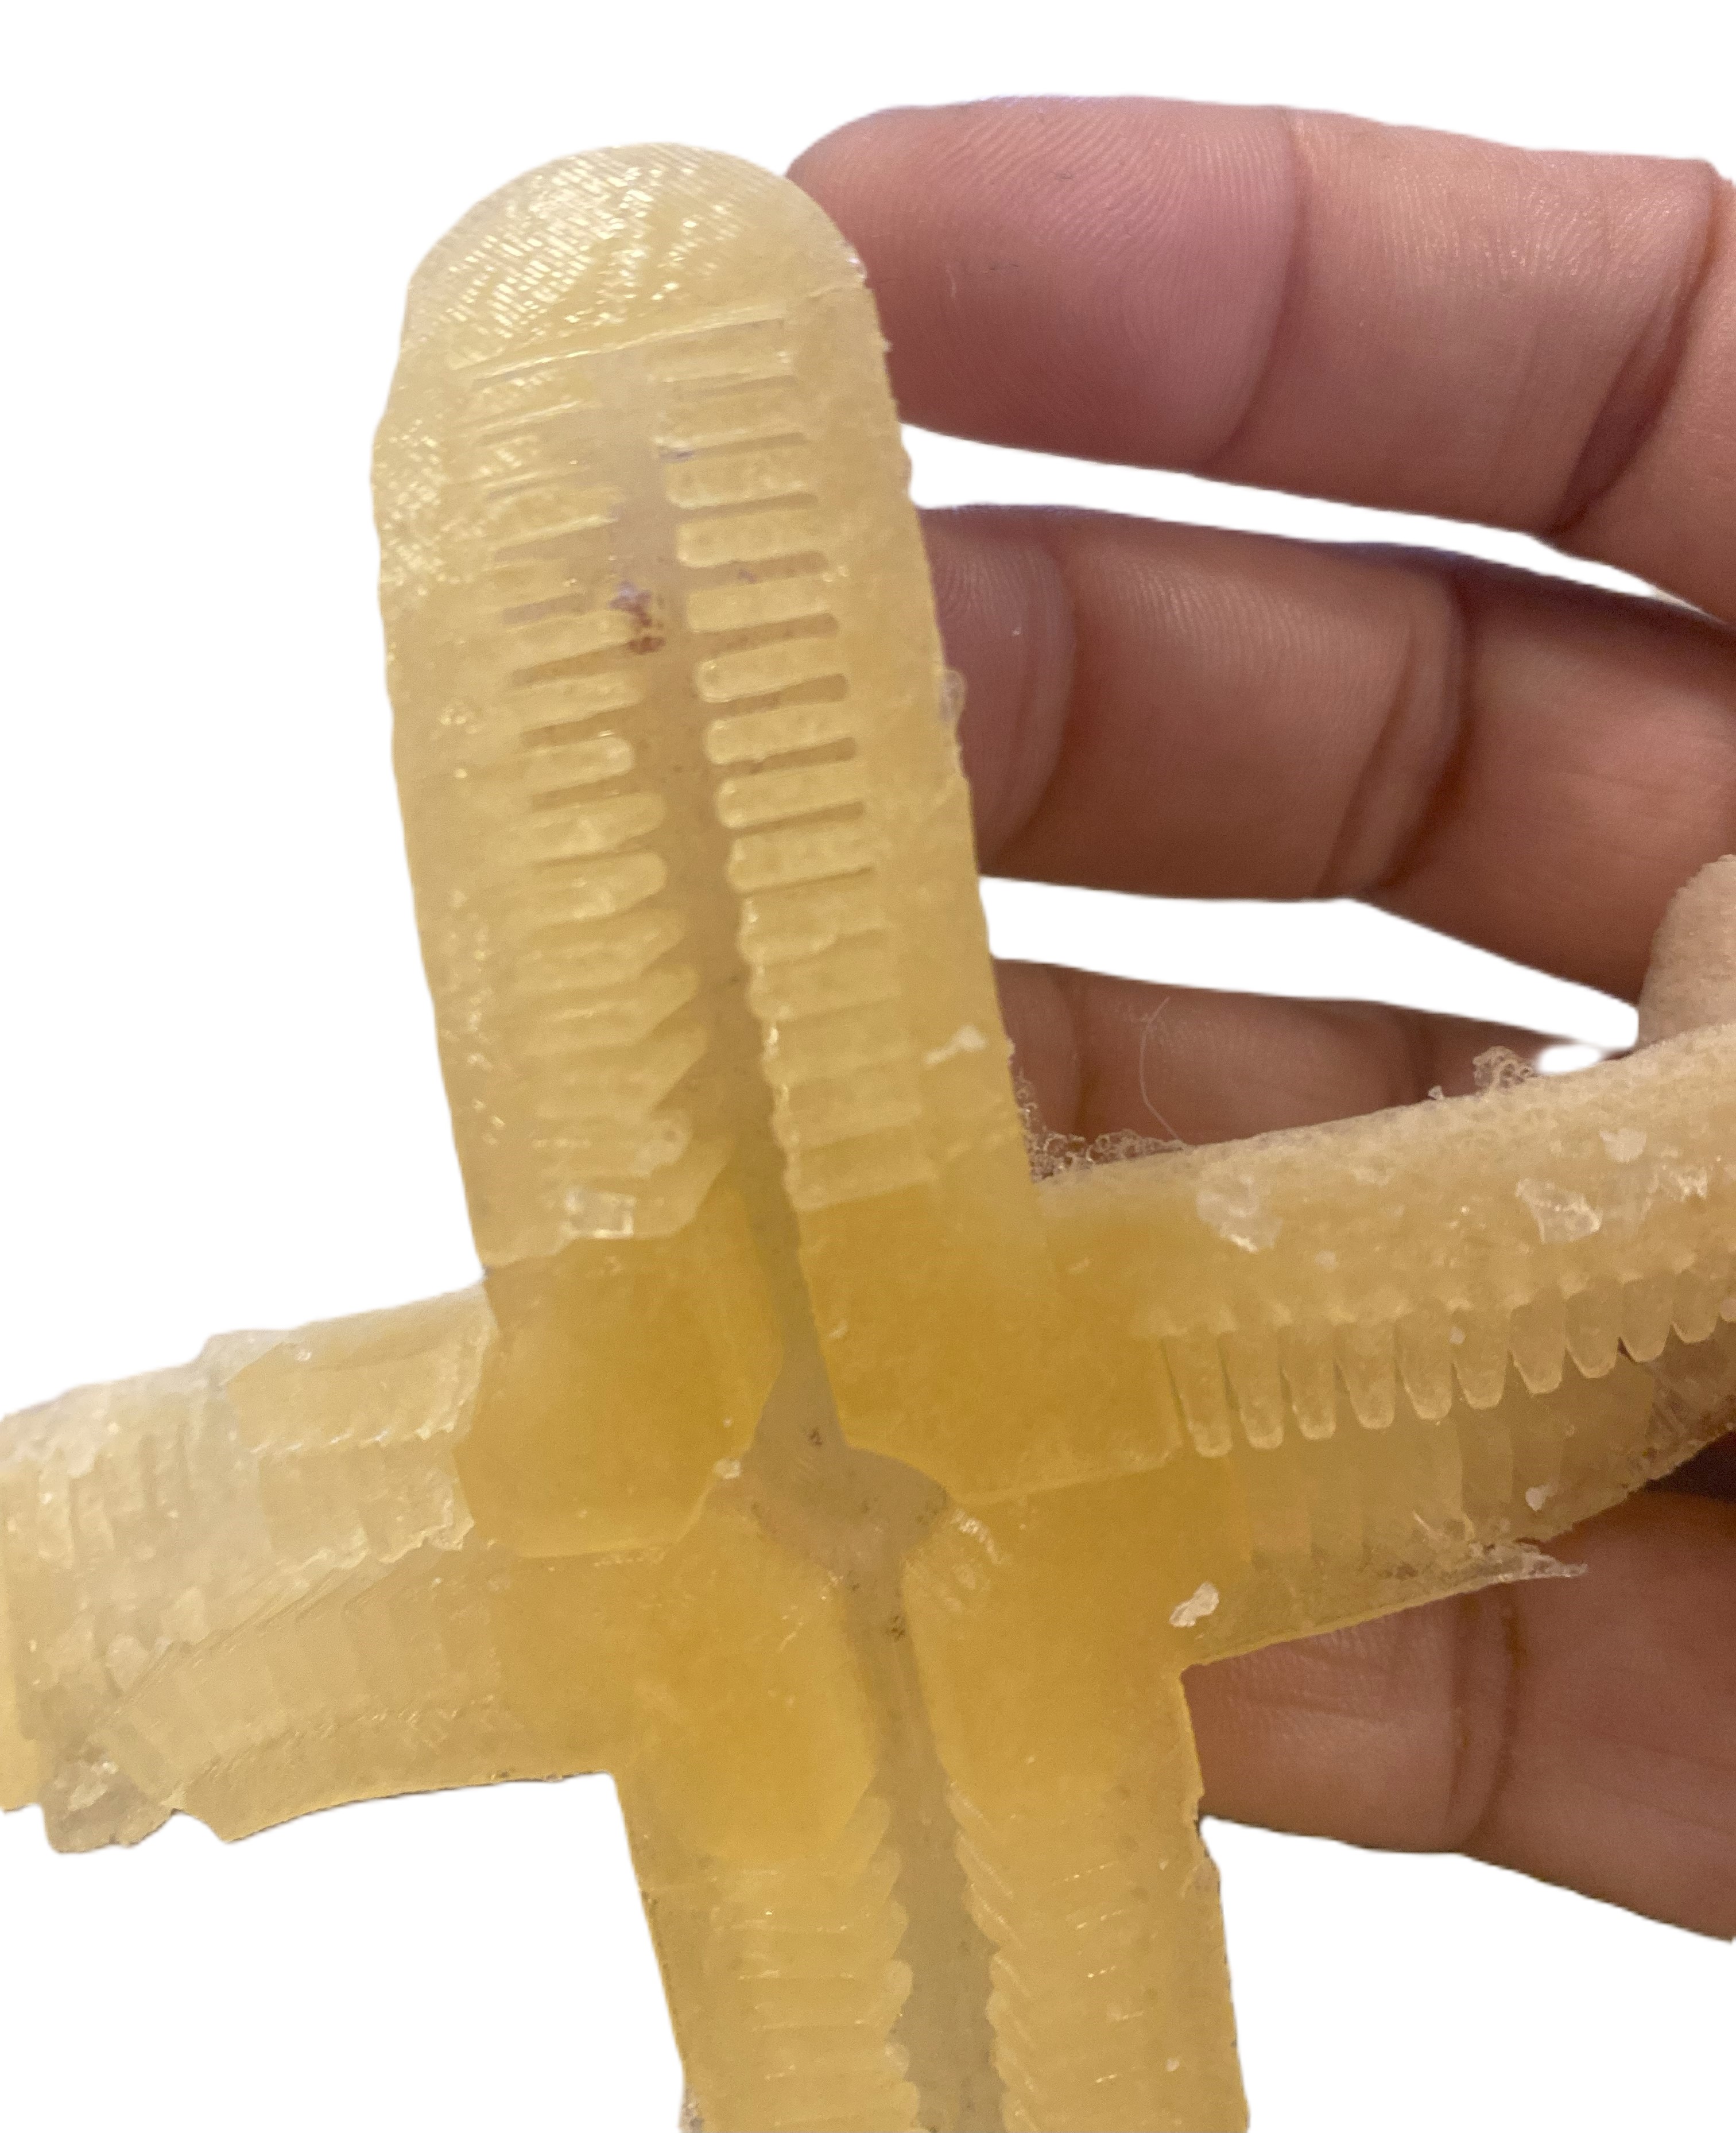
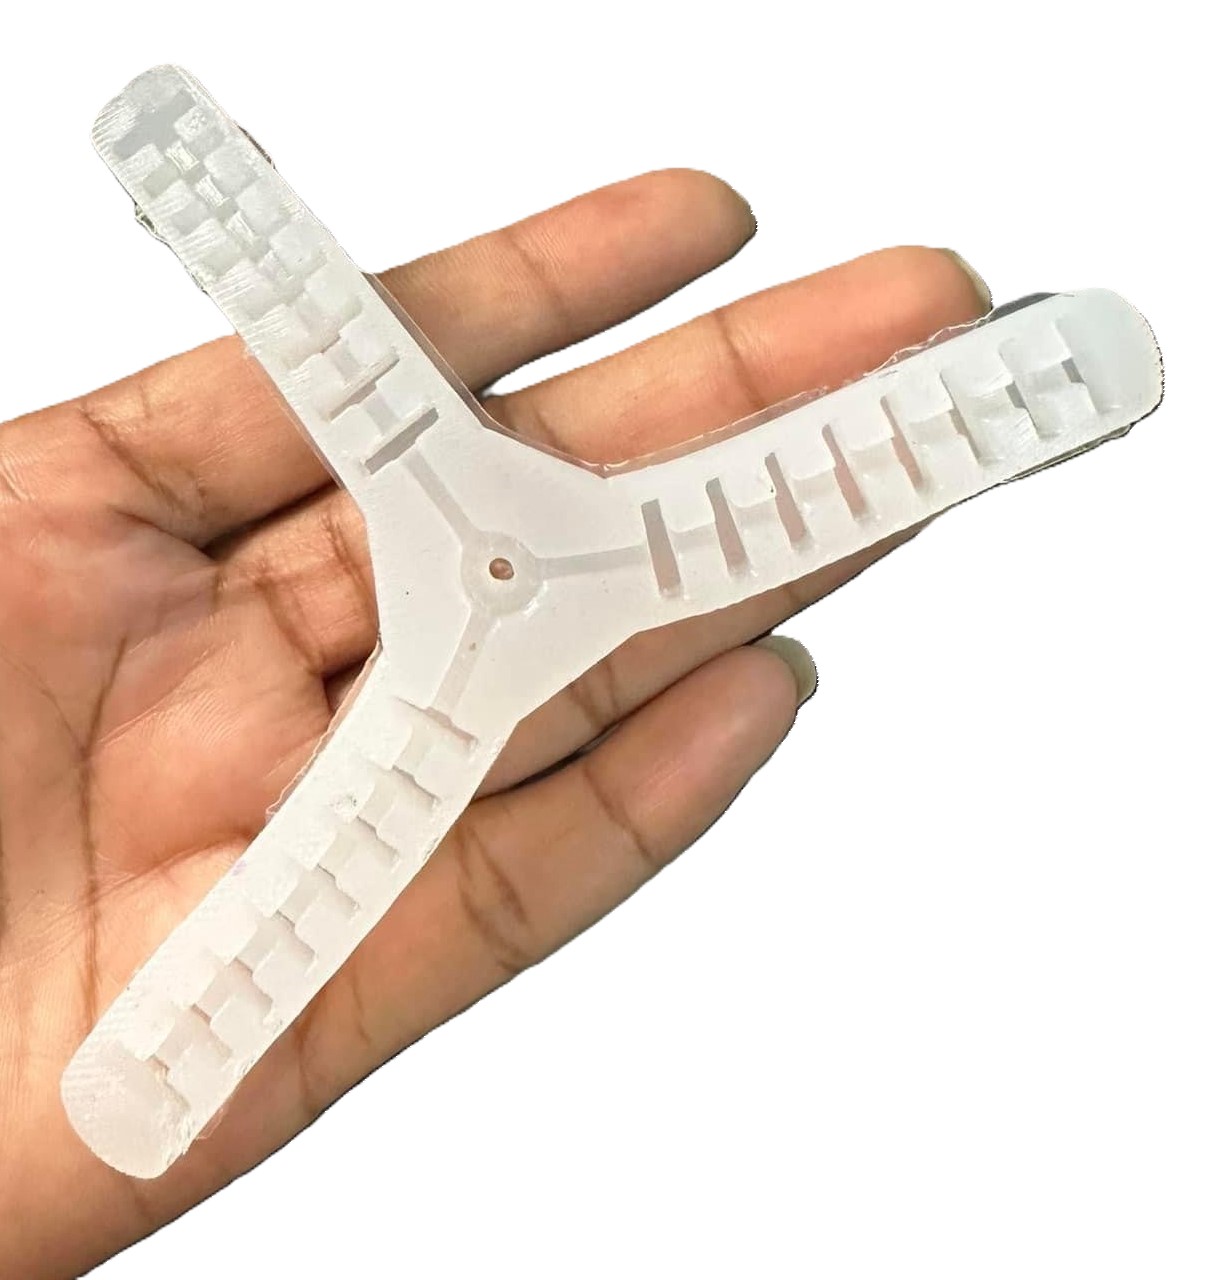
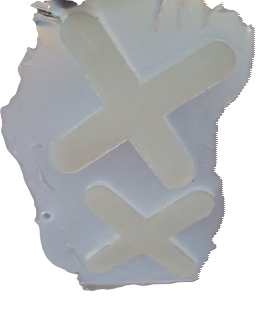
Although the formula sounds simple enough, the first bio silicone model did not go well. The mold I used was based on a 3D printed 4 tentacle gripper from Instructables.
4 tentacle gripper bot
First, the pour had alot of bubbles on the surface so I got some advice to pour a layer on top of the dried model. After I did this I took the dried gripper out of the mold.
Unfortunately it broke in a few places while removing it. Too bad since there were some nice details present, My conclusion is that the 3D mold was too fine and detailed for the bio silicone. Next I decided to use a mold with less details.
Chocolate bar model softbot
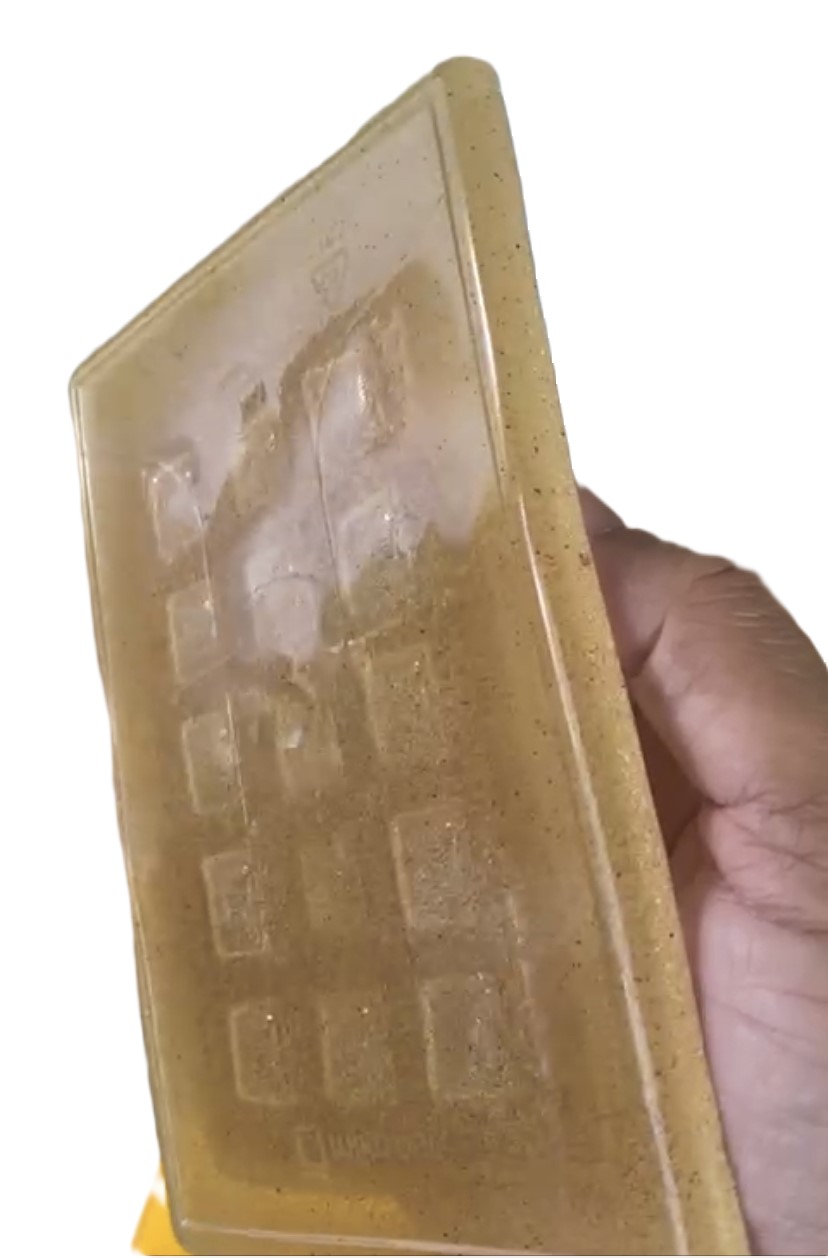
For the second model I used the same formula with a silicone mold for a chocolate bar. When the model dried it was suprisingly sturdy.
Unfortunately my model had chambers but no interconnection, so it only partially worked but could have done better.
It worked best with a needle siringe to pump air and I was able to pump a lot of air into the actuator before it broke.
The good thing about bio silicone is that it can be reused the material by just reheating it in the microwave for 10 to 15 seconds, pour it again in the mold and cool it in the fridge or at roomtemperature.
Process and workflow
You can find the proces for making a biobot below in the developed tutorial workflow or by clicking this link:
HOW to make a Biobot actuator from bio silicone
Ecoflex soft bots
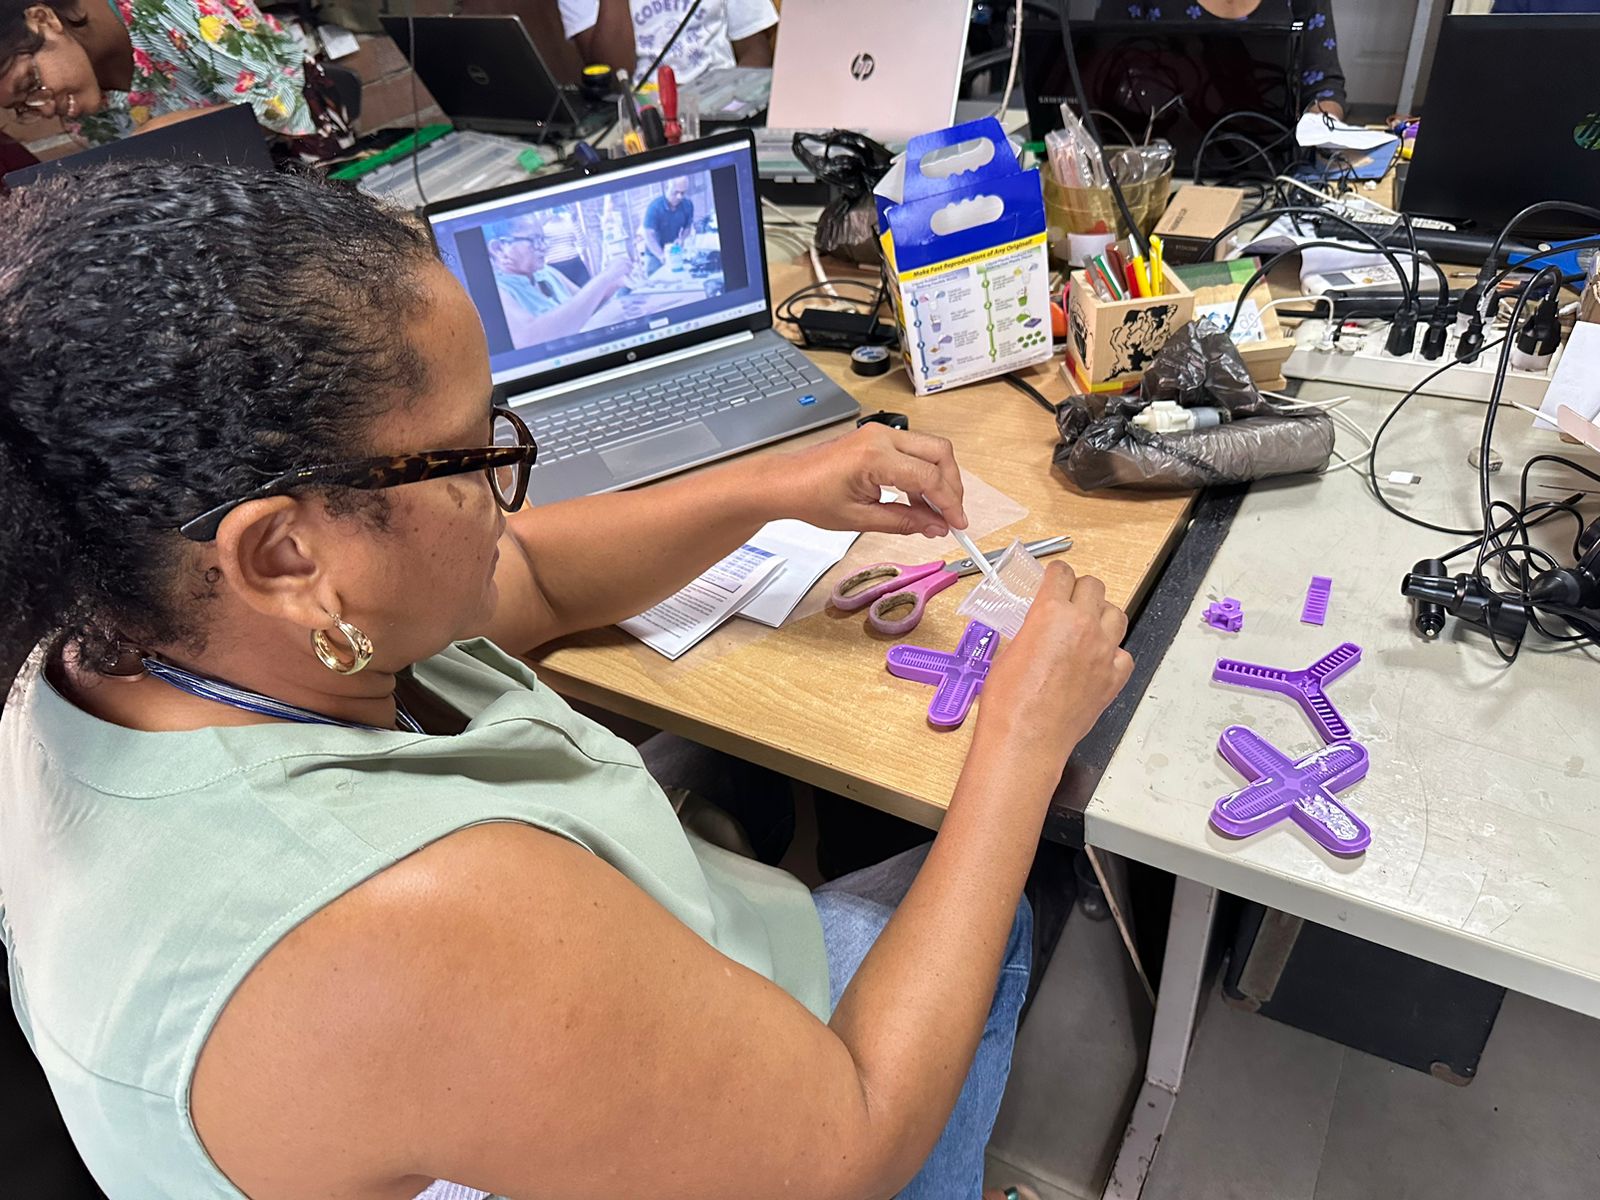
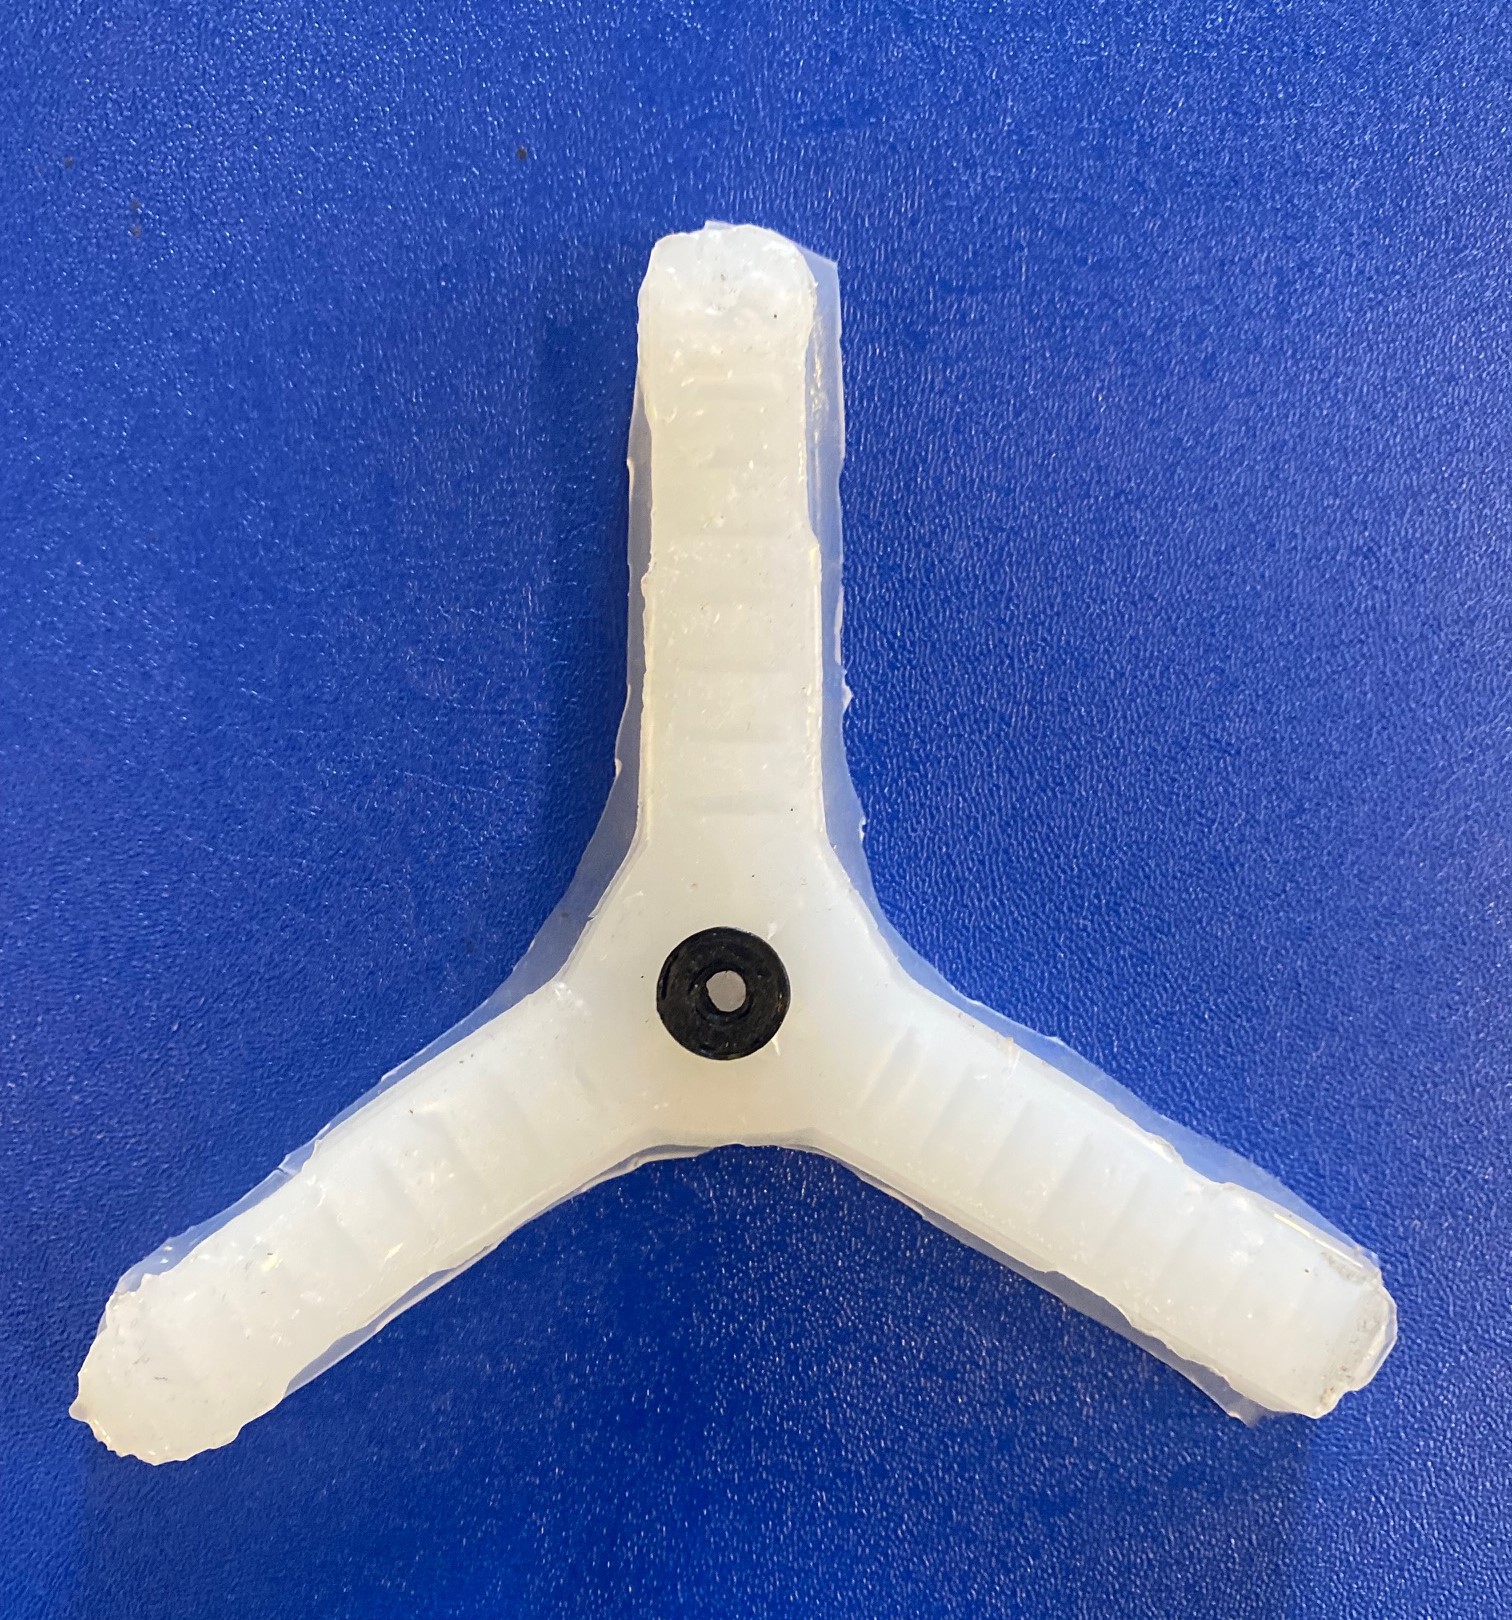
Thirdly I made several softbot grippers in collaboration with the team from IoTLab from Ecoflex 30 silicone. These gripper were made for another project of IoTLab but since it was also part of Fabricademy soft robotics week, we collaborated.
Some grippers had 4 tentacles and some had 3, so in the pictures I'm sharing you'll see both on and off.
I ended up with a 3 legged actuator although I build my documentation with a 4 legged mold so I appologize for this in advance.
The molds were 3D printed from online models we found on instructables. You can find the files in the Files section at the end of this page.
Ecoflex 30 silicone rubber consists of 2 parts, part A and Part B that should be mixed together in equal volumes. It's essential to pour part B into part A and not the other way arround since this will have a negative effect on the mix.
Another instruction is to absolutely not use latex gloves when handling ecoflex. This seems to trigger an adverse response and ecoflex doesnt dry properly as a result.
Once mixed together, you can now pour this into the mold.
Drying time: In theory the drying time should be a few hours in room conditions but in reality it took about 2 days before the actuator could be taken out of the mold. We think this is due to the high humidity conditions here.
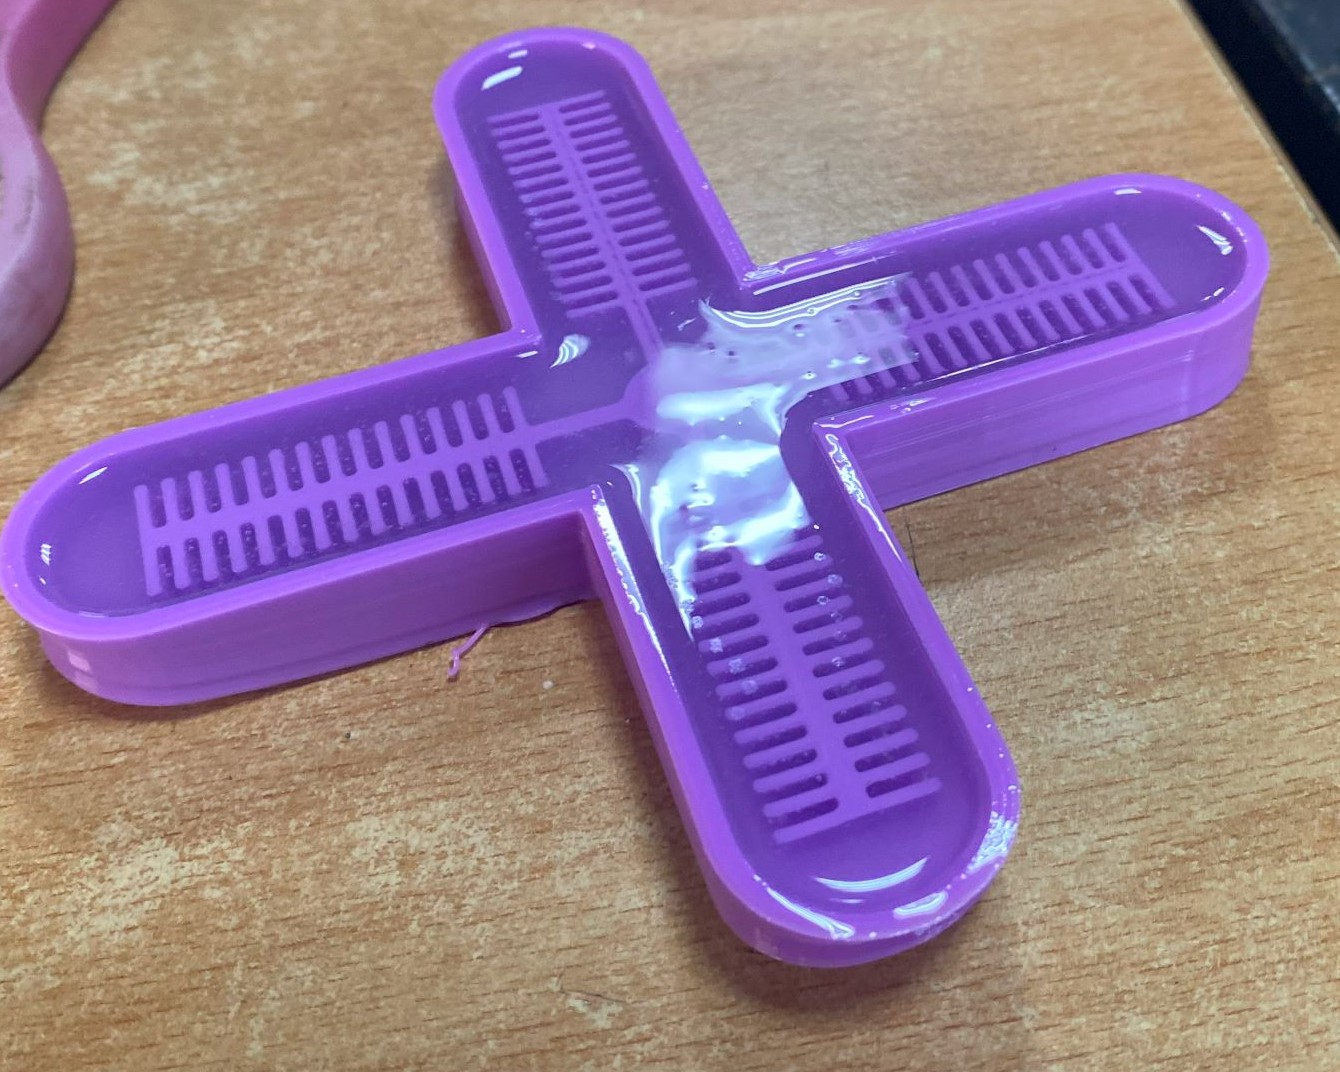
The first part of the actuator came out really well, clean and whole. Much better than the biosilicone with the same mold.
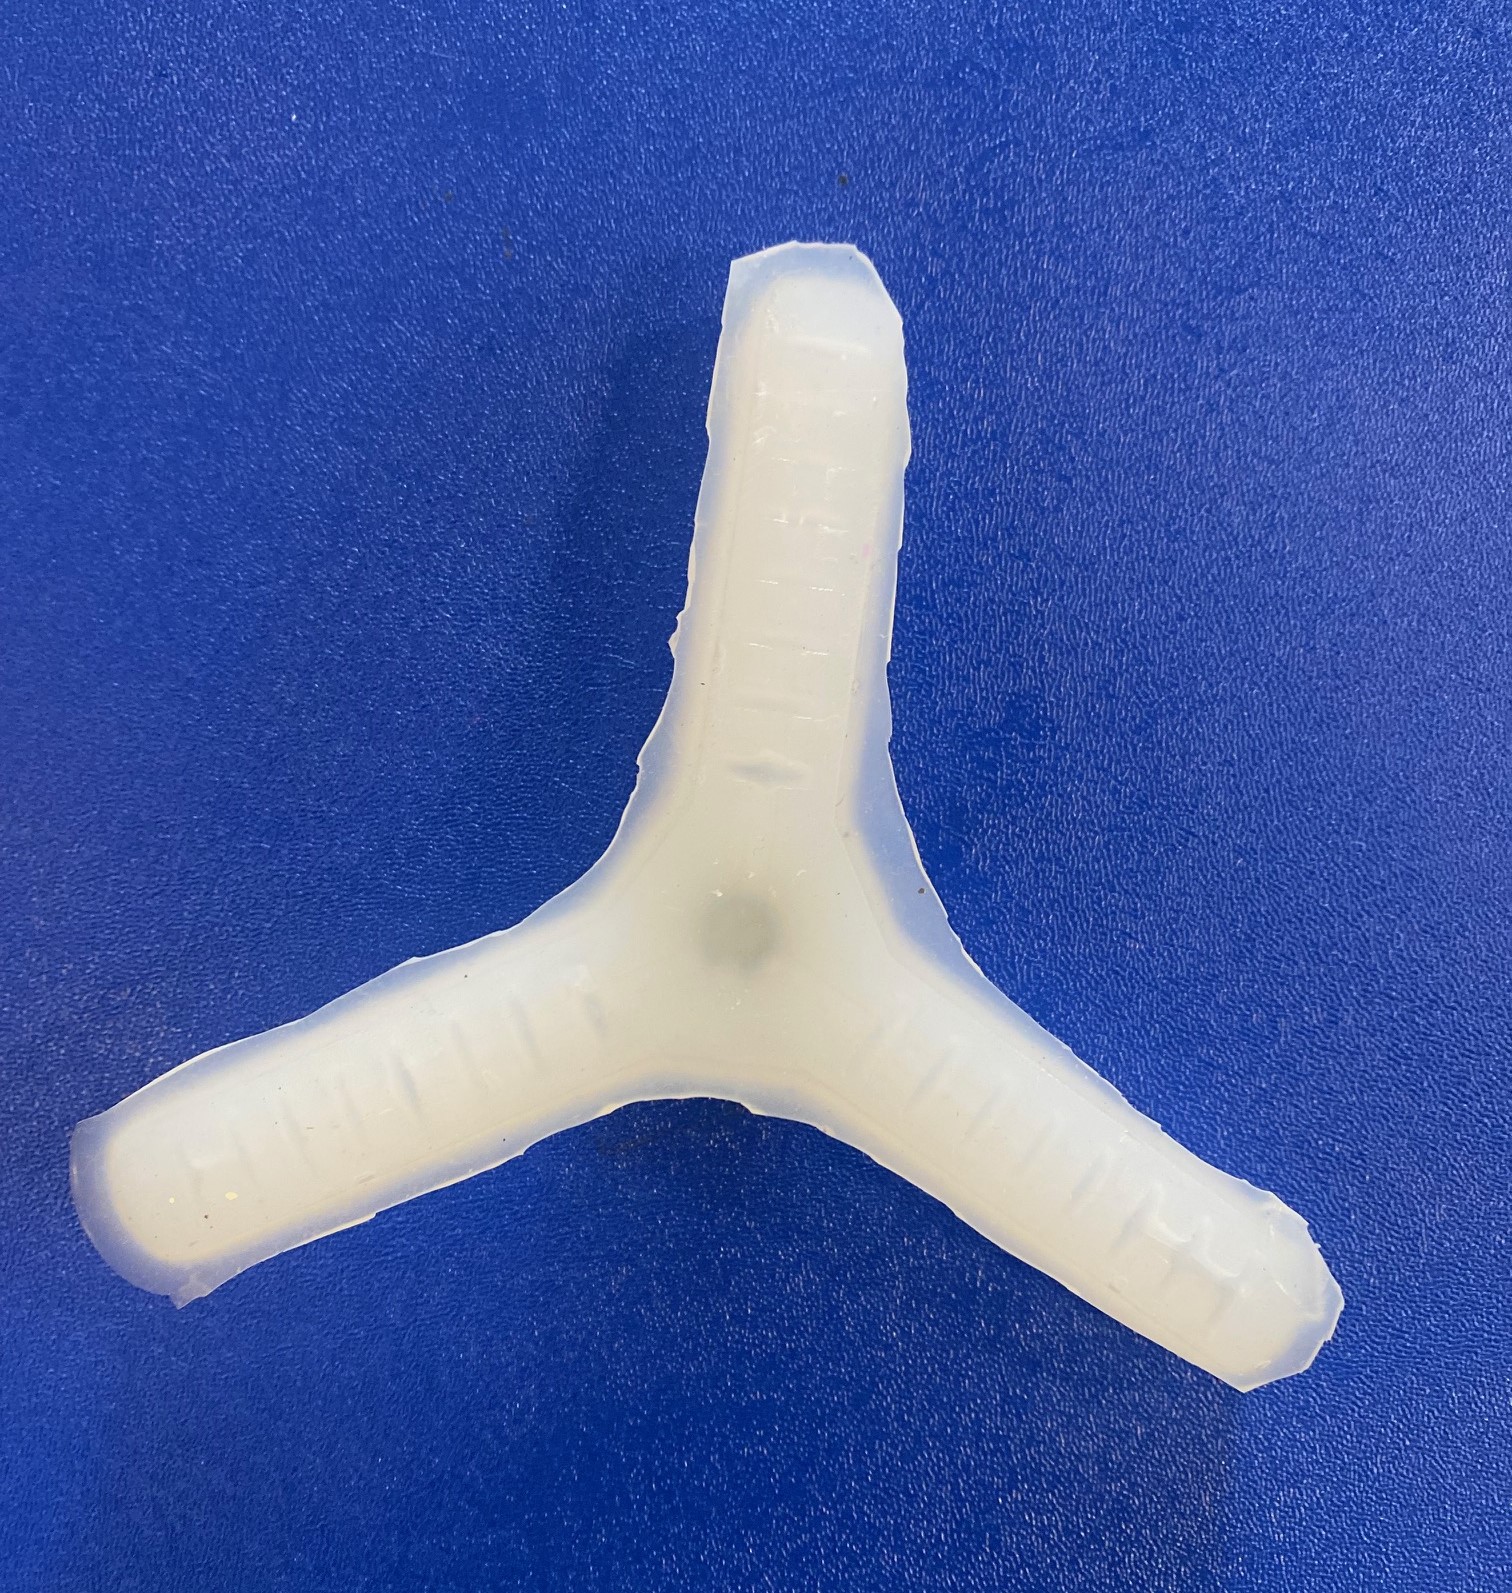
The second pour was the thin film which was poured to close off the chambers of the actuator.
In retrospect we should have poured it, let it dry and later pour a very thin second layer on the film as an adhessive. We did not do this and as a result the models got clogged up and didnt function well.
I can't even demonstrate this since unfortunately the tentacles bursted at one point of trying to get it to work. This experiment I have to redo for sure!
Here is the end result:
References & Inspiration
Other sources of inspiration and research:
- One of the possibilities to apply Fabricademy knowledge I see is in the application of spy animals to observe and interact with animals in their natural environment. Examples:
Octopus Spy animal
-
This video of Universal soft robotics gripper, showing industrial application. Universal Soft Robotic Gripper Beihang University
-
This TED talk shows different opportunities of soft robotics including in medicine TED Talk: The incredible potential of flexible, soft robots | Giada Gerboni
-
Therms-Up!: DIY Inflatables and Interactive Materials by Upcycling Wasted Thermoplastic Bags Kyung Yun Choi, Hiroshi Ishii MIT study on upcycling plastic to soft robotics
In fashion and Fabricademy, some of the interesting and helpful examples I've seen:
The recommended links by Fabricademy staff were also very insightful.
* Beatriz Sandini
Tools
For Vynil soft bots:
-
Vynil sheets
-
Baking paper
-
Pen
-
Pencil
-
Drawing paper
-
Clothing Iron
-
Air pump (electric or bycicle)
For Bio silicone soft bot
-
Water
-
Glycerin/Glycerol
-
Gelatin
-
Microwave
-
Measuring cup and spoons
-
Mixing bowl
-
Mold
-
3D printer or Lasercutter (But if not available you make a mold by hand or buy one)
-
Dry by cooling in the fridge or leave at roomtemperature
-
Airpump (electric or hand) or seringe
For Eco flex silicone soft bot
Instructables.com instructions on soft bot gripper
-
Ecoflex
-
Plastic cups
-
Wooden mixing sticks
-
Mold
-
3D printer or Lasercutter (But if not available you make a mold by hand or buy one)
-
Dry by drying in the oven or leave at roomtemperature
-
Airpump (electric or hand) or seringe
Online resources:
3D Models
The 4 legged 3D model was both obtained from:
Soft robotic gripper
For the vynil models I did not make digital files but handcrafted everything.
Code
I did not use any Code
Videos of endresults
Final tests the vynil soft bots with air pressure
This video shows the inflatable red heliconia made from vynil.
Heliconia softbot
In the second video I added hinges to the orchid trying to get a gripper effect.
I also made a combination of tiger spots vynil on top and a red vynil on the bottom resulting in a Louboutin red bottom shoe inspired soft robot.
The hinges resulted in more movement and almost muscle like patterns in the balloon.
Final tests the biobot with air pressure
Watch the videos below or check out this youtube link for tests I did with the second Biobot actuator. It still needs alot of improvements. The gripper biobot did not come out well unfortunately.
Chocolate mold biobot 1st test
Chocolate mold biobot 2nd test
In addition I tested the strength of the biosilicone by pulling it apart. Check out the video links as well
Ecoflex
Unfortunately I have no video result for the ecoflex soft bot other than this one:
Ecoflex actuator closed and dry