11. Textile Scaffold
Research
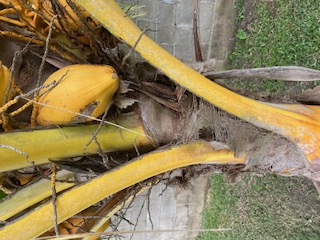
Scaffolding in Suriname
The first thing coming to mind in the Surinamese culture with regards to textile scaffold is the Anjisa headdress. This is a headdress typical to the culture of people of African descend in Suriname. A piece of colorfull fabric of approximately 1 by 1 meter is made stiff with starch (Gomma), dried and ironed flat. Next it is molded and folded into a headpiece sometimes held together with pins. An anjisa can keep its shape for years until the owner decides to reuse the fabric in another form. During slavery these headpieces were used as code for secret messages, as far as I know usually with a social character but it's likely also in the rebellion. For instance in a secret love affair, a woman's headpiece would signal to her lover to meet her at the corner of the street.
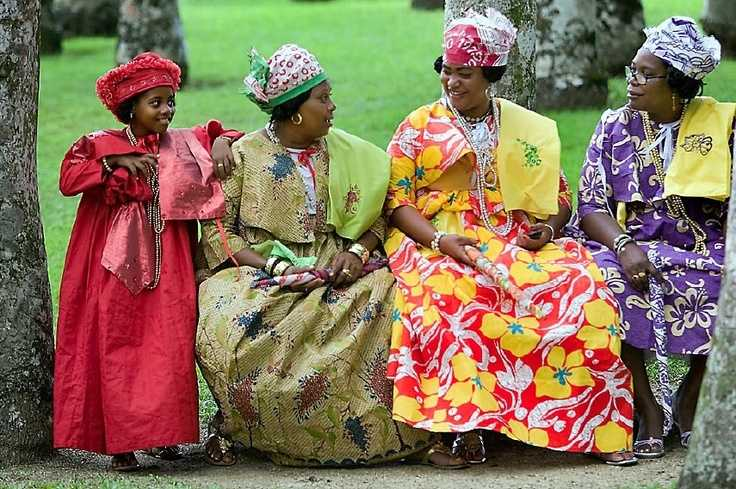
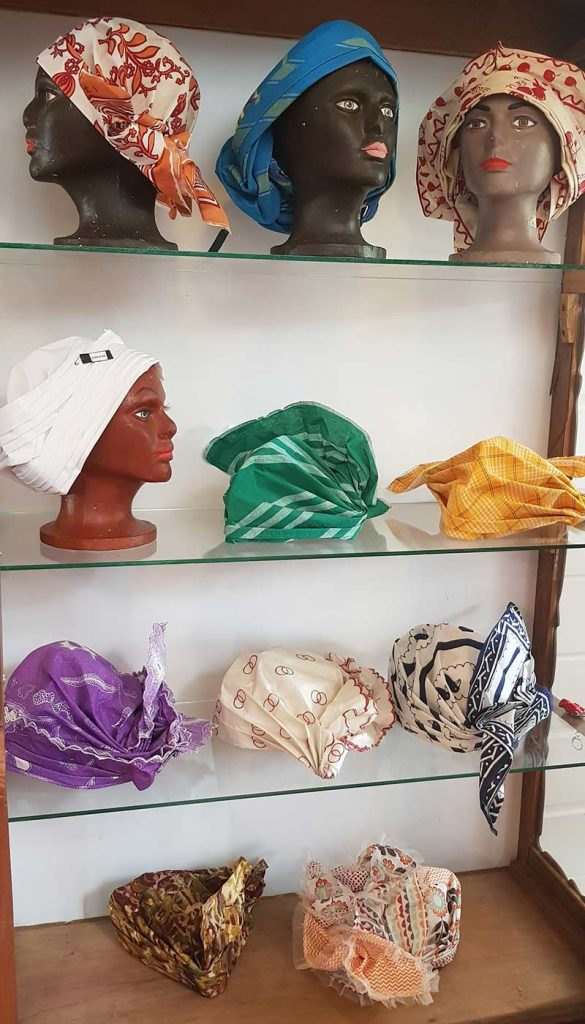
Later in the age of freedom this secret social language continued. Headpieces could signal to jealous neighbors "I know you gossip but I'll stay pretty anyway" or if the headpiece would be really pointy, it signals to a nemesis "I'm ready for war, so dont mess with me". In addition fabrics with special prints often for political significant occassions or for family gatherings are still a practice. More about the anjisa can be found on the website of the Koto museum Koto museum
Other resources: (In Dutch, please turn on the translation in your browser)
Demonstration video: Anjisa demonstration
Wereldmuseum online over Anjisa
Inspiring Alumni pages
Twist Again the interior design items from jeans waste by Dominique Vial are truly excellent Dominique Vial
Other alumni pages that caught my interest: Alessia Pasquini Alve Lagercrantz Dineshkumar Gunasekaran Audrey Kalic JeanMarie Durney
Ofcourse I have not seen everything yet.
Weekly task
Learning outcomes
-
Research skills: the participant has acquired knowledge through references and Concept development
-
Design skills: the participant has learnt through sketches, 3D modeling skills, mould design
-
Fabrication skills: the participant is able of executing from file to production workflow, through 3D modelling, 3D milling (optional) or lasercutting, crystal growing or casting
-
Process skills: Anyone can go through the process, understand it and reproduce it
-
Final outcome: Various samples created using different techniques
-
Originality - Aesthetics: Has the design been thought through and elaborated?
Student checklist
-
Document the concept, sketches, references also to artistic and scientific publications
-
Produce 2 techniques of textile scaffold choosing from the following:
-
fabric formwork with casting
-
crystallization
-
wood-textiles composite
-
resin & bioresin -textiles composite
-
leather molding
-
other
-
Document the process from CAD to CAM, the step-by-step instructions for CNC milling, mold making, vaccuum forming and textile composites
-
Upload your design and fabrication files, including the 3D model and CAM file
-
Document at least 2 processes from design to prototyping, fabrication, materials used, document your achievements and unexpected outcomes
-
Make a stop motion of your crystal growth or use 3D modeling software to simulate your design (extra credit)
Deciding which subjects to focus on
Regarding the weekly tasks, I set out to do 2 subjects: - First: growing christals and - Second make a composite bio plastic/ bio leather from wood waste and agar/gelatin or a similar material. The composite I still have to do but for this week since I am already in the Christmas season with Chrystals.
Update: I made the composite! I created a sheet of mango leather with lasercut wooden pieces sewn into it. see the section UPDATE: Mango leather plywood scaffolding.
Growing Alum Chrystals
This week I focused on growing christals. Yes! I am on the "Bedazzle everything for Christmas" team and so I did bedazzle everything I could find my hands on.
Keeping in mind the instructions during the lecture and in the previous tutorials:
-
Material that is hairy, has maizes or netting
-
An environment that has no movement, shaking, trembling from traffic, motors or just me checking and shaking the pot every hour to see if the christals are there yet and so on. (Geen trilling)
-
Use Glass jars
-
Let material hang just above the bottom but not touch it
-
Clean everything thoroughly to avoid contamination
-
Use distilled water (I used filtered wellwater)
-
If you want christals to grow on just one side of your material, cover the other side with transparant plastic tape.
Testing agar and wood sawndust composite
I created a material sample of agar and sawndust composite partially based oon the Aalto chemarts cookbook ( see my online references ) , which you can find here.
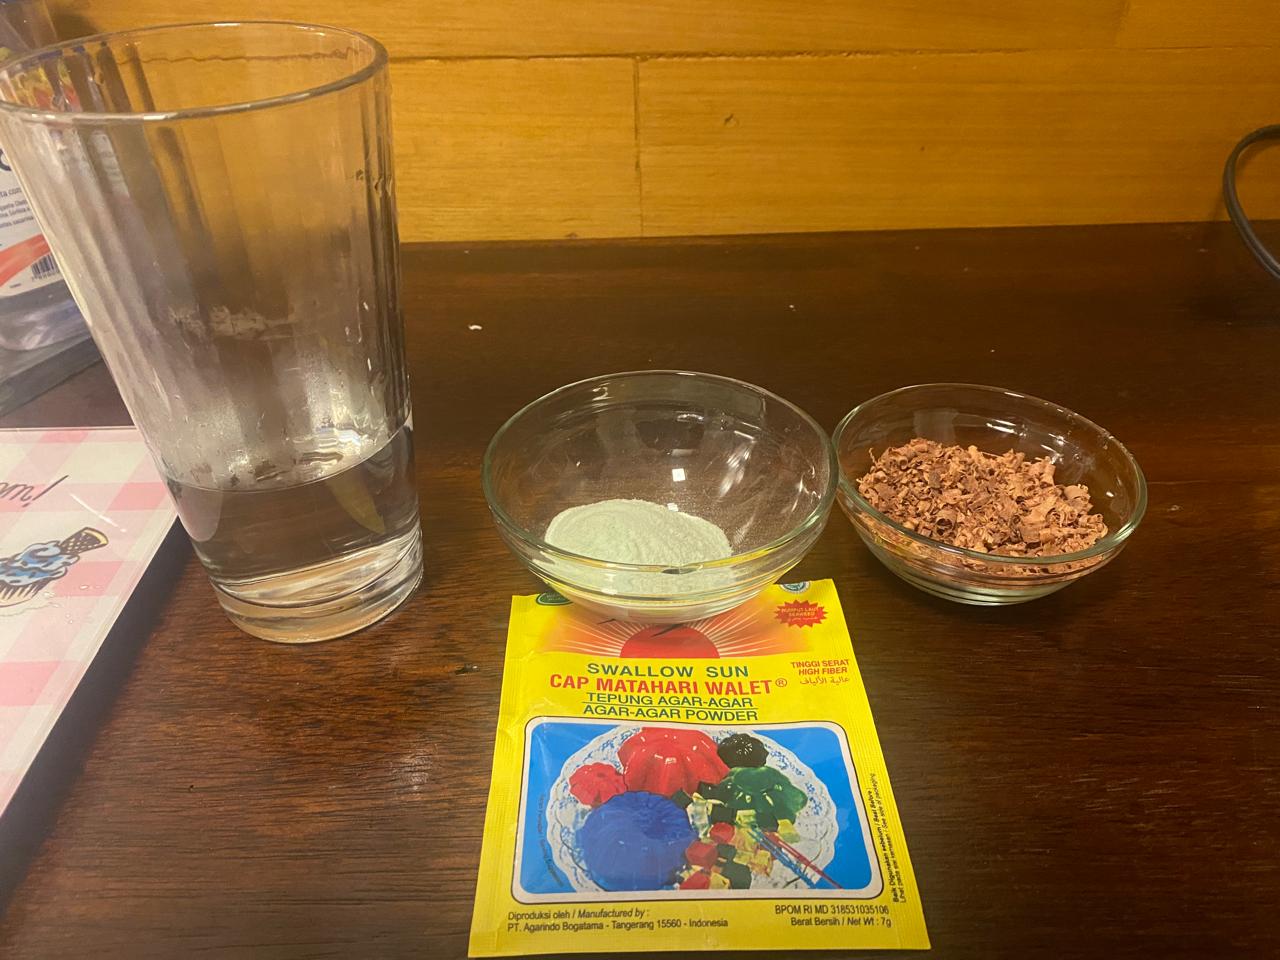
The ingredients are:
- 10 grams Agar
-
2 grams Sawndust
-
100 ml Water
-
Cinnamon ( against mold and fungus)
After mixing and cooking it together, here are some pictures of the sample result.
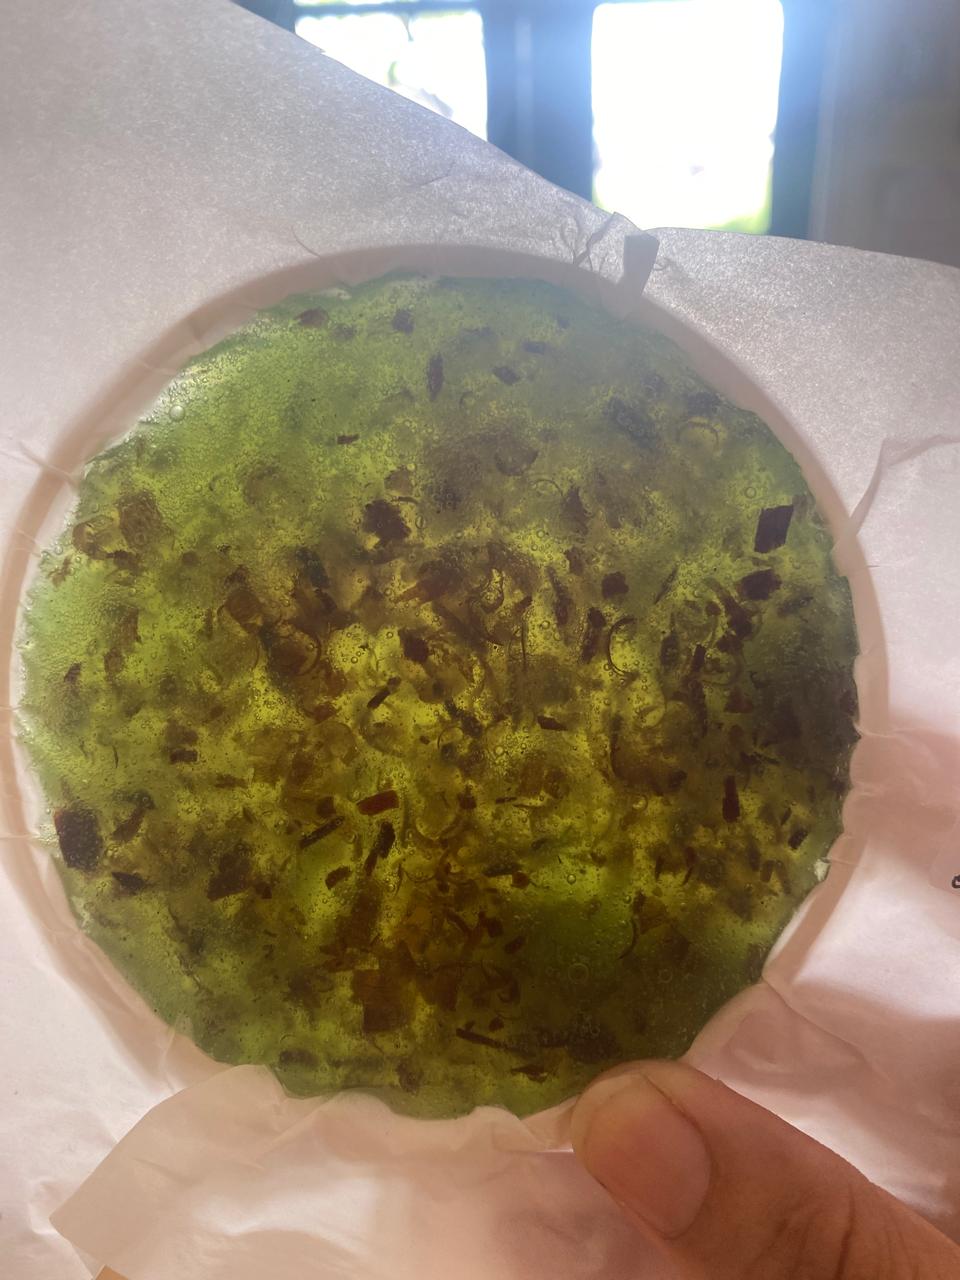
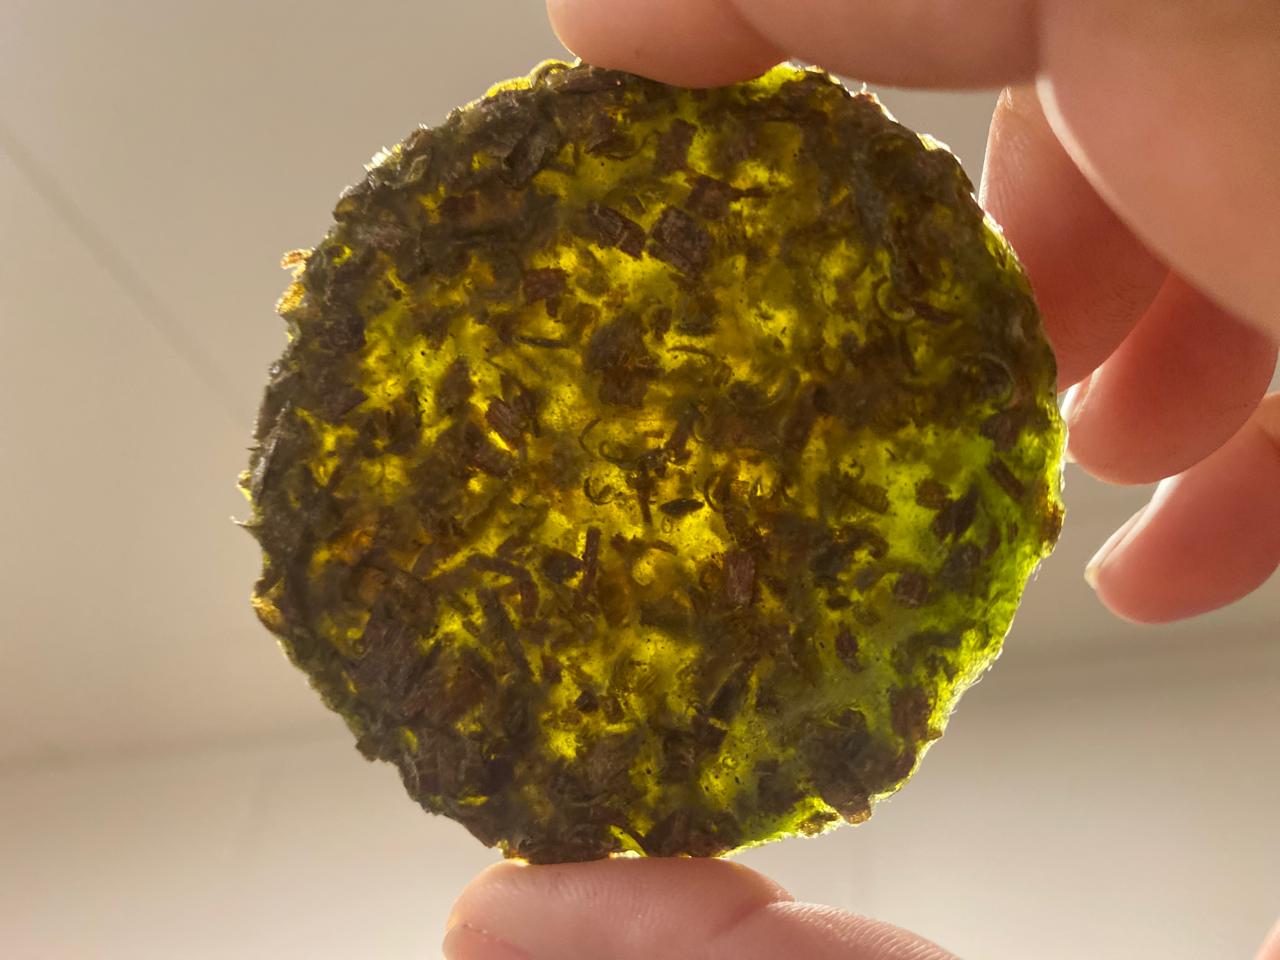
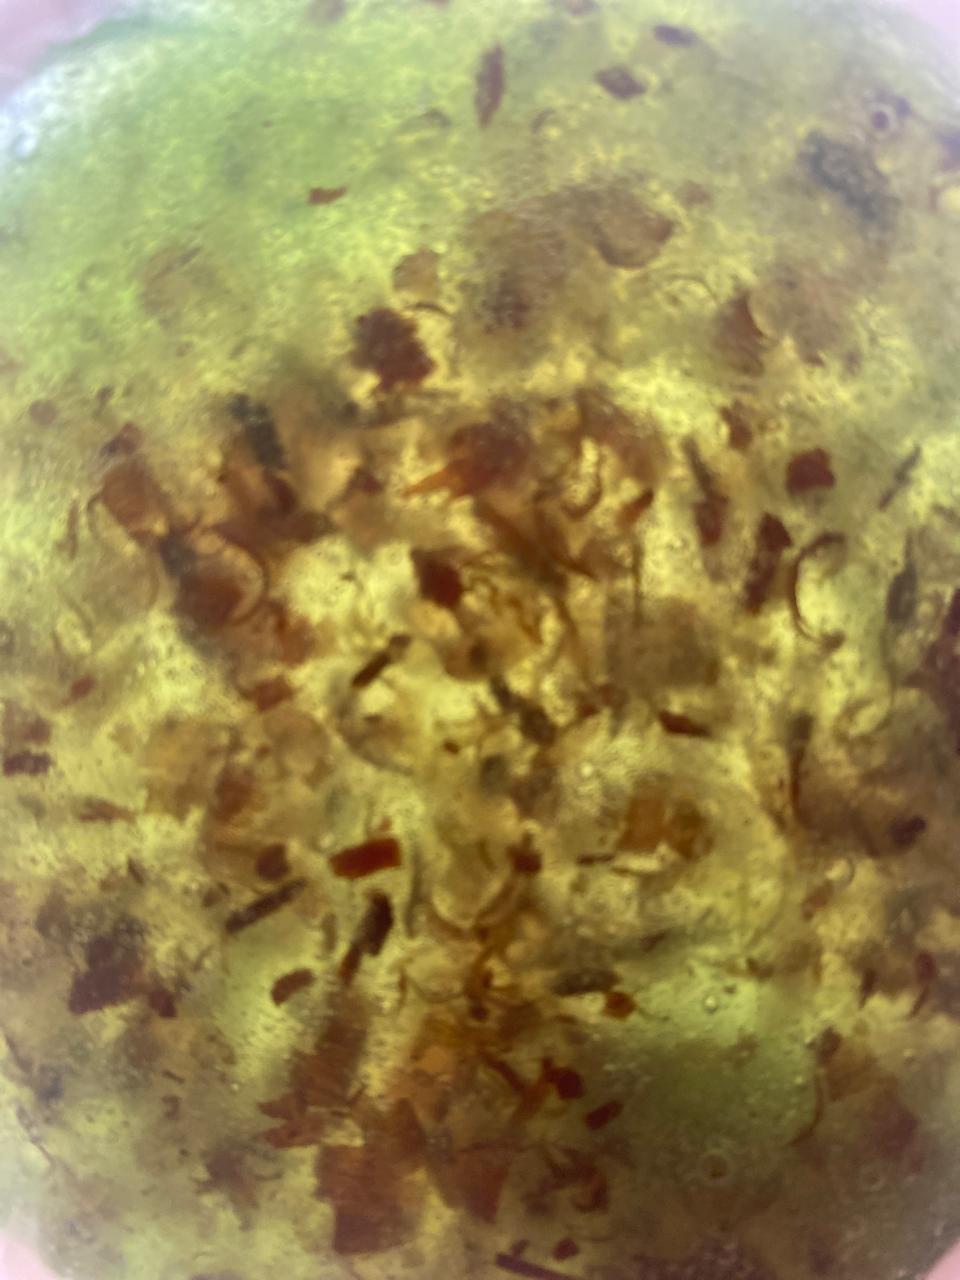
UPDATE: Mango leather plywood scaffolding
For the second scaffolding assignment the biocomposite, I did try out the agar and wood sawn dust composite but for now I give preference to describe the sample of mango leather with wooden pieces sown into it which I made.
The oven plate in which it was poured is a round metal plate with a diameter of 17 cm but due to shrinkage while drying, the size of the sample finally is at 15 cm diameter.
The wooden pieces were cut from a piece of 4 mm plywood in the lasercutter.
I like how the sample turned out and am considering to further use this for my final project biomimicri of frog skin. Here is a picture:
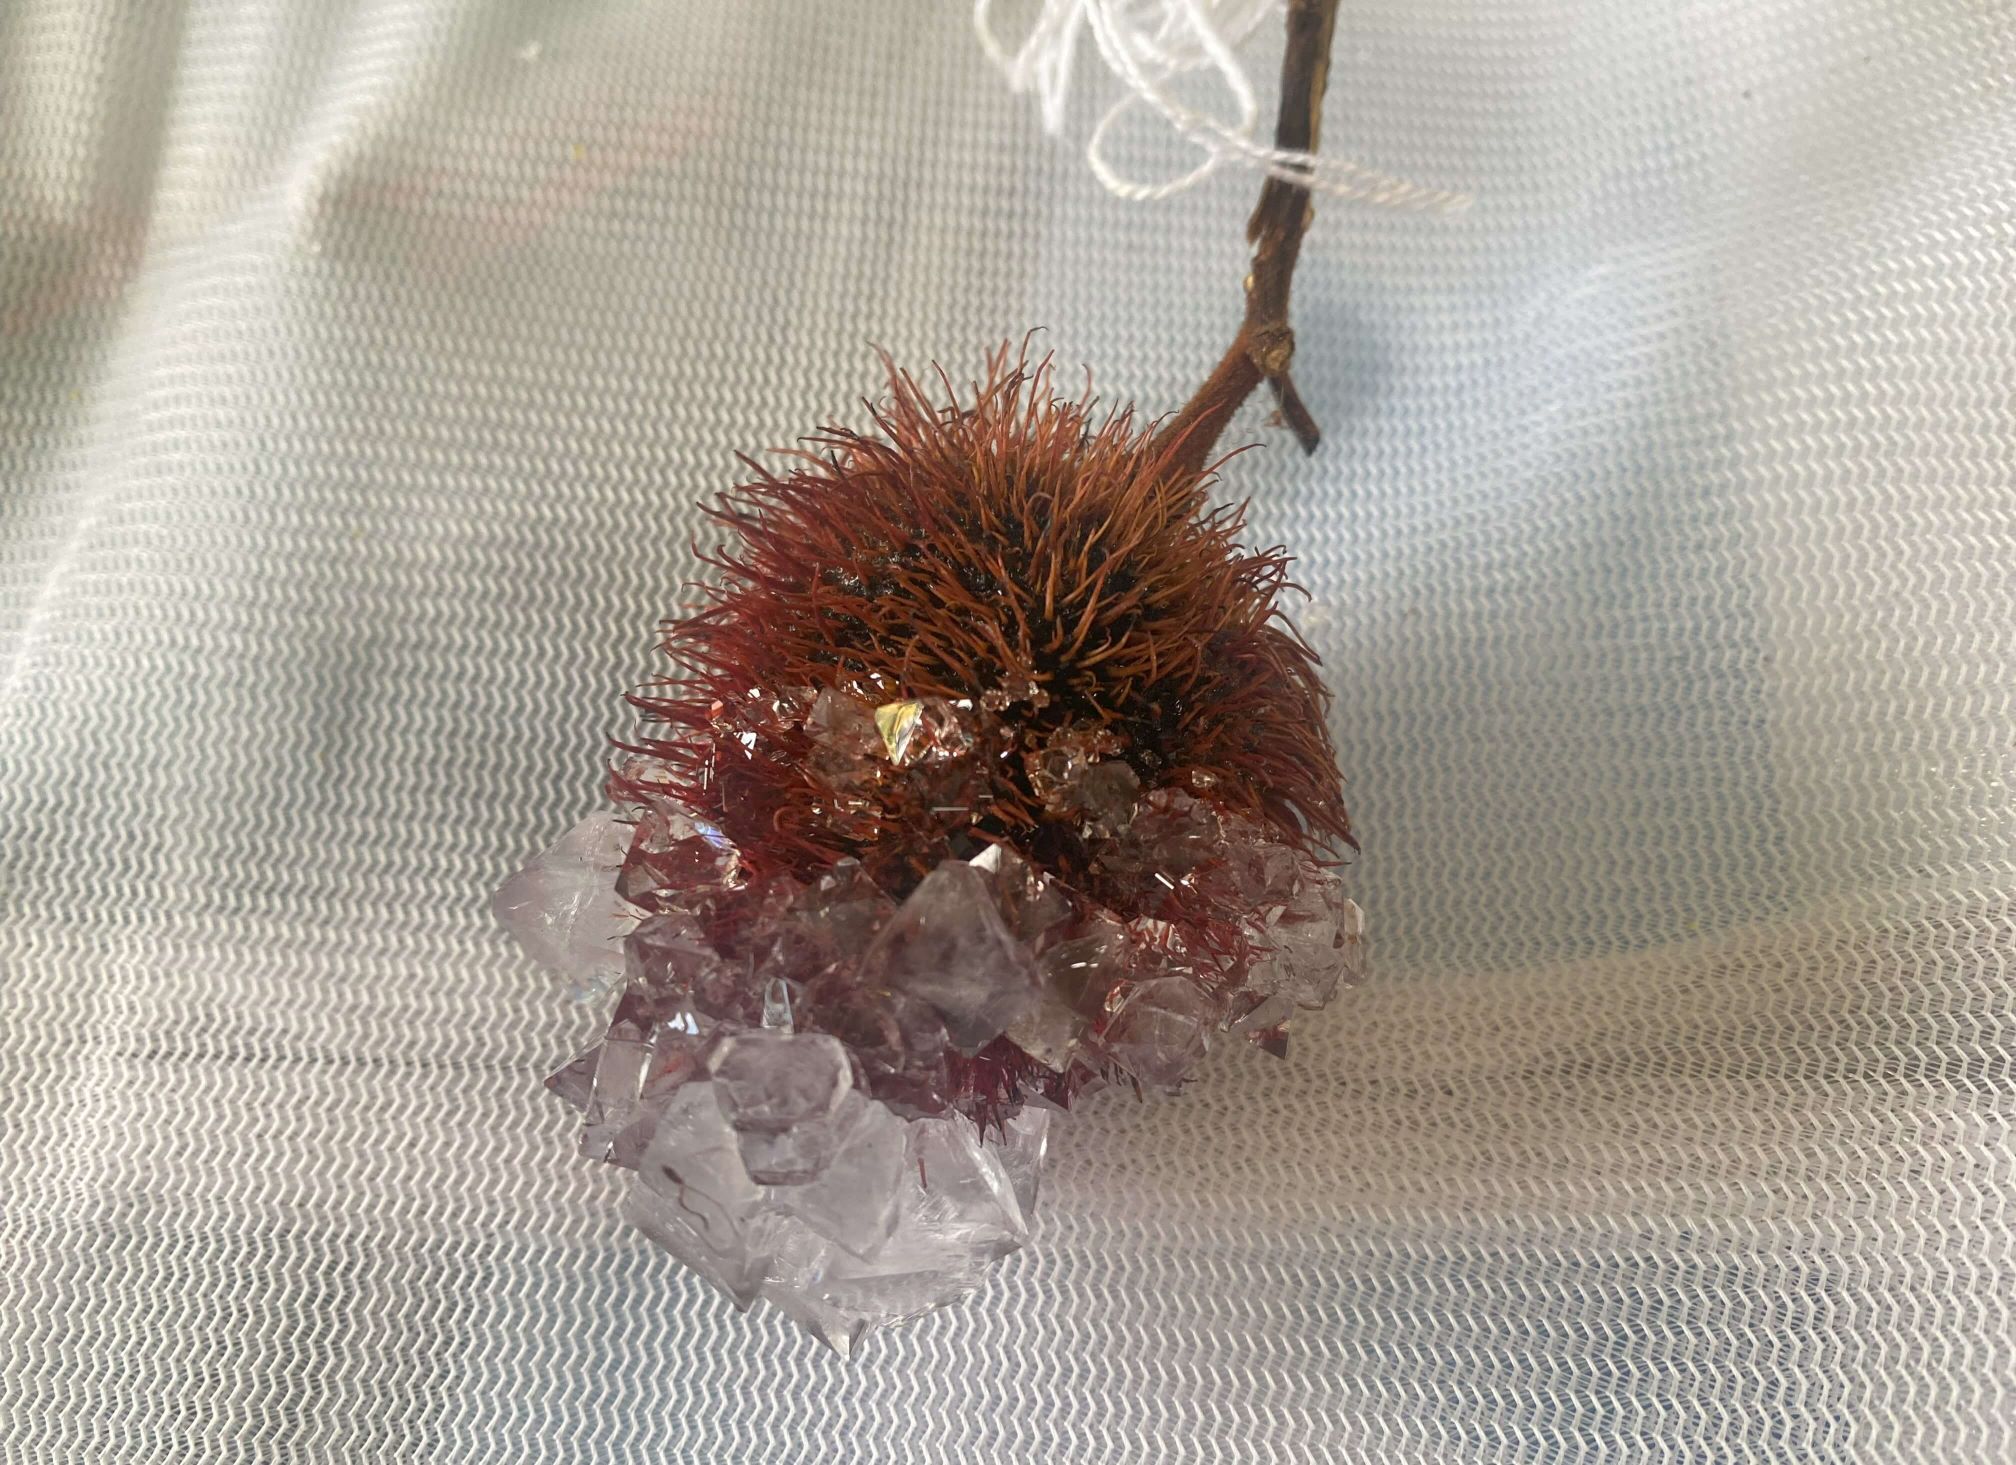
Growing Alum Chrystals: Materials & Process
Choosing materials for the chrystals
The materials I chose to grow the chrystals on are:
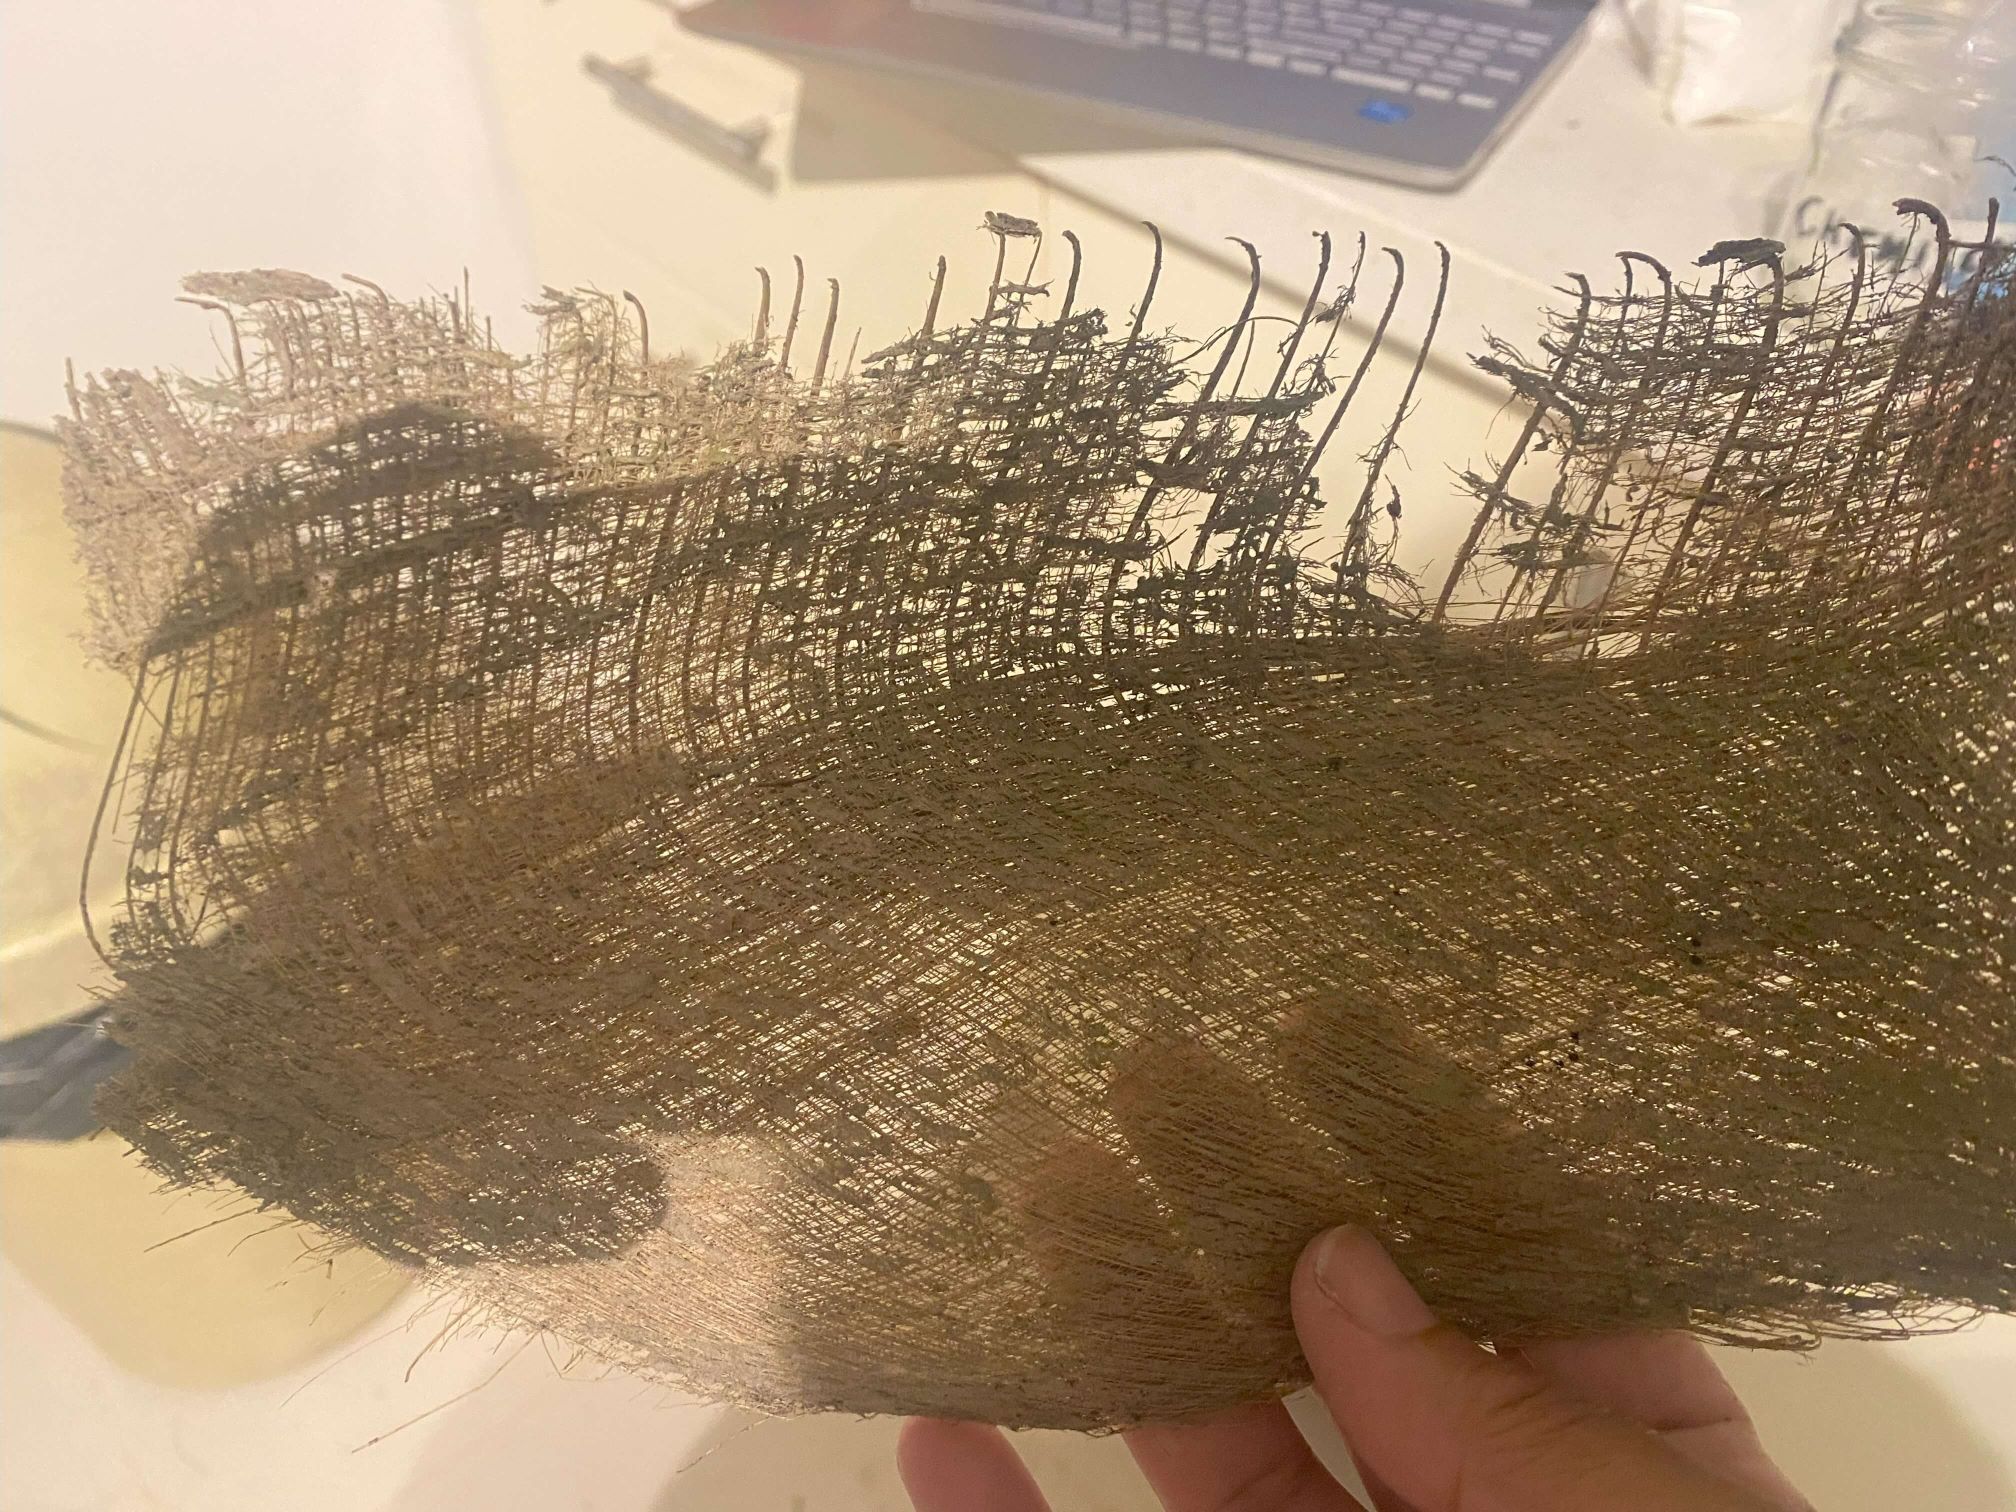
Coconut weave
Coconut weave is a fabriclike material which naturally grows on the stem in between the coconuts. It closely ressembles jute.
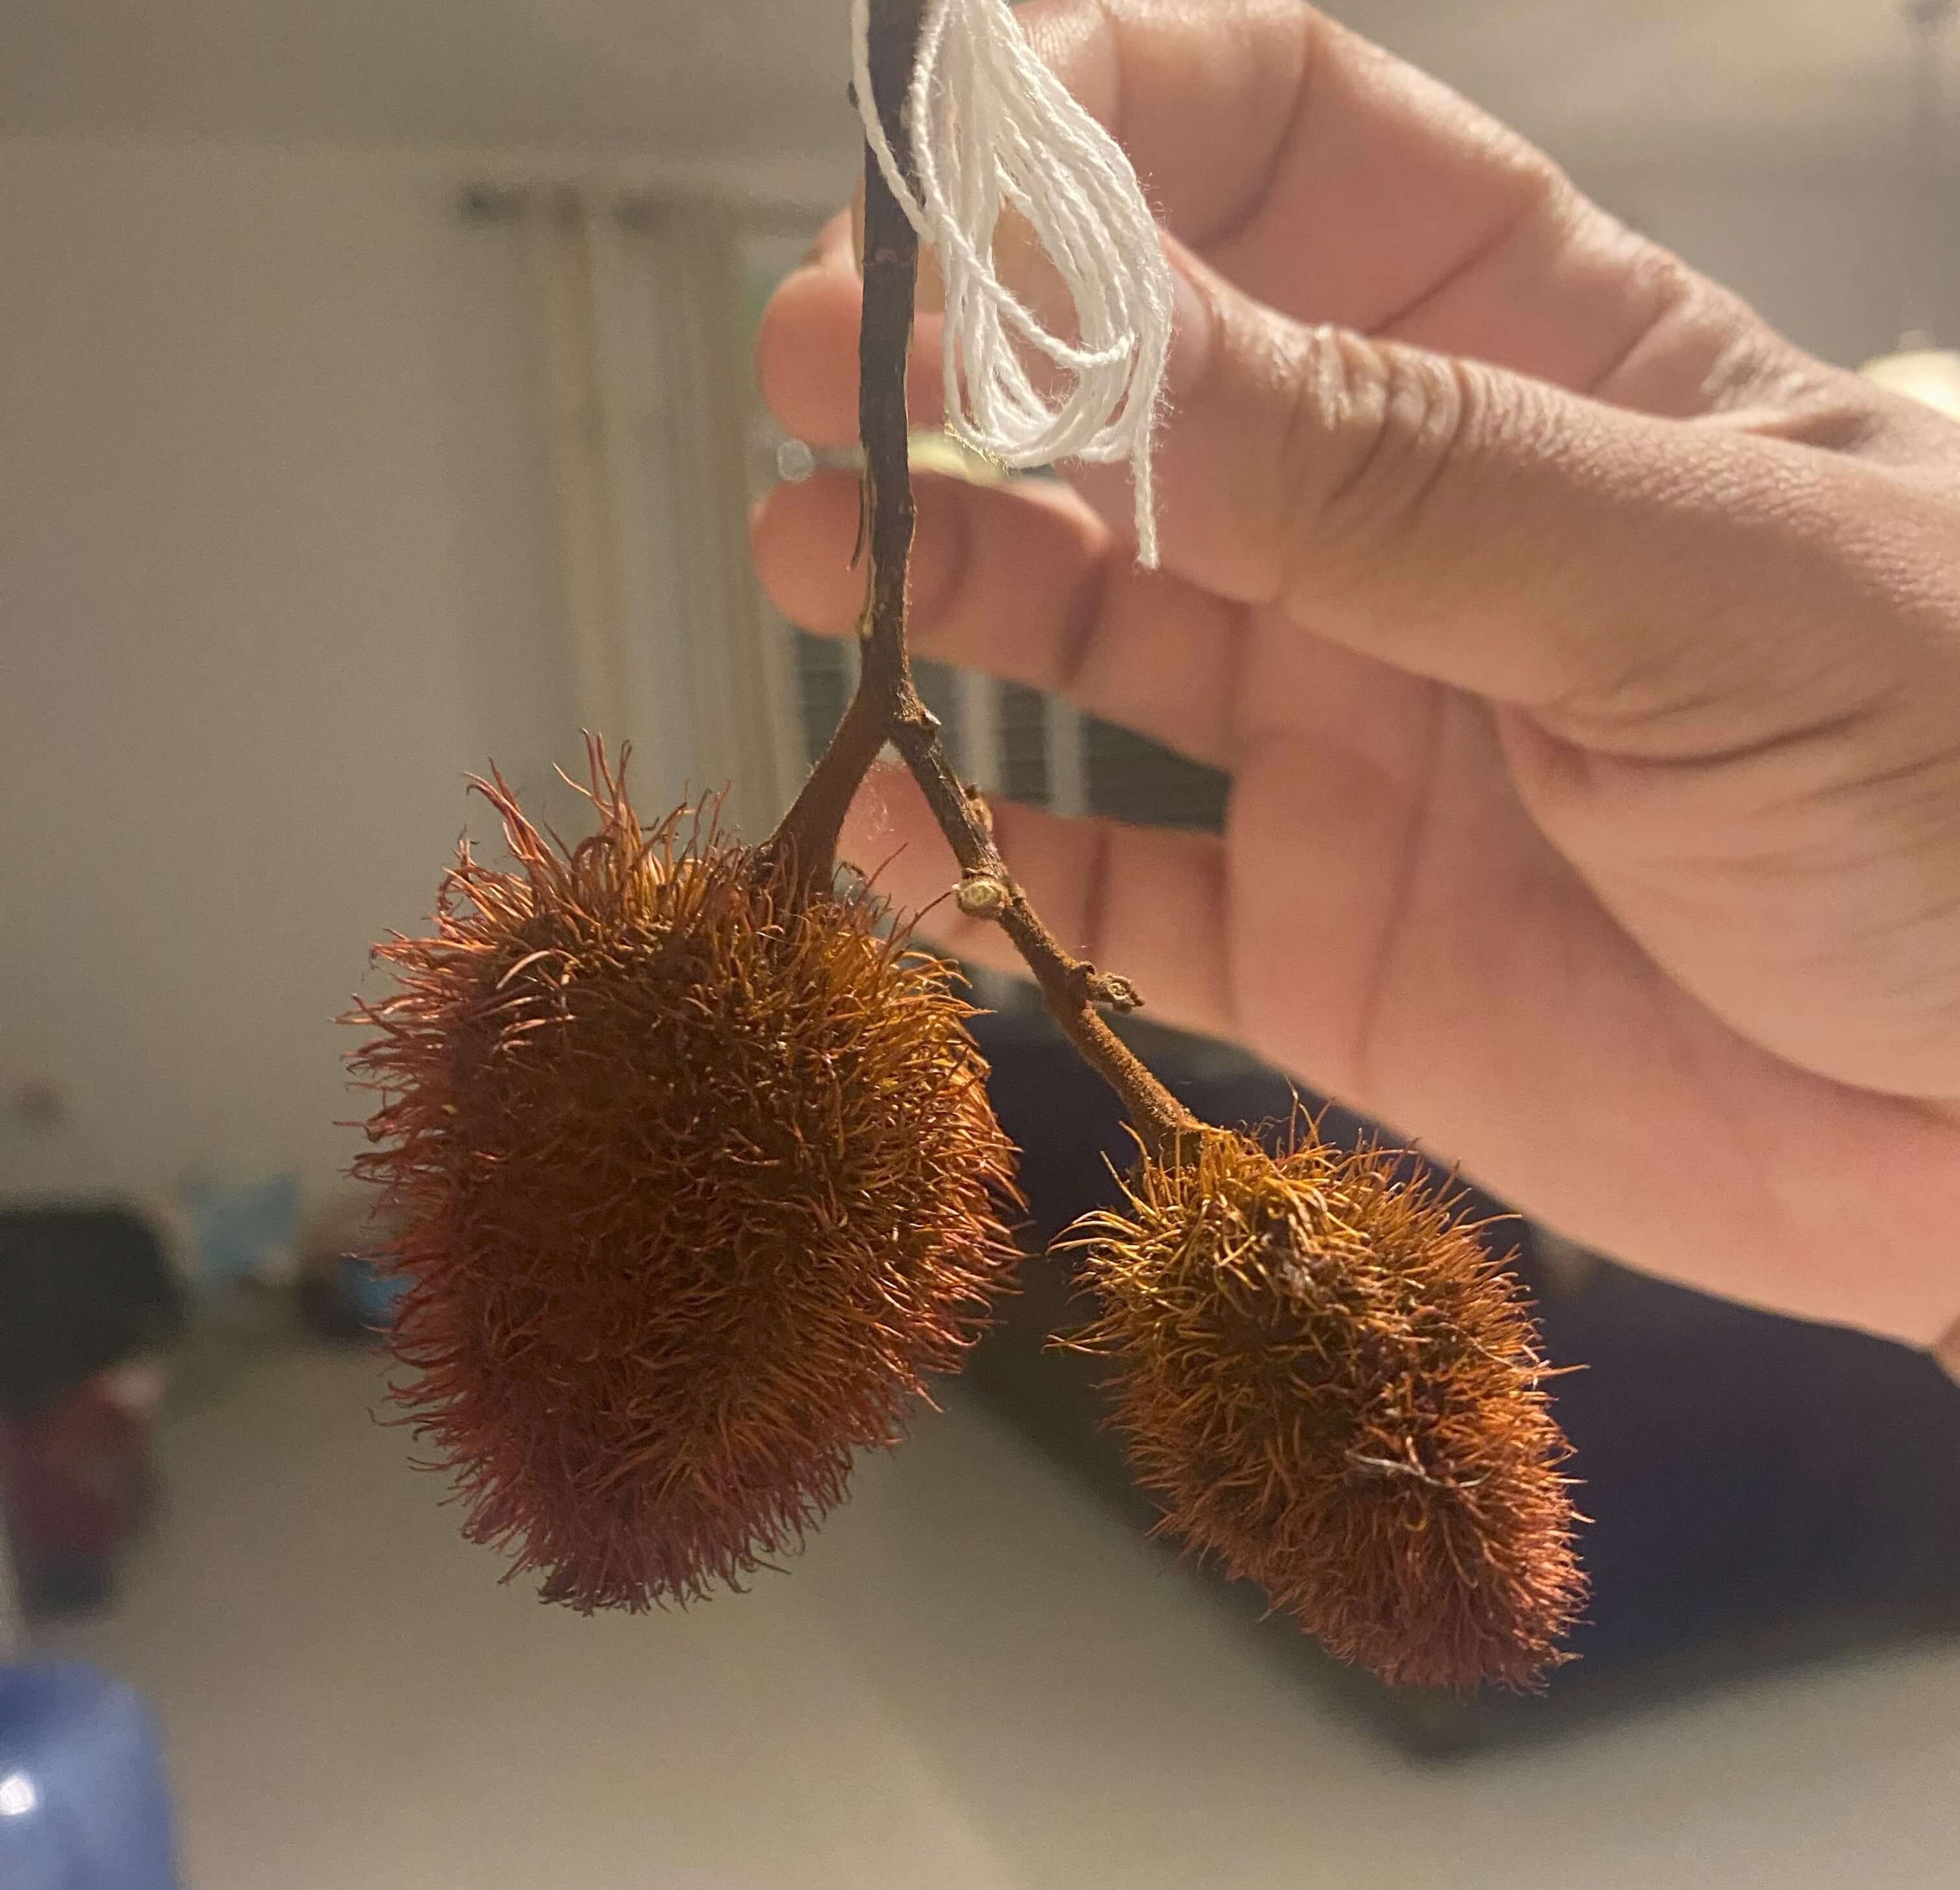
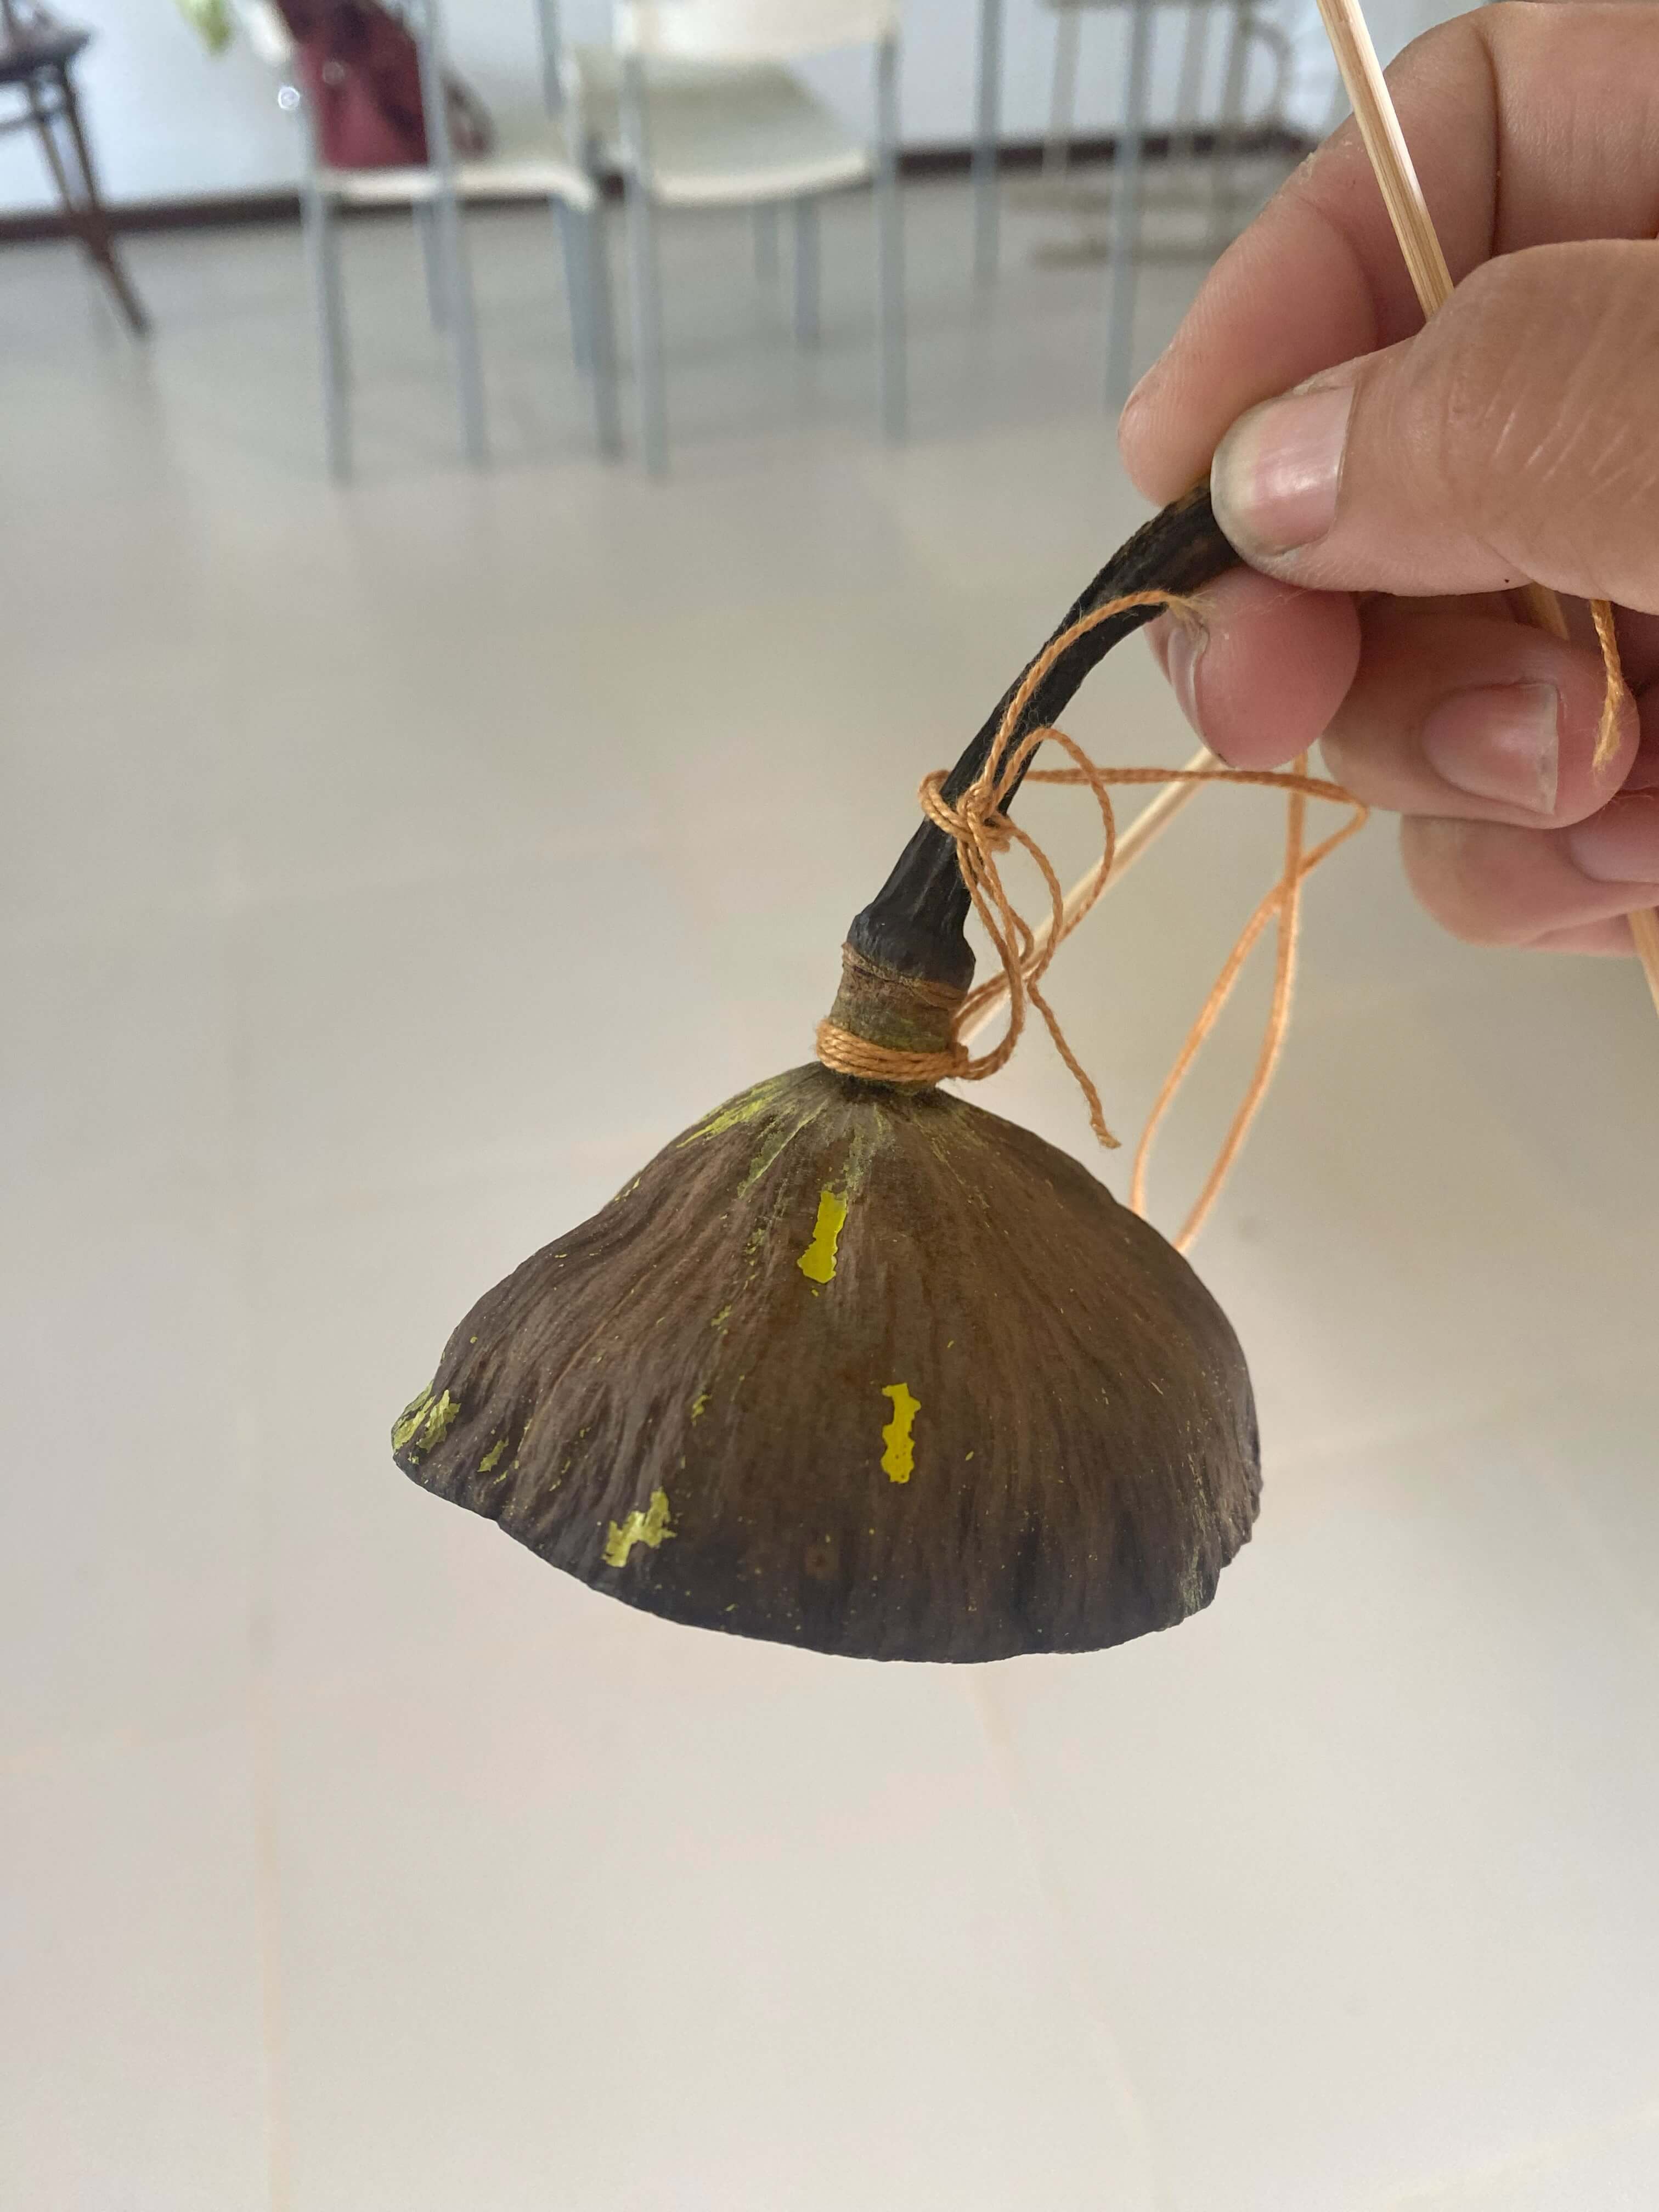
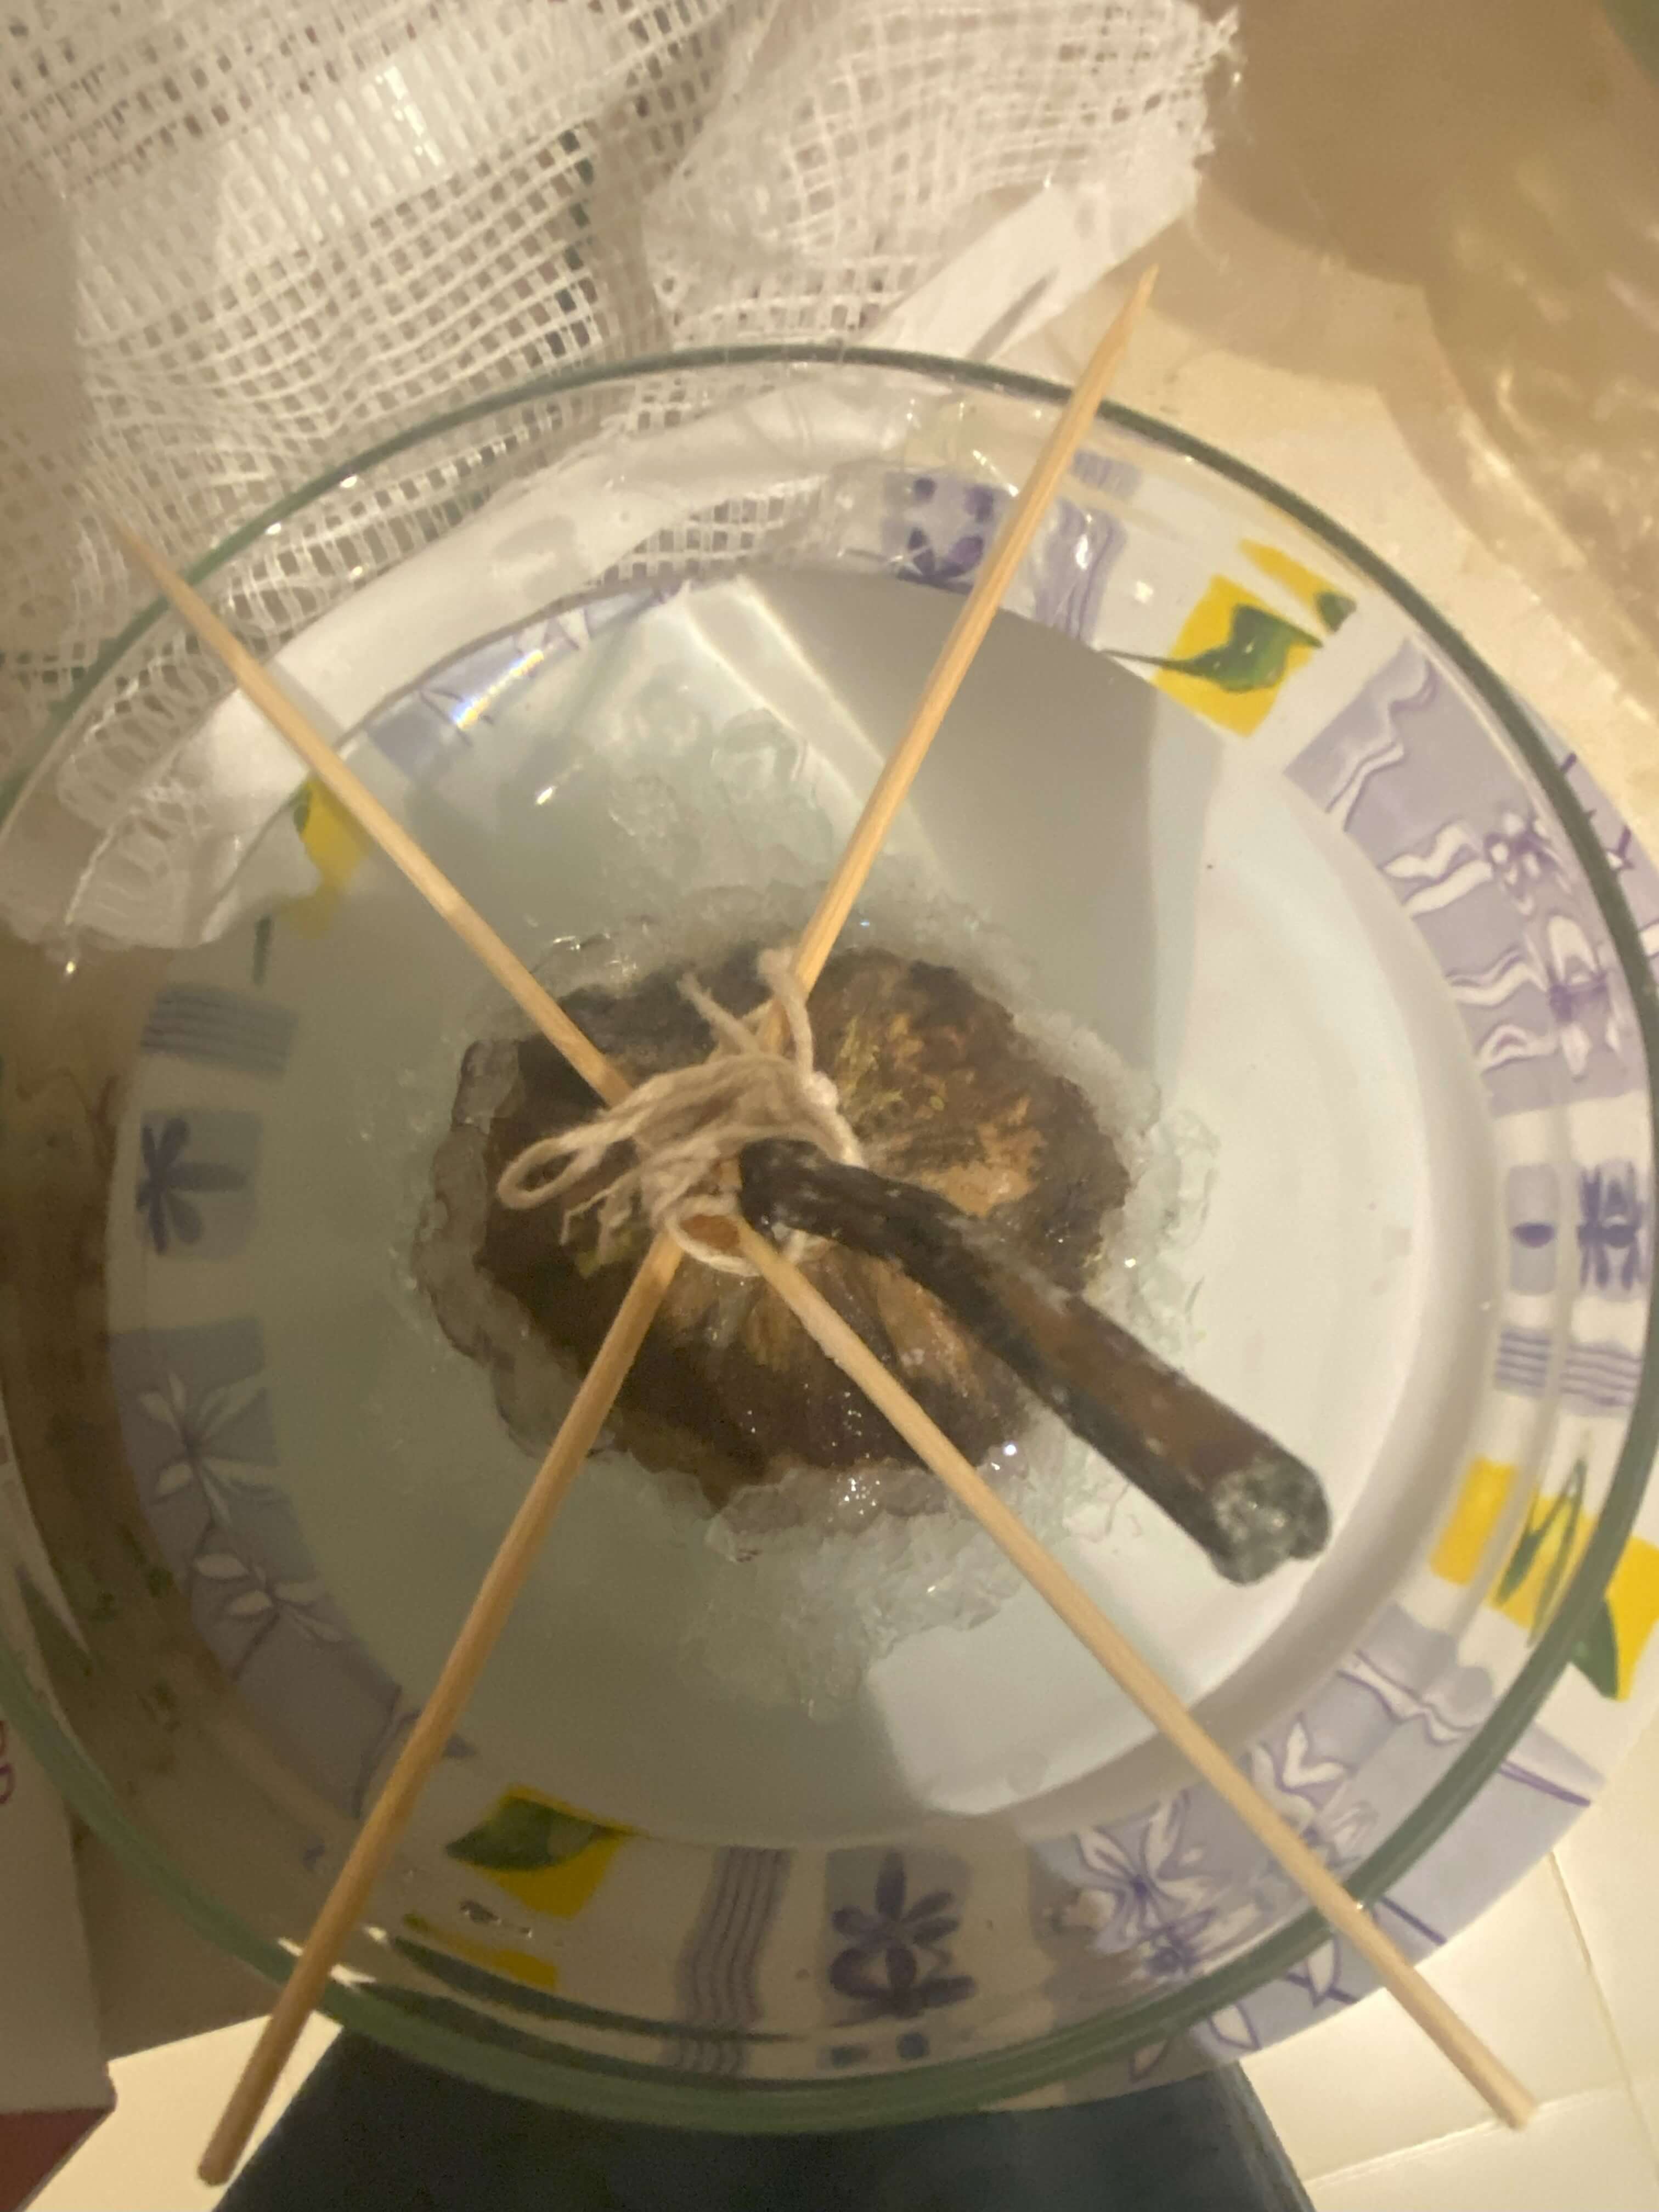
A Koesoewe Annatto pod
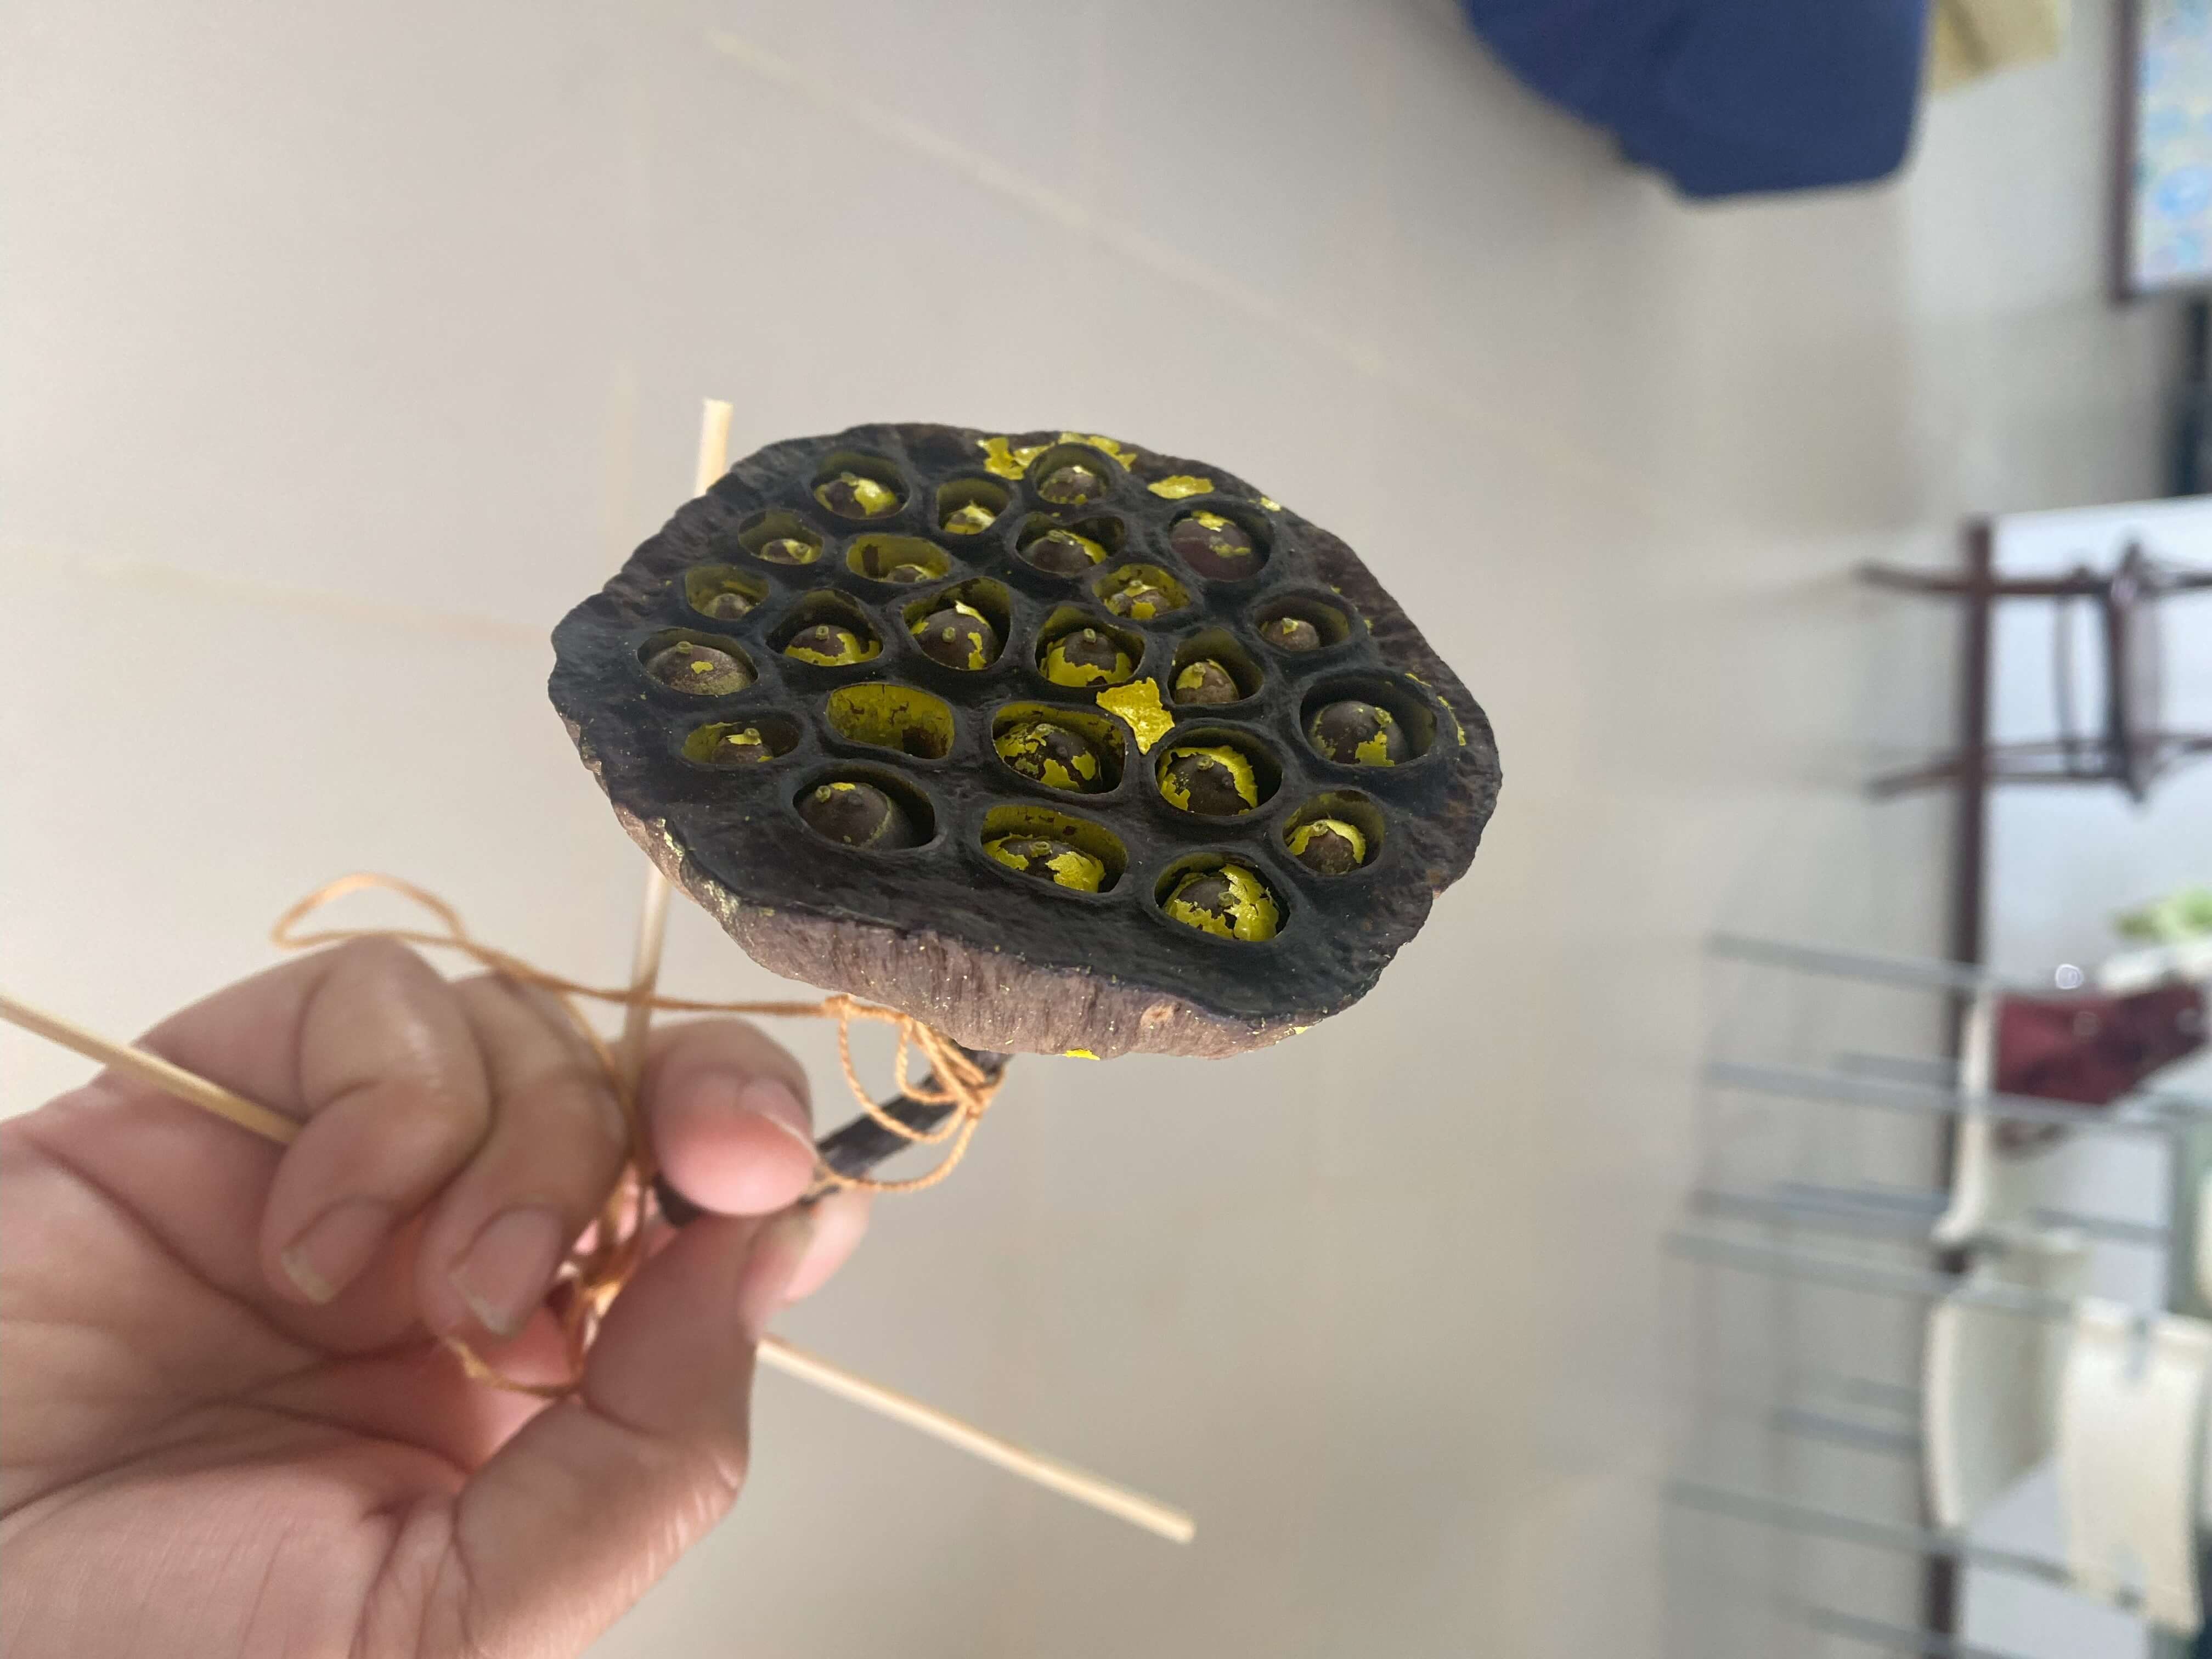
A waterlily seed pod
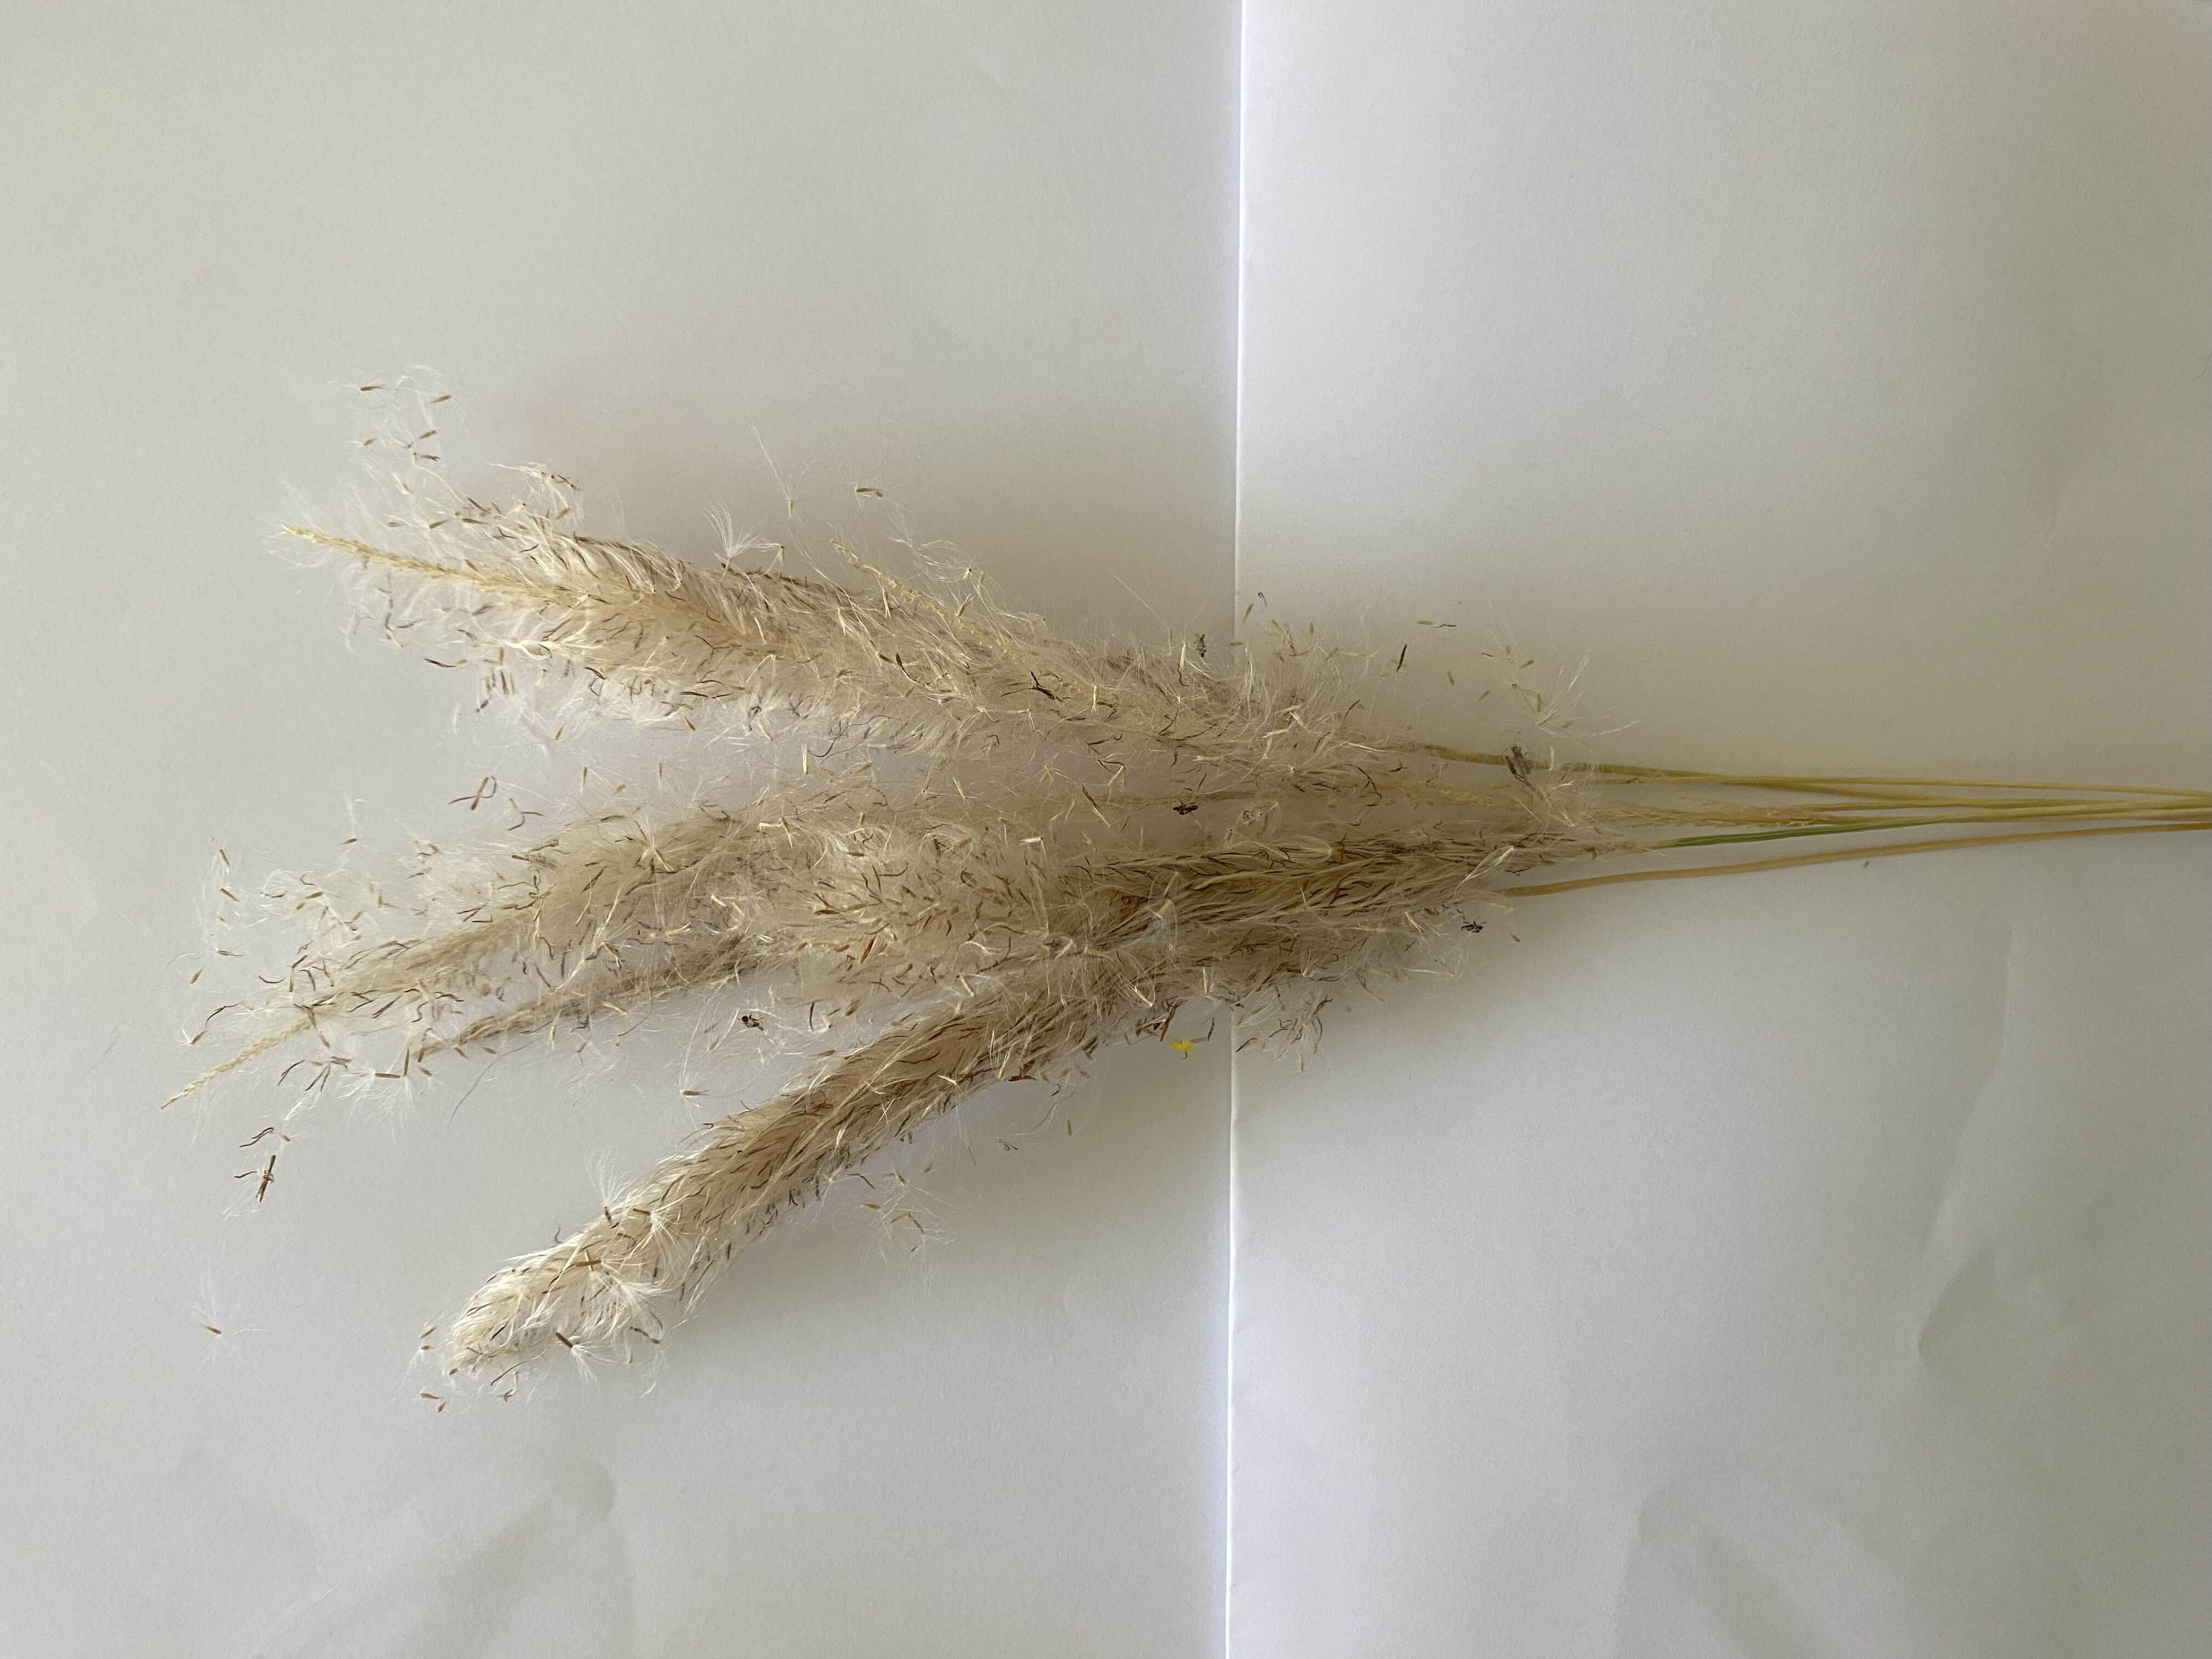
A featherlike grass that literally grows every where, I'll look up the name
Tools and additional materials
Apart from these materials I made sure I had the metal pot, wooden spoon, cleaning agent (I used aceton but also regular washing detergent), cooking stove and several glass jars.
To hang your bedazzle object and keep it in place, you can use chopsticks, bamboo skeeuwersticks ( sate sticks), a piece of cotton yarn, plastictape, clothespin, rubberbands
Process and workflow
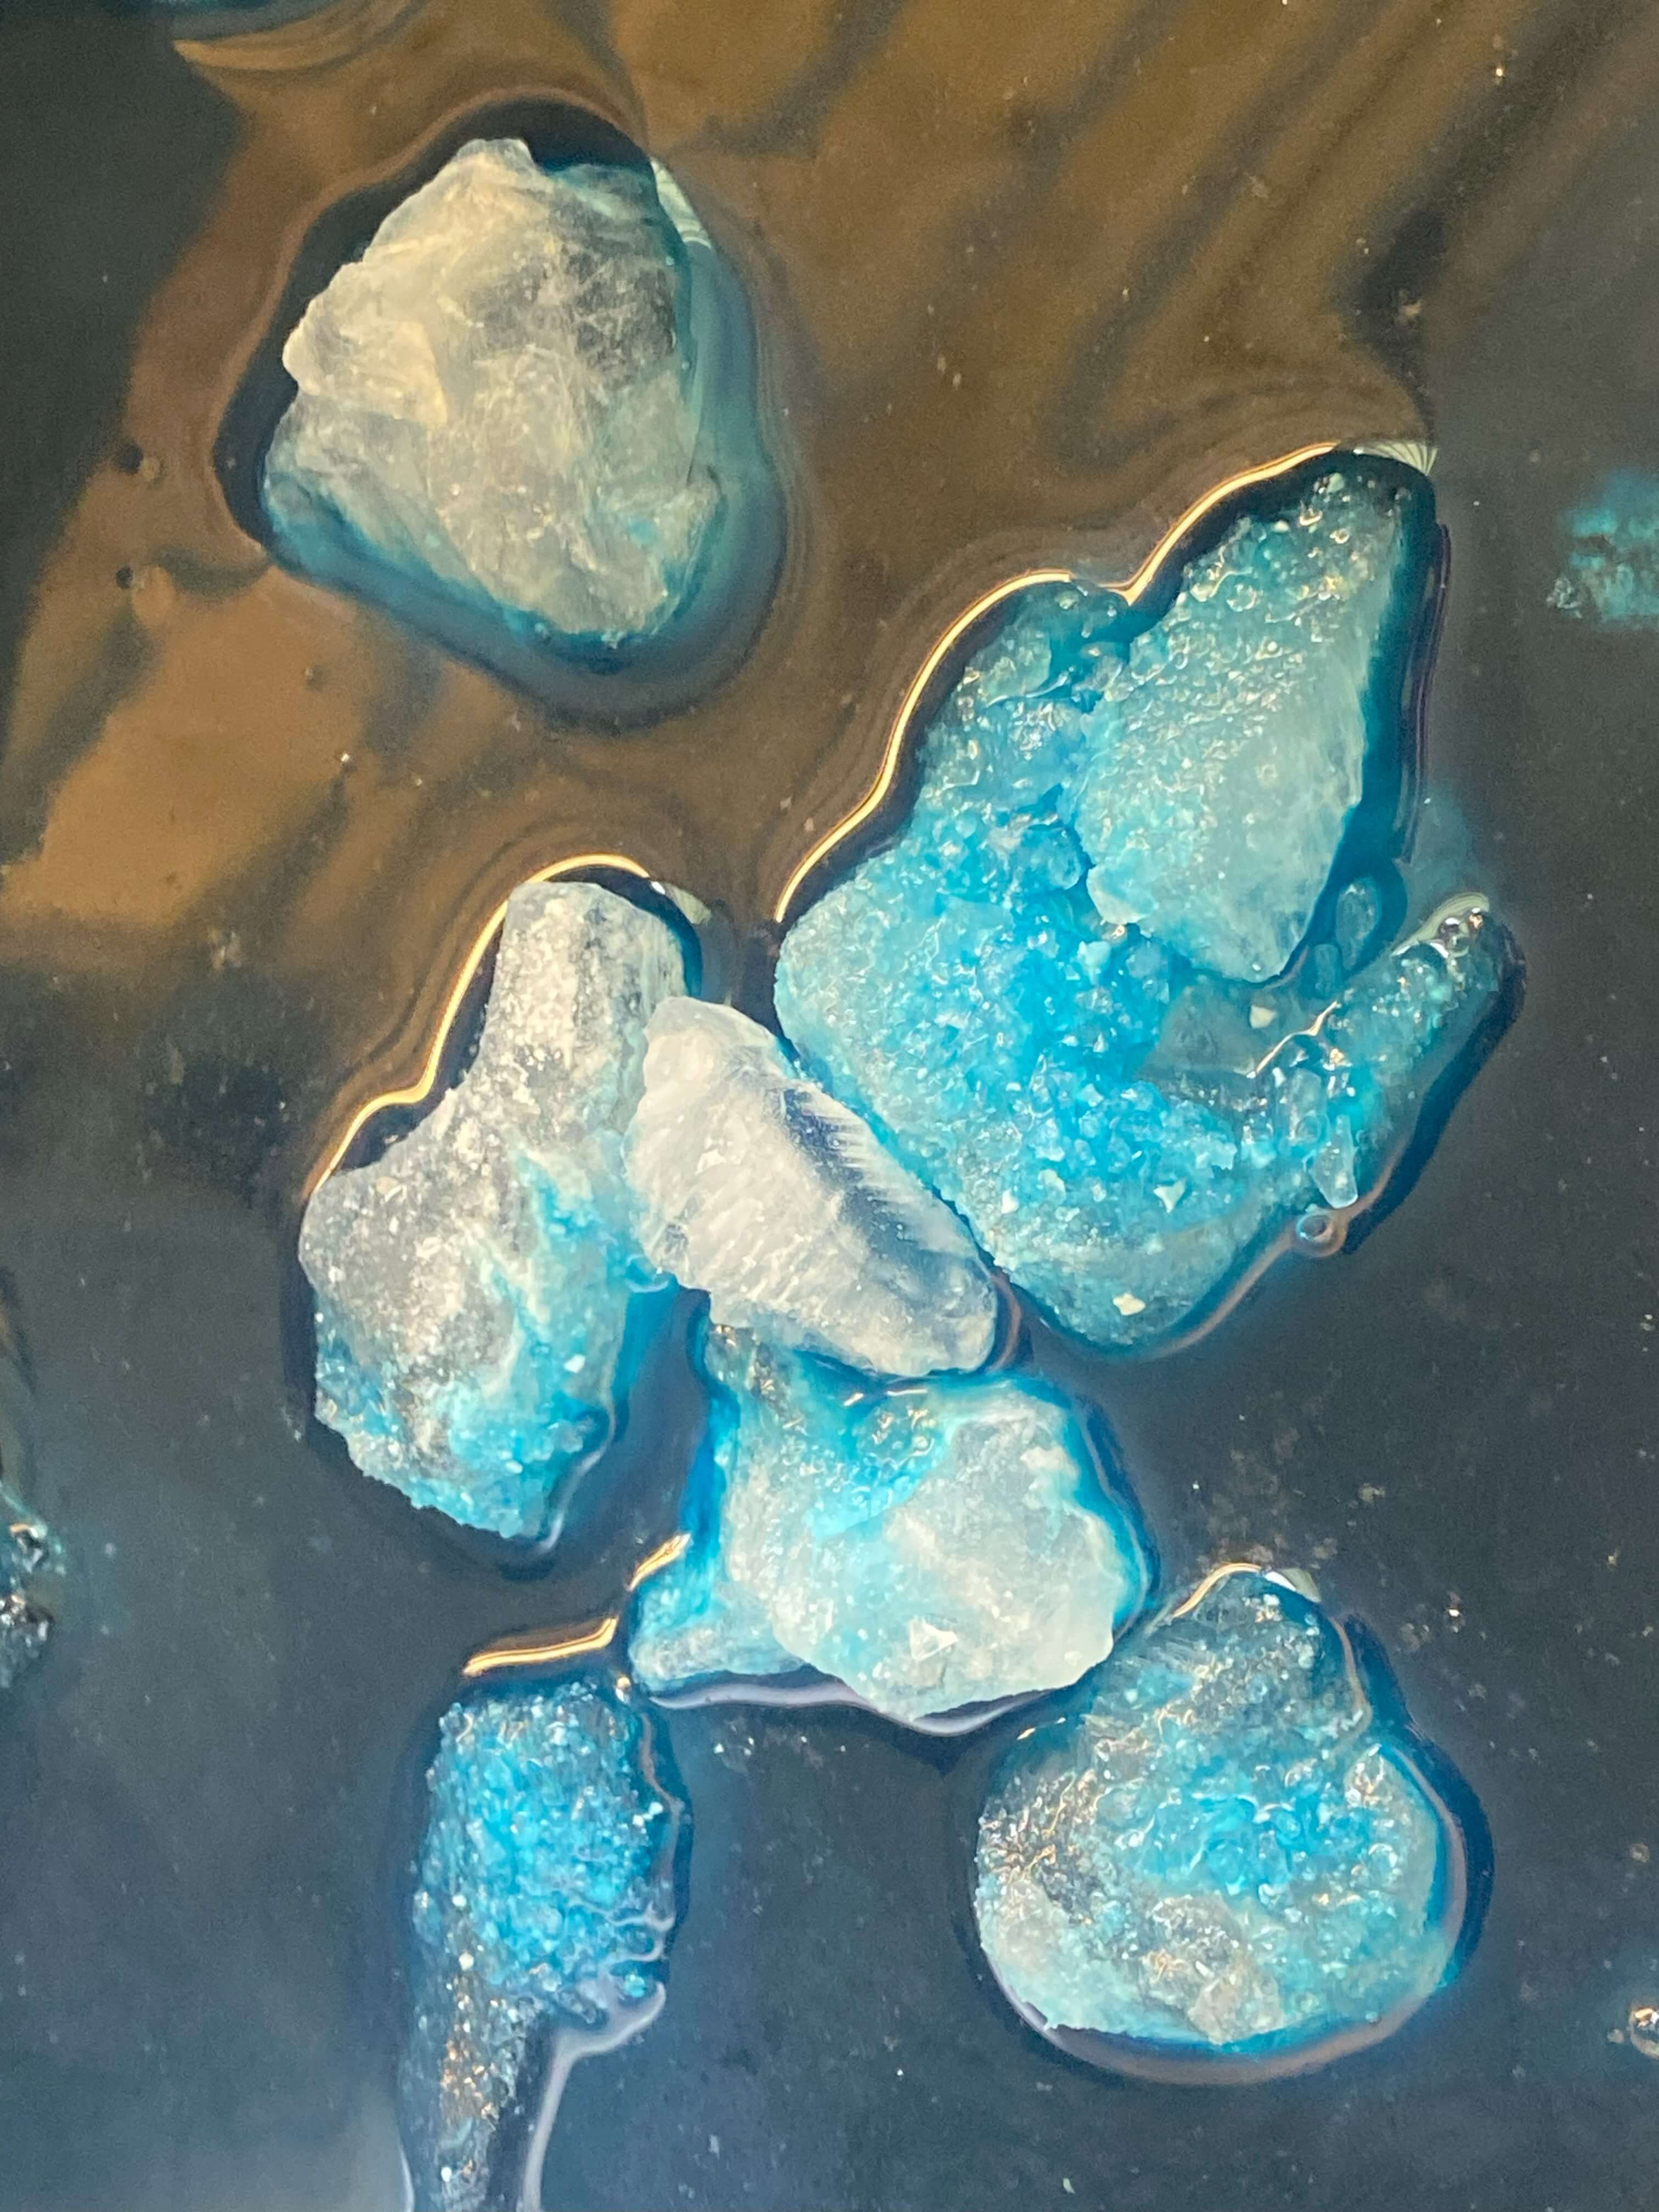
I decided to do some tests first both with the materials and with the christal salts. Regarding the christalsalts I chose Alum first and ended up working with alum to do everything else because I liked how the christals turned out.
Recipe
I used the recipe as instructed in the lecture: 1 liter of fitered wellwater 400 grams of Alum
I also added food coloring but apart from a slightly blueish glow, I did not see an extra effect in the endresult so I returned to working with no added color.
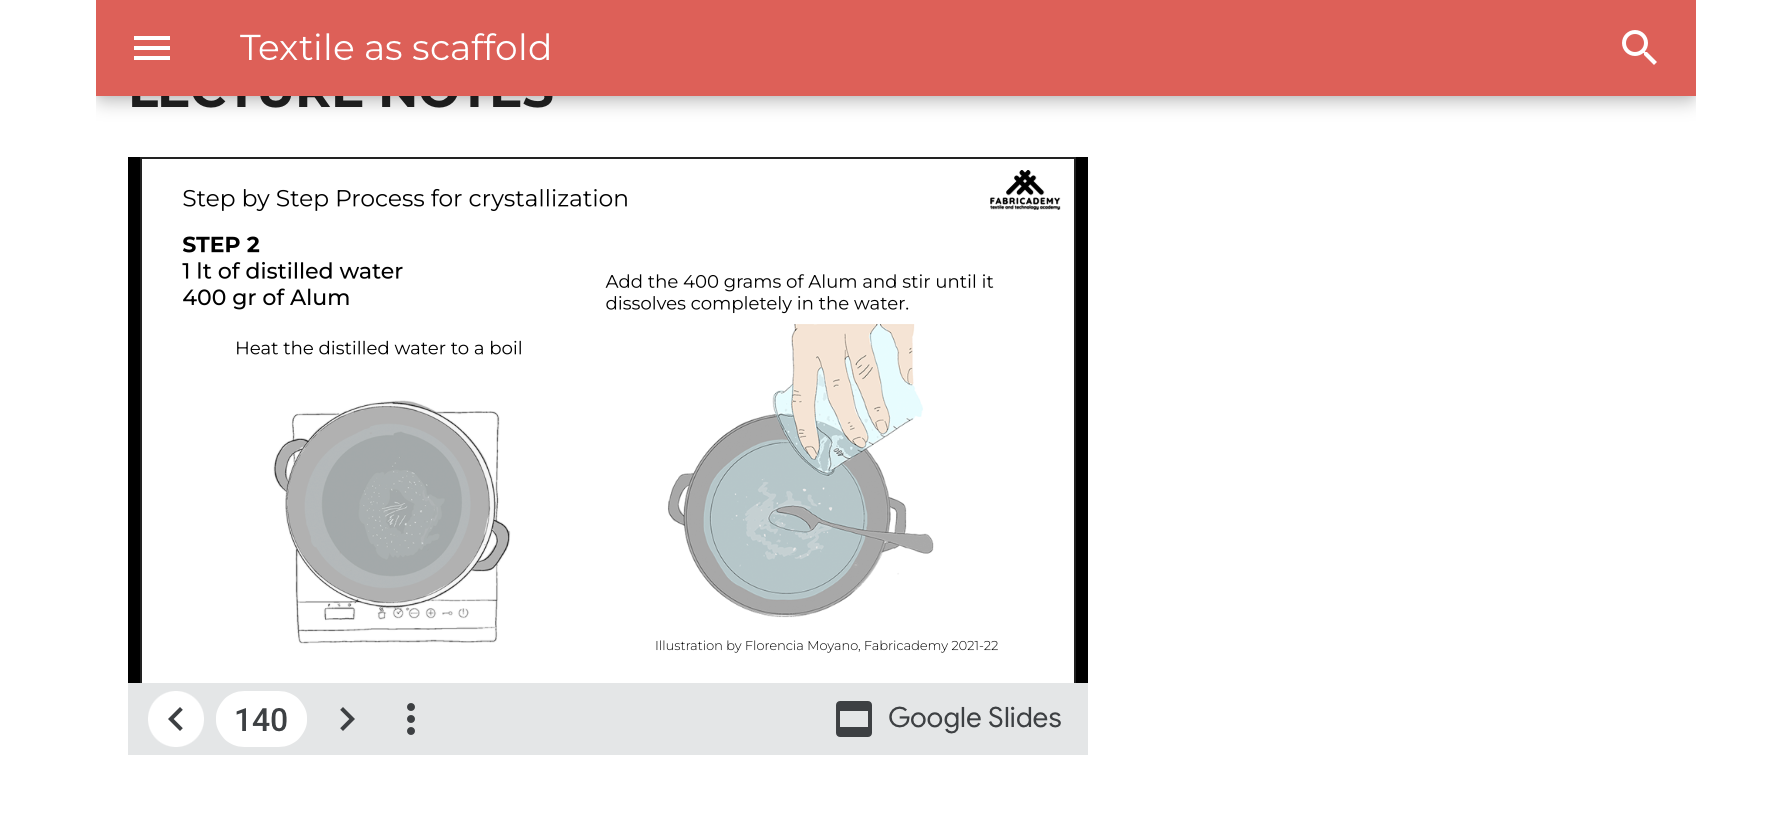
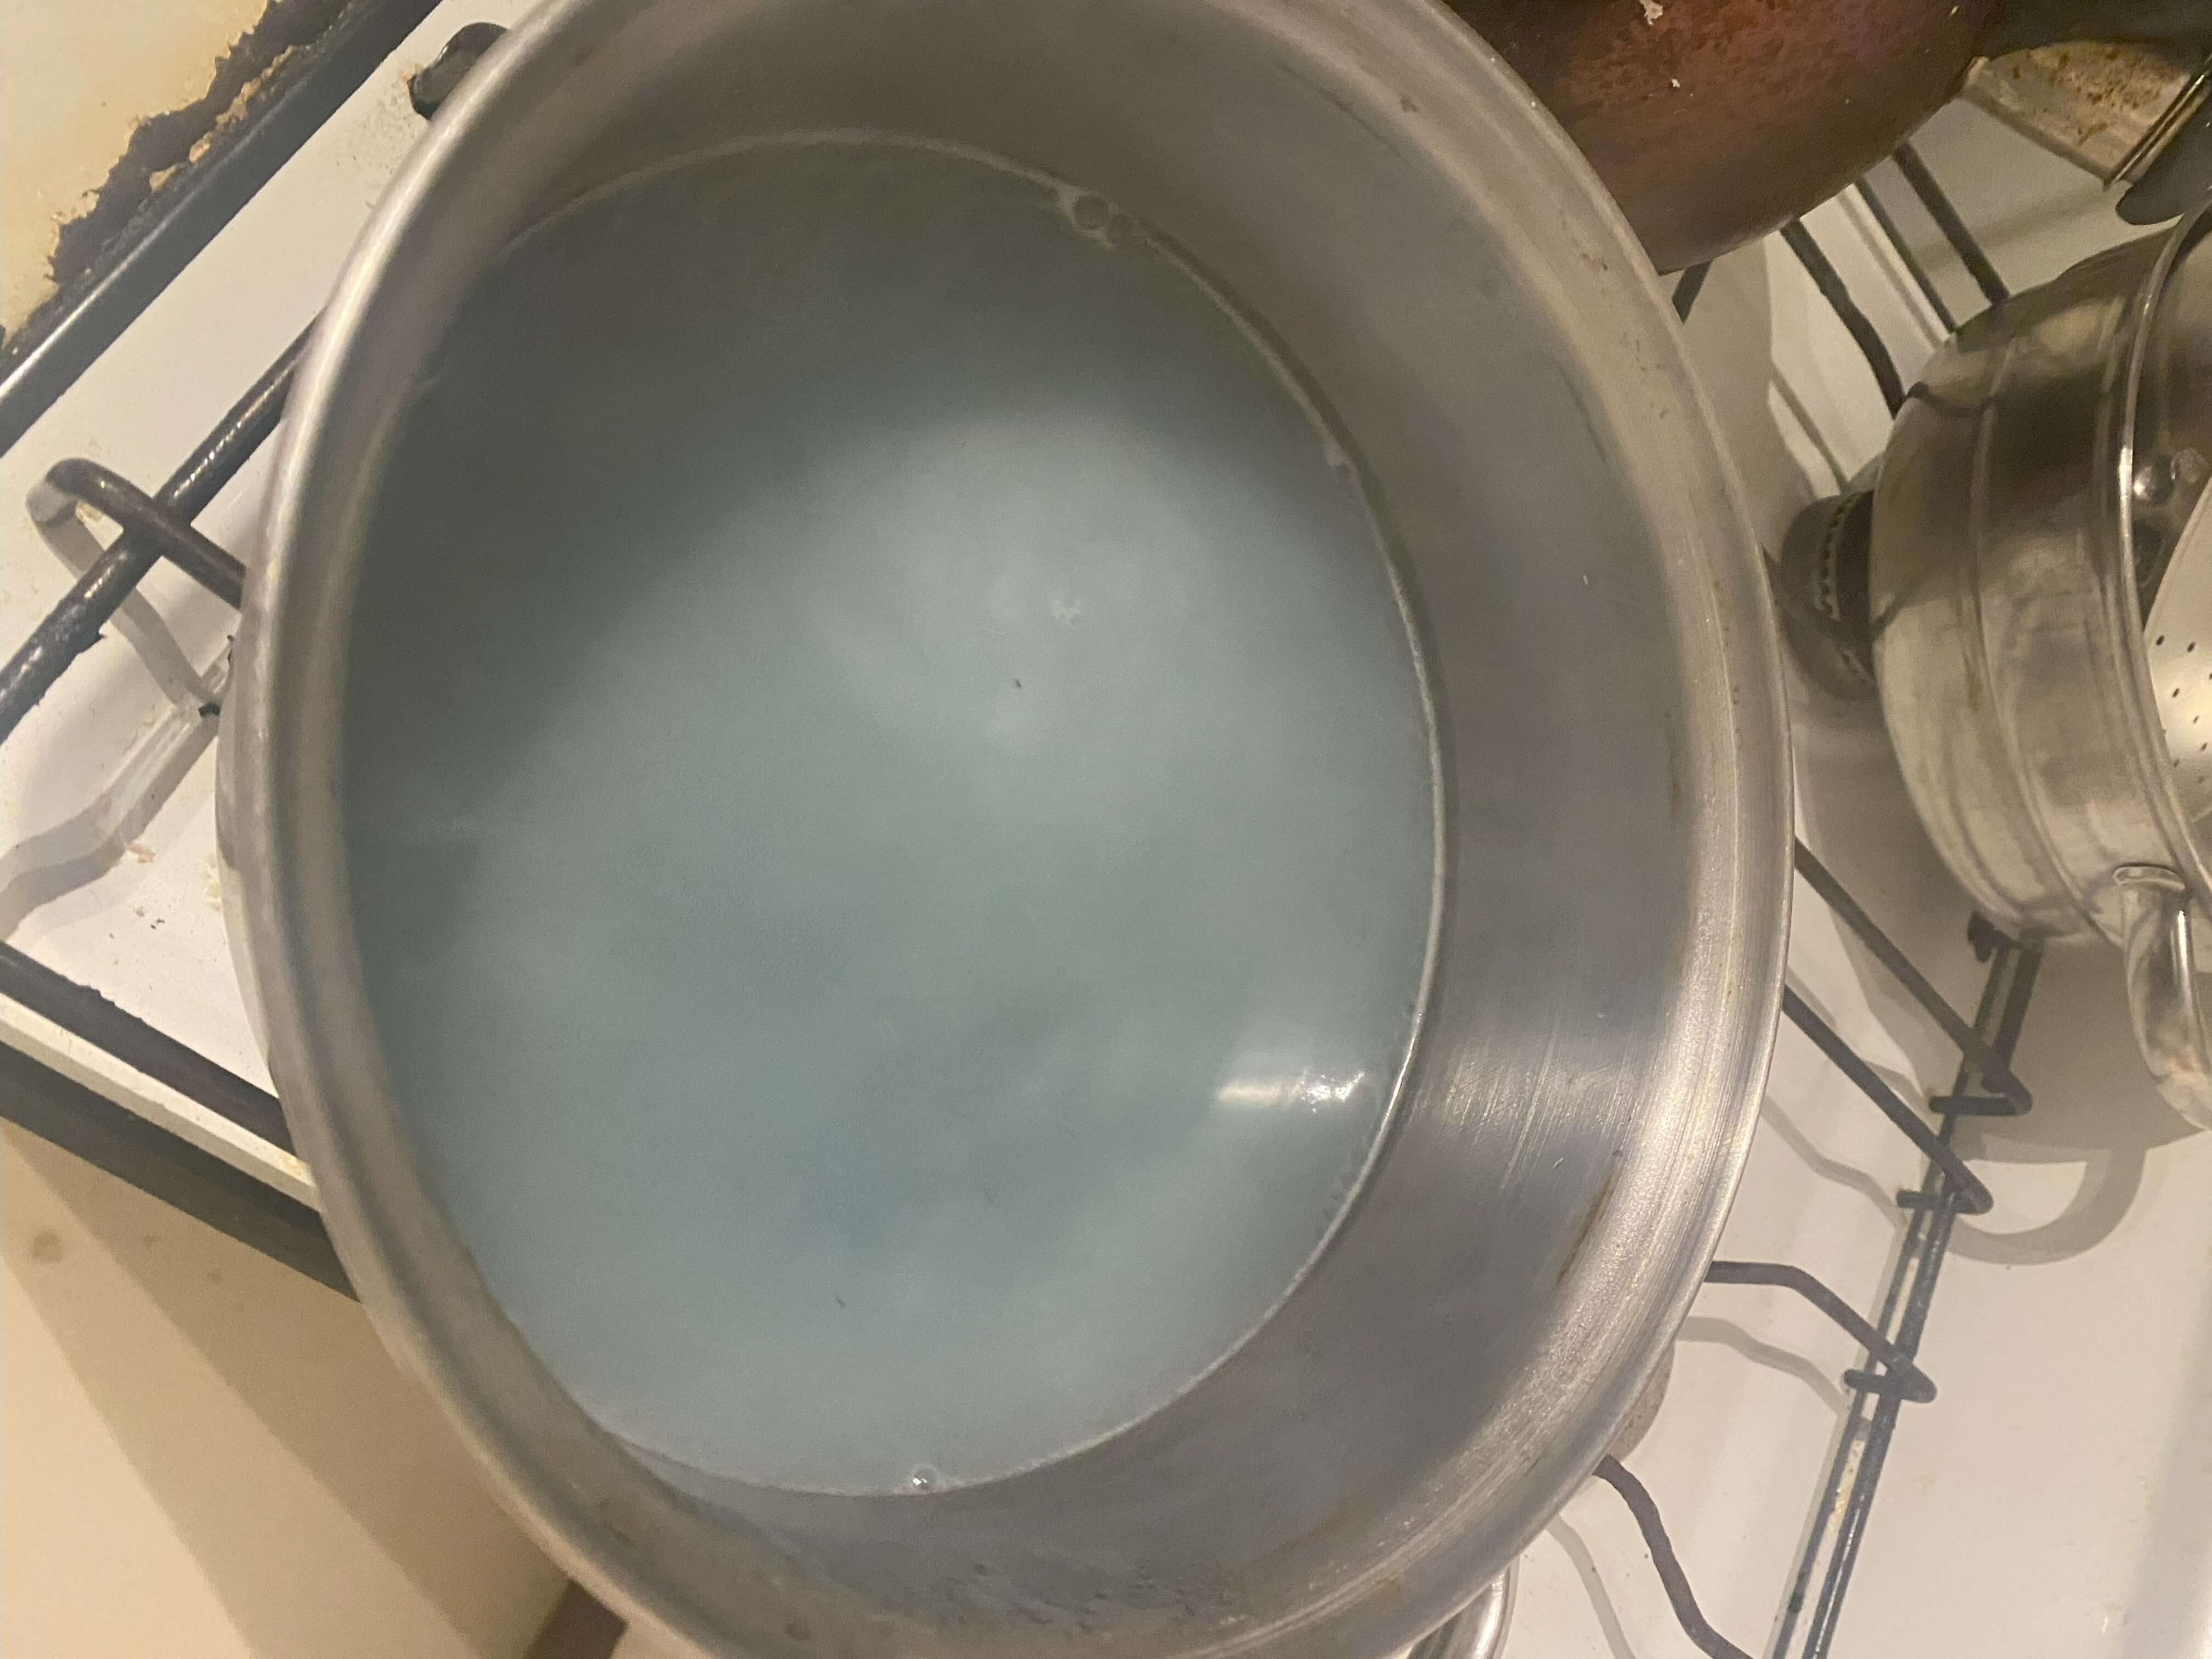
Cooking Christals
I brought the water (1 liter) to a boil I added the Alum gradually starting with 250 grams and adding another 50each time I noticed everything dissolved.
Choosing the right glass jar
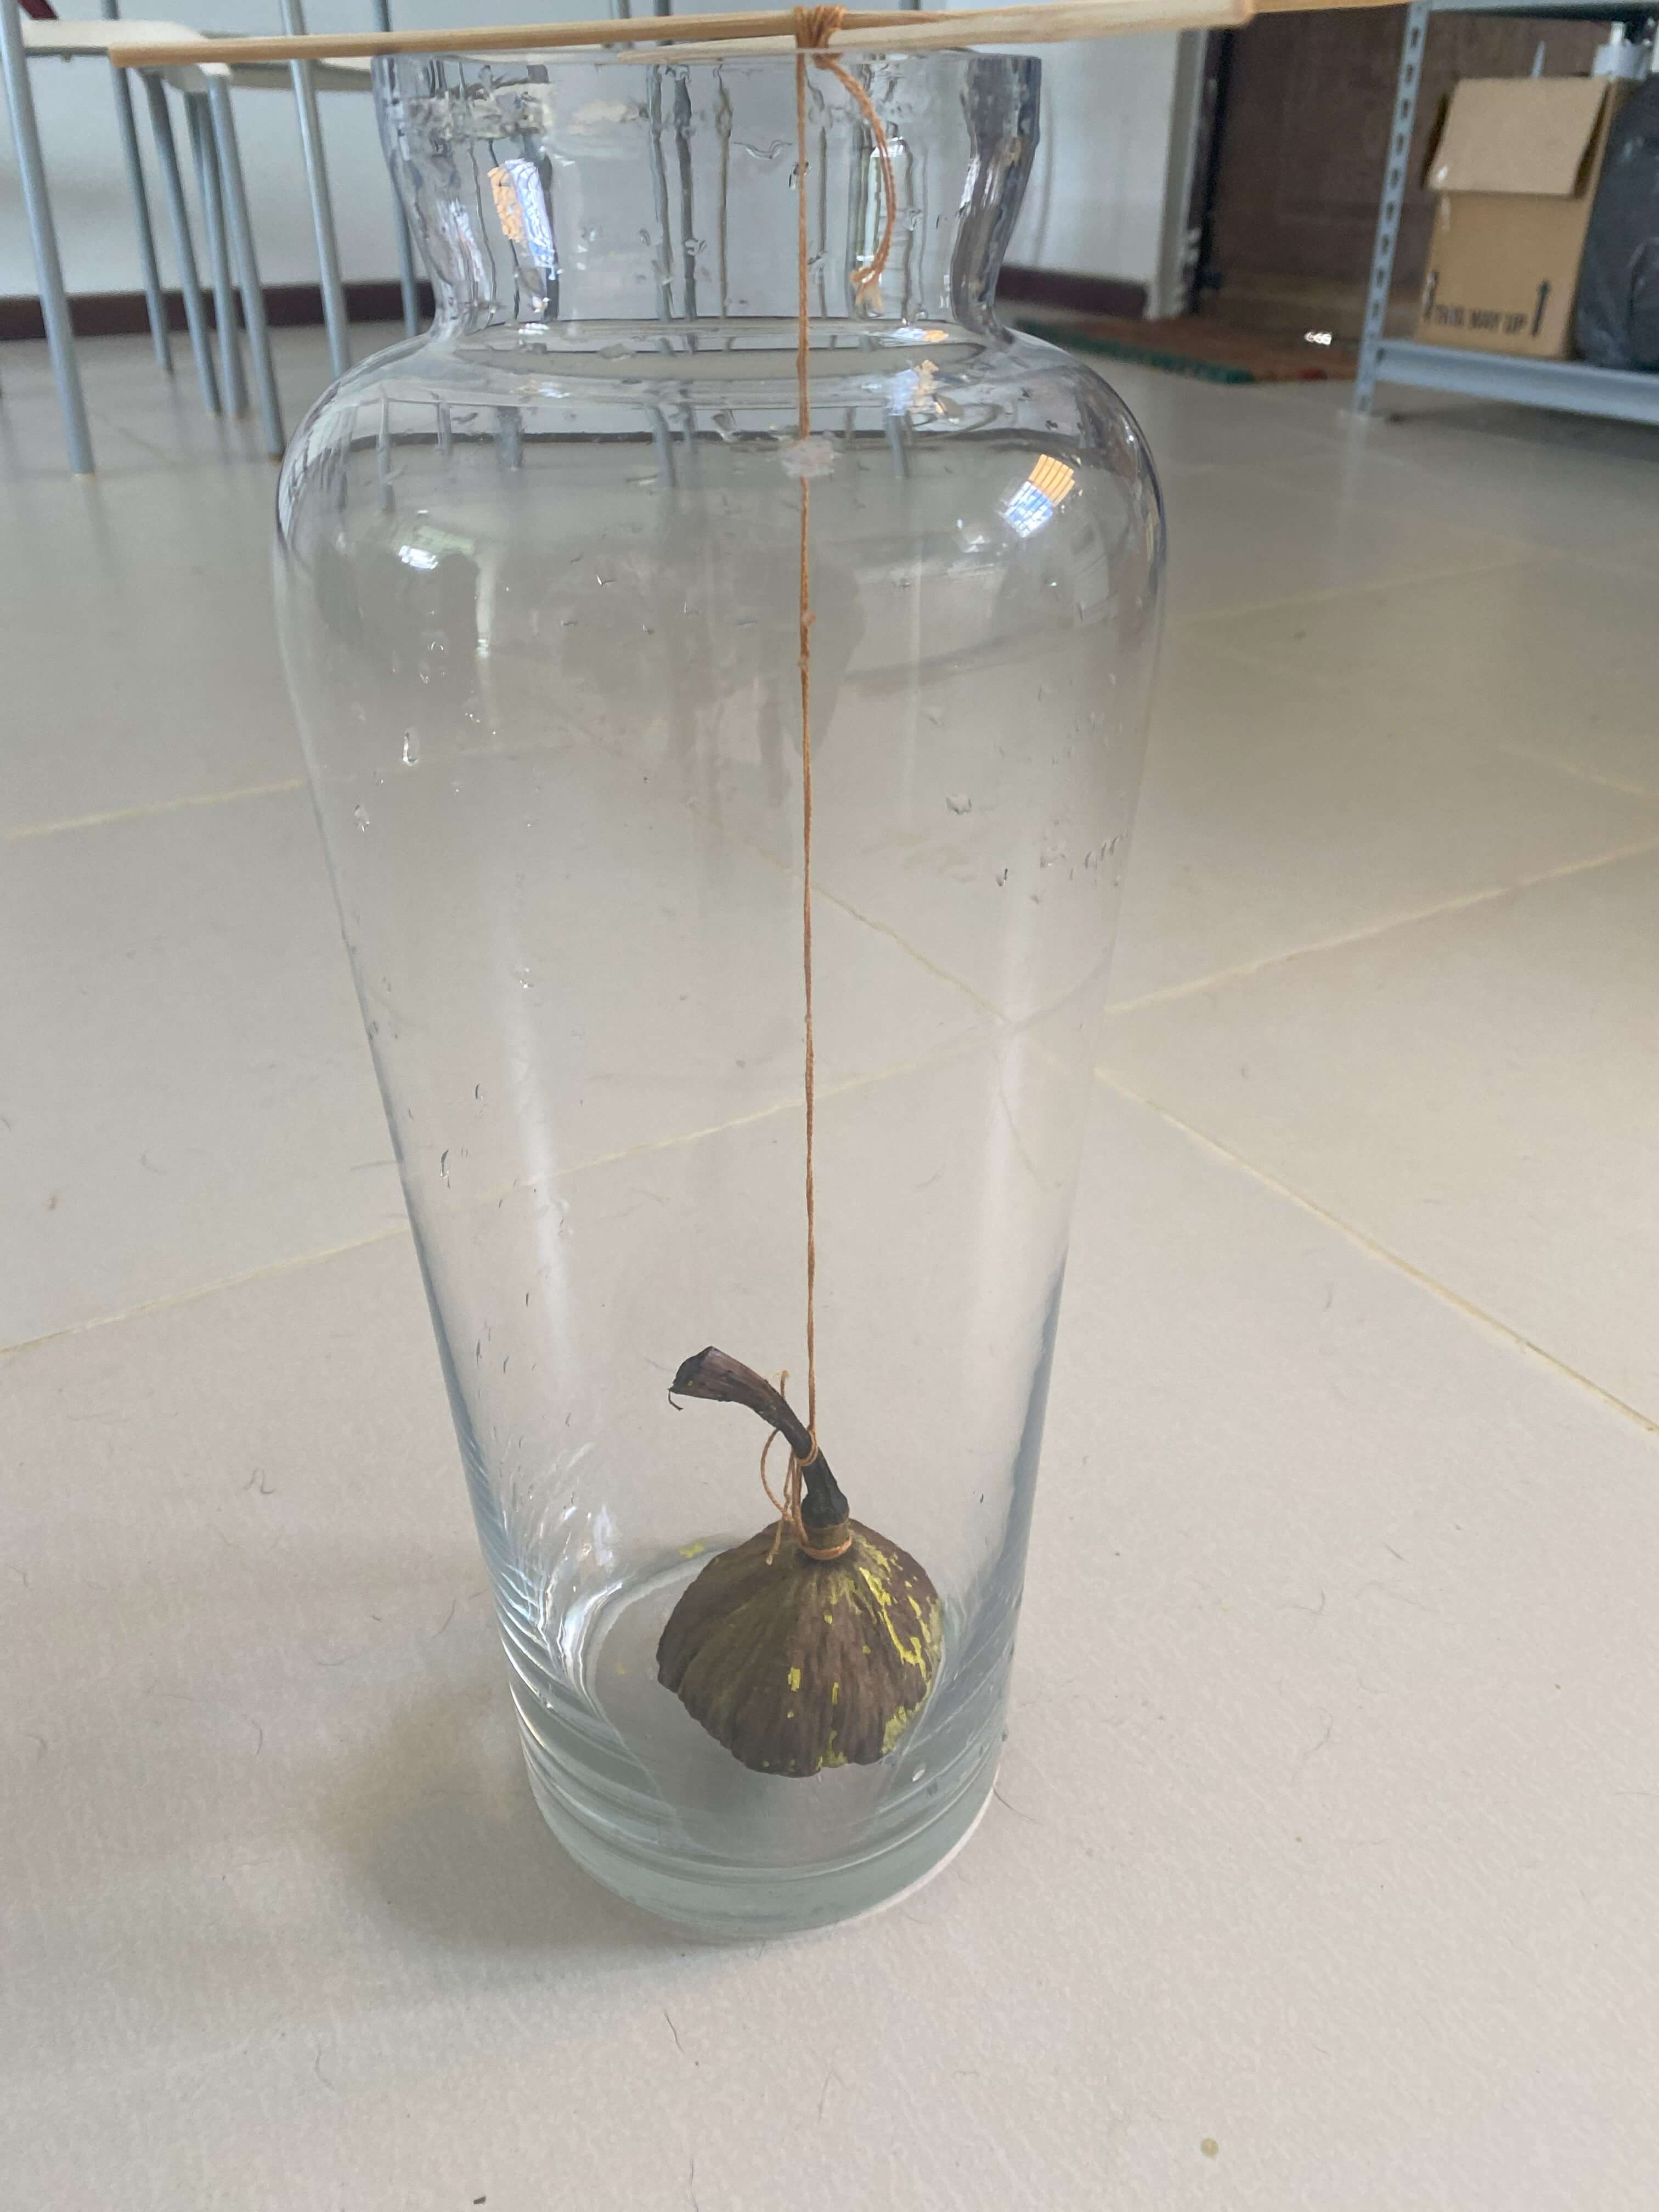
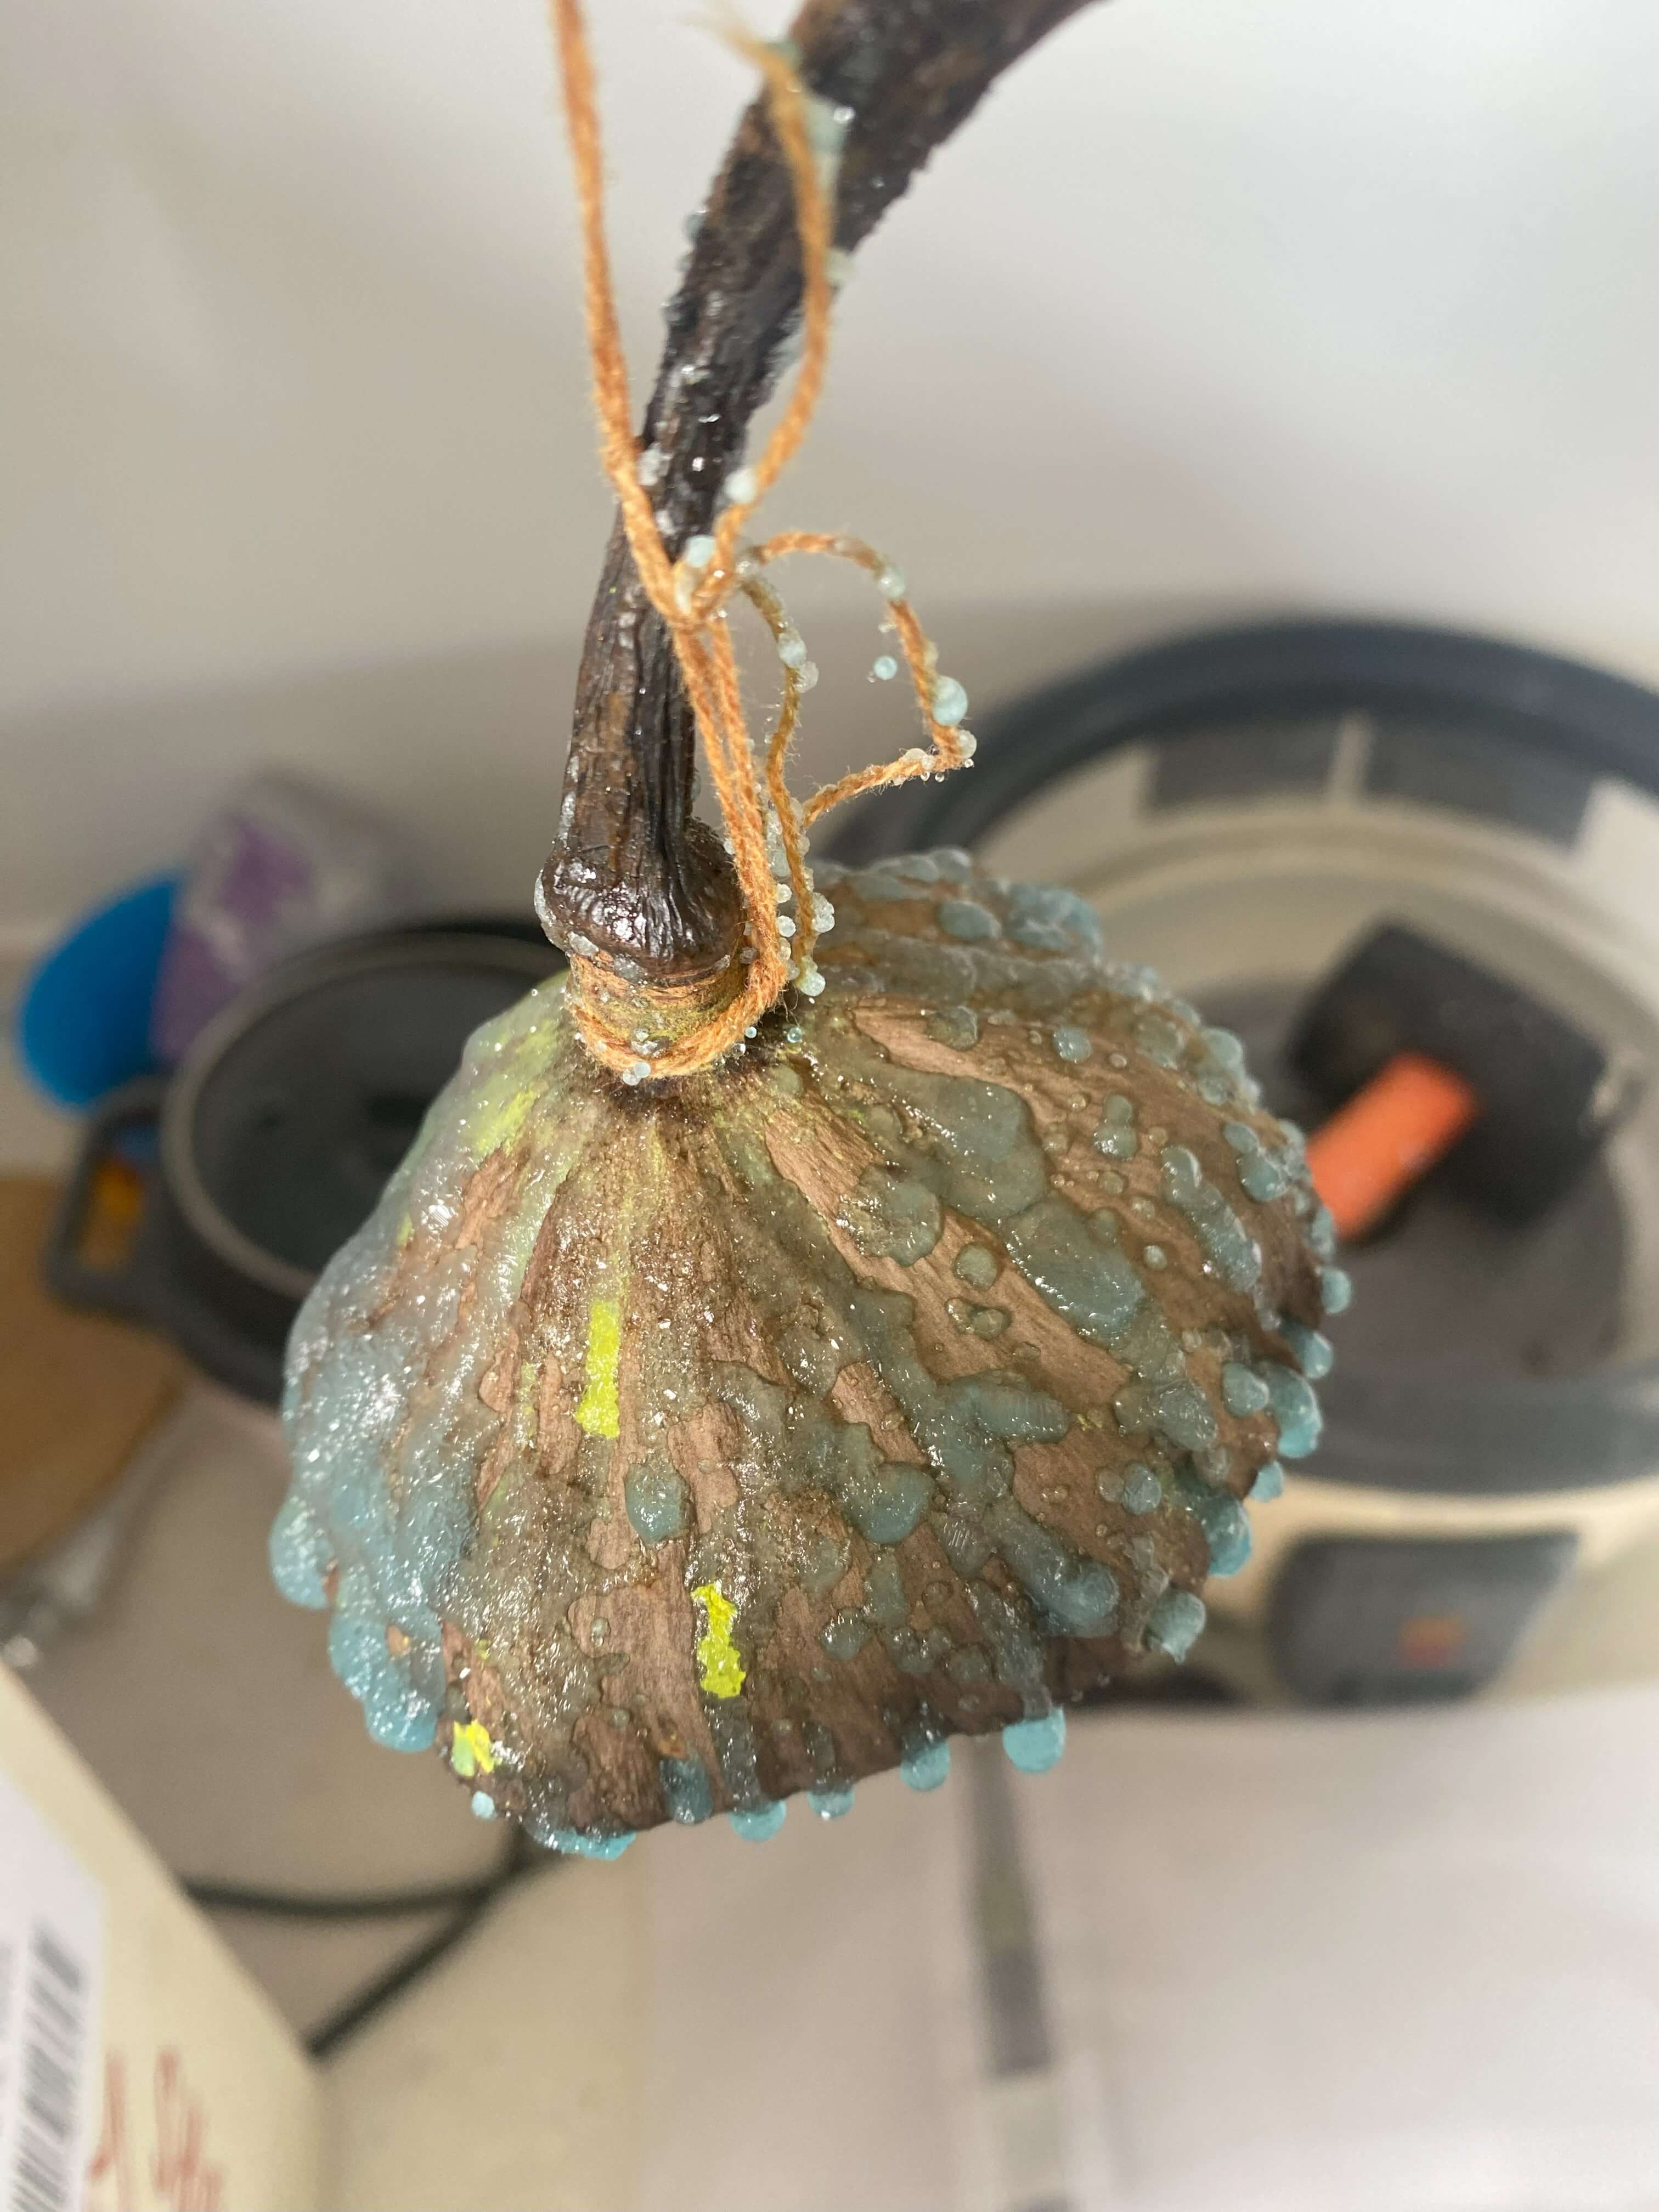
Before pouring over the christal bath into the glass jar, I found it essential to choose which one is right for what you want to bedazzle. If it is something wide like the waterlily seedpod or something tall like the grass (feather like) or a flat item like pieces of coconut weave once I cut forms. It's good to have different glassjars to choose from. If there are a few smaller items, the bath water can be divided and poured into different jars. In choosing the right jar, hang the object to the level you want it to be above the bottom of the pot.
In my case with the waterlily pod, I didnt have a good size jar at first and ended up using a much bigger vase the first time. It was not easy to adjust the measurements like height which in part resulted in less christal growth. The second try I had a bowl shaped jar, much better fitting to the form of the lily. The height was easier to adjust and the lily was closer to the bottom of the jar. As a result the christals looked alot better on that second try.
Compared results:
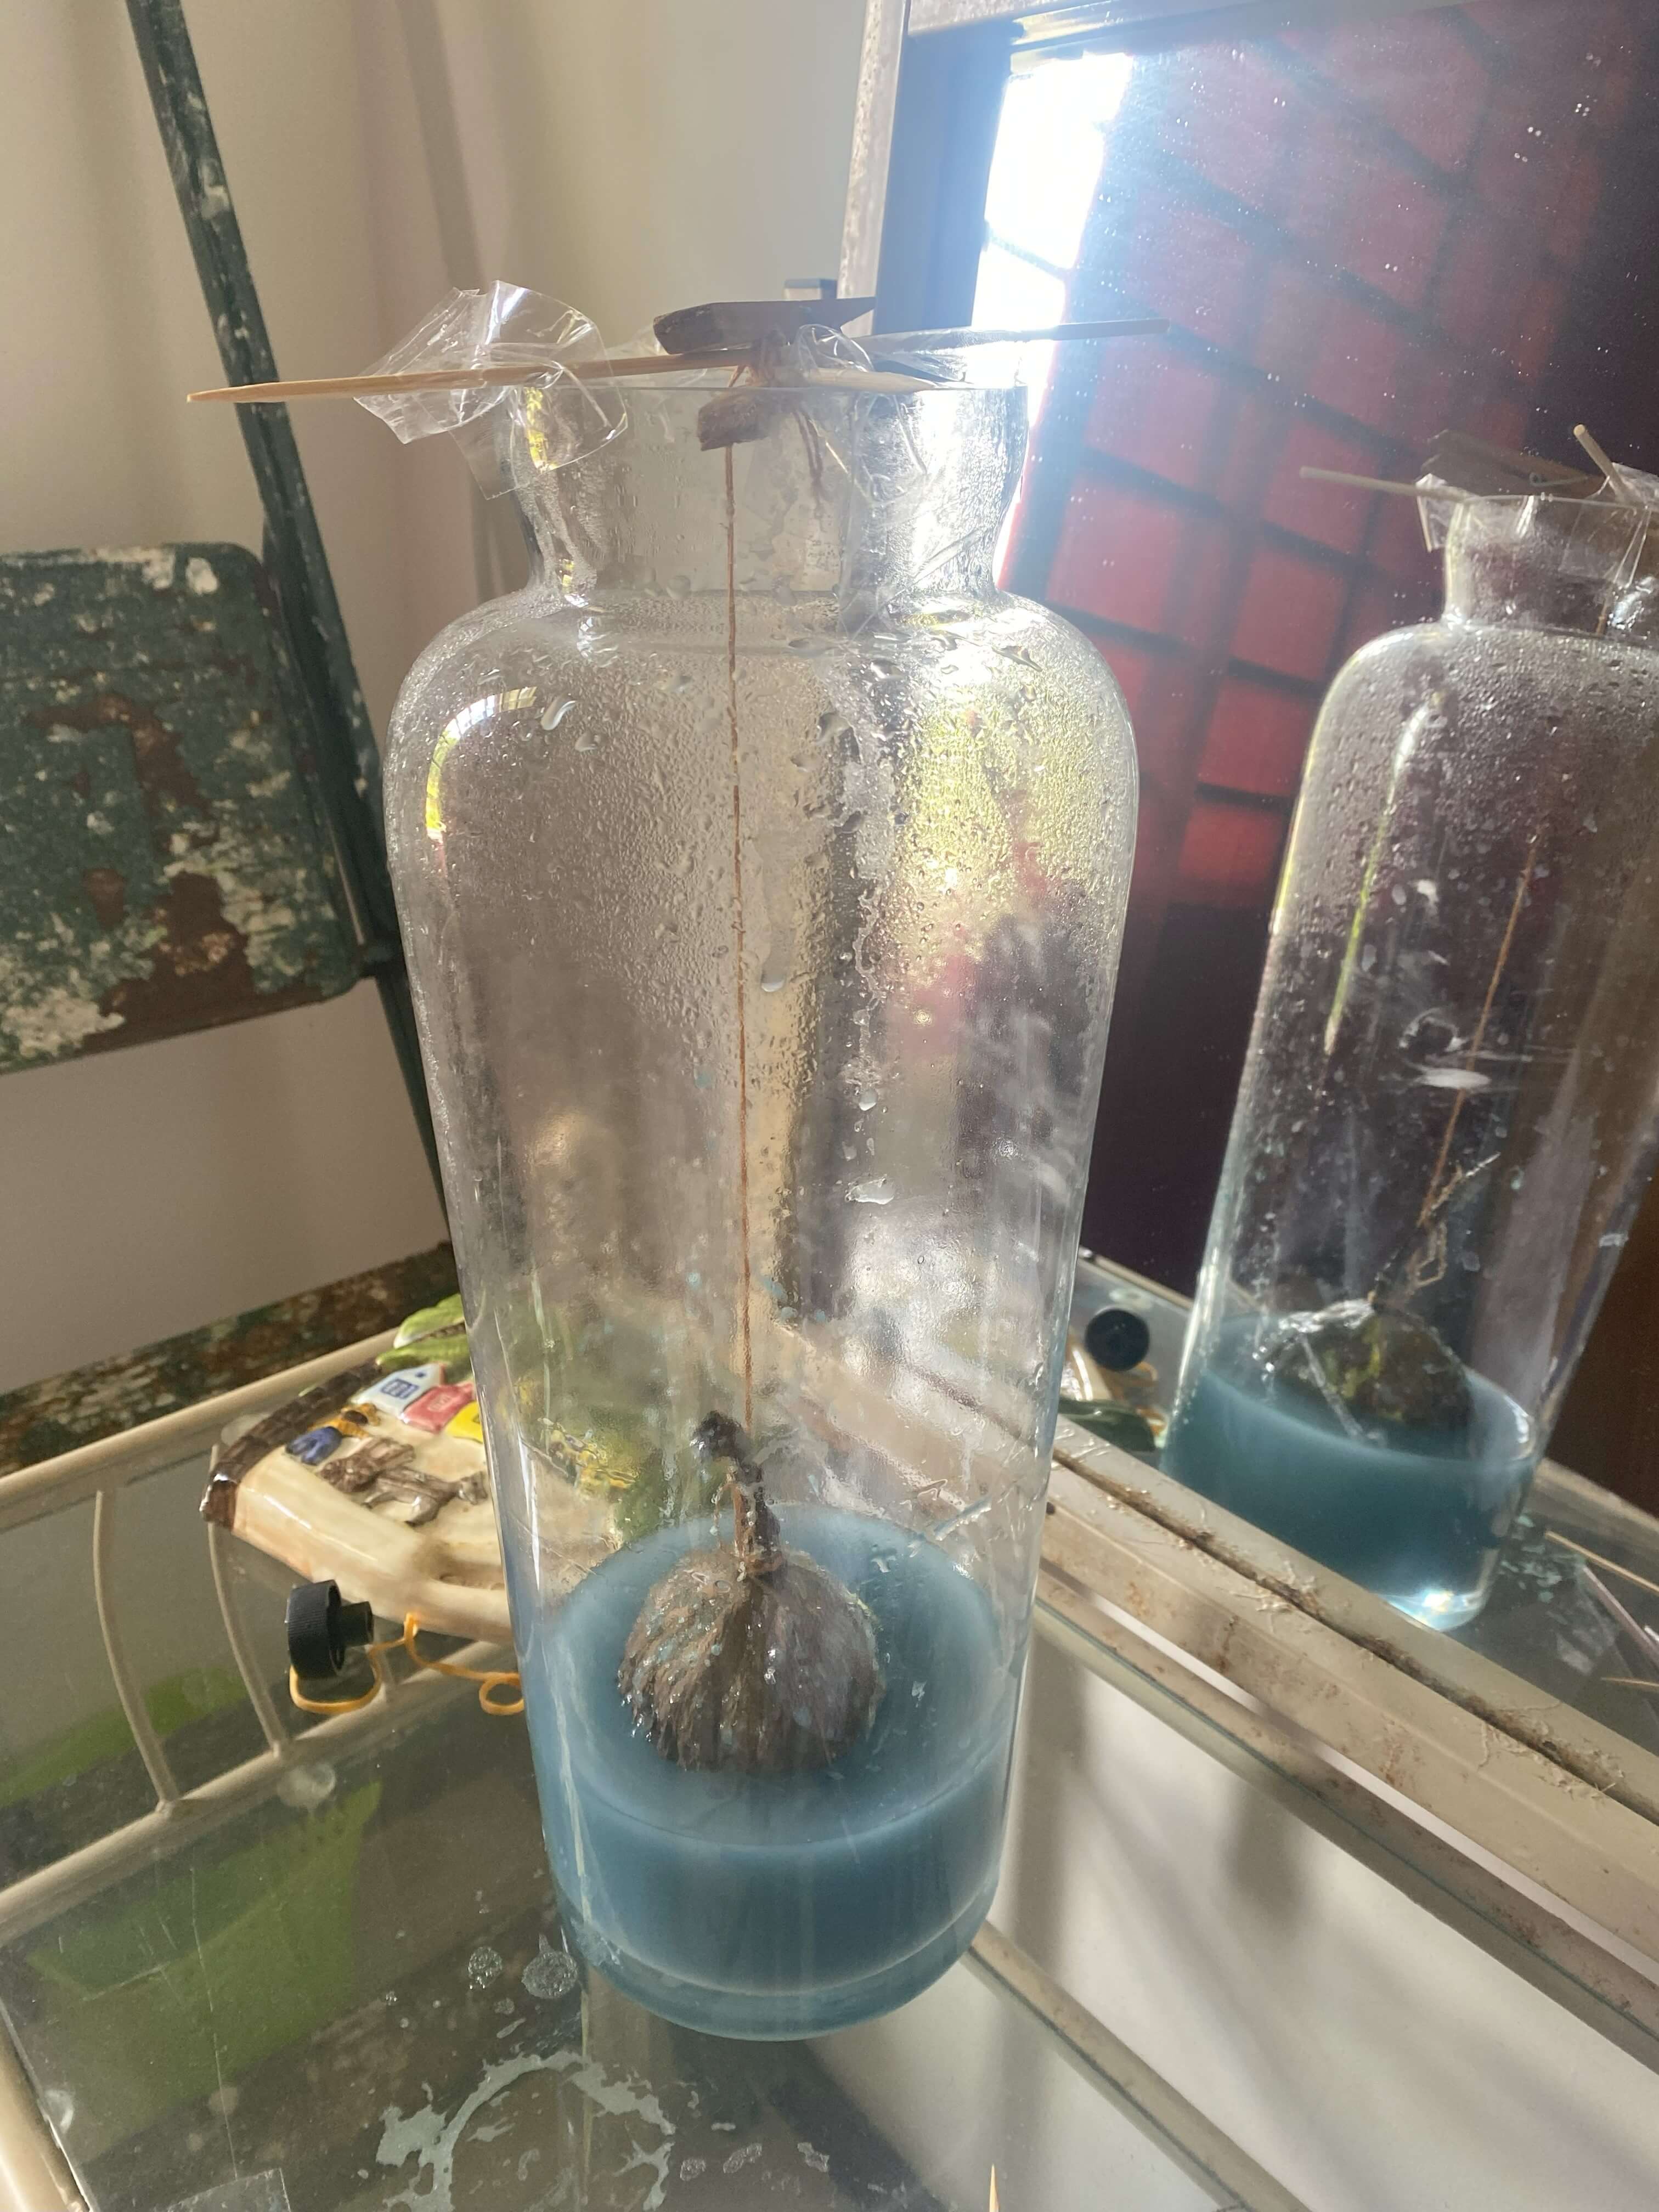
Constructing a hanging structure
I tried to construct the hanging structures before the pouring of the bath. In my case I used: chopsticks, bamboo skeeuwerstick ( sate sticks), a piece of cotton yarn, plastictape, clothespin, rubberbands. Anything that makes sure the object wont touch move once it is in the bathwater.

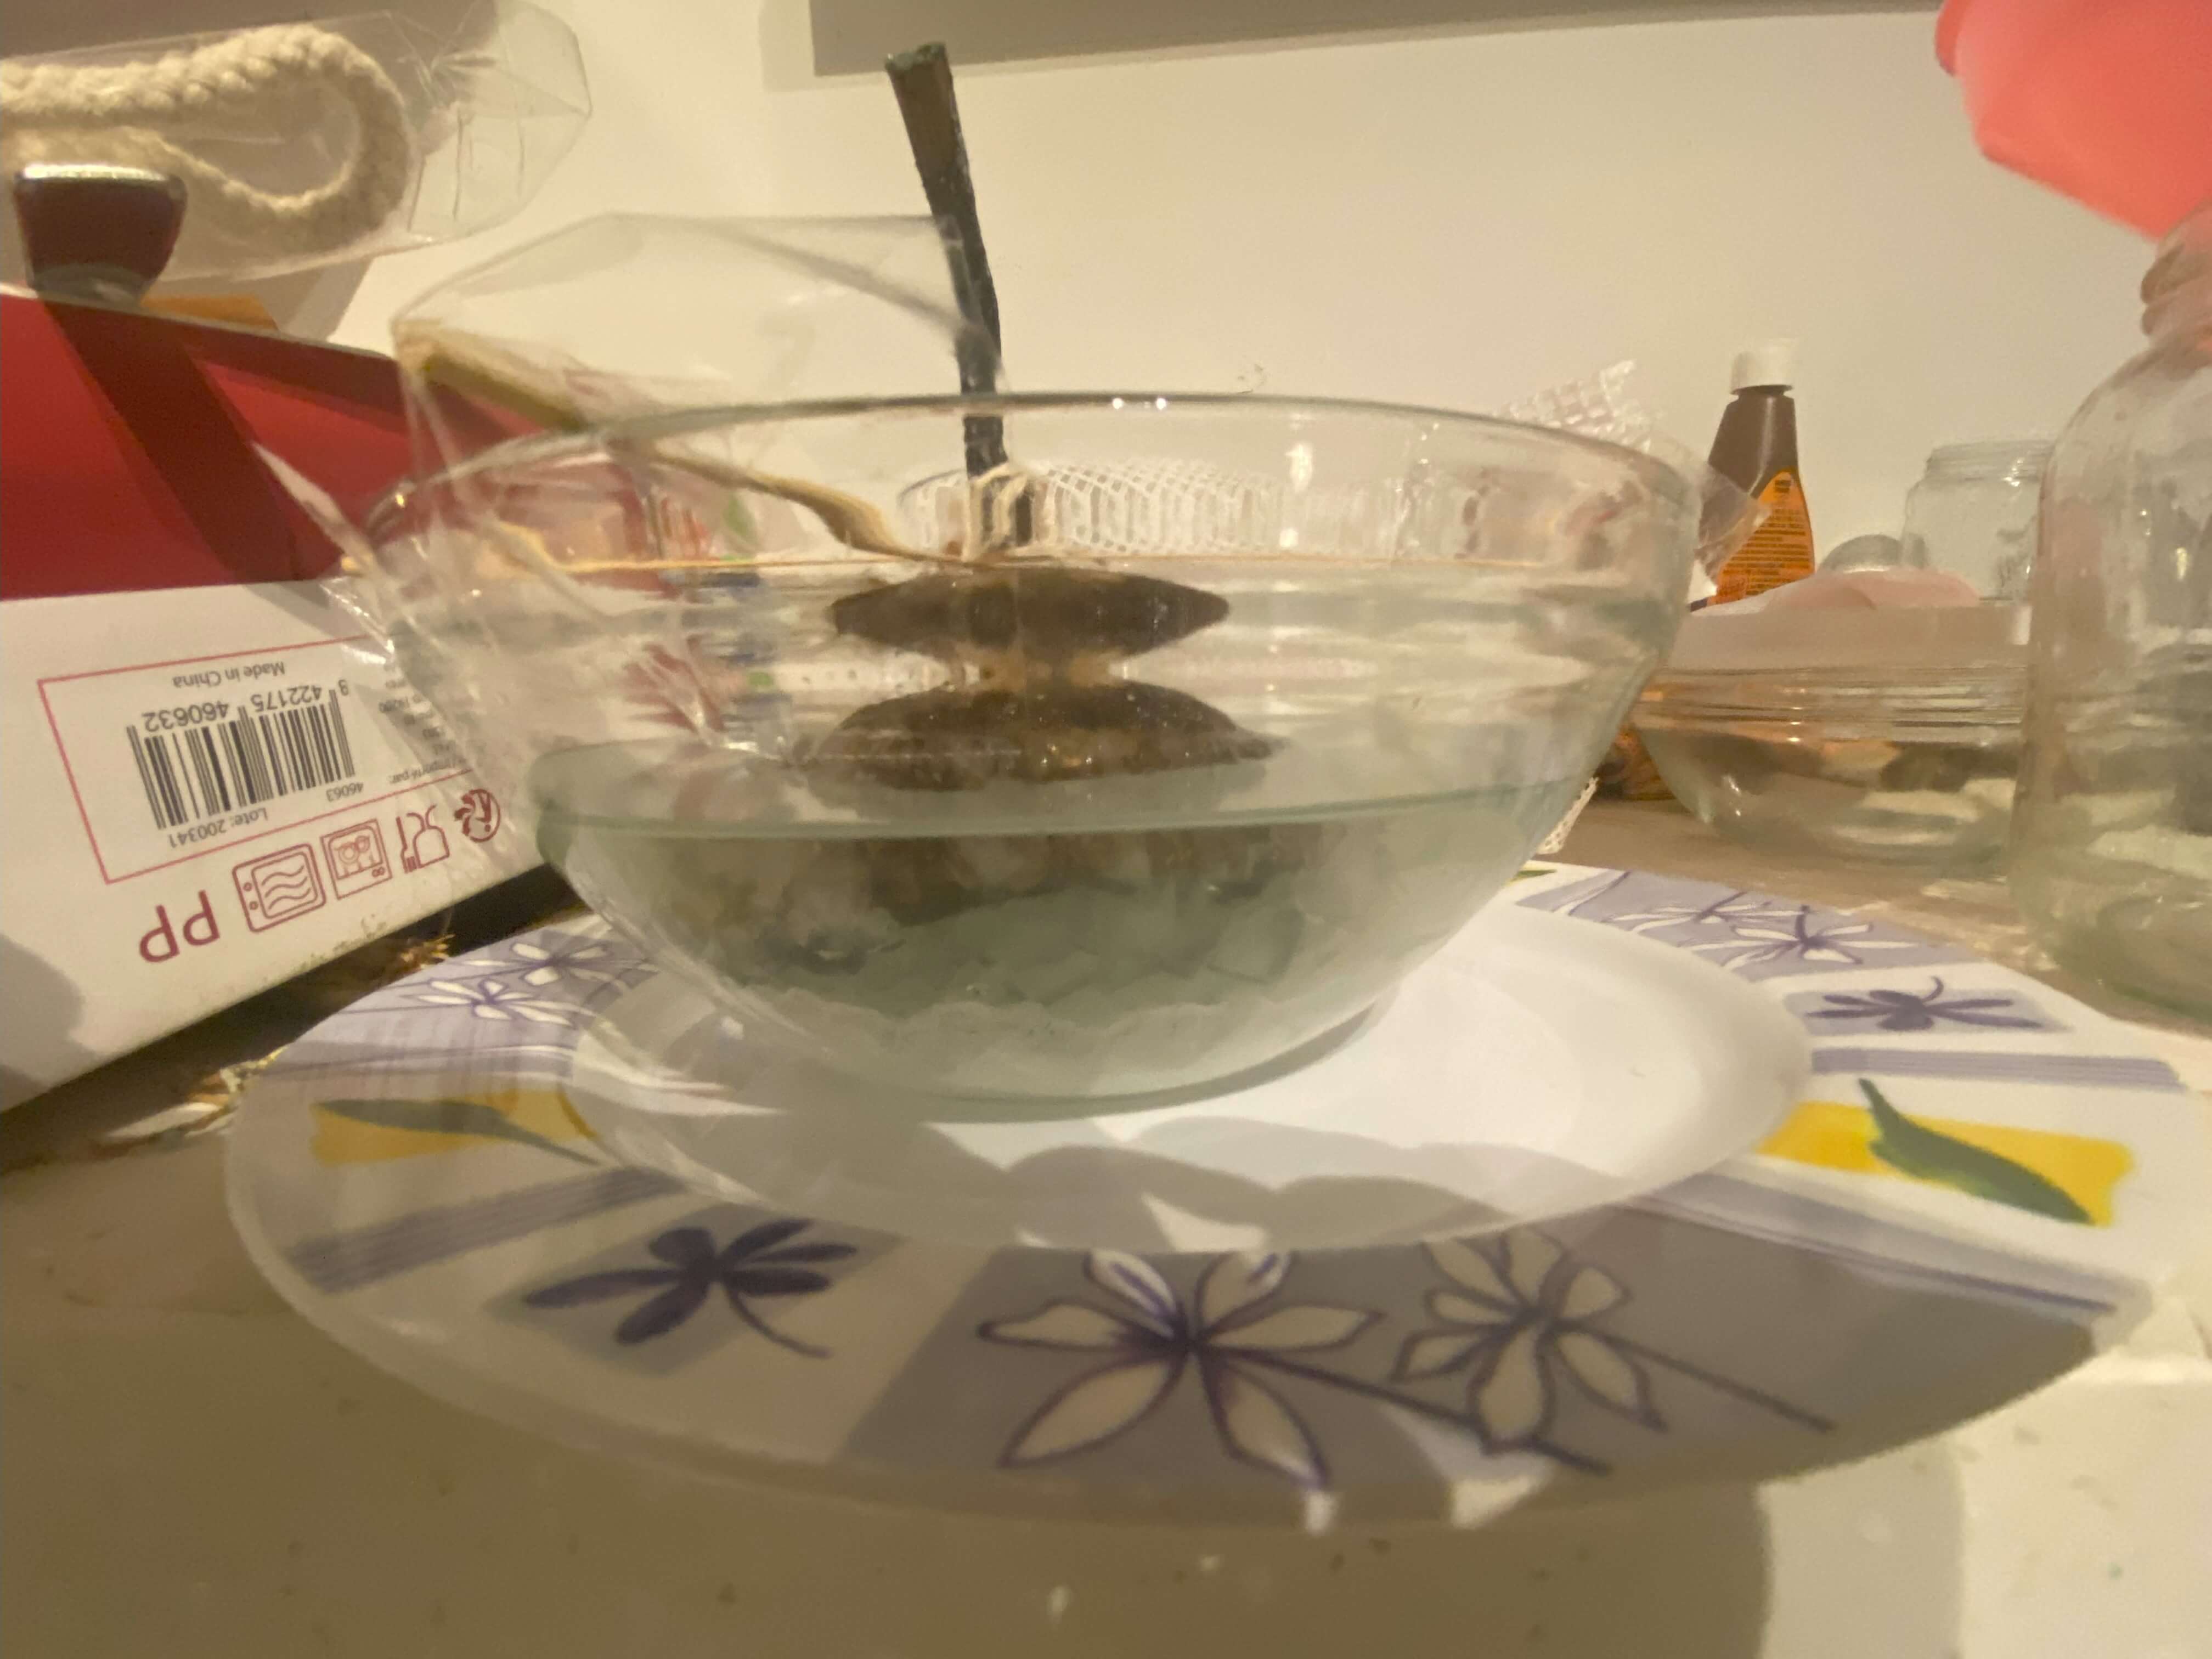
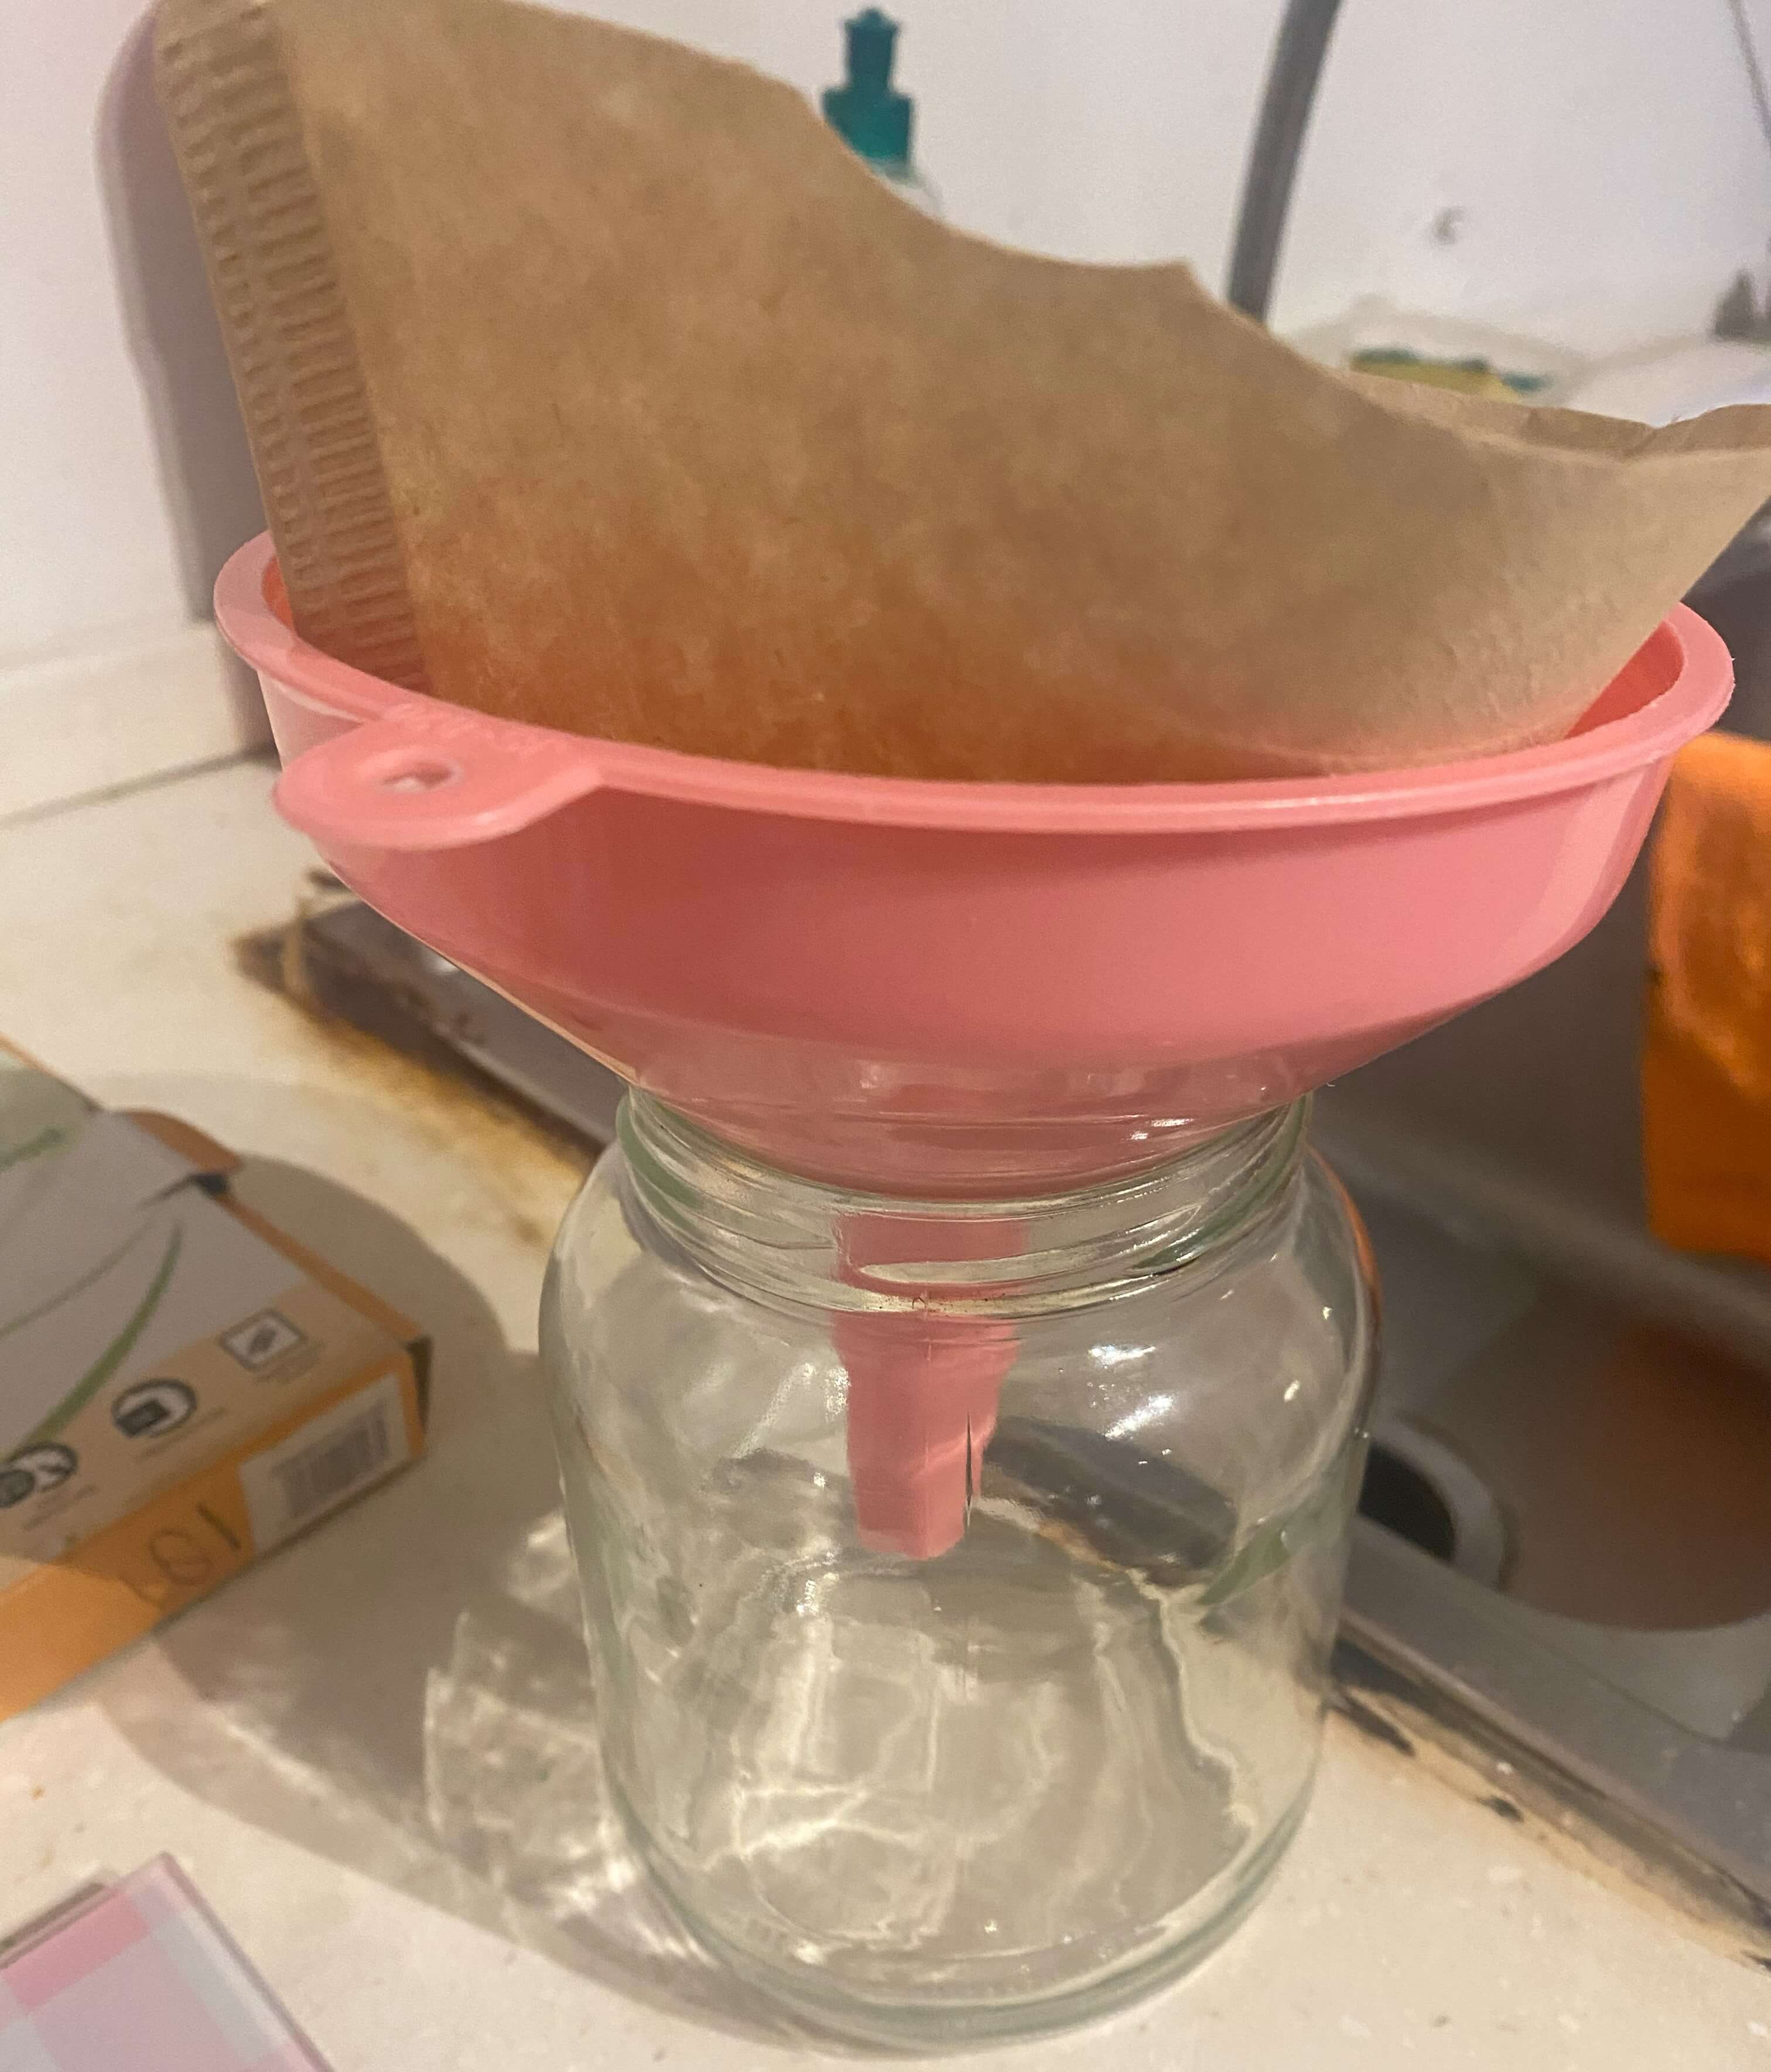
Filtration
I filtered the christal bath with a coffee fiter and a funnel.
Object to bedazzle
I found it better to add the object in the glass jar after the christal bath water was added but in the case of the waterlily seedpod, dripping christal bath water through the filter did give it another interesting effect where the drops would freeze on the waterlily before they could further reach the glassbottom of the jar.
Another time the filter fell over and spilled and I lost my christal bath, which is actually the main reason to first filter and then add the object.
A third option is to hang the object in the glass jar, to filter in a second glass jar and then to pour the bath water into the glass jar with the hanging object. Here the most important thing is not to spill the christal bath water.
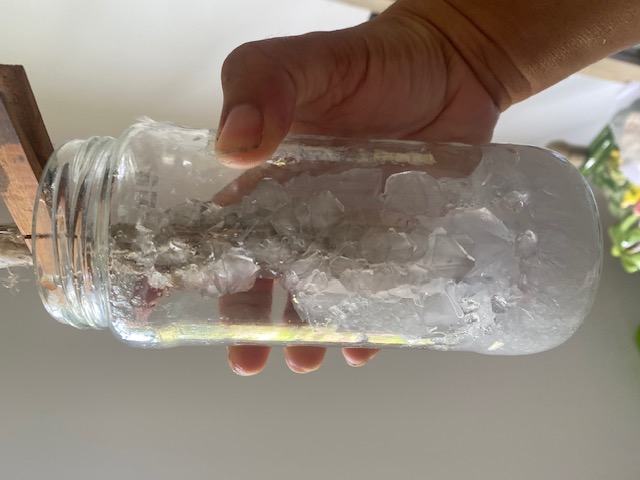
Cover up and Wait (Zzzzzz...)
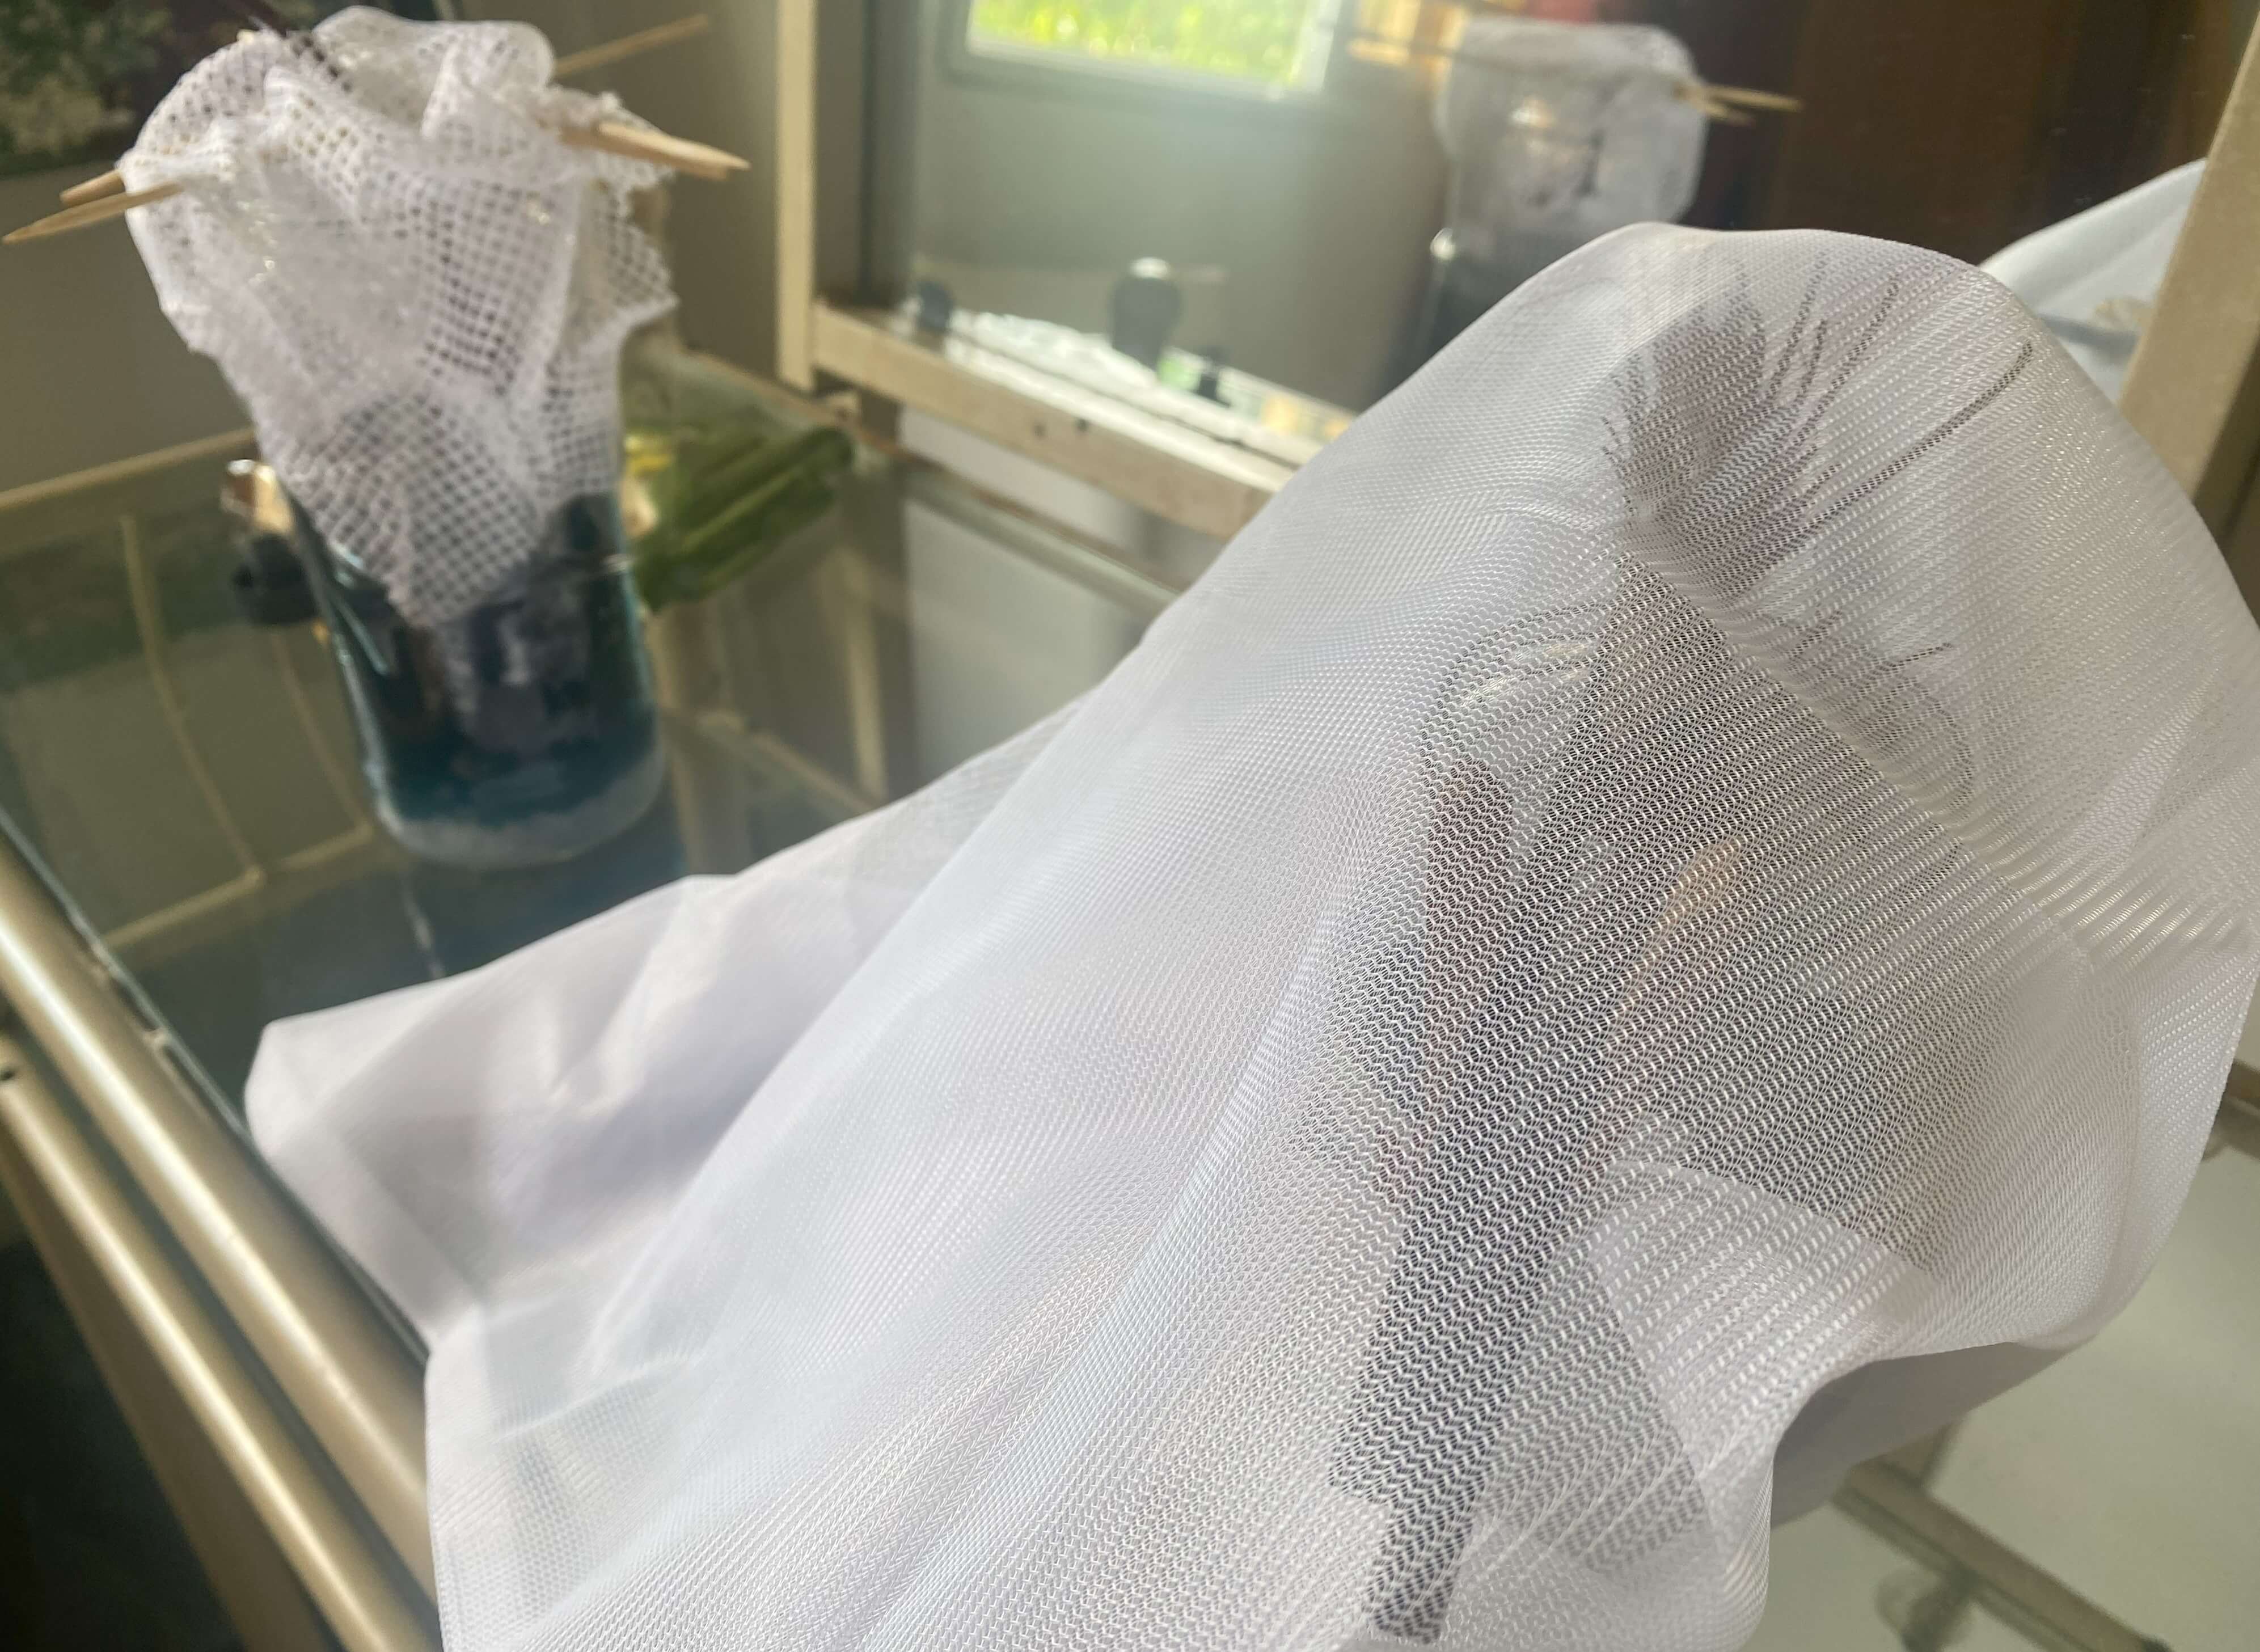
After the christal bath water and the object are in the glassjar, the object is fastened and haning in there, its now time to cover up the jar with a net so the evaporation can leave the jar and not drip back into the water, disturbing the cristalization process. The net can be fastened with a rubberband.
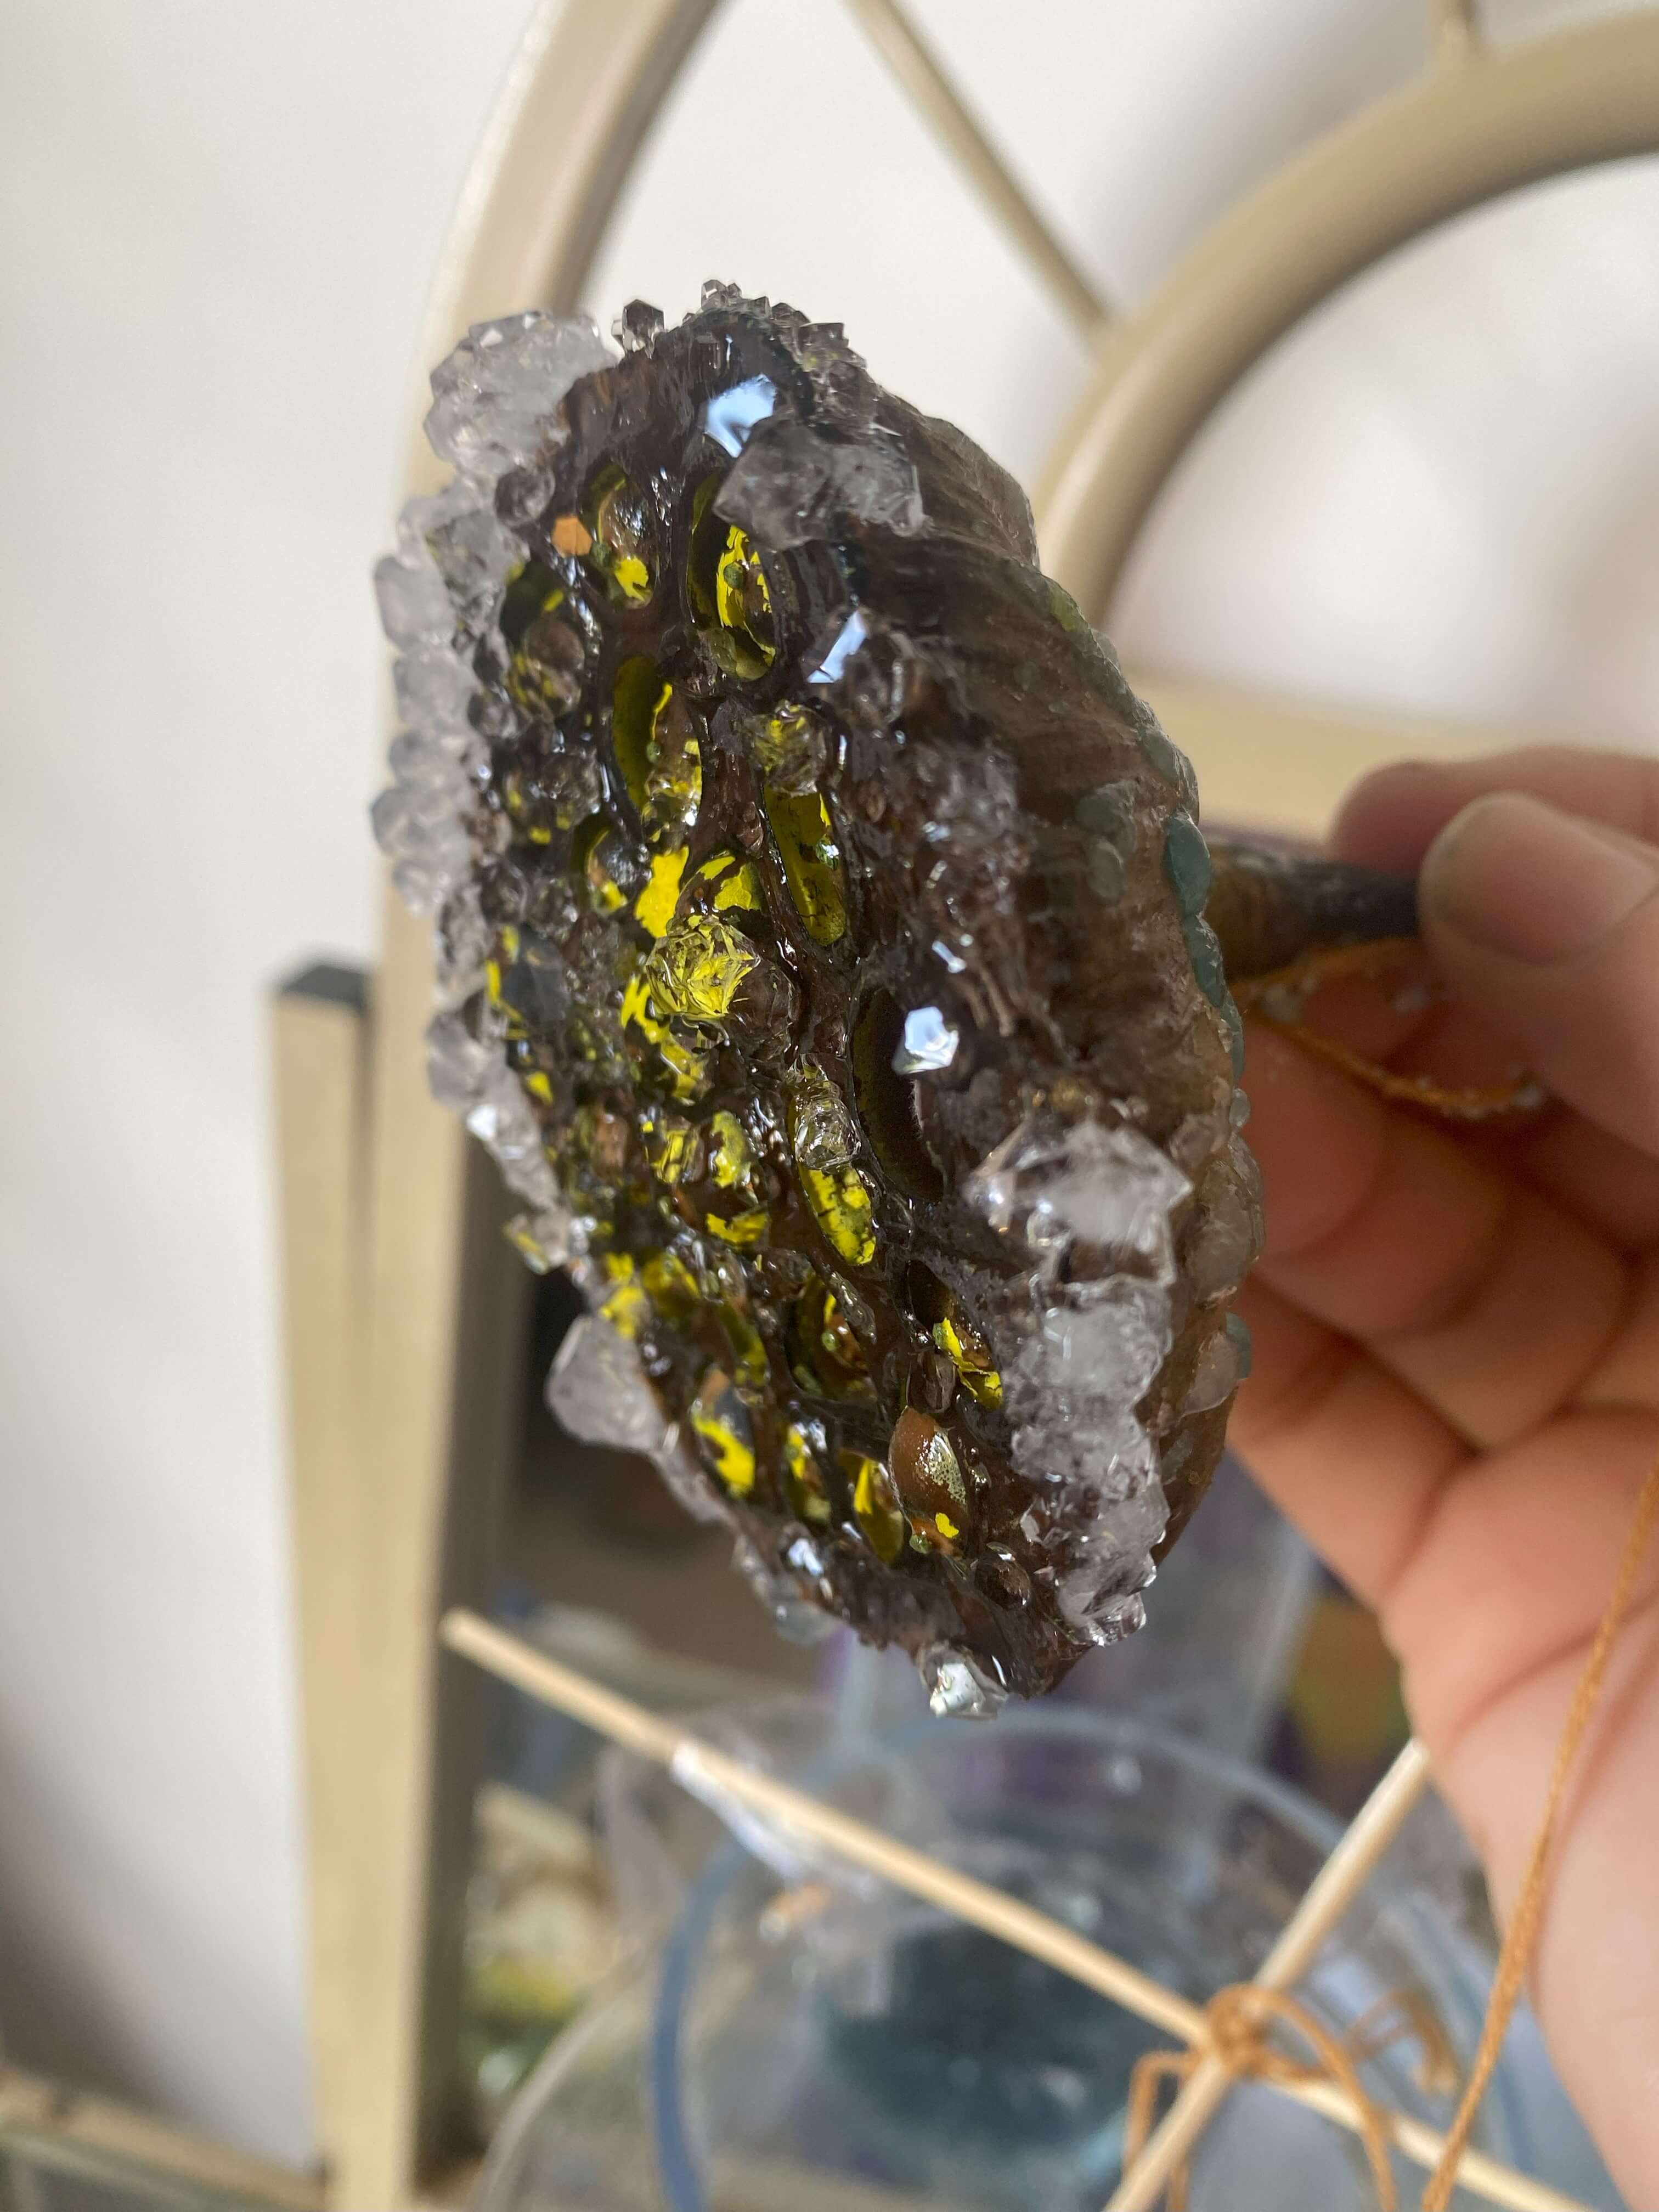
Secondly and very important: the jar has to be put in a quiet place, where the process will not be disturbed for at least 4 hours. Because I know my nosy self, I made sure that this happened at night when I was asleep and I made the christals work. What I liked about this is that I had something to look forward to in the morning. And every day I was pleasantly surprised!
Overview material research outcomes
Here you can see video links and pictures of the outcomes:
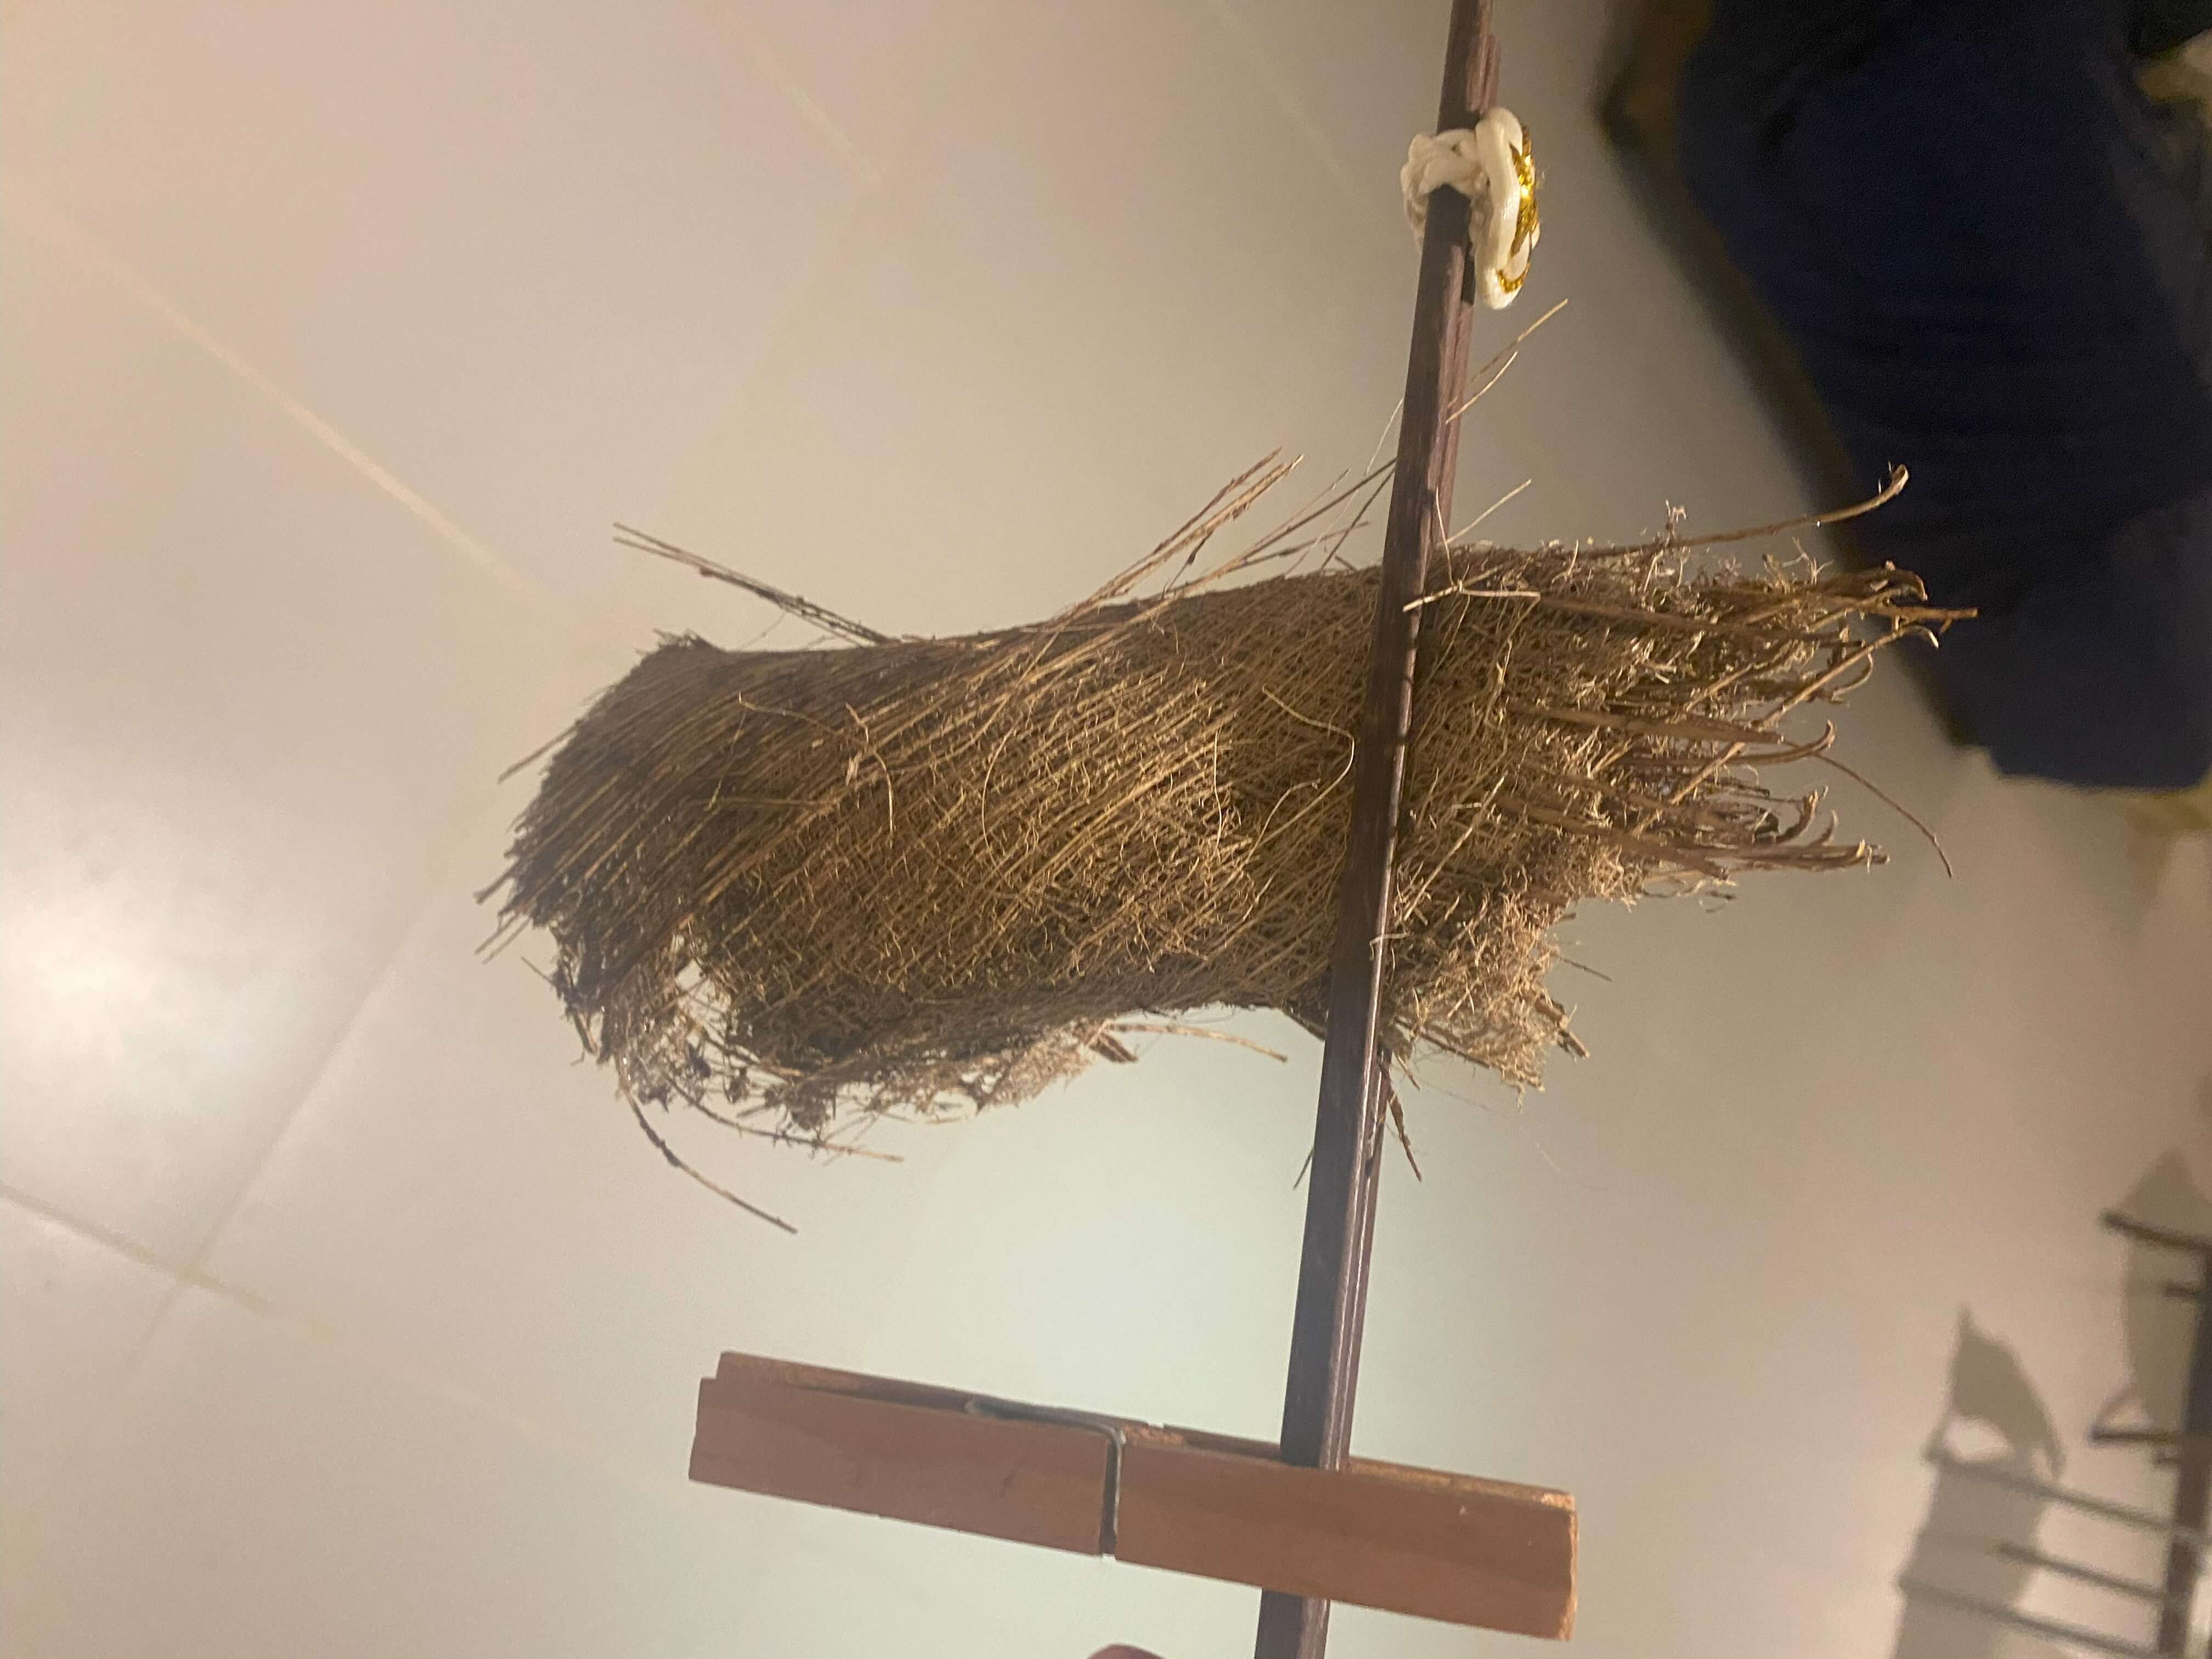
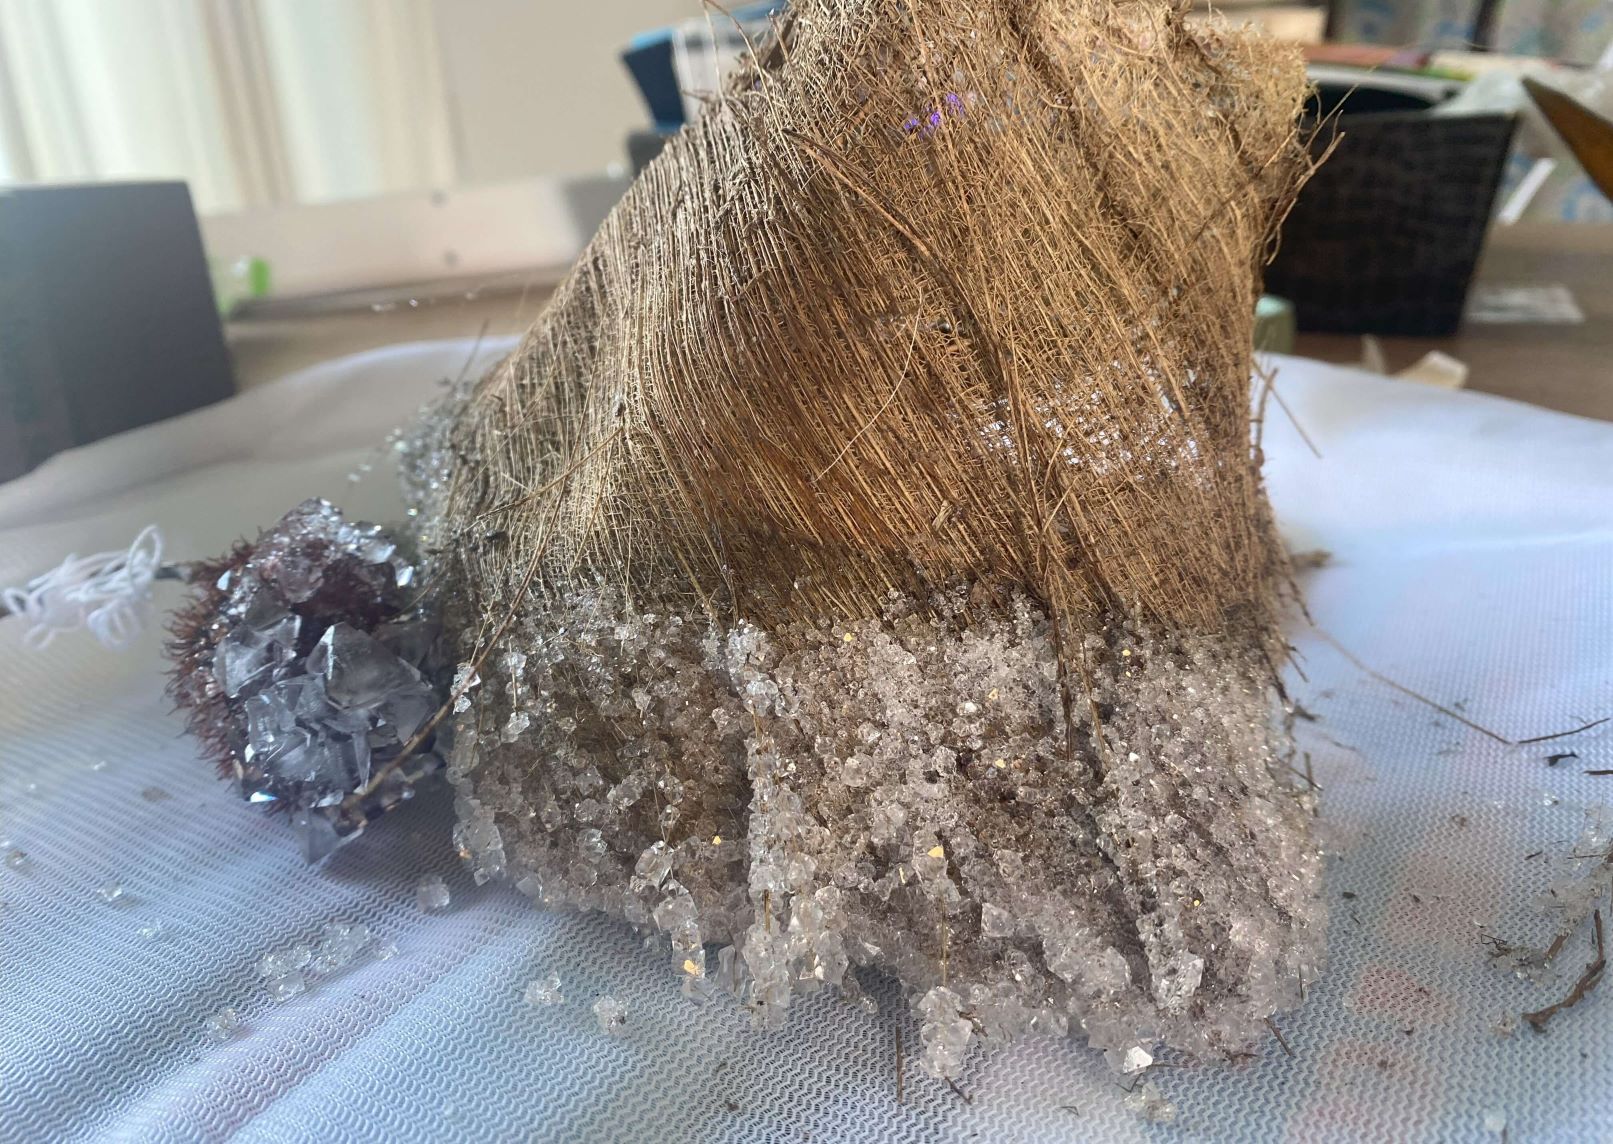
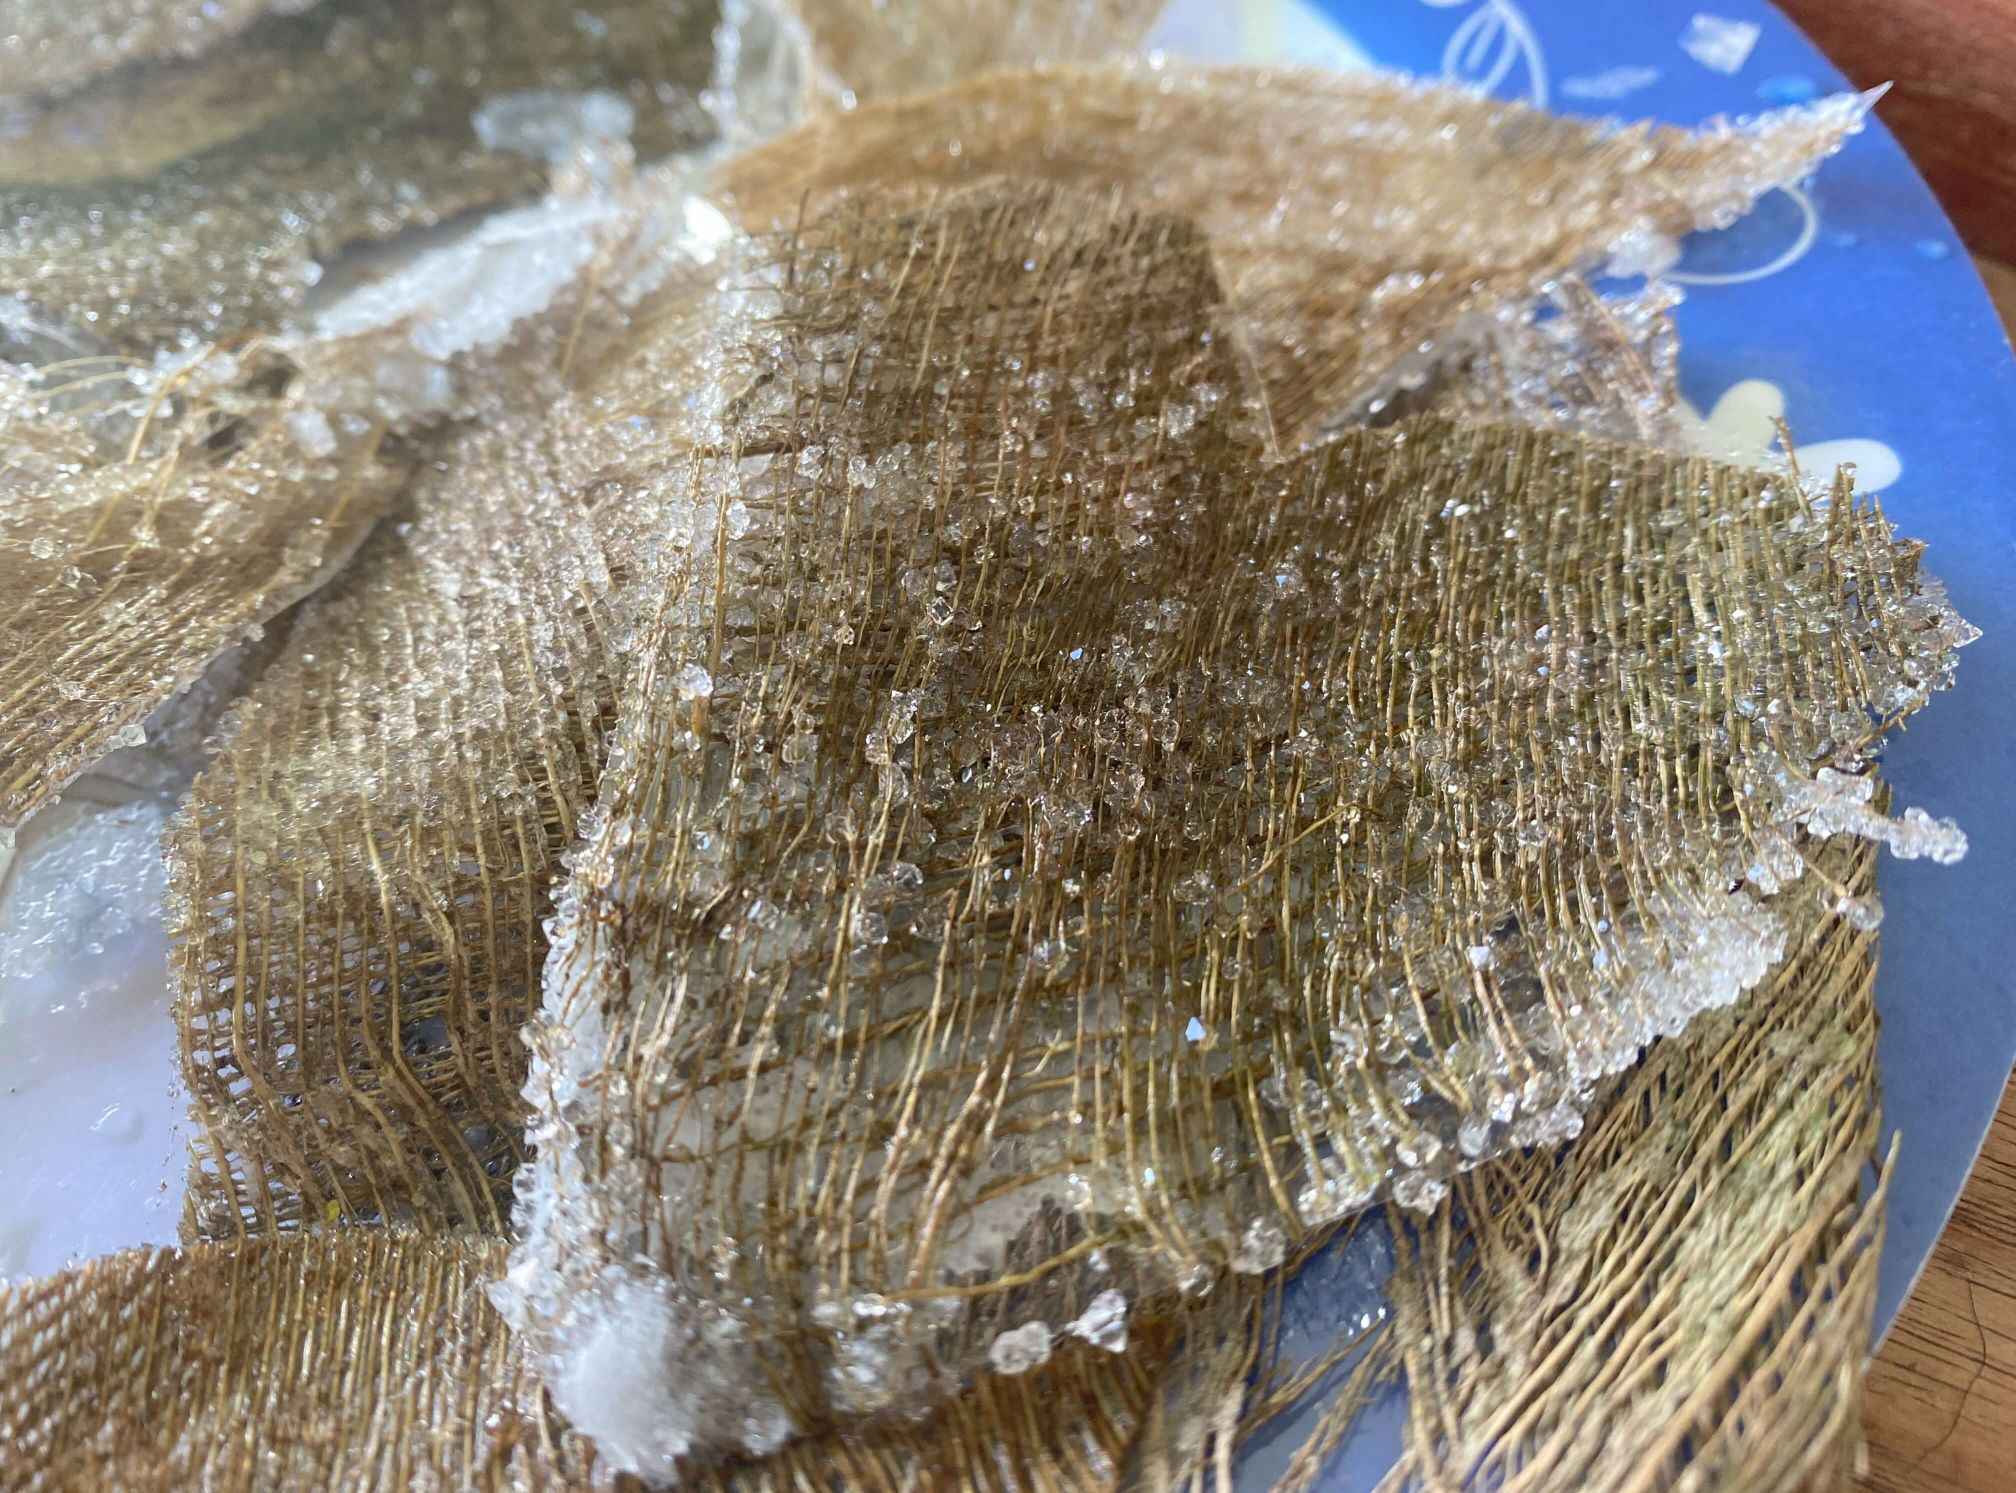
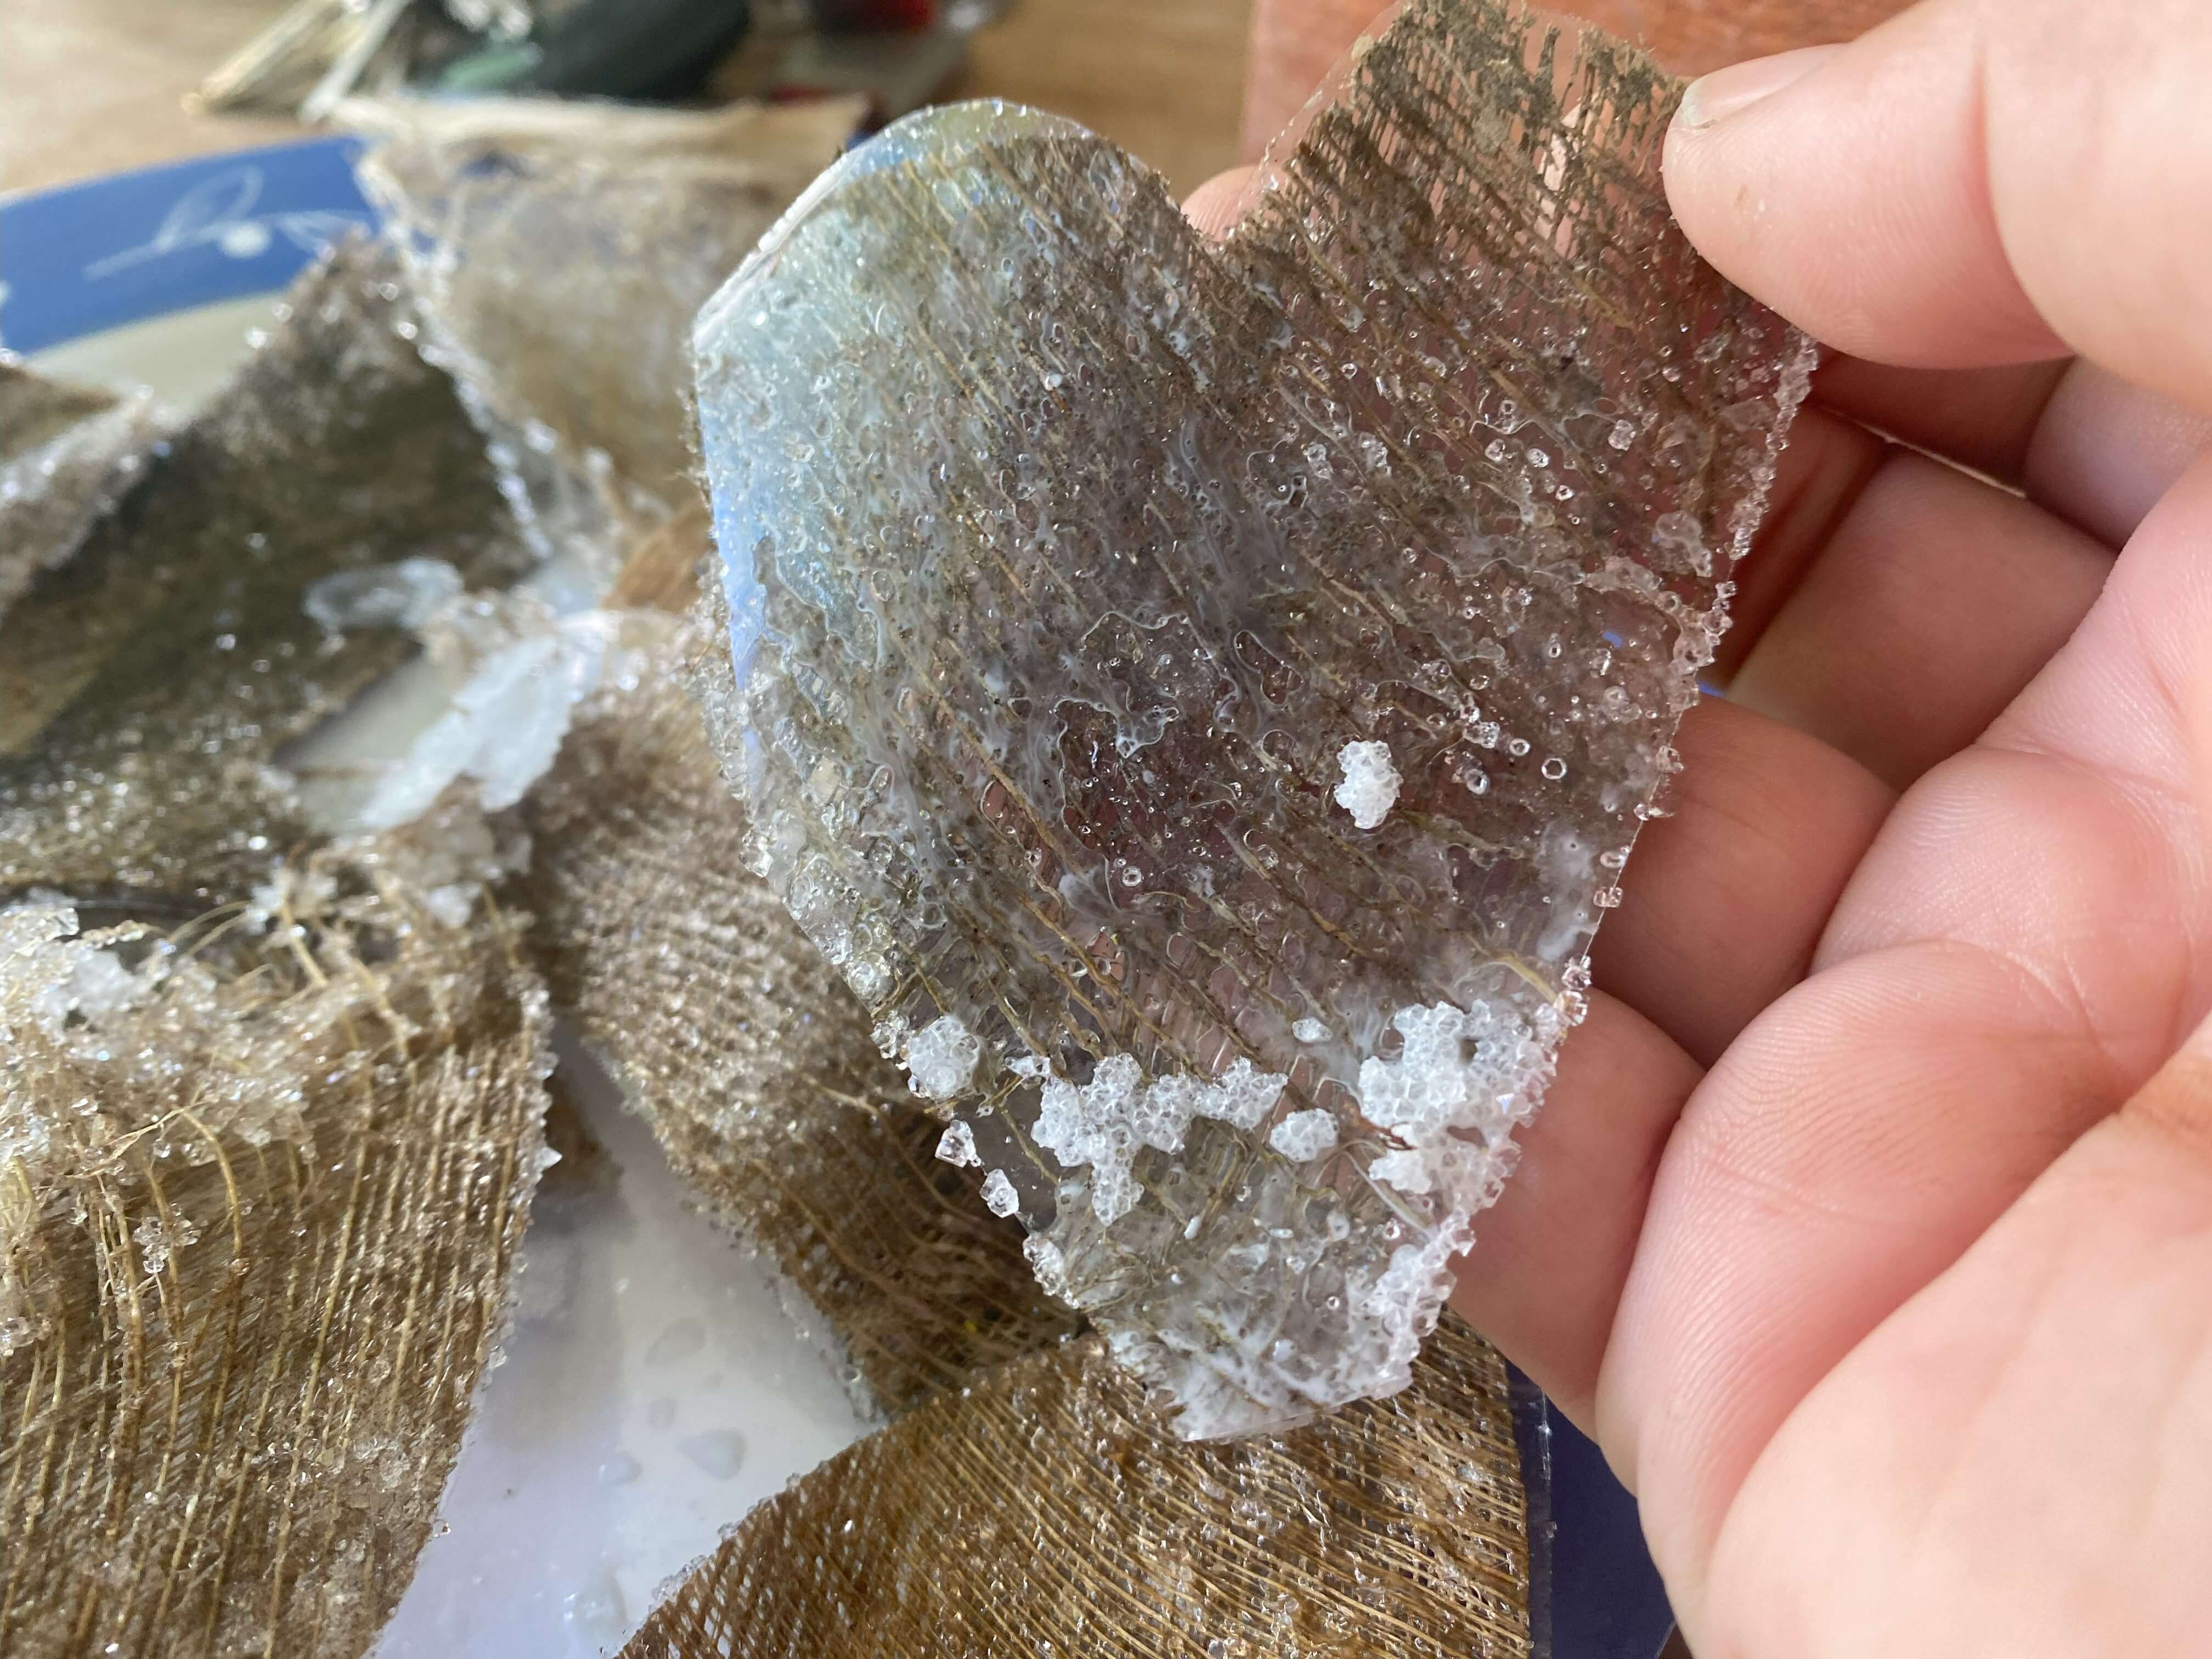
Coconut weave that naturally grows on the stem in between the coconuts. It is like jute. After the initial test went well, I cut shaped pieces out with scissors in different forms leaves, heart, arrow.
Christalized Coconut weave
A Koesoewe pod Christalized Koeswe

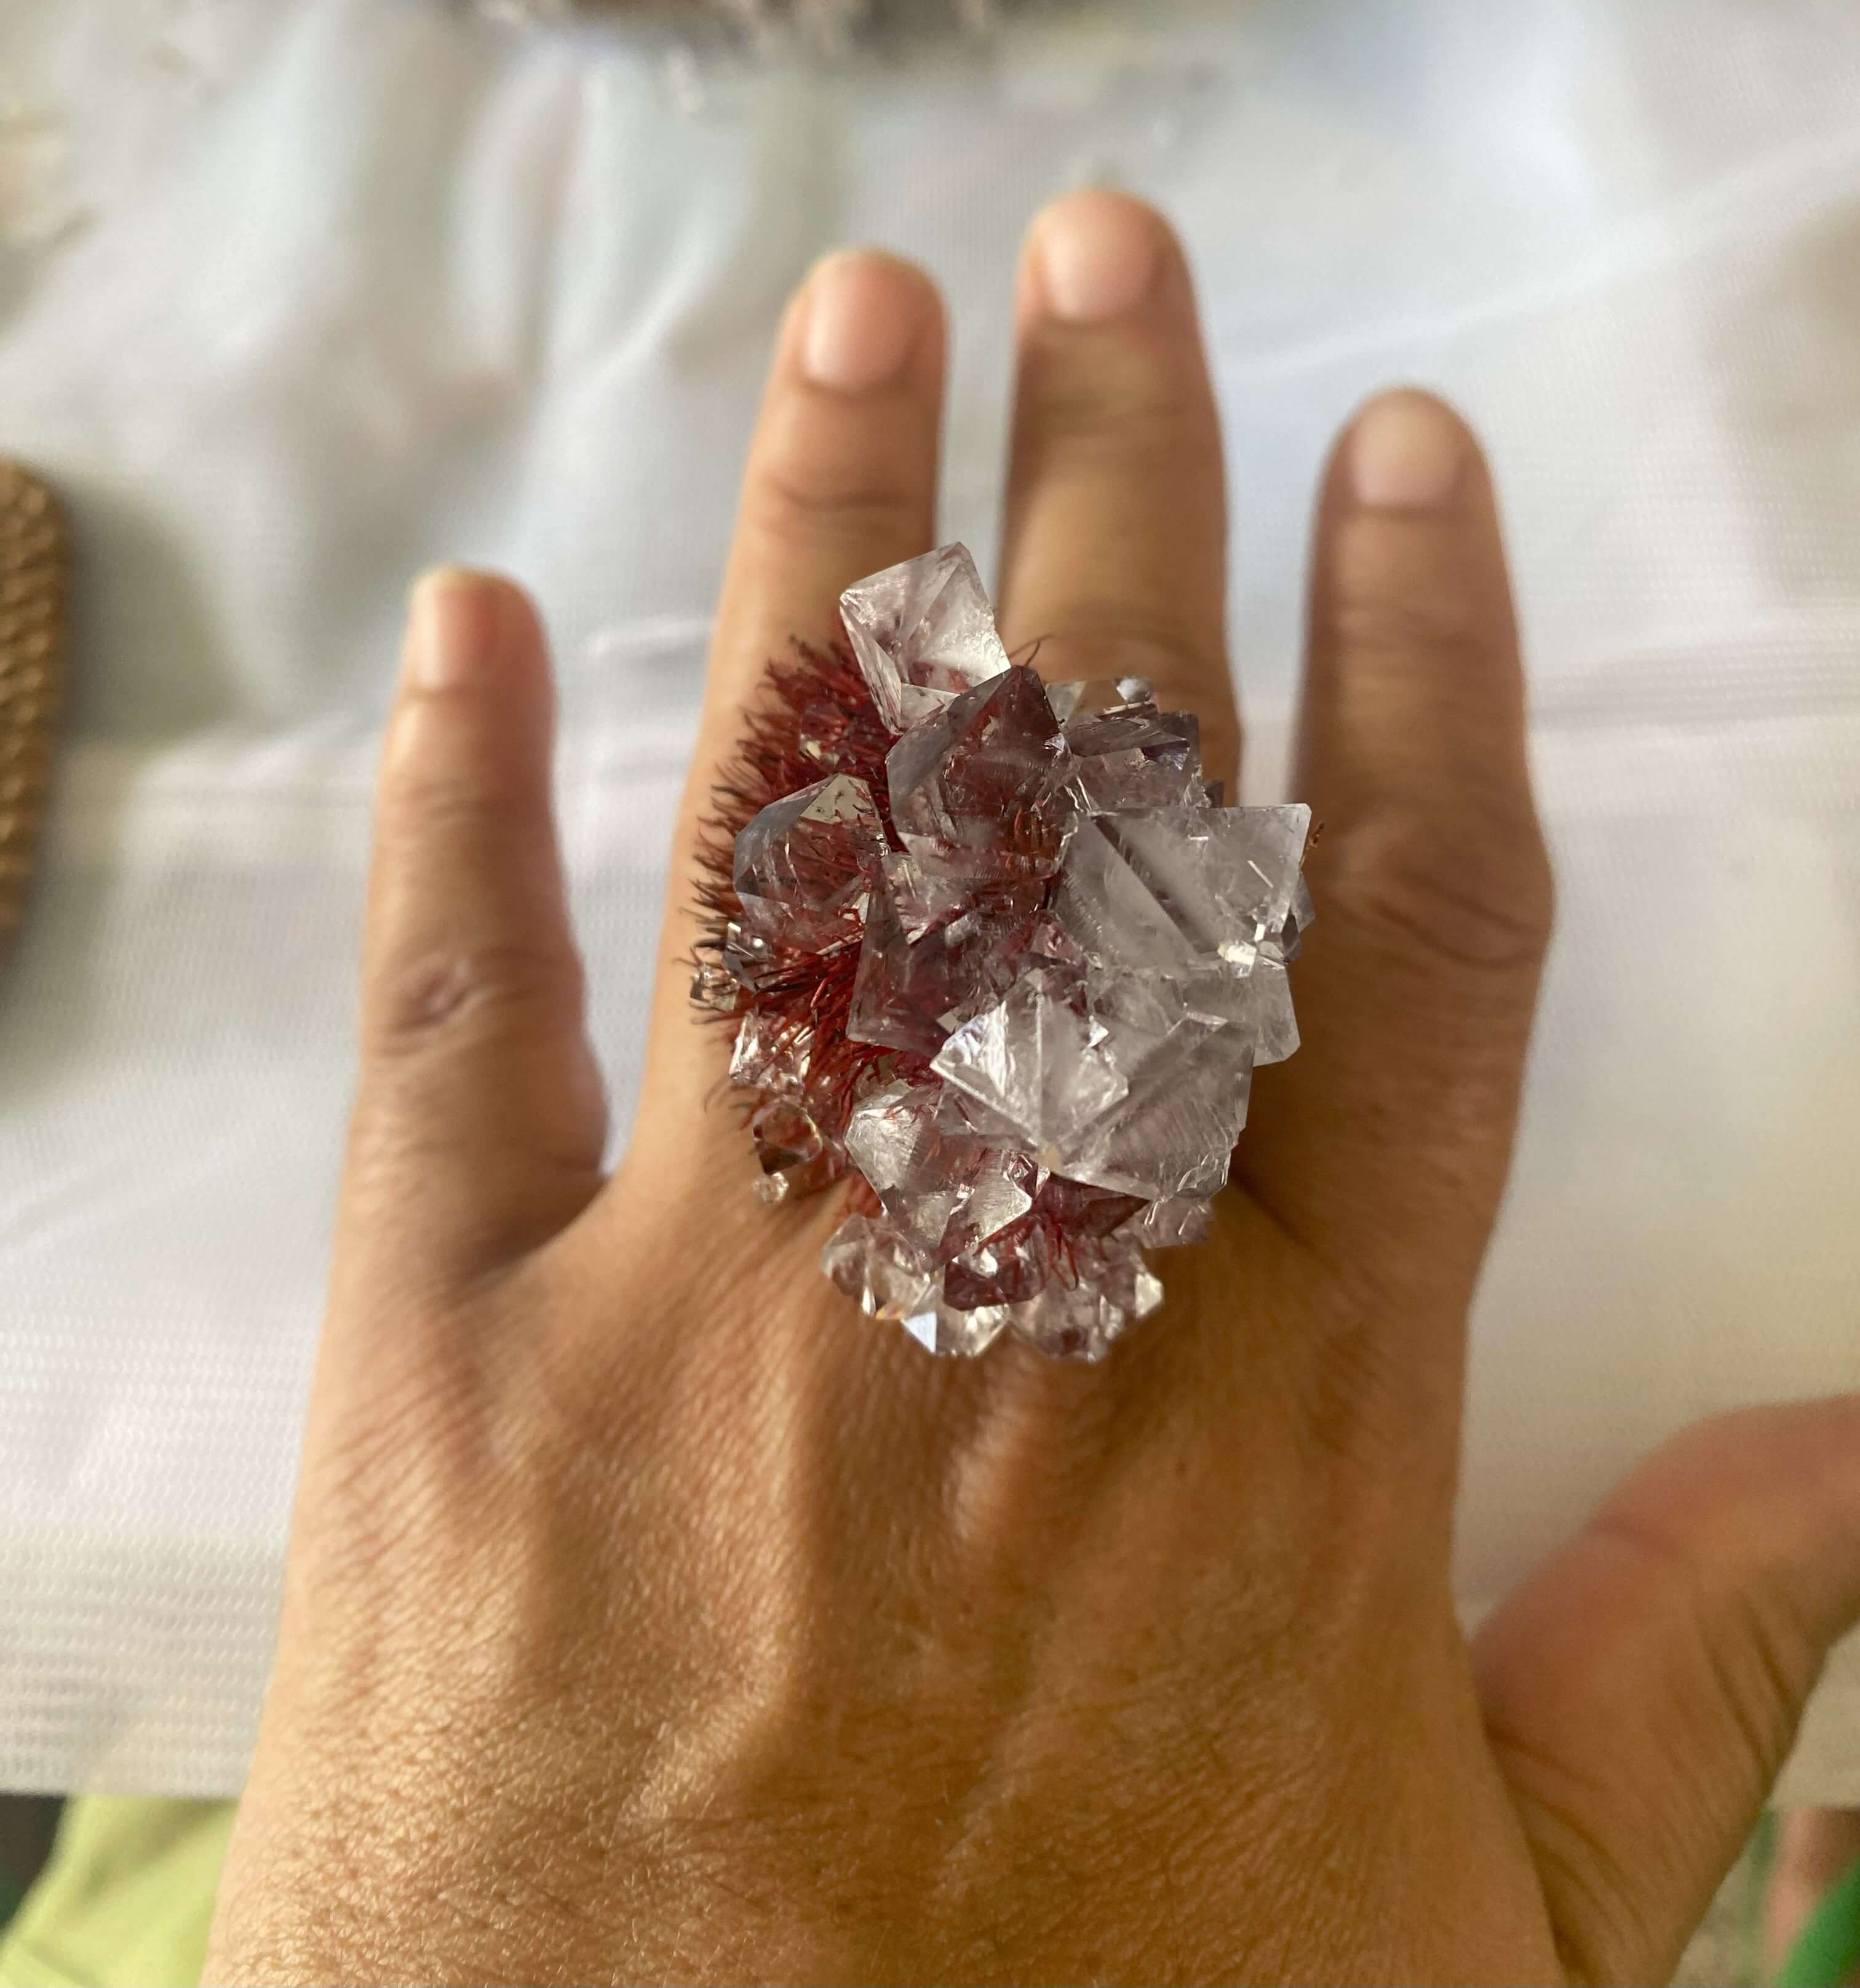
A waterlily seed pod Christalized Waterlily
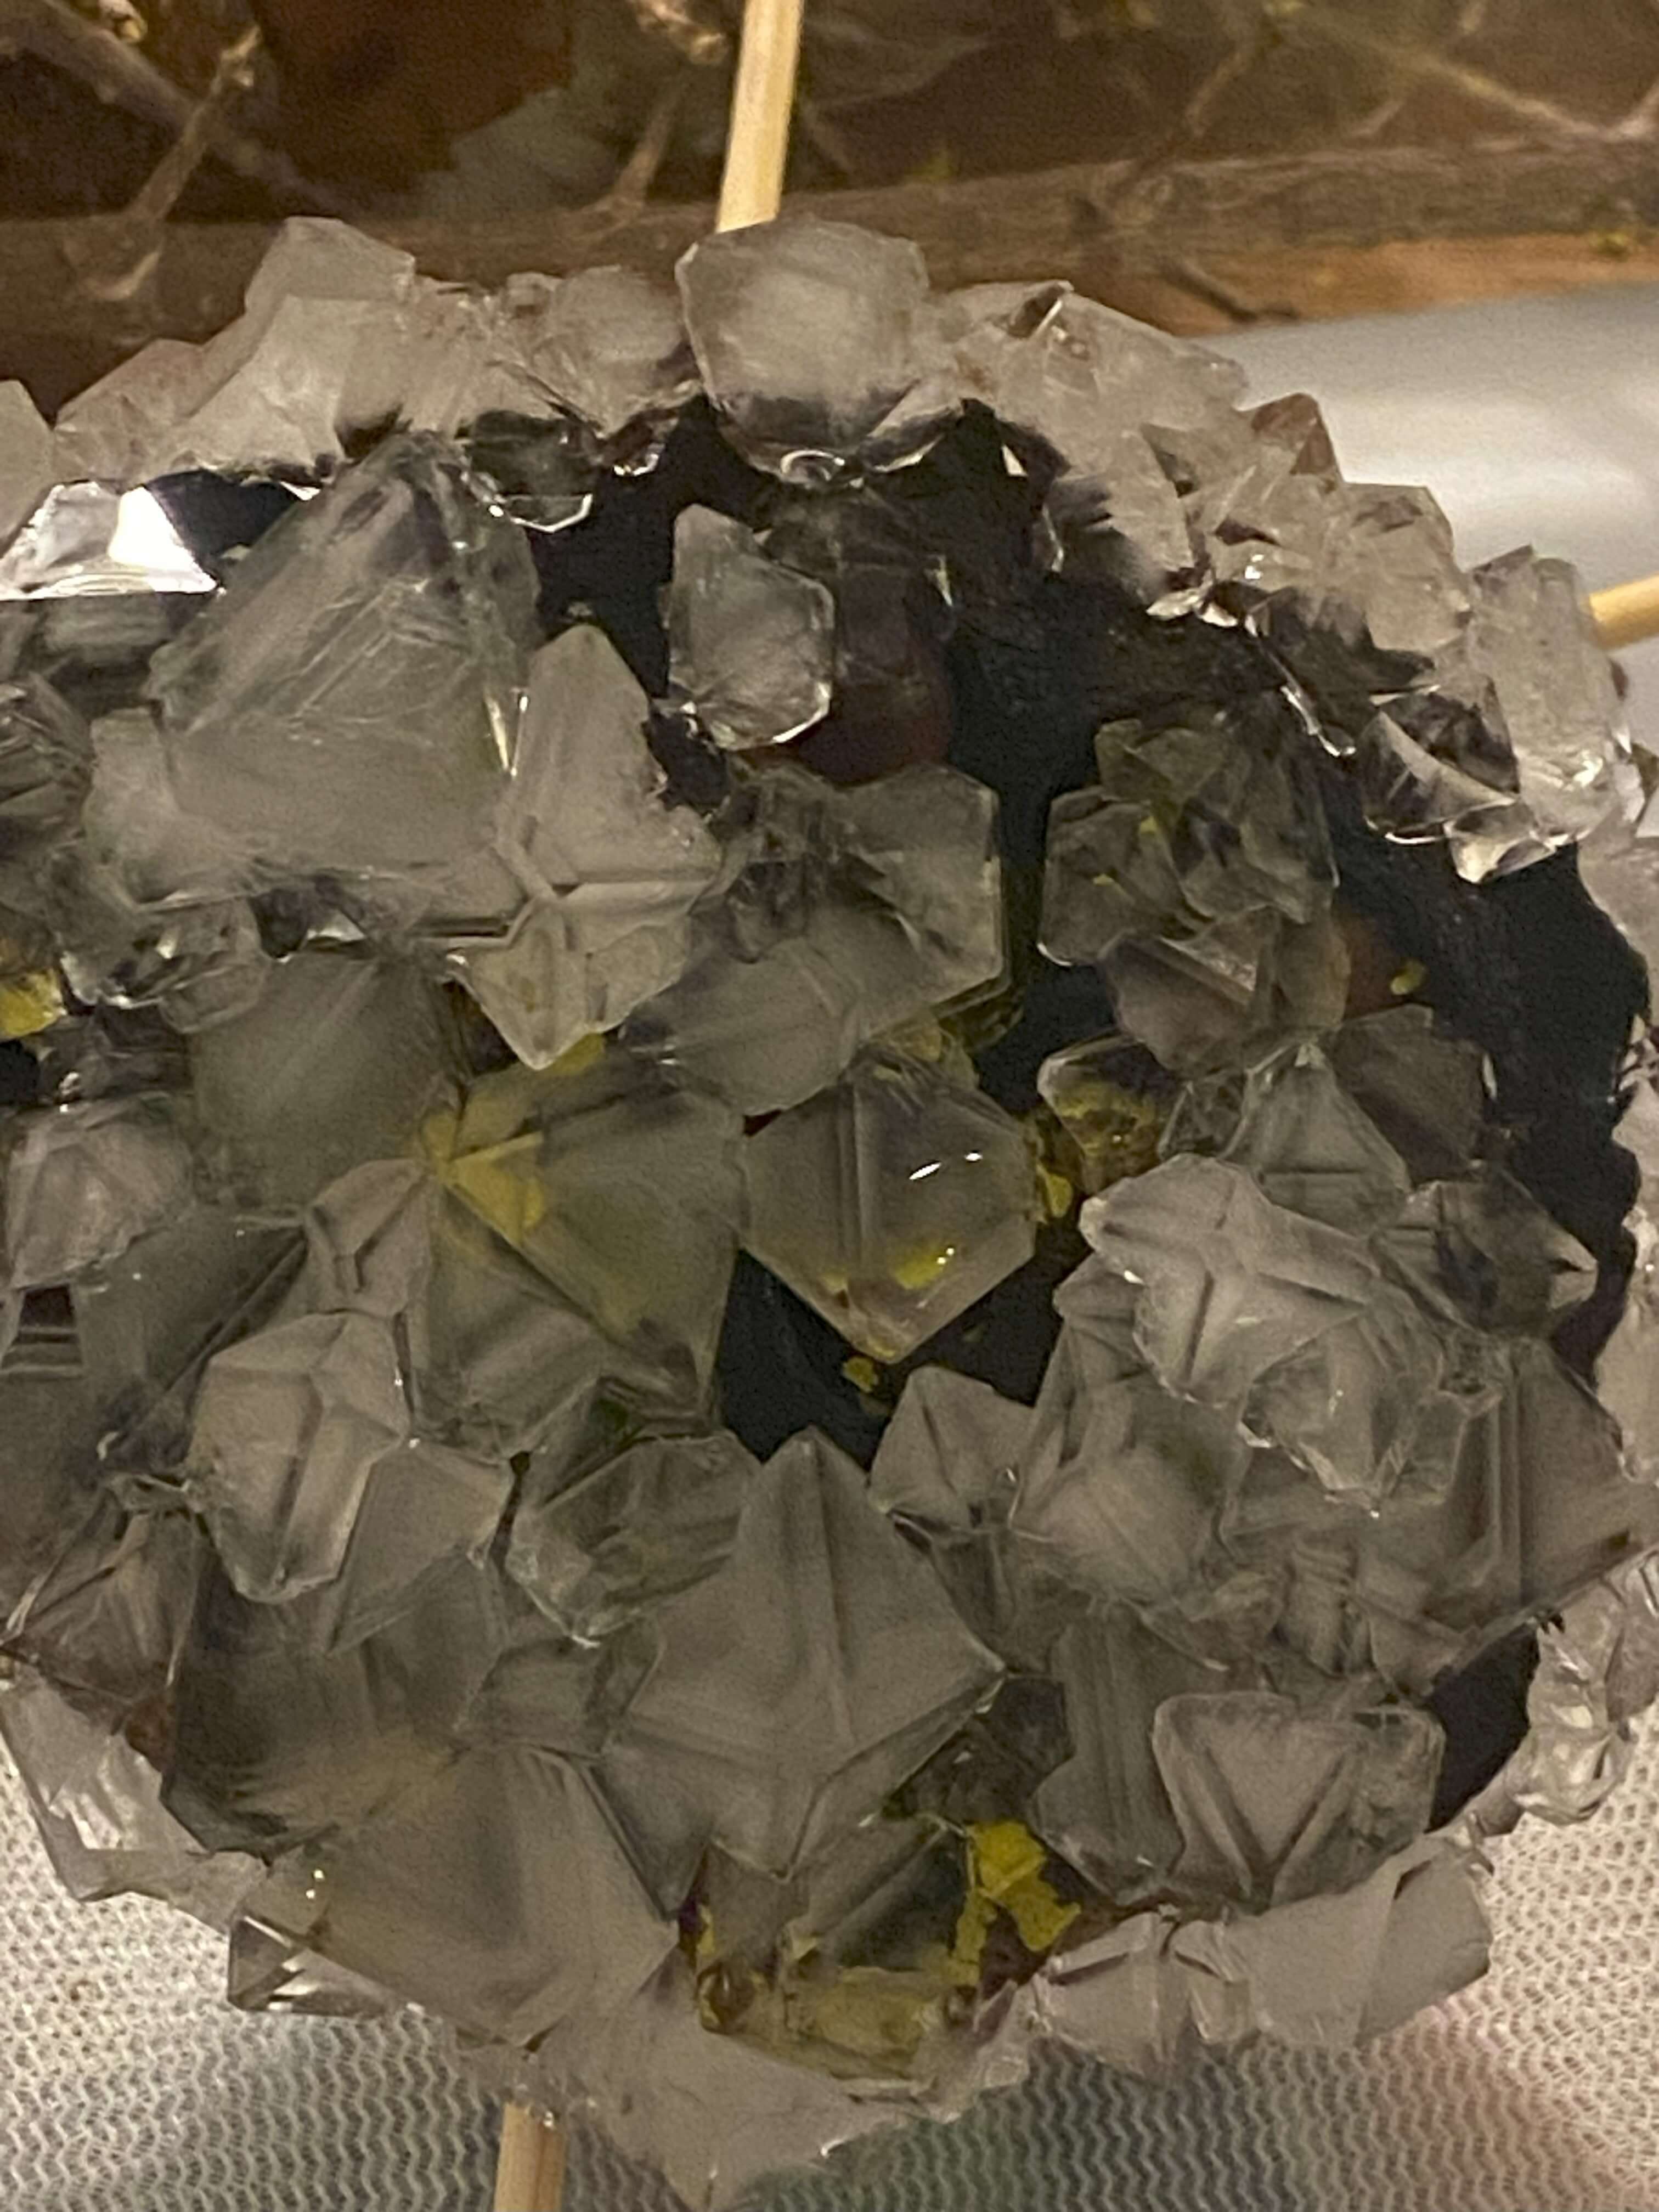
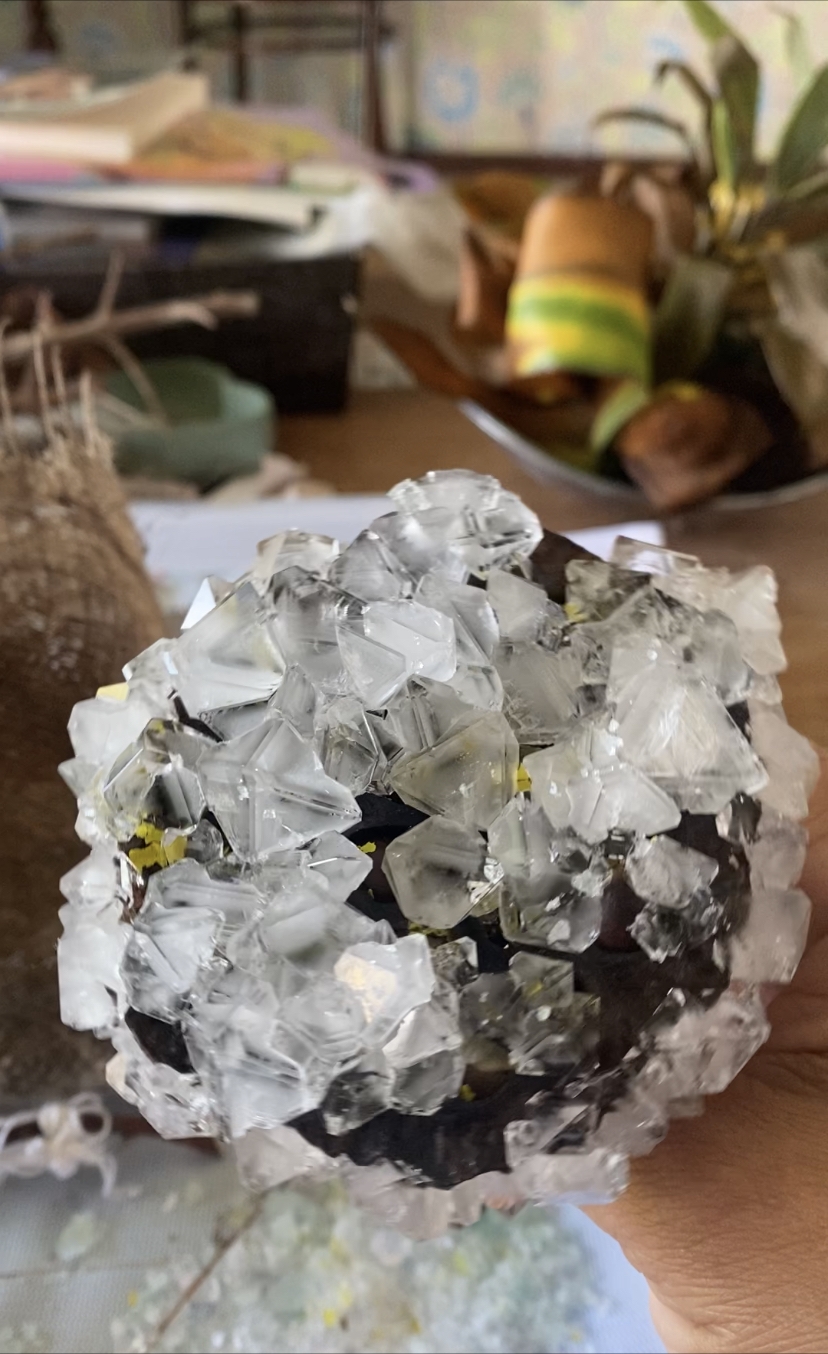
A featherlike grass
This one went way way overboard!. I left it too long!
Under the microscope
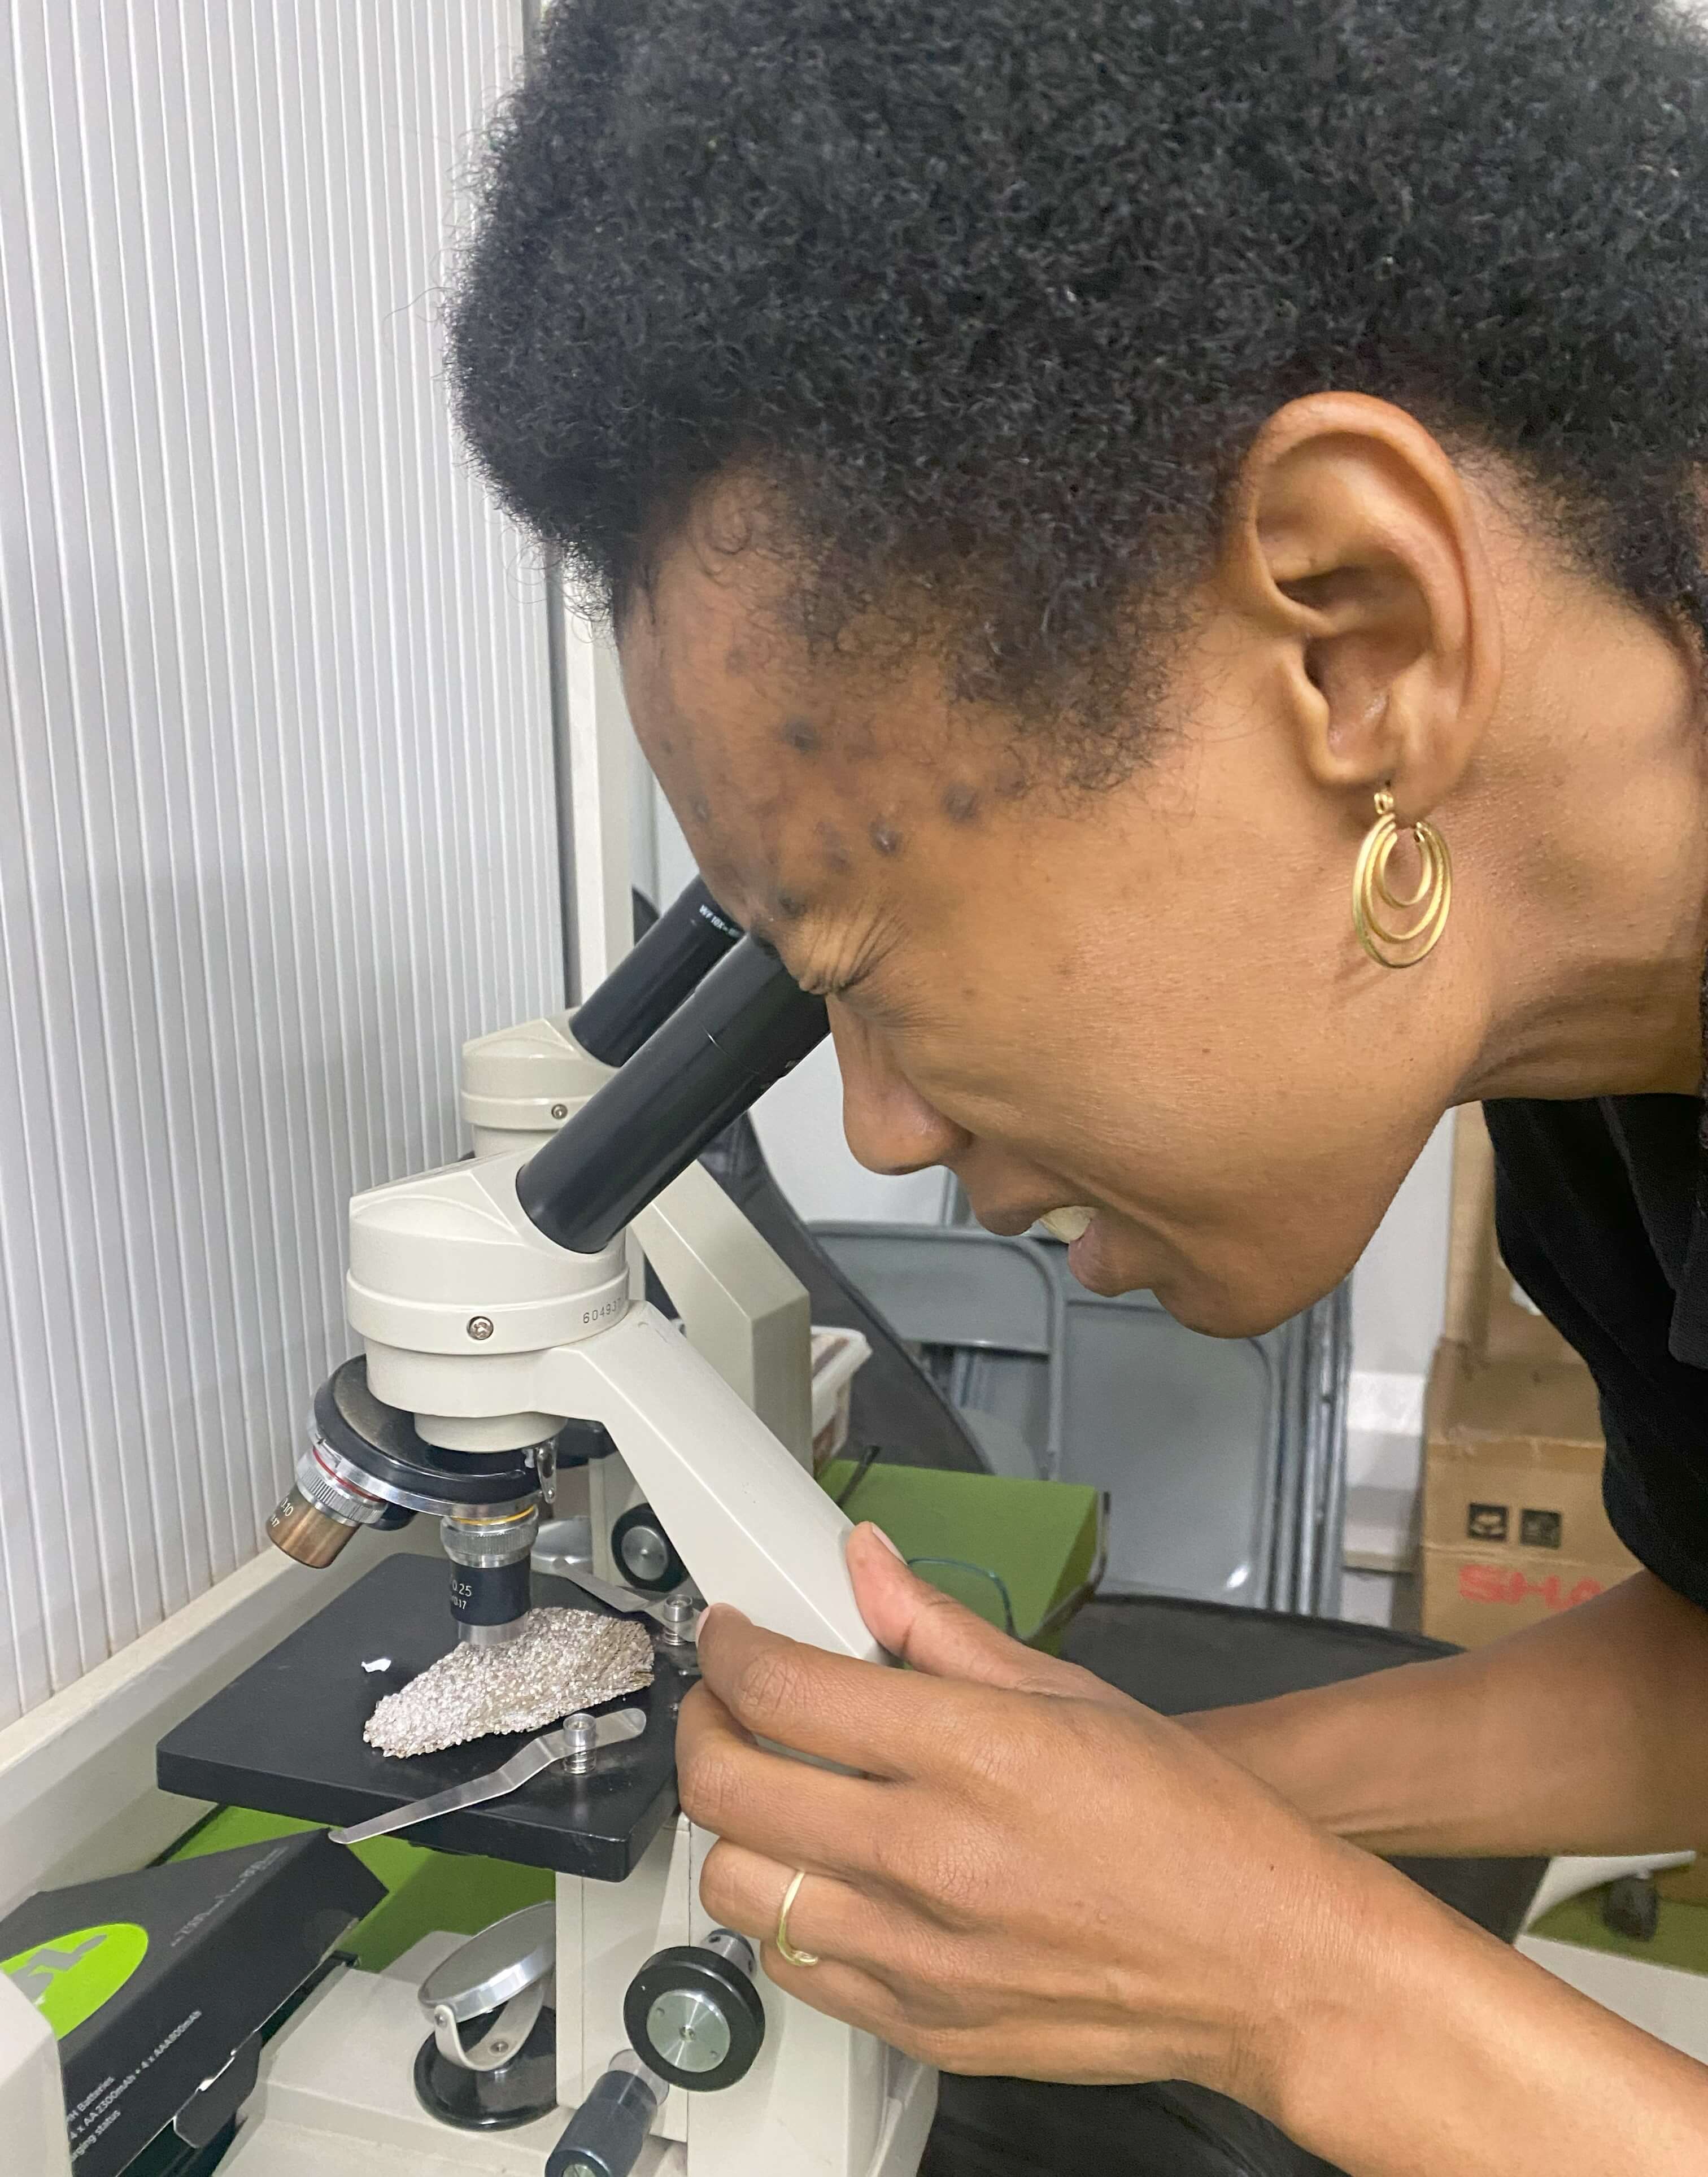 Watch this!
Christals on coconut under the microscope
Watch this!
Christals on coconut under the microscope
I look forward to a Christalized bedazzled Christmas with my own table piece!
Continued: Mango leather plywood scaffolding Materials, Process and Ingredients
For the mango leather recipe I used the recipe from the Fabricademy tutorial Tapioca&Fruit Leather recipes
Recipe MANGO BIOLEATHER & TAPIOCA
- 2 un overripe mangoes (about 300-400 g)
- 25 g tapioca / manioc / cassava starch
- 20 g vinegar
- 5 g salt
- pinch of cinnamon to avoid molding
- 10-20g beeswax
Tools and additional materials
The tools I used to make mango leather are:
- a blender
- metal pot
- wooden spoon
- cooking stove
- several glass jars
- an oven
- a round metal oven plate
Tools for the wooden pieces:
- 4 mm plywood
- Inkscape 2D design open software
- Lasercutter Top Wisdom 150 Watt running on Lightburn 1.2.01 operations software
Process and workflow
UPDATE: HOW TO MAKE MANGO BIO LEATHER A STEP BY STEP PROCESS
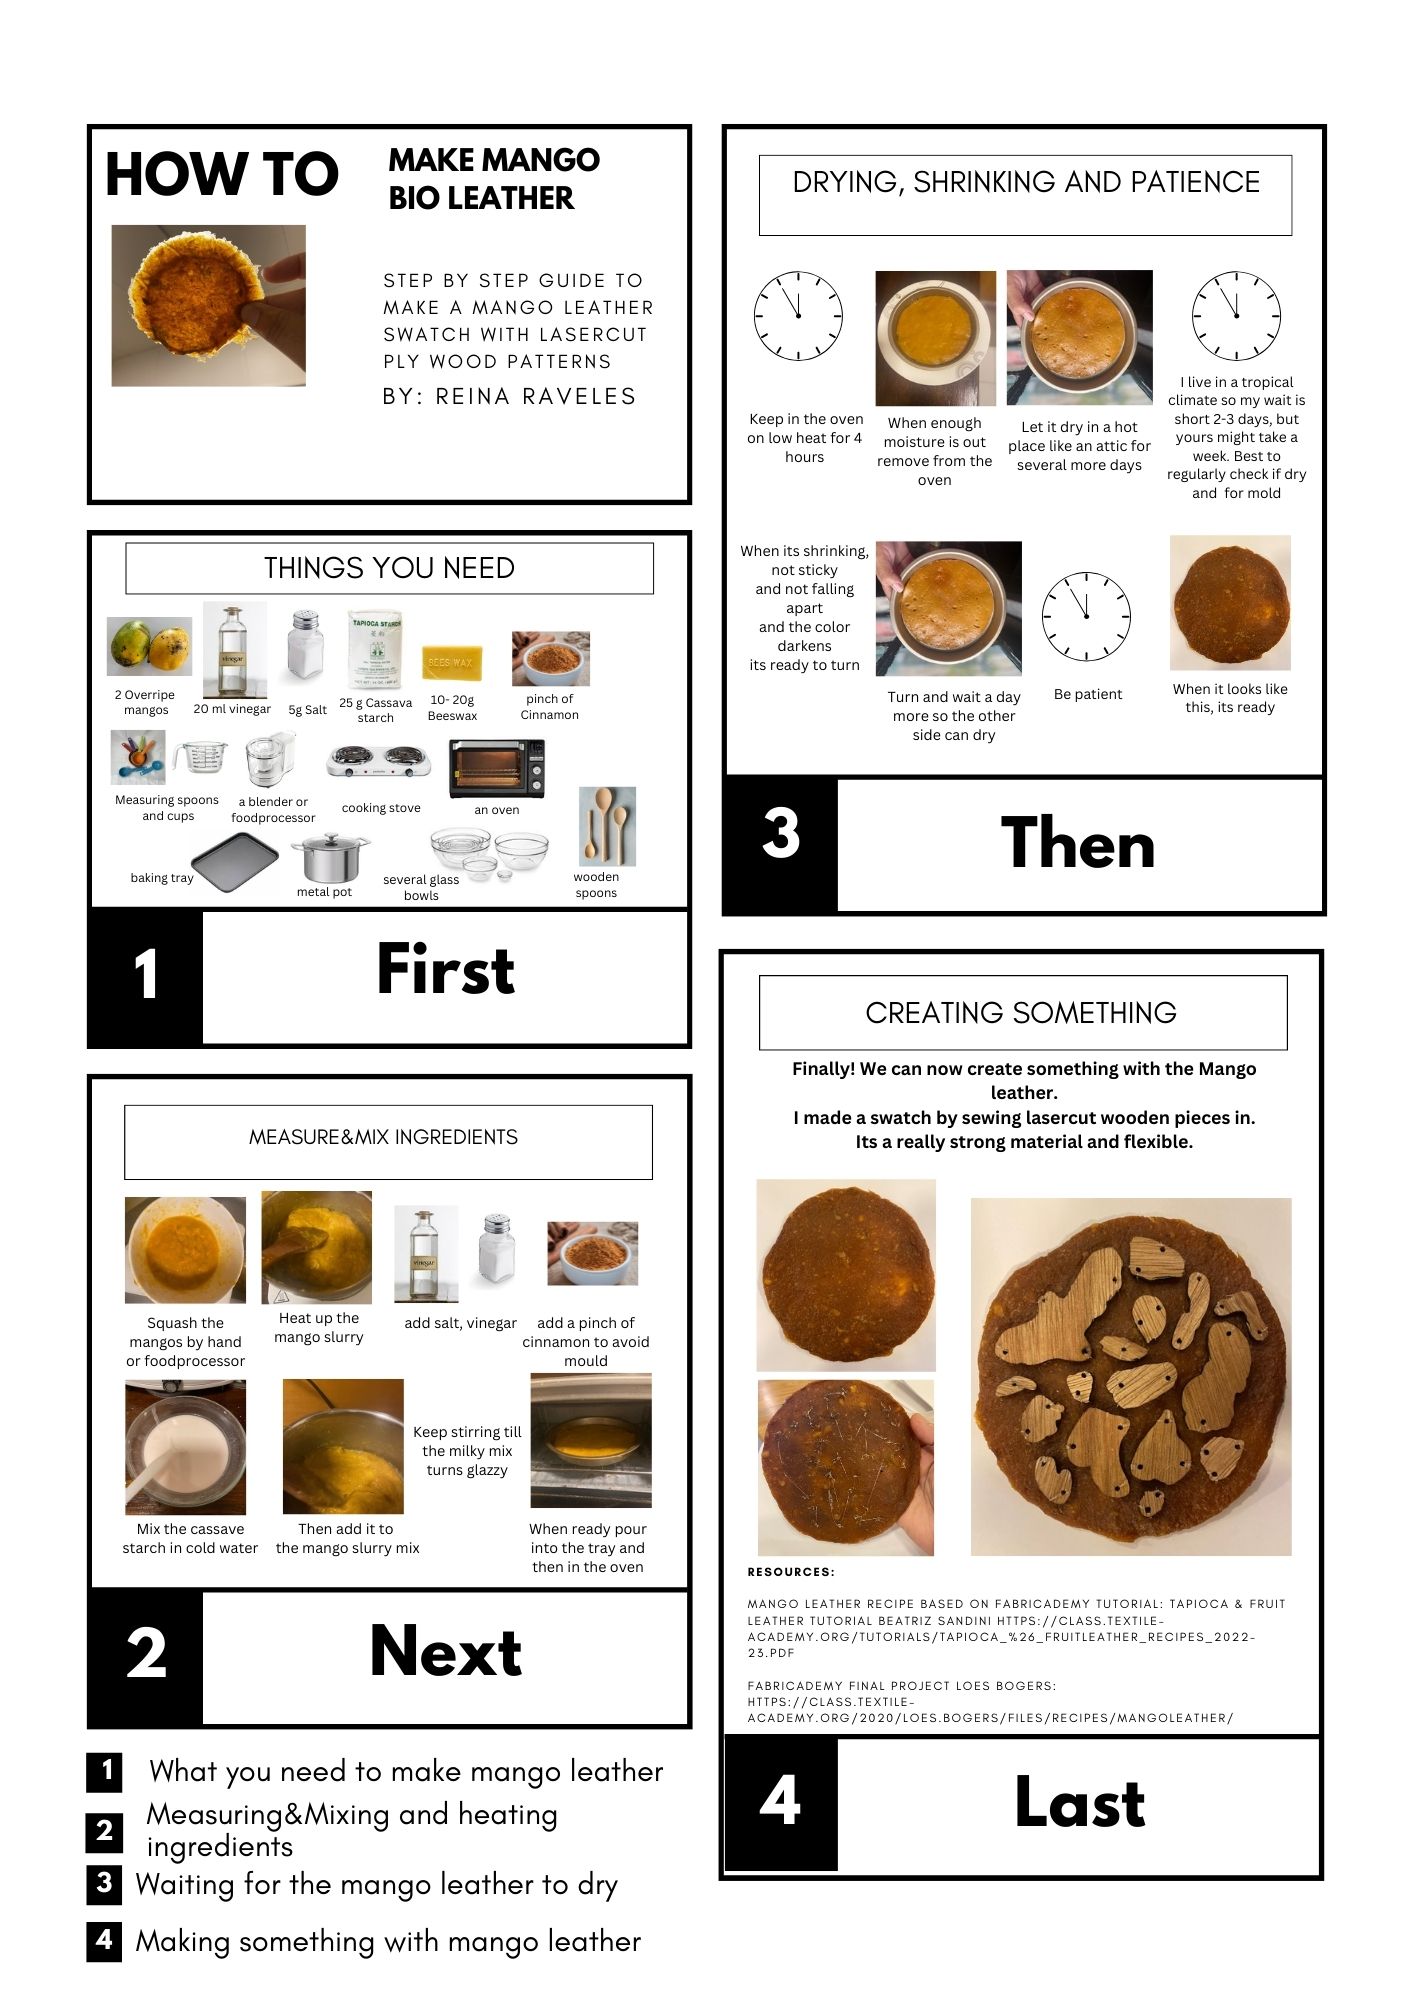
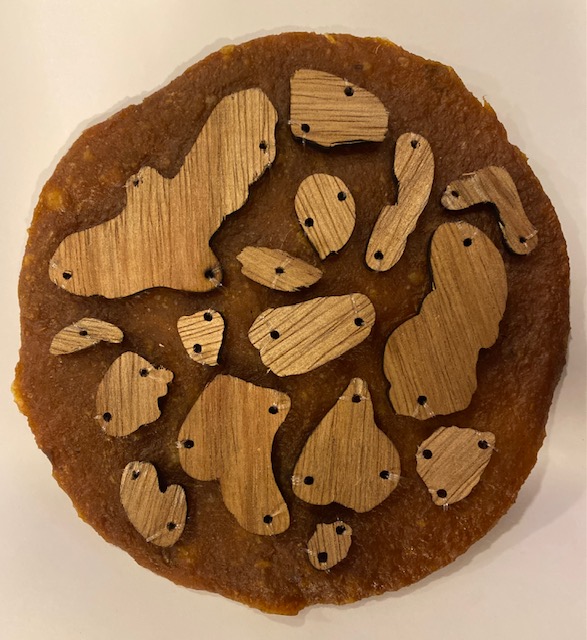
Wooden patterns:
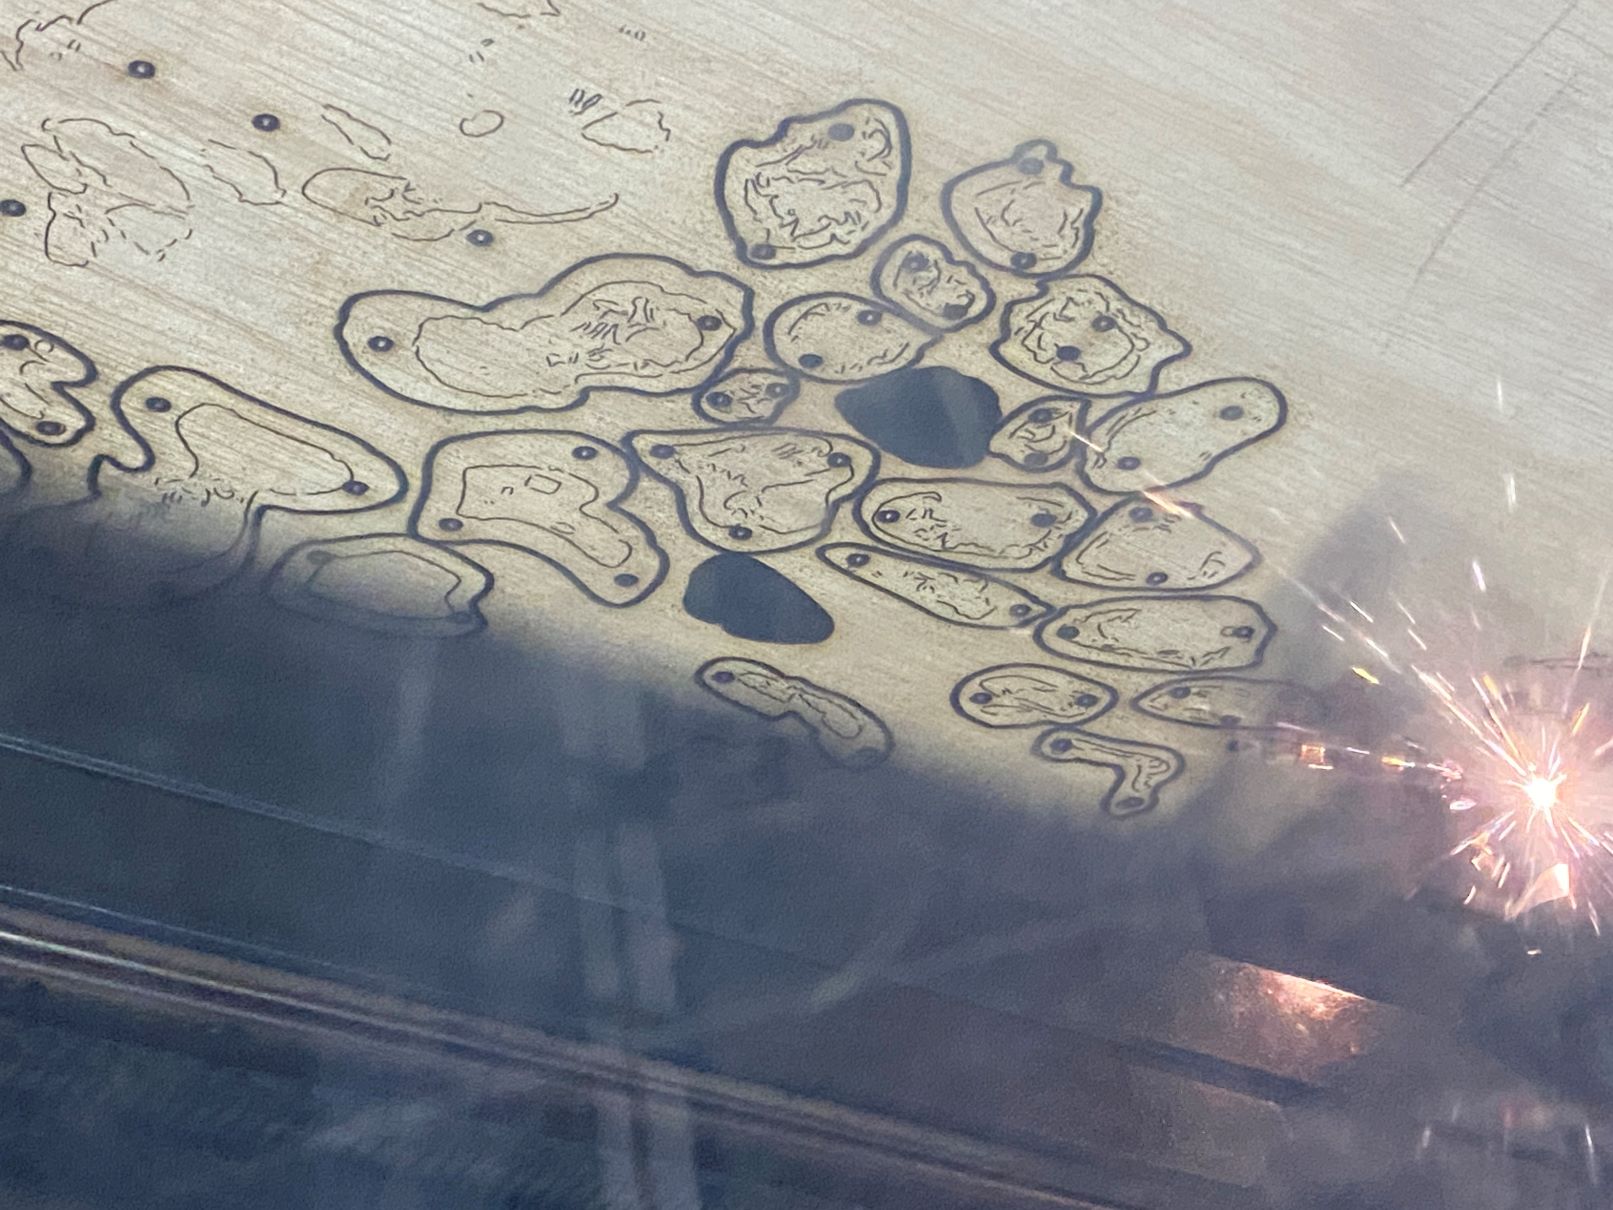
For the fabrication of the wooden pieces I
- first designed the form of the pieces in 2D opensoftware Inkscape. I imported a picture of a poison dart frog because I liked the patterns and used bitmap trace to automate the lines of the patterns.
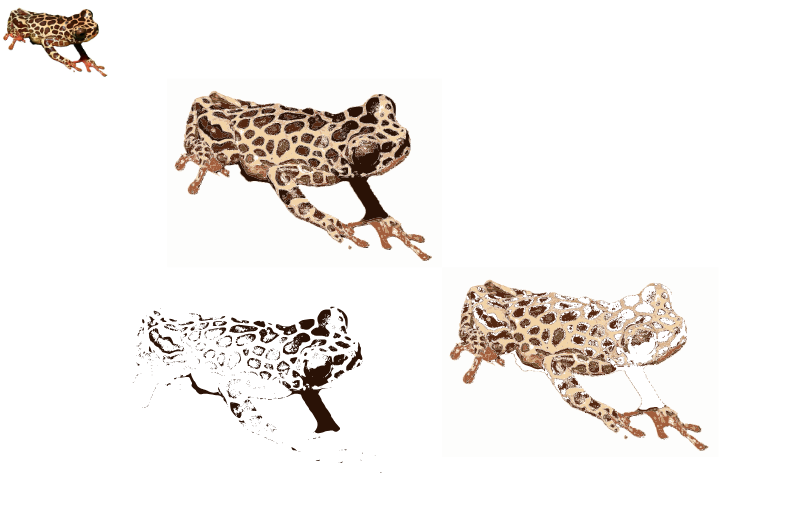 Source: Bereis tree frog Giraffe Phase
- after this I exported the line traces as an SVG file

- thirdly I used the lasercutter to cut the patterns out of a piece of 4 mm plywood.
The IoT Lab lasercutter is a Top Wisdom 150 Watt, full size lasercutter 122 by 244 cm from Chinese manufacturer Mophorn. It runs on Lightburn 1.2.01 operations software (not open source)
Click on the link or picture for a lasercutting video sample:
Finally after the mango leather was completely dry, I randomly place and handsewed the wooden patterns on.
Just with needle and tread. Unfortunately I didnt make a picture of this part of the process.
References & Inspiration
- Download reference
aaltoartsbooks_thechemartscookbook
The SVG file for the lasercut pieces attached to the mango leather can be found here:
