5. E-textiles
This one is hurting me (my brain and my ego) a bit... I'll get back to it soonest!
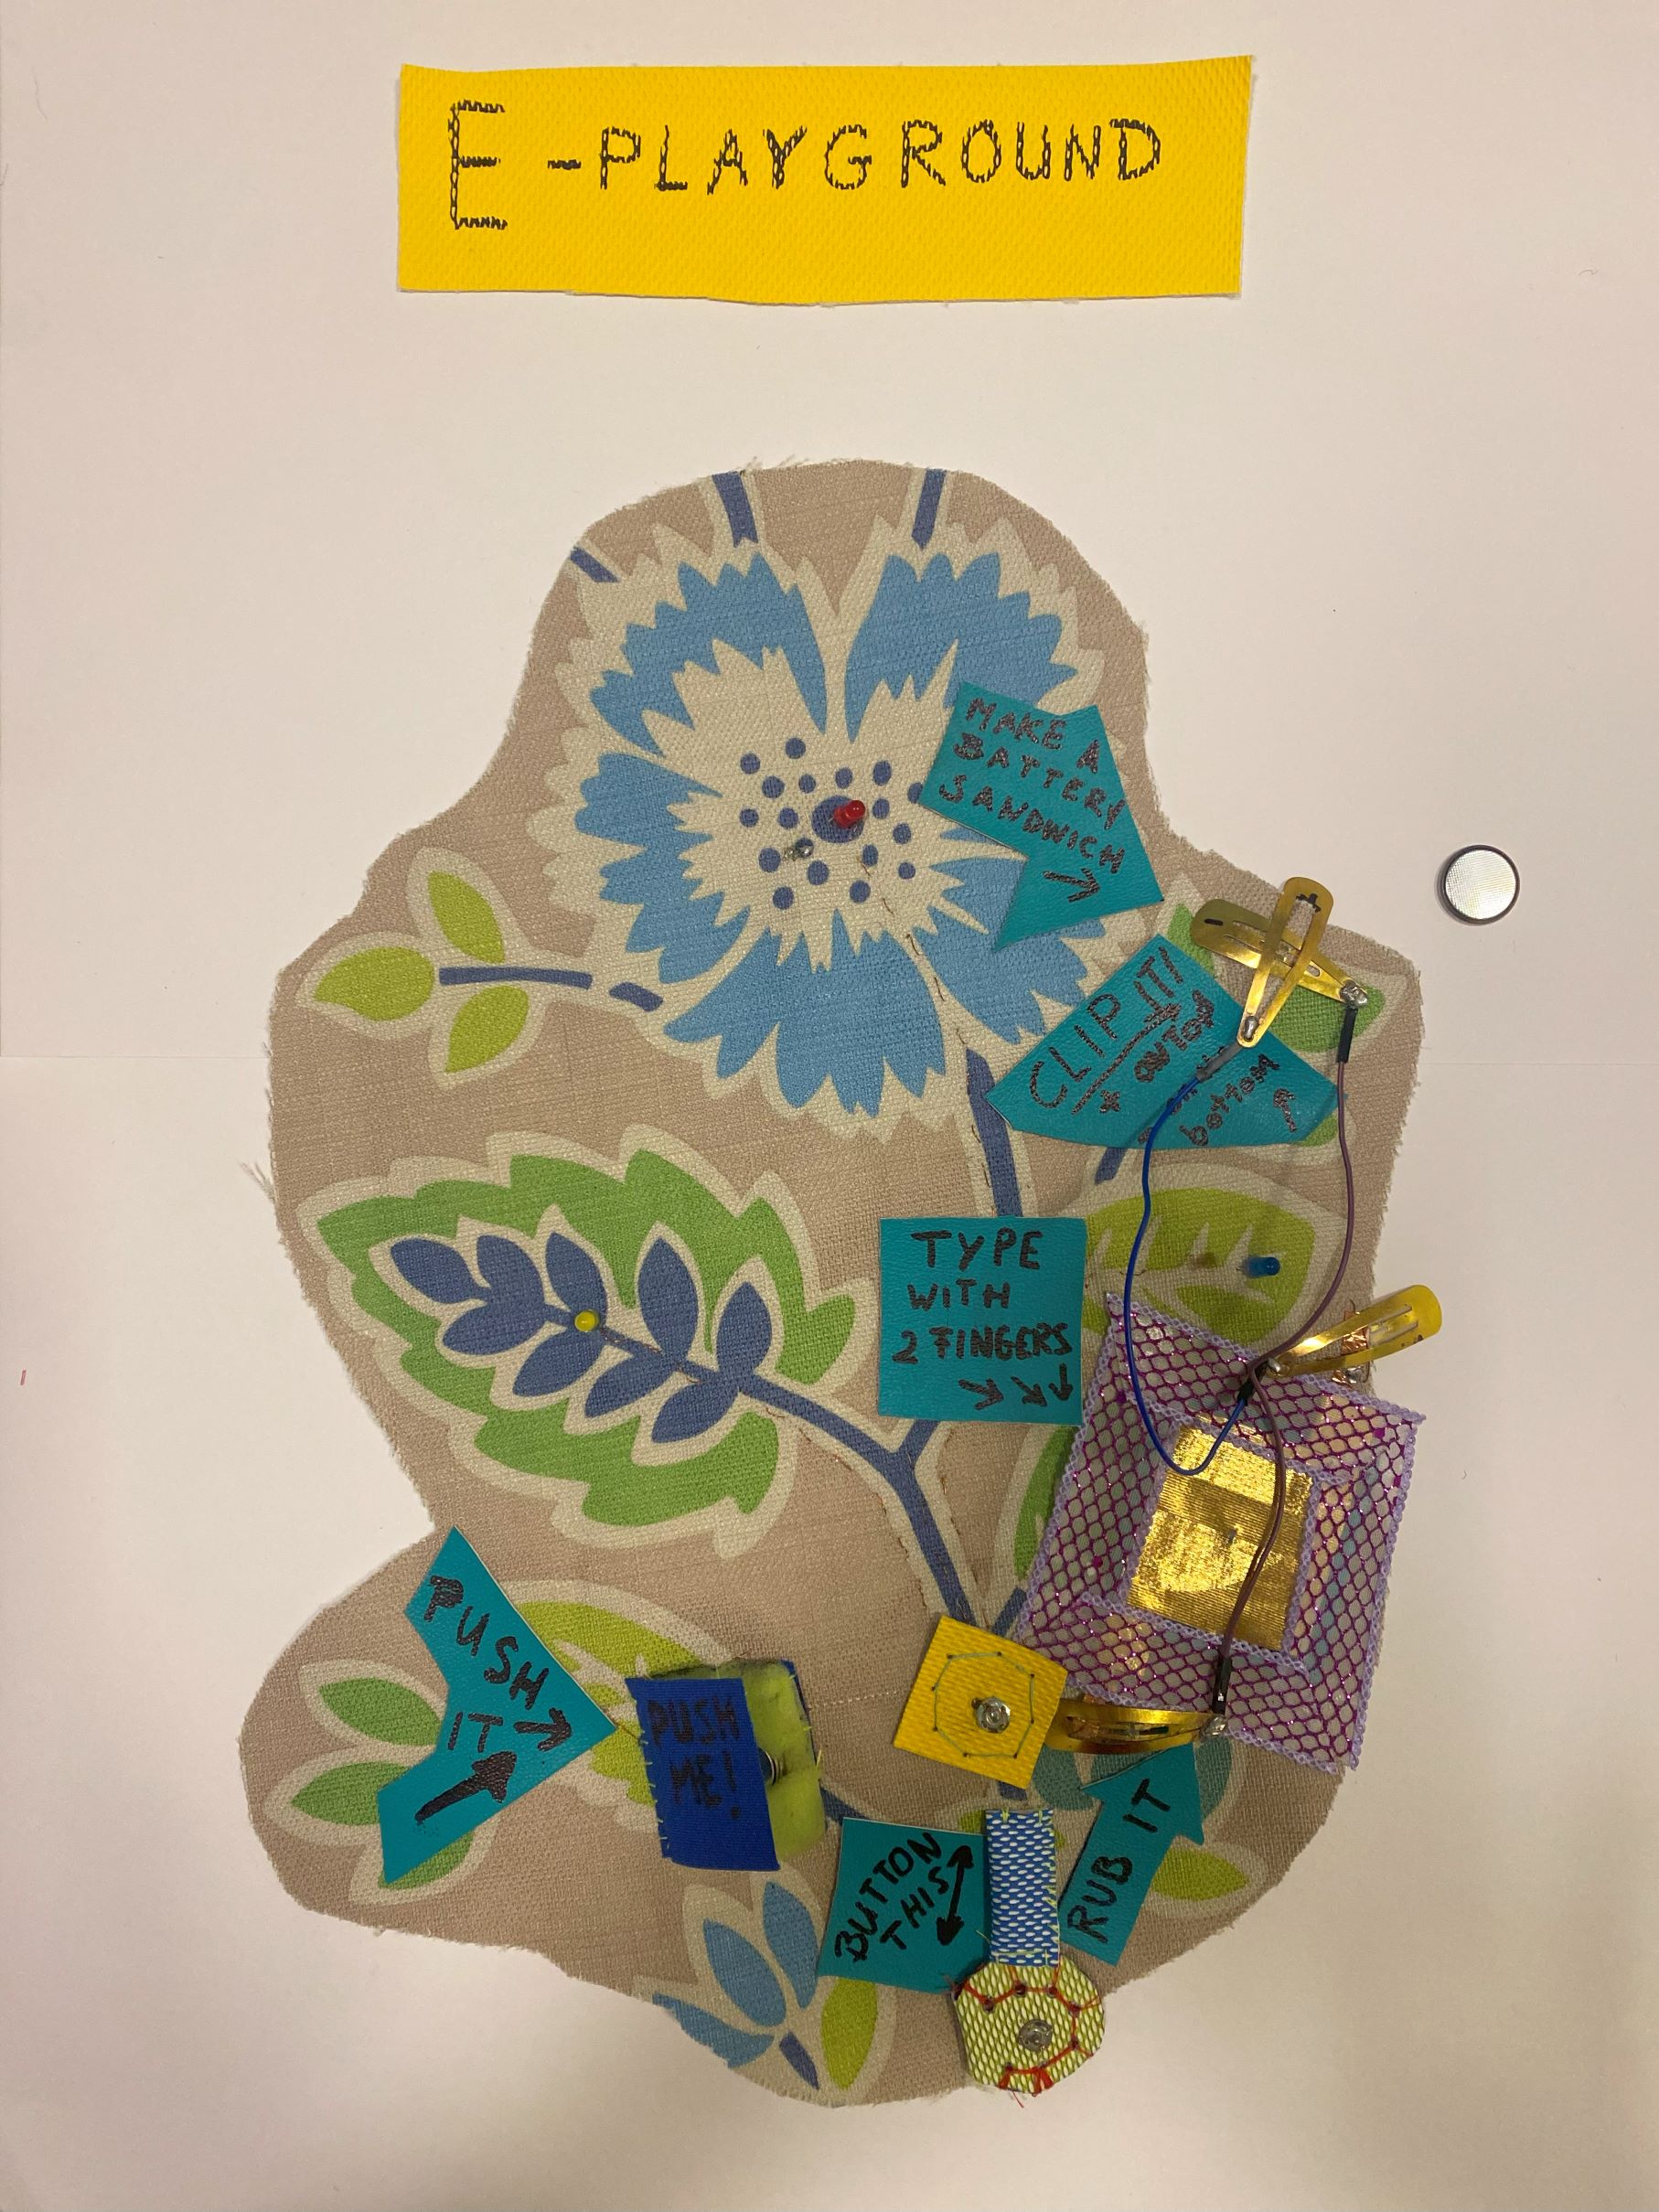
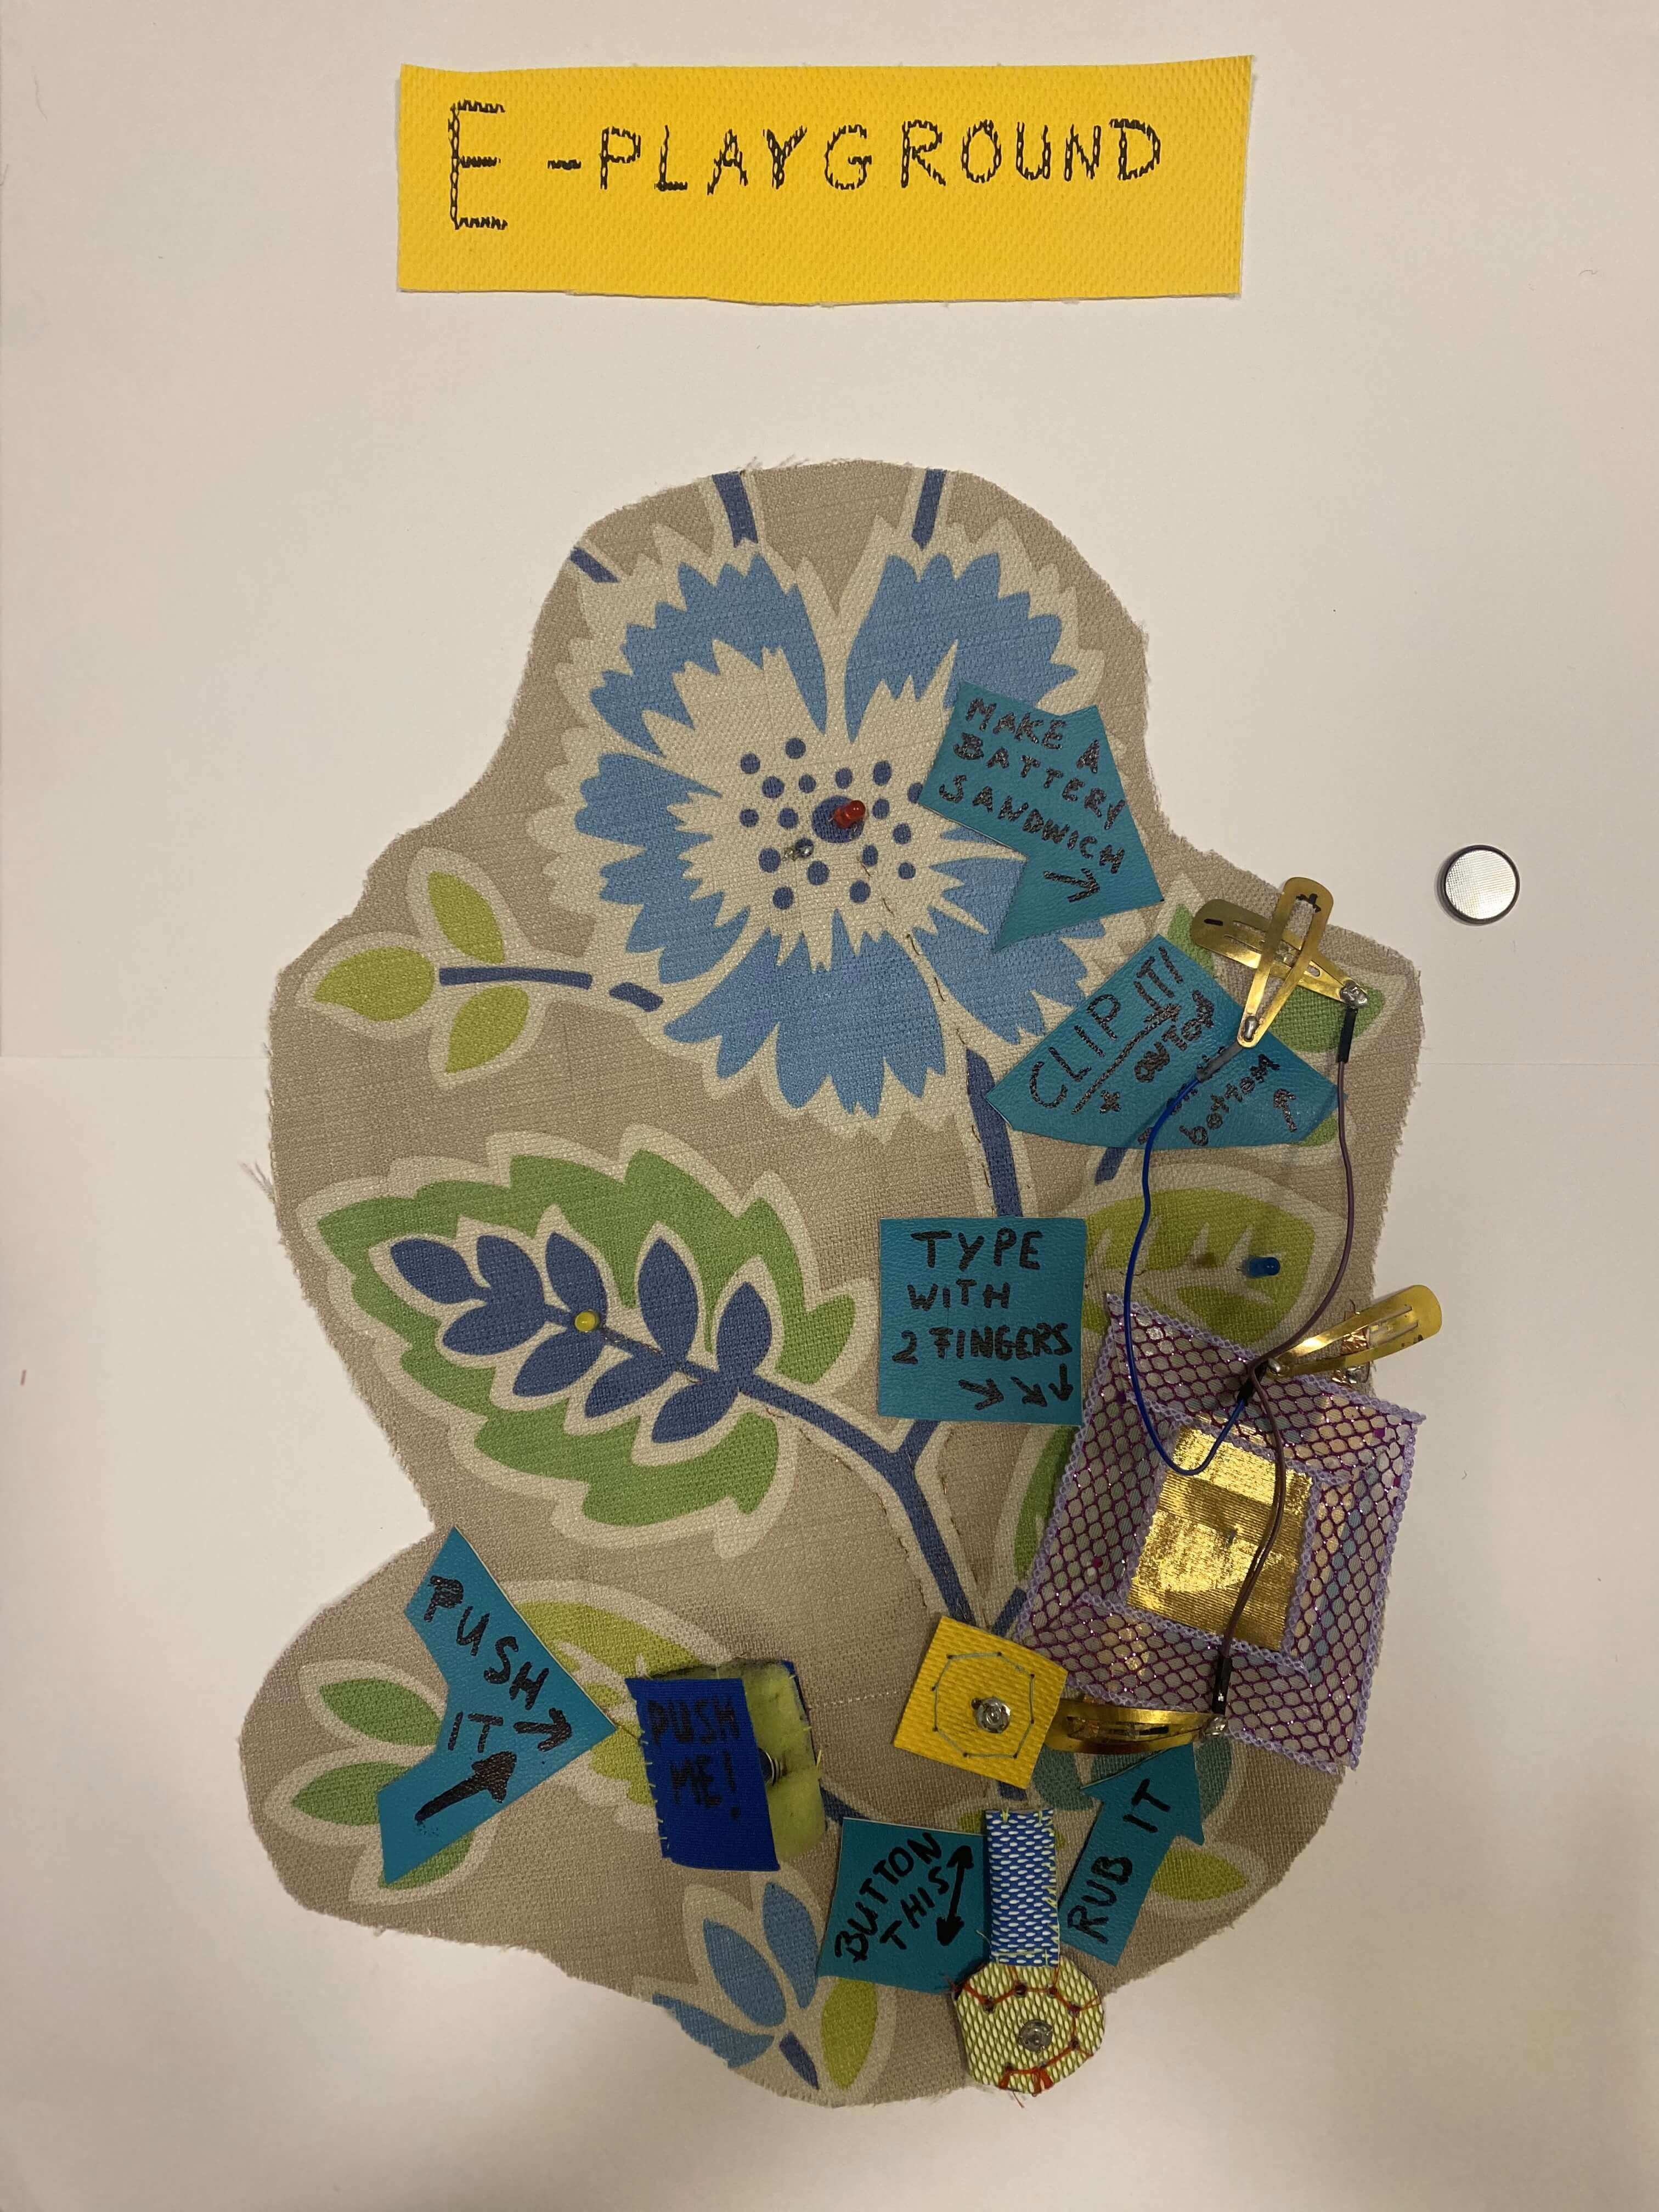
UPDATE: Find here documentation on the E-Playground; A concept for an E-textiles playground for all ages to play around with switches, actuators and traces to better understand the dynamics of electronics, textiles, conductive and non-conductive materials.
For a video demonstration of the E-playground you can click on this youtube link or on the next picture: Youtube video of E-Playground
Assignment
The E-textile objective and assignment
-
Research skills: the participant has acquired knowledge through references or replicating existing projects
-
Design skills: the participant understands how to produce soft circuits, sensors and actuators
-
Fabrication skills: Learn how to embed electronics on fabrics, study soft-hard connections
-
Process skills: Anyone can go through the workflow, understand it and reproduce it
-
Final outcome: The assignment is assembled and either complete or tested
Student checklist
-
Build at least one digital and one analogue soft sensor, using different materials and techniques.
-
Document the sensor project as well as the readings got using the AnalogRead of Arduino
-
Integrate the two soft sensors into one or two textile swatches using hard soft connections
-
Document the circuit and its schematic
-
Document your swatches / samples
-
Upload your arduino code as text
-
Upload a small video of the swatches functioning
-
Integrate the swatch into a project (extra credit)
Processing and getting organized
So it's taken a while for me to document, not because nothing was happening but because I got stuck a few times over simple things like where to put the battery for example. Later going from the swatch to Arduino another gap. Definetly in my Fab development the Arduino and programming micro controllers are a mental hurdle to overcome. But we're getting there!
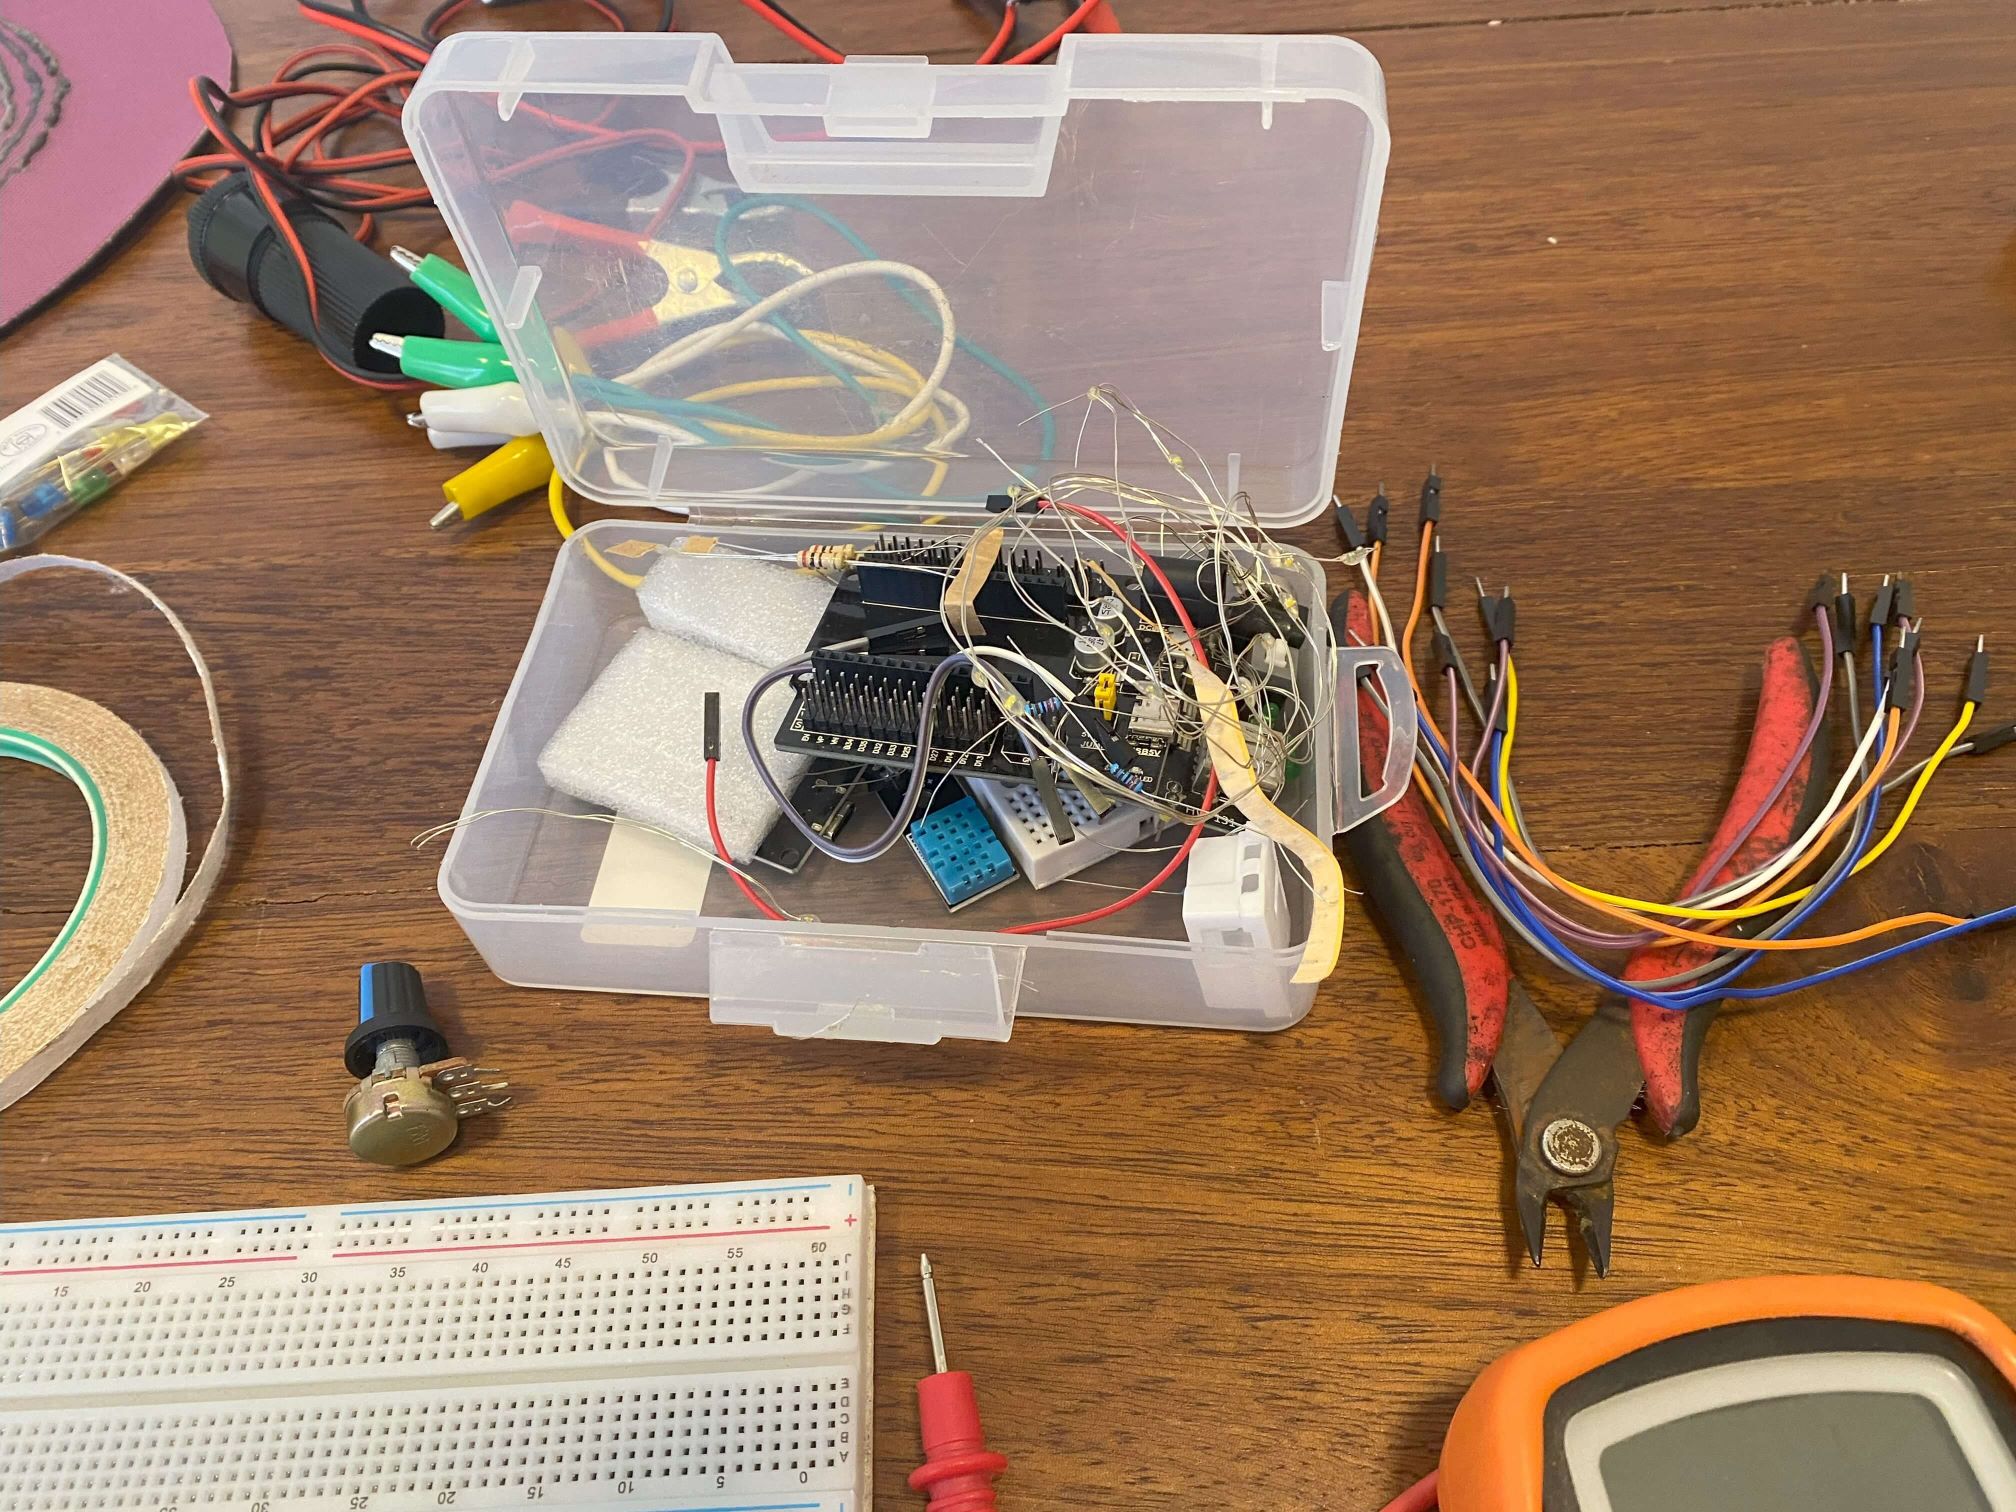
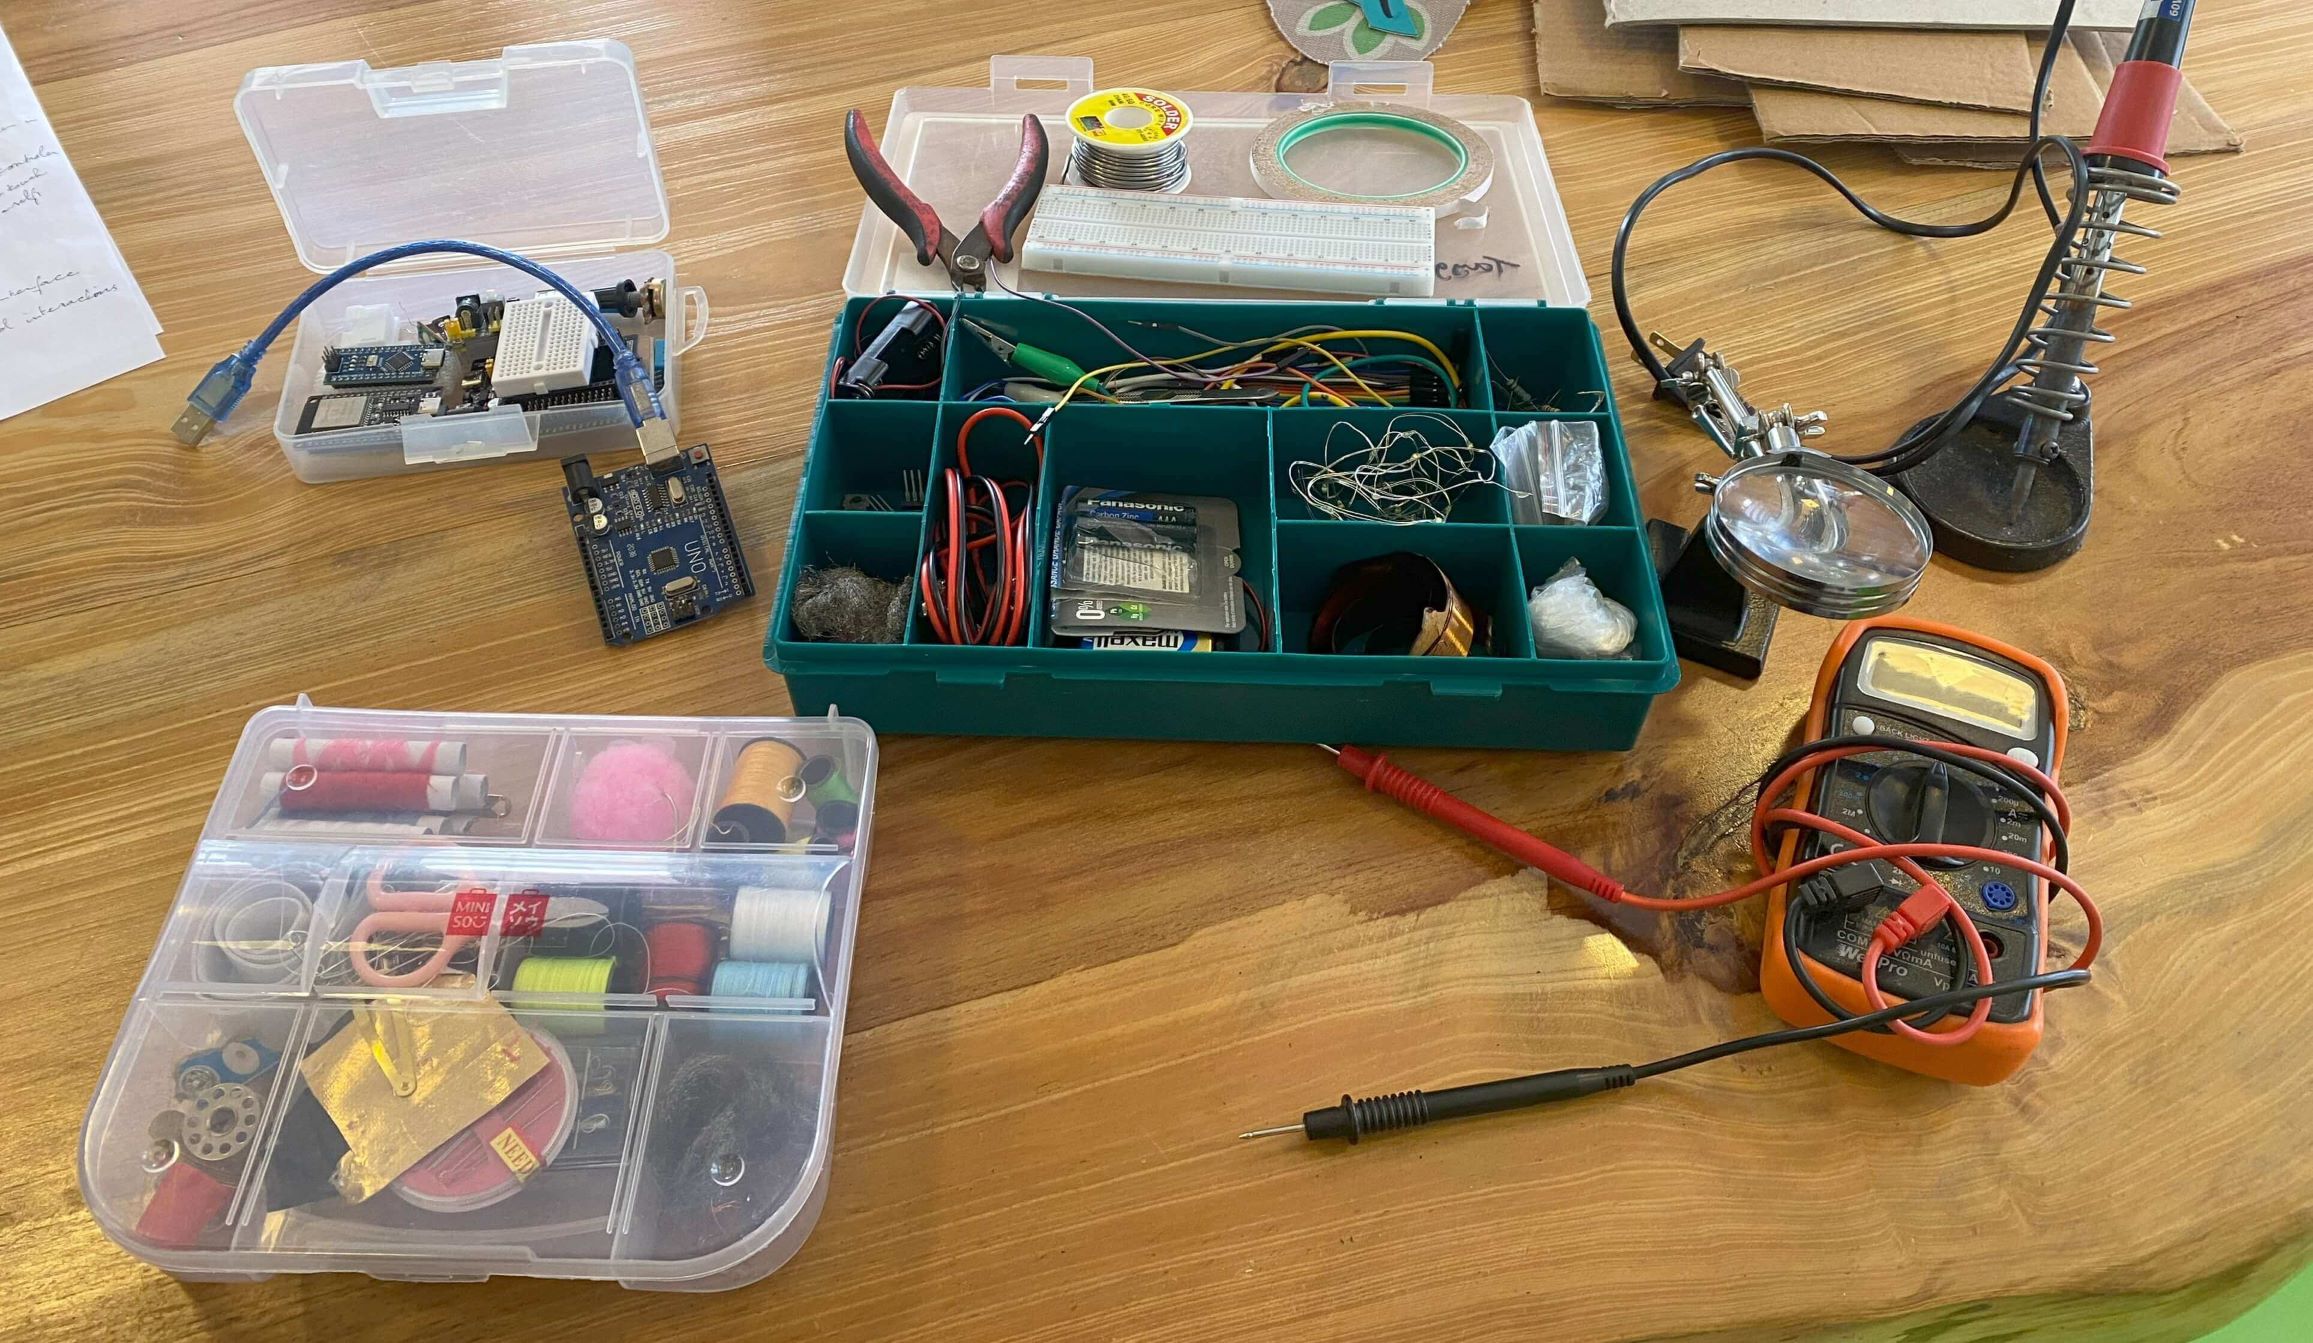
Another thing I had to do is to have all the little thingies organized in boxes where I can find them. Neetness is key to being organized in my headspace. Moving between workspaces makes this challenging and making sure you have something when you need it whether you do the assignment in the IoTLab, at the office or at home is important.
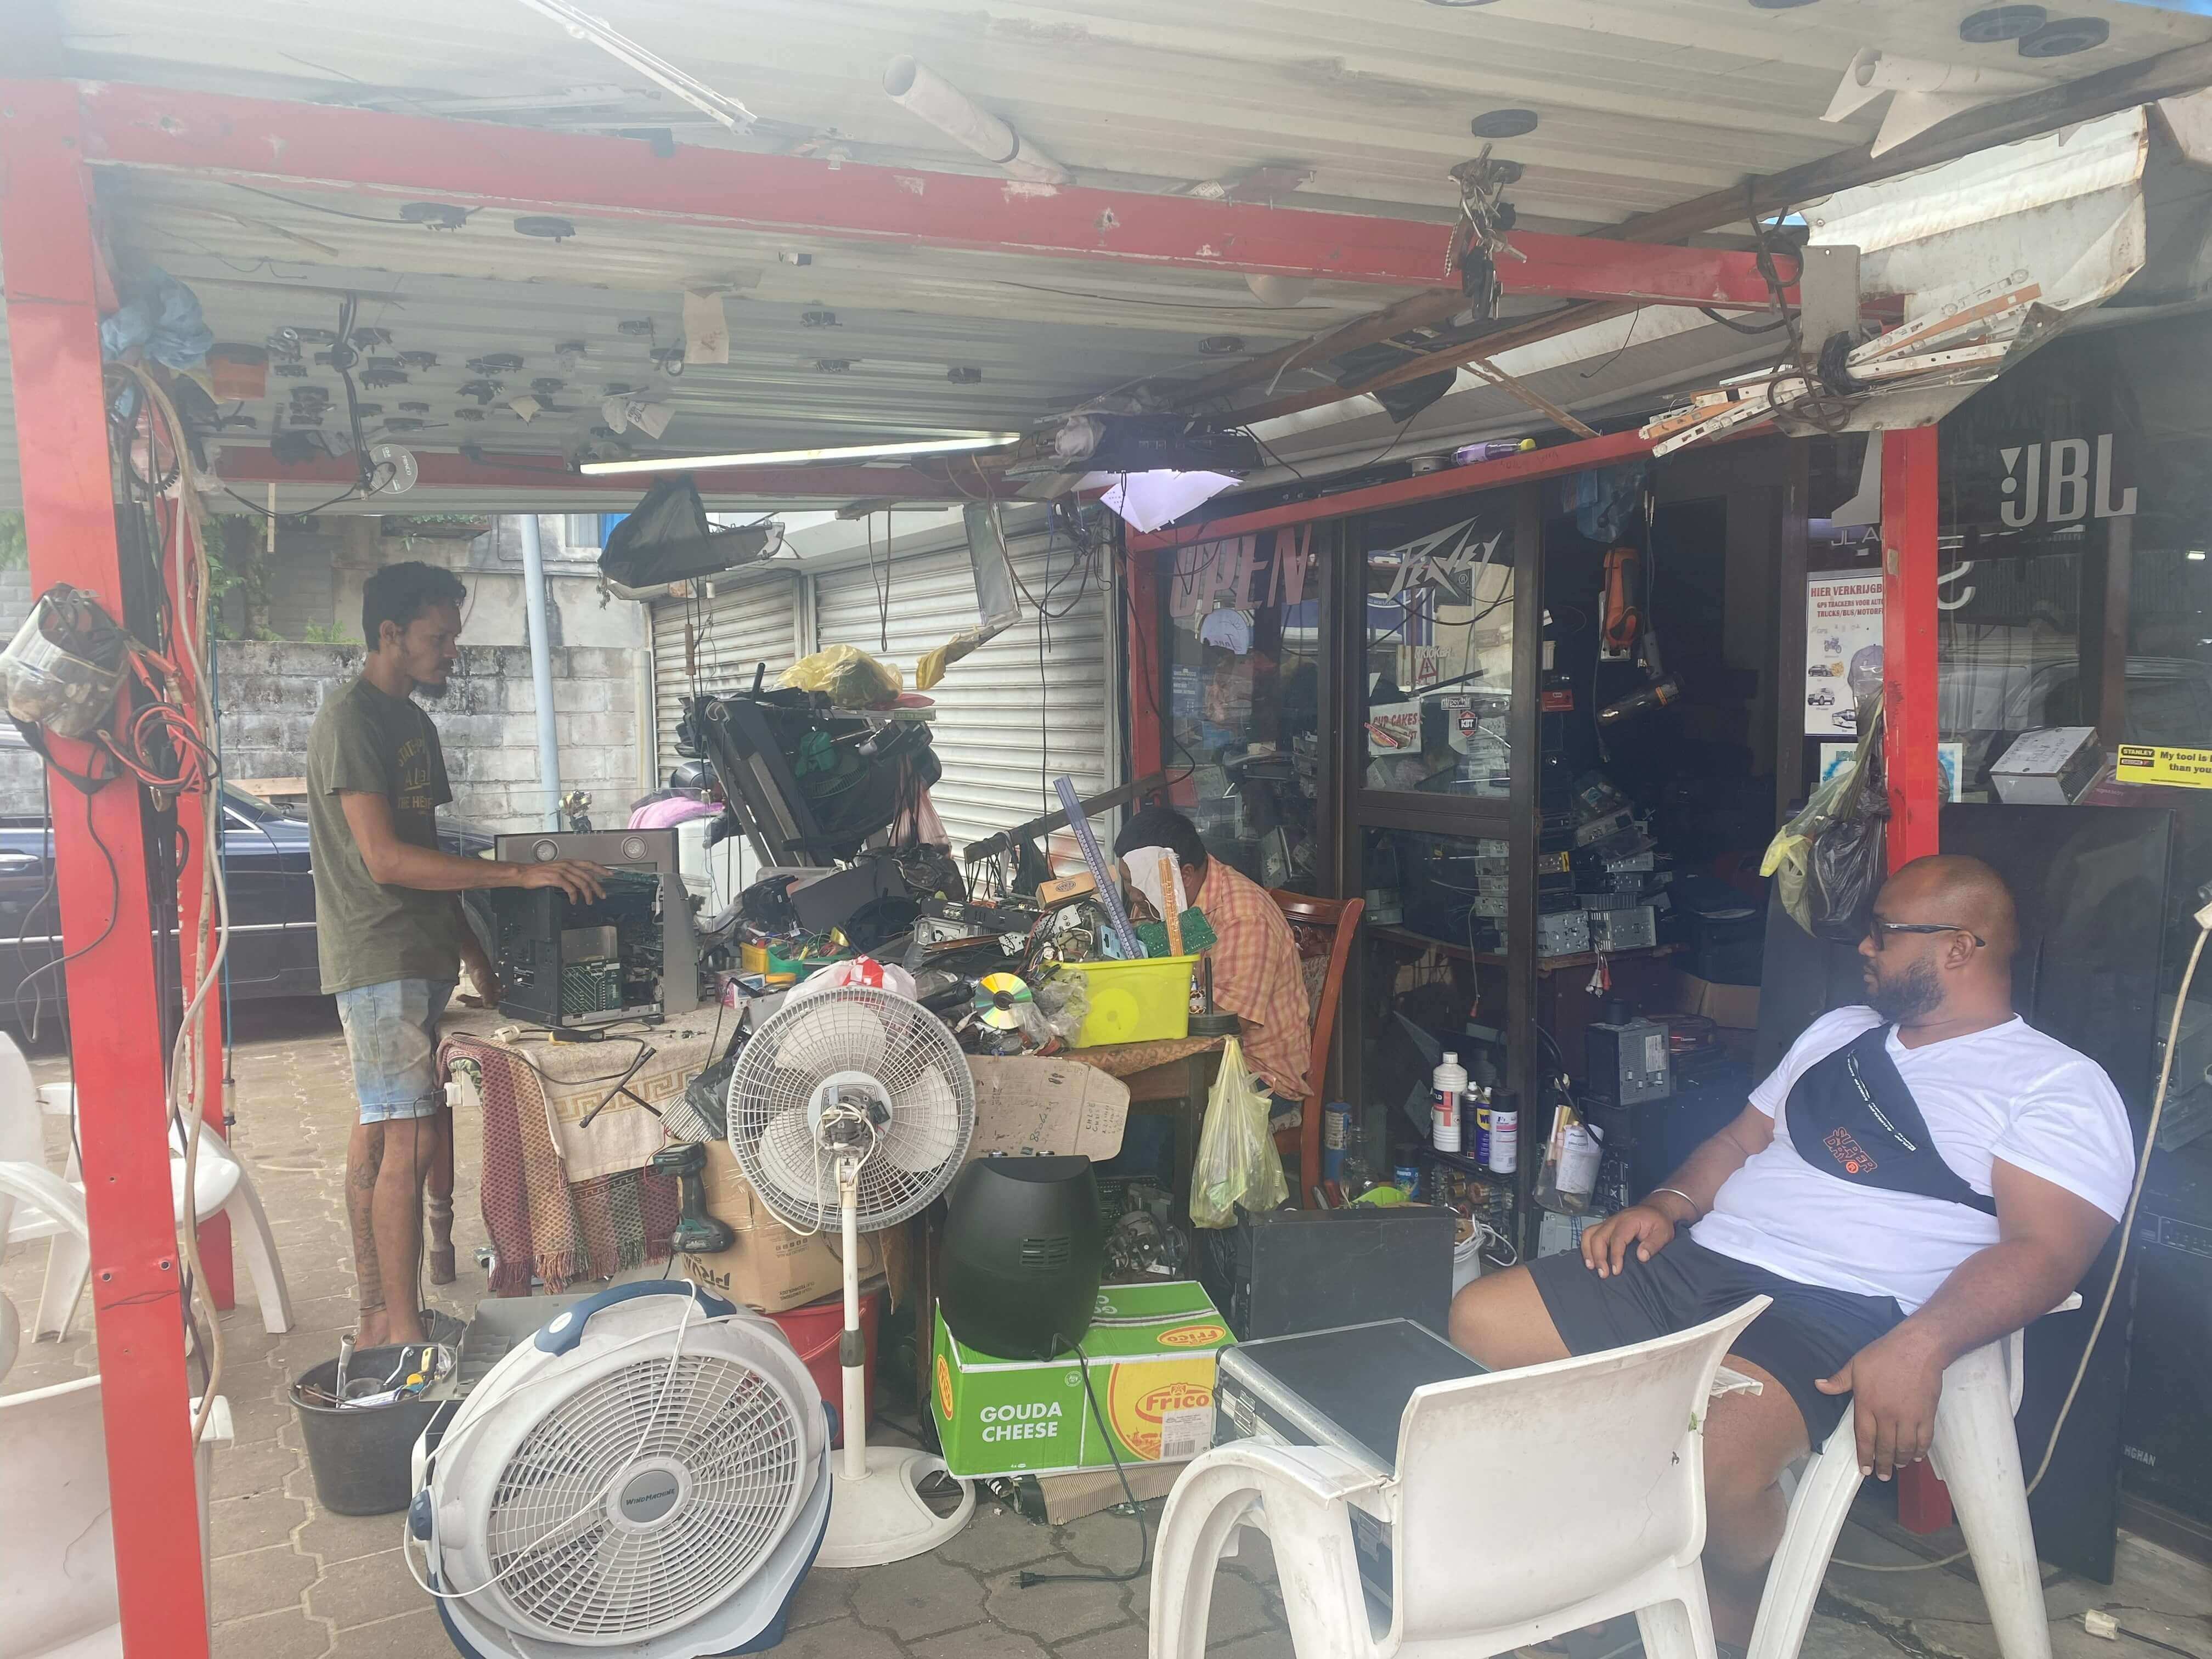
Finally I had to get some things through Amazon like the velostat or discover locally where to buy electronics, sometimes in very surprising places like repair shops that will strip old electronics parts and sell or give away for free to reuse. Definetly a circullar economy I was not aware of!

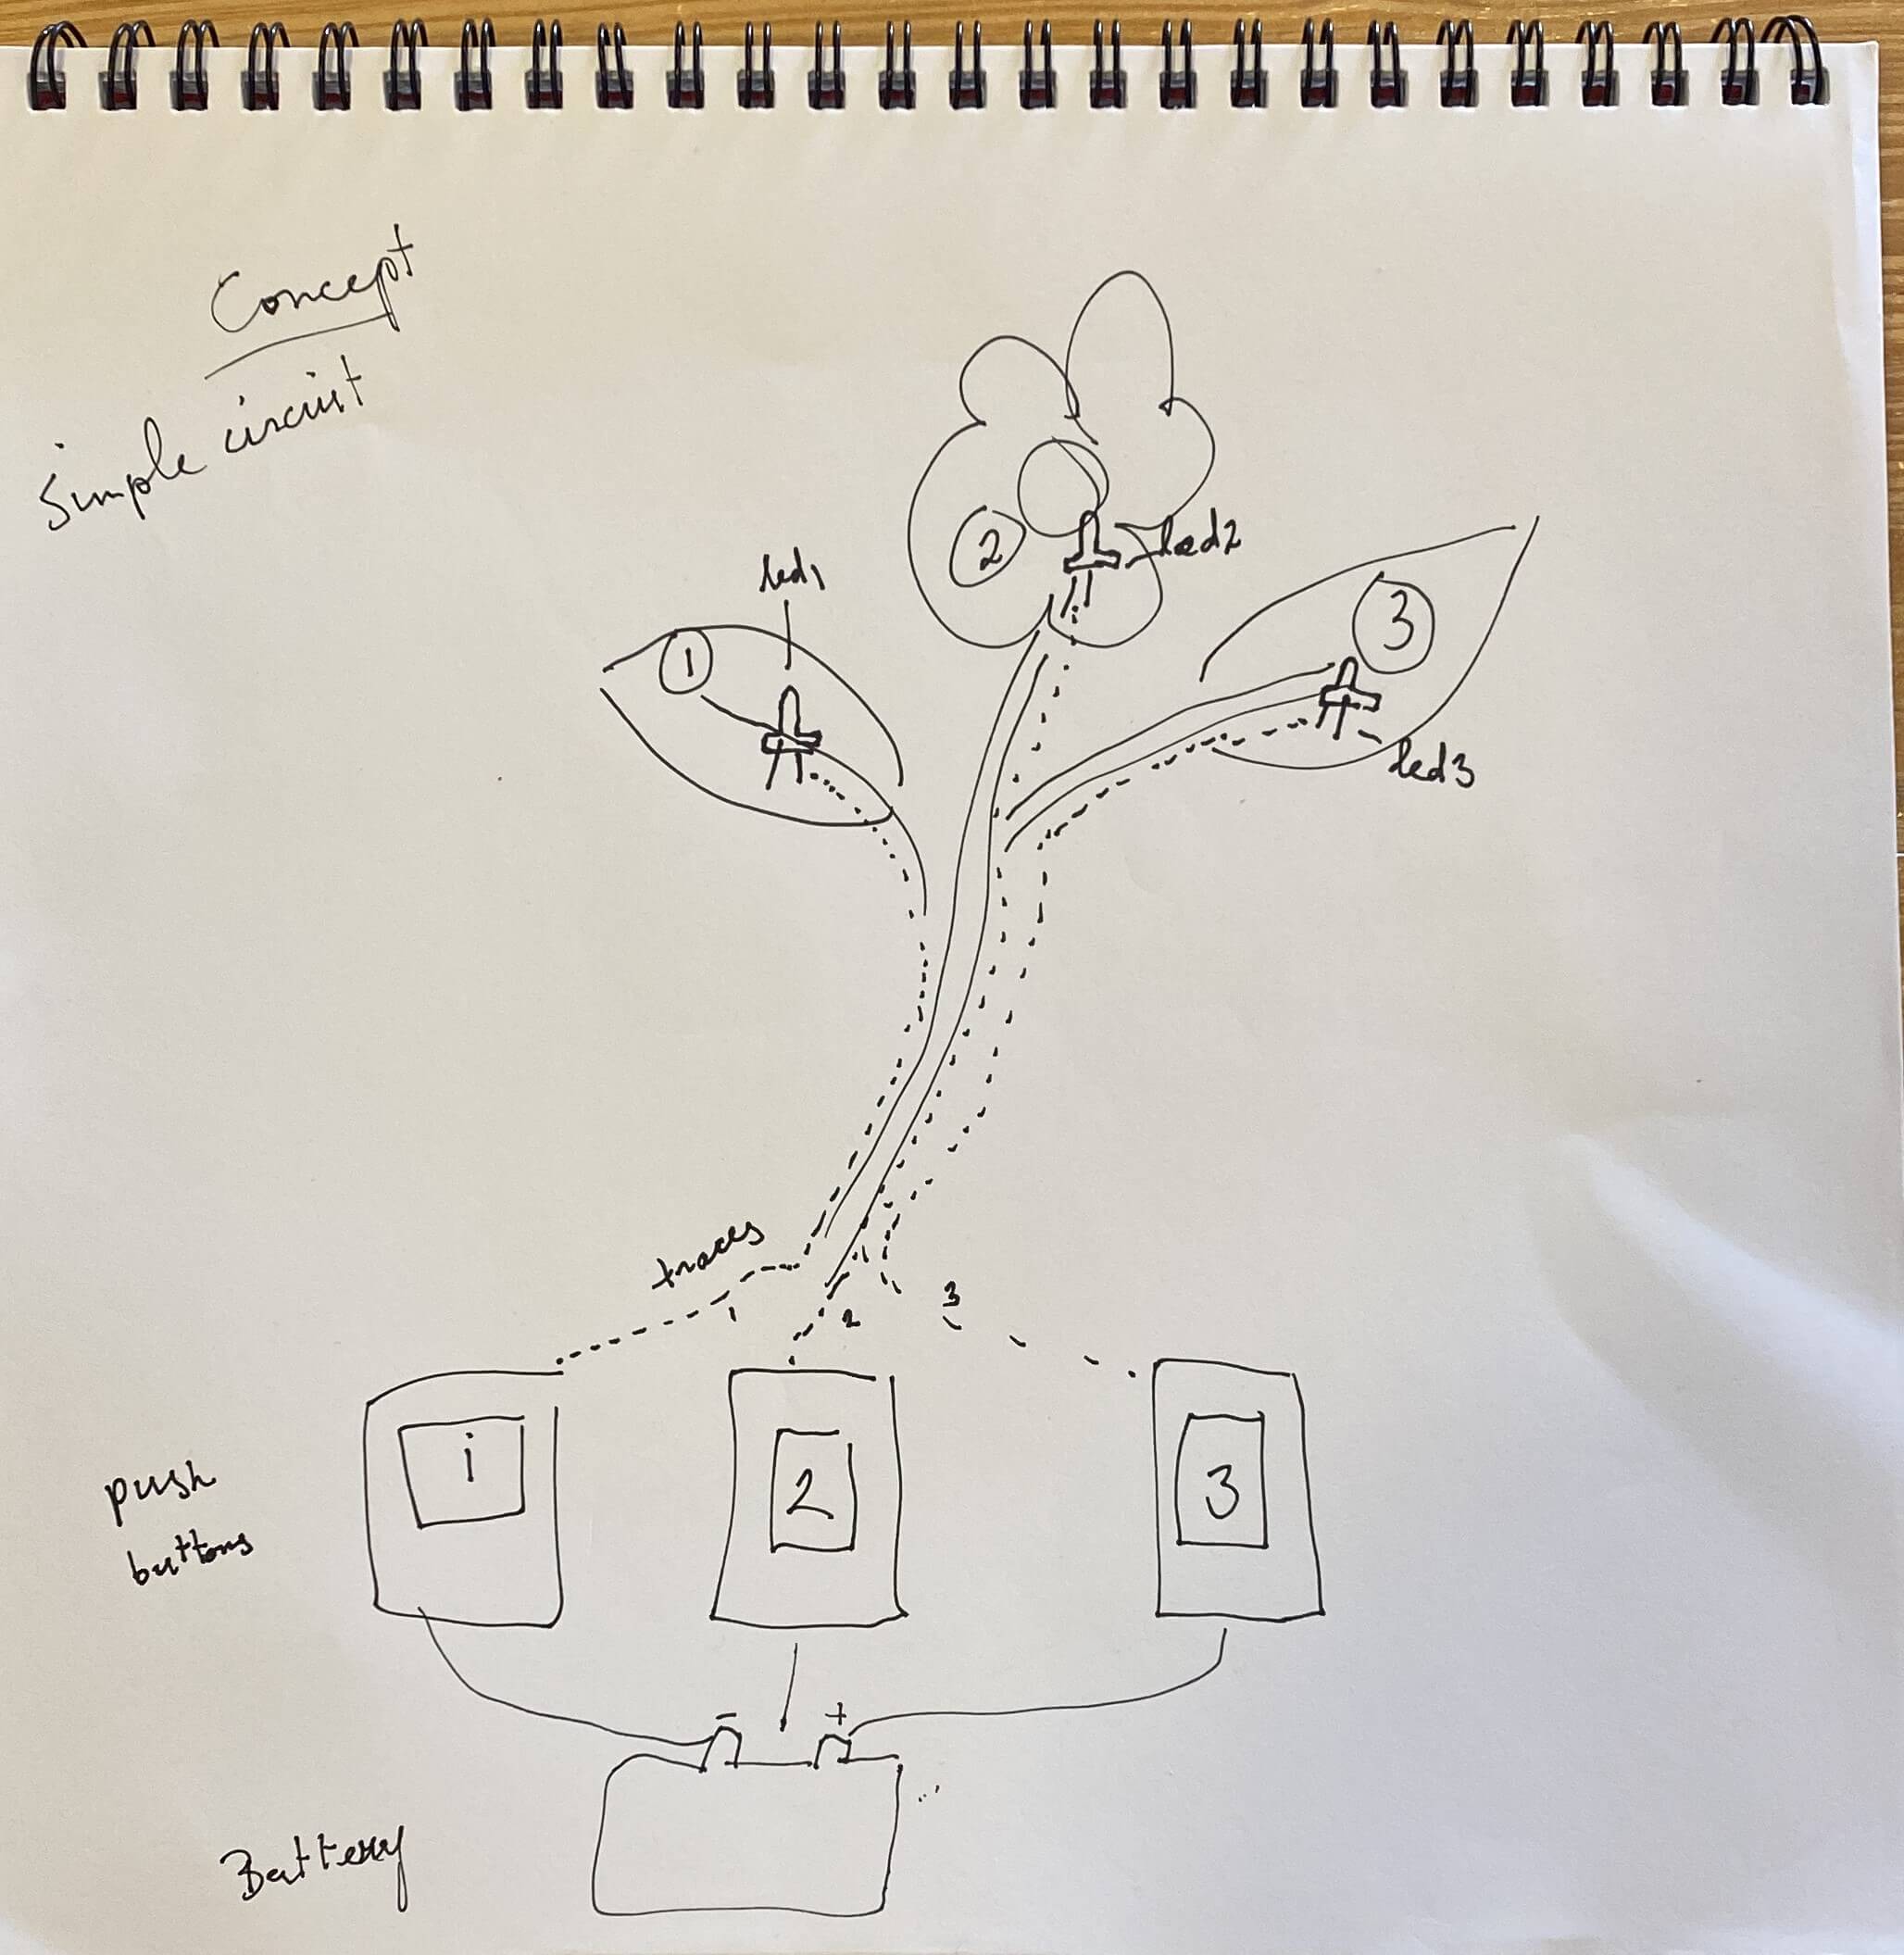
In any case: I made a swatch based on this first Frenkenstein sketch. Very simple and then I had to Arduino it. Not so simple anymore but thankfully I had some good teachers and coaches in Fabricademy and a supporting environment in IoTLabSu. Very grateful for the time you invested in me!
IDEA: E-Playground
I can not say that I started out with the idea to make a E-playground but it eventually got there. A little girl called Emily saw me making the first PUSH-ME switch and after pushing it herself said "I'm confused" in the most cute and funny way. I can imagine her confusion coming from the fact that it does not make sense that fabric, yarn, sponge and kitchen foil produce light. Everytime I added a new switch she told me the same thing but she was more intrigued each time.
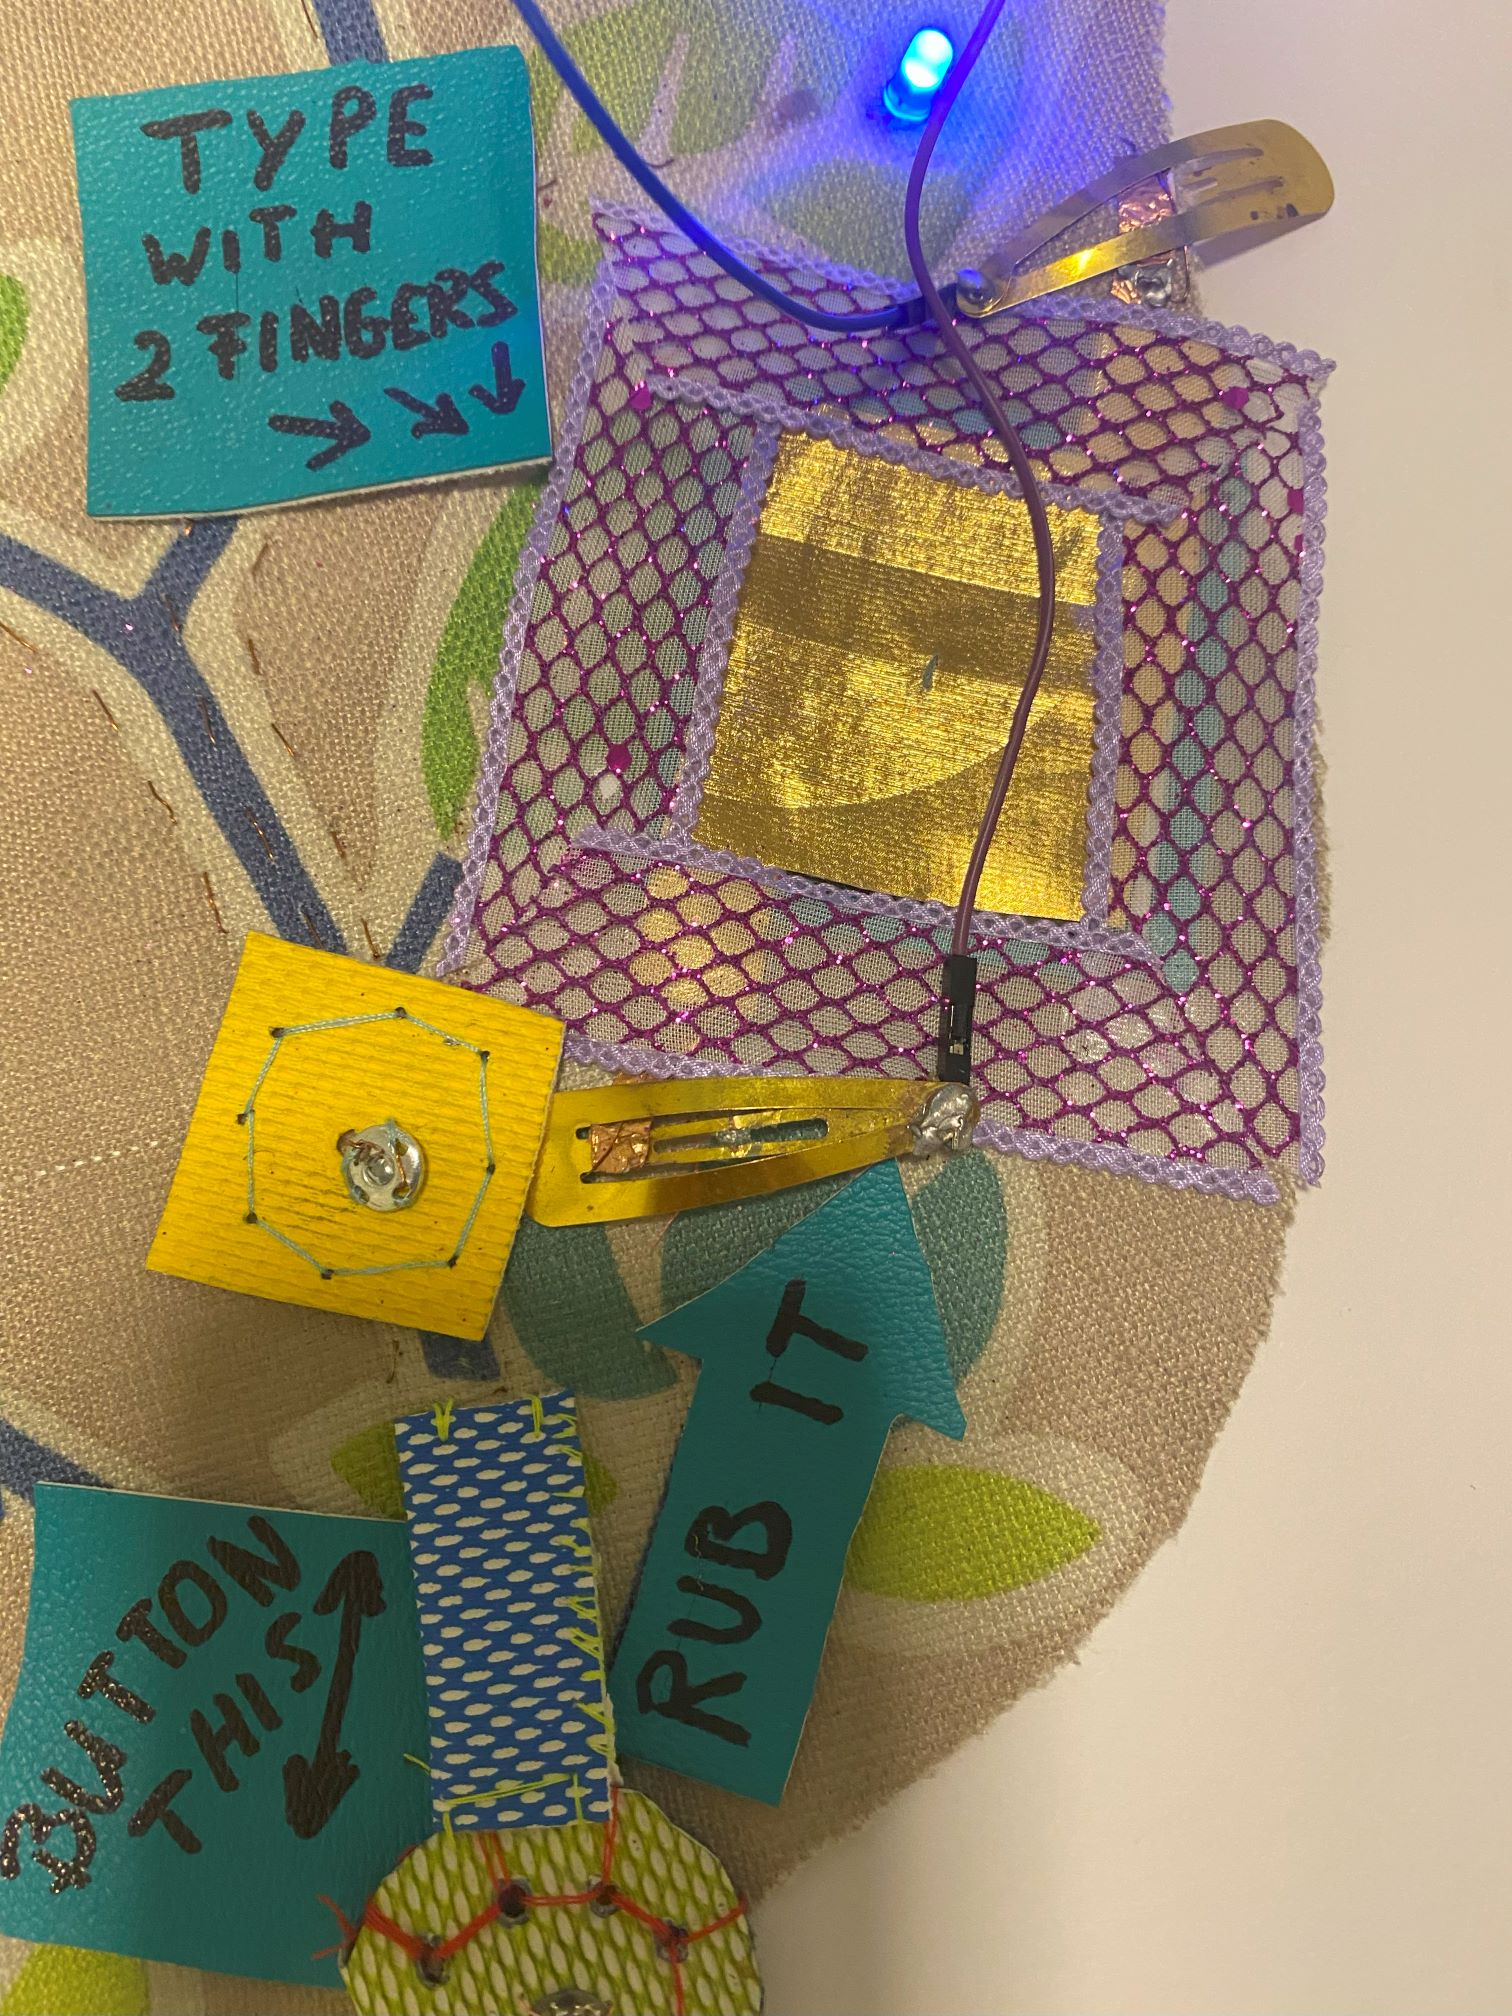
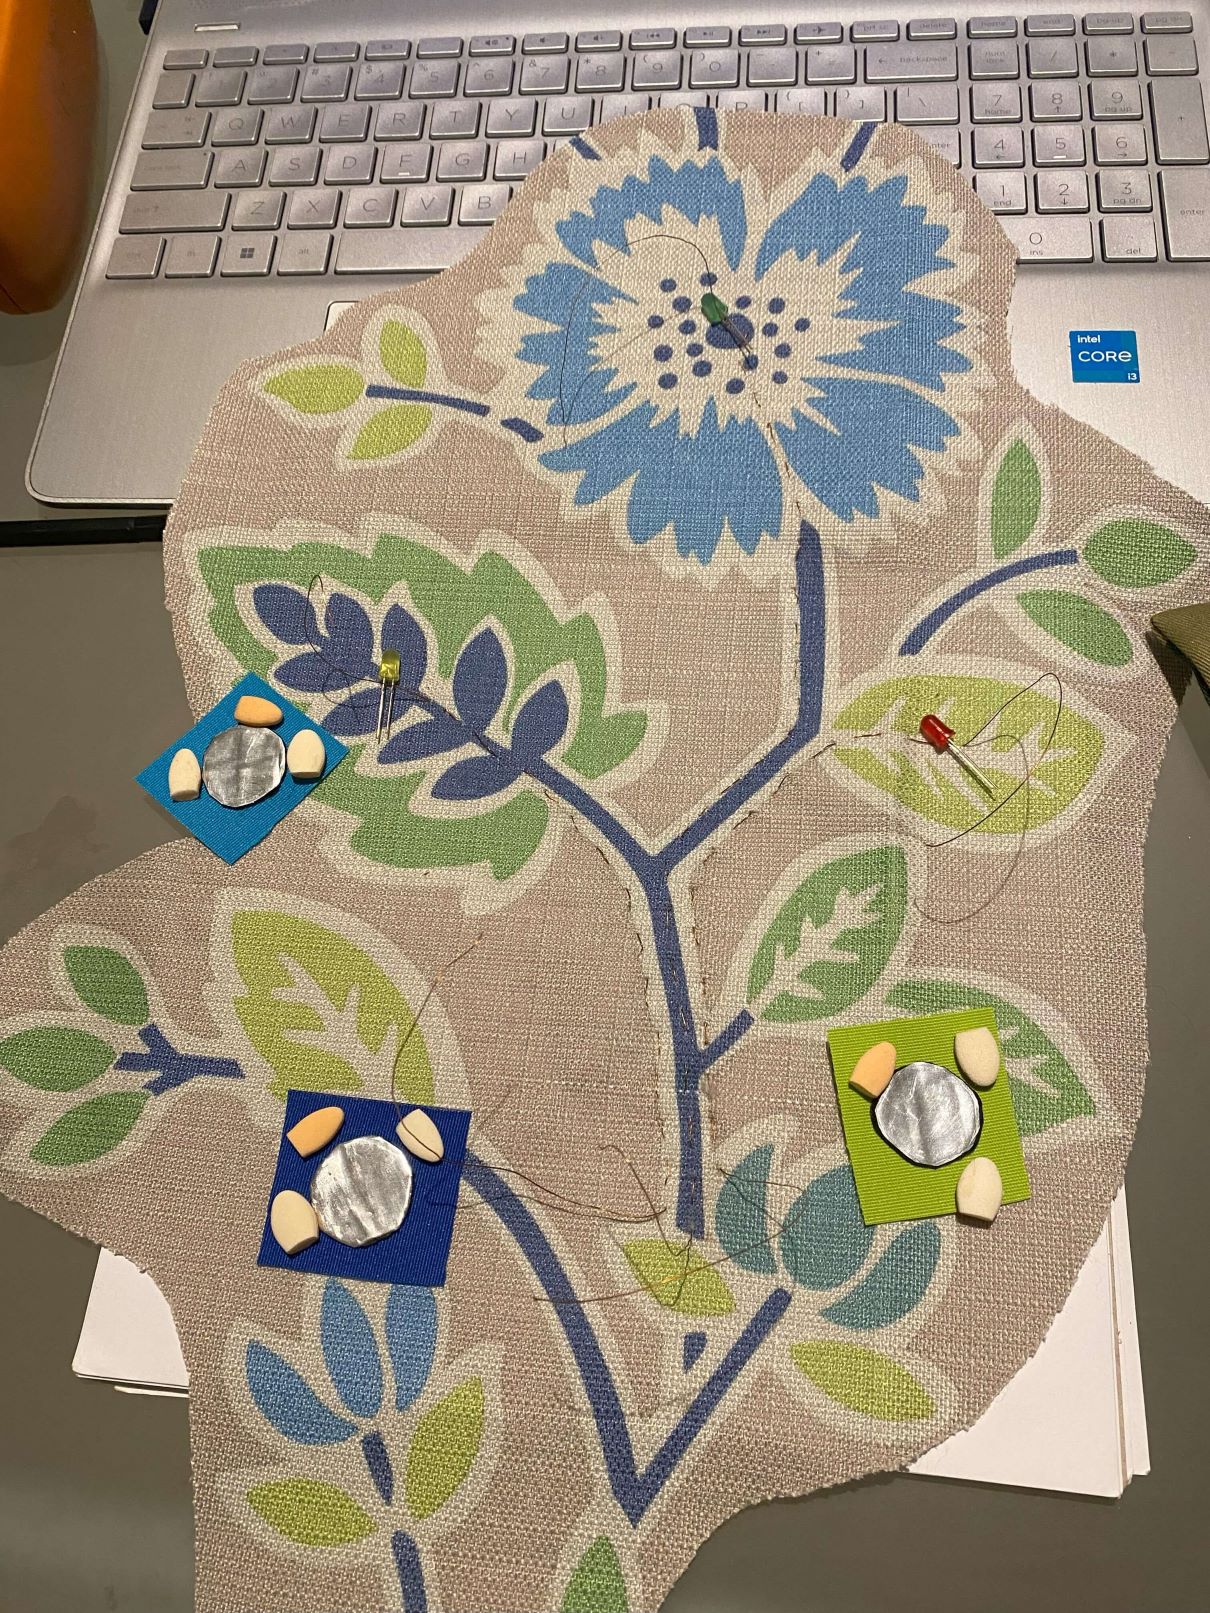
The E-playground consists of a piece of fabric with flowers and leaves in which are integrated: Soft switches, traces, Led lights, Powersources and Instructions. All these parts are very colorful and playful. Details of each part will be shared next.
Parts of E-Playground
Switches:
The switches are the on and off buttons for the lights. This is what the user plays with.
PUSH IT switch
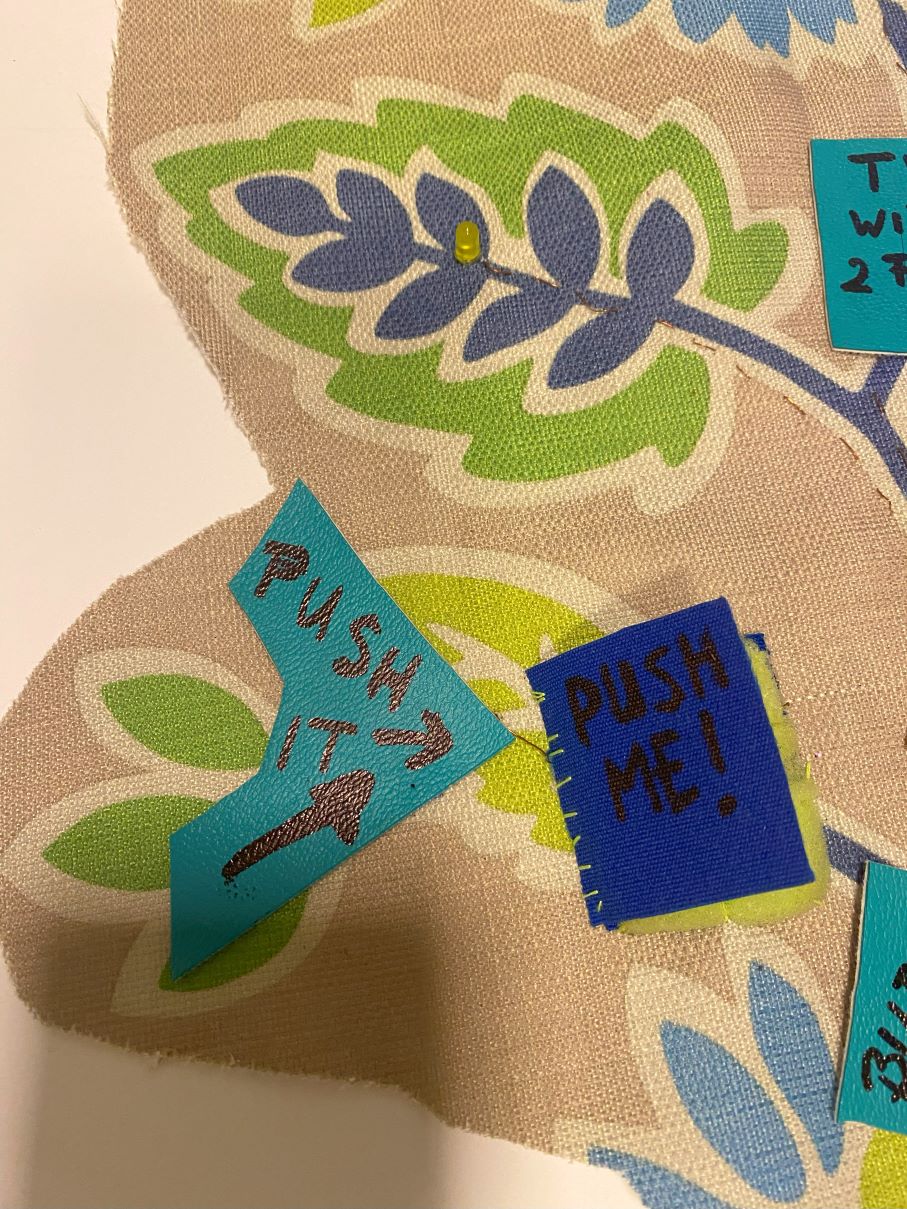
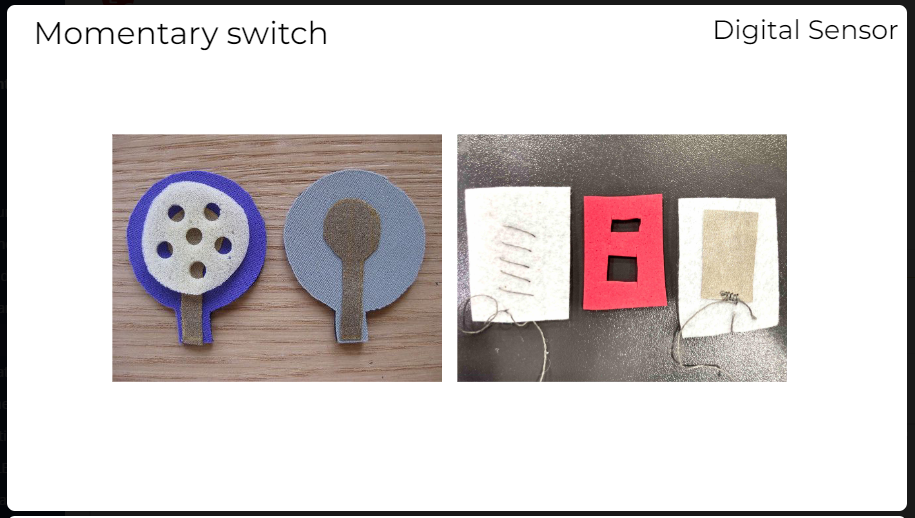
The push it button is a momentary switch in the form of a little book that can open and close. Inside are pieces of foil connected to copperwire on both sides. The foil sandwiches a battery and a sponge. Once closed and pushed together, the led turns on.
This switch is made according to the swatch example in the E-textiles presentation of Fabricademy

BUTTON THIS switch
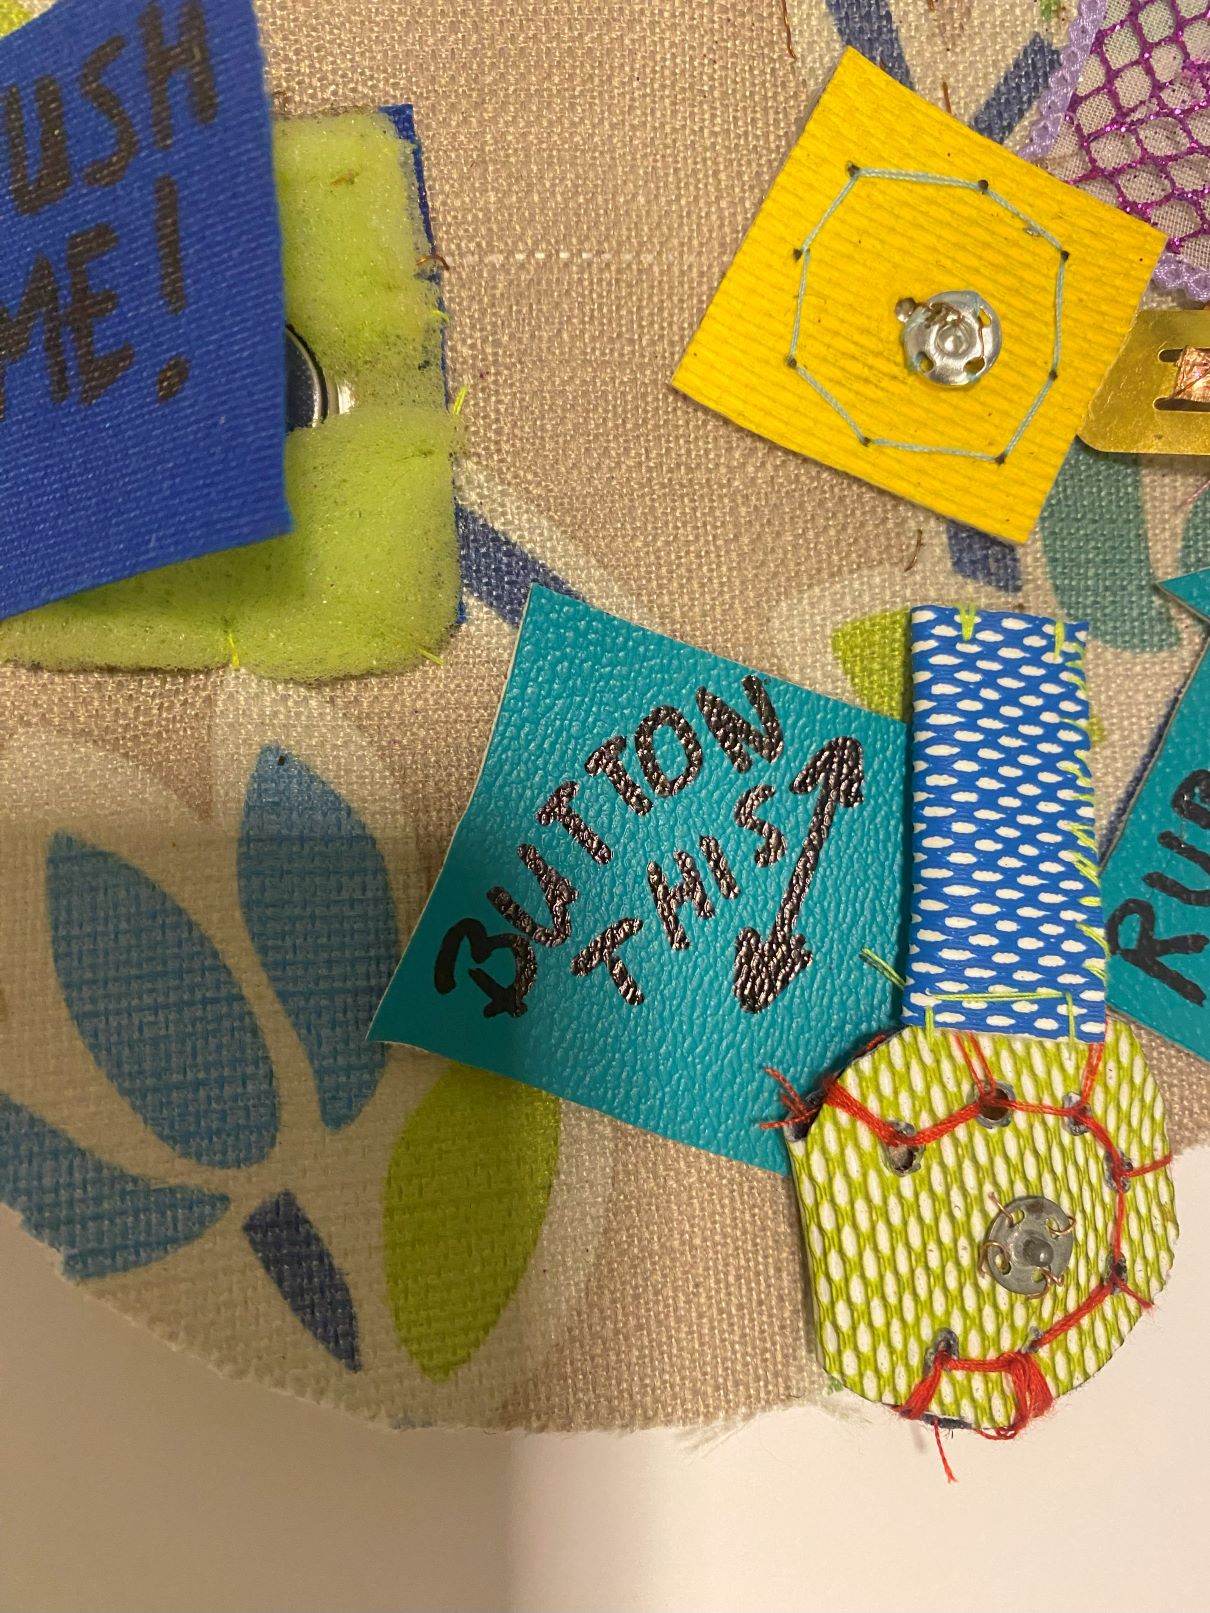
How it works: Click on the next picture for the youtube link to see a demo of the "button this" switch.
Components
The switch works like a joint or lever turning 180 degrees from position1 to connect (position2).
One side of the metal button is connected to power (+)
This is the green circle which is also a pouch for a coin battery.
The other side is connected to (-) (Ground)
When they are connected electricity flows and the LED light turns on.
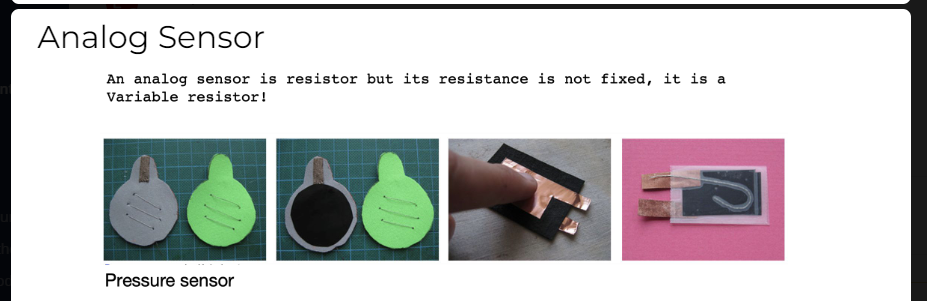
RUB IT switch
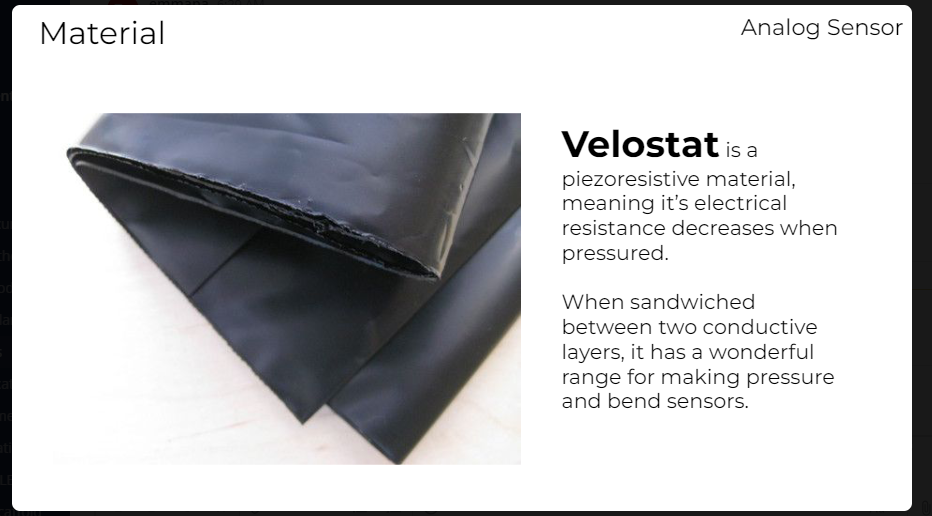
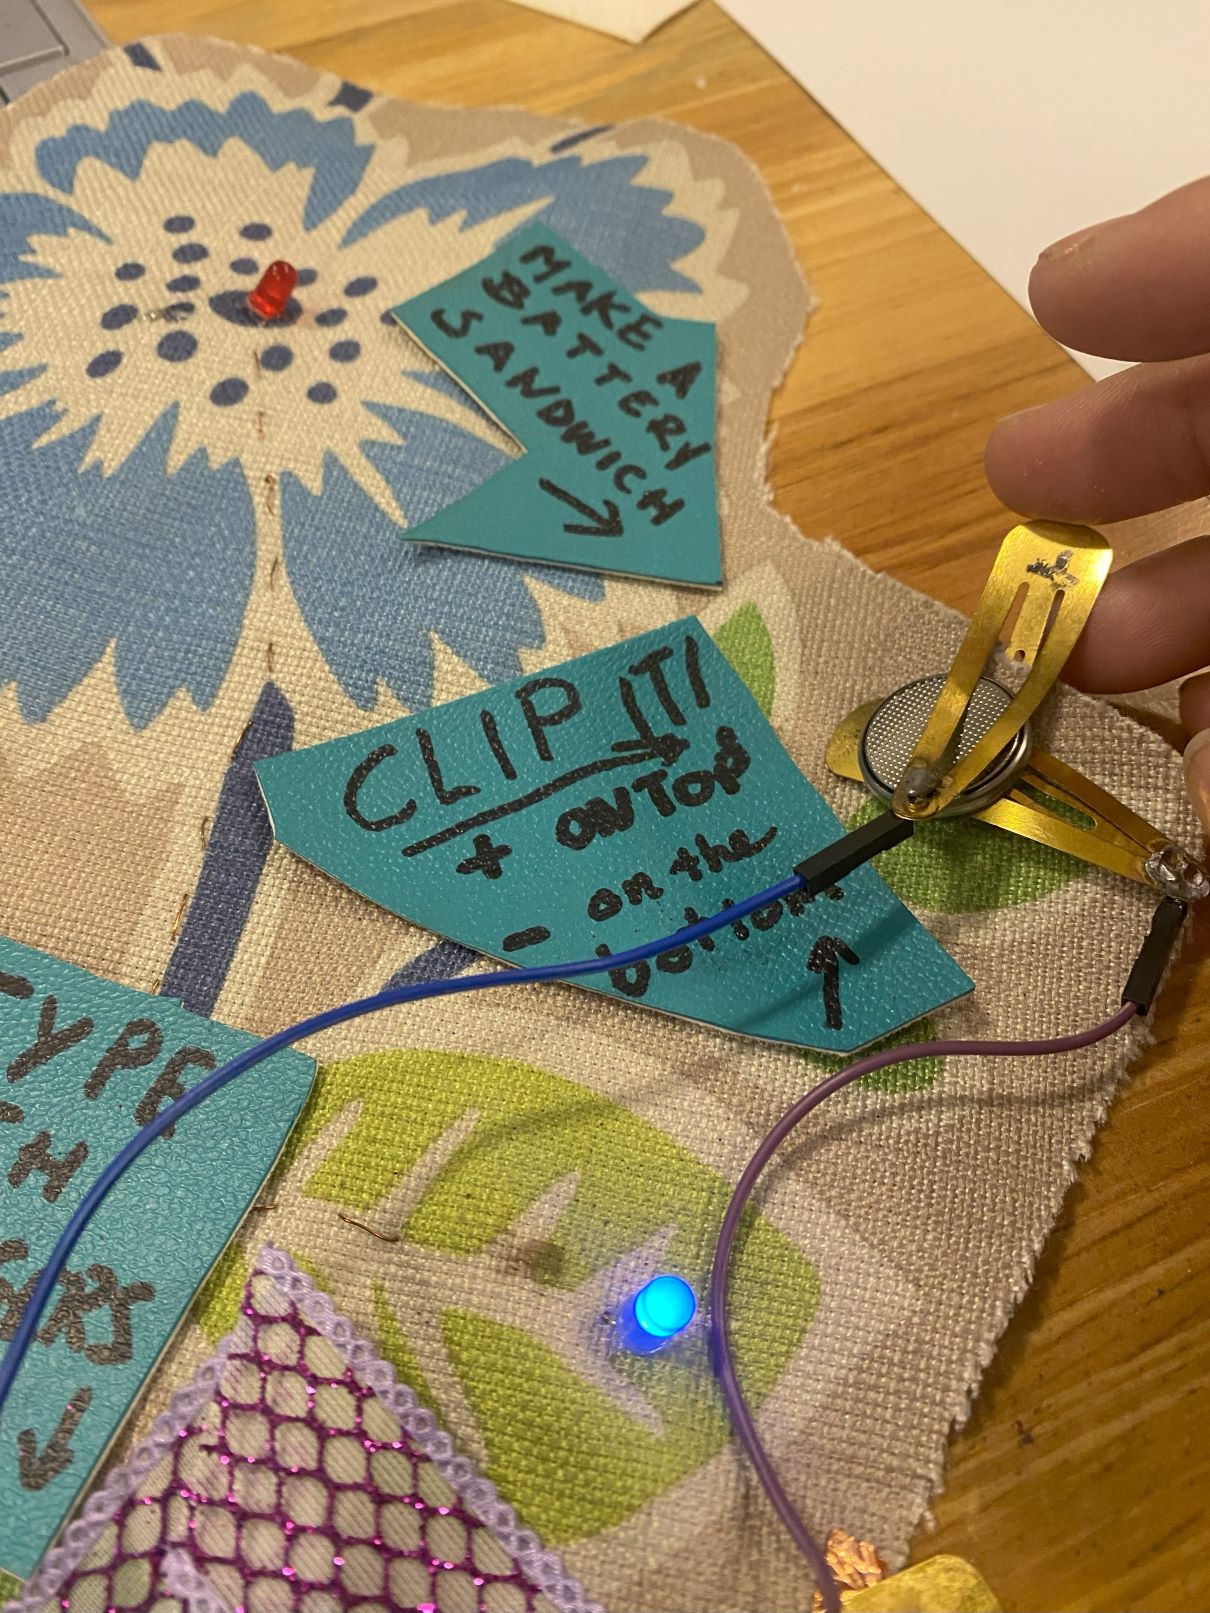
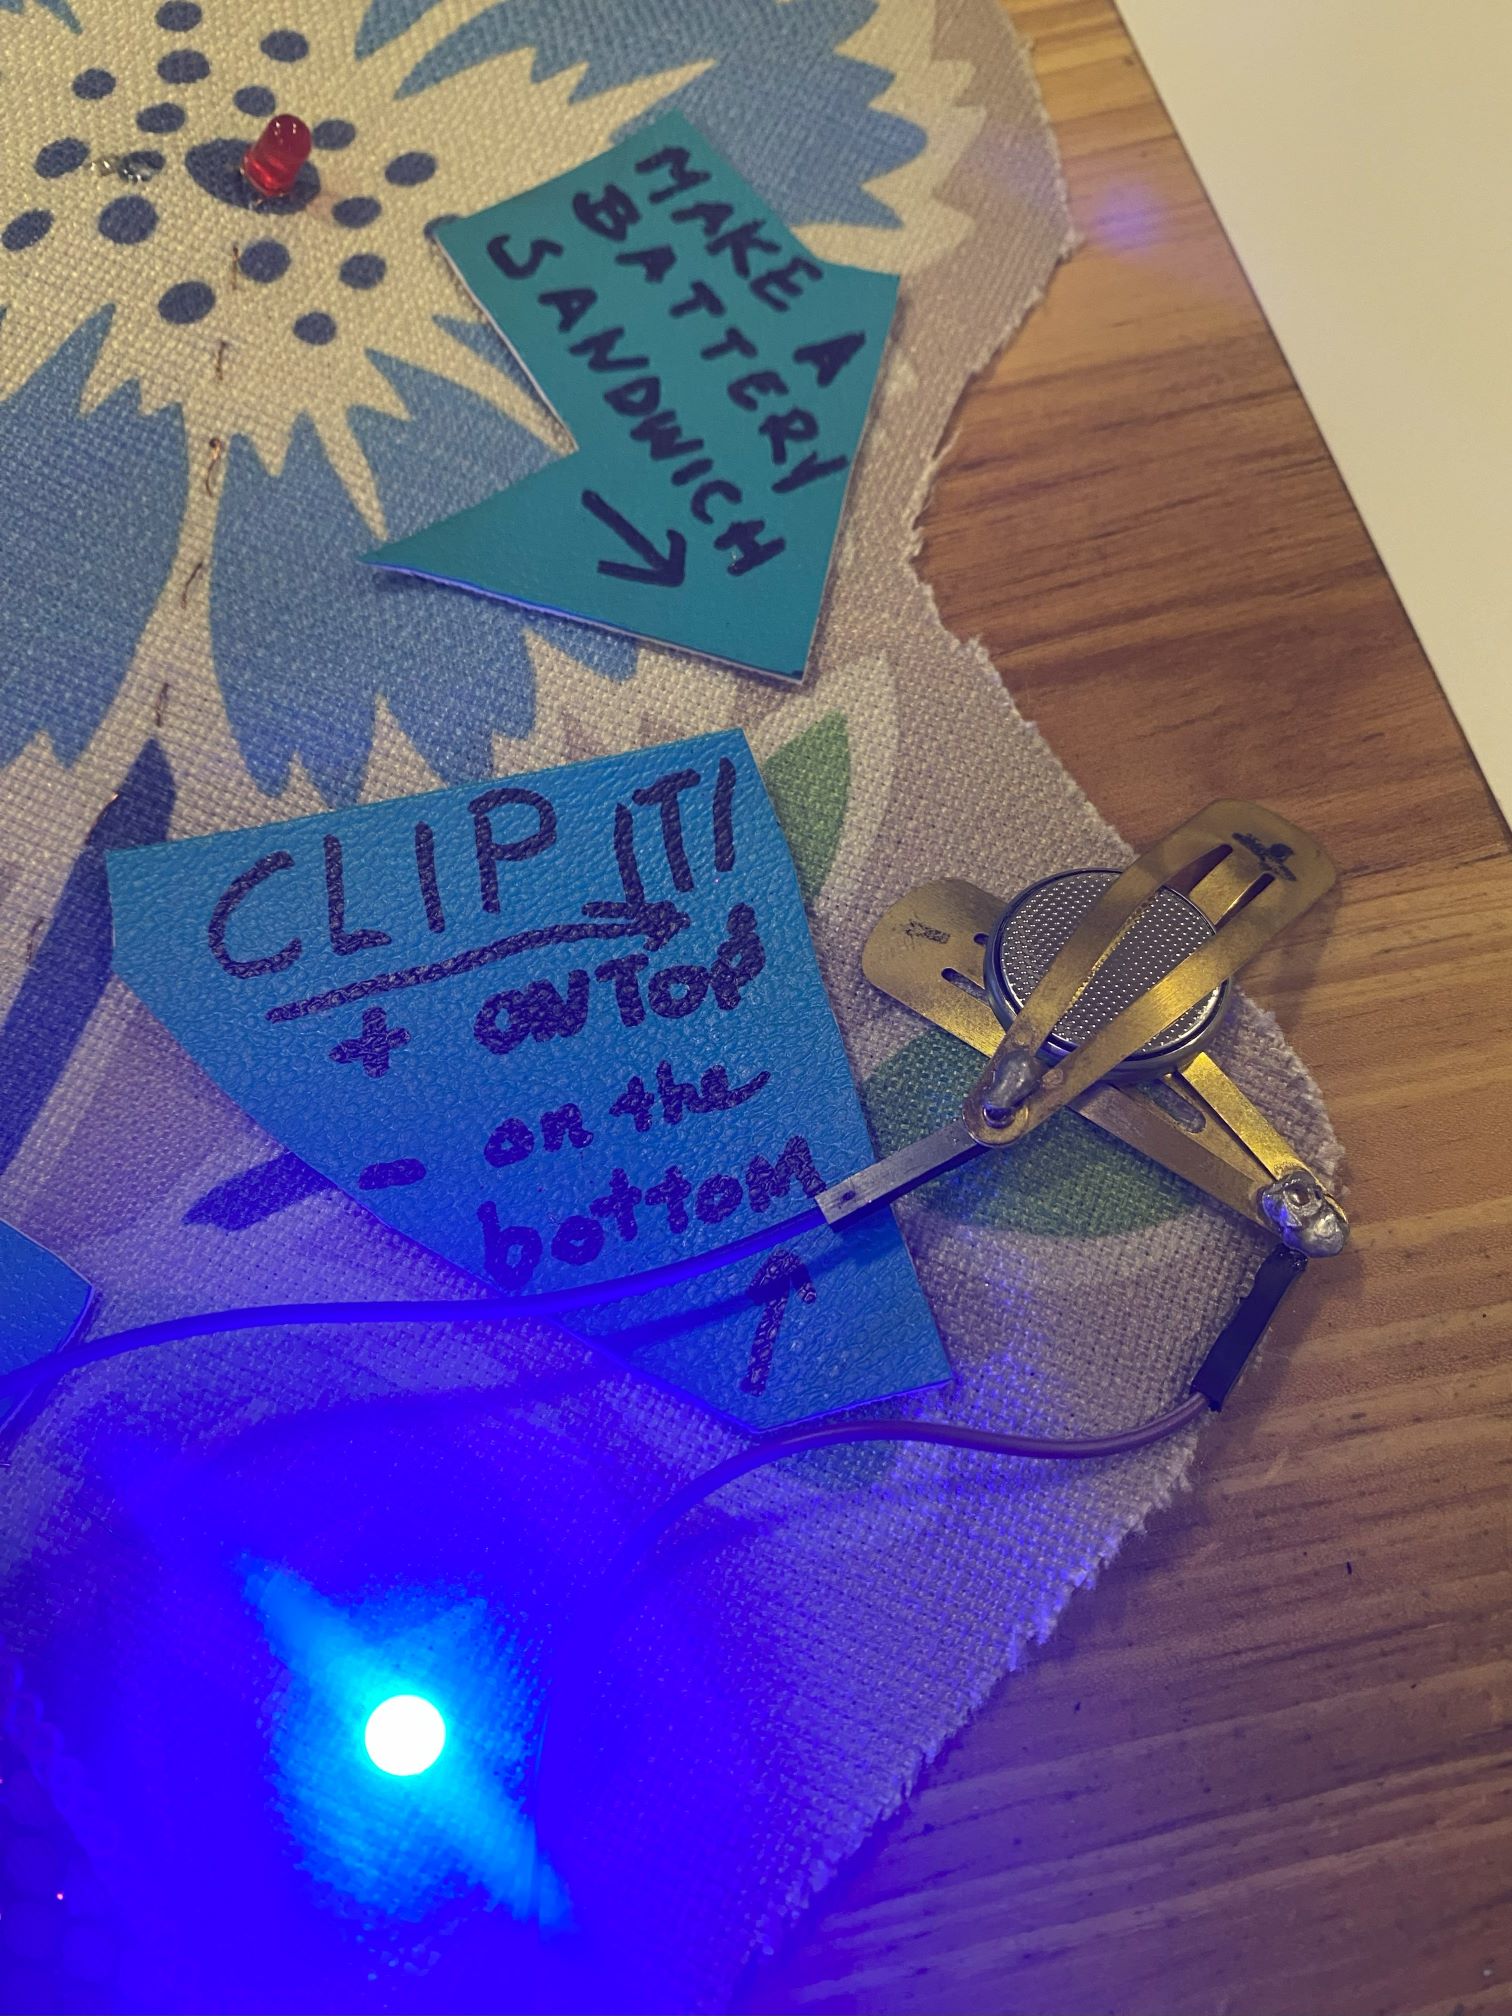
The RUB IT switch is an analog switch made with velostat in between two non-conductive gold color PVC fabrics and 2 pieces of adhessive conductive foil. Pieces of copper tape on both sides are connected to metal hair clips that function as crocodile clips and connect a powersource with led and switch.
This switch is made according to the swatch example in the E-textiles presentation:
Click on the next pictures for youtube links to watch how the RUB IT switch works with the multimeter or click this link Rub it switch testing on multimeter
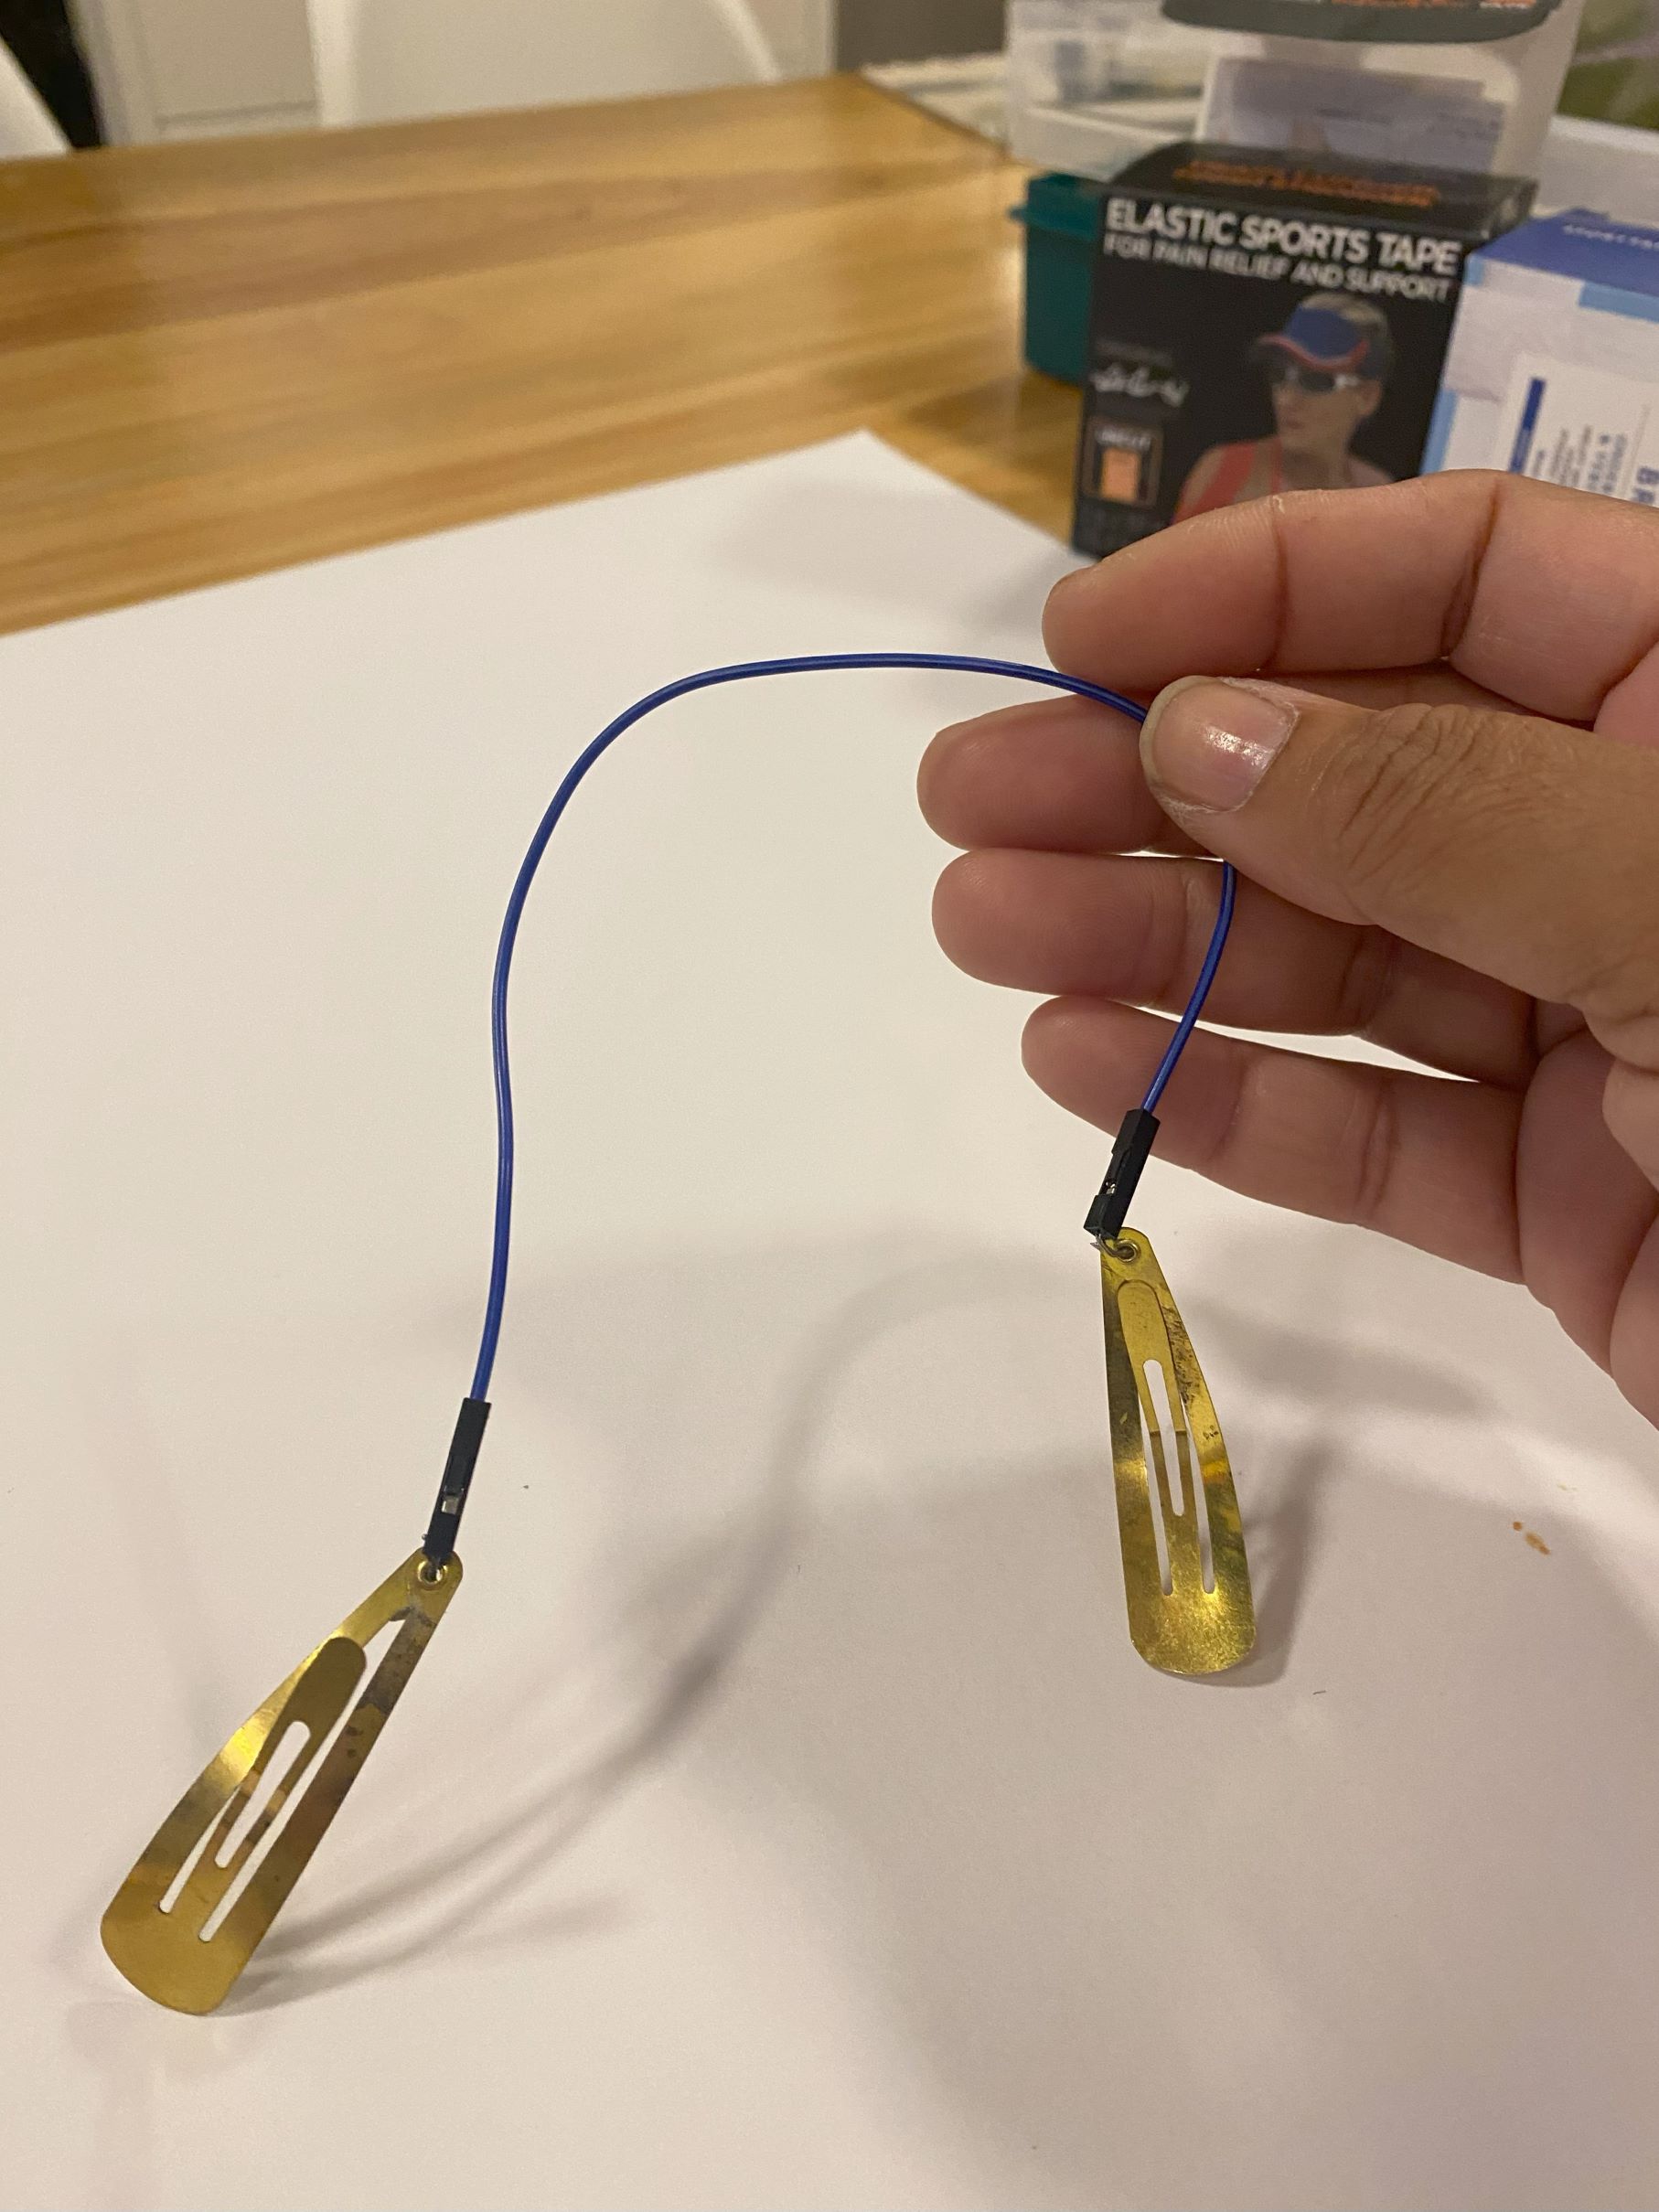
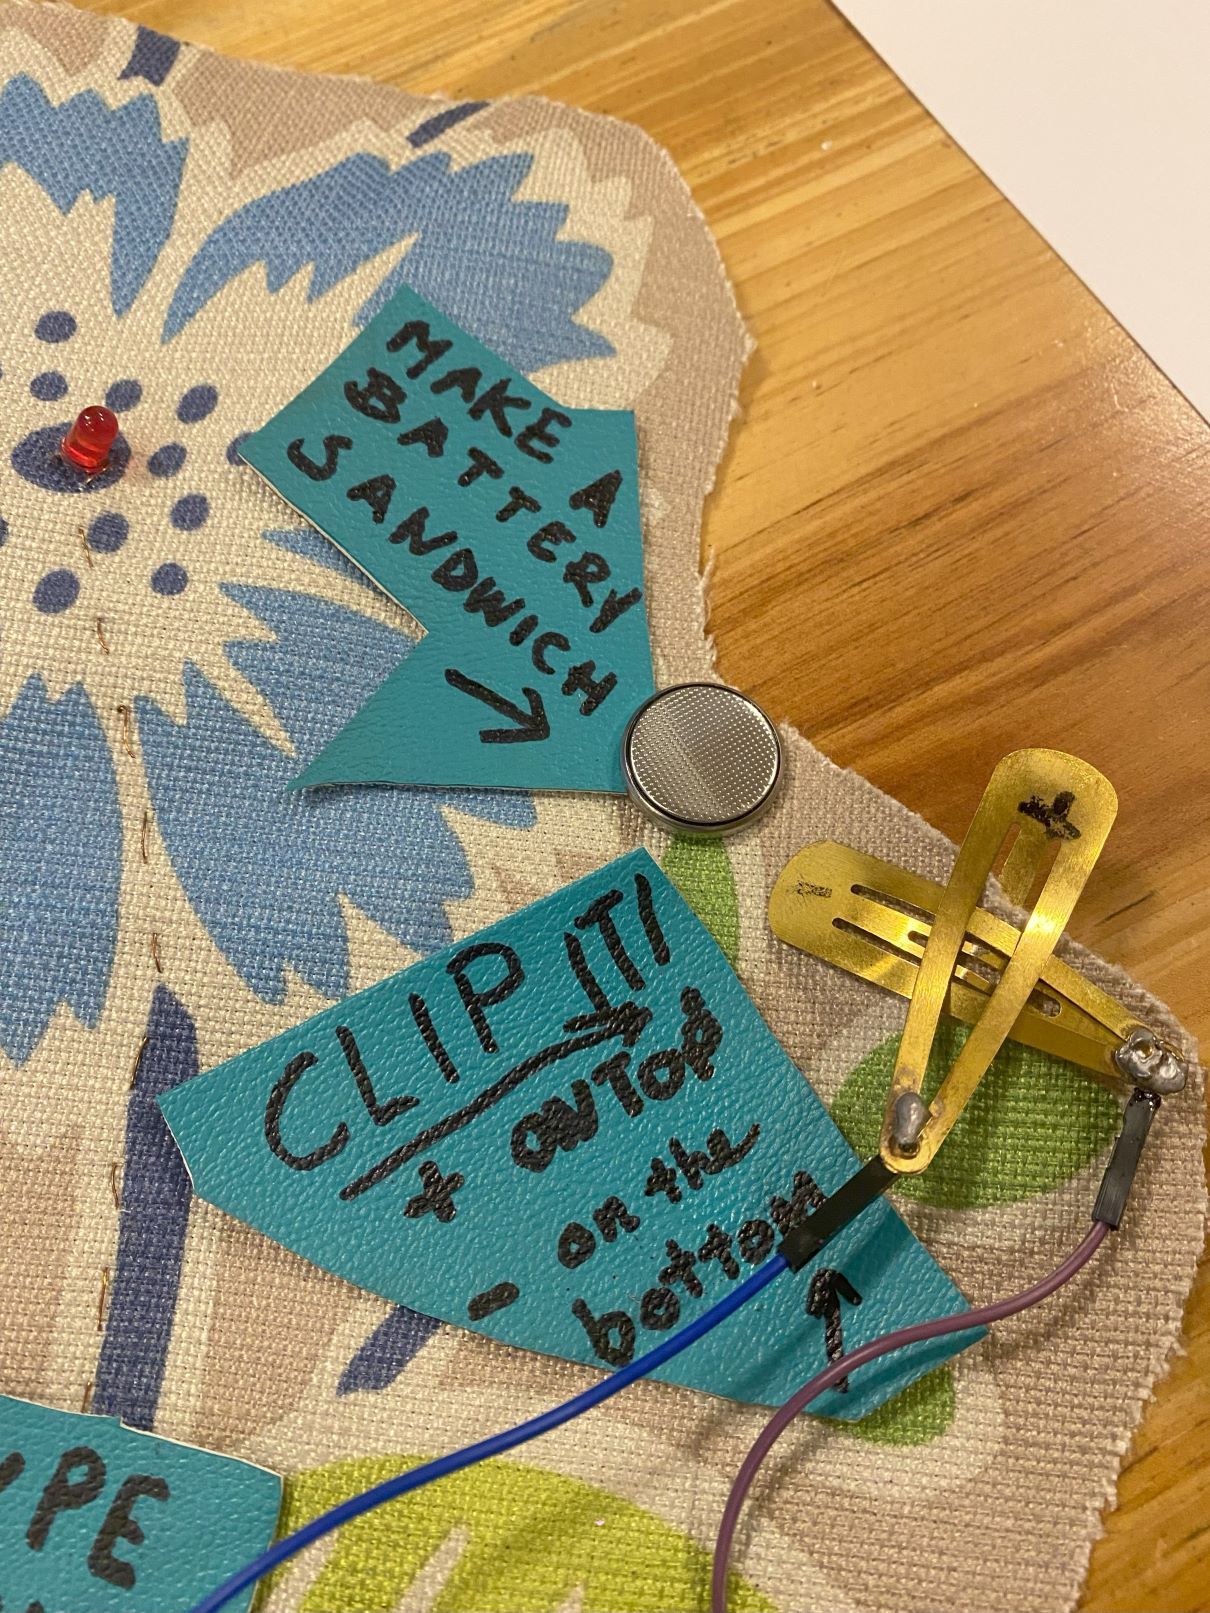
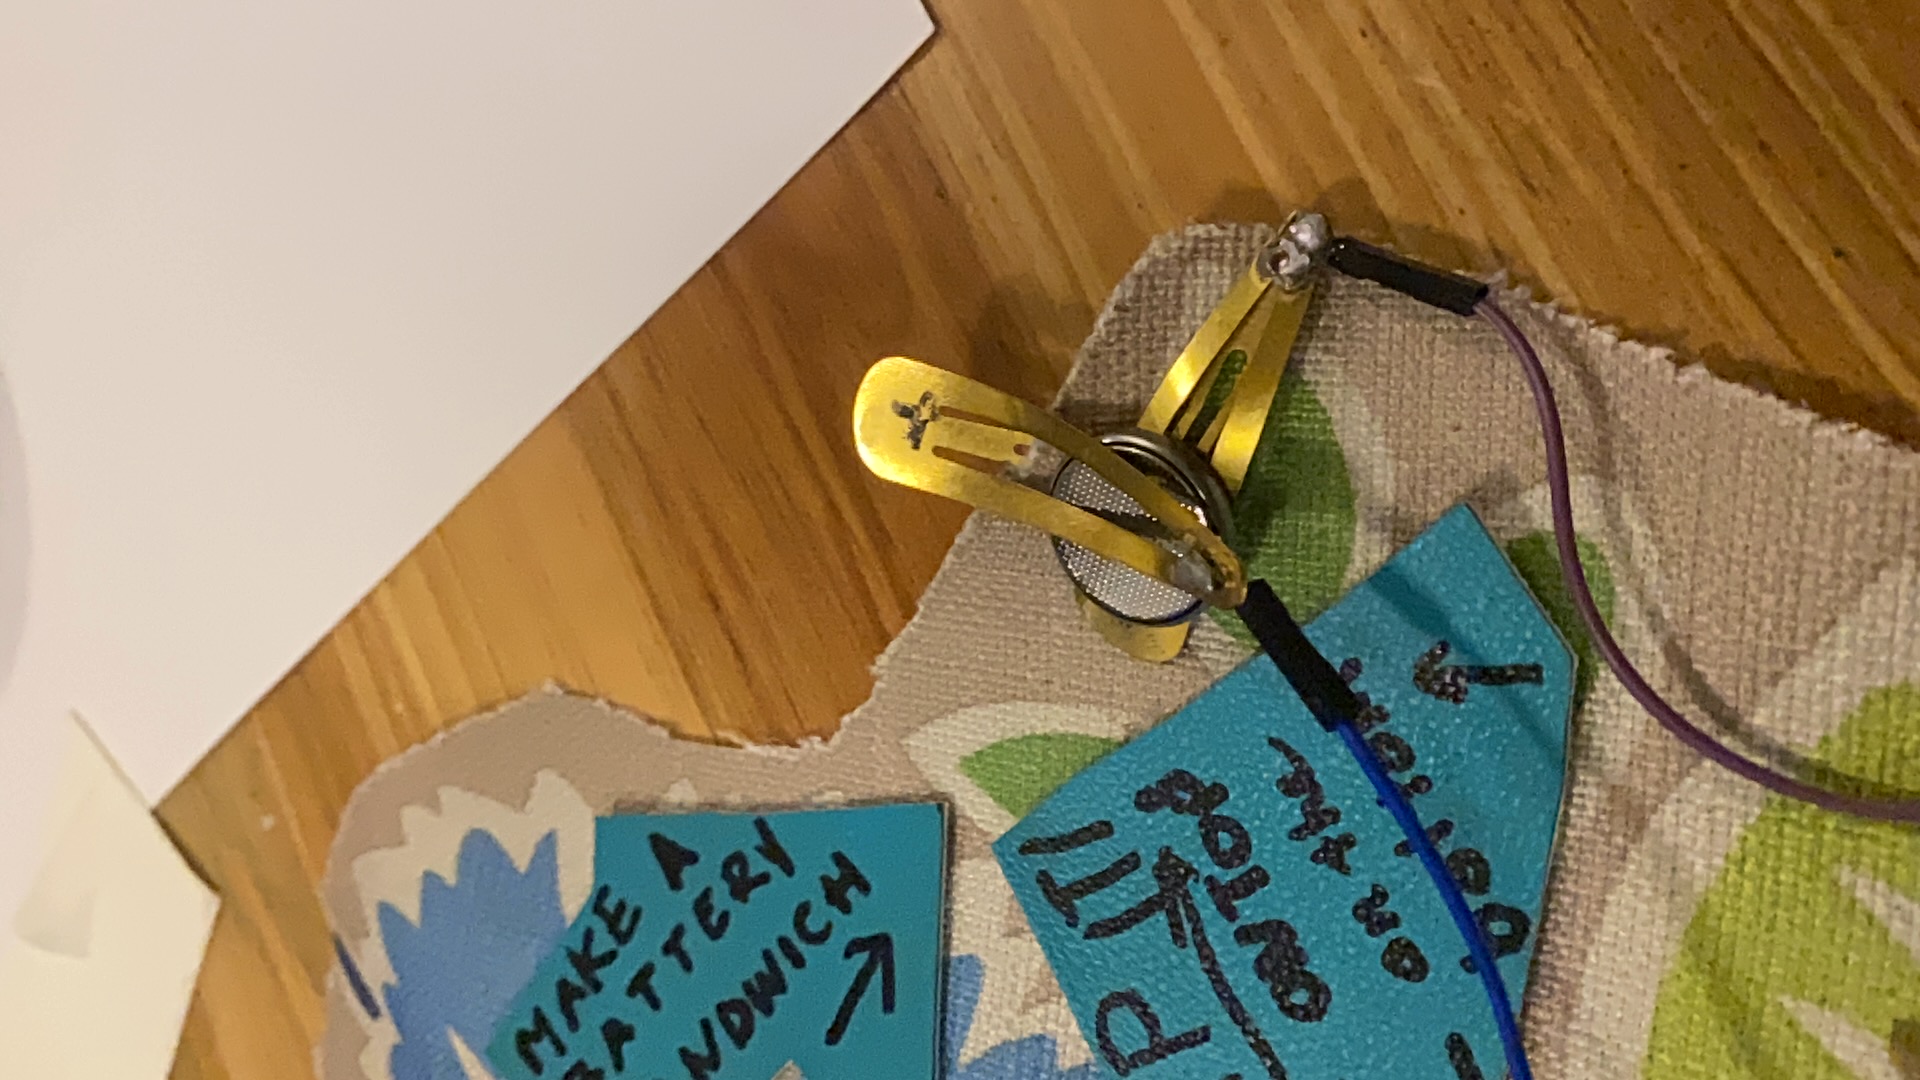
CLIP IT battery holder
The CLIP IT battery holder consists of 2 selfmade crocodile cables made of jumper cables soldered on both sides to metal hair clips. The clips form a + and - side and when connected to the battery they supply power to the RUB IT Velostat switch.

Traces
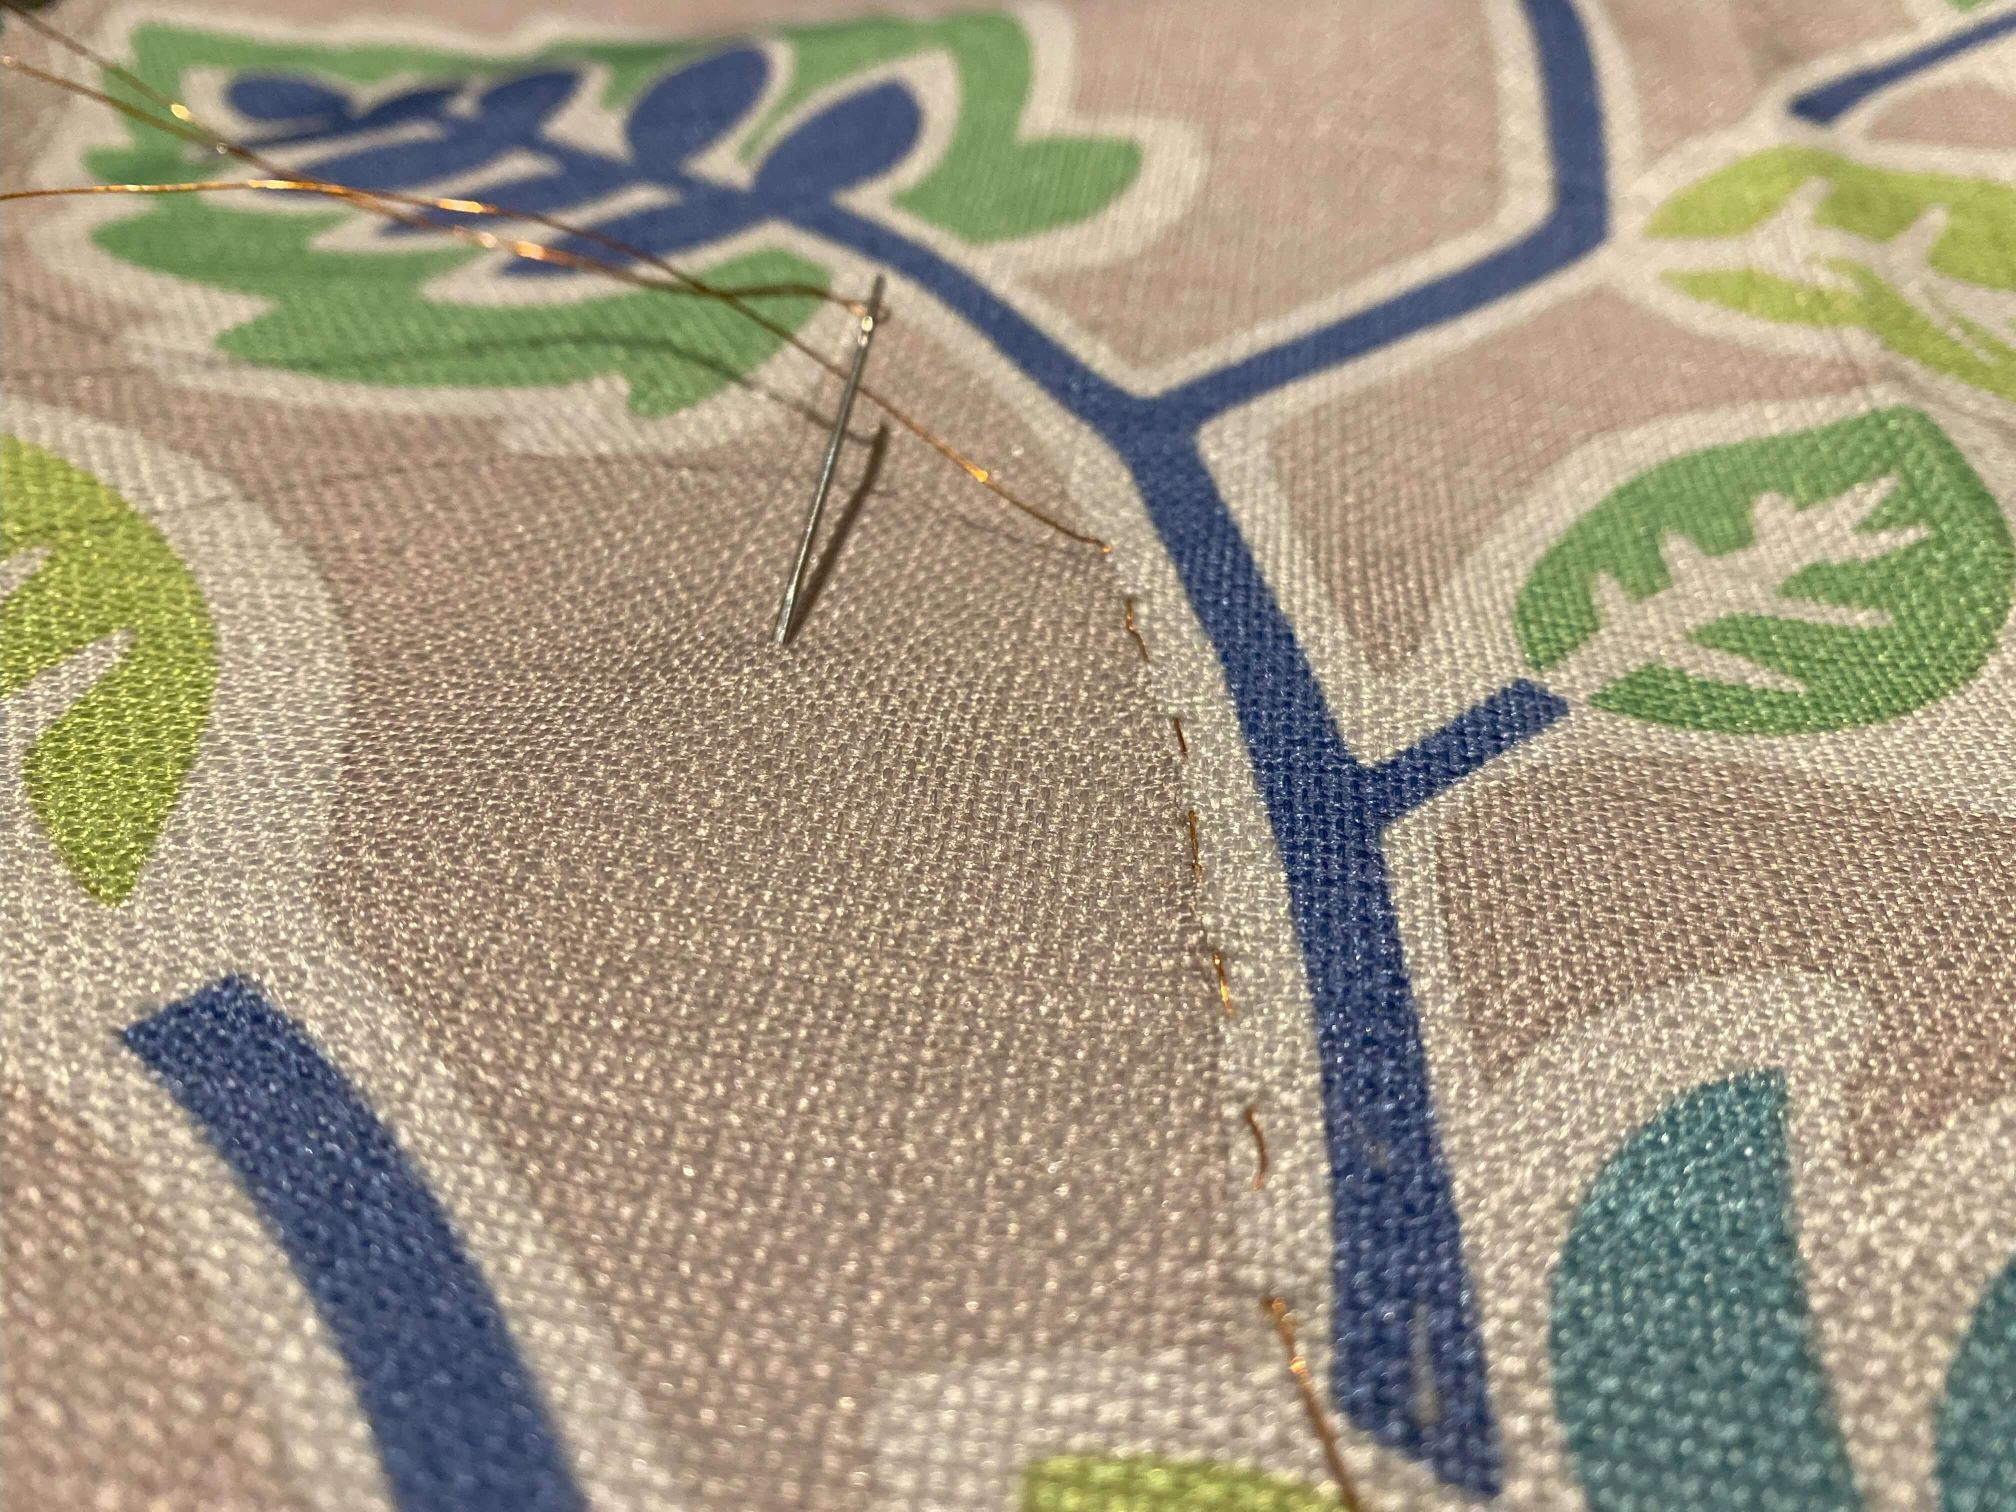
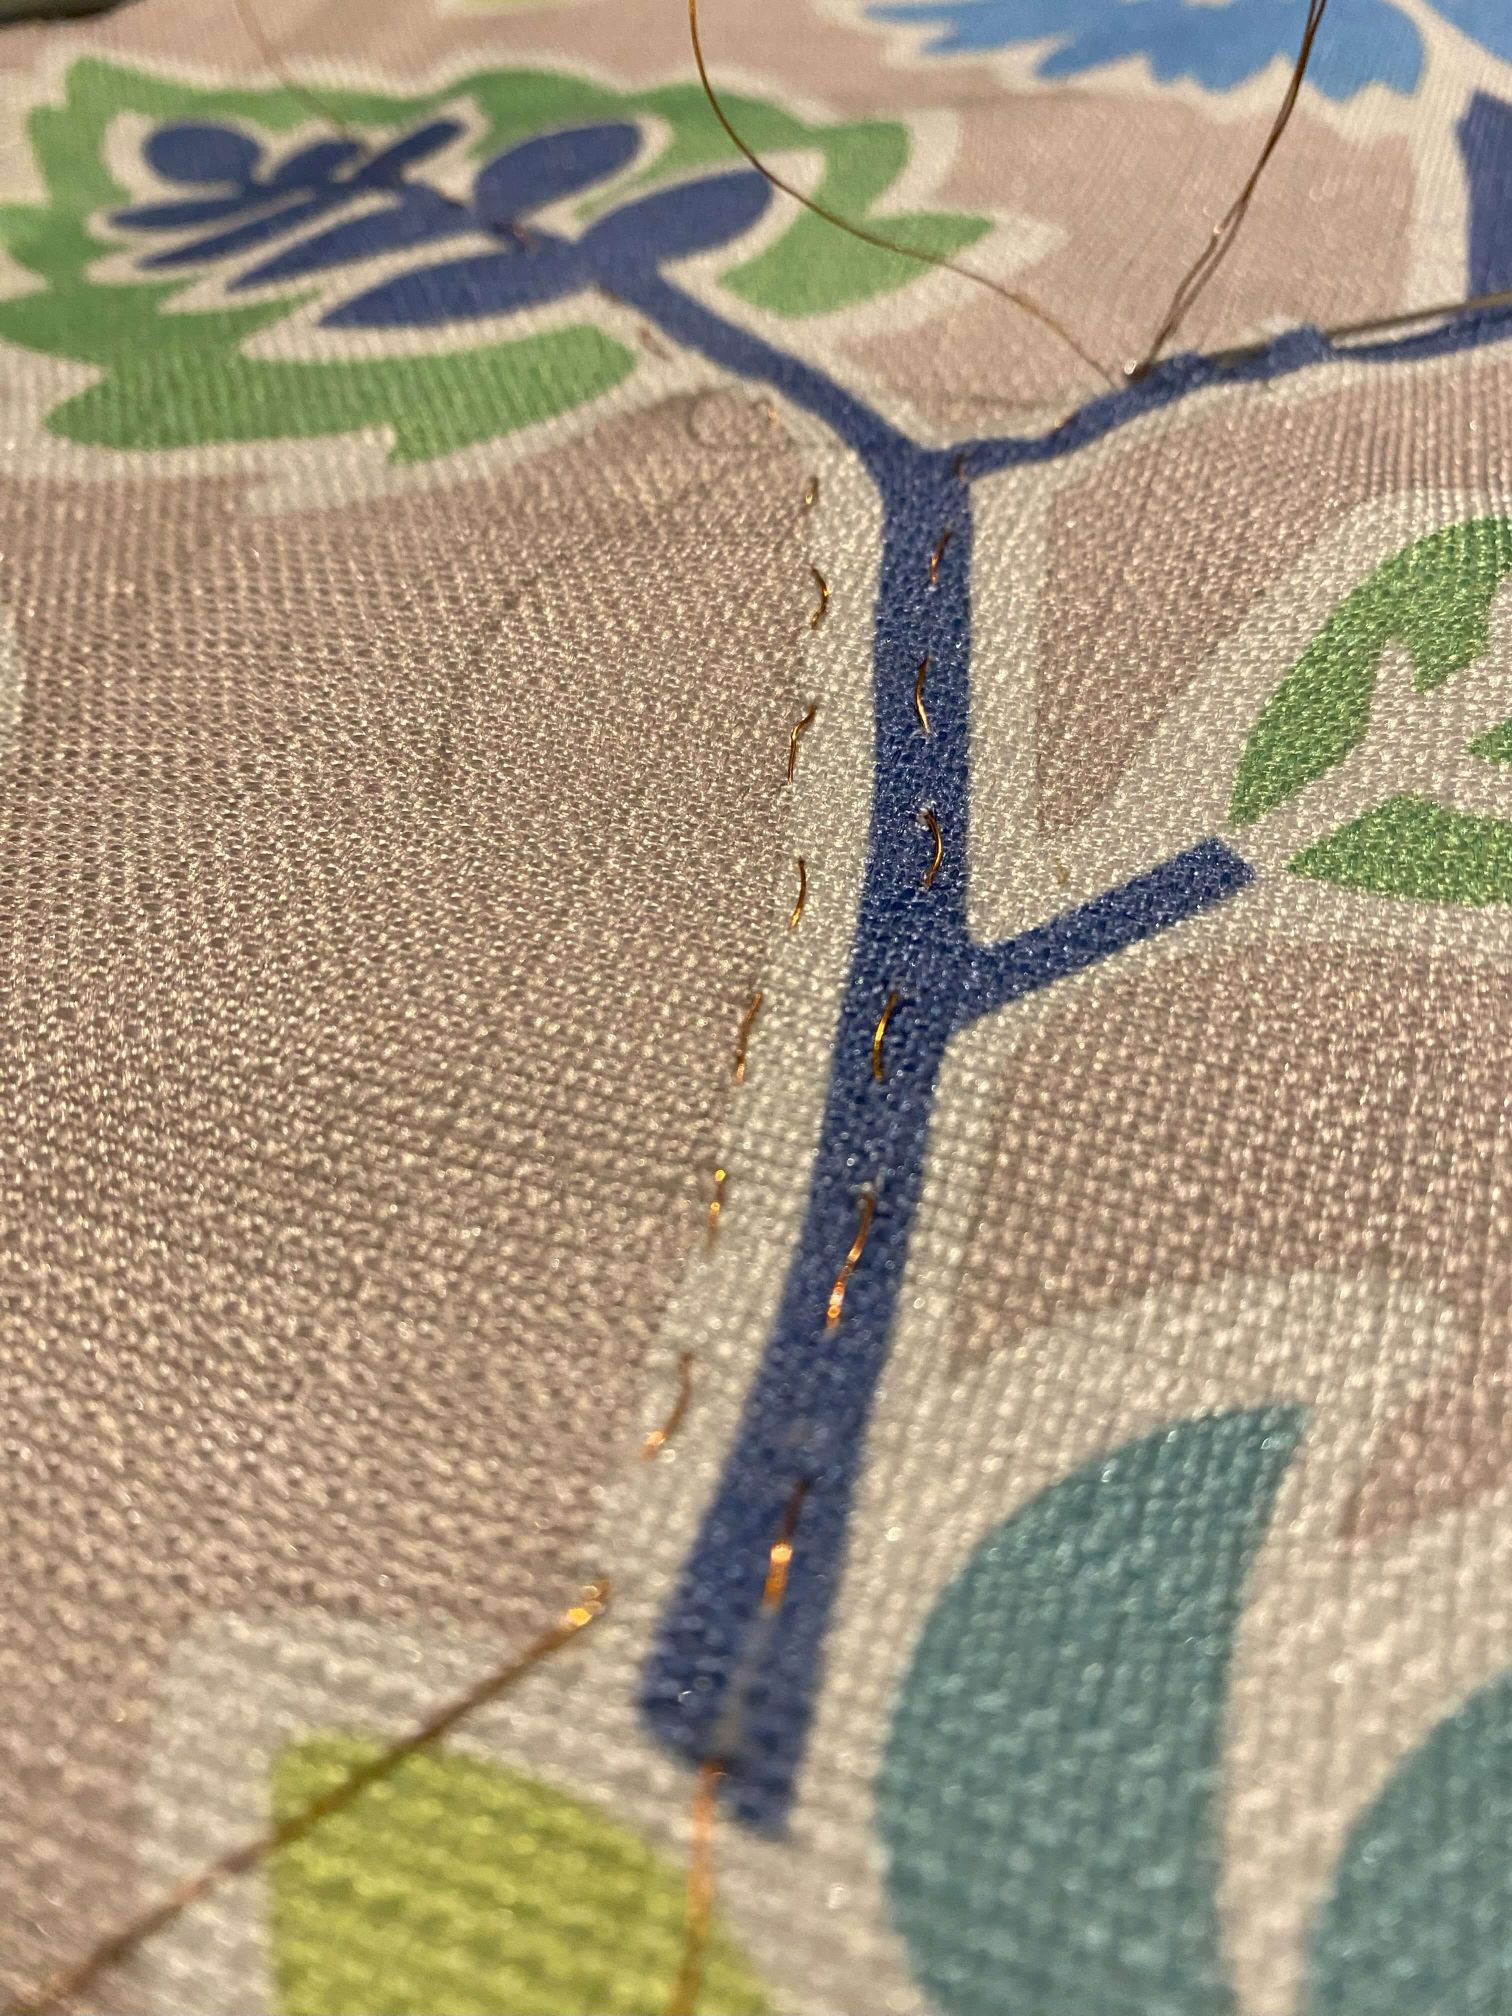
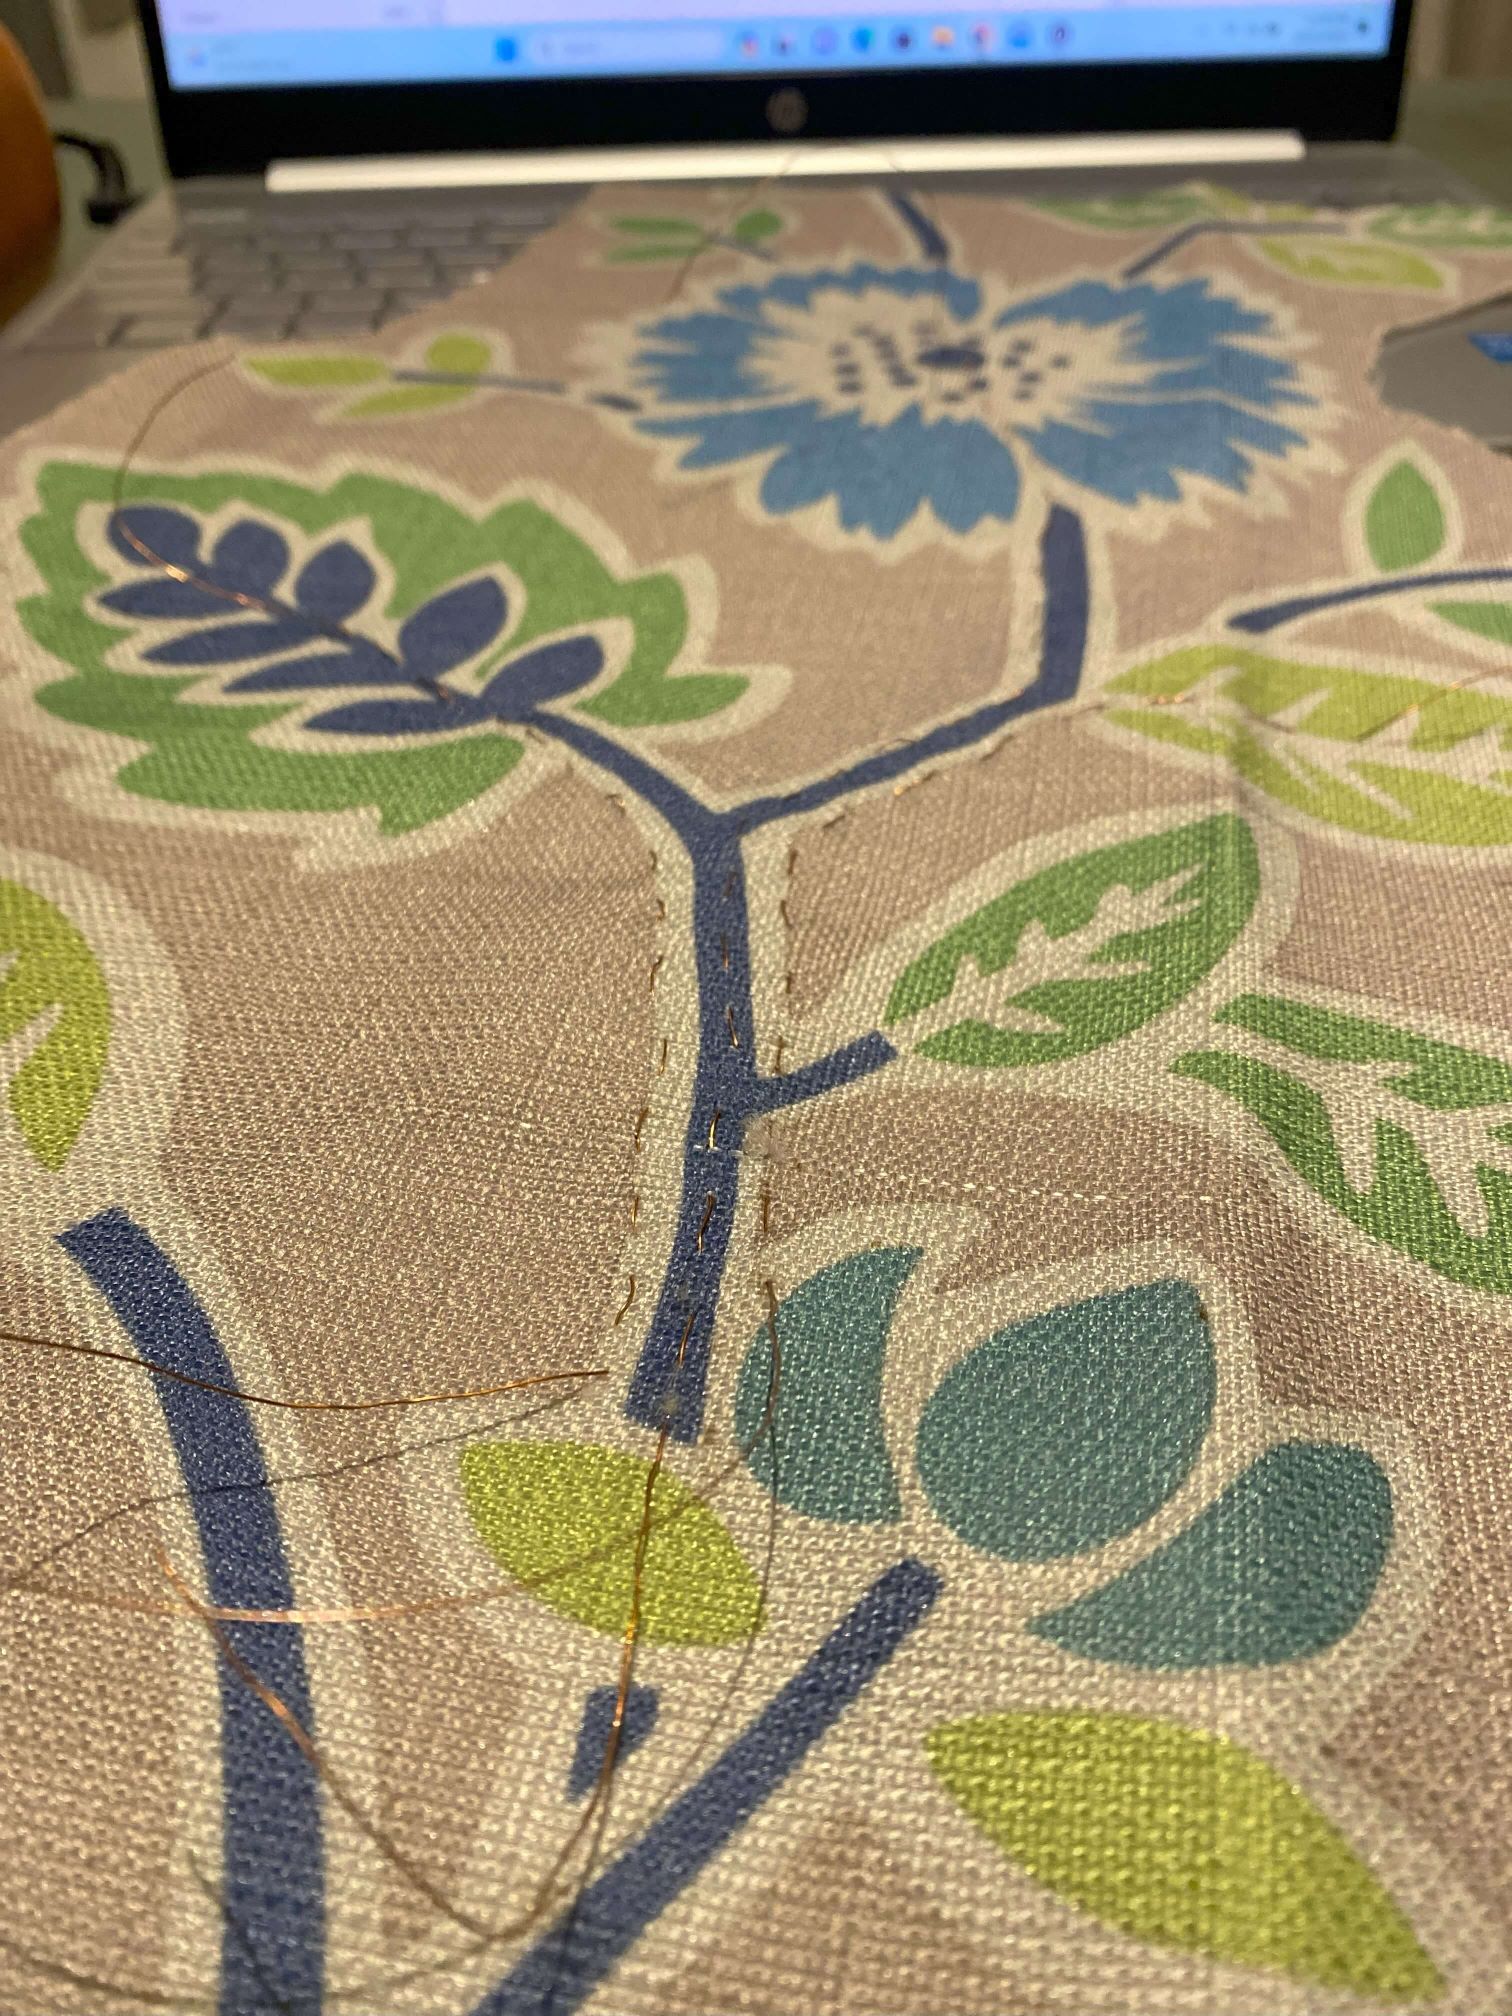
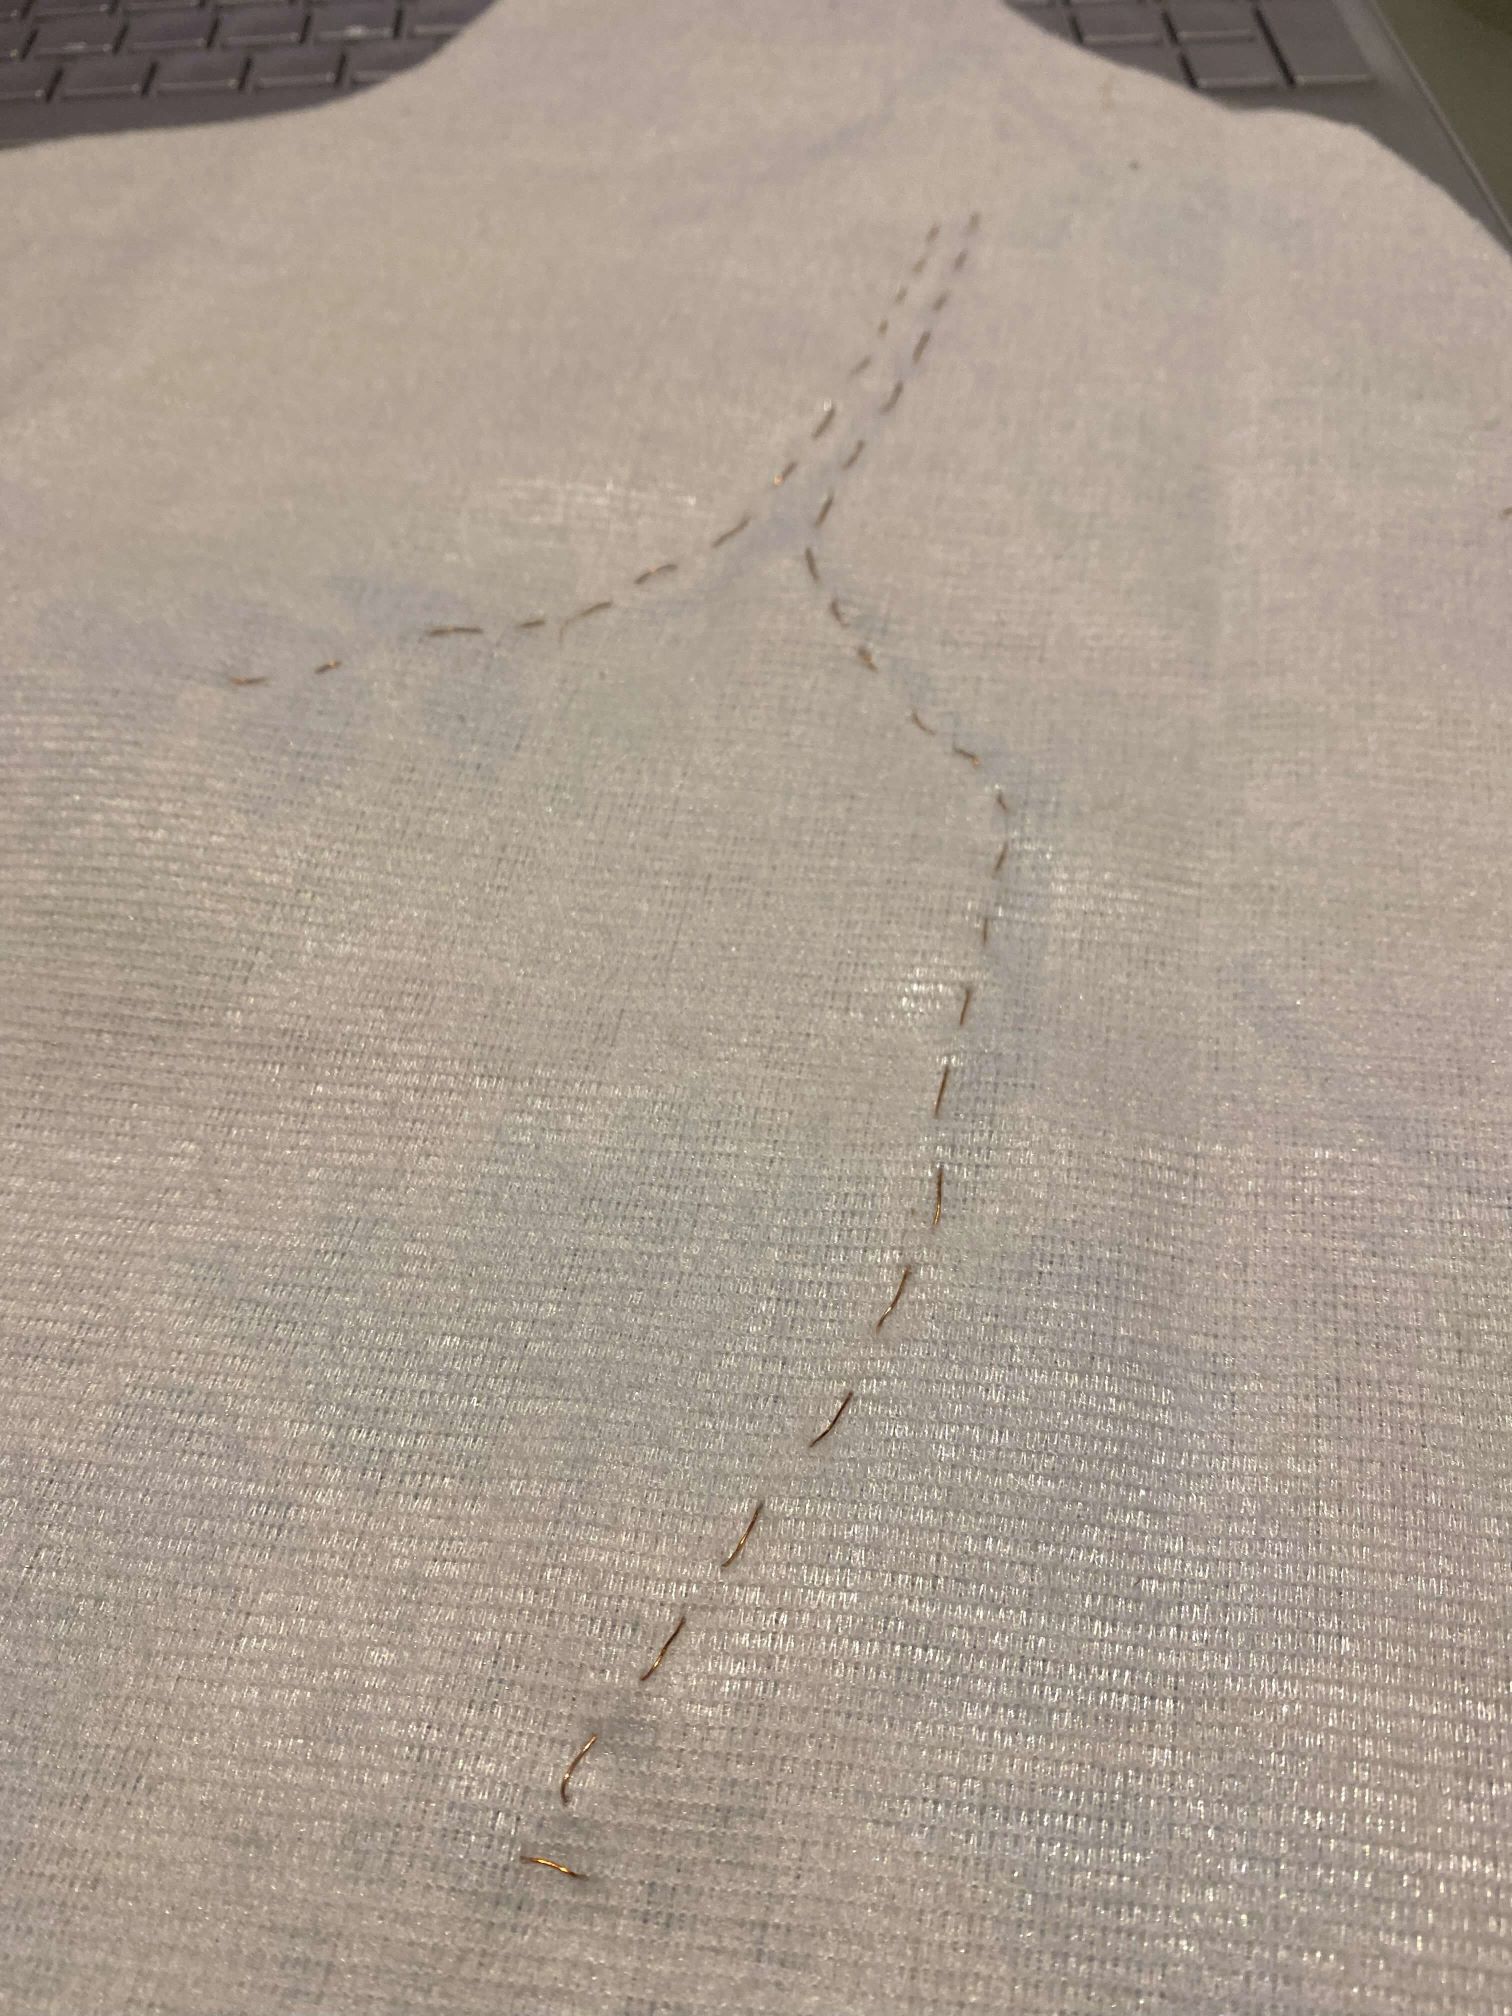
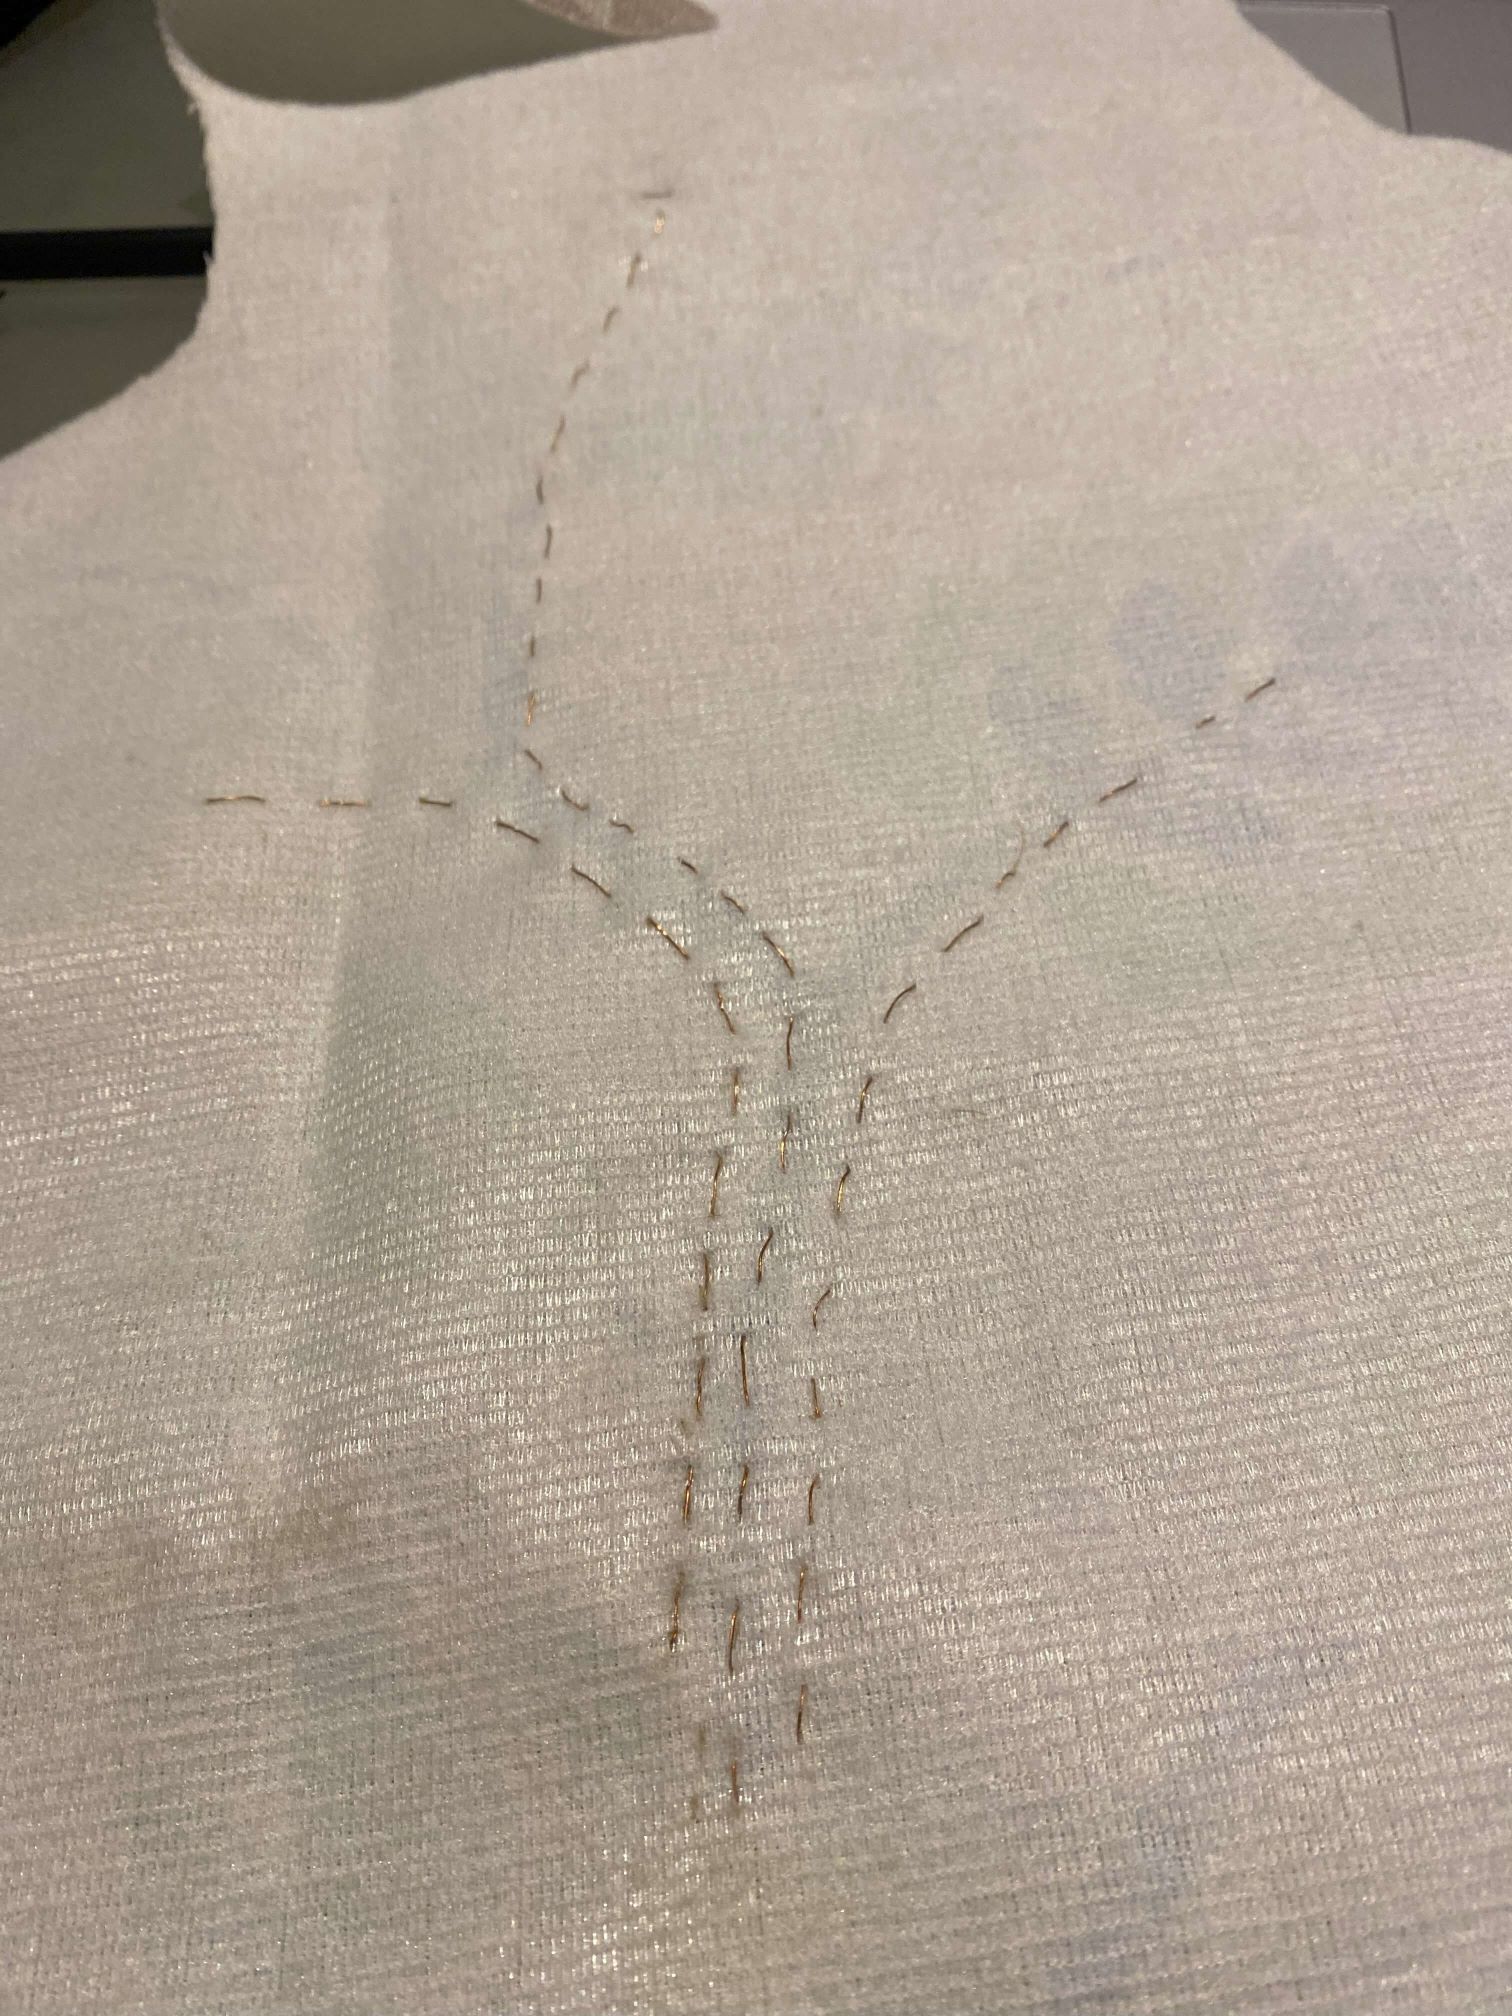
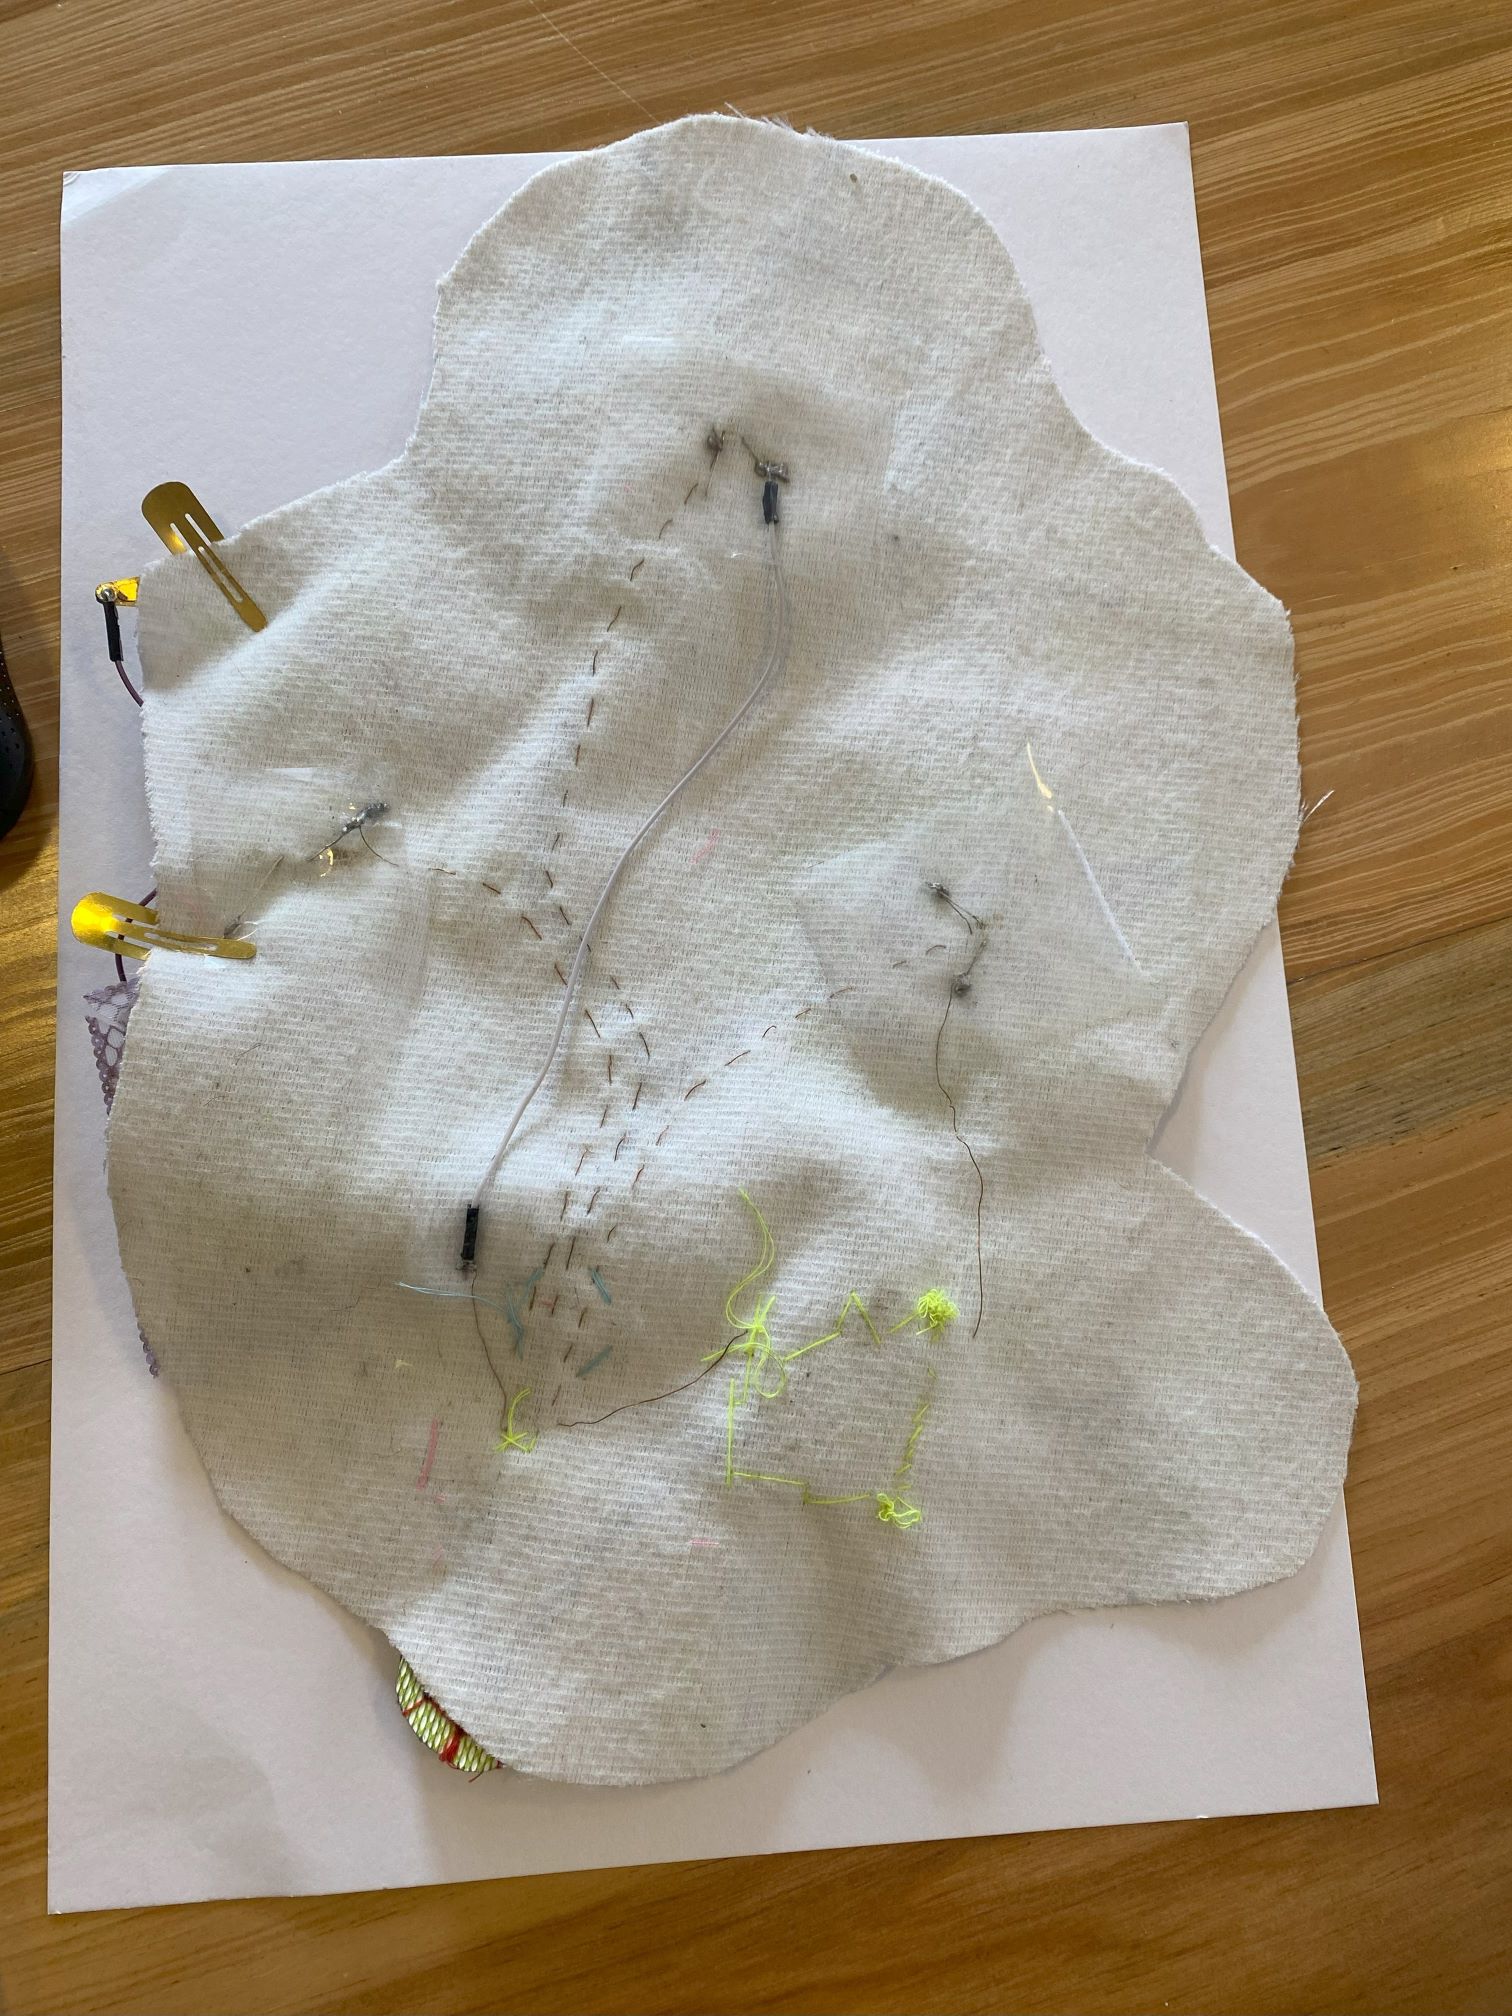
For the traces I used copper tread recycled from an old sound system.I handsewed the traces along the lines of the stem in the fabric patterns. There are 3 main traces of copper thread. The traces connect the switched with the led lights and the power coin batteries. The traces can be seen on both sides of the fabric because they were sewn on, I tried to put the messy parts on the back as much as possible. In a few instances when lines would cross eachother I used jumping cables. I made connection with the leds and hairclips through soldering, with the buttons by wrapping the wire through the openings and with the push me button I simply taped the wire to the foil.
LED lights
3 led lights are placed on the leave and flower patterns. Soldering of the ledlights connecting them with the coppertread and jumpercables happened on the other side of the fabric which you dont see.
Power
The E-playground is either powered by 3 seperate CR2032 coin batteries 3V or by an Arduino UNO micro controler and a 9V battery. The batteries are put in 3 seperate places for each circuit.
Battery in the PUSH IT CIRCUIT: The battery is sandwitched in the switch and can be seen once the top is opened. The sponge keeps the battery in its place. When the top (+) is pushed it connects both with the battery and the bottom trace (- )
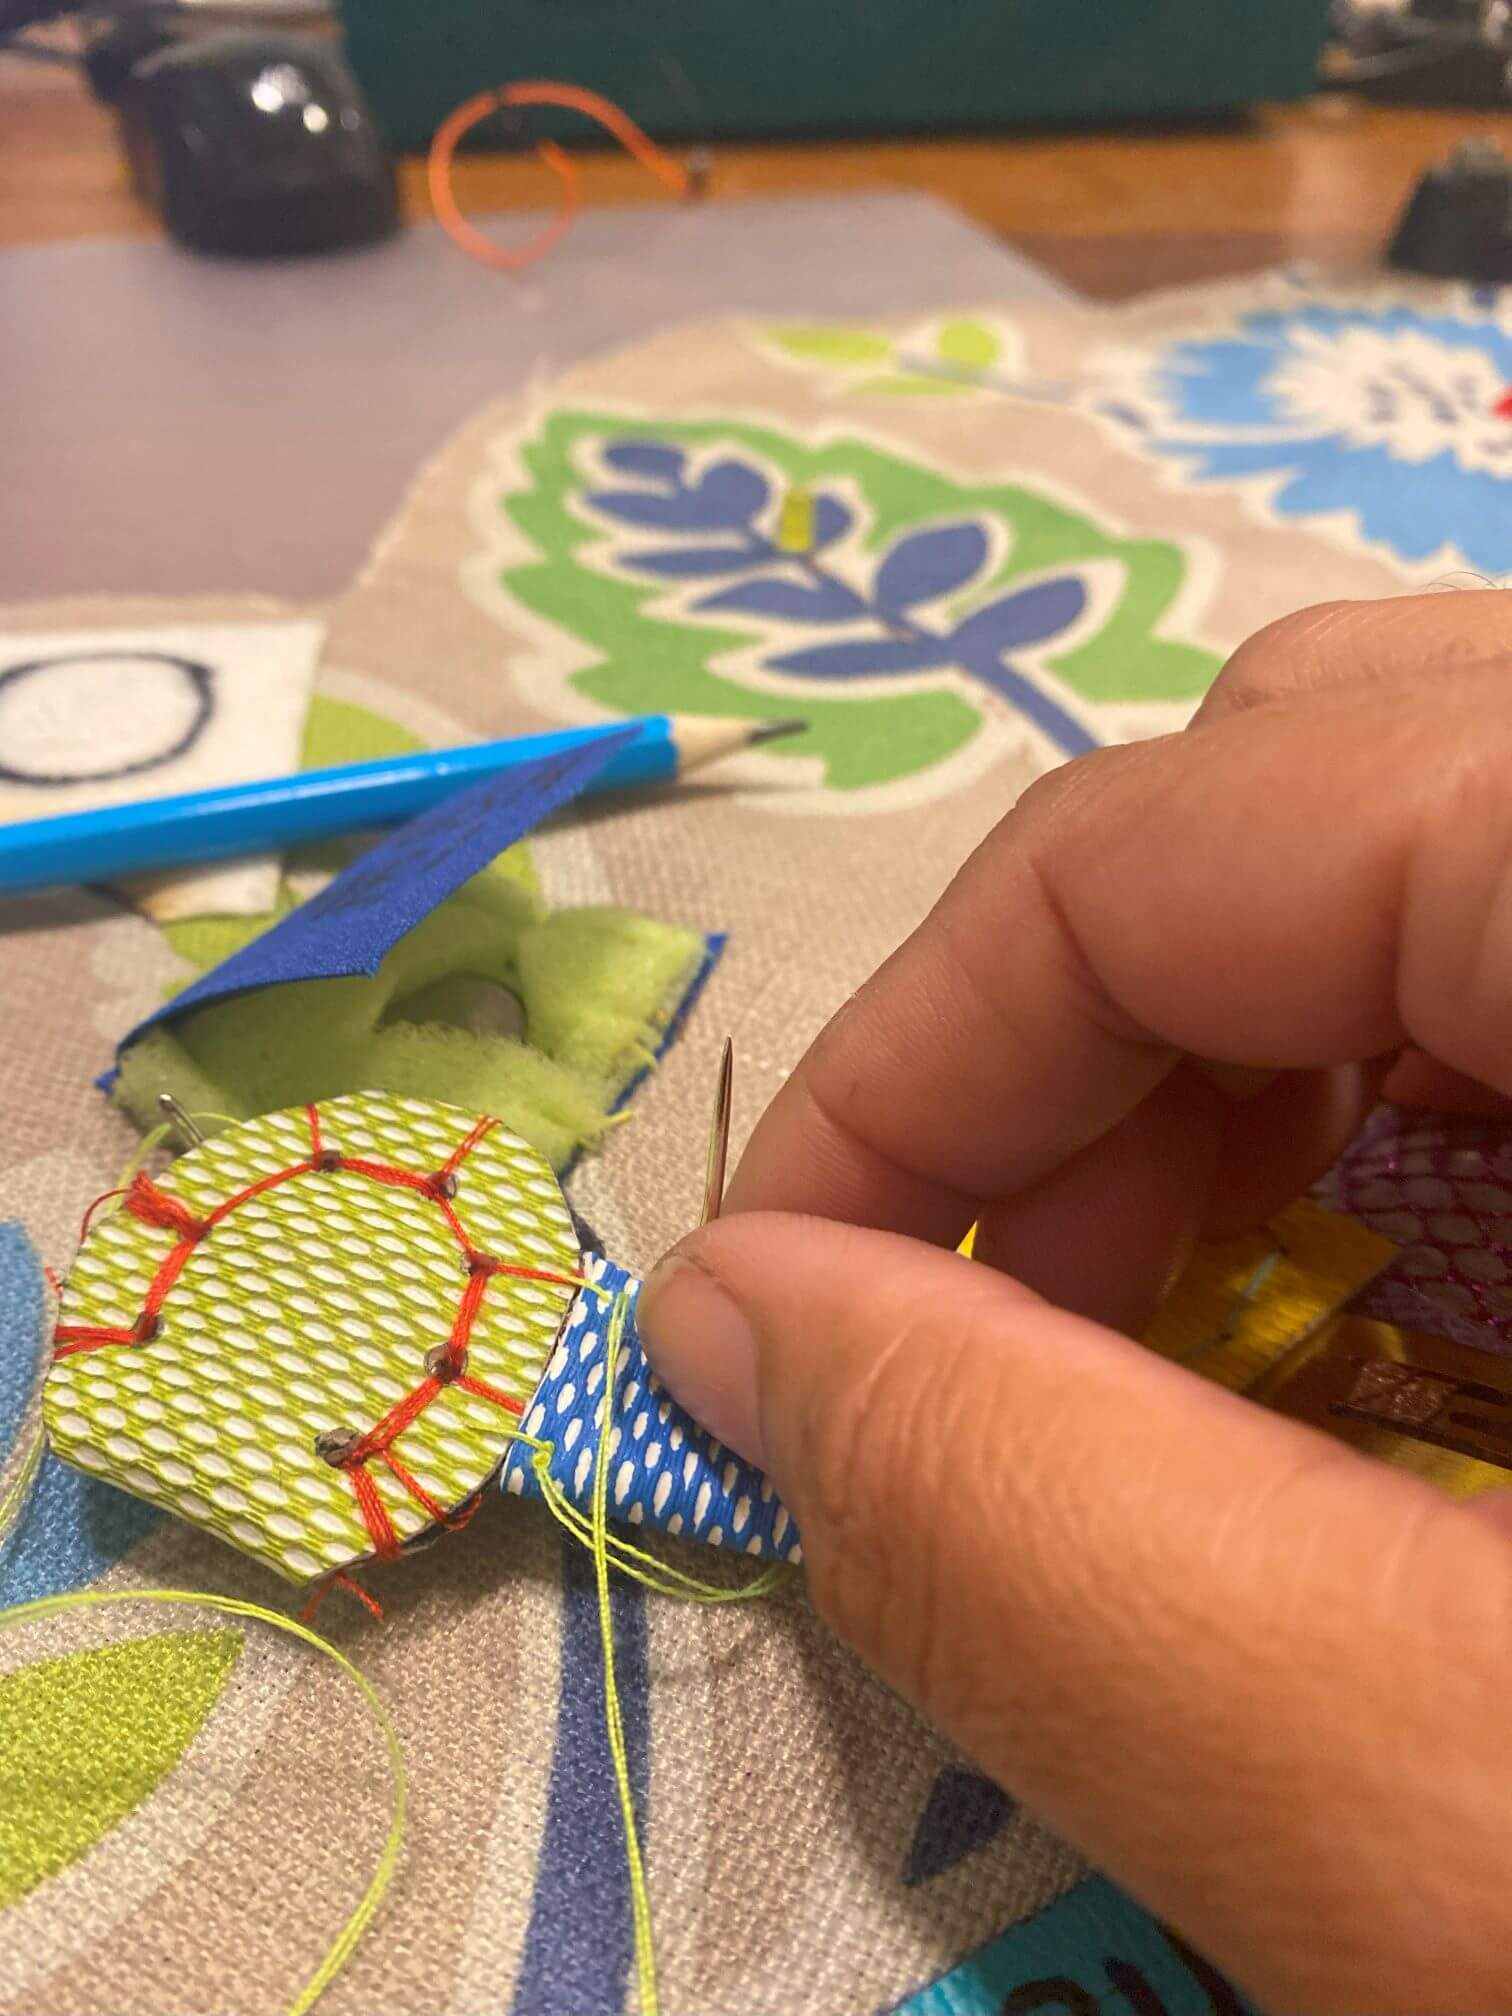
Battery in the BUTTON THIS CIRCUIT: The battery in the BUTTON THIS circuit has a pocket ( green leather closed with red tread). It is again integrated in the circuit where the + side is connected to the button on the green leather and on the - side there is copper tread connected to the battery. This tread is hidden in the blue arm that moves the green pocket towards the yellow one to button them together.
Battery in the RUB IT CIRCUIT and CLIP IT traces: The coin battery here is the only one not hidden but serves as part of the learning experience: "Make a battery sandwich". The hairclip crocodile traces sandwich the coin battery. The + and - side are written on the hairclips as part of the instructions.
Instructions:
The user gets a few simple playful instructions how to change the lights through the switched. These are all glued onto the fabric patterns of the E-playground on bright blue leather.
Research
Research examples:
Definetly the main examples how to construct swatches and soft circuits I found on:
-
the Fabricademy tutorials and notes on E-textiles: Fabricademy E-textiles
-
the Kobakant pages: KOBAKANT DEPOSITORY
-
the page of Lisa Stark: Lisa Stark tutorials
Alumni pages:
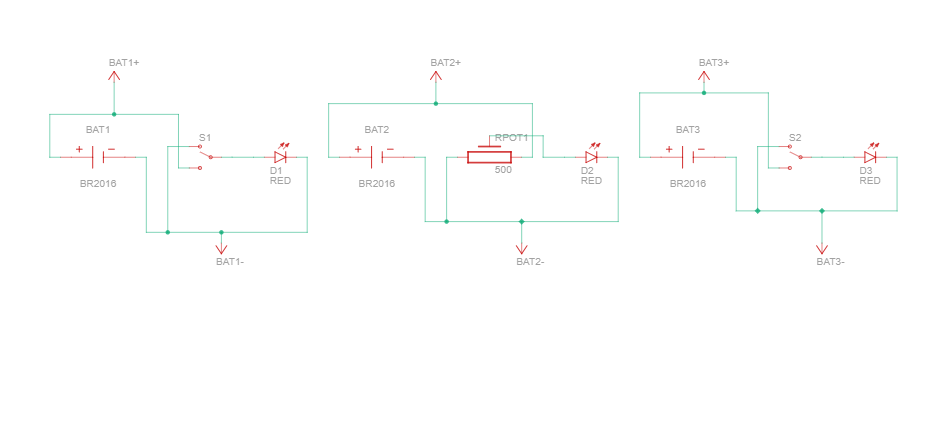
CIRCUIT DRAWING E-playground without arduino
TECHNICAL DRAWING E-playground without arduino
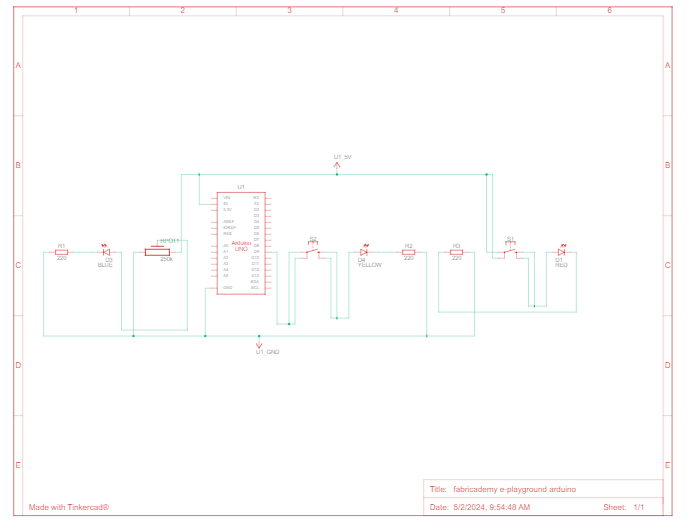
CIRCUIT DRAWING E-playground integrated with arduino
E-playground Circuit drawing integrated with arduino can be found here. This was made in Tinkercad.
E-playground Technical drawing integrated with arduino can be found here. This was automatically generated in Tinkercad.
TECHNICAL DRAWING E-playground integrated with arduino
ARDUINO Simulations
I simulated several circuits with arduino and breadboard.
First the potentio meter to simulate the analog RUB IT Switch. Click on the next picture to see the youtube video. I used an arduino sketch from the file "Fading.ino". You can find the sketch in the Code section of this page.
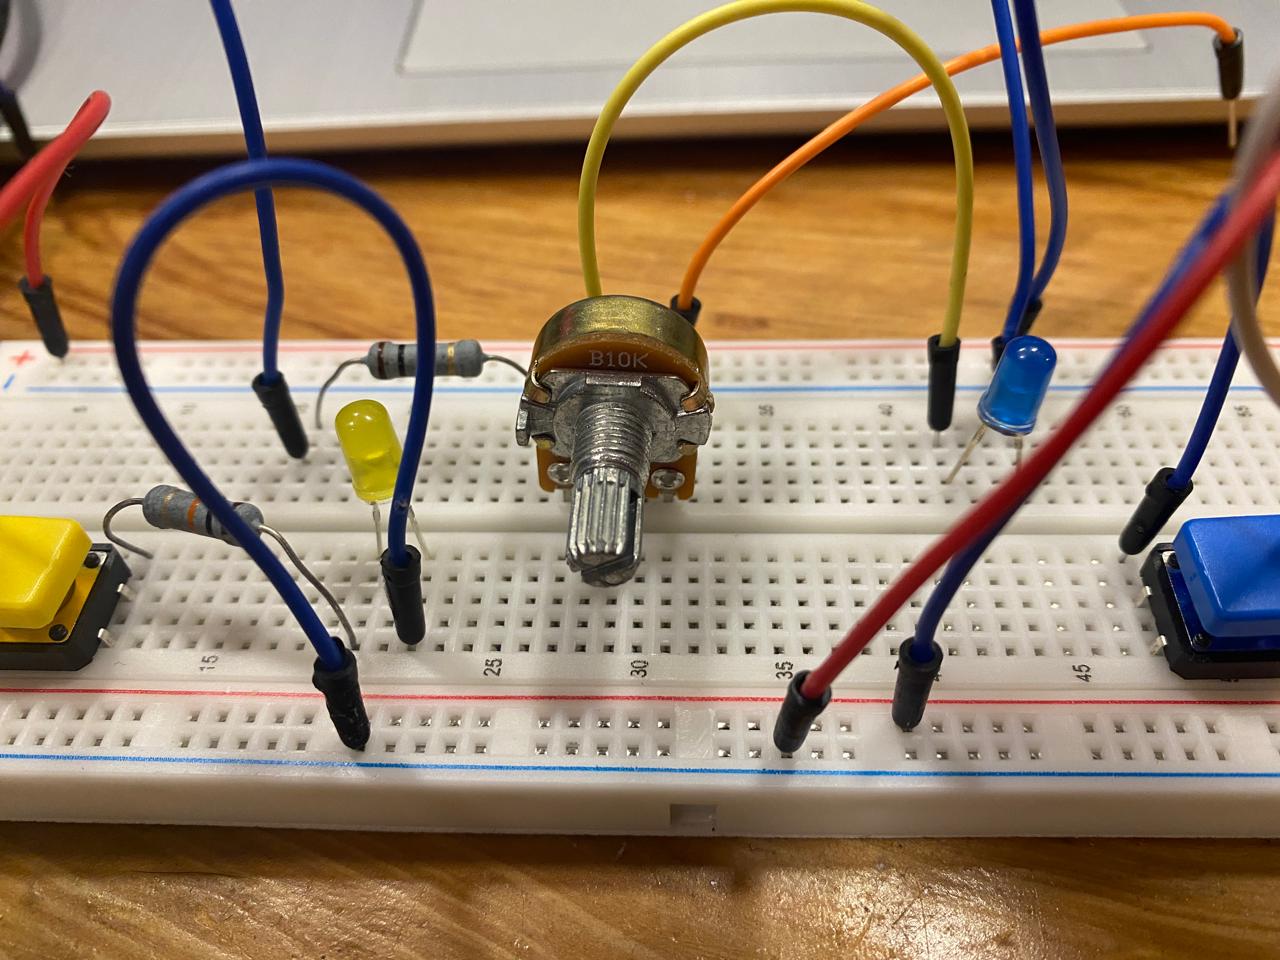
I also simulated the circuit on Tinkercad. Click on the next picture so you can watch the video link:
Materials used
- Fabric leftovers: cottons and commercial leathers
- sponges
- sewing kit with tread and needle
- metal press buttons
- metal hairclips
-
scissors
-
3 Coin batteries
- 9V battery
- Led lamps
- recycled Copper from an old soundsystem or conductive tread
- jumper wires
- baby pliers/ wubbers
- solder iron
- solder wire
-
magnet glass
-
Arduino Uno
- Breadboard
- Potentiometer
- Switches
- Resistors 220 ohm, 10 kOhm
- Multimeter with continuity setting that beeps
Digital Tools
Code Example
Fading.ino
/*
  Fading

  This example shows how to fade an LED using the analogWrite() function.

  The circuit:
  - LED attached from digital pin 9 to ground through 220 ohm resistor.

  created 1 Nov 2008
  by David A. Mellis
  modified 30 Aug 2011
  by Tom Igoe

  This example code is in the public domain.

  https://www.arduino.cc/en/Tutorial/BuiltInExamples/Fading
*/

int ledPin = A0;  // LED connected to digital pin 9

void setup() {
  // nothing happens in setup
}

void loop() {
  // fade in from min to max in increments of 5 points:
  for (int fadeValue = 0; fadeValue <= 255; fadeValue += 5) {
    // sets the value (range from 0 to 255):
    analogWrite(ledPin, fadeValue);
    // wait for 30 milliseconds to see the dimming effect
    delay(30);
  }

  // fade out from max to min in increments of 5 points:
  for (int fadeValue = 255; fadeValue >= 0; fadeValue -= 5) {
    // sets the value (range from 0 to 255):
    analogWrite(ledPin, fadeValue);
    // wait for 30 milliseconds to see the dimming effect
    delay(30);
  }
}
Video
This video link shows the complete E-Playground: