12. Soft robotics
This week we focused on the field of soft robotics. Unlike rigid robots, soft bodied robots have similarities and performance characteristics similar to living organisms or the human body. Soft-robotics are based in bio-inspired design or biomimicry. And that's what I exactly love about this field. As the end-results often move and operate with a natural and slow rhythm which gives the artificial pieces almost a live of itself. I can see how interesting textures and clever use of biomaterials can be a perfect fit to this field to further strengthen the suggestion of a living object.
Inspiration
For me nature is a vast source of inspiration. Even simple creatures can be touching, when we take time to really 'see' them. Take for example the daisy. It is considered a weed and an unassuming little plant and grows here in the meadows in abundance. But they are so sweet, opening for the morning to soak up the sun, and closing for the night to sleep and dream of the next sunny morning to come.
Daisies falling asleep, video by Pete Cobbe
Could I mimic this slow closing of the daisy?
Final results
This week for me became a search for the perfect inflatable petal.
Handmade inflatables with Thermovinyl
The most easy way to start experimenting with inflatables is using baking paper and Thermovinyl fabric, which is heat sealing material. The fabric has a shiny and a dim side. The dim side is the side which can be glued together by applying heat. Baking paper placed in between the vinyl sheets will prohibit the sheets to melt together, leaving channels and chambers through which air can flow.
The approach is straightforward.
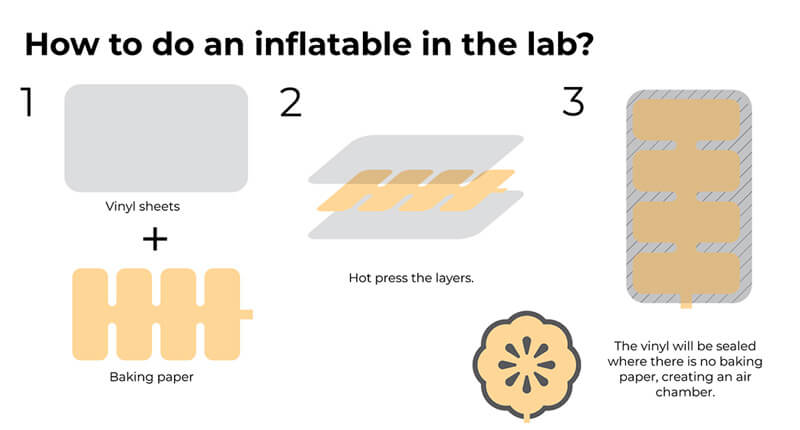
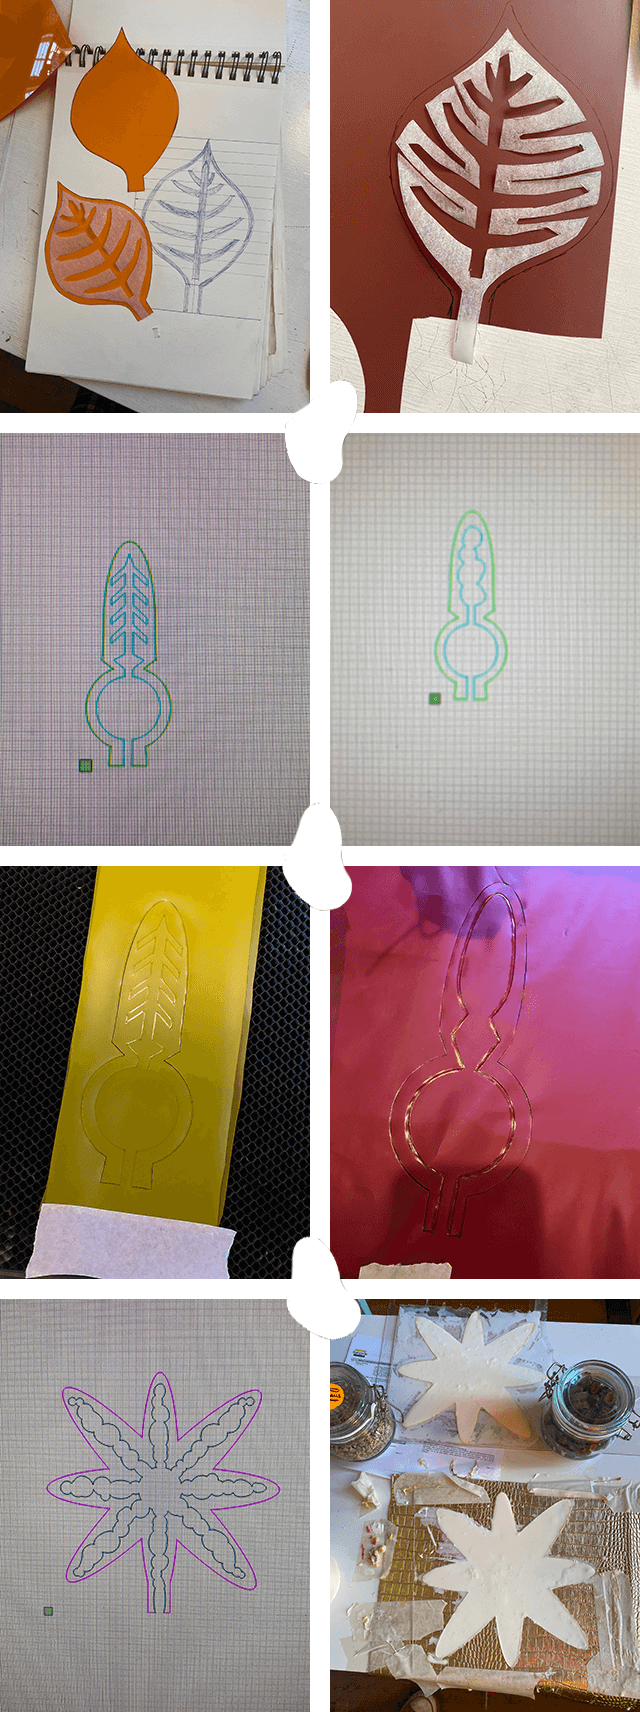
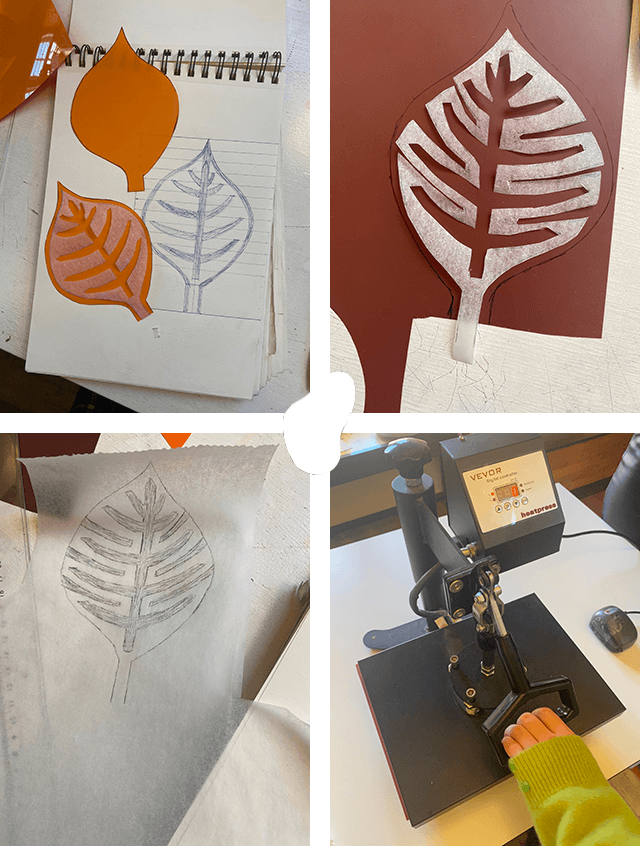
- Sketch your design on paper, there should be an outline of the inside (channels and chambers) and of the outside (object shape).
- Draw the inside on baking paper and cut it out. Make sure that you plan for a small rectangle of paper that surpasses the outline of the outside. This is the spot you will later insert your straw in.
- Draw the outside on vinyl sheets and cut it out twice.
- Place one of the vinyl shapes with the dim side up.
- Layer the baking paper shape in the centre.
- Place the second vinyl shape on top with the dim side down.
- Place the inflatable on the heatpress machine between two sheets of baking paper.
- Select a temperature of 150 degrees and press the Enter button for 10 seconds.
I created rough petal shapes with different vein structures on the inside. They both happily curved when inflated.
Curling vinyl flower, test 1
Curling vinyl flower, test 2
Laser-cut inflatables with Thermoplastic Polyurethane
Thermoplastic Polyurethane or TPU is very easy to melt with heat and it has a nice texture like some sort of silicone fabric. In 2019 Loes Bogers and Beatriz Sandini found out you can use the lasercutter to weld TPU. A perfect way to make inflatables.
The main trick to weld instead of cutting is to have the laser out of focus, and you do that by moving the laser cut lens holder up to around 22 mm. To that end we created a block of left-over wood and plexiglass with which we could place the lens holder to the right height.
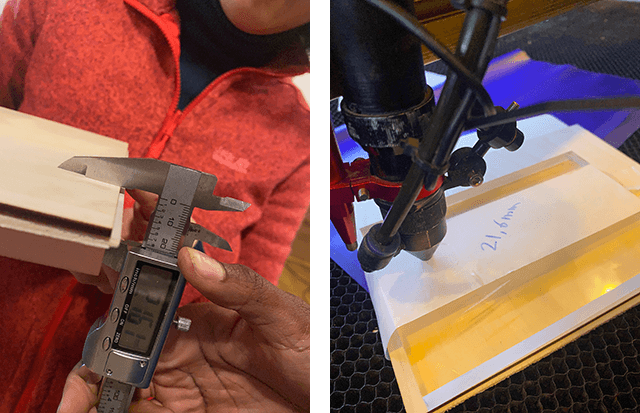
We first did a test together. We used the following settings:
- Height 21,6 mm
- Speed 100
- Power 40
- Corner power 10
That first test did come out beautifully. The lines were thin and perfectly welded, and no holes were present in the fabric.
Welding setting test, video by Marieke van Eyndhoven
Petals, air channel and chamber structures, and welding setting
I made a petal shape in Illustrator, comparable to our test object. I used the settings for the laser as in our test round. This worked out fine. However, when I changed the inside of the petal to a vein structure with sharp lines and corners, I ran into problems. A lot of my corners had holes, the laser had not welded the material in those spots, but the power was so strong that it had completely melted the TPU.
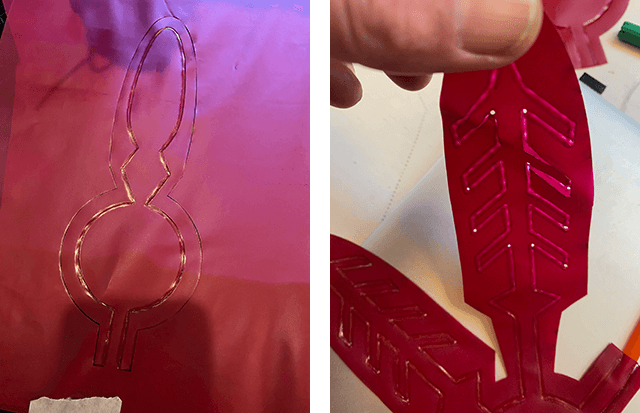
I tried to lasercut the vein-structure petal while using different settings:
- Height 21,6 mm
- Speed 100
- Power 20
- Corner power 10
This time the sharp corners of the vein structure were nicely welded, however the weld lines of the circle shape were very fragile. And after several tests the petal exploded and died.
Vein structure intact, video by Marieke van Eyndhoven
From these tests it became clear that the optimal settings for round circles and curved lines are different than those for square lines and sharp corners.
I decided to replace my air channels consisting of a sharp-cornered vein structure with more organic bubbles as air chambers. Since this would leave all lines to be welded as curved shapes, this should work well with the test settings we had originally used with the power on 40.
My next petal hold up fine, also after many times of inflating the petal.
Organically curve-shaped air chambers, video by Marieke van Eyndhoven
Scaling up to a complete flower
Armed with this knowledge, it was time to scale up to make a complete flower structure.
Flower inflatable, video by Marieke van Eyndhoven
The only issue I did still see, were the air channels from the base of the petal to the air chambers in the petal itself. They were too narrow and as such caused more of a sideways pull and also were still vulnerable spots. Therefore I replaced those narrow channels with curve-shaped chambers as well. That was the form of my final flower.

Welding the final flower structure, video by Marieke van Eyndhoven
Cecilia suggested that I did blow some talc powder in the TPU flower before trying to inflate it. This would help open up all air chambers. So I did and then it was time to inflate the flower. I felt slightly dissappointed about the result. The petals moved only slightly up. It was more an octopus than a flower closing off for the night to get to sleep.
Testing the final flower inflatable, video by Marieke van Eyndhoven
Latex inflatable
For the next experiment I decided to work with textured latex. It felt more delicate than silicone, and as such that material fitted better the flower structure I aimed to make.
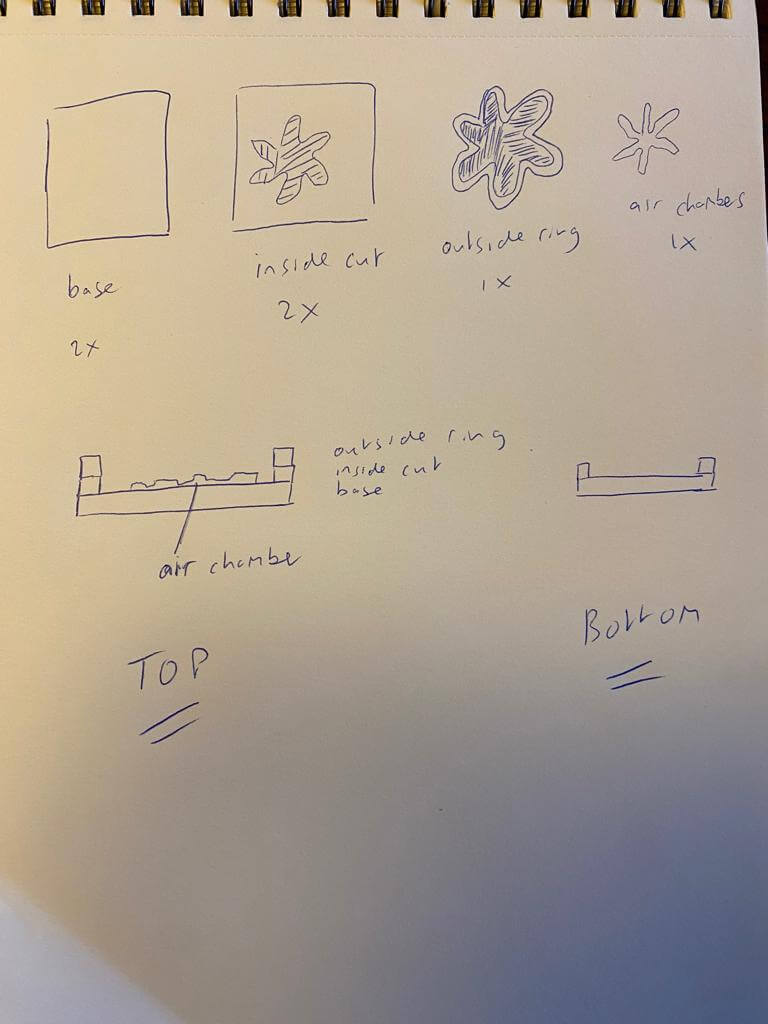
In Illustrator I reworked the form of my inflatable flower to create the layers for a closed flower for a mold. I needed the following layers:
- 2 closed base layers for the top and the bottom (no cutting required)
- 1 sheet of textured material for the top (no cutting required)
- 2 layers with the flower shape cut out (for the top and the bottom to create height for the latex)
- 1 layer with the outline of the flower cut out (for the top to create additional height versus the air chambers layer)
- 1 layer for the air chambers
For each layer I used acrylic of 1,5mm. I used the following lasercutter settings:
- Speed 60
- Power 75
- Corner power 20

Once I had cut out the layers, it was time to assemble them and fill the molds with latex. This were the steps I followed:
- I removed the paper from the acrylic layers.
- I glued the layers together so that I had one mold for the top and one for the bottom.
- With a waterpass I made sure that the table I would work on was completely level.
- First I covered the base with a thin amount of latex with help of a brush.
- After that I carefully poured in the latex to fill up the molds till the brim.
- With a needle I tried to get rid of as much air bubbles as possible so that the surface is as homogeneous as possible.
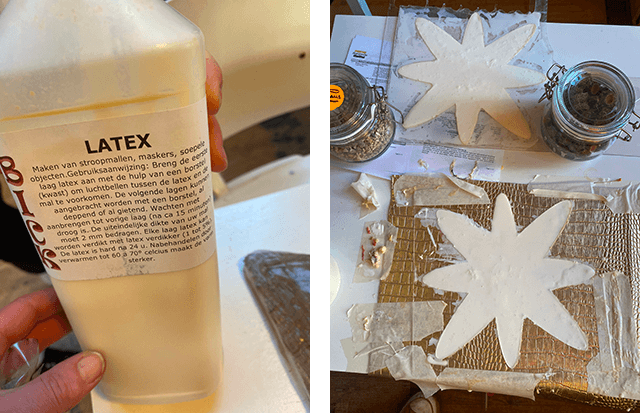
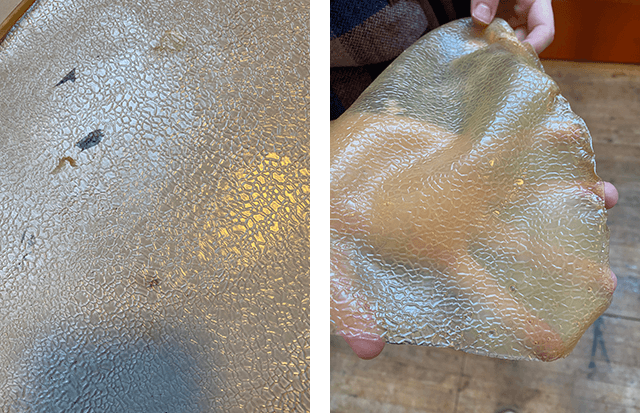
The latex layers of the flower came out of the mold smoothly. The texture of the material I had used for the top had left a very nice imprint. Even some of the shiny golden pigment had transferred to the latex. So all good to assemble this final pièce de résistance of my soft robotic journey.
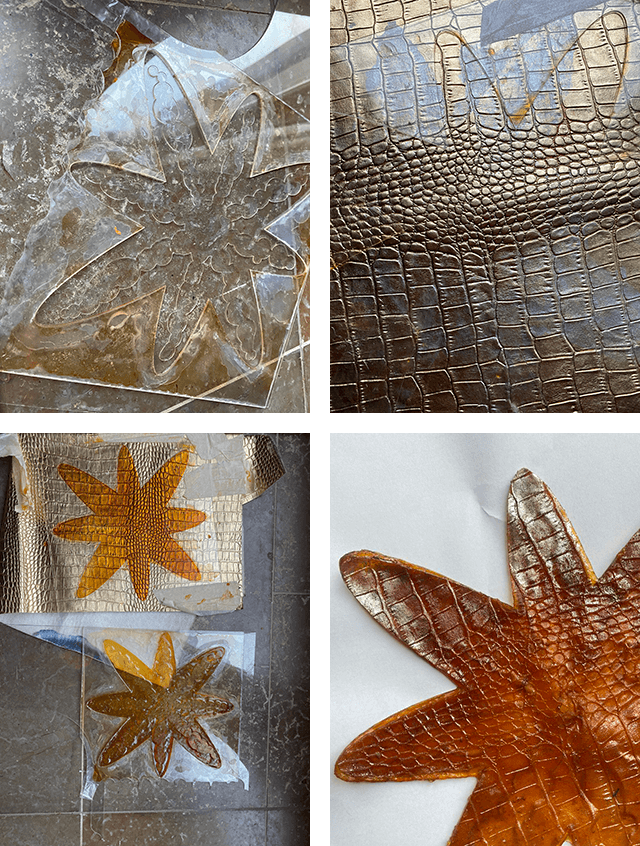
Unfortunately, after having glued the latex layers together, I wasn't able to inflate the flower with air. The latex was so sticky, that the air chambers just did not want to open up. It might have helped if I had sprinkled the chambers with some talc powder, before I glued the layers together.
Files
All the files can be downloaded here.