Process
Flowchart
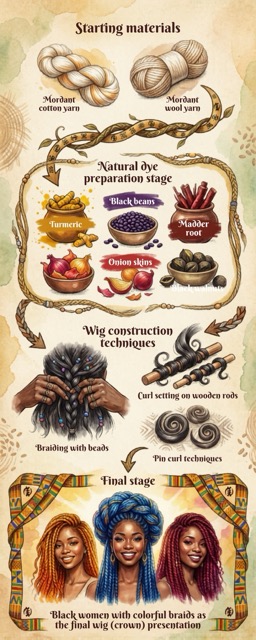
This flowchart illustrates the full process of creating sustainable, culturally expressive wig “crowns” using natural materials and textile techniques. It begins with the preparation of fibers, specifically mordanted cotton and wool yarns, which are treated to ensure they can properly absorb and retain natural dyes. The process then moves into the natural dye preparation stage, where plant-based materials such as turmeric, black beans, madder root, onion skins, and black walnut are used to create a range of rich, earthy colors. Once the dyes are prepared, the yarn is immersed, allowing the color to develop before being dried and set.
Following dyeing, the process transitions into wig construction techniques, where the yarn is transformed into textured “hair.” This includes methods such as braiding with beads to incorporate cultural aesthetics, wrapping yarn around wooden rods to create curls, and using pin curl techniques for tighter, more defined patterns. These techniques allow the material to take on dimensional, sculptural qualities that mimic and celebrate Afro-textured hair. In the final stage, all of these elements are brought together to create finished wigs, or “crowns,” that embody identity, creativity, and sustainability. The result is a collection of vibrant, naturally dyed hairstyles that center Black women, highlighting beauty, cultural pride, and innovative design practices.
Prototype
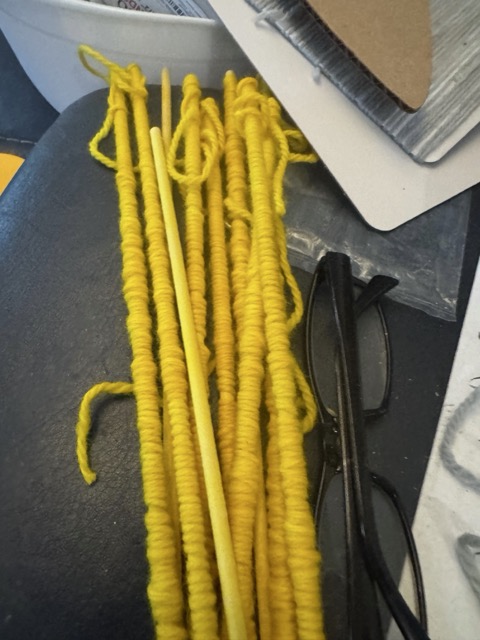
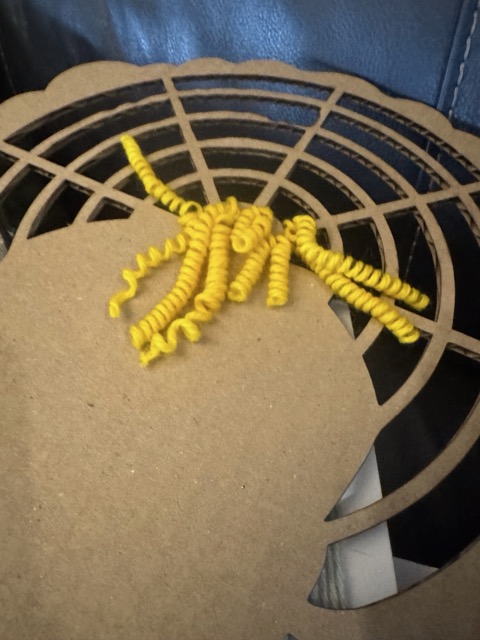
Prototype Development: Yarn Hair + Structural Testing
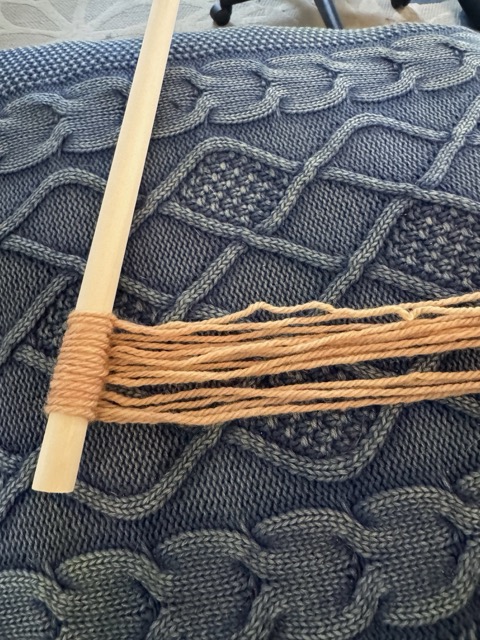
These prototypes explore how naturally dyed yarn can function as hair when combined with a laser-cut structural base, with the goal of testing both material behavior and attachment methods before developing the final wig (crown). The process began with yarn formation experiments, where yarn was tightly wrapped around rods and set over time or heat to create coils and curls, mimicking Afro-textured hair and producing vibrant tones such as turmeric yellow. The next phase focused on attachment and placement, using a laser-cut grid as a scaffold where yarn was inserted, tied, or looped to simulate natural hair growth patterns while testing density, direction, and flow. As the yarn was applied to a cardboard silhouette, the curls lifted off the surface, creating dimension and allowing for layering and expansion. These experiments demonstrated how the design could successfully transition from a flat, laser-cut structure into a three-dimensional, wearable crown. This confirms that the design can transition from flat (laser cut) to 3D (wearable form).
Dye Recipes
Turmeric
Turmeric Dye Recipes (100% Wool Yarn) Materials • 100 g wool yarn • 15–20 g turmeric powder • 1 gallon water • 2 glass jars • Alum mordant (10–15% WOF)
Process 1. Mordant wool yarn with alum for 1 hour. 2. Add turmeric powder to simmering water. 3. Simmer 30–45 minutes. 4. Add yarn and simmer 30 minutes. 5. Place both yarn into the glass jars 6. Let cool and rinse.
Result: Bright golden yellow.
Variations
Turmeric + Vinegar Modifier Additional Step • Add ¼ cup vinegar after dyeing. Result: Softer warm yellow/golden tone.
Turmeric + Baking Soda Modifier Additional Step • Add 1–2 tsp baking soda to dye bath. Result: Warmer orange-yellow tone.
Blackbeans and Variation
Blackbean Variation Recipes (100% Wool Yarn) Materials • 1 bag dried blackbeans • 1 gallon water • 100 g wool yarn • Alum mordant
Blackbean Recipe
Process 1. Soak blackbeans overnight. 2. Remove beans and keep liquid. 3. Mordant wool yarn. 4. Add yarn to cool dye bath for several hours.
Result Bluish gray/purple-gray tone.
Variations Blackbean + Baking Soda Modifier (Add 1 tsp baking soda) Result: More muted blue-gray tone.
Blackbean + Turmeric with Iron Modifier (Add turmeric-dyed yarn into iron-modified blackbean bath) Result: Olive green tones.
Blackbean + Soda Ash Modifier (Add 1 tsp soda ash) Result: Blue-purple variation.
Blackbean + Pickling Lime Modifier (Add small amount of pickling lime) Result: Soft lavender-gray tone.
Blackbean + Cream of Tartar Modifier (Add 1 tsp cream of tartar) Result: Softer dusty blue tone.
Blackbean + Vinegar Modifier (Add ¼ cup vinegar) Result: Muted mauve-purple tone.
Blackbean + Iron Modifier (Dip yarn into weak iron bath for 1–3 minutes) Result: Dark gray/charcoal tone.
Blackbean + Alum Modifier (Additional alum soak after dyeing) Result: Brighter cool gray-purple tone.
Blackbean + Soy Modifier (Soak yarn in soy milk before dyeing) Result: Enhanced softness and deeper muted tones.
Madder Root
Madder Root Recipe Materials • 100 g madder root • 100 g yarn (100% cotton and 100% wool) • 1 gallon water • Alum mordant • Stainless steel dye pot • Strainer
Mordanting Process Cotton Mordanting 1. Pre-wash cotton yarn thoroughly. 2. Mordant using alum solution. 3. Simmer cotton for approximately 1 hour. 4. Allow fibers to cool overnight for improved dye uptake.
Wool Mordanting 1. Gently wash wool yarn. 2. Mordant using alum at approximately 10–15% WOF. 3. Simmer carefully without agitation to avoid felting. 4. Allow wool to cool naturally in mordant bath.
Dye Bath Preparation 1. Soak madder root in warm water before dyeing. 2. Add madder root to dye pot with water. 3. Slowly heat dye bath while avoiding boiling temperatures. 4. Maintain temperature around 140–160°F (60–70°C).
Madder Root on 100% Cotton Process 1. Add mordanted cotton yarn to prepared dye bath. 2. Simmer gently for approximately 1 hour. 3. Allow yarn to cool inside the dye bath for enhanced color development. 4. Rinse with cool water and air dry.
Result: The 100% cotton yarn produced a soft light pink tone with muted warm undertones.
Madder Root on 100% Wool Process 1. Add mordanted wool yarn to dye bath. 2. Maintain low simmer and avoid rapid movement. 3. Allow wool to remain in bath for extended time for deeper saturation. 4. Cool slowly and rinse gently.
Result: The 100% wool yarn developed a rich burgundy-red tone with deeper saturation and warmth. The protein structure of wool allowed the dye to bond more effectively, producing a more vibrant and dimensional color than the cotton sample.
Black Walnut Black Walnut Recipe
Materials • Black walnut hulls • 100 g yarn (100% cotton and 100% wool) • 1 gallon water • Stainless steel dye pot • Alum mordant for cotton • Strainer
Dye Bath Preparation 1. Collect or prepare black walnut hulls. 2. Add hulls to large dye pot with water. 3. Simmer for 1–2 hours to extract pigment. 4. Strain hulls from liquid before dyeing.
Black Walnut on 100% Cotton Process 1. Pre-wash cotton yarn thoroughly. 2. Mordant cotton using alum for improved dye absorption. 3. Add cotton yarn to strained walnut dye bath. 4. Simmer gently for approximately 1 hour. 5. Allow yarn to cool in dye bath before rinsing.
Result: The cotton yarn produced a soft light gray-brown tone with muted earthy undertones. Compared to wool, the cotton absorbed the walnut dye less intensely, resulting in a more subdued and weathered appearance.
Black Walnut on 100% Wool — 50% WOF Recipe • 50 g black walnut hulls per 100 g wool yarn Process 1. Gently wash wool yarn. 2. Add wool to prepared walnut bath. 3. Maintain low simmer to prevent felting. 4. Allow extended soaking for deeper saturation.
Result: The 50% WOF wool sample produced a warm light brown tone with soft caramel and natural wood-like undertones. The lower dye concentration created a lighter and more organic color palette.
Black Walnut on 100% Wool — 100% WOF Recipe • 100 g black walnut hulls per 100 g wool yarn
Process 1. Prepare concentrated walnut dye bath. 2. Add wool yarn. 3. Simmer gently for 1 hour. 4. Allow wool to remain in dye bath overnight for maximum saturation.
Result: The 100% WOF wool sample developed a deep dark brown tone with rich earthy depth and stronger saturation. The wool fibers absorbed the tannins effectively, creating one of the darkest and most colorfast shades within the collection.
Onion Skin Recipes Materials
• Yellow onion skins and red onion skins • 100 g yarn or fiber • 1 gallon water • Alum mordant • Stainless steel dye pot • Strainer
Mordanting Process Cotton and Wool Preparation 1. Pre-wash fibers thoroughly to remove oils and residues. 2. Mordant fibers using alum at approximately 10–15% WOF. 3. Simmer fibers gently for 1 hour. 4. Allow fibers to cool before dyeing. The mordanting process improved color absorption and helped create more vibrant and long-lasting tones.
Dye Bath Preparation 1. Collect a large amount of onion skins. 2. Add skins to dye pot with water. 3. Simmer for approximately 1 hour to extract pigments. 4. Strain skins from the dye liquid before adding yarn. As the onion skins simmered, the dye bath developed rich golden and amber-colored tones depending on the type of onion skins used.
Yellow Onion Skin Recipe Process 1. Add mordanted yarn to yellow onion skin dye bath. 2. Simmer gently for 30–45 minutes. 3. Allow fibers to cool in dye bath for deeper color development. 4. Rinse and air dry.
Result: Yellow onion skins produced bright golden yellow and warm amber tones.
Red Onion Skin Recipe Process 1. Prepare dye bath using red onion skins. 2. Add mordanted yarn carefully to strained dye bath. 3. Maintain gentle simmer to preserve color richness. 4. Allow fibers to soak for extended time if deeper tones are desired.
Result: Red onion skins created a reddish-gold tone.
Mentoring notes
Although I did not receive formal written notes from my midterm evaluation possibly due to presenting at the end of the final session, the feedback I received during the review was impactful. My mentor, Becky, encouraged me to shift my focus away from the garment aspects of the project and instead concentrate more deeply on the hair itself as the central material and concept. She emphasized the importance of exploring the chemistry and material relationships within the work. This insight prompted me to rethink my approach and begin investigating yarn as an alternative to traditional hair materials. I started comparing fibers such as cotton and wool with 100% human hair, considering their structural, aesthetic, and chemical properties. This reflection has pushed my project toward a more material driven exploration, aligning more closely with sustainability and innovation in textile based hair design.
However, during the final evaluation, my notes are as followed...
Darlene M Eberhardt-Burke Dyeing Hair - Color Botanical Crown Collection
- CECILIA Well done Darlene! You really made it happen and its fun, its real and meaningful! I loved the video, the happiness and fun you all had together is so powerful and contagious! and the outcomes are a great alternative to current options. well done!
- CLAUDIA Very powerful, very inclusive and personal project. Great improvements since last time I loved how you managed to craft the project starting from your early natural dying experiments and great to see that now everything together makes sense. Sense of identity, care and community. People reconnecting with themselves and express something personal, their personalities. Well done! This could also turn into a business, while keeping it open to empower people also building upon it.
- NURIA Darlene, I’m really proud of your work and very happy to have accompanied you on this journey. Your project has evolved beautifully in recent weeks, resulting in a vibrant and playful collection of naturally dyed wigs. Well well done ! <3
- CAROLINA Darlene, this really is a hairy surprising project. Congratulations!
- STEPHANIE Love the looks and the video! Very empowering!
- DIANE Darlene your project and presentation are so full of joy! The visuals and styles are amazing, and the amount of work that went into these crowns makes my head spin!
- Marissa Darlene, this is the kind of pride in existing authentically I always seek. The second I heard that beat drop in your film, I made the same face I make when I see freestyle dancers hit their beats at a cypher. I really loved this, how unique and fun it is. Thank you for sharing, we need more of this.
- DIANA Sooo fun!! I wished we had widely availble wigs made out of sustainable materials!
Design File
The SVG file used for this fabrication experiment is available below.