Deliverables
The Booklet
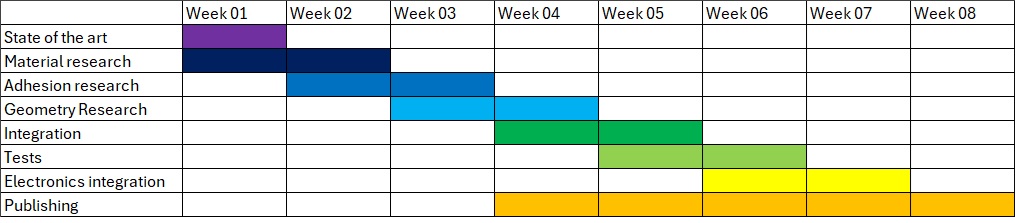
This is the first part of the deliverables of this project, and it consist in a physical and digital publication that works as a reference for makers, students and researchers. This planning and fabrication was done through this timeline:
The book compiles:
- Research on inflatables
- Material exploration and benchmarks
- Fabrication methods and sealing techniques
- Experimental results and observations
- Fabrication parameters for different machines
This booklet is modular so new pieces can be added without interfering with the flow.
Material sample library
This samples are used as a starting point for people to understand both how the materials behave and how the pieces can be manufactured. The sample library includes:
- Plastic films
- Hybrid textile materials
- Recycled packaging materials
- Experimental laminated structures
Each sample documents: * Material type * Fabrication method * Sealing parameters * Observed performance
Inflatable textiles protoypes
A series of inflatable prototypes were fabricated to test different design strategies and fabrication methods.
These prototypes explore:
- Seam geometries
- Chamber structures
- Air retention behavior
- Structural response when inflated
- Movement based on geometry (biomimetics)
Fabrication files and parameters
All the digital fabrication files are included in this documentation. Also are included the details for the fabrication of each experiment.
These files include:
Laser cutting files for the booklet structure Printable page templates Inflatable pattern files Experimental sample geometries
The documentation and details include:
- Laser sealing parameters
- Thermal sealing using a 3D printer hot end
- Material testing procedures
- Assembly instructions
Experimentation and documentation
This documentation includes:
- Experimental observations
- Successful and failed tests
- Fabrication guidelines
- Recommendations for further exploration
These processes will be documented like this:
- Thermal sealing using Laser
- Thermal sealing using the 3D printer hotend
- Thermal sealing using the Hot iron press with parchment paper sandwiched
For each material, different sealing parameters that include temperature, time, even pressure. The goal is to determine the best parameters for each material, so we can have reliable fabrication methods. These experiment's results are included in the booklet as samples.
Laser cutter sealing
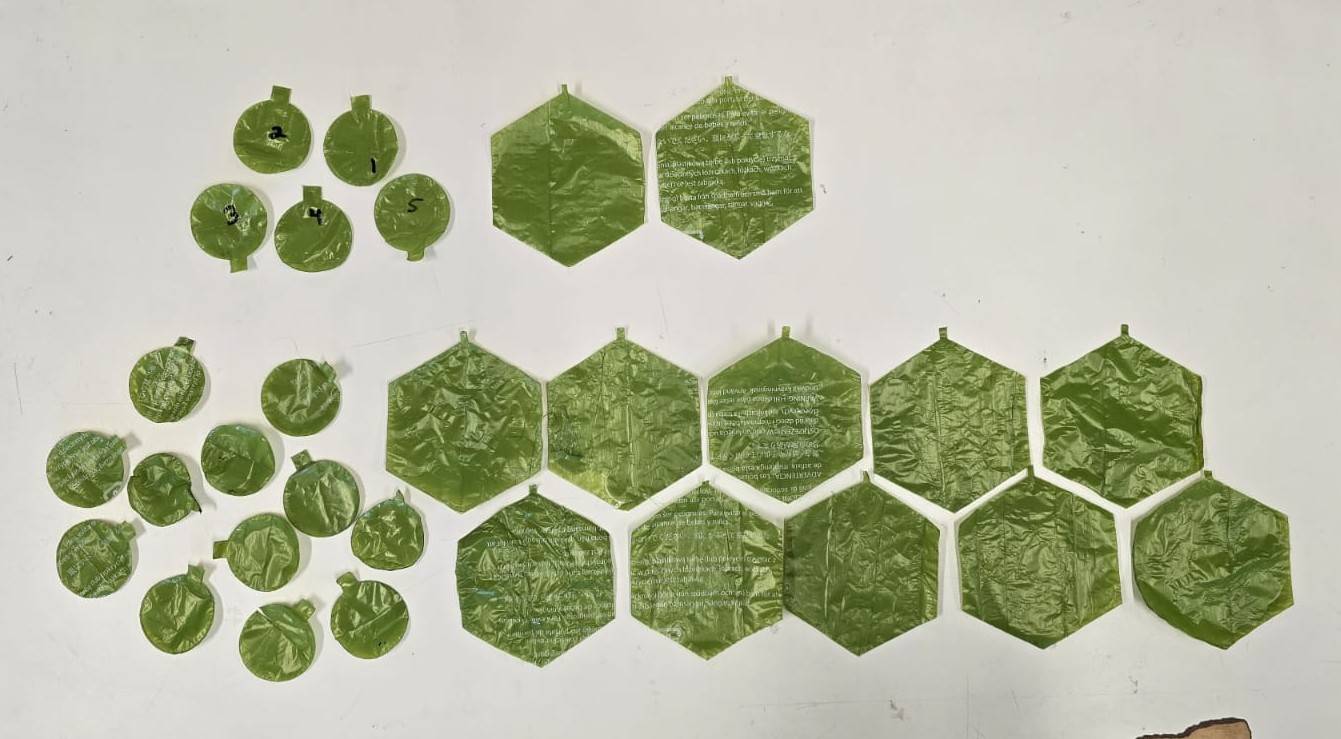
For this process we are using 3 different patterns for inflatable chambers on the materials. The parameters on each are different and listed, and the key for a clean fusing is to have both sheets as close together as possible, it is possible to use liquid, like water or hairspray, so the sheets stick together better. Some plastic bags are very tightly packed so it is useful for this process. Static electricity can also be a powerful ally, as rubbing the plastic on one's hair can create enough attraction between the sheets. For this process we can't use any PVC as it can produce toxic chlorine gases when it burns. With that in mind, the results for the rest of the materials are as follows:
LDPE ★★☆☆☆
- Machine: Laser Cutter
- Material: LDPE Plastic Film
- Did it work?: Yes
- Layer configuration: 2 layers
Sealing
- Power: 30%
- Speed: 200 mm/min
- Offsets: 3
- Fill: No
Cutting
- Power: 40%
- Speed: 100 mm/min
- Offsets: 1
- Fill: No
Chip's bag ☆☆☆☆☆
- Machine: Laser Cutter
- Material: Polypropilene + aluminium film + Polyethylene
- Did it work?: No
- Layer configuration: 2 layers
Sealing
- Power: 40%
- Speed: 150 mm/min
- Offsets: 3
- Fill: No
Cutting
- Power: 60%
- Speed: 100 mm/min
- Offsets: 1
- Fill: No
Ziploc bag ★★★☆☆
- Machine: Laser Cutter
- Material: Polyethylene film
- Did it work?: Yes
- Layer configuration: 2 layers
Sealing
- Power: 20%
- Speed: 200 mm/min
- Offsets: 3
- Fill: No
Cutting
- Power: 35%
- Speed: 100 mm/min
- Offsets: 1
- Fill: No
RipStop ☆☆☆☆☆
- Machine: Laser Cutter
- Material: RipStop
- Did it work?: NO
- Layer configuration: 2 layers
Sealing
- Power: 65%
- Speed: 100 mm/min
- Offsets: 3
- Fill: No
Cutting
- Power: 75%
- Speed: 50 mm/min
- Offsets: 1
- Fill: No
Mylar ☆☆☆☆☆
- Machine: Laser Cutter
- Material: Mylar
- Did it work?: NO
- Layer configuration: 2 layers
Sealing
- Power: 22%
- Speed: 1000 mm/min
- Offsets: 3
- Fill: No
Cutting
- Power: 60%
- Speed: 400 mm/min
- Offsets: 1
- Fill: No
Polyester film ★★★☆☆
- Machine: Laser Cutter
- Material: Polyester film
- Did it work?: Yes
- Layer configuration: 2 layers
Sealing
- Power: 25%
- Speed: 250 mm/min
- Offsets: 3
- Fill: No
Cutting
- Power: 30%
- Speed: 100 mm/min
- Offsets: 1
- Fill: No
3D printer sealing
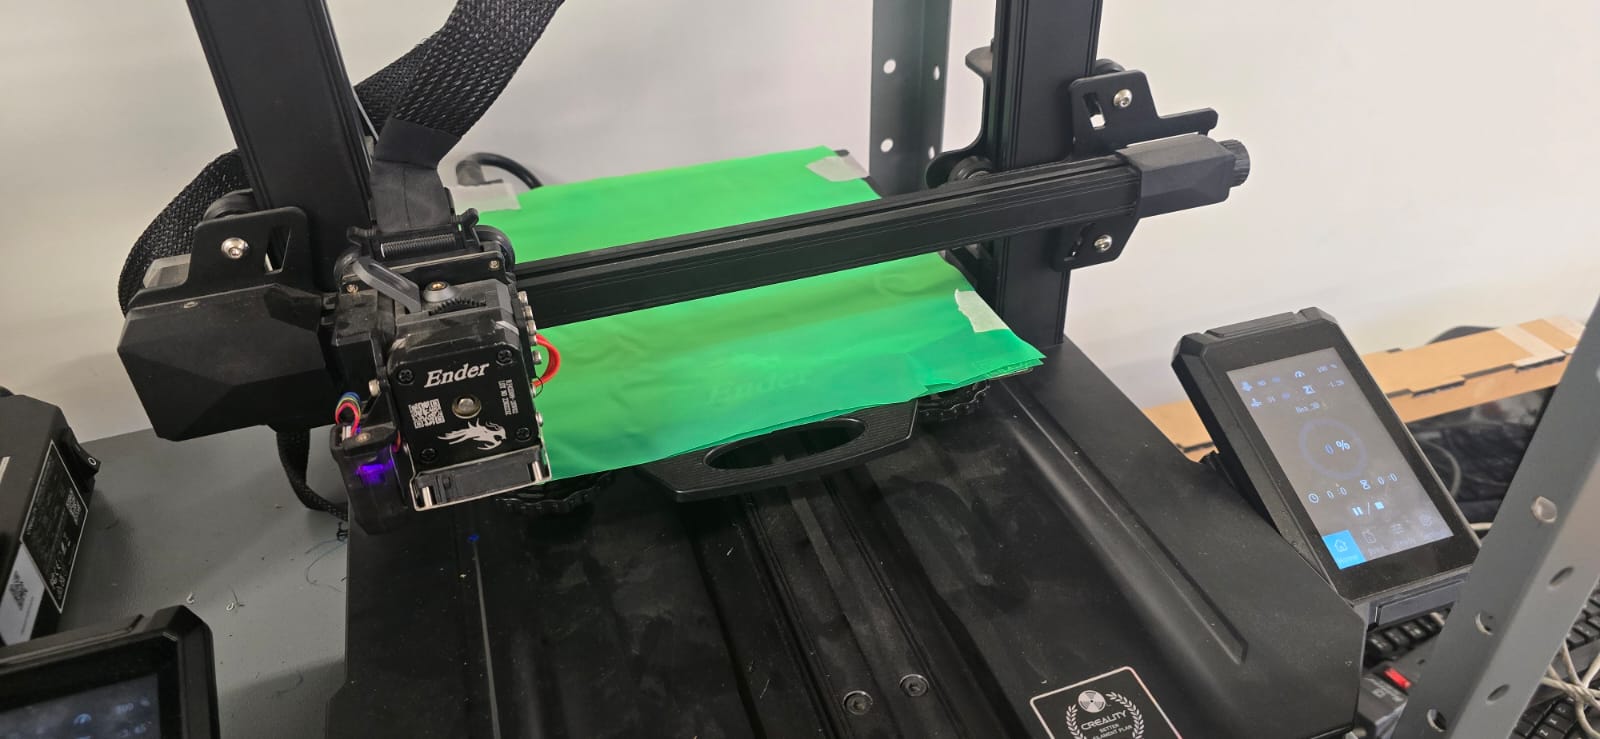
For this process we need to be more careful and accurate with the parameters like temperature or speed. It is important to say that we are actually not 3D printing, but using the hot end of the machine to fuse the different layers. The most important part for this process to work is to adhere the material to the printing bed as perfect as possible, without creases and to avoid any movement caused by the hot end. We have to trick the printer for it to print on thinner layers so the material fuses better, and also block the filament sensor so the machine thinks its printing correctly. Some printers, like the Prusas can print without filament as an option on the menu.
Textile vinyl ☆☆☆☆☆
- Machine: 3D printer
- Material: Textile vinyl
- Did it work?: NO
- Layer configuration: 2 layers
Sealing
- Hot end temperature: 150°-210°C
- Travel speed: 60 mm/min
- Z-offset (1st layer height): 0.1mm
- Number of passes: 1
- Wall number: 3
- Line width: .4mm
- Cooling fan: On
- Bed temperature: 65°C
Crystal PVC ☆☆☆☆☆
- Machine: 3D printer
- Material: Crystal PVC
- Did it work?: NO
- Layer configuration: 2 layers
Sealing
- Hot end temperature: 150°-210°C
- Travel speed: 60 mm/min
- Z-offset (1st layer height): 0.1mm
- Number of passes: 1
- Wall number: 3
- Line width: .4mm
- Cooling fan: On
- Bed temperature: 65°C
Polyester film ☆☆☆☆☆
- Machine: 3D printer
- Material: Polyester film
- Did it work?: NO
- Layer configuration: 2 layers
Sealing
- Hot end temperature: 150°-210°C
- Travel speed: 60 mm/min
- Z-offset (1st layer height): 0.1mm
- Number of passes: 1
- Wall number: 3
- Line width: .4mm
- Cooling fan: On
- Bed temperature: 65°C
Satin PVC ☆☆☆☆☆
- Machine: 3D printer
- Material: Satin PVC
- Did it work?: NO
- Layer configuration: 2 layers
Sealing
- Hot end temperature: 150°-210°C
- Travel speed: 60 mm/min
- Z-offset (1st layer height): 0.1mm
- Number of passes: 1
- Wall number: 3
- Line width: .4mm
- Cooling fan: On
- Bed temperature: 65°C
LDPE ☆☆☆☆☆
- Machine: 3D printer
- Material: LDPE
- Did it work?: NO
- Layer configuration: 2 layers
Sealing
- Hot end temperature: 150°-210°C
- Travel speed: 60 mm/min
- Z-offset (1st layer height): 0.1mm
- Number of passes: 1
- Wall number: 3
- Line width: .4mm
- Cooling fan: On
- Bed temperature: 65°C
Chip's bag ★★★★☆
- Machine: 3D printer
- Material: Polypropilene + aluminium film + Polyethylene
- Did it work?: YES
- Layer configuration: 2 layers
Sealing
- Hot end temperature: 150°-210°C
- Travel speed: 60 mm/min
- Z-offset (1st layer height): 0.1mm
- Number of passes: 1
- Wall number: 3
- Line width: .4mm
- Cooling fan: On
- Bed temperature: 65°C
Ziploc bag ☆☆☆☆☆
- Machine: 3D printer
- Material: Polyethylene film
- Did it work?: NO
- Layer configuration: 2 layers
Sealing
- Hot end temperature: 150°-210°C
- Travel speed: 60 mm/min
- Z-offset (1st layer height): 0.1mm
- Number of passes: 1
- Wall number: 3
- Line width: .4mm
- Cooling fan: On
- Bed temperature: 65°C
RipStop ☆☆☆☆☆
- Machine: 3D printer
- Material: RipStop
- Did it work?: NO
- Layer configuration: 2 layers
Sealing
- Hot end temperature: 150°-210°C
- Travel speed: 60 mm/min
- Z-offset (1st layer height): 0.1mm
- Number of passes: 1
- Wall number: 3
- Line width: .4mm
- Cooling fan: On
- Bed temperature: 65°C
Mylar ☆☆☆☆☆
- Machine: 3D printer
- Material: Mylar
- Did it work?: NO
- Layer configuration: 2 layers
Sealing
- Hot end temperature: 150°-210°C
- Travel speed: 60 mm/min
- Z-offset (1st layer height): 0.1mm
- Number of passes: 1
- Wall number: 3
- Line width: .4mm
- Cooling fan: On
- Bed temperature: 65°C
Hot iron press
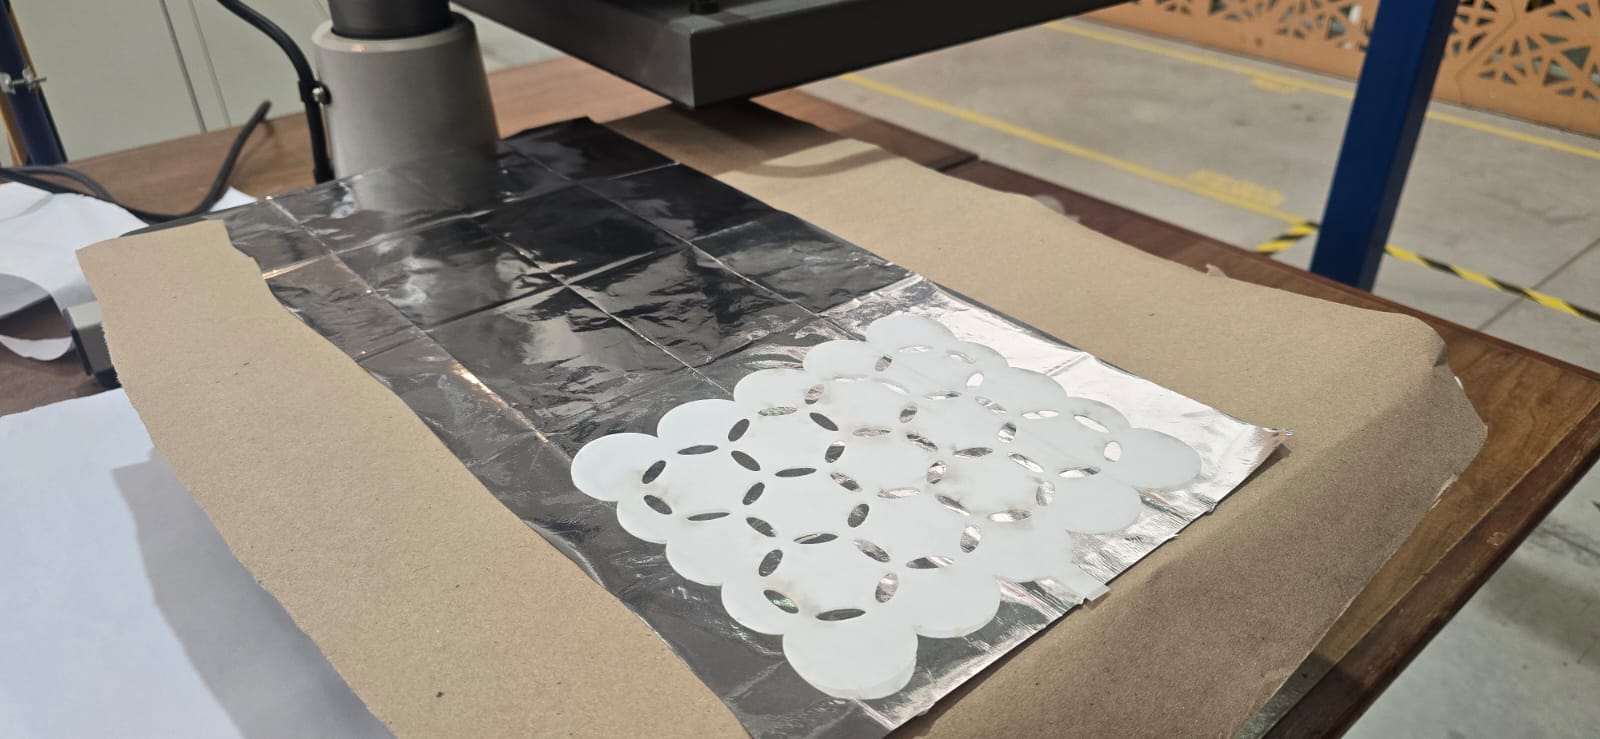
By sandwiching a layer of wax paper, which was previously laser cut, between the sheets of polymer materials, we can control which areas are adhered to each other, and which ones get to inflate, then a tab is added for introducing the hose for inflation.
Textile vinyl ★★★★★
- Machine: Hot iron press
- Material: Textile vinyl
- Did it work?: YES
- Layer configuration: 2 layers
Sealing
- Press temperature: 150°C
- Pressing time: 15s
- Observations: Brittle under pressure on sharp edges.
Crystal PVC ★★★★☆
- Machine: Hot iron press
- Material: Crystal PVC
- Did it work?: YES
- Layer configuration: 2 layers
Sealing
- Press temperature: 200°C
- Pressing time: 20s
- Observations: Special care
Polyester film ★★★★☆
- Machine: Hot iron press
- Material: Polyester
- Did it work?: YES
- Layer configuration: 2 layers
Sealing
- Press temperature: 150°C
- Pressing time: 5s
- Observations: Melts at high temperatures/times
Satin PVC ★★★★☆
- Machine: Hot iron press
- Material: Satin PVC
- Did it work?: YES
- Layer configuration: 2 layers
Sealing
- Press temperature: 200°C
- Pressing time: 15s
- Observations: Gets really soft with high temperature
LDPE ★★★★☆
- Machine: Hot iron press
- Material: LDPE
- Did it work?: YES
- Layer configuration: 2 layers
Sealing
- Press temperature: 100°C
- Pressing time: 60 mm/min
- Observations: Weak material, doesn't hold the pressure long.
Chip's bag ★☆☆☆☆
- Machine: Hot iron press
- Material: Chip's bag
- Did it work?: NO
- Layer configuration: 2 layers
Sealing
- Press temperature: 200°C
- Pressing time: 10s
- Observations: Doesn't stick to itself
Ziploc bag ★★☆☆☆
- Machine: Hot iron press
- Material: Ziplock bag
- Did it work?: YES
- Layer configuration: 2 layers
Sealing
- Press temperature: 150°C
- Pressing time: 10s
- Observations: Hard to unstick from the press
RipStop ★★★☆☆
- Machine: Hot iron press
- Material: RipStop
- Did it work?: YES
- Layer configuration: 2 layers
Sealing
- Press temperature: 200°C
- Pressing time: 20s-25s
- Observations: Weak bonds
Mylar ☆☆☆☆☆
- Machine: Hot iron press
- Material: Mylar
- Did it work?: NO
- Layer configuration: 2 layers
Sealing
- Press temperature: 200°C
- Pressing time: 20s
- Observations: Doesn't stick to itself.
Manufacturing
For the manufacturing of this project, I resorted to the resources of the internet, to try and find a pattern for the vest. Fortunately enough, Longan patterns had a fantastic free pdf (non-commercial license only) that includes the vectors for the vest on sizes from small to extra-large, instructions for printing the pattern on A4 size paper, and the instructions for sewing and finishing the garment.
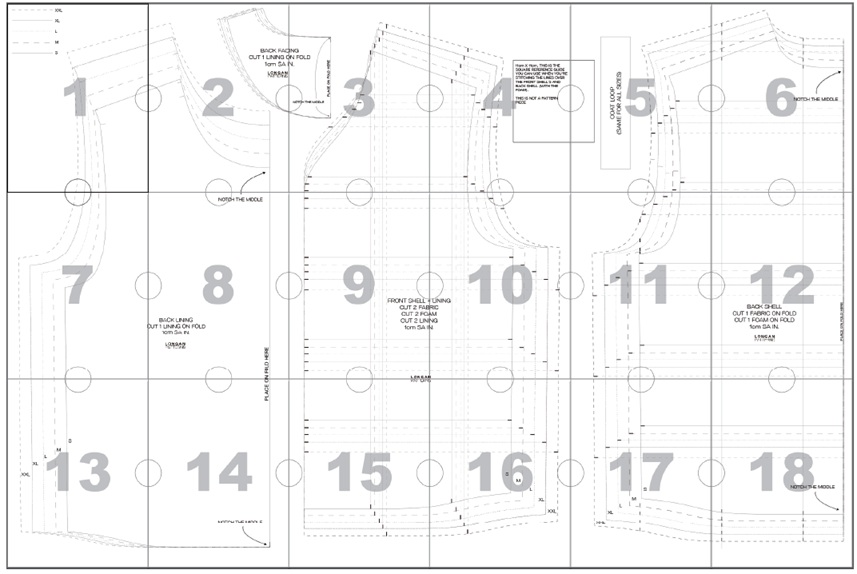
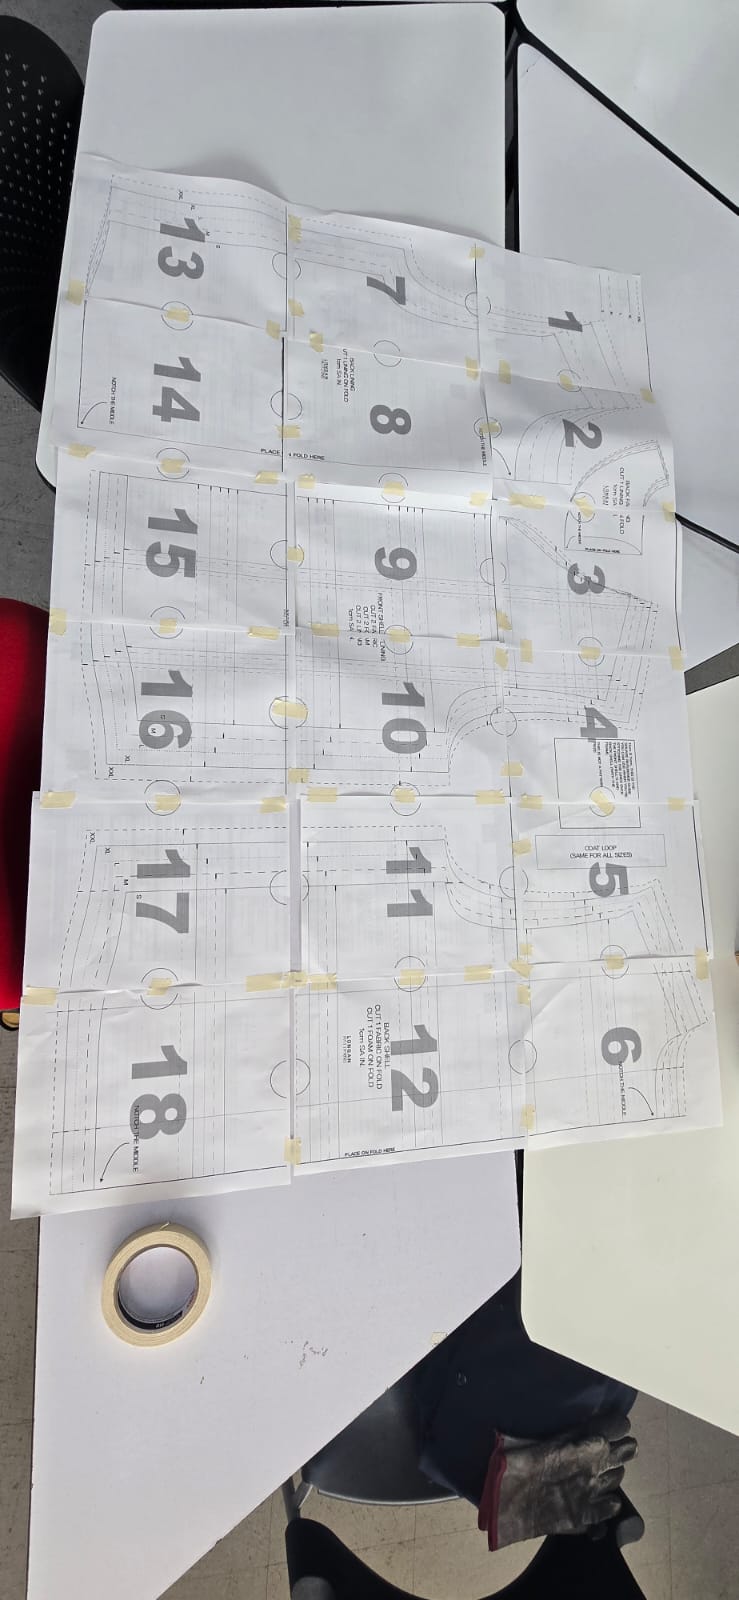
The first part was printing it as recommended on the document, using 18 (recycled) sheets of paper, pasting them together using the reference circles for right alignment.
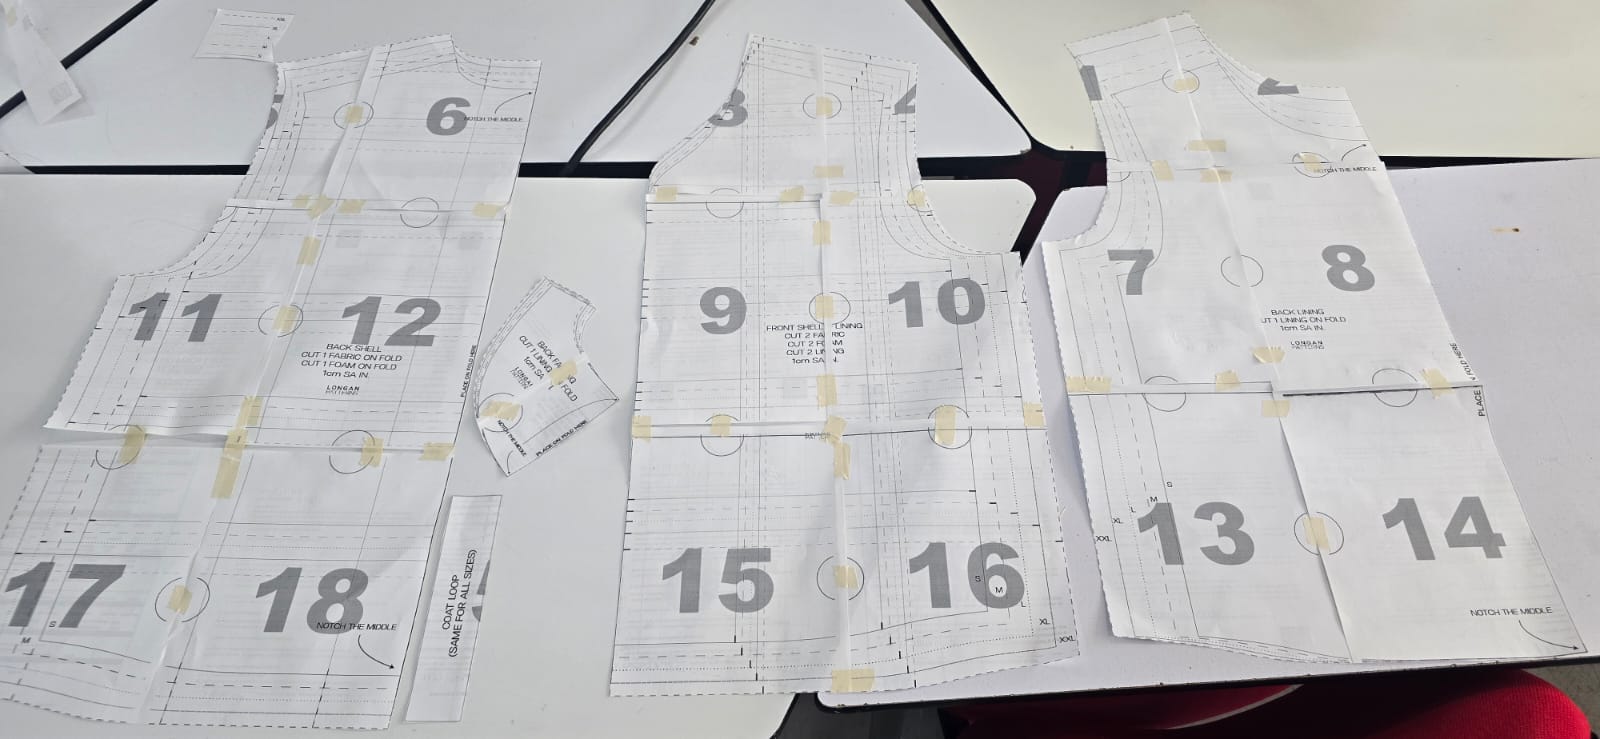
Afterwards the patterns are cut from the whole paper, and the joints are reinforced with tape.
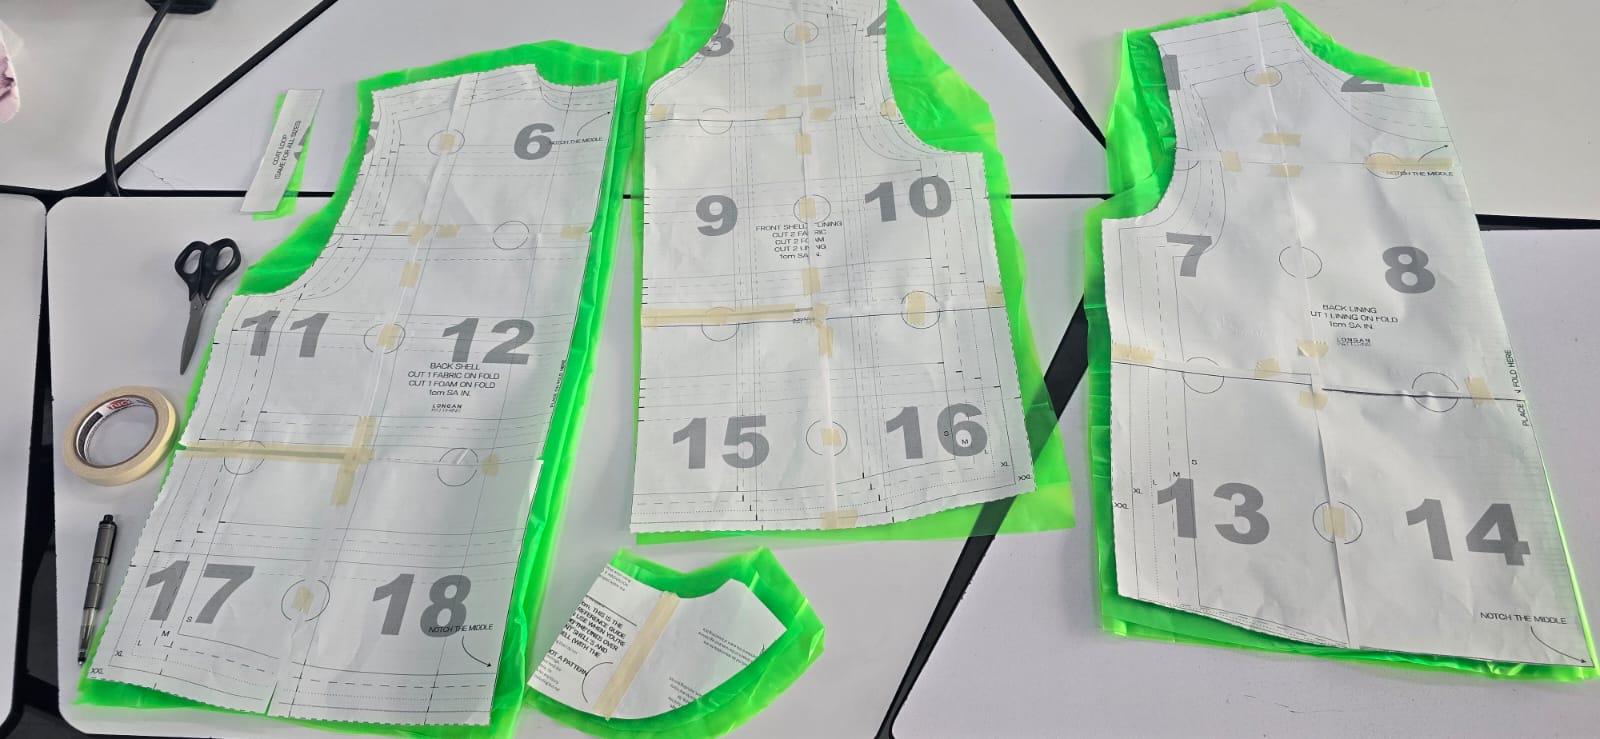
The final material I worked with is called PVC Satin, a light, waterproof, translucent, and green colored PVC sheet, very similar to the ones used in raincoats. On the characterization tests, this is a very useful material, as it adheres to itself quite strongly with heat, so the method for manufacturing the air pockets will be using waxed paper again.
Using the translucent properties of the material, and the paper patterns, the shape and size is cut, using the M measurements, and adding a 5mm offset for stitching and bonding. Make sure to pay attention to the (included) instructions because the back lining has to be folded in half, to create a symmetric piece. All the pieces must be cut twice, as we want them to be inflatable, in other words, to sandwich the wax paper for the inflatable bits.
Having all the pieces cut to size, the next part was integrating the inflatable bits into the whole structure, inflatable parts on the lumbar area, vertical flanges on the front parts, and finally the neck piece. The wax paper was custom laser cut with the shapes described above and then sandwiched between the shapes cut on the PVC. The principle is the same, the areas where there is no wax paper, the PVC will adhere to the other layer when heat is applied.
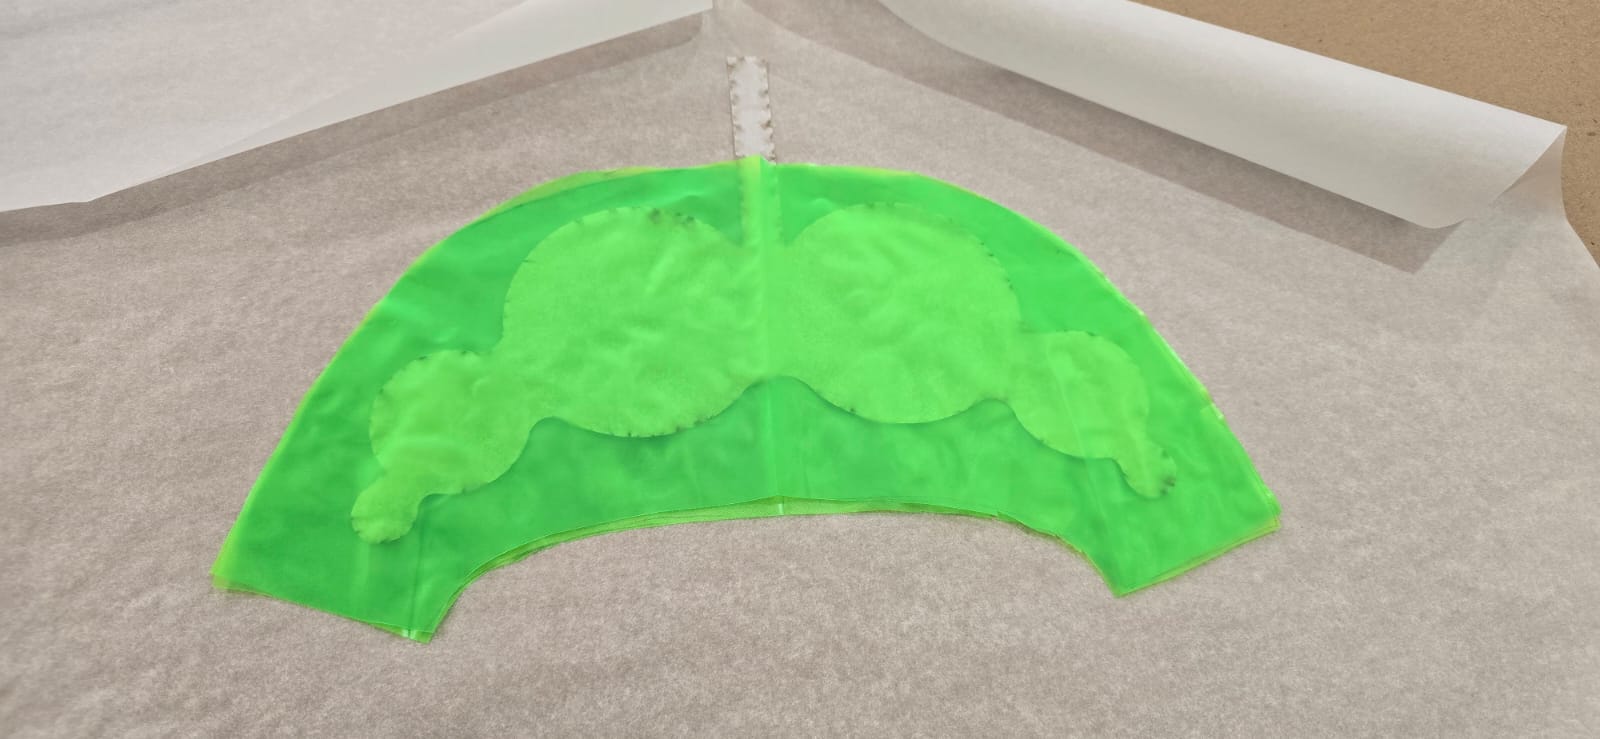
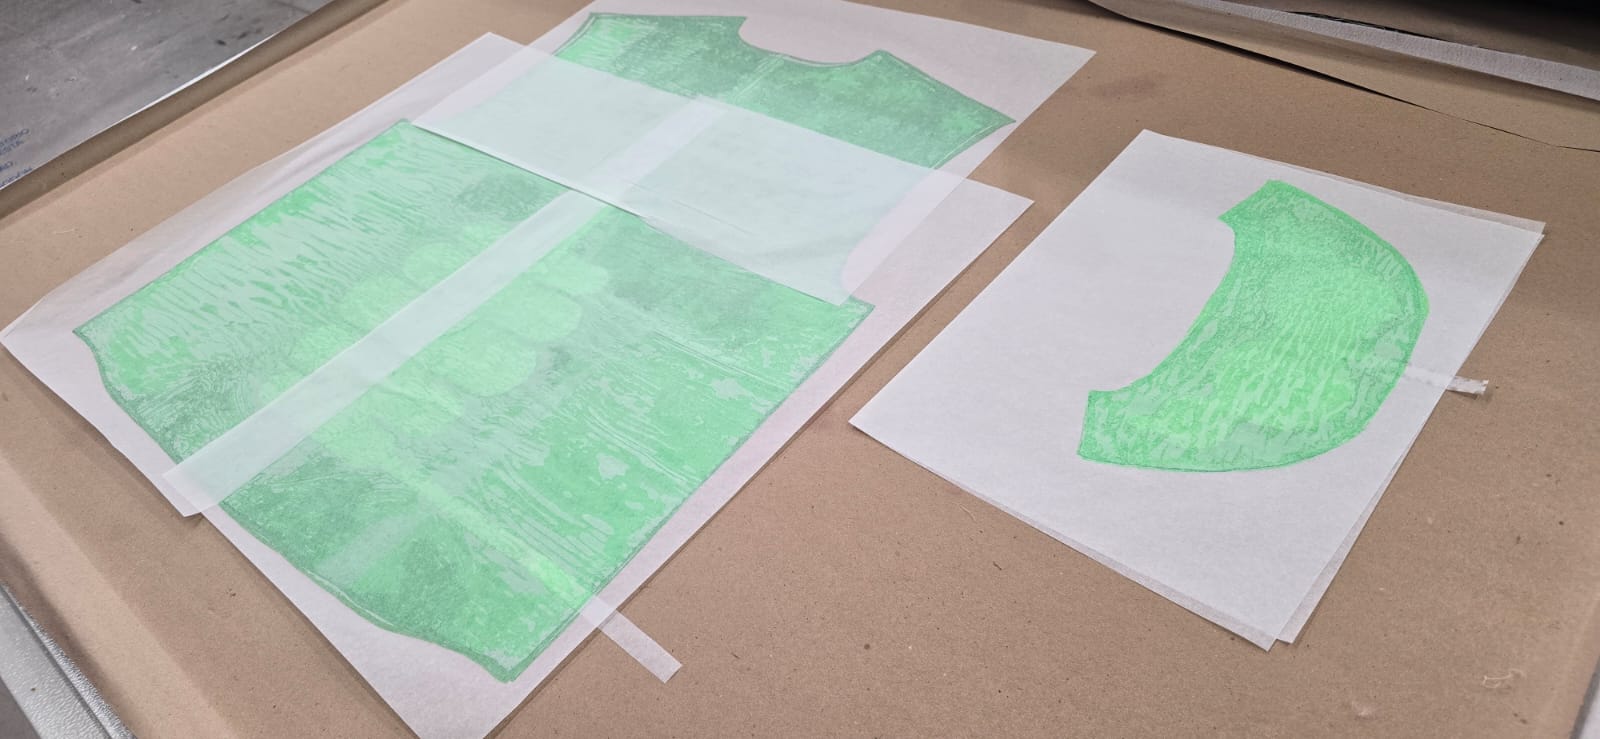
Having now the finished parts of the vest, it is time to join them. These parts are joined with the heat applied by the hot-iron, in this case I'm using a sublimation iron, with an area of 1m x 1m.
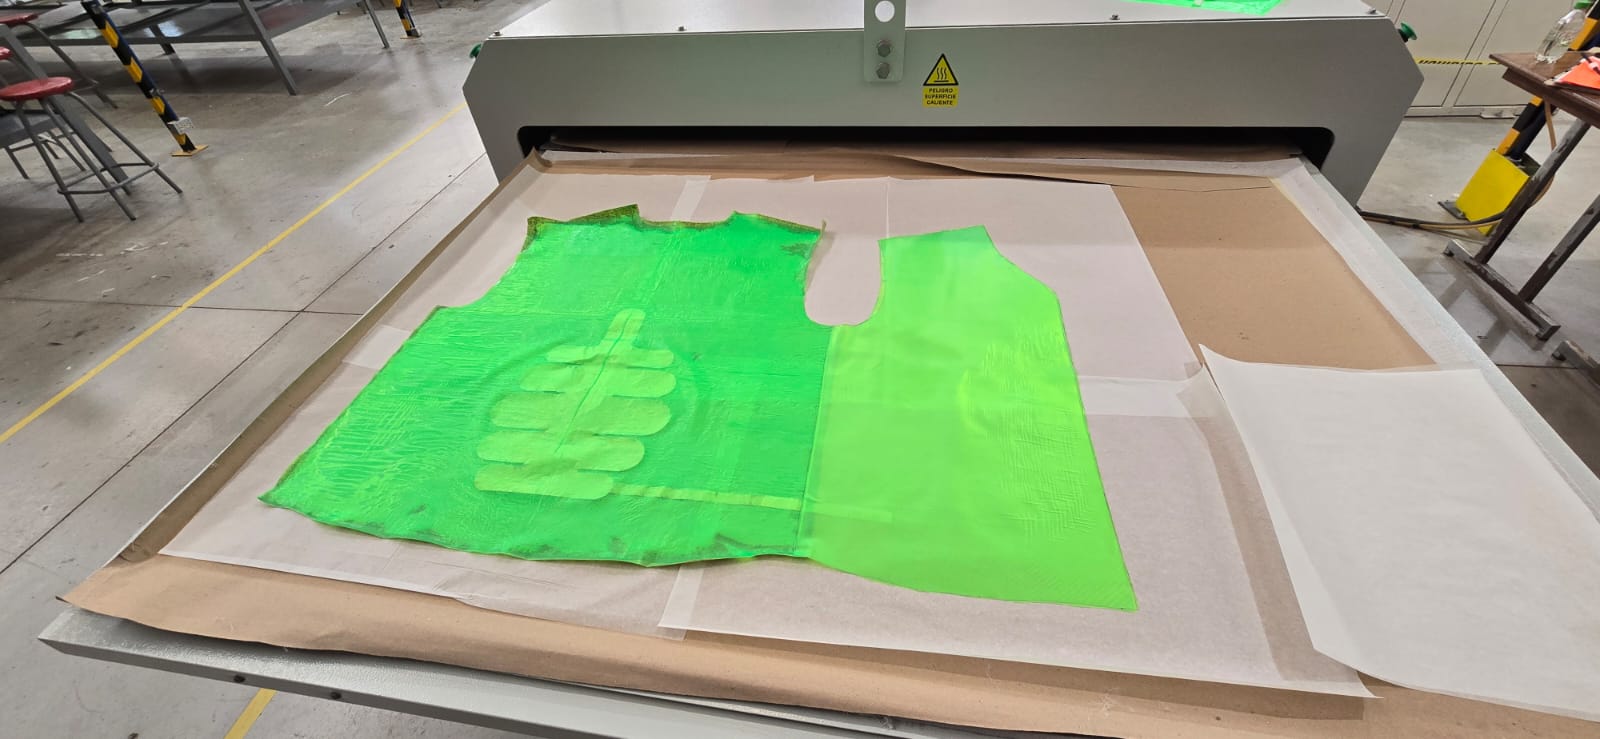
A small hole is cut on the inflatable parts, to introduce and glue the air inlet parts, which connect each part with hoses, hidden on the inside of the vest.
The electronics are placed inside of a box and connected to the hoses for each of the inflatable parts.
After a quick fit, the vest is done and ready to use.
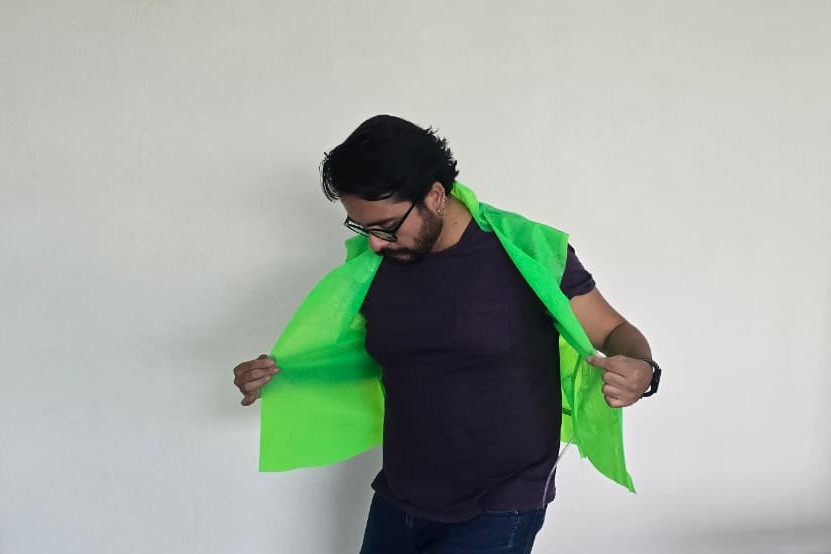
Bill of materials
| Component | Material | Specifications | Notes | Cost |
|---|---|---|---|---|
| Cover STRUCTURE | Corrugated cardboard | 5 mm thickness | Laser cut to create a rigid and lightweight structure | $5 USD per sheet. |
| Binding system | Paper binding pins | Standard two-hole punch spacing (~80 mm) | Allows pages to be added, removed, or rearranged | $2 USD per 10 pins |
| Interior pages | Paper sheets | Letter size, trimmed to 22 cm height | Ensures pages are protected within the cover | around $1.50 USD with color printing. |
| Inflatable sample pages and material for the garment | Plastic film / textile samples | Variable depending on experiment | Used for inflatable textile demonstrations | Around $45 USD for all the different sheets and garment |
| Air pump compartment | Corrugated cardboard | Integrated into cover structure | Designed to hold a small manual hand pump | - |
| Manual air pump | Plastic hand pump | Hand pump for measuring blood pressure | Used to inflate the interactive pages | $17 USD for the whole kit |
| Adhesive | Paper glue | As required | Used for cover wrapping and assembly | $5 USD per liter |
| Paper pattern for the garment | BW recycled printed paper | Letter sized, preferably recycled | Any BW printer will work | $1 USD |
| Motors with air pump | Electric DC motor | DC motor with integrated air pumps | 2 pieces | $200 MXN - around $12 USD |
| H Bridge | L298N model | Double pwm driver | Integrated circuit for controling speed and direction of the motors | $20MXN, around $1.50 USD |
| SeeedStudio XIAO RP2040 | Integrated device "brain" | Model Rp2040 | SeeedStudio | $250 MXN - around $14.50 USD |
| Batteries | 18650 Battery | Model 18650 3.7v | For powering the devices | 12 pack for $300 MXN - around $18 USD. |
| Wax paper | Professional use Wax paper | Big area for cutting: 41cm x 61cm | Sold in industrial kitchen supplies stores | $21 USD |
| 3D printer use | 3D Printer | The university charges $1.50 MXN per minute (around $0.086 USD) | Around 3 minutes per test, and 3h print time for the wearable | $311 MXN - around $18 USD |
| Laser cuter use | laser cuter | The university charges $8 MXN per minute (around $0.45 USD) | ~2 minutes per test + 15 minutes for the garment | $270 MXN - around $15.50 USD |
Final cost
The final cost of the booklet, budgeting the time of the machines use, materials, printing and assembly goes to:
- Somewhere around $125 USD if you were to recreate the booklet and garment with similar costs than México and having access to the machines from a FabLab.
Evolution and maturation
The first proposal for this project was presented and reviewed, for which I had thorough feedback for both improvement and focalization on the topic.
First conceptual presentation
Midterm Presentation
Final Presentation
Story telling
This project started with the question: How can something intangible, like air, become a structural, insulating and formative component of design?
As we have seen through this research, these kind of inflatables exist all around us: Architecture, wearables, soft robotics, medicine, but the fabrication remains hidden behind industrial processes; How can we bring this knowledge to a more accesible space, like FabLabs and Makerspaces?
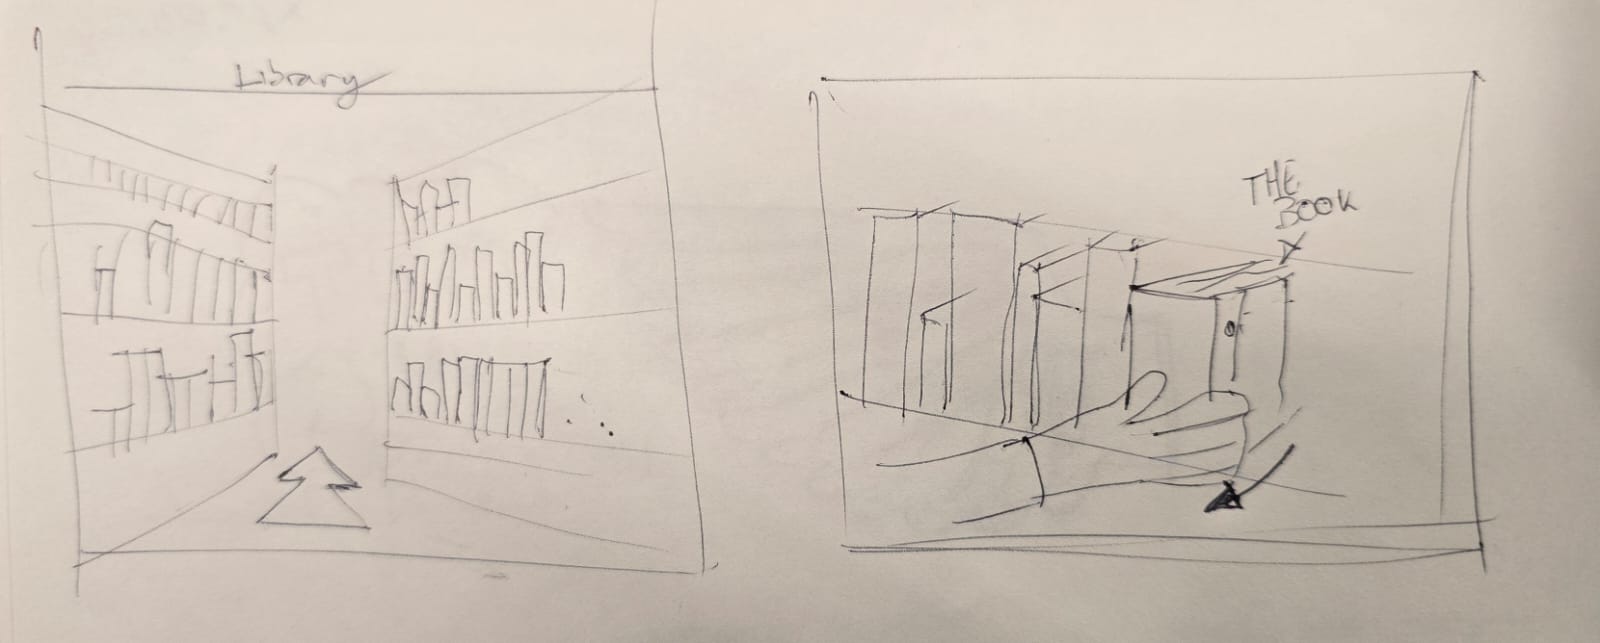
How to tell this story on the video?
The video starts in silence, while walking through a library corridor showing shelves with books. The camera stops at a book: The Textiles under pressure booklet.
A hand reaches for it and takes it to a study desk, where it is opened and the information within is showed.
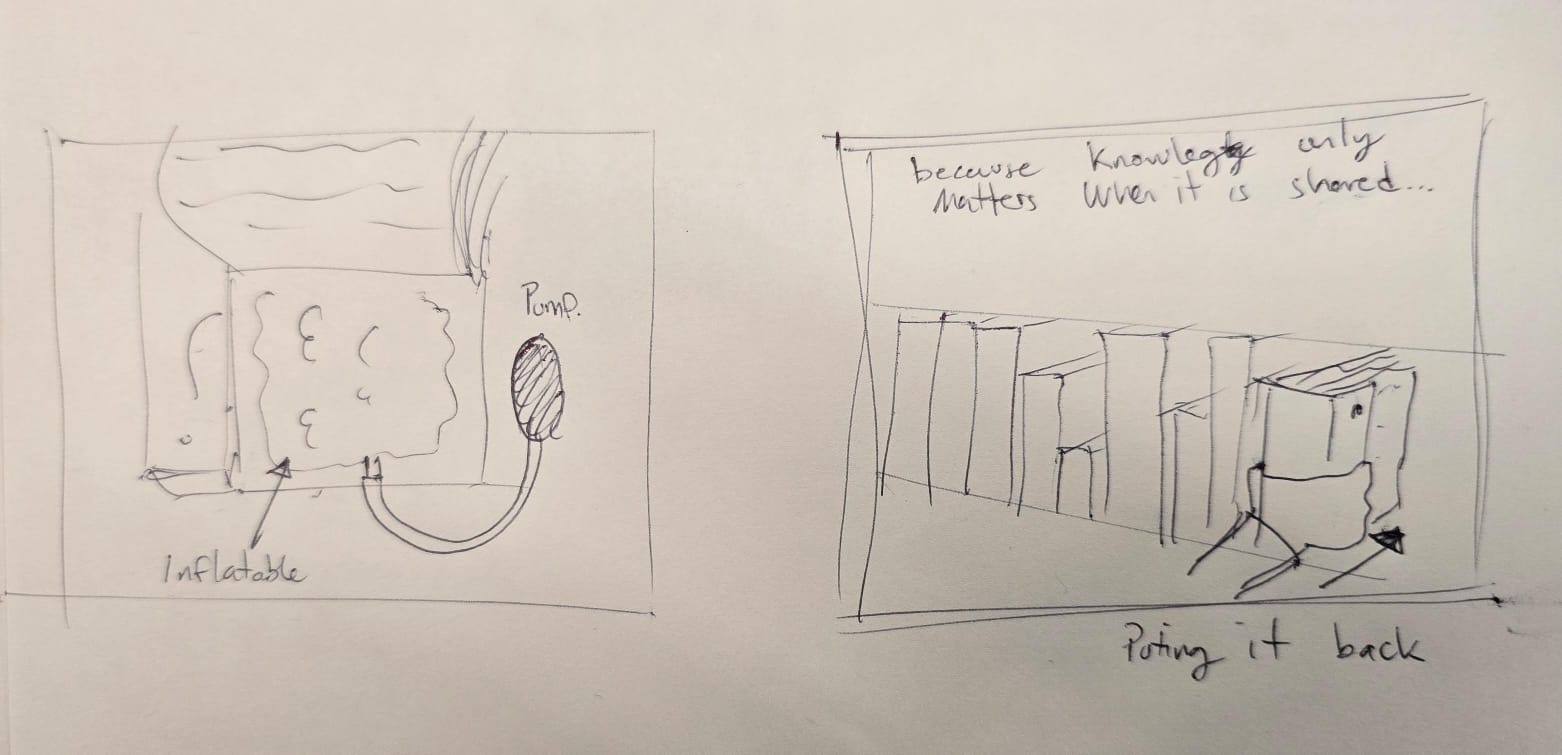
The hand-pump is taken from the compartment and connected, and the different samples are shown being inflated and deflated.
The pattern for the vest is shown, and a sequence of photos showing the cutting, proper fitting, laser cutting of the wax paper, pressing of the pieces together, and the electronics integrated are then presented.
The vest is worn and we se a close up of the connection of the hoses for inflation, then more close ups of the inflatable parts.
Quick snapshots of the vest being used and modeled, and we go back to the open book at the library, which then is closed and put back in the shelve, as the camera moves away.
The final line says:
“because knowledge only matters when it is shared.”
And the script for the voice narrating the importance of the knowledge, and sharing it, and also integrating it into a product says the following:
Knowledge is scattered everywhere around us, In shelves, books, fragmented. Not all knowledge is easy to access Some of it is hidden, or it is technical Inflatables are an example of this They exist across disciplines But understanding them is not clear How can this knowledge be gathered and shared? What if this book could be activated instead of read? What can we do with this information, apart from sharing it? We can create products, we can integrate it We can reproduce the experiments and use them locally We can design We can create We can Make Because knowledge only matters when it is shared
You can check the final video below: