02 process
3# Process
Introduction
This section provides the information, files, and fabrication processes required to replicate the Textiles under pressure book locally. The project embraces the idea of distributed co-creation, where knowledge is not centralized in a single laboratory or researcher, but instead shared, reproduced, and expanded by a network of makers, students, and educators.
By documenting the experiments, materials, and fabrication methods in an open and accessible way, the booklet becomes more than a publication: it acts as a toolkit for collective exploration. Educational environments (and/or Fablabs, makerspaces and such) around the world can reproduce the samples, adapt the experiments to locally available materials, and contribute new findings to the growing body of knowledge around inflatable textiles.
In this way, the project aligns with the principles of open documentation and distributed manufacturing, encouraging a collaborative approach to material research and textile innovation.
Each replication of the booklet becomes a new iteration of the research.

The Book per se
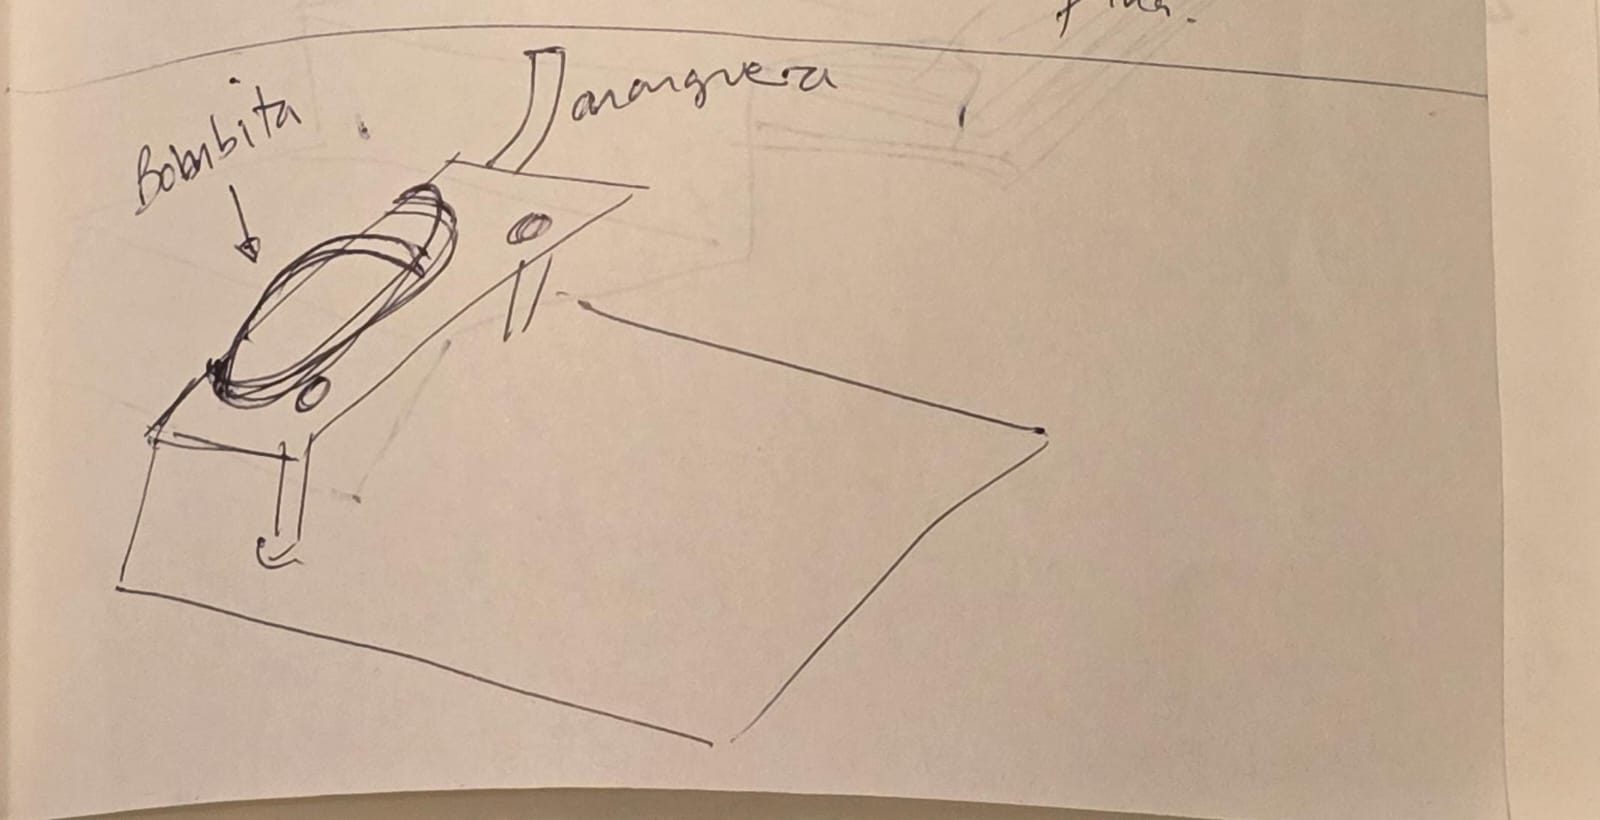
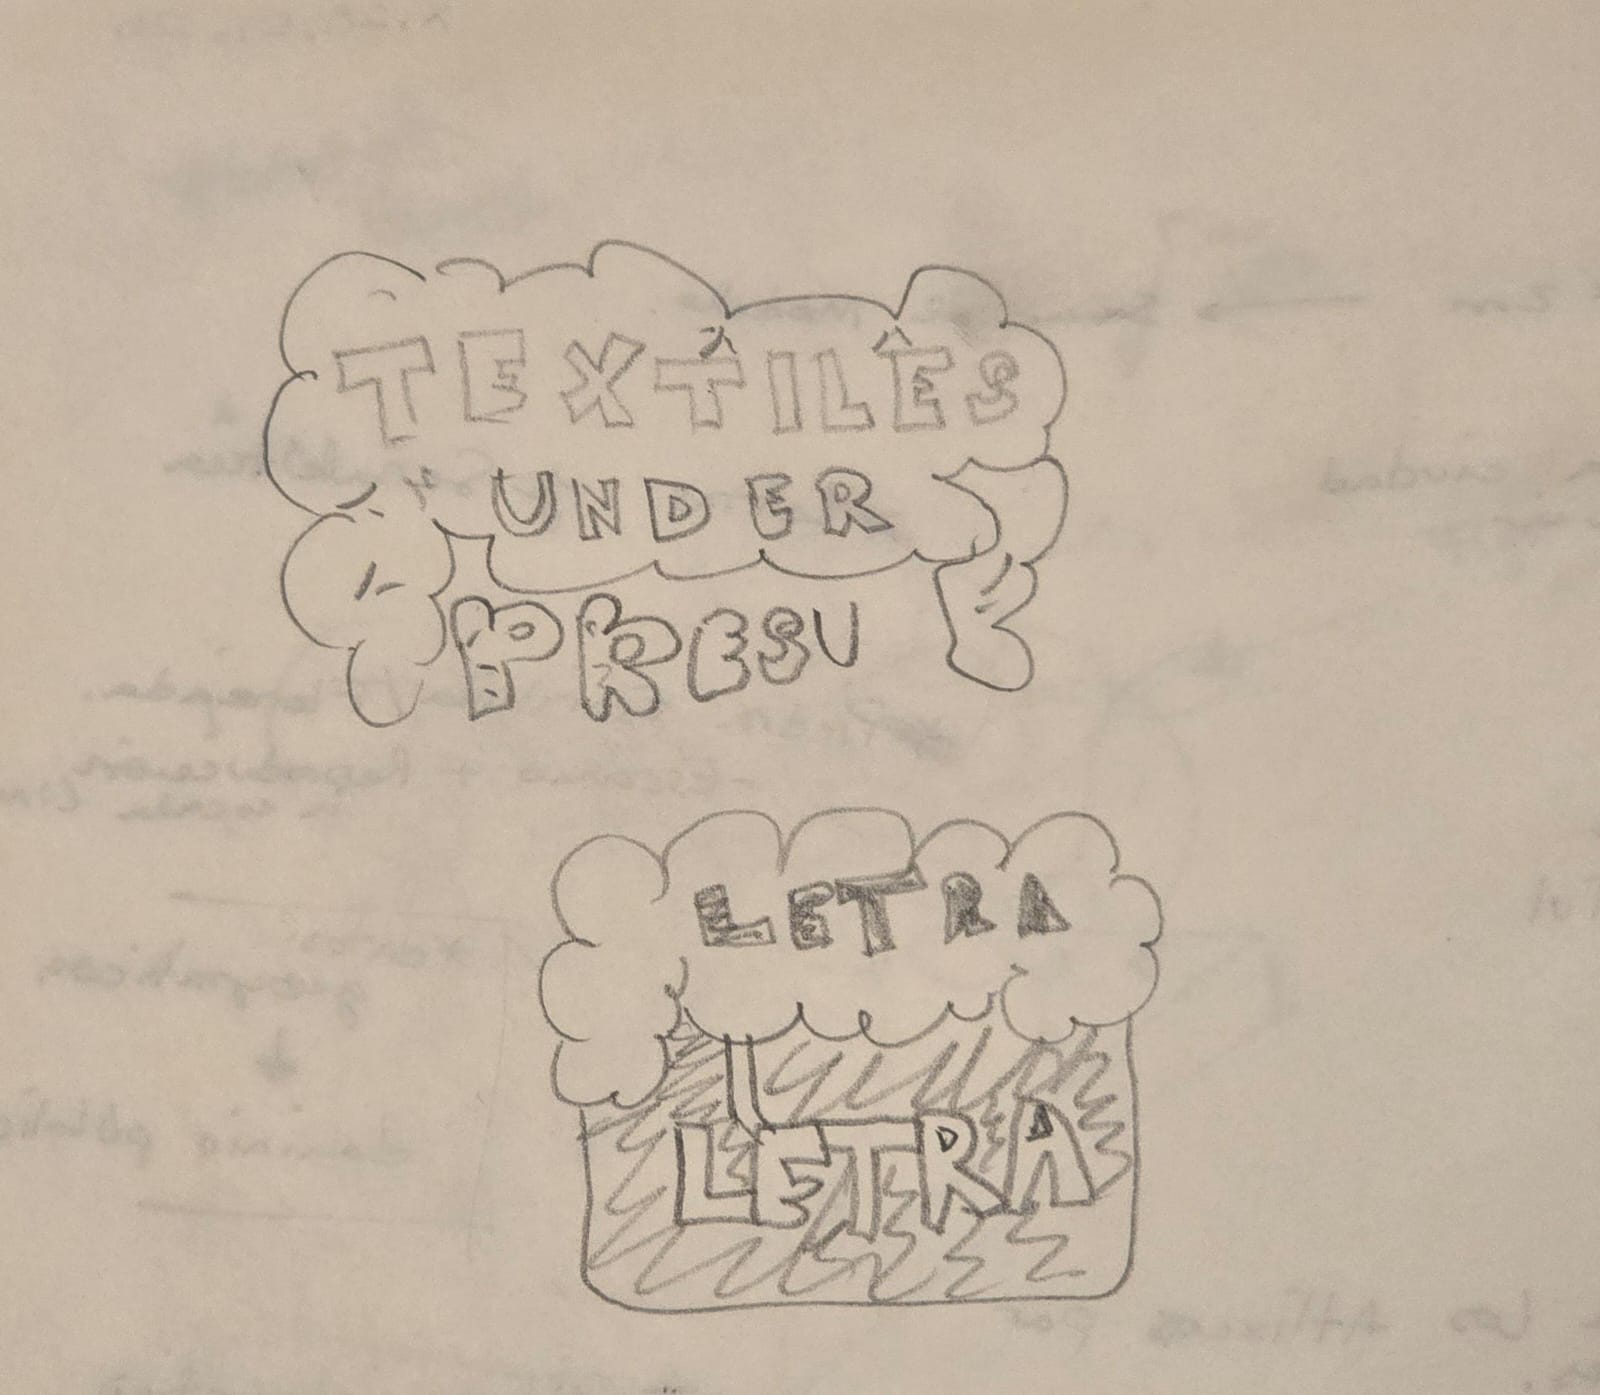
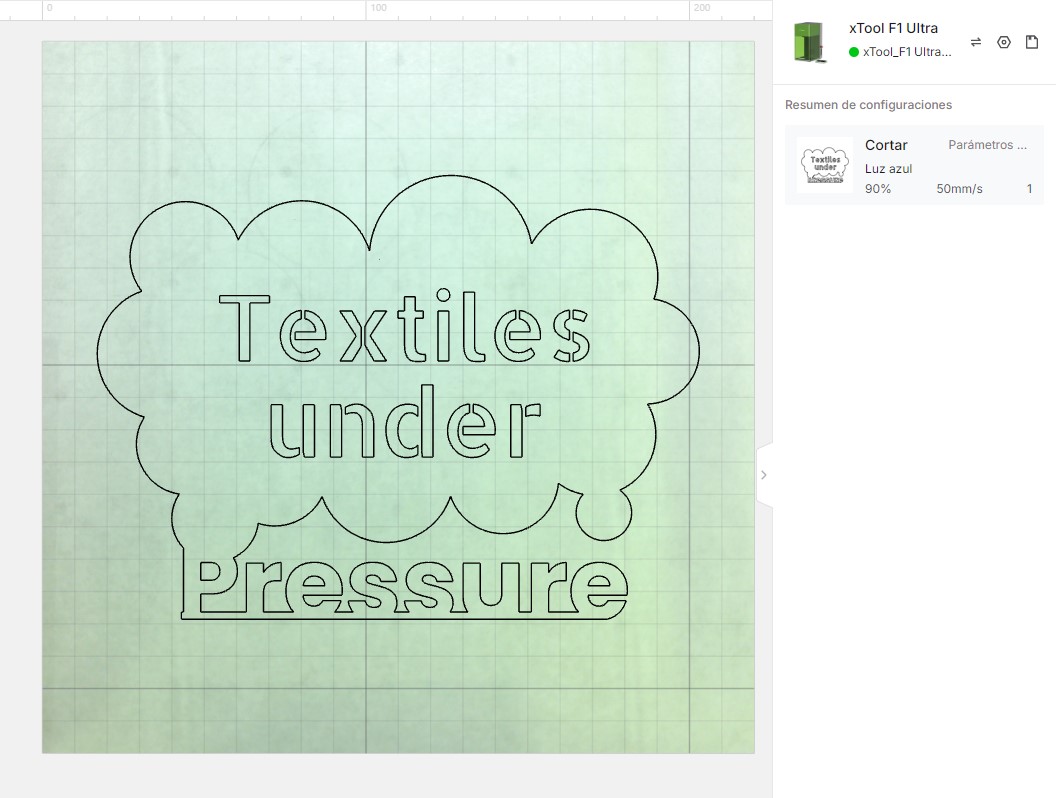
Conceptually I started to design it as a paper binder, so one could add and remove pages easily. The first idea was using one of those metal rings, but it was hard to get, and very hard to use, as one has to buy the binder and remove the "spine". The next line of thought was using screw pins, that look quite aesthetic and are incredibly easy to use, in comparison with the rings. I also wanted to have a small air pump, which could be either electric or manual; looking online, I was struck by the idea of a heart pressure monitoring hand pump for this project, so I went for it.So I started sketching these ideas, and in one iteration I found it was possible to add a small compartment for storing the pump, and making it very integrated. During one of the mentoring sessions, Adriana came up and shared the amazing idea of building and designing this book as a pop-up book so the cover was designed to look seamless, but when inflated, the name Textiles under Pressure could be read.
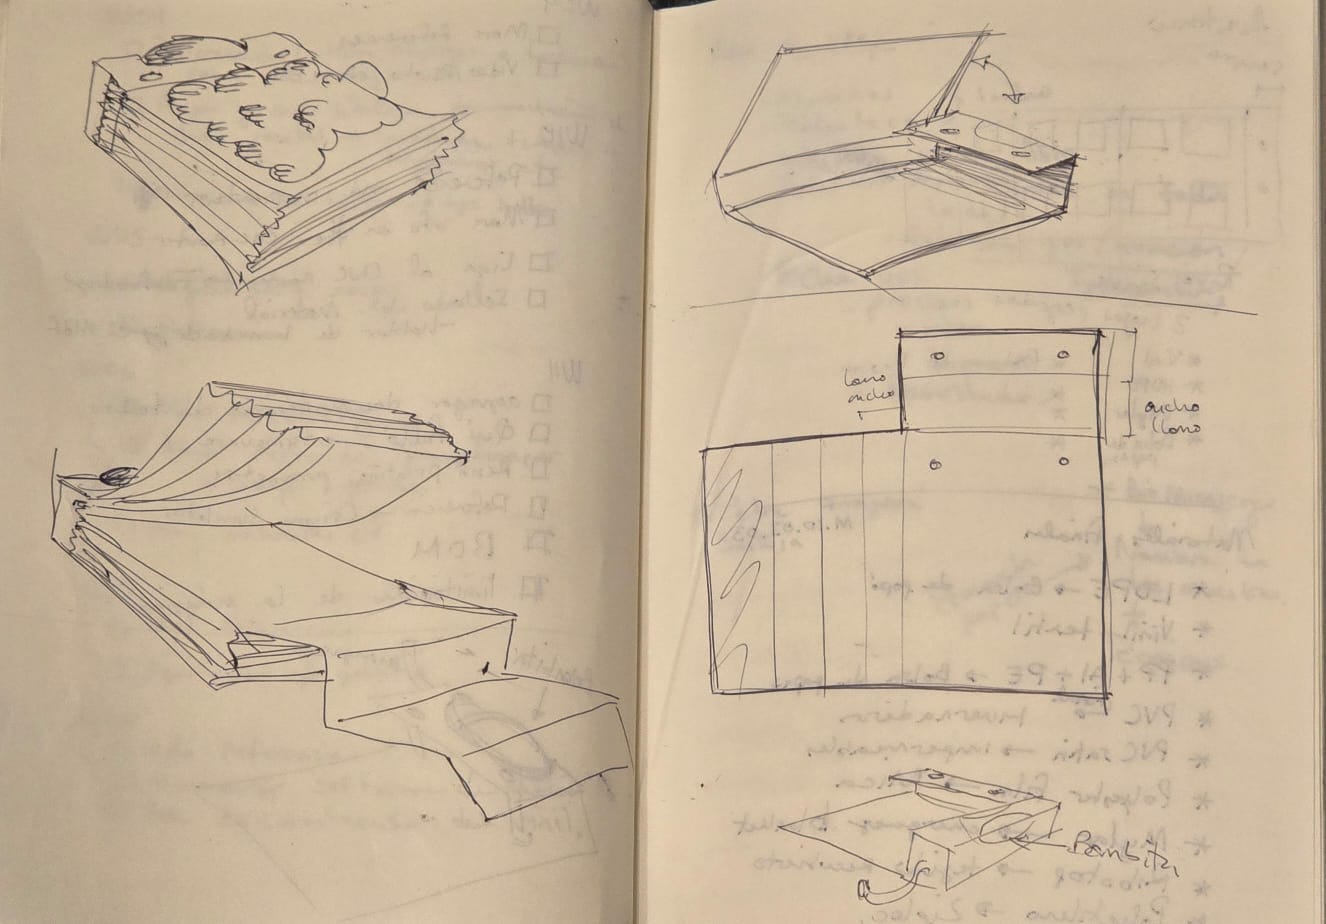
The cover is made from 5 mm corrugated cardboard, laser cut to shape in order to create a rigid and lightweight structure. To improve both durability and visual quality, the cardboard cover can be wrapped with a decorative paper layer, also laser cut to the same dimensions for precise alignment.
The interior pages are designed to accommodate letter-size sheets, slightly shortened to fit comfortably within the covers. Each page measures 22 cm in height, ensuring the edges remain protected by the cover while maintaining compatibility with standard printing formats, and also for adding tabs.
This modular structure allows the booklet to function not only as a publication, but also as a living archive of experiments, where new material samples, test results, and documentation can be continuously added.
Bill of Materials – Booklet
| Component | Material | Specifications | Notes | Cost |
|---|---|---|---|---|
| Cover STRUCTURE | Corrugated cardboard | 5 mm thickness | Laser cut to create a rigid and lightweight structure | $5 USD per sheet. |
| Binding system | Paper binding pins | Standard two-hole punch spacing (~80 mm) | Allows pages to be added, removed, or rearranged | $2 USD per 10 pins |
| Interior pages | Paper sheets | Letter size, trimmed to 22 cm height | Ensures pages are protected within the cover | around $1.50 USD with color printing. |
| Inflatable sample pages | Plastic film / textile samples | Variable depending on experiment | Used for inflatable textile demonstrations | Around $30 USD for all the different sheets |
| Air pump compartment | Corrugated cardboard | Integrated into cover structure | Designed to hold a small manual hand pump | - |
| Manual air pump | Plastic hand pump | Hand pump for measuring blood pressure | Used to inflate the interactive pages | $17 USD for the whole kit |
| Adhesive | Paper glue | As required | Used for cover wrapping and assembly | $5 USD per liter |
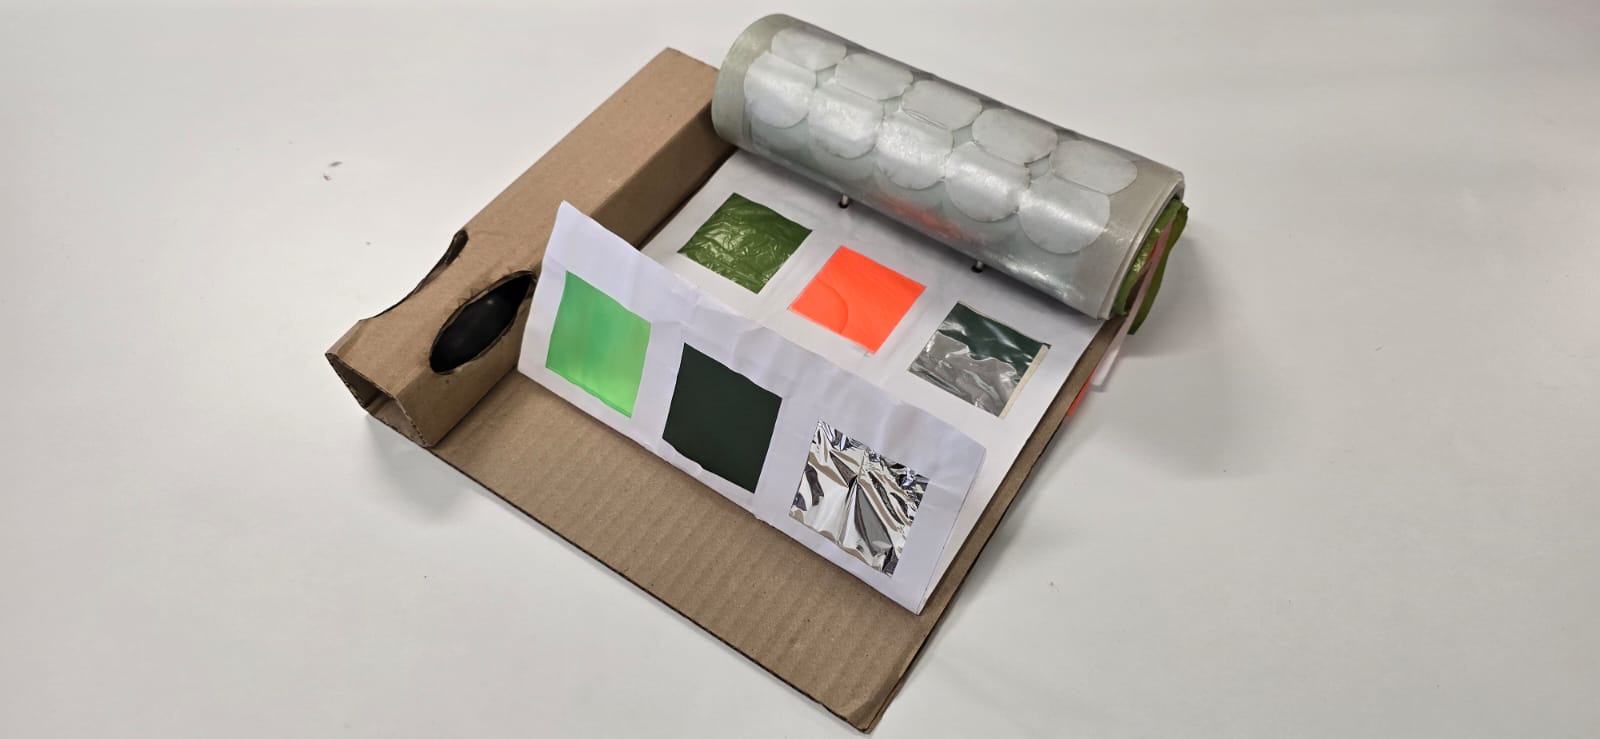
Materials
The materials that were chosen for this experimentation must be:
- Easy to find
- Non-expensive
- Standardized
- Common plastic films
- Recycled packaging materials
- Textiles
- experimental materials
These tests allowed the project to establish a basic understanding of which materials could contain air and which required additional treatments or hybridization.
The materials chosen for this experimentation were done so based on availability, how easy it is to find them, how harmful some of the sealing processes might be, flexibility, permeability, compatibility with sealing processes, and the possible applications as garments:
- LDPE – As in dog litter bags
- HDPE – As in heavy duty trash bags
- Textile vinyl – That adheres with heat
- Crystal PVC
- Satin Fluorescent PVC
- Soft transparent PU – As in transparent curtains
- RipStop (cotton – polyester blend + PU) - As in camping tents
- Mylar – As in emergency blankets
- PolyPropilene + aluminum – As in Chip bags
Keep in mind that these chosen materials may not be so easy to find locally, so it's important to do tests with the materials available.
Sealing methods
The purpose of these techniques is, on one hand, capture air between the layers, and on the other hand, preventing it from escaping. This can be done through heating, or even adhesives.
Heat
The purpose of this book is to experiment on heat-sealing methods for the different materials, all done through means of digital fabrication.
Fusing with ironing
Using the heat press we can fuse different layers of materials, and with a “isolating” material in between, it is possible to do it in specific parts, so the result behaves like we want to.
Laser
Using a laser cutter, it is possible to weld different layers of thin materials. Special thanks to Saskia Helinska and Javier Alboguijarro, whose previous research helped and inspired me a lot on this topic.
3D printer
With “Cheating” the 3D printer, it is possible to use the hot-end to fuse layers of materials in specific areas.
Air retention
How long can the material and technique hold the air inside without any leaks.
Leaks
Leaks can be repaired with the same material, a bit of all-purpose glue, and/or heat.
Valves
By using off-the-shelf check valves, it is possible to increase the air retention time and capacity of the materials.
Experimentation (Applied theory)
Sealing
Using different digital fabrication methods, the materials were sealed on determinate patterns and inflated to check the results.
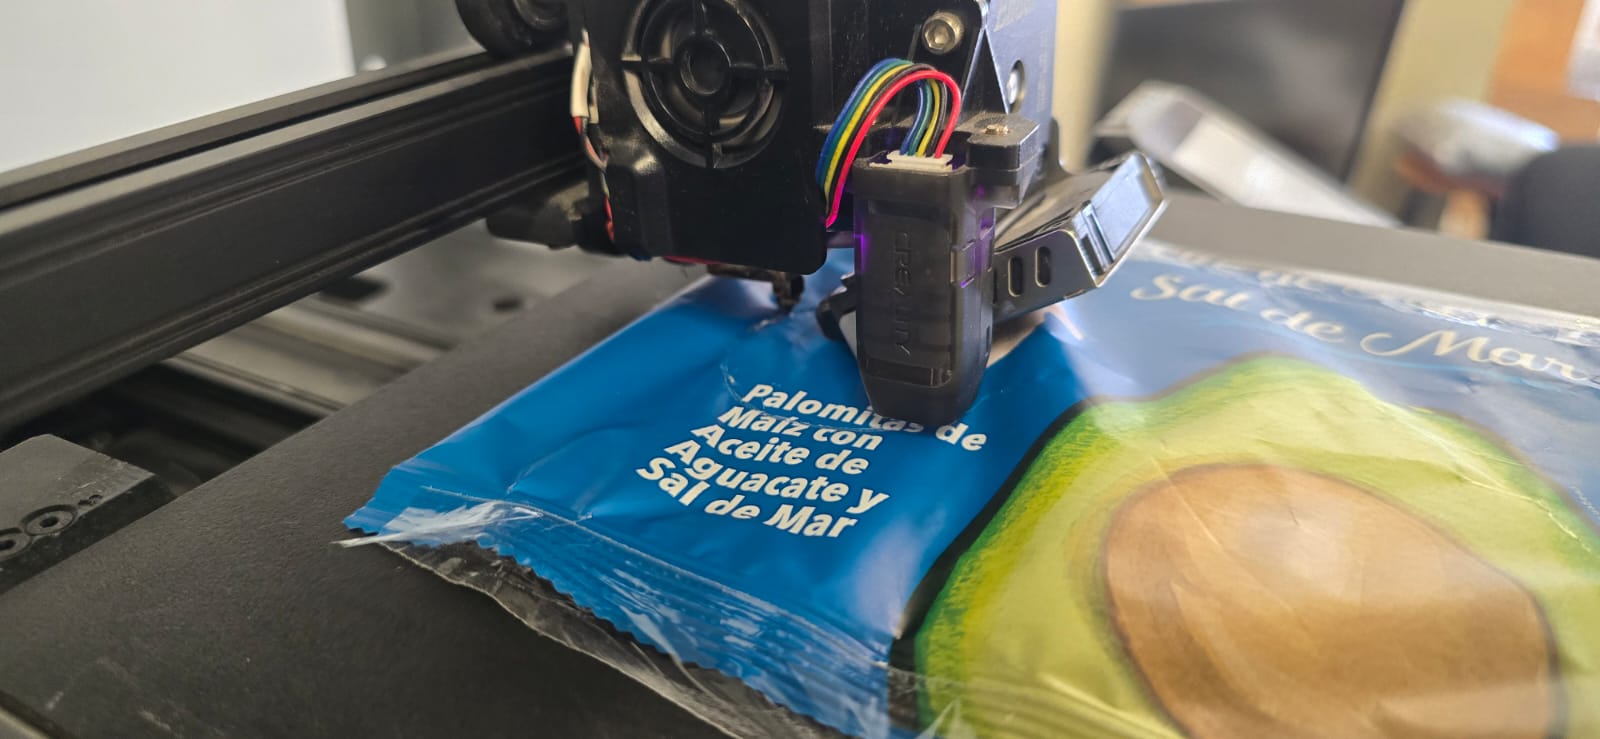
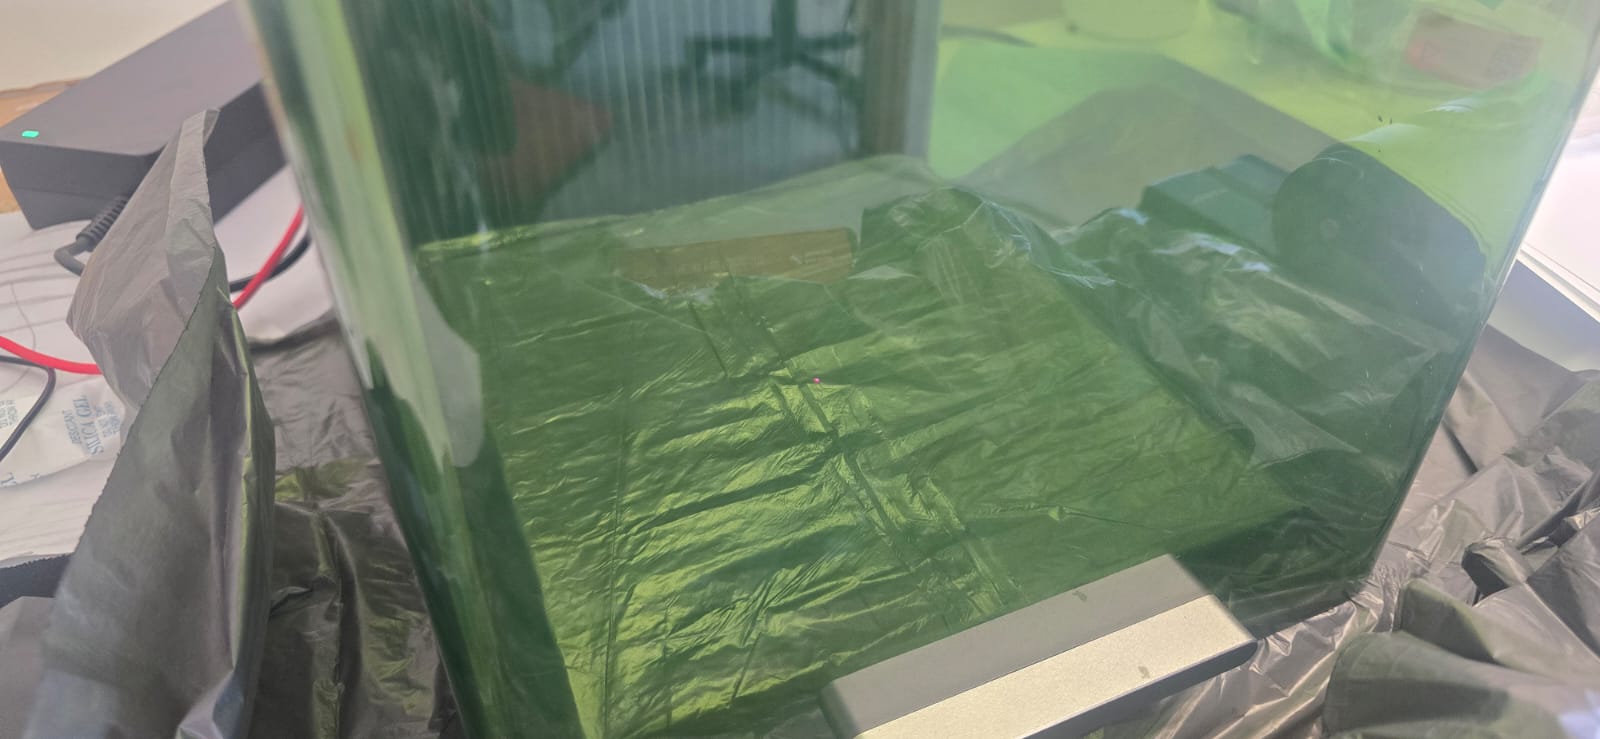
Laser sealing
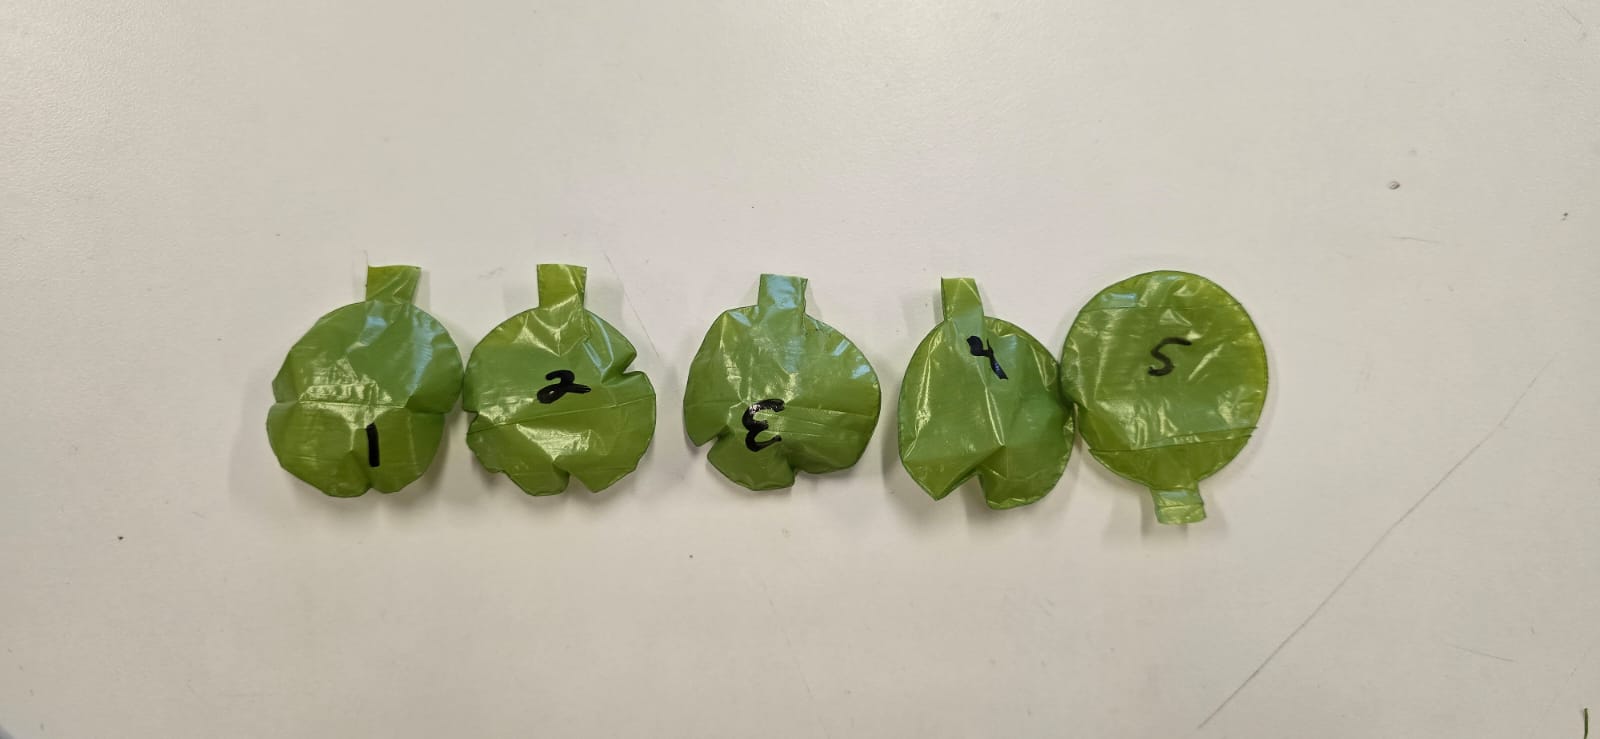
For this process, the starting point is a vector file to cut on the laser machine. The shape to be produced is a basic balloon, then we can move on to more complex geometries.
The basic principle is to have 2 or 3 passes for the materials to weld, with a small offset from the cutting vector. For these experiments, the offset was different in order to get the most accurate and best bond. To figure out which parameters are to be used on every offset, 5 different tries were made. The material used here are dog litter bags made from thin HDPE, and the machine that was used is the Xtool F1 Ultra Here are the results of every test.
Offsets: .1mm - .5mm
The general parameters for this type of welding are low power and high speeds, for this particular case it was 15% power and 500 mm/s for speed.
The next step was to use this information for more complex geometries, and also I wanted to experiment with the engraving area tool, in case it had better results for welding both layers.
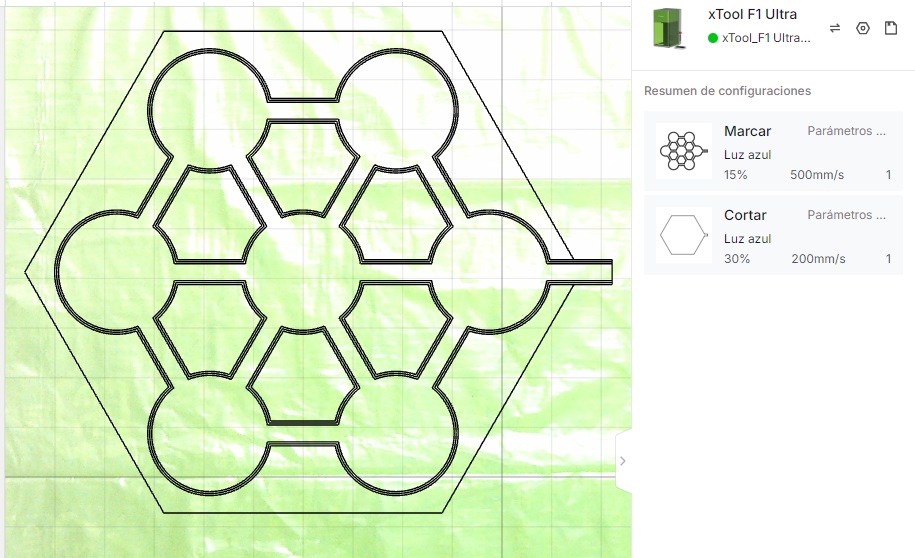
As a conclusion, the best parameters were 2-3 offsets at .4mm for the best seal. The area engraving wasn't very helpful, as it eroded the edges of the seal and was easier to unstick.
Heat press with textile vinyl
The cover for the booklet was designed to be inflatable and readable, some letters are flat and some volumetric. First the design was drawn with Onshape and cut on parchment paper with the laser cutter. The areas where there is paper, is where the balloon/volume will be generated, and the areas without paper are sticking to the other vinyl, creating flat areas.
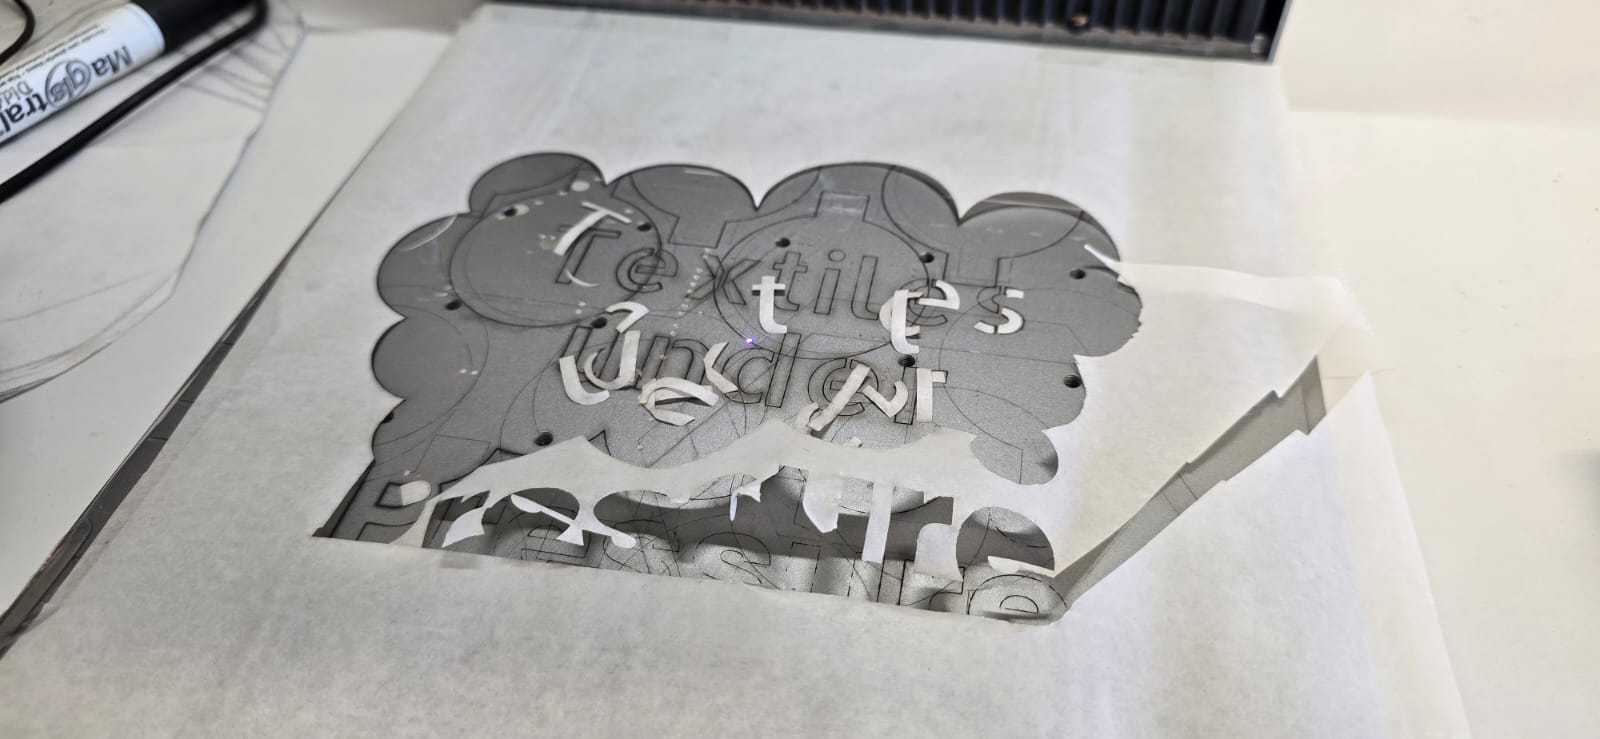
The parchment paper stencil was sandwiched between two pieces of textile vinyl with the sticky part in the middle, and then pressed at 160°C for 15 seconds. The hard plastic film is removed and the final result is inflatable.

It is important to remember to add a small tab at the top, or any edge whatsoever, for it will be the opening for inflating, and measure the space for the propper tubing.
3D printer sealing
The principle of this process is to have the 3D printer nozzle, while hot, to complete passes on the materials for them to bond. The general parameters for this experiment were the same, but the ones that vary for different results are the temperature, speed, passes (in this case, walls), and layer height.

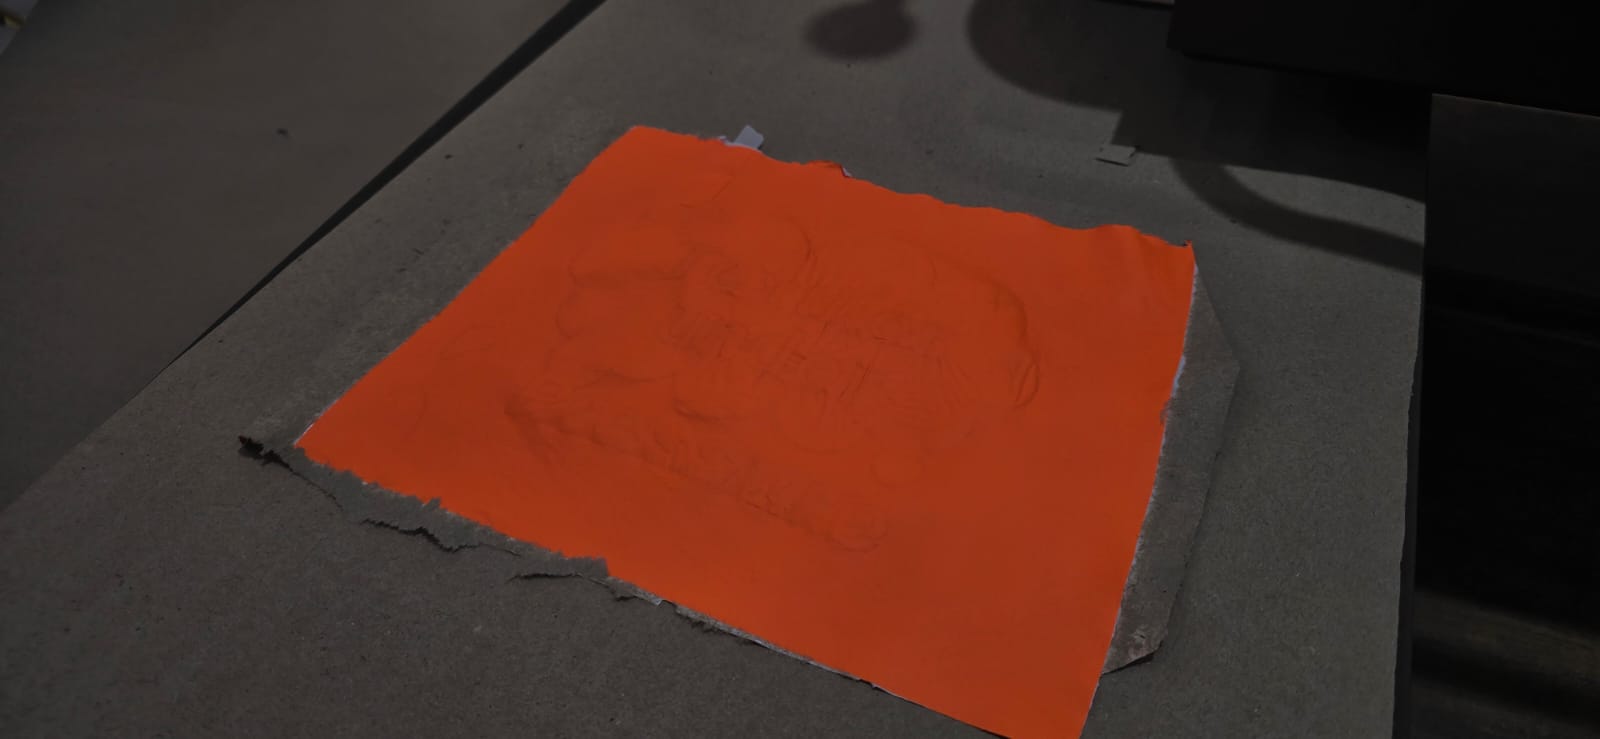
The results of this exploration created a material sample library, forming the foundation for further experimentation.

The garment
For the final part of this project, a garment is designed and fabricated using the previously described methods, both the inflatable part of the textiles, and integration of an automatic/electronic systems.
What?
This project’s output is a garment that provides temporary support in two key areas of the body: The neck, and the lumbar region, by using inflatable parts and an integrated electronic/pneumatic system for providing the inflation. During the Fabricademy course, I had the opportunity to work and experiment with various processes that led to this final project, for example the inflatable textiles were directly influenced by the Soft robotics assignment, and the electronic integration was based on the E-textiles, Wearables and Skin electronics assignments. After studying the current state of the inflatable garments and interaction with the body, the different processes for manufacturing, and the materials compatible with these methods, the design process began.
For Whom?
Modern lifestyles and jobs are increasingly requiring people to remain in uncomfortable and static positions for extended periods. These positions can be harmful for the body as they can lead to muscular fatigue, pain, discomfort, and poor posture.
According to the paper: Impact of lumbar support on pain reduction in low back pain patients: A systematic review and meta-analysis of randomized control trials by Akbar et all, the overall quality of life and reduction of pain in patients can be improved through appropriate lumbar support, which can be translated directly to people who remain in static in long periods of time like office-work related jobs, or long-distance travelers.
And, the article by Kaur: Reasons to carry a travel neck pillow for your next trip in the Dr. Ortho website, highlights the advantages of having neck support during long trips, for example better posture, or it can even help with fatigue levels. So that is why this project is focused on the lumbar and neck areas.
How?
The garment to be designed and manufactured must have the following characteristics: * Can be worn under regular clothes. * The inflatable part must provide support for the body in two key places: neck and lumbar area. * Must inflate/deflate automatically or with a simple interface like a button. * The automatic inflation/deflation system must be rechargeable and removable.
Electronics
The electronics behind the project must do the following actions:
- A device that is small enough to carry close to the body.
- Must have batteries and be rechargeable
- It must have two outputs for the different inflatable parts of the garment
- The interface must be simple, it consists of two buttons, one press and it inflates, next press and it deflates, for both pumps.
How is it possible to make this device?
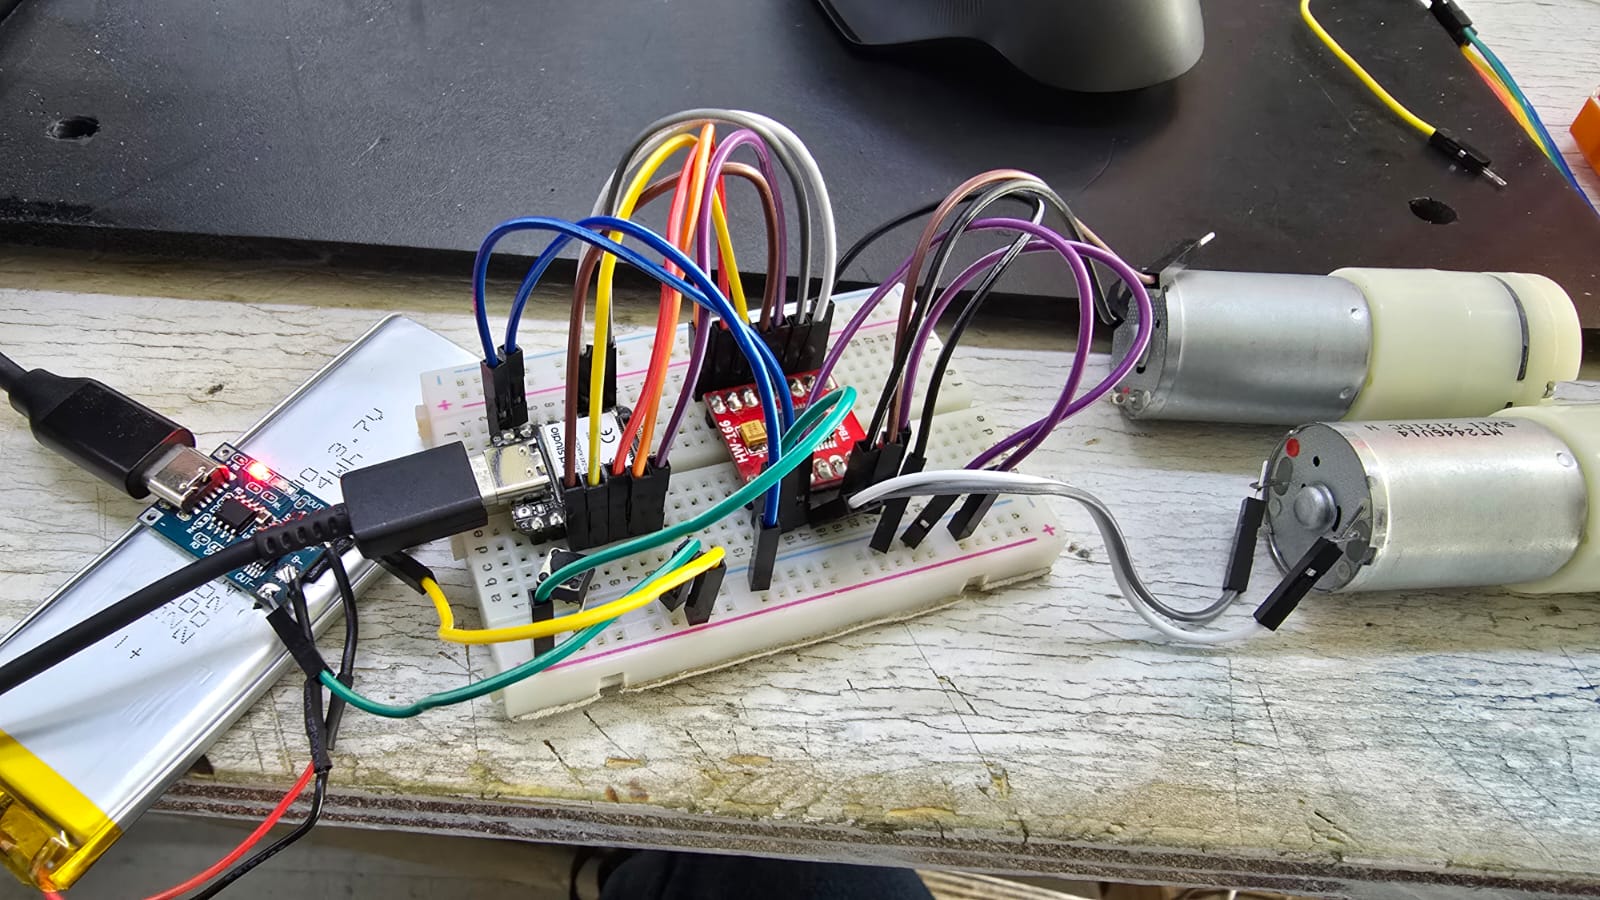
- First, we will be needing a brain, in this case it is a Xiao RP2040, a microcontroller that’s programmable to do whatever we need it to do.
- We need two motors with small air pumps attached to them, and a controller for these motors so they can inflate and deflate on command.
- We need a battery and charging system to provide power for all the device’s parts, which are modelo de baterías y modelo del cargador.
- And two buttons for controlling the device. The electronic schematic looks like this, and will be tested with a protoboard:

The code for the microcontroller is the following:
// ---- Botones ----
#define BTN1  D0
#define BTN2  D1

// ---- TB6612: standby ----
#define STBY  D2

// Motor A
#define AIN1  D3
#define AIN2  D4
#define PWMA  D5

// Motor B
#define BIN1  D6
#define BIN2  D7
#define PWMB  D8

// ---- Parametros ----
const unsigned long LONG_PRESS = 600;    // ms para pulsacion larga
const unsigned long RUN_TIME   = 20000;  // 20 s de giro en pulsacion corta
const unsigned long DEBOUNCE   = 30;
const int SPEED = 255;                    // velocidad 0-255 (255 = maxima)

enum Estado { PARADO, GIRO_CORTO, GIRO_LARGO };

struct Motor {
  uint8_t btn;
  uint8_t pwm, in1, in2;
  bool lastState;
  unsigned long pressStart;
  bool longActive;
  Estado estado;
  unsigned long runStart;
};

Motor motores[2] = {
  { BTN1, PWMA, AIN1, AIN2, HIGH, 0, false, PARADO, 0 },
  { BTN2, PWMB, BIN1, BIN2, HIGH, 0, false, PARADO, 0 }
};

void motorForward(Motor &m) {
  digitalWrite(m.in1, HIGH); digitalWrite(m.in2, LOW);
  analogWrite(m.pwm, SPEED);
}
void motorReverse(Motor &m) {
  digitalWrite(m.in1, LOW);  digitalWrite(m.in2, HIGH);
  analogWrite(m.pwm, SPEED);
}
void motorStop(Motor &m) {
  digitalWrite(m.in1, LOW);  digitalWrite(m.in2, LOW);
  analogWrite(m.pwm, 0);
}

void setup() {
  Serial.begin(115200);

  pinMode(STBY, OUTPUT);
  digitalWrite(STBY, HIGH);   // habilita el driver (sin esto no gira nada)

  for (auto &m : motores) {
    pinMode(m.btn, INPUT_PULLUP);   // boton a GND
    pinMode(m.pwm, OUTPUT);
    pinMode(m.in1, OUTPUT);
    pinMode(m.in2, OUTPUT);
    motorStop(m);
  }
}

void loop() {
  unsigned long now = millis();

  for (auto &m : motores) {
    bool state = digitalRead(m.btn);  // LOW = presionado

    // --- Flanco de bajada: inicia pulsacion ---
    if (m.lastState == HIGH && state == LOW) {
      m.pressStart = now;
      m.longActive = false;
    }

    // --- Mantener presionado > LONG_PRESS -> giro largo (sentido B) ---
    if (state == LOW && !m.longActive && (now - m.pressStart >= LONG_PRESS)) {
      m.longActive = true;
      m.estado = GIRO_LARGO;
      motorReverse(m);           // gira al lado opuesto mientras se mantenga
    }

    // --- Flanco de subida (se solto el boton) ---
    if (m.lastState == LOW && state == HIGH) {
      if (m.longActive) {
        m.estado = PARADO;       // era giro largo -> detener al soltar
        motorStop(m);
      } else if (now - m.pressStart >= DEBOUNCE) {
        m.estado = GIRO_CORTO;   // pulsacion corta -> giro sentido A por 20 s
        m.runStart = now;
        motorForward(m);
      }
    }

    // --- Temporizador del giro corto (20 s) ---
    if (m.estado == GIRO_CORTO && (now - m.runStart >= RUN_TIME)) {
      m.estado = PARADO;
      motorStop(m);
    }

    m.lastState = state;
  }
}
After having finished and tested the circuit, code and schematic, it is time to create an integrated device.
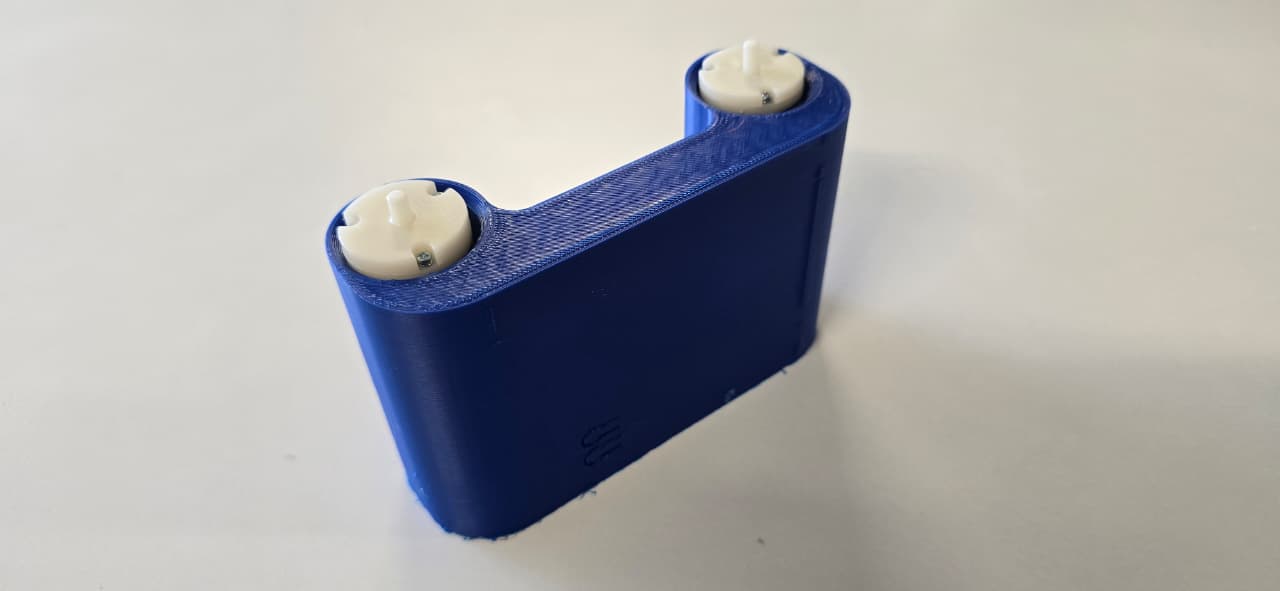
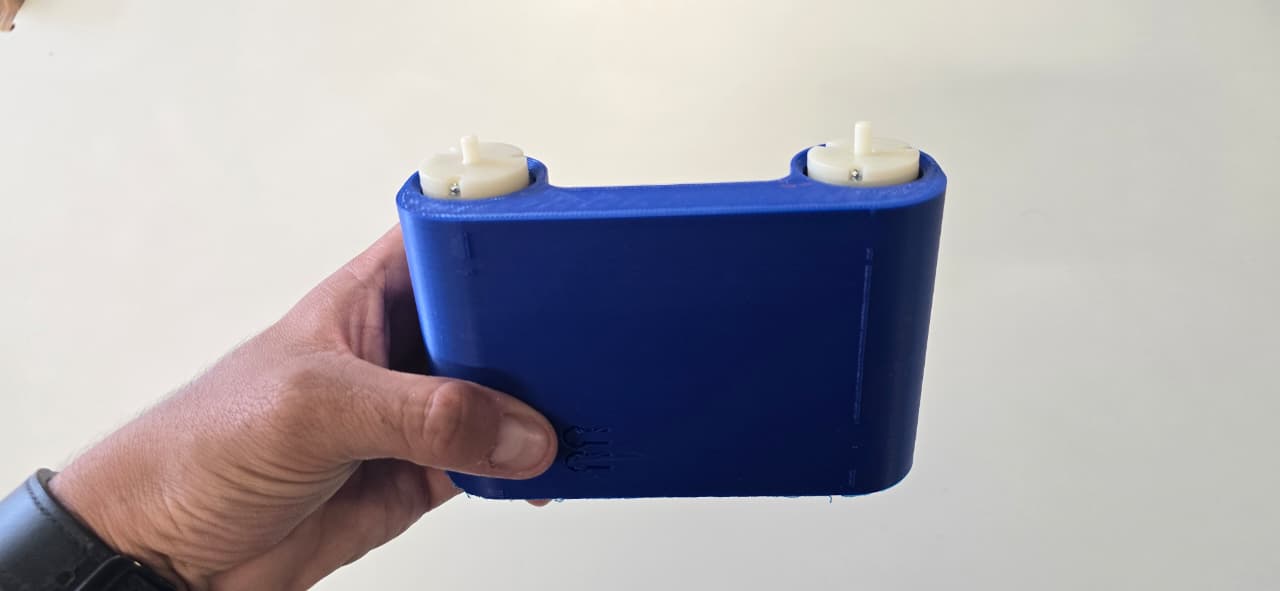
Device
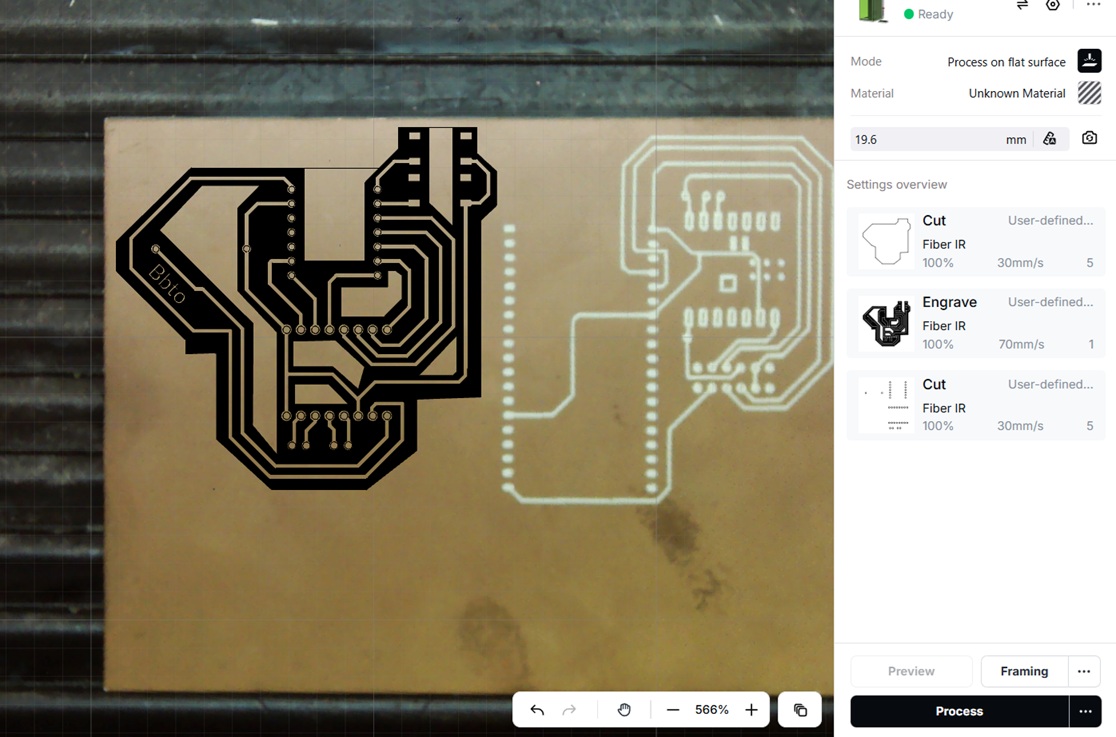
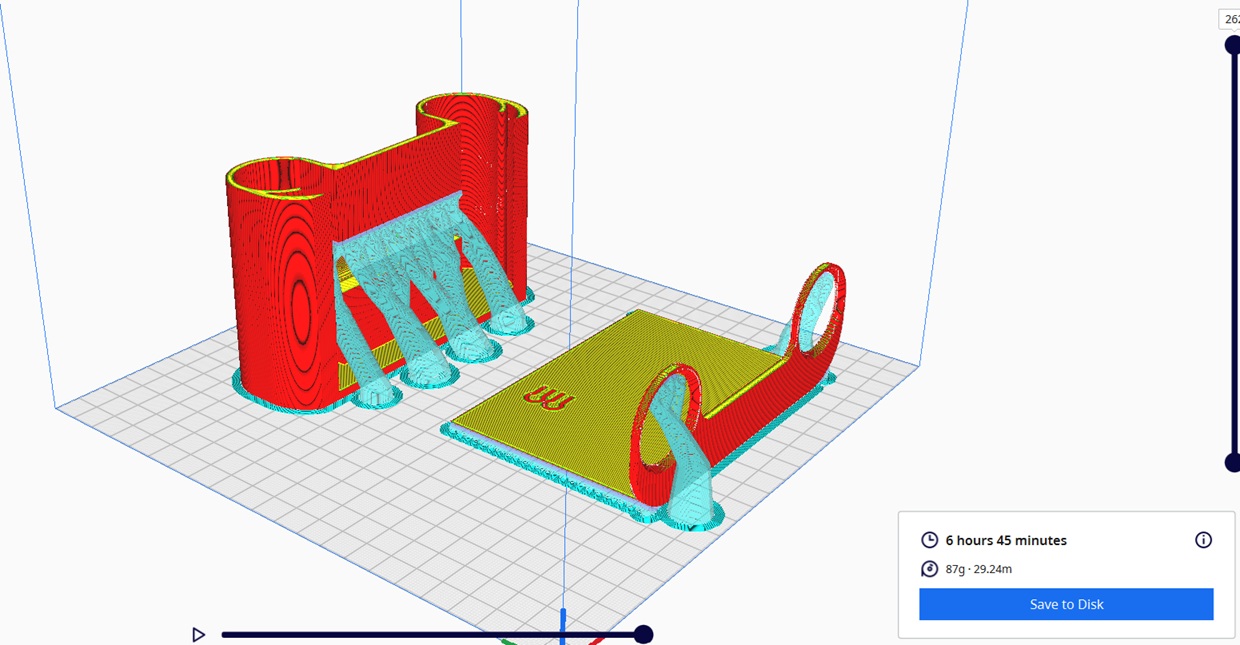
The first part is to manufacture the pcb, which includes the outputs, inputs and controllers in a small footprint, it connects to the charging circuit and batteries. I will be using the software KiCAD and export the drawing for manufacturing on the laser cuter.
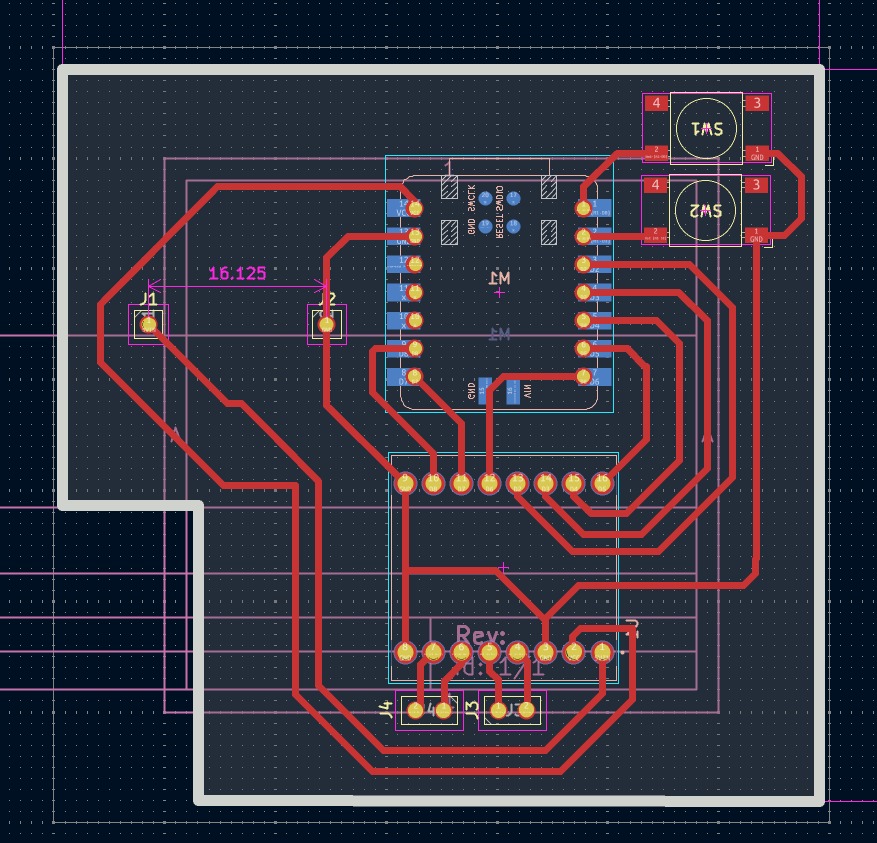
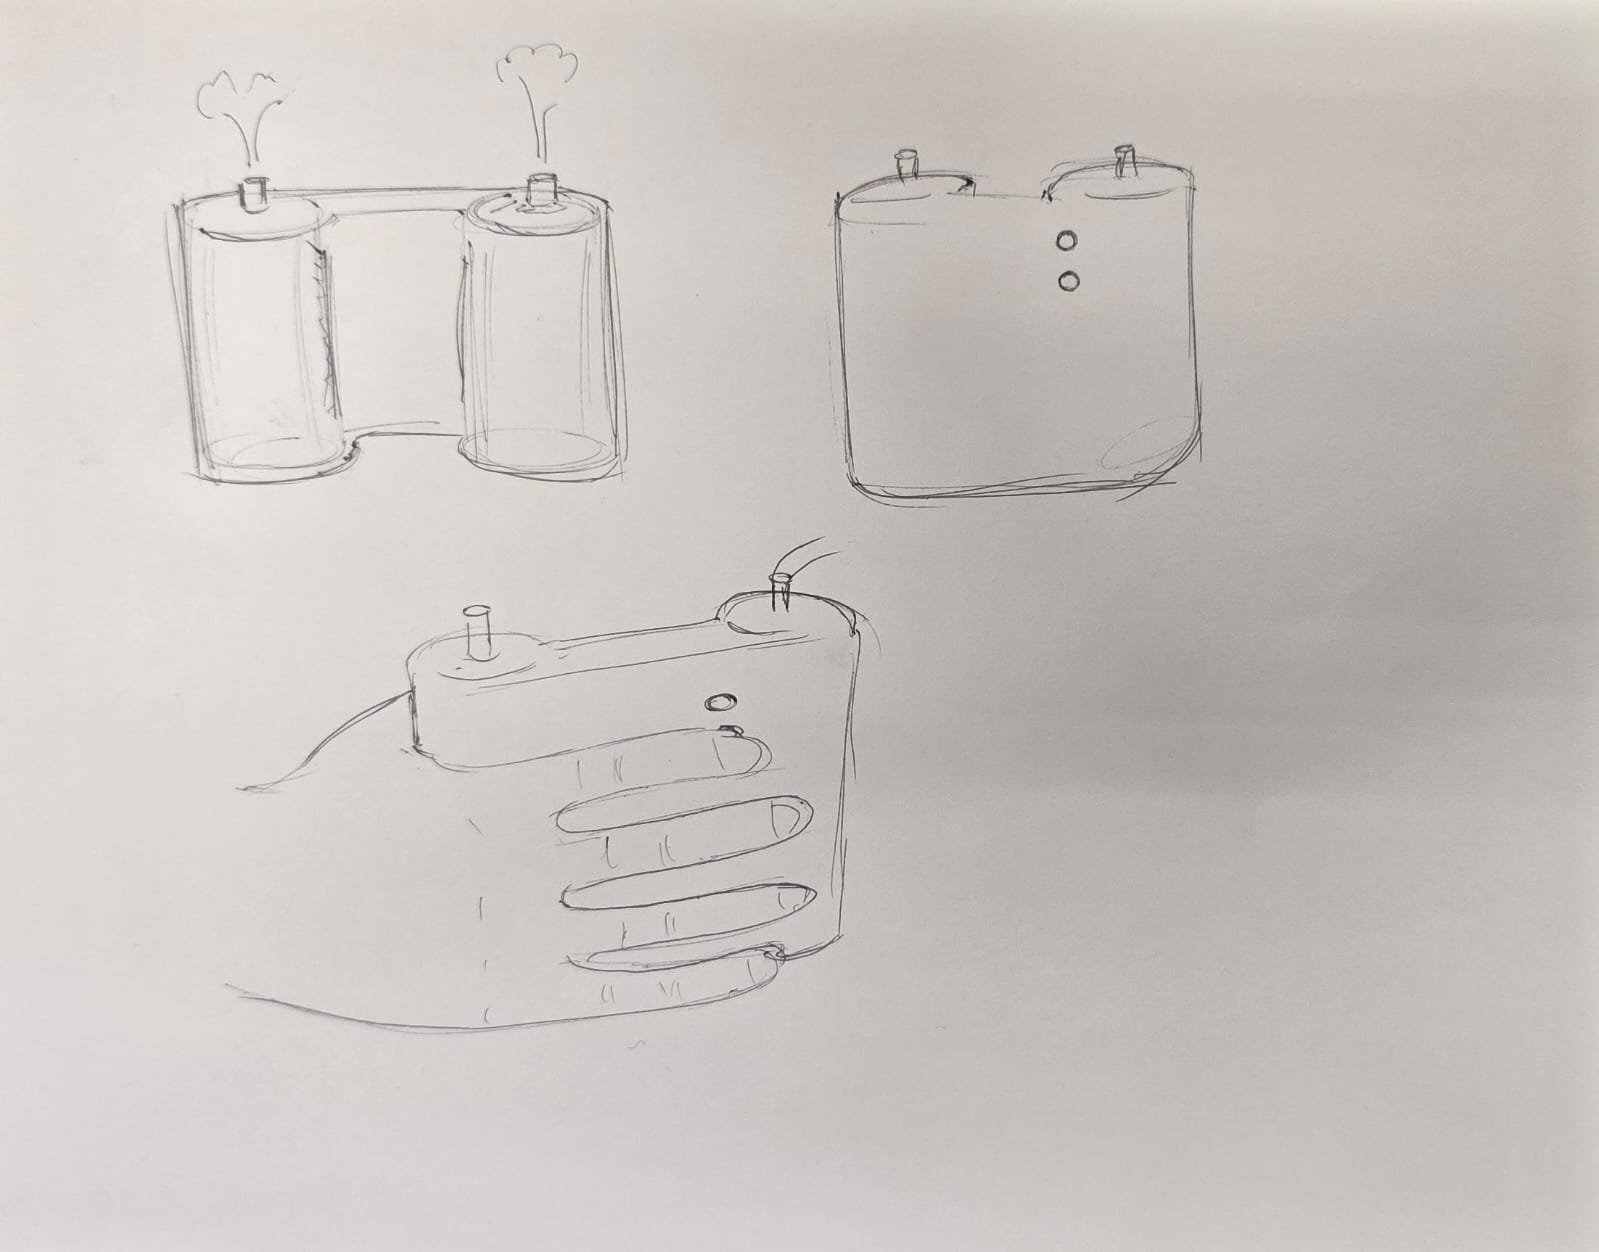
The following step is to integrate all these components in a case. All the components were adjusted and measured to design the piece, which I sketched to look something like this:
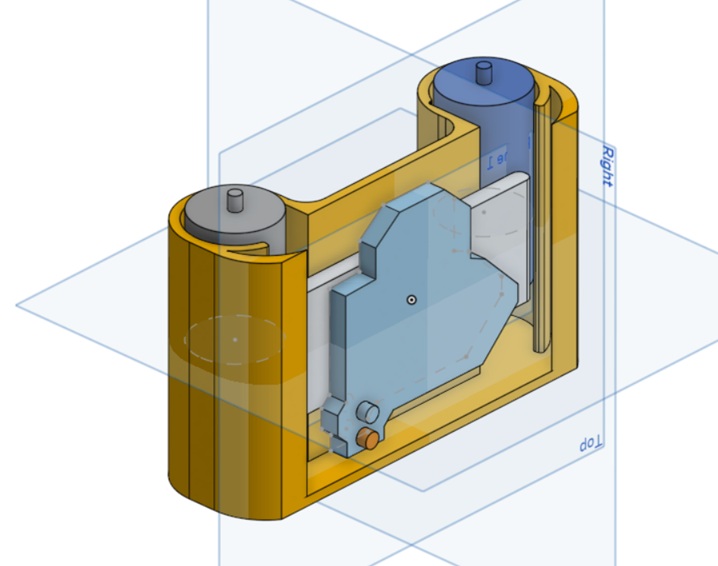
Voilà! We now have a working device for inflating the chambers on the garment. If you would like to dig deeper into the process of creating PCBs, I would recommend visiting my Fabacademy assignment on electronics production
Special thanks to Pepe who helped me greatly with this part.
Design
The garment must be designed to accommodate inflatable parts on the specified areas, but first let’s experiment with inflation shapes, movements and geometries.
The inflation
Over the course of this chapter, the focus will be the different geometries for these inflatable textiles, as we now have developed the methods for sealing, and are familiar with the materials.
Geometries for movement
Based on the research paper Bioinspired and biohybrid soft robots: Principles and emerging technologies by Chen et all, where the movement is classified as different living beings.
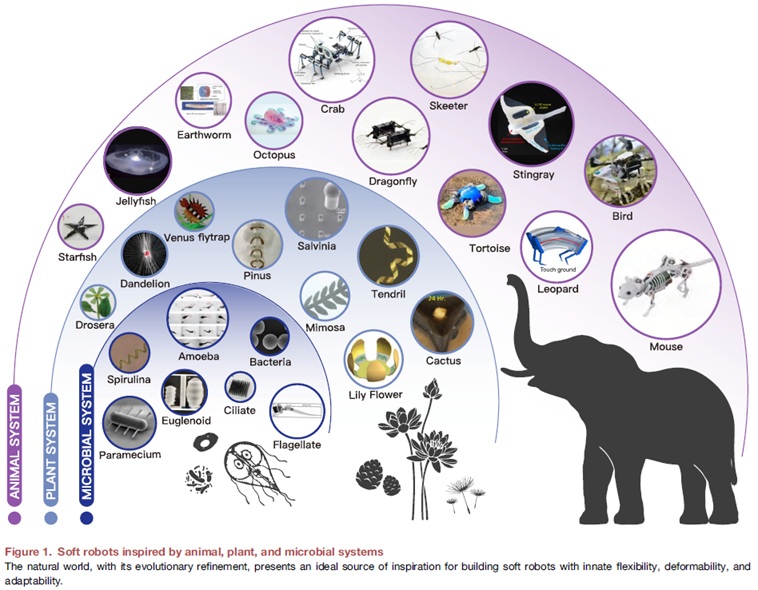
So, after this reading, I found 5 principal movements that are done through inflatable textiles, working as soft robotic systems, which are:
- Flapping, as the movement of wings or stingrays swimming.
- Bending/extending as octopi’s tentacles grabbing objects, on two different angles
- Twisting, as tendrils, somewhat like yarn and ropes
- Expanding/contracting like an earthworm, or the accordion’s movement
- Blooming/closing as flowers, which is a sum of various Bending/extending parts
The next part was the design of these examples of movements and selecting the most optimal process for sealing. The chosen software is OnShape, as it is easy to parameterize and work online, and the most appropiate method and material for these tests is hot-ironed textile vinyl with waxed paper sandwiched between the layers, as it offers a great seal, errors are easy and cheap to correct, and we can work with intricate geometries.
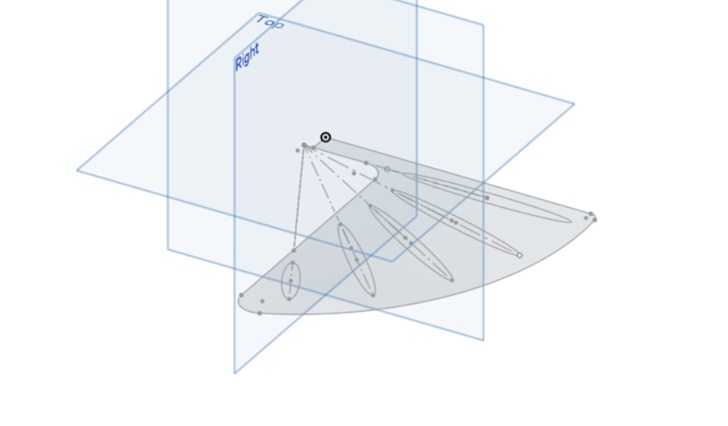
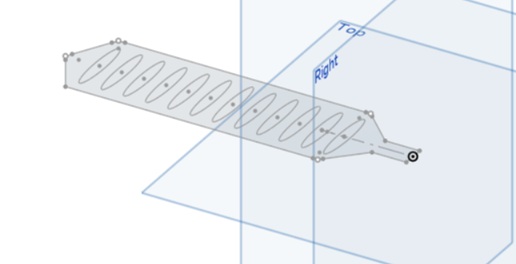
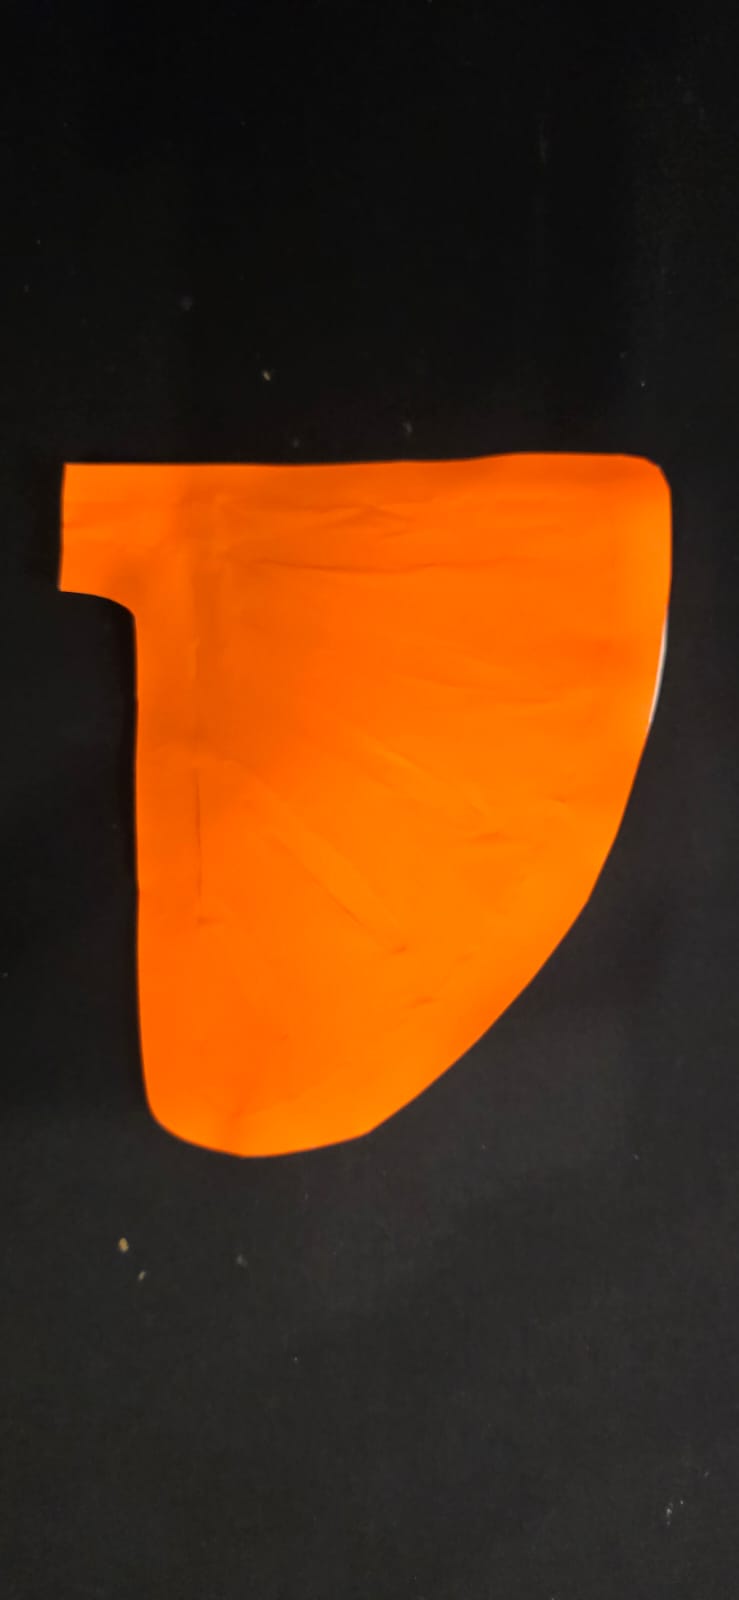
Flapping
This geometry is based on wings/fins, with a movement that resembles the mechanics of animals both flying and swimming. The wing/fins move in angle, exaggerating the motion the further the part grows away from the base, where the air-inlet is located.
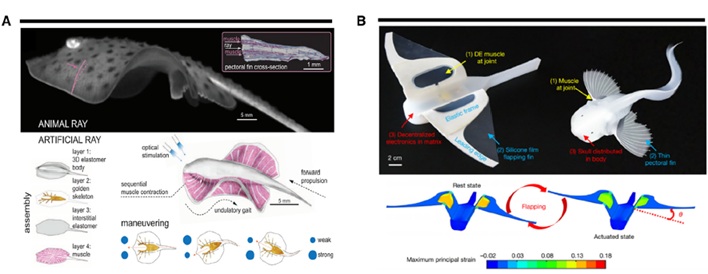
For this drawing, the shape is a softened triangle with inserts resembling bones, which provide rigidity and the movement we are looking for.
All the sketches will be laser cut in waxed paper and sandwiched between two sheets of textile vinyl, which will be promptly ironed to fuse the layers, and then cut to shape/size
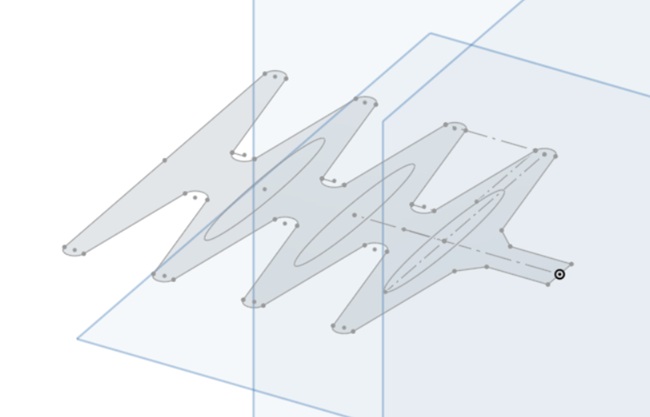
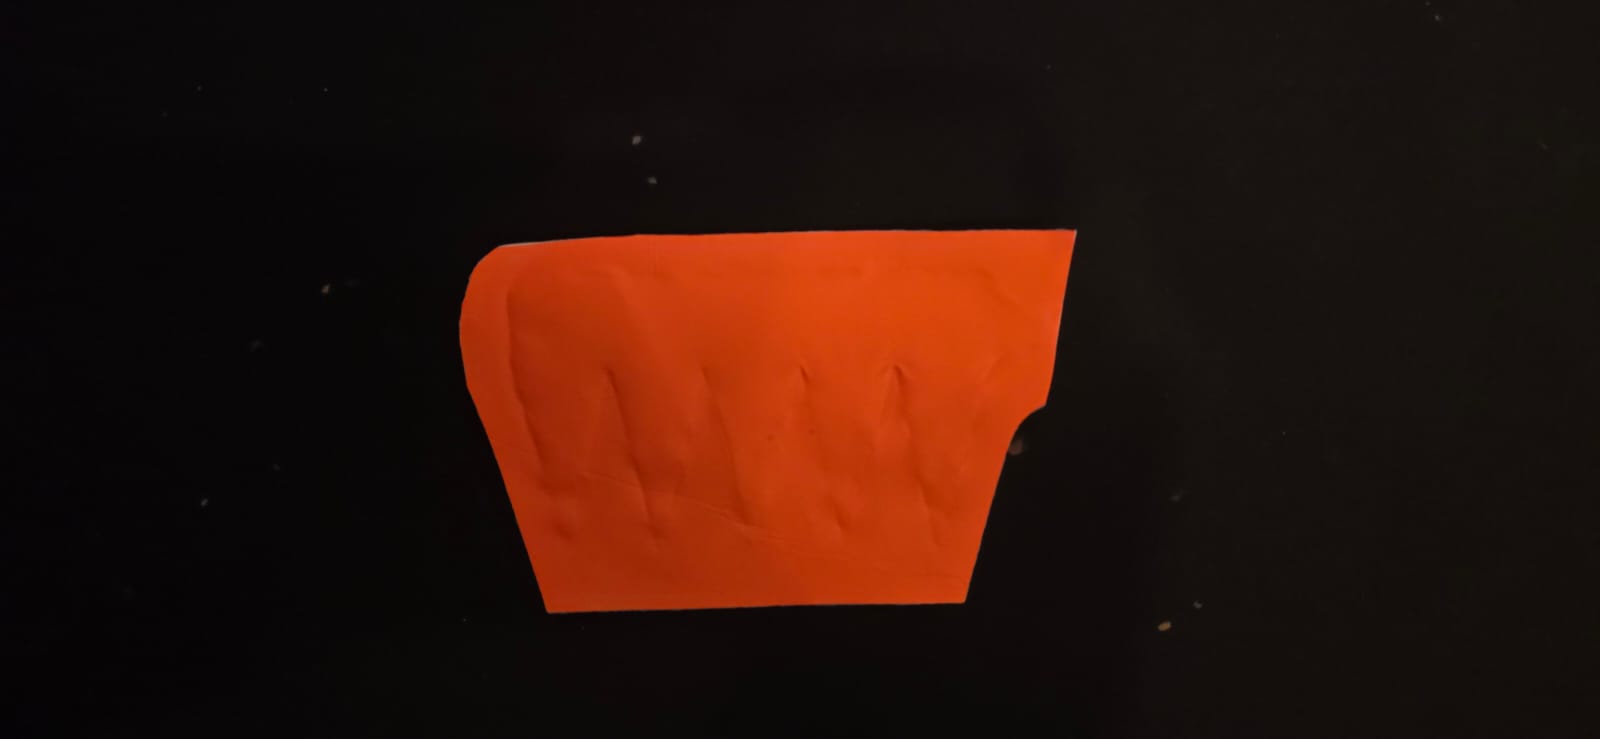
Bending
The bending principle was divided into two geometries, depending on the angle of the bend, perpendicular or parallel to the ground, and their applications: The first one is better for grasping objects, and the latter is better for creating a non-rigid structure between two parts, like the backbone of fishes while swimming.

Both examples bend but in different directions as shown in the videos
Twisting
The twisting movement in nature can be observed in plants, seeds, and microorganisms with the property of swimming, like H. Pylori, B. Burgodferi or C. Crecentus.

This example is of a micro-robot that moved with a controlled acoustic field, thanks to the two spirals in its body.
The design for the twisting movement on this air-responsible test was based on geometry, more than nature: an angled air chamber on a flat sheet of material will twist when inflated.
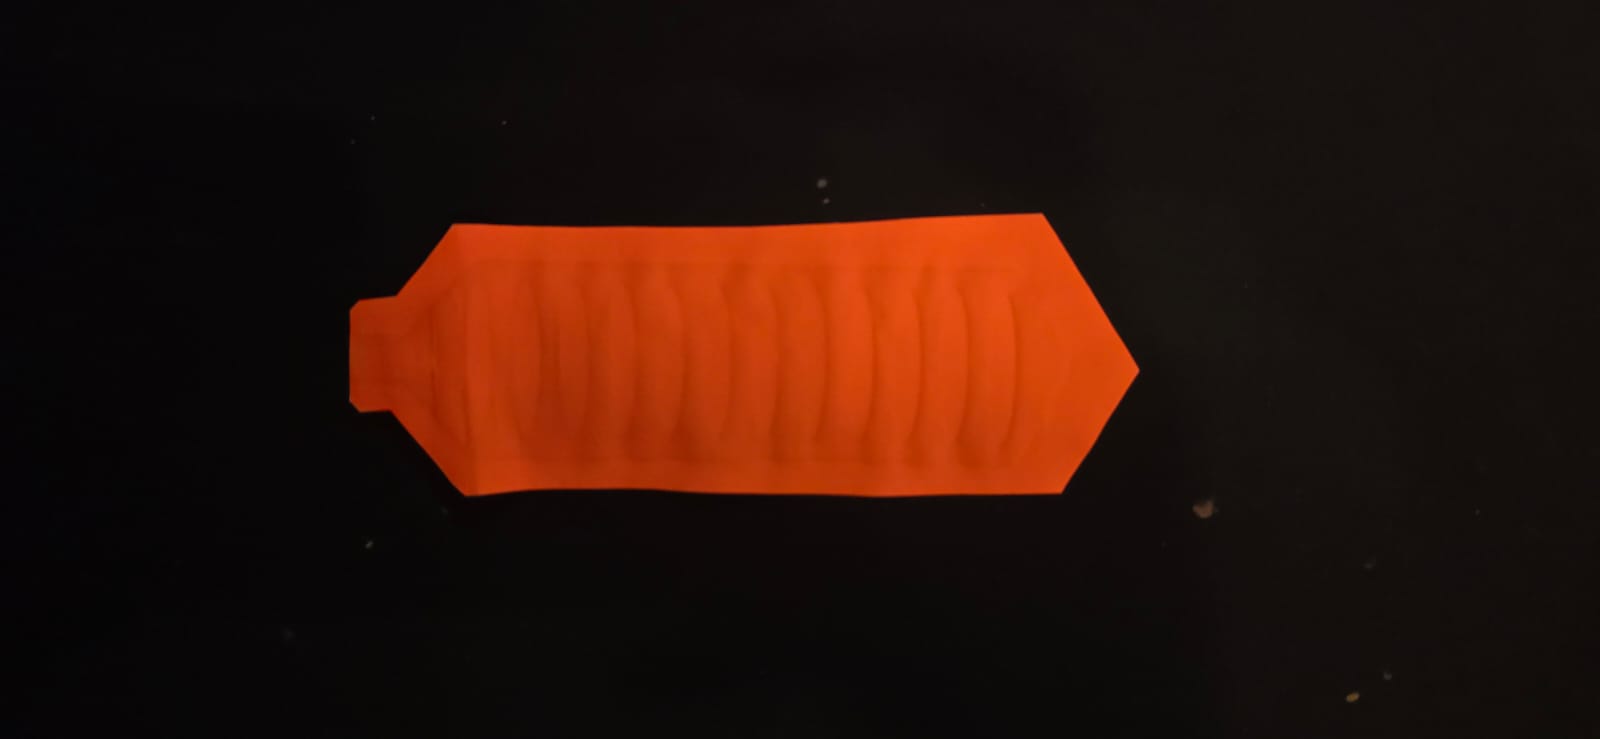
Expanding
This movement resembles the walk of an earthworm, expanding and contracting its full body to dig through the wet dirt. It is easier to understand (at least for myself) as the movement an accordion does of expanding and contracting to create sound.
The design of this test needed tabs inside, perpendicular to the movement, in order to contract/expand properly.
Blooming
This movement is very organic and easy to imagine, like both blooming flowers, and the motion of a jellyfish swimming, or even an umbrella opening/closing
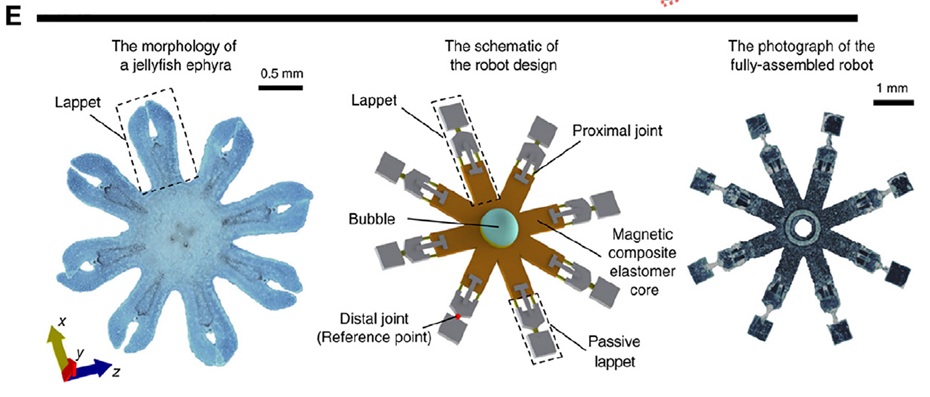
The geometry of this example resembles a starfish, and in the middle, we find a “core” where the air inlet is located, for providing this organic movement.
Gallery

Geometric patterns for support
These patterns are designed more for garments as support systems, instead of movement. These kinds of designs exist already, even though they don’t use air as often; the garments are filled with down feathers, or natural and synthetic soft and fluffy products, to provide thermal insulation, water-resistance, and lightness.


Following the same workflow as the previous exercises for finding the most optimal geometry for parameters like support, insulation, collapsibility, comfortability, etc. During the Soft robotics assignment I experimented with two patterns for this kind of applications, which will be used as a starting point for the next tests. The process will be the same laser cut waxed paper patterns sandwiched between two layers of textile vinyl, and then hot-ironed together.
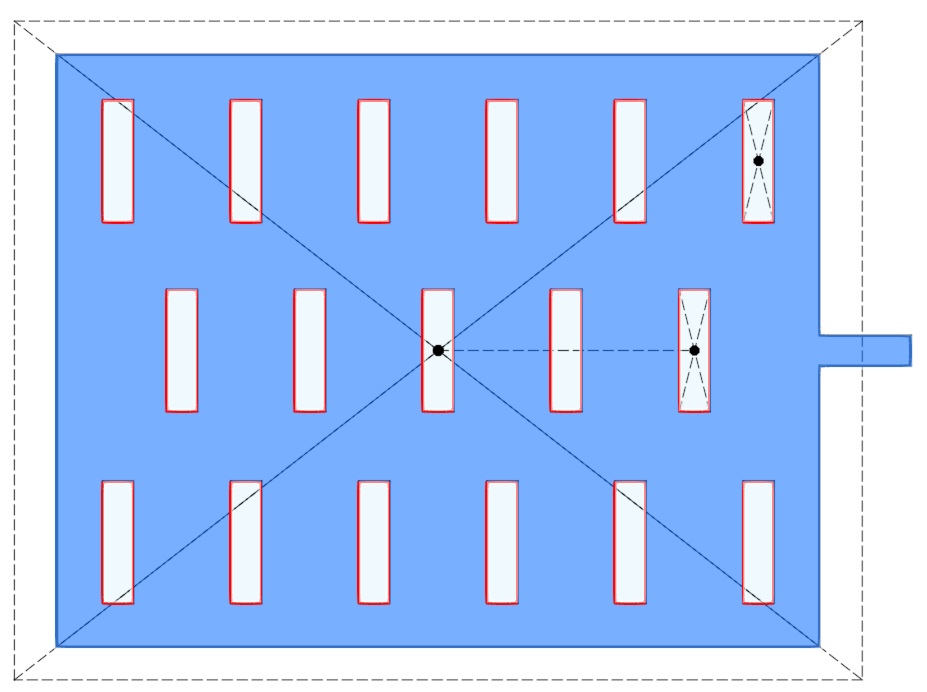
Rectangular pattern
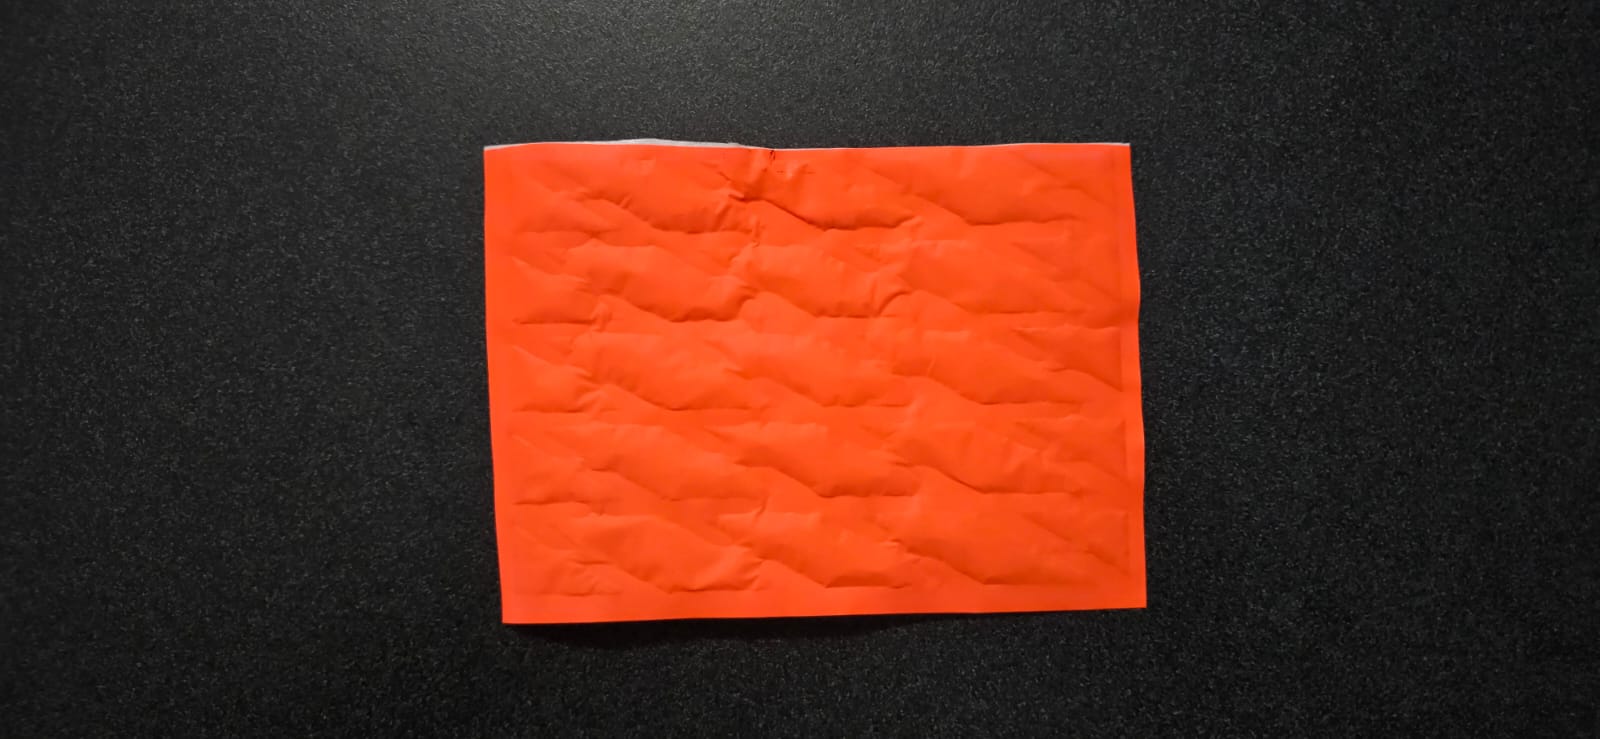
This pattern is based on already existing puffer jackets with a pattern of repeated sealed rectangles with an offset, so the puffy part “inflates” around them, creating a shape similar to bowties repeating all along the garment.
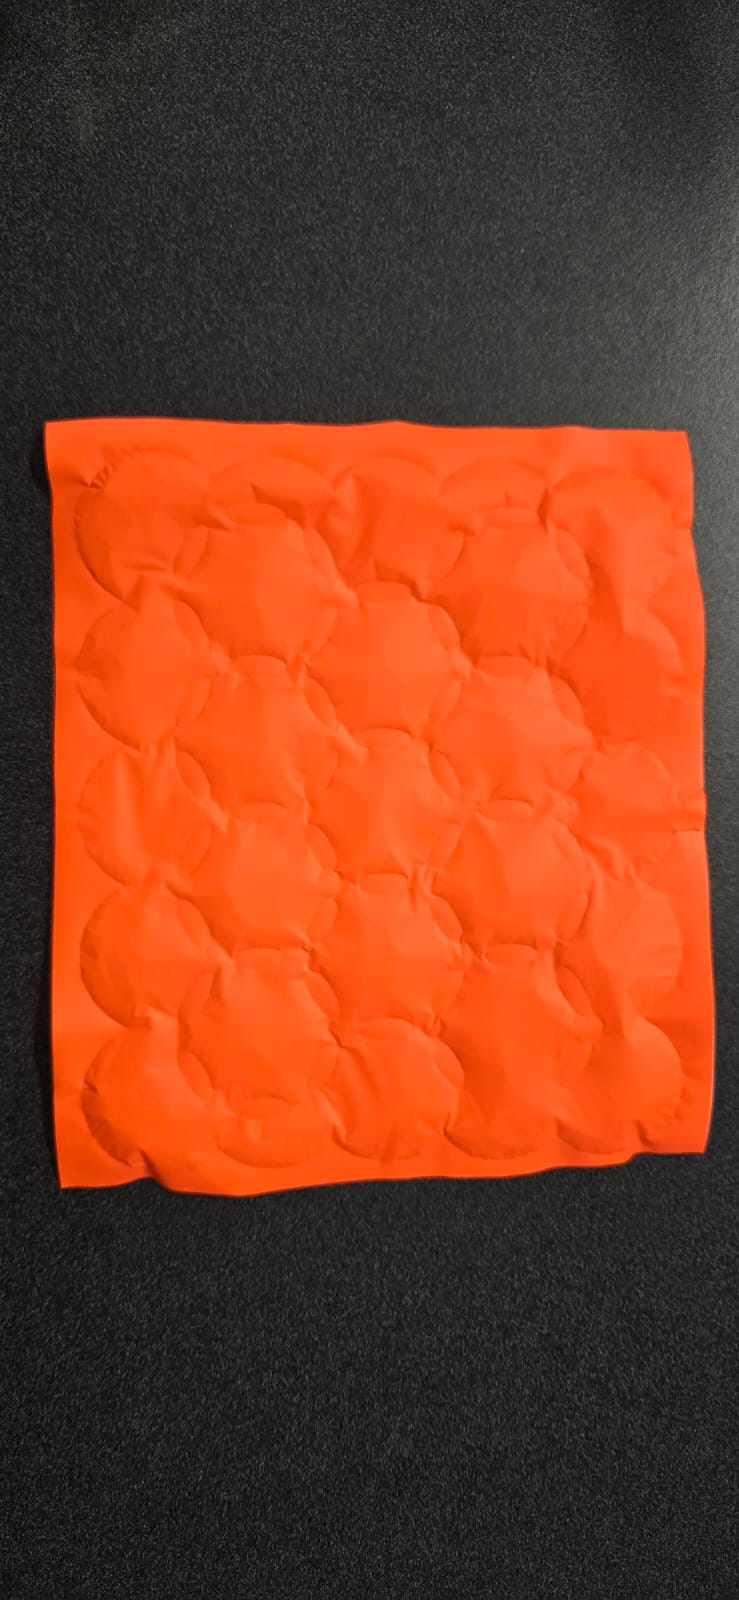
Circular pattern
The circular pattern was created by drawing circles all connected so the airflow is constant, creating “spheres” all over the surface. Foto fusion
Rhombus pattern
This shape is created withrhomboid or diamond figures through all the piece, somewhat like a Baklava cutting pattern, by having two sets of parallel lines, the first set is horizontal, and the second one is angled by 30°, then adding an offset and connecting the pieces to provide airflow on all of them.

Elongated bubble
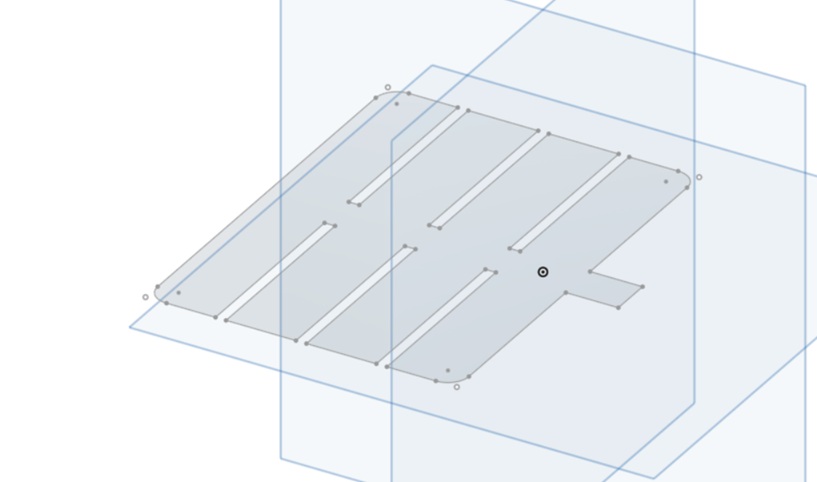
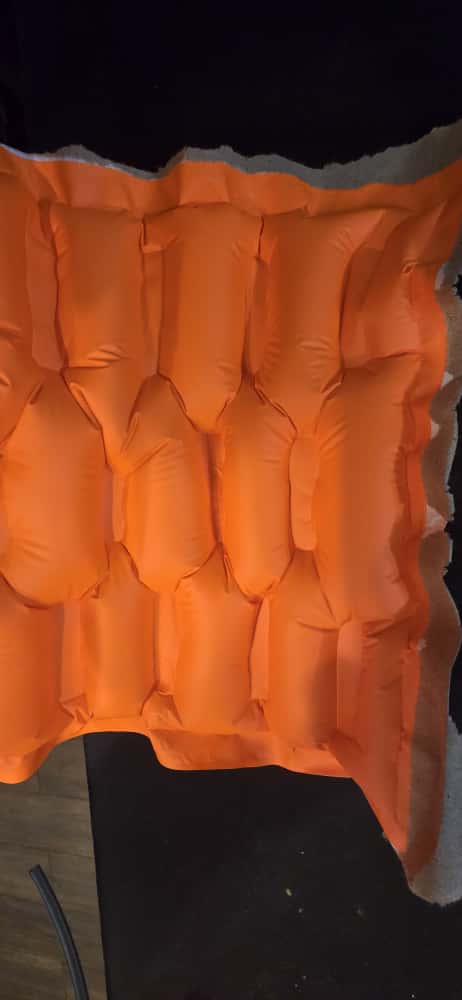
The elongated bubbles are based on the packaging material which consists of long tubes filled with air, to protect fragile objects. This pattern can be used to provide constant support and compression in garments.
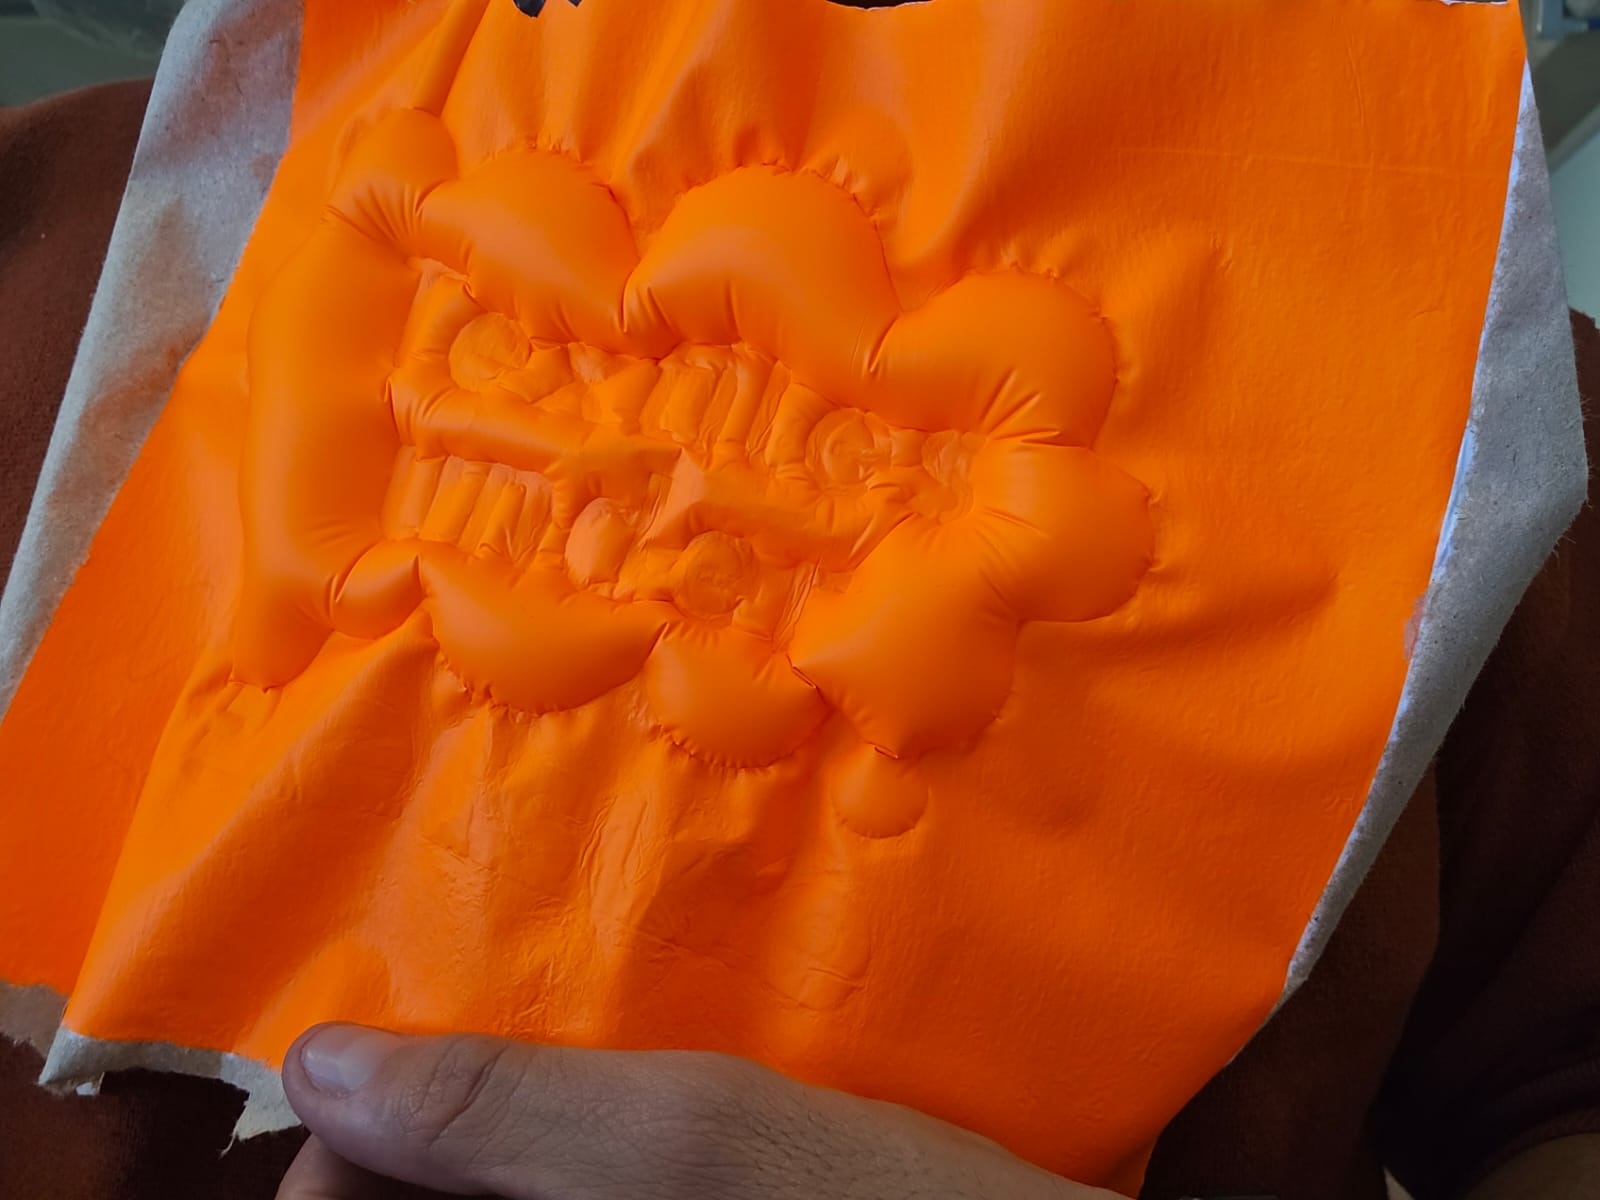
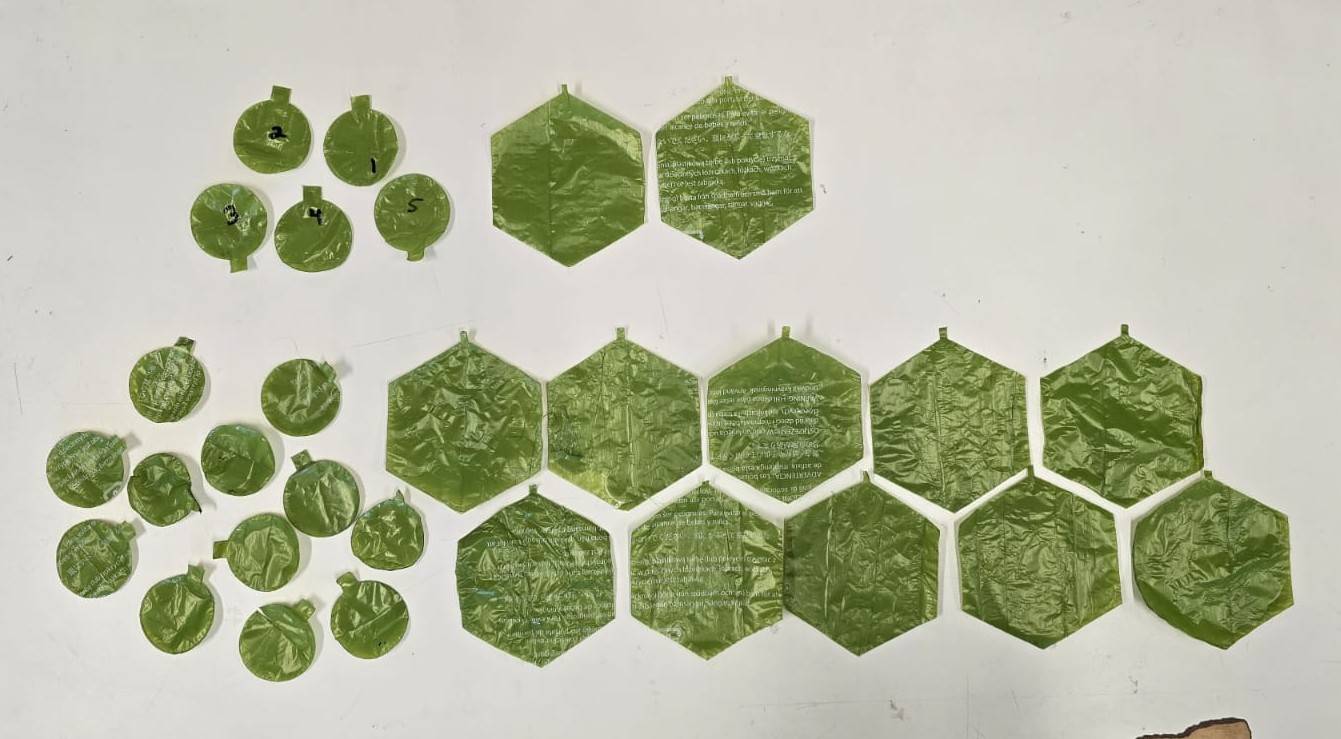
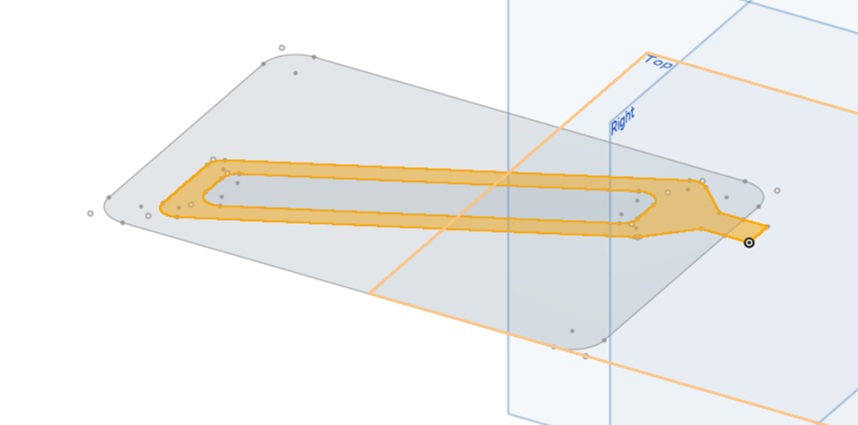
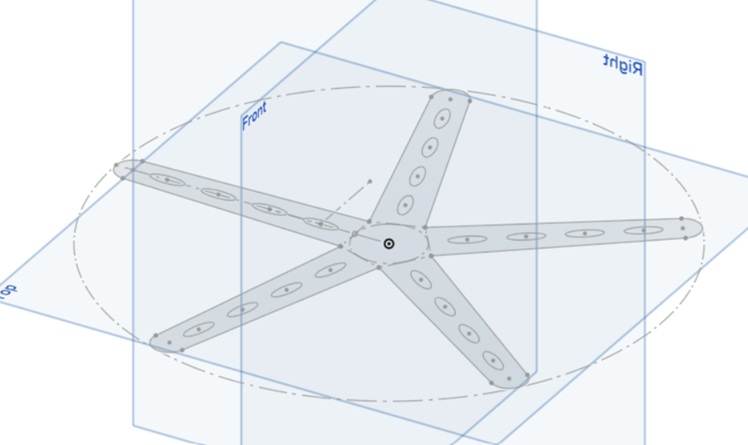
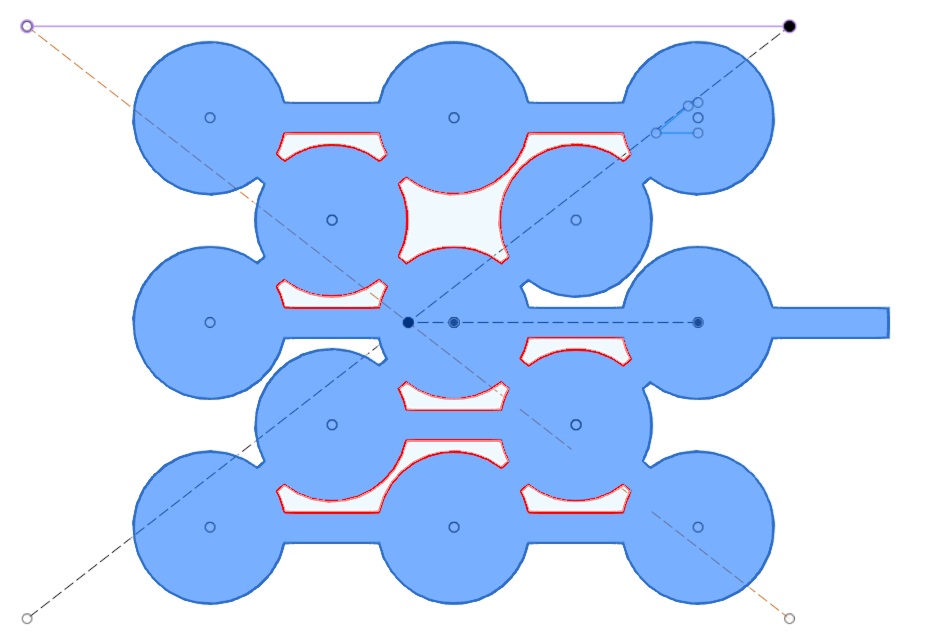
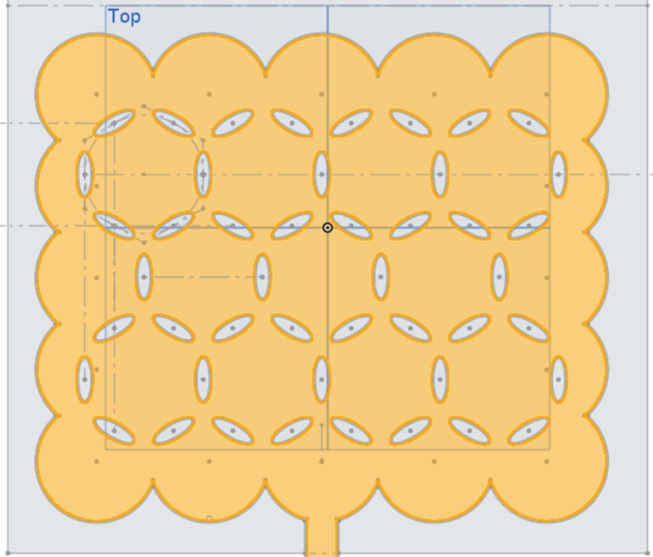
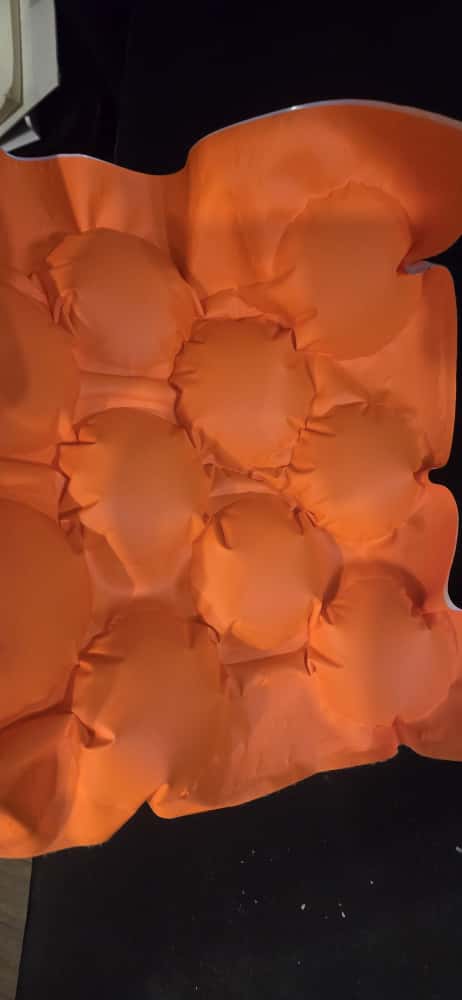
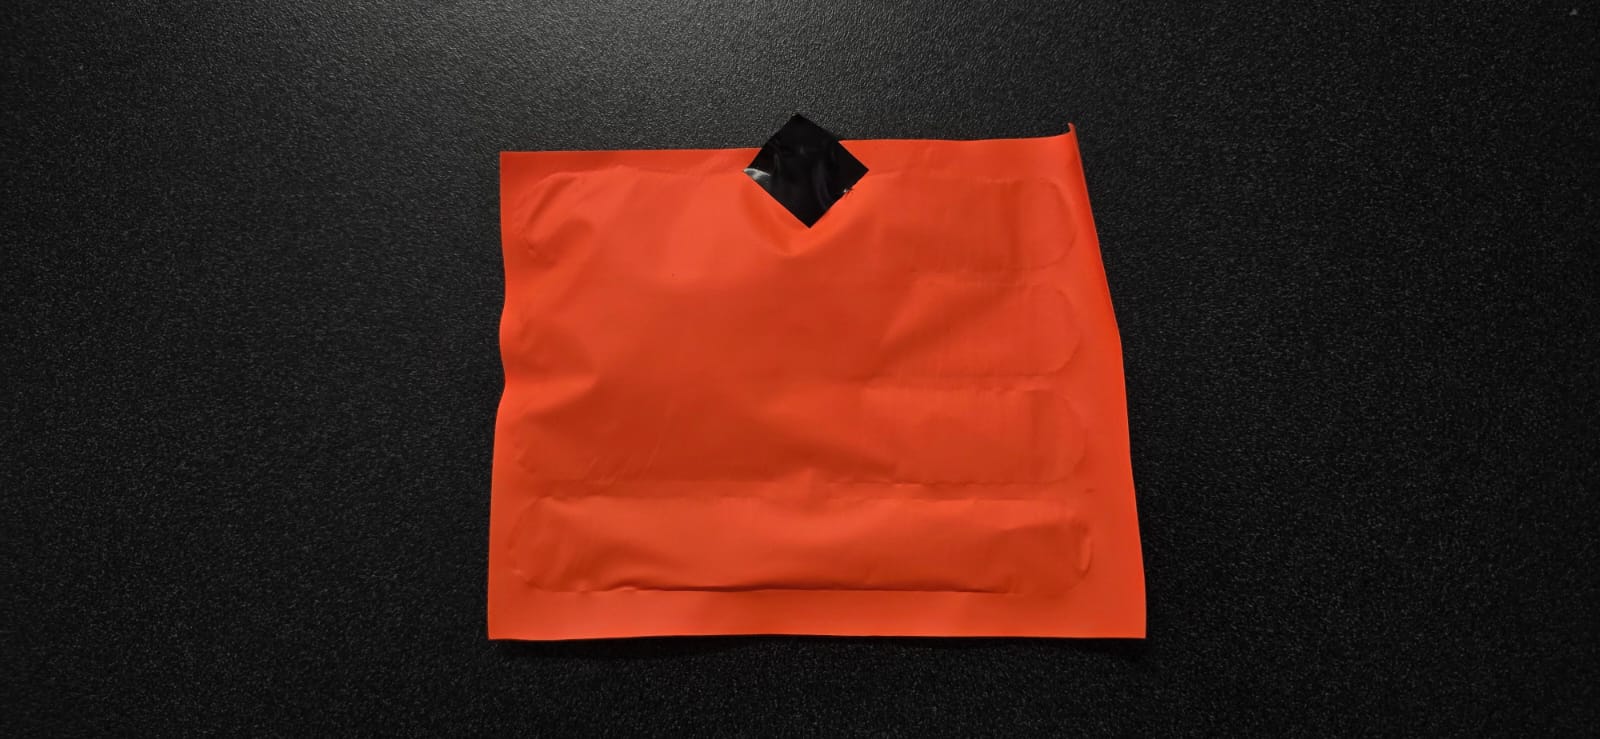
Hexagonal pattern
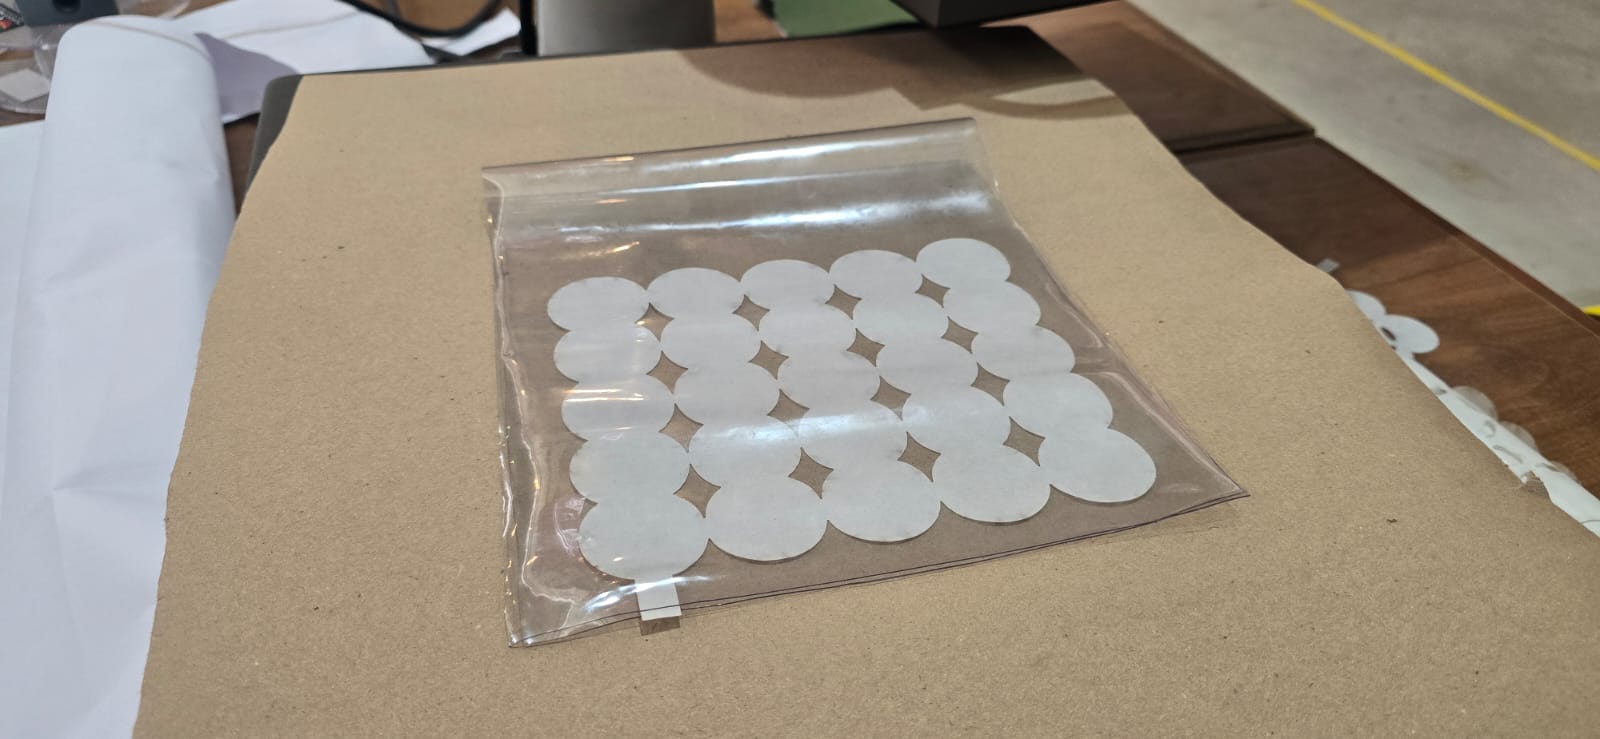
This pattern is designed with ellipses repeated along the edges of a hexagon, and then repeated along the piece, creating this inflatable 6 pointed “stars”. This example was used as a sample for the tests on the booklet.
Gallery
|