3. Circular Open Source Fashion
I. Intro
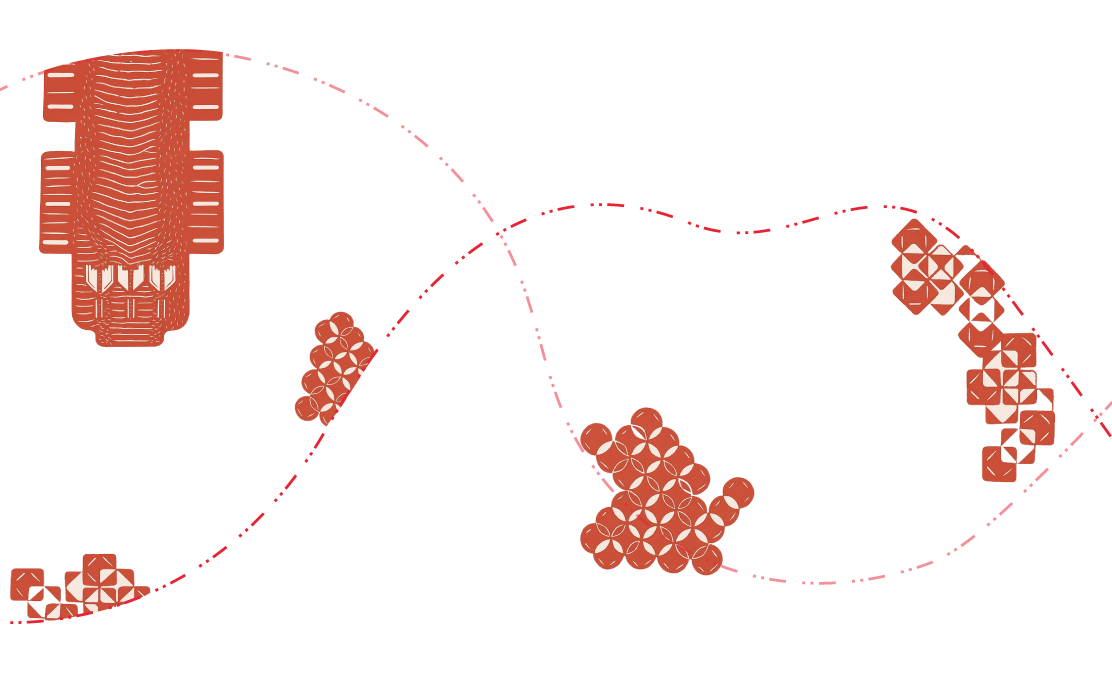
Circular fashion is a design and production approach in the fashion industry that aims to keep materials, garments, and resources in use for as long as possible while minimizing waste. Instead of the traditional make then dispose model, circular fashion focuses on creating closed loops where products are designed to be reused, repaired, resold, upcycled, or recycled at the end of their life.
II. Research & Inspiration
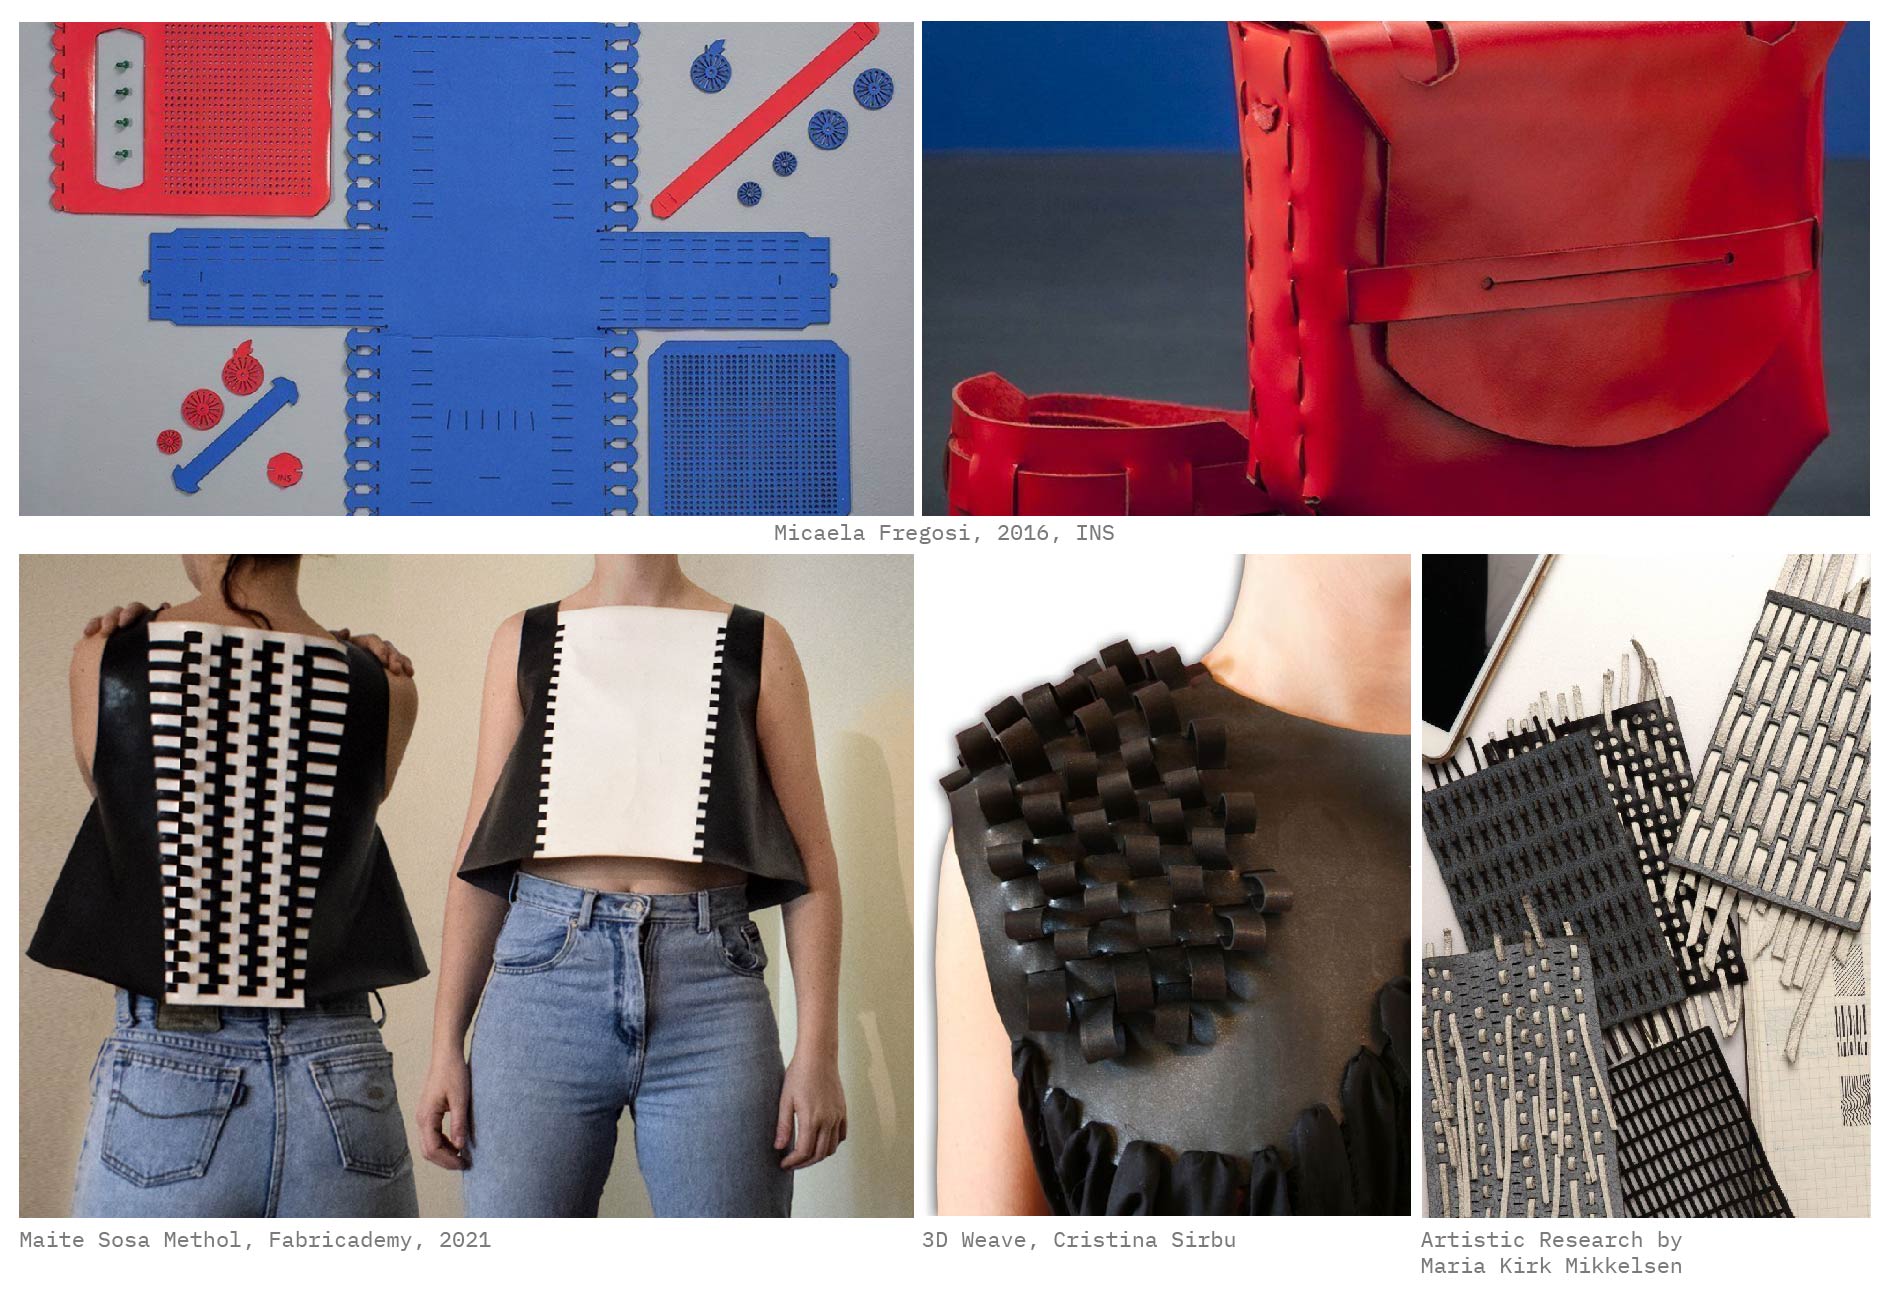
The Documentation of Maite Sosa Methol was really inspiring and directed my attention towards the work of Micaela Fregosi whom is an Uruguayan Textile Designer, designing laser-cut, no-stitch bags and purses made of leather and neoprene. In Addition, one of the other interesting works that I came across was Maria Kirk Mikkelsen's artistic reasearch called Tell it All with Leather and Stripes were she experiments the storytelling with materials instead of words through different leather and stripes arrangements, and without the use of stitches. Within this week's assignment I am willing to test the creation of multiple leather garments/bags through using means of joints of the same material.
III. Class Experimentation
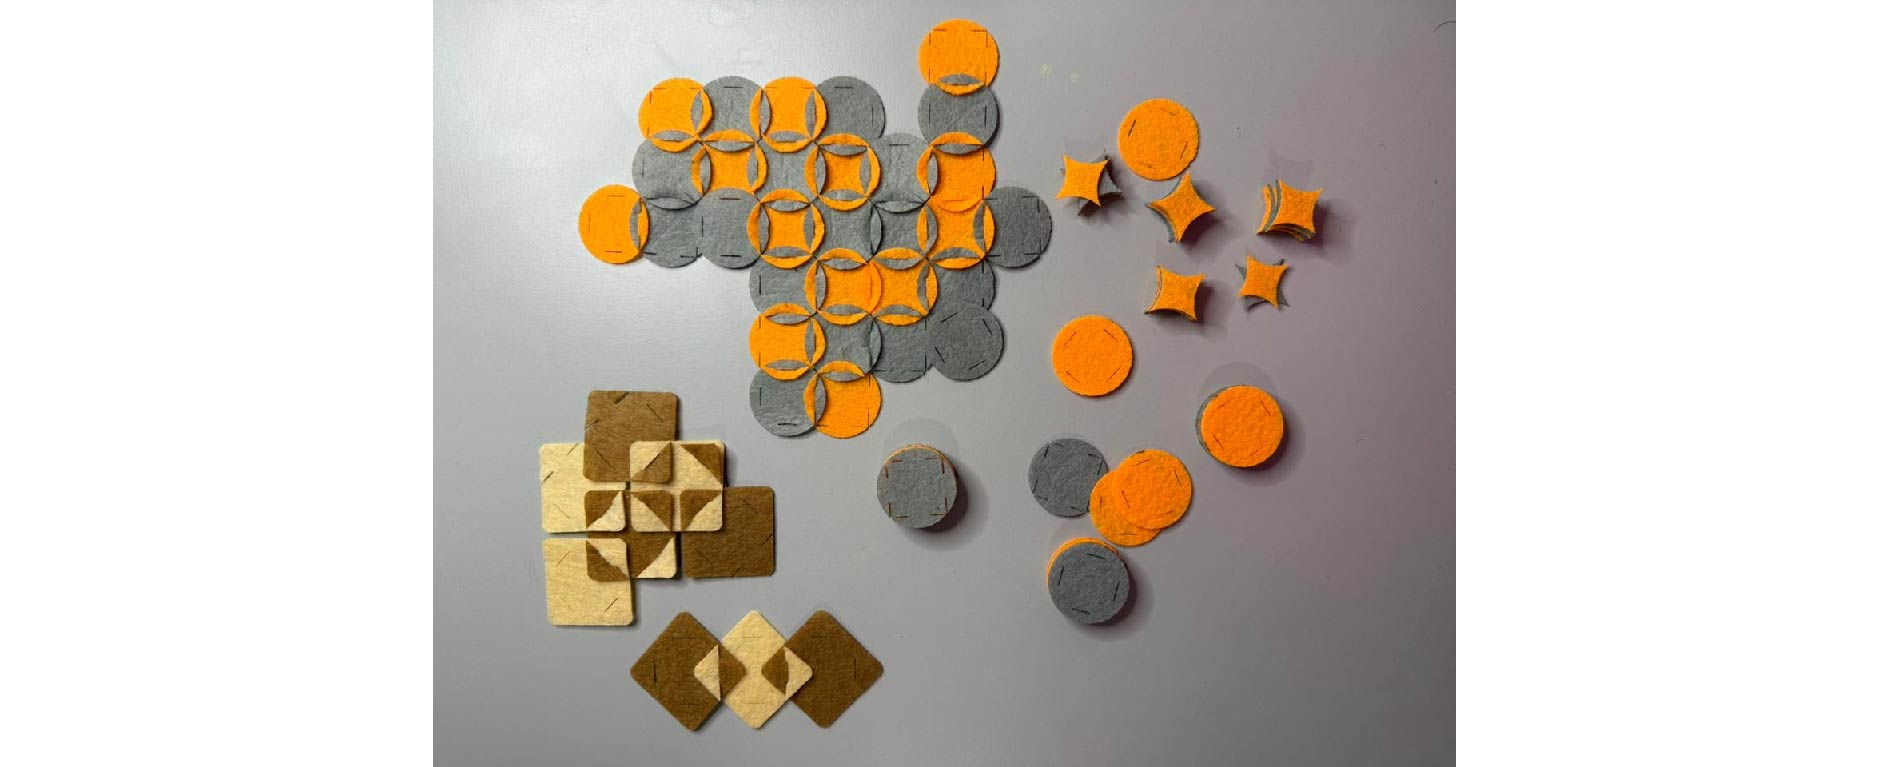
Prior to starting the design and the ideation of the products I wanted to produce within this week assignment, I decided to test the jointing systems and assembly of simple shapes like circles and squares which my Instructor Claudia suggested to start with and test on paper and felt prior to proceeding with other materials.
The test process went as follows:
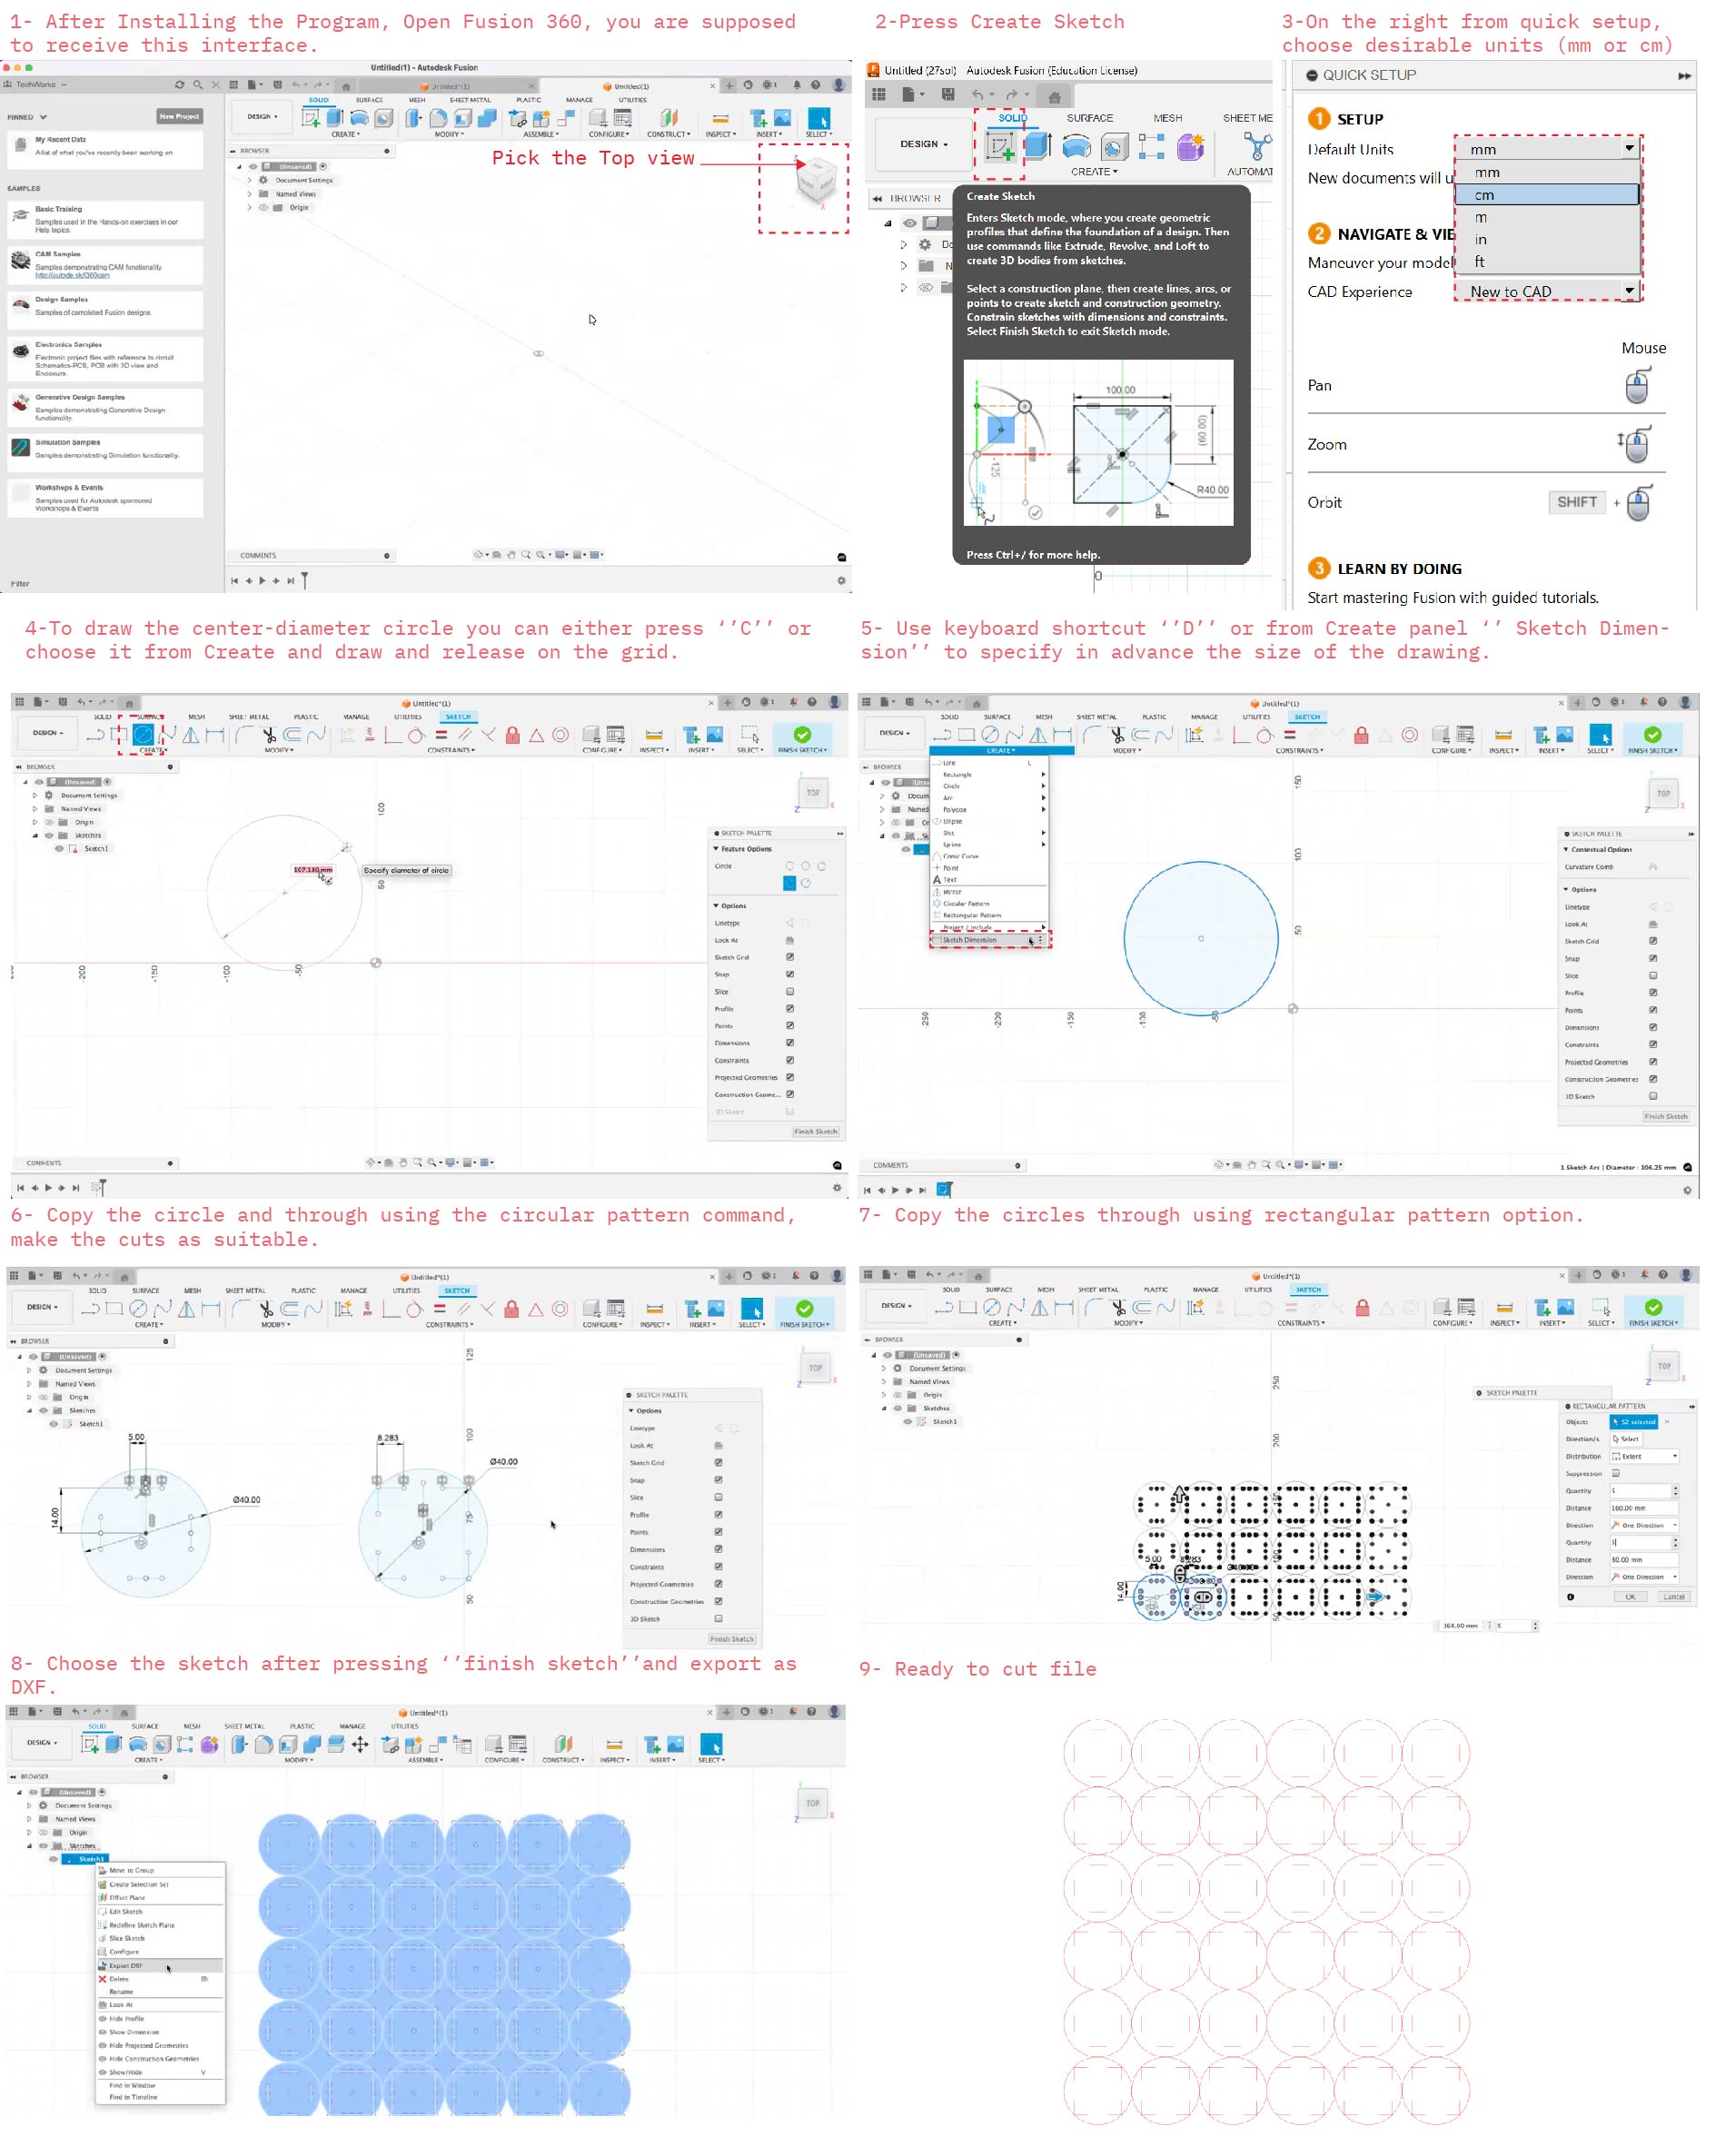
Step 1: 2D Drawing
The PDF test files of the circles and squares were ready done by my Instructor Claudia to test along their interlocking system possibilities, however I will walk it through how they were drawn on Fusion 360:
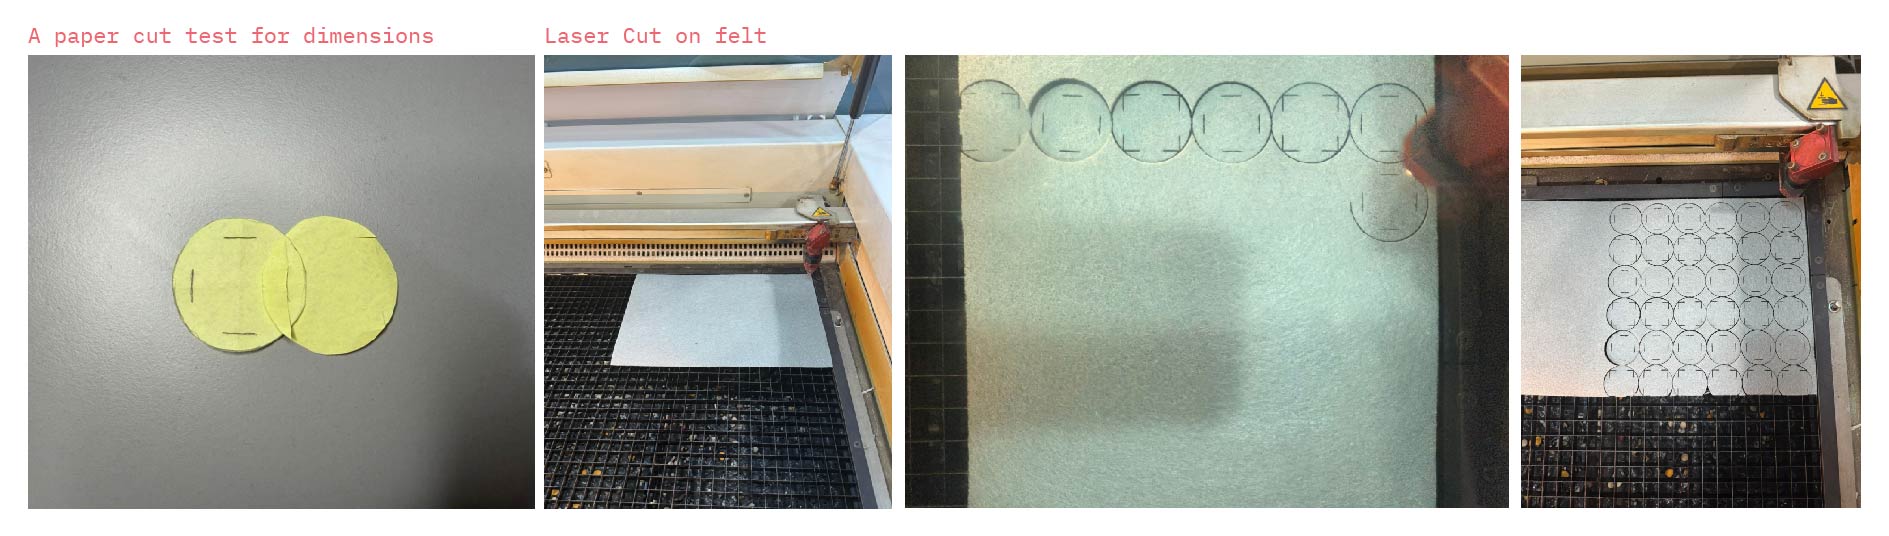
Step 2: From Paper-Cut to Laser-Cut

Laser Cutting Fabric Using Trotec Speedy 400
-
Prepare the fabric : Lay the fabric flat, remove wrinkles, and secure it to prevent shifting.
-
Place a backing if needed: Use paper, cardboard, or transfer tape underneath delicate fabric for stability.
-
Set up the file: Prepare clean vector lines in the design software and assign the correct cut settings.
-
Focus the machine: Place the fabric in the bed and set the correct laser focus.
-
Test settings: Run a small test cut first to check edge quality, burning, and accuracy.
-
Adjust speed and power: Fine-tune settings depending on fabric type, thickness, and desired finish.
-
Start cutting: Run the job while monitoring the machine continuously.
-
Remove the fabric carefully: Lift the cut pieces gently to avoid distortion, especially with delicate textiles.
-
Clean edges if needed: Check for scorching, loose fibers, or incomplete cuts.
Step 3: Testing the Interlocking Possibilities
IV. Design and Ideation (Week Assignments)
1. Olive Stitch Leather Purse
A. Concept
Building on the concept developed during Digital Bodies Week, I returned to the olive tree as a central symbol. In this iteration, I translated the olive tree motif from traditional Palestinian embroidery into a laser-cut bag design, reimagining the stitch itself without the use of actual stitching.

B. Material Choice
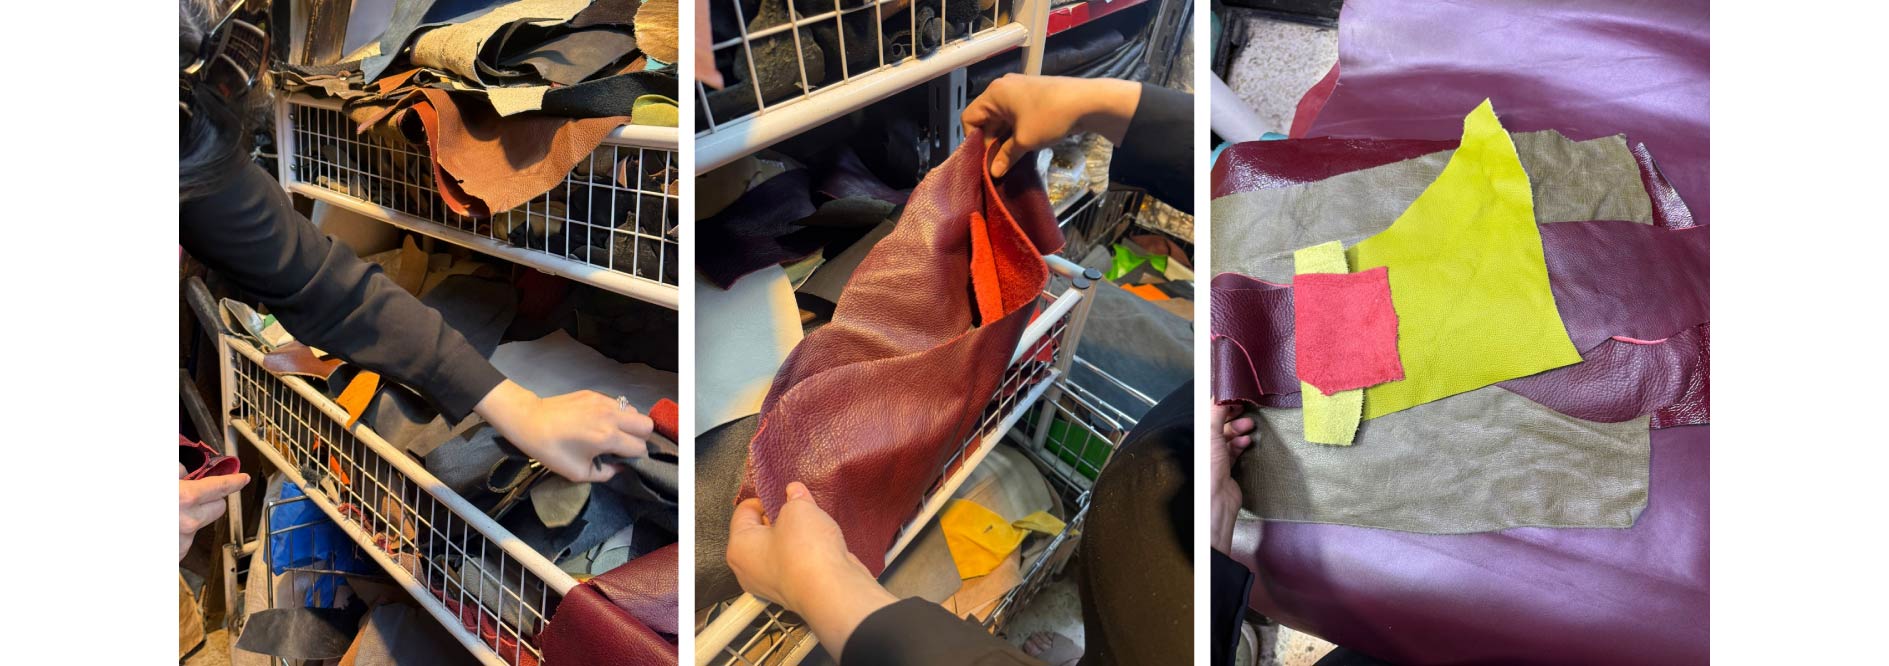
I chose leather as the primary material and prototyped the bag in felt, sourcing mostly second-hand and leftover leather pieces from local leather stores.
C. Design and Fabrication Process
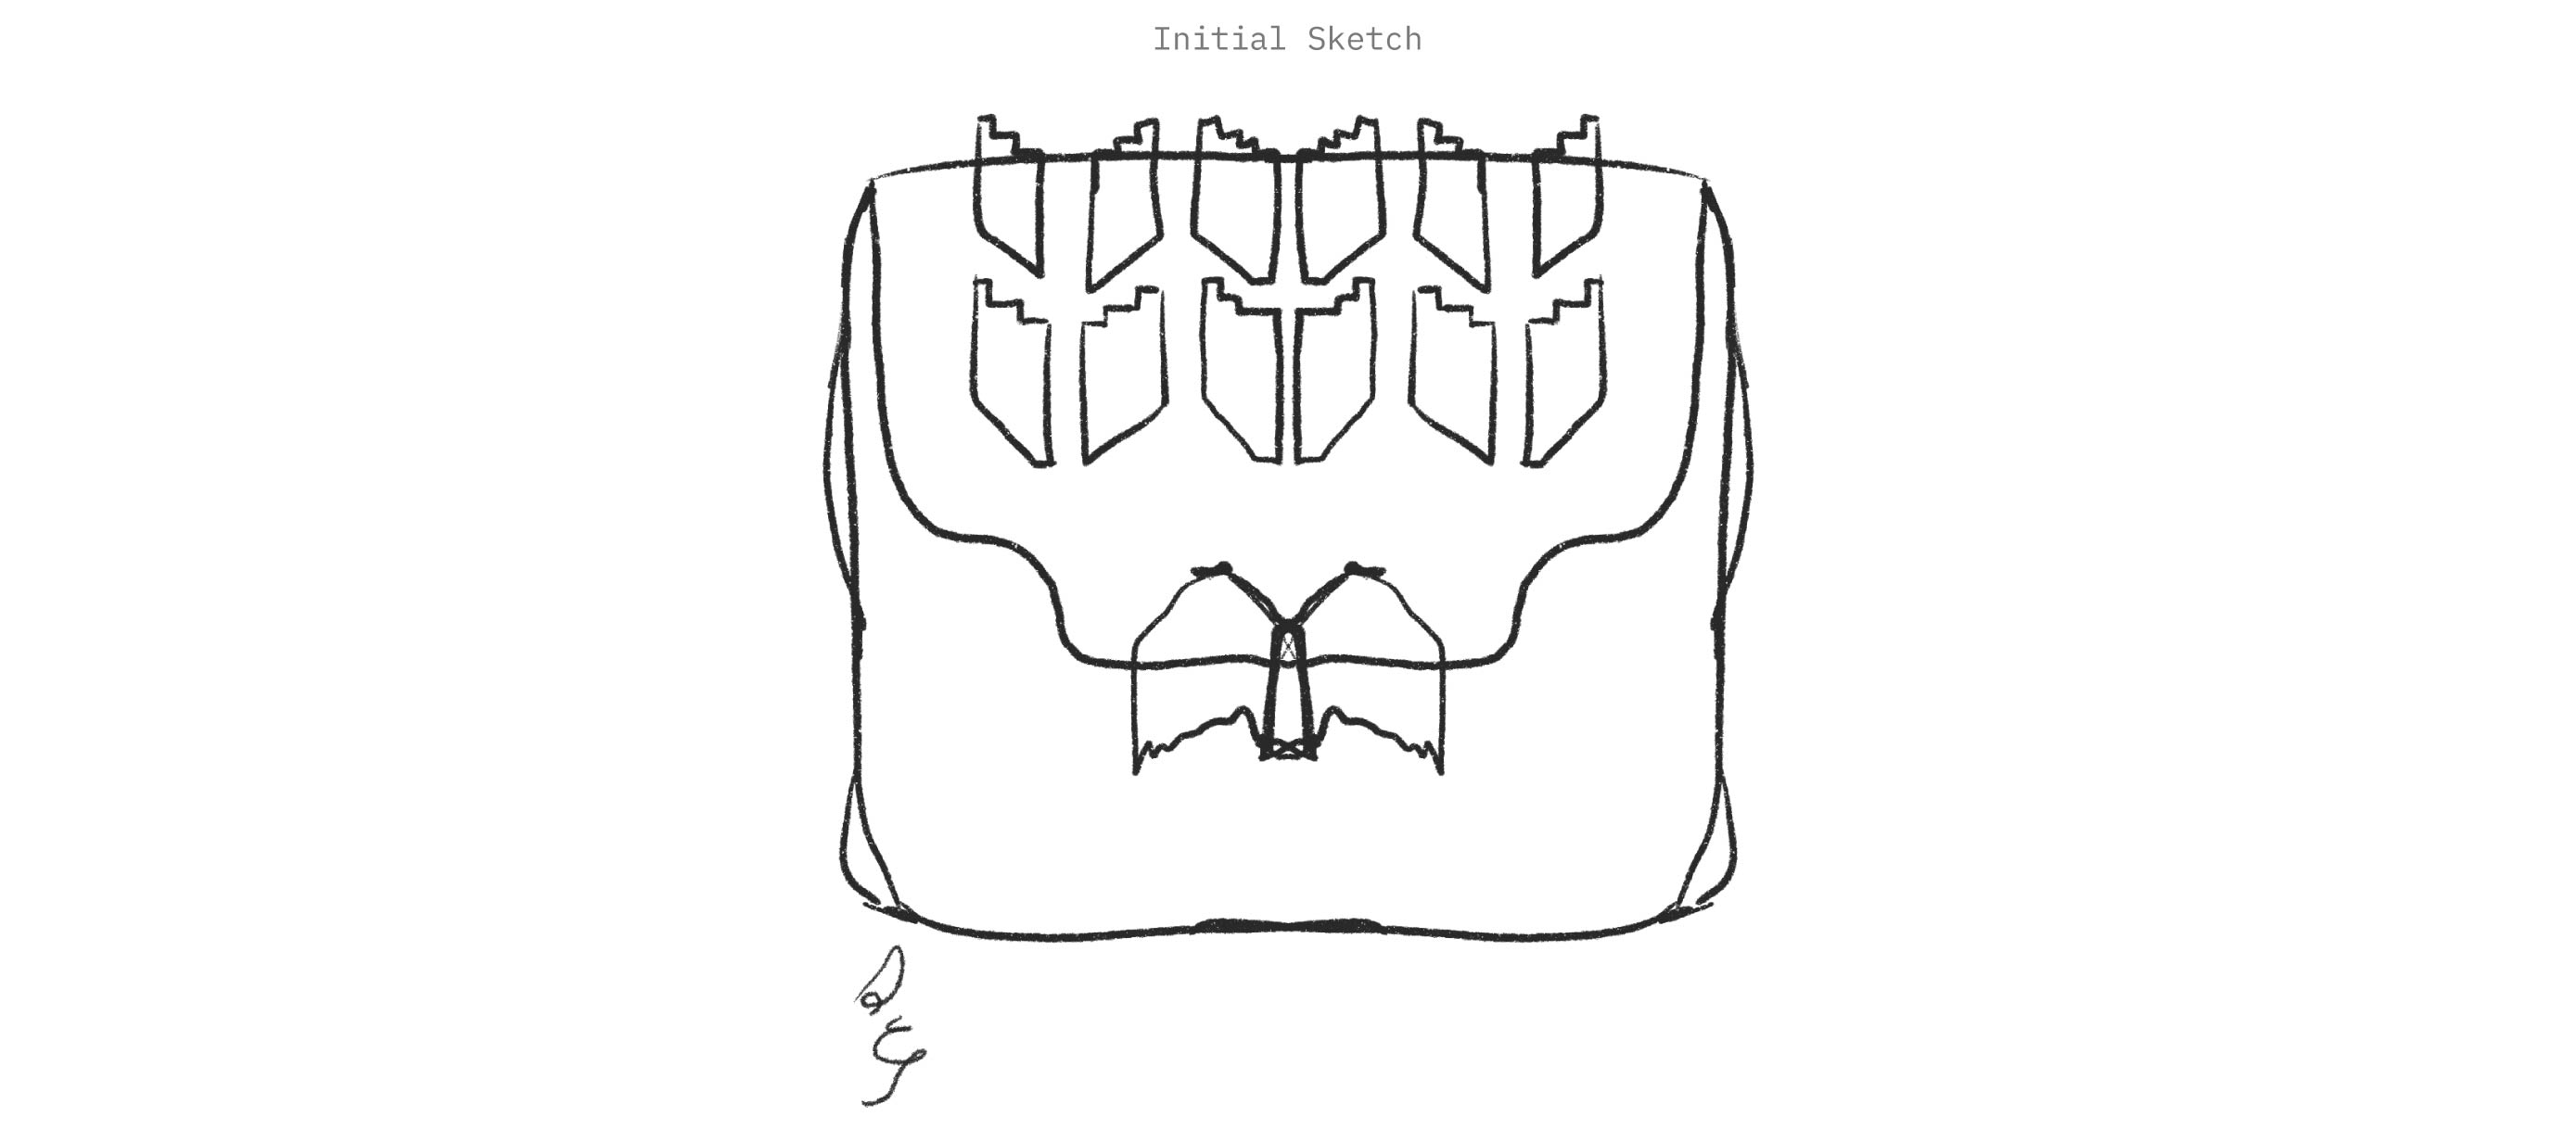
- The process began with an initial sketch exploring a purse concept.
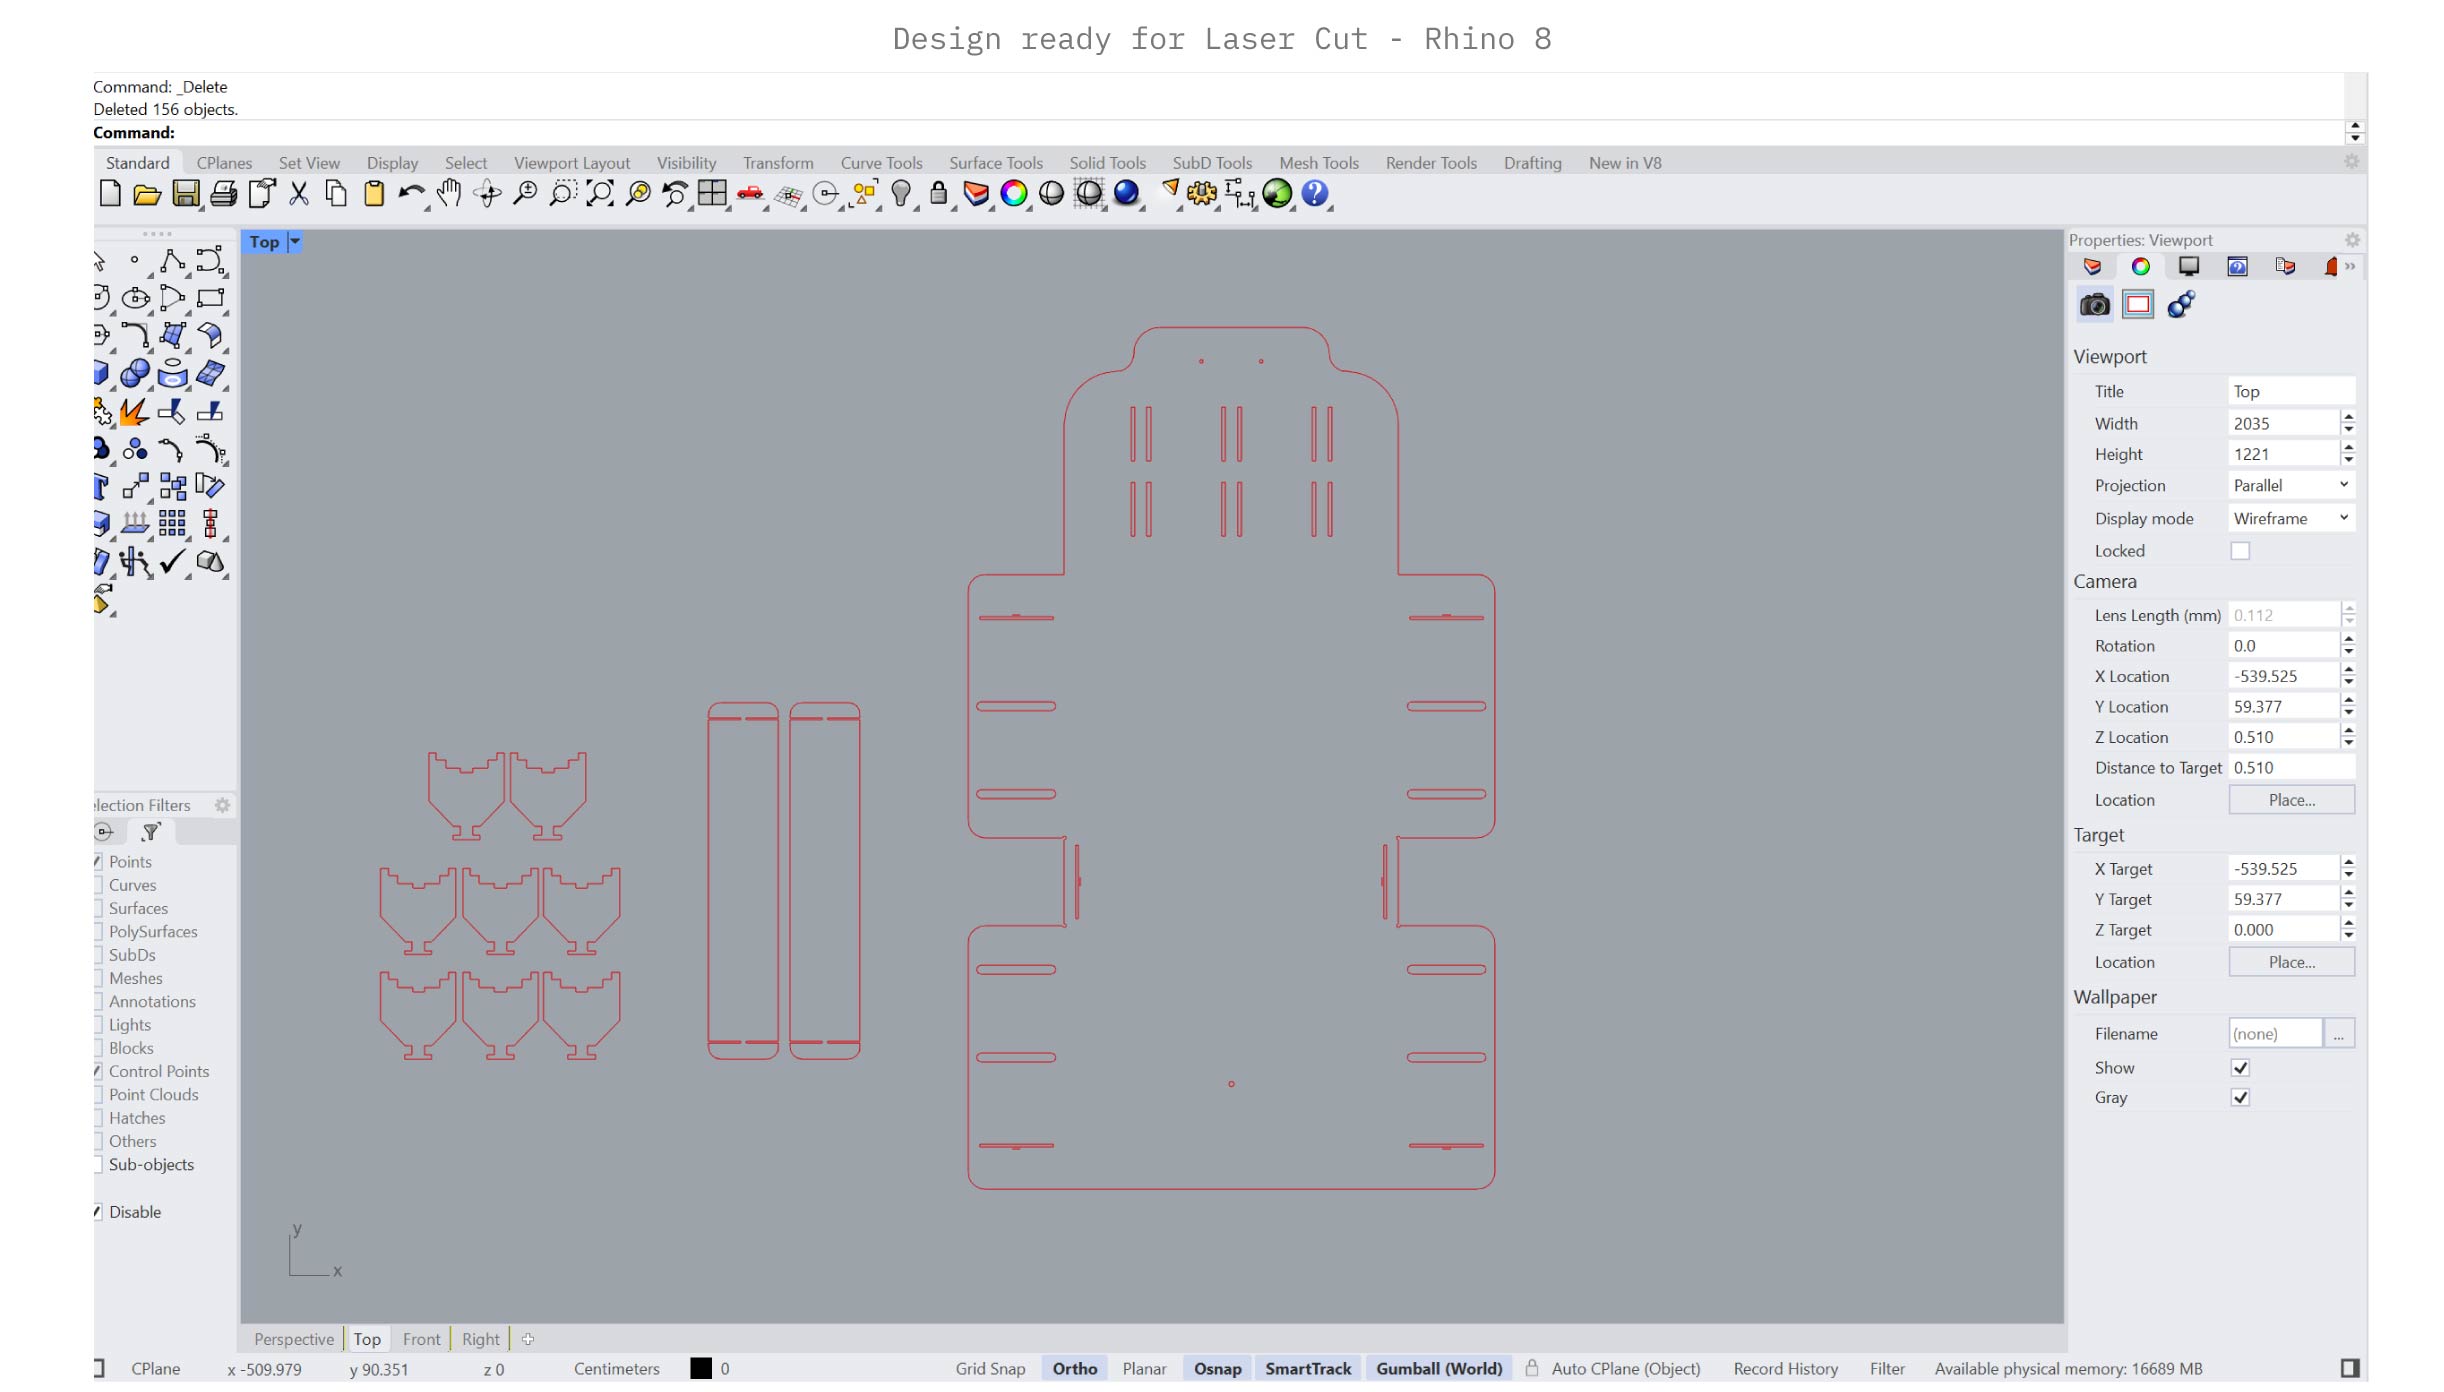
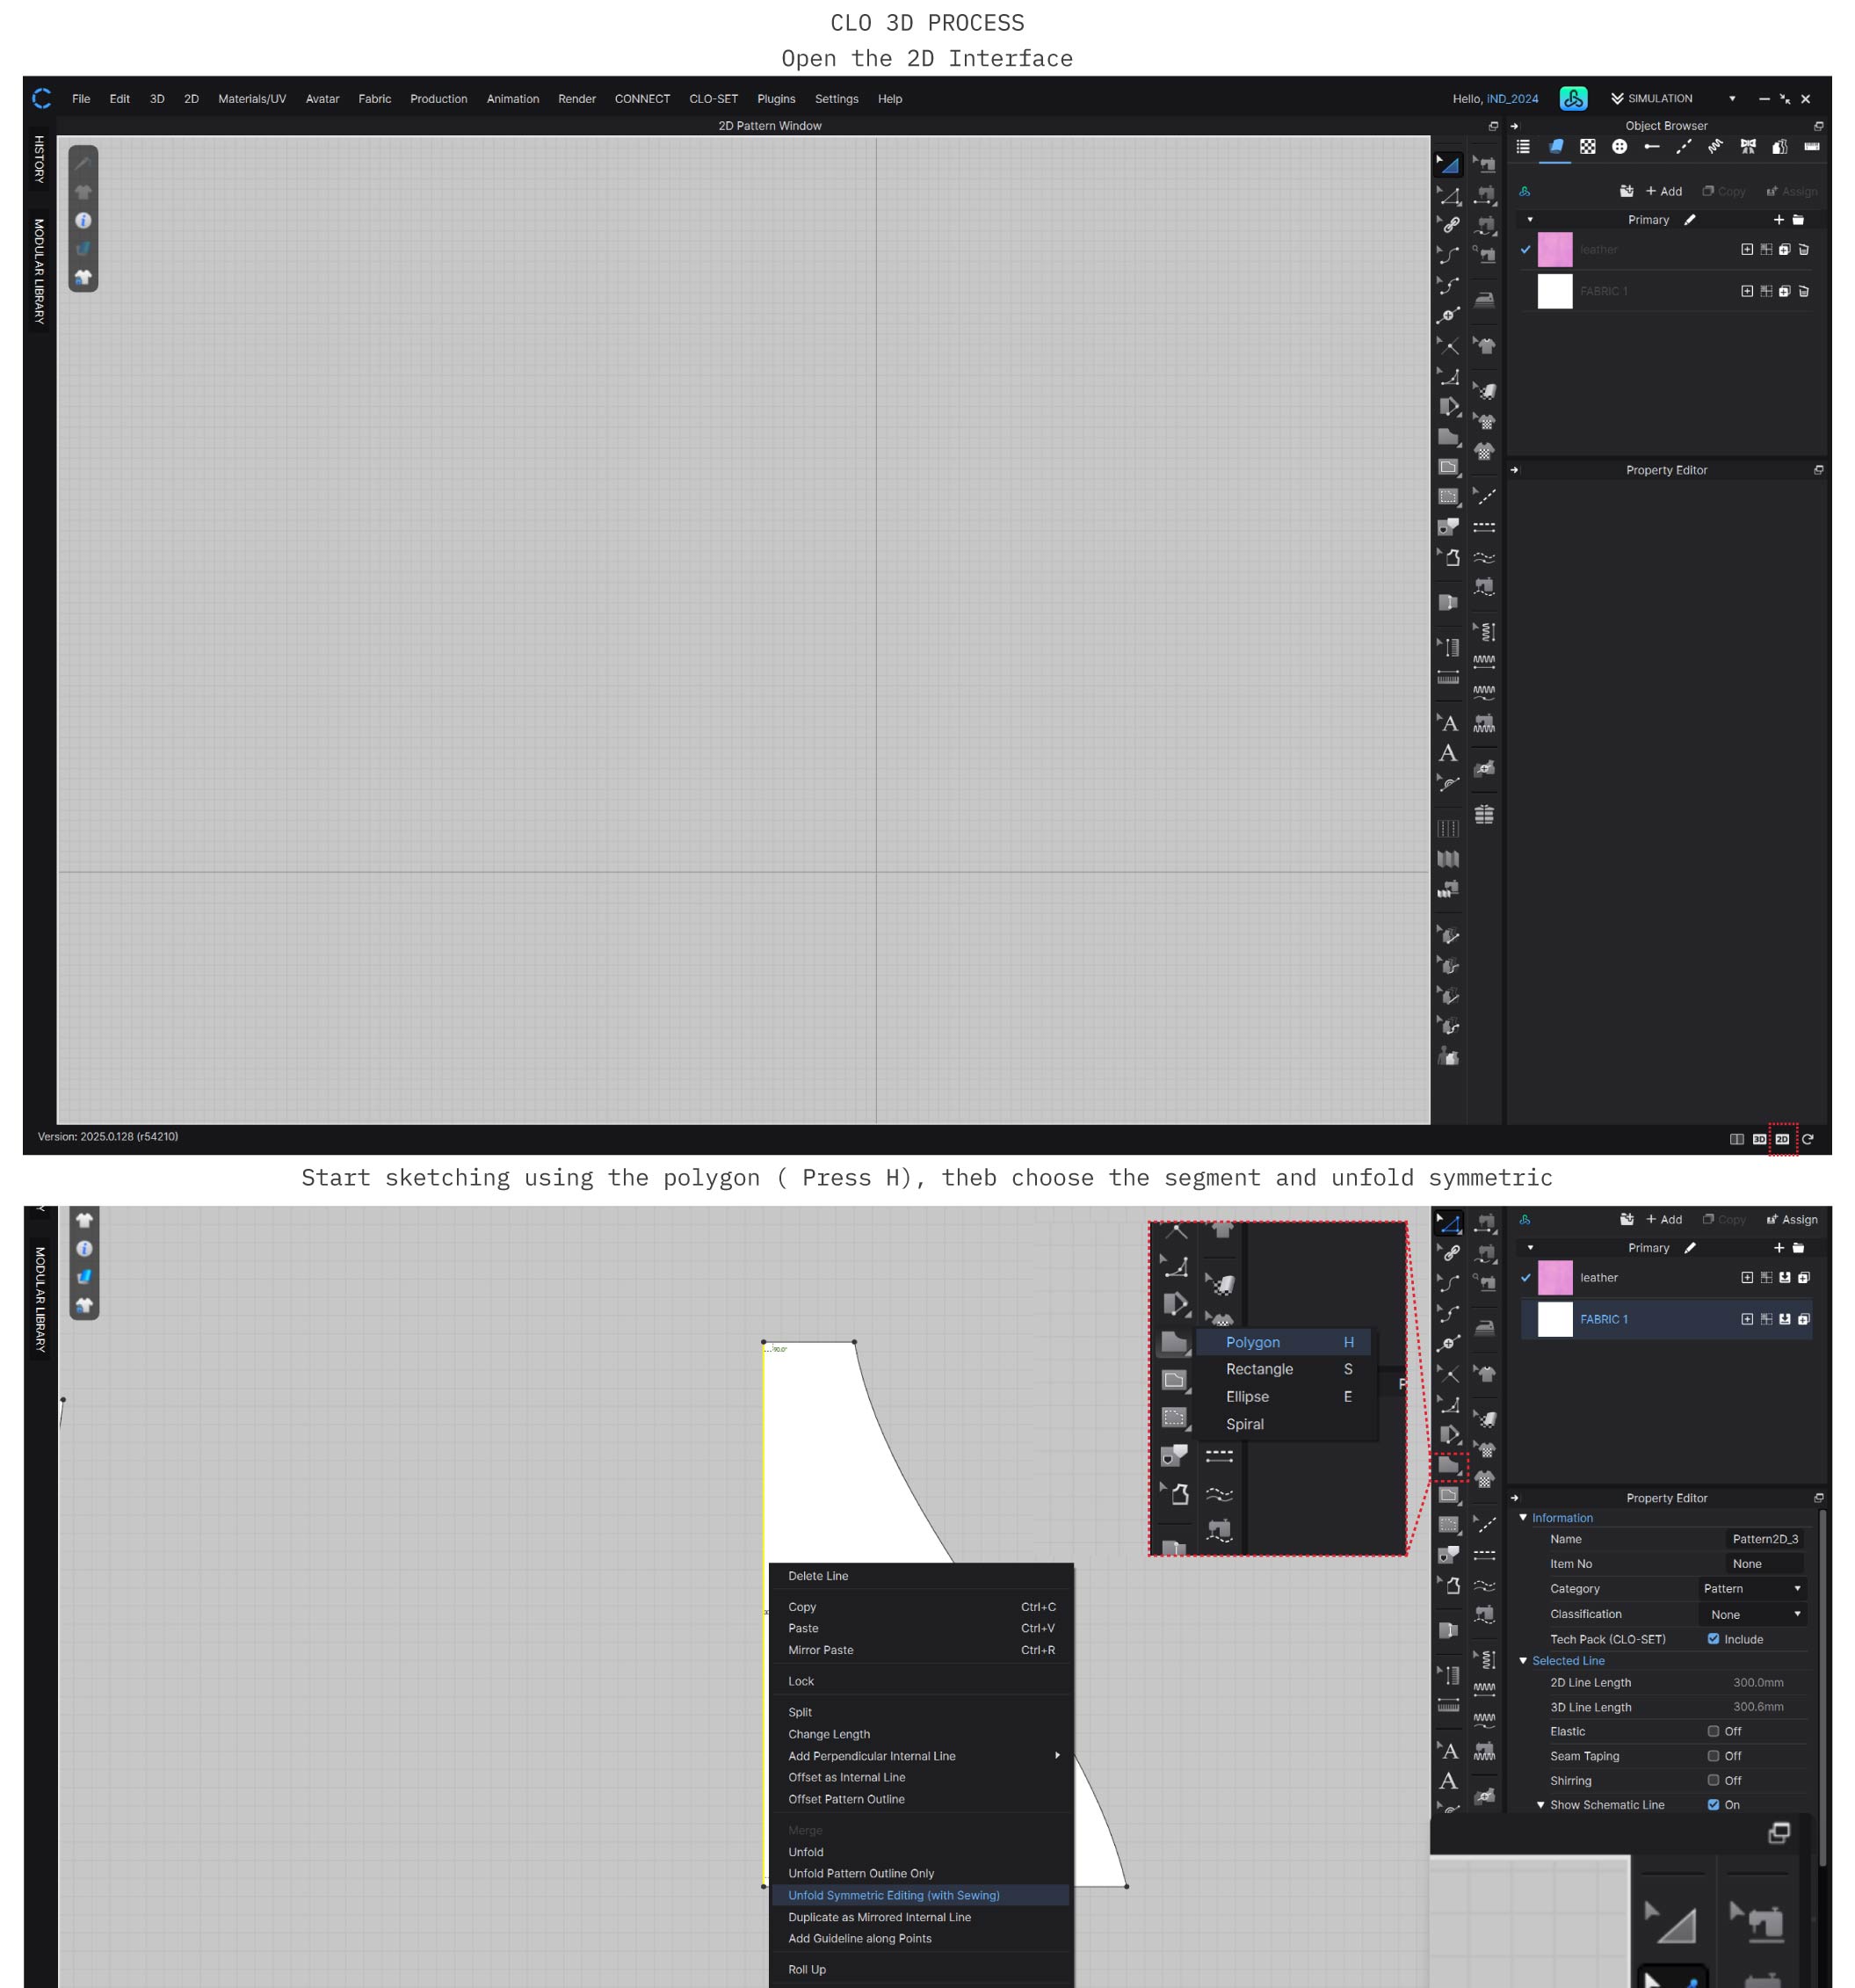
- Preparing a full ready-to-cut design drawing on Rhino:
The bag was designed in Rhino by first creating the main 2D silhouette in Top View using tools such as Polyline, Line, Arc, and Fillet to achieve smooth rounded edges. Symmetrical elements were generated using Mirror.
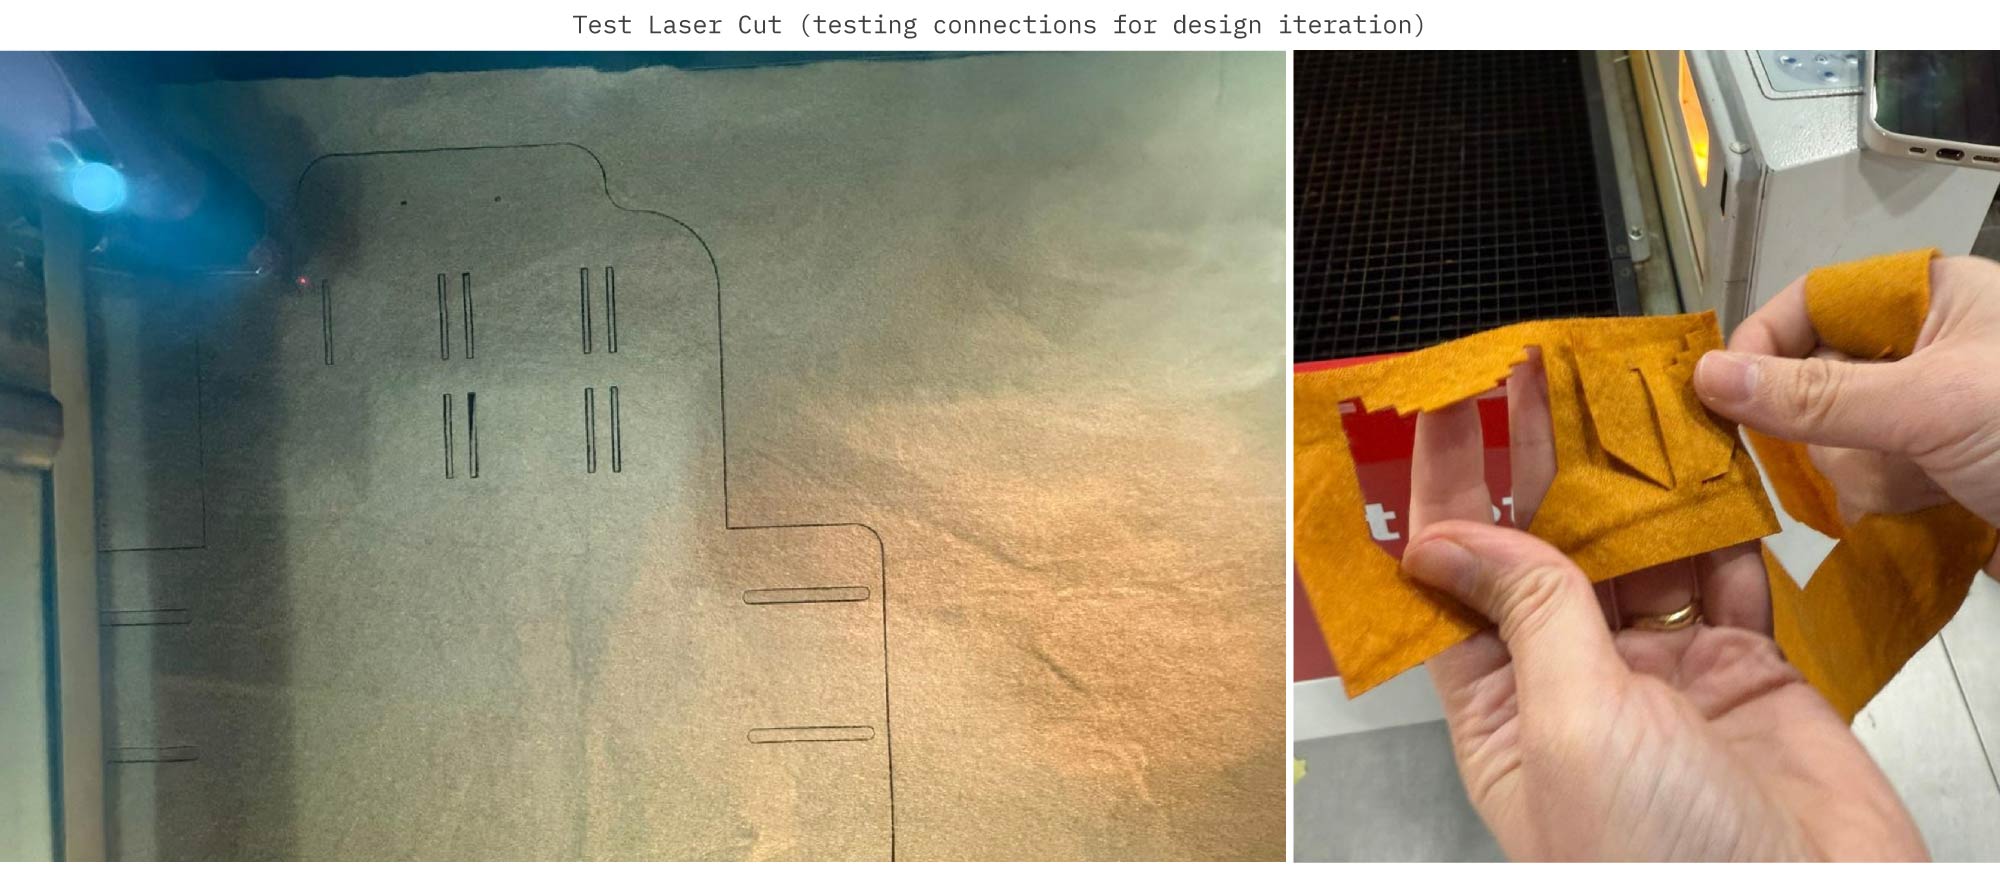
- Run a test laser cut of the pattern to test connections using felt:
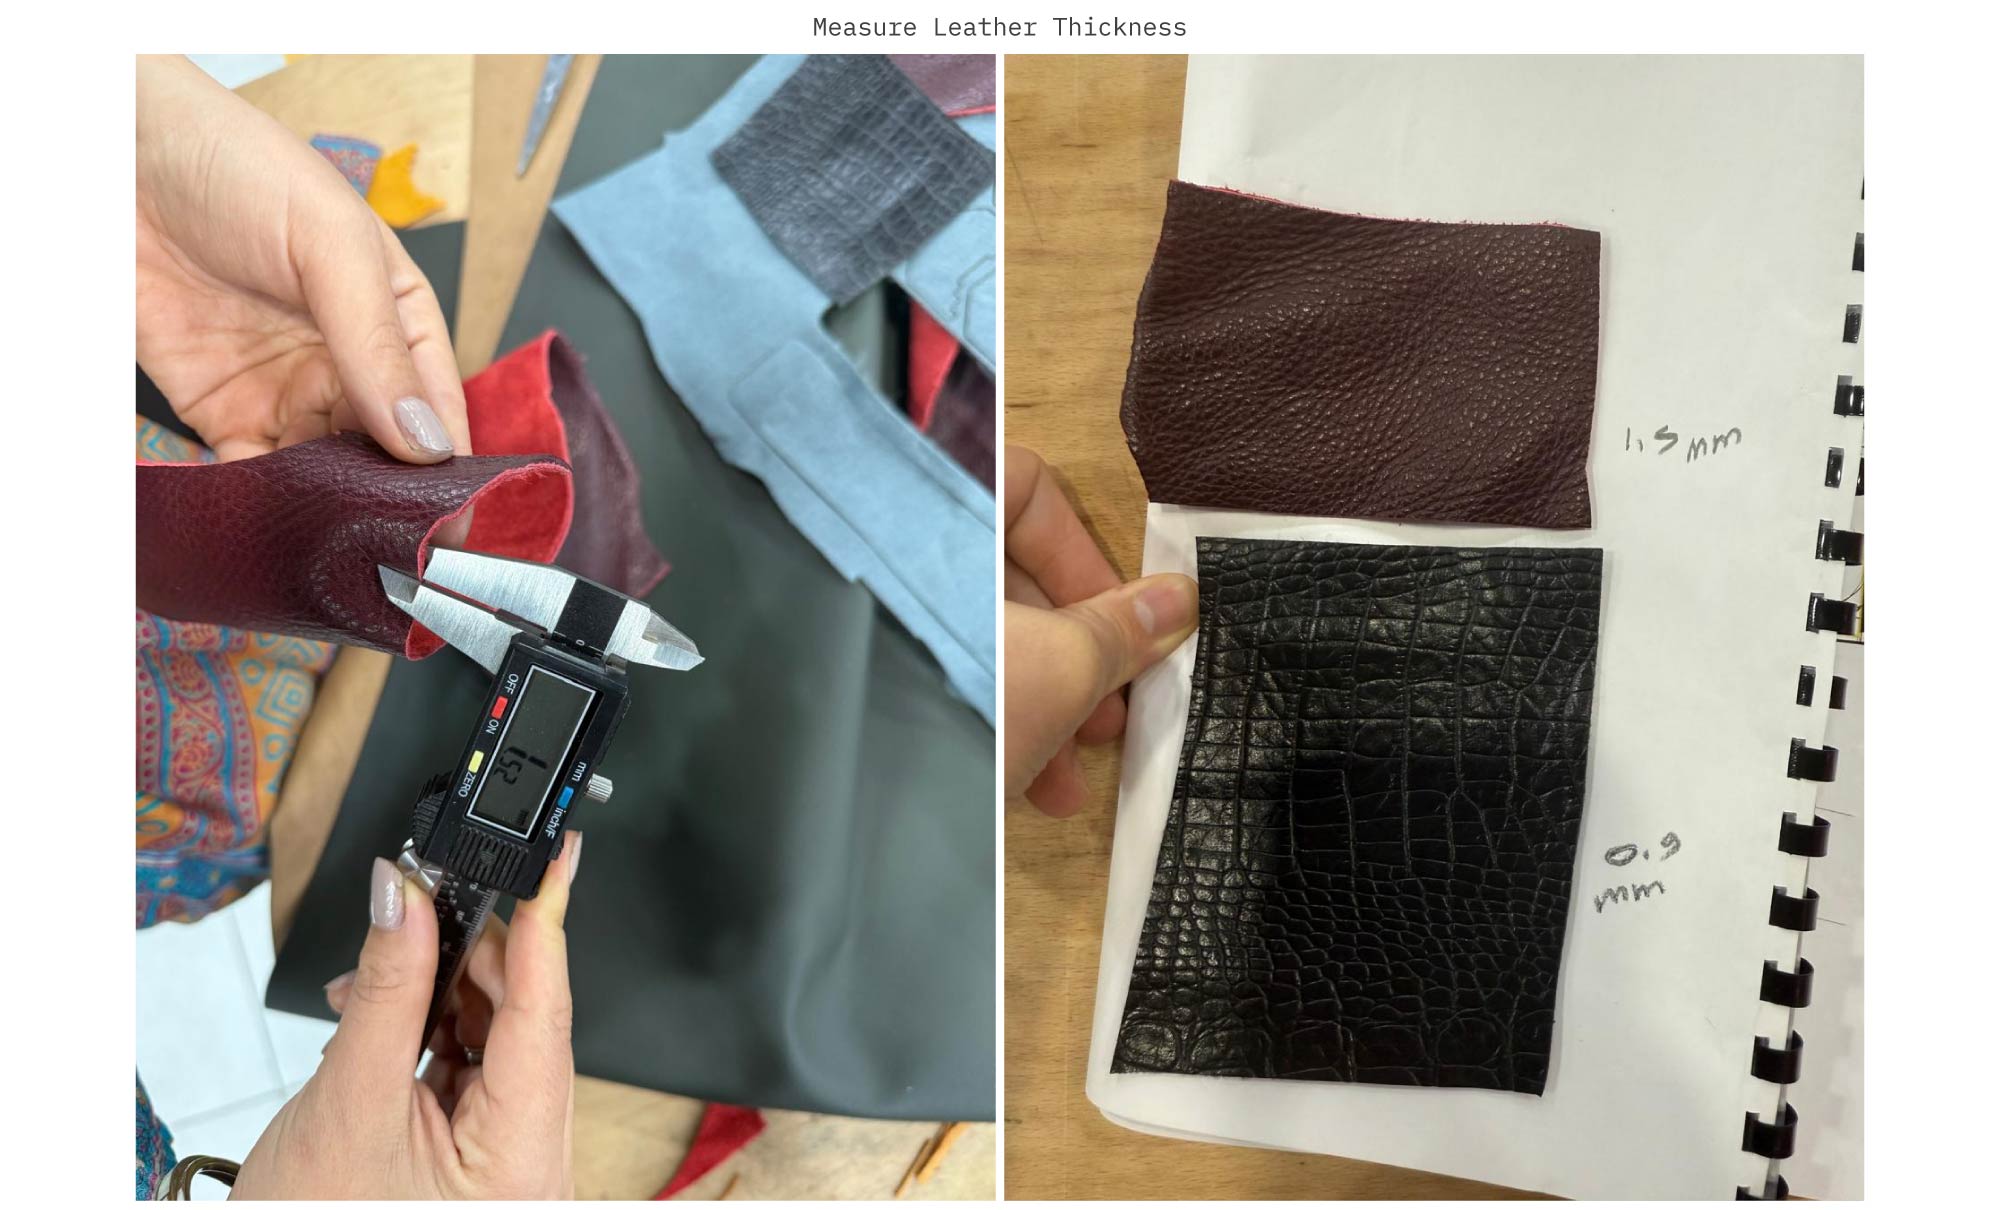
- Measure the fabric thickness:
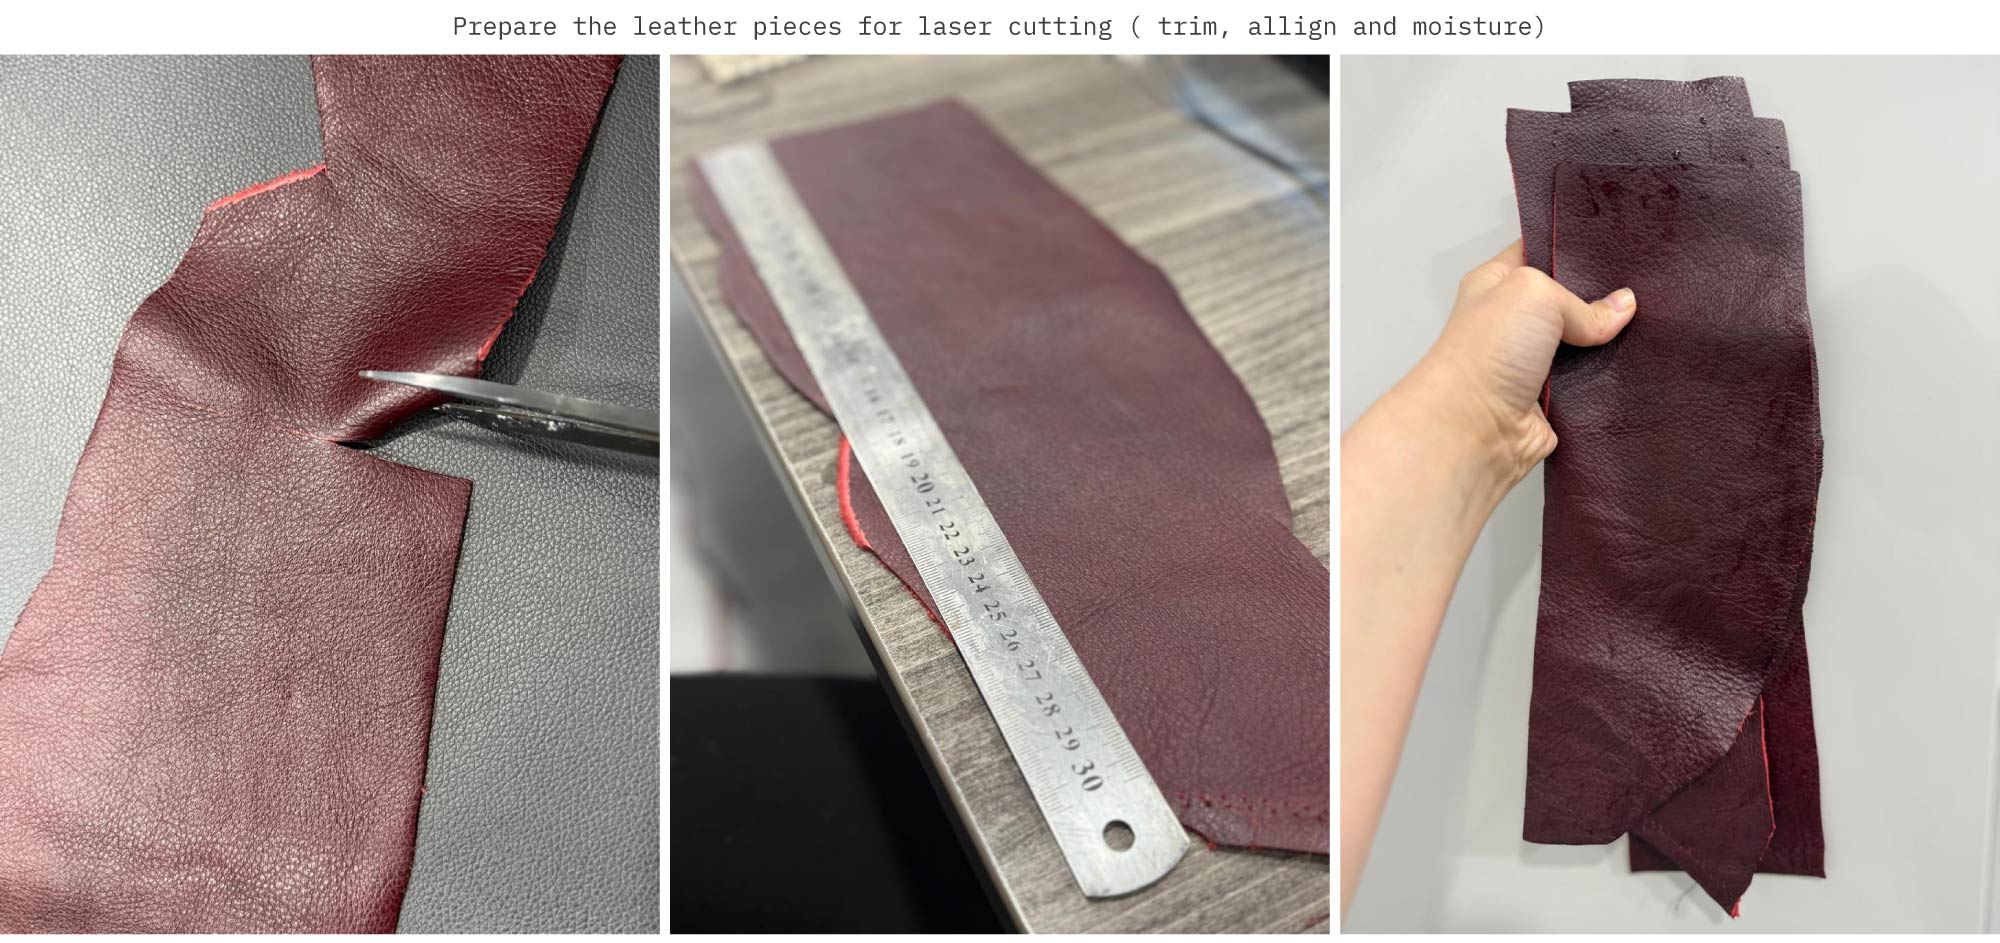
- Prepare the leather (trim,allign and moisture):
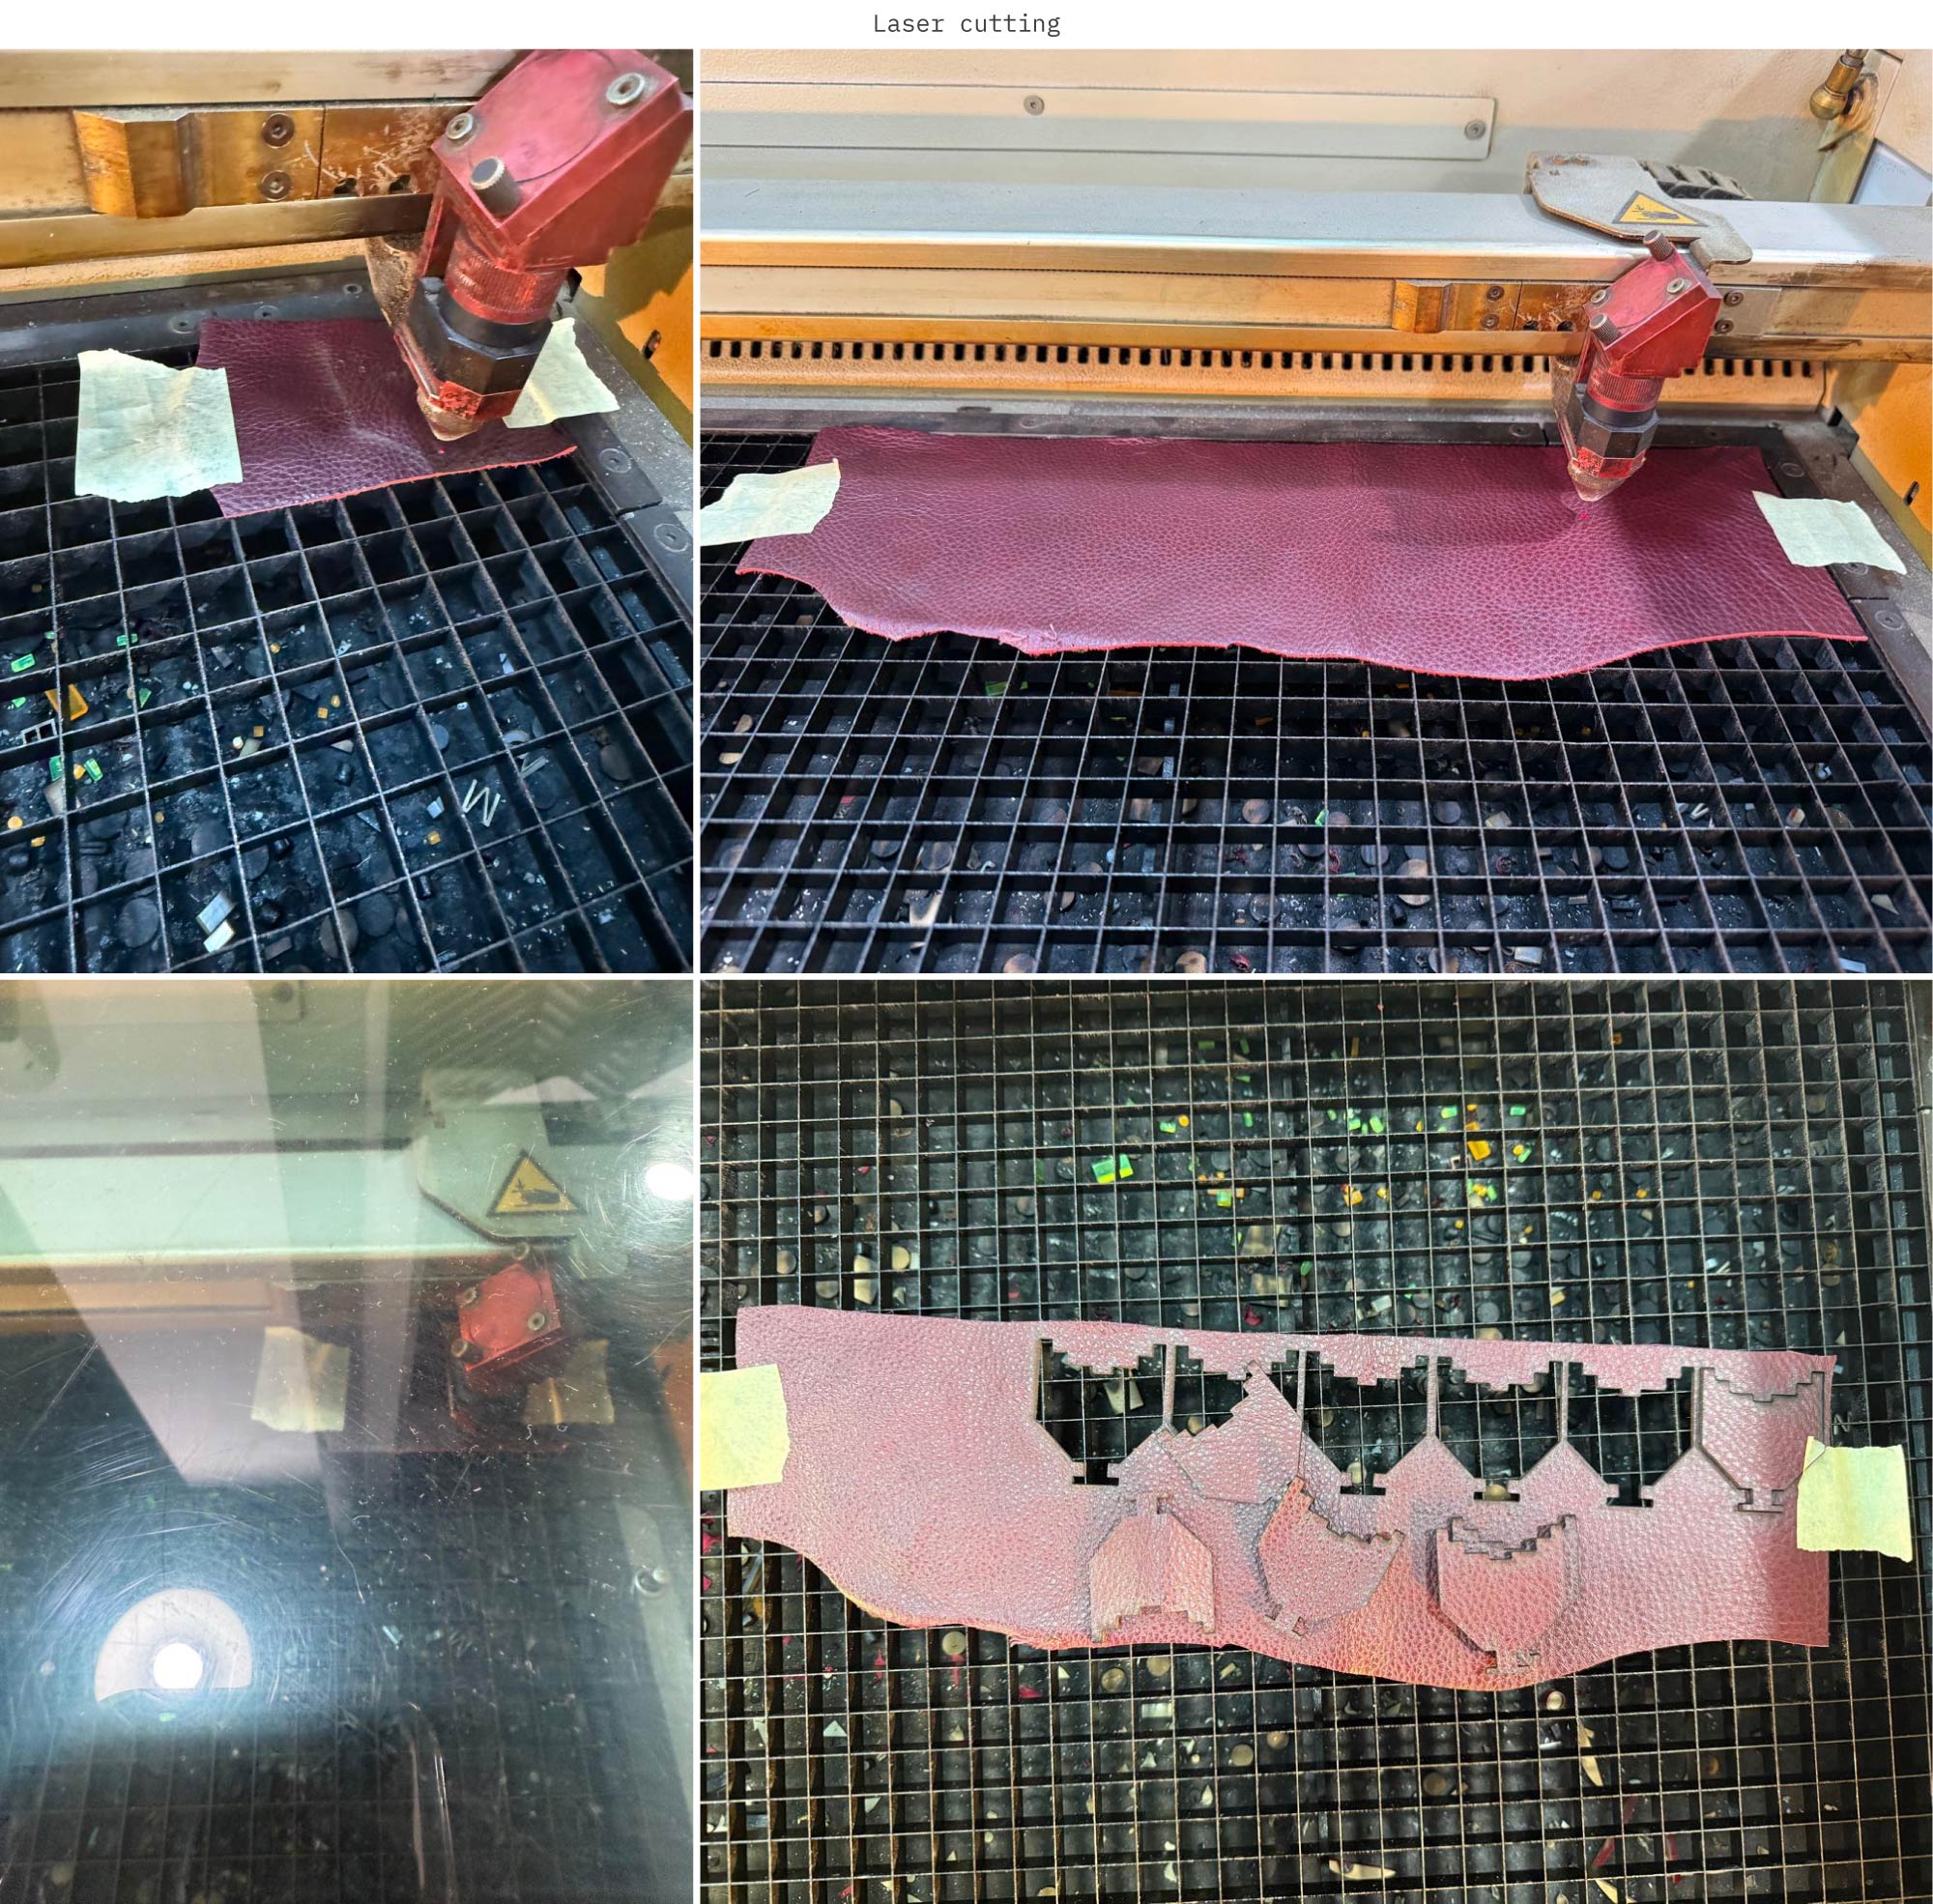
- Laser Cut the pieces:
Laser Cutting Settings
Black 0.9 mm Leather: Power:100 - Speed:1.9 - PPI/HZ:1000
Maroon 1.5 mm Leather: Power:80 - Speed:2.4 - PPI/HZ:1000
Notes when Laser Cutting Leather
Secure and flatten the leather to prevent movement.
Slightly moisten if needed to reduce burning and edge charring.
Expect darkened edges; clean or sand if required.
Test patterns on felt first.
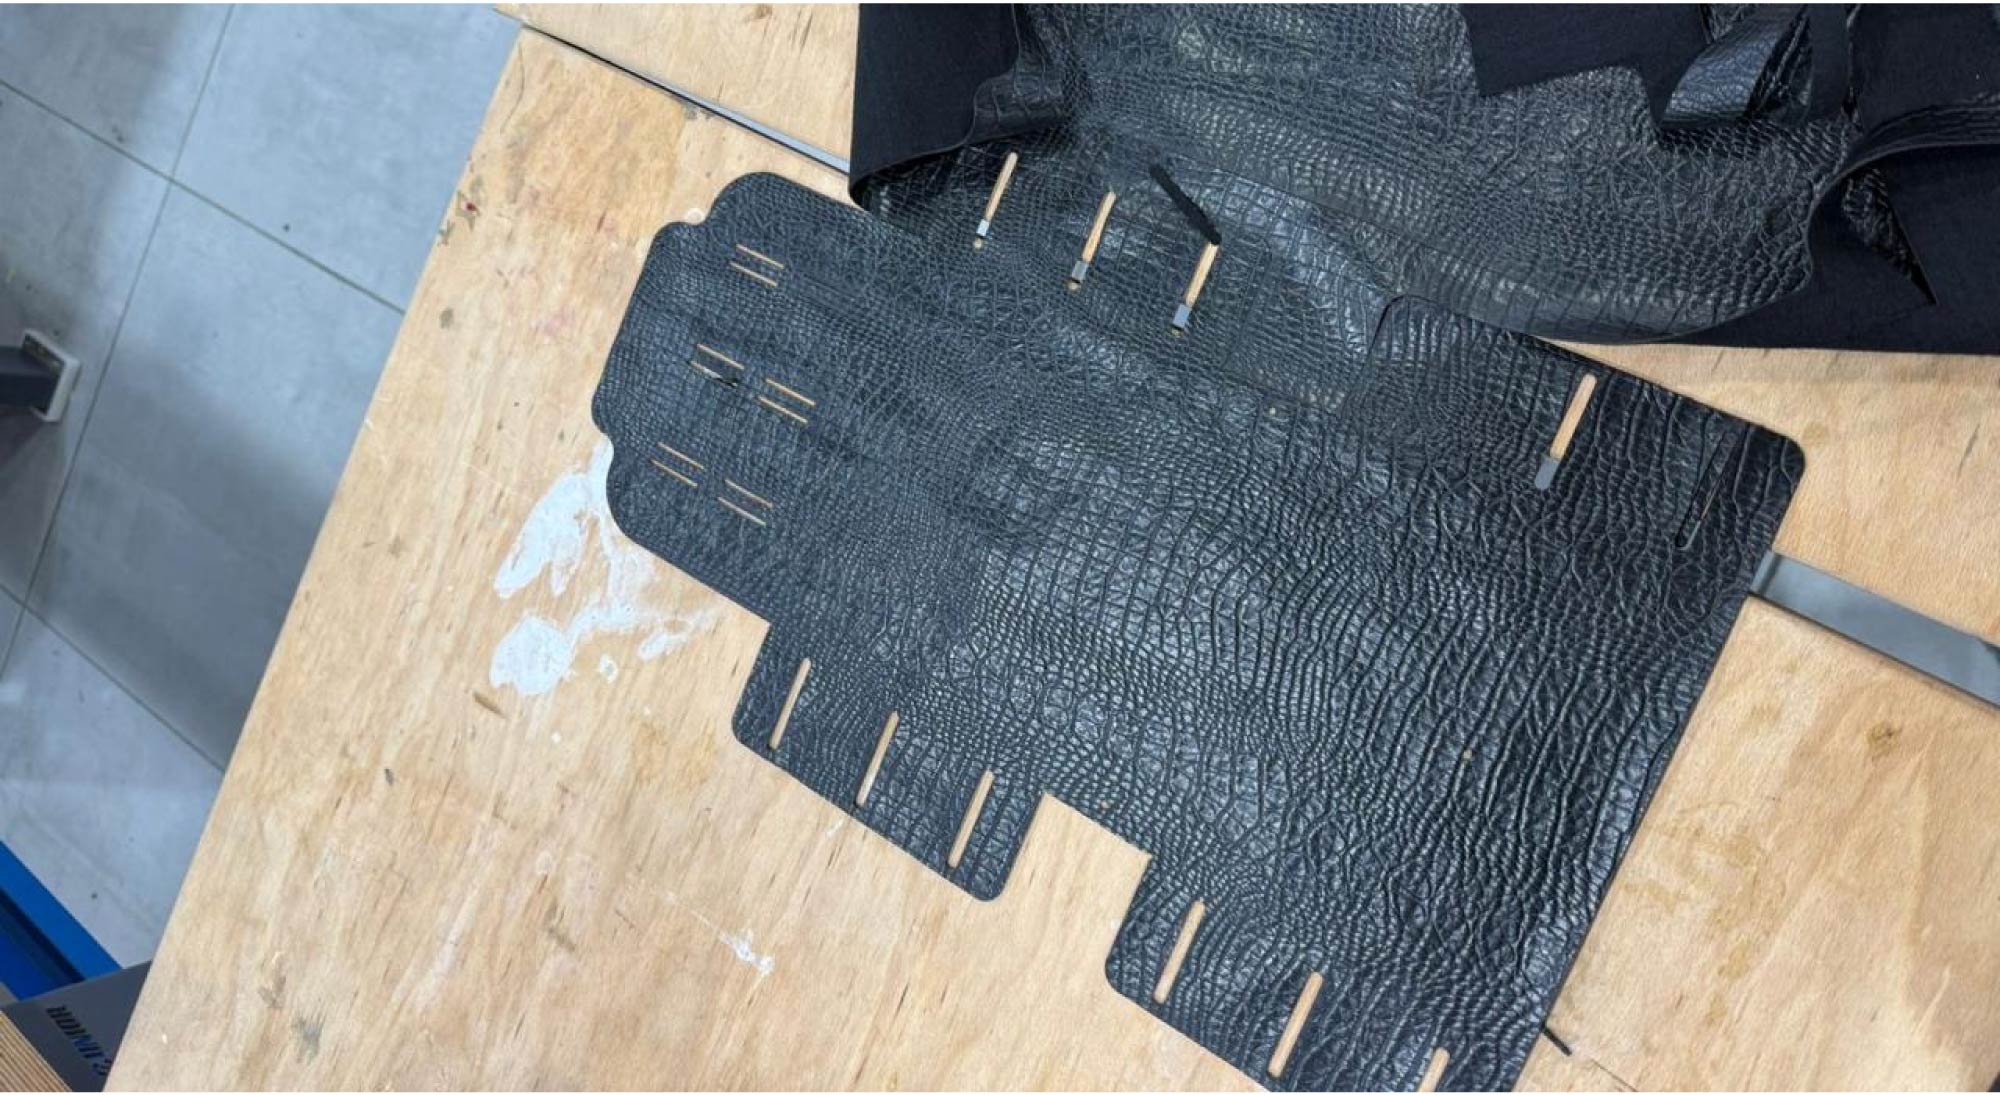
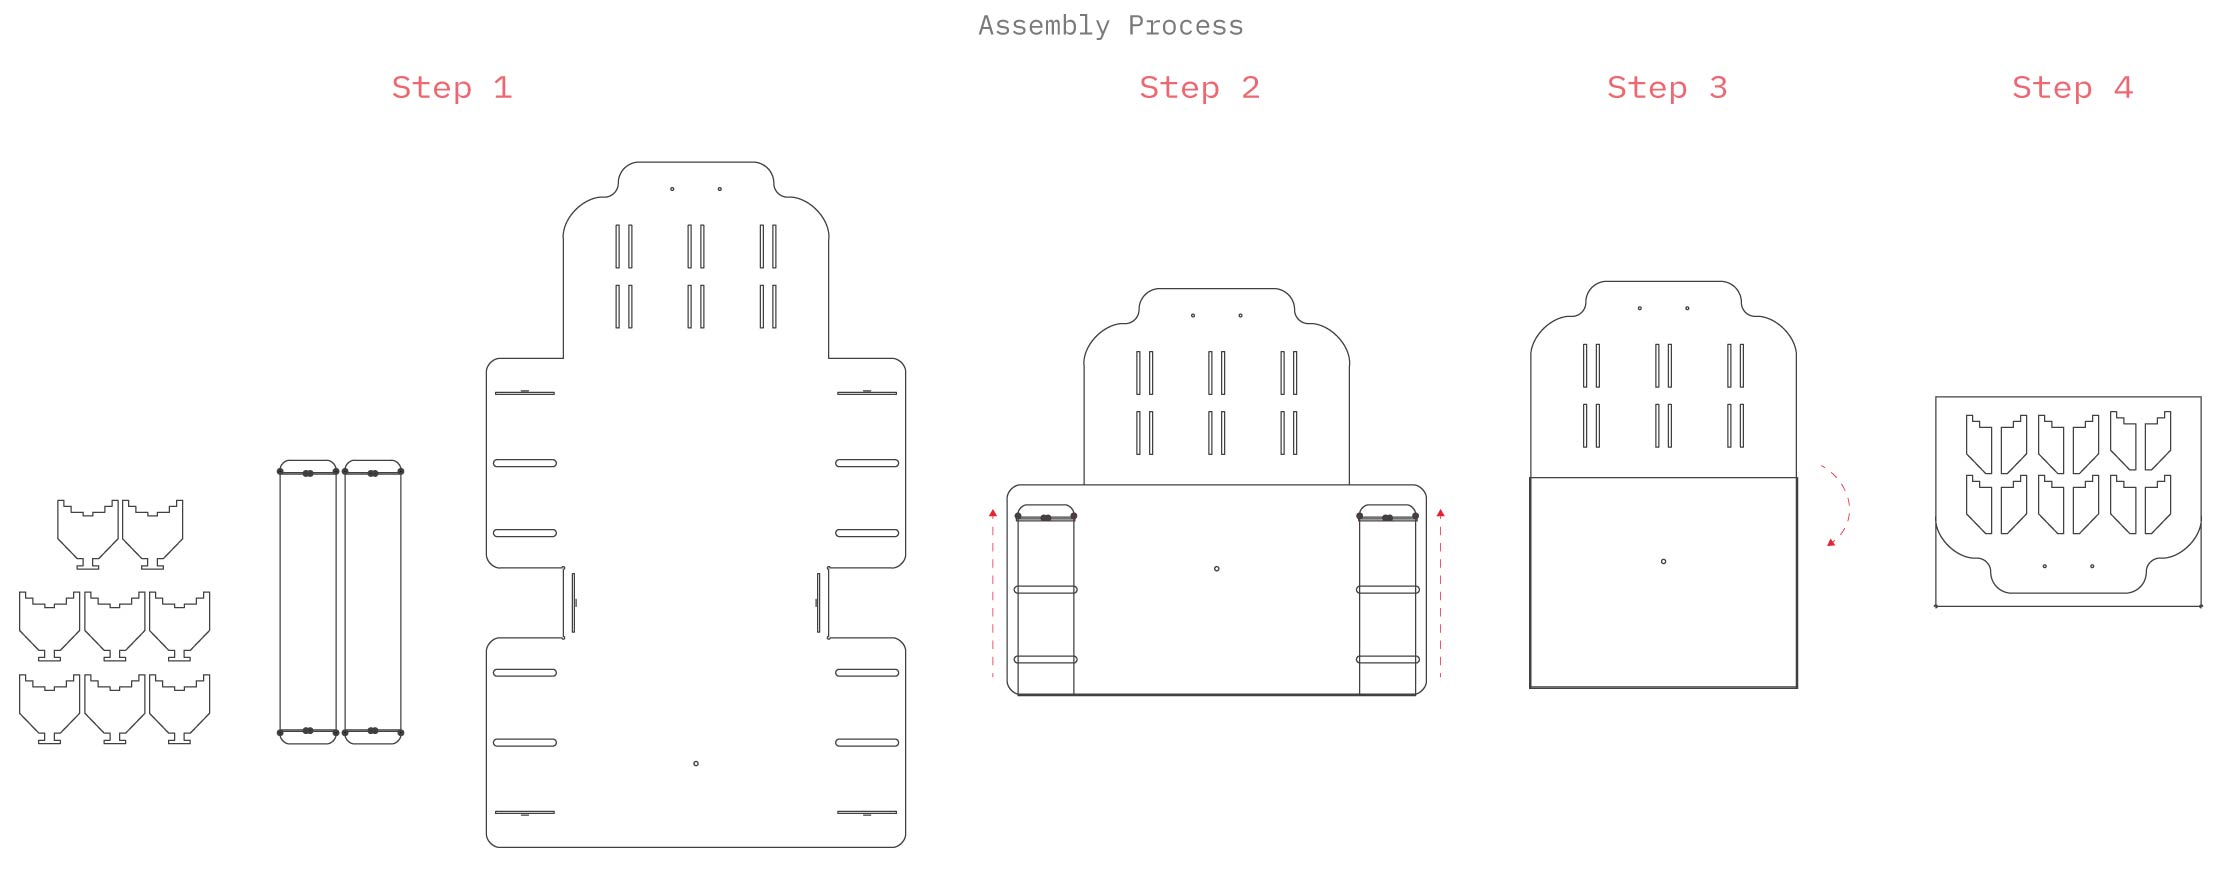
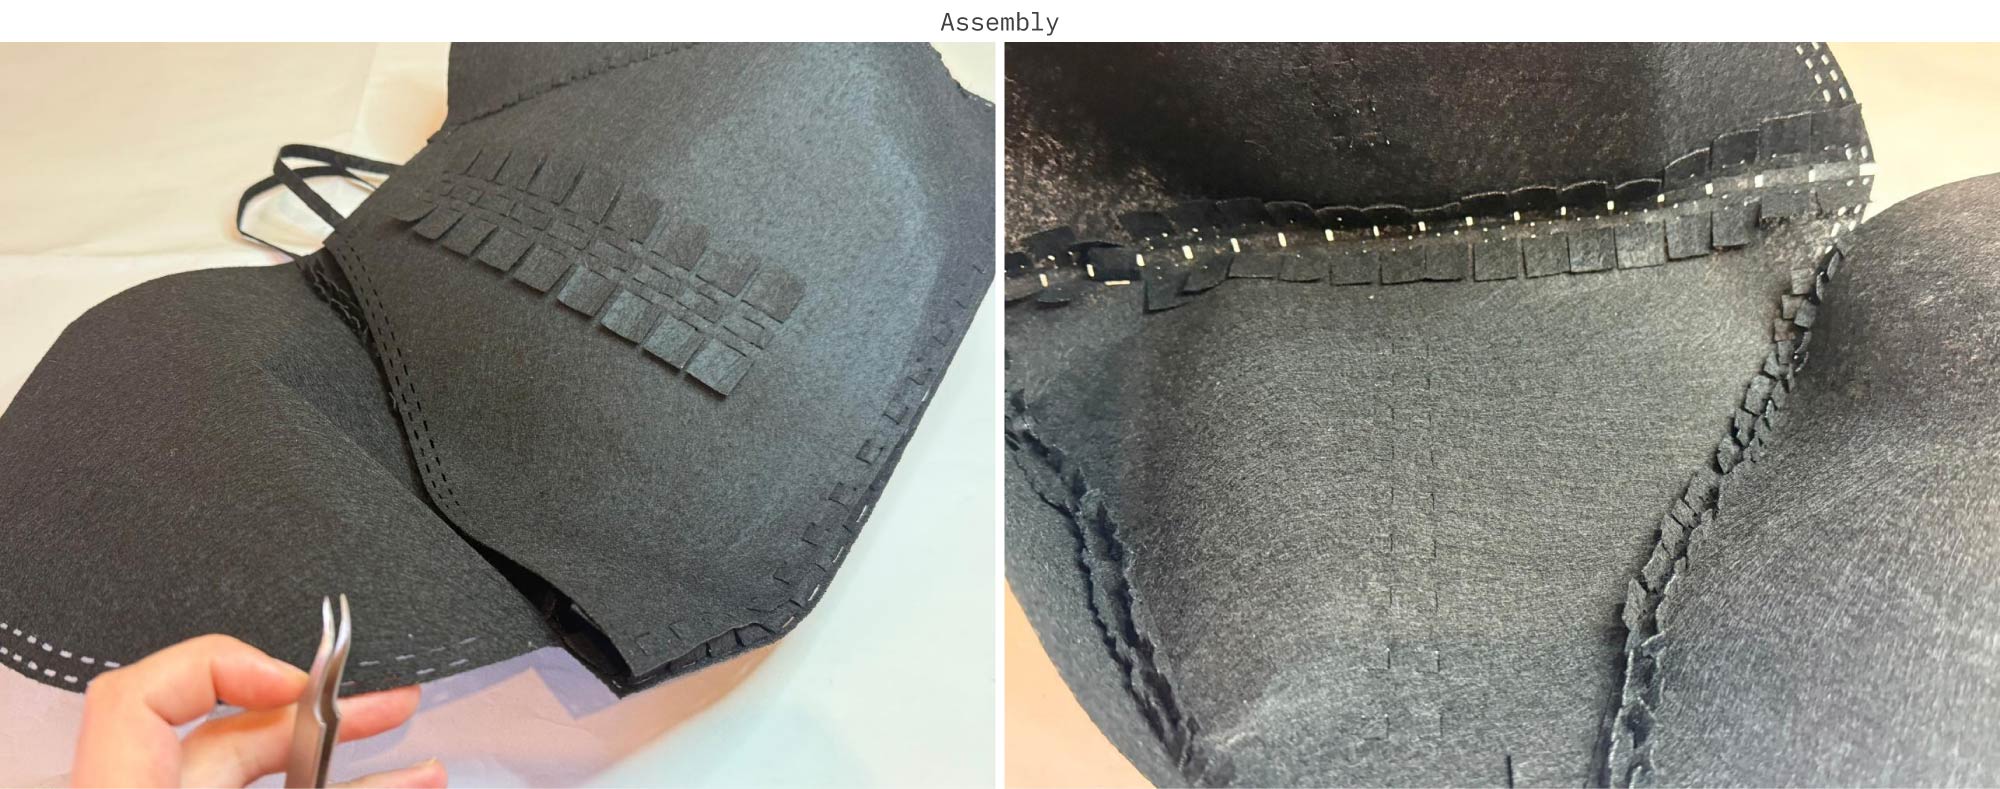
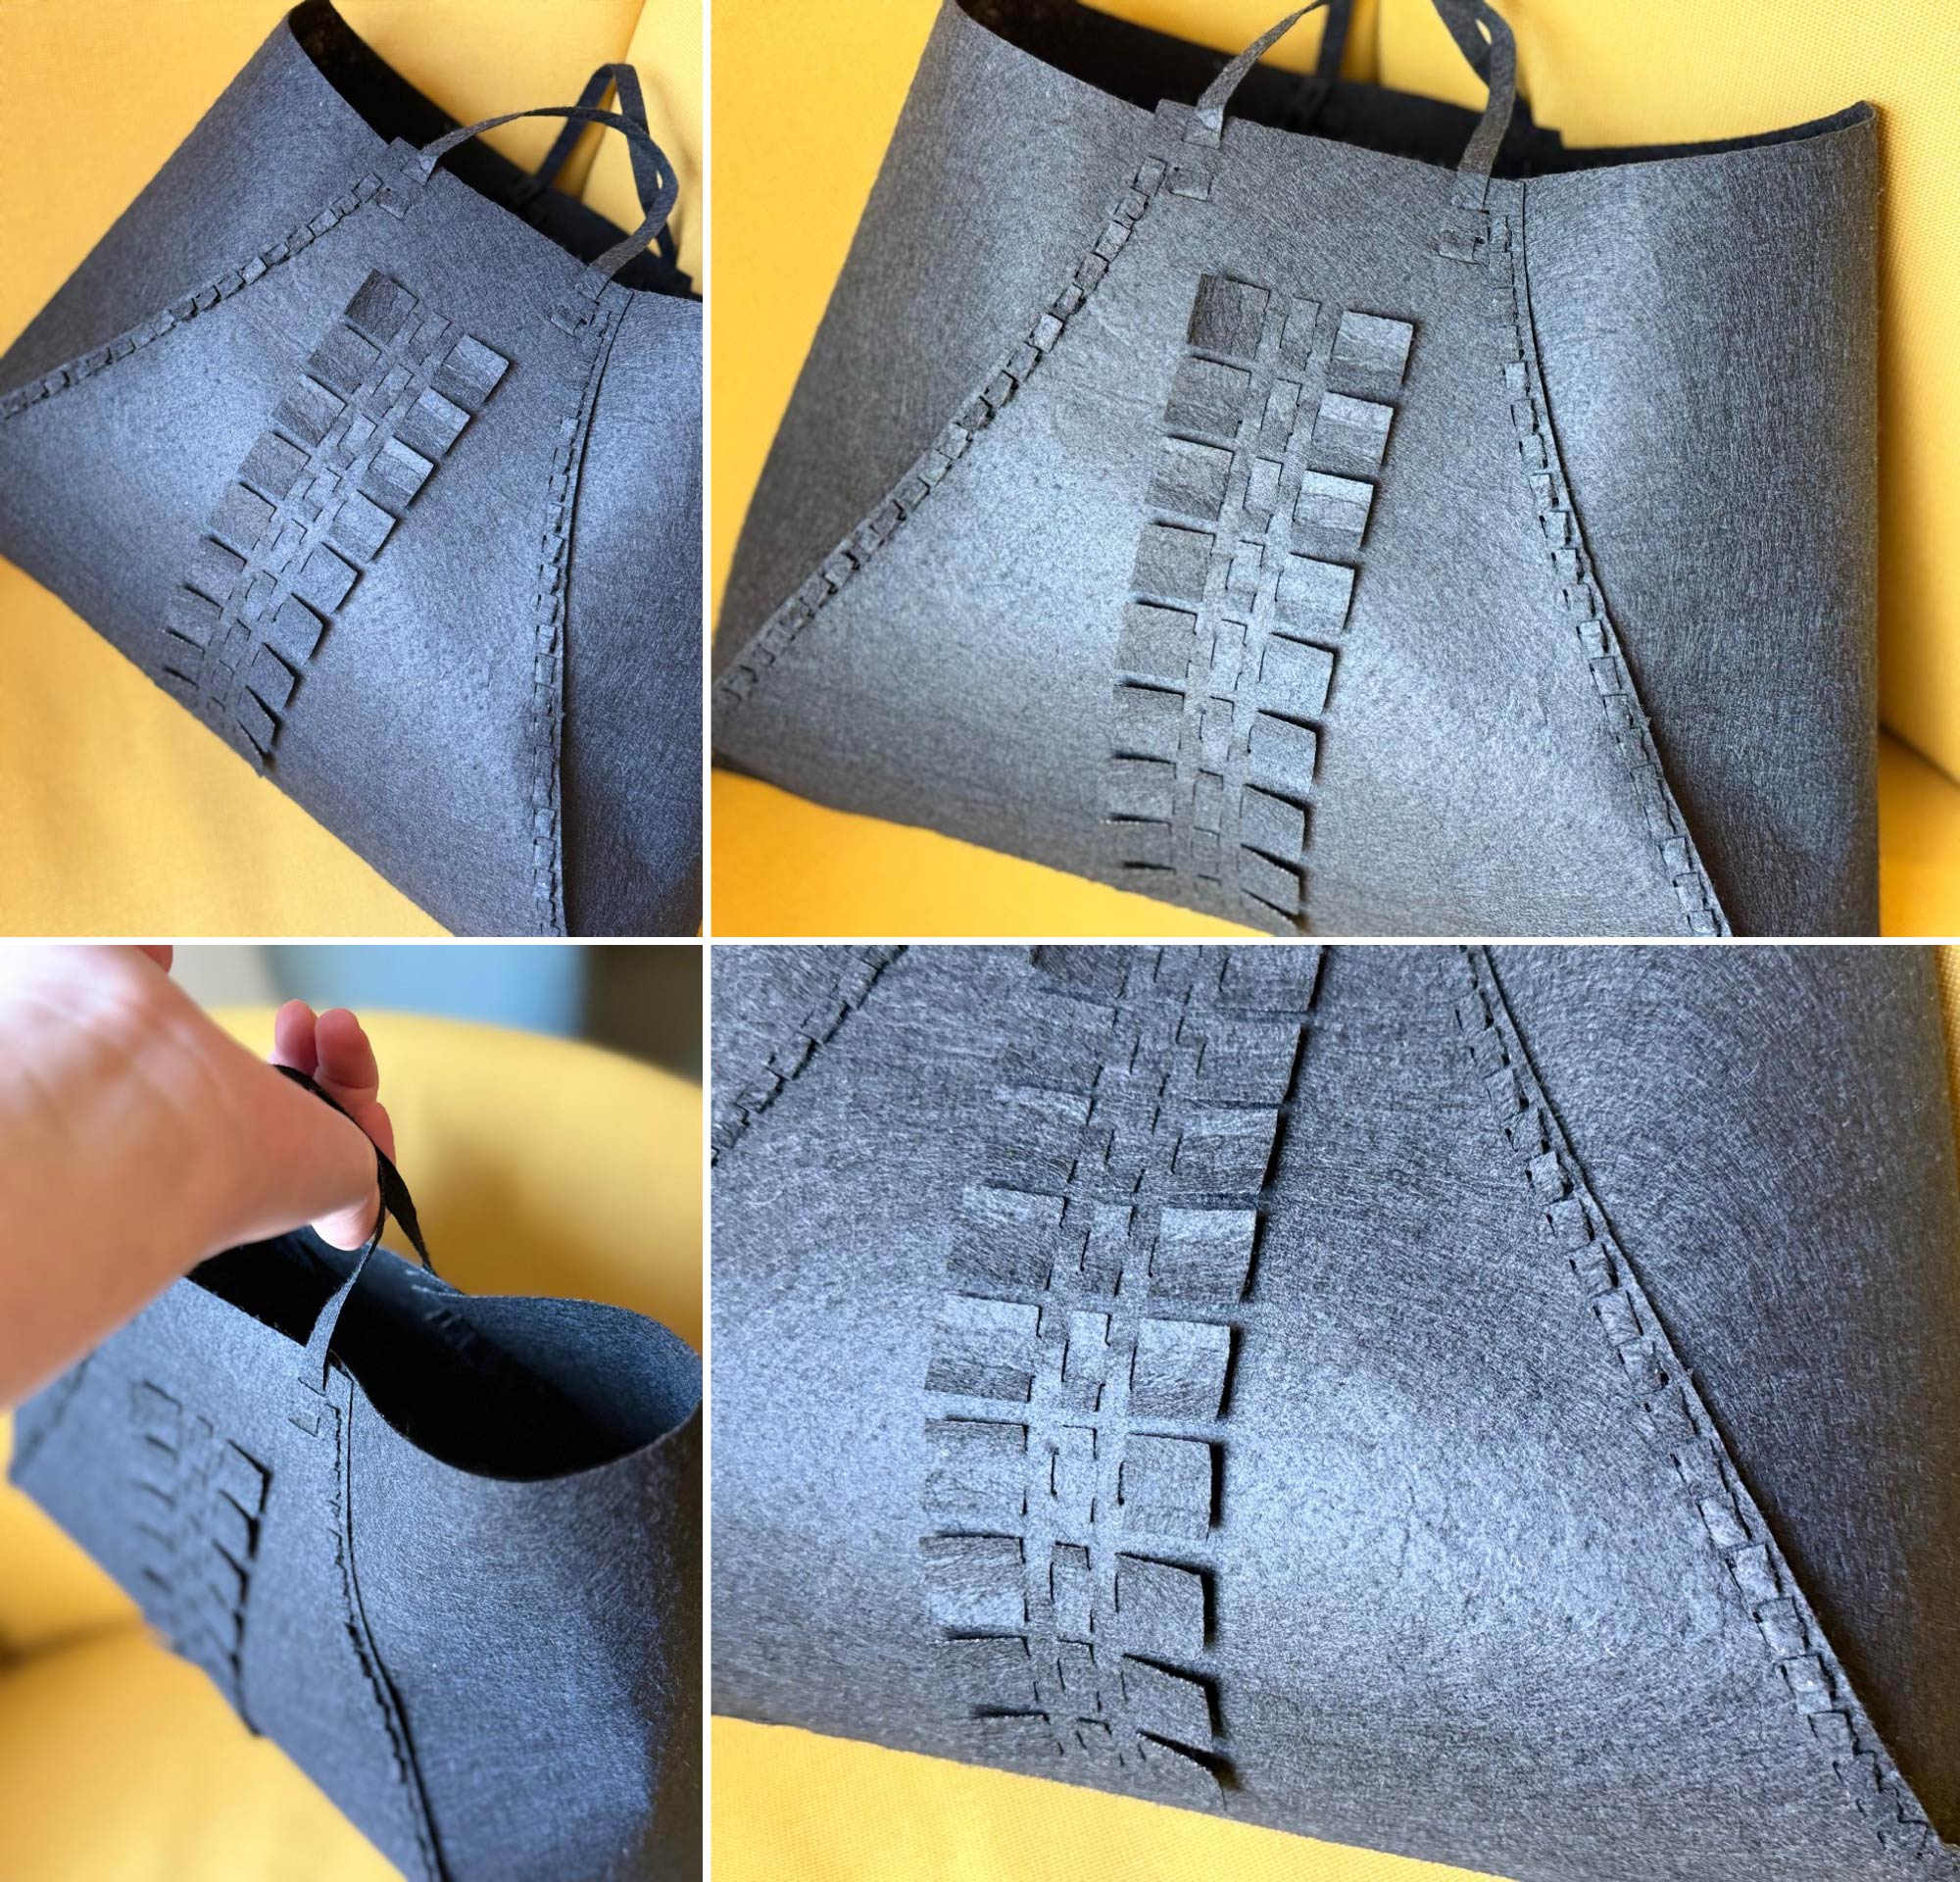
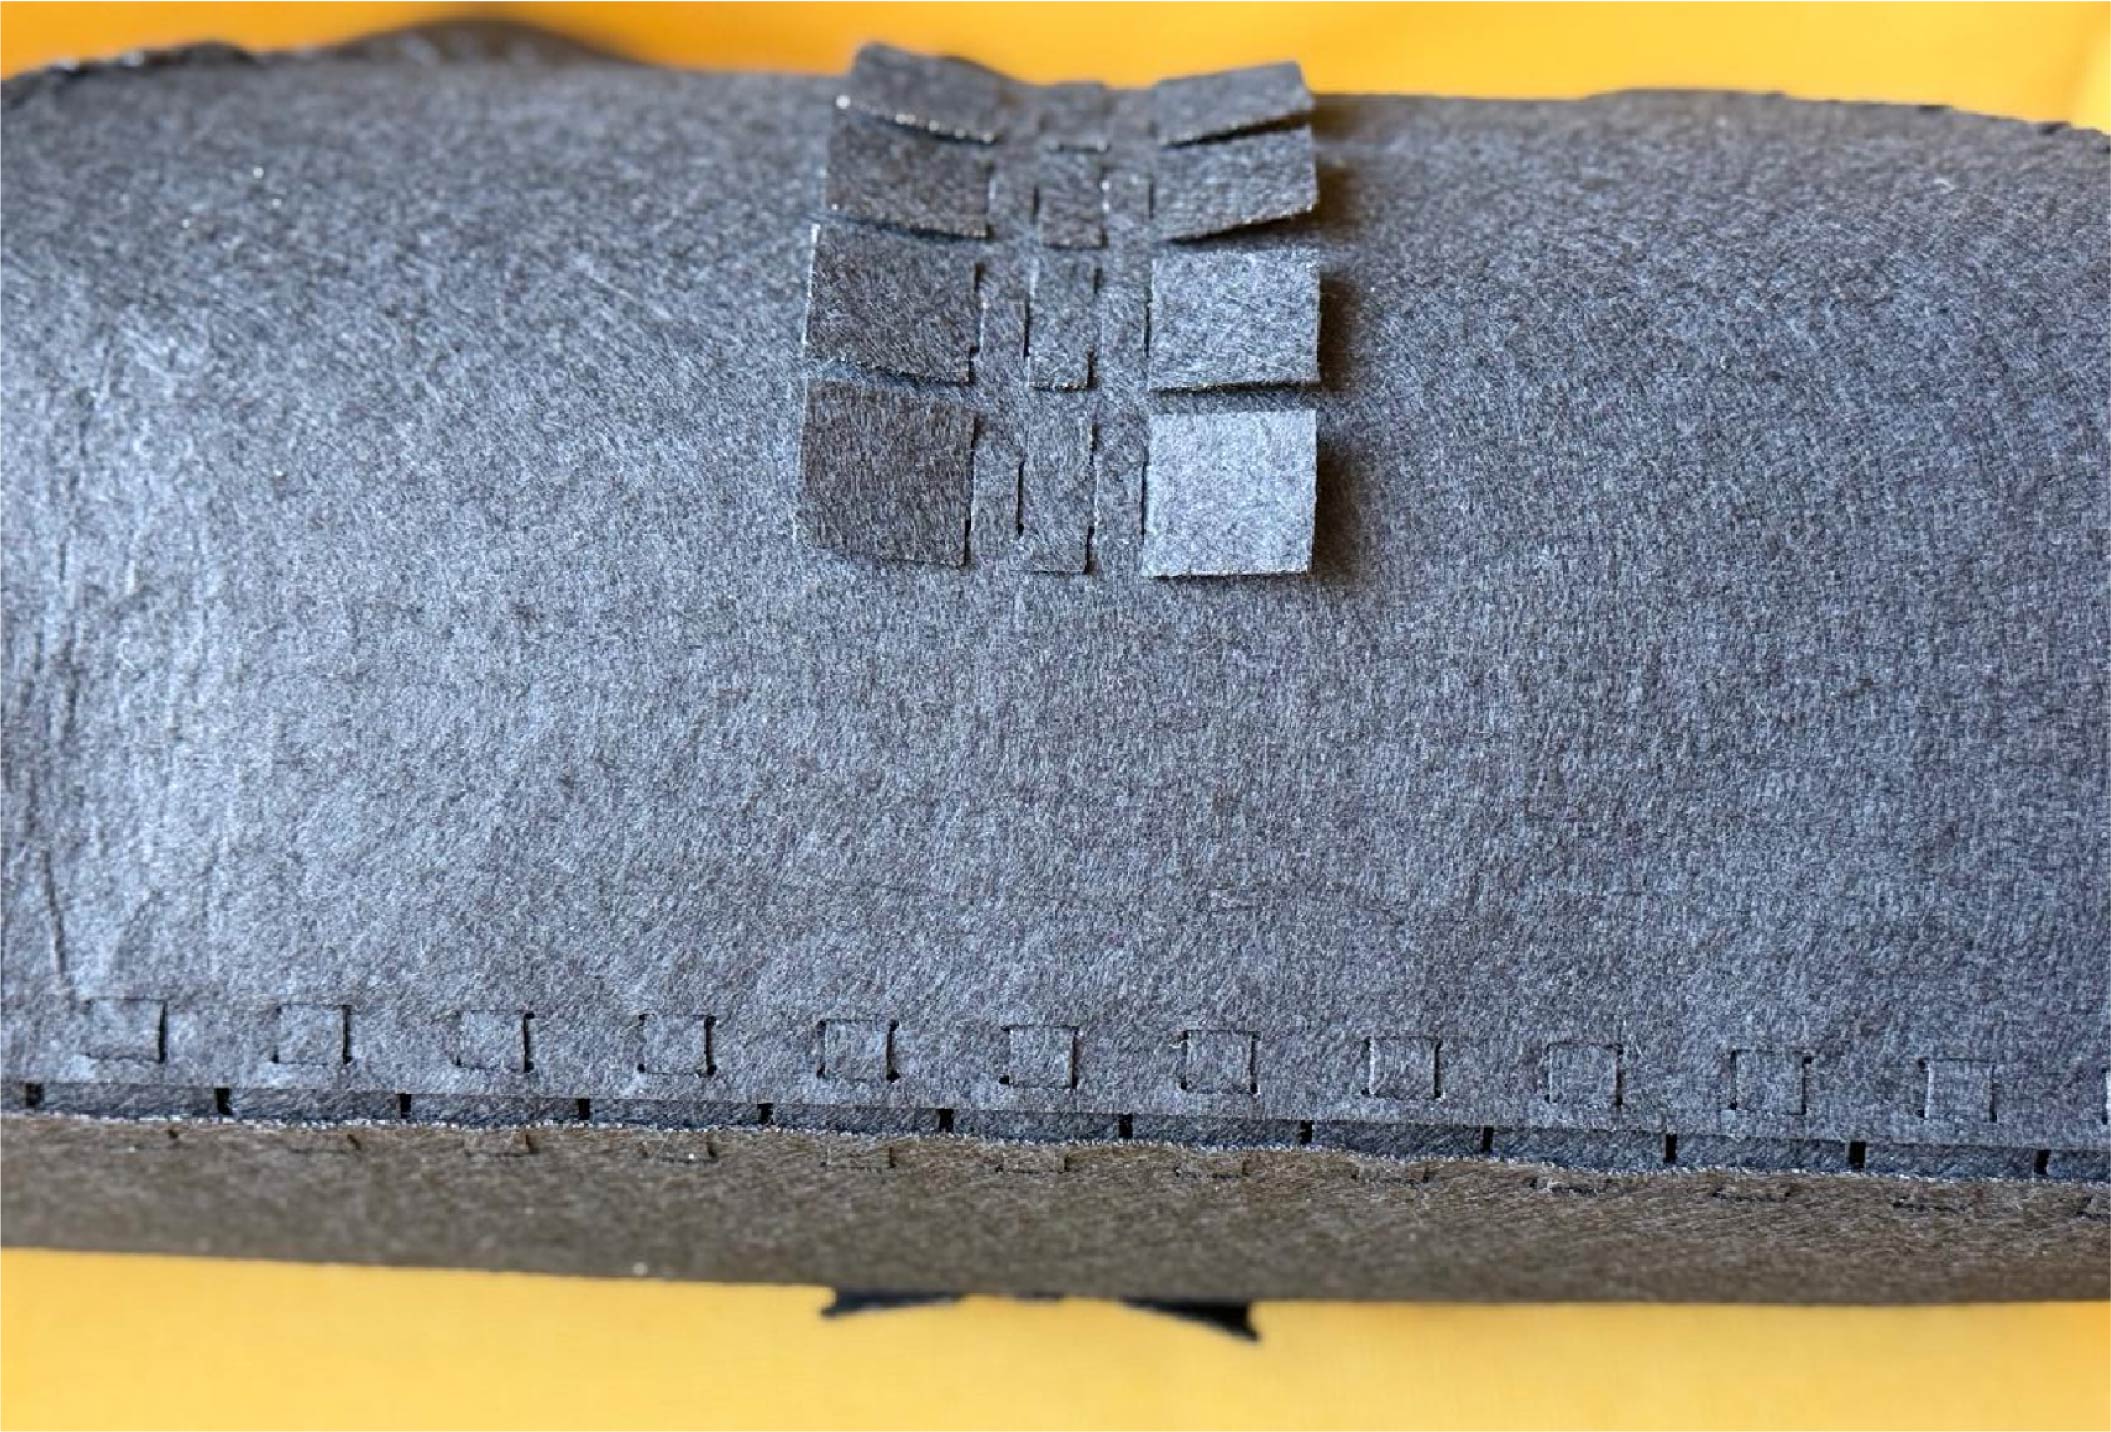
- Assembly Process:
D. Result
2. Snip-Snap Bag
A. Concept and Design
I was inspired to design a bag that could be assembled and disassembled using a single scalable joint, with interchangeable front elements,similar to a LEGO-like system of assembly and reconfiguration.
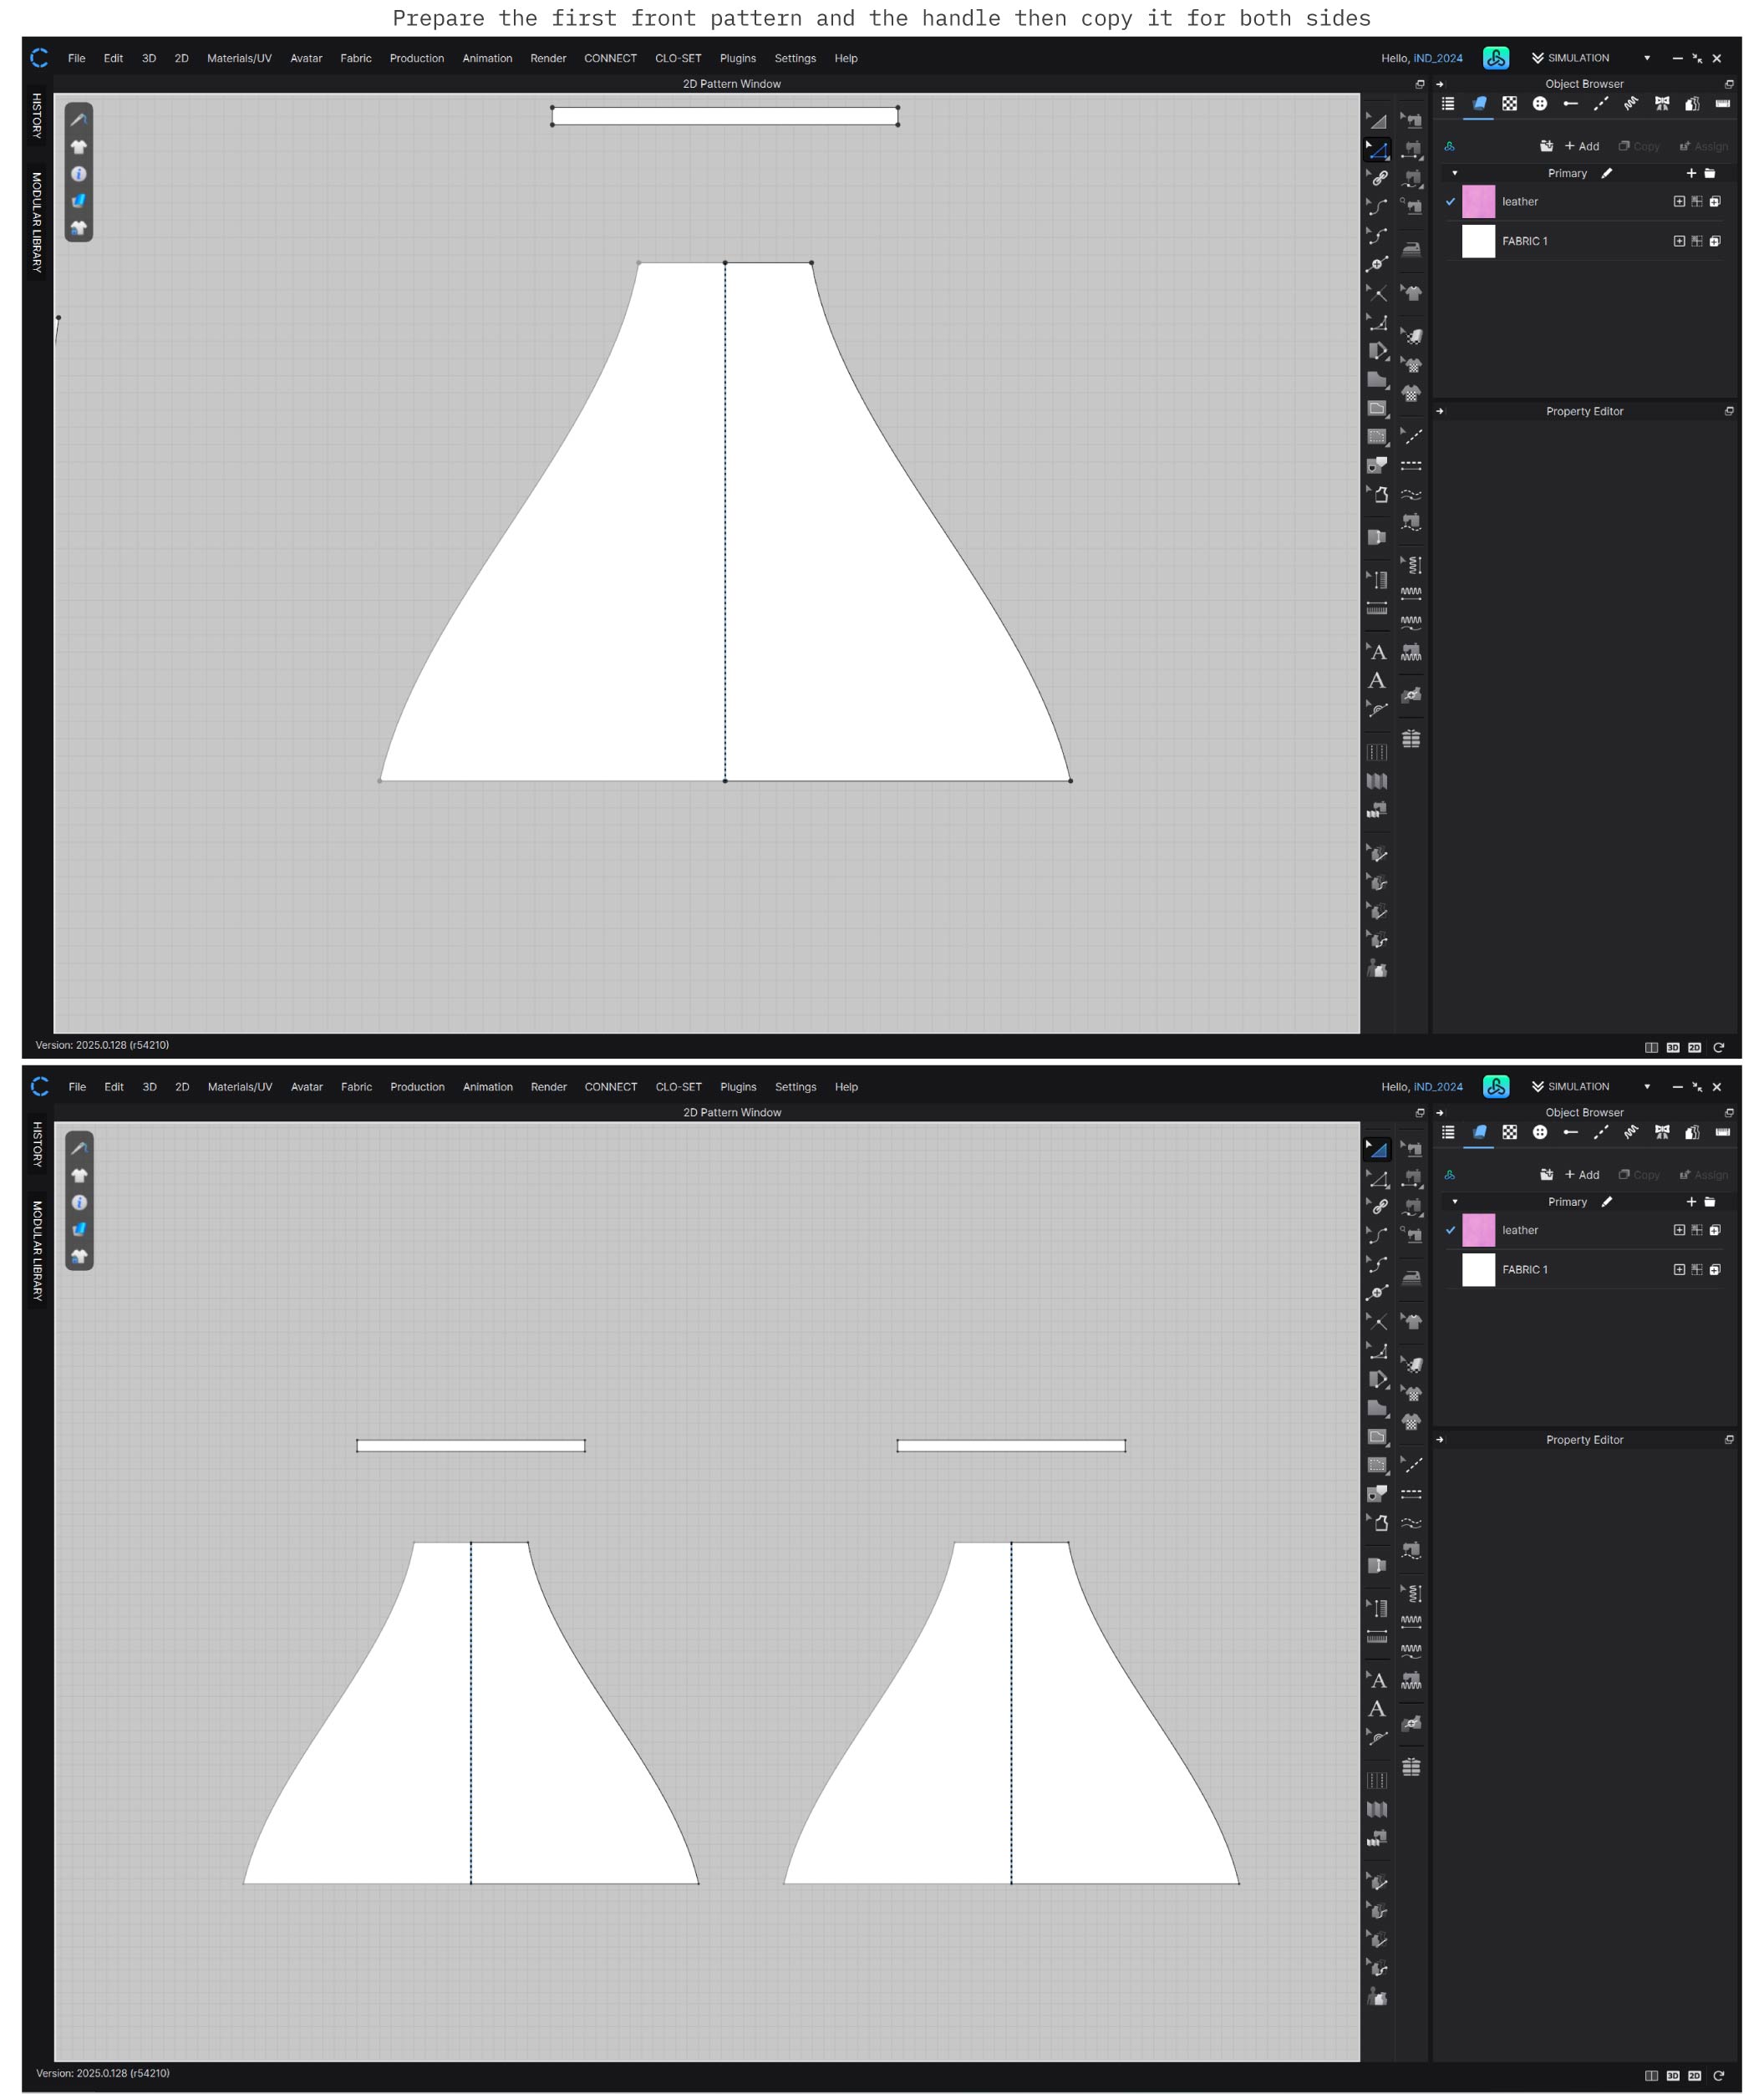
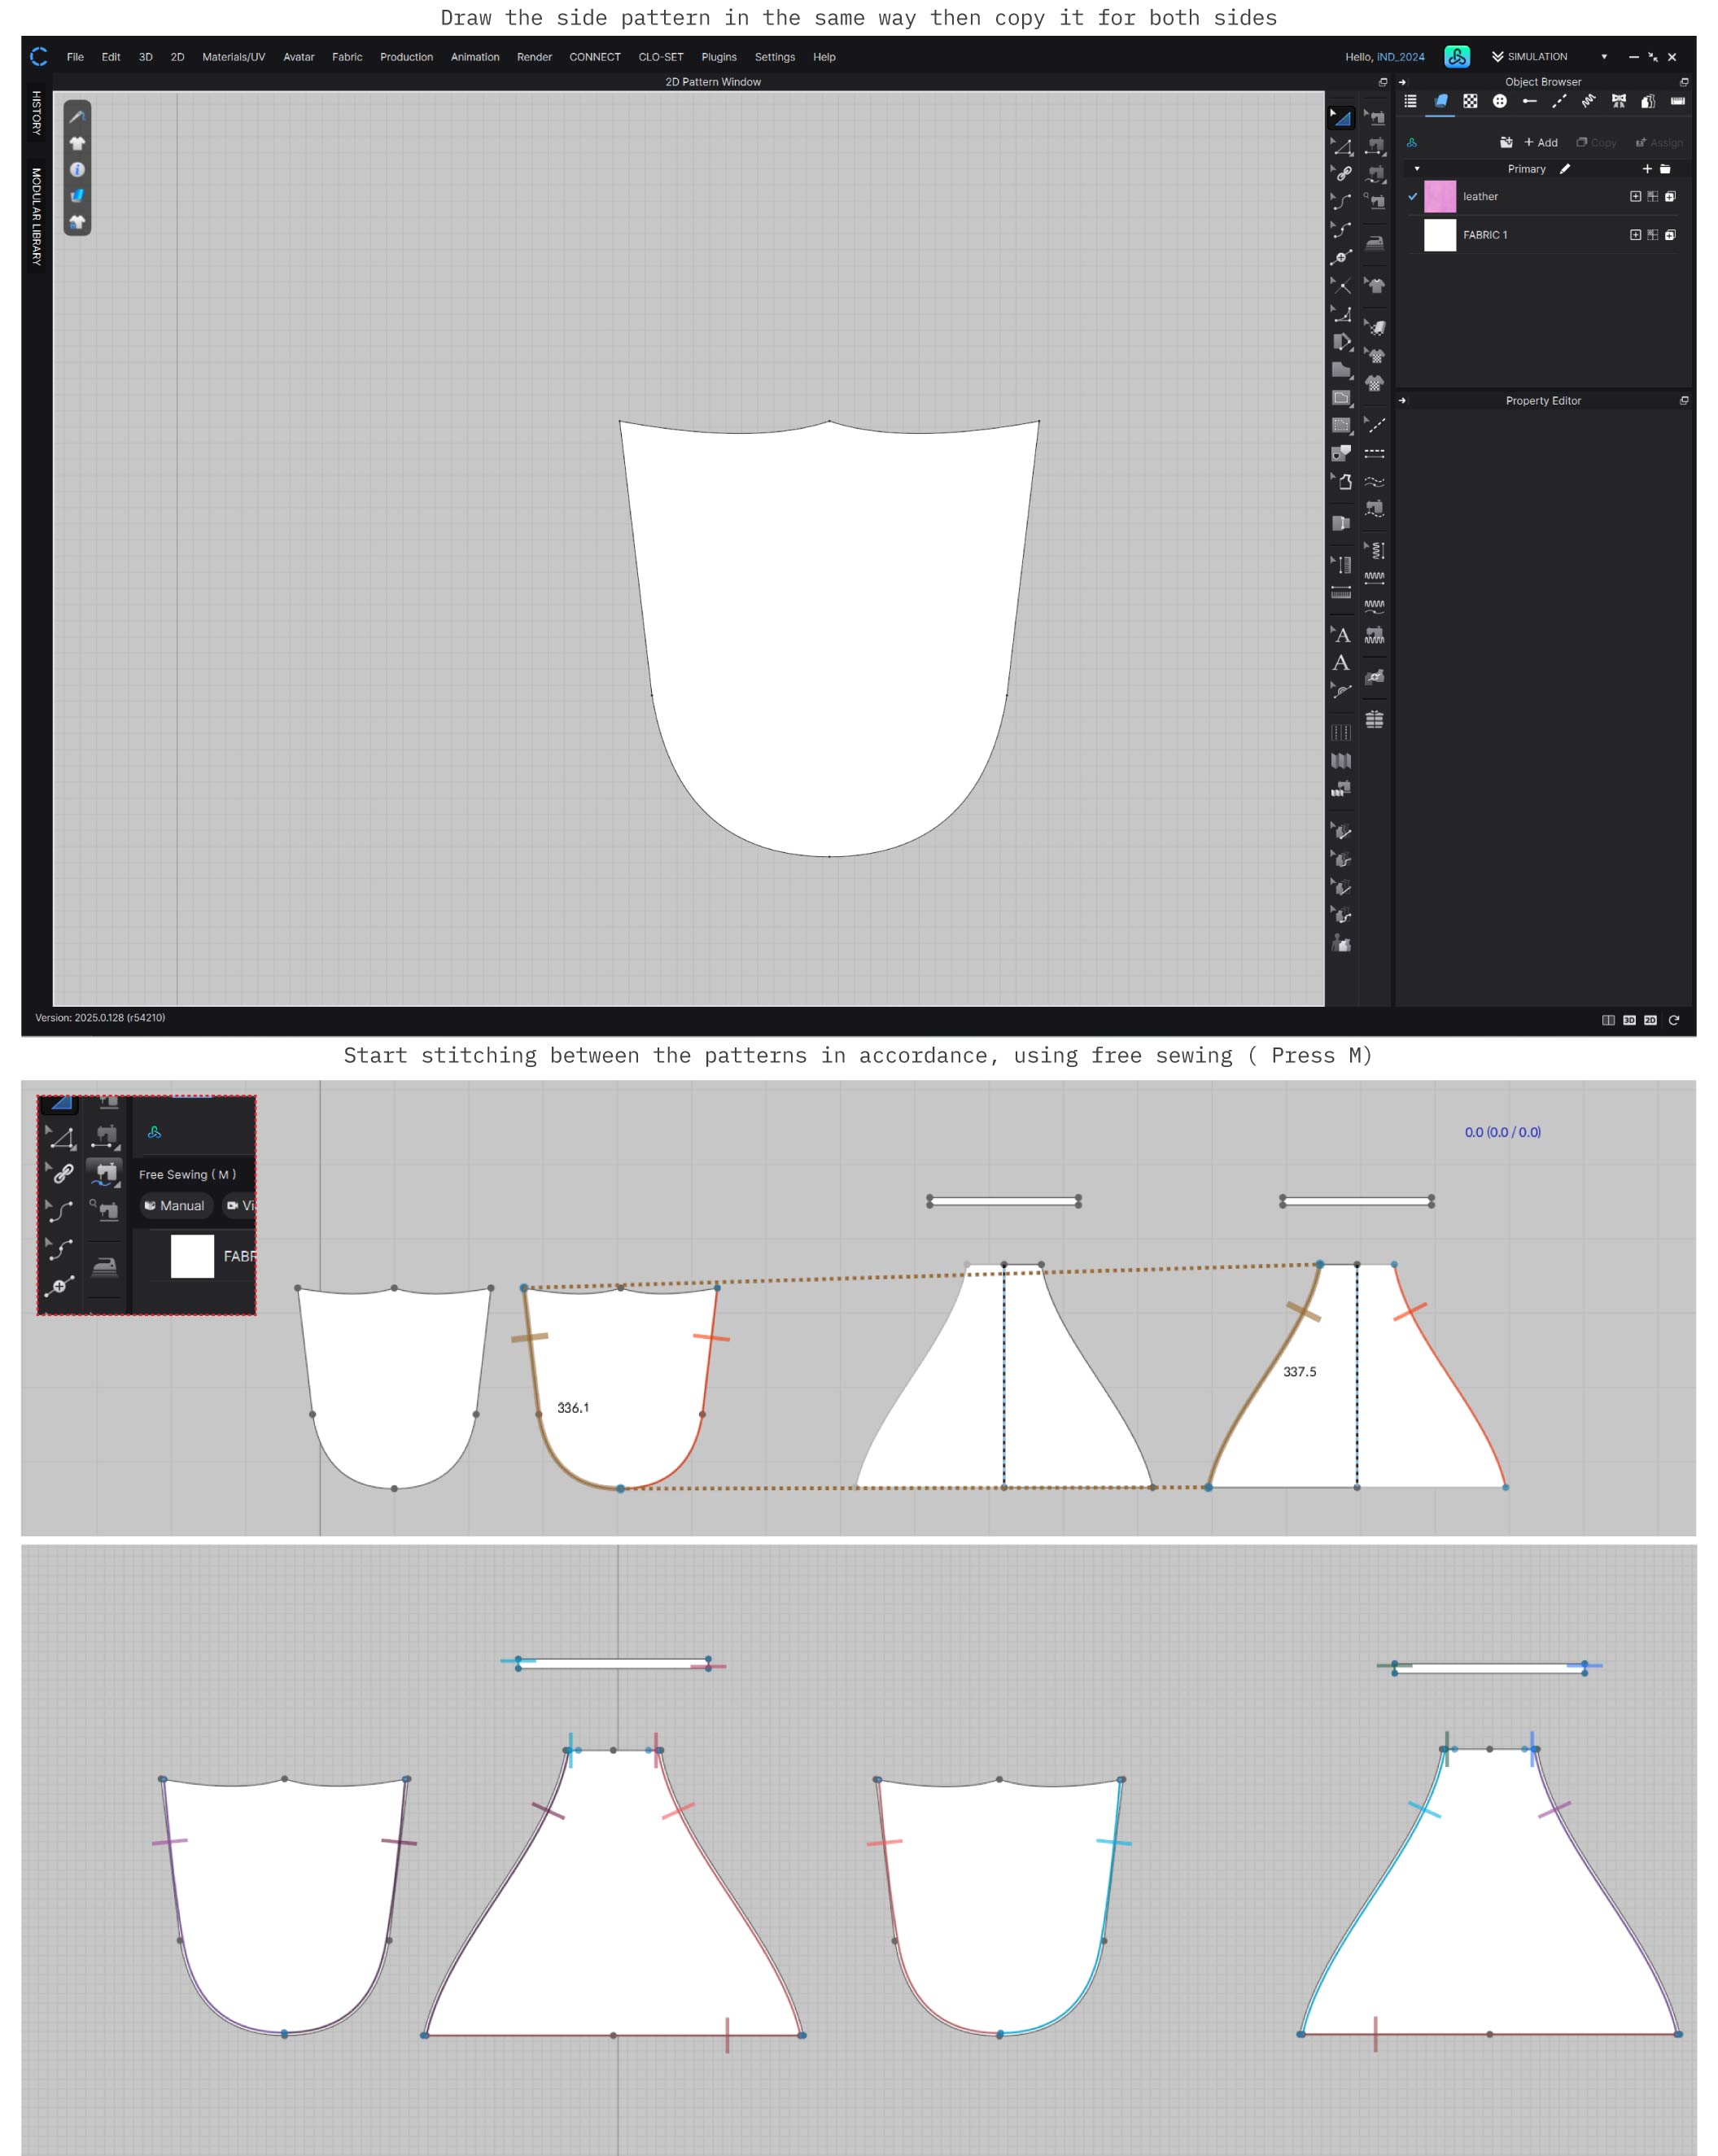
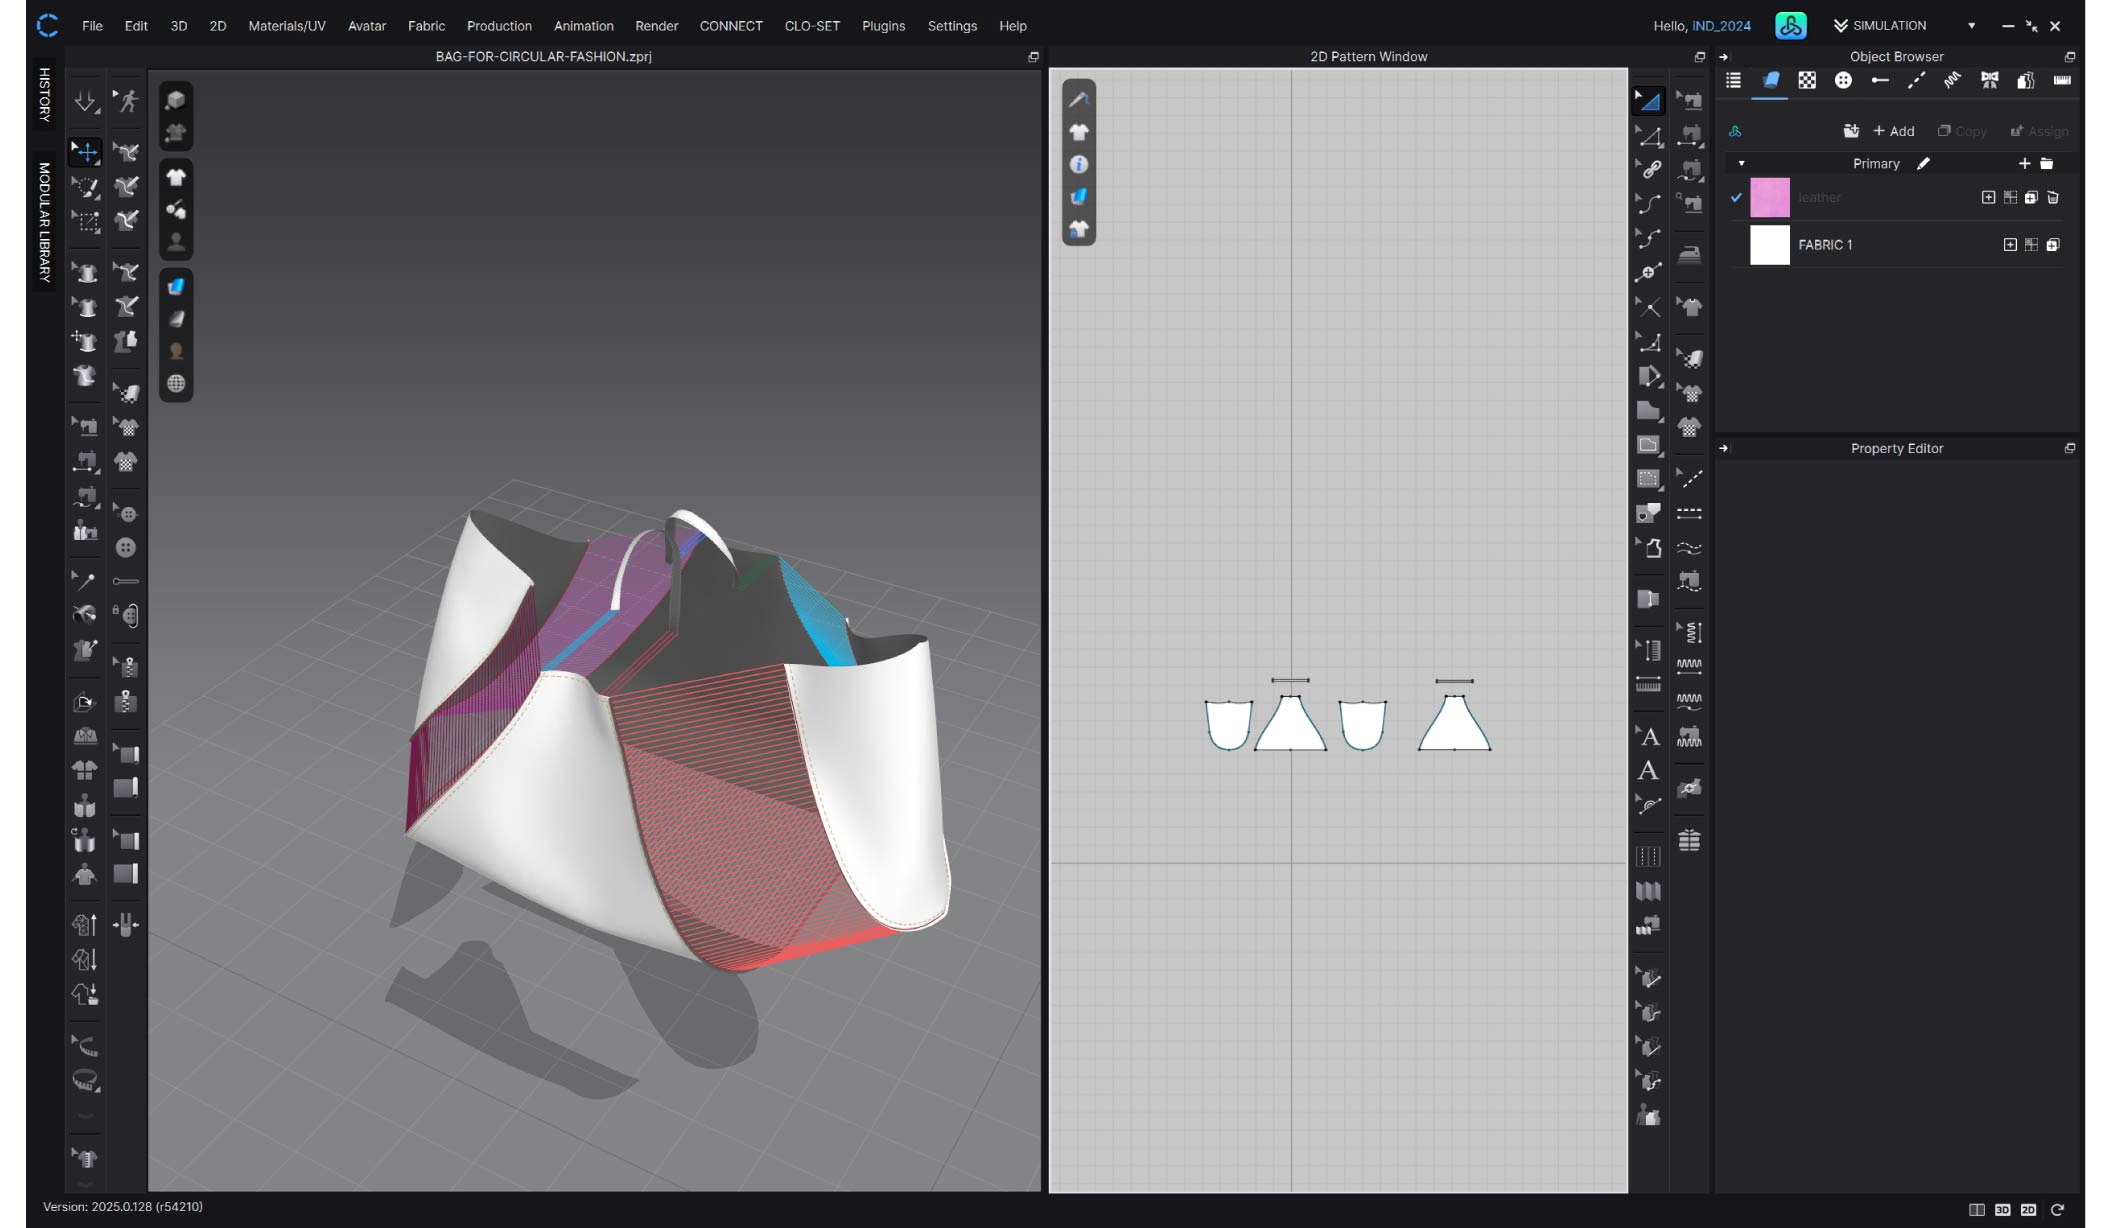
- Pattern making and design:
B. Fabrication and Iteration Process
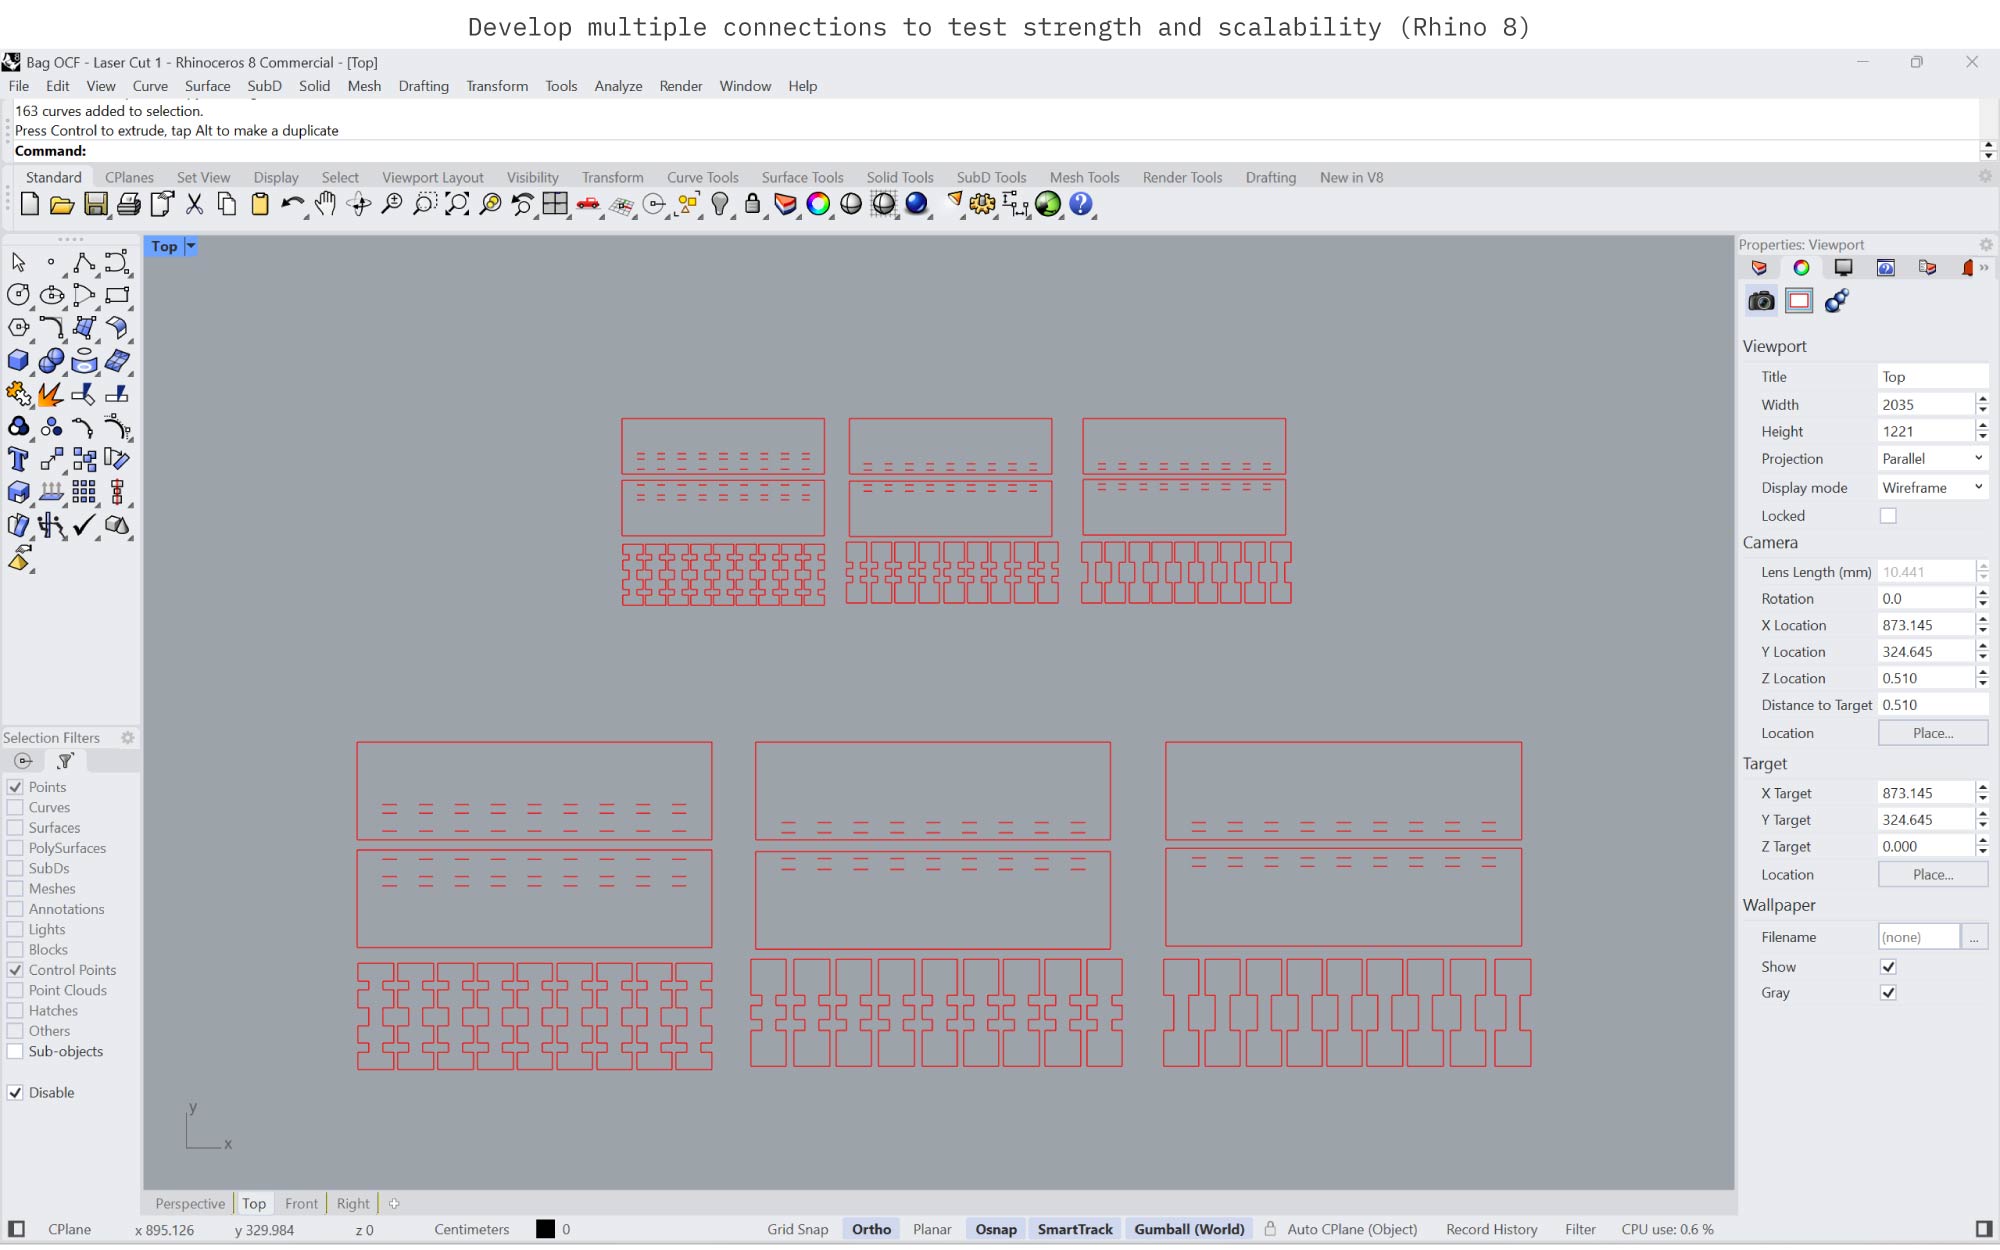
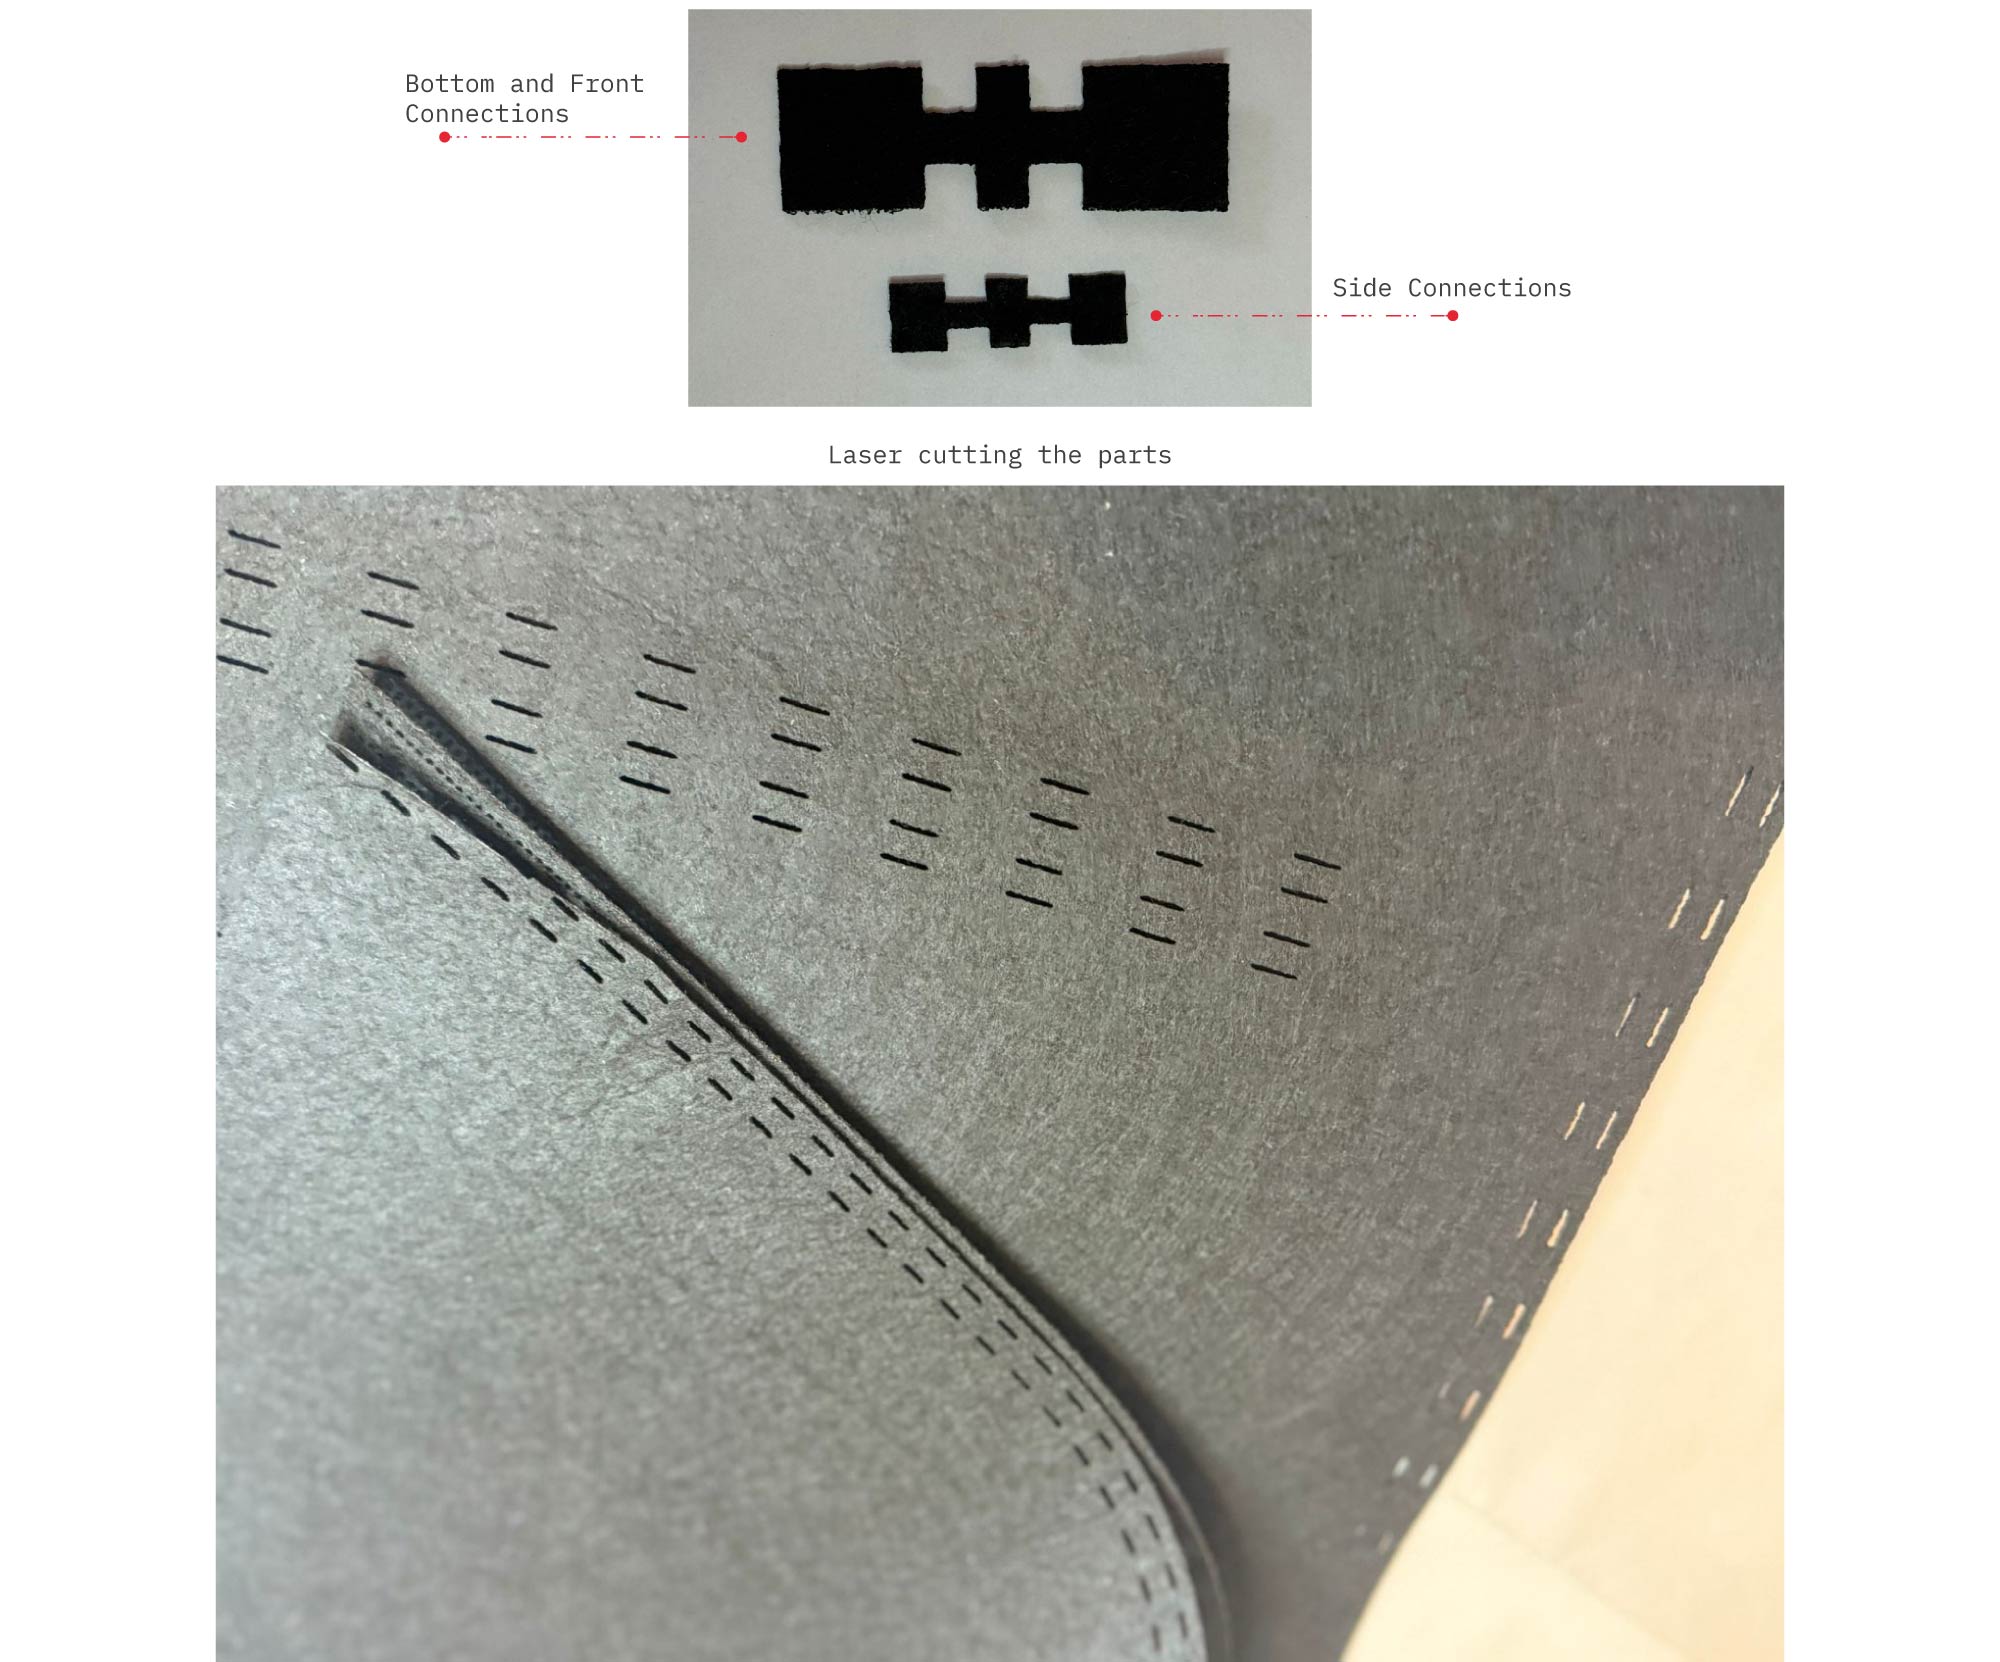
- Design multiple connection types to evaluate strength and scale:
Multiple connection systems were developed in Rhino to evaluate strength, flexibility, and scalability of the assembly logic. Using tools such as Rectangle, Polyline, Array, Copy, and Mirror, a series of interlocking joint variations were designed and repeated parametrically across different scales and densities. Trim, Offset, and Join were then used to refine the geometries and ensure precise laser-cut tolerances.
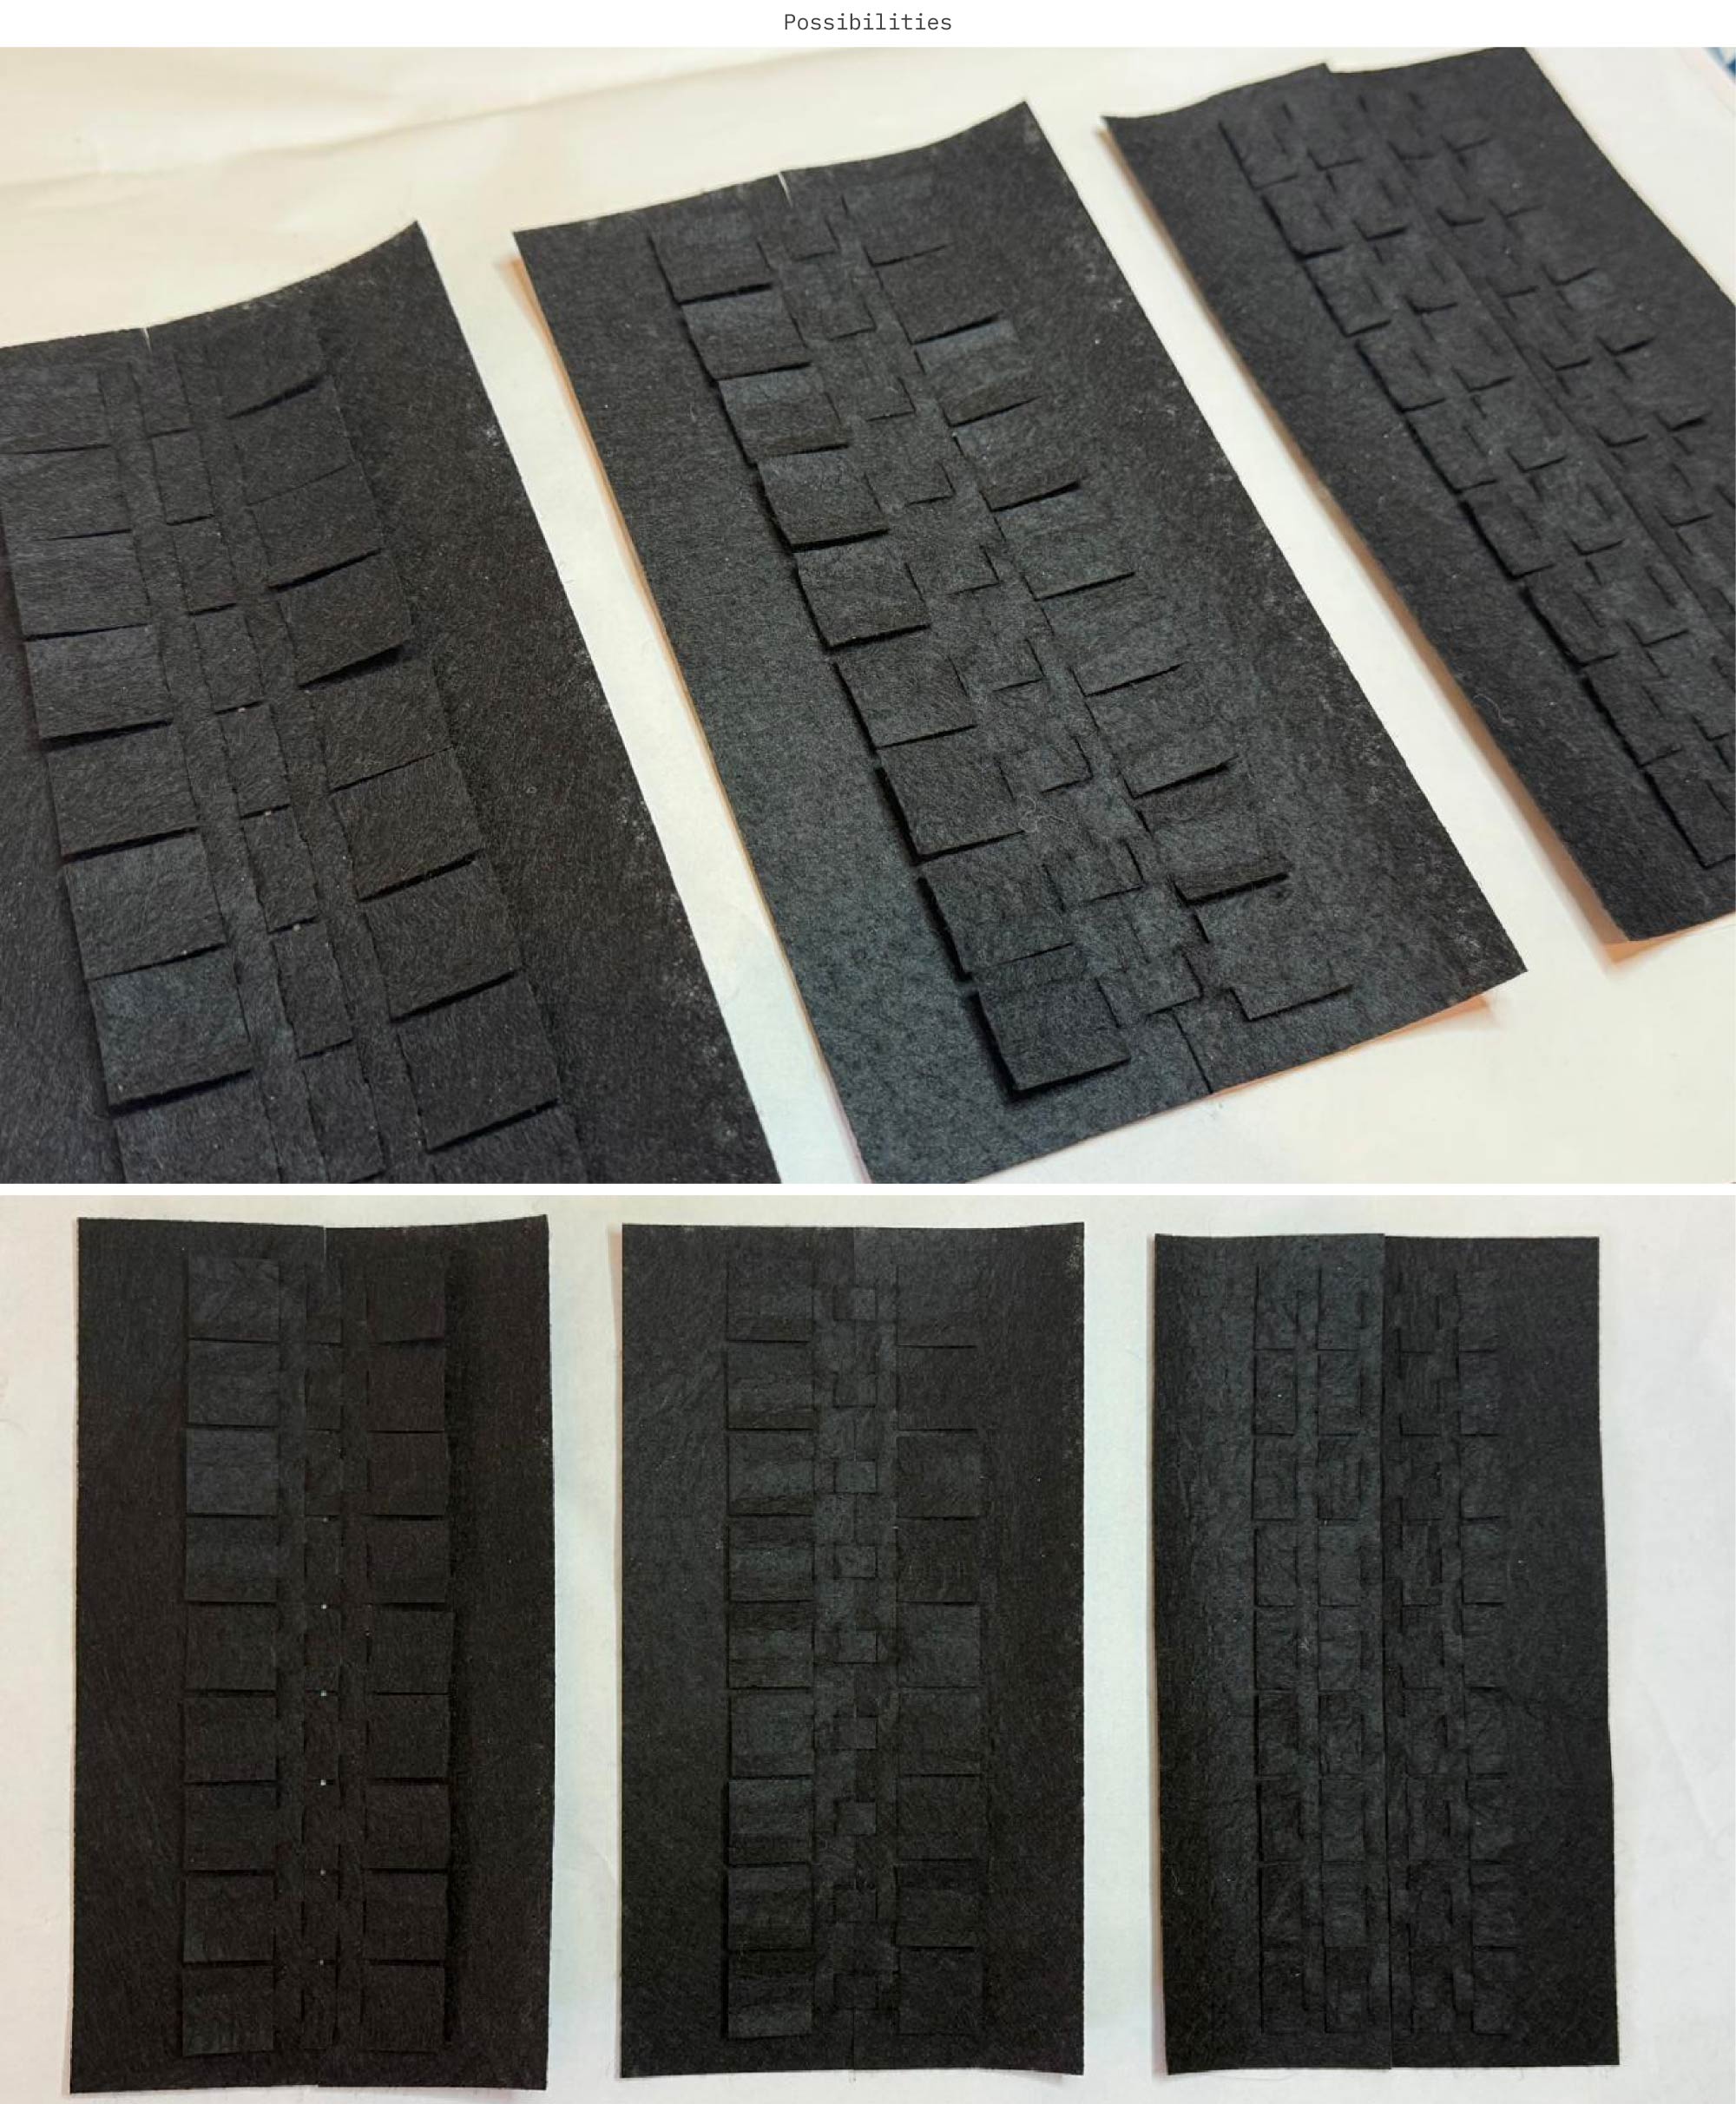
- Laser Cutting conncetion tests:
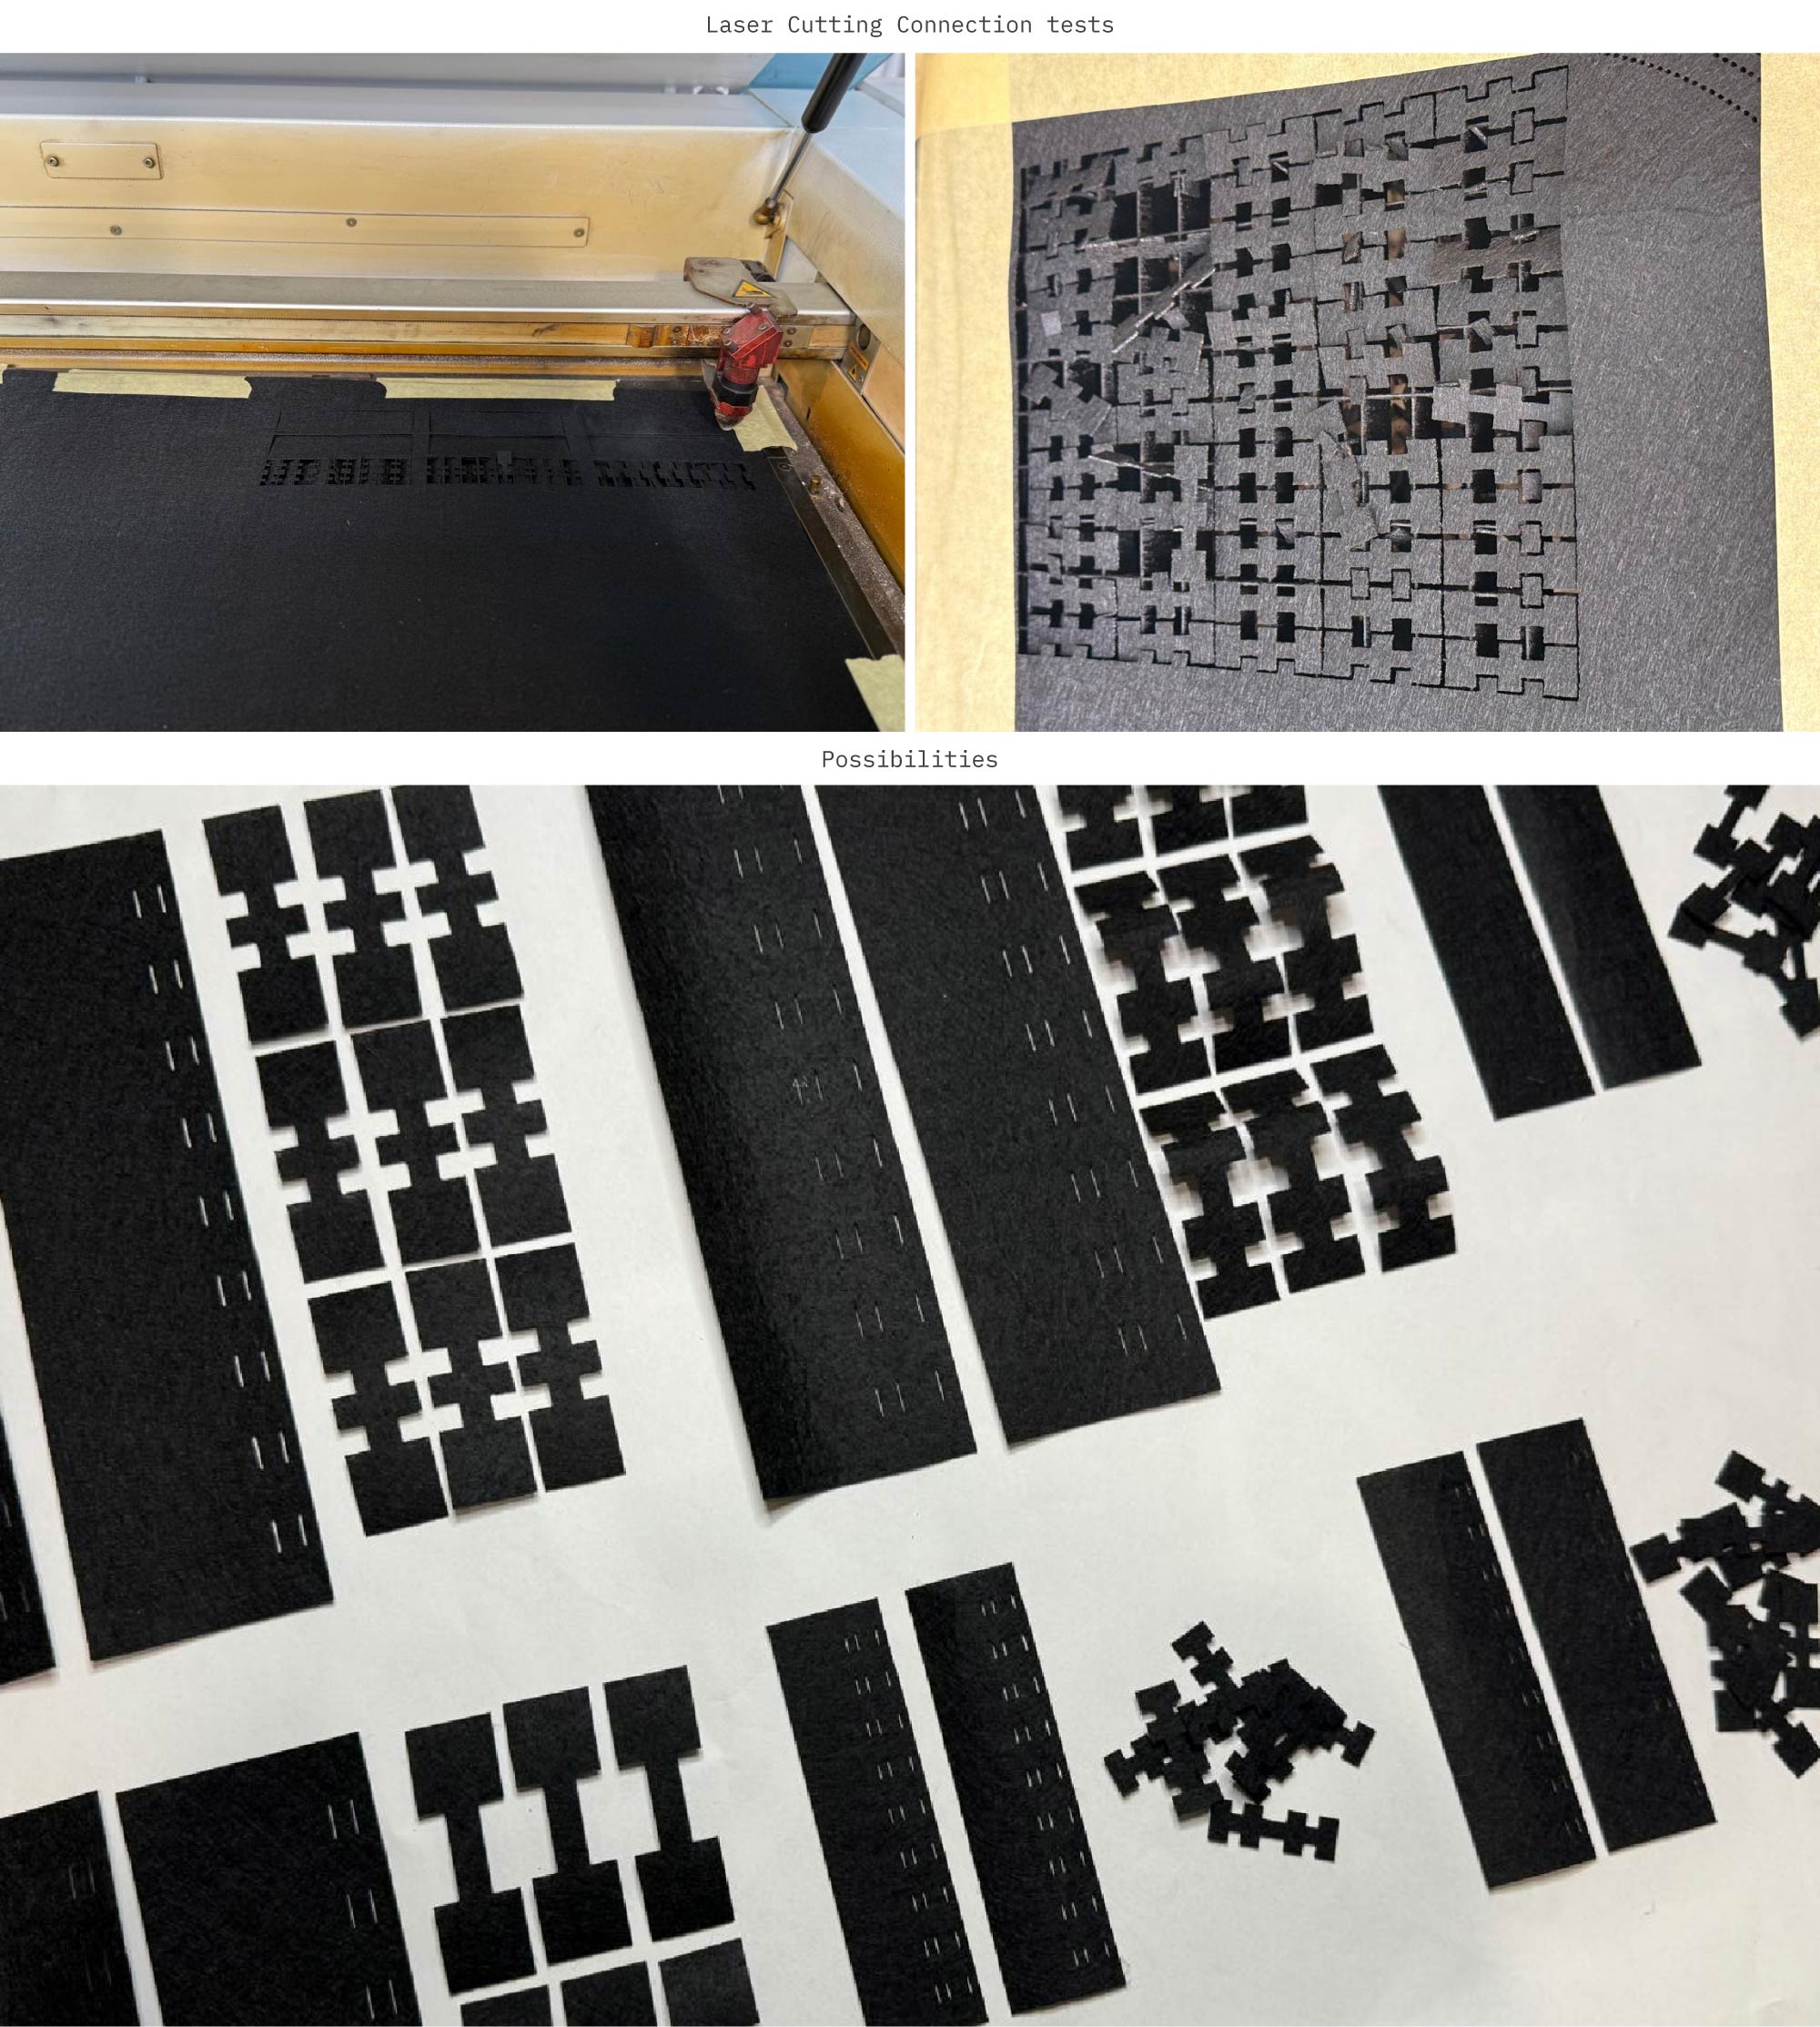
Laser Cutting Settings
Felt: Power:60 - Speed:2.5 - PPI/HZ:1000
- Assemble and test:
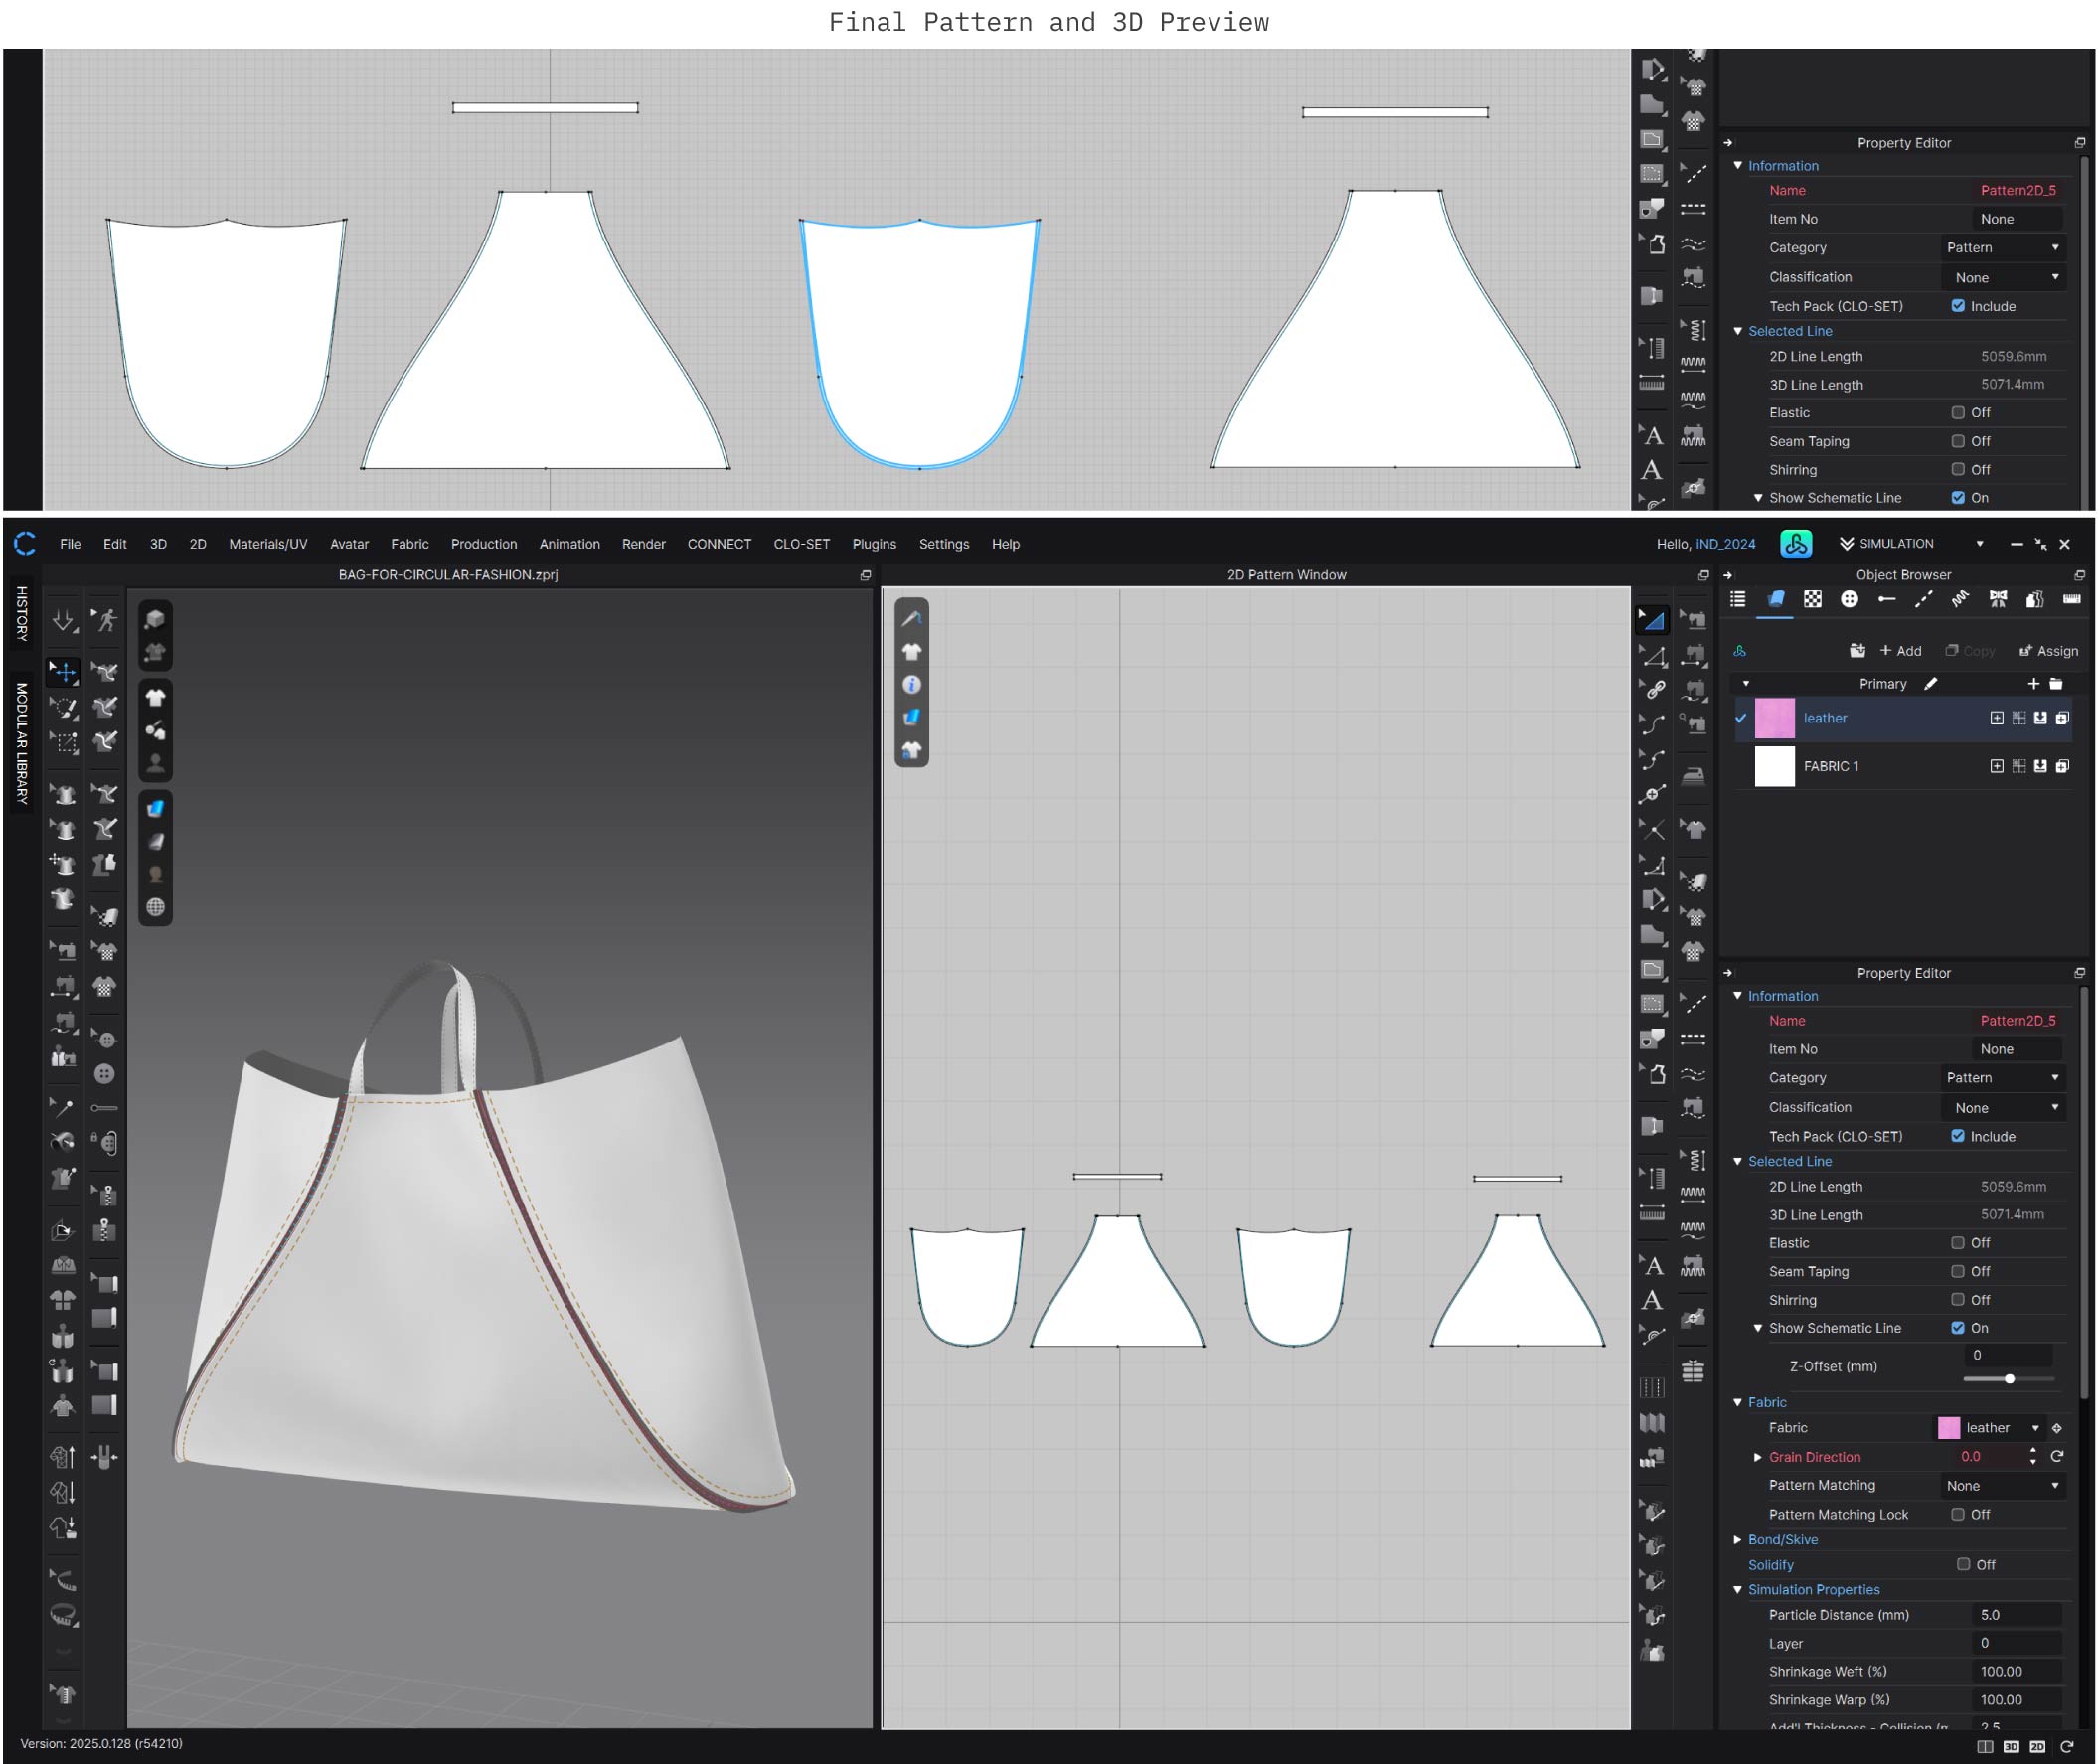
- Once the pattern is validated, it is exported to study no-stitch connection strategies:
 - Finalize design:
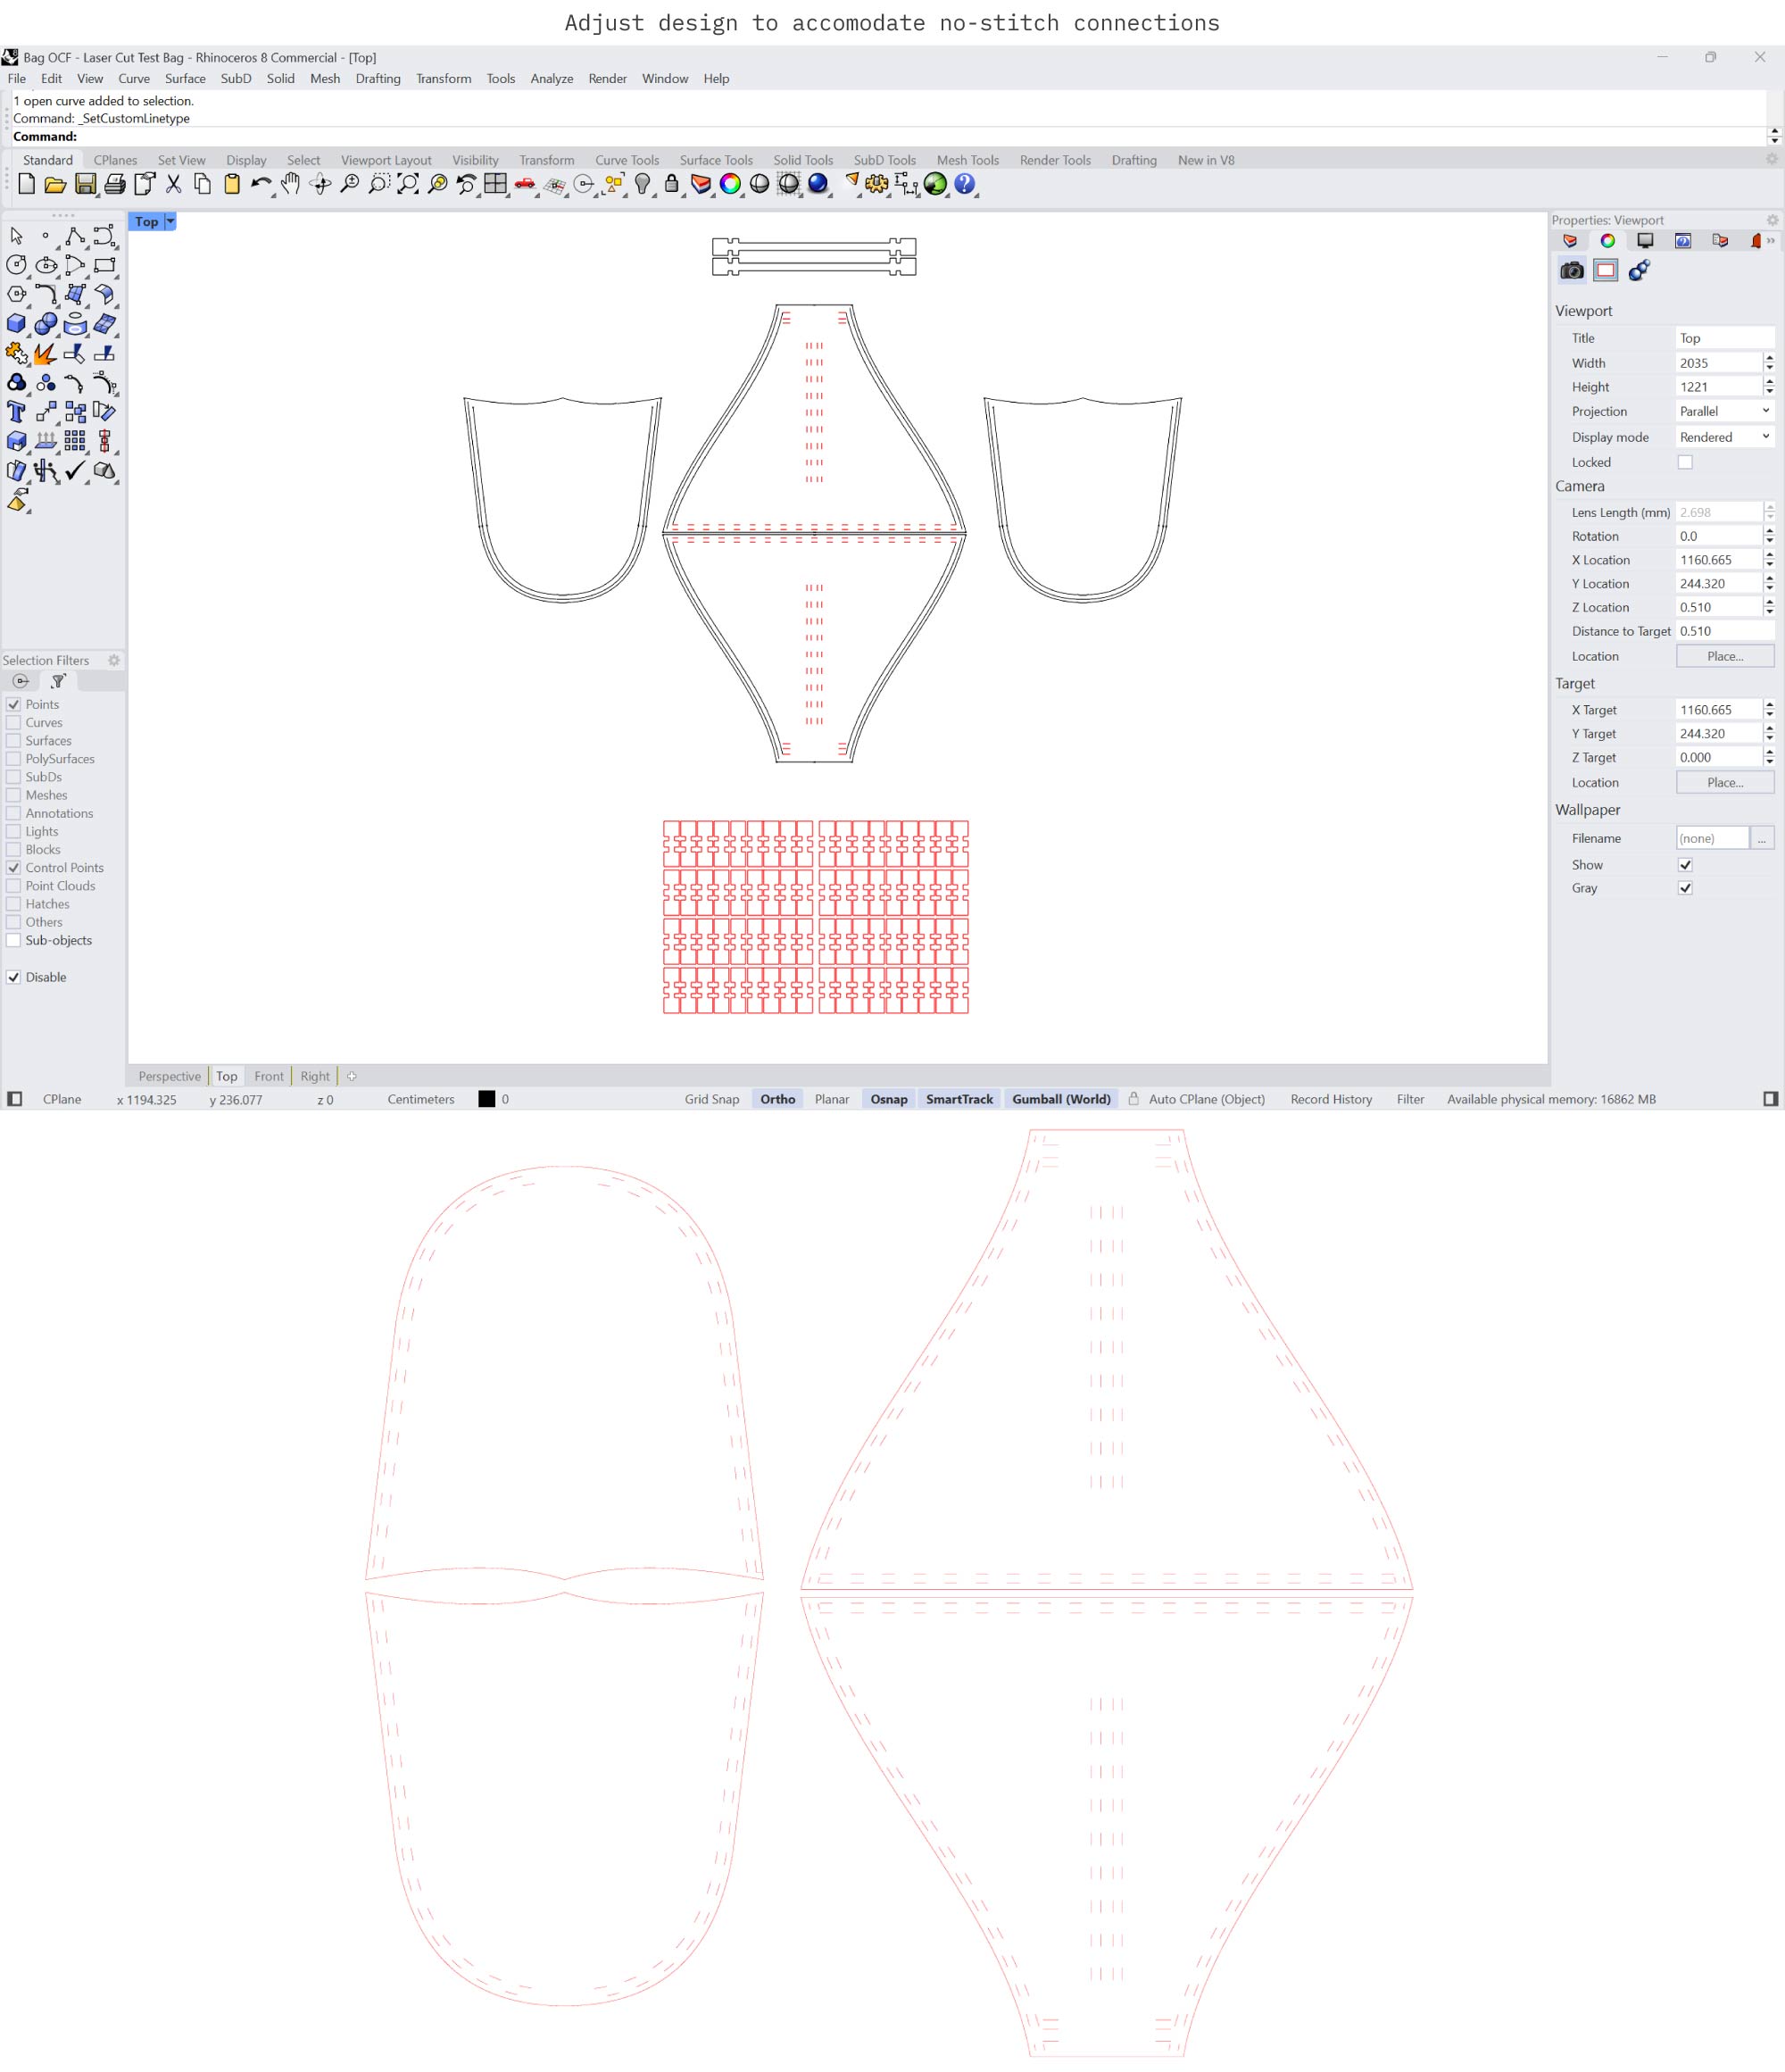
- Laser Cut:
- Assemble:
C. Result
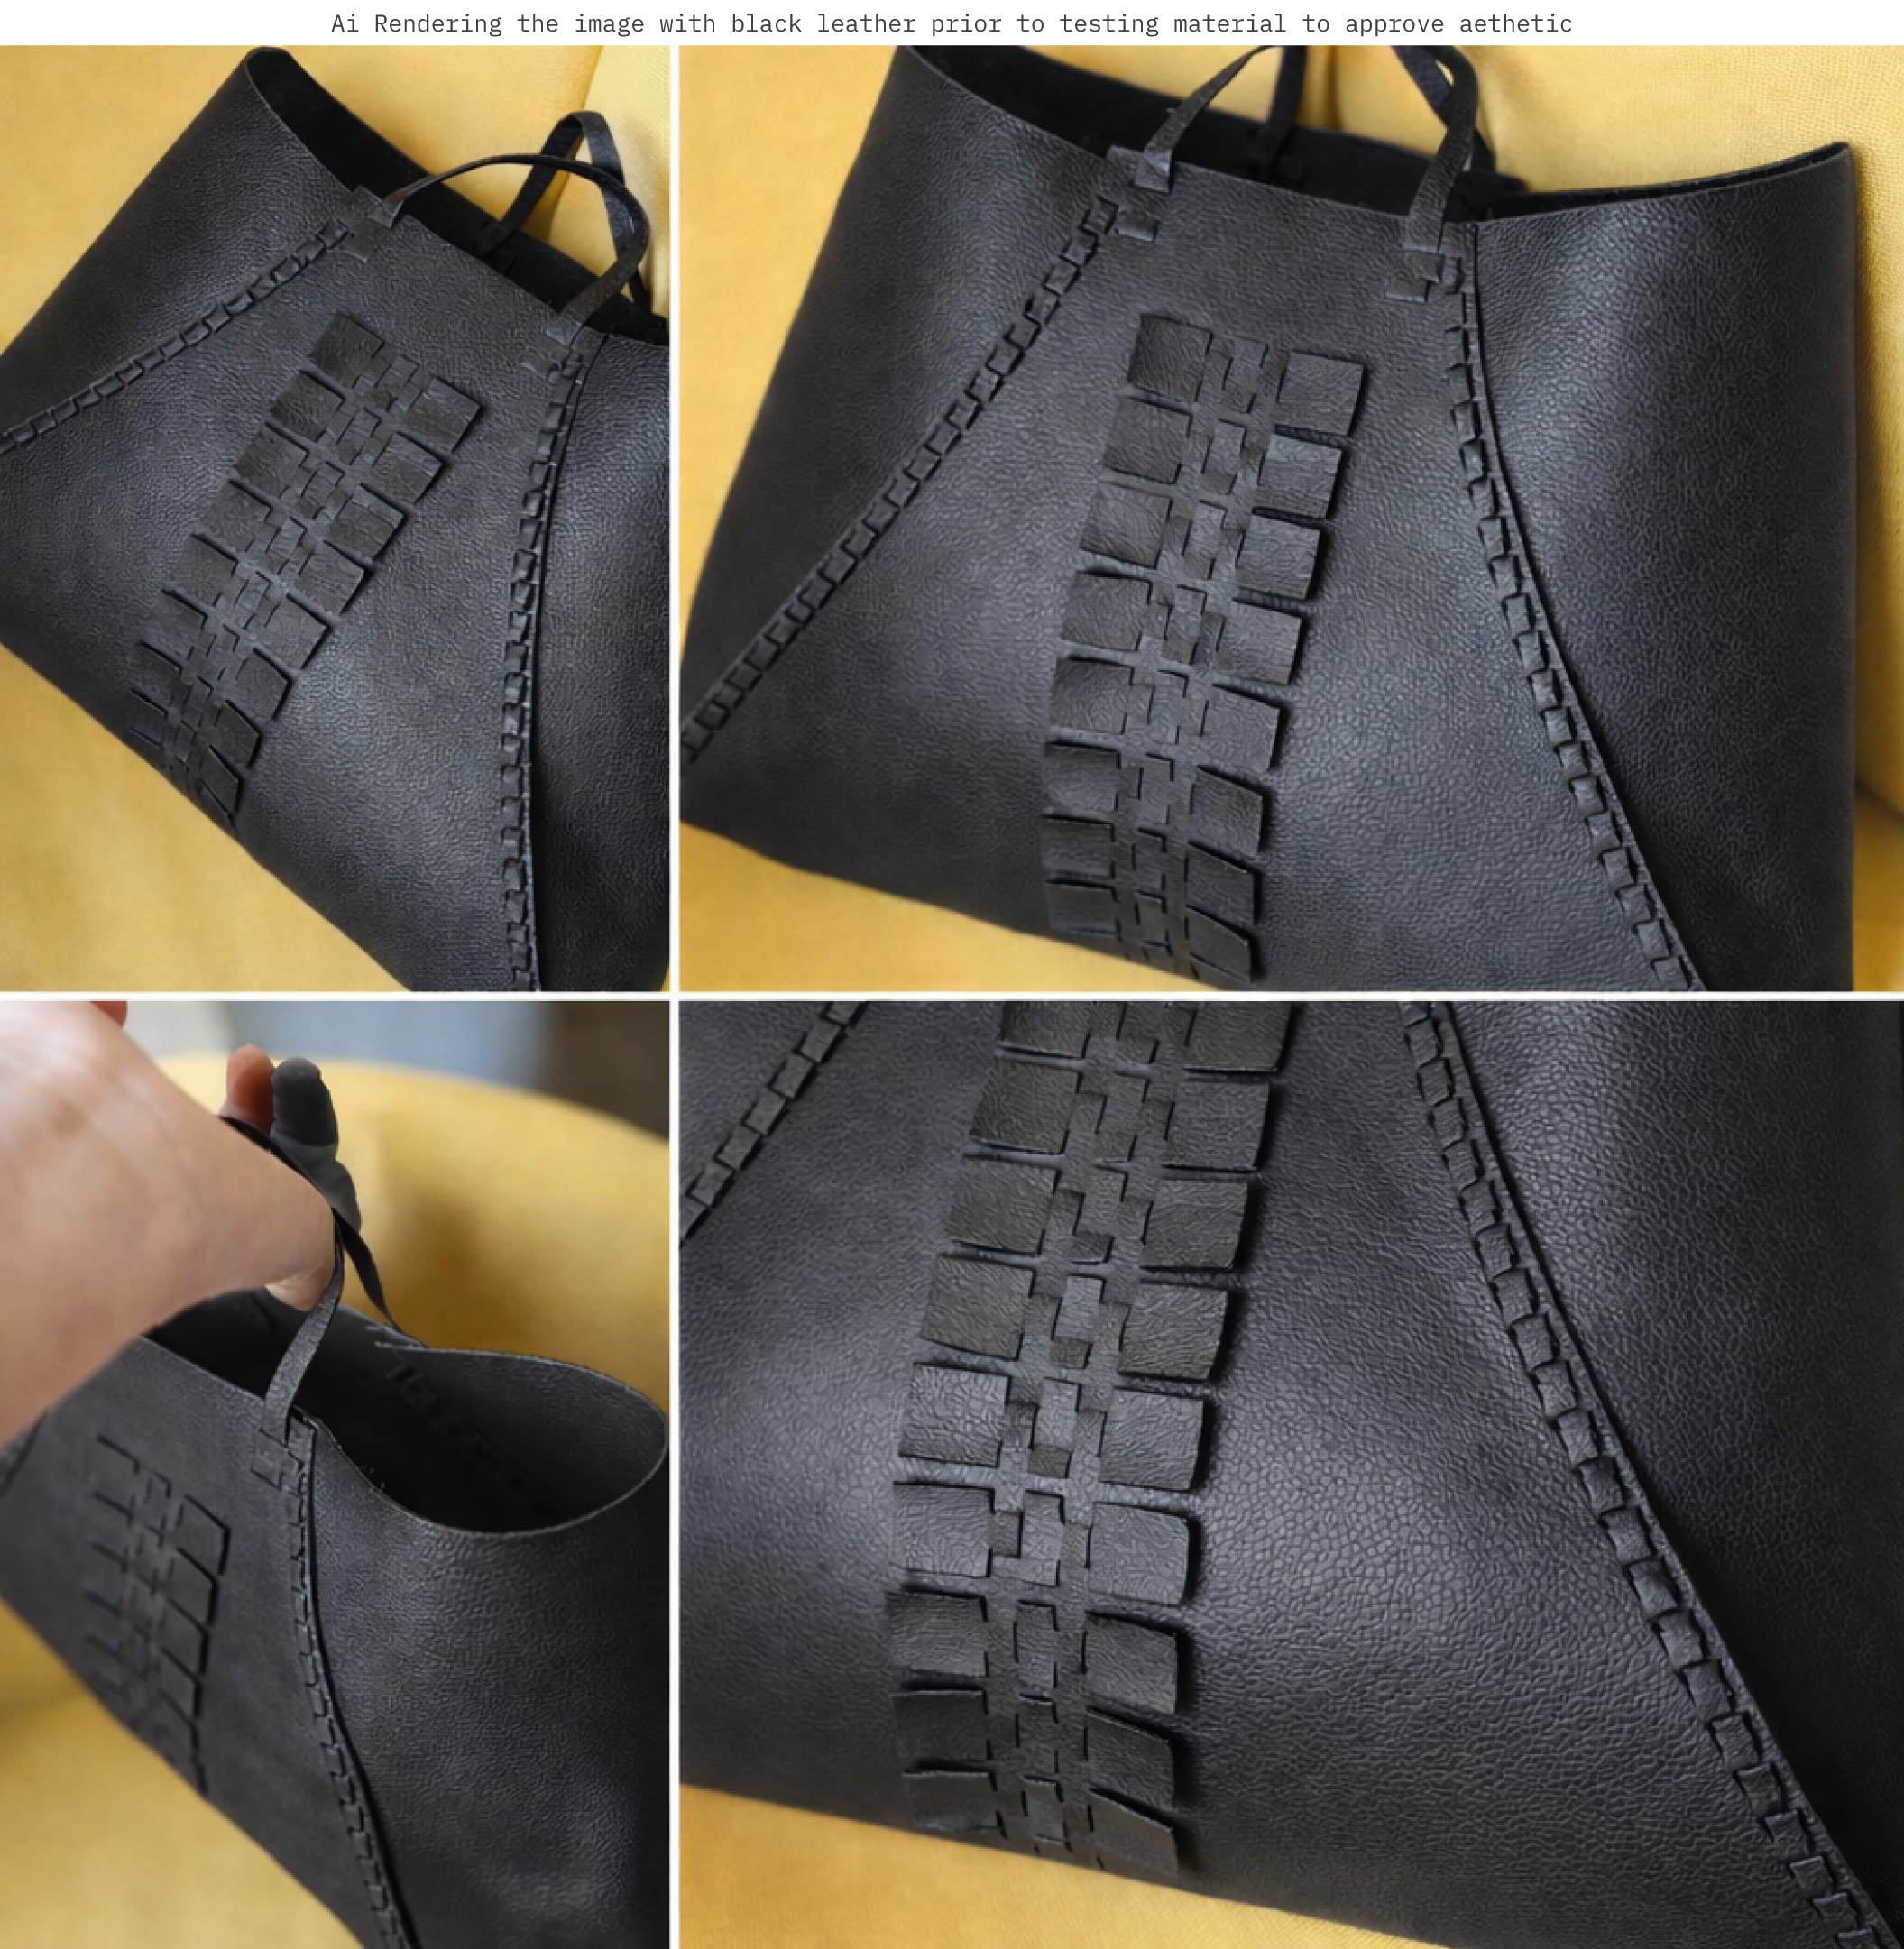
Digital material test:
V. Fabrication files
-
File: Olive Stitch Purse ↩
-
File: Snip-Snap Bag ↩