Clay Experiments
I. Understanding the clay in hands
Before experimentation, understanding clay’s basic properties, workability, drying behavior, and firing response, was essential. This informed shaping, crack prevention, and control over strength and porosity, though trial and error remained the most valuable learning process within this stage.
3 Types of Clay were under my initial study :
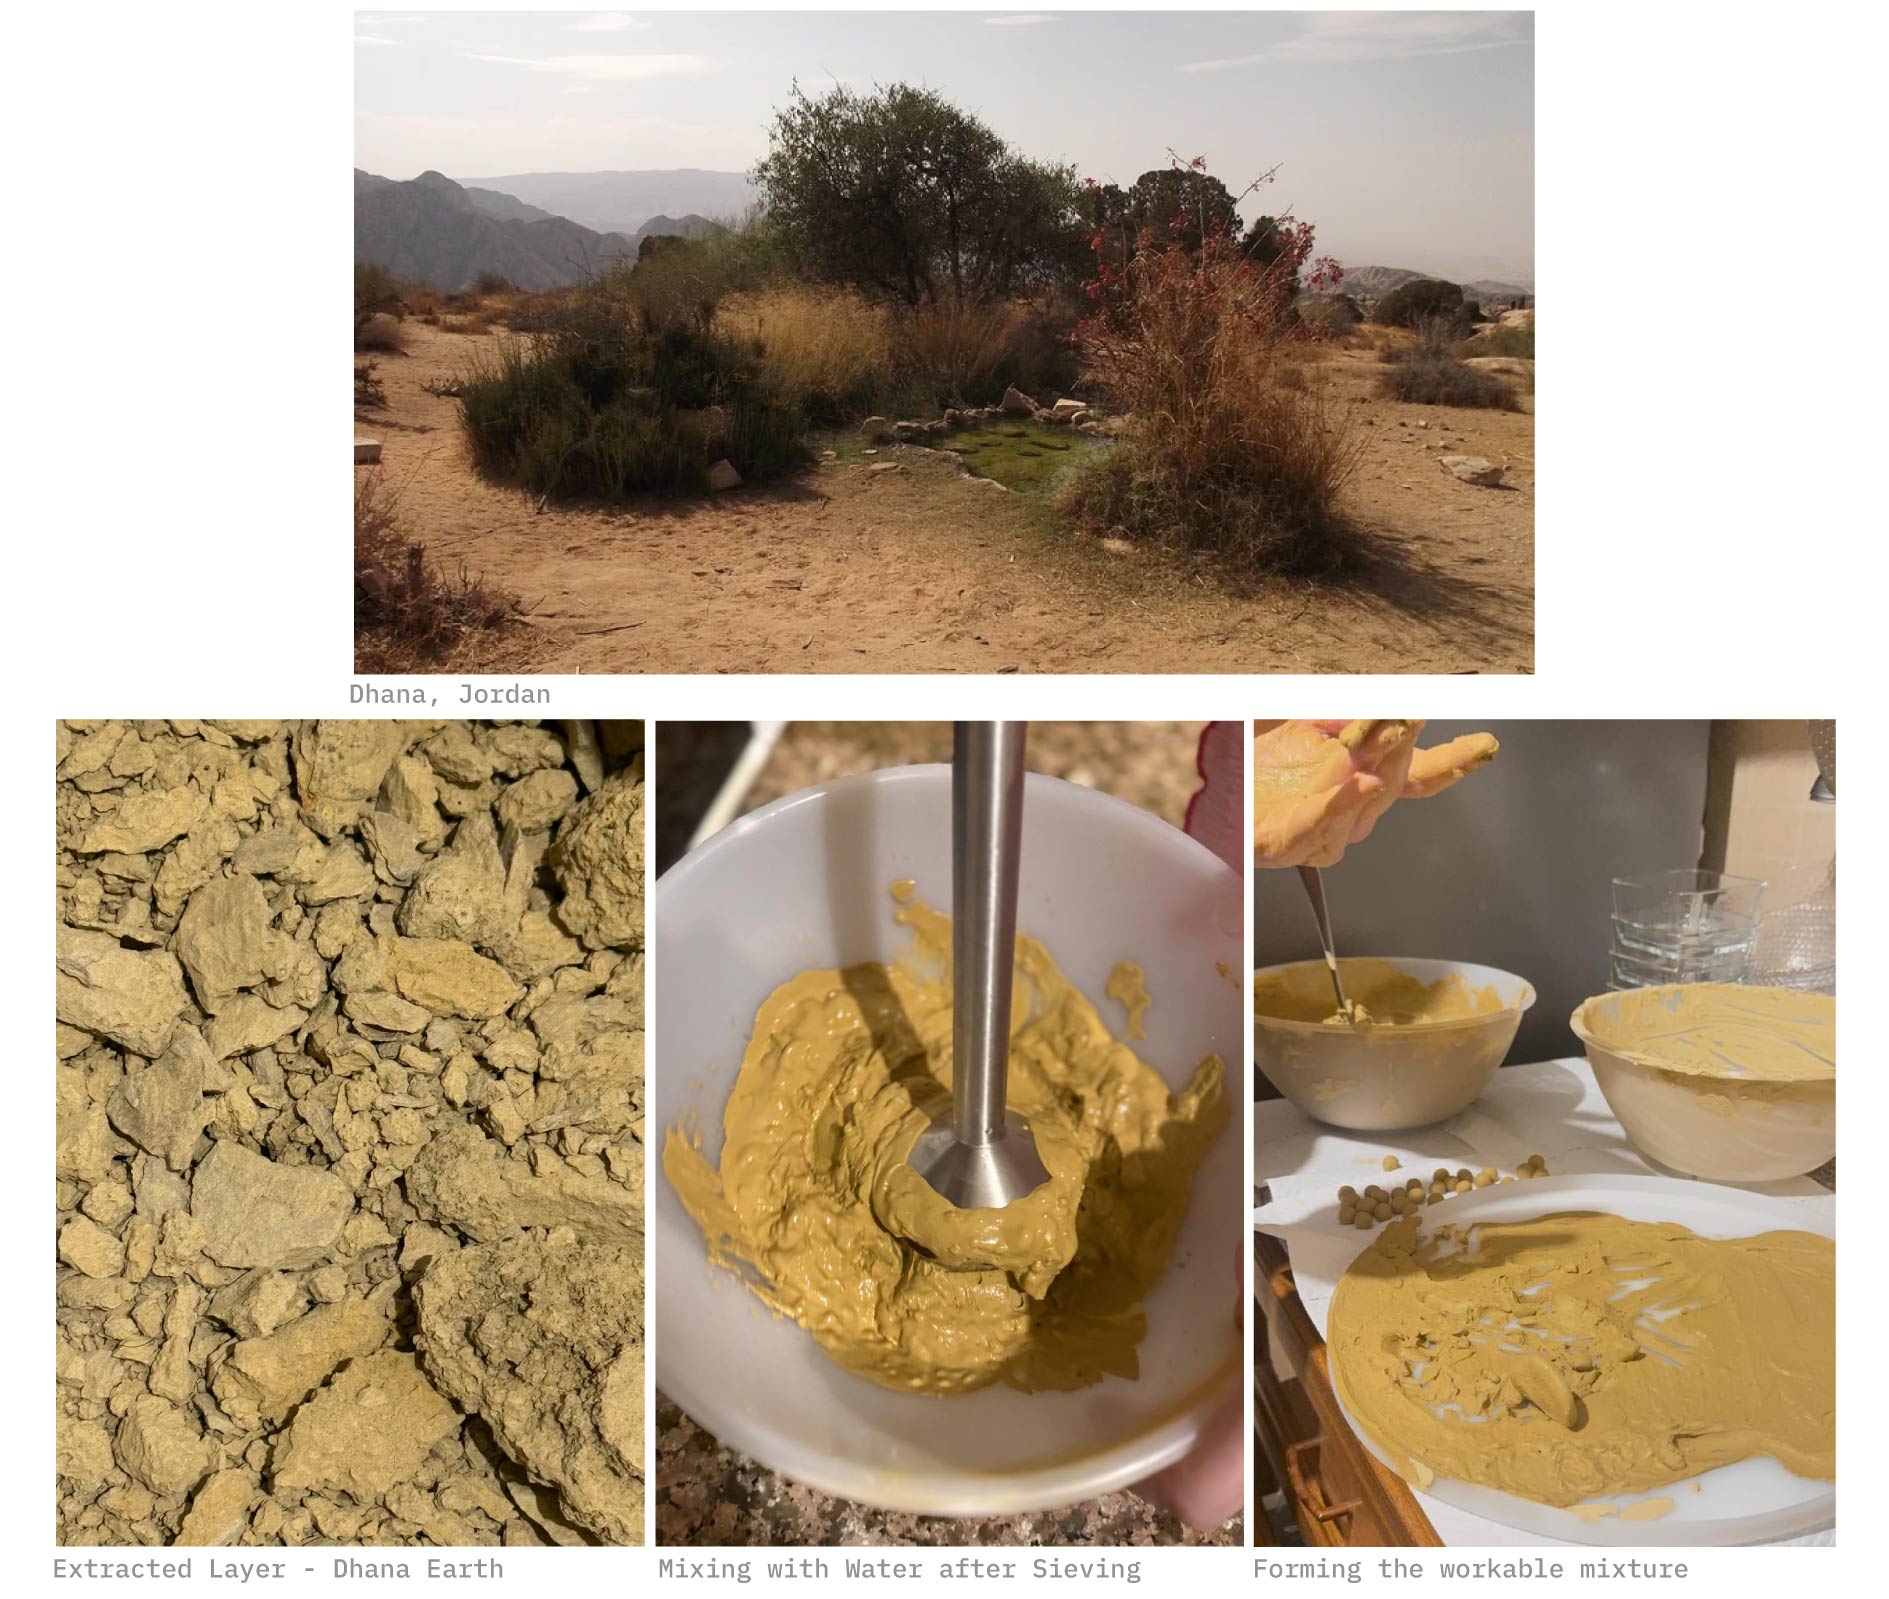
- Dhana Clay:
Dhana clay is a locally sourced, coarse earthen clay characterized by a high content of sand and natural aggregates. While these inclusions can reduce shrinkage during drying, testing revealed that the material becomes brittle after firing and more prone to cracking. Its low plasticity and rough texture make it suitable for structural and experimental applications; however, it proved unsuitable after firing my terracotta modules for text.
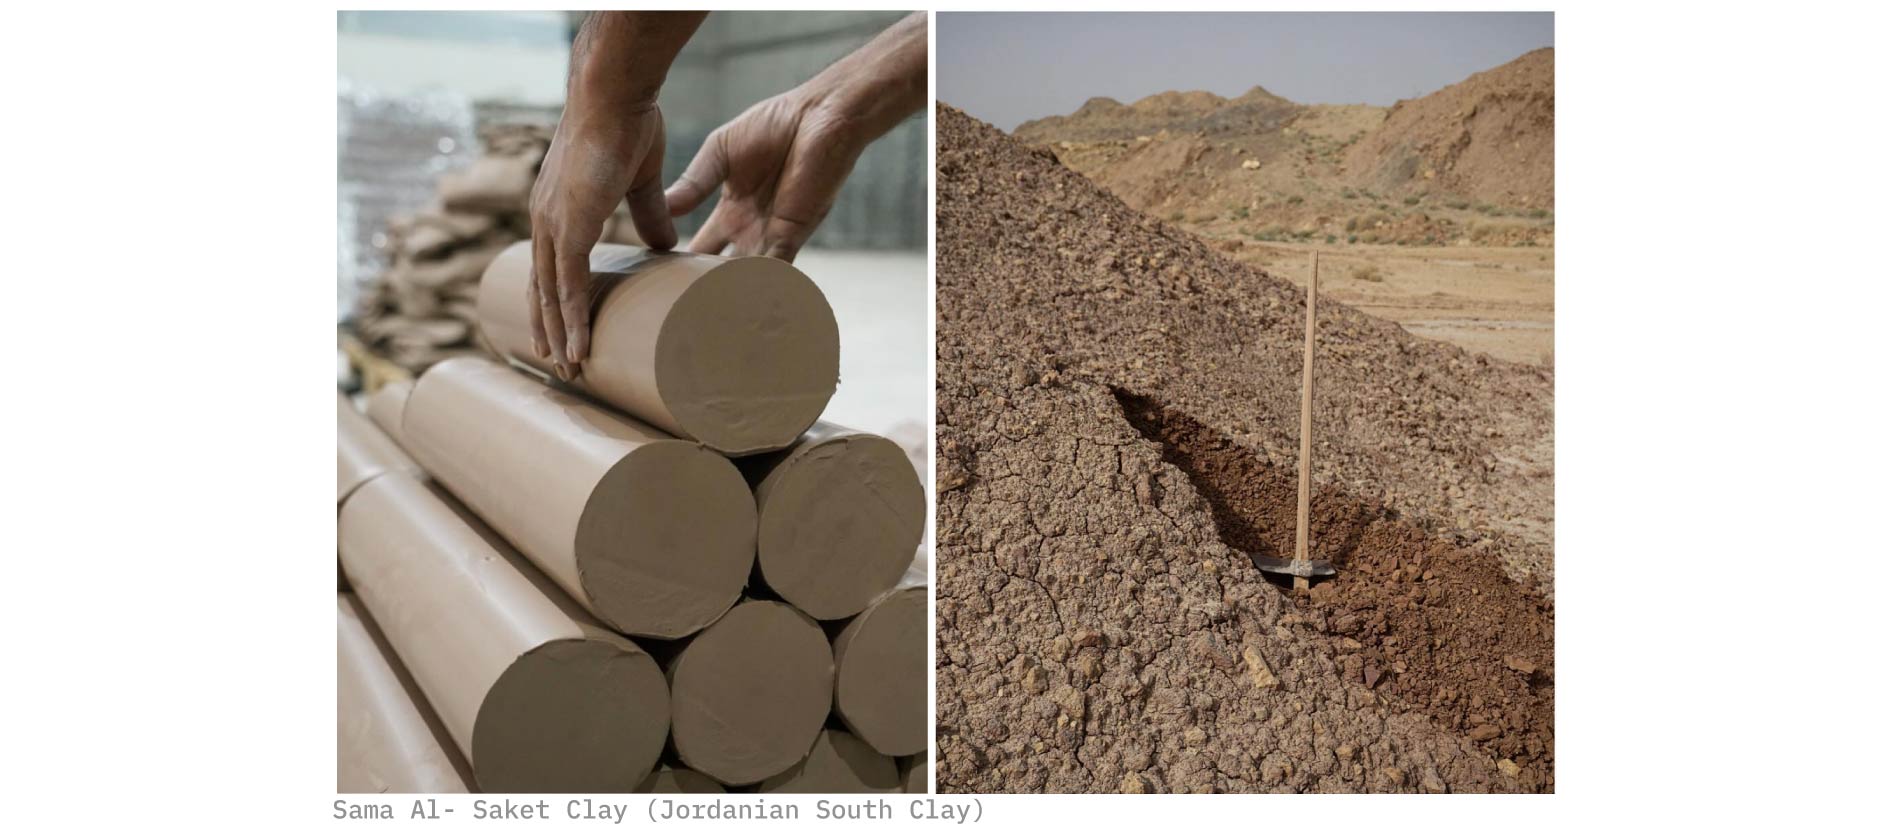
- South Jordanian Red Clay (Sama Al-Saket):
Jordanian Red Clay is a refined ceramic clay characterized by its rich iron content, which gives it a distinctive red color after firing. It offers higher plasticity and workability compared to coarse earthen clays, allowing for more precise shaping and detailing. When fired, it achieves greater strength and cohesion, making it suitable for terracotta applications. Its controlled porosity and durability make it a reliable material for both crafted objects and experimental ecological uses. However, it is sensitive to contamination and can be easily stained or altered in color when fired alongside other clay types.
- Italian Clay (Colorobbia):
High-quality, industrially processed ceramic clay known for its consistency, refined particle size, and reliable performance. It offers excellent plasticity and workability, allowing for precise forming and detailing. When fired, it achieves strong structural integrity with controlled shrinkage and predictable results, making it suitable for both artistic and technical applications. Its standardized composition ensures repeatability, making it a dependable choice for prototyping and refined ceramic production. It doesn't get stained or altered in color when fired alongside other clay types.
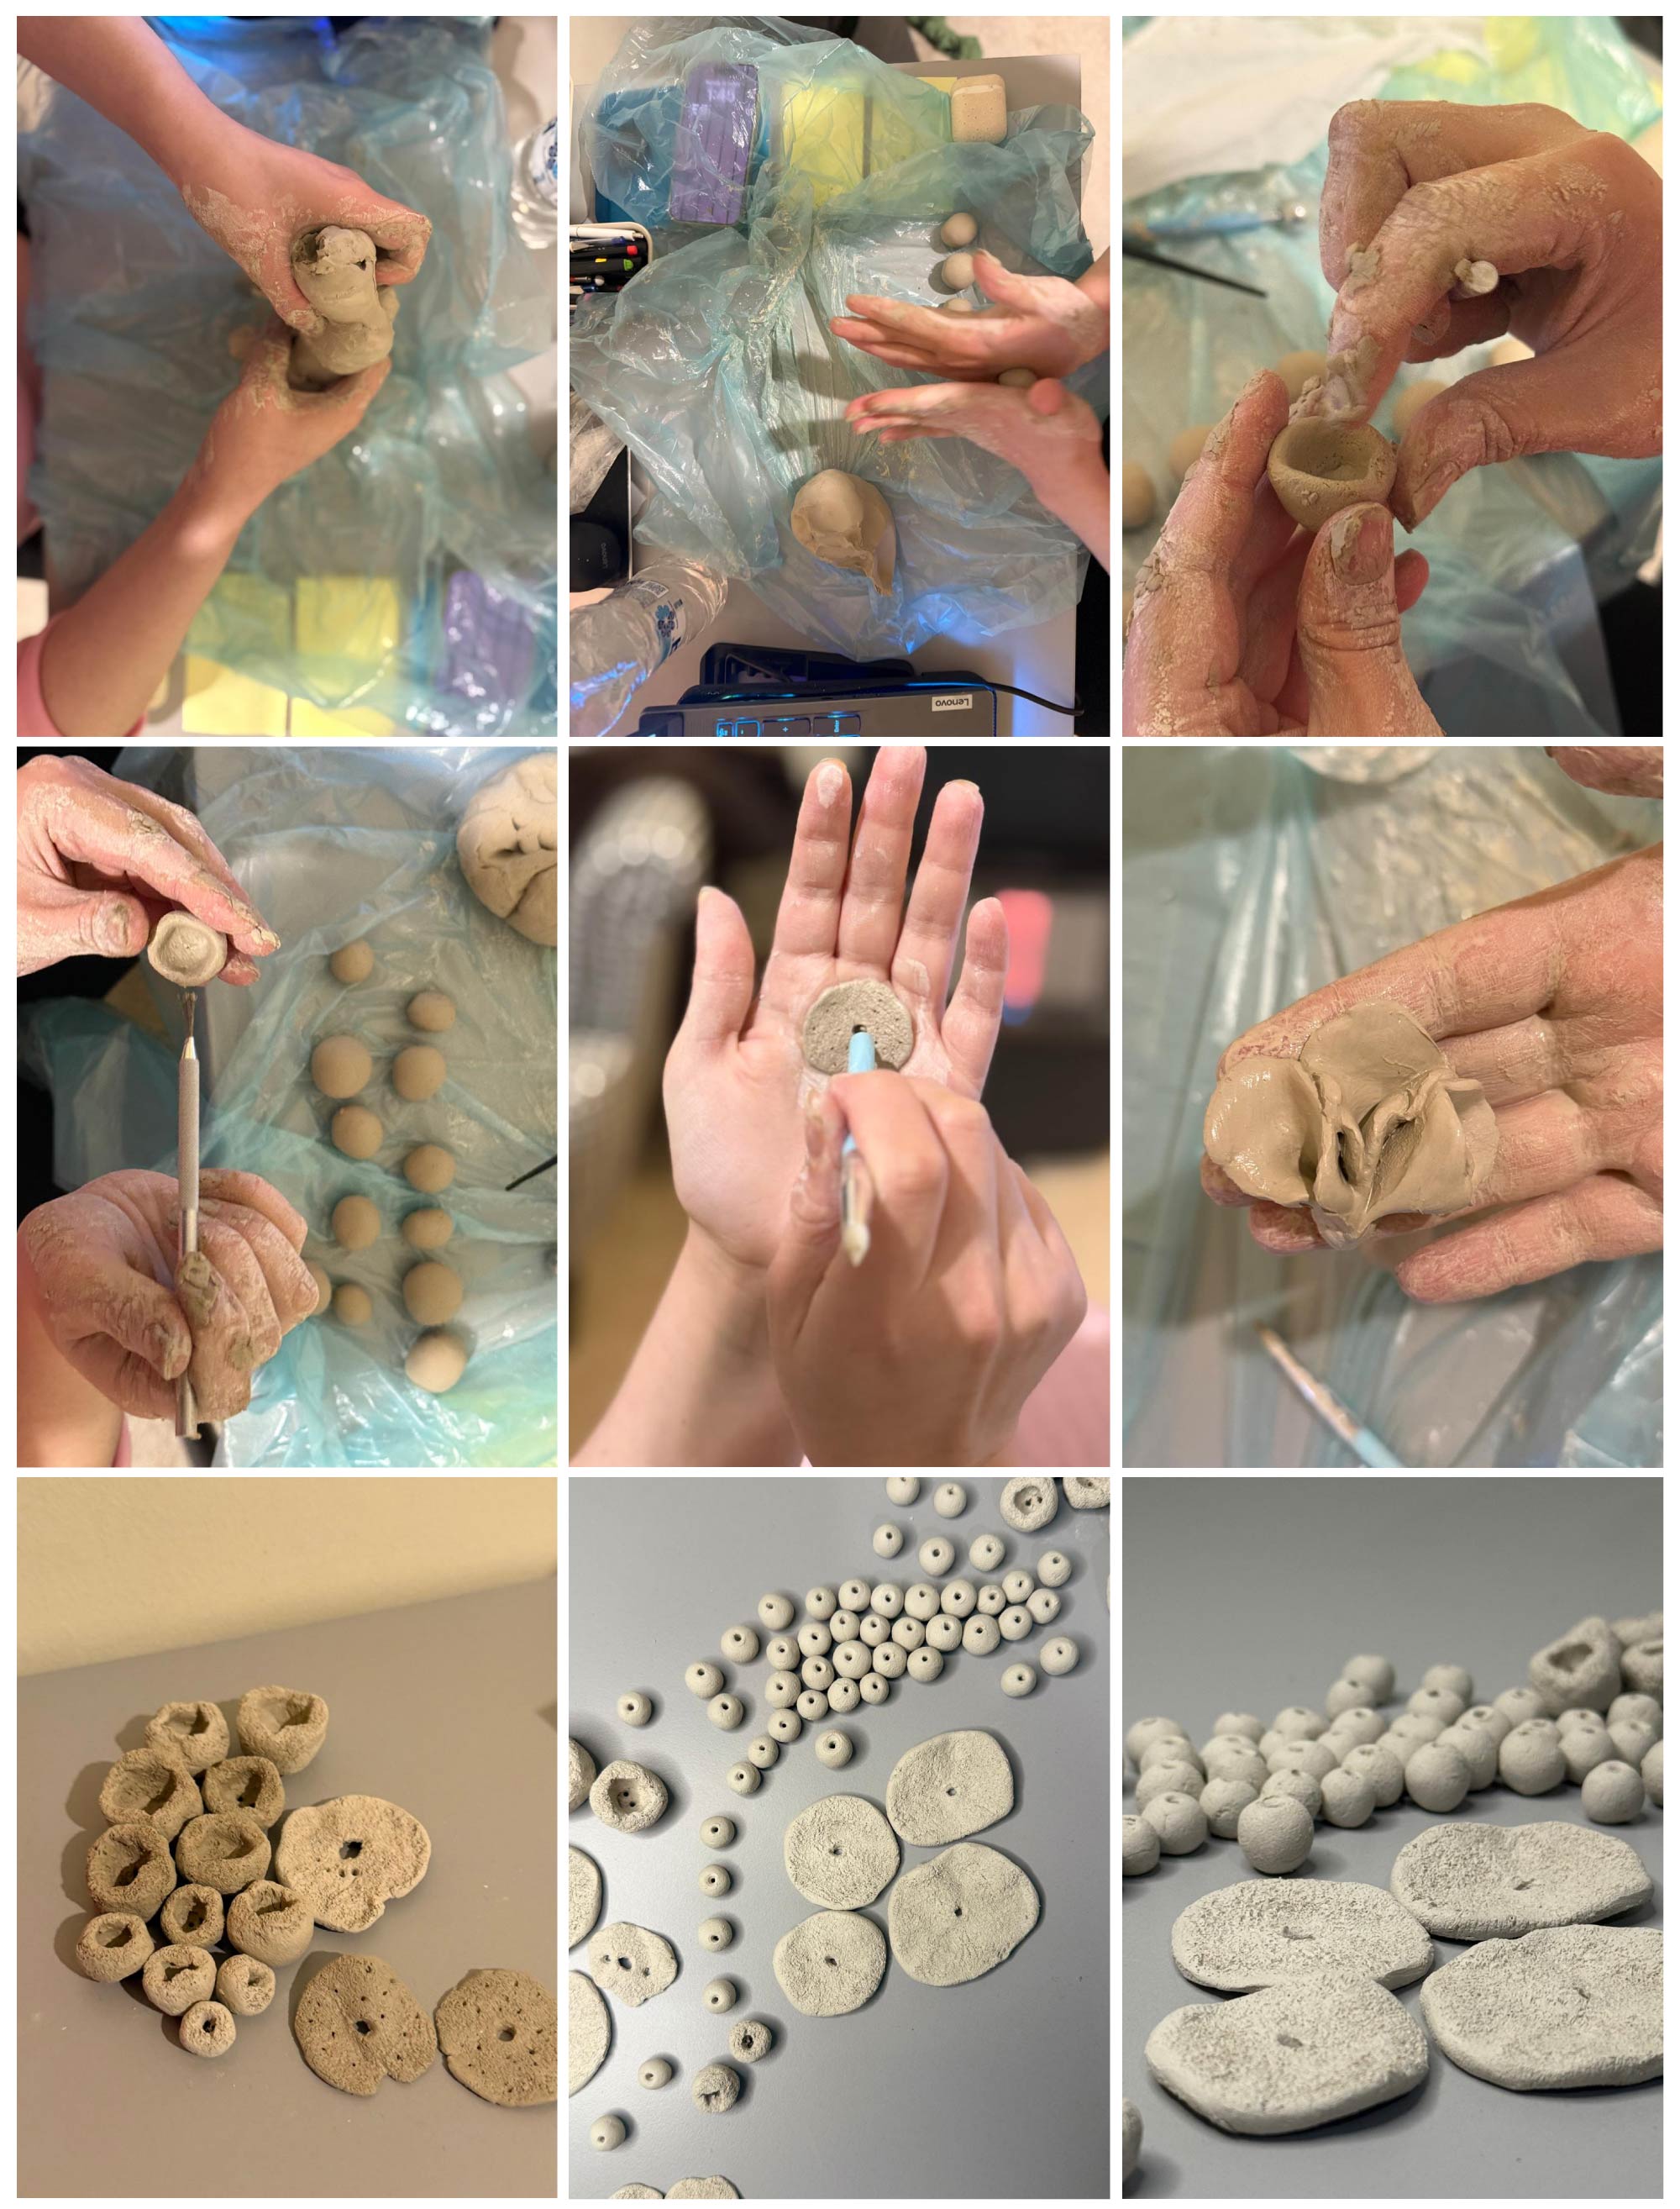
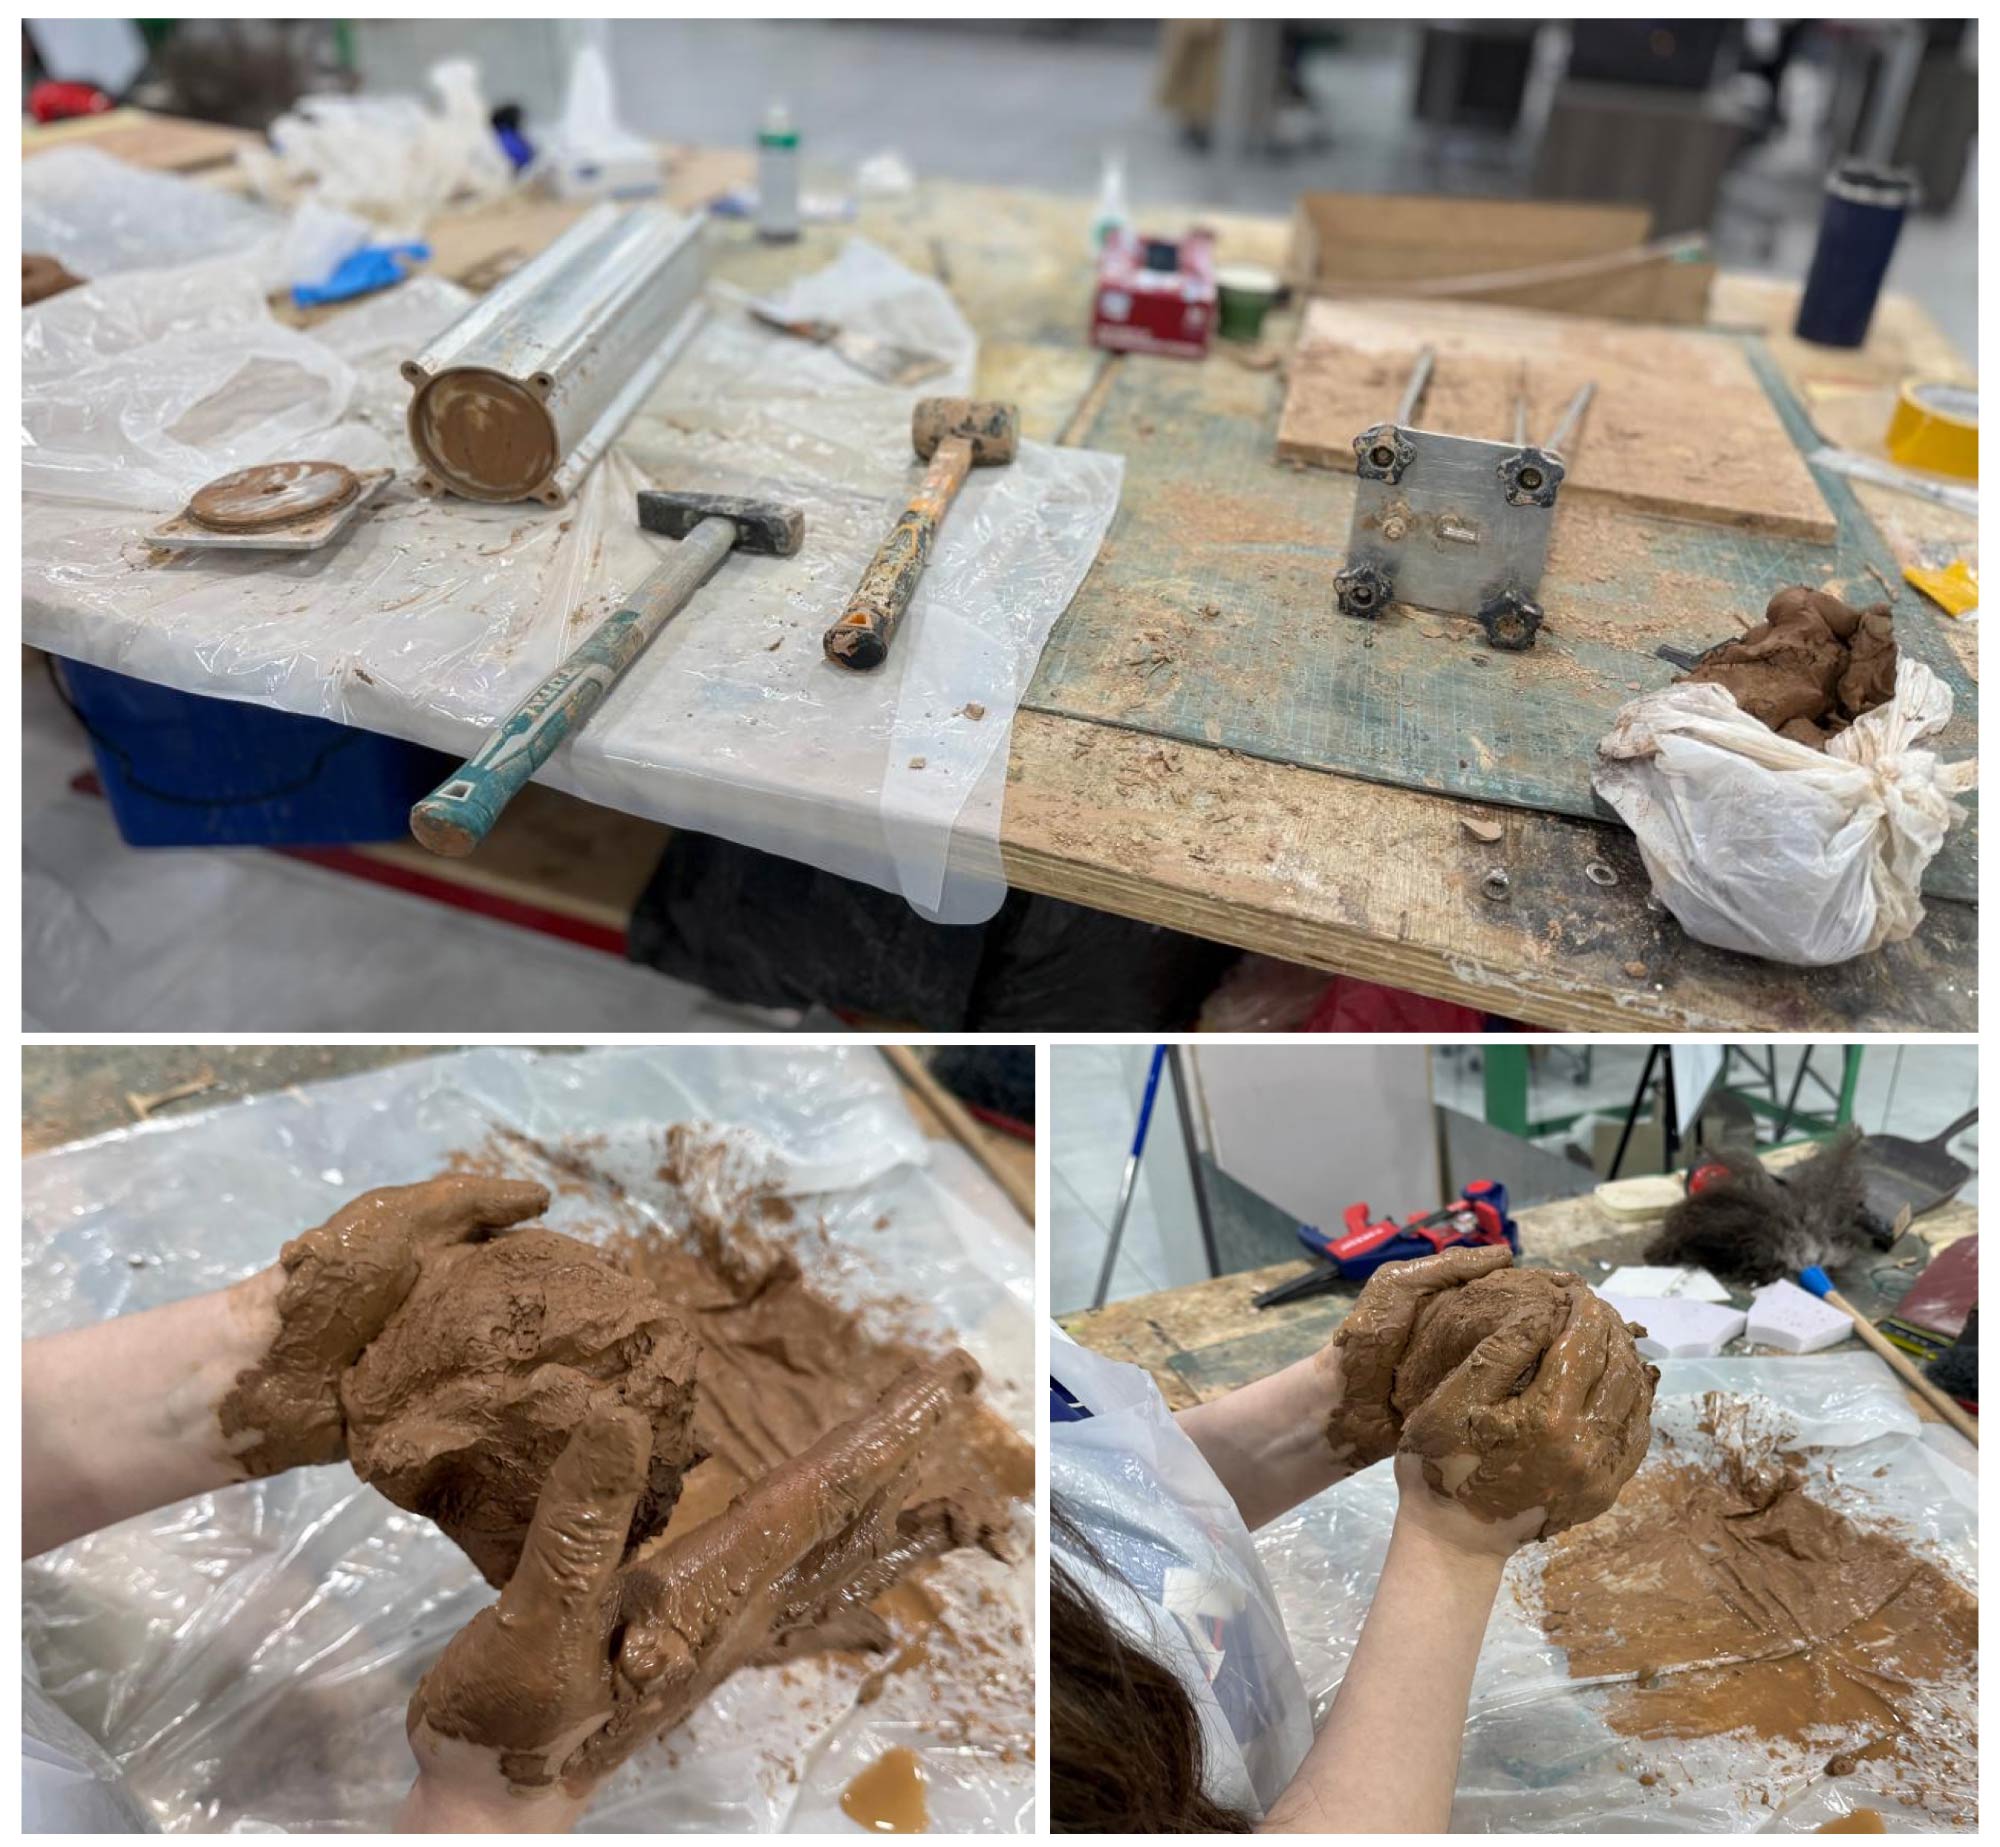
II. Hand Molding Clay Experiment
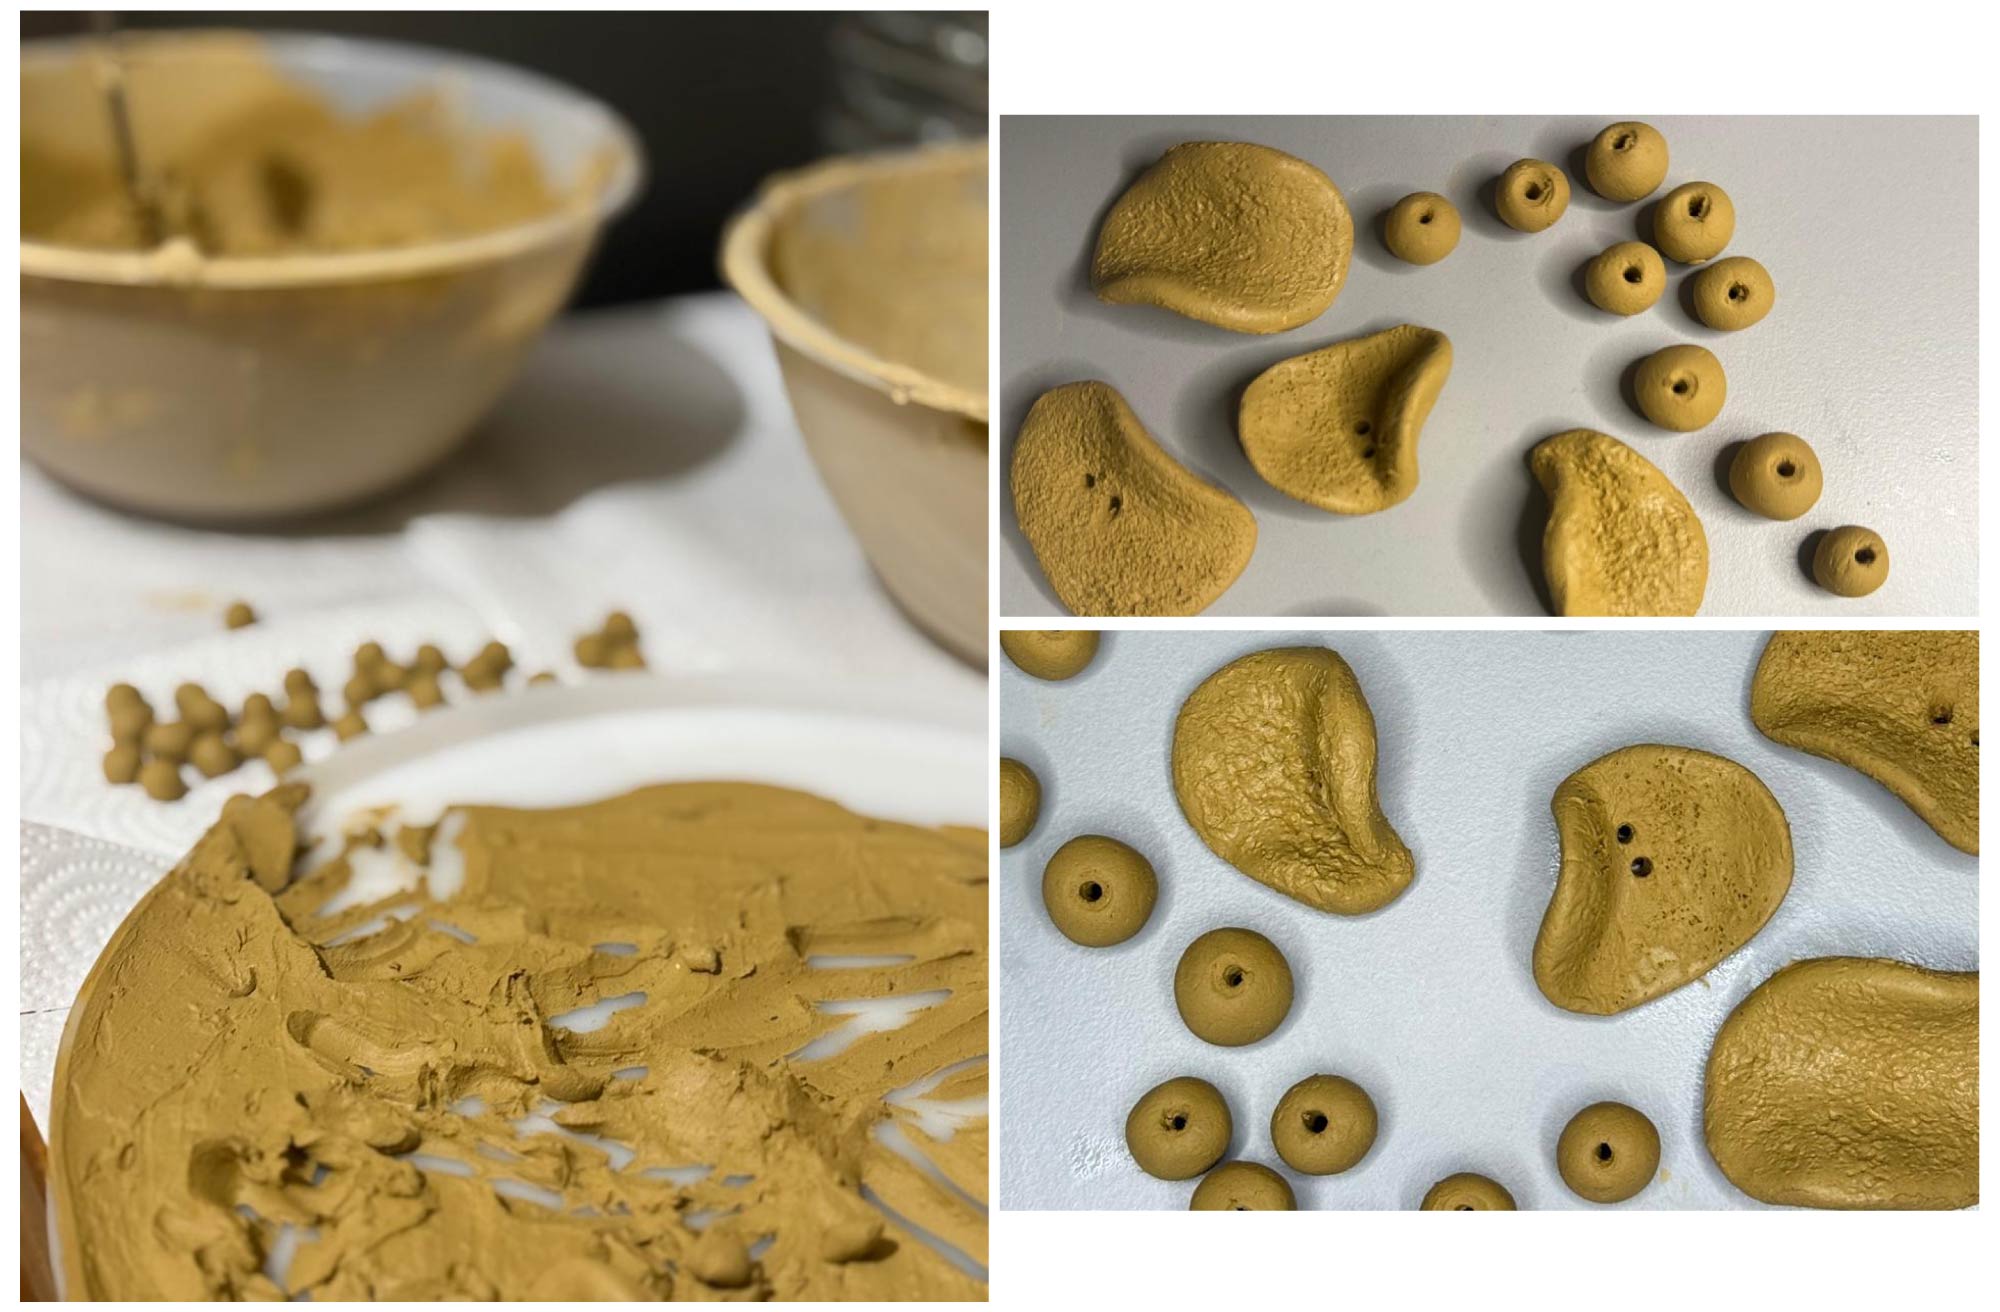
This phase explored hand molding as an intuitive method for shaping clay and understanding its tactile behavior. Through direct manipulation, the material’s plasticity, response to pressure, and tendency to crack or deform were observed. This process allowed for testing organic forms and surface textures, informing both the design language and the material limitations for further development.
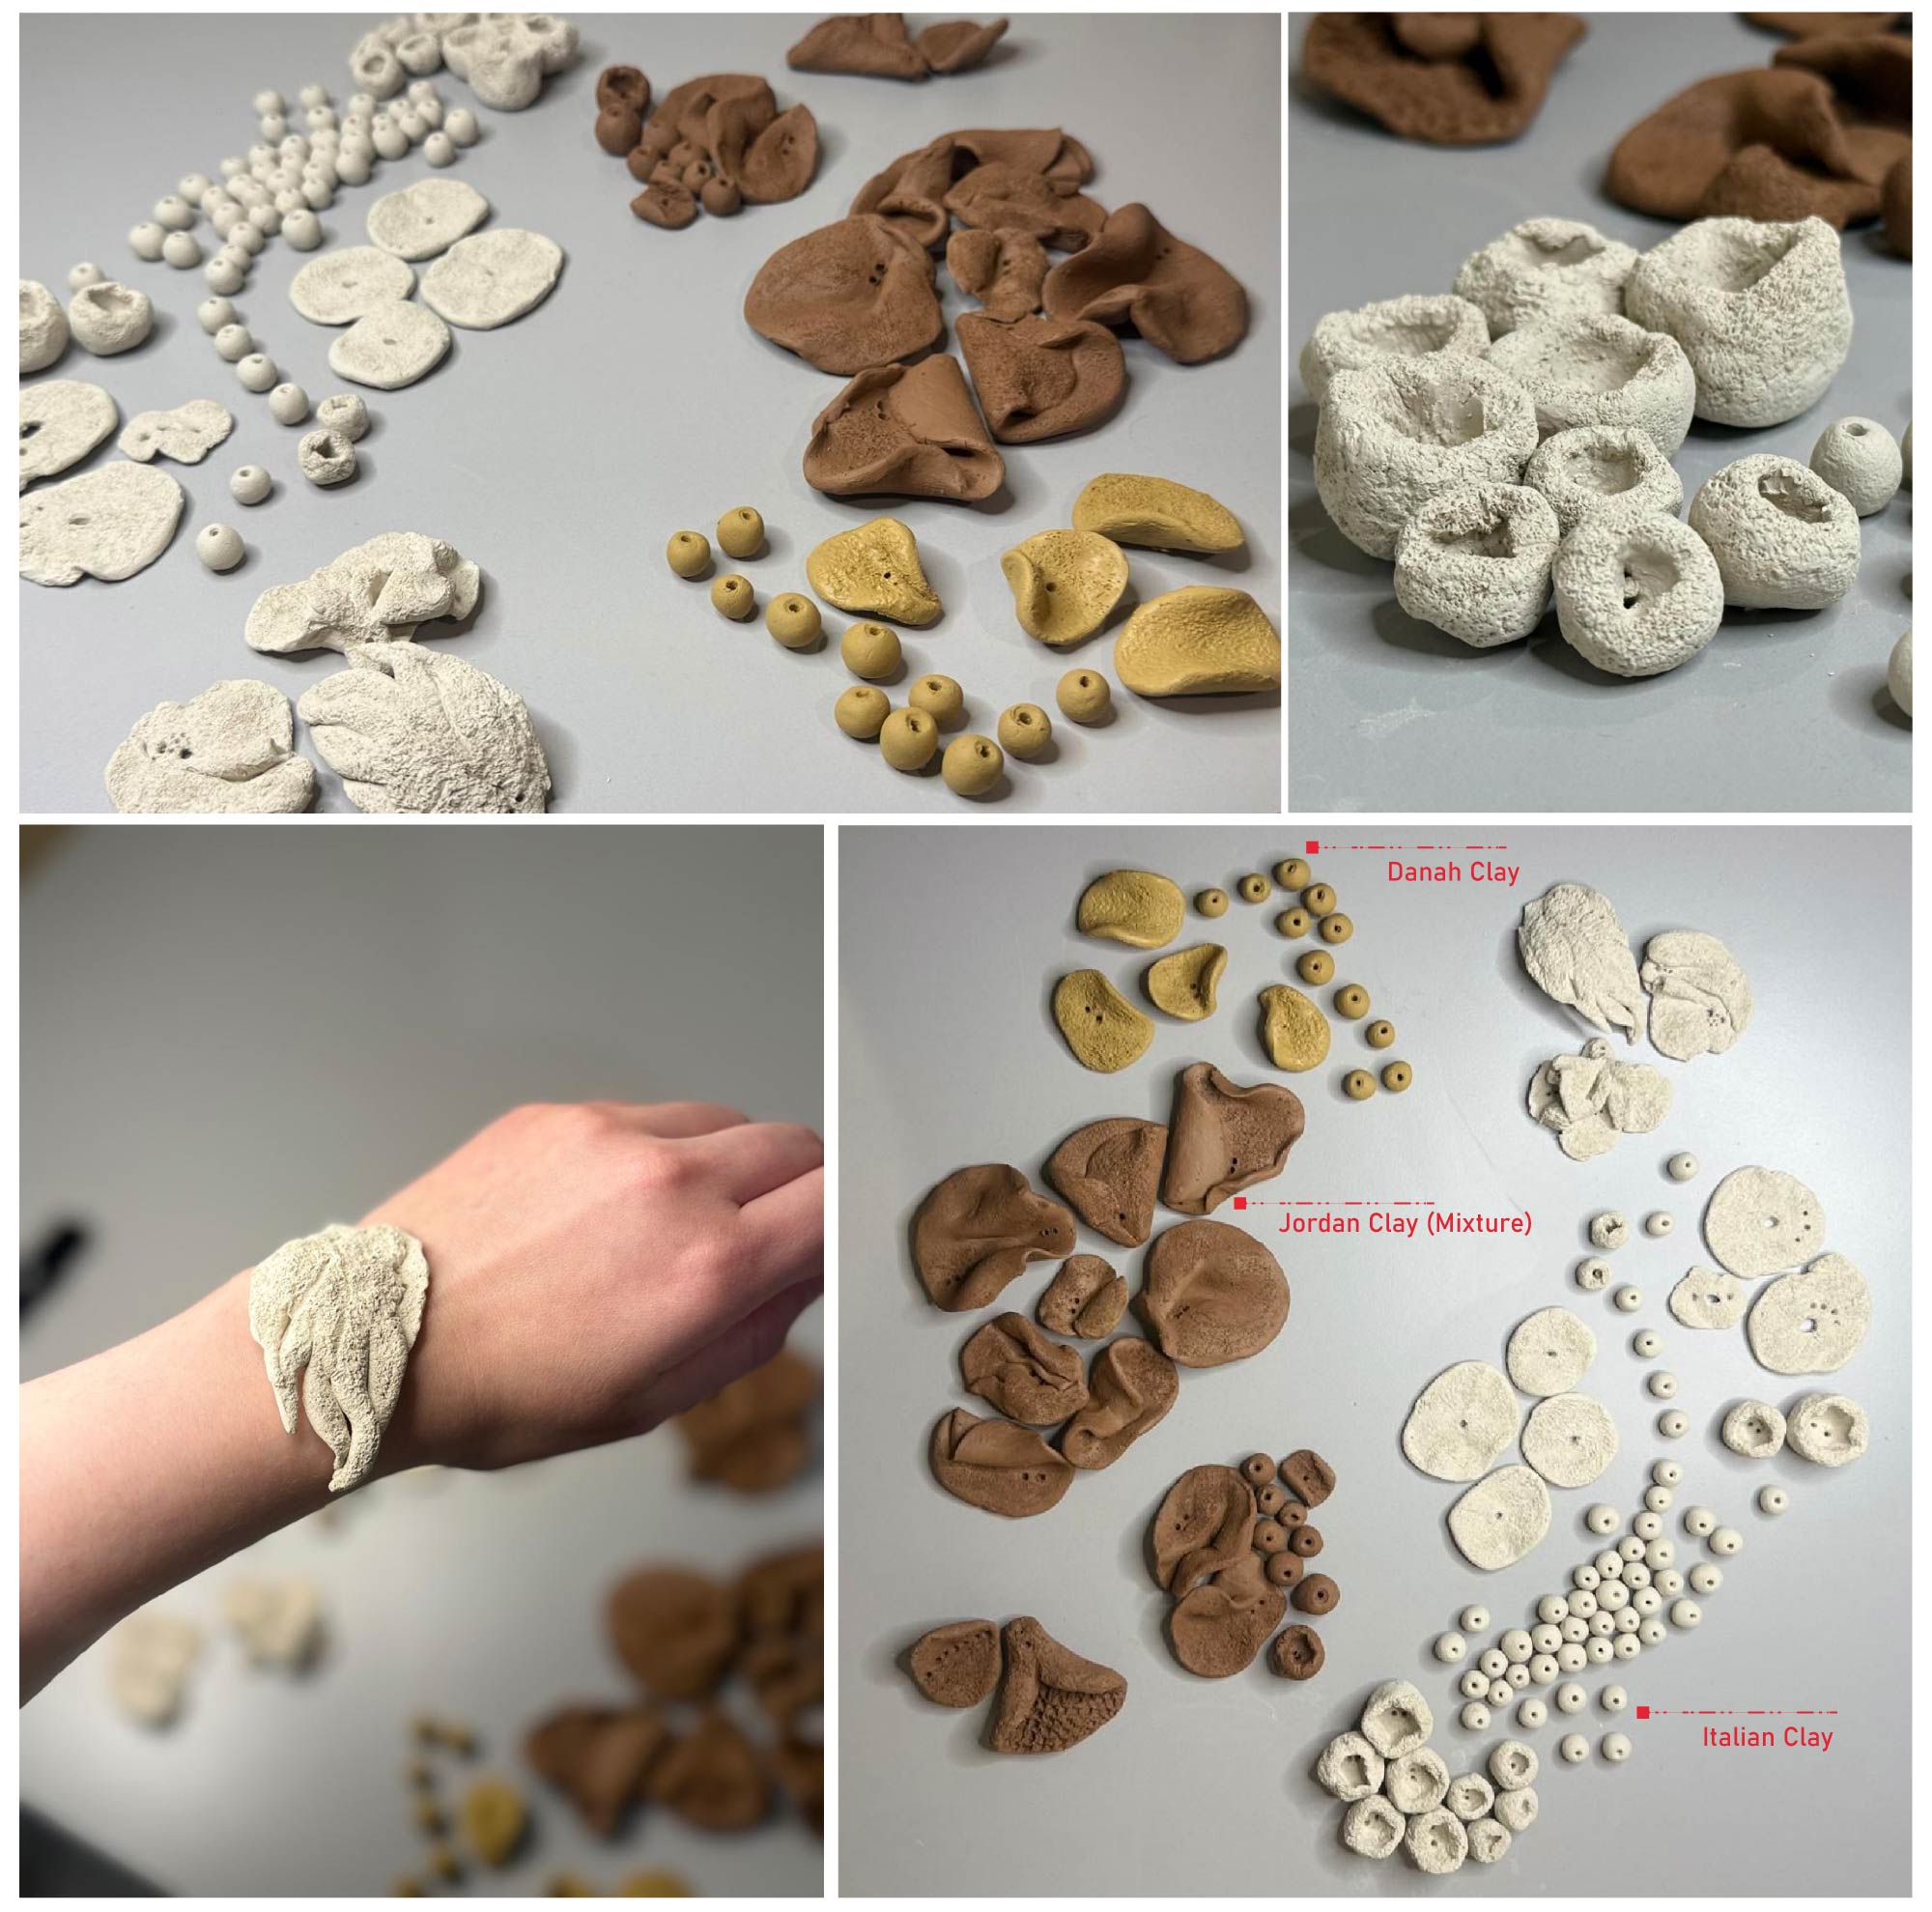
A. Hand Molding Italian Clay
B. Hand Molding South Jordanian Clay
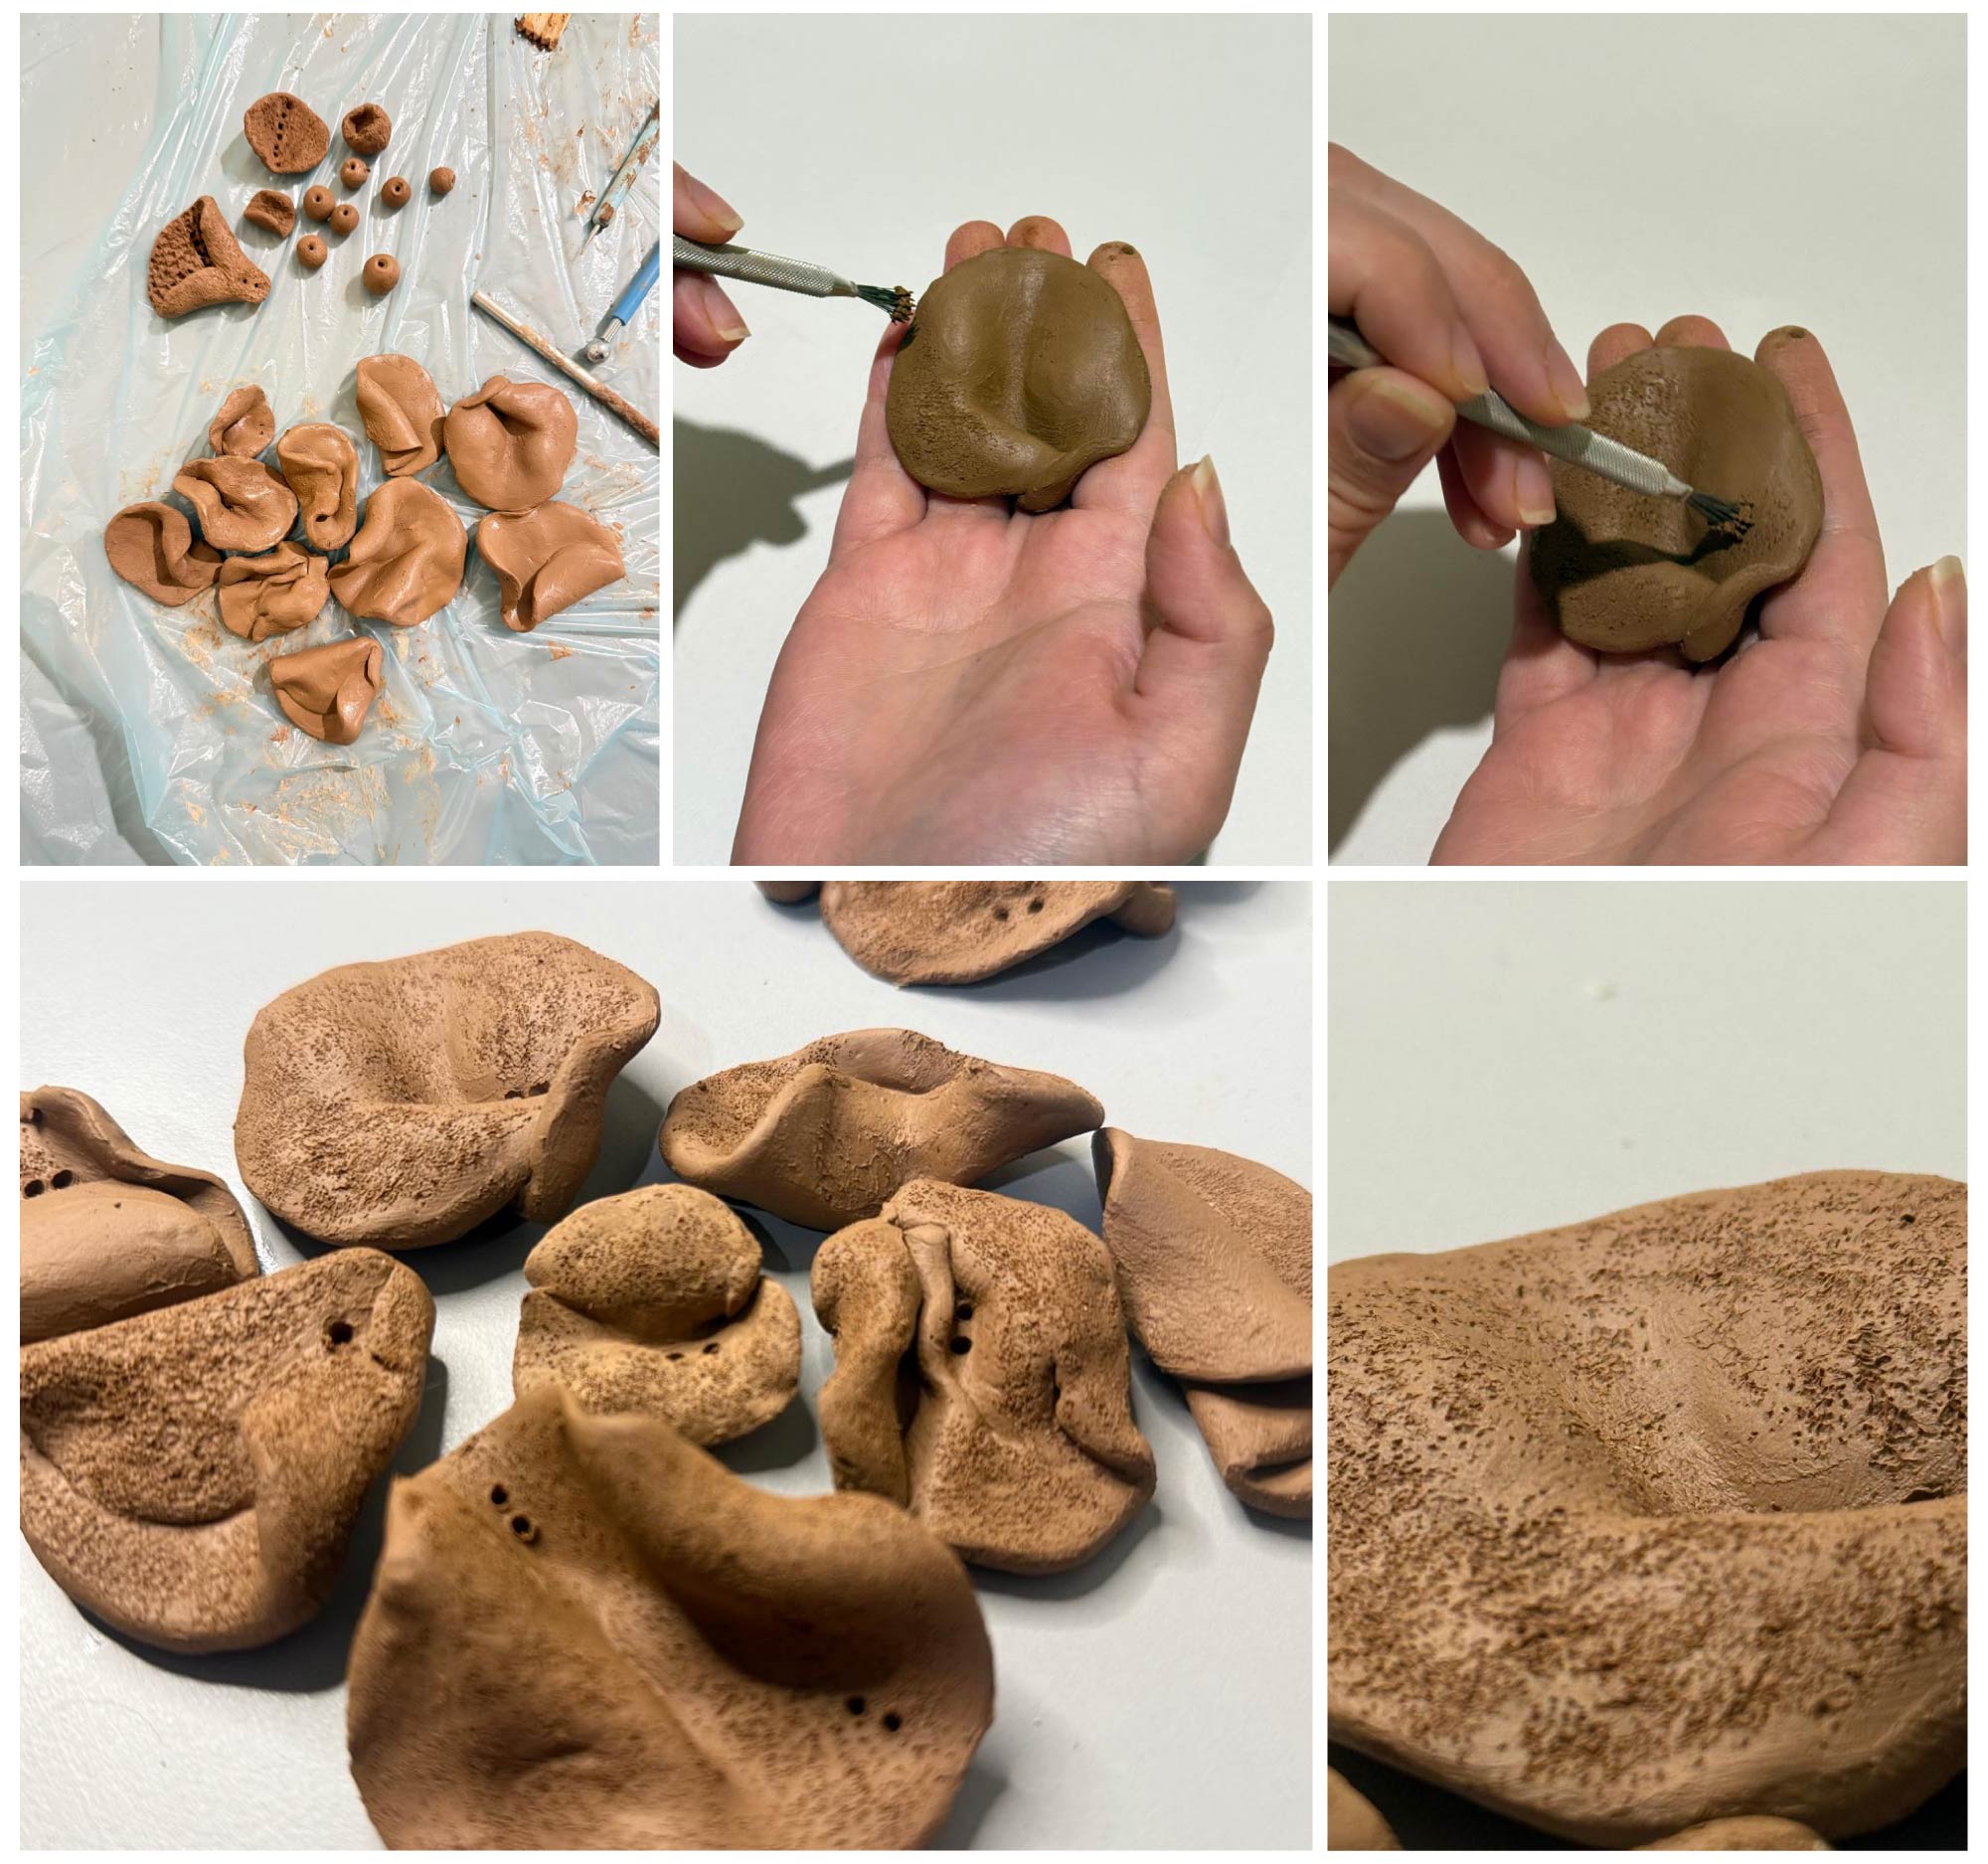
C. Hand Molding Dhana Clay
III. 3D Printing Clay Experiment (WASP 2040)
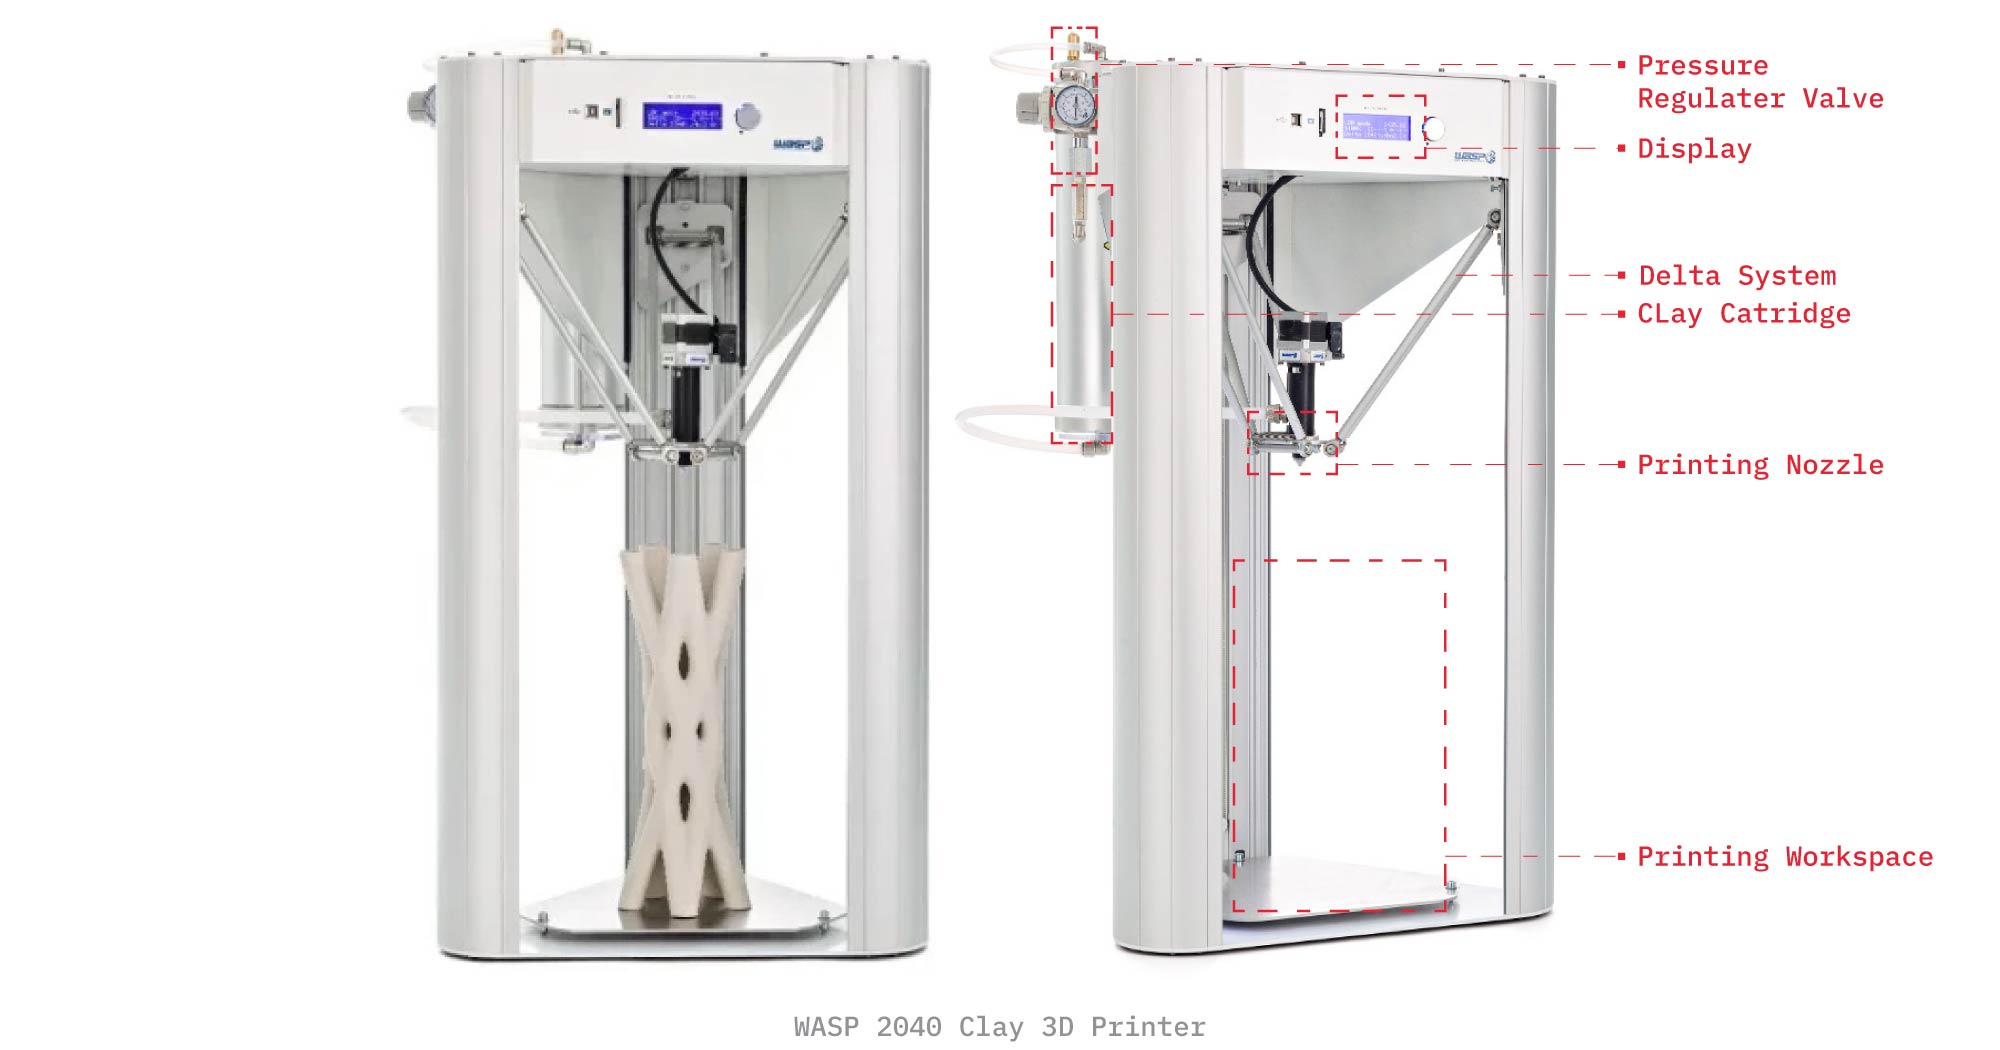
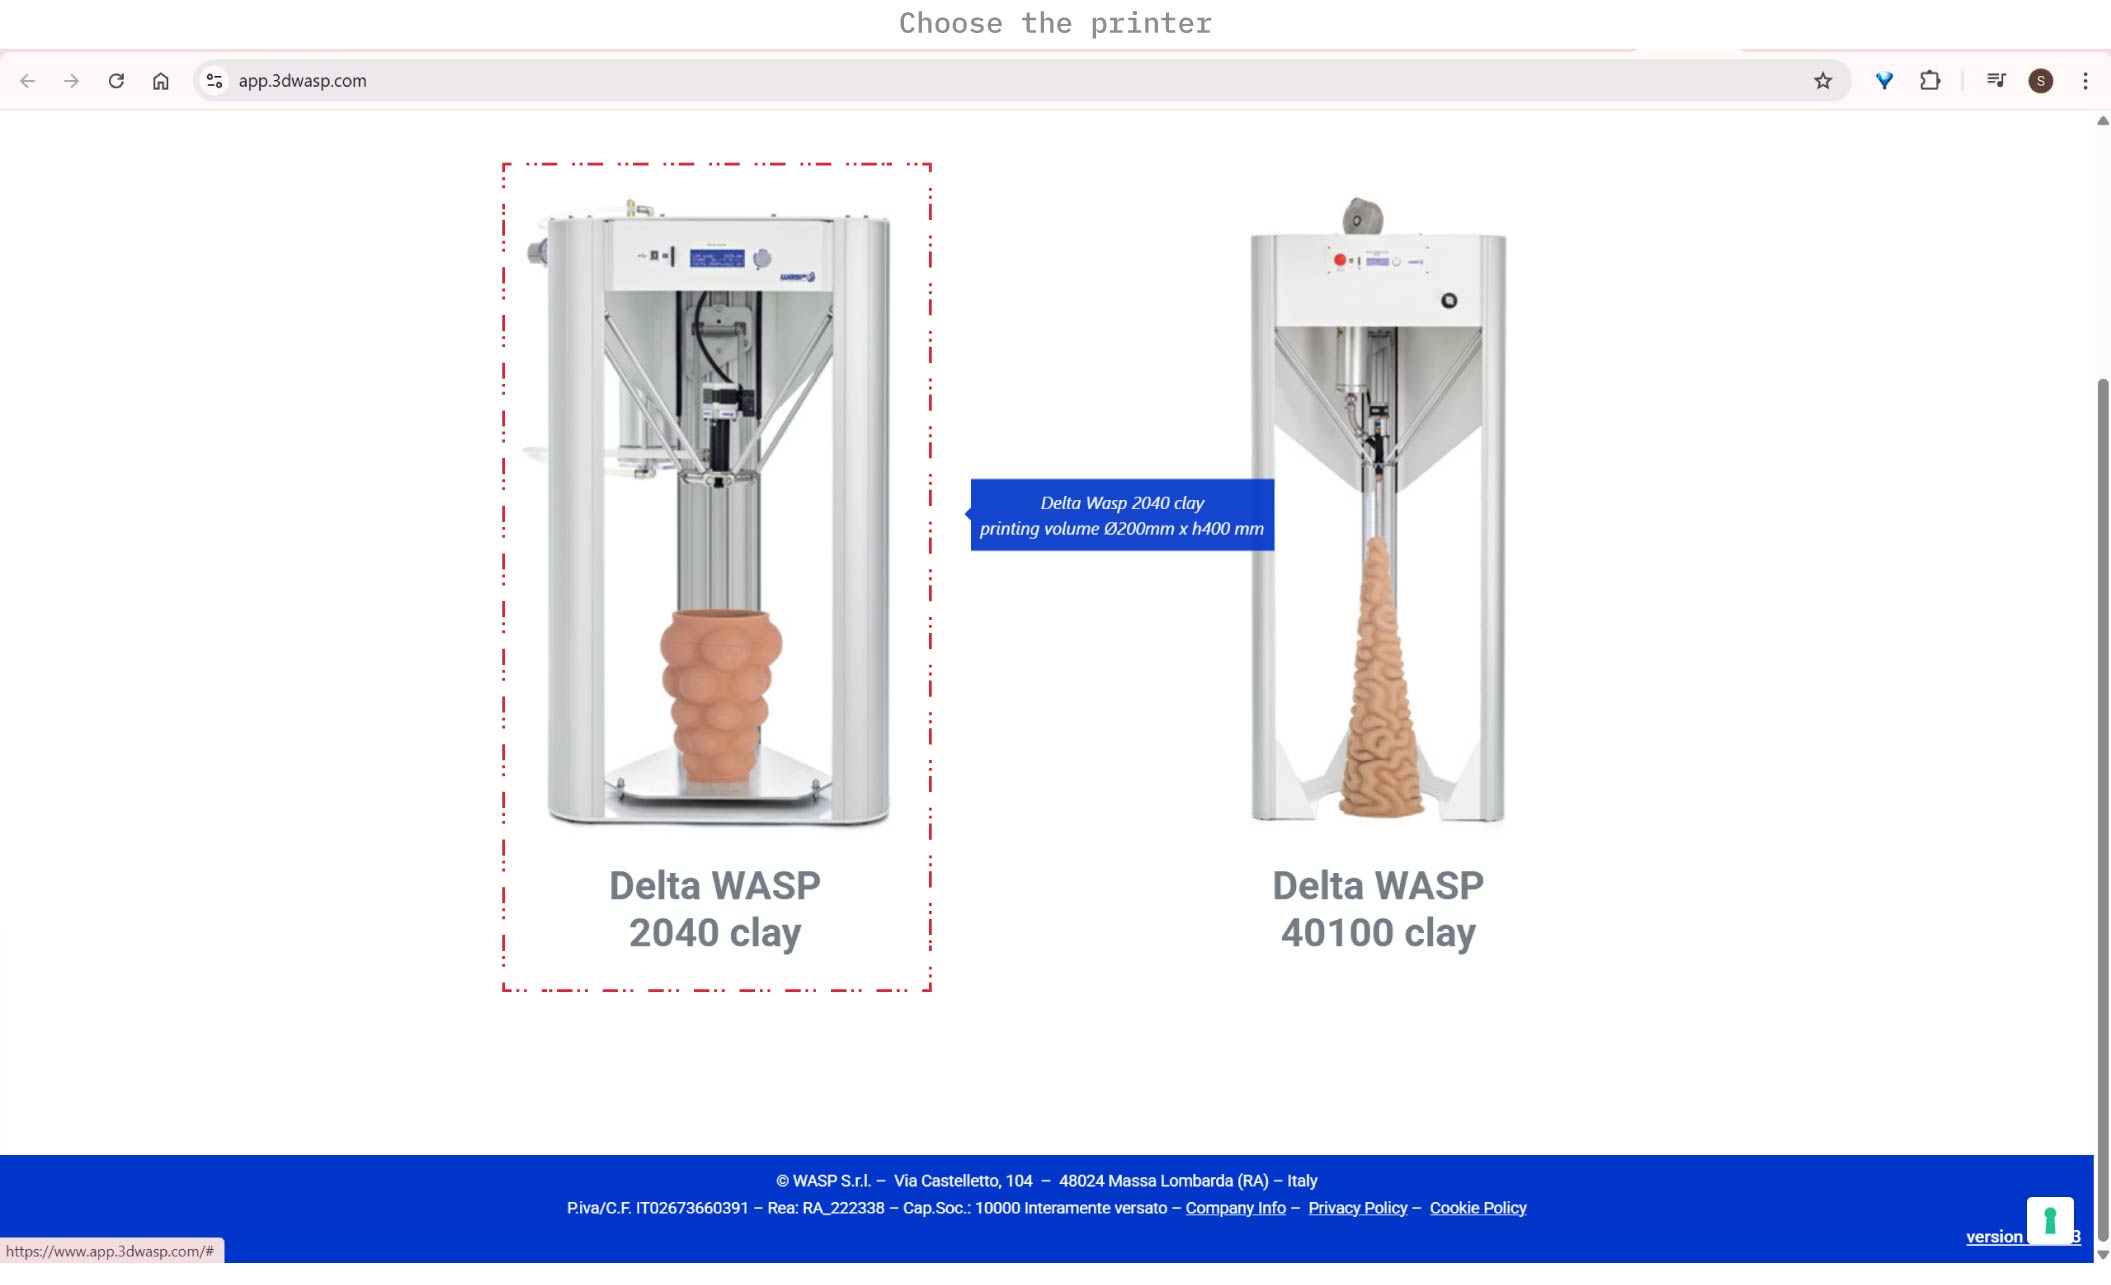
A. Introduction to WASP 2040 Clay 3D Printer
The WASP 2040 Clay 3D Printer is a compact, professional delta-style 3D printer designed for the extrusion of ceramic materials such as clay, porcelain, and earthenware. It uses a controlled screw-based extrusion system (LDM) to deposit fluid material layer by layer. Designed for precision and material experimentation, it enables the production of complex geometries and repeatable forms that are difficult to achieve through manual methods. Its compatibility with various clay bodies makes it a valuable tool for both design research and fabrication.
Clay 3D Printing Process Using WASP 2040
-
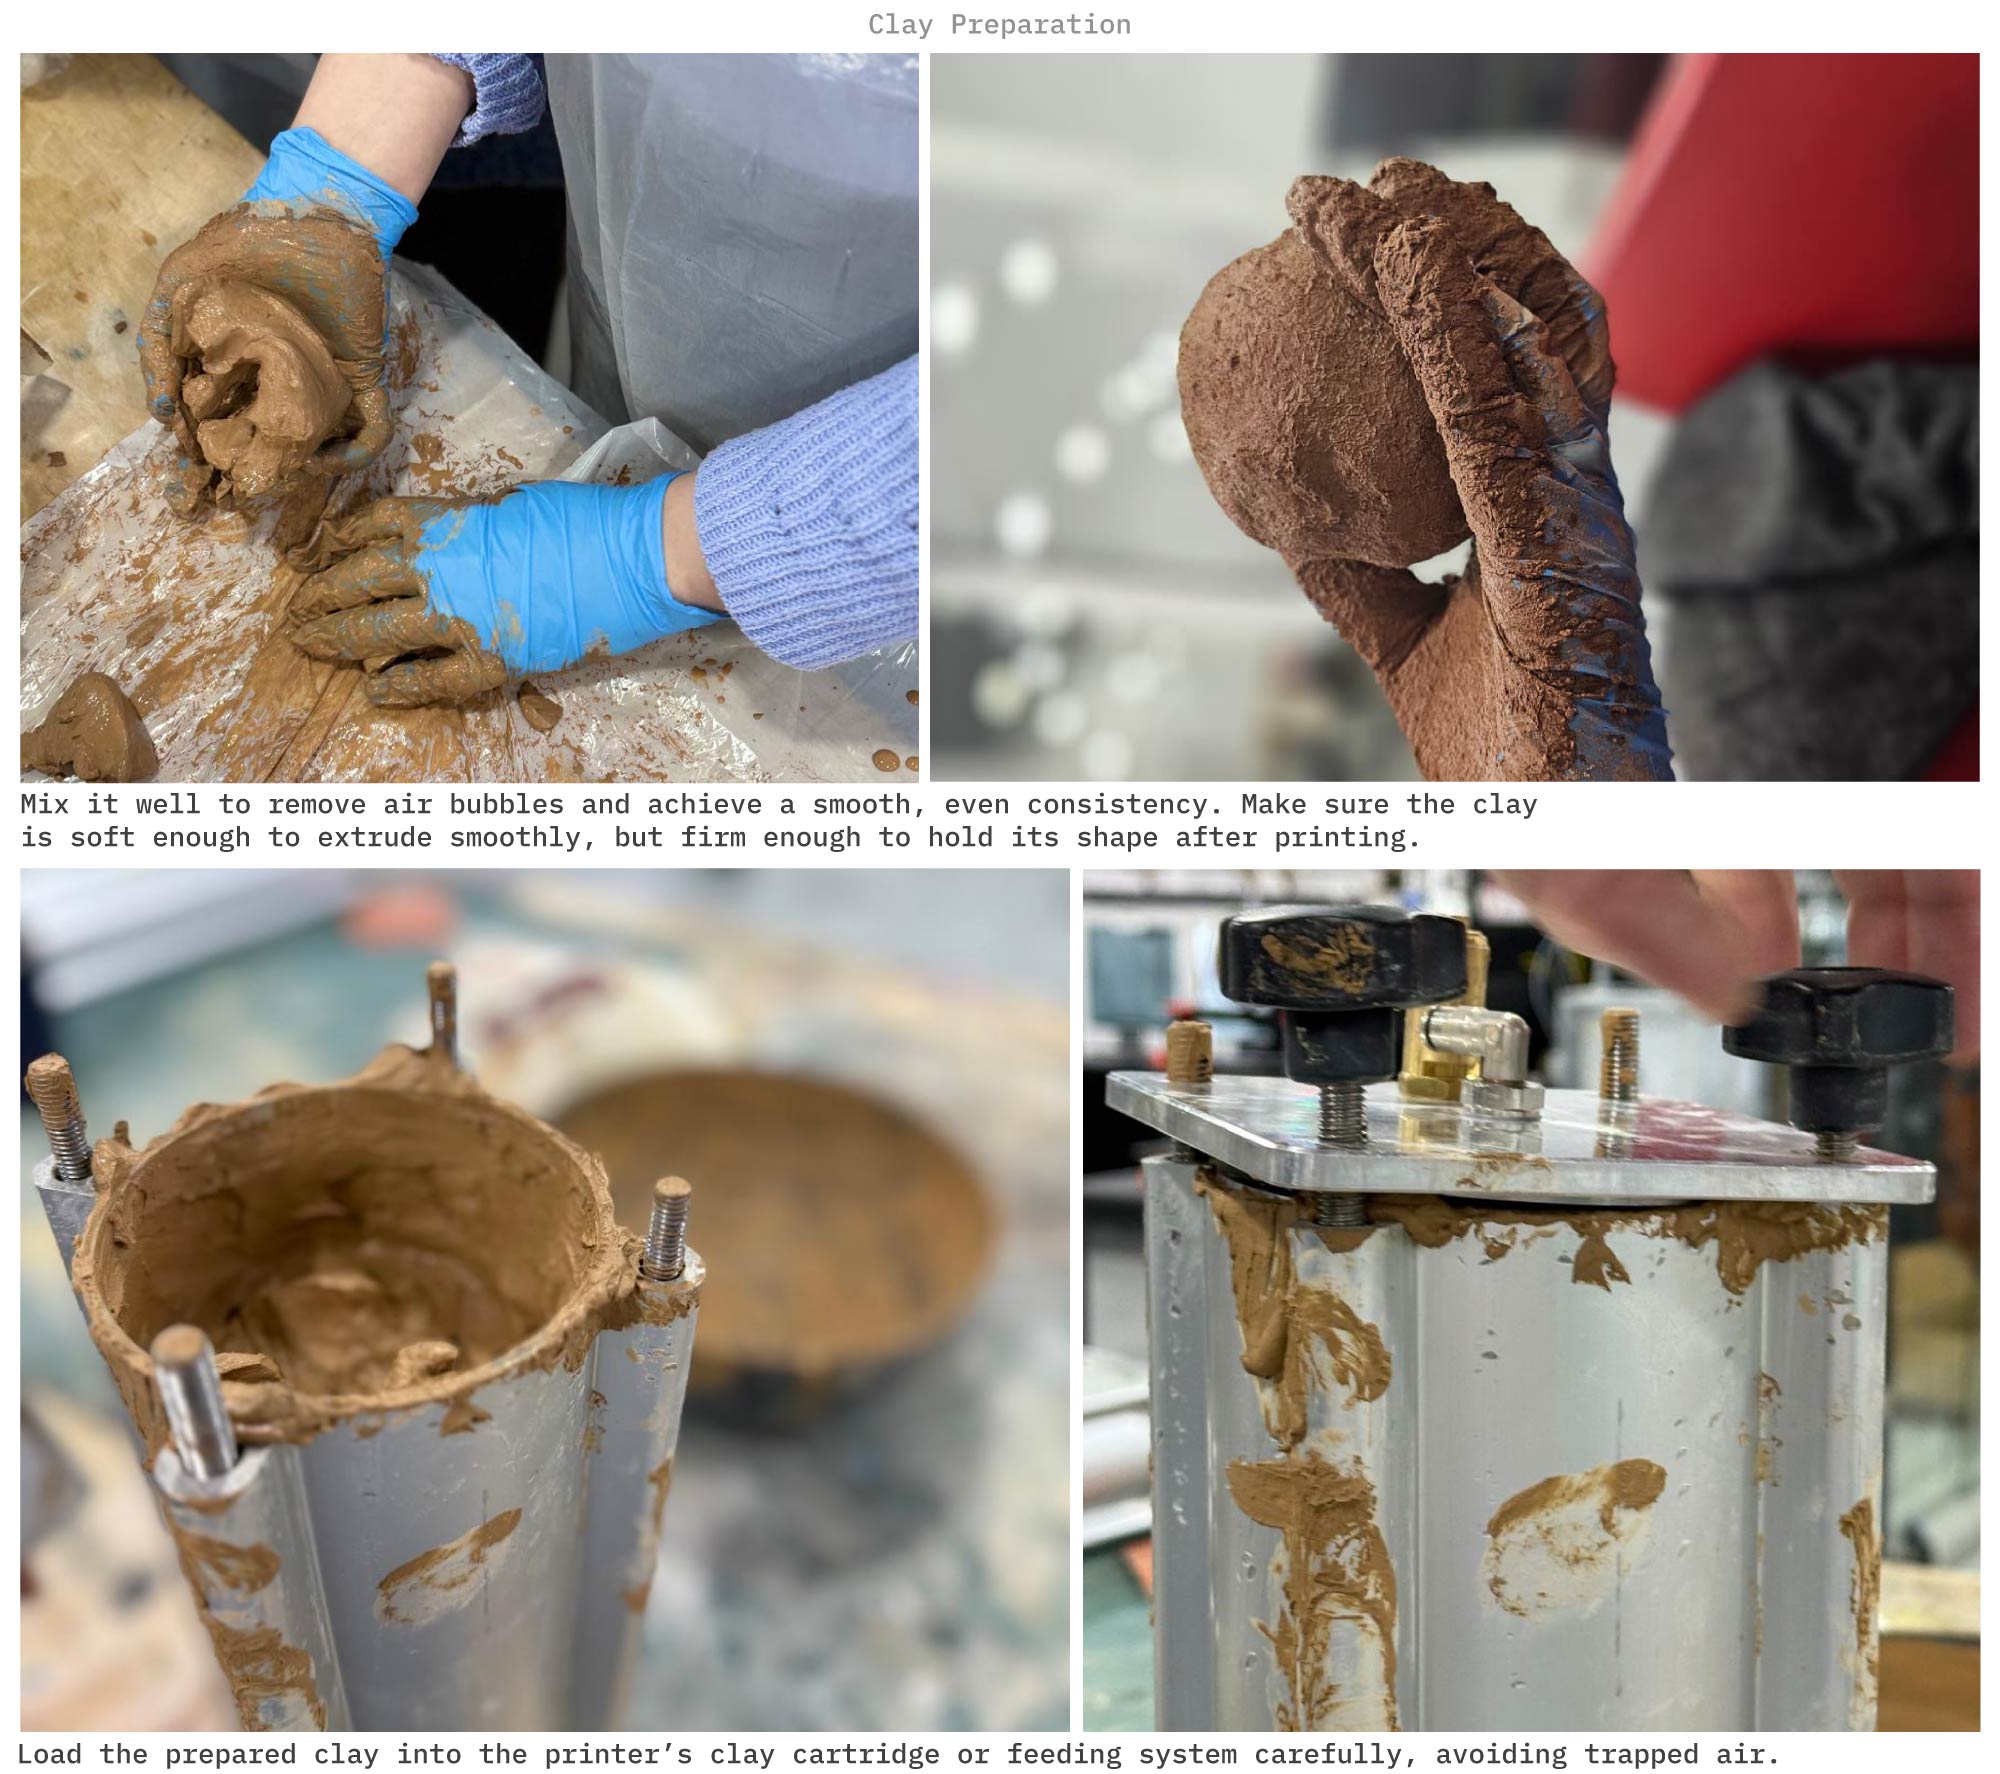
Prepare the clay: Choose a clay body suitable for extrusion, then wedge or mix it well to remove air bubbles and achieve a smooth, even consistency. Make sure the clay is soft enough to extrude smoothly, but firm enough to hold its shape after printing.
-
Fill the cartridge/tank: Load the prepared clay into the printer’s clay cartridge or feeding system carefully, avoiding trapped air.
-
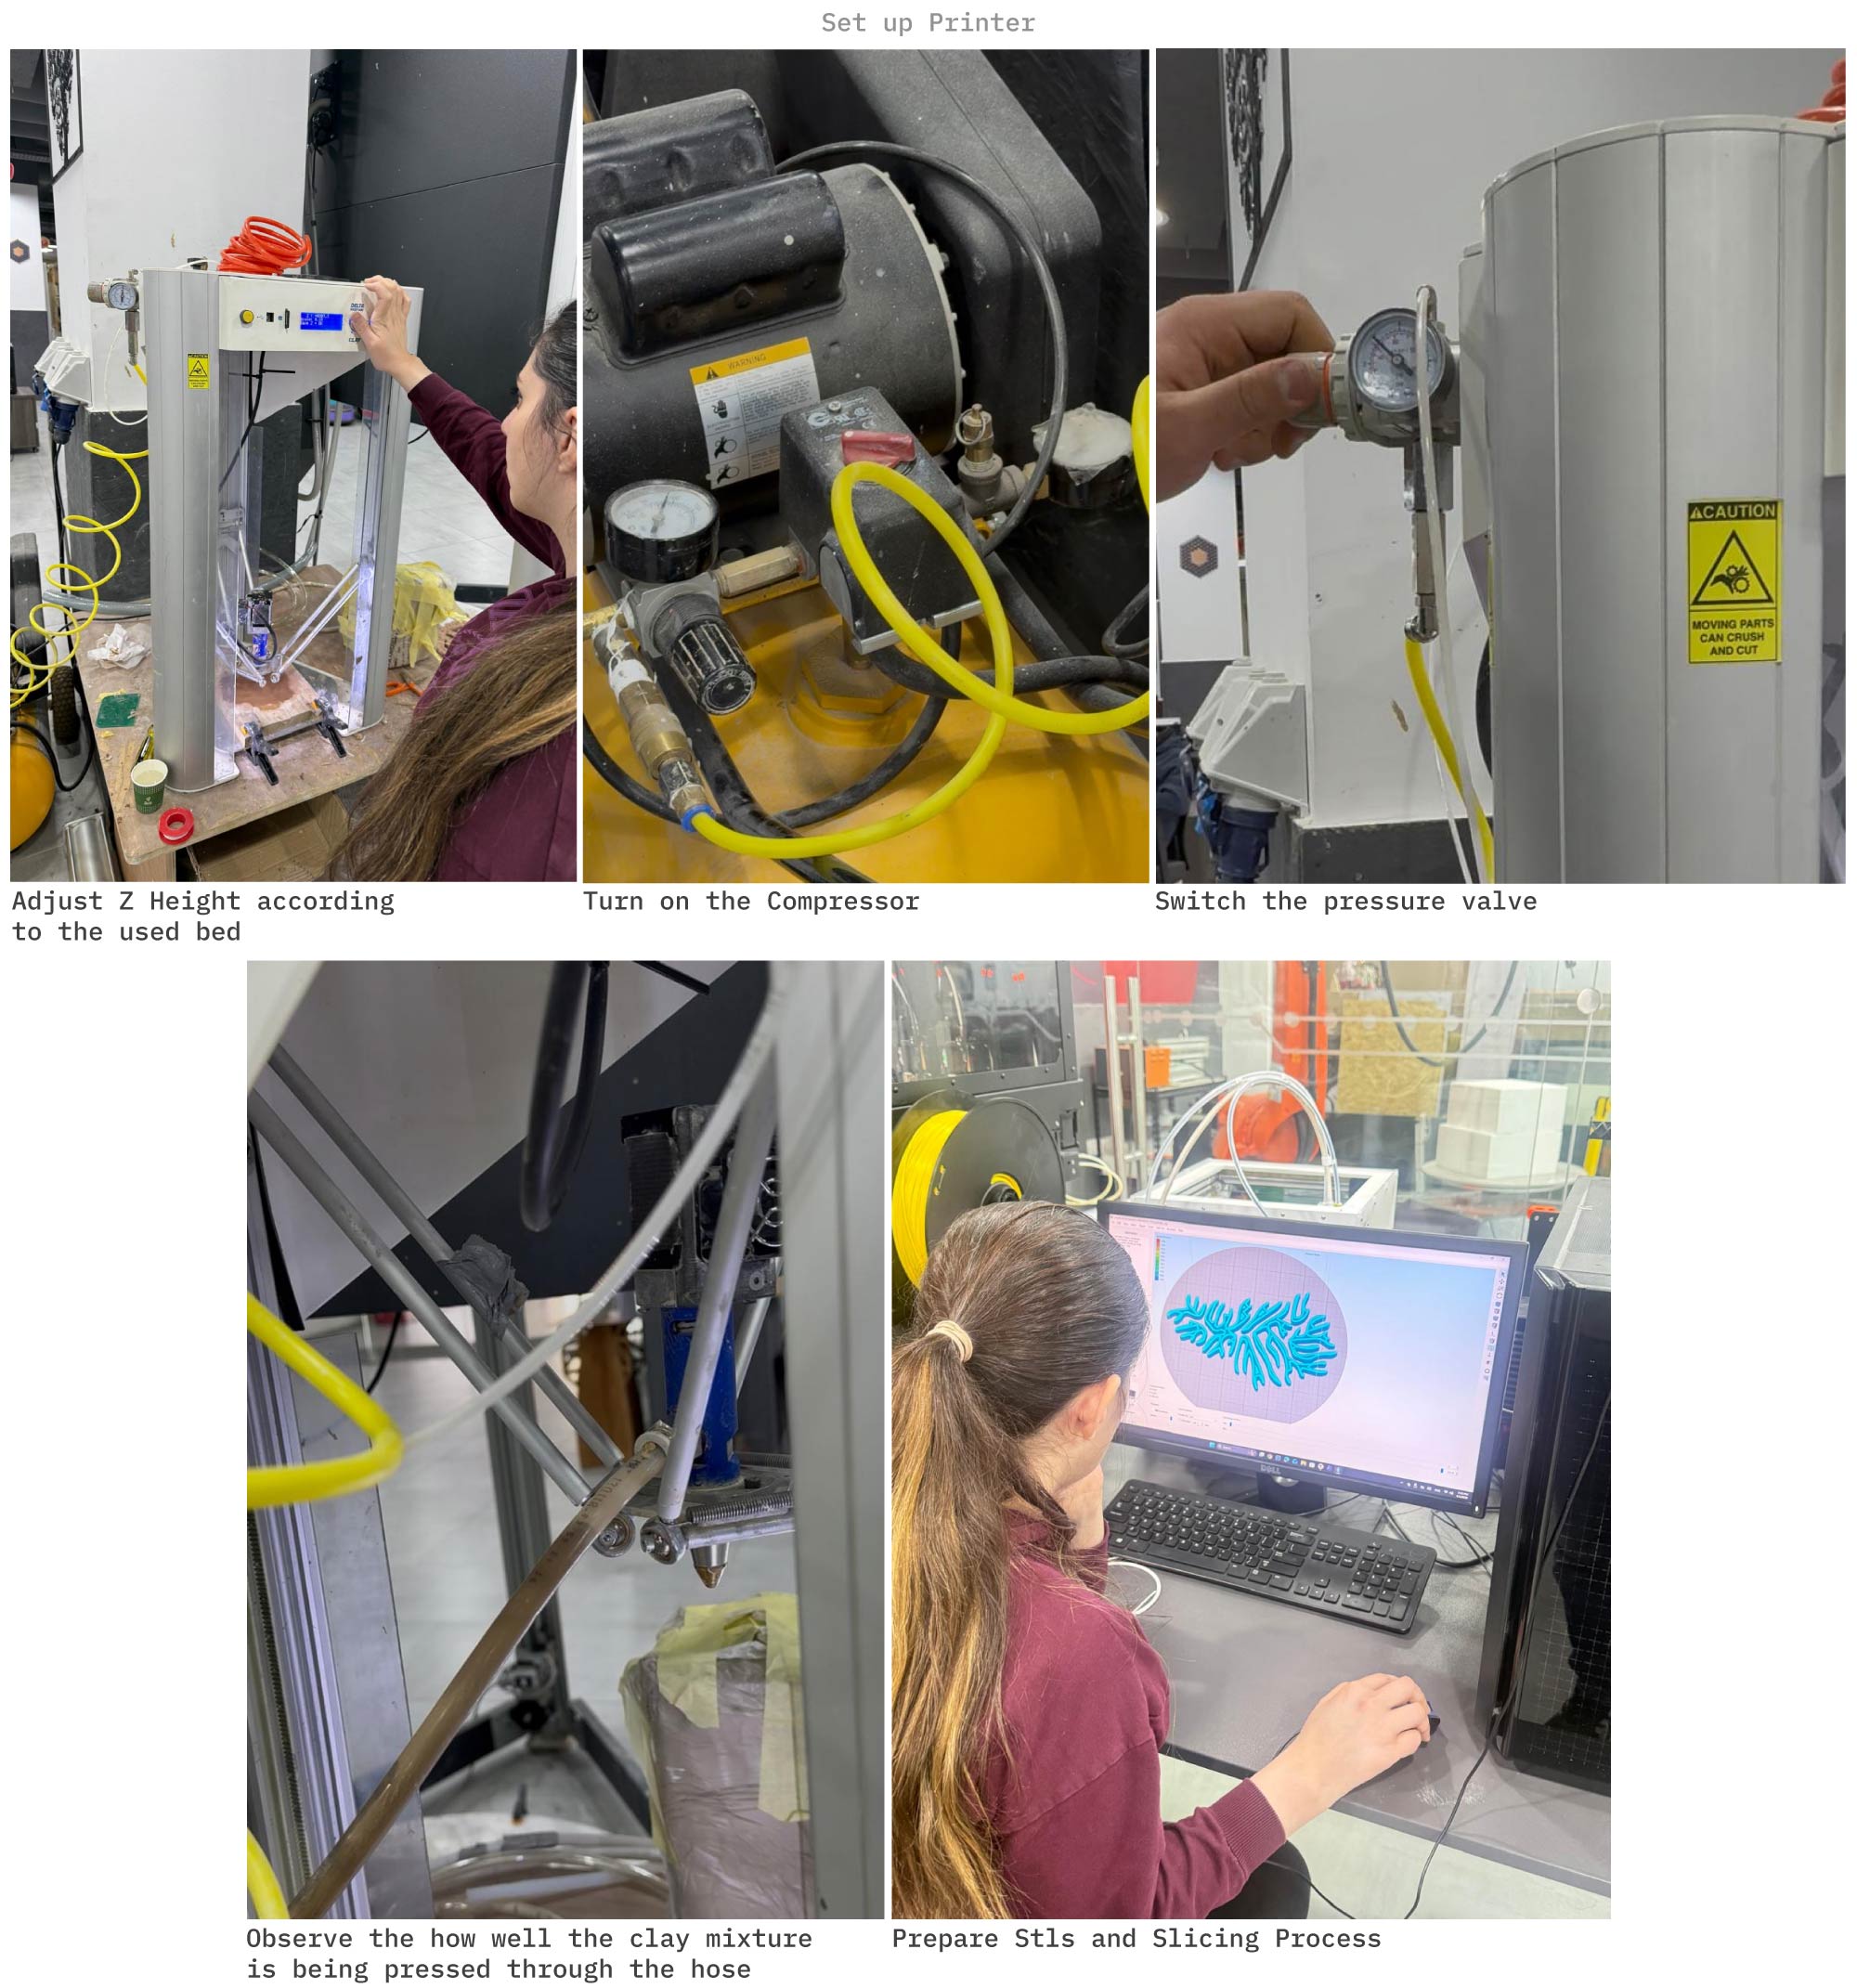
Set up the printer: Check the nozzle size, secure the clay tank, and make sure the print bed is clean and properly positioned.
-
Prepare the digital model: Create the 3D model, then slice it in the appropriate software with settings adapted for clay, such as layer height, print speed, and extrusion rate. (In my experience I used Wasp 3d Slicer, Simplify 3D and Termite for Rhino)
-
Calibrate the machine: Home the printer, set the correct bed distance (Z), and test the extrusion flow before starting the full print.
-
Start printing: The WASP 2040 extrudes clay layer by layer following the toolpath of the sliced model.
-
Monitor the print: Observe the extrusion consistency, layer bonding, and shape stability, adjusting speed or flow if needed (from TUNE).
-
Remove and dry the piece:Once printed, leave the object to dry slowly and evenly to prevent warping or cracking.
-
Refine if needed: Clean edges, smooth surfaces, or assemble additional parts once the clay reaches a leather-hard stage.
-
Bisque fire the piece: After full drying (1 week), fire the piece in the kiln to harden it.
Helpful References:
1- How to Setup Delta WASP 2040
2- Delta WASP 3D printer - LDM Extruder - how to print with clay extruder
3- Tutorial for Rhino plugin Termite
B. Computational Design Process for Clay 3D Printing
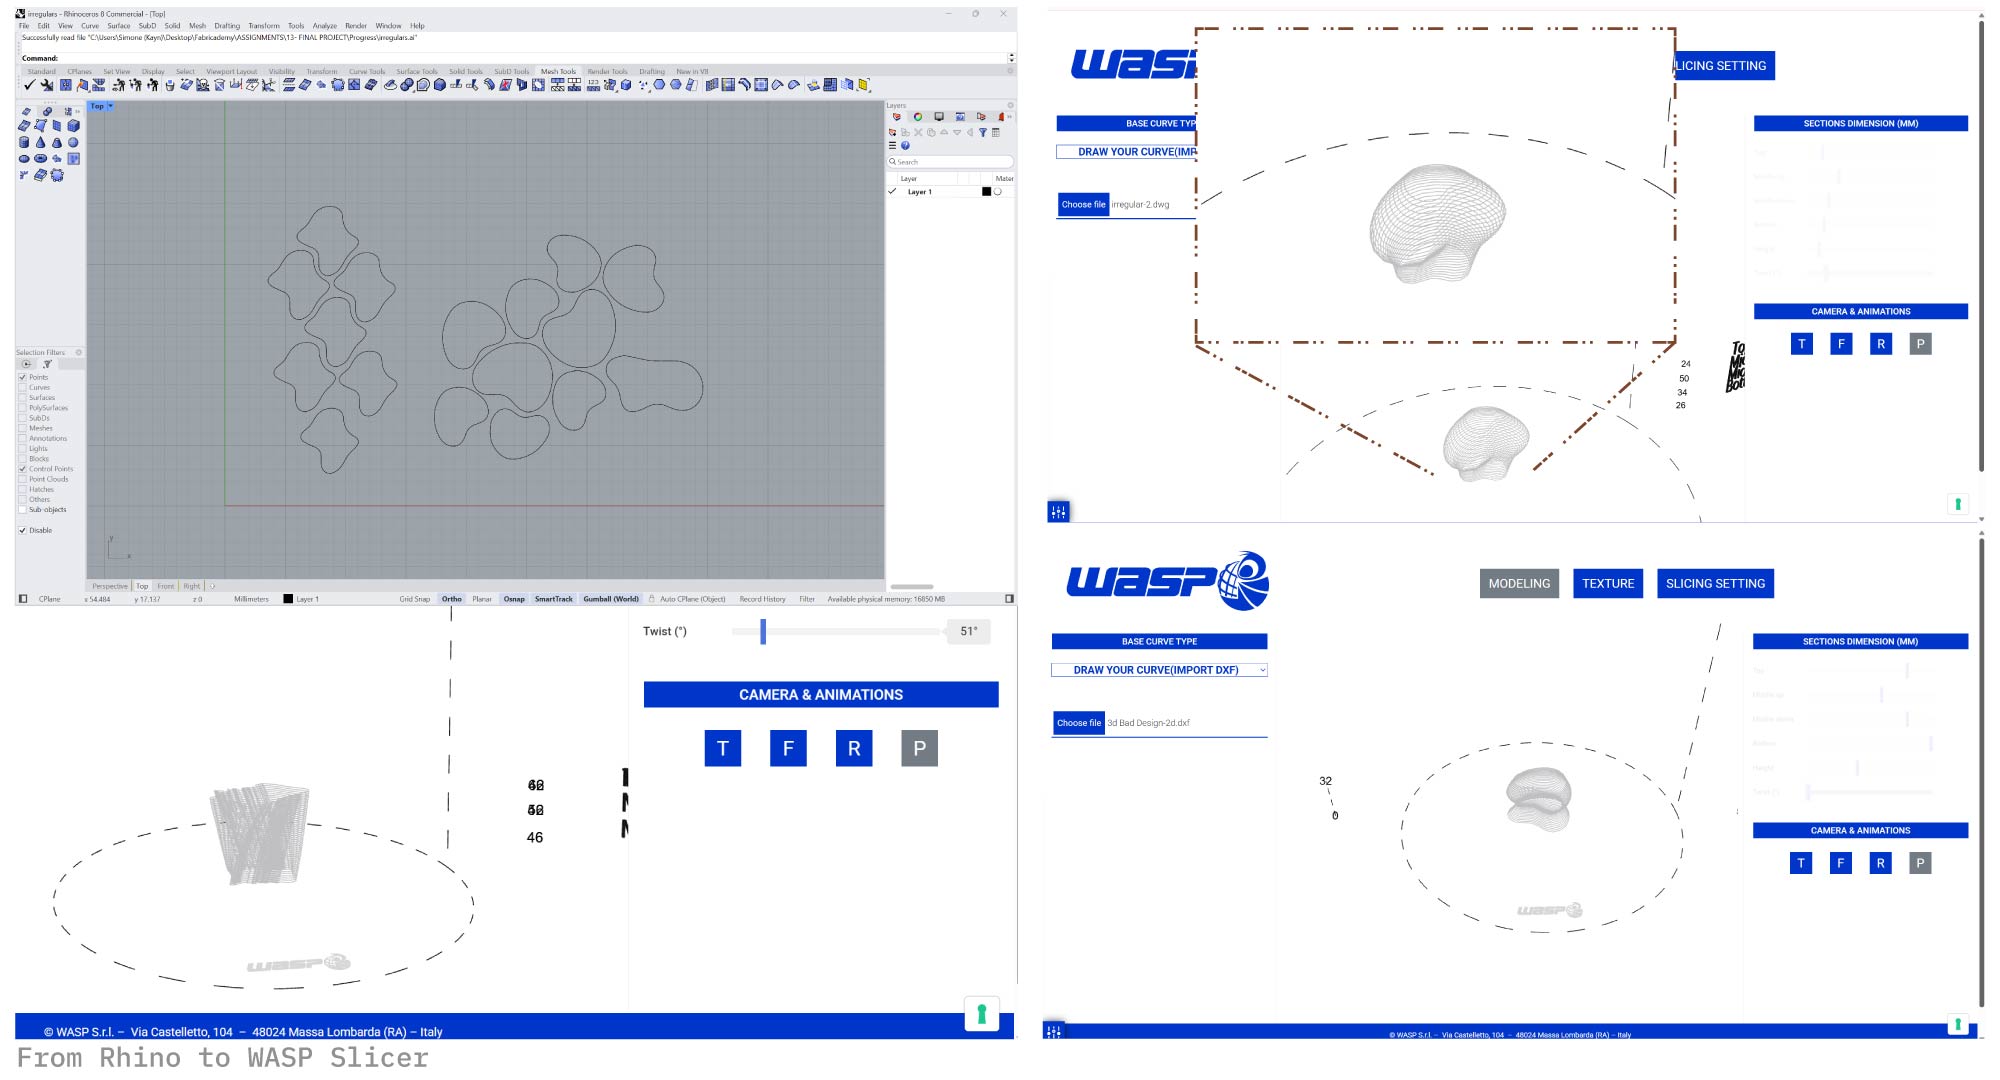
Design to Slice to Fabrication Workflow Exploration:
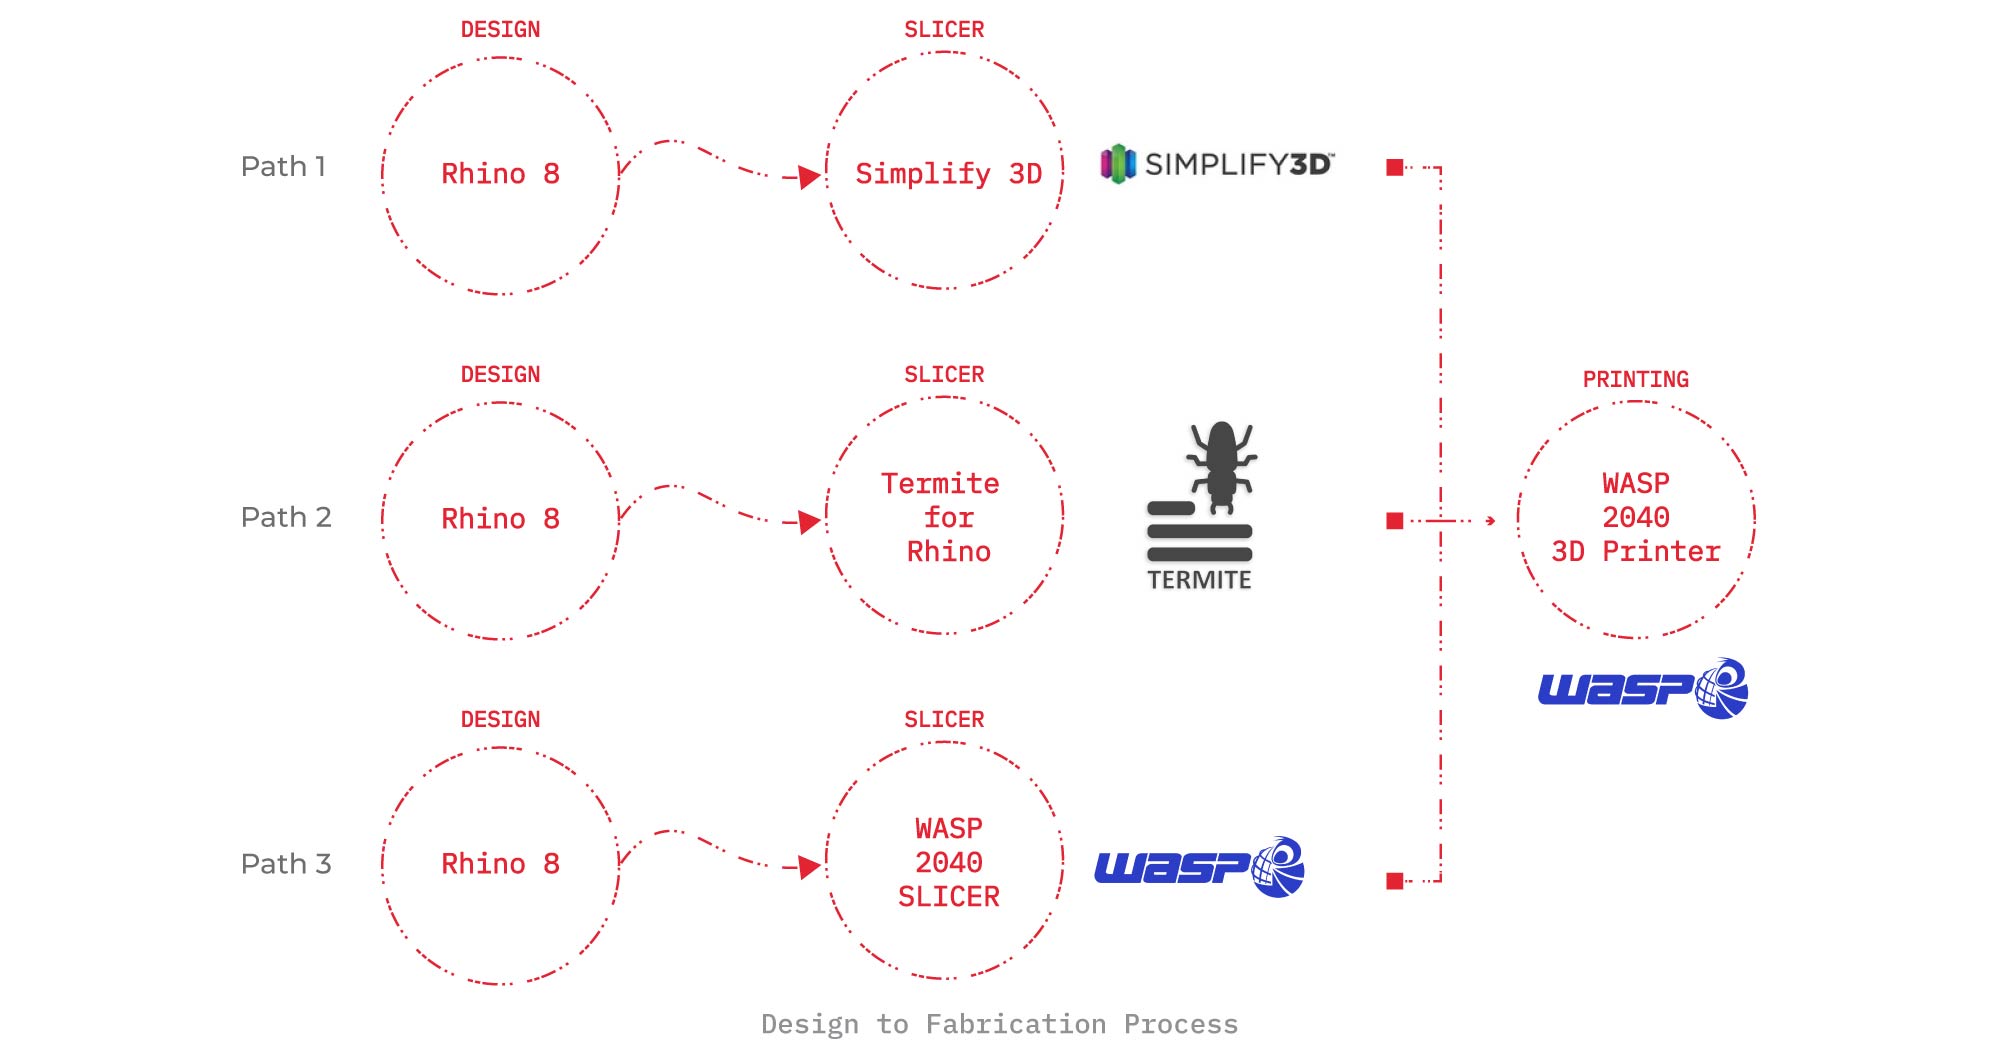
My workflow mostly combined both Rhino and WASP Slicer as design tools. While Rhino was used to develop and refine the geometries, WASP Slicer became an extension of the design process, where parameters such as layer height, speed, and extrusion were adjusted to shape the final outcome. Designing across both platforms allowed for a more responsive and material-driven approach.
A series of geometries were first developed, though several exceeded the fabrication limits of the WASP 2040. These were subsequently reconstructed using more fabrication friendly workflows. The exploration proceeded as follows: the studies were conceived to test the printability of different geometries and their alignment with ongoing coral morphology investigations.
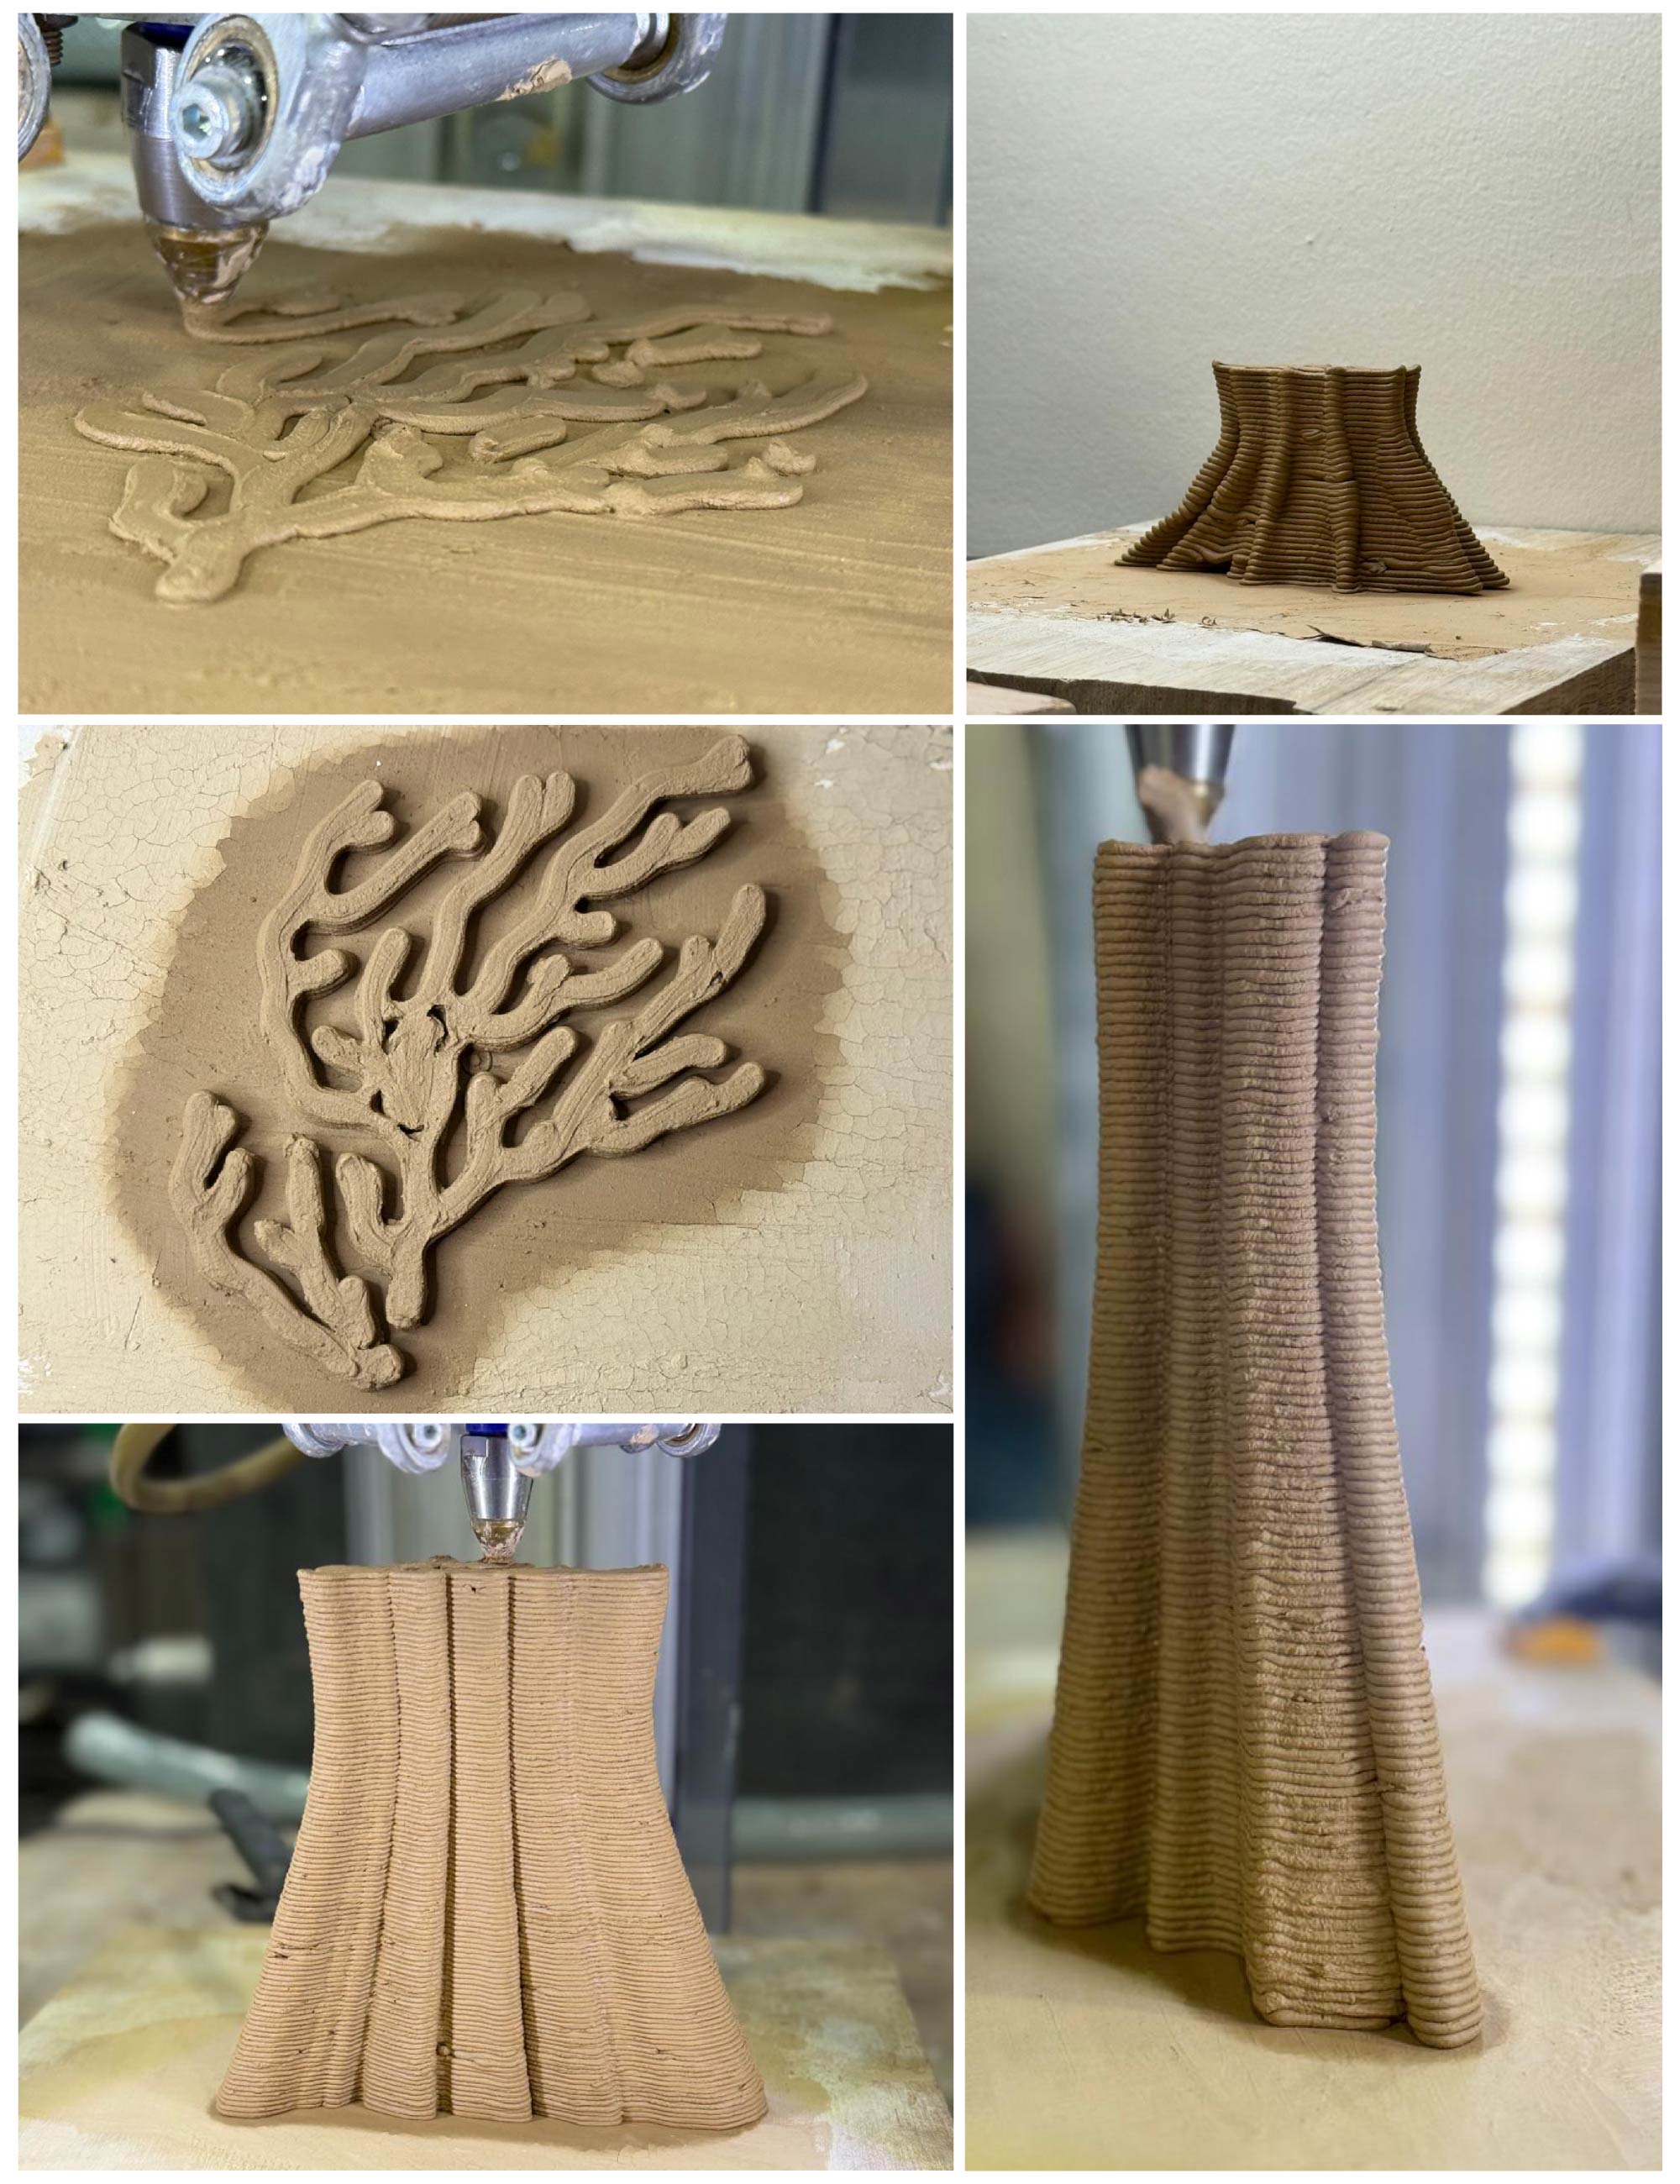
1. Flat Morphology Design Studies
I began with flat morphology studies, focusing on bendability by 3D printing thin layers and experimenting with post-printing manipulation. The models were developed in Rhino and sliced in Simplify3D. As these were among my earliest trials, the results were not very successful, mainly due to my limited familiarity with the printer. In later experiments, I discovered techniques, such as printing on butter paper,that would have significantly improved these tests by enabling controlled bending during and after printing. Cracking, which commonly occurred in flat prints, was better managed through moisture control, particularly by reintroducing drops of water with a sponge or fingers as the material shrinks.
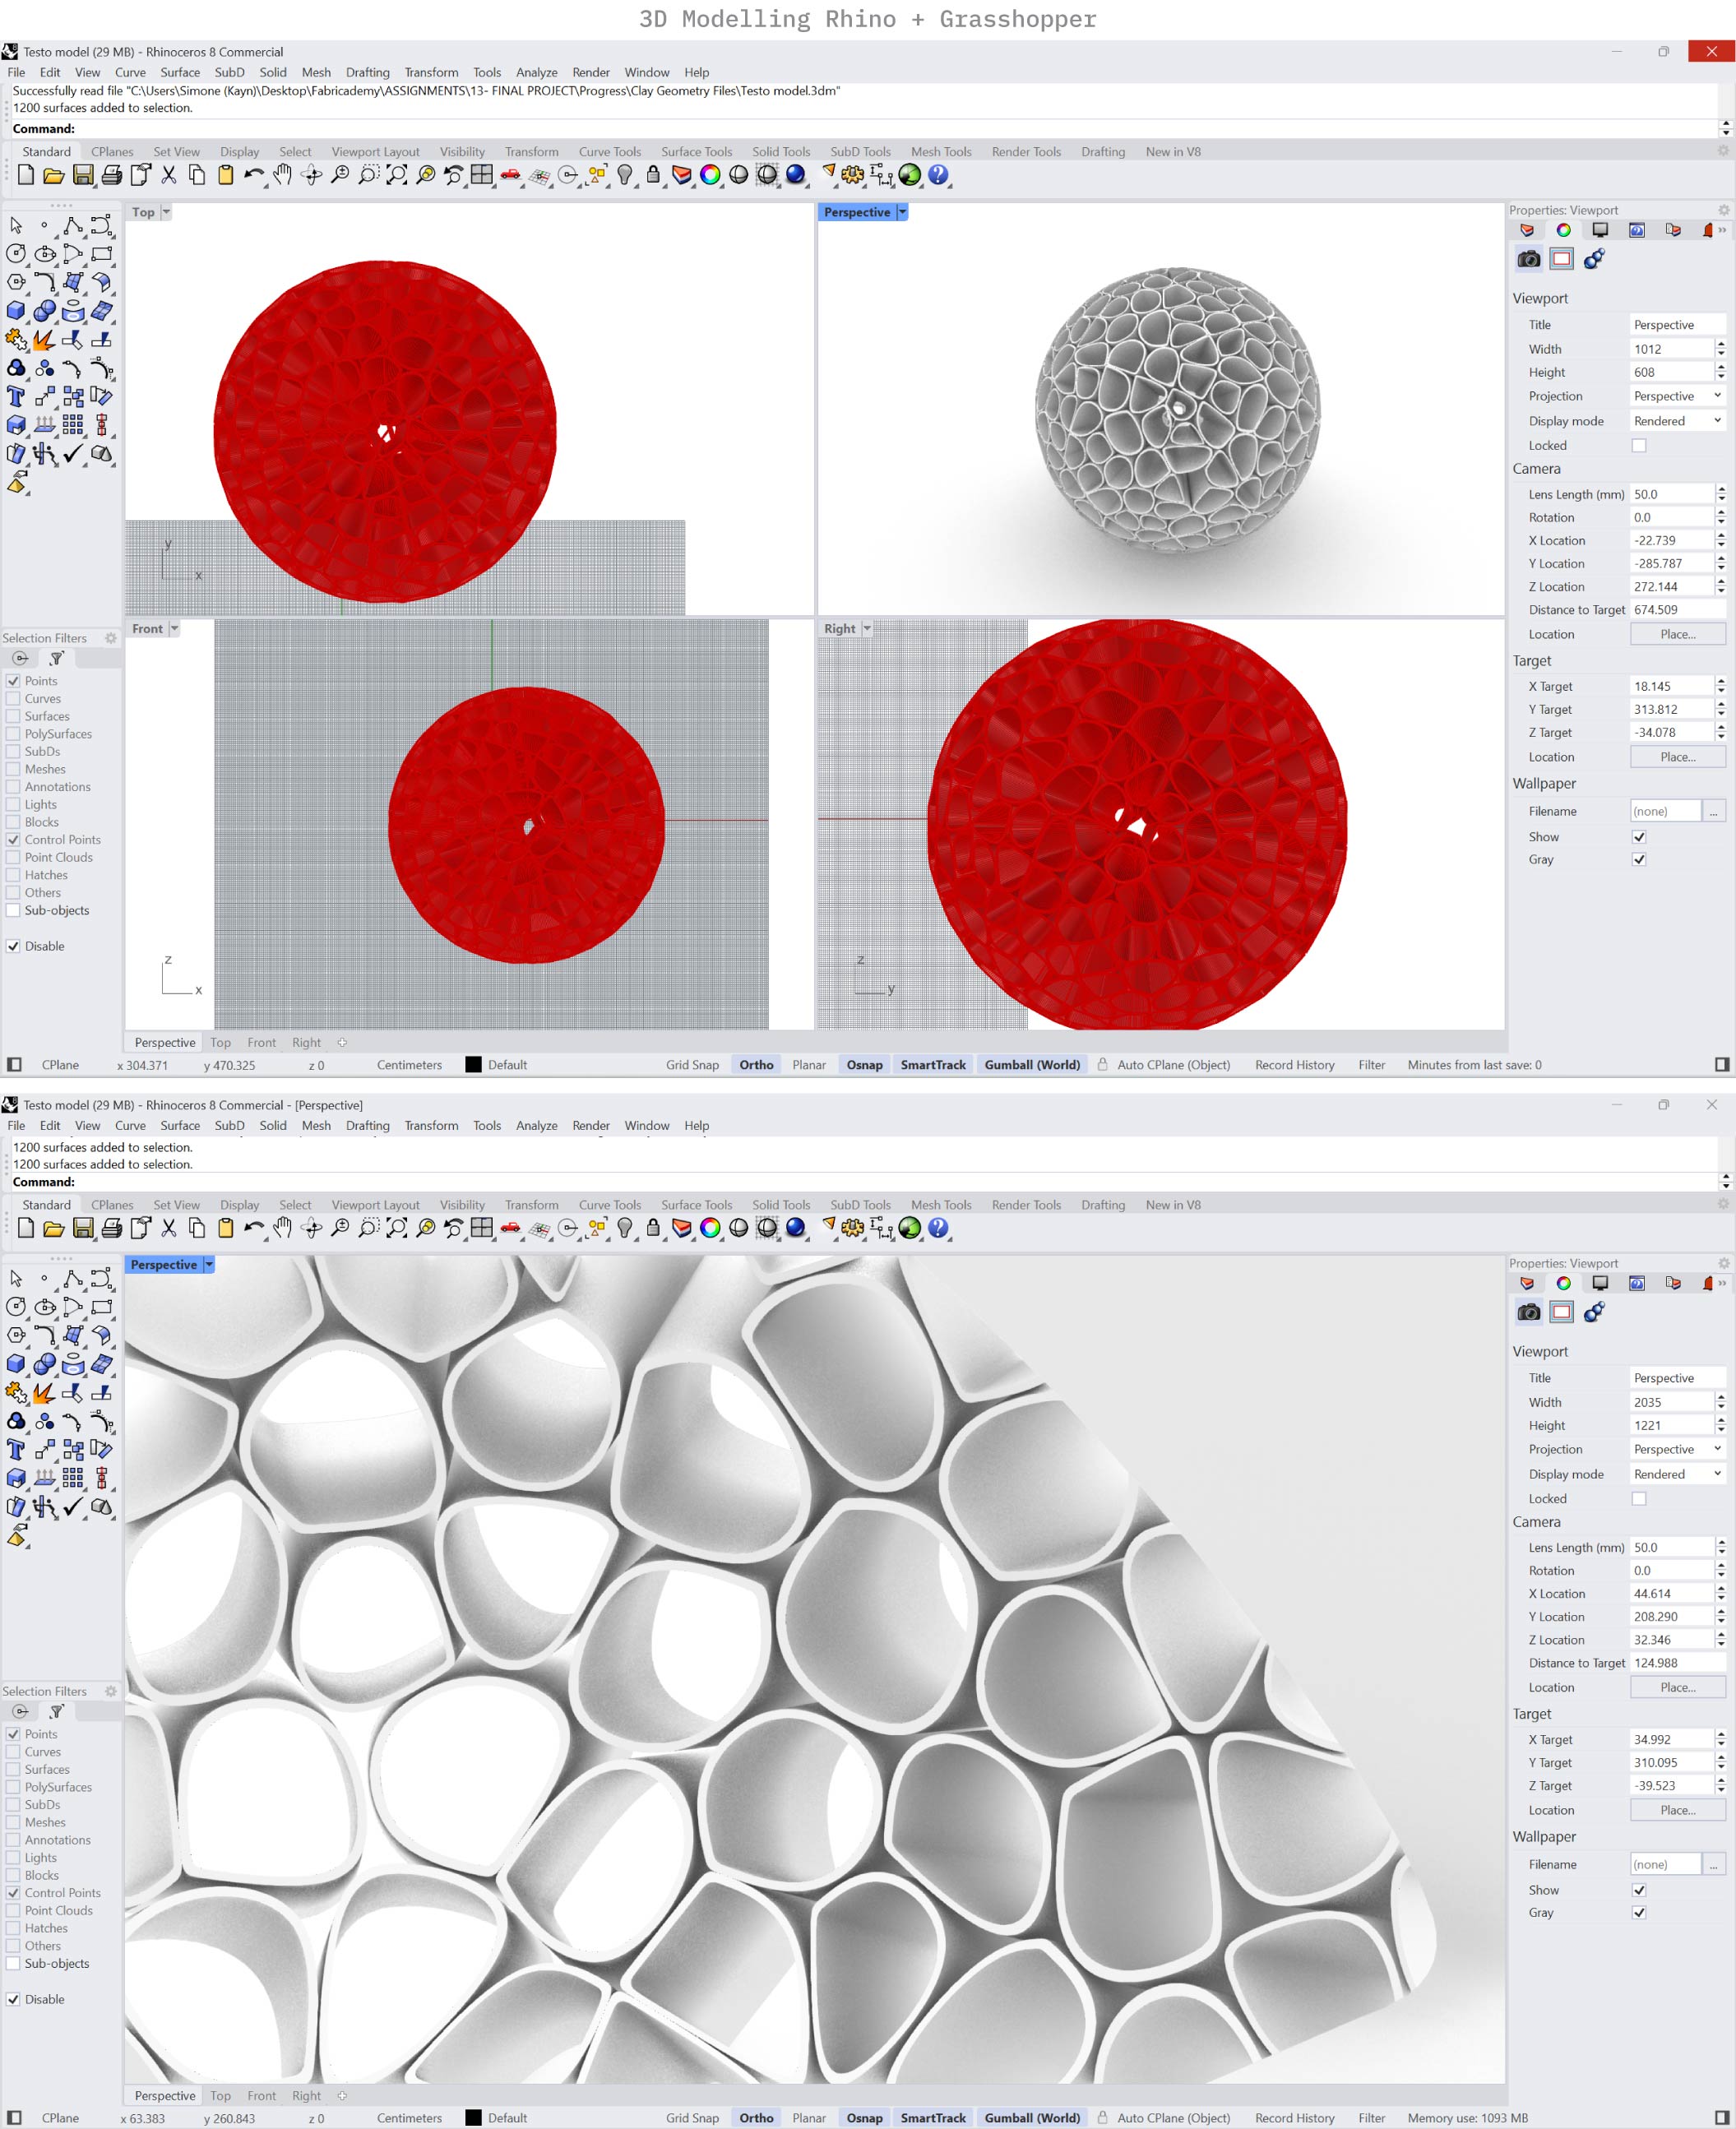
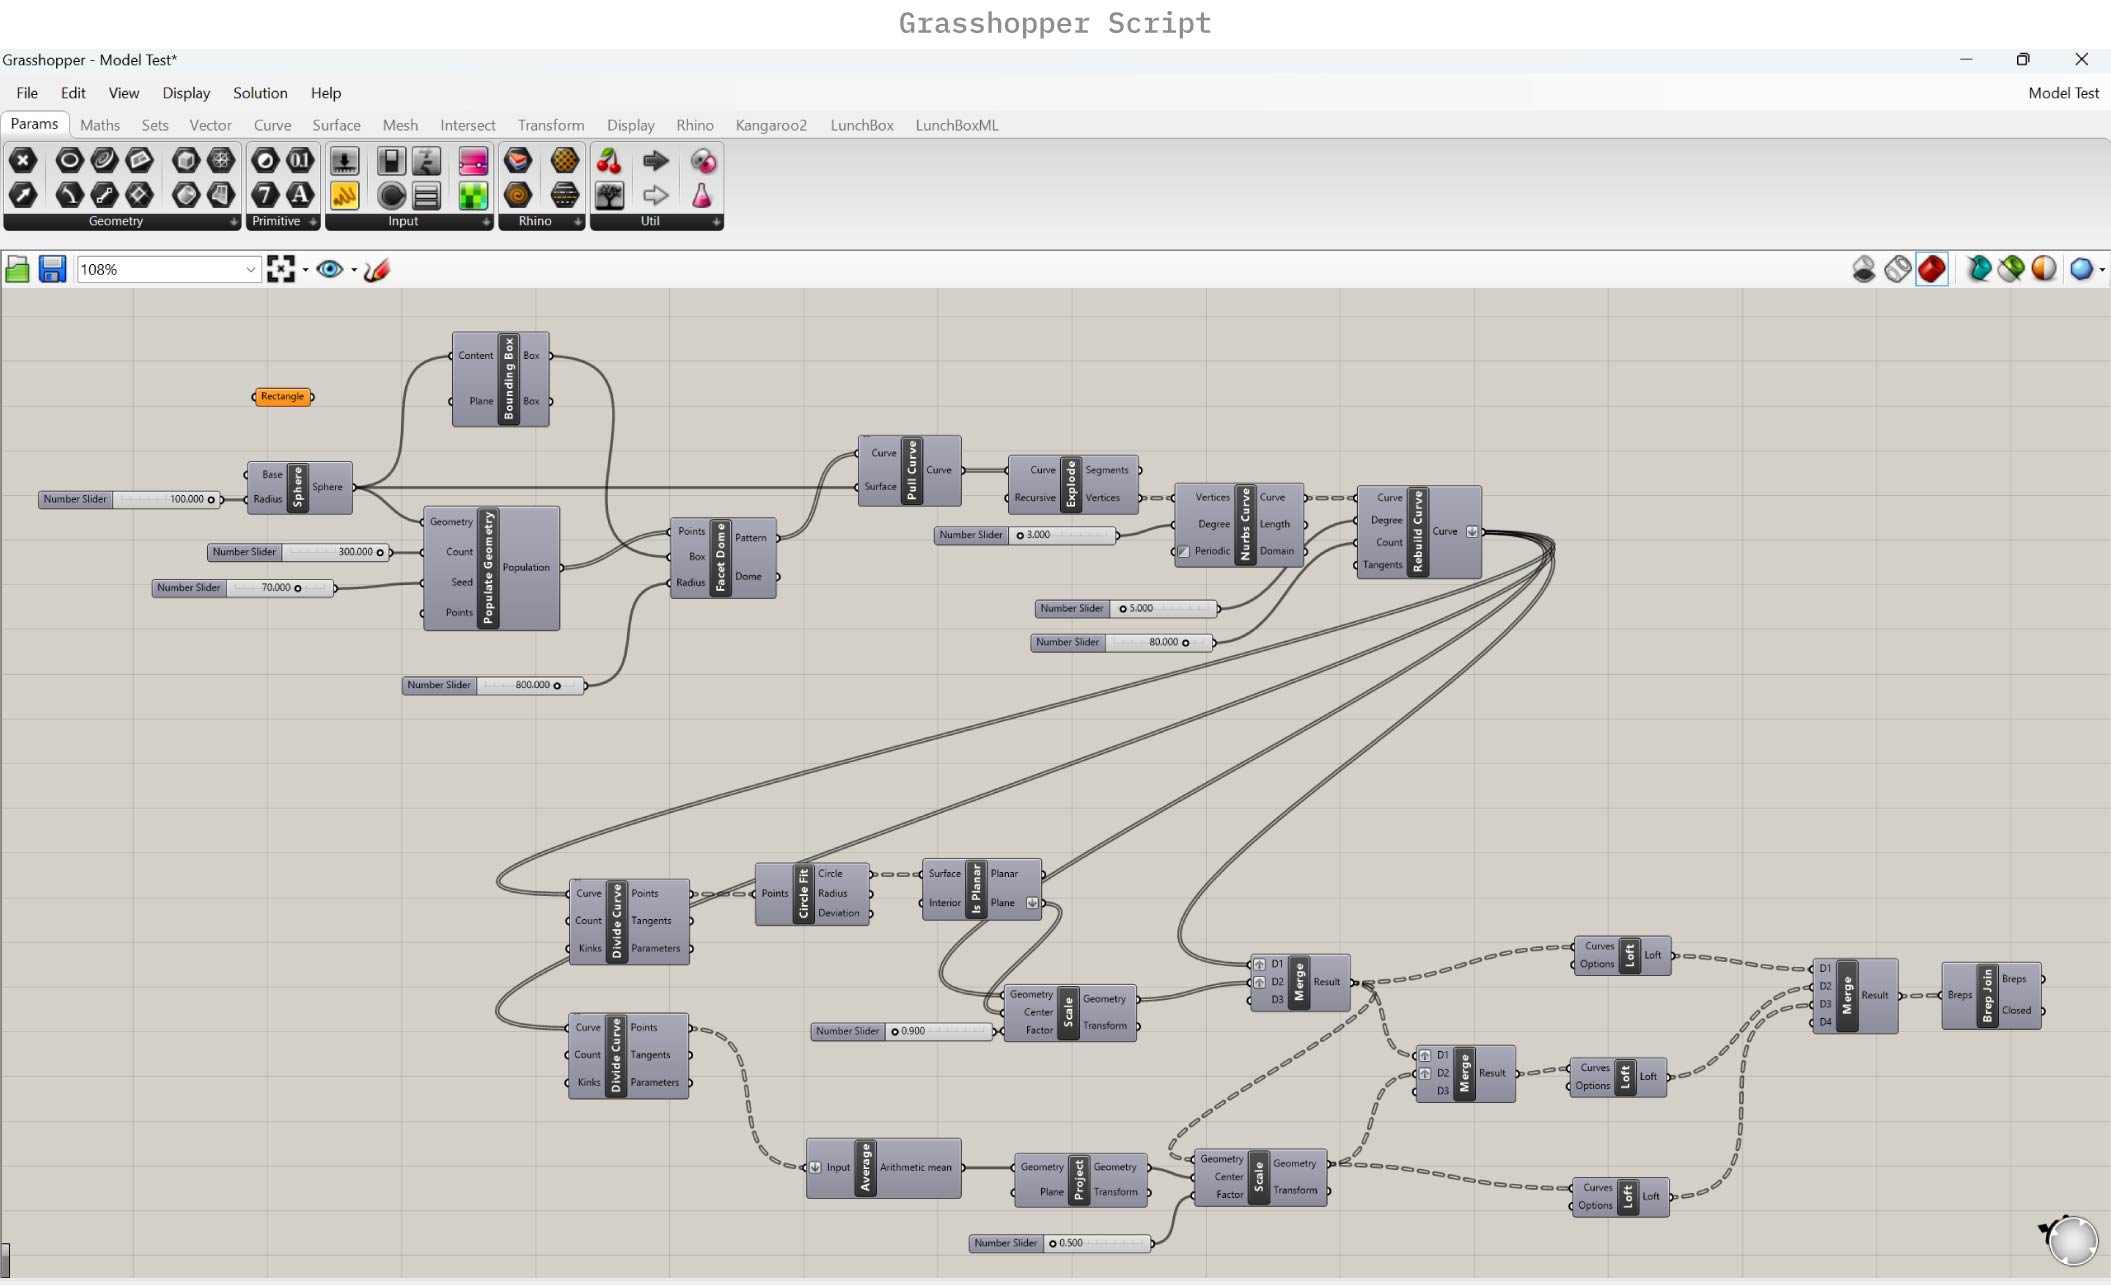
2. Spherical Shell (Interconnected Modules) Design Study
I continued my research by developing a spherical morphology composed of interconnected modules. In this phase, I was finalizing my exploration of the coral geometry and investigating its scalability, with a focus on generating repetitive systems of irregular modules that form micro-shelters. However, the resulting model proved to be extremely challenging to fabricate through 3D printing.
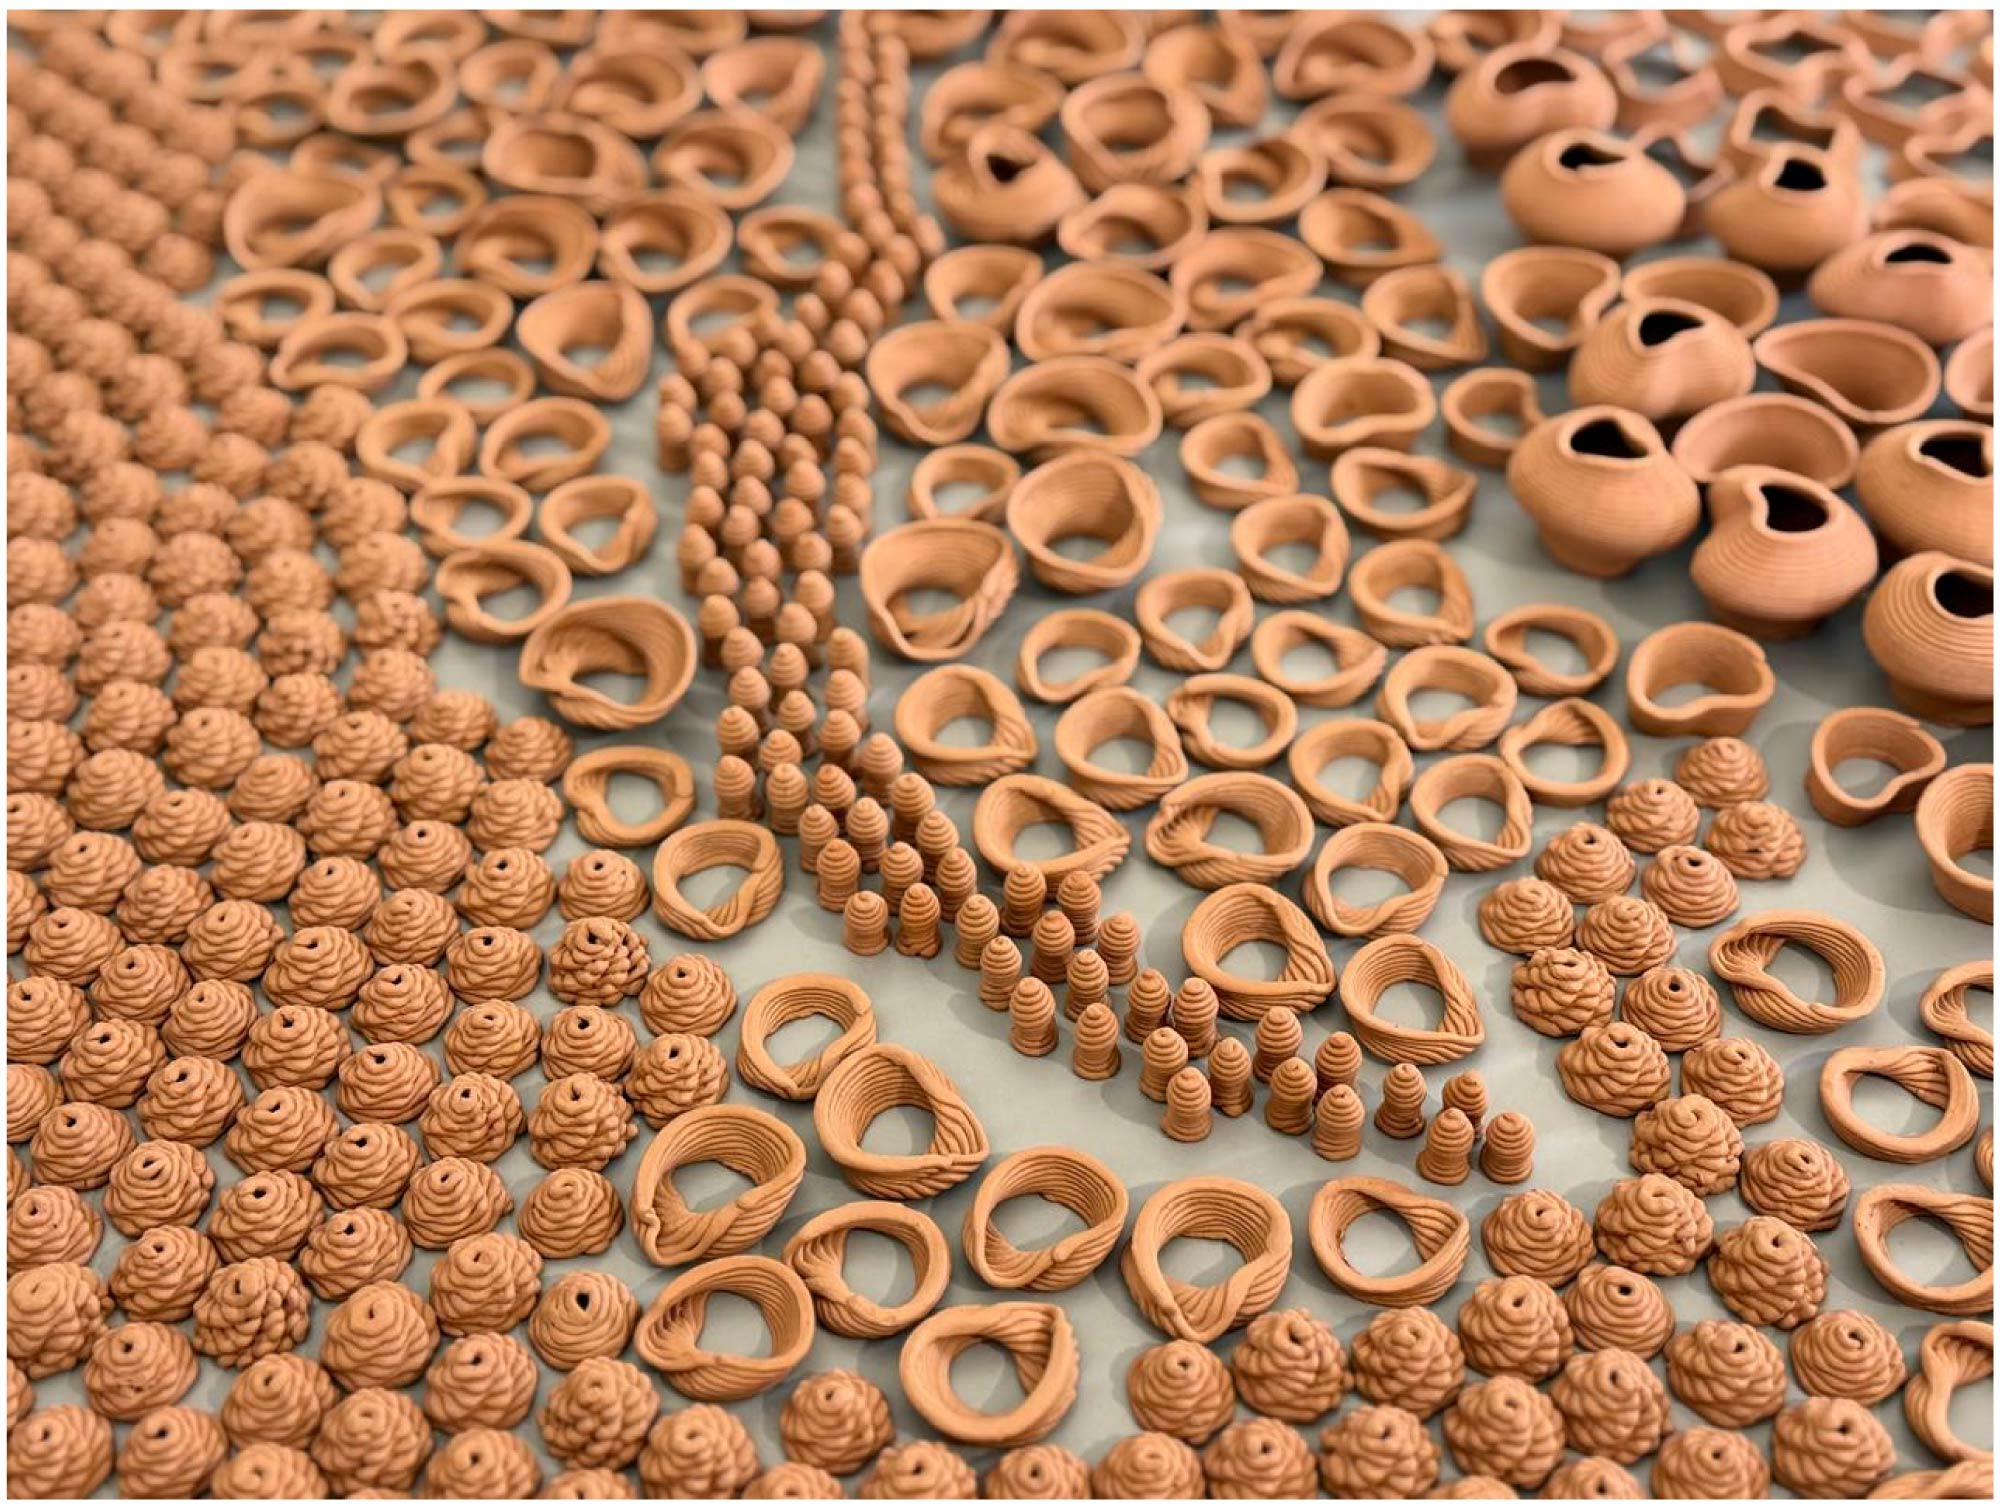
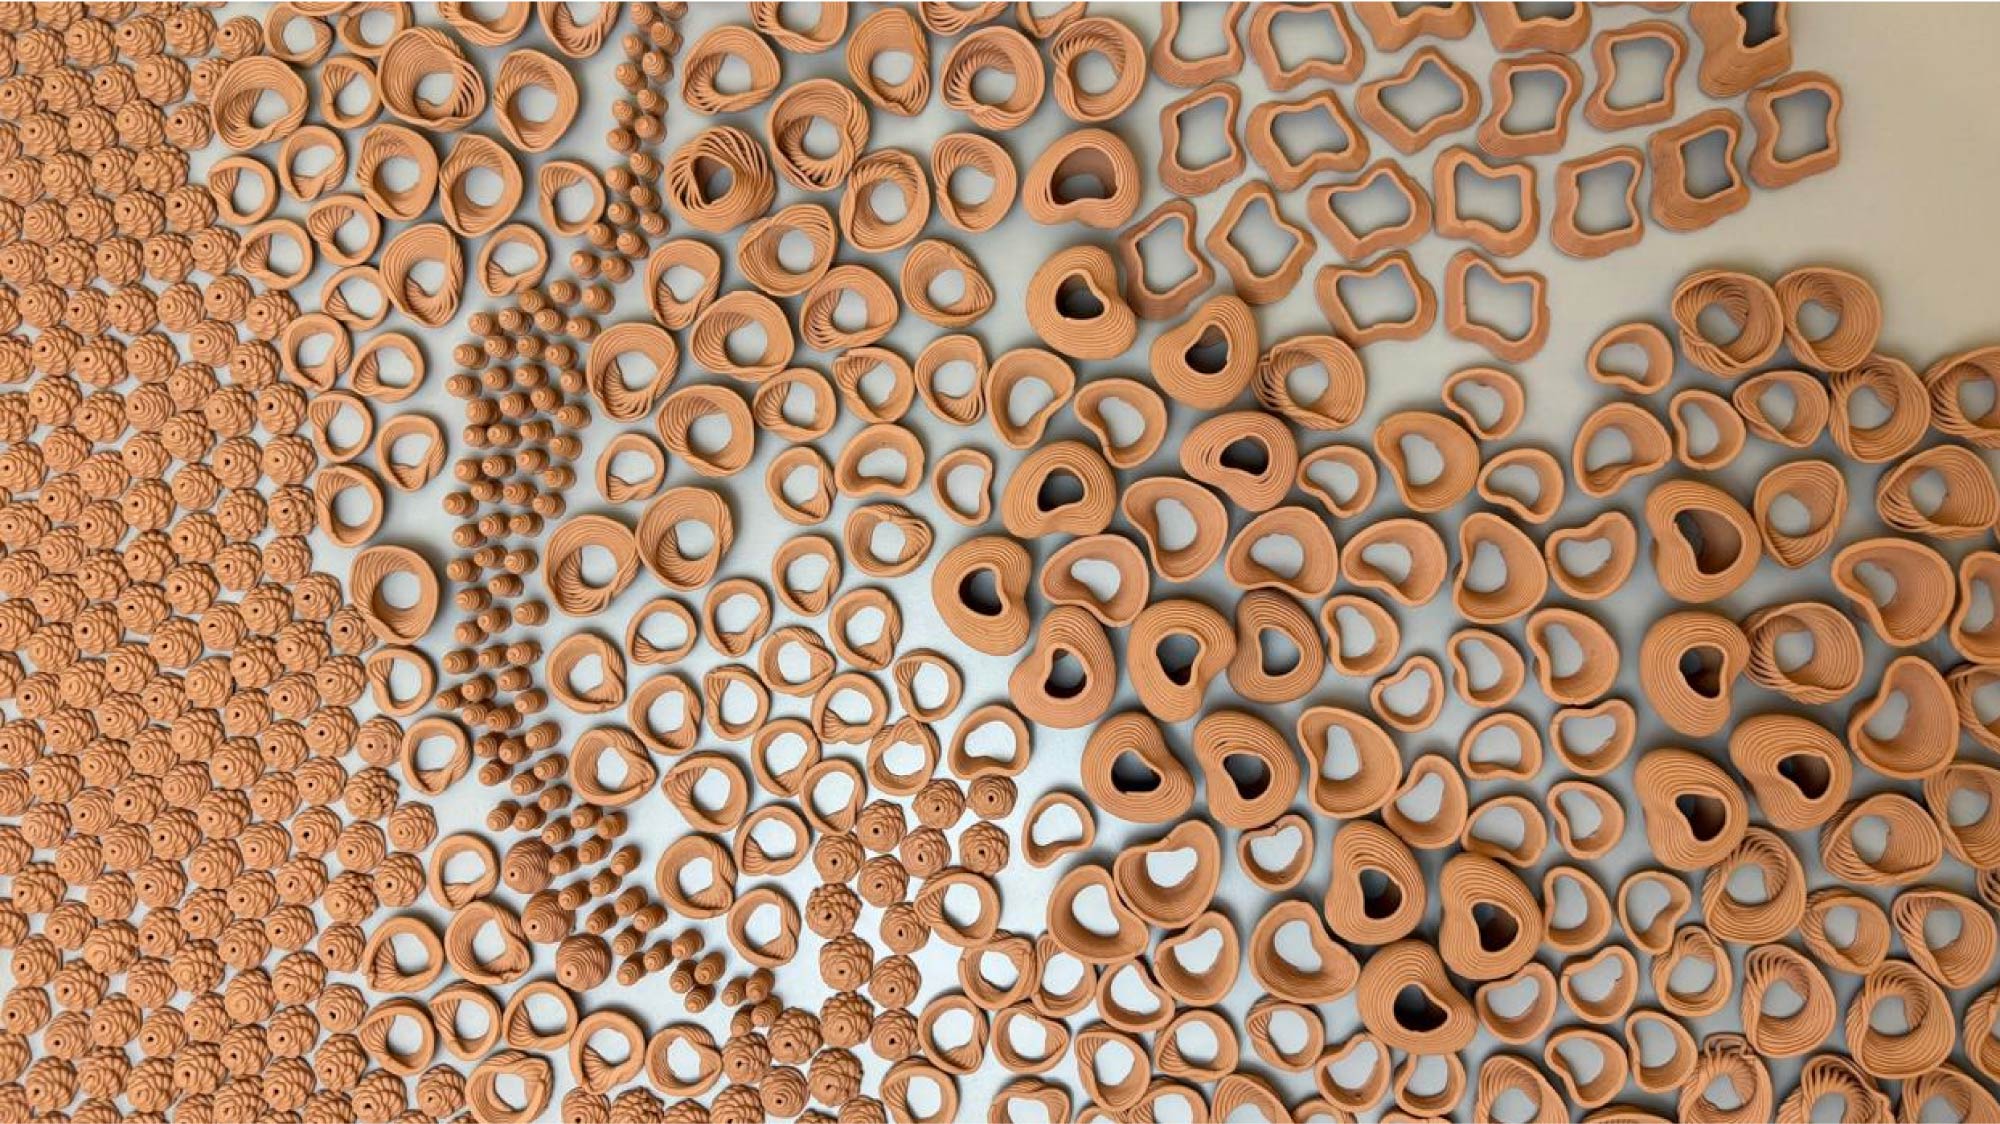
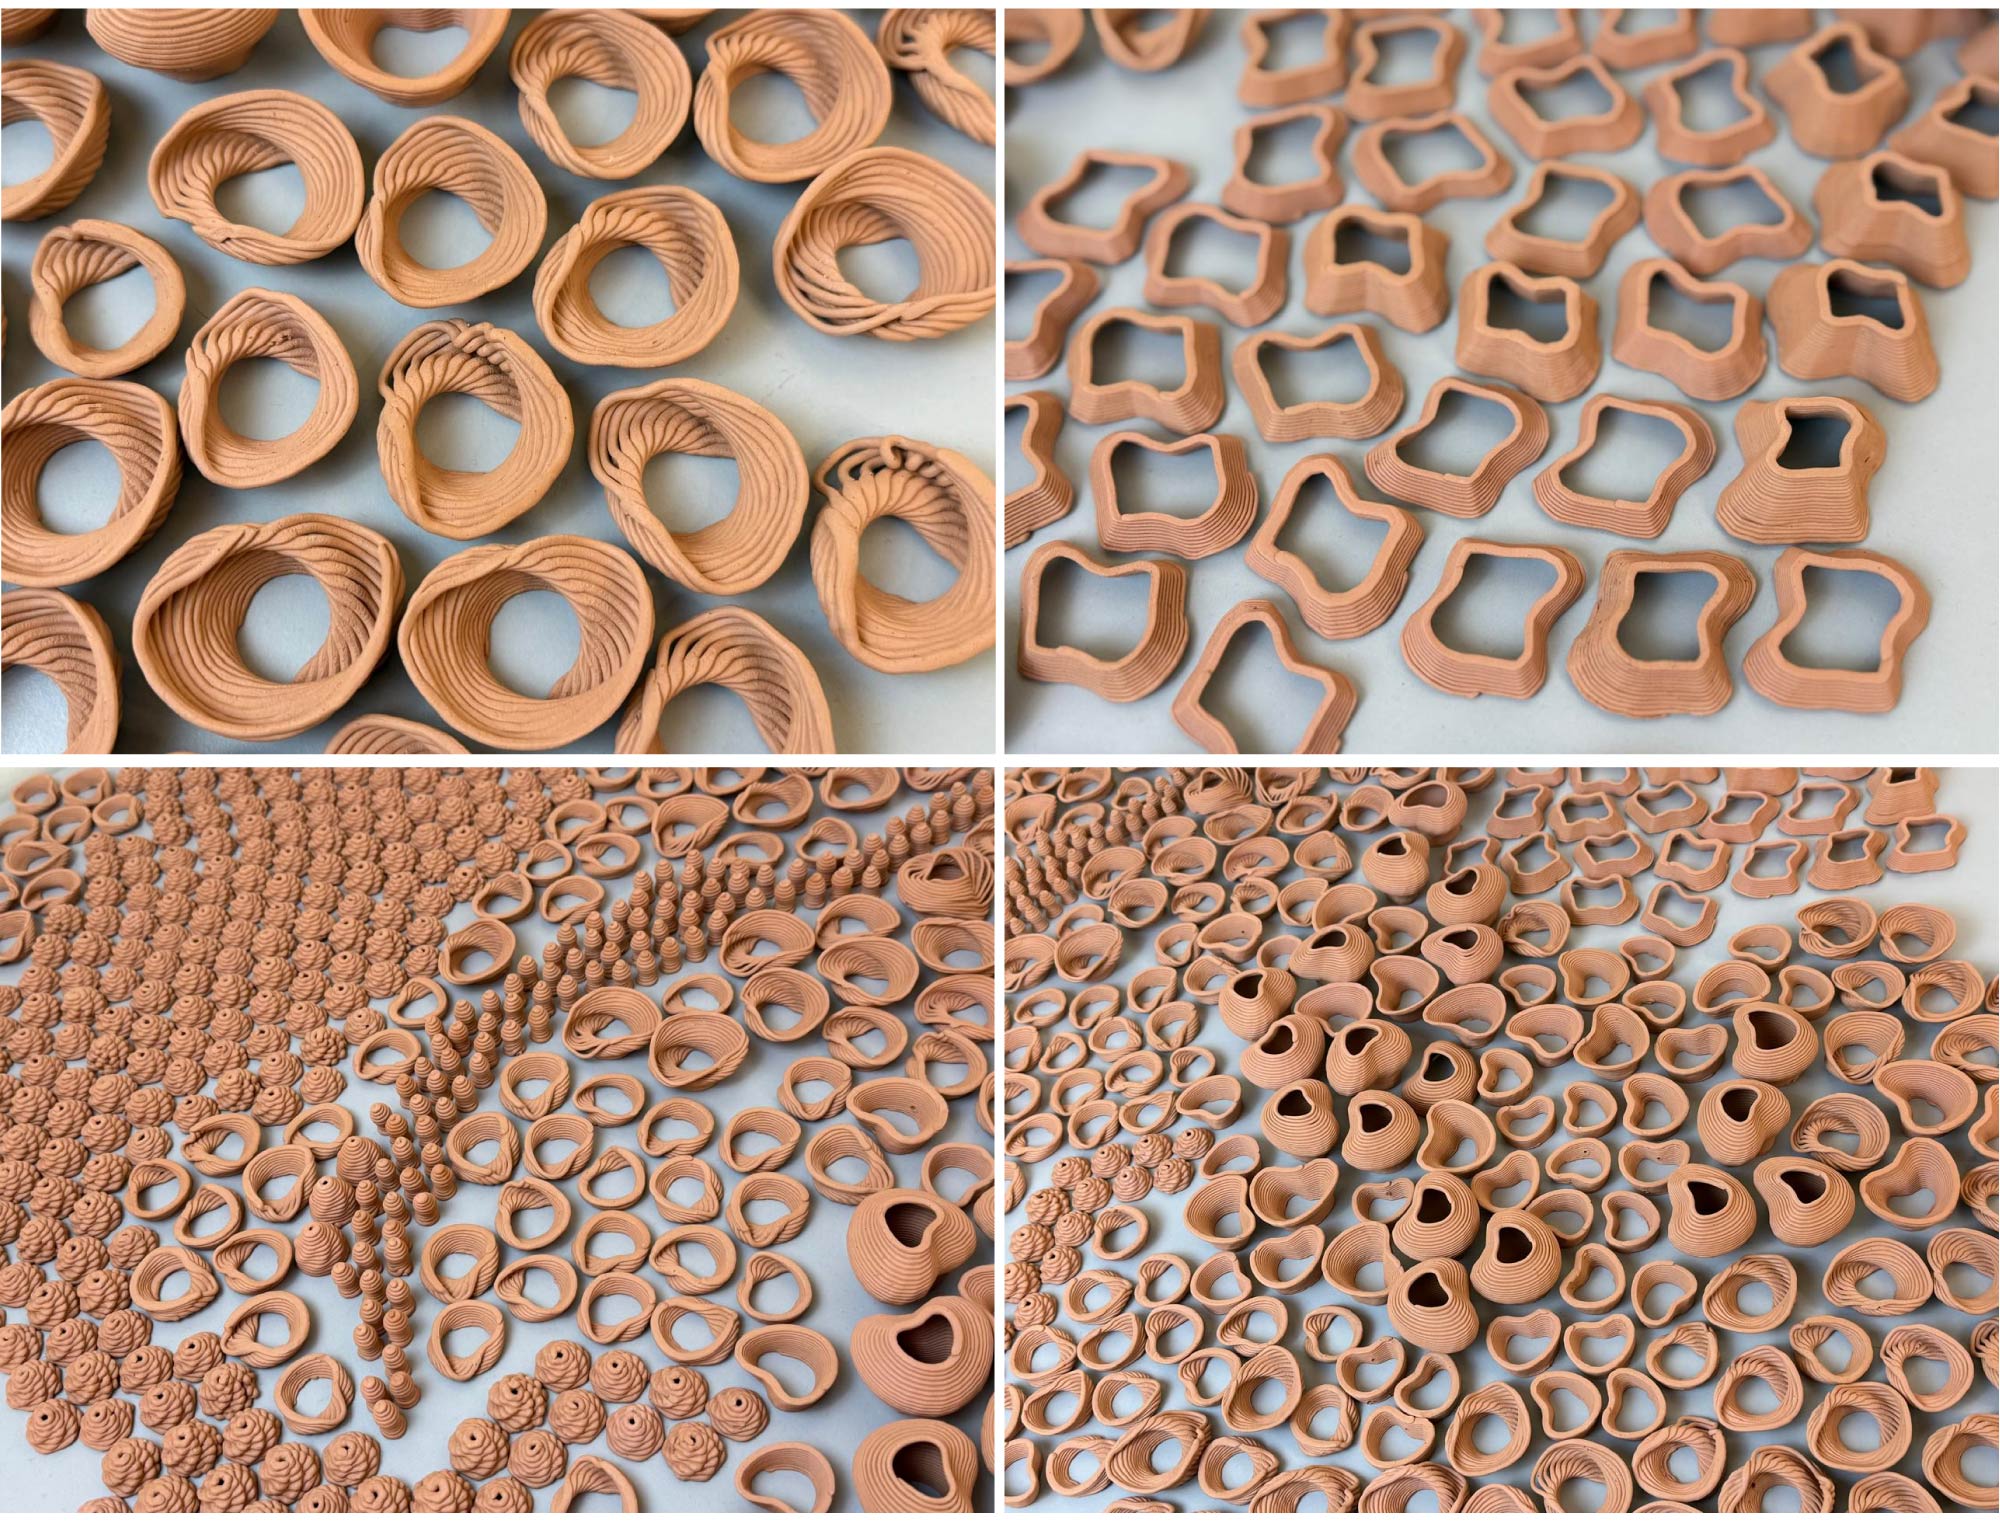
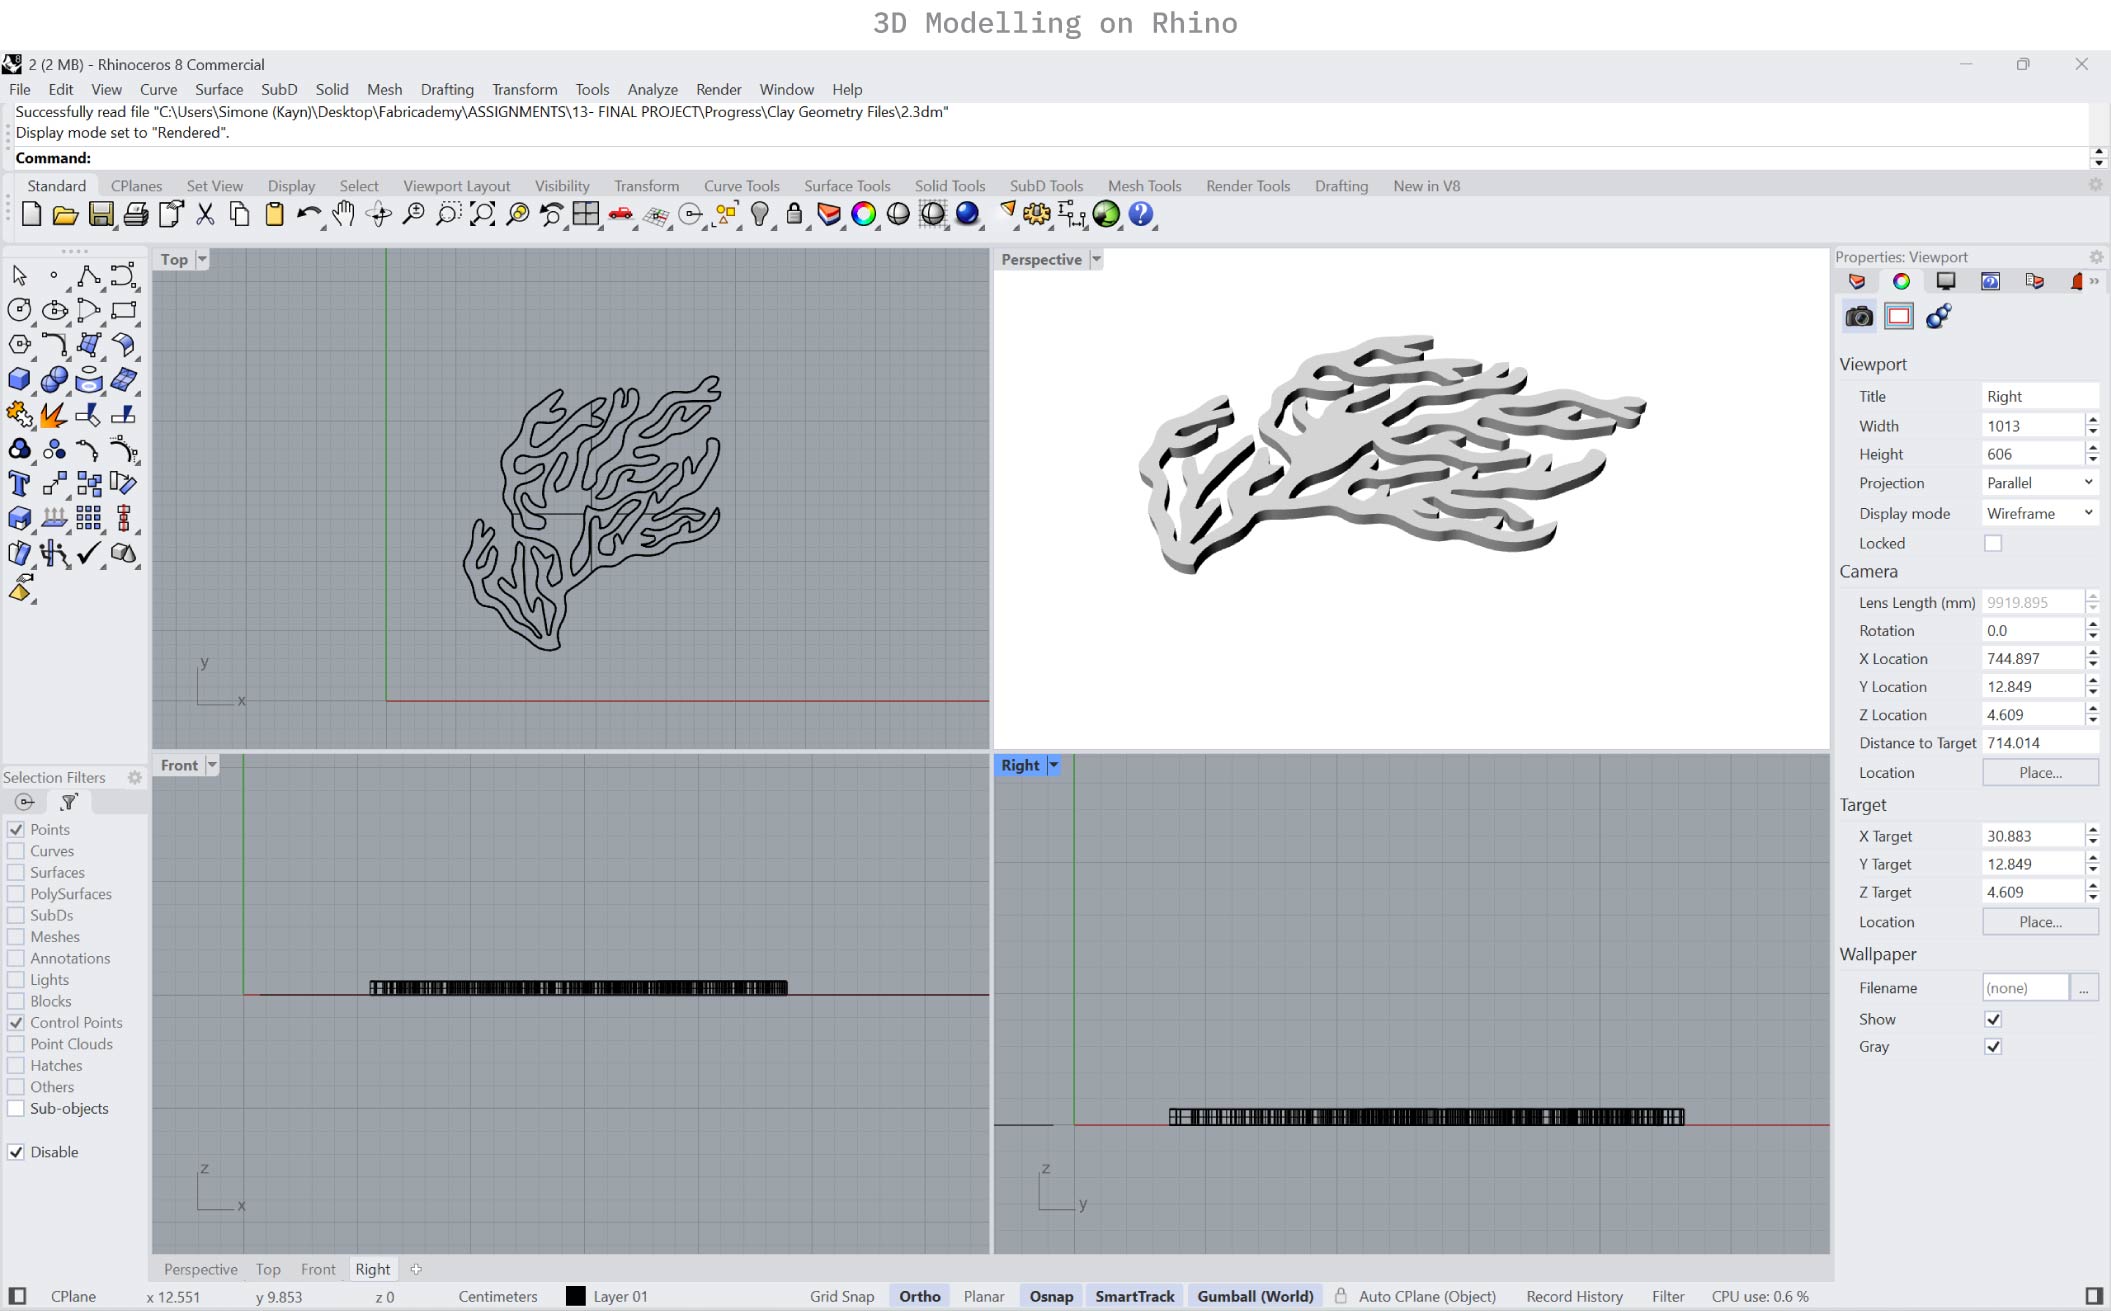
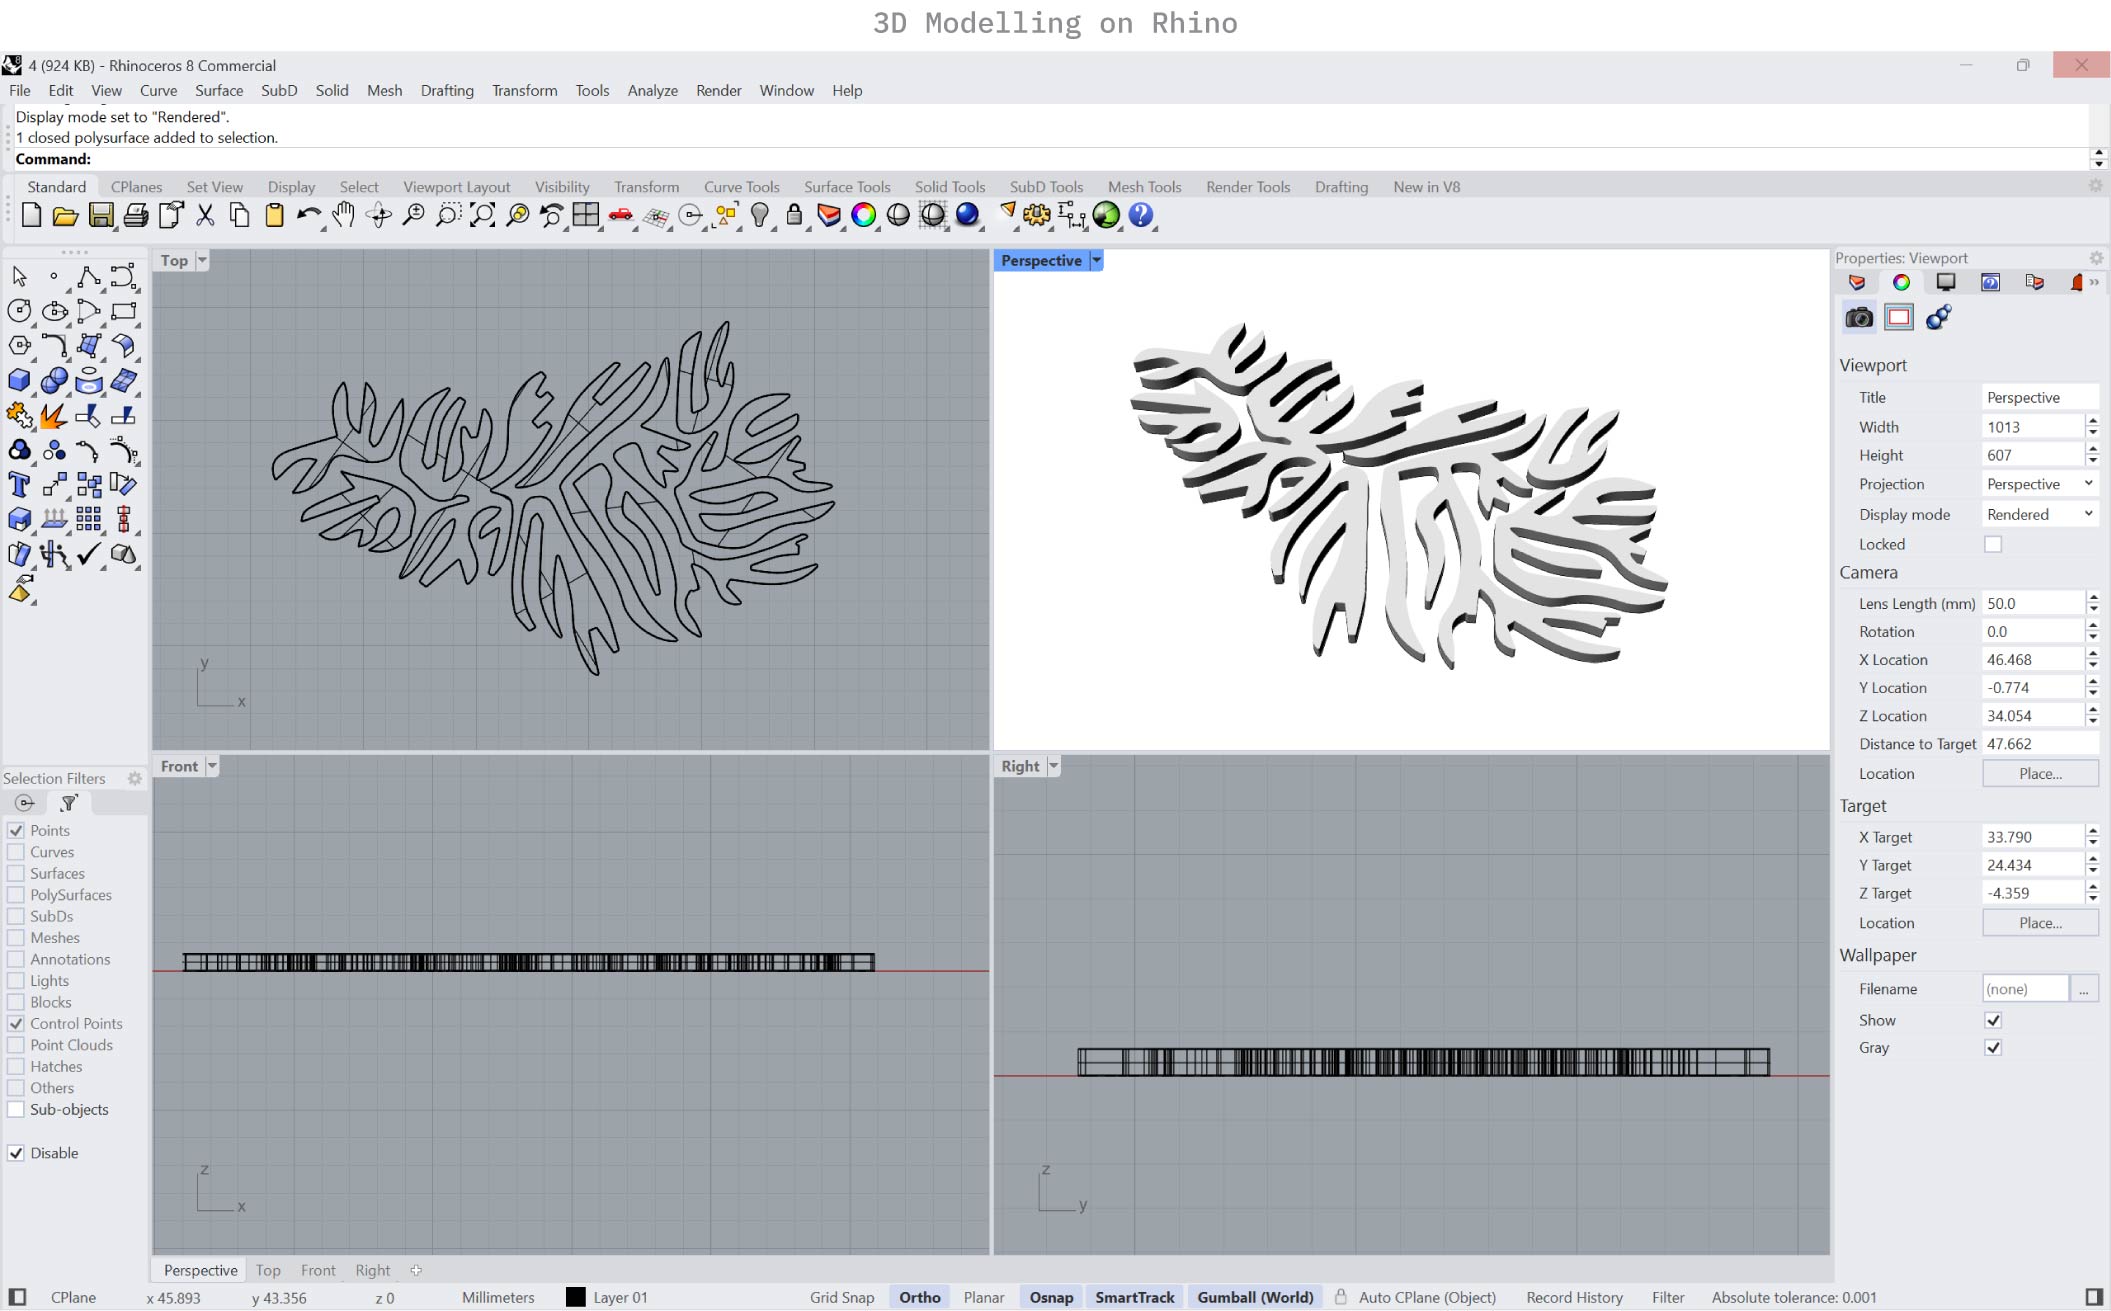
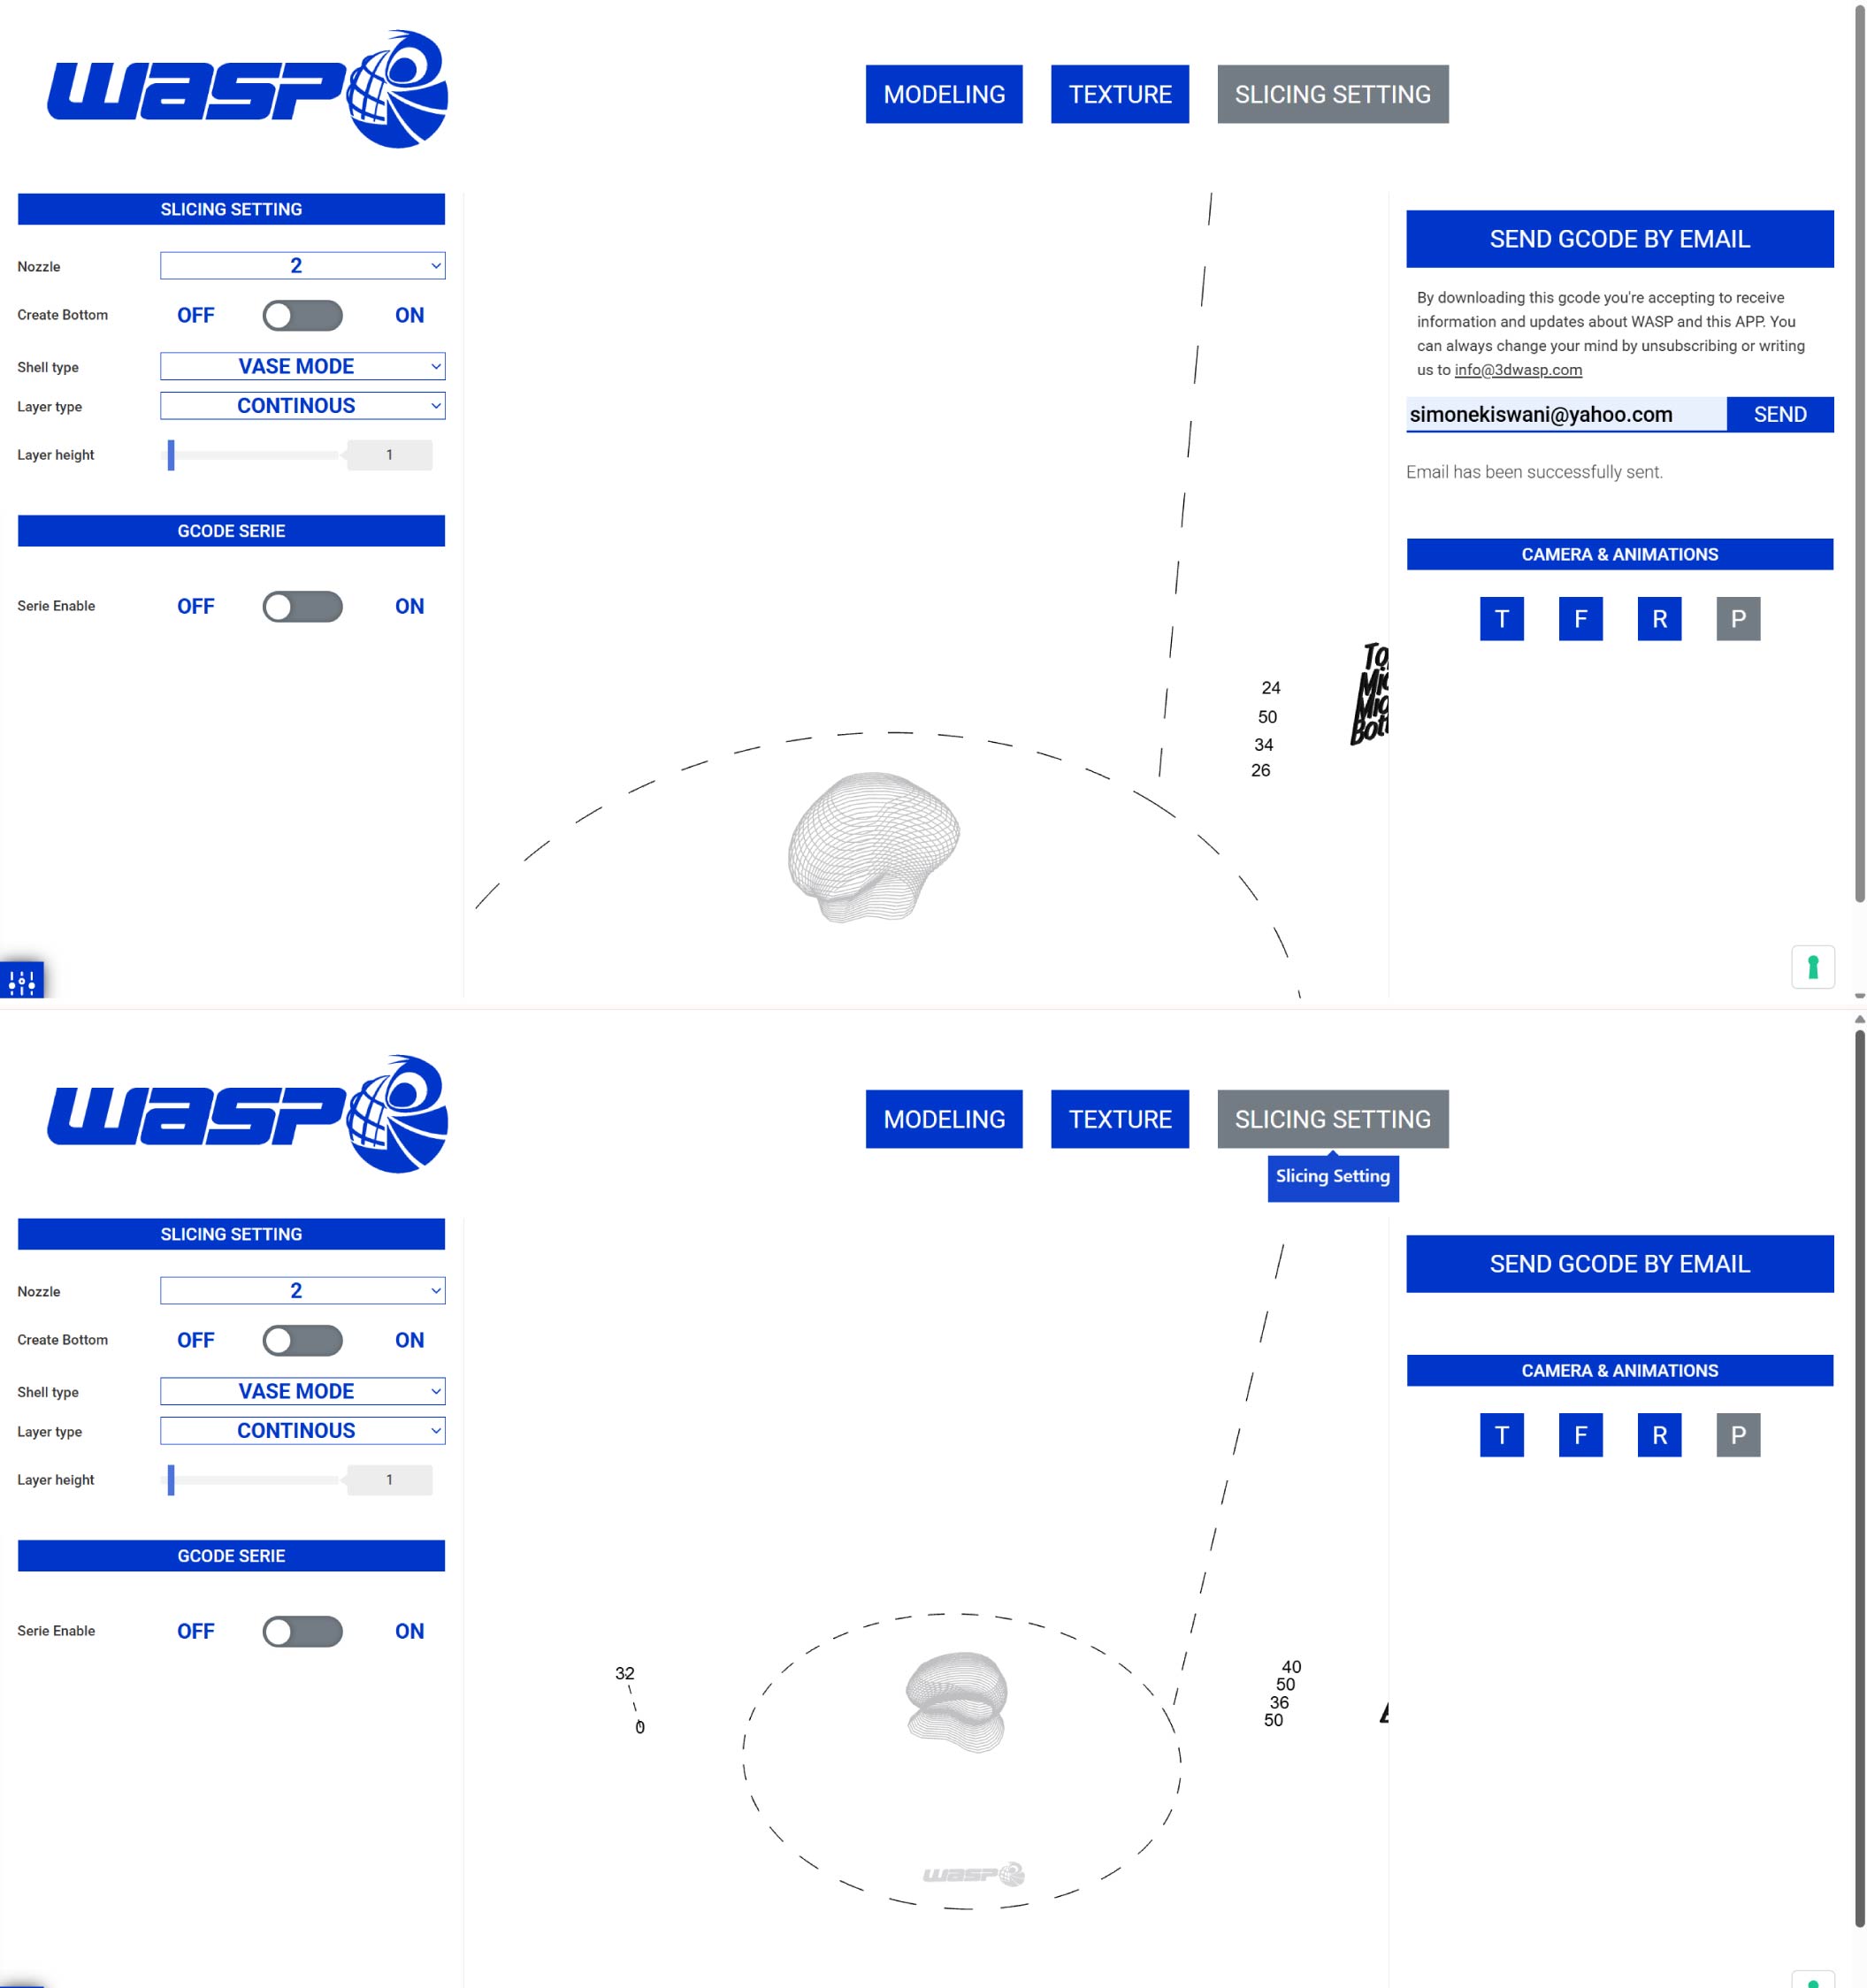
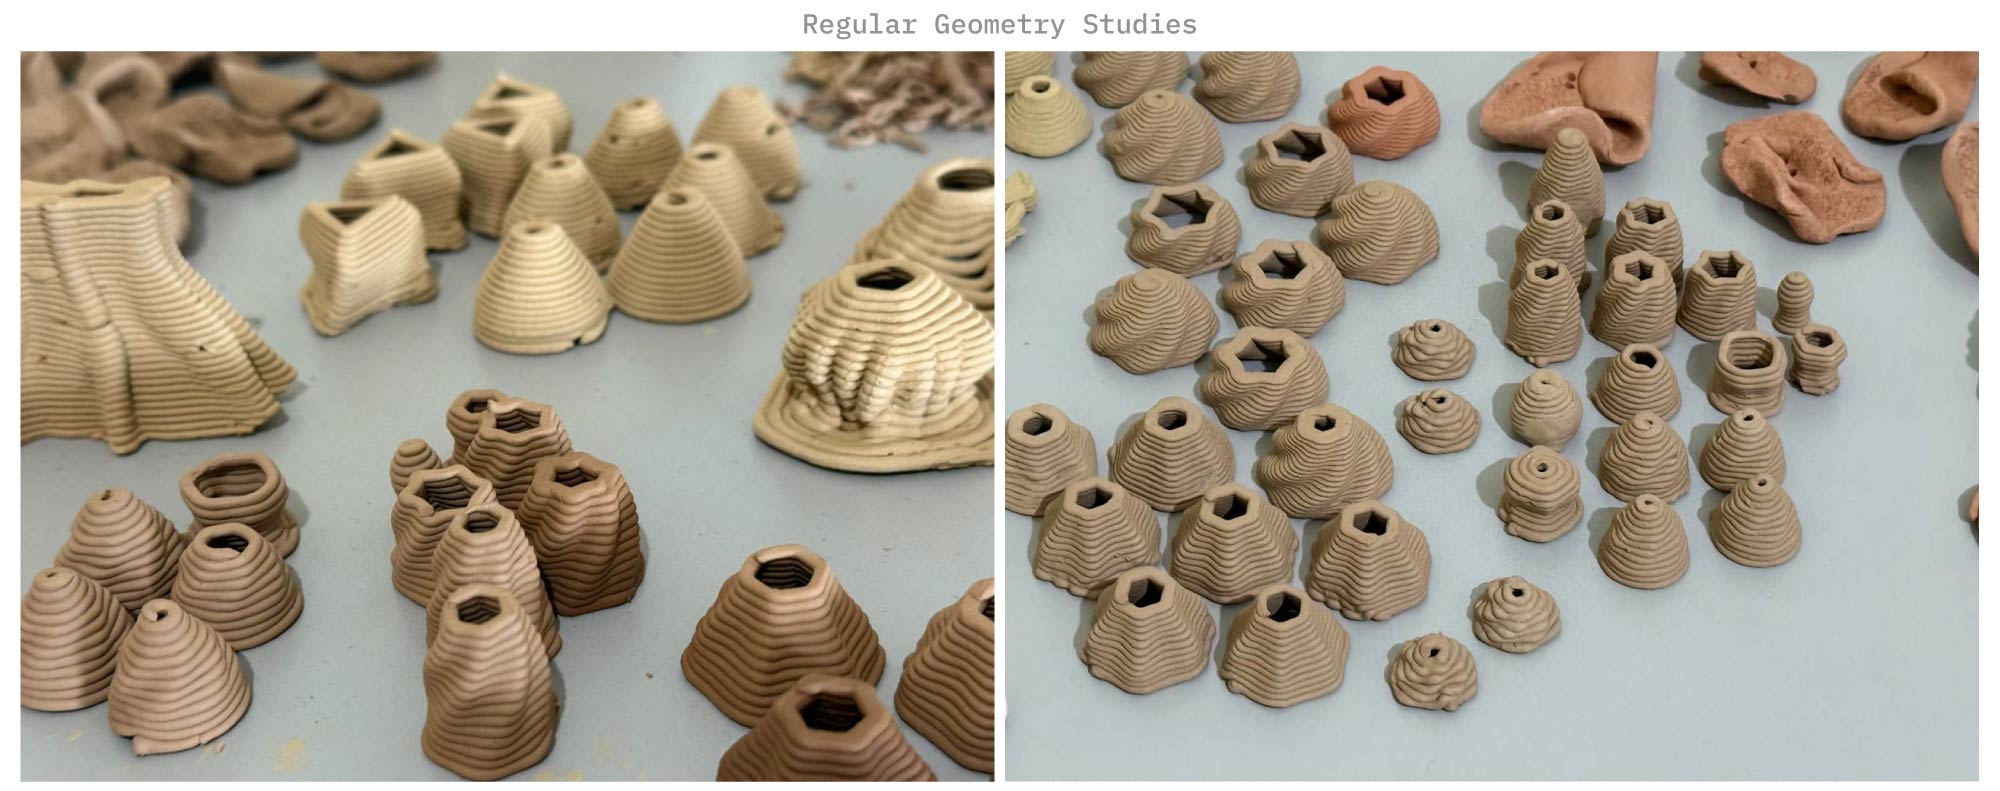
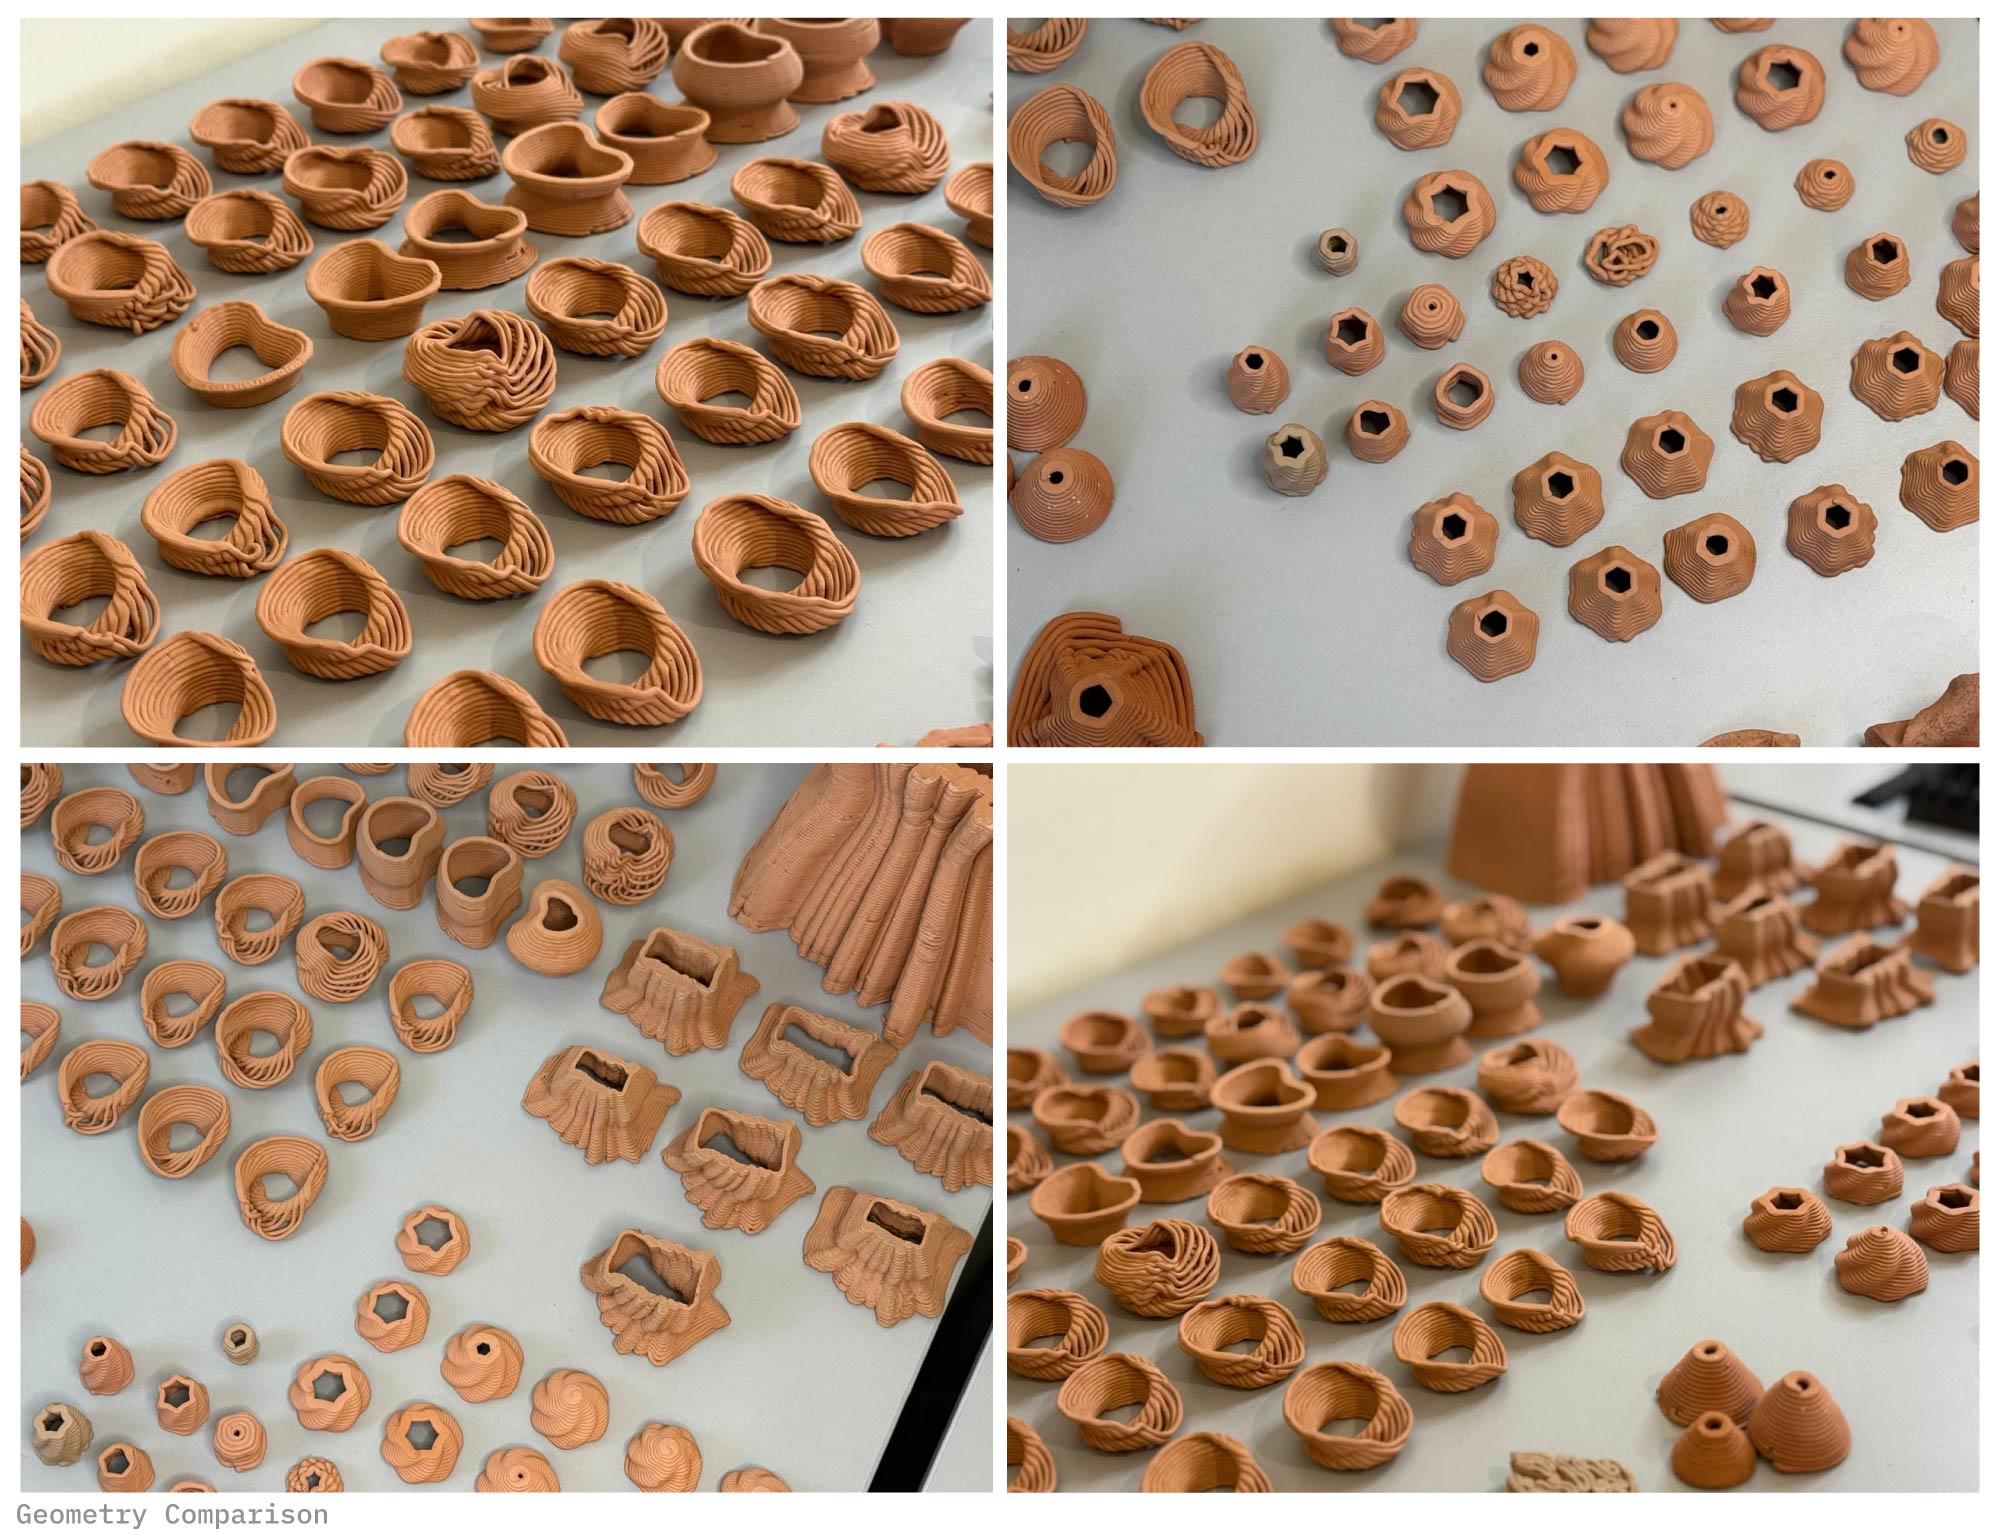
3. Individual Modules Geometries Design Study
In this phase, I conducted a series of individual tests on different geometries, ranging from regular to irregular forms and across multiple scales. All tests were performed using both 3 mm and 1.5 mm nozzles. This stage evolved into an extended experimental process, using Rhino to develop 2D geometries and continuing 3d stage and fabrication through the WASP 2040 slicer.
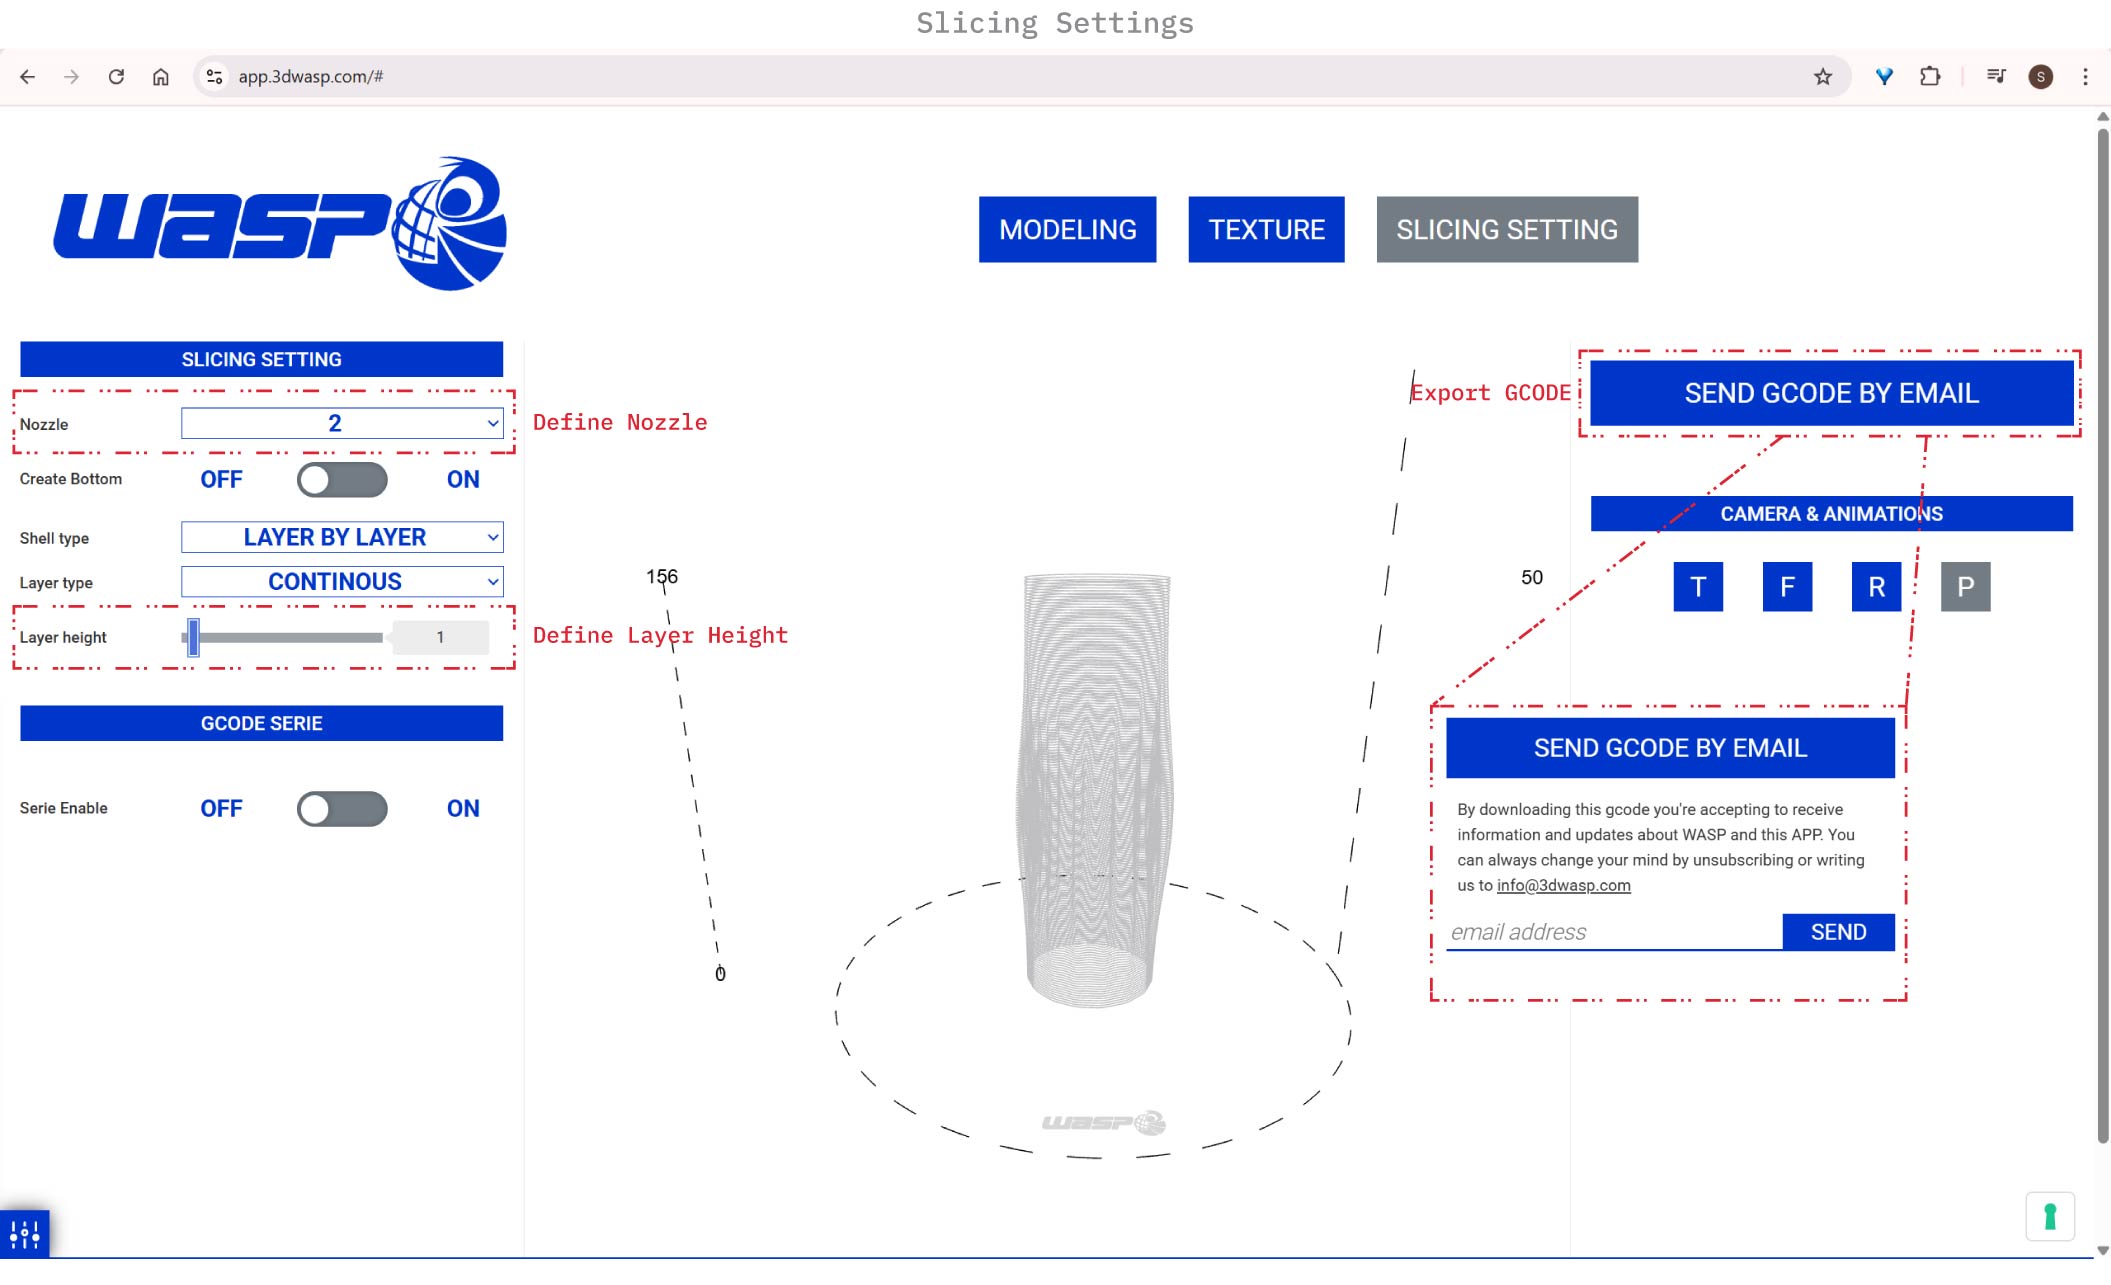
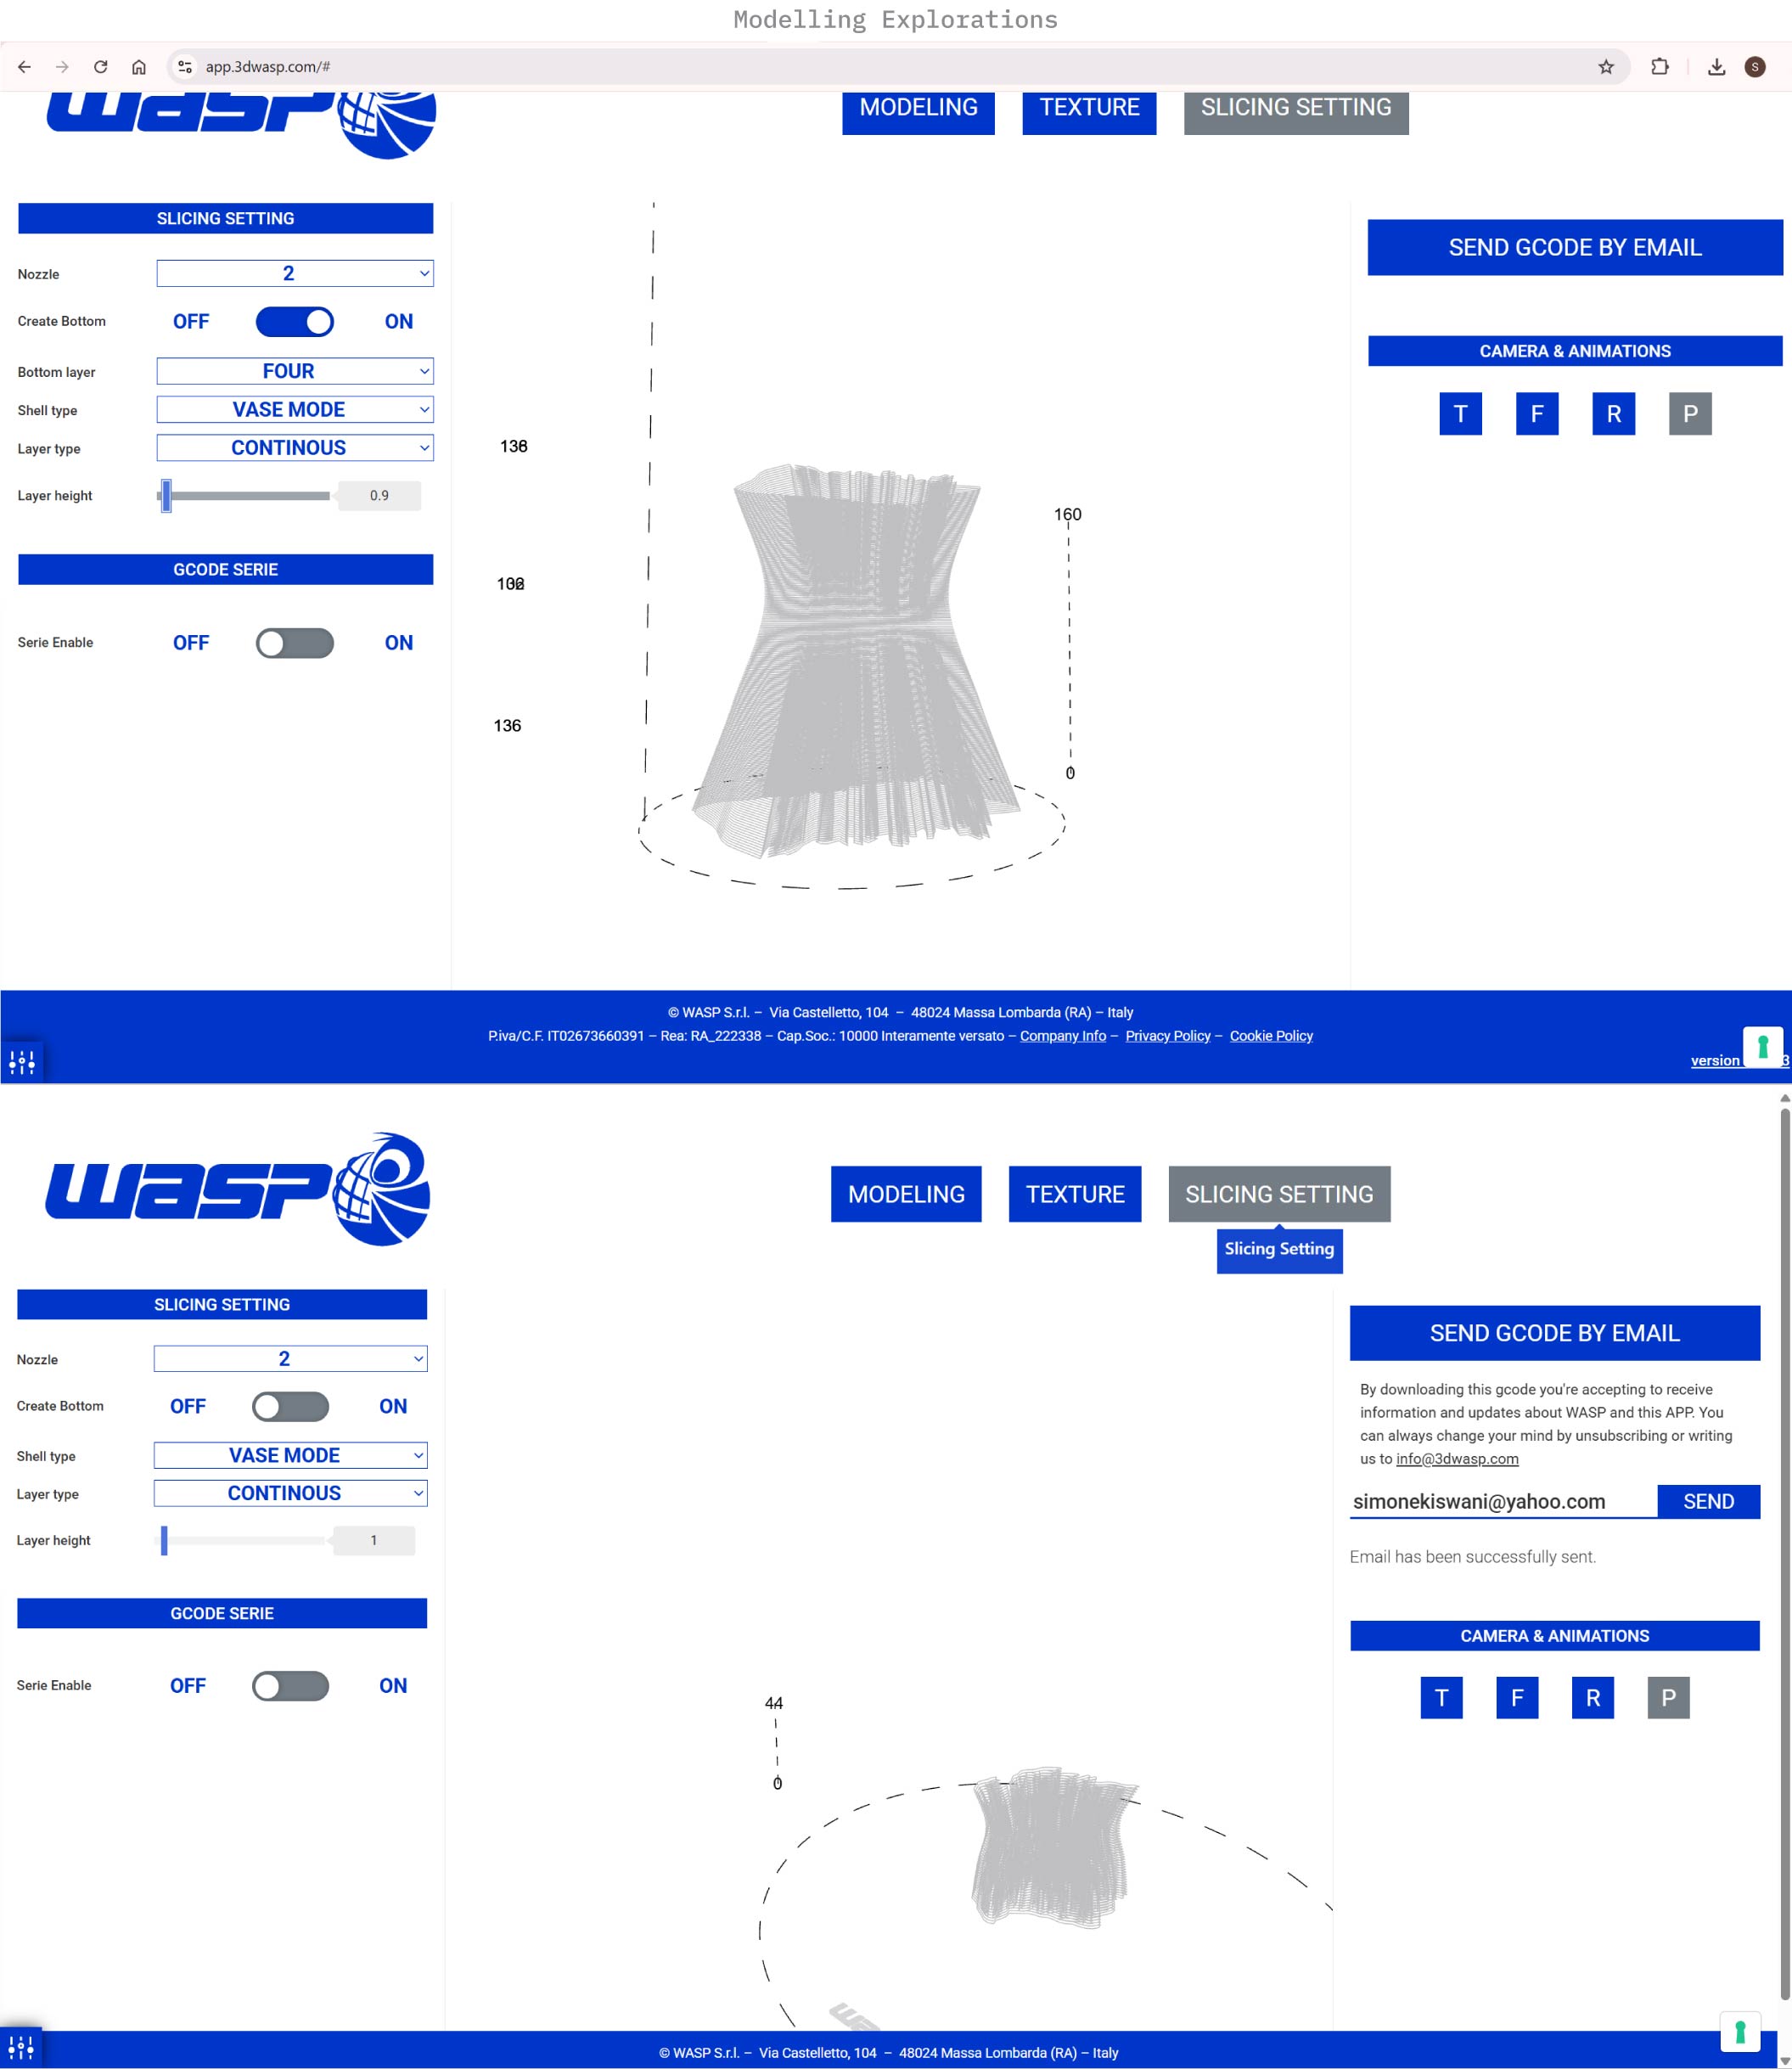
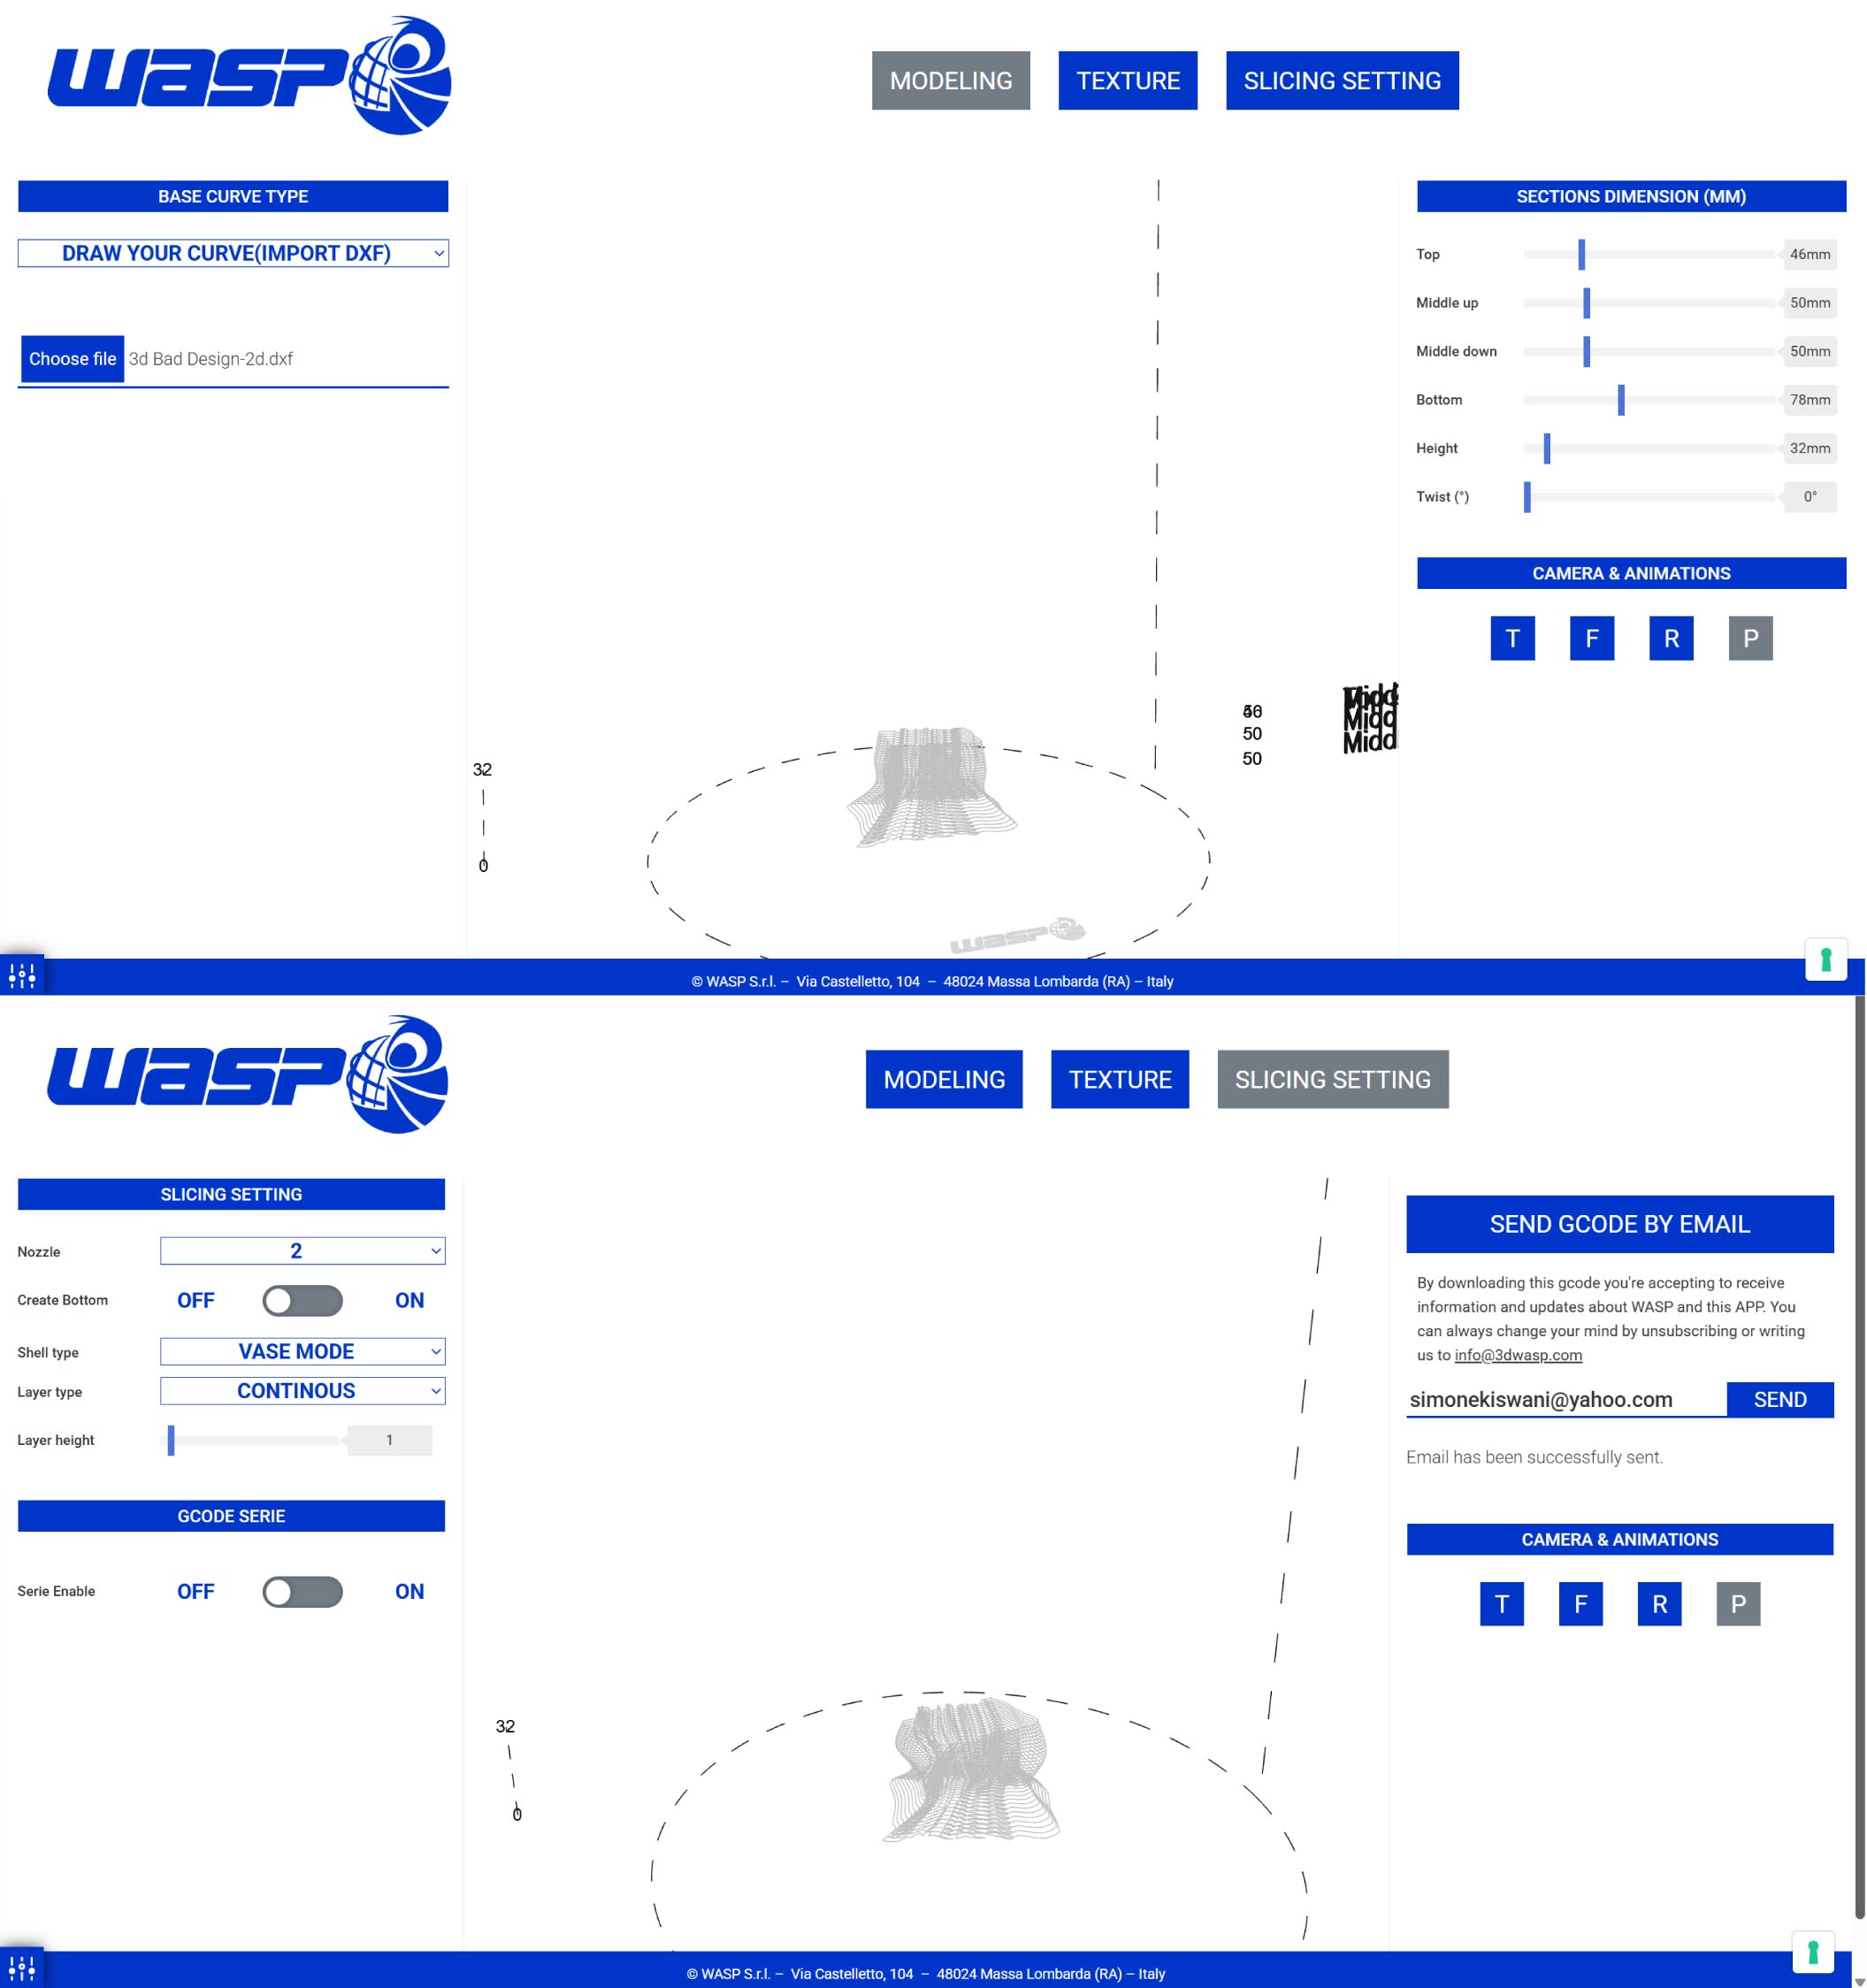
- Introduction to Delta Wasp Slicer Workflow:
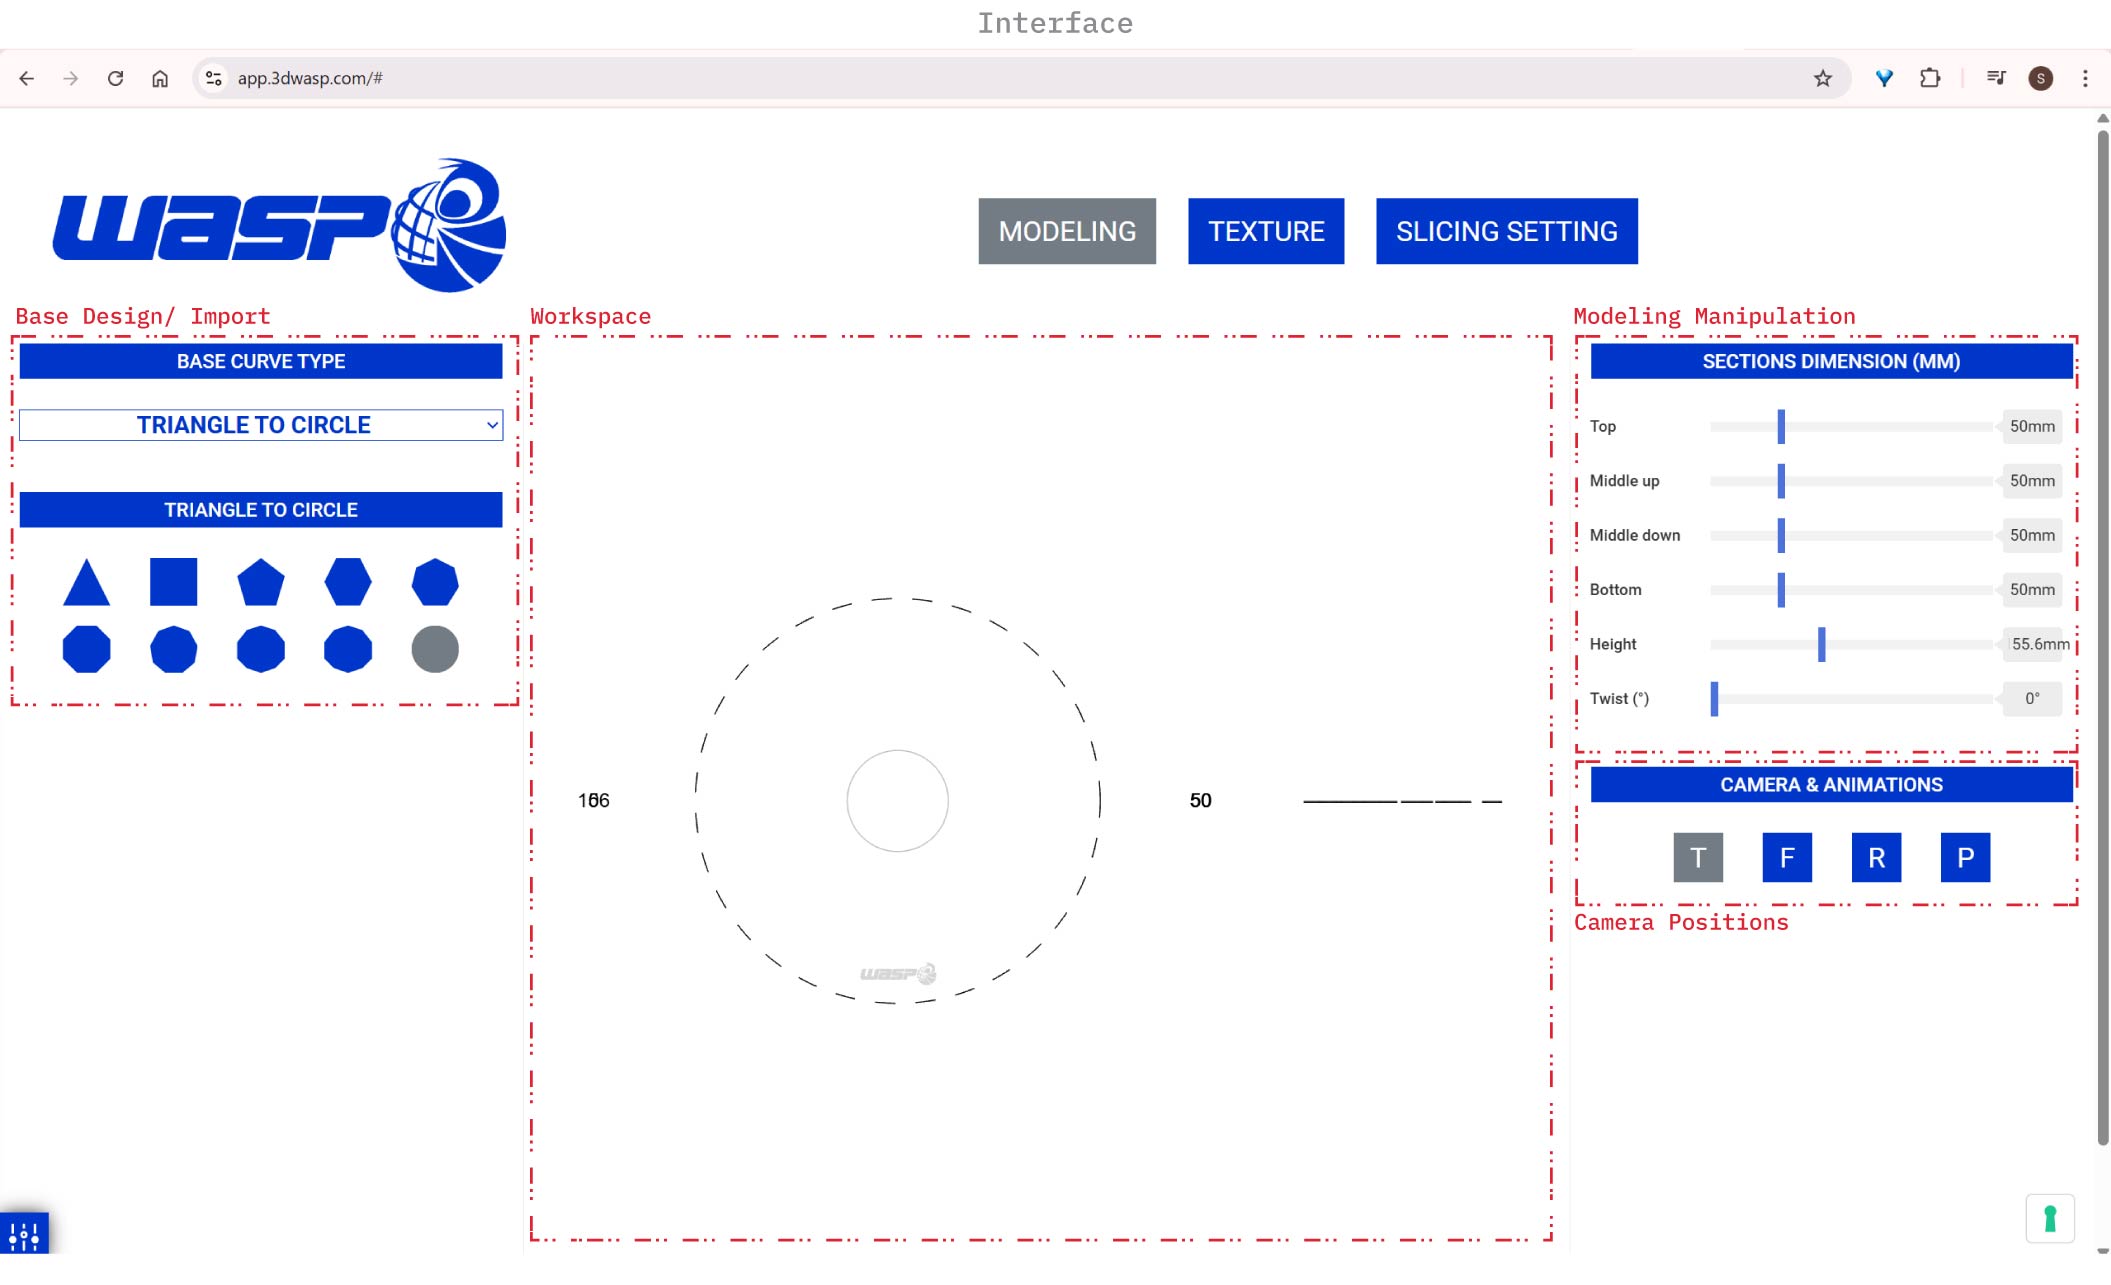
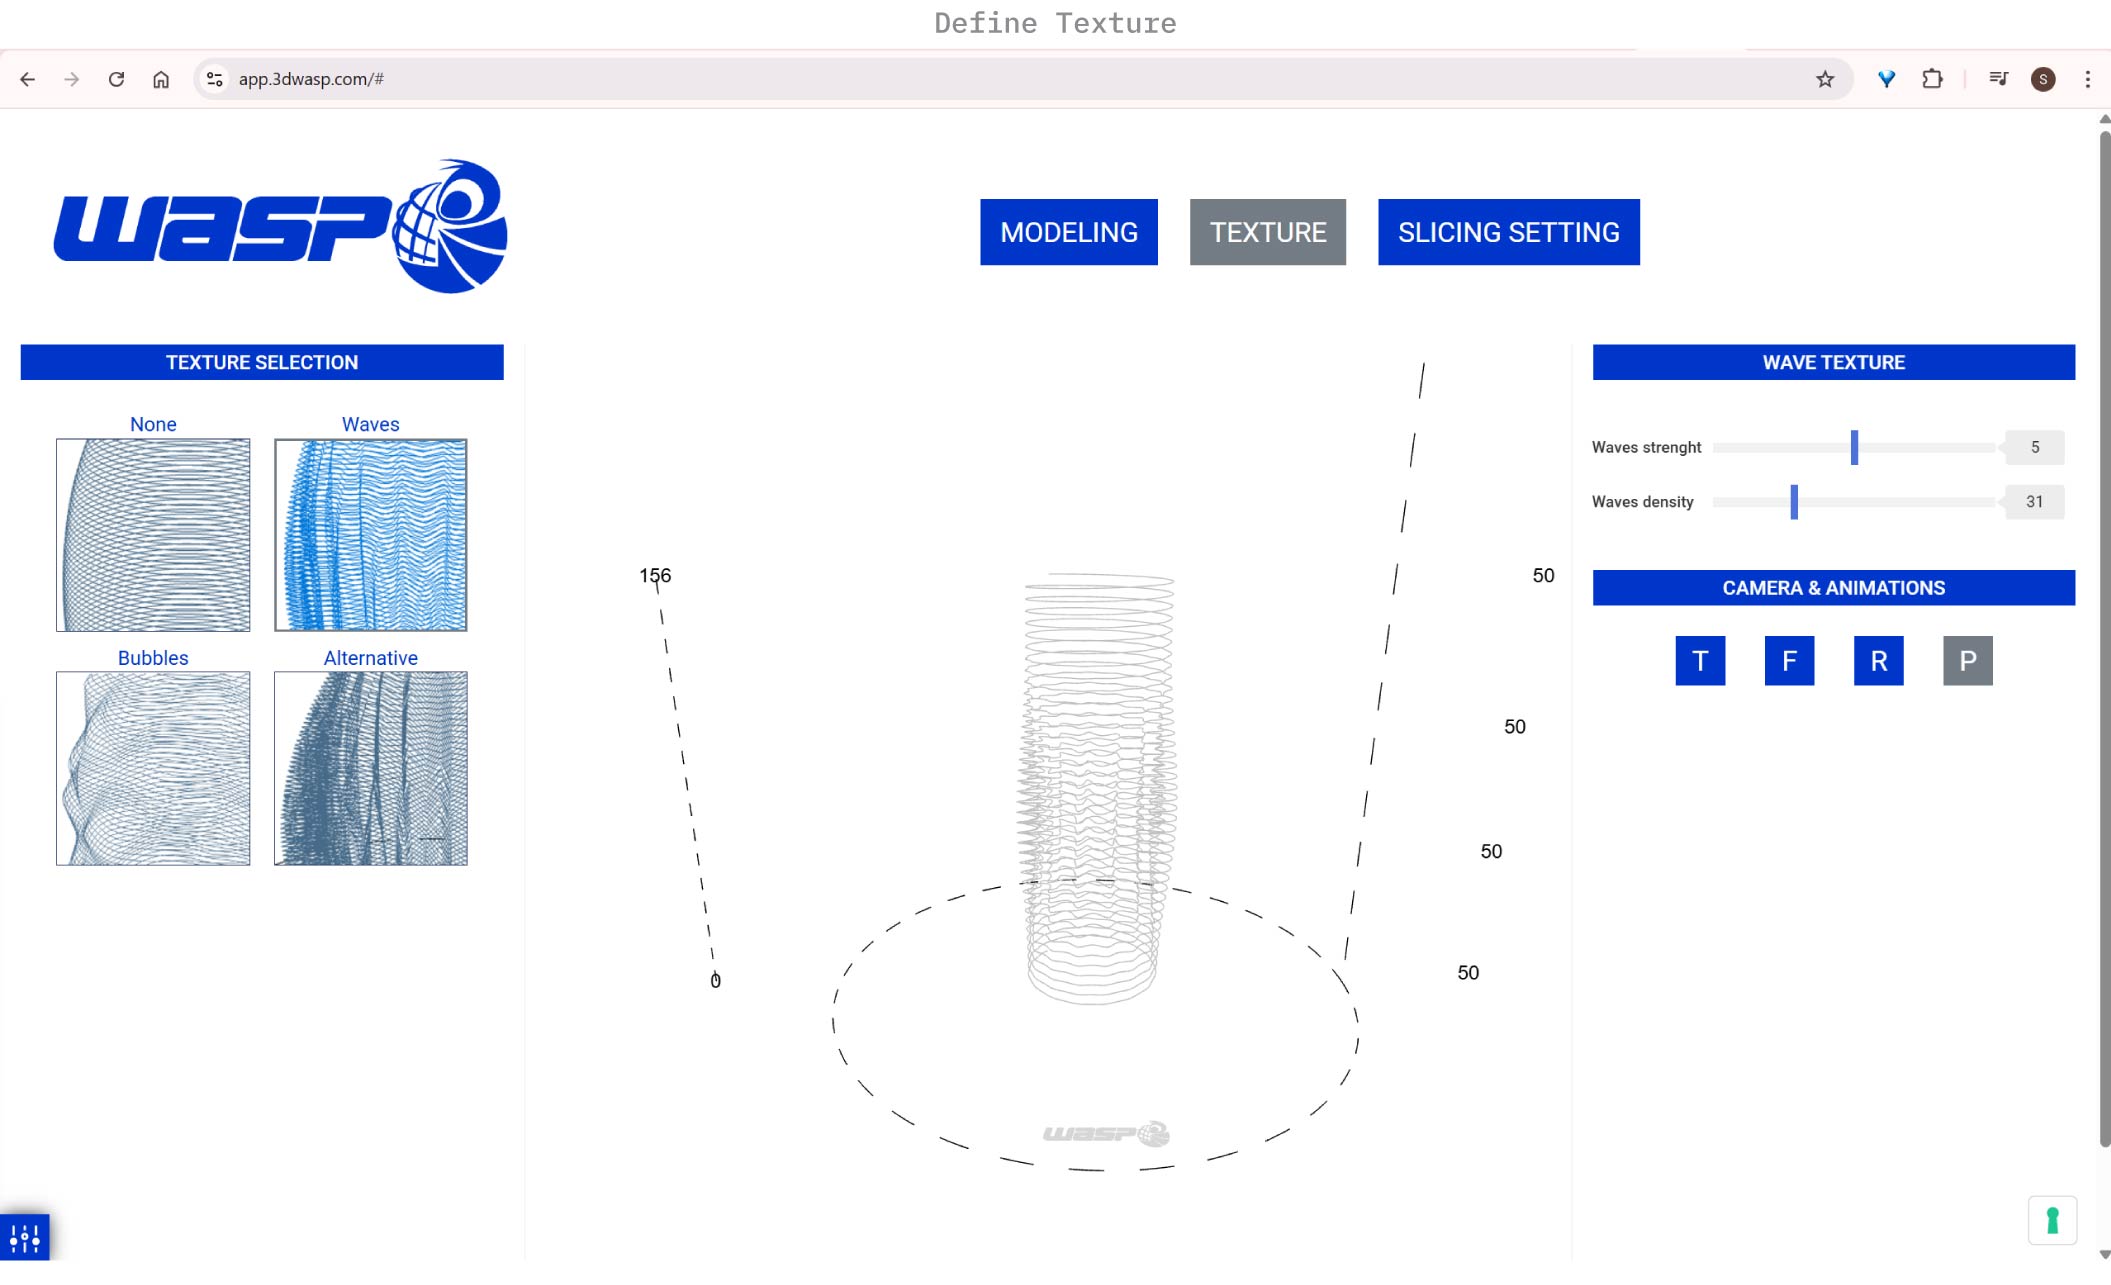
Slicing with WASP 2040 Slicer
- Layer height = 50–80% of nozzle diameter
- Avoid details smaller than nozzle size
- Limit overhangs to ≤ 30–45°
- Balance speed and extrusion (slower = more control)
- Ensure clay is plastic (not too wet / not too dry)
- Start with a slow, well-adhered first layer
- Use butter paper for easy release and post-bending
- Control cracking by reintroducing moisture during drying
- Test different scales + nozzle sizes for each geometry
- Modelling Experimentation:
- Final Modules:
C. First Experiment with WASP 2040 Clay 3D Printer
- Clay Preparation and Loading into Catridge.
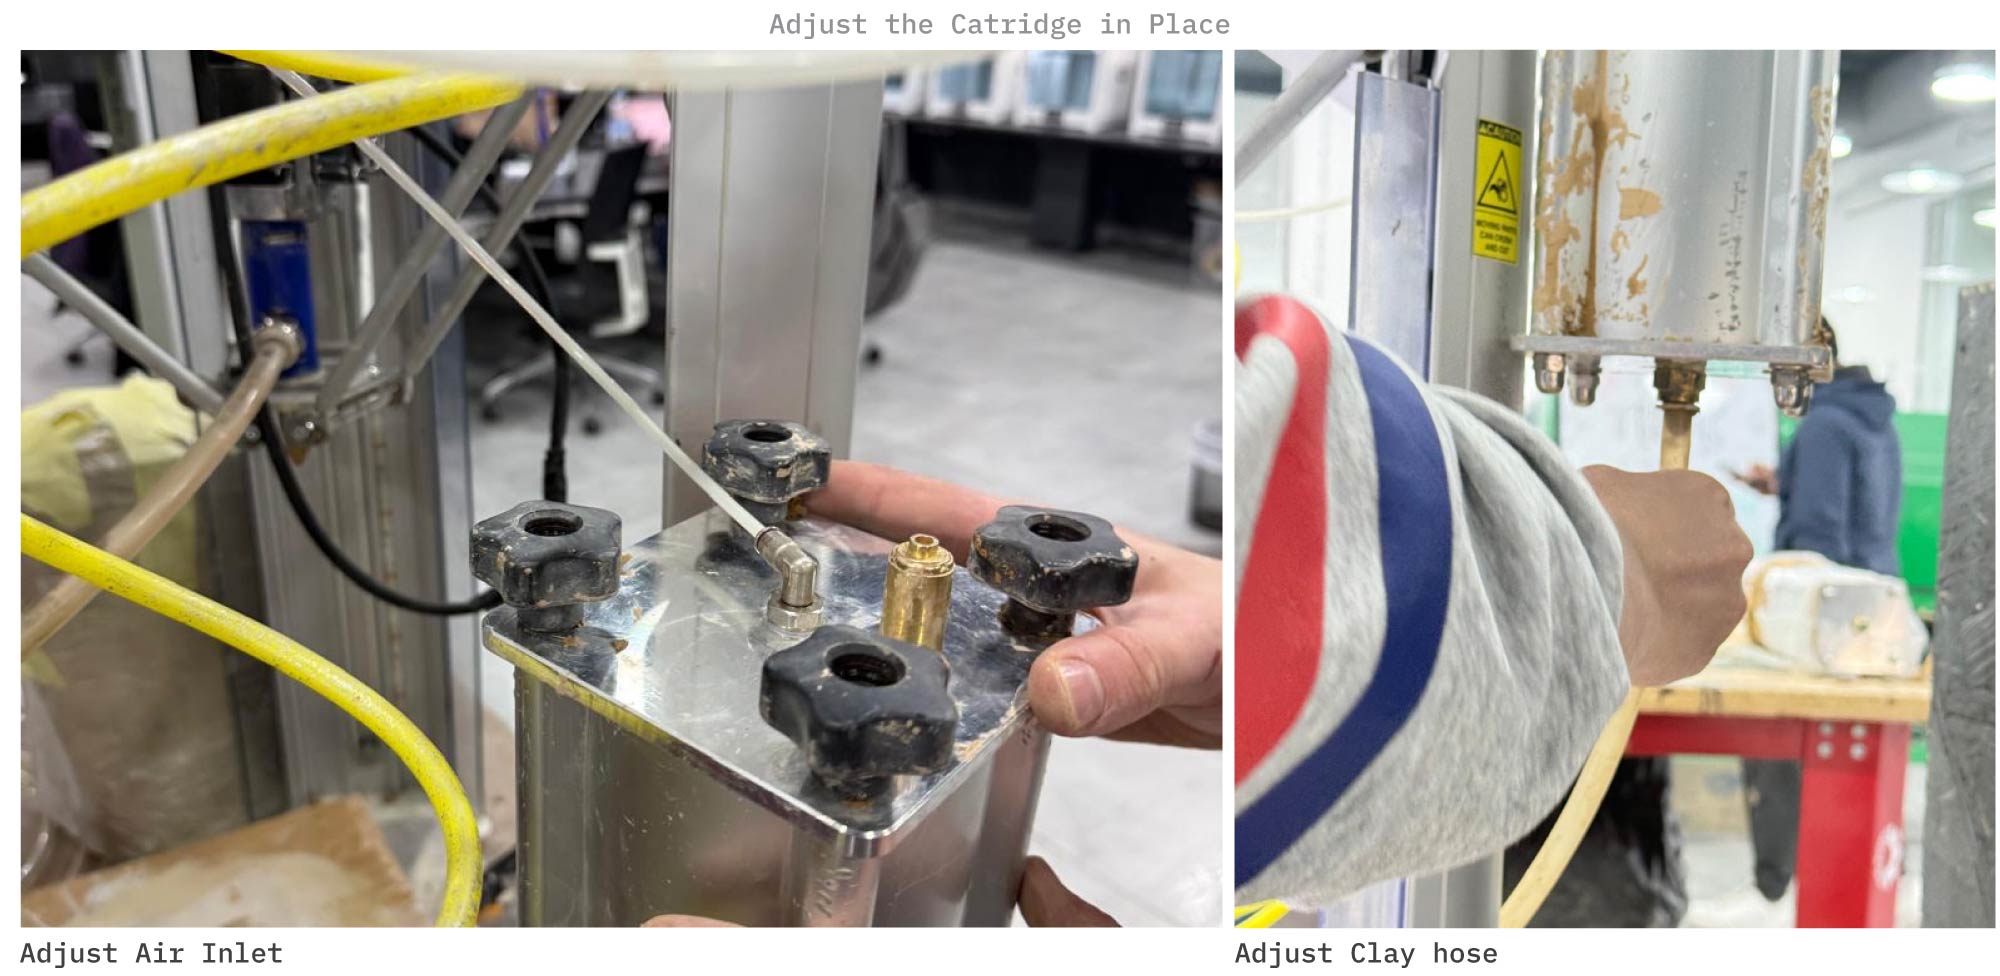
- Adjusting the Catridge in place and connecting the Air Inlet.
- Setup the Printer.
- First Attempts on 3D Printing
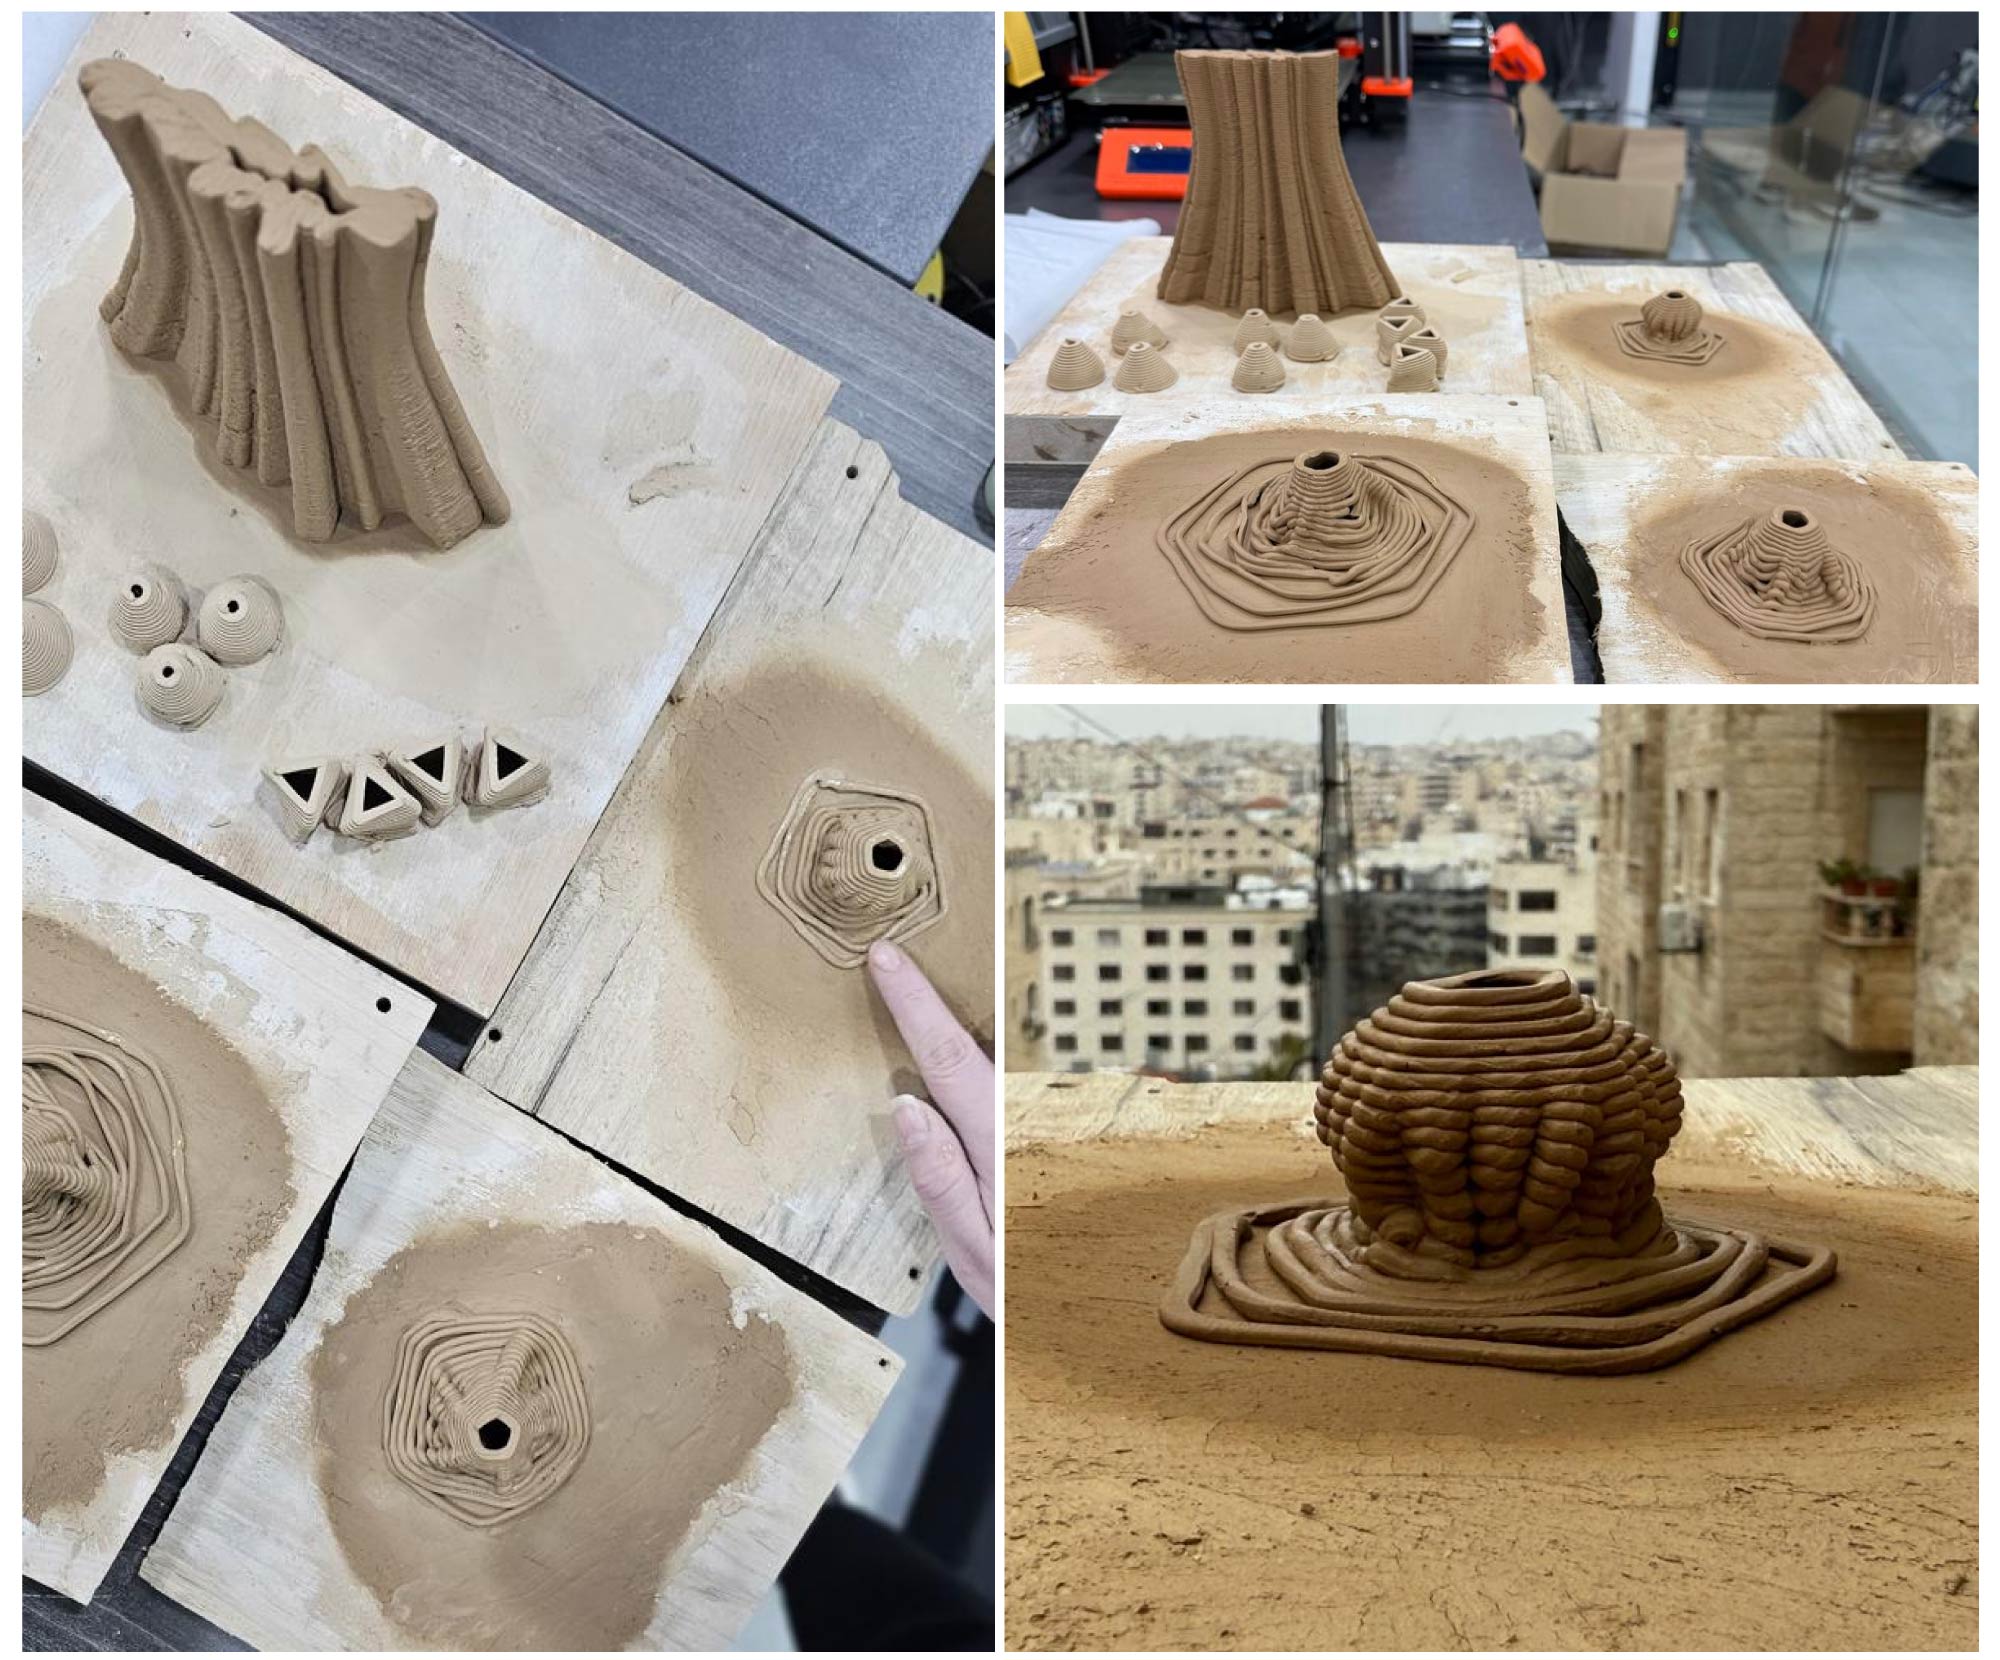
D. Second Phase Experiments
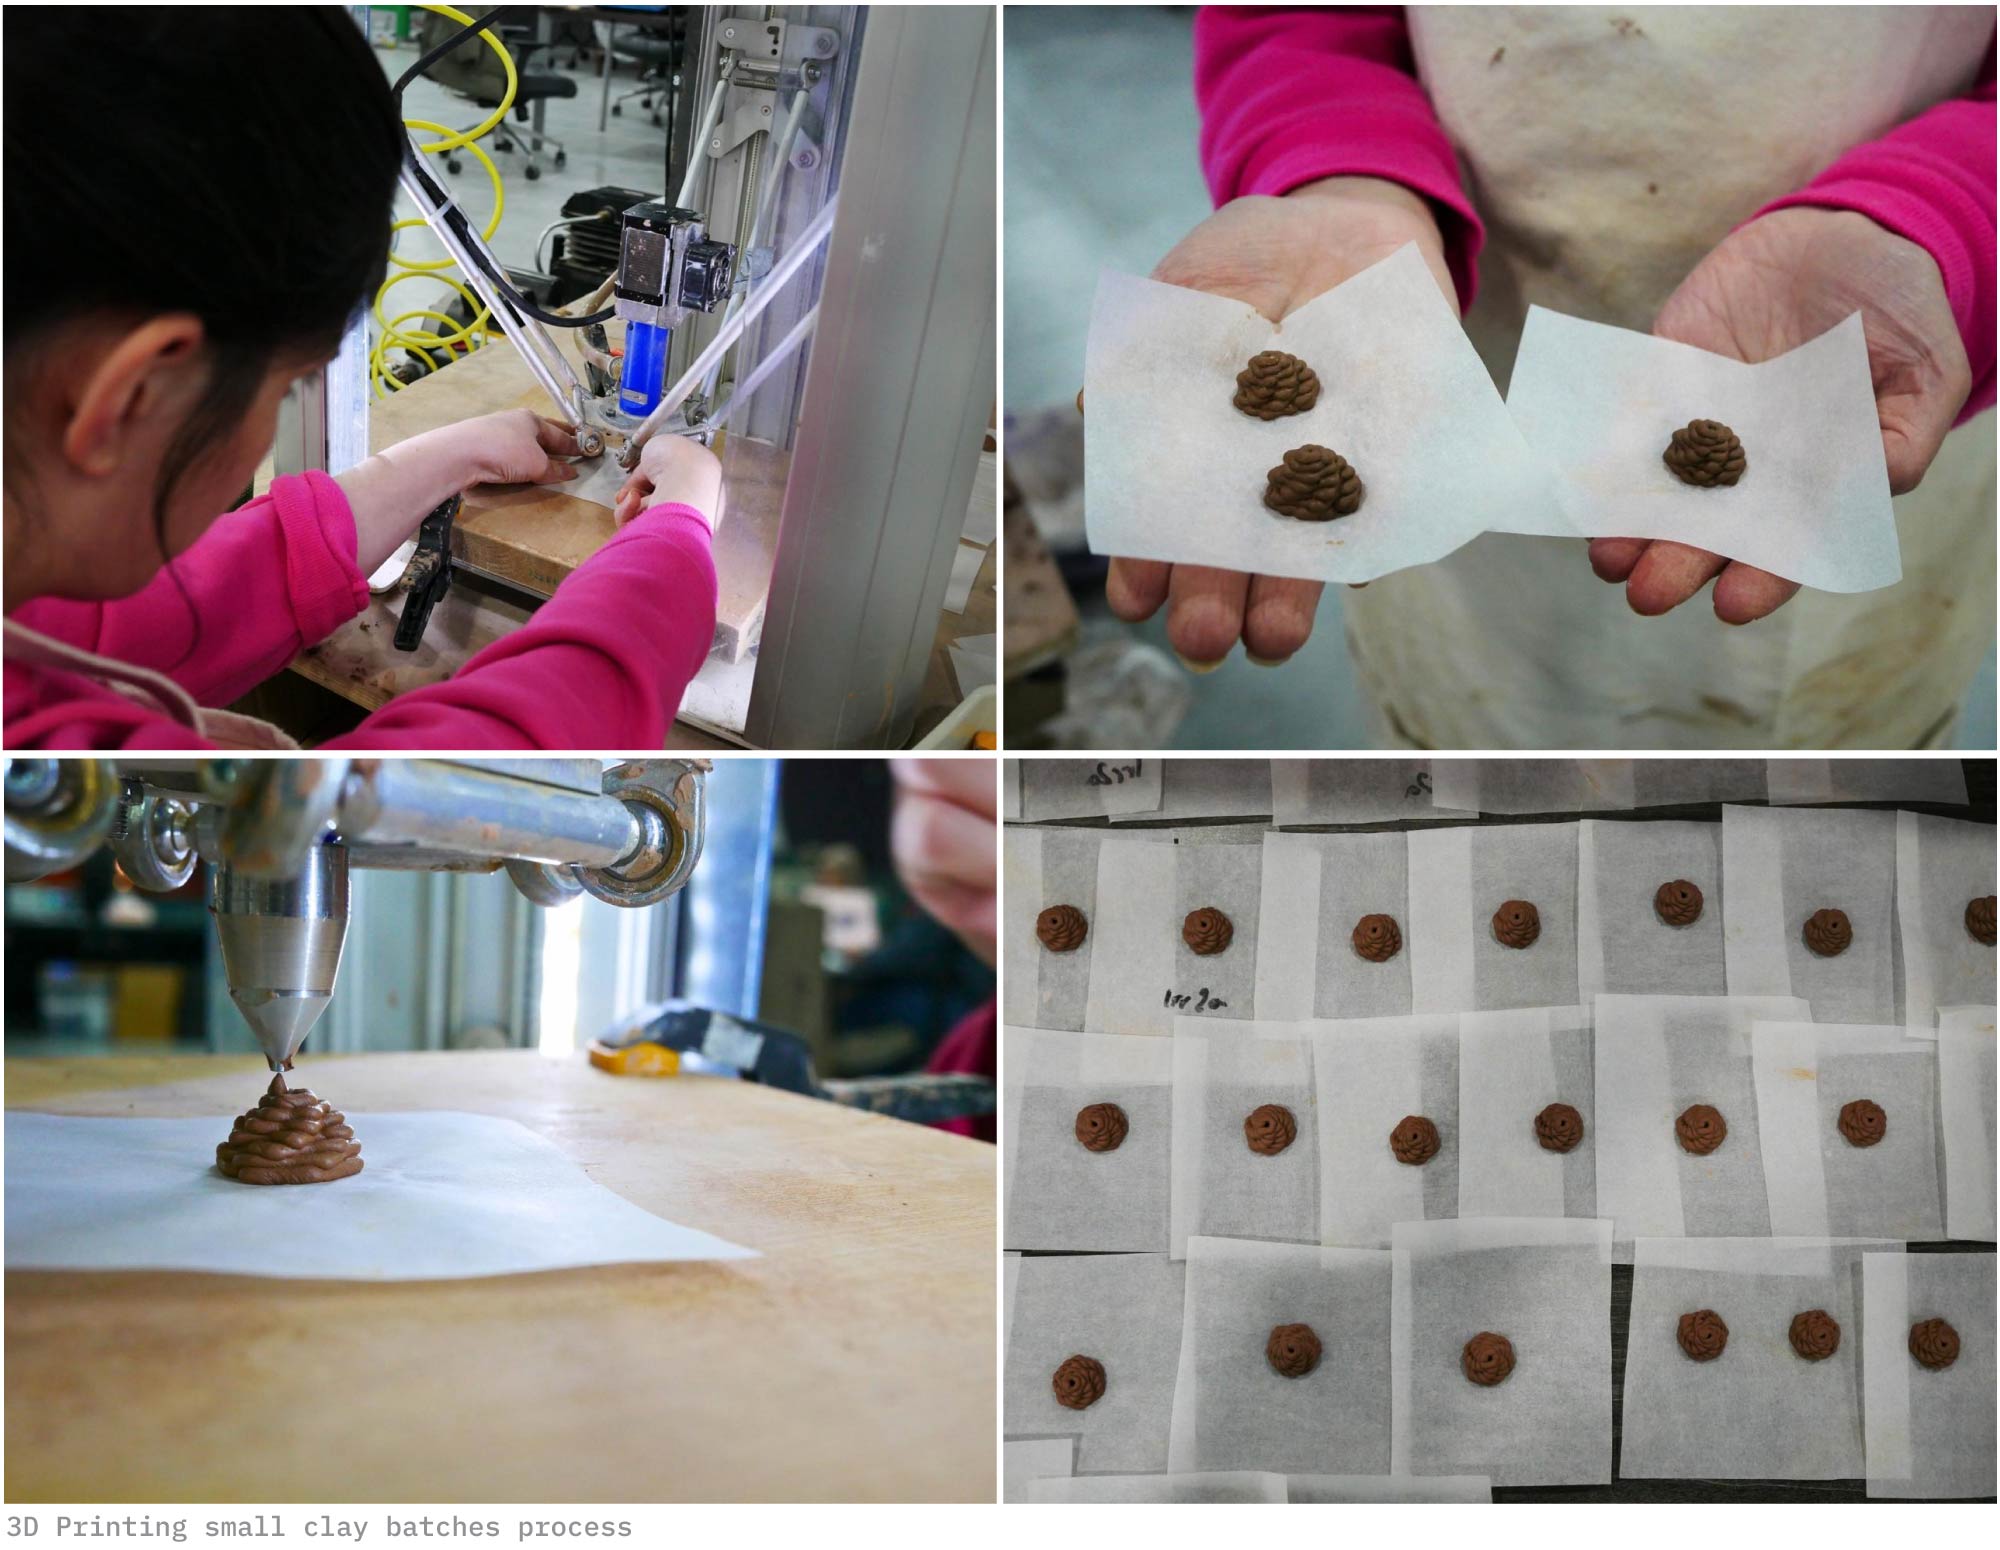
The second phase of 3D printing experiments focused on small-scale geometric forms, enabled by reducing the nozzle diameter from 3 mm to 1.5 mm.
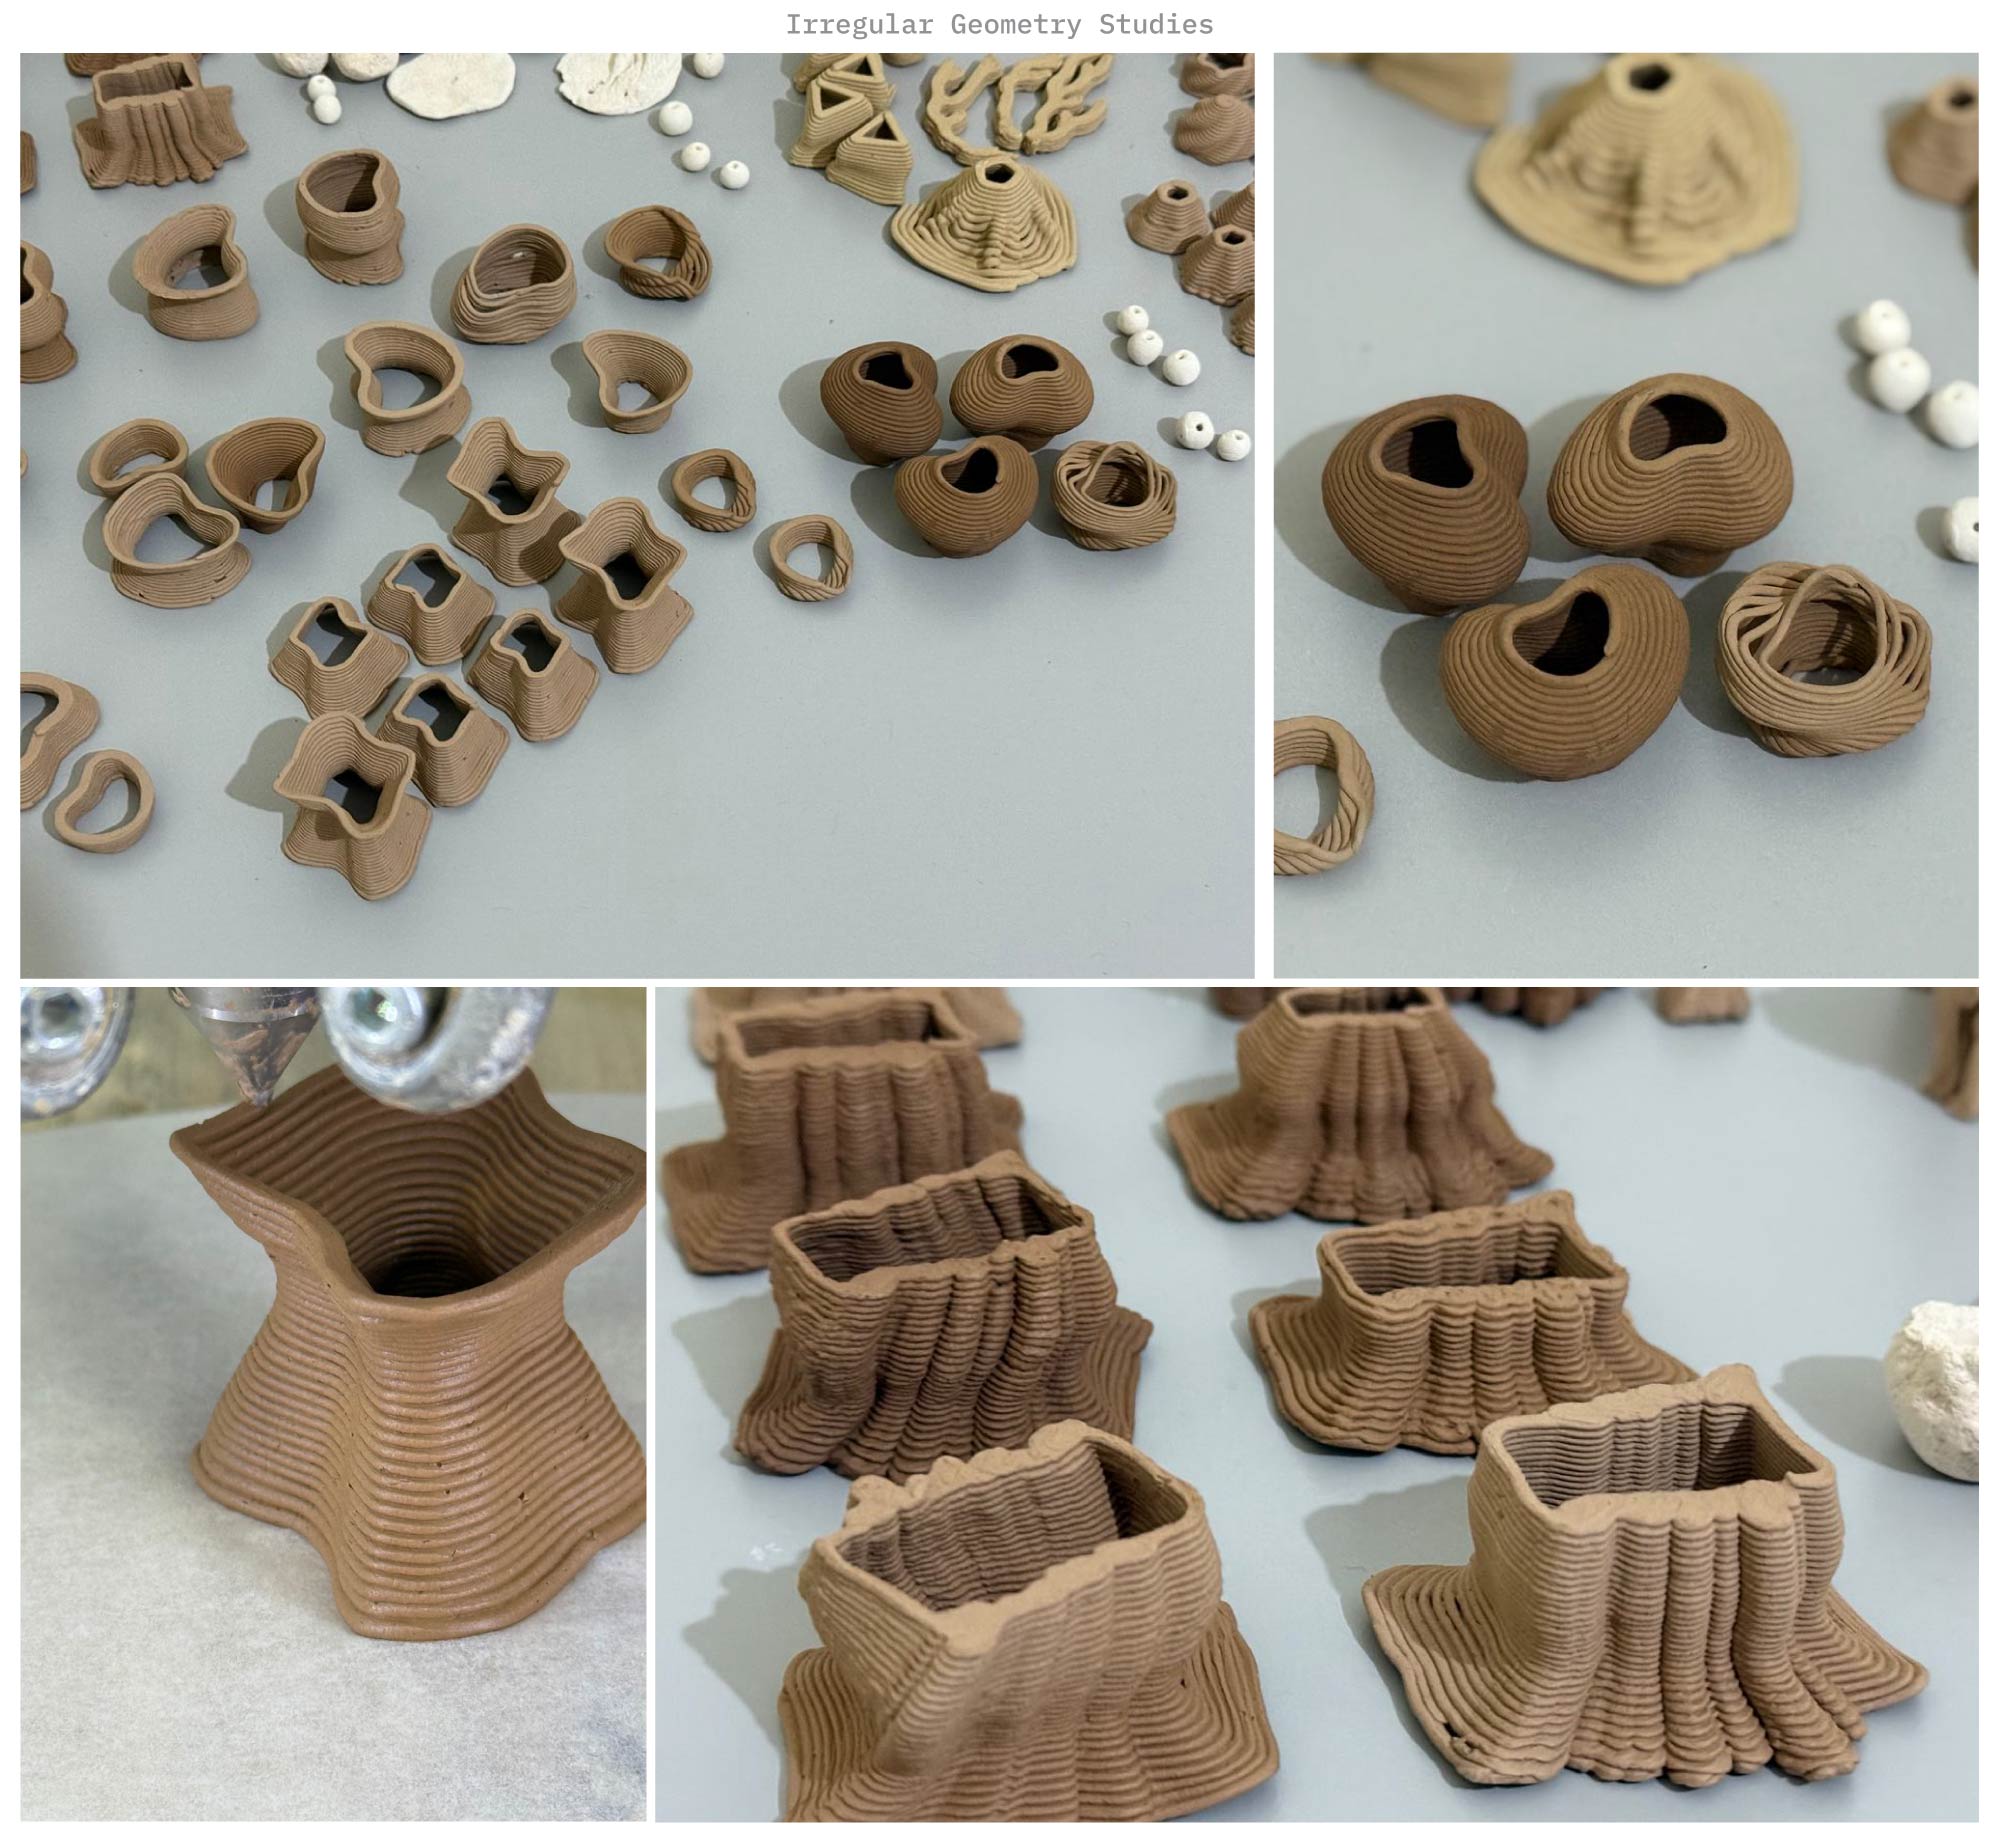
E. Third Phase Experiments
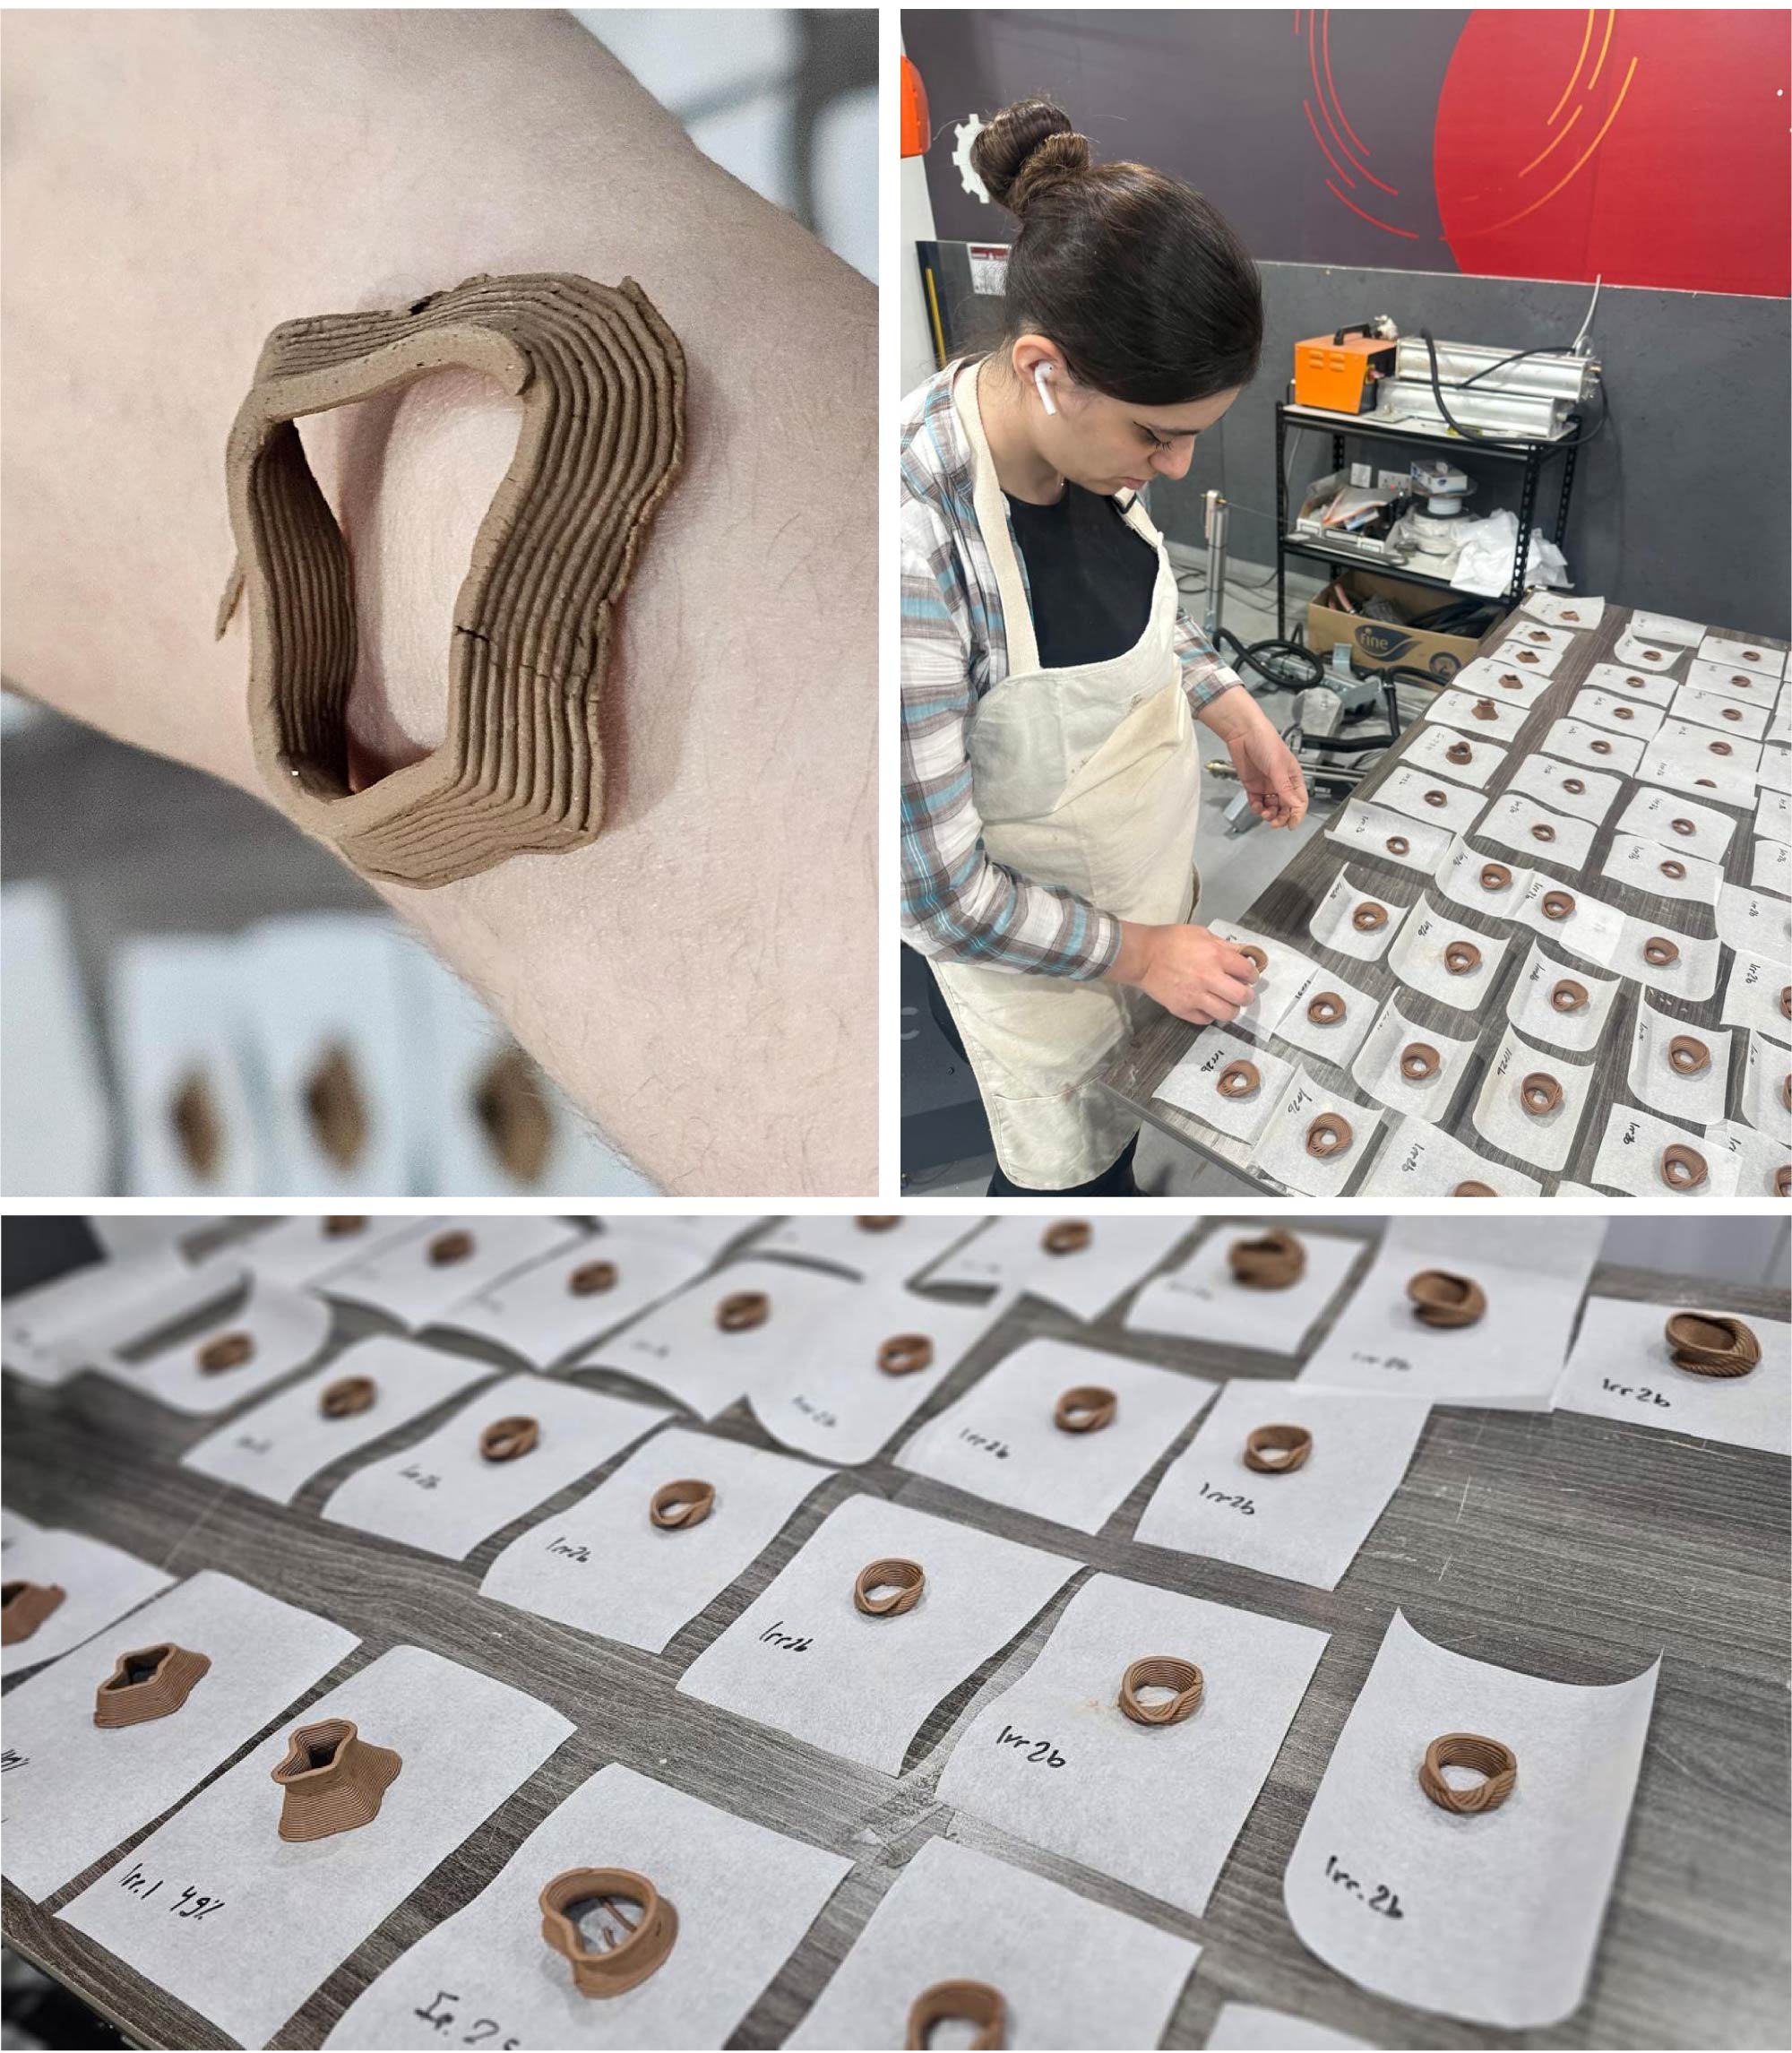
The third phase of 3D printing experiments focused on small-scale irregular forms.
F. Bisque fire the first batch of modules
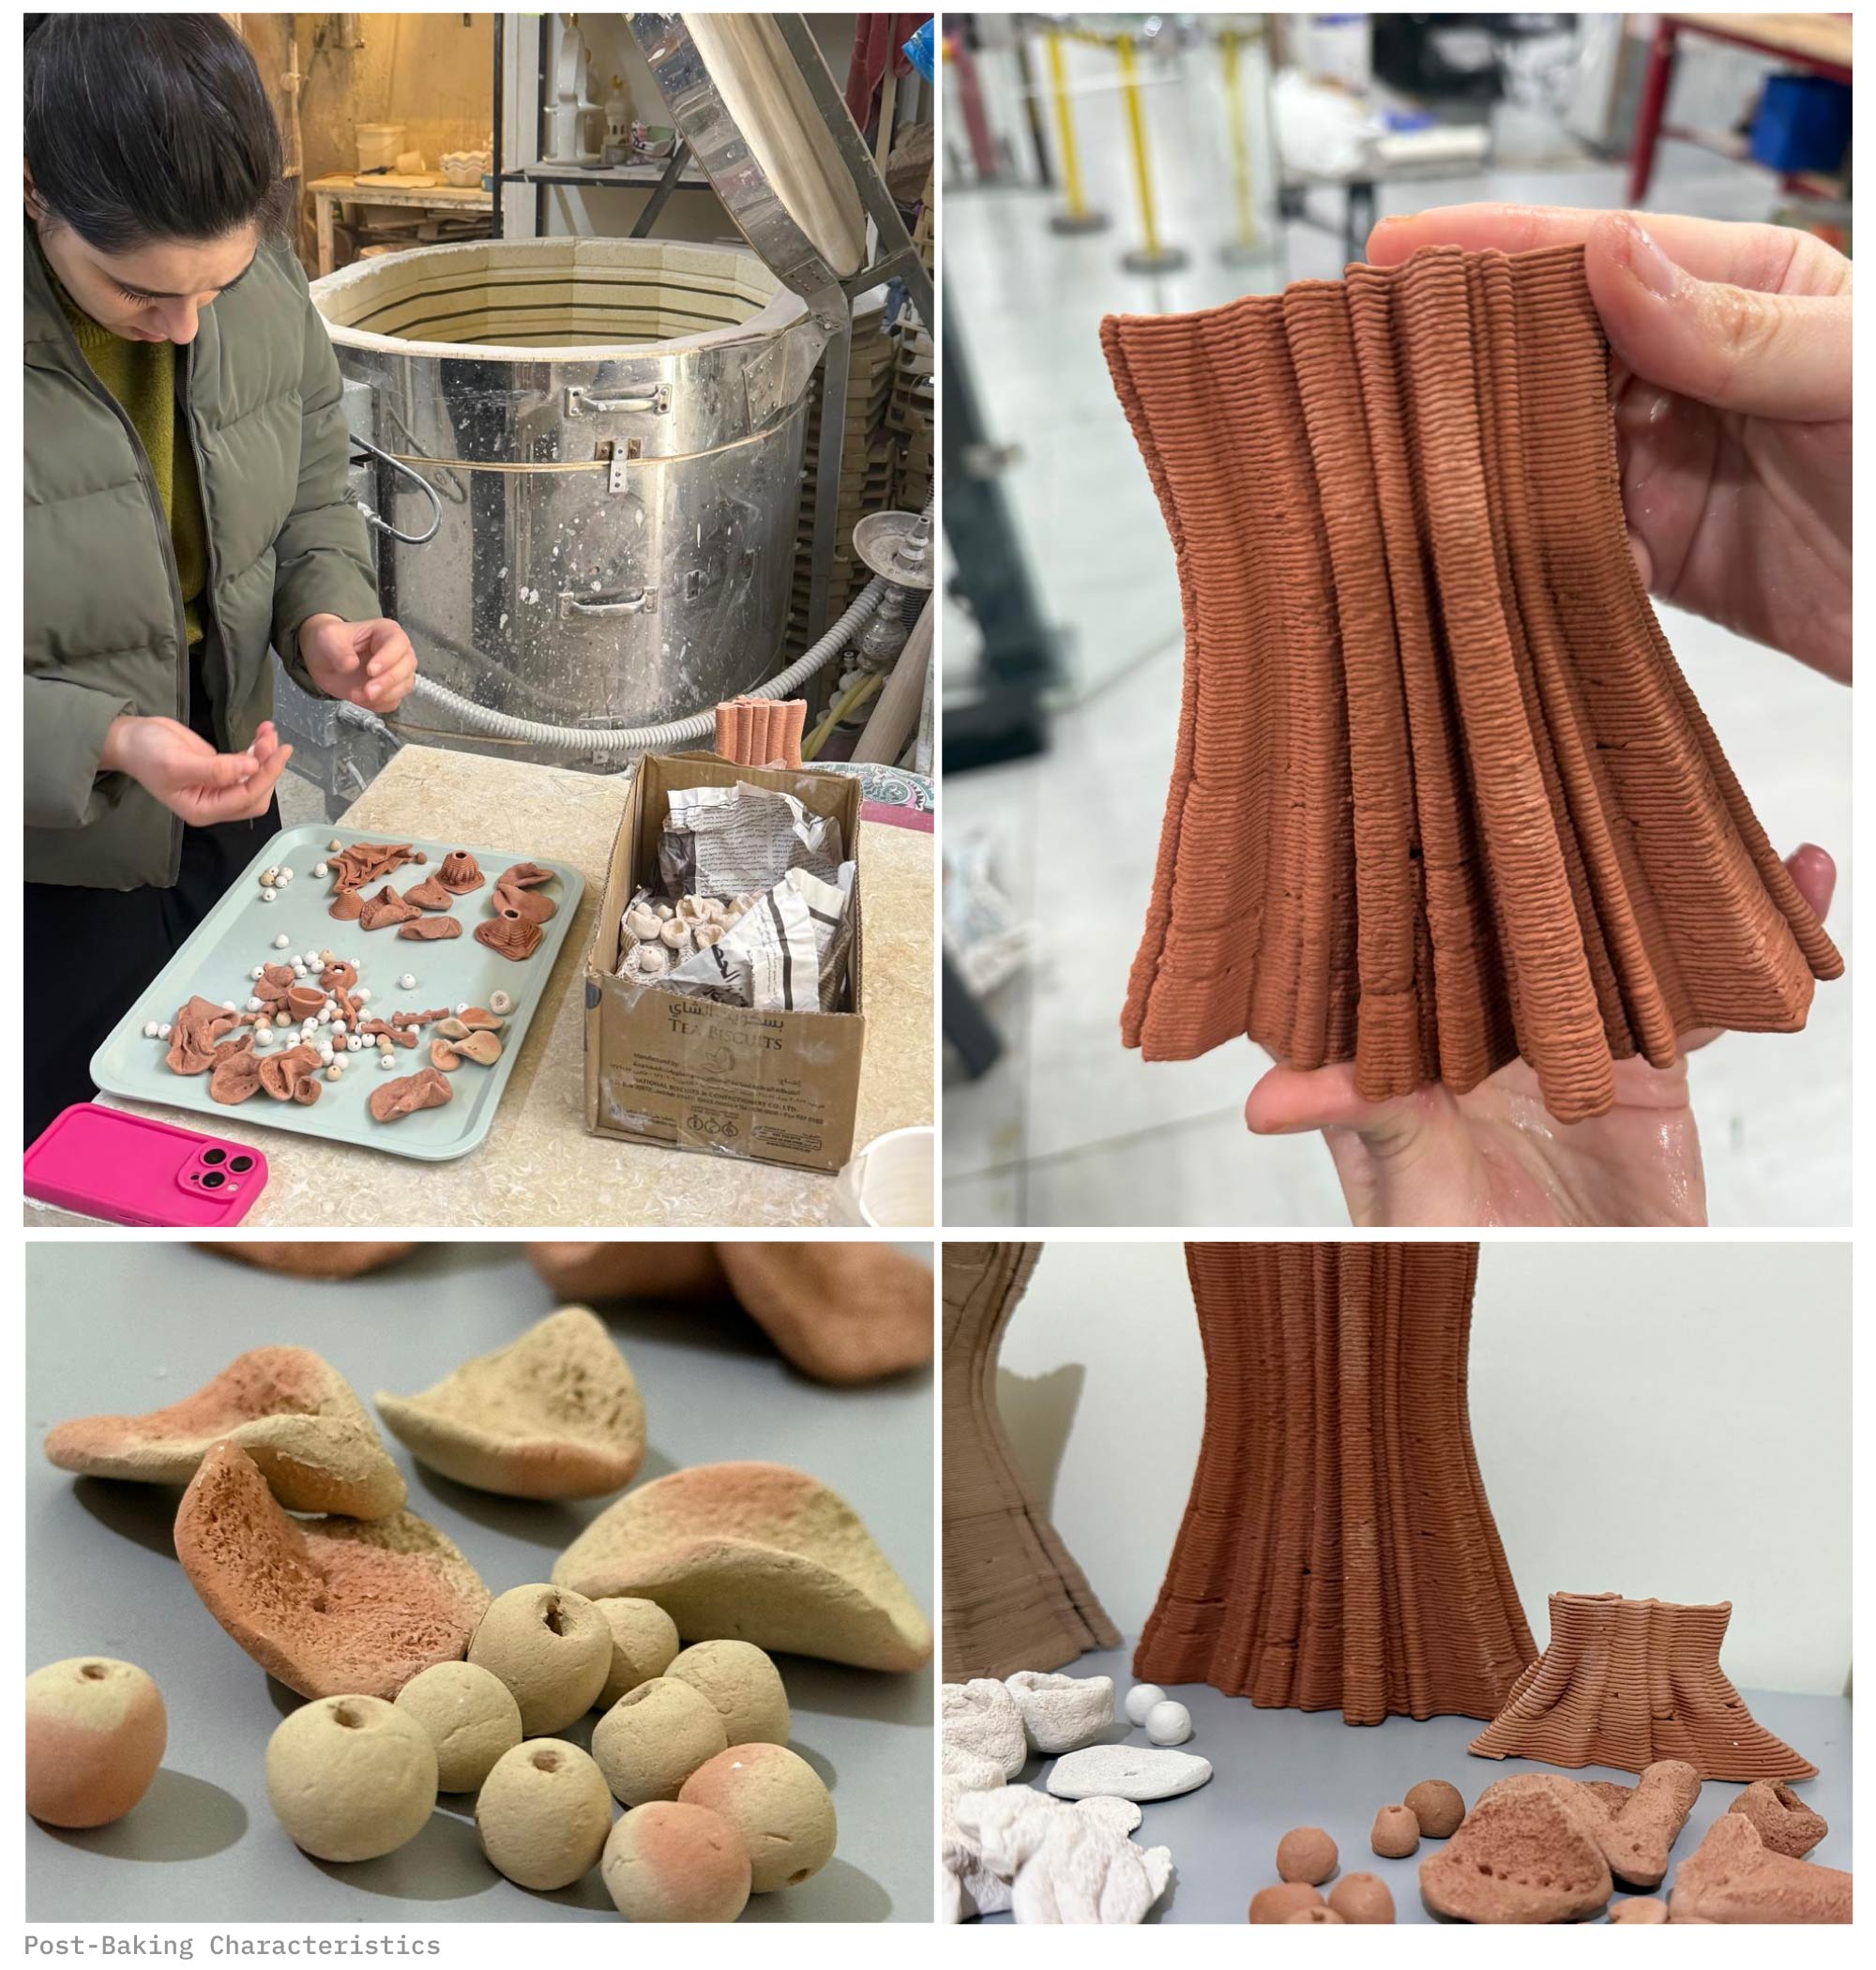
Comparison between the 3 types of Clay after Bisque Fire
Dhana Clay: Prone to contamination if fired with different clay types, cracks after days from baking.
South Jordanian Clay: Prone to contamination if fired with different clay types, great strength and cohesion after baking.
Italian Clay: Not Prone to contamination if fired with different clay types, great strength and cohesion after baking.
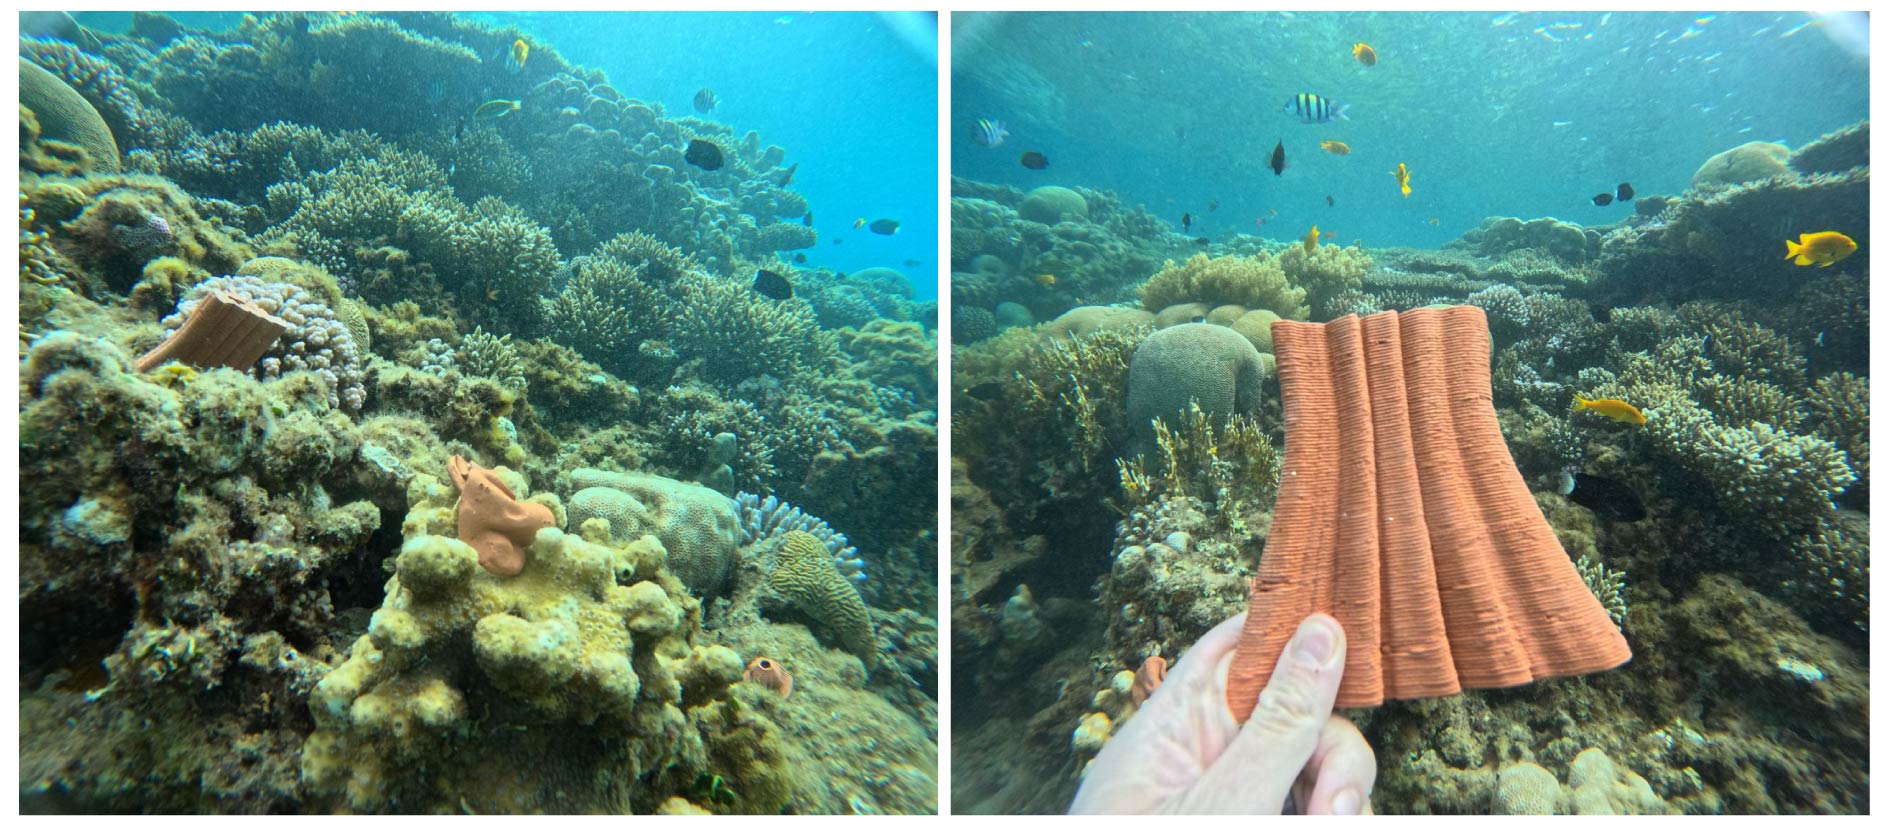
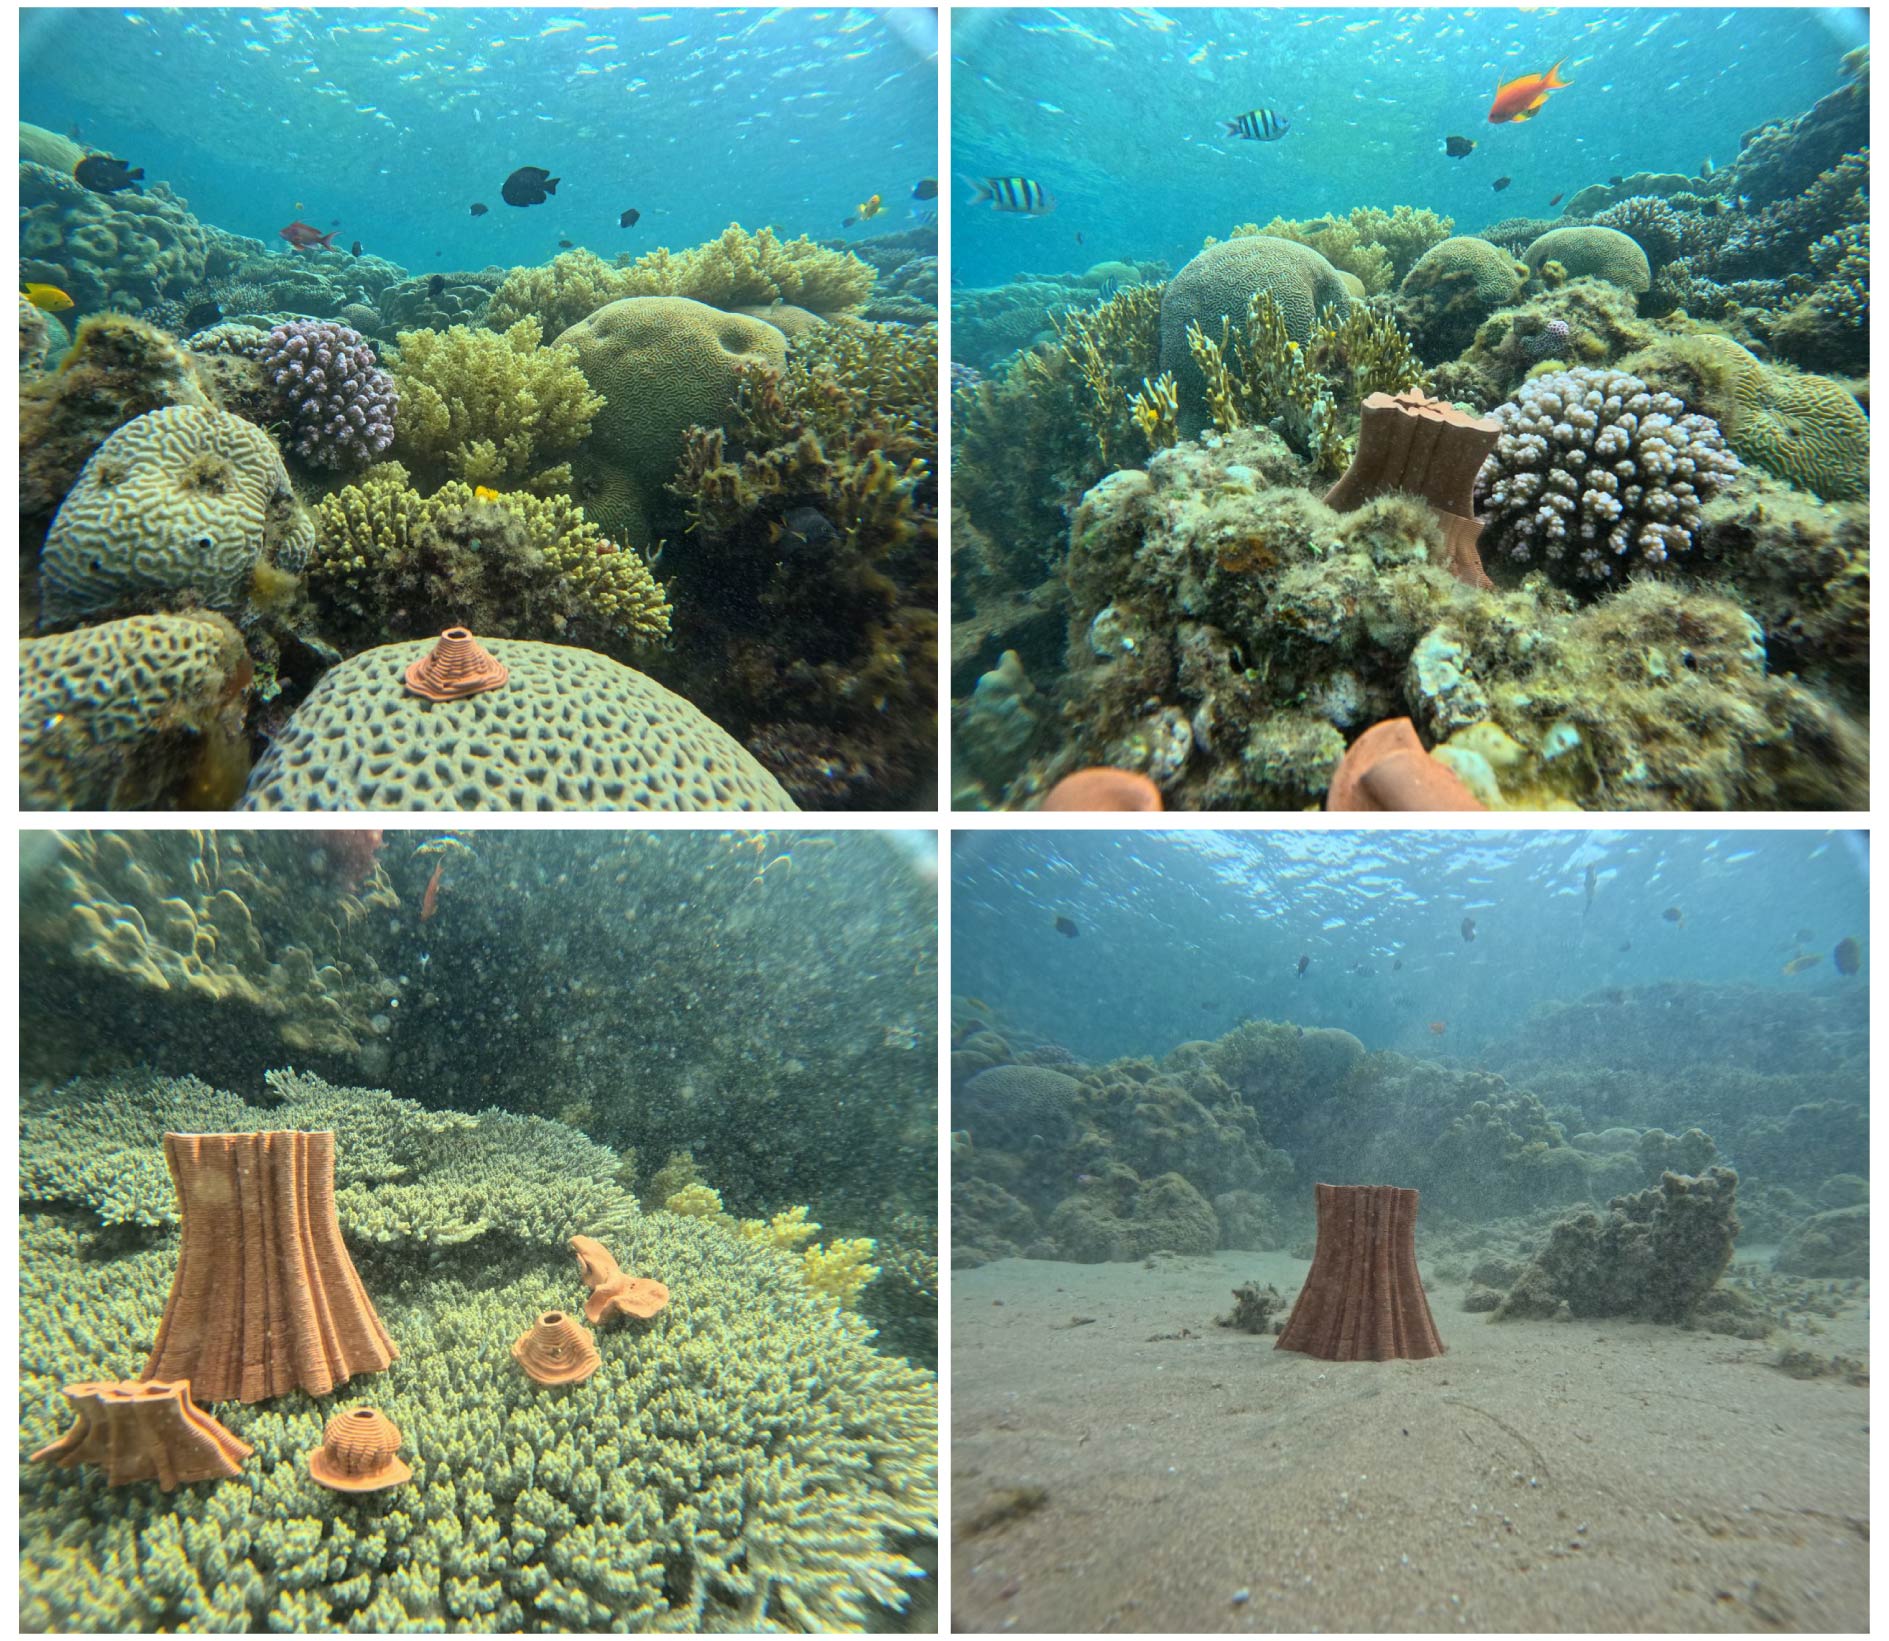
G. Test the first baked samples in the sea
Testing the first fired clay samples directly in the marine environment to evaluate their behavior and interaction with the reef ecosystem. The pieces were placed within multiple locations and conditions to observe stability, surface response, and potential for integration within existing coral structures.
IV. Final Pieces for Garment
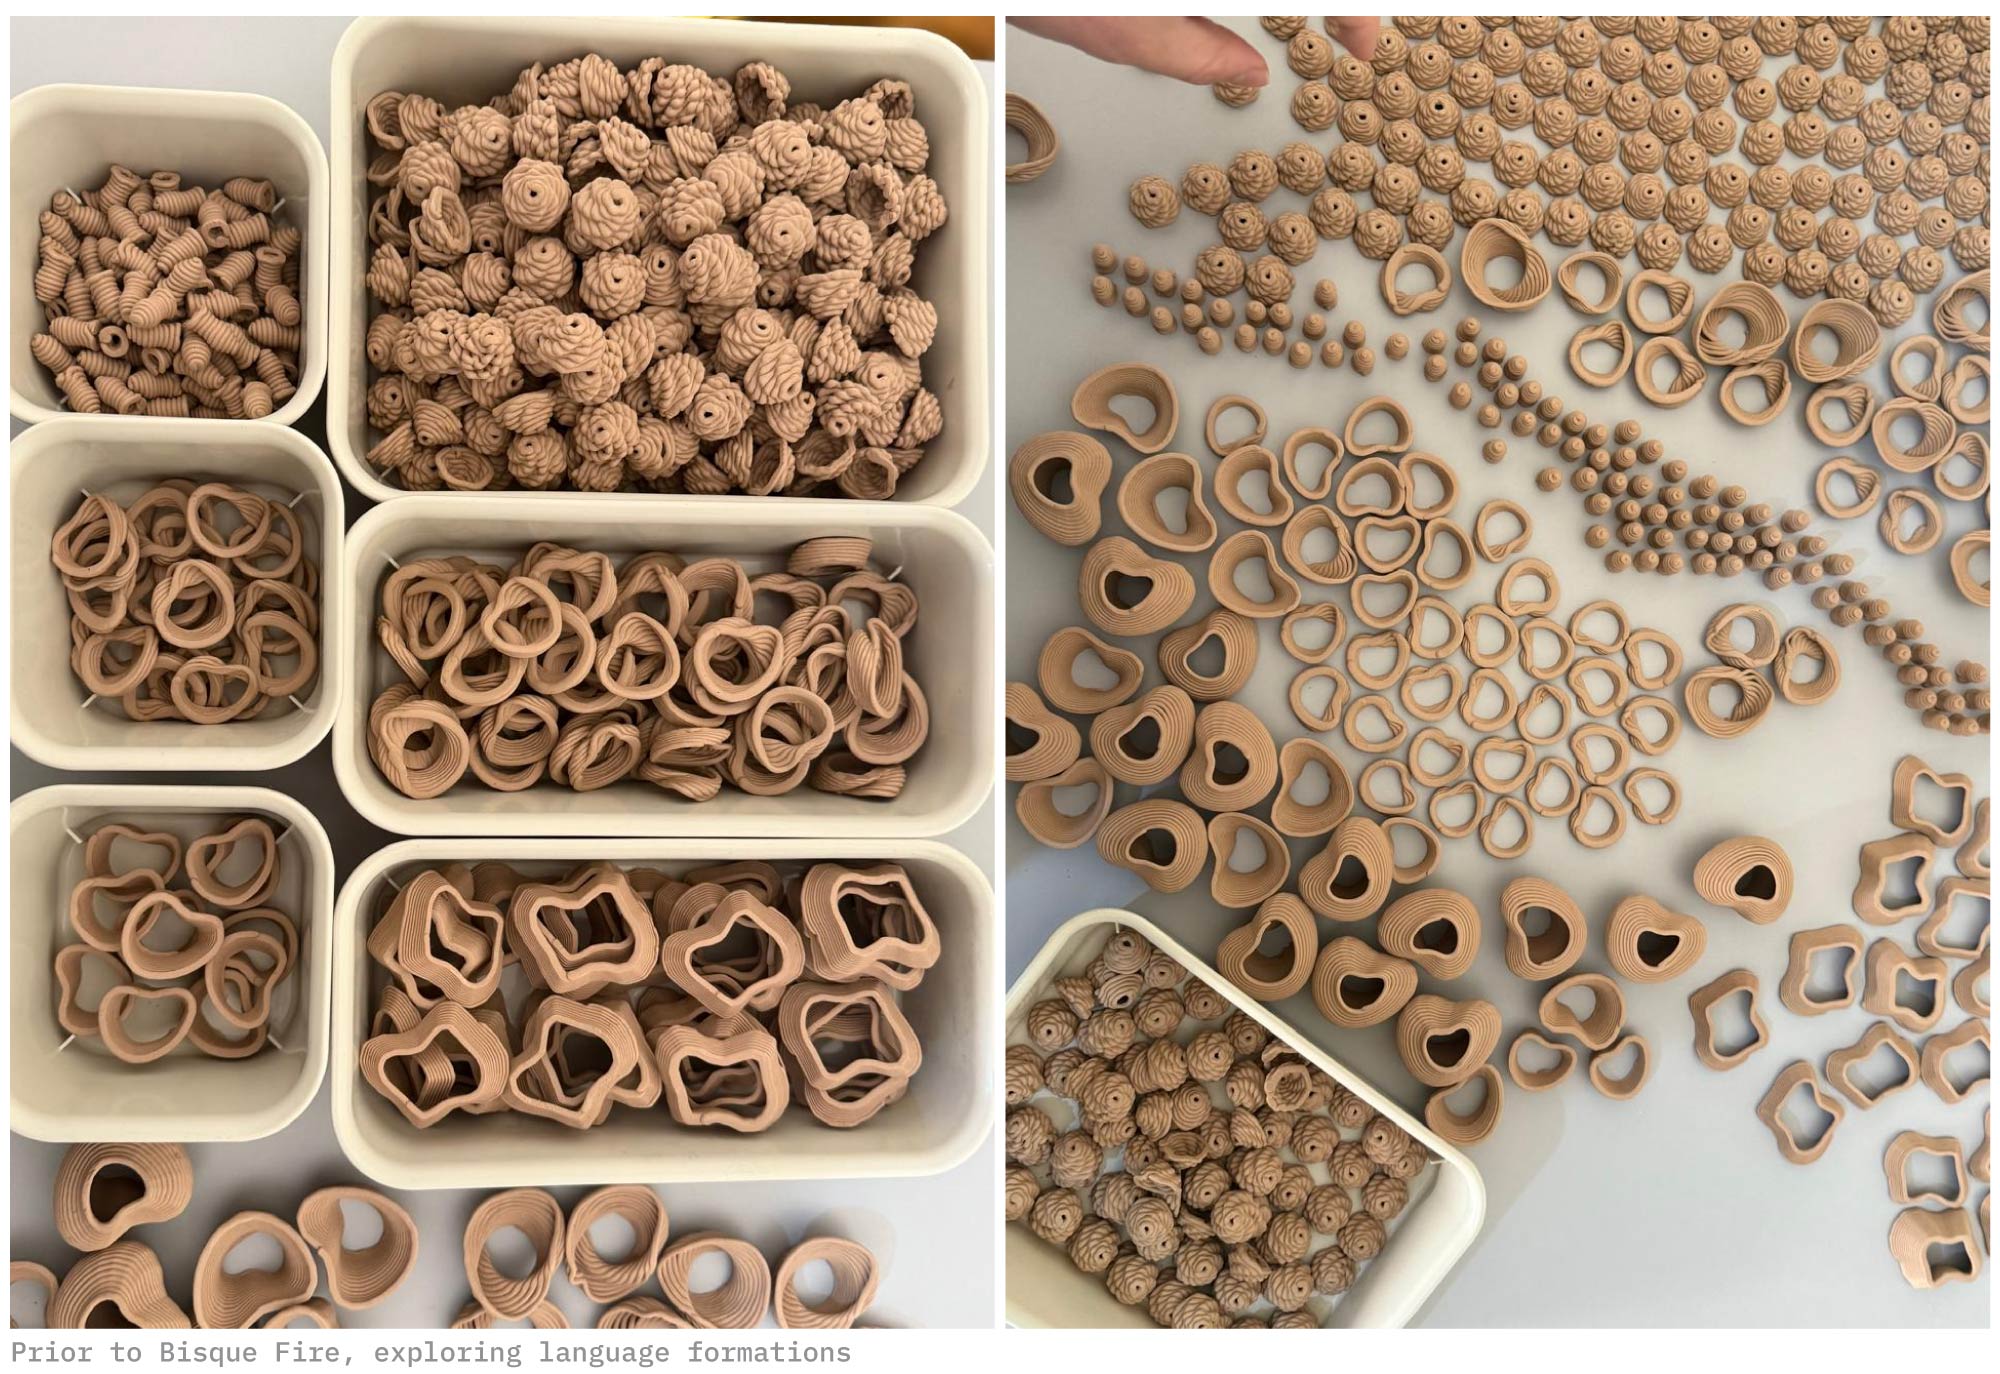
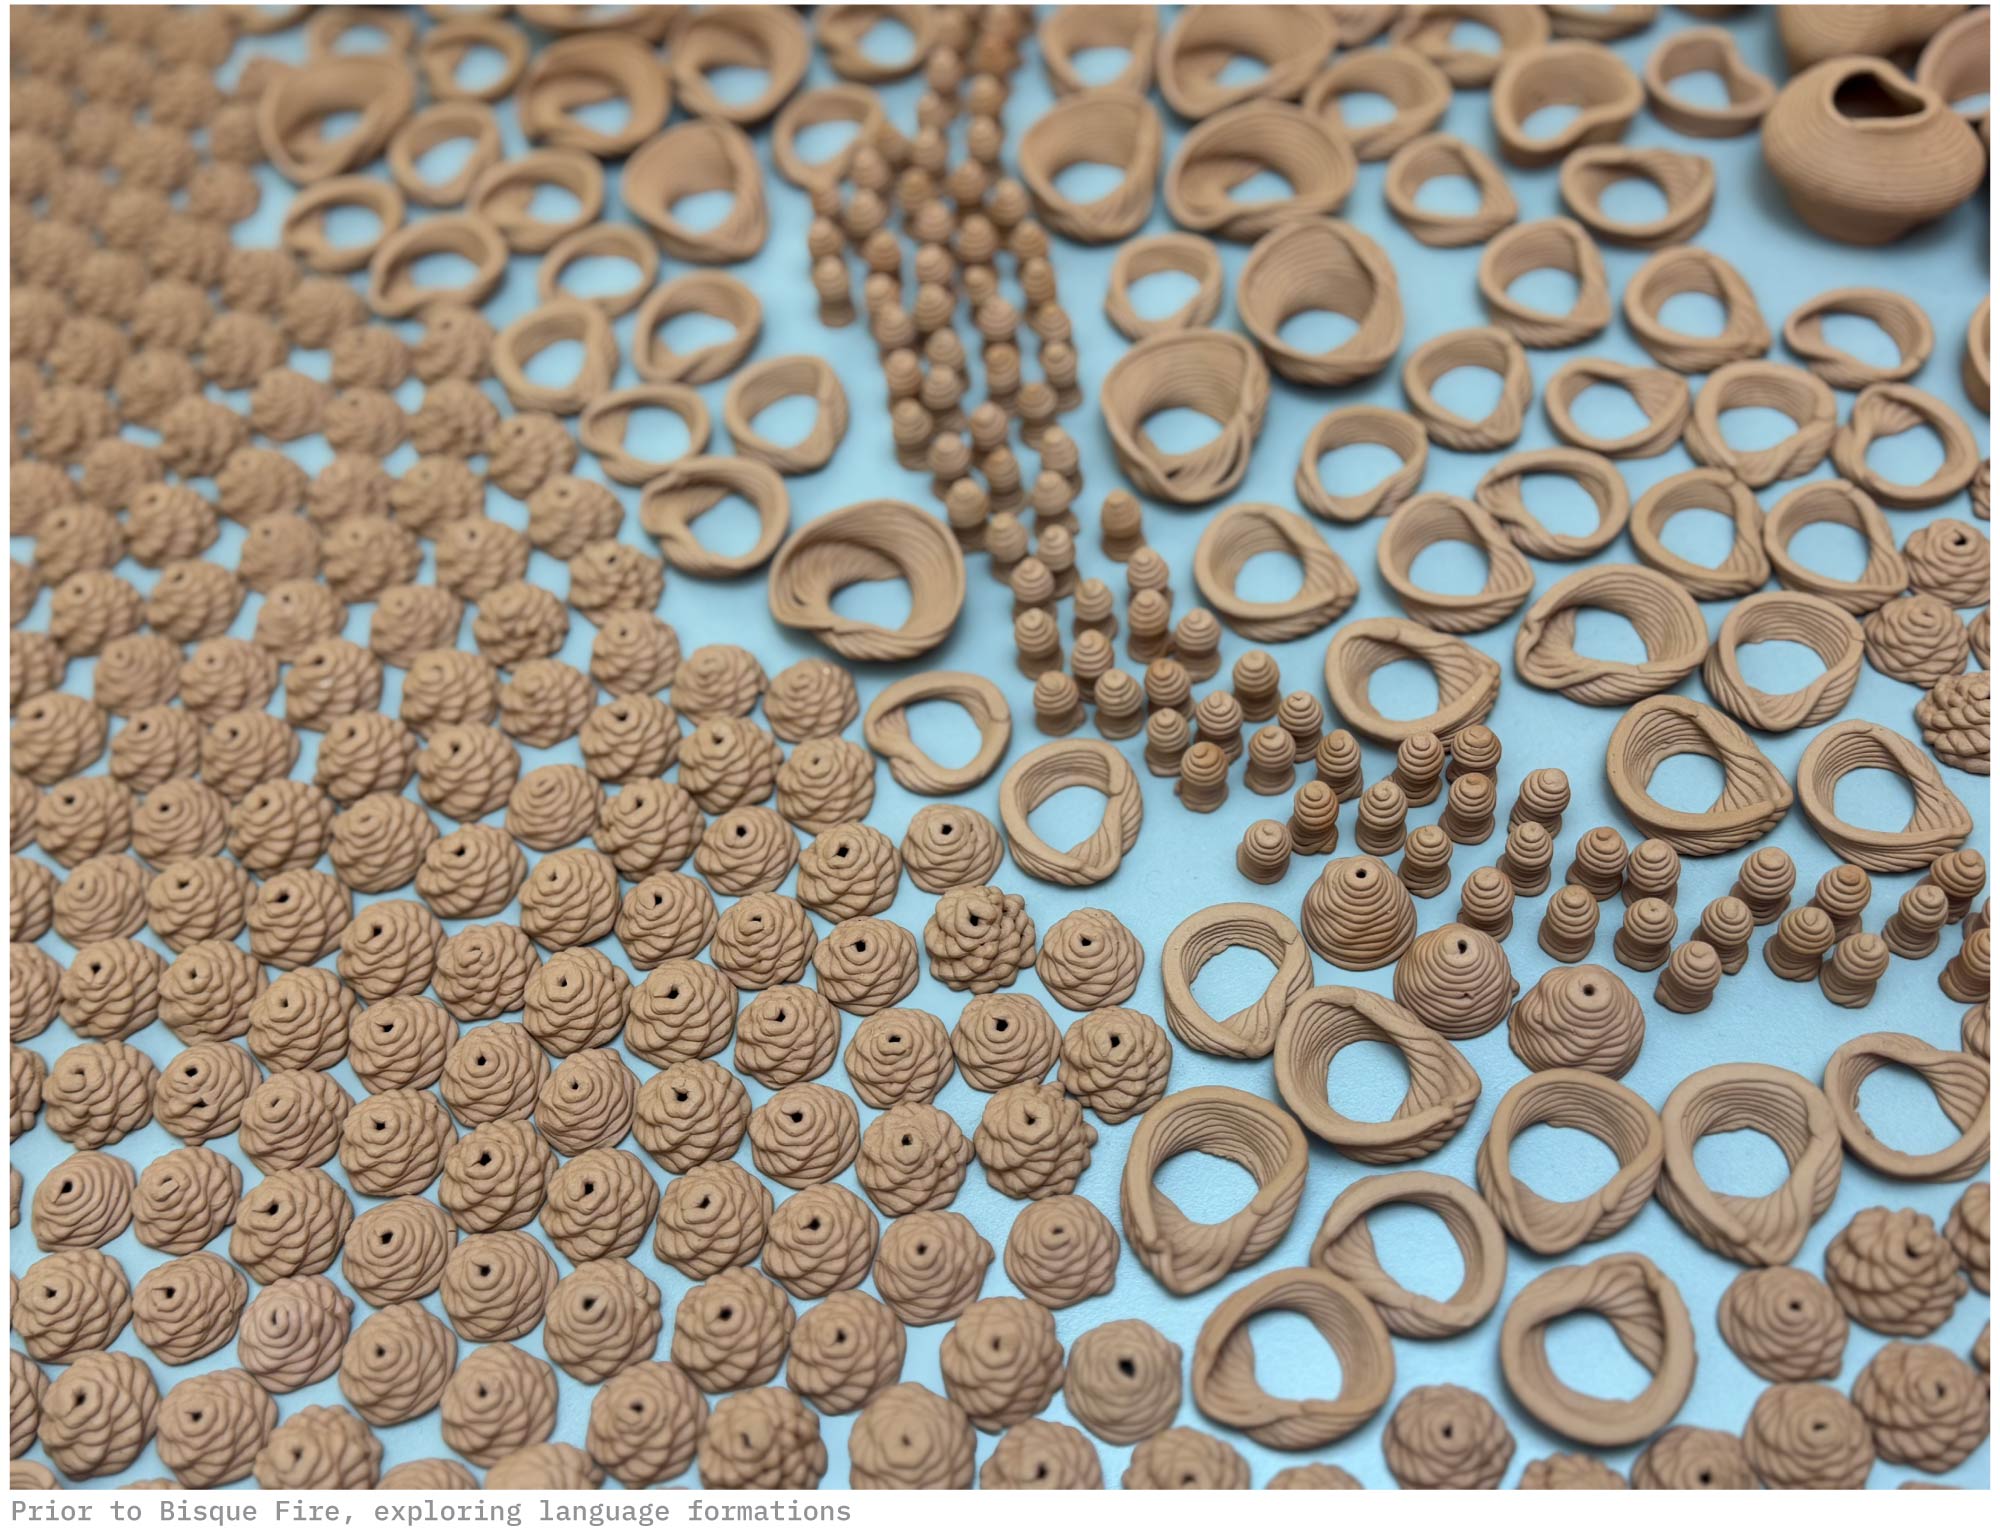
The final clay modules were a mix of both regular and irregular geometries, incorporating varying levels of niche formation within their geometry. I developed a series of gradual variations from a single design by pausing the print at 20%, 50%, and 80%, I generated gradual variations with some being refined manually by hand.
3D Printing Process:
Post Bisque Fire of Final Samples:
Investigating how distinct shapes establish a language, and how these languages can be woven together.