Digital bodies
References, research & inspiration
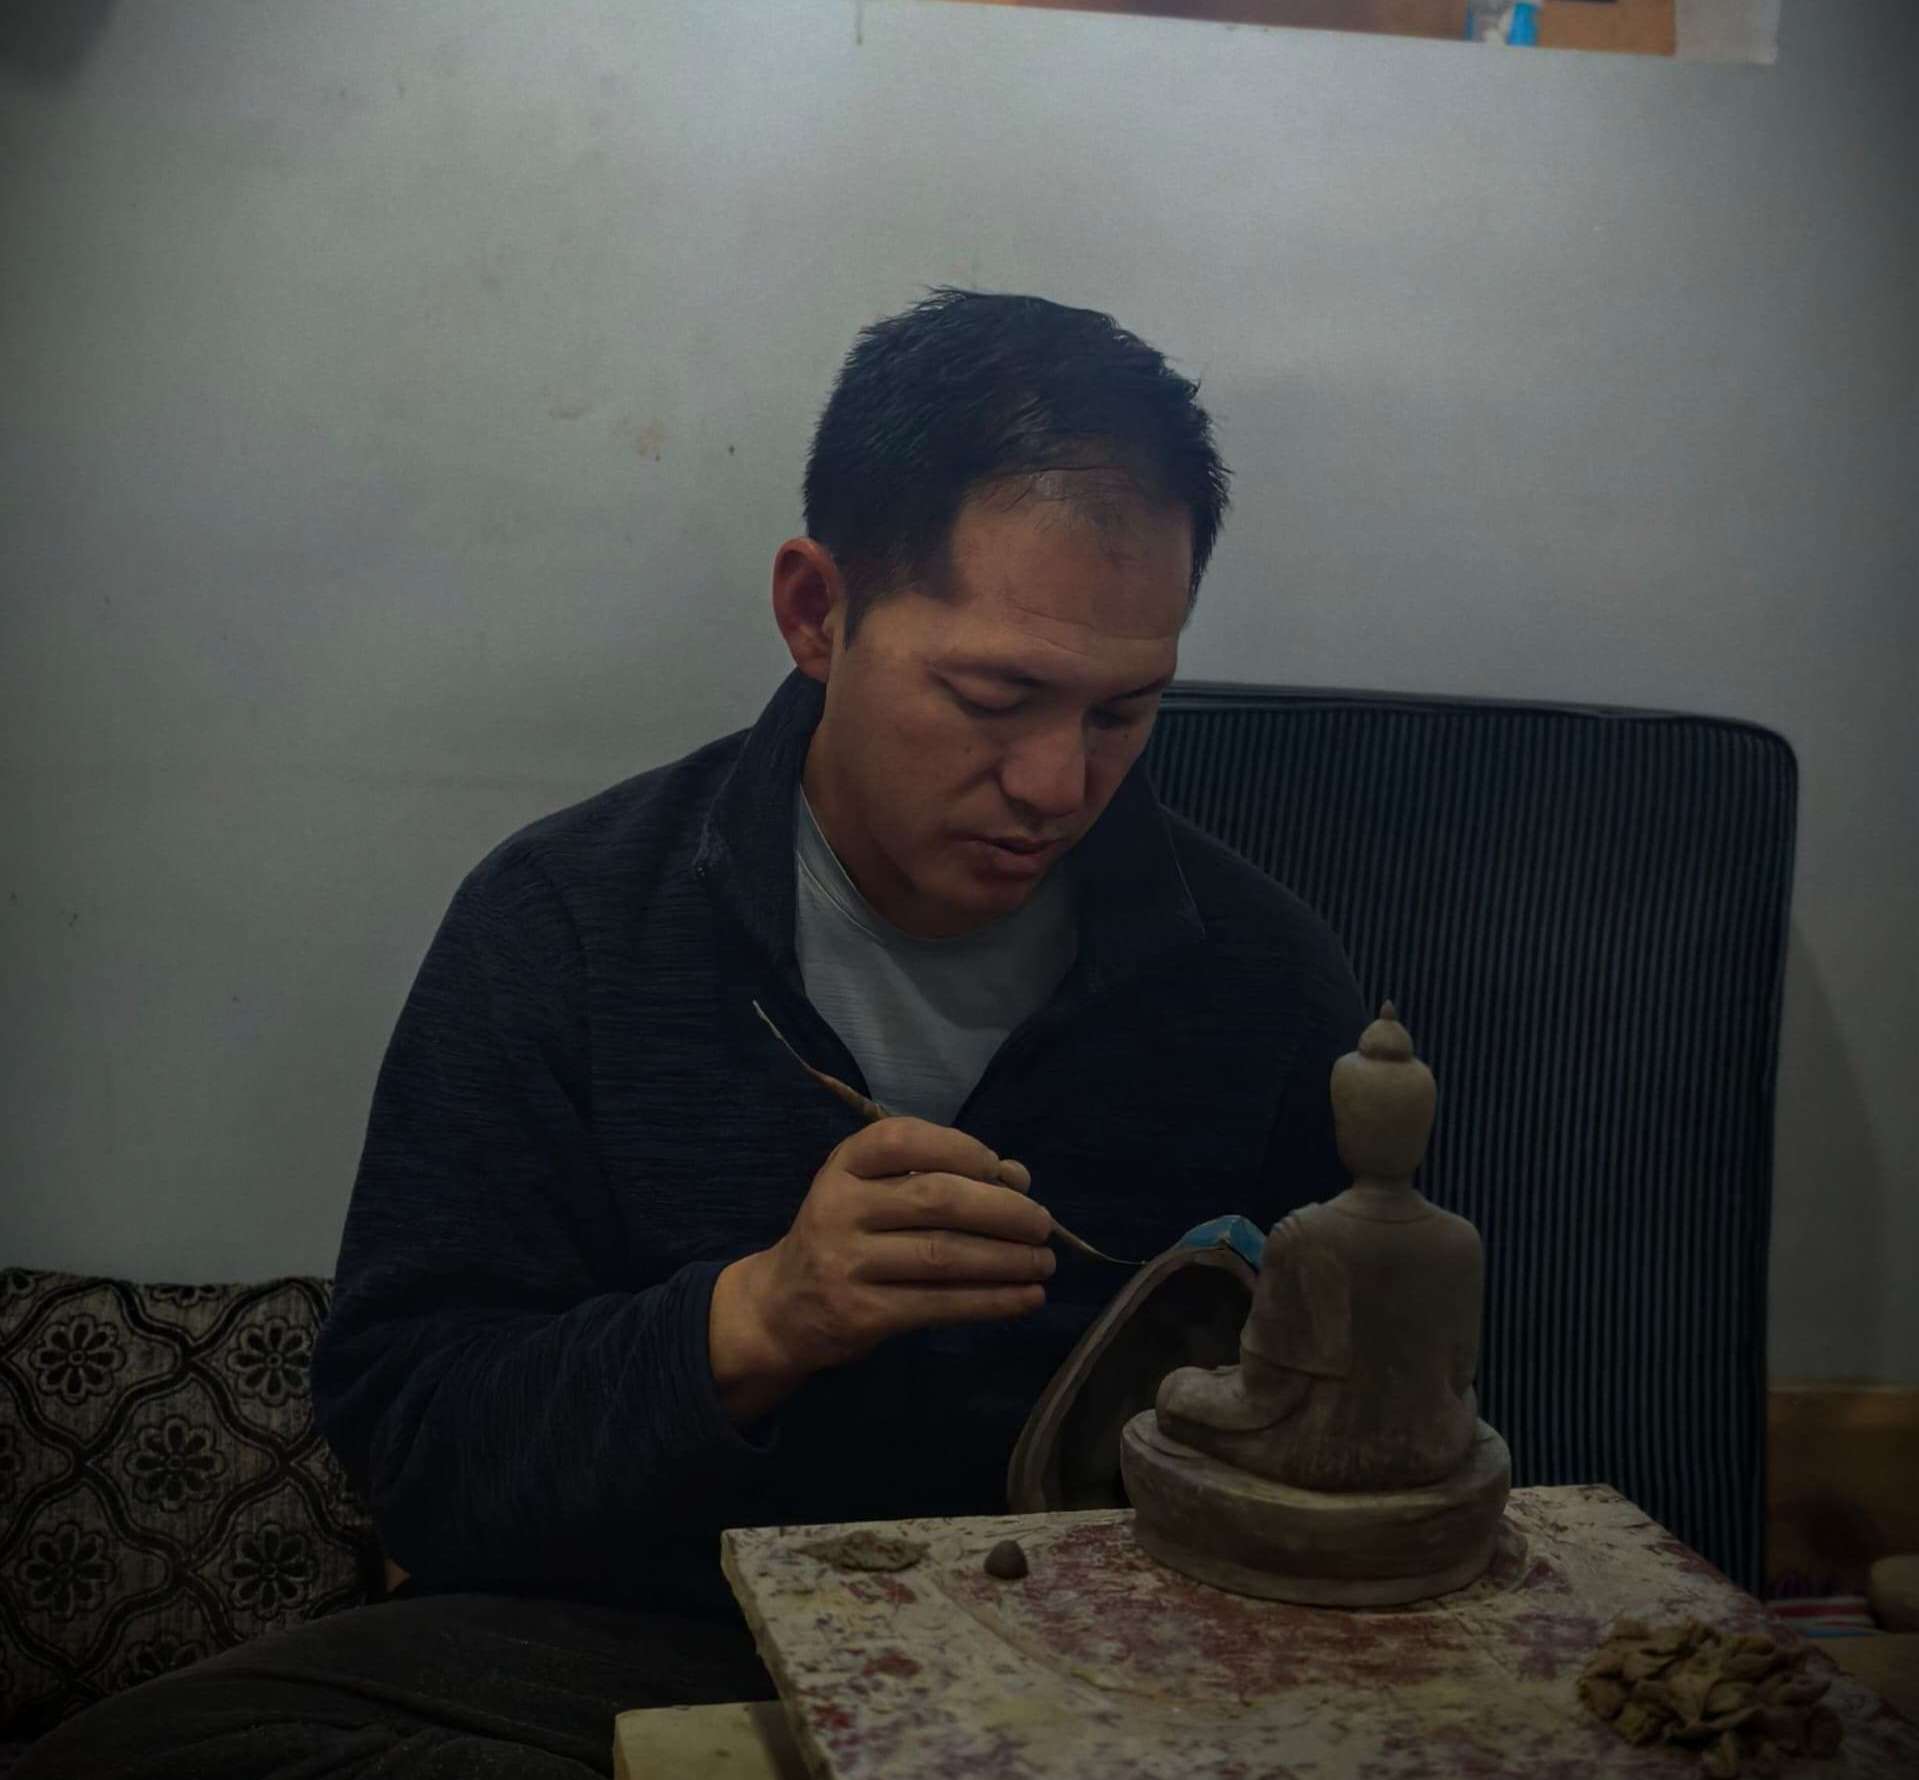
Before I even touched a scanner or a laser cutter, I was already curious about my colleague Sonam Wangdi's work. He's a sculptor, and he makes these amazing statues out of mud. I remember one day I was just sitting there watching him work — smashing the mud, shaping it, slowly turning it into a human body. He was doing the eyes and the nose, and just watching him do that made me realize how complicated the human body actually is. Like, every little curve means something.
What got me thinking was that he does all of this with just his hands. No measurements, no computer, nothing. He's just done it so many times that he knows where things go. And if he messes up, that's it, he has to start that part over. There's no undo.
That's when I started thinking about how tech could fit into this. Could a scanner capture what he does with his hands? Could I take that same idea — building up a human body — but do it digitally, where I can fix mistakes, save versions, and turn it into something I can actually cut and build with a laser cutter? That's basically where this project came from.
Italy
 I also got to see sculptures in Rome, at Piazza Navona and the Trevi Fountain, and honestly that was a whole different experience. Just standing there looking at statues that have been sitting in the same spot for hundreds of years, and how detailed the anatomy is on them, it made me think about how sculptors back then were basically dealing with the same problem people still deal with now — how do you take a human body and turn it into something else, like stone or metal. And the crazy part is they did all this without any of the tools we have today. Just skill and a lot of time.

source:unsplash.com
Process and workflow
Capturing the Body: 3D Scanning
Step.1
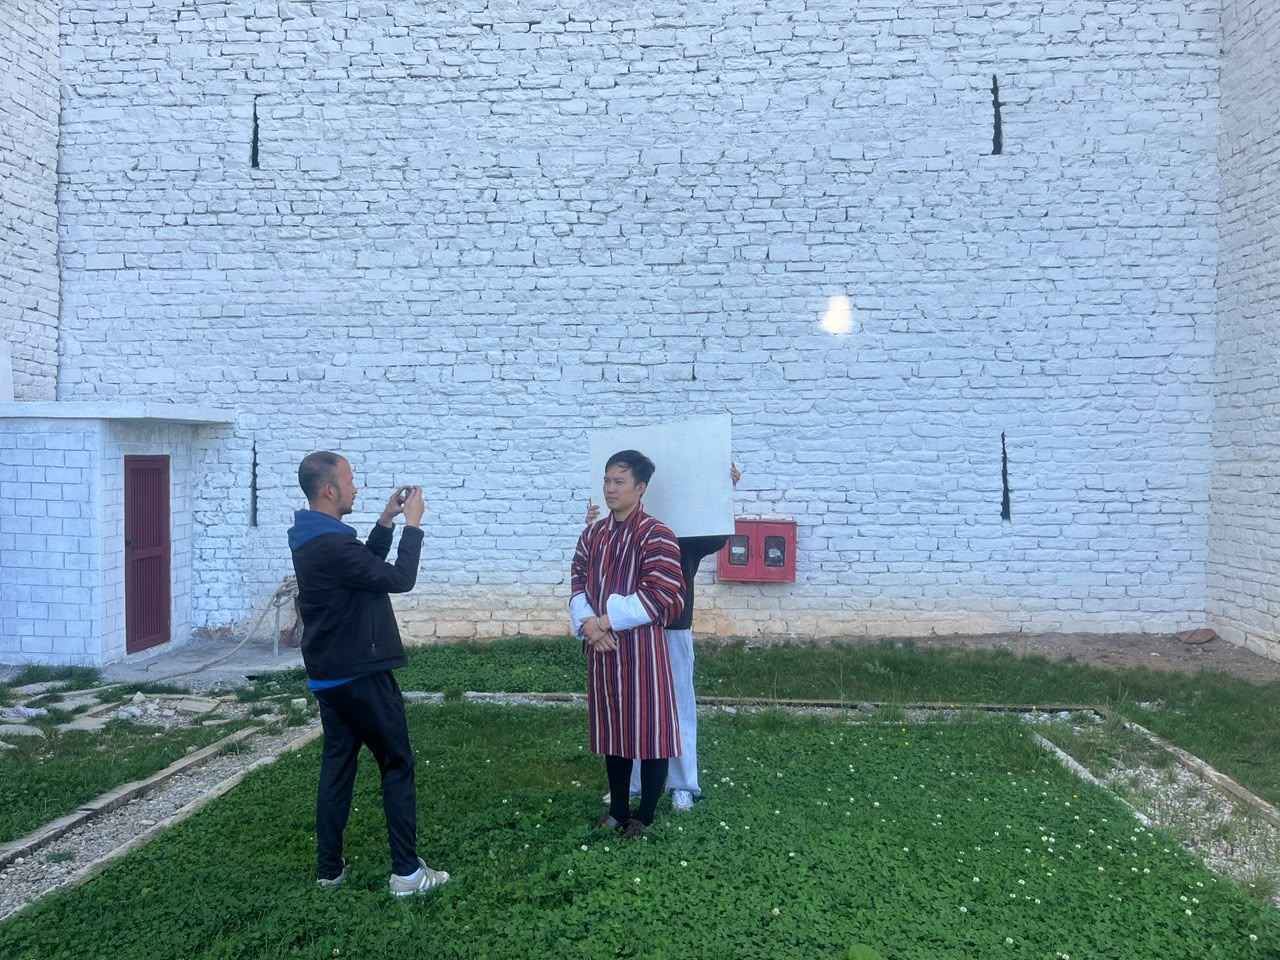
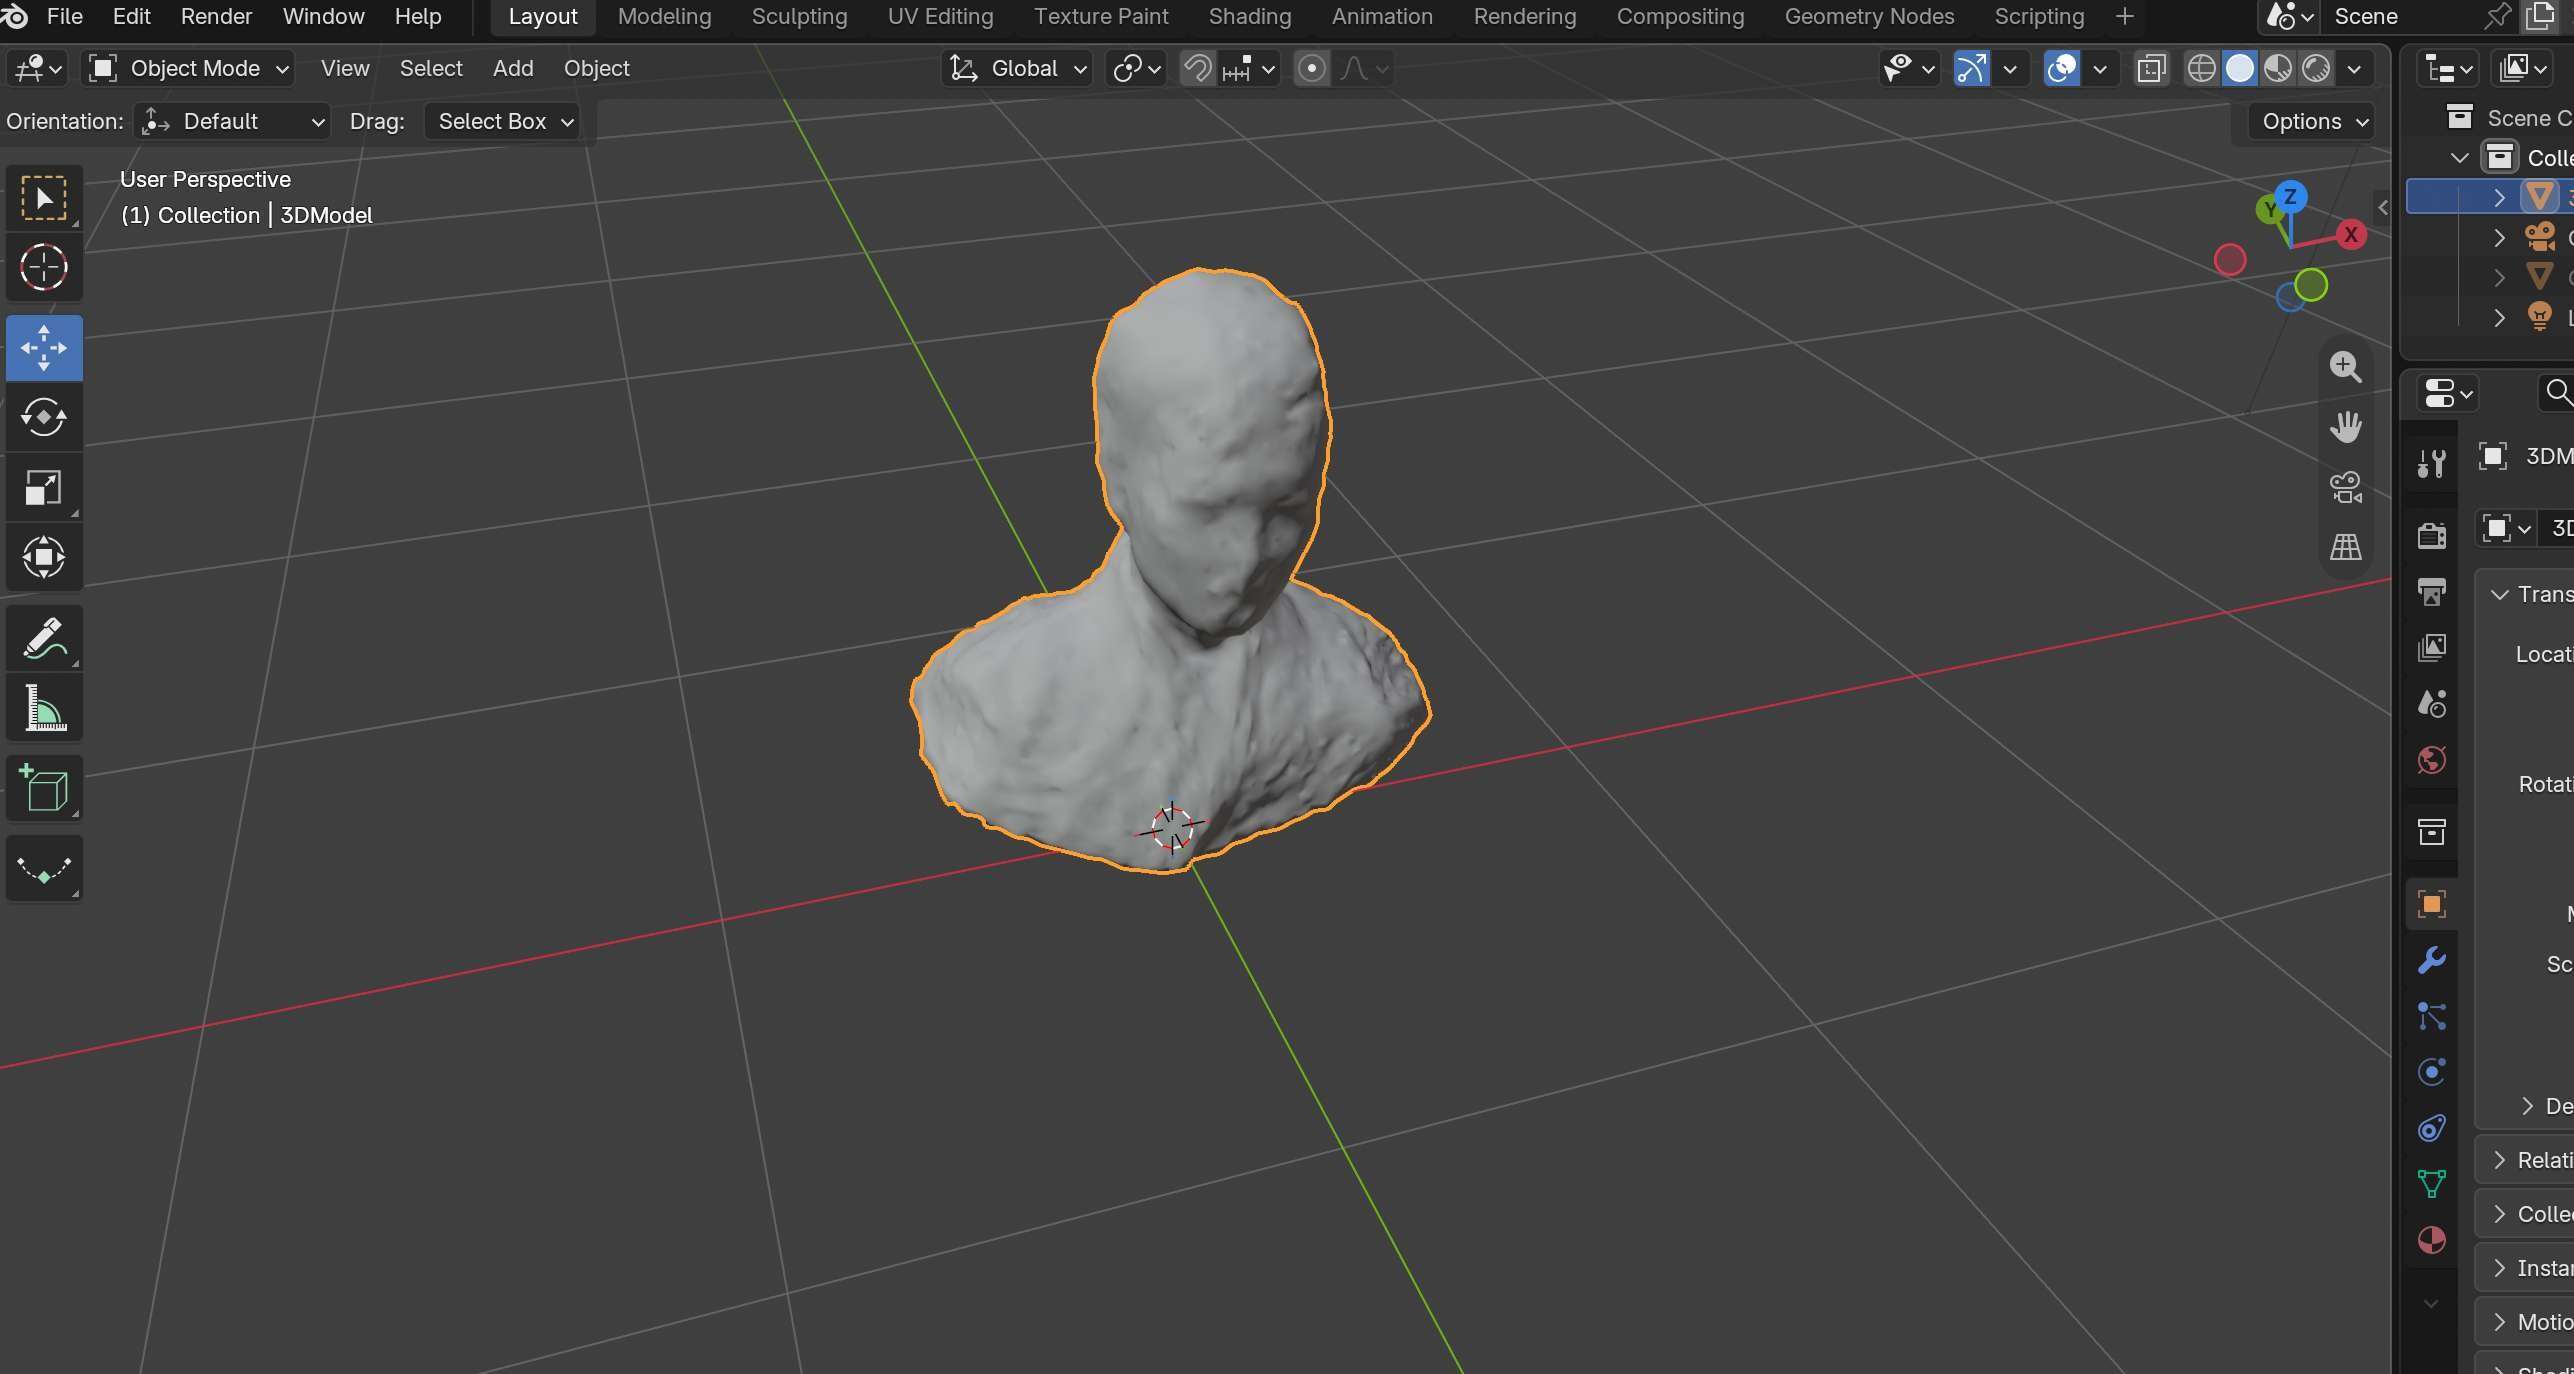
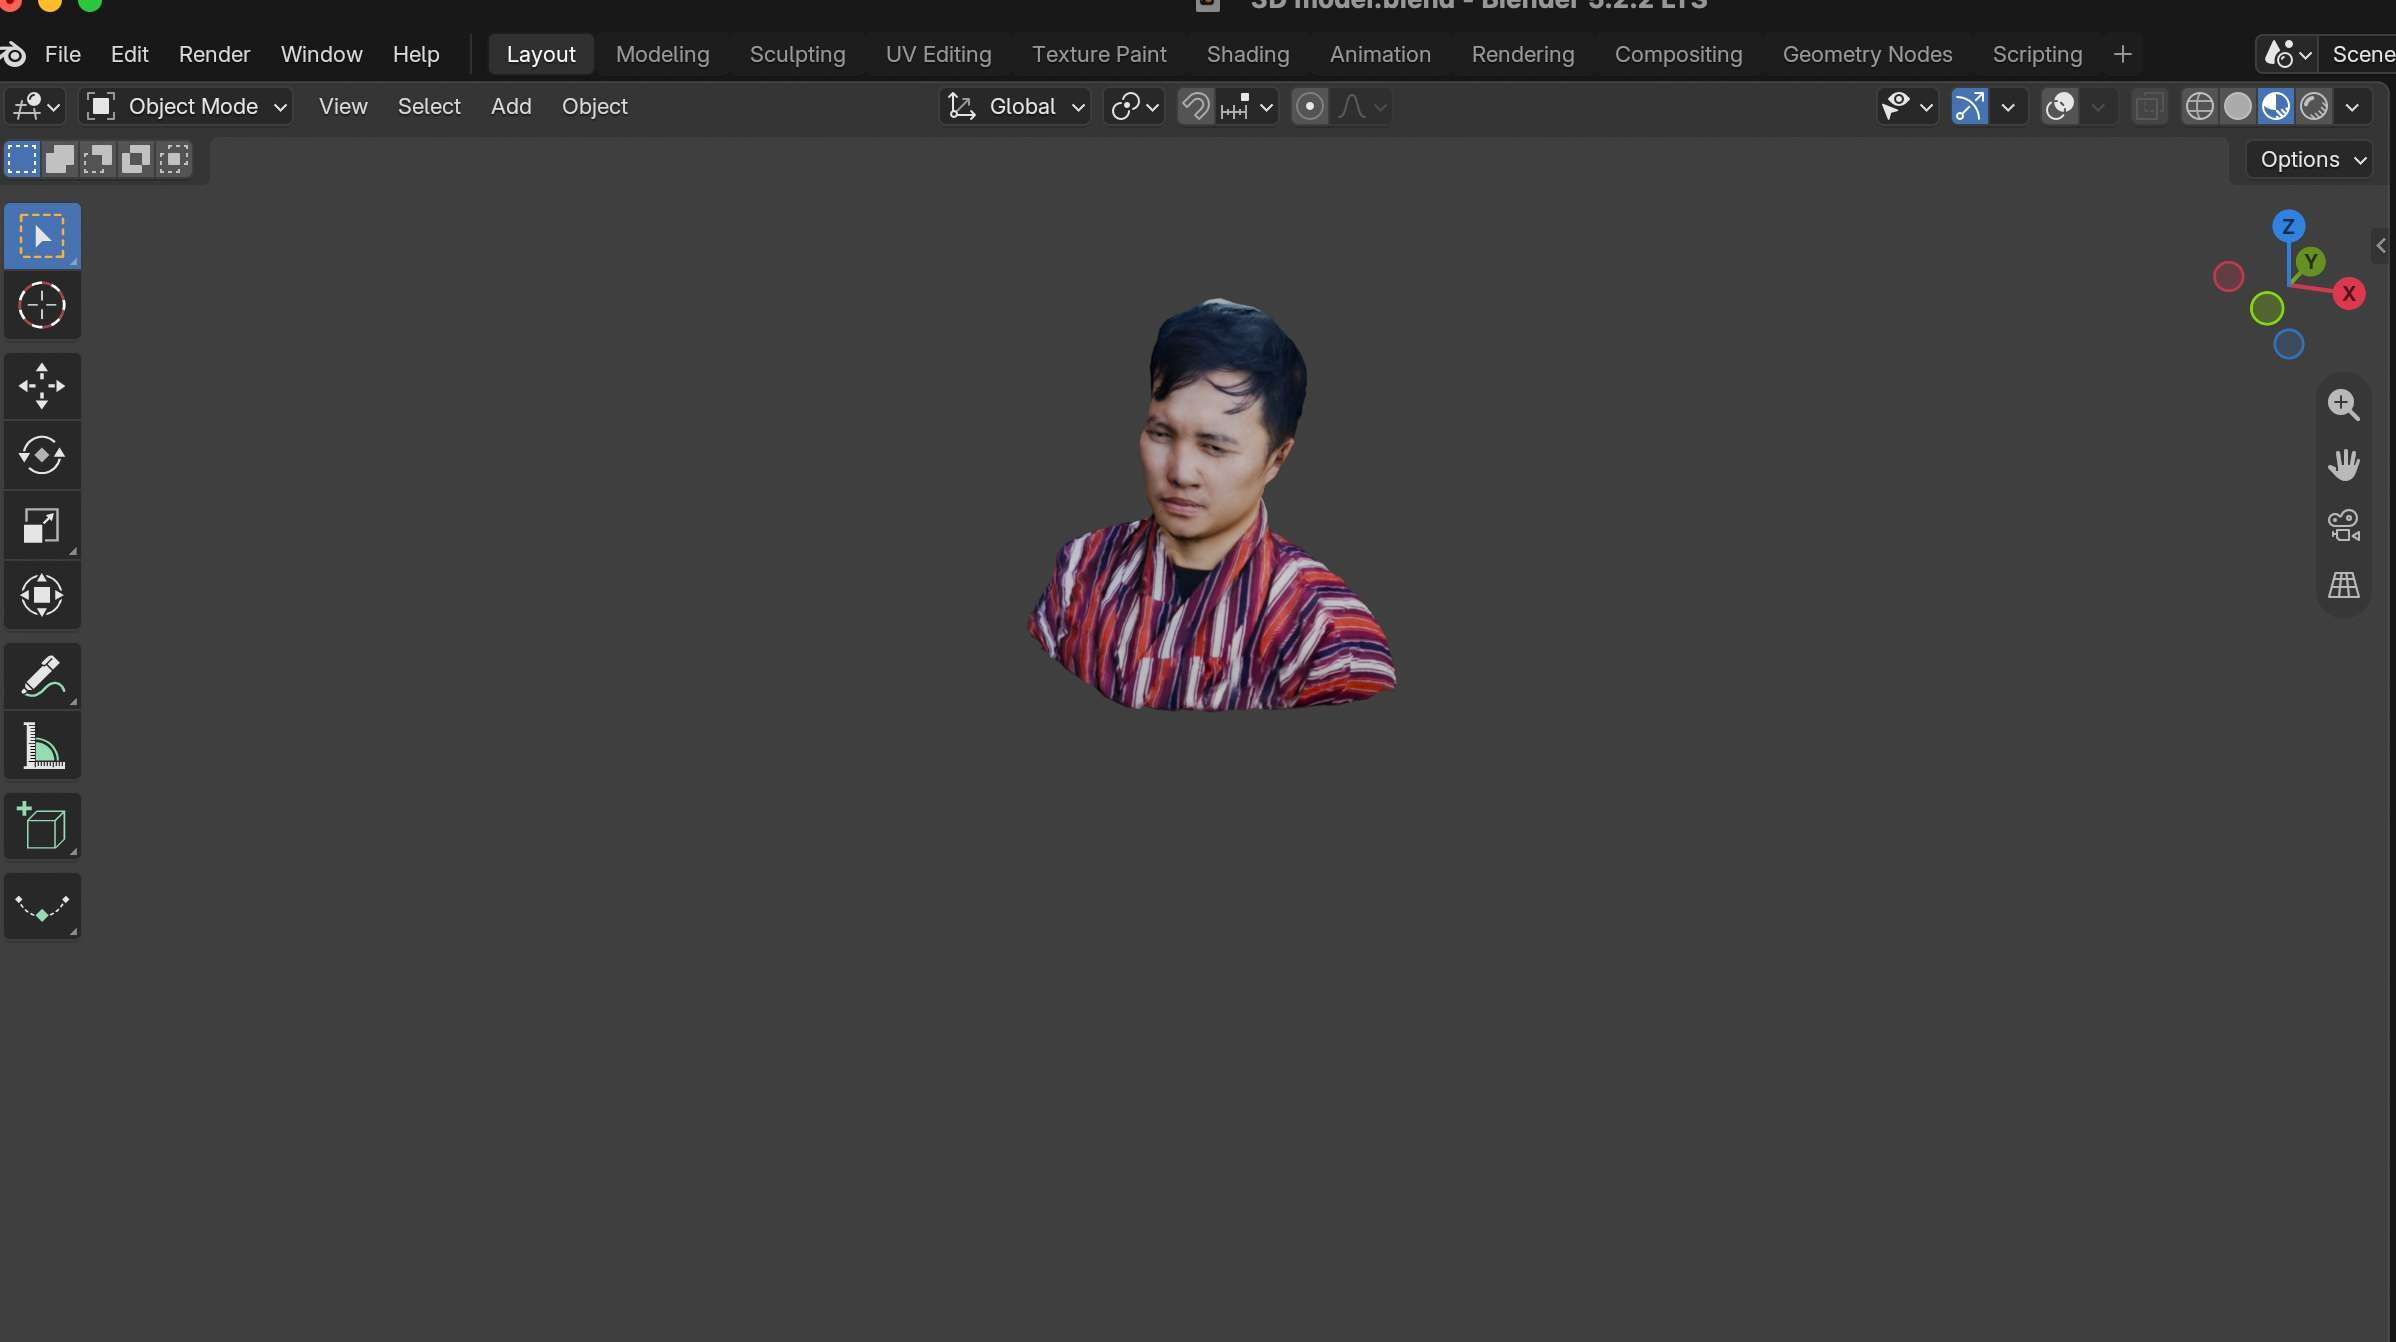
Scanning my own head sounded simple until I actually tried to figure out how to do it. You can't really scan yourself, so I asked a friend to help me out. We picked a corner of the place with decent lighting and nothing too busy in the background, and I stand while my friend stood there holding my phone, looking a little unsure about where to start.There are many 3D scanning apps available on the Play Store, and I decided to try KIRI Engine. Although it is a paid app, it allowed me to export my scans three times for free, which was enough for me to try it out. It uses photogrammetry to create a 3D model from photographs, and I was really impressed with the result. The scan turned out quite well and gave me a good starting point for my project.

Step.2
I told them to just walk slowly around me in a circle, keeping the phone pointed at my head the whole time, while I tried my best to sit completely still. That part was actually harder than it sounds — every time I felt like sneezing or wanted to check how it was going, I had to remind myself not to move. My friend went all the way around once, front to back to the other side, then came back to get the top of my head and up close around my ears, since those spots are easy to miss on the first pass.
Step.3
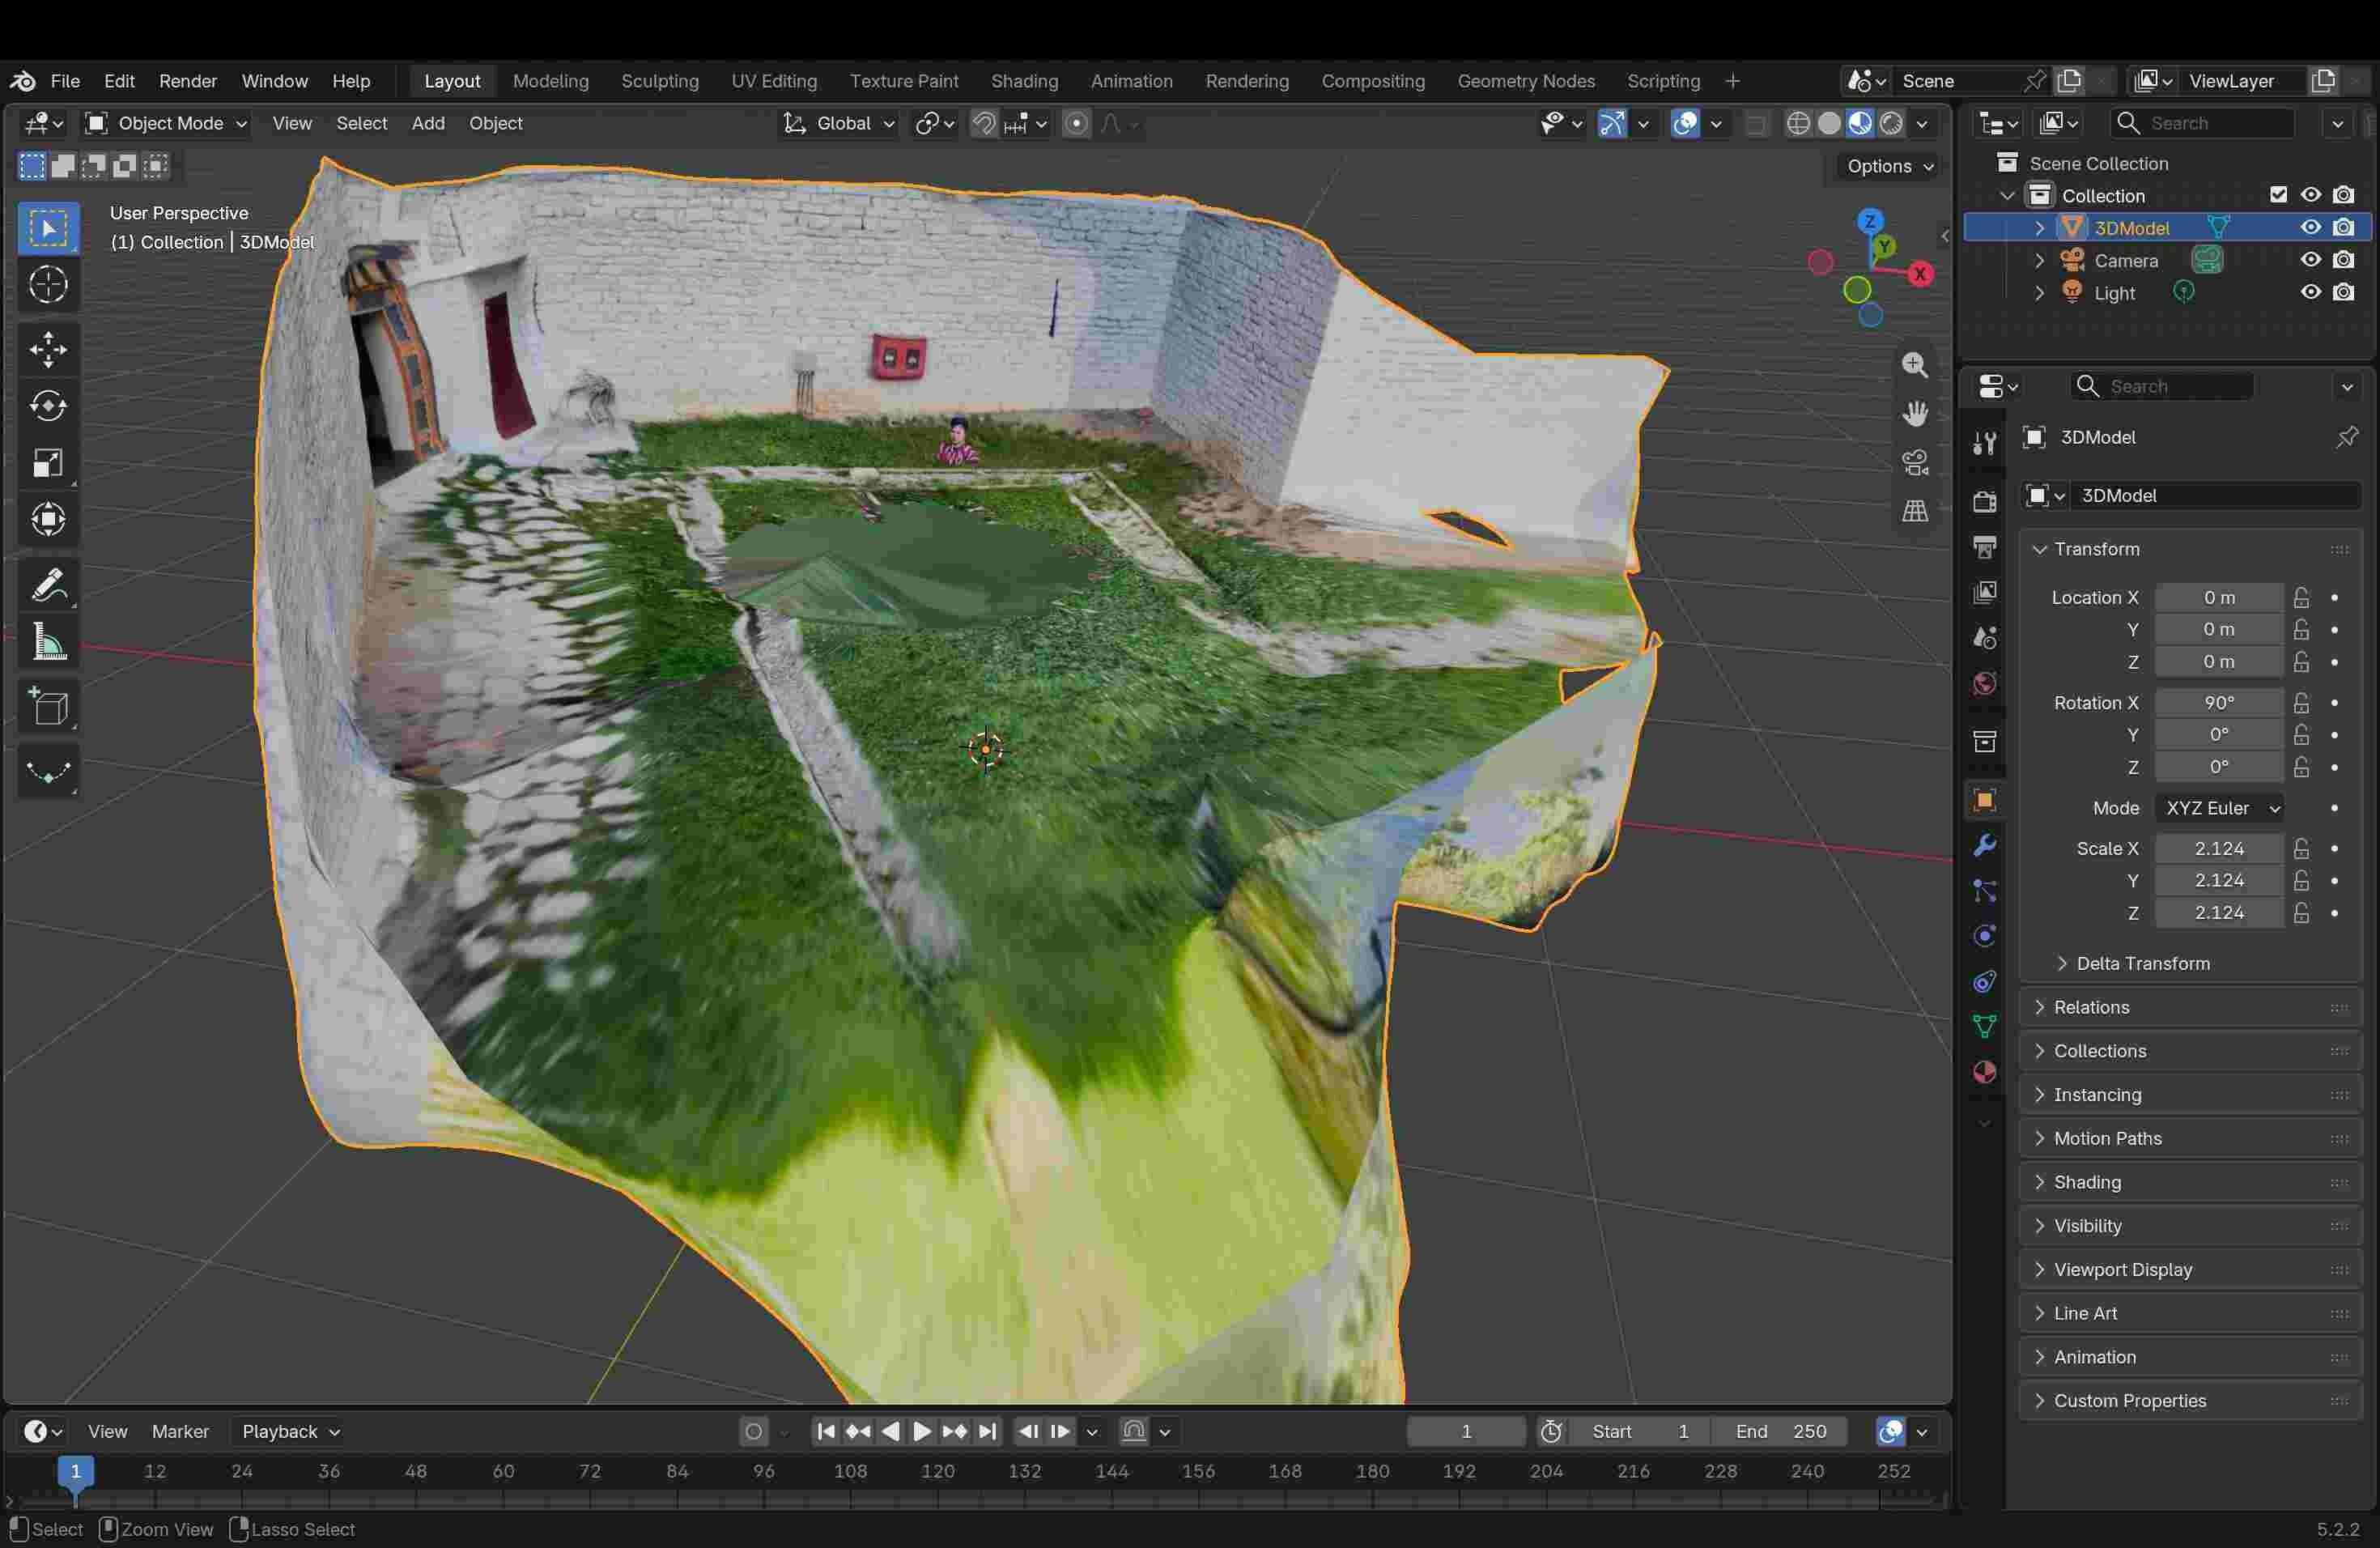
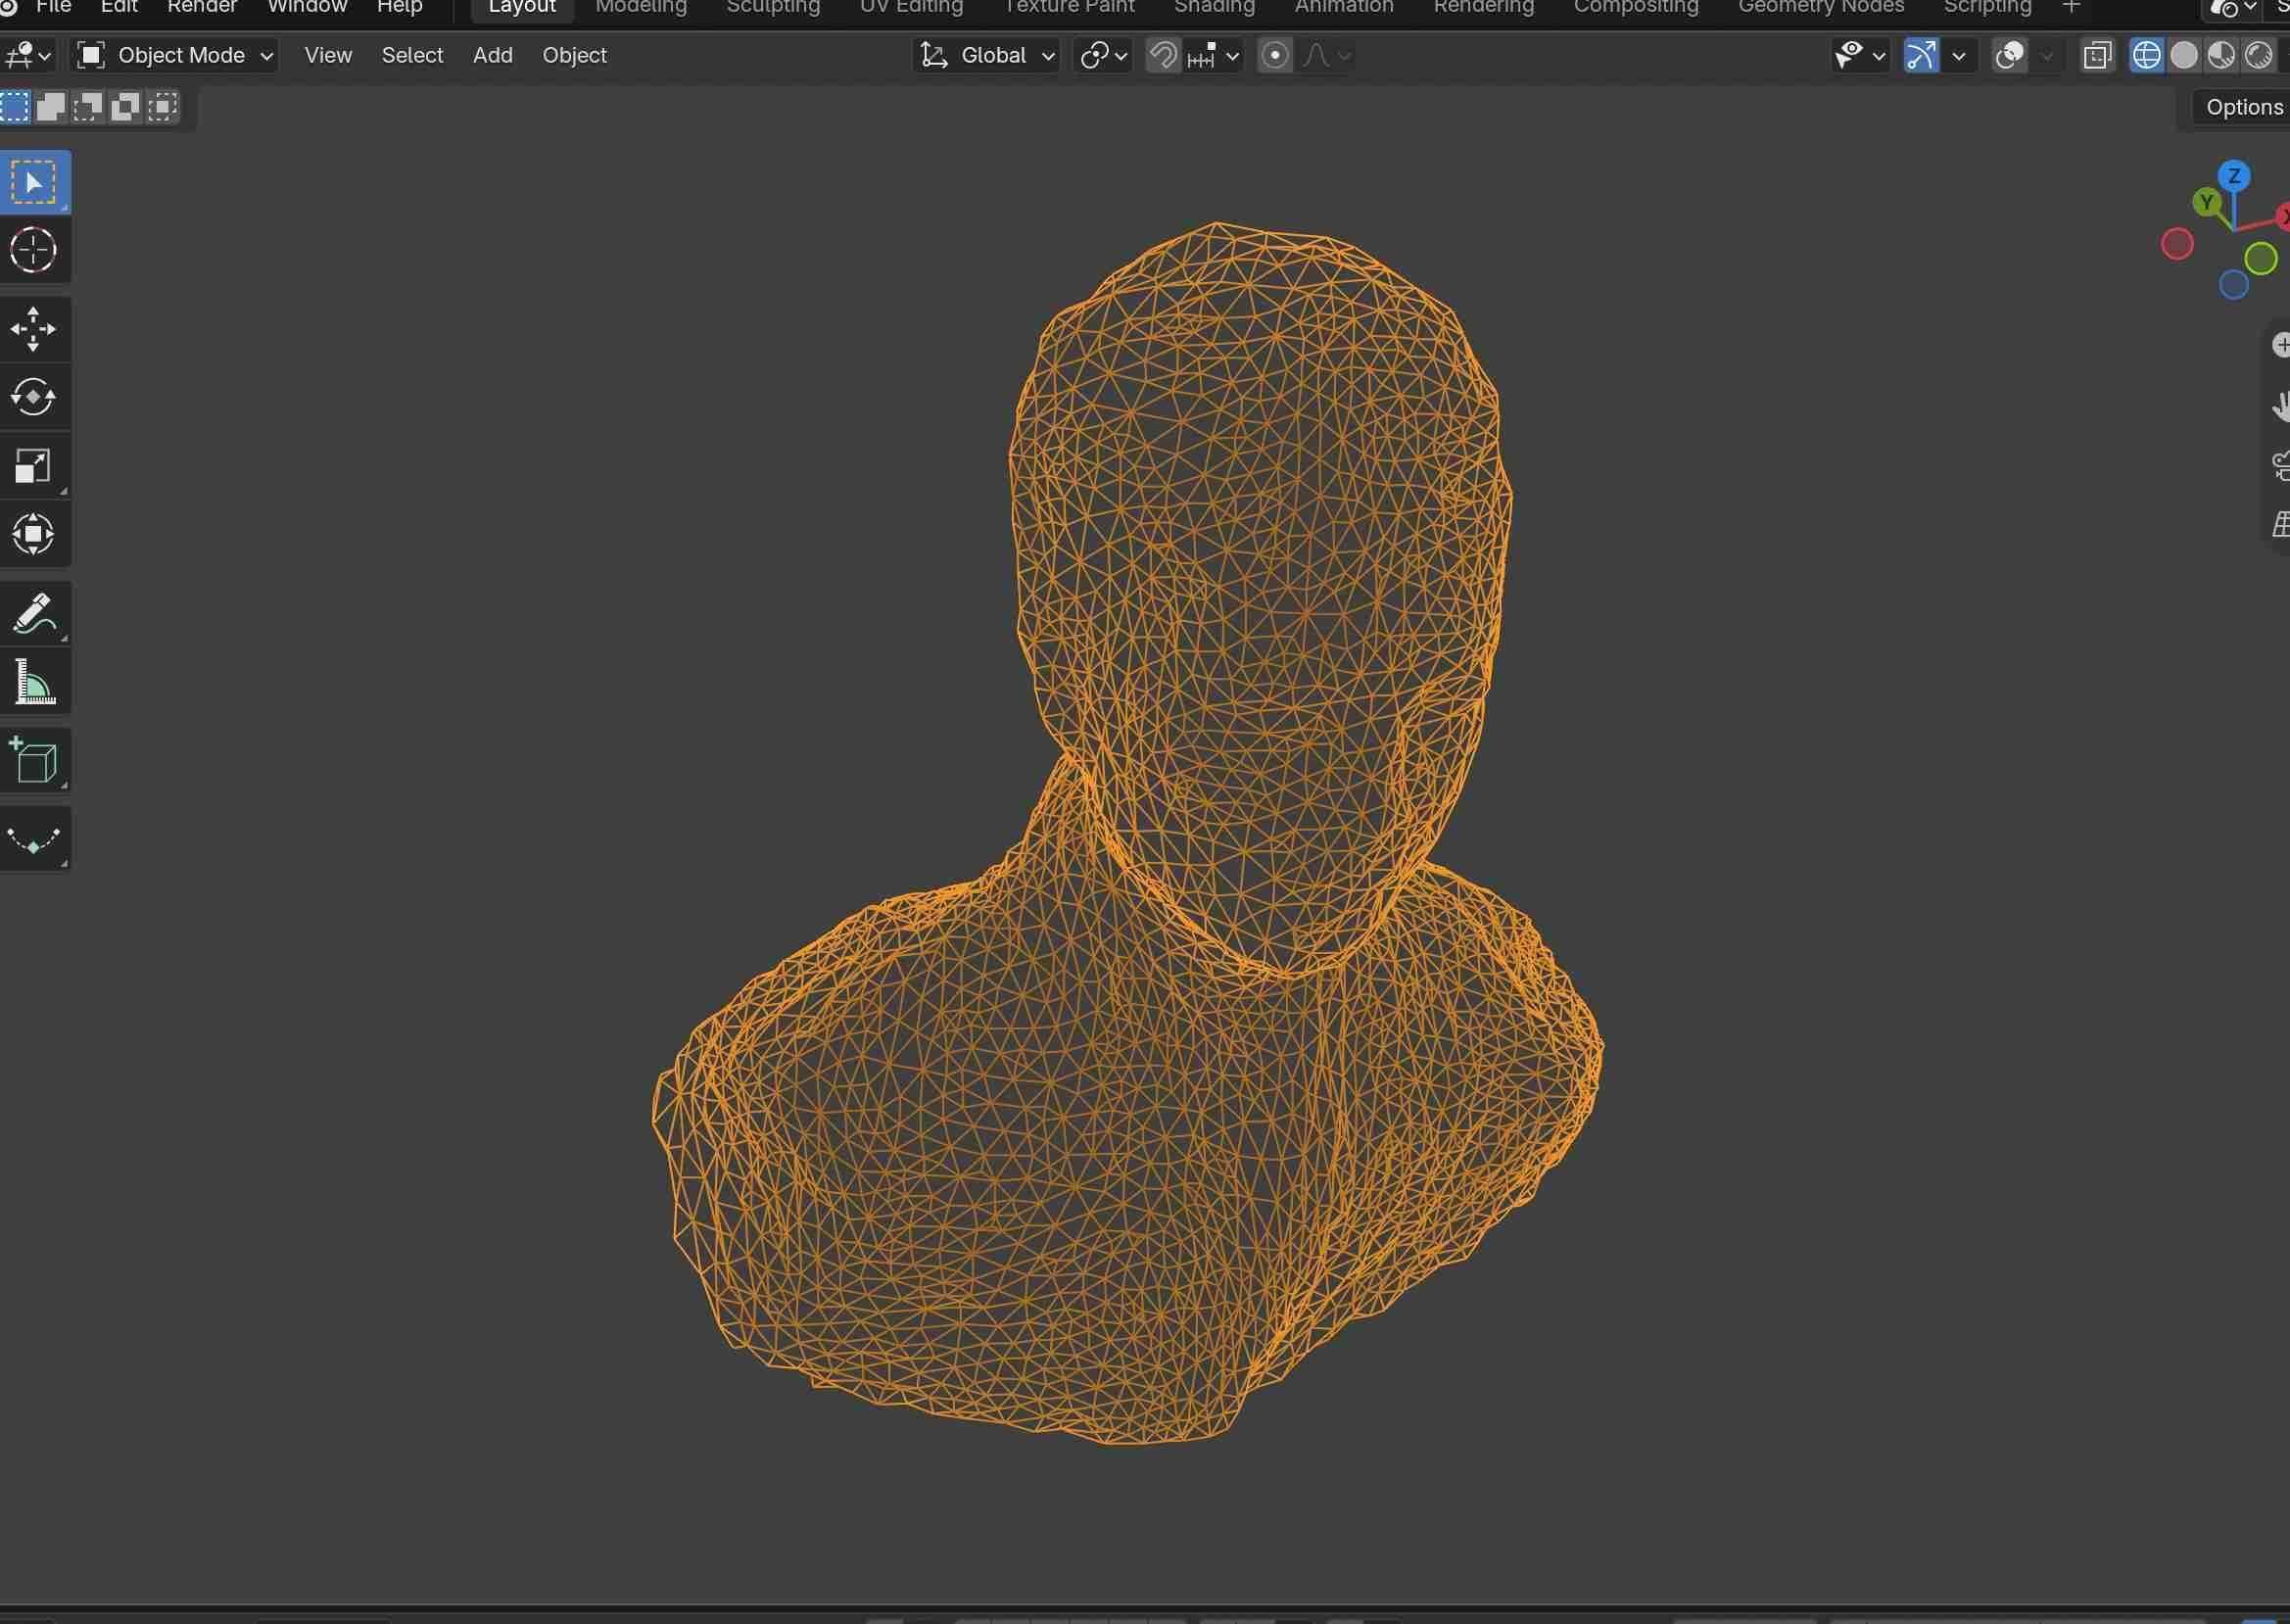
The first few attempts at scanning did not work well, so we had to try again. Once we got a complete scan, I exported it and imported the model into Blender for cleanup. The raw scan was still a little rough, with some background captured and an uneven surface, but the overall shape of my head was successfully captured.
Step 4.
I removed the unwanted background from the scan and tried to keep only the important details of my head. I then started playing around with the 3D scan in Blender and experimented with different tools to become more familiar with the software and understand how I could modify the model.
Making a hand: from 3D to a sewing pattern
After playing around with my head scan, I wanted to make something smaller and simpler to sew. A whole head has a lot of curves and it would have been a lot of tiny pieces, so I decided to make a hand instead. A hand is still complicated (five fingers!) but it is easier to understand as a shape.
Step 5. Designing the hand
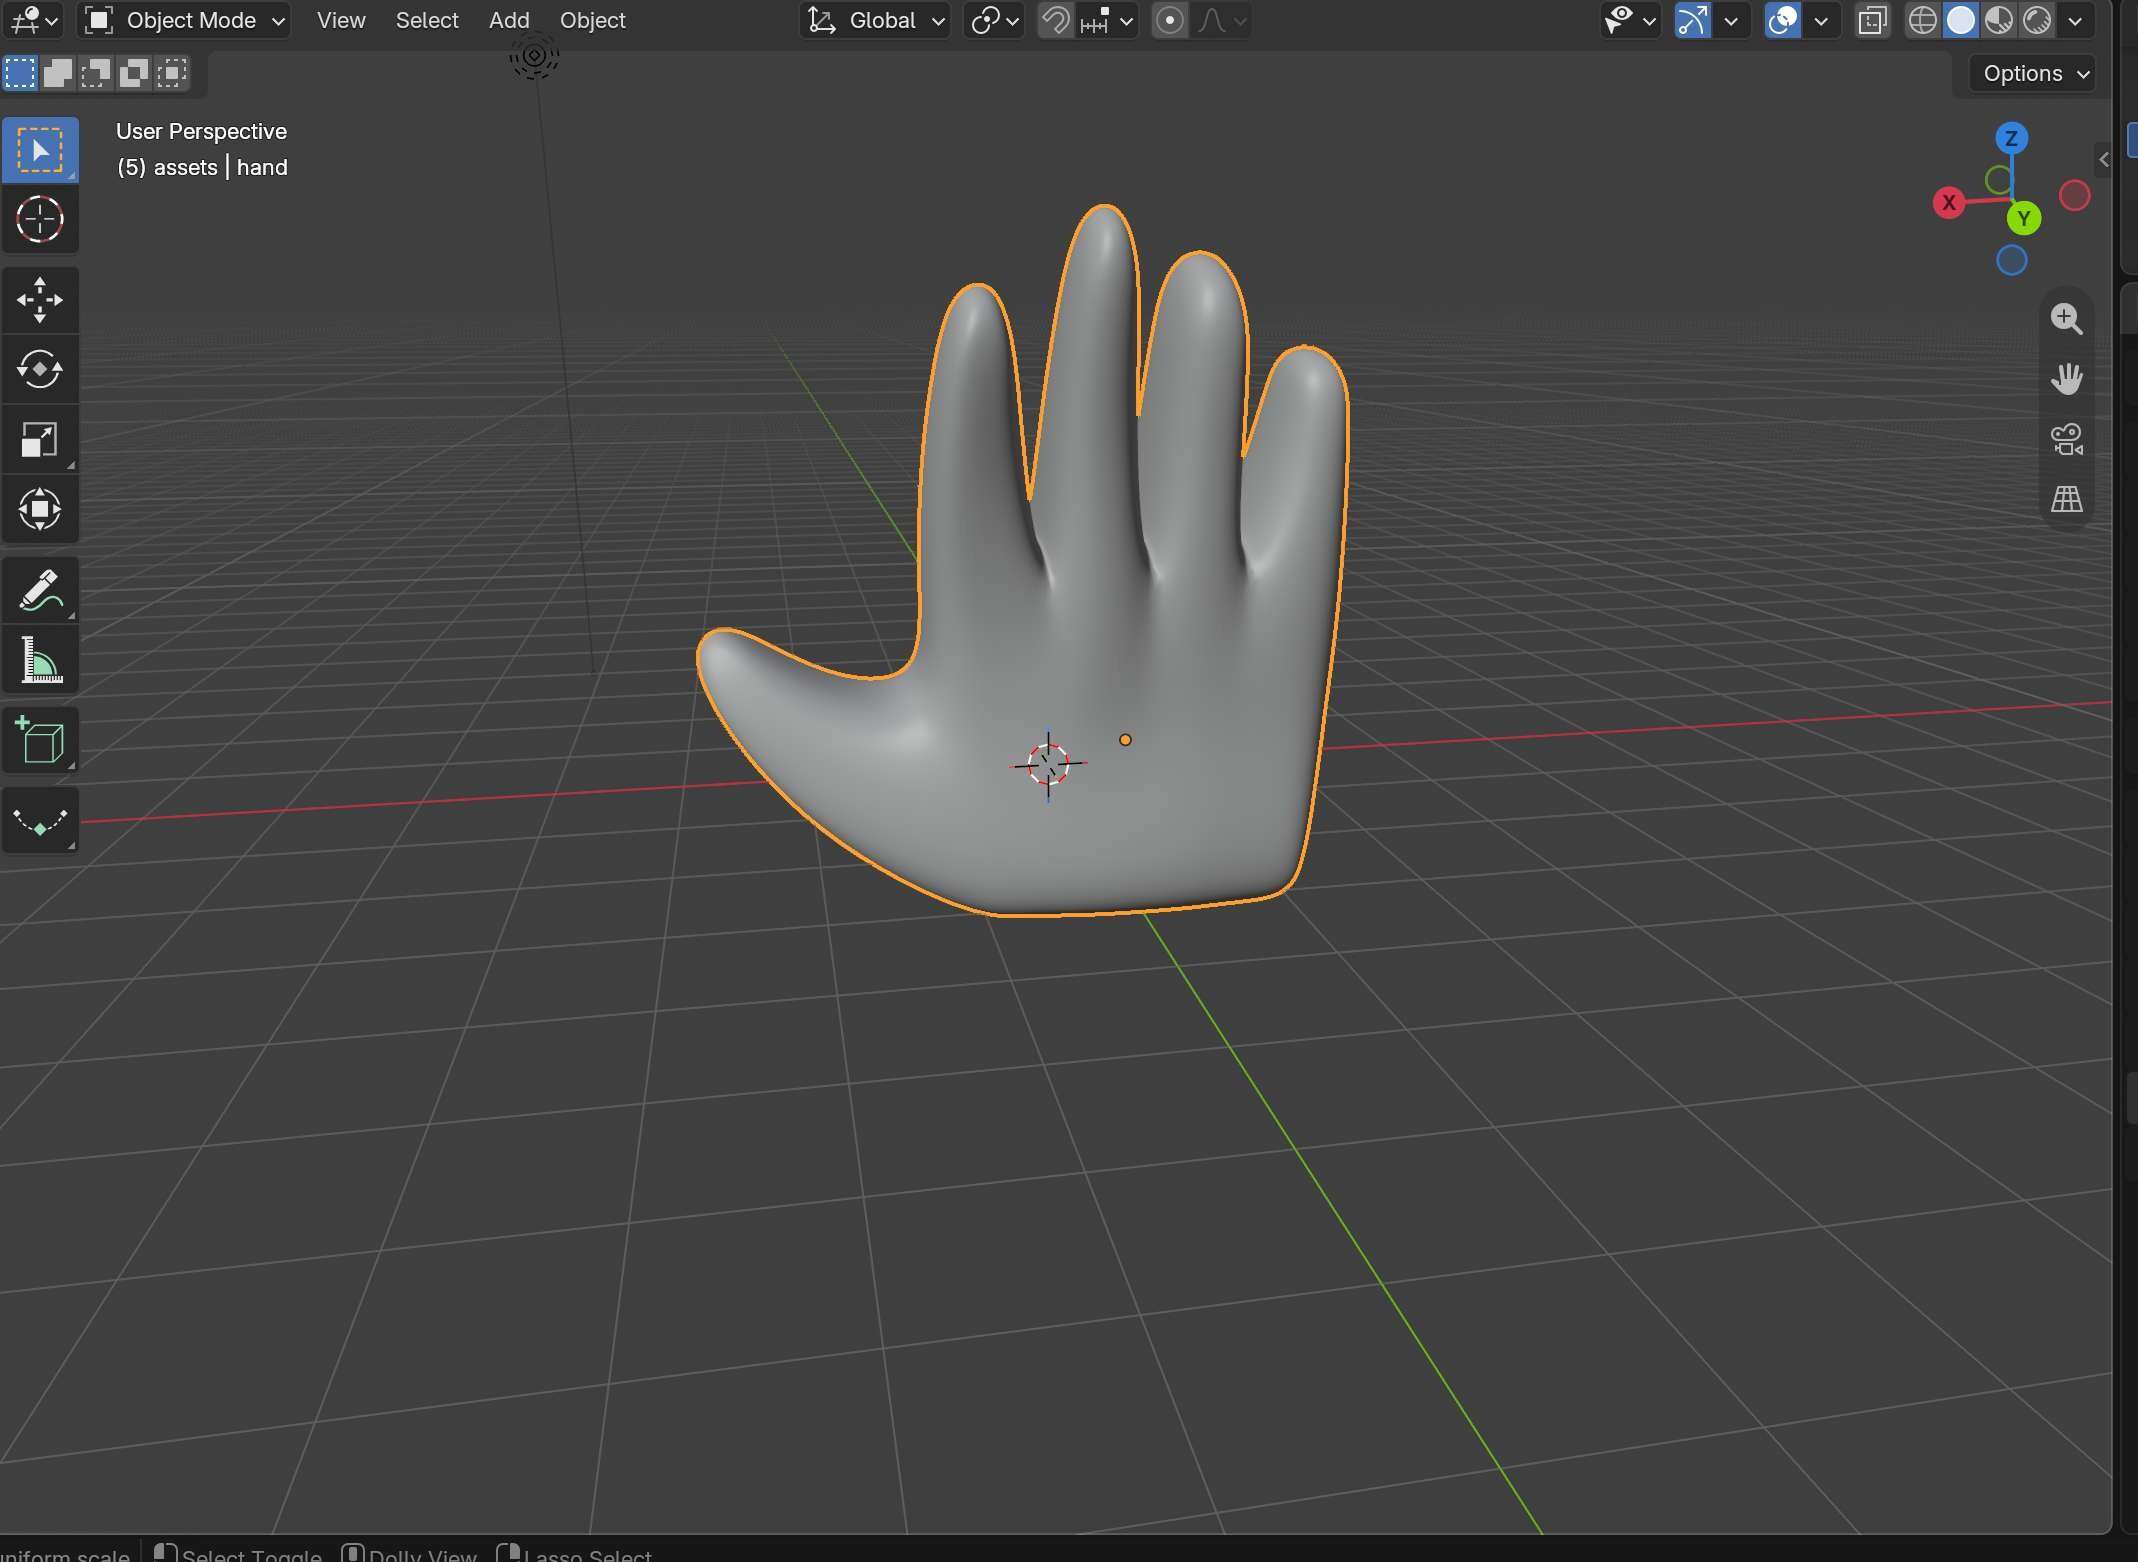
I made the hand in Blender. [Say how you did it here: modelled it from a simple shape, sculpted it, or scanned your own hand.] I started with [a cube / a cylinder / my scan] and slowly pushed and pulled it into the shape of a palm with a thumb and four fingers. The tool I used the most was proportional editing (press O, then G to move, and scroll the mouse wheel to change how big the area of influence is). It let me pull a finger out without making a sharp, ugly point.
I also spread the fingers a little bit apart instead of keeping them tight together. This was on purpose, because I found out later that the seams get very hard to sew in the tiny gap between fingers.My first version had way too many faces. If I had turned that into a pattern, I would have got hundreds of tiny pieces. So I reduced it. I used Quad Remesh and brought the face count down to around faces. Then I smoothed the surface so the pattern edges would not be wobbly.
Step 6. Installing the Seams to Sewing Pattern add-on
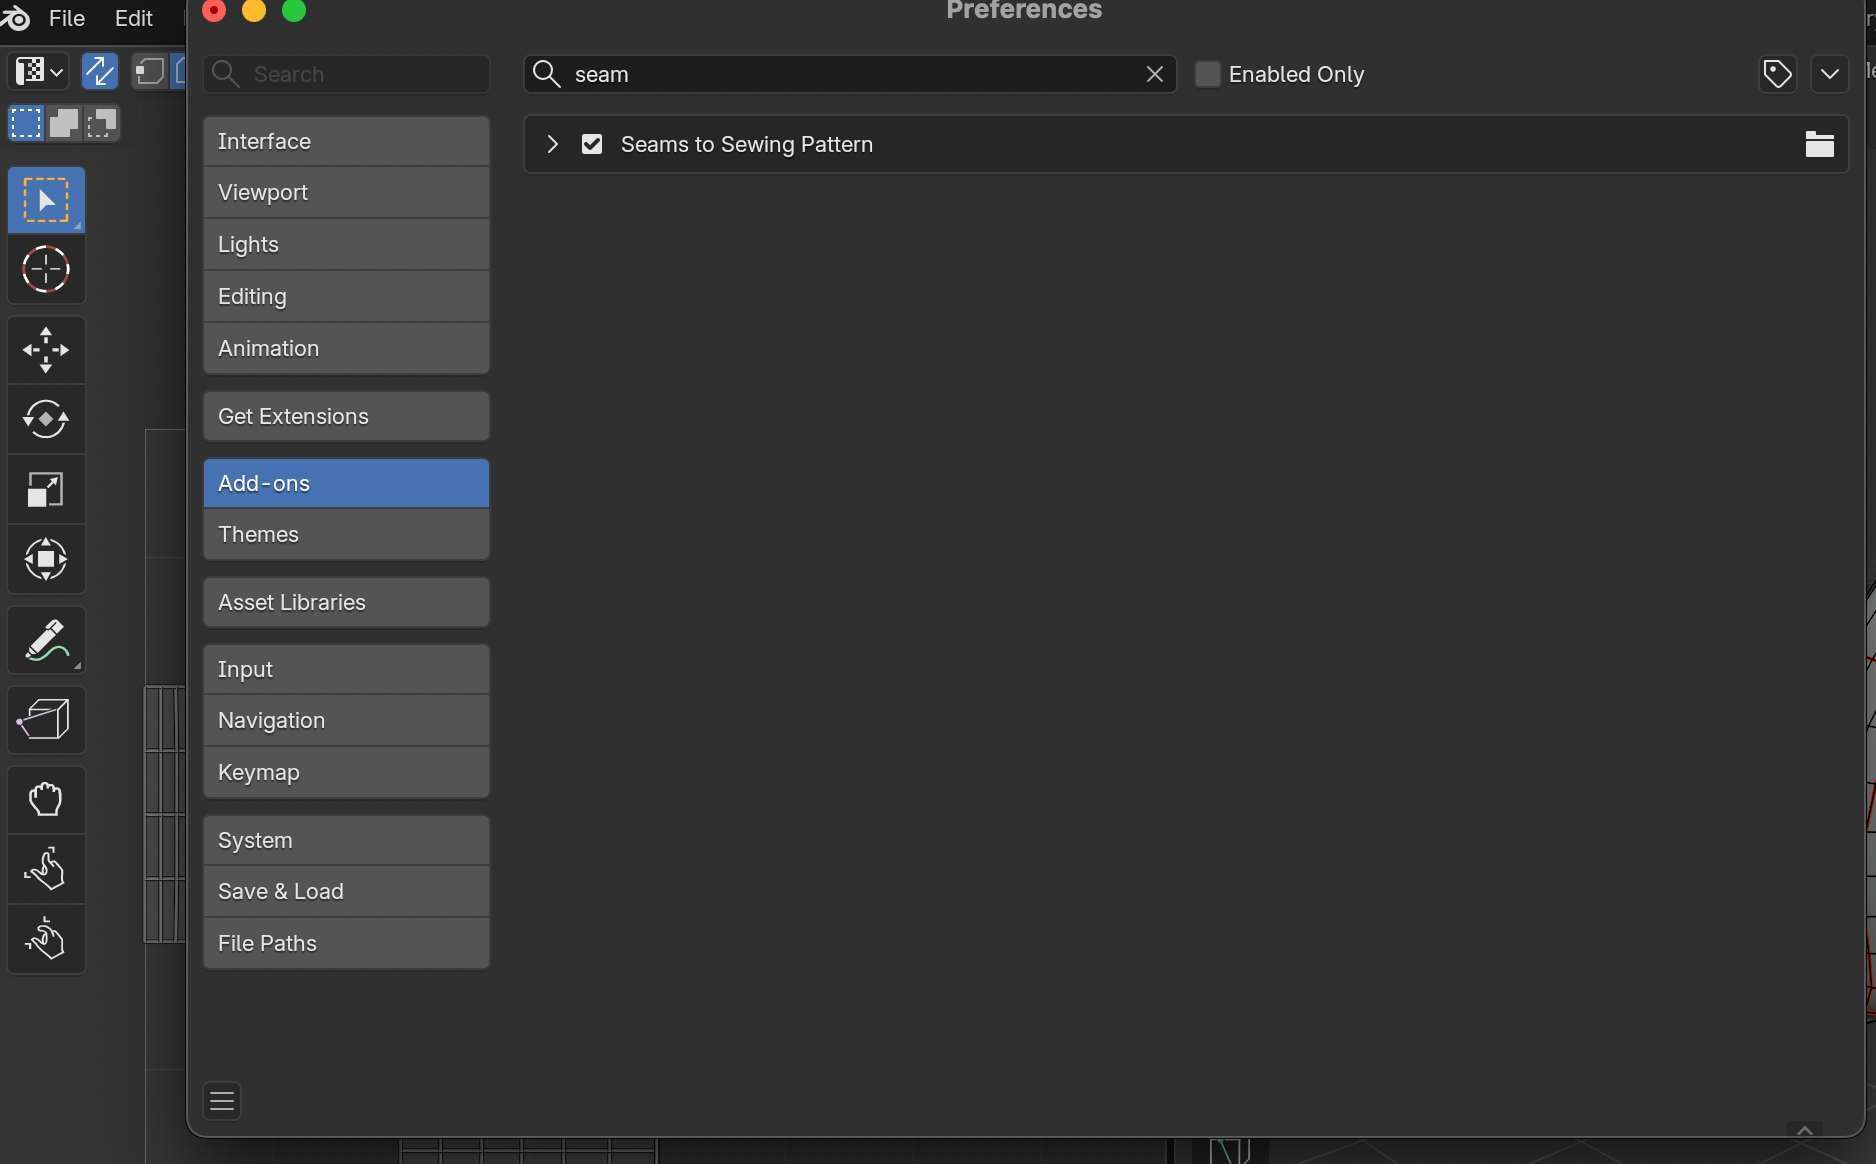
The add-on is what turns my 3D hand into flat 2D pieces. I downloaded the sceam to sewing pattern extensions.seams to sewing pattern Then in Blender went to Edit > Preferences > Add-ons > Install, picked the file, and ticked the box to turn it on.
Step 7. Marking the seams and Unwrapping into flat pieces
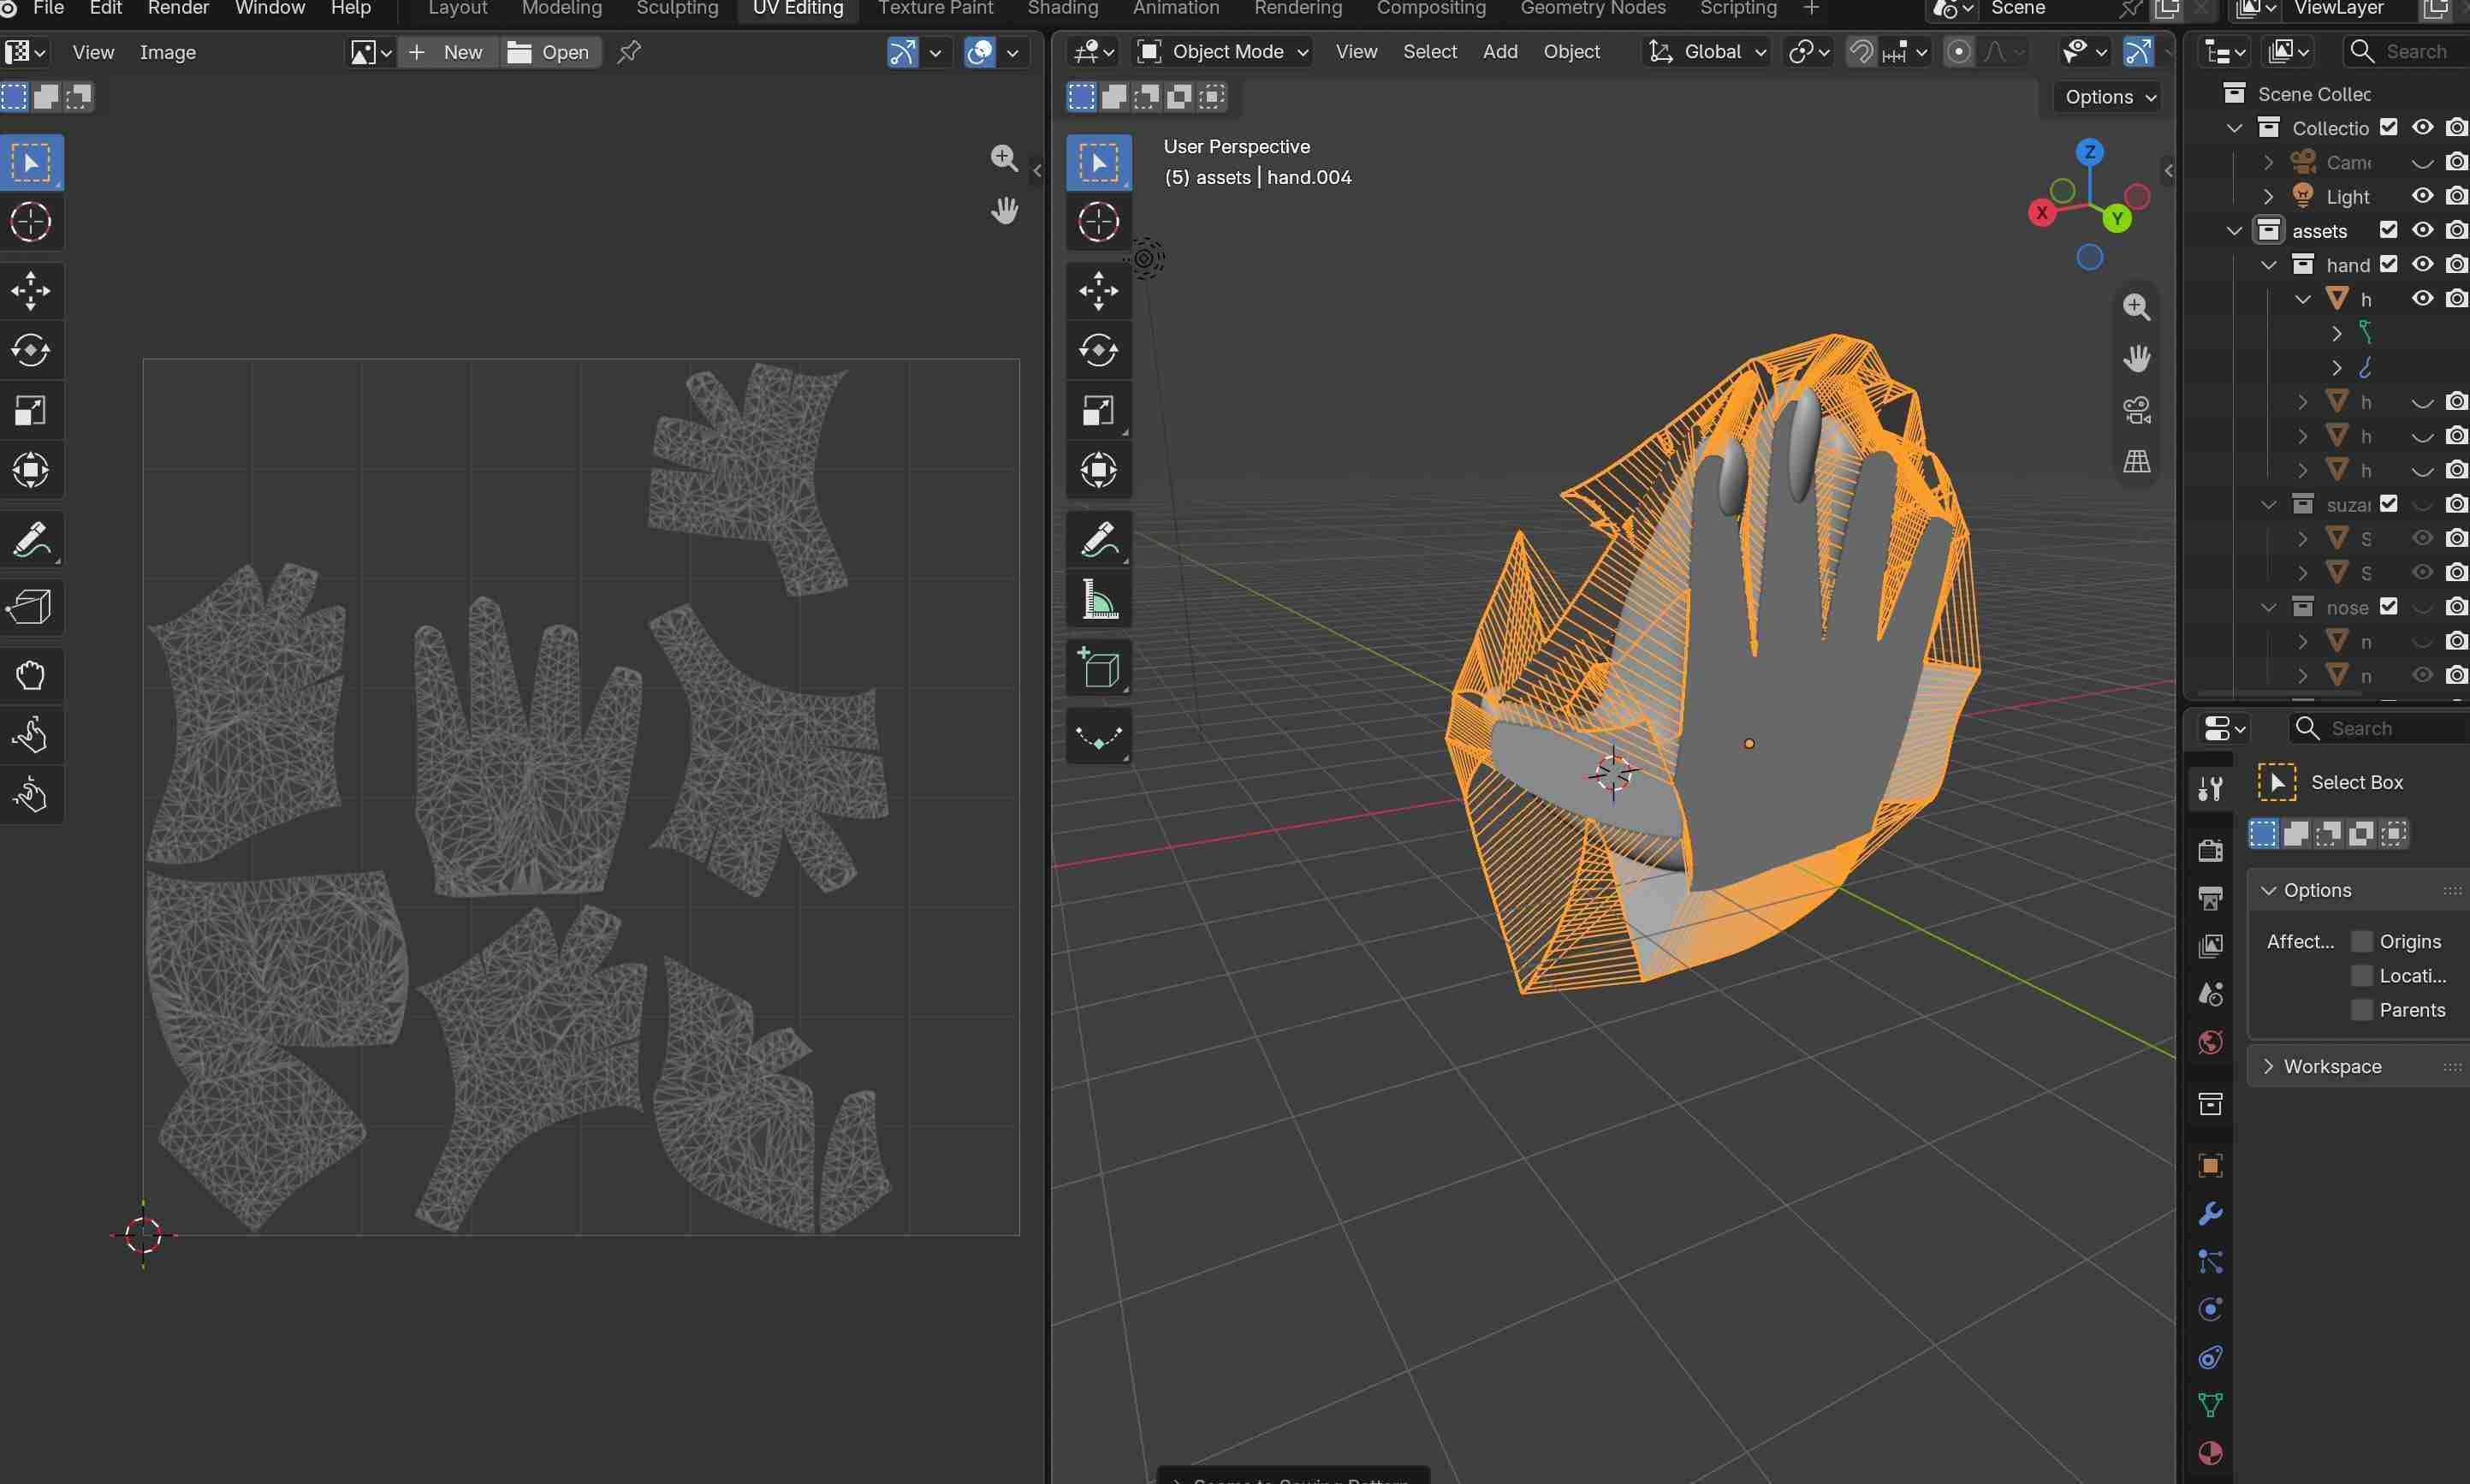
This is the part where I actually design the pattern. Seams are the lines where the fabric pieces will be sewn together. In Edit Mode, I selected the edges where I wanted a seam, then pressed Ctrl+E and chose Mark Seam. The seams show up as red lines.
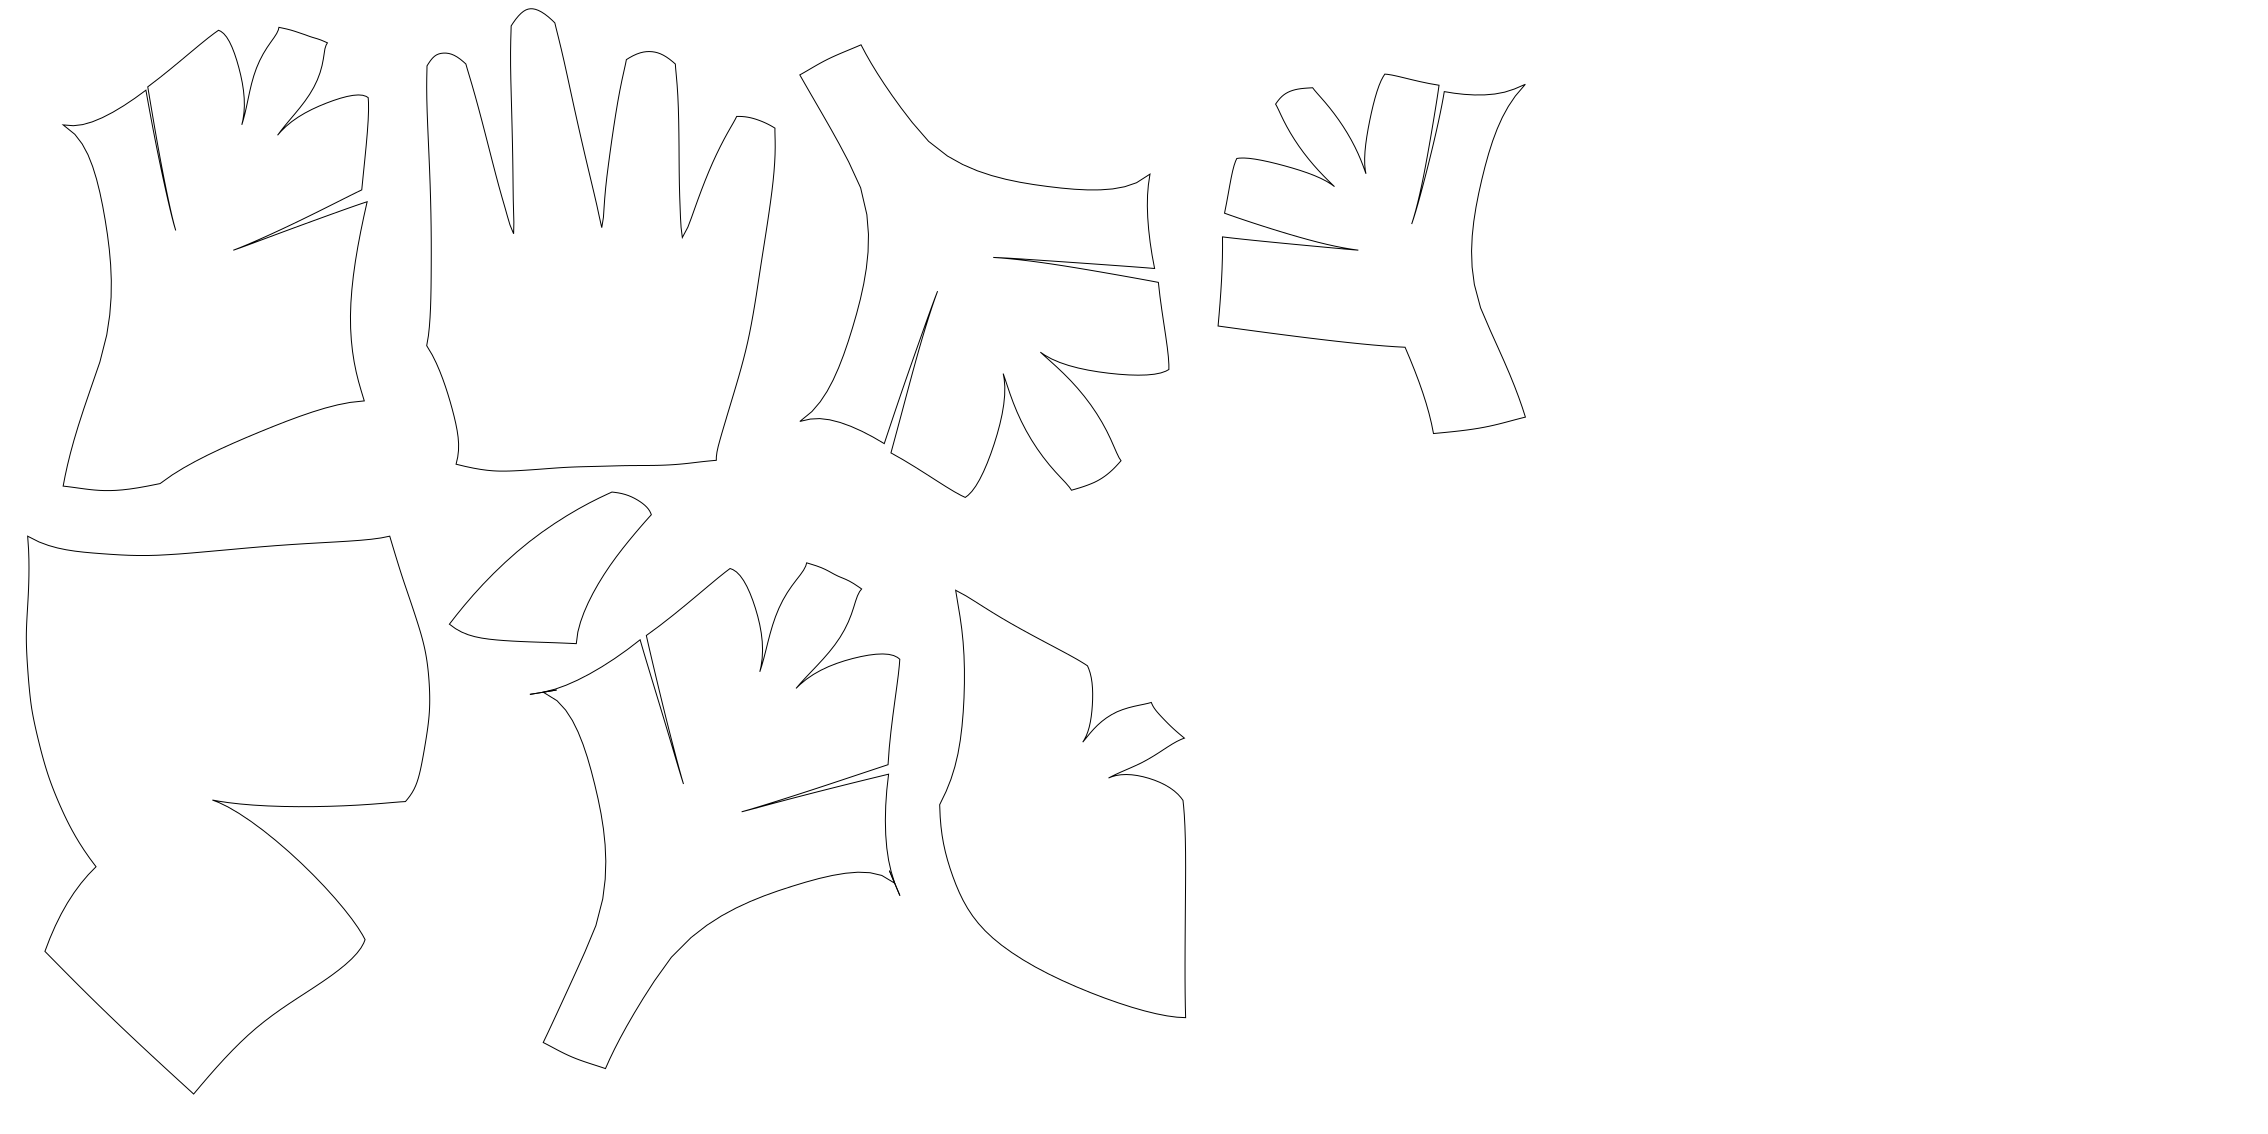
After marking the seams, I selected everything (A) and pressed U > Unwrap. Then I opened the UV Editor to look at the flat pieces. I checked that no piece was overlapping another one and that nothing looked badly stretched. If one piece looked strange, I went back to Step 8 and moved the seam.
Step 9. Getting the real size and exporting the pattern
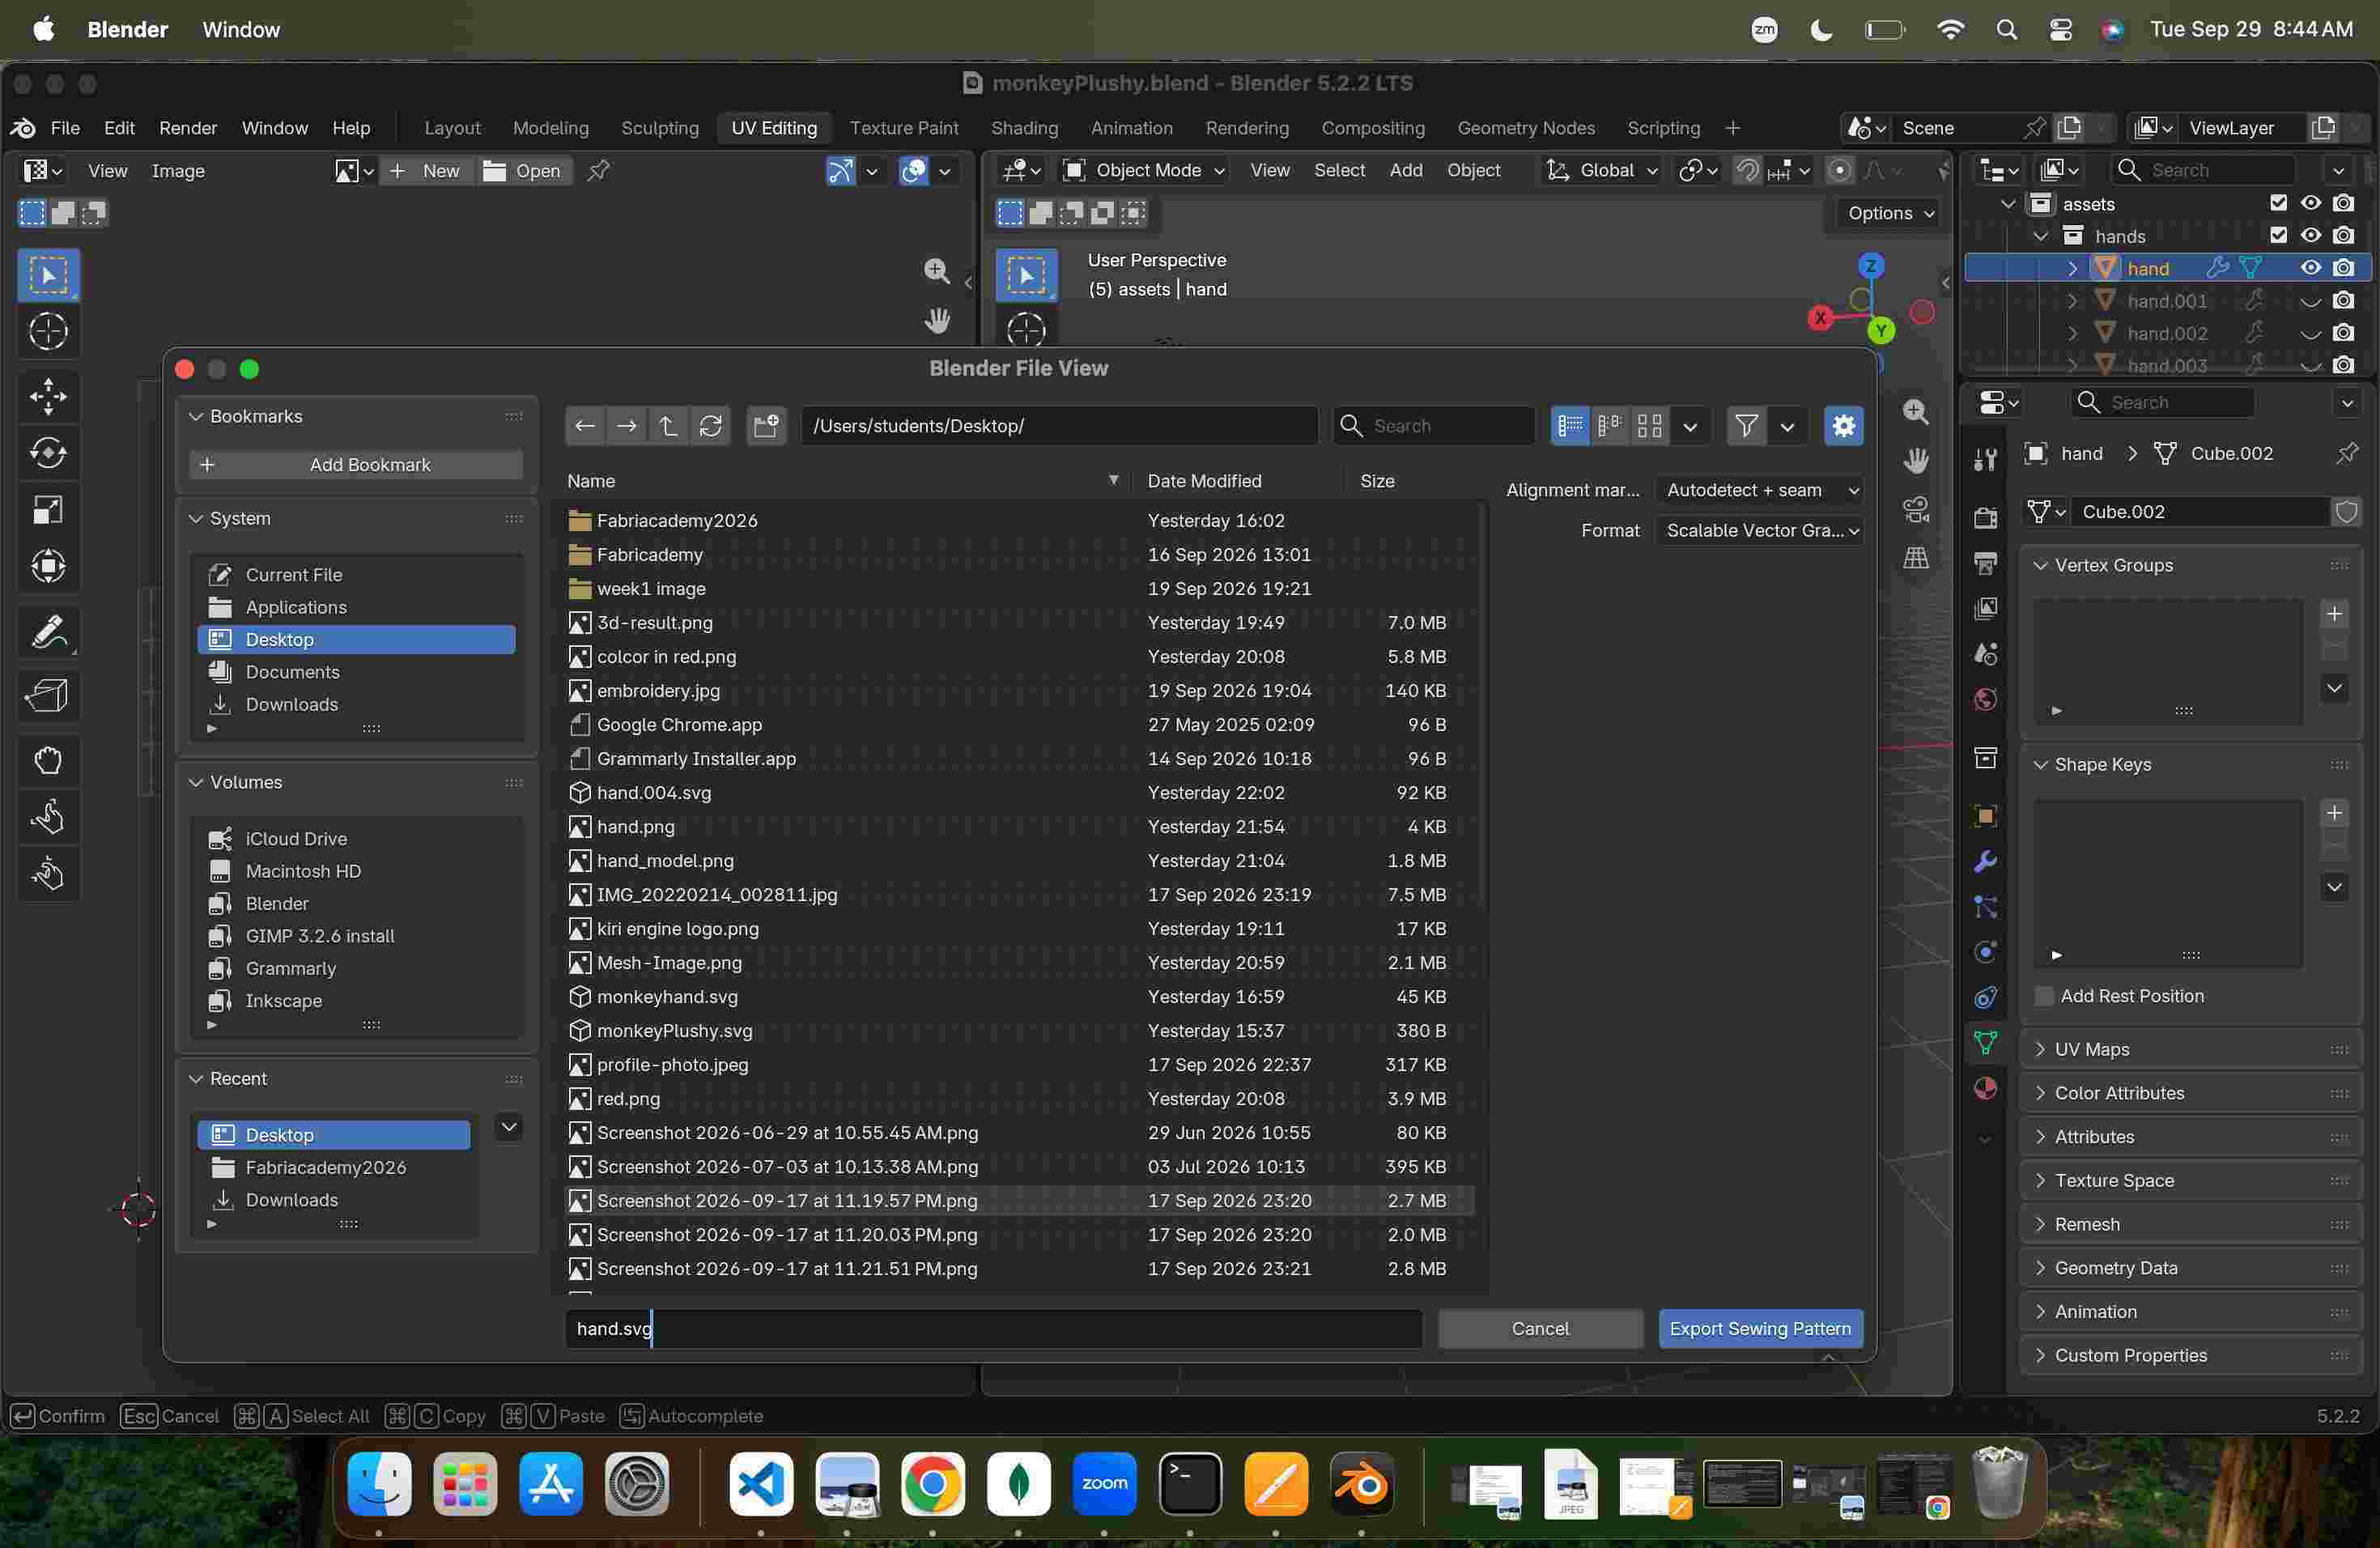
Before exporting, I set the size of the hand to the size I actually wanted, and applied the scale (Ctrl+A > Scale). If I skip this, the pattern comes out tiny or huge. I made my hand about 10 size long.then i export using the export sweing pattern in SVG. select the object>eport the sewing pattern>export to SVG
Step 10. Preparing the file for the laser cutter
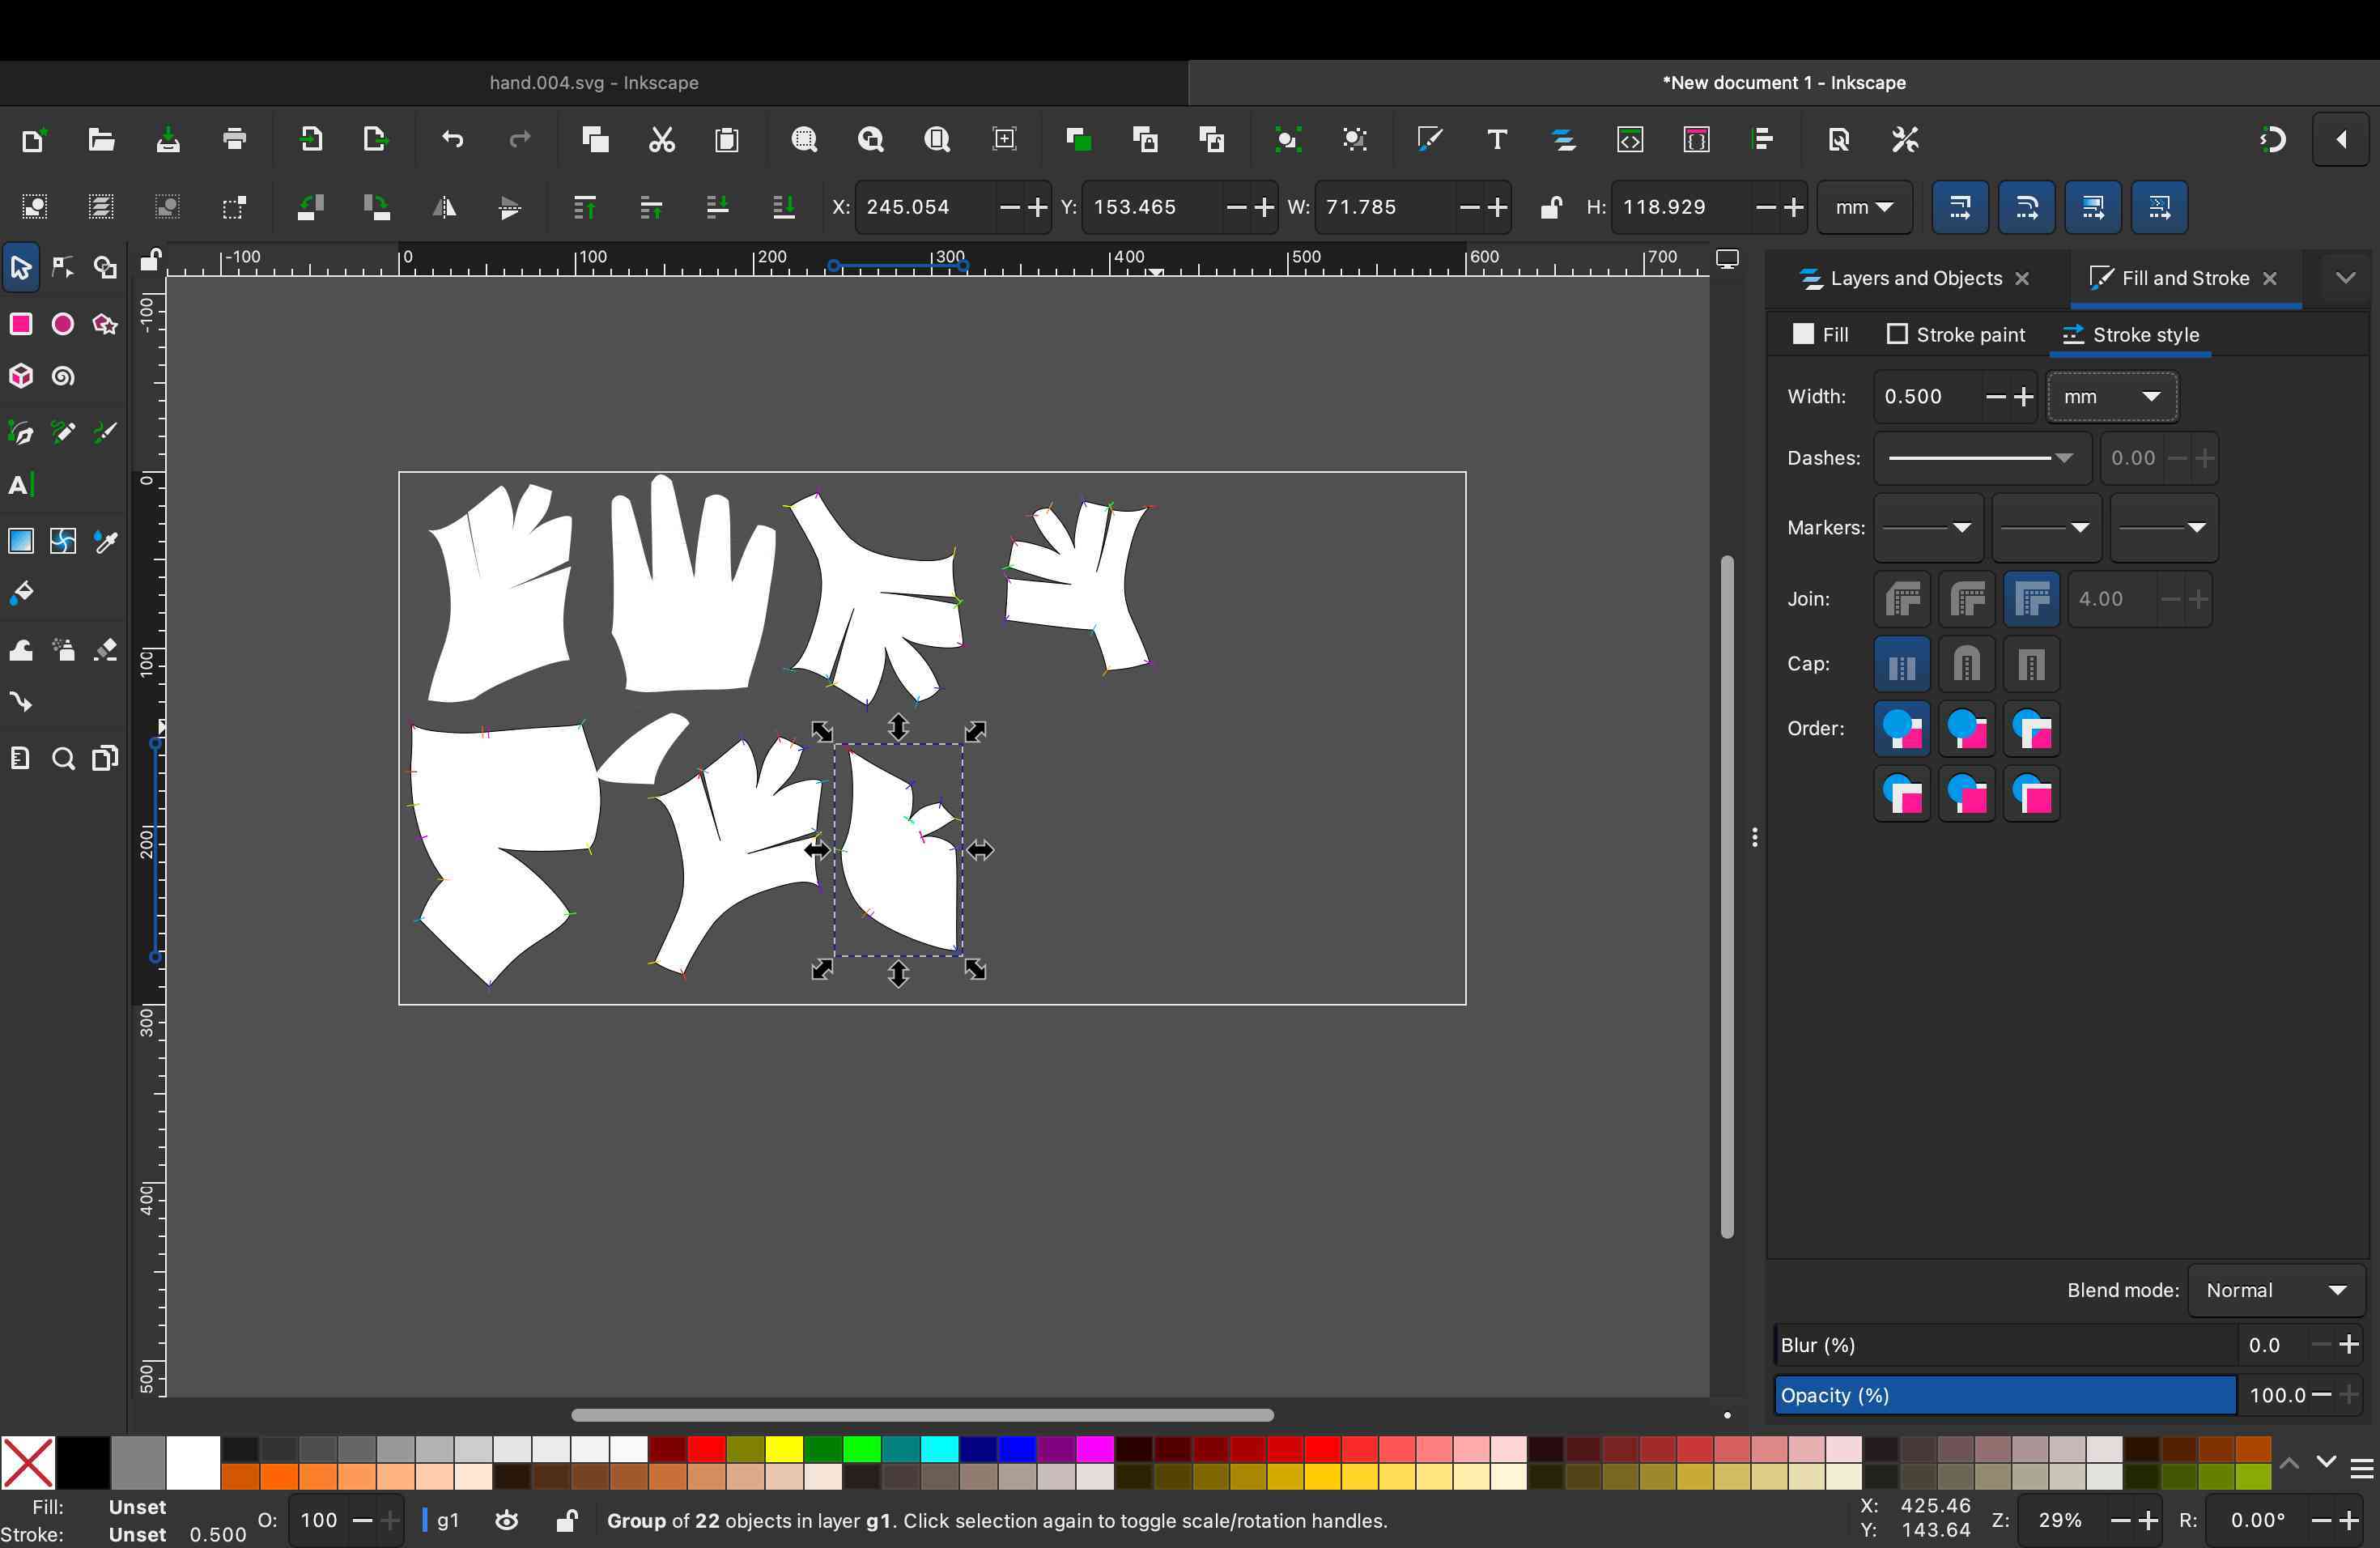
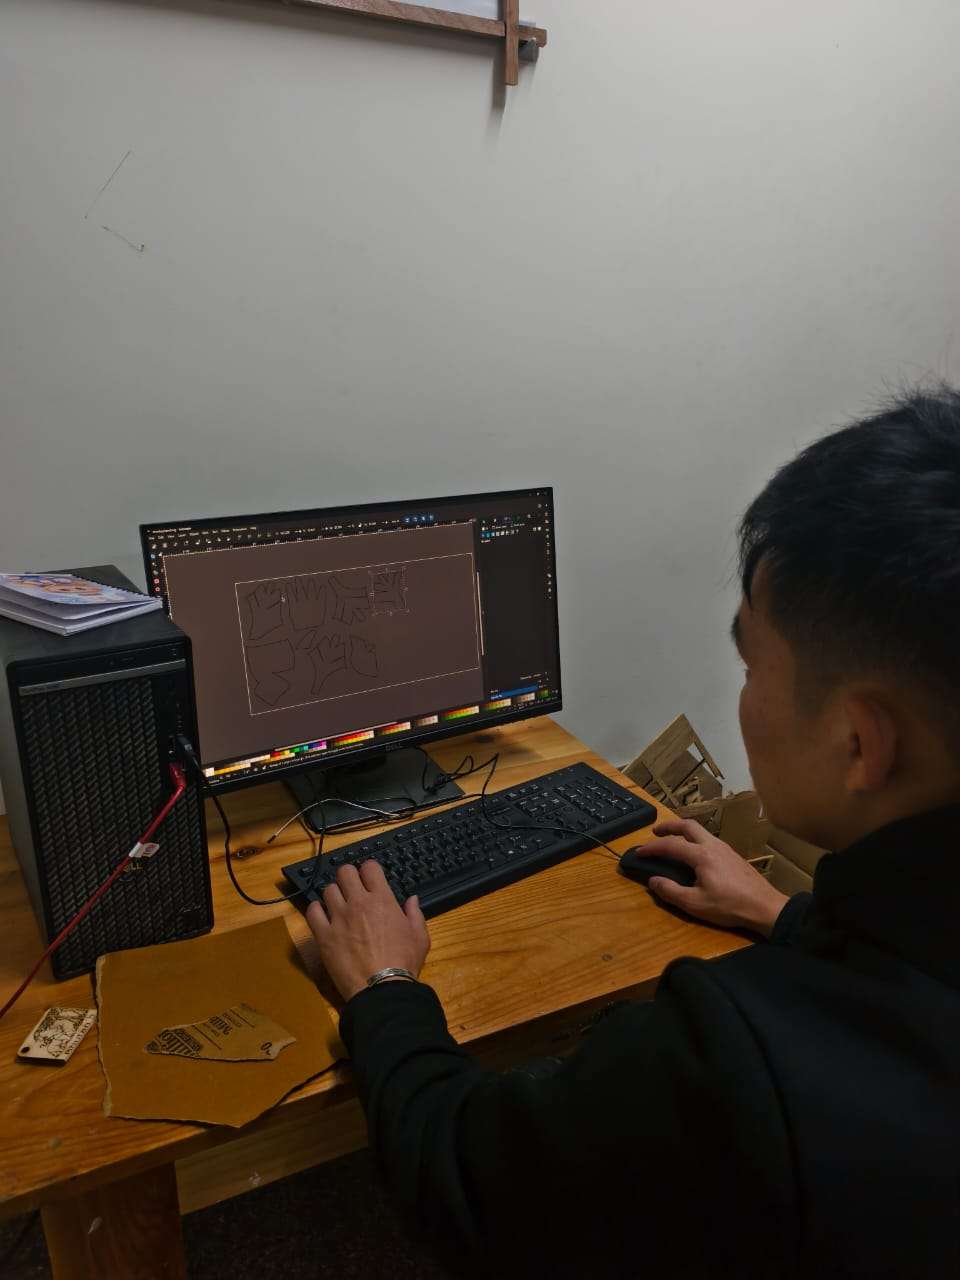
I opened the exported file in Inkscape software. First I measured one piece to make sure the size was still correct. Then I set up the lines the way the laser needs them: black thin lines for cutting marks, so the machine knows what to cut through and what to just mark. I also numbered the pieces so I would not get lost when sewing.
I arranged all the pieces close together to waste as little fabric as possible, and saved the final file as svg.
Step 12. Laser cutting
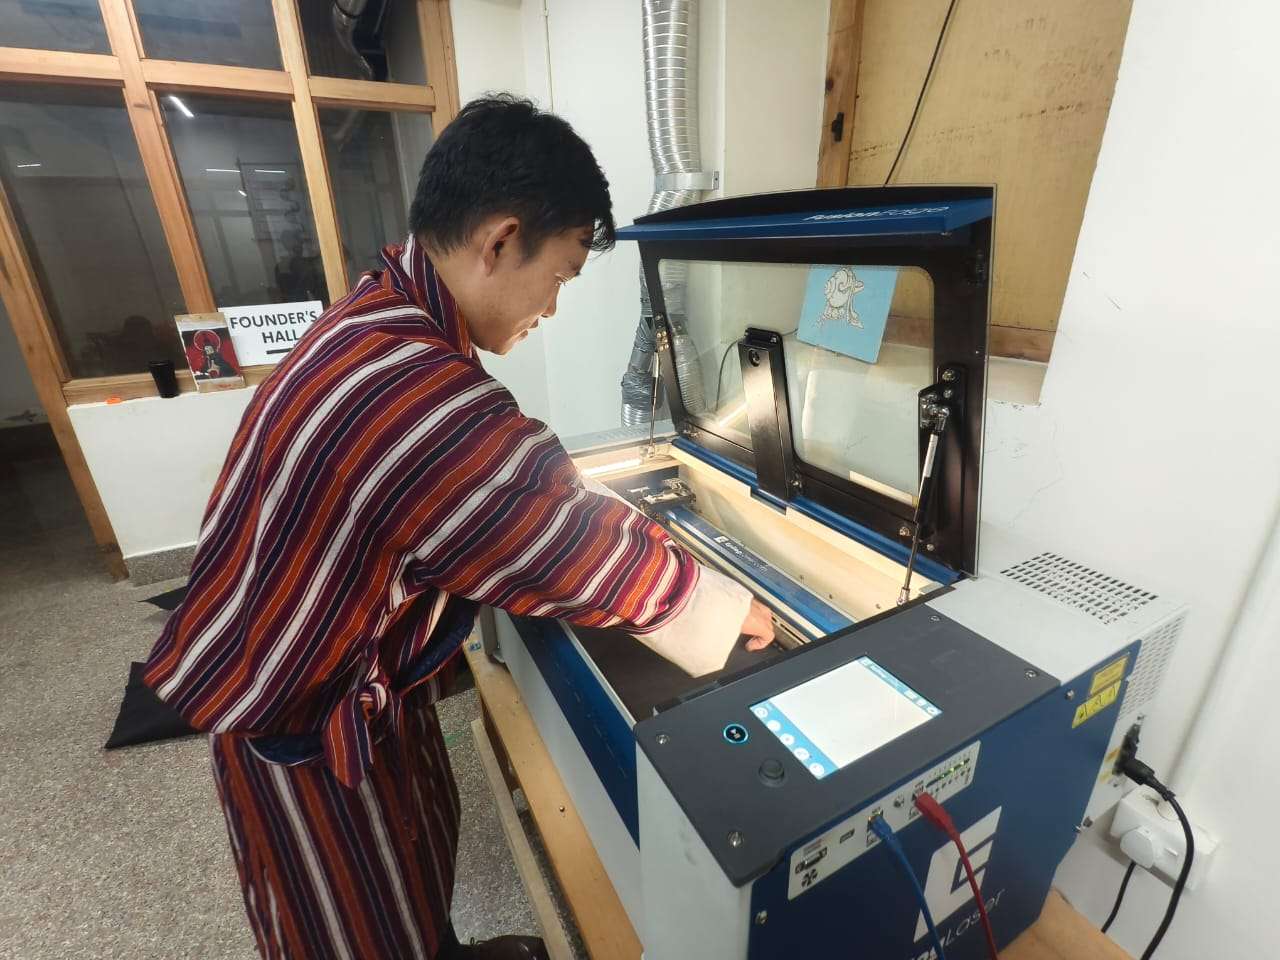
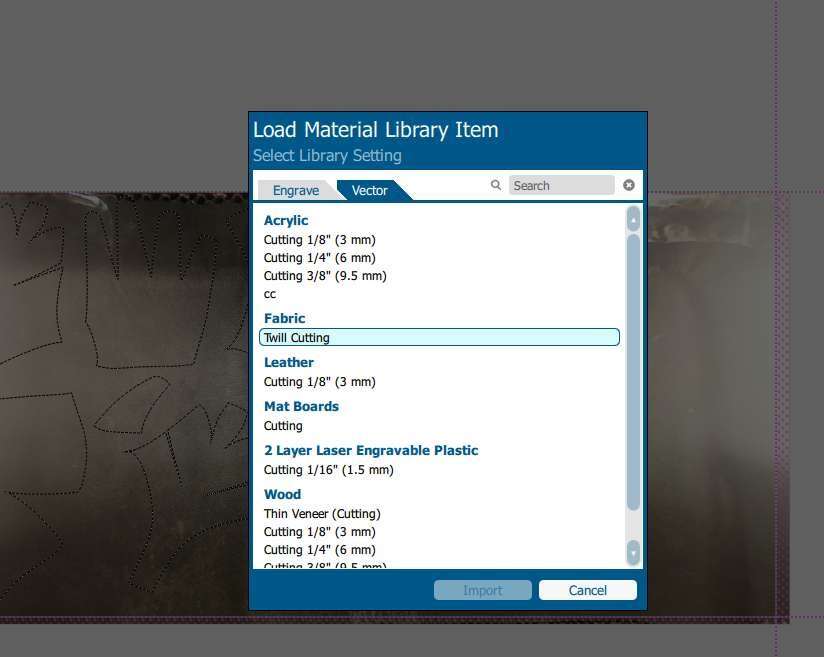
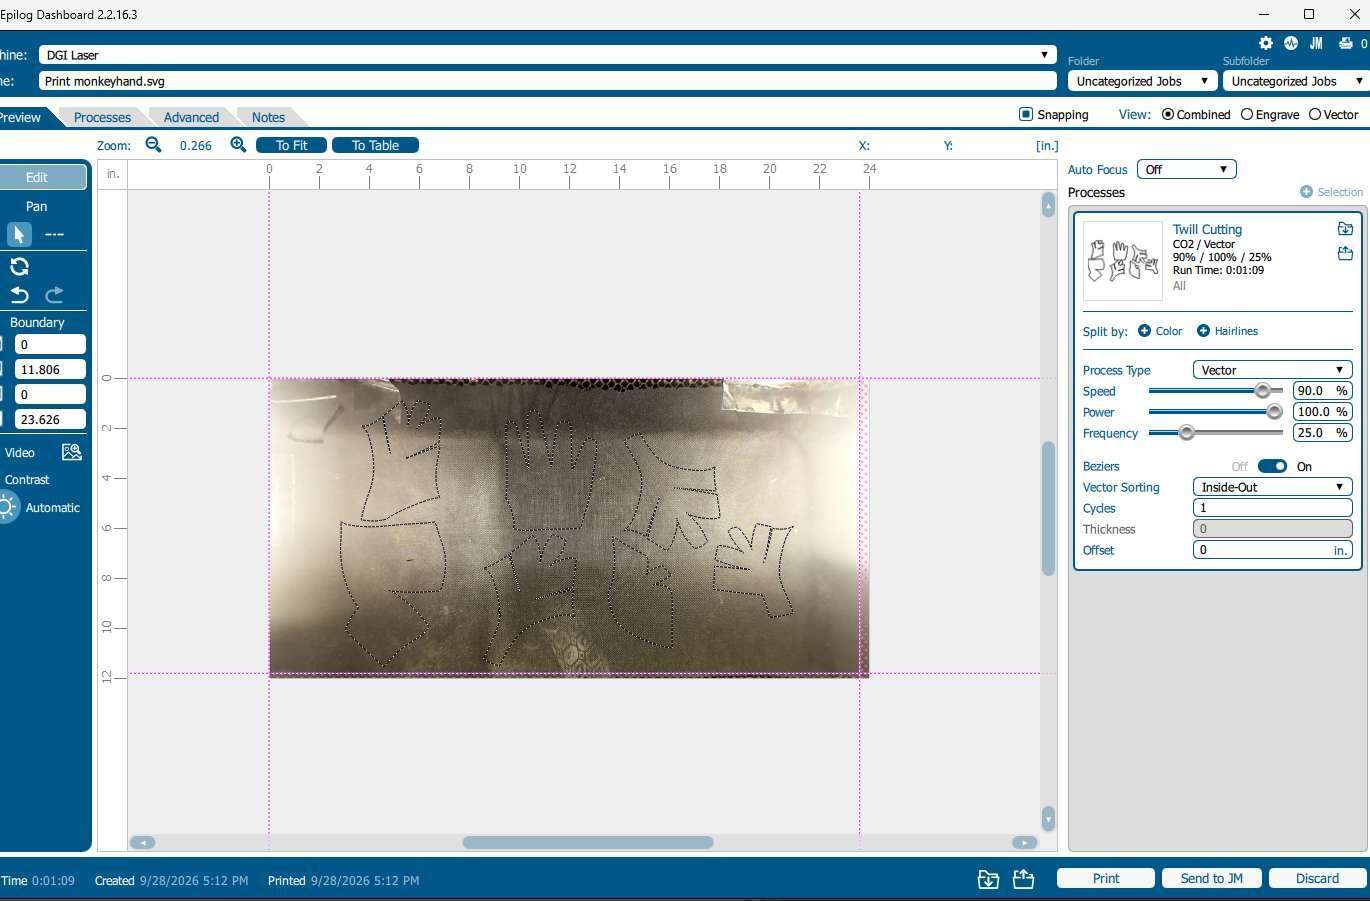
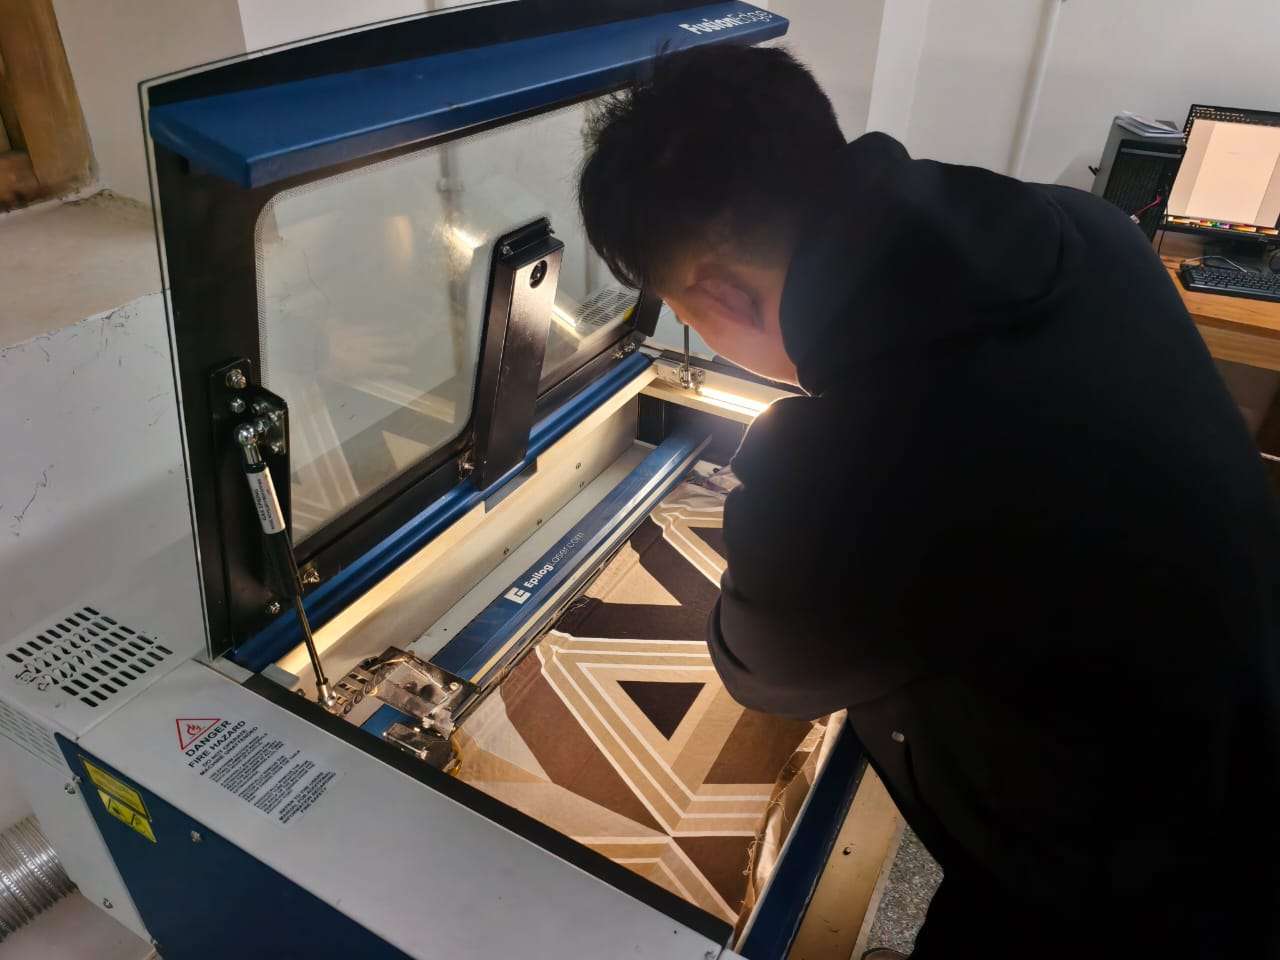
I used the epilog at DGI fablab. My material was [type of fabric, for example felt or cotton], [thickness] thick. It is important to use a fabric that is safe for the laser. Some synthetic materials melt or give off bad fumes, so I checked with mr anith first.
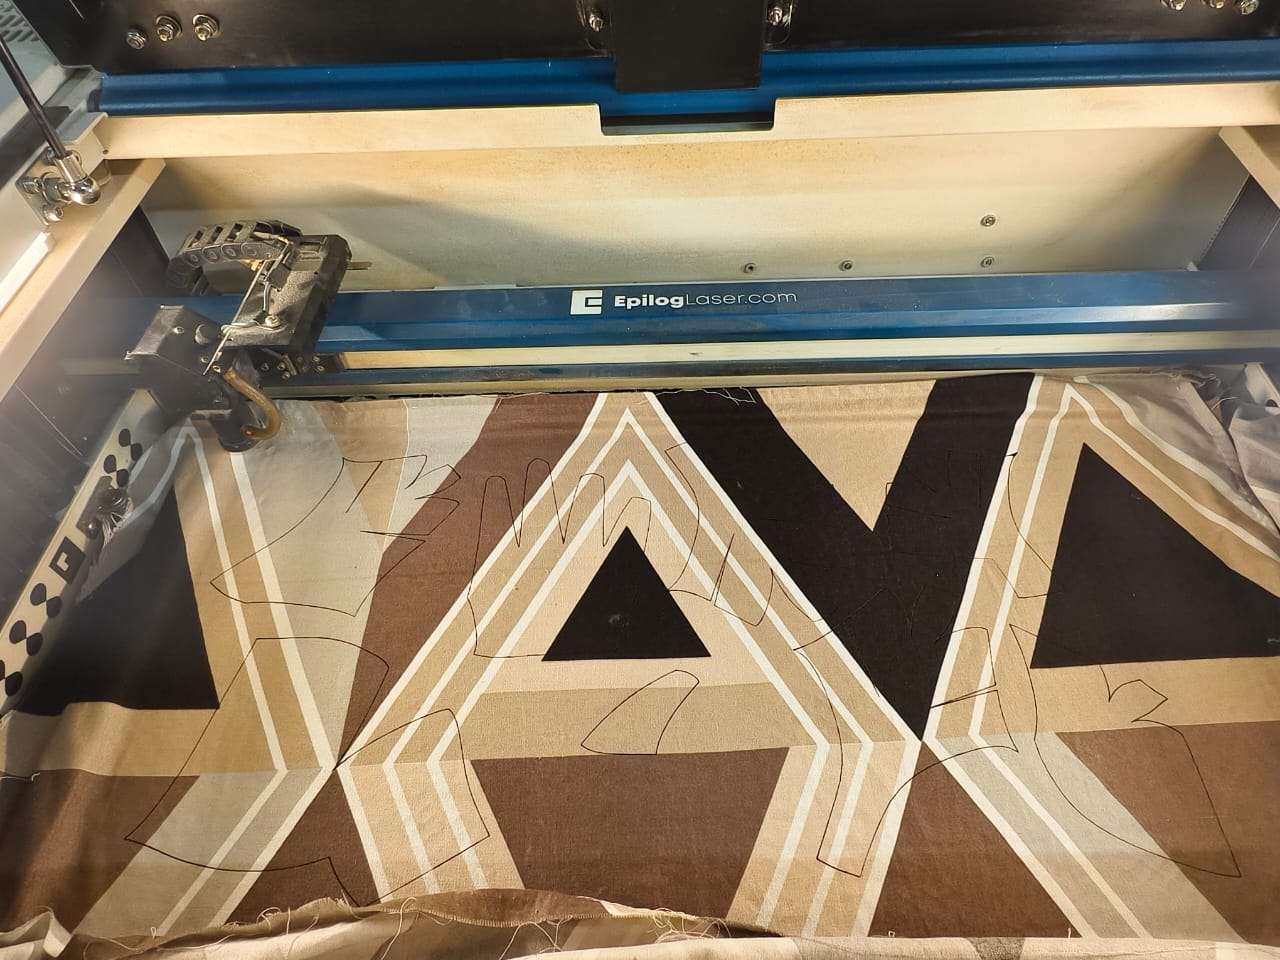
I did a small test cut first on a scrap piece. My first settings were [speed / power], it cut perfectly fine. i started to do for rest.
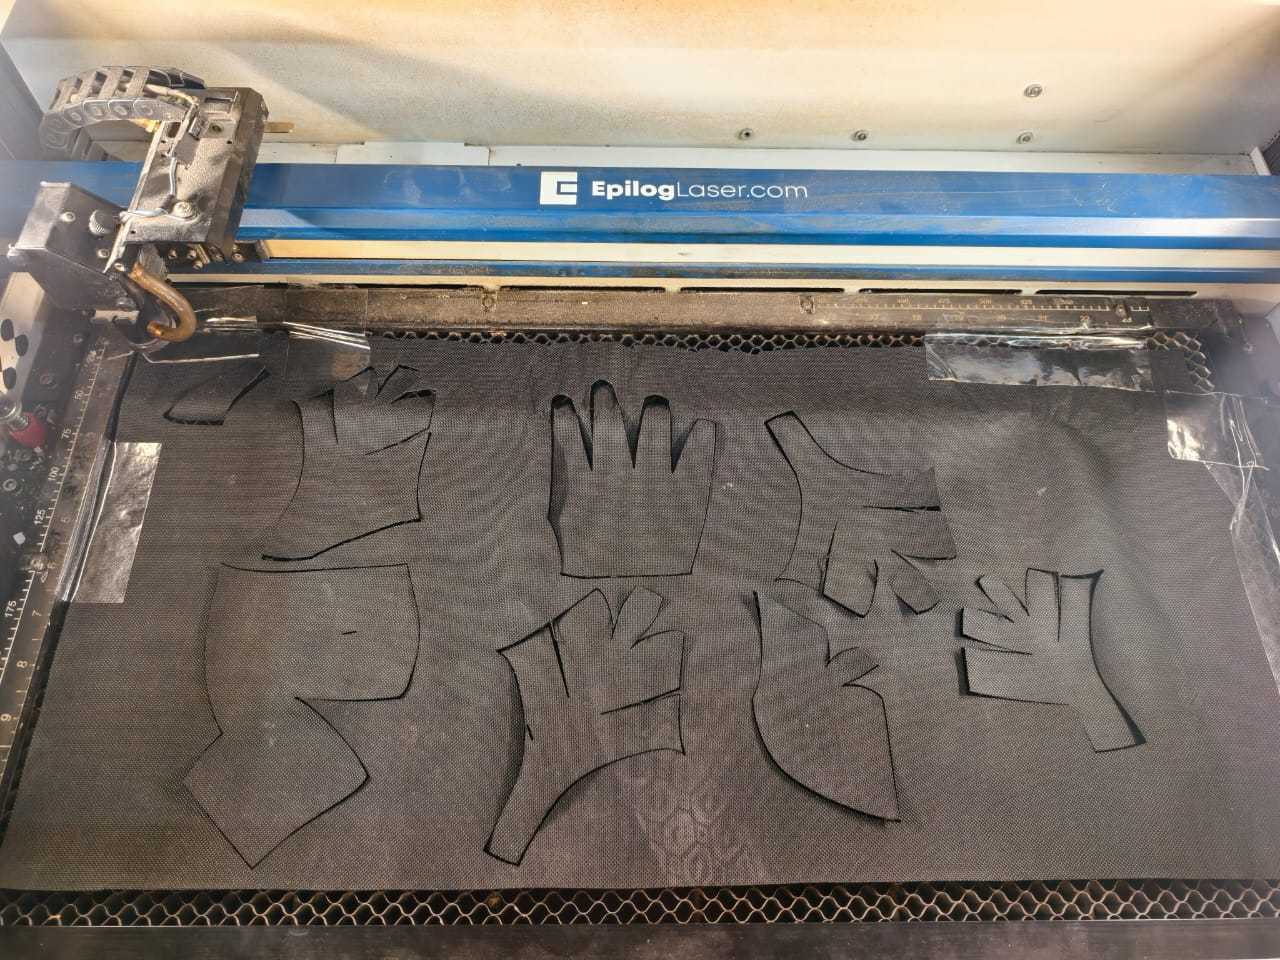
Oops!!!
I made a mistake by choosing the wrong fabric. It was too stiff, difficult to sew, and the final size was also smaller than I expected. So, I went back to the lab and decided to try a different fabric that I found at home. I kept the same laser cutter settings and cut the pattern again. This time, it worked much better—the fabric was softer, easier to work with, and the shape came out just right for me.
1
2
3
3D Models
upload DOWNLOADABLE 3d models of your files such as MakeHuman, Final 3d modelled body, 3D Scans, etc. Make sure to make them DOWNLOADABLE.
3D hand model
3D scanner of my head
Results
Finally!
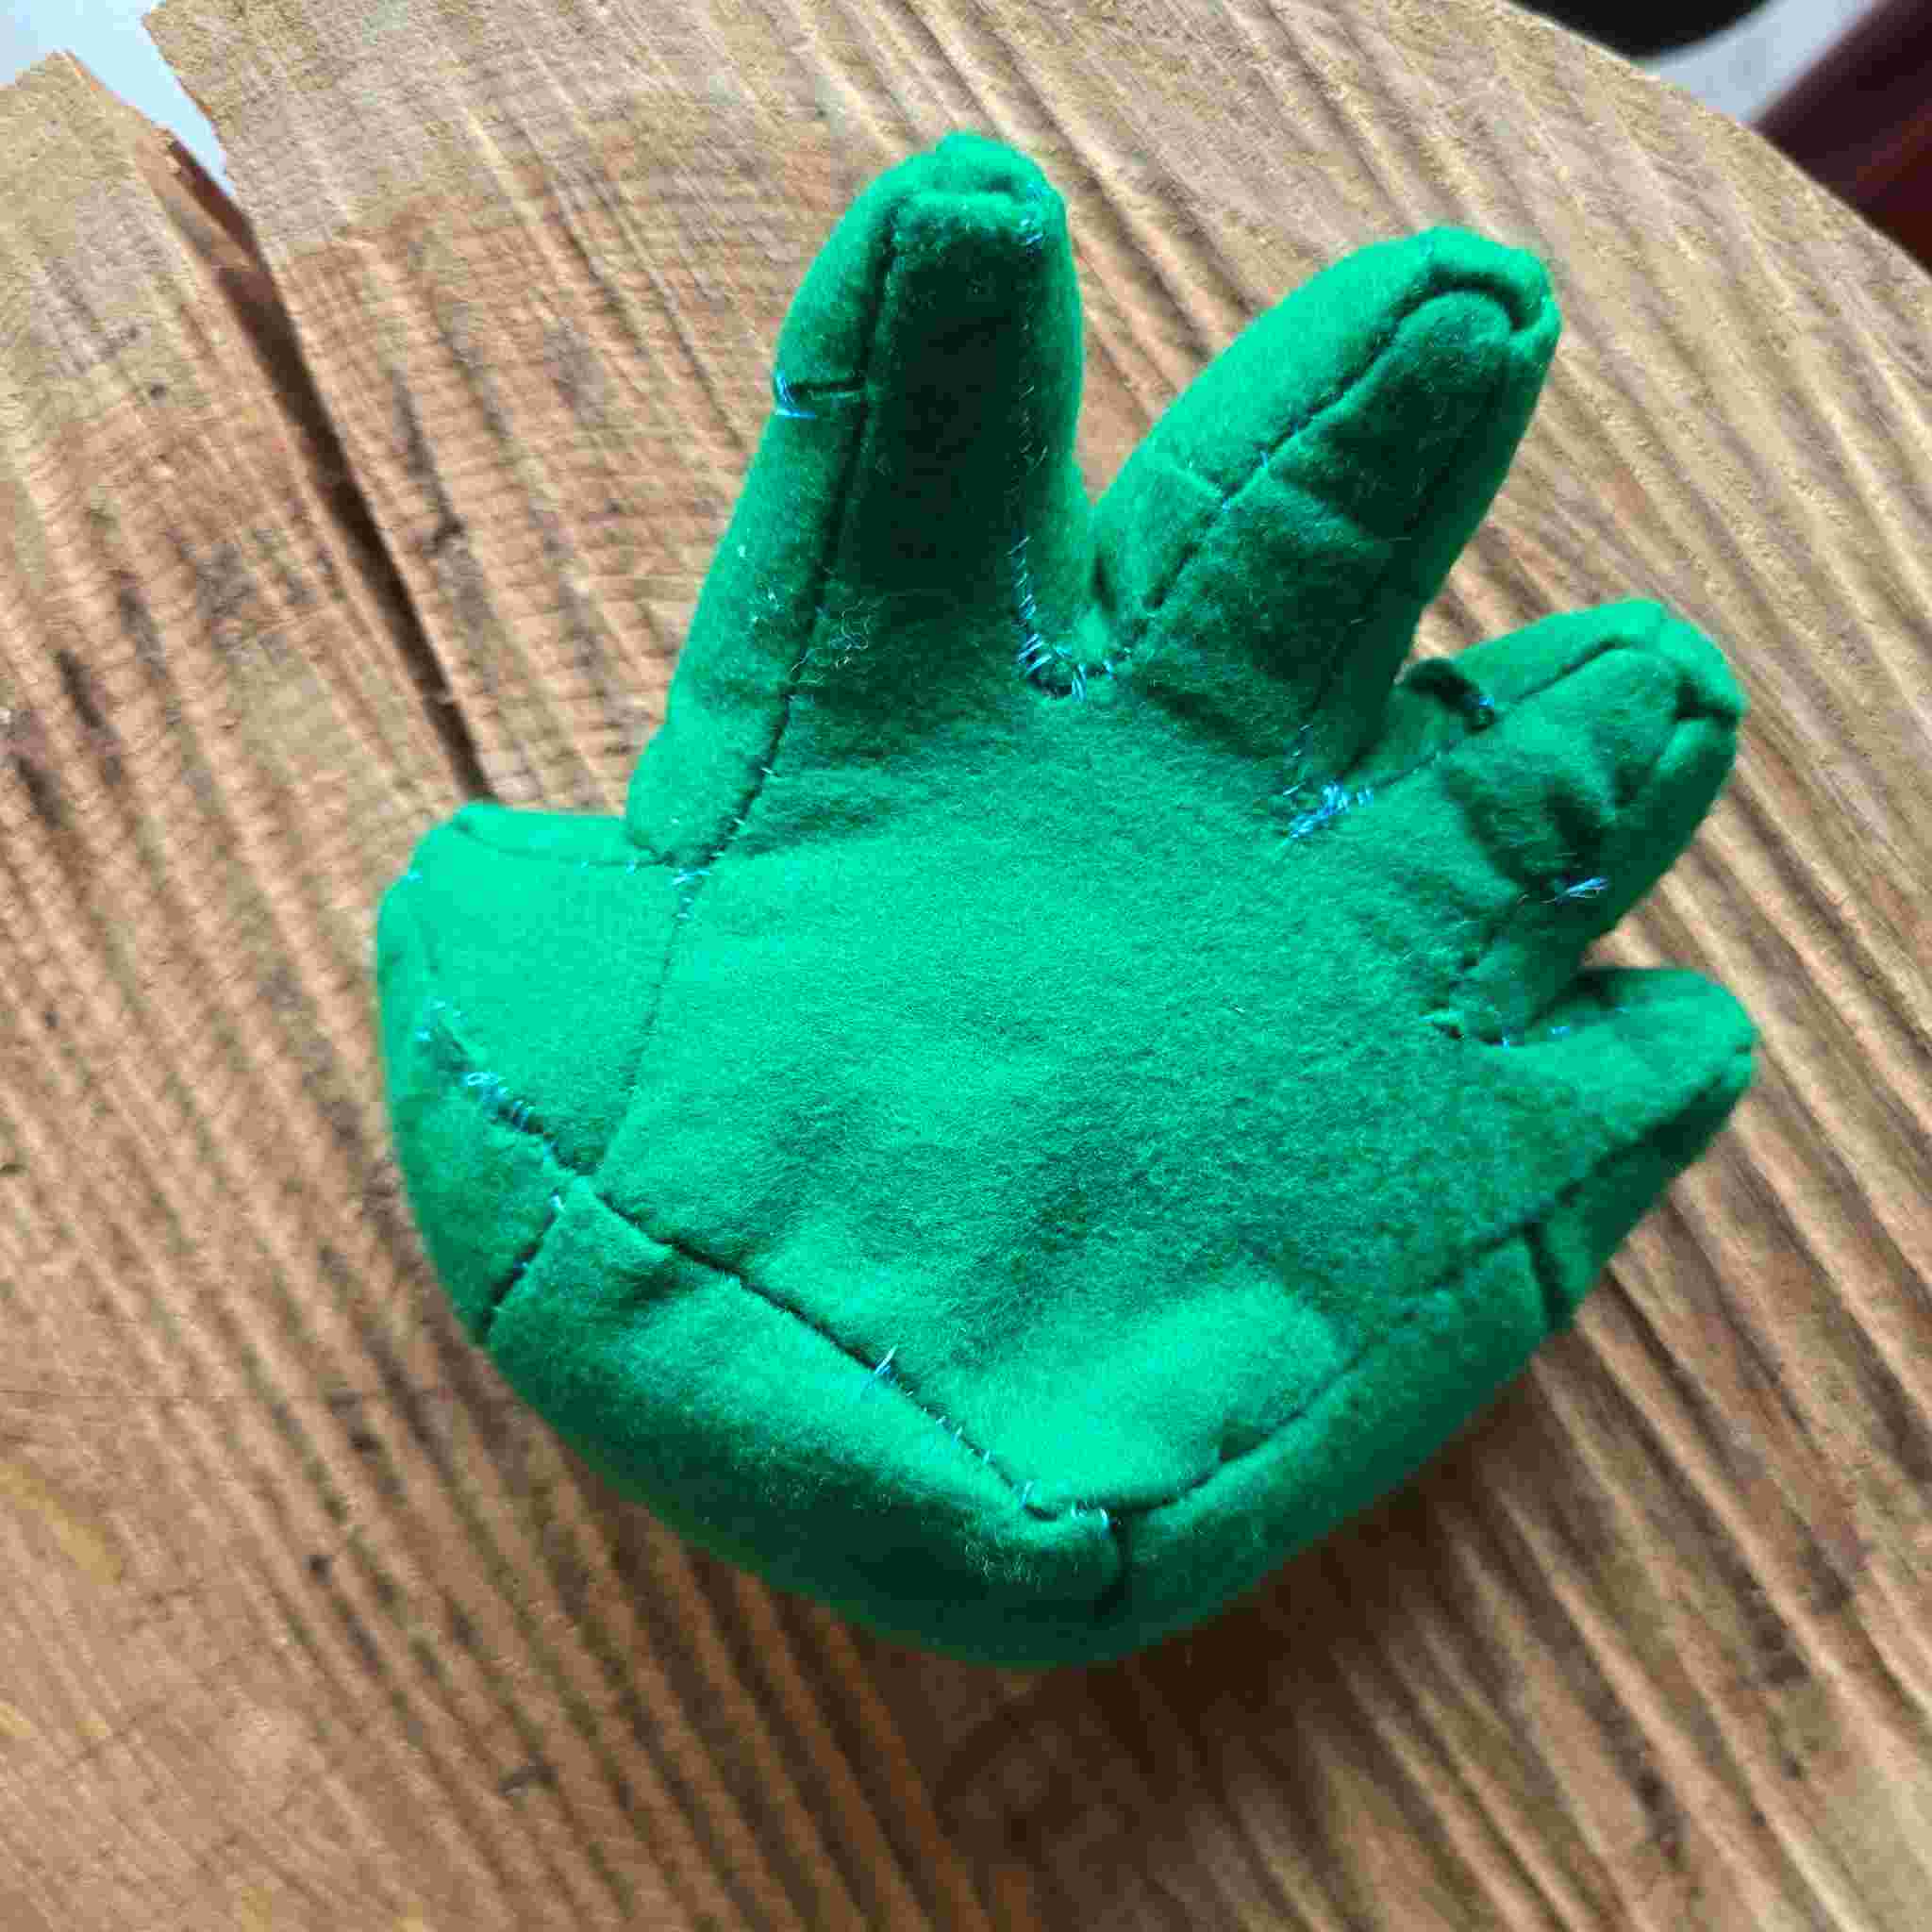
Yeah!! Finally, I was able to sew the pattern together and see my 2D pieces turn into a complete 3D body shape. It was really satisfying to see the final form come together after all the scanning, cleaning, cutting, and experimenting.
Tools
- Blender
- KIRI Engine app
- Seams to Sewing Pattern
- Image Compressor
- Claude
- ChatGPT
Weekly reflection & critical thinking
This week, I learned how to use the 3D scanner, Blender, Inkscape, and the laser cutter. I learned how to clean and work with my 3D scan, turn it into a 2D pattern, and prepare it for laser cutting. I also learned that the whole process requires patience because even a small mistake in one step can affect the final result.
One of the biggest things I learned was from my mistake in choosing the wrong fabric. It was too hard to sew and did not give me the shape I wanted, so I tried another, softer fabric and got a much better result. This experience helped me understand the importance of choosing the right material and testing before making the final piece. I believe the skills and lessons from this assignment will be very useful for my final project, especially when working with digital fabrication and textiles.
Fabrication files & References
-
File: 3d scan of my head ↩
-
File: 3d Hand design ↩
-
Reference: Sara; Digital Bodies; fabricademy.io; 2021 ↩
-
Reference: Mina's; Digital Bodies; fabricademy.io; 2024 ↩