BioChromes
Final work of this week
References, research & inspiration
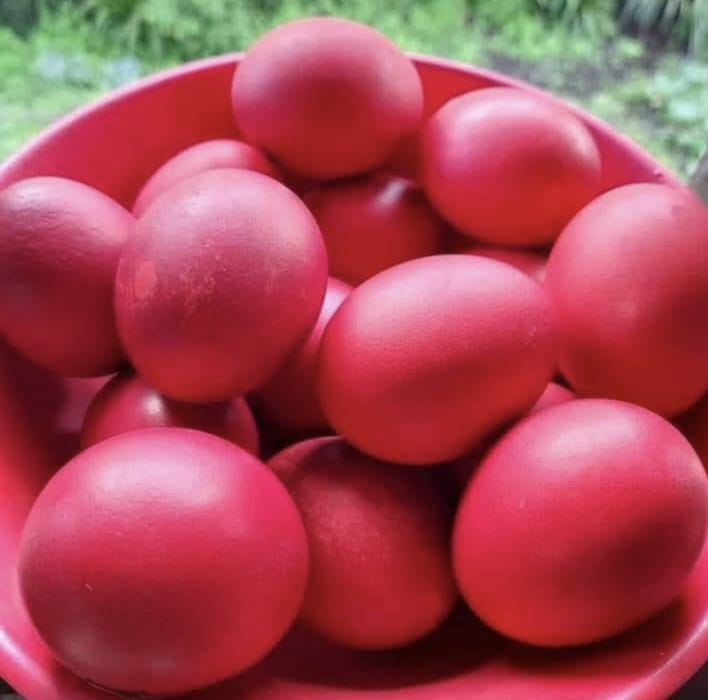
As a child, I remember playing with a plant commonly known as Rubia (Tshuthe), which produces a red colour. I used to apply the colour to eggs and turn them into beautiful shades of red. It was fun to play with these colourful eggs, and I never needed to use any artificial colours from the market. Back then, I had no idea that I was actually using natural dye from plants or that colours could be extracted from nature.
These childhood memories inspired me to try natural dyeing myself. I want to explore the plants and other natural materials around me, such as roots, leaves, flowers, and other parts of plants, to see what colours I can get from them.
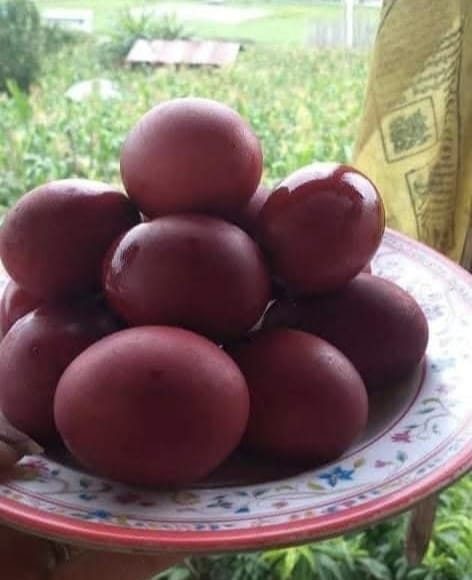
Natural Dyeing in Bhutan
Natural dyeing has been part of Bhutanese culture for many generations, long before synthetic dyes became widely available in the market. People used to extract beautiful colours from plants, insects, and minerals for everyday purposes, including dyeing clothes, painting, and traditional medicine.
Bhutan has a rich variety of plants because of its diverse environment, from the subtropical forests in the south to the alpine meadows in the north. This diversity offers many possibilities for natural dyeing. However, making natural dyes takes time and patience. The process can involve collecting and preparing raw materials, drying, fermenting, extracting colours, and mordanting the fabric. Each step can affect the final colour.
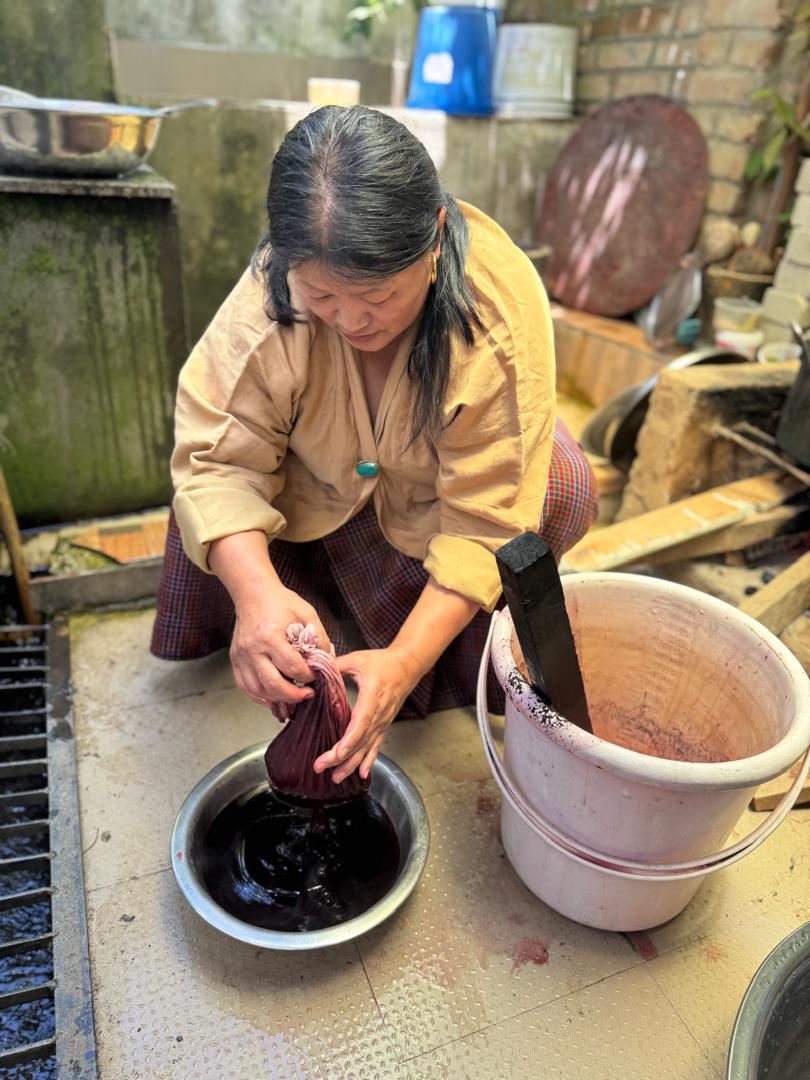
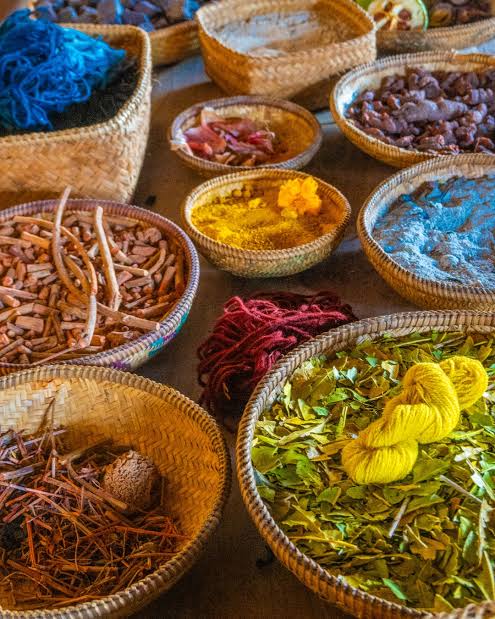
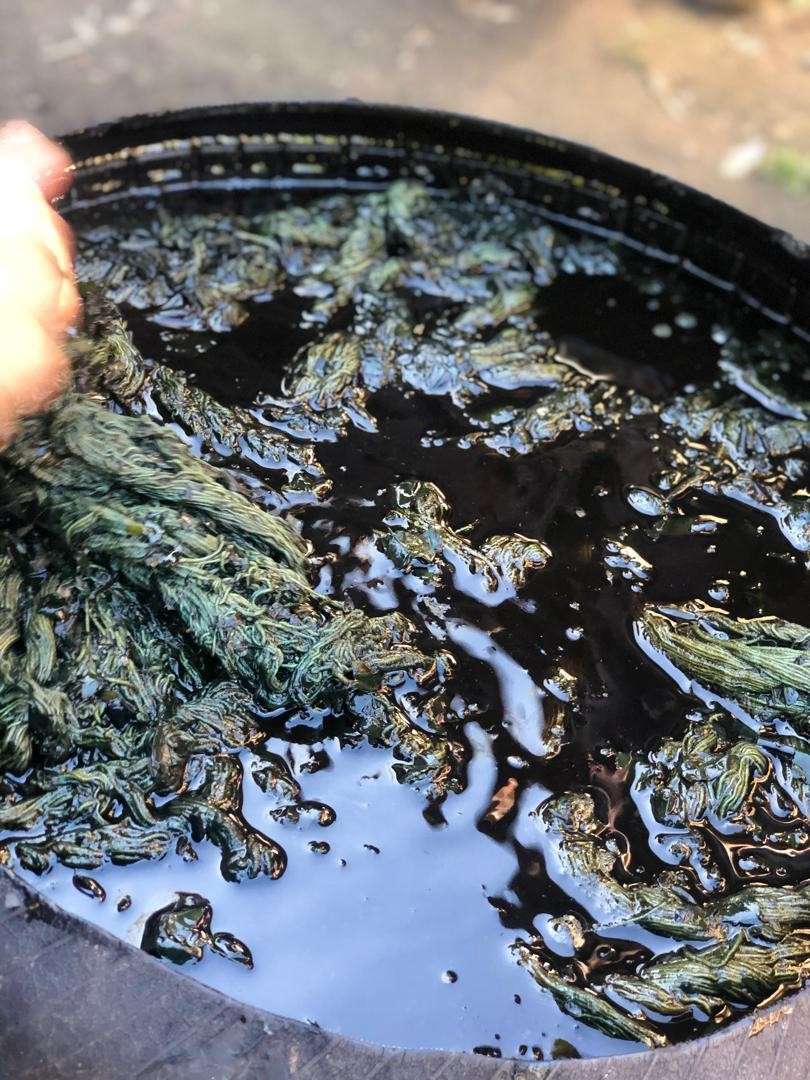
One thing I find interesting about natural dyes is the range of shades they can produce. The colours often have a depth and warmth that make them different from synthetic dyes. I want to learn more about how these colours can be extracted and how different plants and dyeing methods affect the results.
Learning About Deki's Natural Dyes
Deki's Natural Dyes is a family business in Bhutan that has passed down its knowledge and practices through three generations. The business produces natural dyes in a range of vibrant colours using raw materials available in nature.
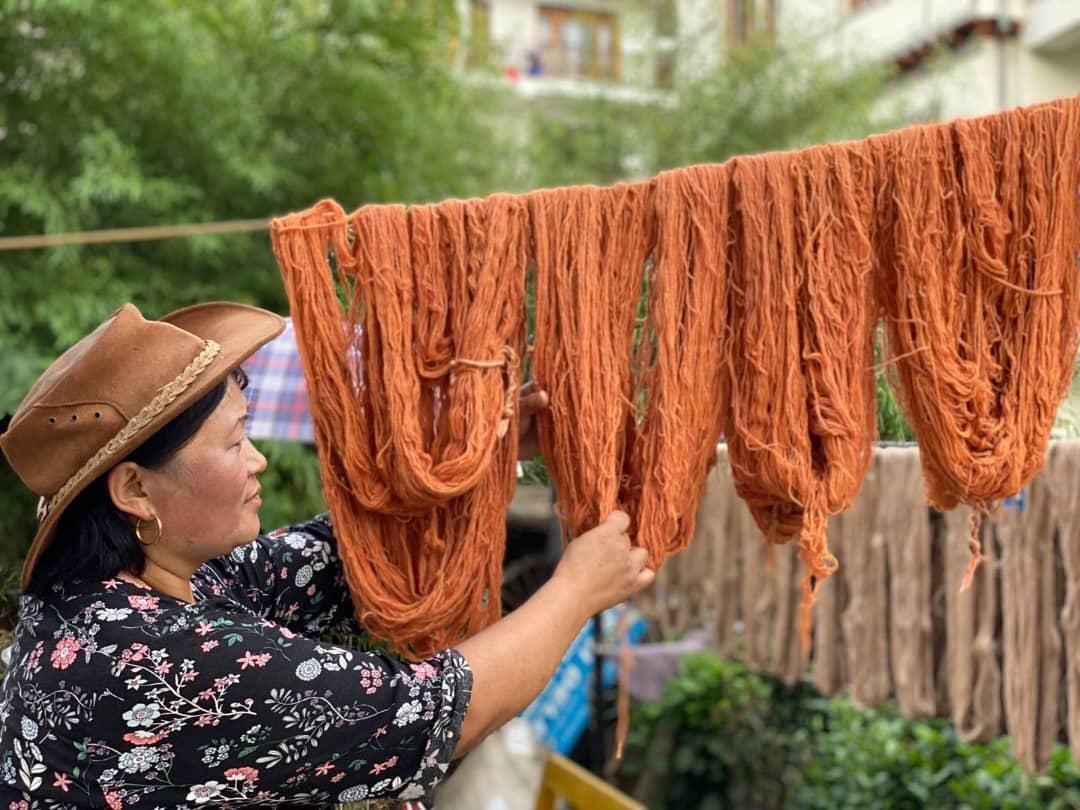
While researching natural dyeing, I came across Deki's work and became interested in learning more about it. I reached out to her daughter, Tshering Choden, and asked her a few questions about their work, the materials they use, and their dyeing process.
Some of the Interview Questions Asked to Tshering
1. Introduction: Could you introduce yourself and share how you started your journey in natural dye making?
I am Tshering Choden, a third-generation natural dyer, and natural dyeing has been a part of my life since childhood. I learned this traditional art by growing up alongside my mother, Deki Yonten, and my late grandmother, Kinzang Choden. I observed their work, learned from their experiences, and gradually developed my own knowledge and skills.
For me, natural dyeing is more than just a craft; it is a family tradition and a valuable part of our cultural heritage. The knowledge I carry today has been passed down through generations, and I feel a deep responsibility to preserve it and share it with future generations.
2. History: Could you tell me about the history of natural dyeing in Bhutan and the traditional knowledge passed down through generations in your family?
Natural dyeing has been an important part of Bhutan's traditional textile heritage for generations. Before synthetic dyes became widely available, natural materials from plants, roots, bark, leaves, nuts, and other locally available resources were used to produce colours for traditional textiles. Historically, natural dyes were used to colour fabrics for various traditional purposes, including textiles associated with monastic attire and the garments worn by religious practitioners. These textiles required particular colours, and dyers relied on their knowledge of natural materials and traditional dyeing methods to achieve the desired results. In my family, this knowledge has been passed down from my grandmother and aunts to my mother, and then to me. Much of what I learned came through observation and practical experience rather than written instructions. By watching the older generations prepare dye materials, handle yarn, select mordants, and work with different colours, I gradually learned the techniques myself. Every generation has contributed to preserving this knowledge. For us, natural dyeing is not simply about producing colour; it is about maintaining a connection to our ancestors, our natural environment, and our cultural identity.
3. Raw Materials: What raw materials do you use to make natural dyes, and which locally available plants produce the best colours?
We use a wide variety of natural materials to produce dyes. In fact, many plants can produce colour because they contain natural colouring compounds, known as pigments or colourants. Different parts of a plant, including its roots, leaves, bark, fruits, seeds, and shells, can produce different colours depending on their chemical composition. Among the materials I use, madder root and walnut husks or shells are particularly valued for the colours they produce. Madder root is traditionally associated with red and reddish shades, while walnut husks and outer coverings can produce rich brown and other earthy tones. The final colour depends on several factors, including the plant species, the part of the plant used, its maturity, the season of collection, the preparation method, and the mordant used. Working with locally available materials allows us to explore the colours offered by our natural surroundings. It also encourages us to appreciate the diversity of plants and other resources that can be used in traditional dyeing.
4. Indigo Dye: How do you make indigo dye? What raw materials do you use, and how do you extract the blue colour from the plant?
Indigo dyeing is different from many other forms of natural dyeing because the blue colour develops through a process involving fermentation and oxidation. Traditionally, indigo plant material is placed in a clay pot with water and left to ferment. The pot is sealed with clay or mud to maintain the conditions needed for the fermentation process. During this stage, the natural compounds in the plant undergo changes that help make the indigo colourant available for further processing. After fermentation, the liquid is processed to obtain the indigo colourant. When the dissolved indigo precursors come into contact with oxygen in the air, oxidation takes place, allowing the characteristic blue pigment to develop. Depending on the traditional method being used, the resulting pigment may be collected and prepared for dyeing. When dyeing yarn, the indigo must be prepared in a form that allows the colour to penetrate the fibres. The yarn is removed from the dye bath and exposed to air, where oxidation causes the blue colour to develop. Indigo dyeing requires patience and careful observation. The fermentation conditions and the stages of oxidation are important in determining the quality and strength of the final blue colour.
5. Mordants: What mordants do you use? Do you use traditional, locally available materials or purchase them from town, and which do you recommend for beginners?
We use traditional mordants and locally available mineral materials to help develop different colours and improve the way dyes interact with yarn. Some of the materials we use are obtained from stones found in Bhutan. We source certain materials from the Lhuntse area, while others are collected from steep cliffs in Kortoe. Mordants are important in natural dyeing because they can influence the final colour, its intensity, and how well the colour attaches to the fibres. Different mordants can produce different shades even when the same plant dye is used. For beginners, I would recommend starting with familiar, locally available materials and learning how they affect the dye colour through small, controlled experiments. It is important to understand each material before using it on a larger quantity of yarn. Beginners should also be careful when handling mineral materials and should not assume that every naturally occurring substance is safe to use.
6. Fabric and Testing: Which fabrics work best with natural dyes, and how do you test colour fastness? What simple testing methods or tools would you recommend?
Natural dyes generally work well with natural fibres, particularly those made from plant or animal sources. The results depend on the type of fibre, the dye material, and the preparation process. In our traditional practice, we work with yarn and prepare it carefully before dyeing. Traditionally, we assess the quality of dyed yarn by washing it repeatedly until the water runs clear. We also allow the yarn to dry in sunlight and air, observing how the colour develops and whether it changes during the process. However, traditional observation alone does not provide a complete scientific assessment of colour fastness. As part of an ADB-supported project in India, we also submitted our products to testing laboratories to evaluate their quality. For beginners, I recommend washing a small sample of dyed yarn separately and observing whether the colour bleeds into the water. It is also useful to compare the colour before and after washing and to keep a sample exposed to light alongside one stored away from light. These simple methods provide an initial indication of colour performance, while laboratory testing can offer more reliable results for wash fastness and light fastness.
7. Dye-Making Process: Could you explain your complete dye-making process, from preparing the raw materials to dyeing the fabric, including the quantities, temperature, and timing? Our dyeing process begins with collecting suitable raw materials from nature. We select the materials according to the colour we want to achieve and prepare them for extraction. The general process involves the following steps:
1.  Collecting the raw materials: We gather the required plant materials or other natural dye sources, such as roots, bark, leaves, or walnut coverings.
2.  Preparing the yarn: We wash the yarn to remove dirt and other impurities so that the dye can penetrate the fibres more evenly.
3.  Preparing the dye bath: We boil the collected raw materials in water to extract their colour. The length of time required depends on the material being used.
4.  Straining the dye: We separate the liquid dye from the solid plant materials to obtain a dye bath suitable for colouring the yarn.
5.  Preparing the mordants: We prepare different mordants in separate containers. Different mordants can influence the shades produced by the same dye.
6.  Dyeing the yarn: We place the prepared yarn in the dye bath and allow it to absorb the colour. We monitor the colour as it develops.
7.  Developing different shades: By using different mordants and varying the dyeing process, we can obtain several shades from a single primary dye source.
8.  Washing and drying: Once the desired colour is achieved, we wash the yarn to remove excess dye and allow it to dry.
The quantities, temperature, and timing vary according to the raw materials, yarn type, and desired colour. We rely on experience and observation to determine the appropriate conditions for each dye. There is no single recipe that works for every plant or fibre. With experience, a dyer learns to recognise the changes in the dye bath and adjust the process to achieve the desired results.
8. Liquid vs. Powder Dye: What is the difference between liquid and powdered natural dyes? How are they prepared, stored, and preserved, and which form is better for beginners?
In our traditional yarn-dyeing practice, we mainly use liquid dyes, particularly when working with plant materials. Liquid dyes can be prepared by extracting colour from the raw materials in water and using the resulting dye bath directly. Powdered natural colourants are another form, and preparing them generally involves additional processing to obtain a dry material that can be stored and used later. In our experience, powdered colourants are a newer technique in our practice, and we associate some powdered materials particularly with mineral sources. For plant-based dyes, I find liquid dyes more practical because they allow us to work directly with the extracted colour. They are familiar to us and fit well with our traditional yarn-dyeing methods. We store prepared dye materials in containers with tightly closed lids. Proper storage helps protect them from contamination and unwanted changes. Liquid plant dyes may spoil or change over time, so they should not be assumed to remain usable indefinitely. For beginners, I recommend starting with liquid plant dyes. This makes it easier to observe the colour extraction process, understand how different plants behave, and experiment with different mordants.
9. Colour and Quality: How do you control the final colour and ensure it lasts through washing and exposure to sunlight? What factors affect the colour outcome most?
Controlling the final colour requires experience, patience, and careful attention throughout the dyeing process. The colour obtained from a natural material can vary depending on the raw material, the quantity used, the preparation method, the yarn, and the mordant. We begin by selecting suitable raw materials and preparing the yarn properly. We then extract the colour and use appropriate mordants to help achieve the desired shade. When necessary, we repeat the dyeing process to build up the colour gradually. An important part of our practice is washing the dyed yarn until the water runs clear. This helps remove excess dye that has not adequately attached to the fibres. We then dry the yarn in sunlight and moving air, while observing how the colour develops. To improve colour quality, it is important to understand that achieving a strong initial colour does not automatically mean the dye will remain stable over time. Wash fastness and light fastness are separate properties, and some natural colours are more sensitive to washing or sunlight than others. The main factors affecting the final result include:
•   The type and quality of the natural dye material.
•   The amount of dye extracted and its concentration.

•   The type of yarn and how well it has been prepared.

•   The type of mordant used and the method of application.

•   The dyeing temperature and duration.

•   The number of dyeing cycles.

•   The washing, drying, and storage conditions.
By understanding these factors and testing our work, we can improve consistency while continuing to respect traditional dyeing methods.
10. Advice for Beginners: What are the most common mistakes in natural dye making, and what advice would you give someone who wants to experiment with locally available plants and develop their own natural dyes?
One of the most common mistakes beginners make is thinking that once they obtain a colour from a plant, the dyeing process is complete. In reality, getting the first colour is only the beginning of the process. The dyed yarn needs to be washed and assessed carefully. We often have to repeat parts of the process and continue washing until the water runs clear and the colour becomes more stable. We also need to observe whether the yarn retains its colour after washing and drying.
Some beginners assume that obtaining an attractive colour means they have mastered natural dyeing. They may begin selling their products before properly testing the quality and durability of their dyes. When the colour later fades or runs during washing, customers may lose confidence in the product, damaging the dyer's reputation and the trust they have built in the market. My advice to beginners is to be patient and take the time to understand the entire process. Experiment with locally available plants, record the materials you use, and observe how different mordants affect the results. Test small quantities before dyeing larger batches, and do not assume that a colour is permanent simply because it looks beautiful when first produced. Natural dyeing is a skill that develops through repeated practice, observation, and learning from mistakes. We must respect the process and remember that producing a beautiful colour is only one part of making a good-quality dyed textile. For those of us who have inherited this knowledge, it is also important to preserve traditional methods while exploring ways to improve quality and meet the expectations of today's market. In this way, we can help ensure that natural dyeing remains a living tradition for future generations.
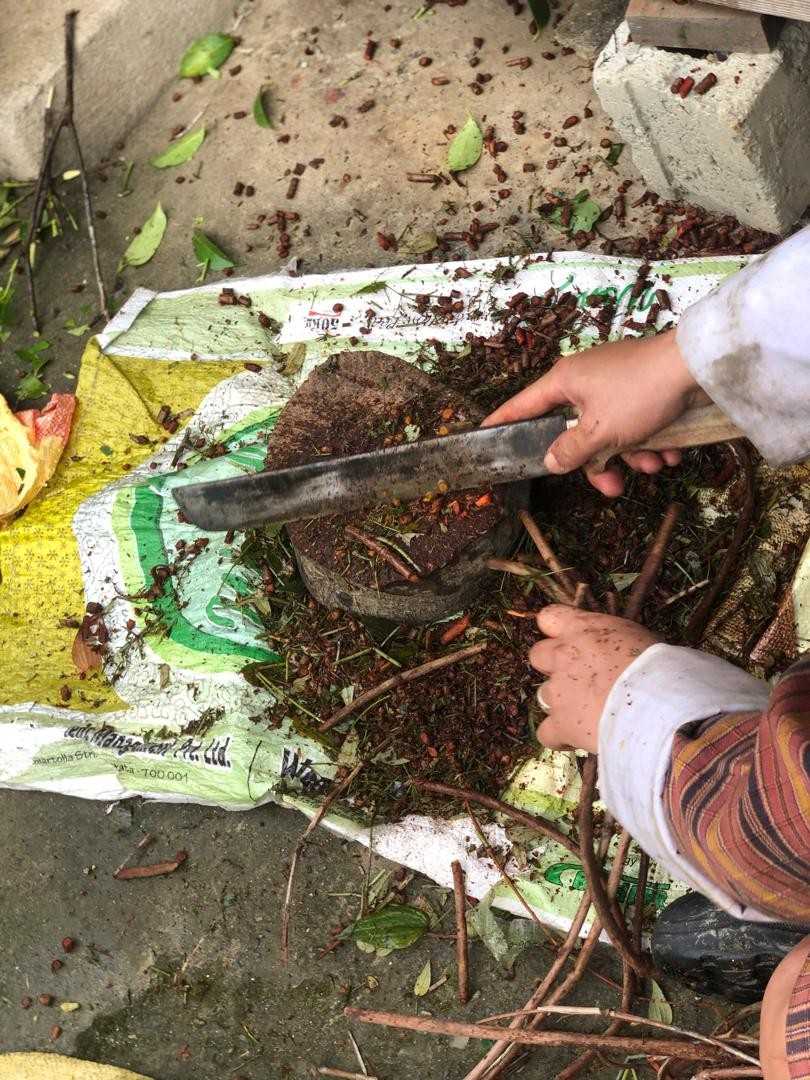
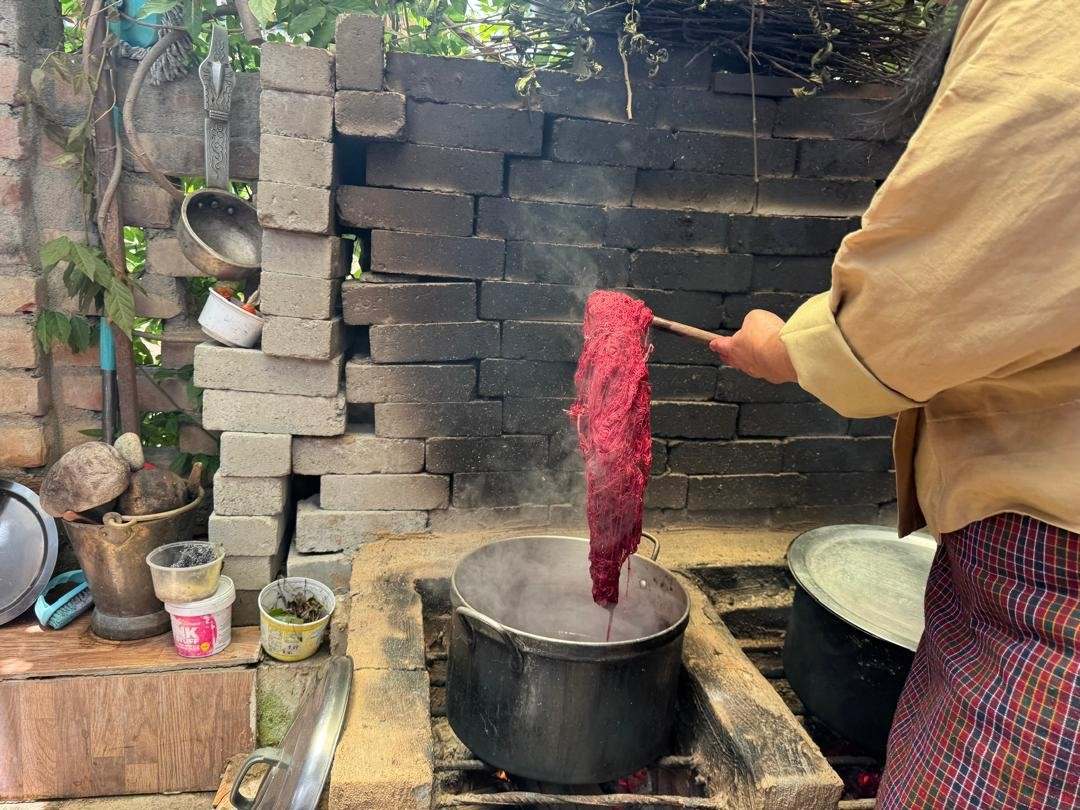
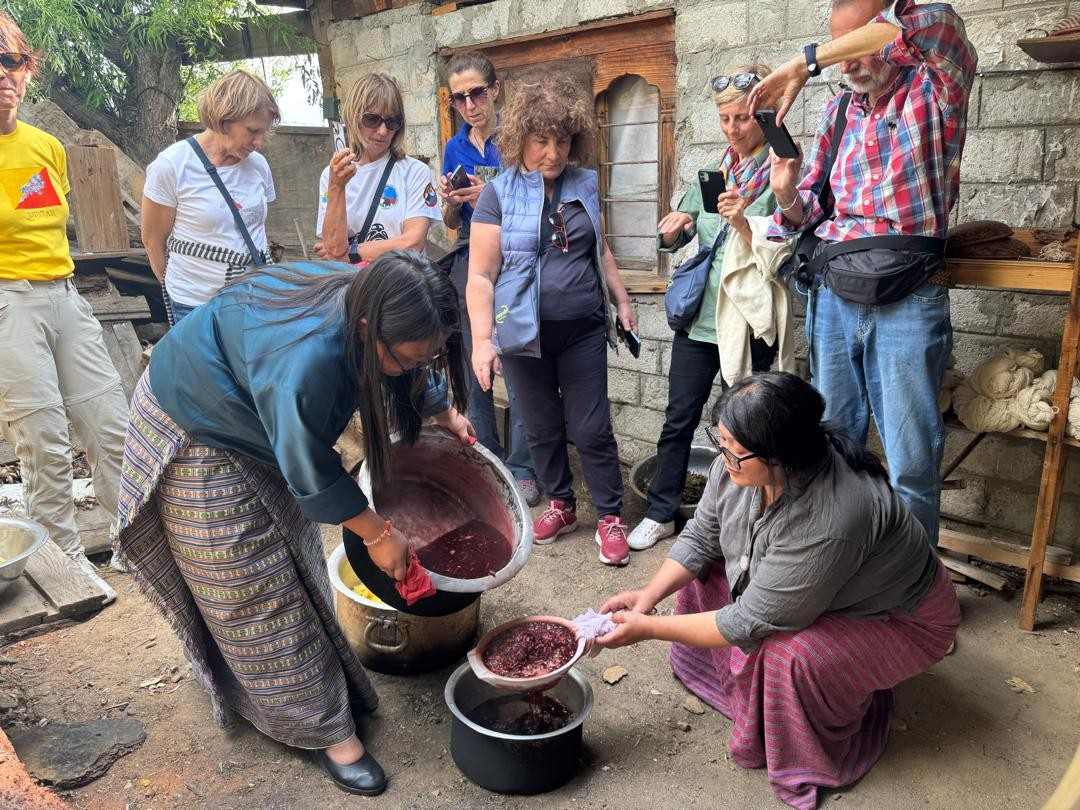
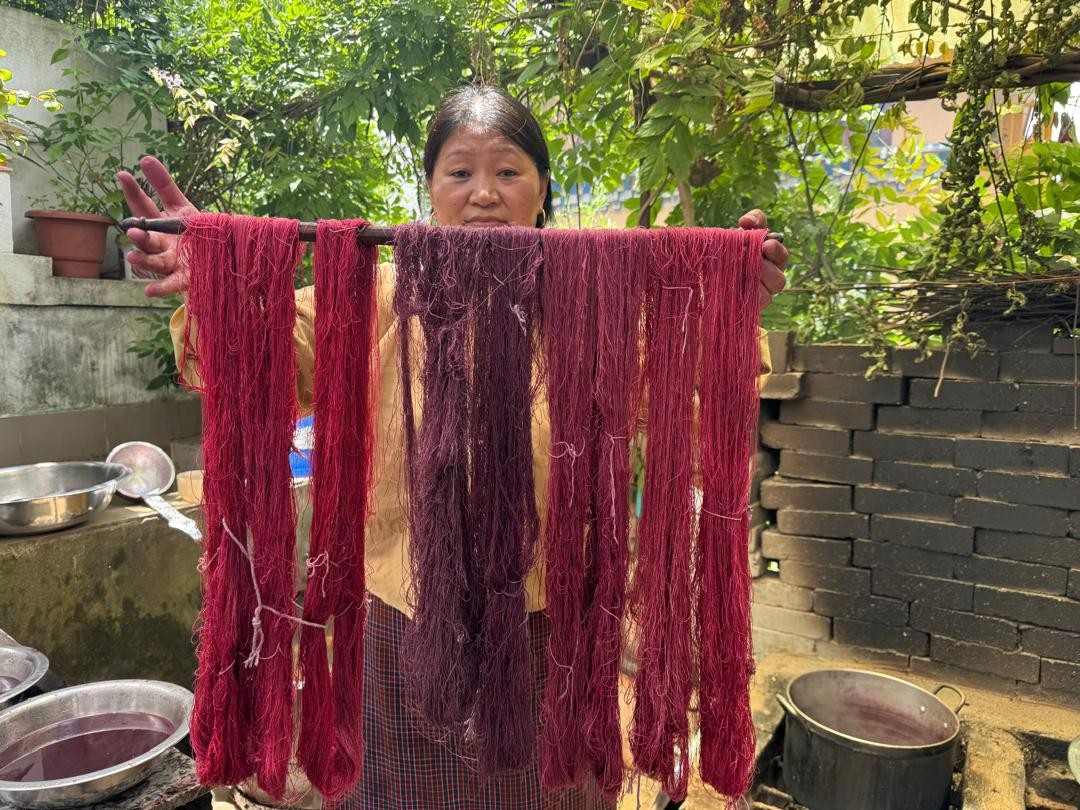
I was particularly interested in how they continue to use traditional dyeing methods while exploring different ways to extract colours from natural materials. Deki's Natural Dyes works with natural fibres such as cotton, wool, and silk, using dyes derived from plants like turmeric, indigo, and pomegranate to create different shades, including reds, pinks, and blues.
I also found it interesting that their work involves researching ways to extract colours from plant and vegetable waste. This made me think about how materials that are often thrown away could be used for something valuable. Learning from their experience will help me understand natural dyeing better and explore how I can apply these methods in my own experiments.
Process and workflow
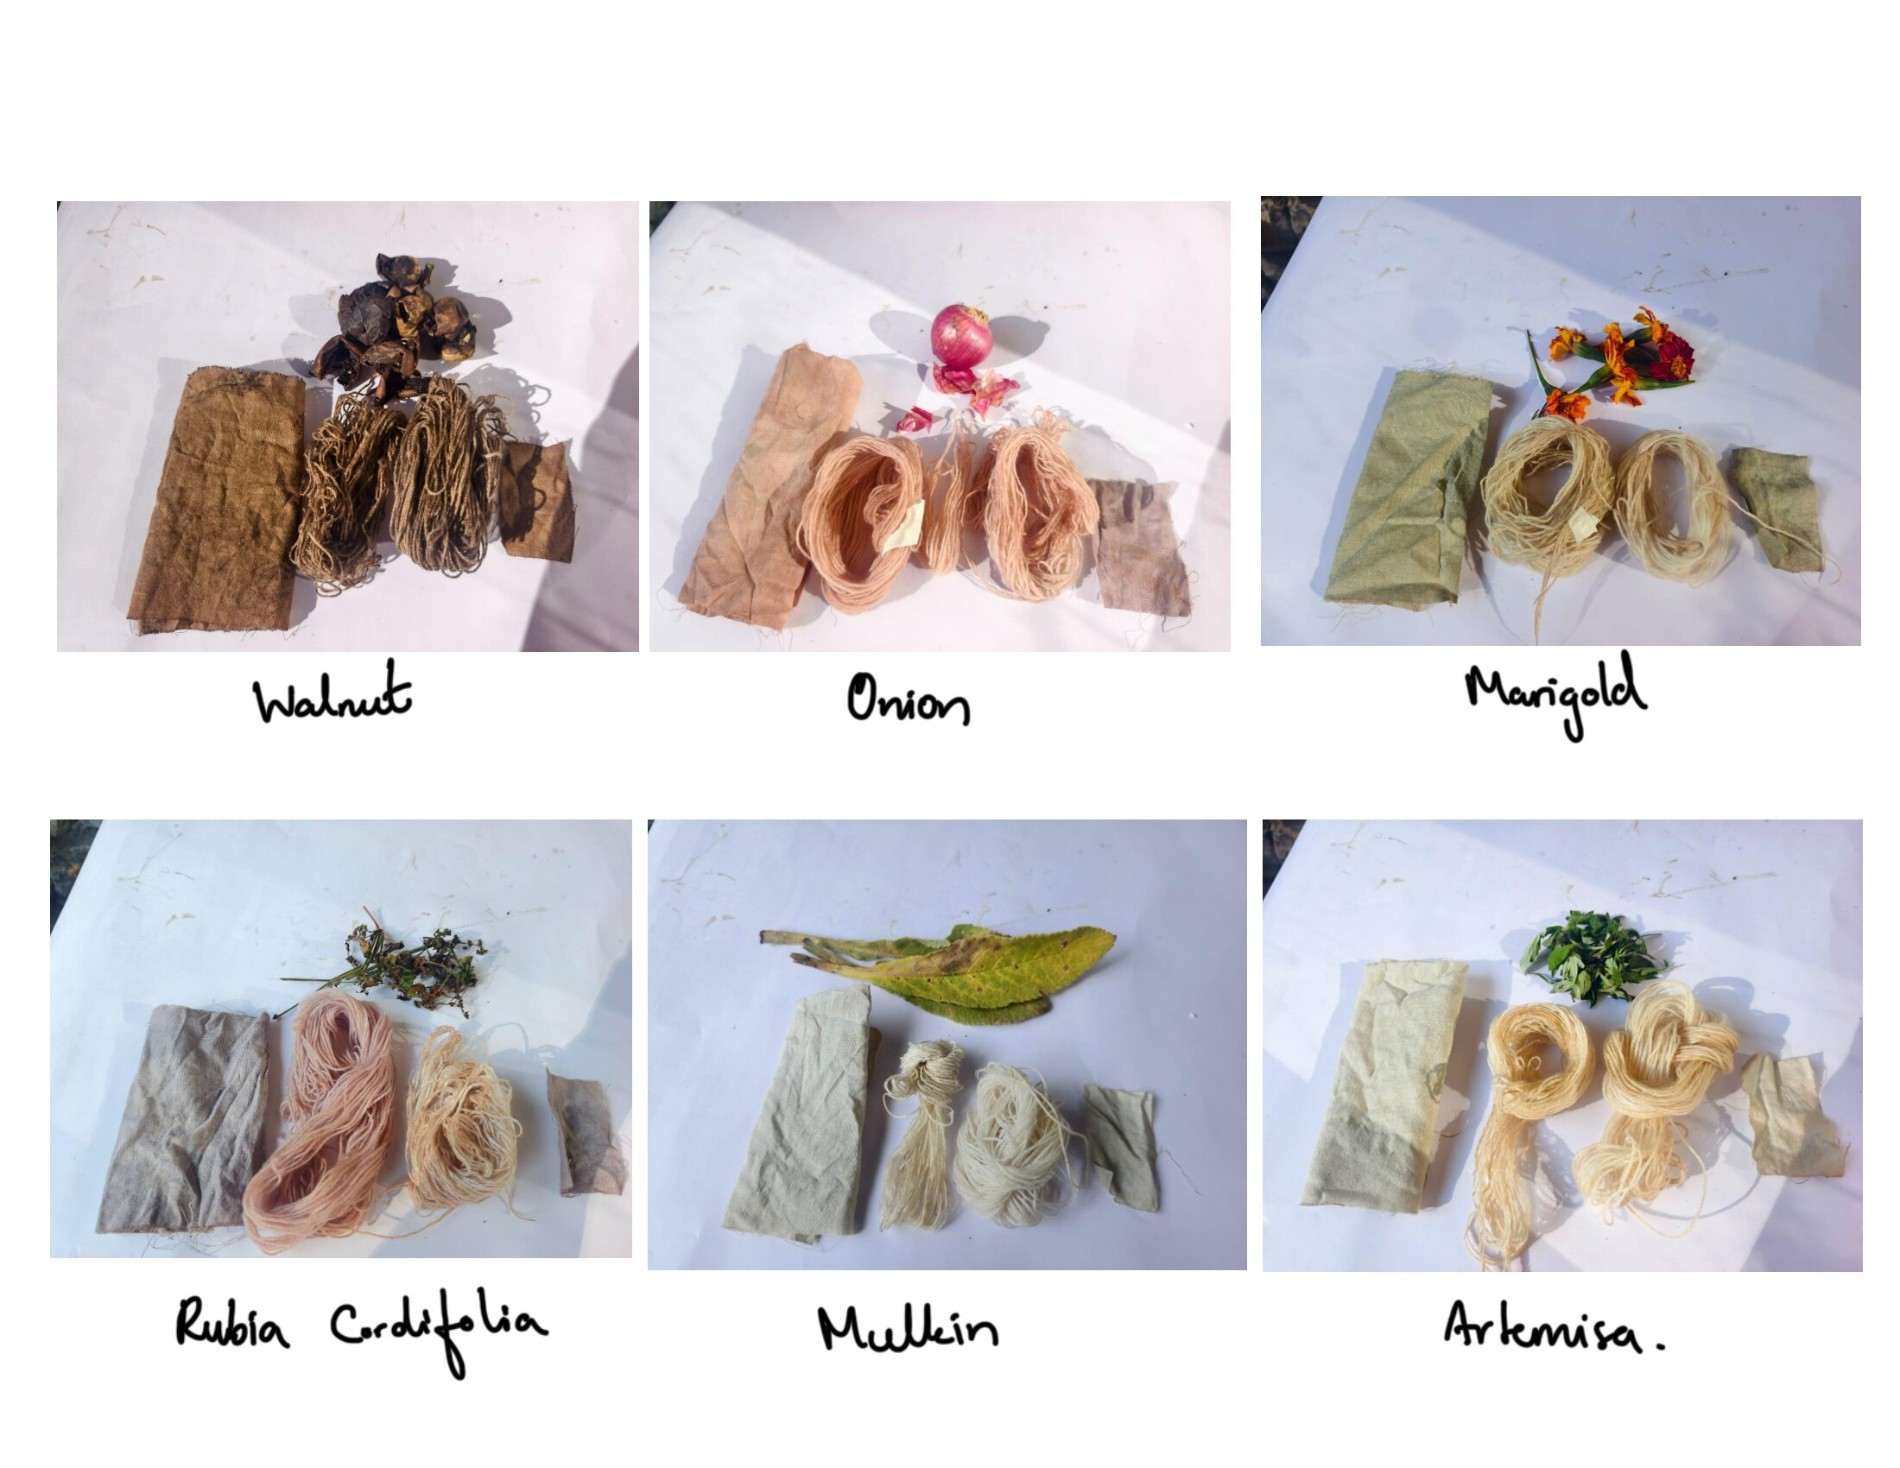
Since I wanted to extract natural dyes from the materials available around me, the first step was to identify places where I could collect the raw materials. I decided to experiment with six different natural dye sources. So far, I have collected walnut peel, onion peels, marigold flowers, and Rubiarubia cordifolia , mullein.
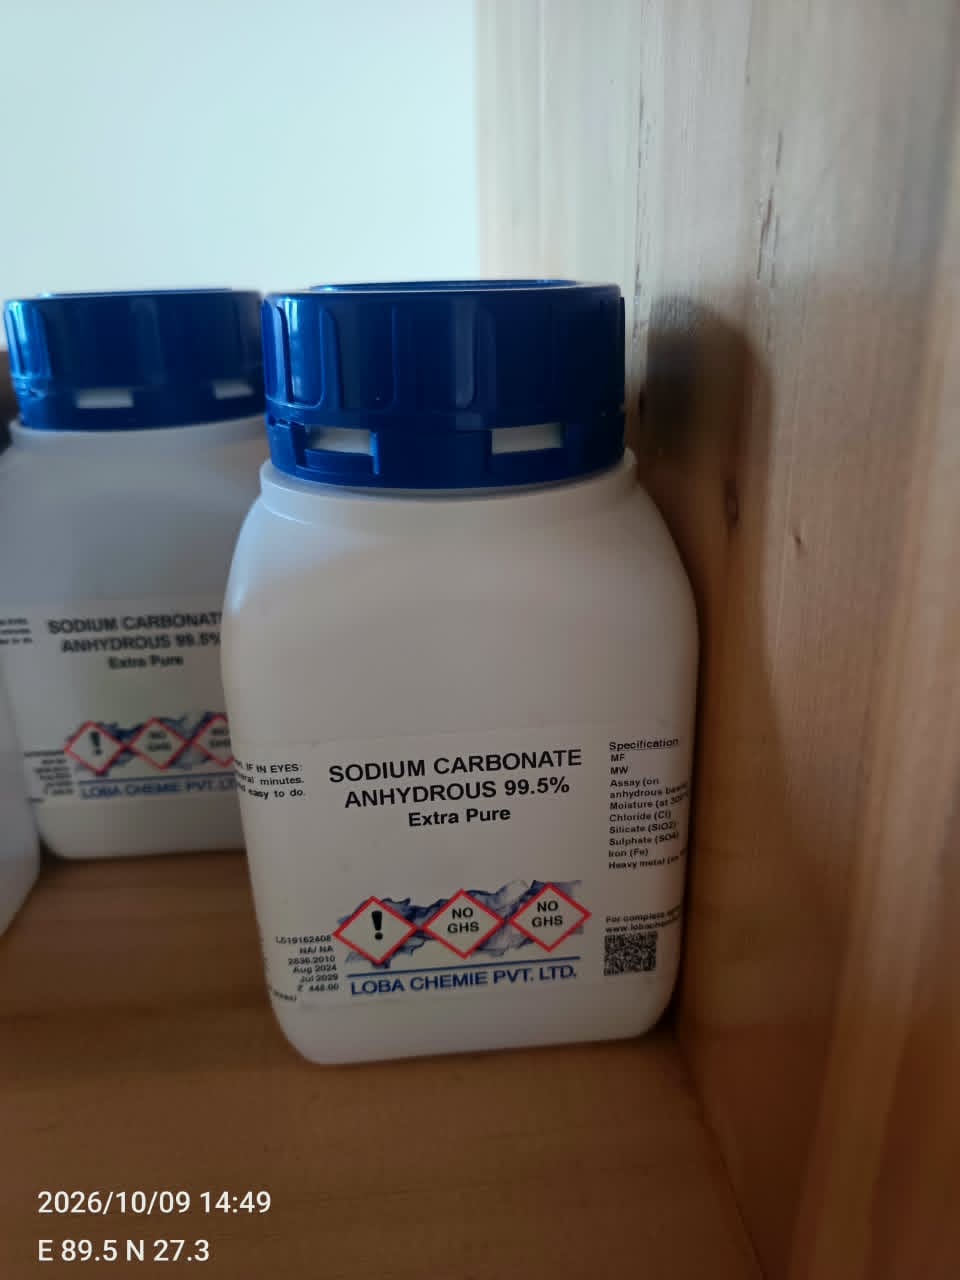
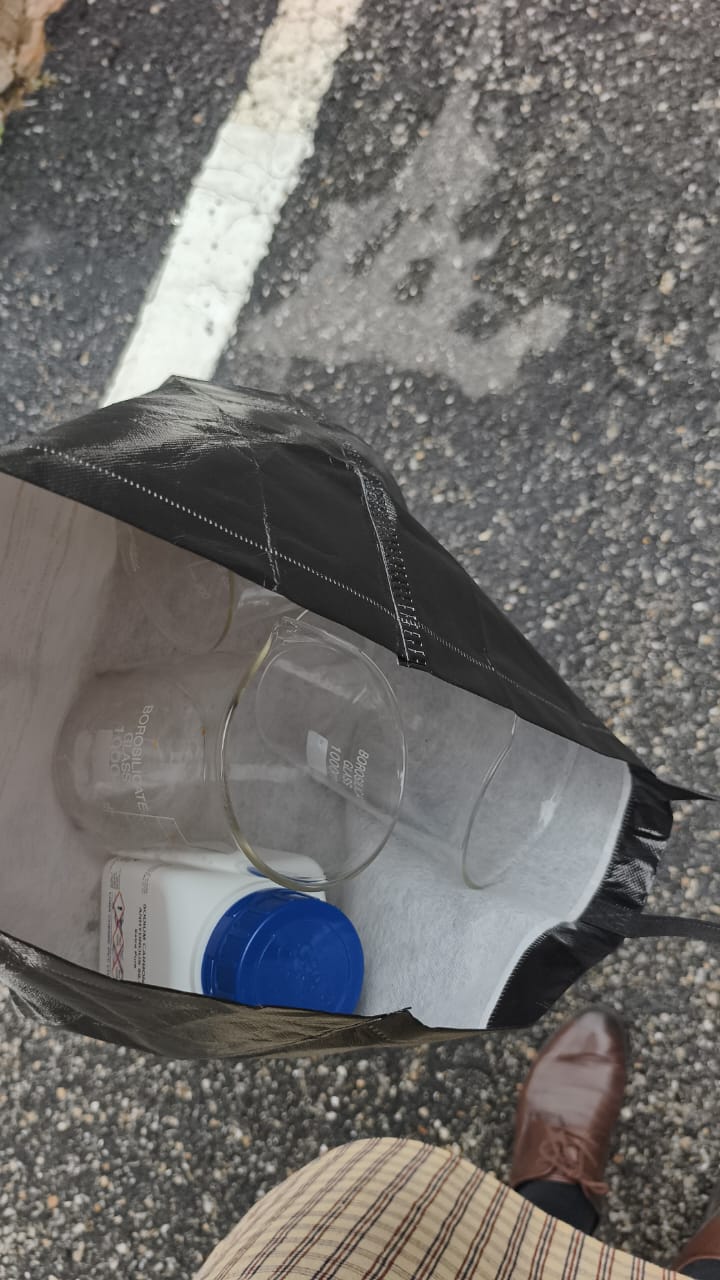
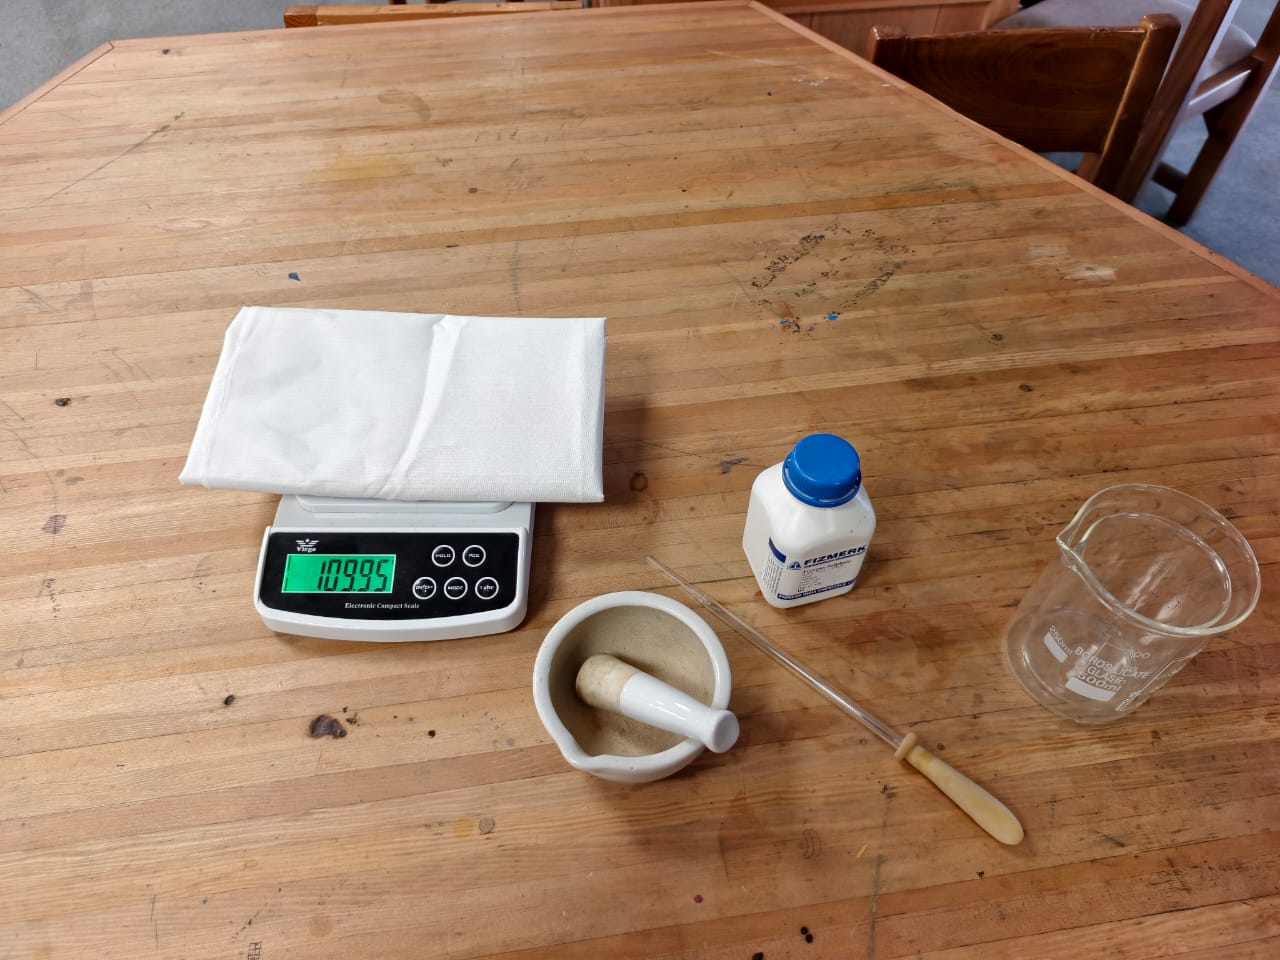
Step 1 Collecting instrucment and breakers and weighting machine from the school lab
Before collecting the raw materials from nature, I went to the school chemistry lab to gather the equipment and materials I needed for the dye extraction process. I collected soda ash, ferrous sulphate, a weighing machine, beakers, safety glasses, and gloves. The lab did not have alum, so I decided to work with the materials that were available.
I needed the weighing machine to measure the materials, the beakers to prepare the dye solutions, and the safety equipment to protect myself while working with the chemicals. I also collected soda ash for scouring the cotton fabric and ferrous sulphate for mordanting.
Step 2 Prepare Fabric: Scouring + Mordanting
As i could not get different types of fabic to by near by town. however i management to get the cotton and wool(wool not 100 percent wool, it mixed). i try to do a experment with the wool, espically adding with zero mordant and with mordant.For now i am using ferrous suplate to do mordanting of my wool fabric But for cotton i did added frooius sulphate.
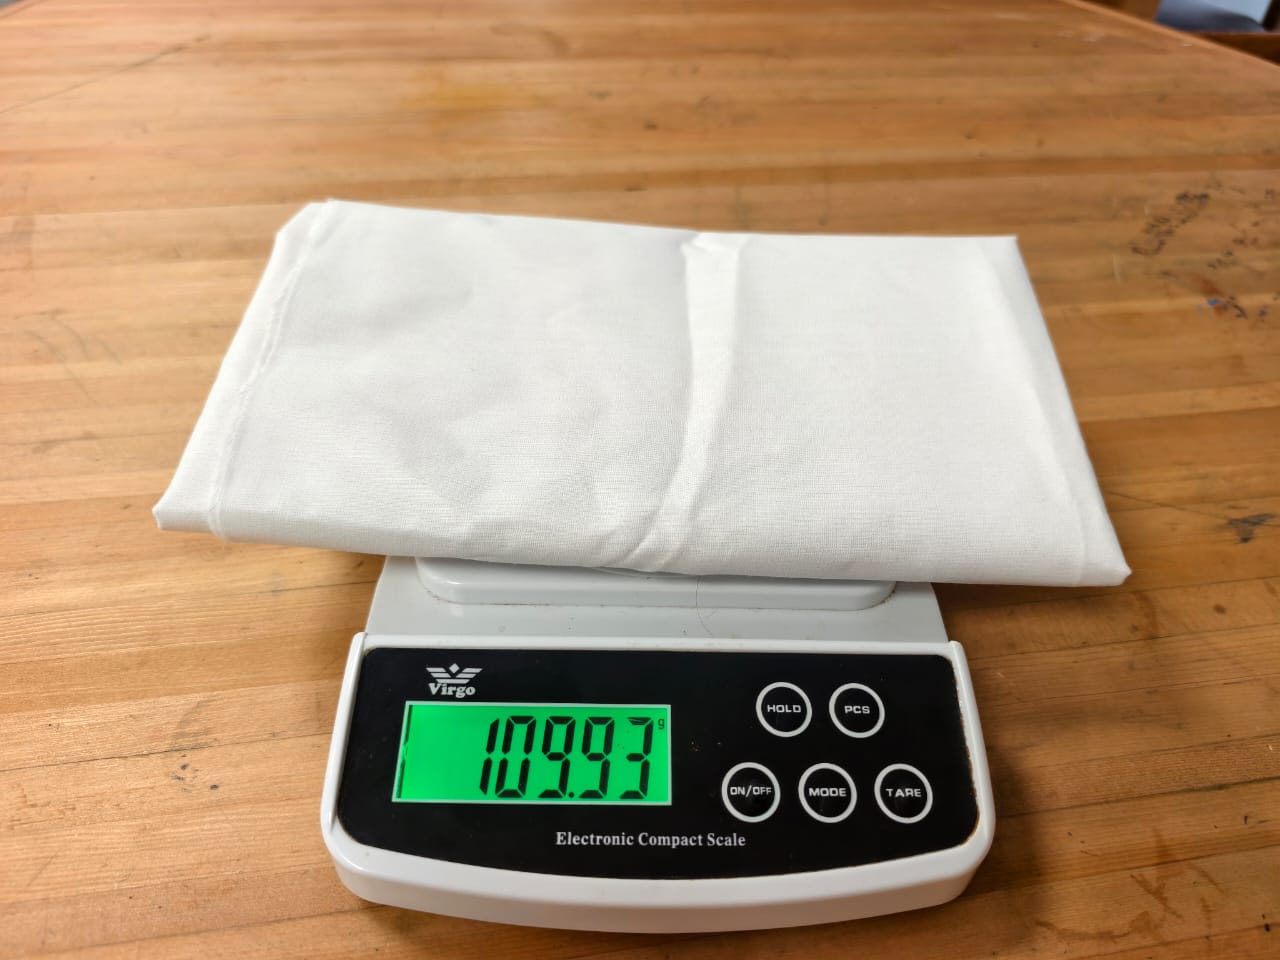
Cotton
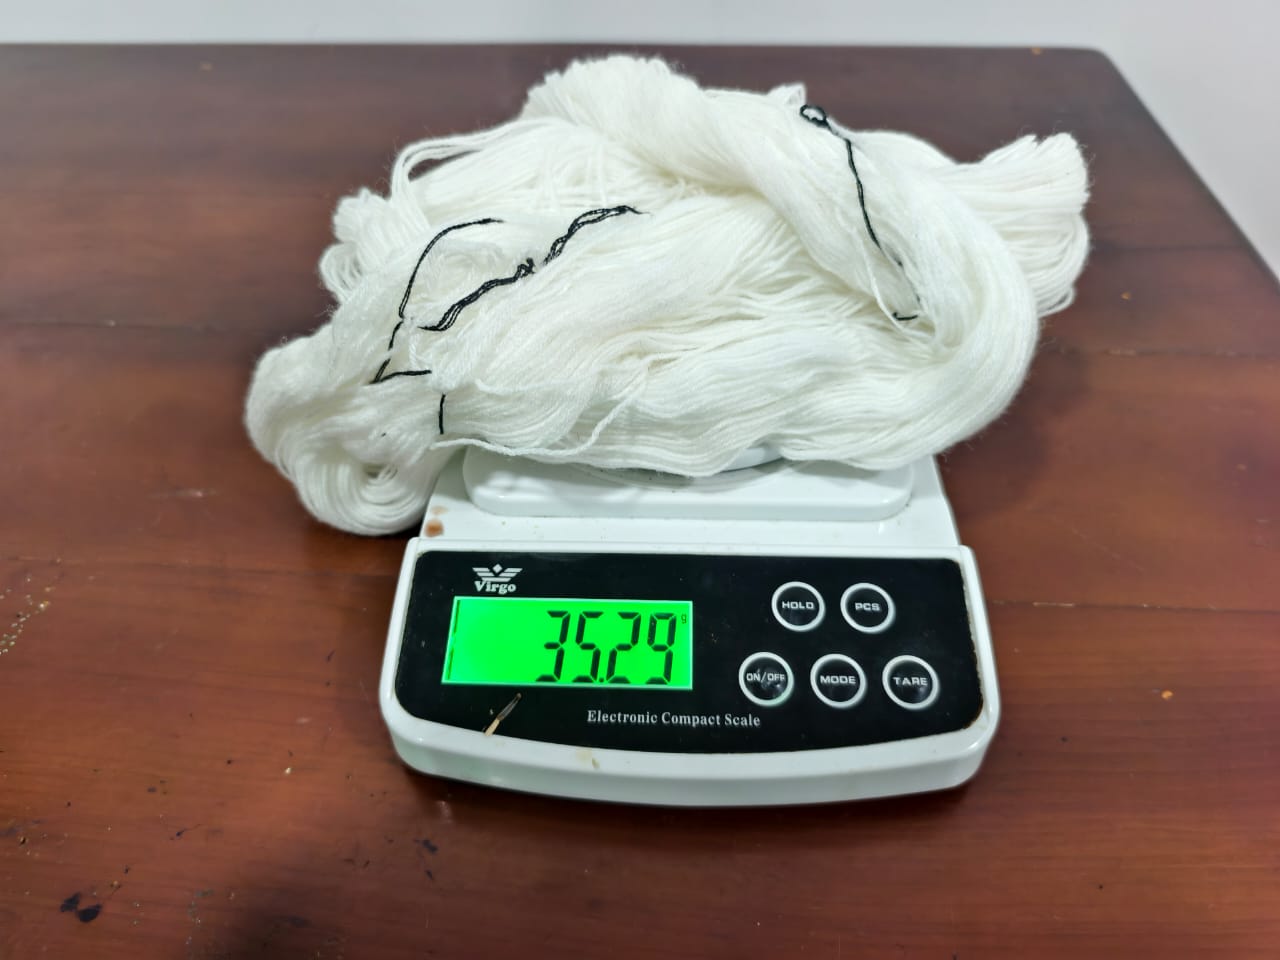
Wool(Mixed)
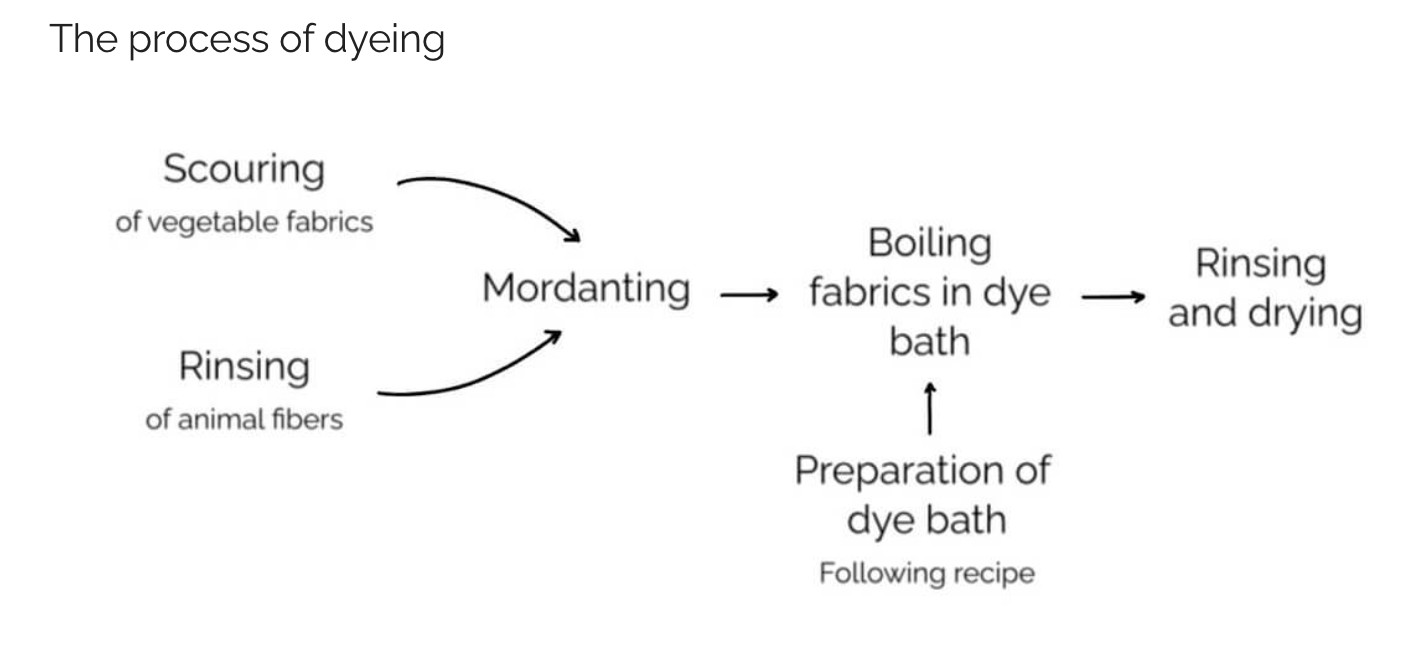
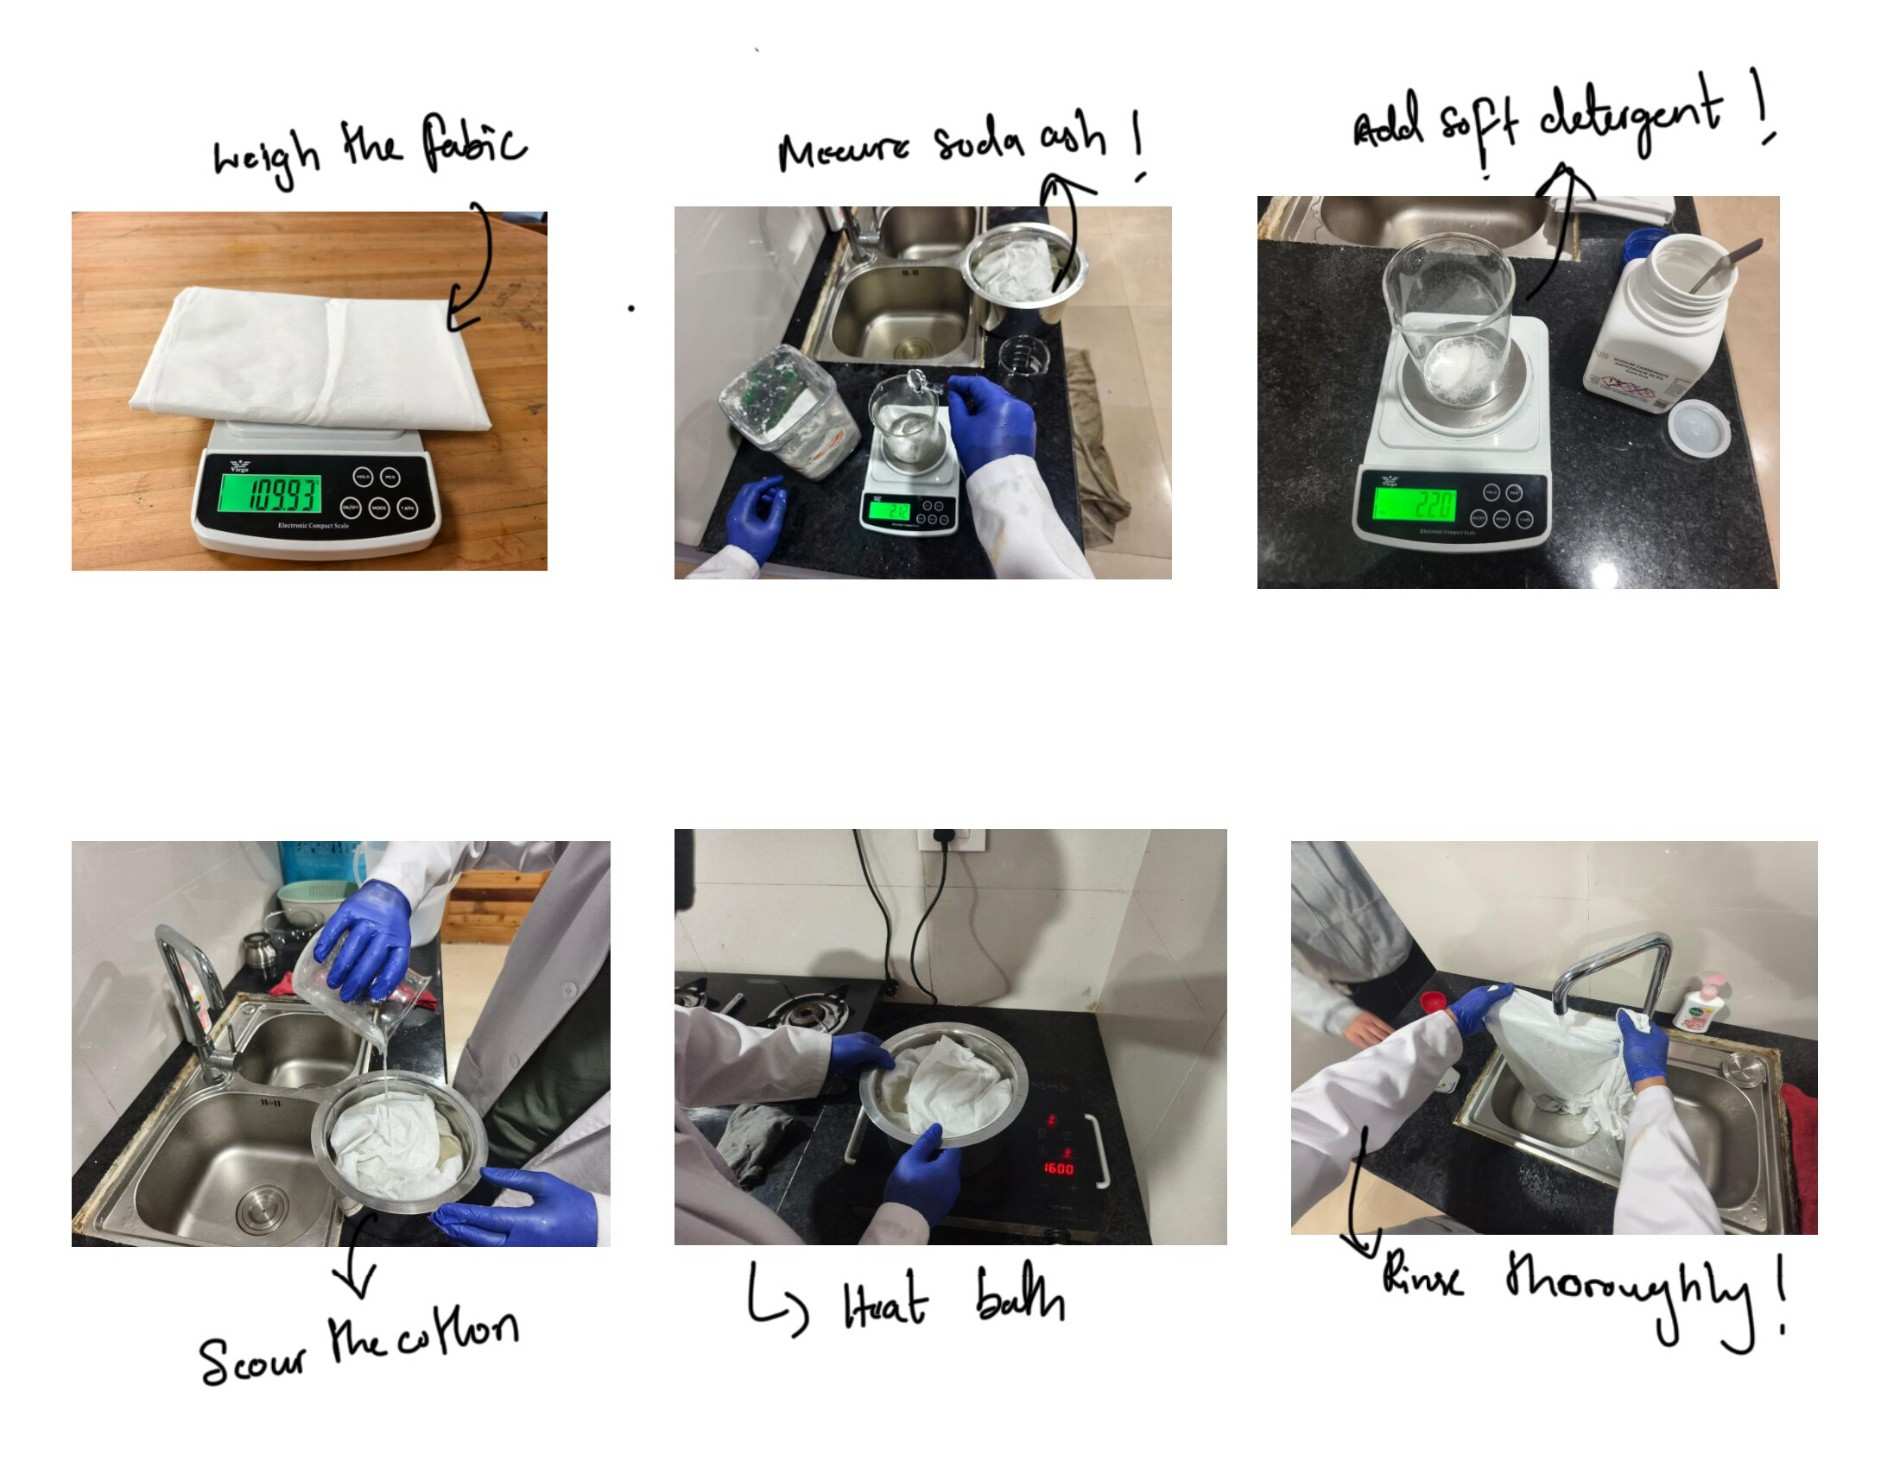
Part A: Scouring
Because I bought some fabrics from the store, I need to scour my fabric. In other words, deep clean it, to get rid of any manufacturing excess (dirt, wax) that may still be on the fabric when I picked it up from the store.
To scour my fabrics, I first need to figure out the WoF = Weight of Fabric. Below is a list of ALL the things you’ll need to scour your natural fiber fabrics that contain cellulose.For my fabric, i did 2 percent with wight of the fabric. For a scouring i watched this VIDEO
Material you need for scouring your fabric
A weighing machine
Stainless steel pot
Water-proof, heat-resistant gloves
Soda Ash, soft detergent (Avoid touching this with bare hands / wear safety goggles)
Enough clean water to cover your fabric
Oops! I made a mistake before starting the scouring process. When I brought the weighing machine home, I did not check it carefully. It kept showing zero even when I added soda ash to the beaker. At first, I thought I was doing something wrong, but later I realised that the weighing machine was not giving me the correct readings.
I had to go back to the lab to get a better weighing machine so that I could measure the fabric and chemicals accurately. This was an important lesson for me because using the wrong measurements for soda ash or ferrous sulphate could affect the results of my natural dye experiments.
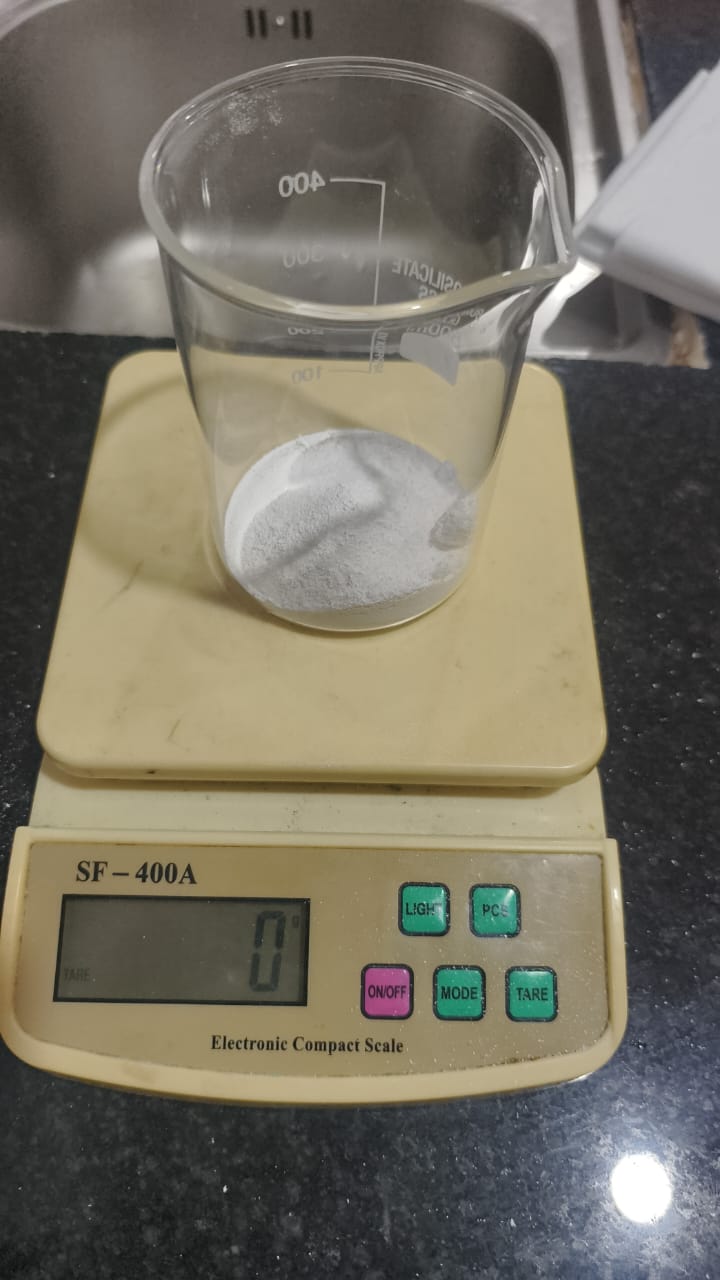
After getting a working weighing machine, I was finally able to weigh my fabric and calculate the amount of soda ash required for scouring.
I prepared both the cotton and wool samples for scouring. I used warm water with soda ash and kept the fabric in the bath for approximately 30 minutes without boiling it. The purpose was to remove dirt, grease and other impurities from the fibres before moving on to the mordanting and dyeing stages.
For my cotton fabric, which weighed 110 g, I decided to use soda ash at 2% of the fabric's dry weight.

I decided to use soda ash at 2% of the cotton's weight. Since my cotton fabric weighs 110 g, I measured 2.2 g of soda ash for the scouring process.use the formala above
For the wool, I followed the same scouring process, calculating the amount of soda ash based on the weight of the wool. Next, I will prepare the fabric for mordanting using ferrous sulphate before proceeding with natural dyeing.
Part B. mordanting the Fabric
After scouring, the next step was to prepare the fabric for natural dyeing through mordanting. I used ferrous sulphate as my mordant and calculated the required amount based on the dry weight of each fabric sample.For mordanting i watched this video
The earlier mistake with the weighing machine reminded me how important accurate measurements are in textile experiments. However, I made another mistake during mordanting. For my 17 g wool sample, I intended to use 1% ferrous sulphate, which should have been 0.17 g. Unfortunately, I mistakenly used 1.1 g, carrying over the amount I had calculated for my 110 g cotton fabric. As a result, I added much more ferrous sulphate than intended.
This experience taught me to double-check my calculations and measurements before starting each experiment. I also realised that mistakes in the amount of mordant used could affect the final dye colours and make it difficult to compare the results accurately. It was a reminder that careful preparation and documentation are important parts of the experimental process.
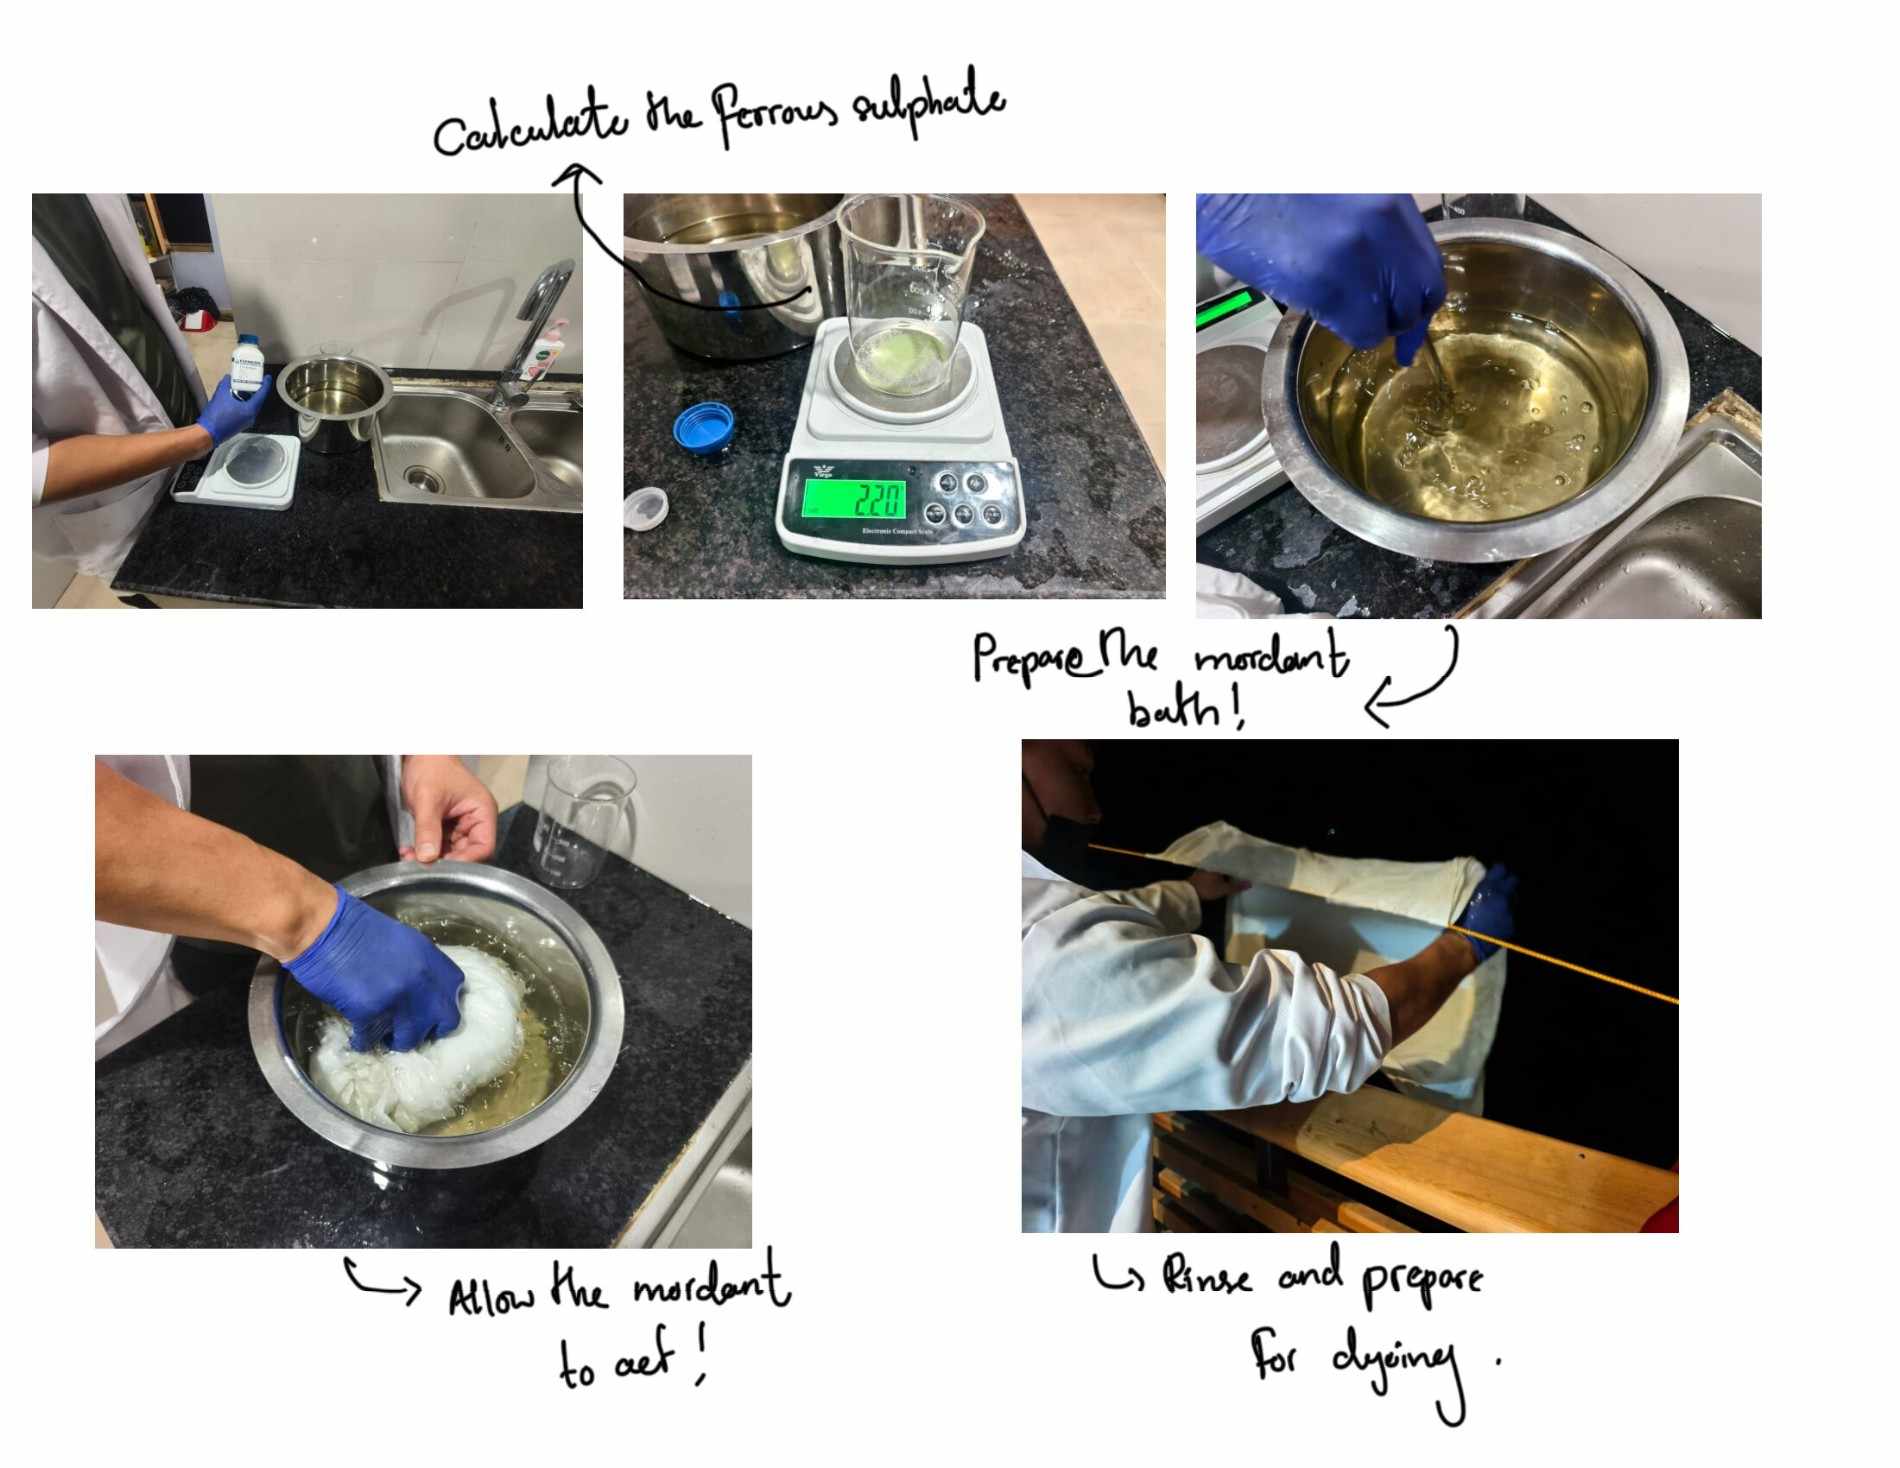
Material you need for mordanting your fabric
A weighing machine
Stainless steel pot
Water-proof, heat-resistant gloves
Ferous suplhate or Alum (Avoid touching this with bare hands / wear safety goggles)
Enough clean water to cover your fabric
Step 3 preparing for nature plants
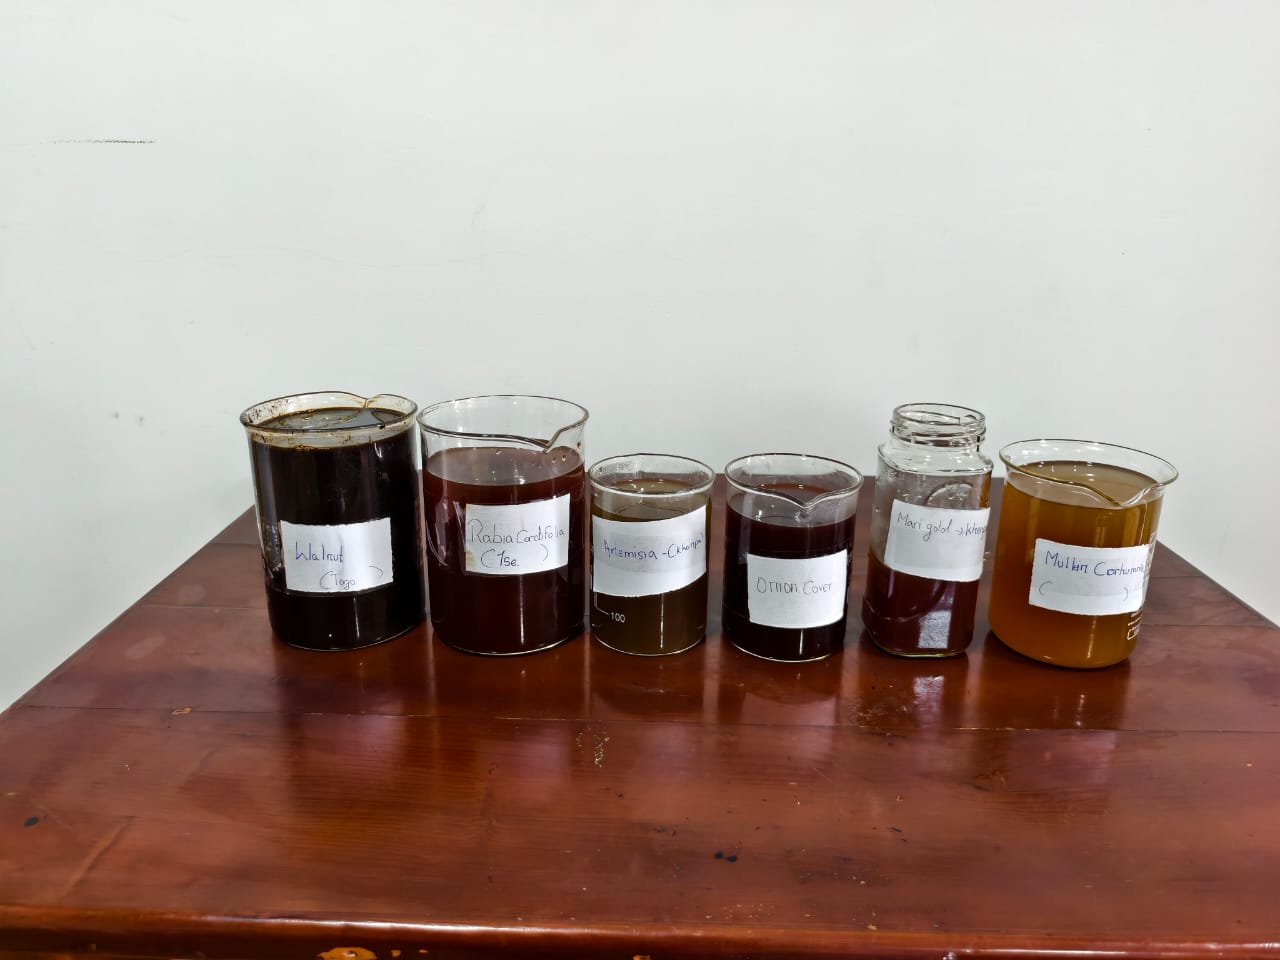
Since I wanted to explore natural dyes using materials available in my surroundings, I started looking for different plants and other natural materials that could be used for dye extraction. I collected six materials: walnut, Rubia cordifolia, onion peels, marigold, mullein and artemisia.
I chose these materials because I wanted to experiment with different natural sources and see what colours they could produce. Collecting the materials from my surroundings also helped me connect the dyeing process with the natural resources available around me.
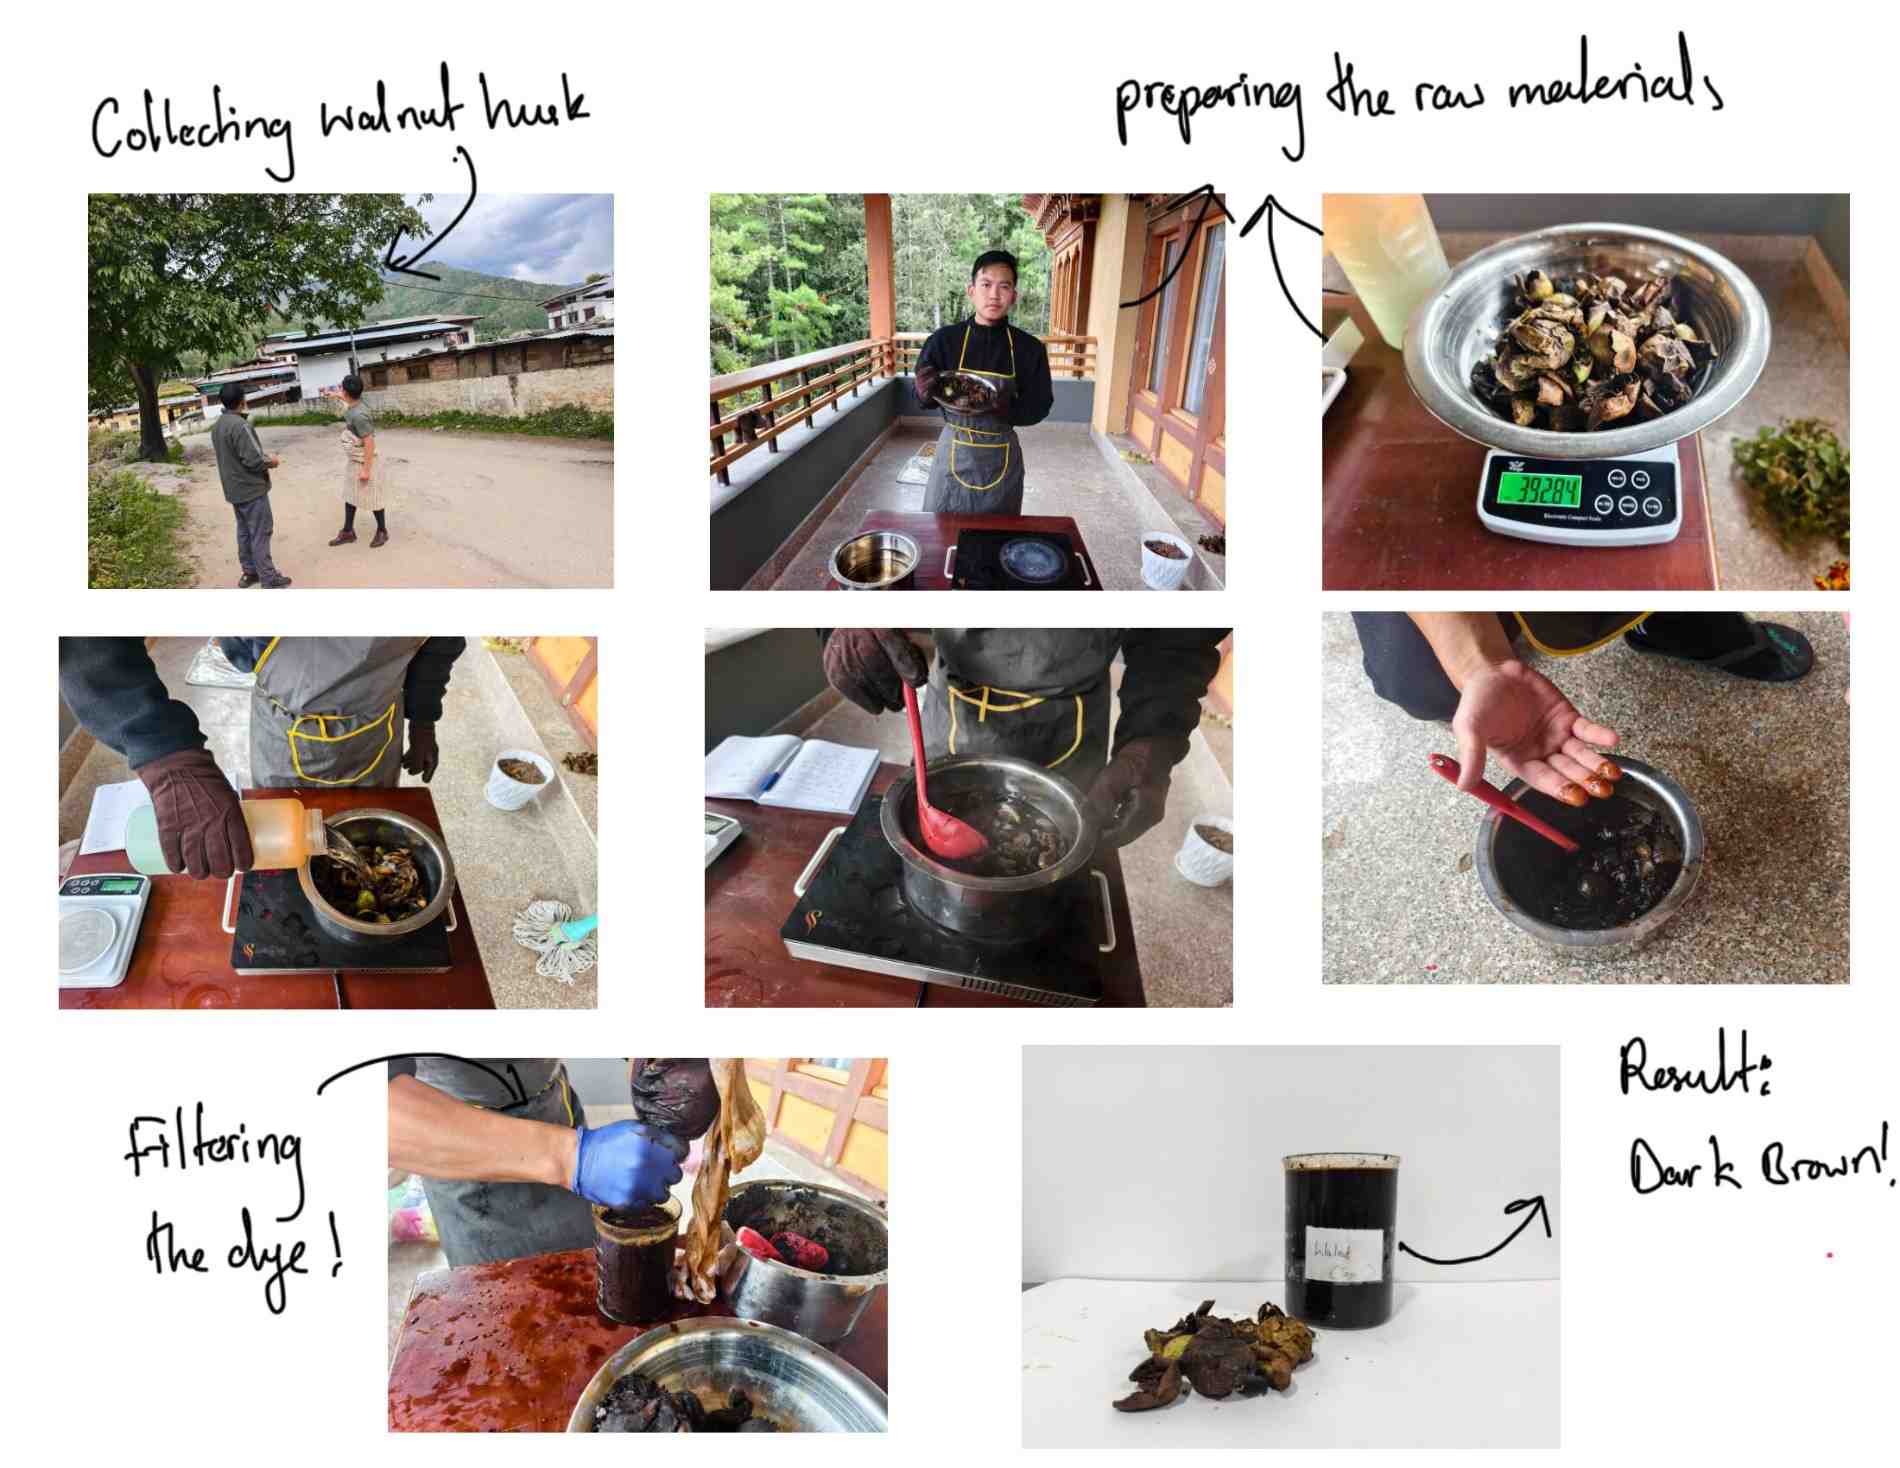
Walnut
I collected both fresh and dried walnut husks because I wanted to experiment with them and see whether they would produce different colours during the dye extraction process.
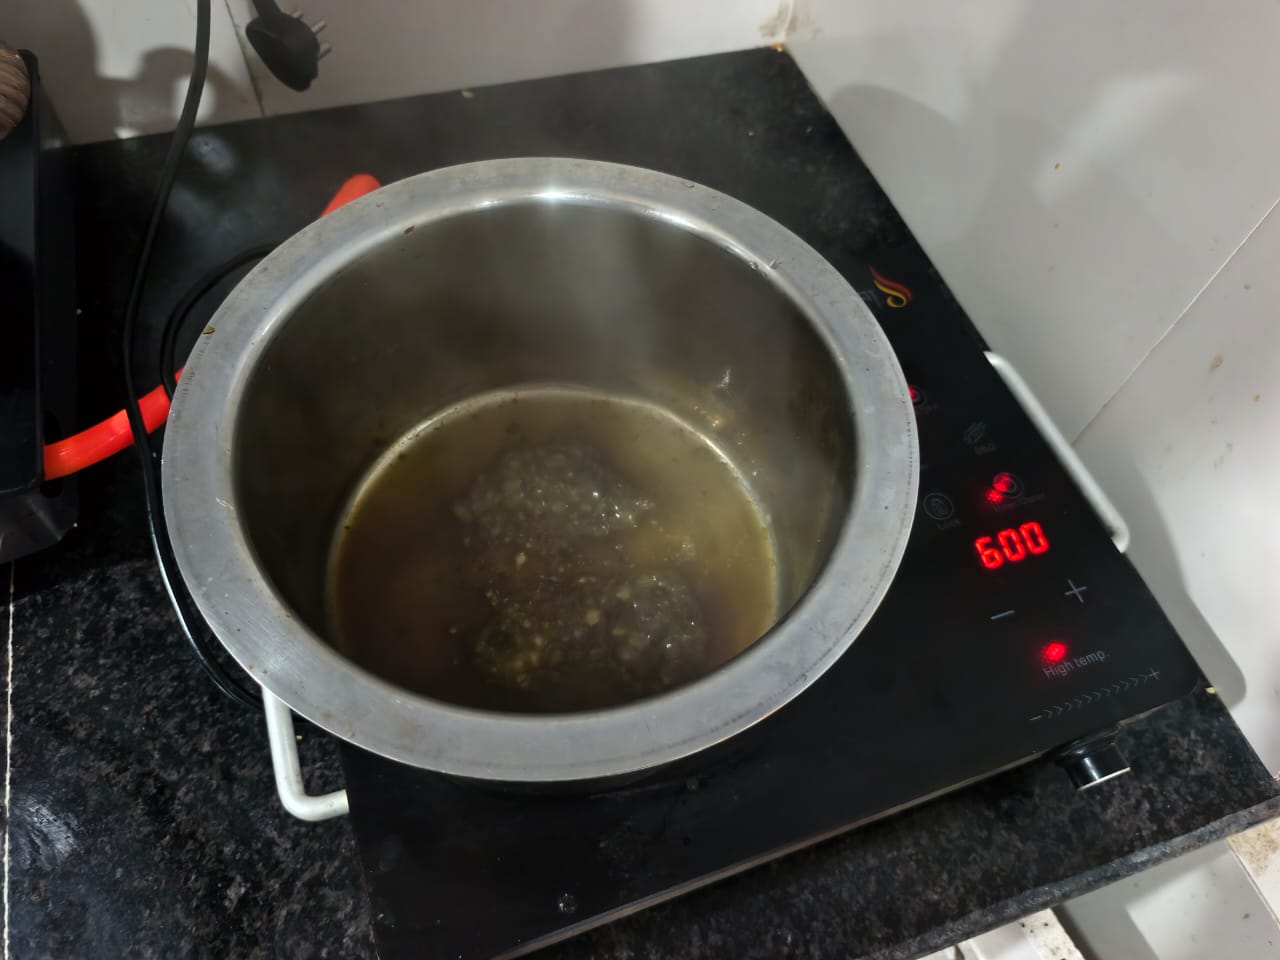
My recipe to prepare walnut dye
weight:392.83 gram
Water:2 liters
Time:1 hours
Result: Dark Brown
Rubia cordifolia(manjistha)
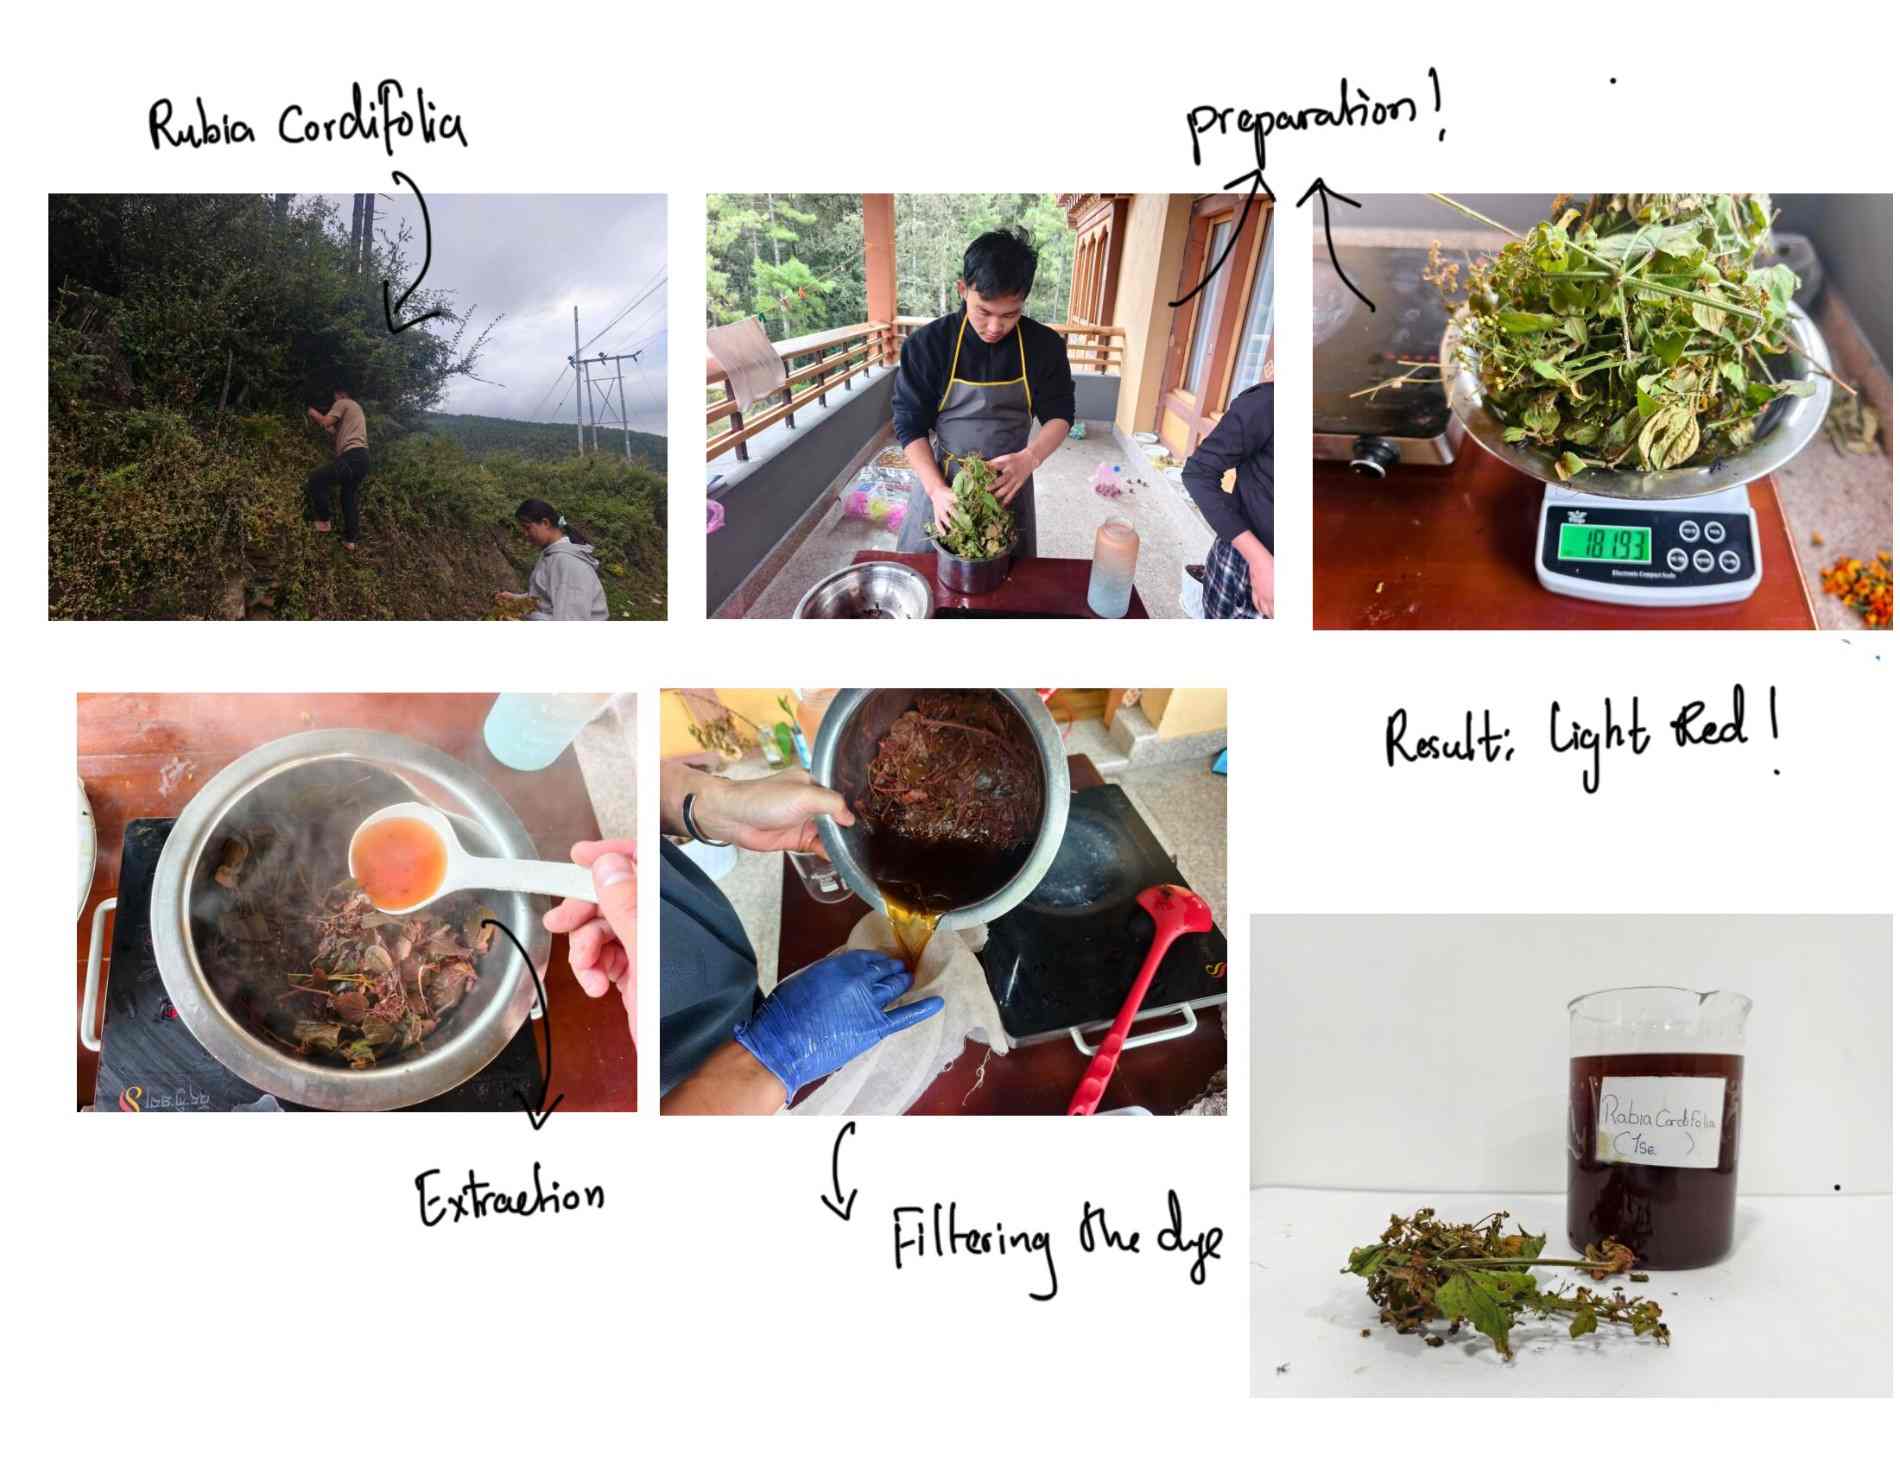
Rubia cordifolia, also known as manjistha, is a climbing plant whose roots have been used for centuries as a natural red dye. In Bhutan, it is valued for its ability to produce red shades and is also known for its traditional medicinal uses.
This plant is special to me because it was the first natural dye I experienced as a child. Finding it again for this assignment brought back those memories. However, it was not easy to find manjistha in the high-altitude region where I live now. Luckily, I managed to find one, although the colour of the plants was not as strong as I had expected. I have noticed that manjistha growing in the warmer eastern and central regions of Bhutan is often associated with stronger red colours. I wonder how the growing conditions and location might influence the colour produced by the plants.
My recipe to prepare Rubia cordifolia dye
weight:181.93gram
Water:2 liters
Time:1 hours
Result: Light red
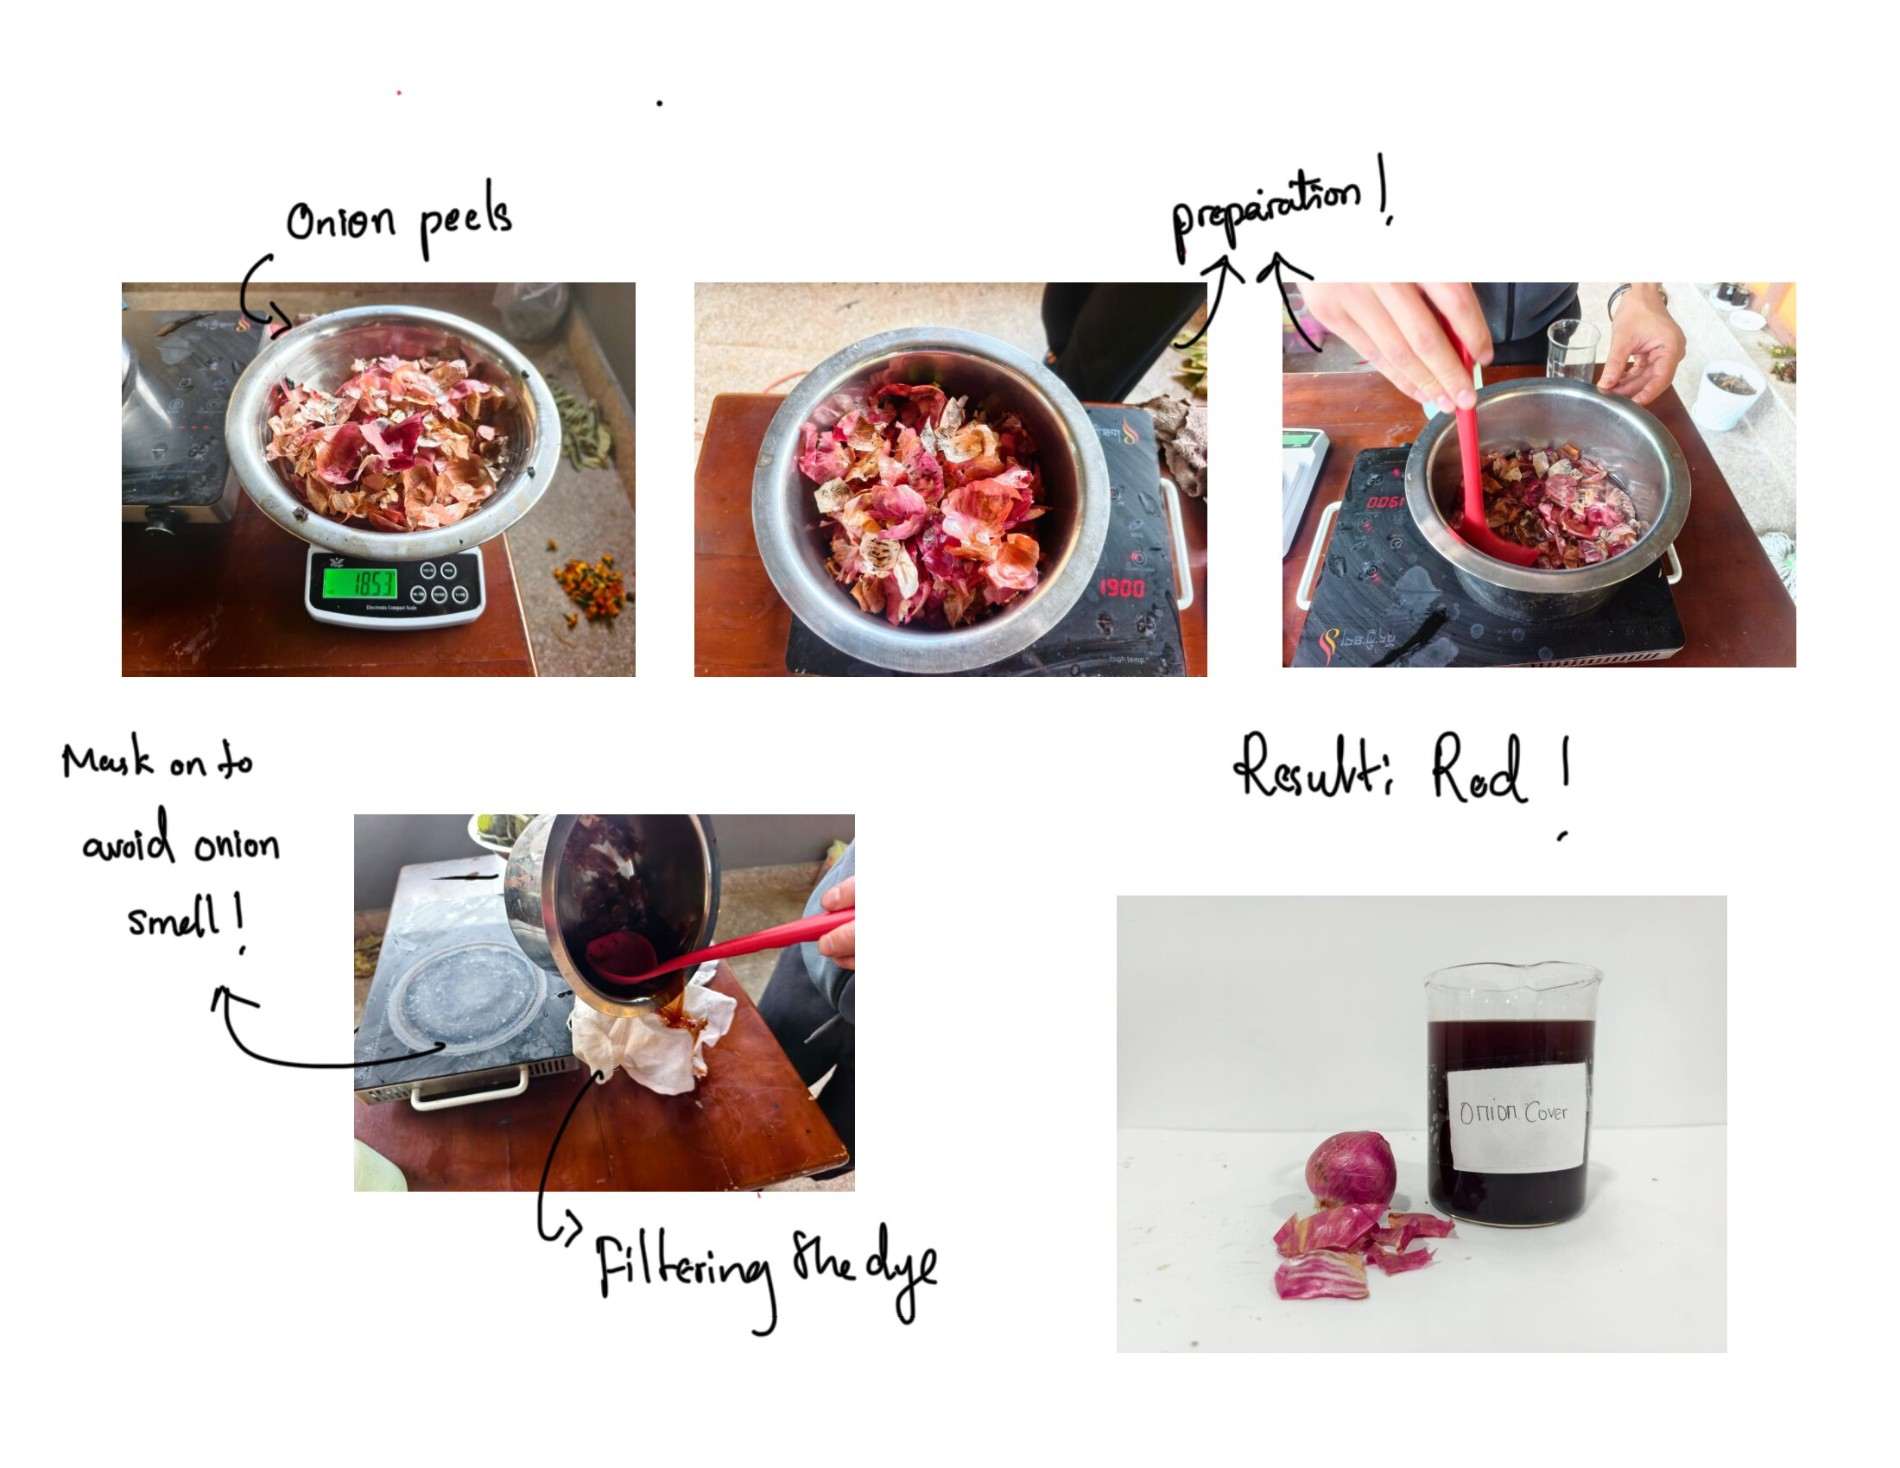
Onion Peels
Onion peels were another material I wanted to experiment with. Instead of throwing them away, I wanted to see what colours I could extract from them and whether they would be useful for dyeing cotton and wool.
My recipe to prepare Onion dye
weight:18.53 gram
water:1liters
Time:30min
Result: Red
marigold
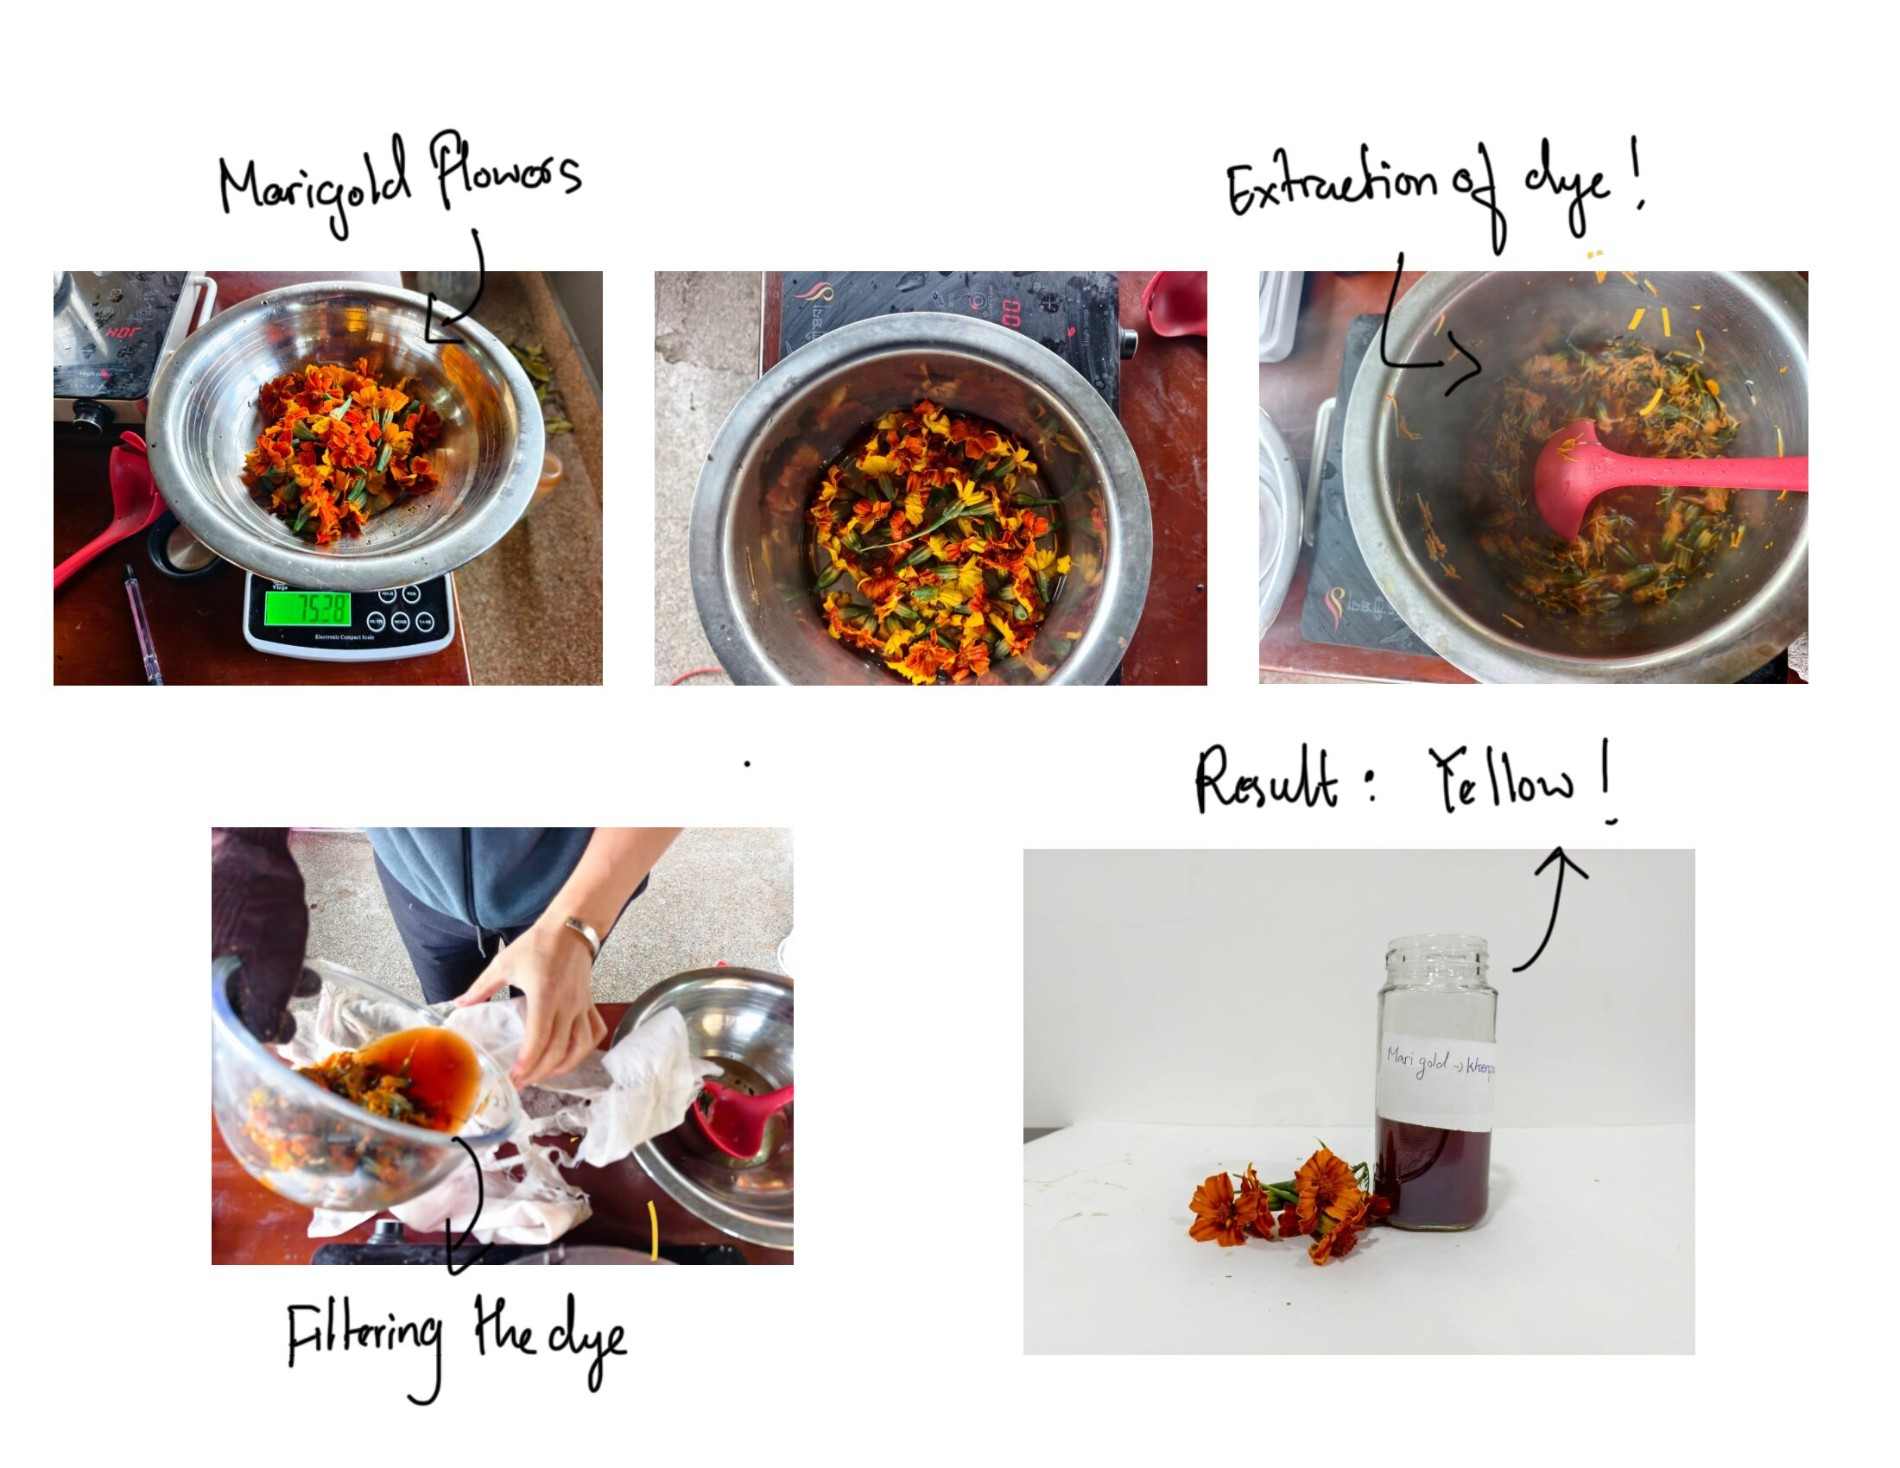
Marigold is known for its bright yellow flowers and is commonly grown in warmer parts of Bhutan. I was surprised to find it growing in a high-altitude place like Paro. Since I found fresh marigold flowers, I decided to collect them and try extracting their colour.
Compared with some of the other materials, extracting colour from marigold seemed much easier. I noticed the colour appearing in the water almost as soon as I started heating the flowers.
My recipe to prepare onion dye
weight:75.28gram
water:0.5 litre
Time:20 min
Result: Yellow
Mullein
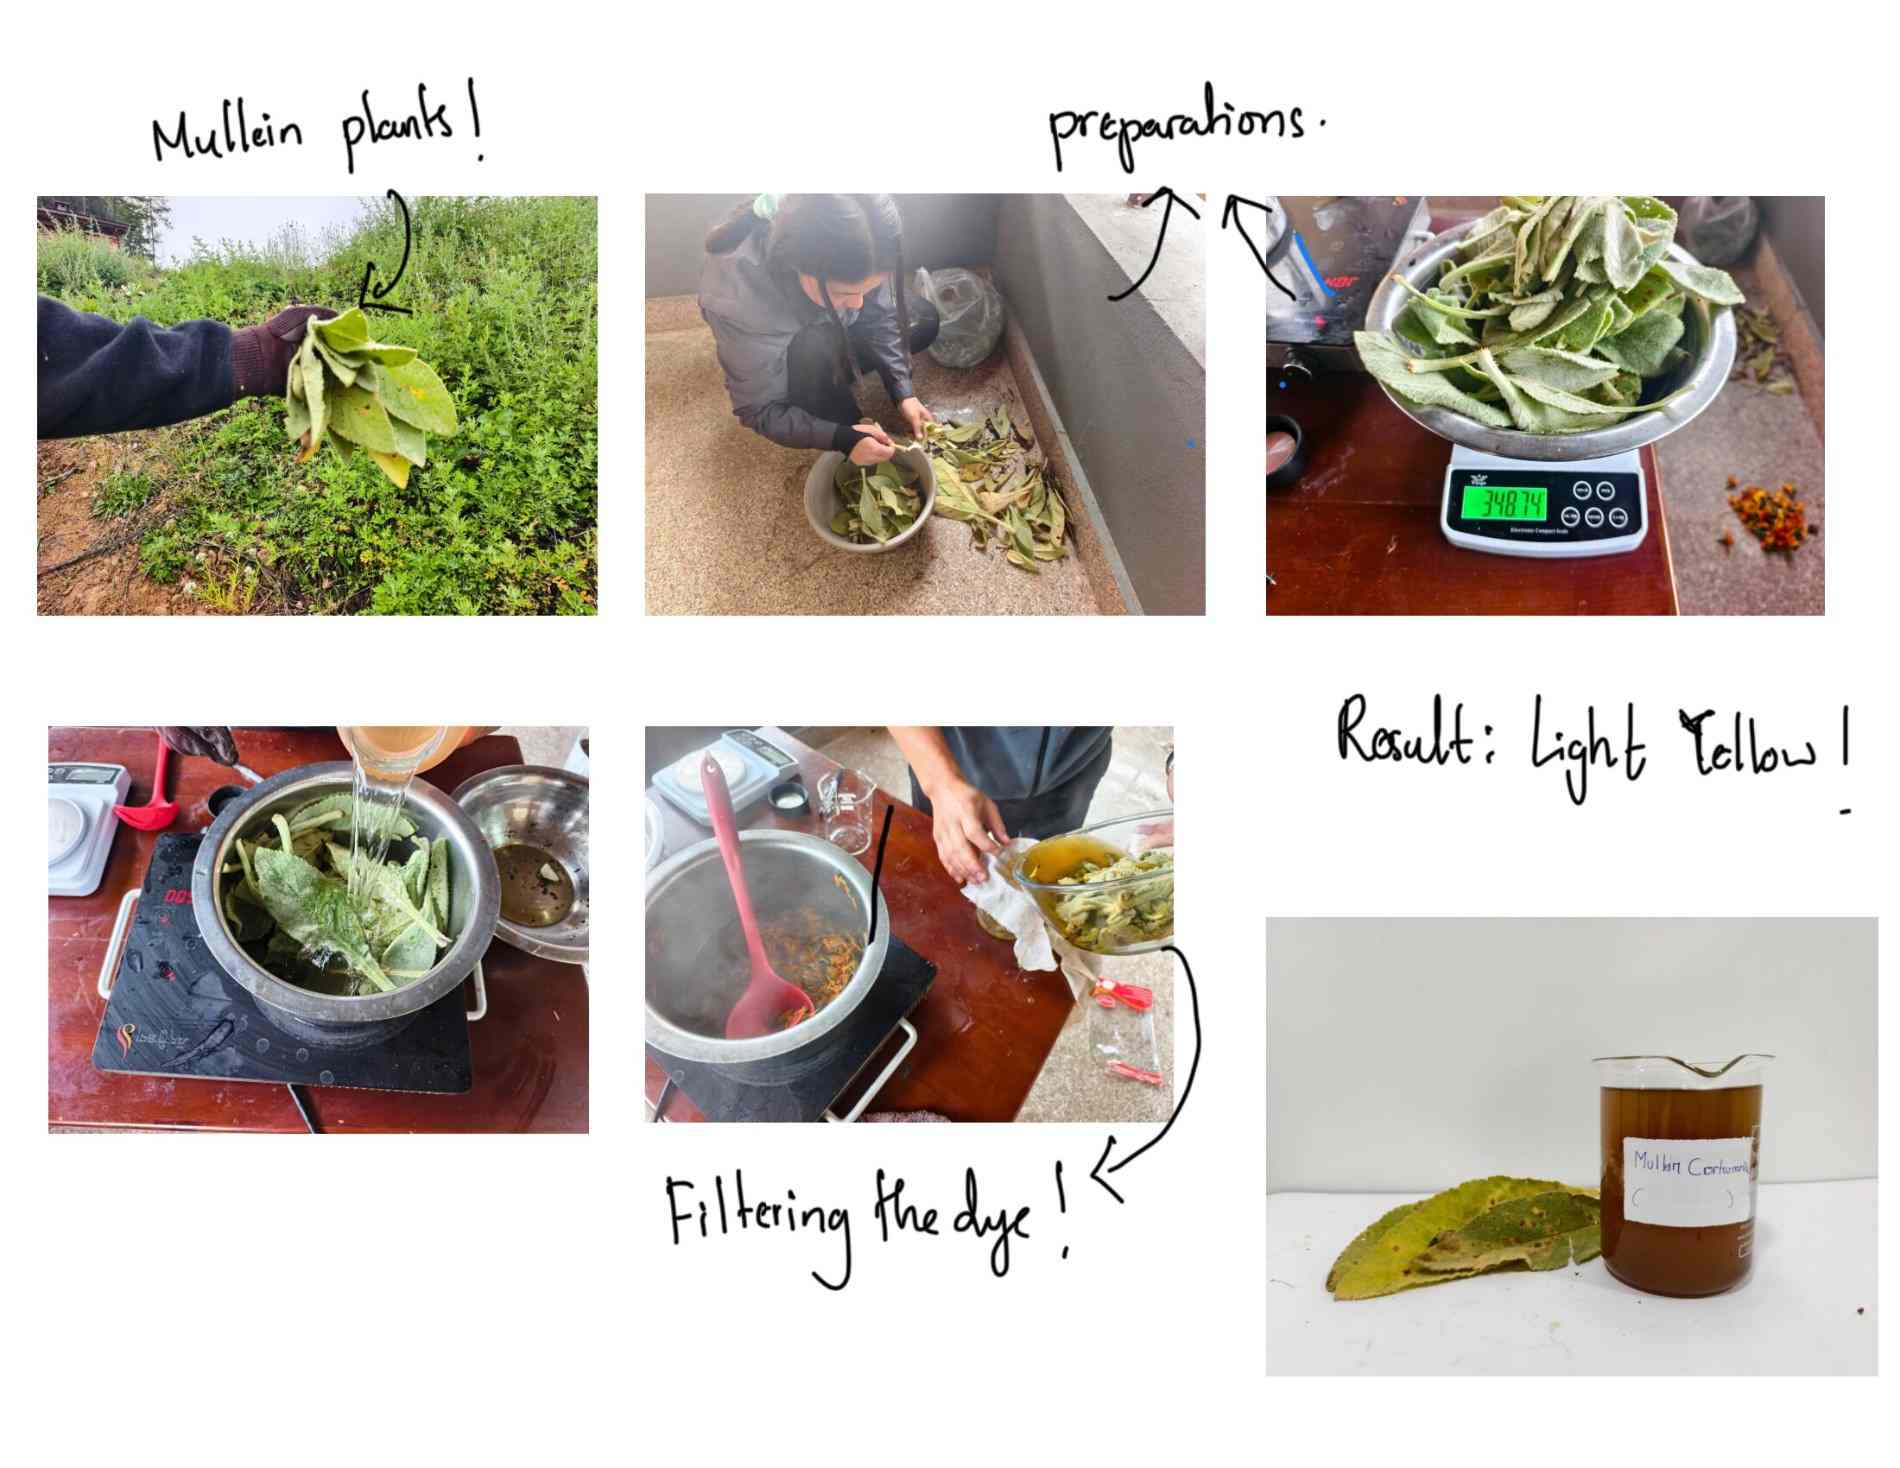
Mullein is a tall plant that can grow in highland areas. I had seen it growing near my home many times, but I did not know that it could be explored as a natural dye source.
Rico suggested this plant to me, which made me curious about the colours it might produce. Since it was available near my home, I decided to collect some and experiment with extracting its colour. It was interesting to discover a possible use for a plant that I had seen so often without paying much attention to it.
My Recipe to prepare Mullein dye
weight:398 gram
water:1 litres
Time:30min
Result: Light Yellow
Artemisia
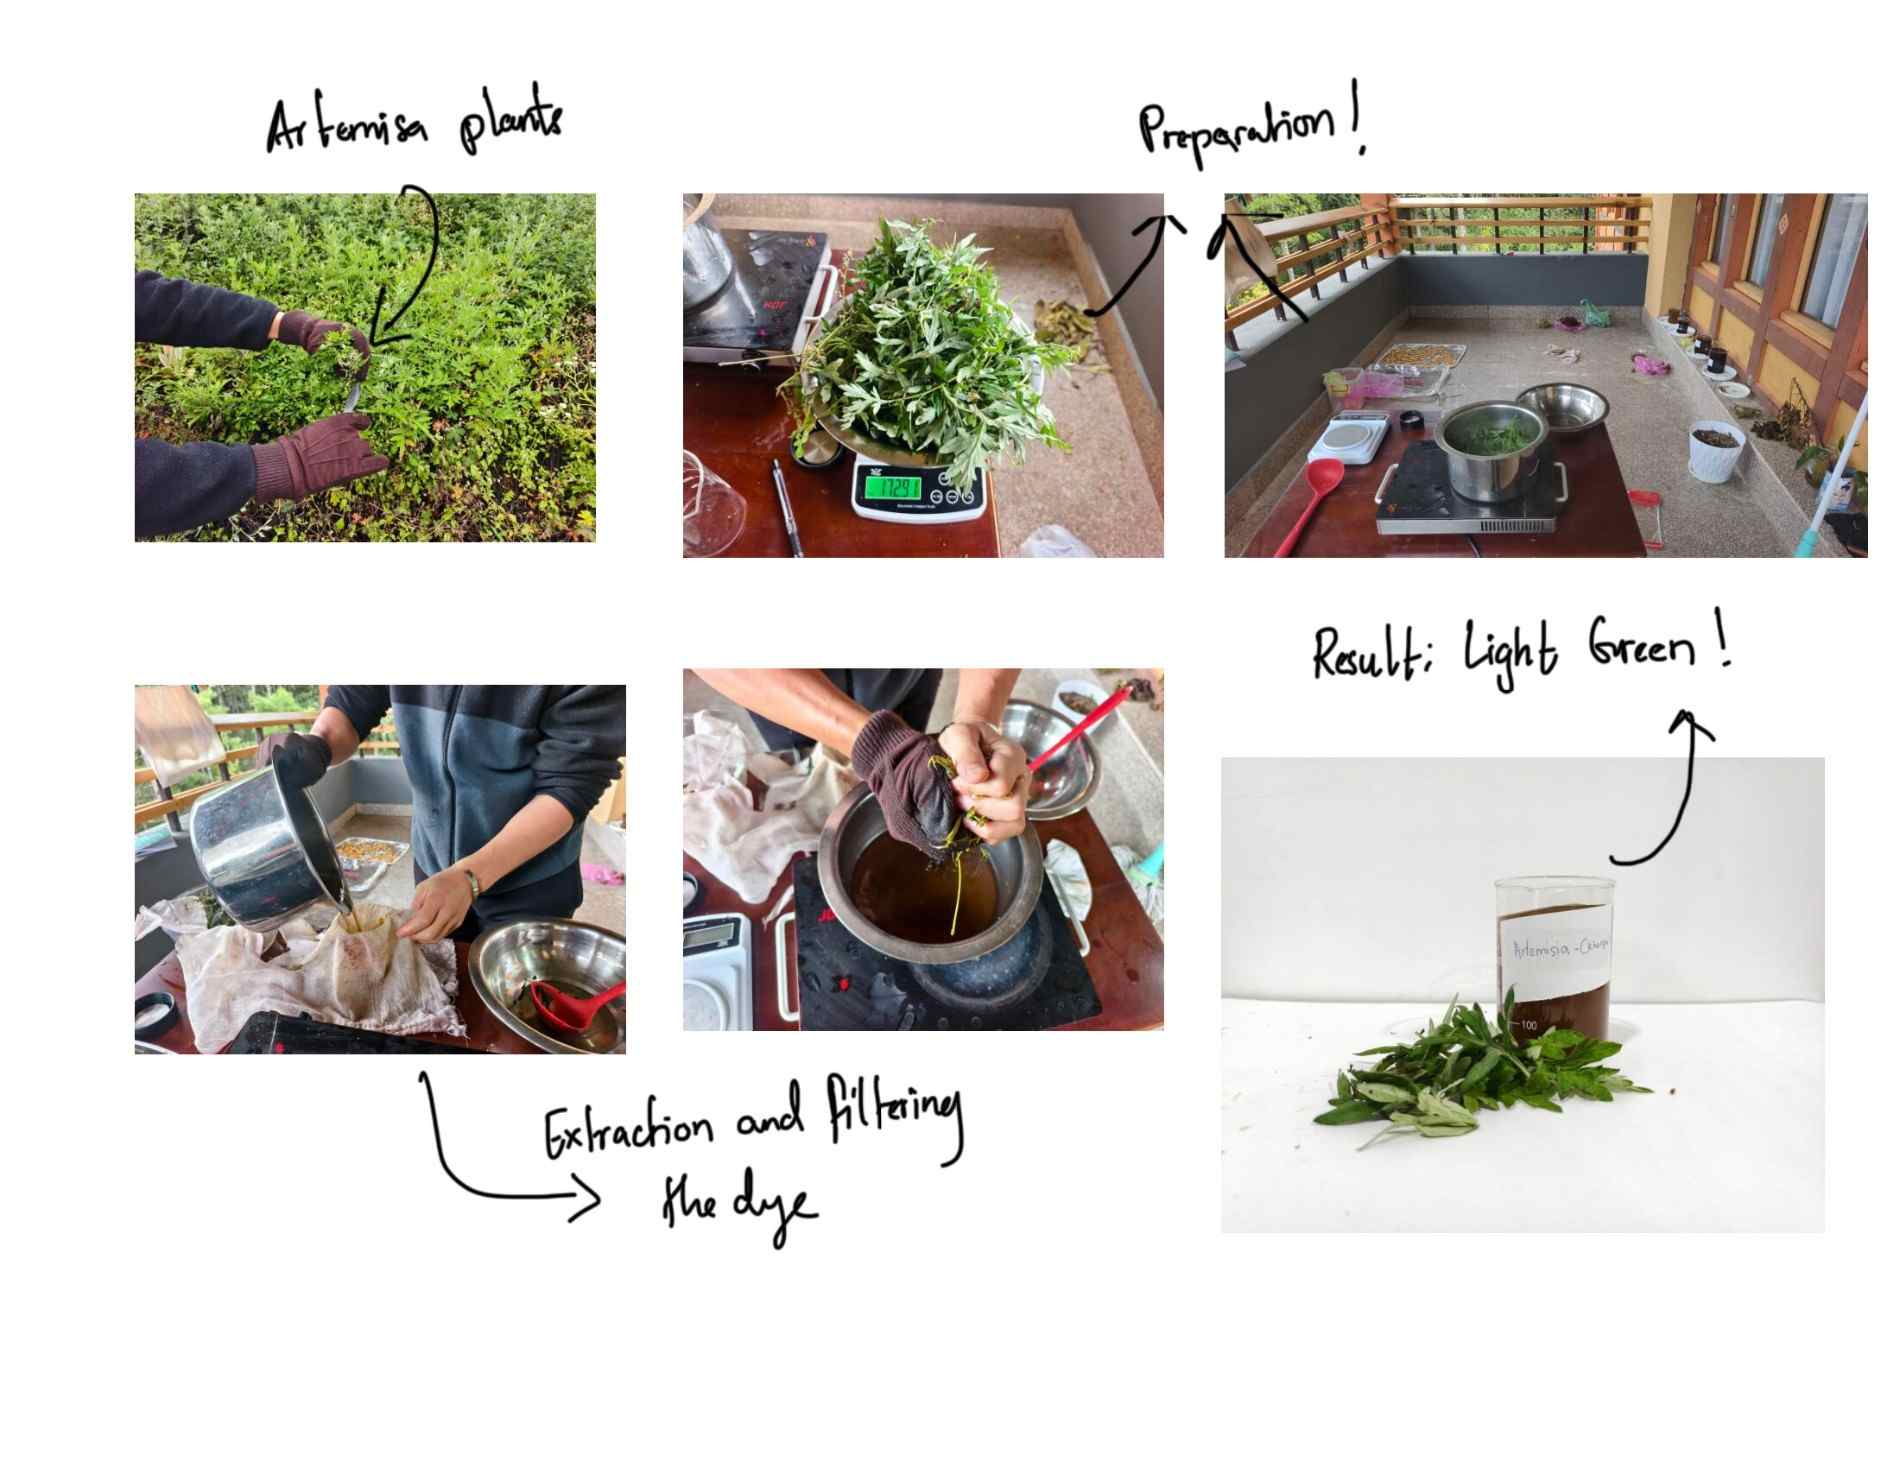
Artemisa is a group of plants known for their traditional uses, including medicinal applications. I had seen these plants growing near my home, but I did not know that they could also be explored for natural dyeing.
Since the plant was readily available in my surroundings, I thought I would give it a try. I collected some fresh material and prepared it for dye extraction to see what colour it could produce.
My Recipe to prepare Artemisia dye
weight:173 gram
water:1 litres
Time:30 min
Result: light green
...
Step 4 dying the fabric
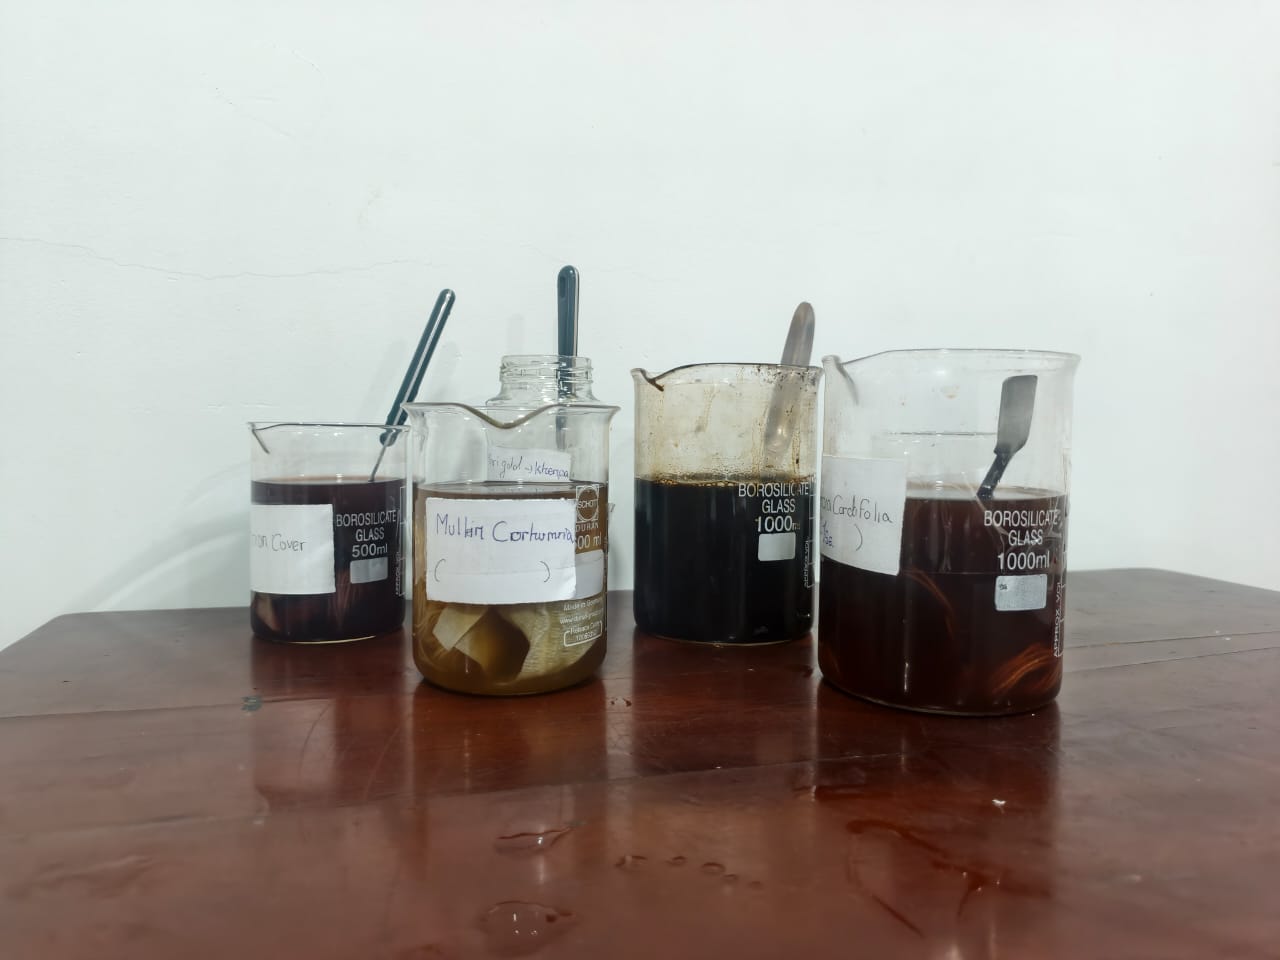
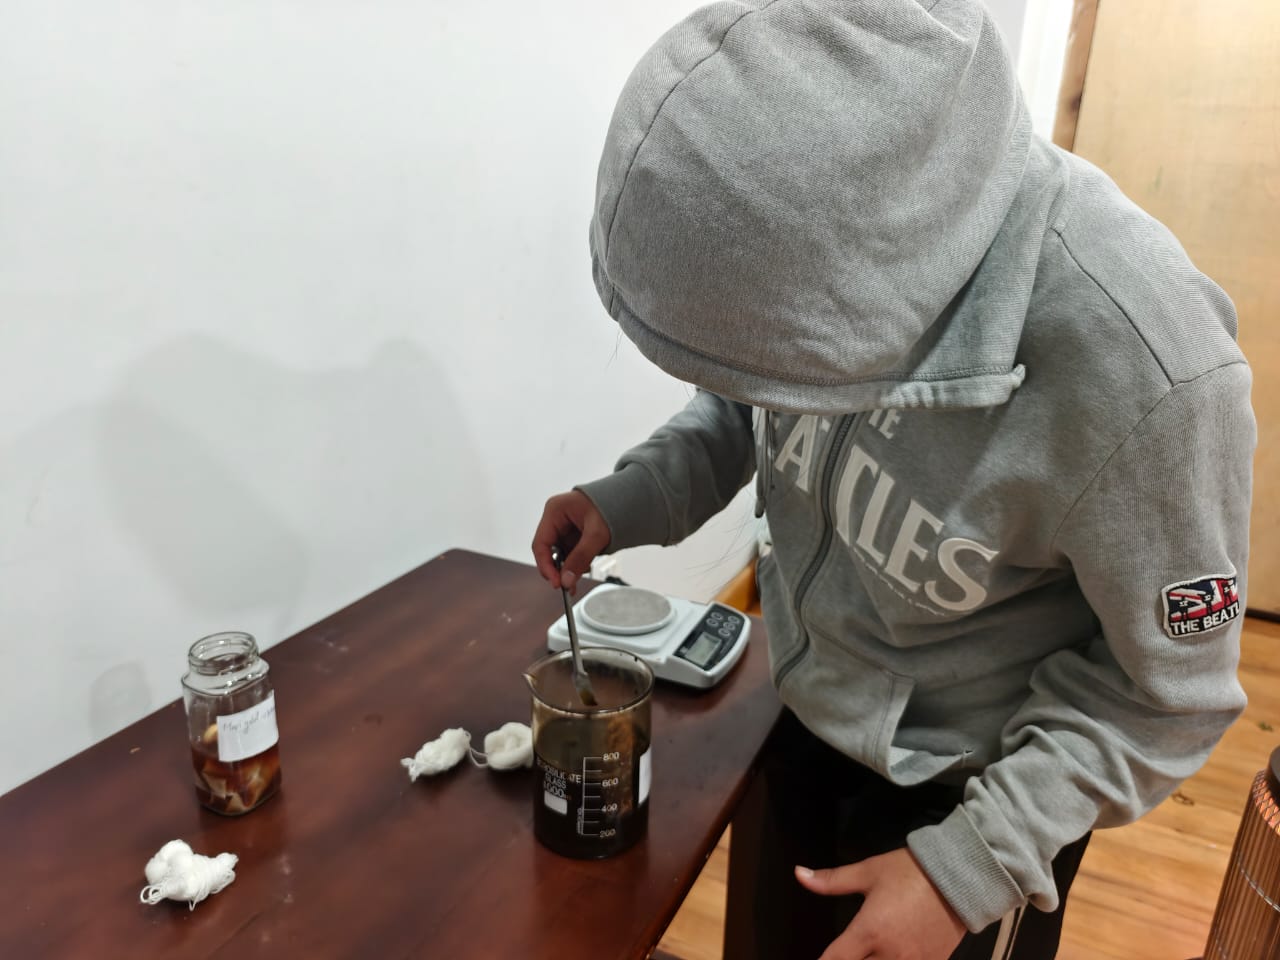
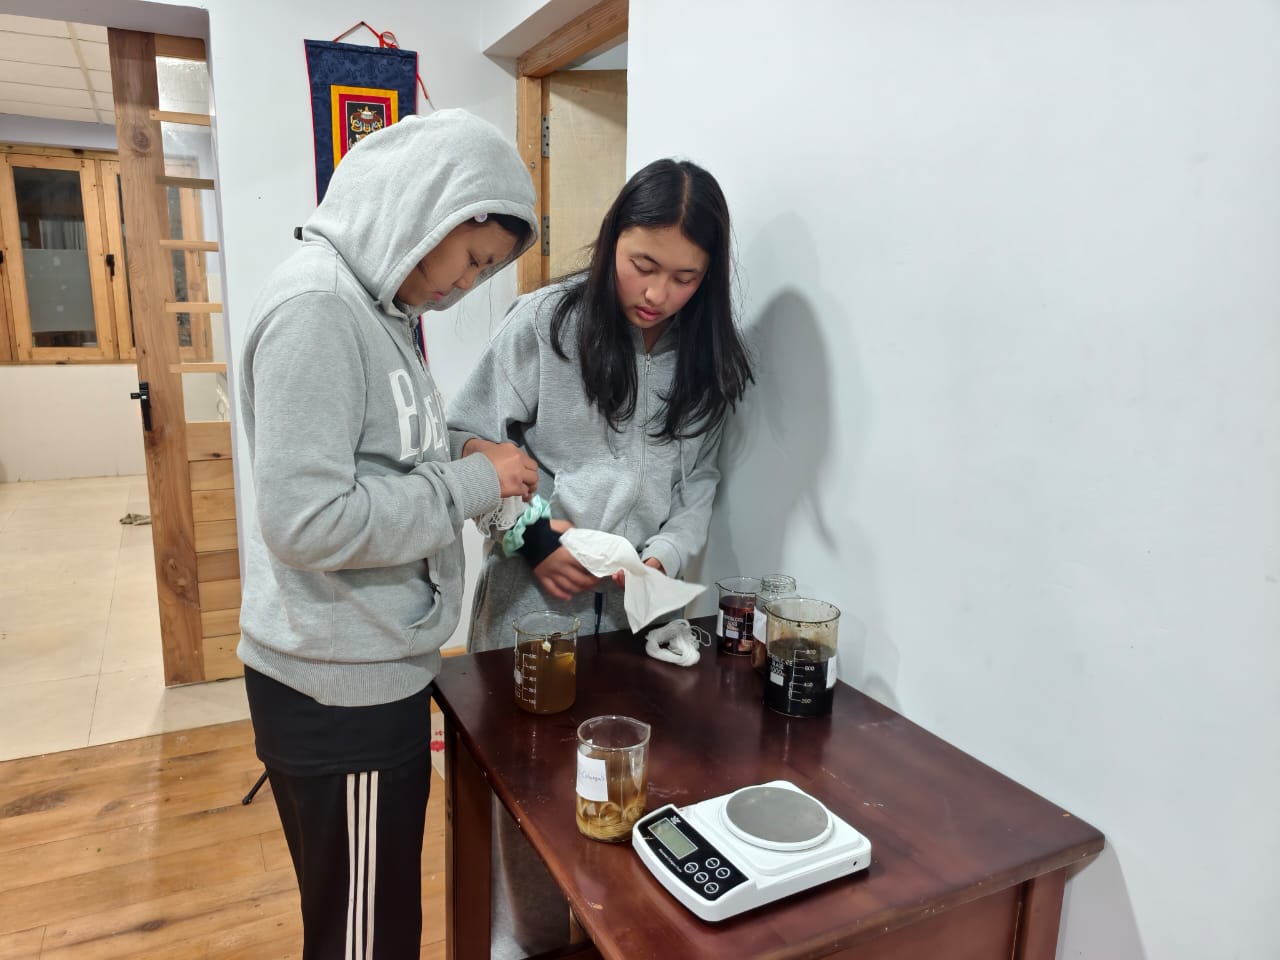
After preparing the six natural dye baths, I placed my cotton and wool samples into the respective dye baths. I gently simmered the fabrics to allow them to absorb the colours from the plant materials. After heating, I left the fabric samples soaking in the dye baths overnight to give them more time to absorb the colour. I repeated this process for all six natural dyes to observe the different colours produced on cotton and wool.
step 5 Dyring the dye farbic
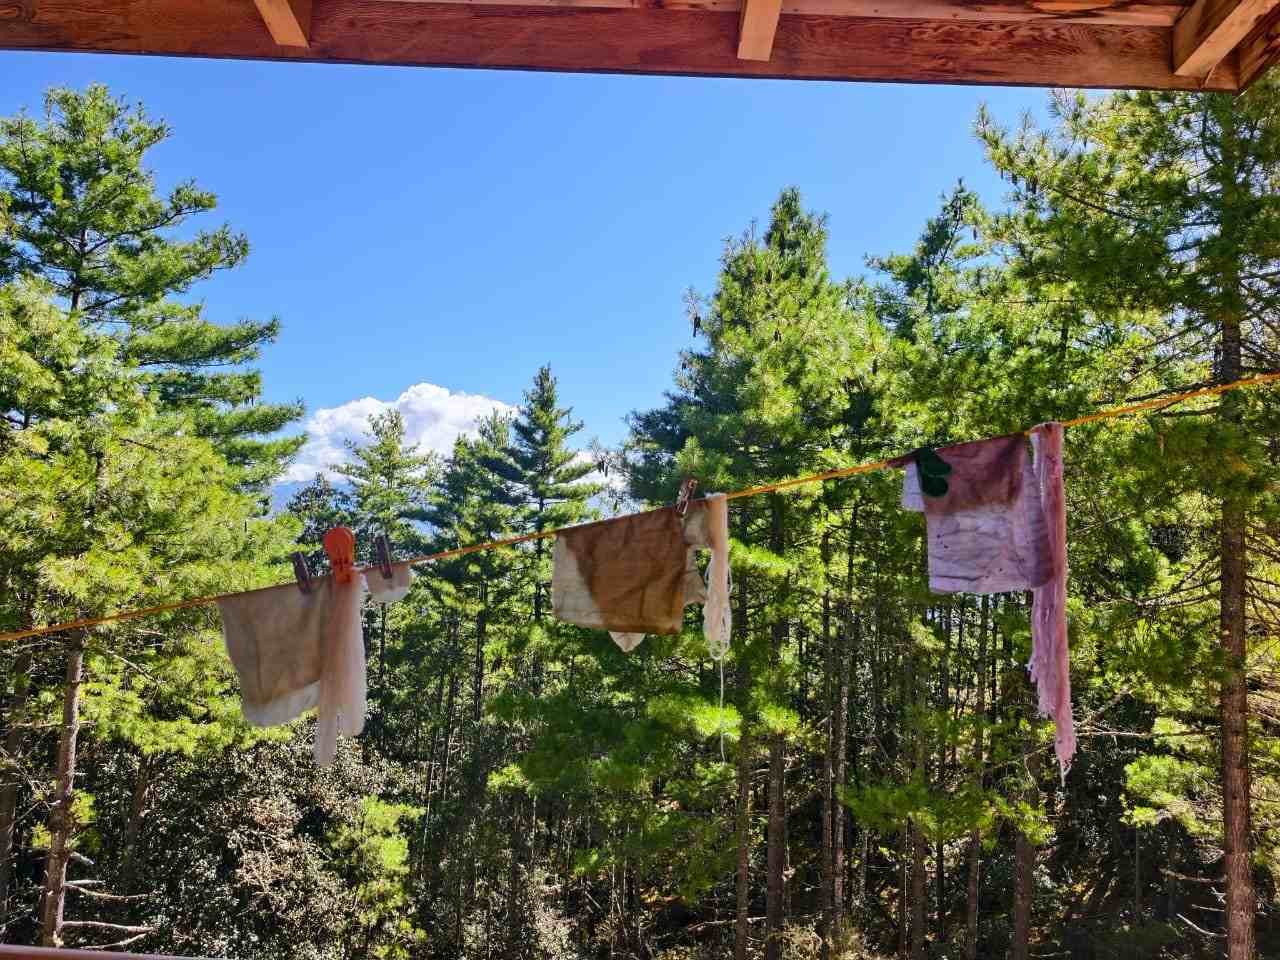
The following day, I removed the fabric samples from the dye baths and rinsed them gently. I then laid them out to dry before examining the final colours. Once dry, I could compare how each natural dye coloured the cotton and wool and observe the differences between the two fibres.
Step 6 Making Pigment and Ink
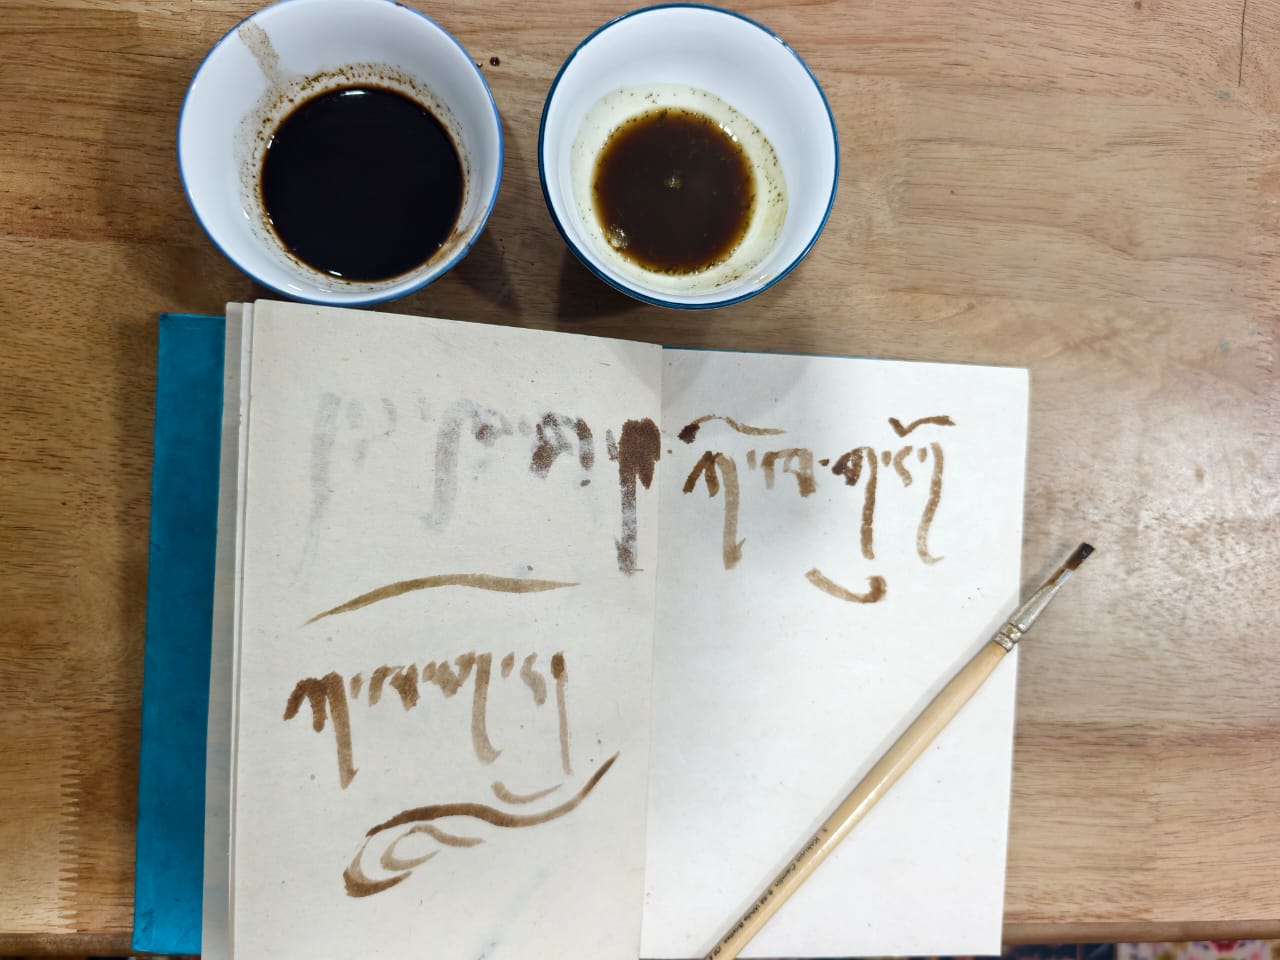
I did not use all the dye I had preparedt to make ink and pigment, so I decided to try making ink and pigment using walnut and marigold. The walnut ink turned out really nice, with a dark brown colour. I tried writing a few words in my notebook to test it, and I was happy with how it looked. It was interesting to see how the natural dye I extracted could also be used for writing, not just for dyeing fabric.
Step 7 Dyeing My Shirt
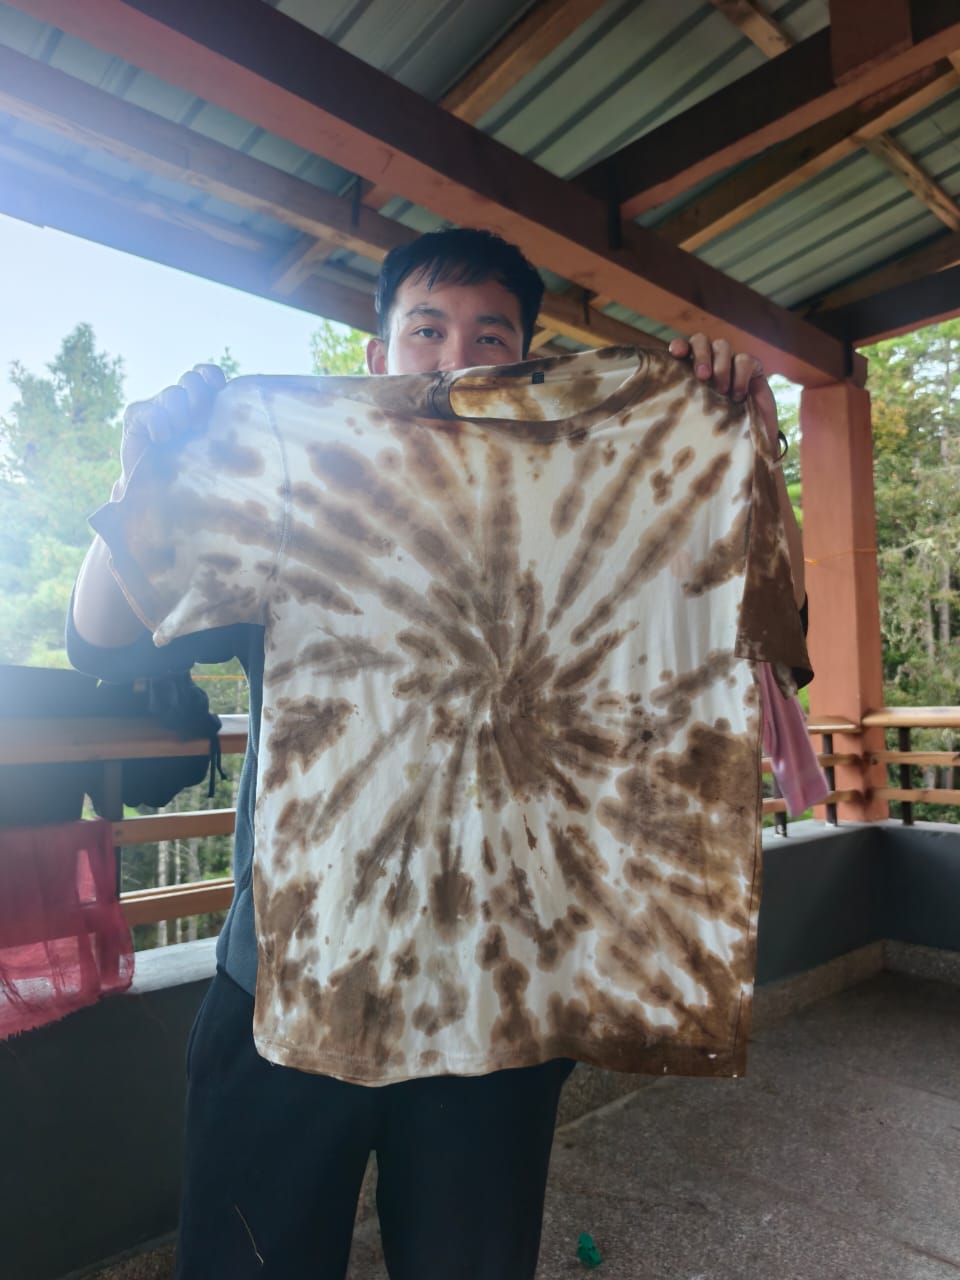
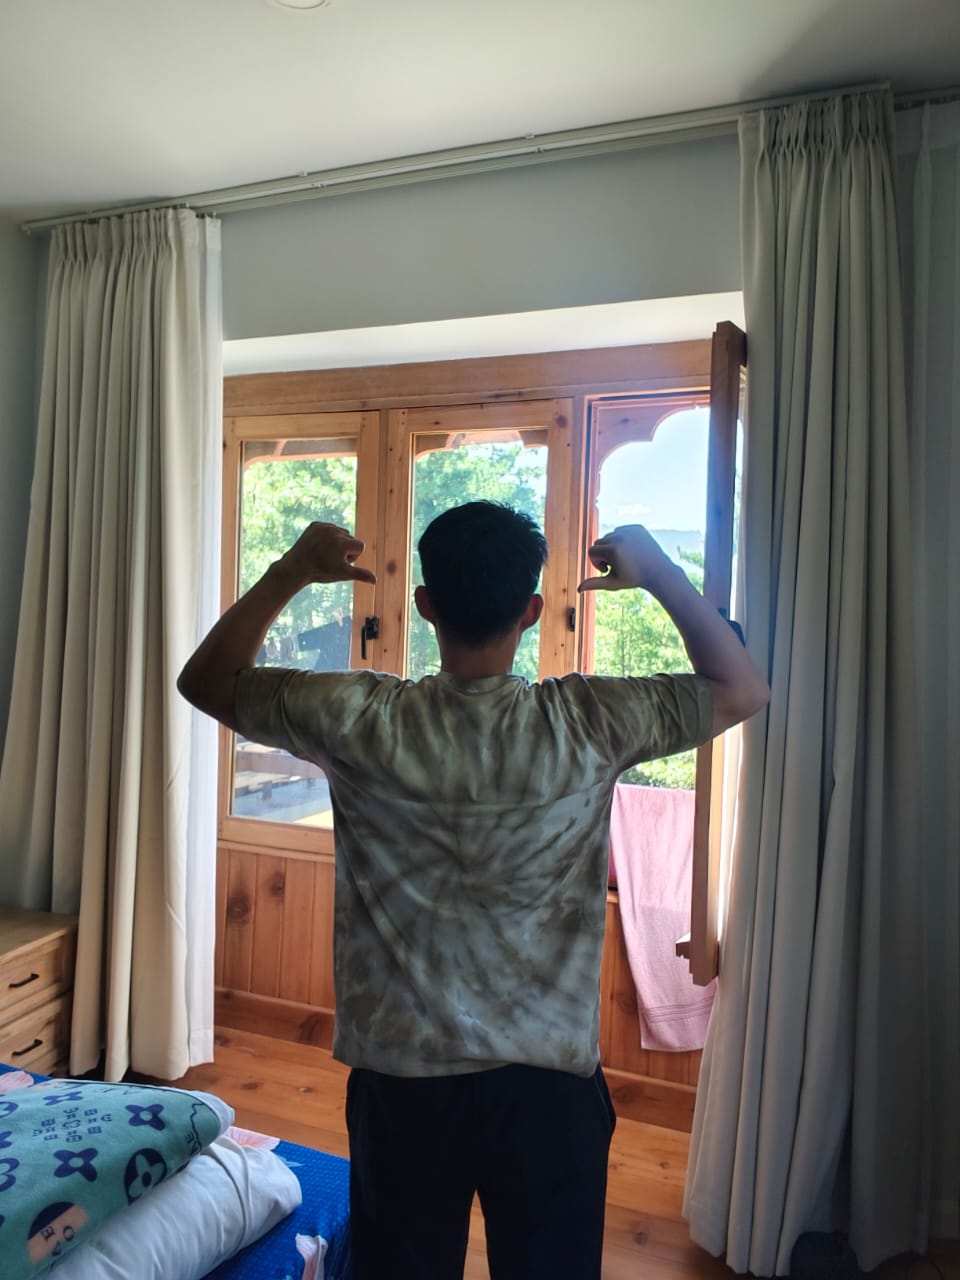
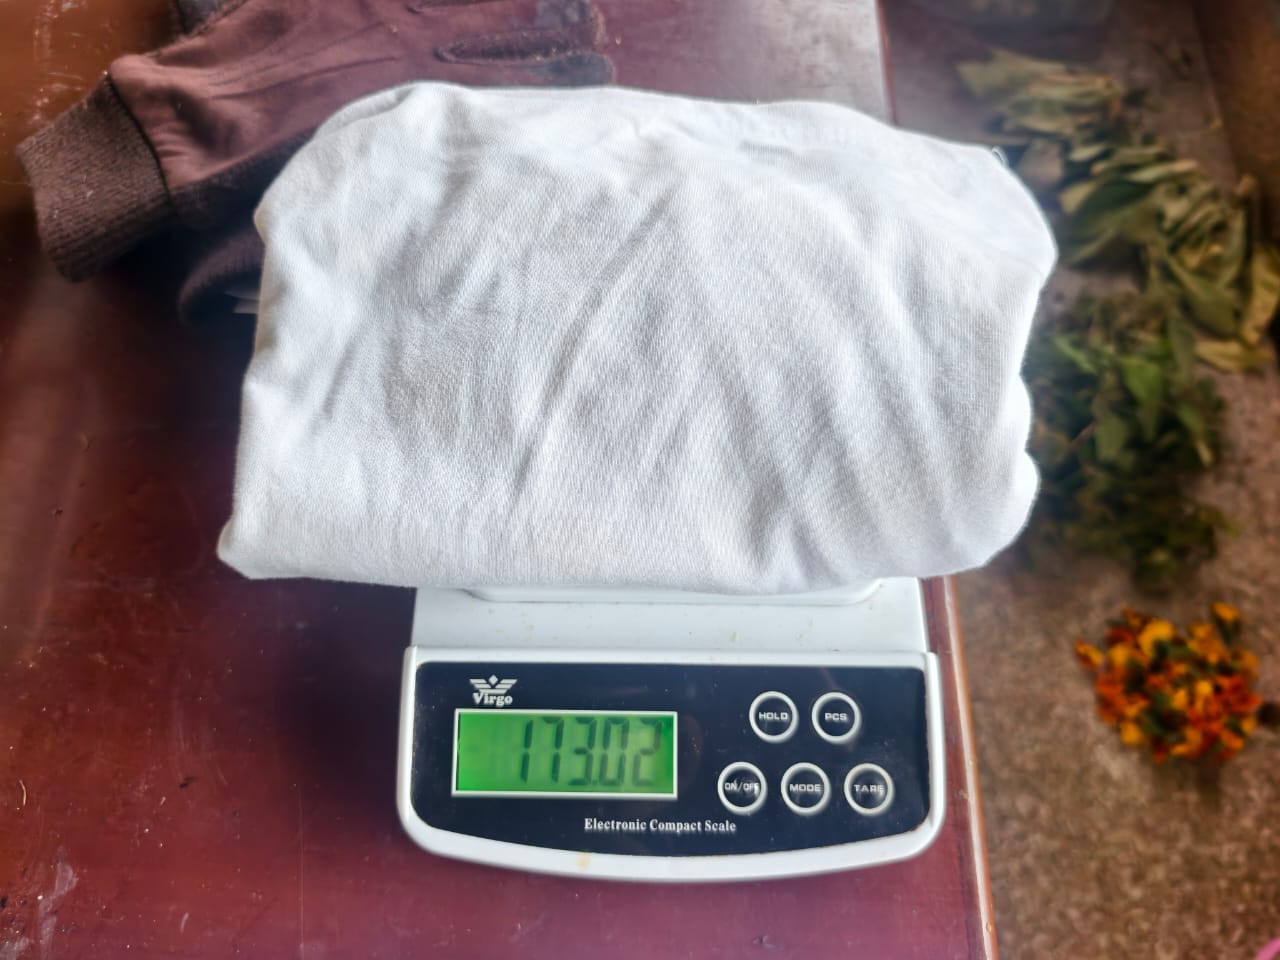
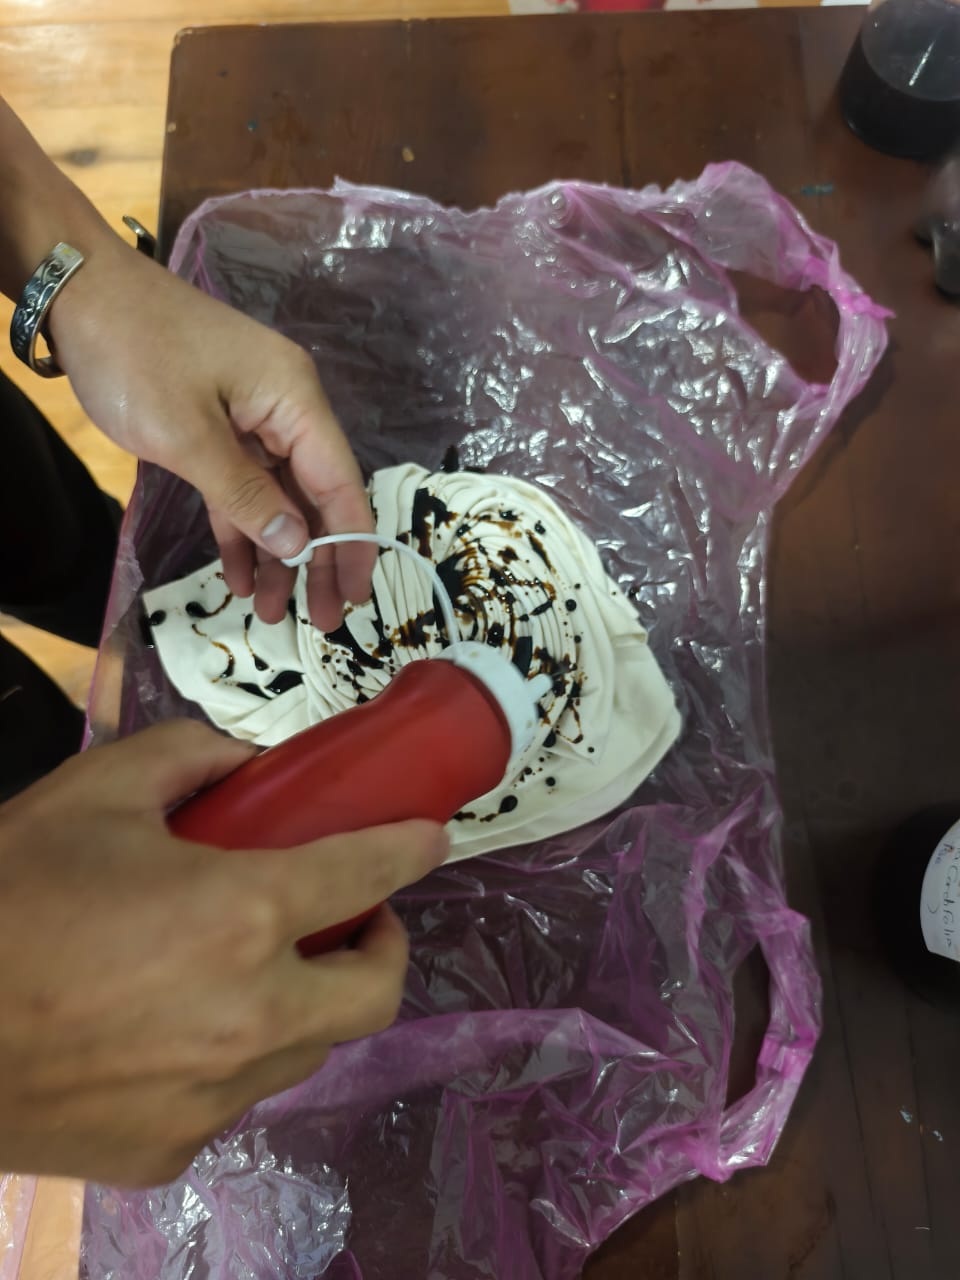
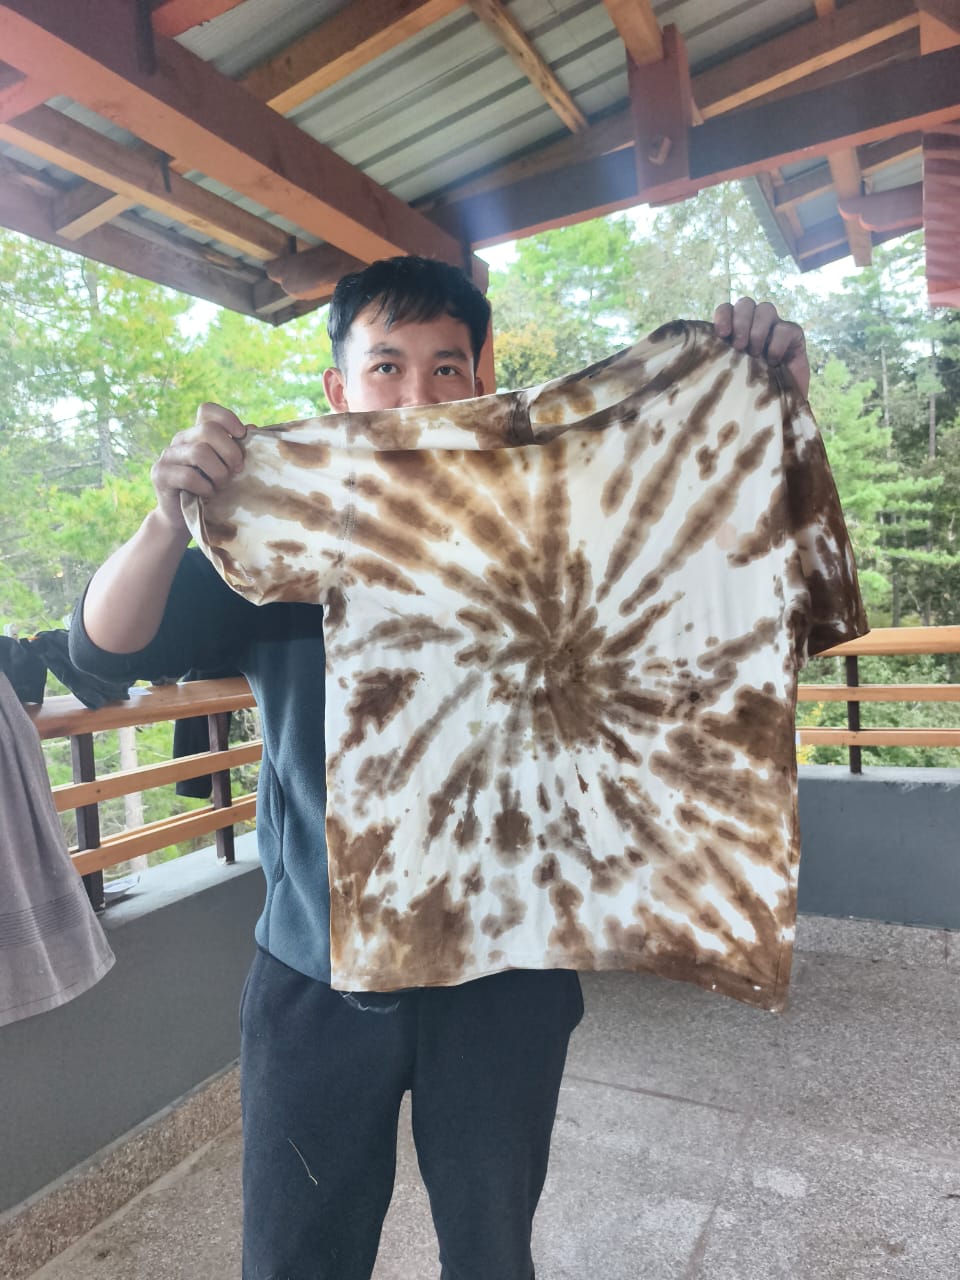
After that, I wanted to try something fun, so I decided to dye my own white cotton shirt using the walnut dye. First, I weighed the shirt to determine its weight before dyeing. Then, I mordanted the fabric before putting it into the walnut dye bath. I wanted to see how the natural colour would turn out on a shirt rather than just on small fabric samples. This was a fun way to experiment with the dye I had made and apply what I had learned to something I could actually wear.
Tools
Weekly Reflection & Critical Thinking
-
One mistake I made was not checking the equipment properly before starting the experiment. For example, I did not check the weighing machine carefully before measuring the materials.
-
I made a mistake while weighing the ferrous sulphate and added more than the required amount when mordanting the wool. As a result, the fabric became brittle. This taught me the importance of measuring carefully and cross-checking the quantities before using any materials.
-
This assignment helped me connect with my tradition and culture, which our ancestors have preserved for generations. It made me appreciate the traditional knowledge behind natural dyeing and textiles.
-
Through this experiment, I learned that I can extract natural dyes from materials around me and use them to dye fabric myself. It was exciting to discover that I can explore and practise natural dyeing using locally available materials.
Recipe files & References
https://www.bhutanwiki.org/articles/natural-dyes-of-bhutan
-
Reference: Sara; Digital Bodies; fabricademy.io; 2021 ↩
-
Reference: Mina's; Digital Bodies; fabricademy.io; 2024 ↩
-
Reference: Ania Grzeszek; kaliko ↩
-
Reference: n.n; Little Yellow Wheelbarrow; January 7, 2023 ↩
-
Reference: BhutanWikiJanuary ↩