1. State of the art, project management and documentation
What did I get myself into?
It’s been a while since I’ve written anything, let alone taken a course in which every topic is completely foreign and far-fetched from what I already know.
I am extremely stressed. My inner-critic is telling me to give up before I’ve even begun.
To help myself absorb the gist of what this week is about (no less, what this course that I was so determined to sign myself up for is about – why did I do that, again?), I've perused a couple of Fabricademy alumni’s websites.
Simply put, this week is all about Documentation. As for this course, I’ll get back to you on that…
As bland and mundane as this week’s topic sounds, it’s actually… not. It’s anything but mundane. What it is, is an entire new universe.

Freaking out, continued.
To help wrap my head around whatever this week’s process was, my first step, as I’ve mentioned, was to immediately seek help. I decided to climb onto the shoulders of Fabricademy alumni giants to help me foresee what it was I needed to do to get me through this first week.
Websites I Like
I can’t promise you that this website will do the same for you. For the time being, my needs are to make notes that make sense to me, that work for me, notes that are going to get me from one step to the next.
The first website I looked at was my teacher’s, Rico. Okay…. Yeah, no. No way in hell am I going to make it past the first week.
However, looking at Surzhana Radnaeva’s website, which was short and simple, I was able to feel something akin to hope. (Thank you)
This is because, before even getting into the how – which I will get into, eventually (hopefully) – I agonized over the what. By that, I mean I scrutinized over what I was going to document on the topic of Documentation itself.
FYI, at the time I am writing this sentence, I still have no clue how to do the actual documenting. I’m just spilling onto a GoogleDoc to ease myself from the panic I’m creating inside my head.
Looking at Rico’s website, I saw A LOAD of gibberish. It was a lot. A lot of gibberish. Endless scrolling of gibberish.
Was it gibberish? Not even a little bit. Did I interpret it as gibberish? A hundo.
There is too much I don’t know. I don’t know any of this. I don’t know anything. How am I going to write THIS MUCH about something I literally know nothing about. I was a little too quick in coming to the conclusion that Nothing In This World Makes Any Sense.
And then I remembered to breathe.
Baby Steps
Okay, so I might have bashed Rico's website (sorry about that Rico), but I wouldn’t still be here if it weren’t for his notion Project Management page.
From what I’ve gathered, there are three main points to this documentation process.
The three points you need to know are:
- Markdown Scripting
- IDE (Integrated Development Environment)
- Gitlab
These are all interconnected. The Integrated Development Environment (IDE) is like a notepad where you’ll script your process in the specific language (Markdown) and then “commit” it to the cloud (Gitlab). Allow me to elaborate.
1. Markdown Scripting is the Language
Right now, I am drafting this text that you’re reading on GoogleDocs. In order for me to present this text on this site that you’re viewing, I need to translate it into “scripting,” called Markdown, in order for the computer and Gitlab to register it as a website.
There are two places/ environments in which you can add Markdown scripting to your text. The first is in Visual Studio Code (an IDE software you download onto your computer). The second is in the web IDE on your Gitlab site.
The language essentially includes symbols to bold, italicize, and organize your headings.
Here is a tutorial for Markdown. Here is a Markdown Cheatsheet.
2. Integrated Development Environment (IDE) is the notepad
This environment, or notepad, where your scripting goes, can be accessed on a software downloaded onto your computer, or on the web (through Gitlab).
This year, it’s highly suggested that you access the IDE straight from the web. The pros is that you can edit your text, then commit it straight to gitlab, and the changes will be seen on your website. It’s convenient. The con is that you need to work in an area with stable wifi, and can’t edit your website offline.
Anyway, the IDE is where you will be “Scripting” – aka where I’ll be pasting the text that you’re reading and inserting special symbols to make certain text headings, or in italics or bold.
It’s pretty straightforward.
3. Finally, Gitlab is the file cabinet ??

Gitlab is an online browser – a cloud of sorts, that does many things. It’s where you are going to store all of your documentation. It turns your scripting into a personal website. It keeps track of the history of changes you make to your scripts while also making it visible to all your peers.
Special Mentions (for Gitlab)
- Docs
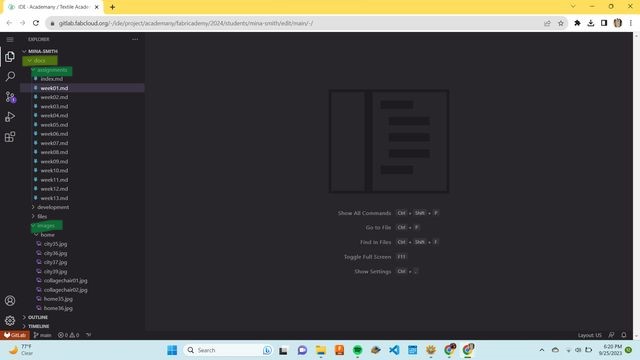
When you access the web IDE on gitlab, you will notice that you have a few different folders. The first one is titled “docs.” This folder is where all your documentation is stored, including your assignments from week 1 all through week 14, your images, files, etc. - Mkdocs.yml
Outside of the docs folder, you’ll see another folder with a purple punctuation mark icon
 , called mkdocs.yml, this is the settings of your website, where you’ll enter code for the theme, and colors, and font that will help your website look more presentable.
 - Docs>Images
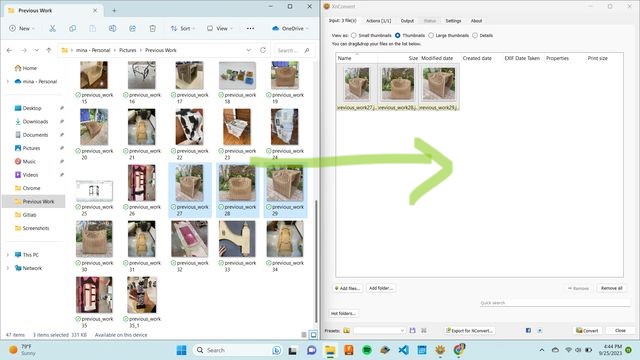
Back in the docs folder, you have a folder for all the images that you are going to use for your site. The images folder can further be organized into weekly assignments or home page, project page, etc. Take loads of photos for your website. But remember to compress them into a small size before uploading them to your IDE. Each image should be around 150kb (kilobytes), and in .jpg format. This is a good software to download onto your computer to compress your images in bulk.
Uploading Images to Web IDE
There is a specific way to upload images onto your website. Before uploading the images you want for your website onto your web IDE “images” folder (under docs), you want to make sure the images are the right size – this means anything under 100-150 kilobytes.
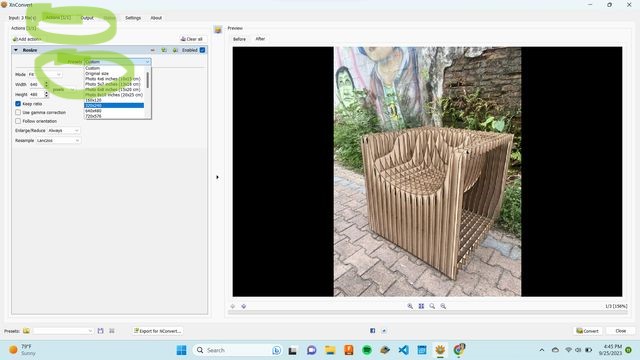
If you have a lot of images, a useful image bulk converter is XnConvert Here is the link to download the software.
- Drag/Drop all the images you want to upload to your site into XnConvert
- Go to "Actions" tab and choose the preset 640x840
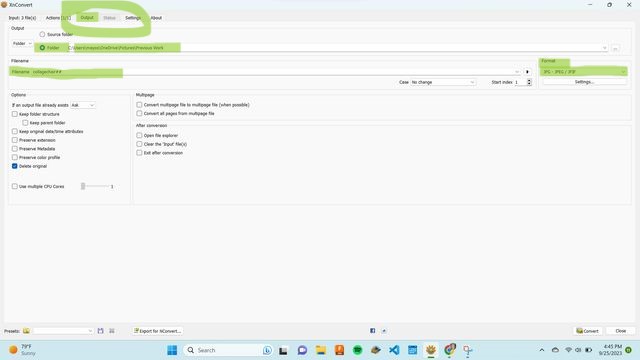
- Go to "Output" tab and choose the folder on your computer you want to save the image in, name the file, and choose the format JPG
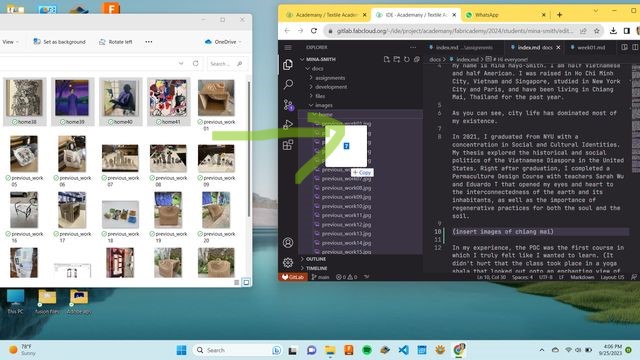
- Drag and Drop your images onto your Web IDE.
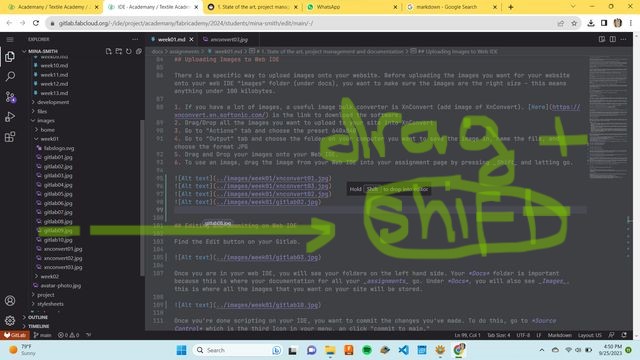
- To use an image, drag the image from your Web IDE into your assignment page by pressing Shift and letting go.
Editing and Commiting on Web IDE
Find the Edit button on your Gitlab.
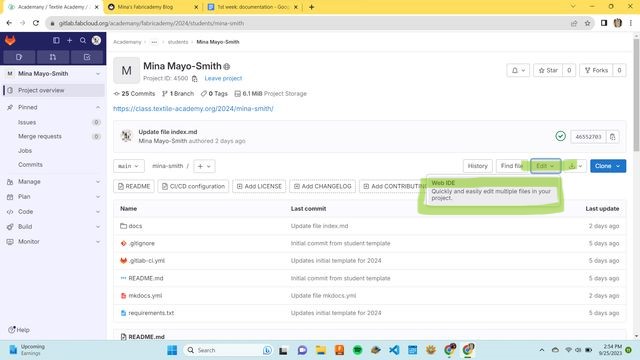
Once you are in your web IDE, you will see your folders on the left hand side. Your Docs folder is important because this is where your documentation for all your assignments go. Under Docs, you will also see Images, this is where all the images that you want on your site will be stored.
Once you're done scripting on your IDE, you want to commit the changes you've made. To do this, go to Source Control which is the third Icon in your menu, an click "commit to main."

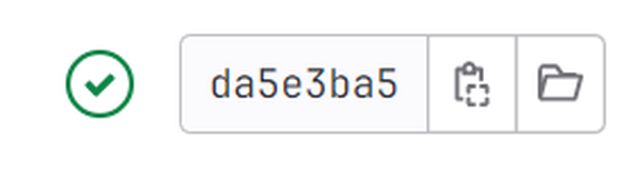
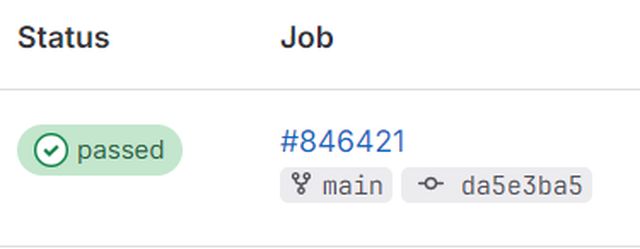
To make sure your changes are being committed to your website. Check the "Commits" and "Jobs" tabs on your Gitlab desktop. I recommend you pin these two pages because you will be checking these pages each time you make a change to your website.
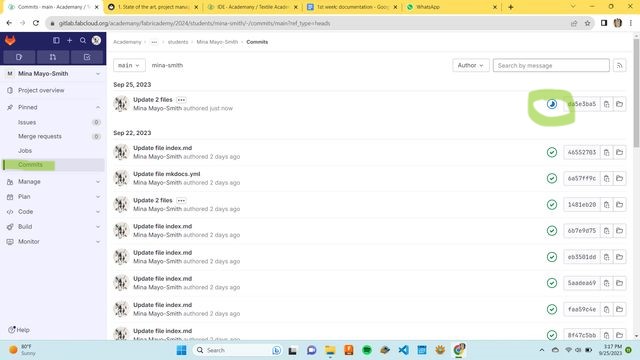
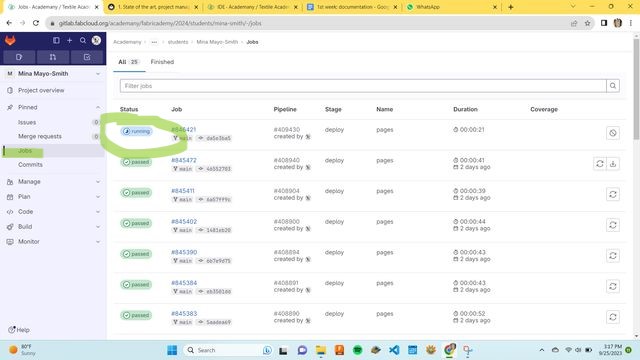
Once Gitlab is finished committing your changes to your website, it will display a green check mark, like this:
To wrap up
Let’s look at this week’s Learning outcomes and Student checklist.
Learning outcomes
- Research skills: Learn the process and tools used to document course work
- Design & process skills: Acquire the necessary skills to publish projects, documentation and share the results of each assignment
Student checklist
[x] Build a documentation website describing you and your motivation for the textile-academy, including your previous work
[x] Upload the documentation to your project page on class.textile-academy.org
[x] Add references and research based on the topic of your interest
[x] Learn how to upload images, videos, references and how to use Markdown and Gitlab
[x] Learn about the fab lab processes, booking system, usage, machine demos, tools and safety rules
[x] Customize your website and document how you did it (extra credit)