Digital Bodies
This week we focused on making 3D models in different ways. I used Blender, MakeHuman, and Slicer to make my physical 3D model. Using the Xbox 360 Kinect, I made a scan of myself and an object and turned it into a digital model. On this page, you can read how I did this.
Moodboard and Research
My inspiration for this week was broad, and I was not sure where it would take me. I was really inspired by color, movement, and coping or mirroring, as you can see below.
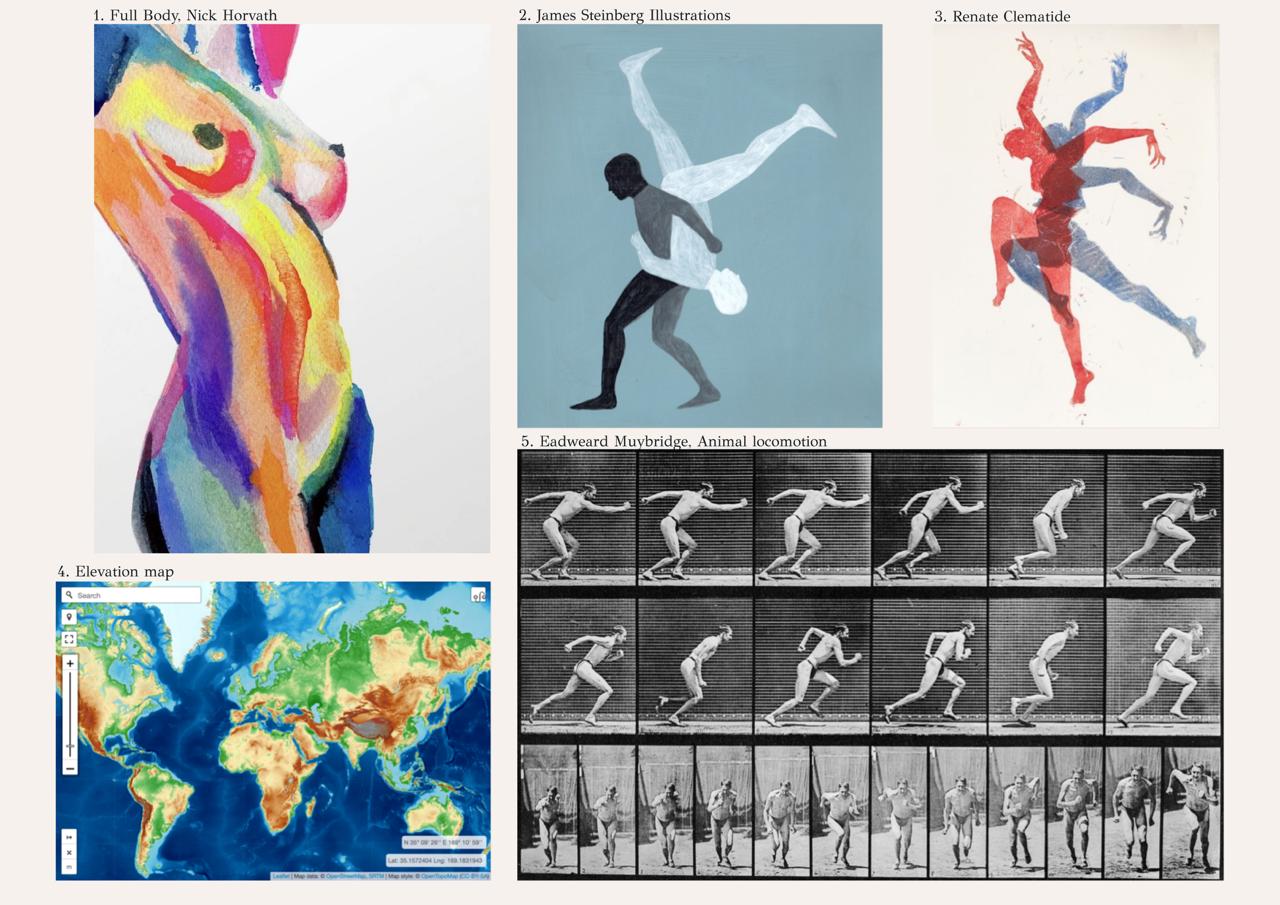
The torso made me think of the elevation maps I used to make during my studies. The elevation maps are used to show, in a 2D point of view, the different heights and depths of an area. The vision of a female torso with the bright colors used for the elevation map was my first idea, but I wanted to explore further.
So I did! During the presentation of Anastasia, the artworks showing movement were the ones that stayed the most in my mind. It was showing a story of something that happened once and was captured in one piece. This brought me to my second idea: the movement of running away from your old self to discover new things, but your old self trying to take and hold you back.
My last 3D model came a bit from the same story and feeling. But I added the mirroring, as shown in the work of James Steinberg2.
Process
After making the moodboard and following Rico's Blender and MakeHuman tutorial, I started exploring and playing with the features.
Blender and MakeHuman
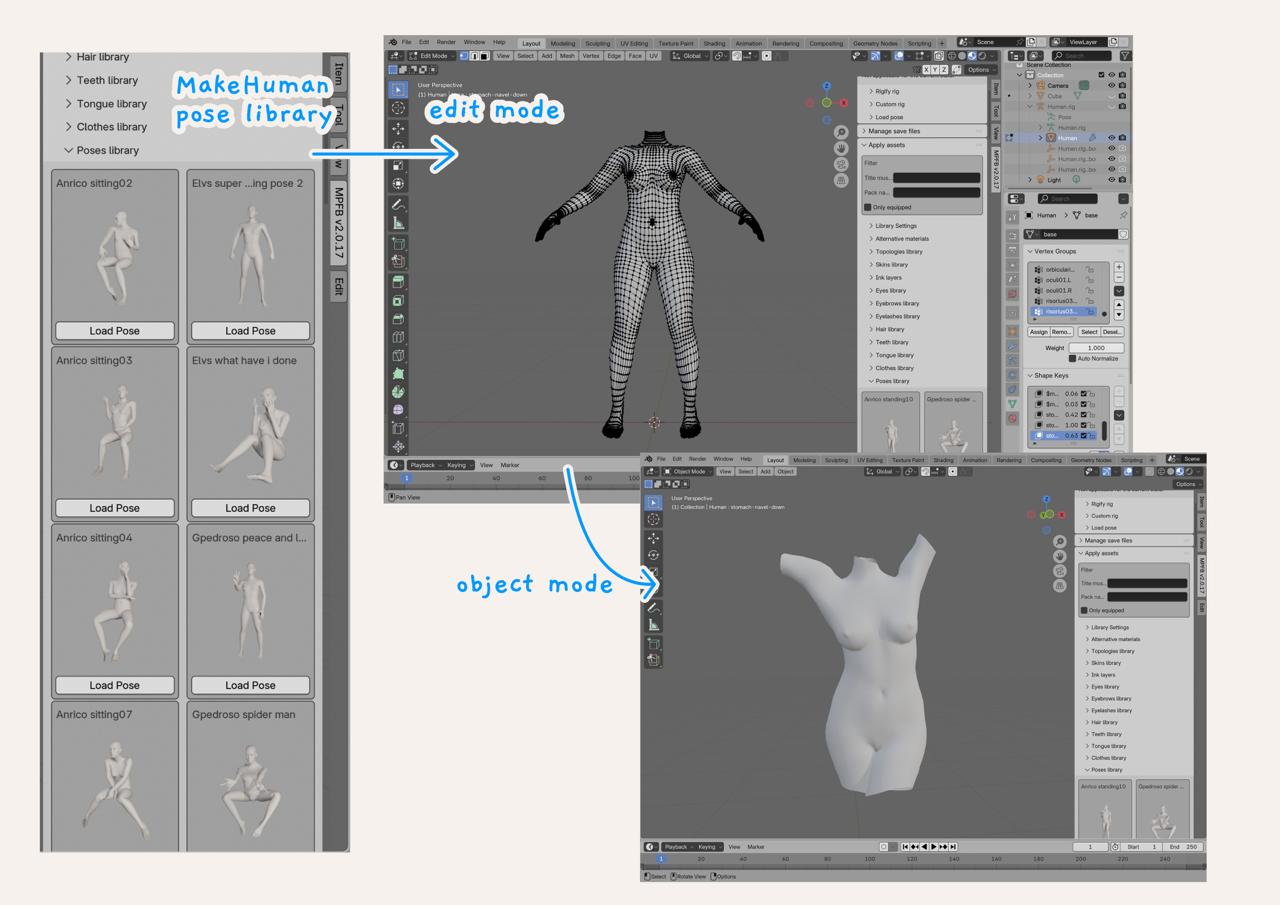
I started by creating my first idea, the elevation map torso. I created an average female body with MakeHuman. I added a rig and tried to change the arms into a position where they were above her shoulders and the hands were touching the head. This was more difficult than I thought, even with my Blender experience of making Jam, and I didn’t succeed in putting the arms above the shoulders. Luckily, I discovered MakeHuman had a Pose library in Apply assets. I went back to the site and downloaded some of the pose packs. With those poses, there was not even a single pose where the arms would go above the shoulders. There was the elvs_epic_haute_couture_2 pose from pose pack 03, where the hand was put on the waist. Here, I just had to put them above the shoulders, and I got the pose I wanted. I deleted the parts I didn’t need in edit mode, and then I had the shape I was going for.
For the second idea, showing the movement of moving on. I did basically the same as idea one. I made an average male body with MakeHuman, I added the rig and some eyes, and I put him in the callharvey3d_sittingdefault pose from pose pack 01. For this idea, I needed a running person as well, so I duplicated the sitting male and changed his pose to the jjones_sisyphus pose from pose pack 04. This is not a running pose, but it came close. I used the work of Eadweard Muybridge5 to make the running pose as realistic as possible. It was hard to make my idea and story transition to the 3D world, and this idea became like that my least favourite.
That’s why I wanted to try again and think of the same story but more broadly. In the same pose pack as the “running” I found the culturalibre_falling pose. As the name says, it’s a pose of a person falling. With James Steinberg’s2 piece in mind, I chose to duplicate the falling person and position it on the opposite side so it creates the look of letting go and holding back.
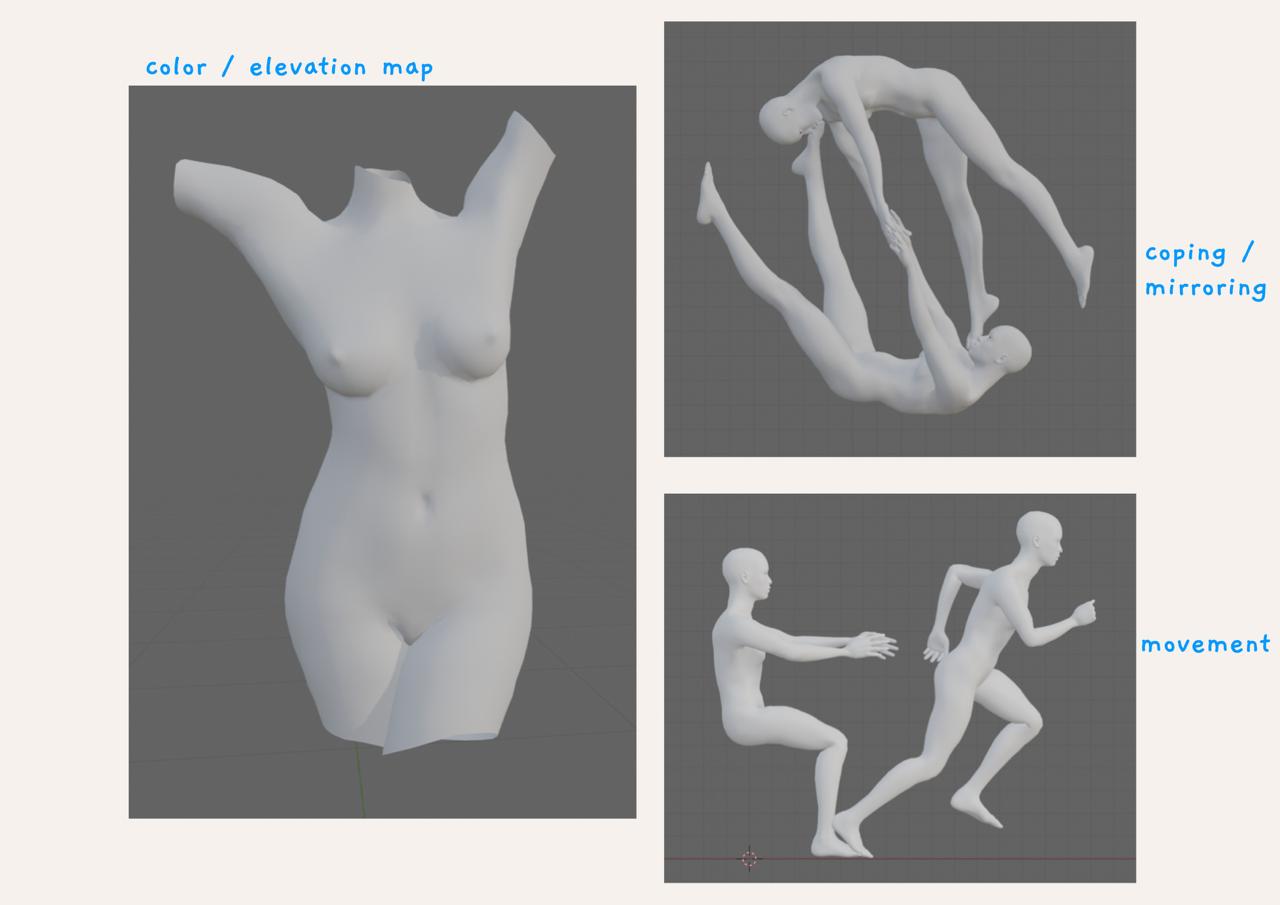
I mostly couldn’t decide between the torso and the two falling people. When discussing this with Cappucine, there were a couple of things to think about. The two falling people are a bigger project because of the details. When sizing down, the details wouldn’t be that visible. So it would be smarter to just take a part of the work. With that, we decided to cut the torso.
I resized the model to be around 25cm tall and cleaned it up in Blender and made the bottom and top flat so it could stand. Because every time I went into edit mode, the body would jump back to the rest position, it was hard to imagine how to flatten the model. I tried changing the rest position to the pose, but then the changes made in edit mode wouldn’t show up in object mode, so this was not the way to go. I tried duplicating it and deleting the rig, but without success. So I went back to Rico's tutorial, and yes, he explained exactly what to do in this situation.
How to fix this situation
- Select your body, not the rig, in object mode.
- In the top left corner, there is the option Object.
- In the list that pops out, search for Convert.
- And click on Mesh.
As simple as it is, it was hard to find and figure out on my own. Thanks to Rico's tutorial!
Slicer
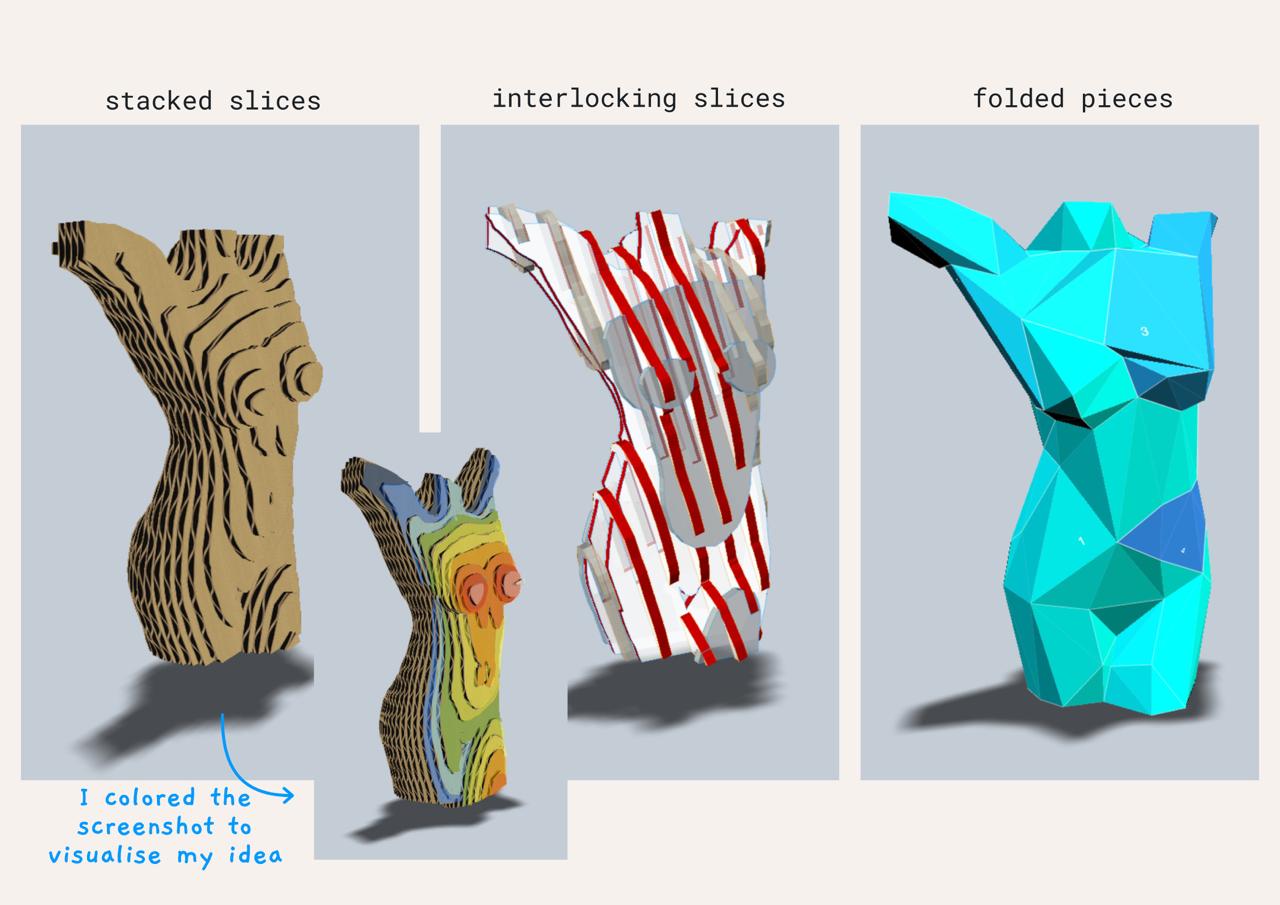
I had never worked with Slicer, but luckily it’s an easy-to-understand program, especially with the tutorial I watched from Fabricademy 2023. I imported the torso file and made sure I selected the Z-axis so it would look the same as in Blender. I adjusted the Manufacturing settings to work with the laser cutter here in Lyon. I played a bit around with the construction technique, but the interlocking slices gave lots of red parts, which means that it’s not possible to assemble. For the folded pieces, I liked the look, but my idea of the elevation map would not translate well with the construction. To make the idea come to life, I used the stacked slices construction technique. I changed the slice direction, so I would have top-to-bottom pieces that I could each give their representative color.
I exported the 2D files as a PDF and rearranged the pieces to reduce the cardboard waste. Here you can download the PDF file with the rearranged pieces.
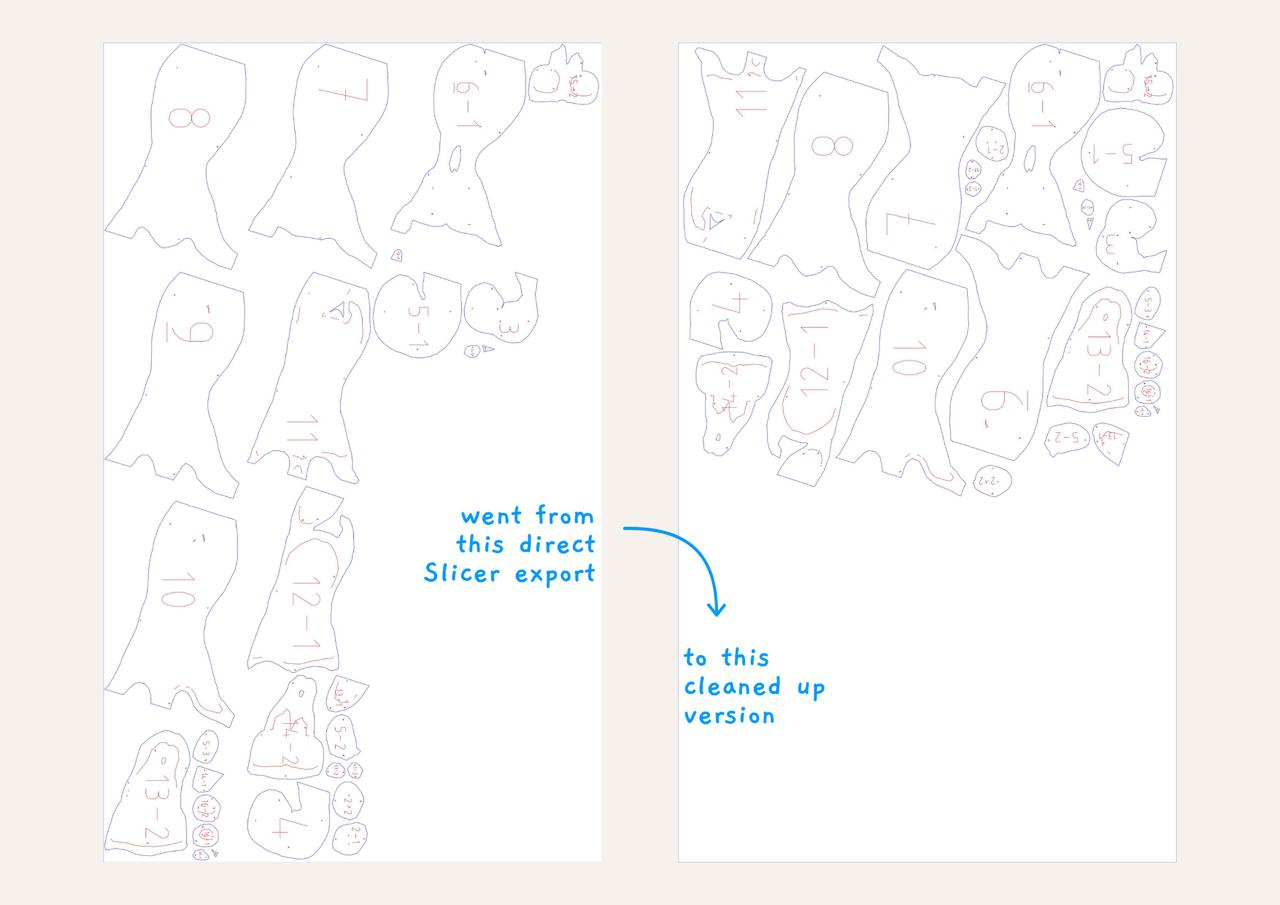
Now it’s time to cut!
Laser Cutting
Before cutting, I got an explanation of how to use the laser cutter, what materials are possible, and which are absolutely not. Here I discovered that the color and thickness of the lines are important. The red lines will fully cut through the cardboard, and the black lines will cut just a bit, this is for the numbers on the pieces and guiding lines. The thickness of the line needs to be 0.001pt otherwise, the laser cutter would not recognise it.
Instructions for the laser cutter
- Turn on the chiller.
- Turn on the laser cutter with the lid closed. The light must turn on, and the bed will go down.
- Turn on the compressor.
- Place your material on the laser cutter bed.
- Open RayjetManger on the computer.
- Drag and drop your file onto the bed and click on the eye to make it visible.
- Connect to the laser cutter.
- Make sure the file is alligned with the material in the laser cutter. By putting the laser on a corner of the material and draging the file on the computer to this corner.
- Choose your material. And check that the change is made in the upper right corner.
- Press "start" and wait. Keep all the time an eye on the laser in case of a starting fire.
There were quite some struggles with making the laser cutter do its job. The first time we started, the red/outside lines that needed to be cut through the cardboard were not deep enough, so it was not possible to push out the pieces. We increased the power and decreased the speed to see if those settings would work, but again, it was not deep enough.
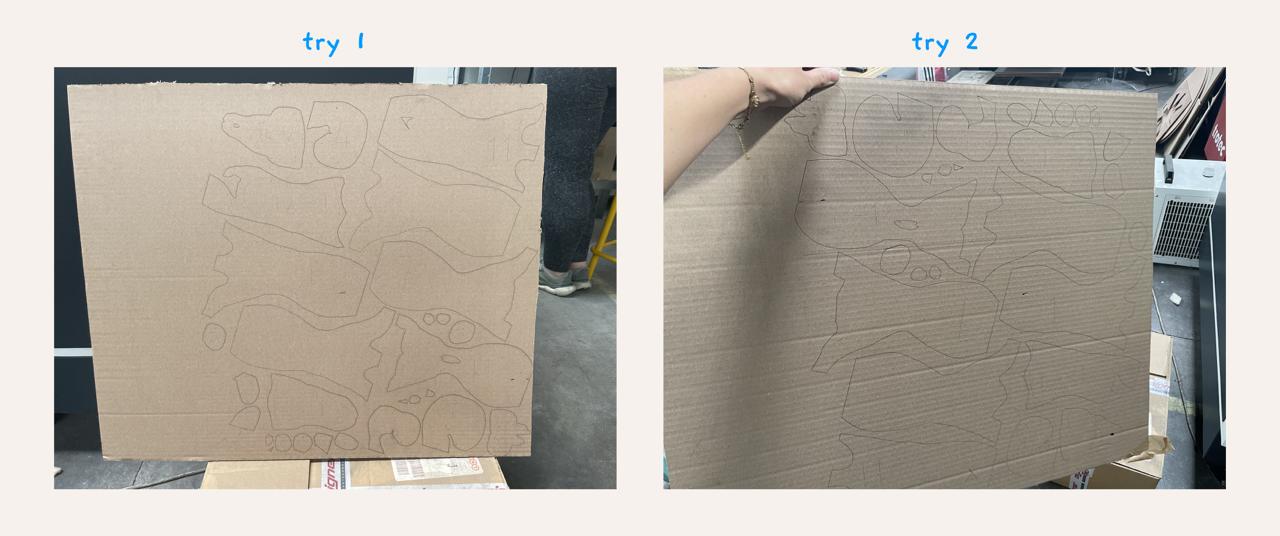
The third time was the charm, we first did a test, and that worked perfectly. So we rearranged the pieces to fit on another size of cardboard and started the cutting. It all went fine until it hit a tinier piece on the border of the cardboard, and it started a tiny fire. We stopped the cutting, opened the machine, and put out the fire. Luckily, lots of pieces were cut already that we could take out and put on the side. But there were still some pieces missing, here again, we needed to rearrange them and start the laser cutter to cut the last pieces. Hopefully there was no fire again, and I had all the pieces. Here is a short video of the laser cutter cutting the cardboard into the right shapes.
After gathering all the pieces, it was time to paint and assemble.
Painting and Assembling
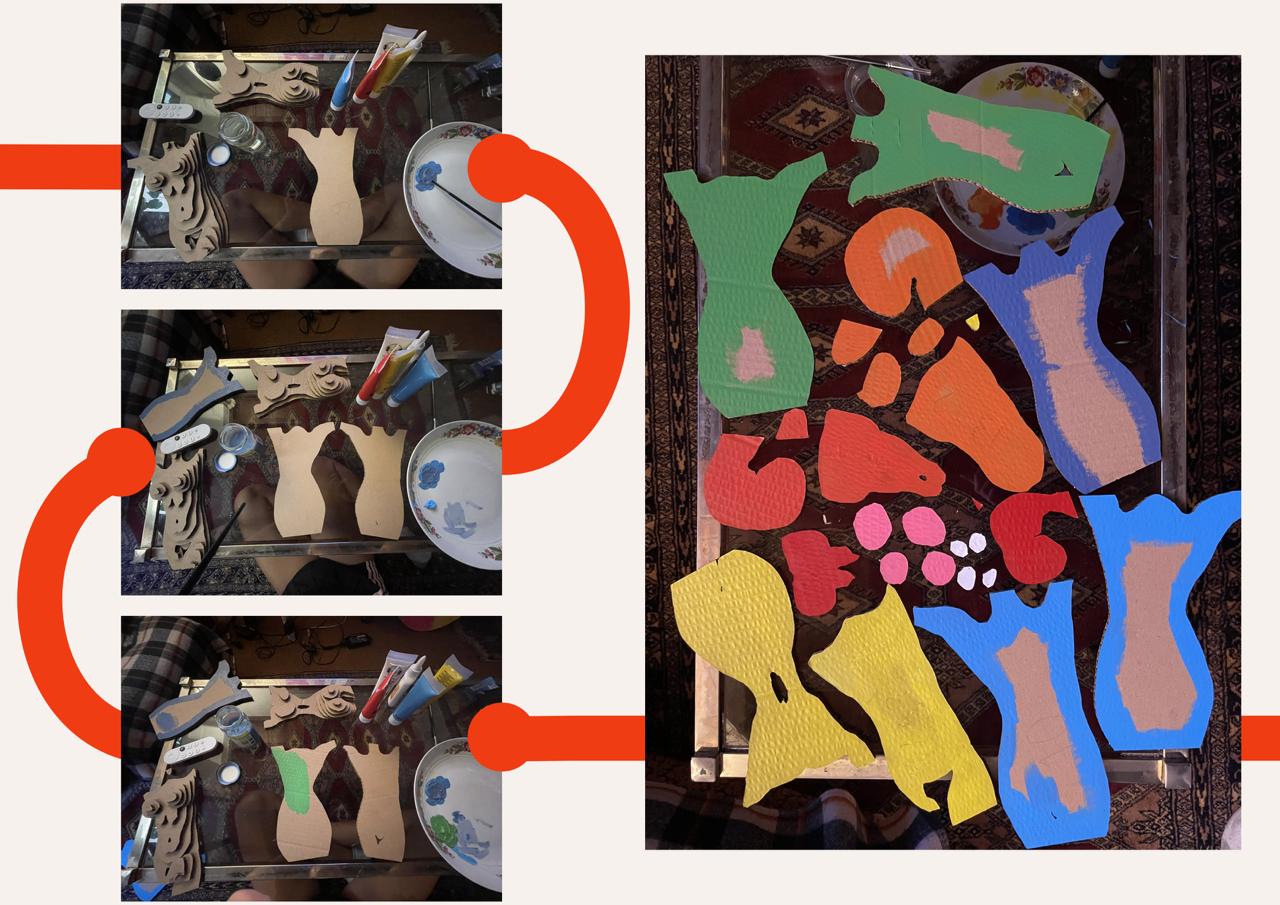
To create the elevation map, I assigned colors to each height/dept. To make sure I painted all the pieces the right color, I used the Assembly steps in Slicer to note the colors on the pieces. Here is an overview of the pieces with their assigned colors.
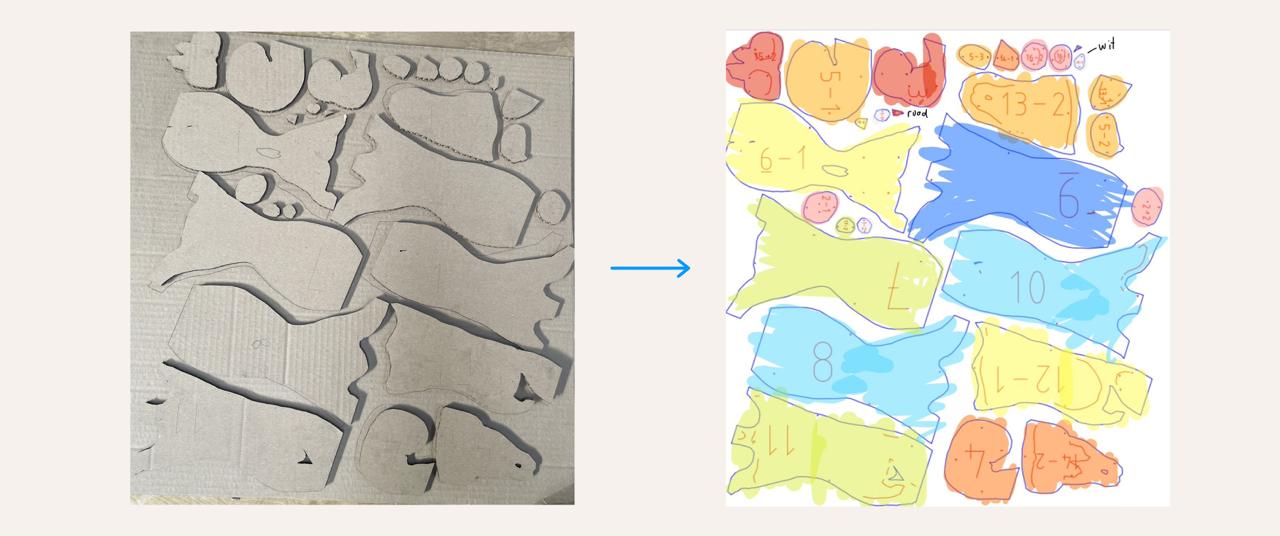
During painting, this picture was very helpful. (1) I laid out the front and back on their flat side and stacked all the remaining pieces on top. I started with the dark blue color, working from the middle to the outside. (2) When switching colors, I grabbed the bottom pieces of the stacked front and back and just painted the side that was showing. (3) And I repeated that for all the pieces with their assigned colors. As you can see in the picture, some are not fully painted. This is because the middle of those parts will not be visible when assembled.
The paint dried fast. I did a second layer on the yellow pieces to make it more opaque.
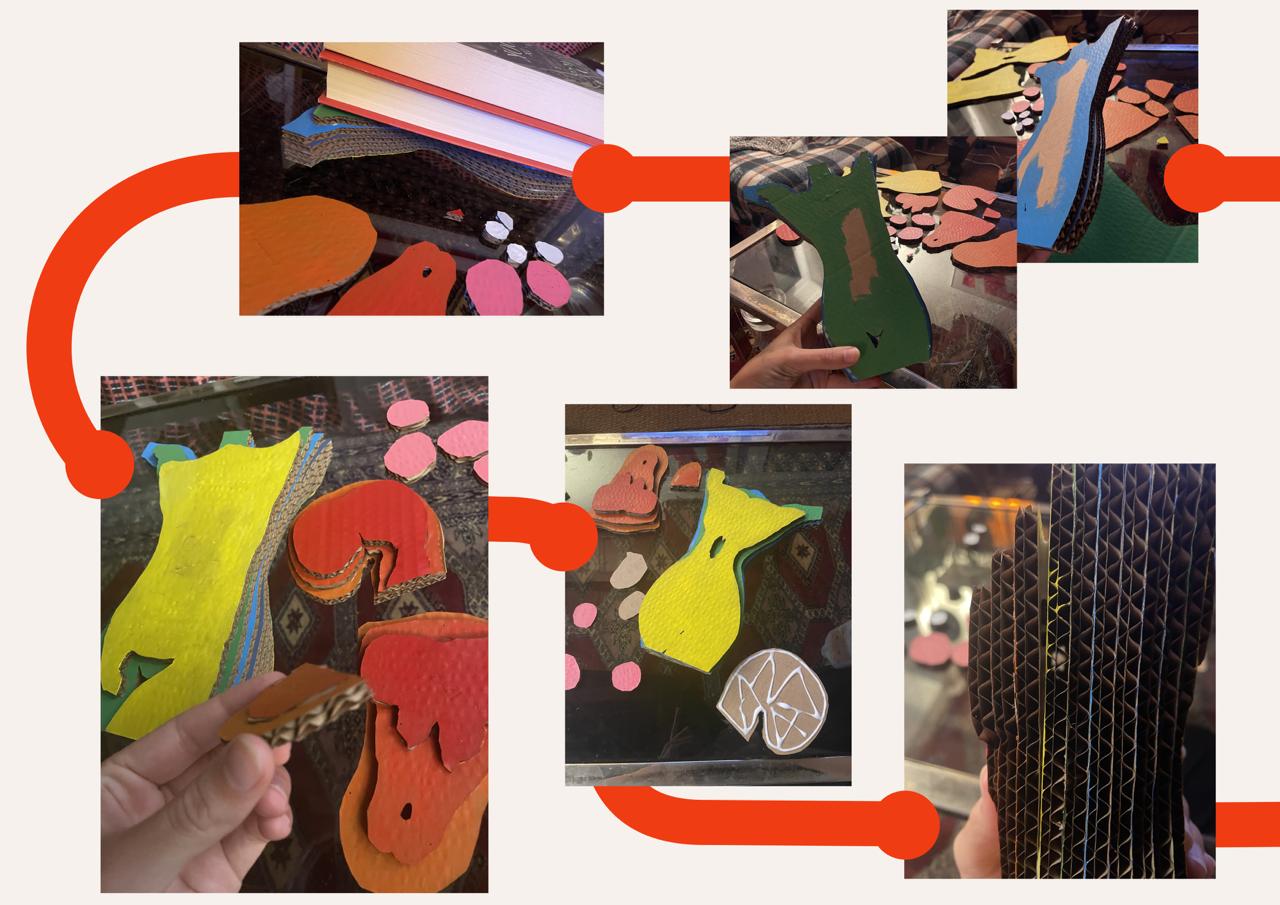
On to assembling! Because of the colors, it was easy to see how to assemble the model. (1) I worked again from the middle to the outside. So, on the middle dark blue pieces, I glued the two light blue pieces, and on top of those, the two green pieces. I did this until the yellow pieces, these were the last pieces that were covering almost the full body. (2) To make them stick together in all places, I put some books on top, and that worked quite well. I repeated this separately for the orange/red pieces and put a book on top of those as well. (3) The next day I wanted to finish the work. When I took all the stuff from underneath the books, I discovered that a tiny piece had too much weight on it and became flat. Sadly, I couldn’t do anything about it because the glue made sure it would stay in place. (4) The last steps of assembling. I connected the pieces that had dried overnight, and the pieces were assembled. (5) I ran into another tiny problem because I didn’t dare to put the books on the tinier pieces again. In some places the carton was not sticking that well together, no matter how long I held it tight to make the gap disappear. Luckily, it’s just in one or two places and not that visible, only when inspecting the piece.
To see the result, jump to Results.
3D Scanning
Aside from making the 3D model, I learned how to make 3D scans of objects and persons. They are not really different from each other.
3D scanning steps
- Open Skinect to connect the attached Xbox 360 Kinect.
- Choose the option person or object, depending on what you want to scan.
- Use the Kinect to go around the person or object slowly.
- Make sure you keep the person or object in the green so the scan will work best.
- When finished, let the program run the fu the full scan.
- Now you can run other fixes, like making it watertight, closing the holes, and simplifying.
- When you're done with the fixes, you can export it.
We scanned two things: me and the fire extinguisher. Cappucine scanned me, during that process, it was very important not to move. In the result, you can see that I have a bit of difficulty with that. The fire extinguisher was scanned by me. Here, it was important to keep an eye on the computer screen to see if I was keeping enough, but not too much, distance from the object.
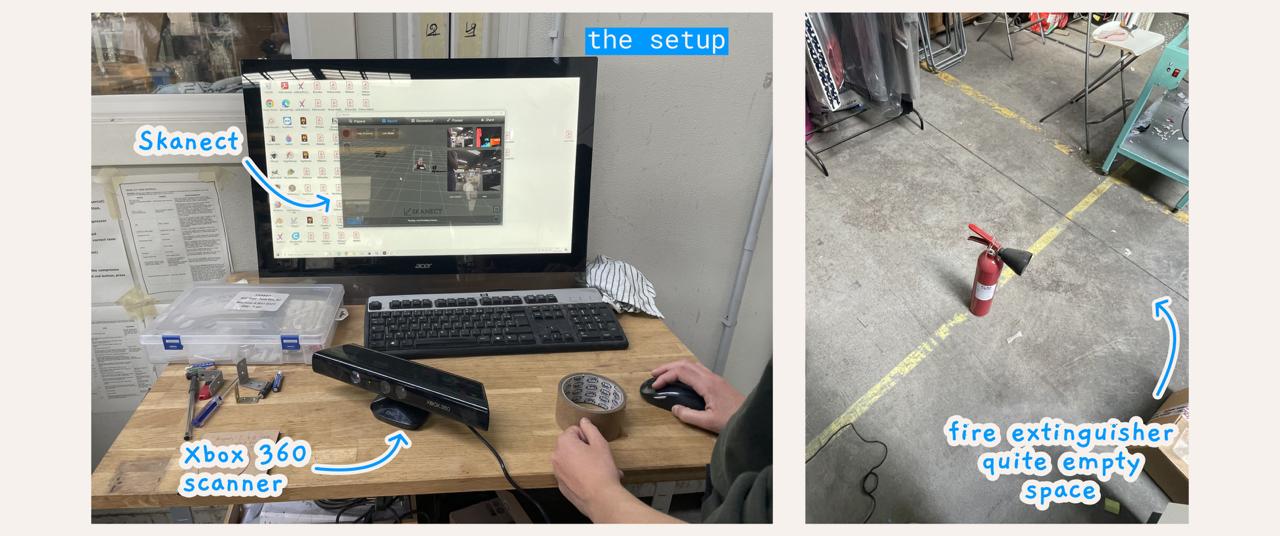
Here are the results of the scans:
Results
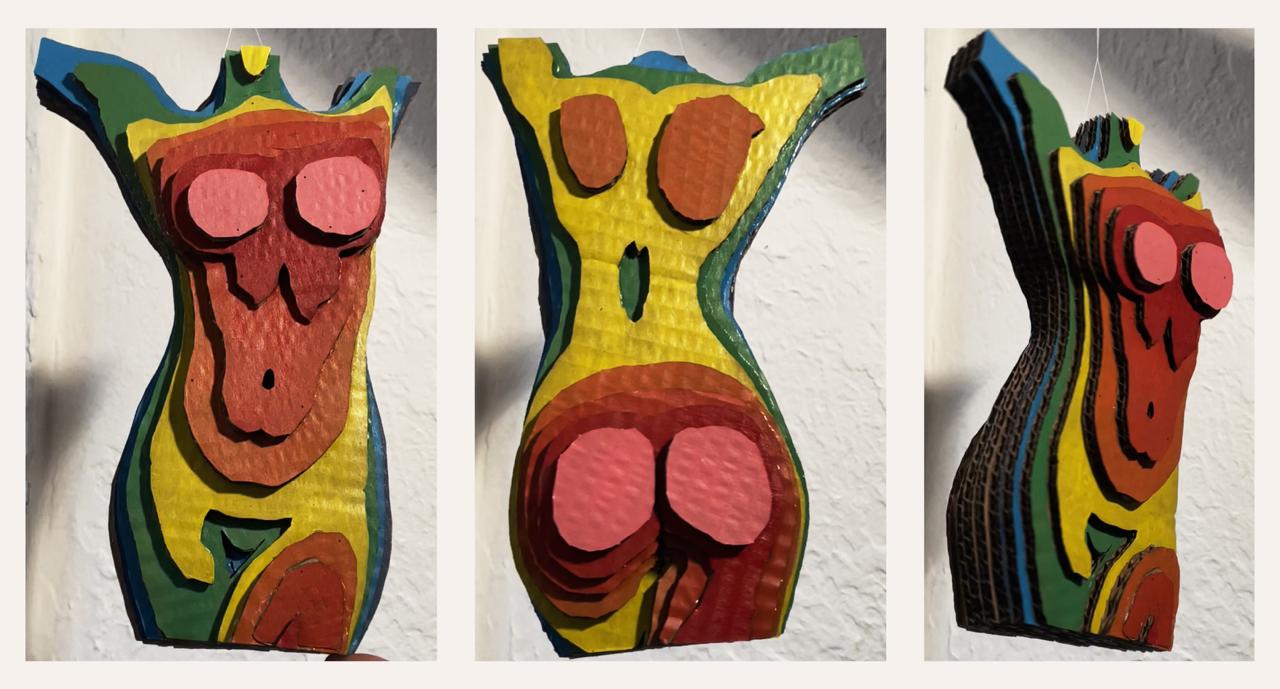
Here is the finished 3D model!
The different colors show the different heights well when it’s looked at from the front and back just like an elevation map. On the side, you can see the real height of the cardboard and the silhouette of the body. Here are some more pictures of the final work.