BioChromes
In week 4 of Fabricademy, we dive into the world of natural colors. On this page, I will show you exactly what I did this week and how you can do it too. At the beginning of the week, I was new to the dyeing process and curious to learn and see what results we would get. The first day was mostly prepping the fabrics and was not that exciting to me, but the next day blew my mind. Every time I pulled fabric out of a dye bath, my mouth opened in surprise. I was not expecting that natural dyes could be so vibrant and intense. If you cannot wait to be amazed, jump to the results.
Process
The process can almost be split into the days we work on it. Day 1 (Wednesday ): prepping day; Day 2 (Thursday ): dye day; Day 3 (Friday ): making inks, pigments, and printing paste, and documenting all the samples. I will explain it all to you just like how Capucine and Marion did to me.
Prepping
First things first, what are the fabrics and dyes we will be experimenting with?
| Fabrics: | Dyes: |
|---|---|
| Wool | 1. Birch leaves |
| Silk | 2. Nettle |
| Cotton | 3. Madder extract |
| Linen | 4. Lac dye extract |
| 5. Campèche extract | |
| 6. Honey extract | |
| 7. Peach extract | |
| 8. Pomgranate extract | |
| 9. Réséda extract | |
| 10. Something Marion will bring: onion peels and beech nuts | |
| 11. Indigo vat |
With this in mind, we picked our fabric pieces and cut them into smaller pieces that could be divided into 8 smaller pieces. Like this, we could have, with each dye bath, an alum bath and an iron bath. We weighed the total of each material and the eleven piles together to get the dry weight. This is an important step because the amount of all the things we add later depends on the WoF (Weight of Fabric).
Scouring
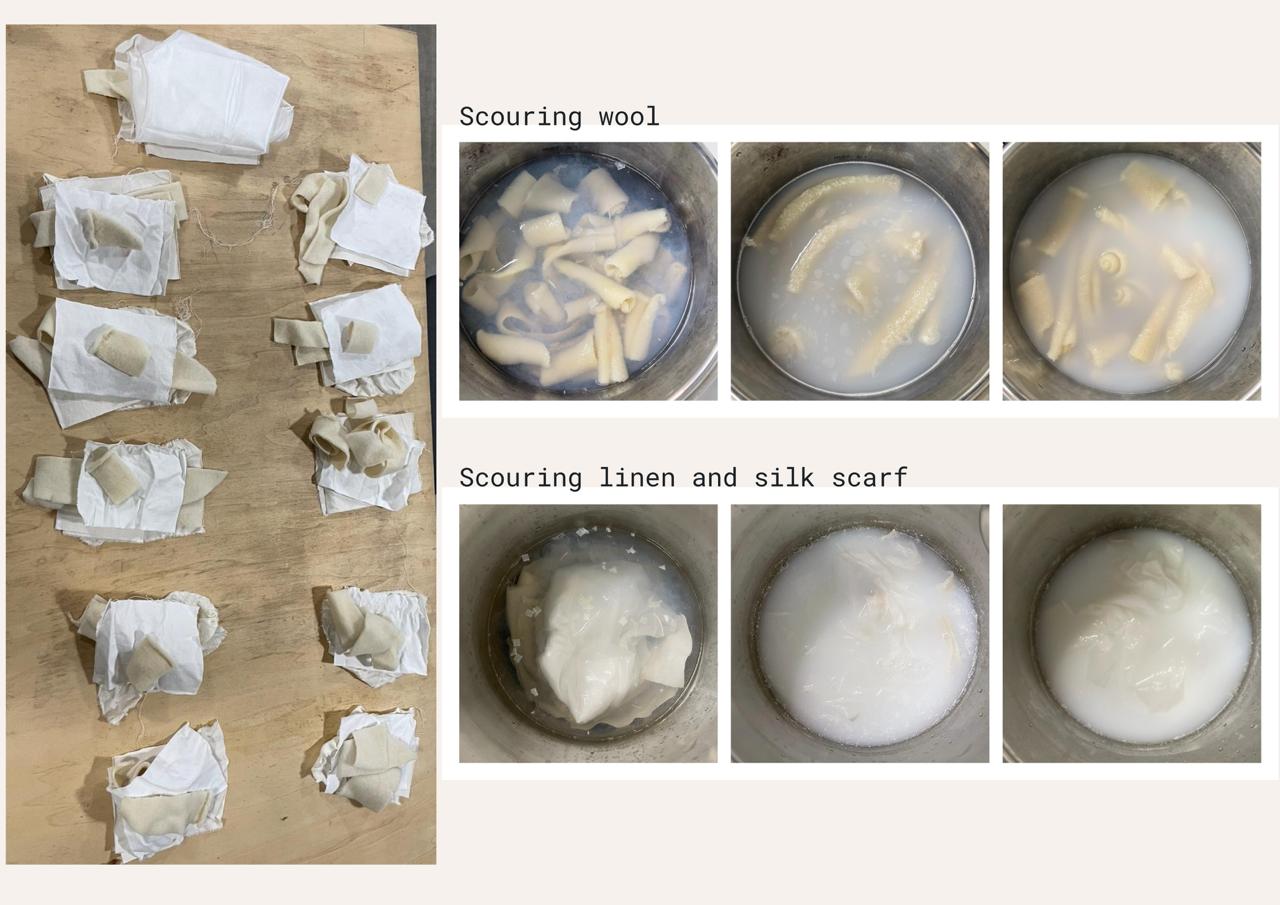
It’s important to have very clean fabrics so the dye molecules can attach well to the fabric molecules. The silk and cotton pieces we got out of a bag were already scoured fabrics, so this was good to go. But the wool and linen were not ready, we gave them a soap bath for around half an hour at 40°C. The soap bath consists of tap water until the fabric is completely under water and 2 tbsp of Savon de Marseille flakes. After half an hour, we rinsed the fabric and went on to the next step.
Scouring recipe
- 2 tbsp of Savon de Marseille flakes
- Tap water until fabric is underneath water
- 30 minutes around 40°C
Engaling
This is an extra step for the cellulose fibers so the dye will attach more easily to the fabric. The cotton and linen were added to a pot with 17 grams of oak gall and topped off with tap water until the fabrics were covered. We let this cook for 1 hour. In this time, just the linen changed color, it was uneven, and it looked like someone painted with mortar on the linen before.
Engaling recipe
- 10% WoF of oak gall
- tap water until fabric is underneath water
- 1 hour of cooking
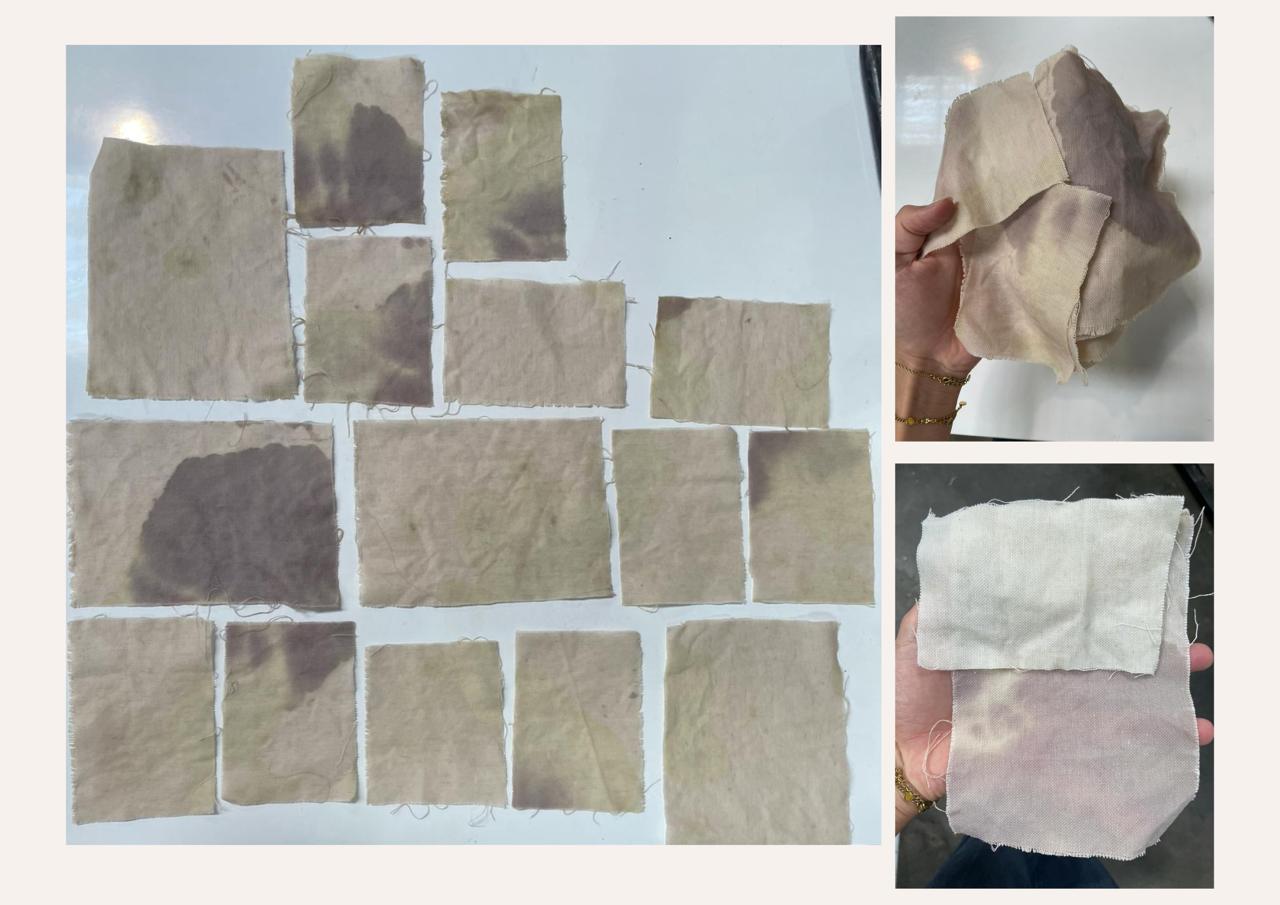
We kept these pieces to do some tests with later on, but we didn’t want to use them for the final result. From the fabric stash, we picked another linen fabric and scoured this again. Because this fabric was dirtier, we decided to wash it in tap water with 2 tbsp of savon de Marseille flakes and 30 grams of sodium carbonate (10 g/L). We rinsed it and put it in the same oak gall bath as used before, with no extra oak gall added. These linens also turned pinkish after 20 minutes, we let them cook for an hour in total and hoped for the best.
More intense scouring recipe
- 2 tbsp of Savon de Marseille flakes
- 10 grams / liter of sodium carbonate
- Tap water until fabric is underneath water
- 30 minutes around 40°C
Mordanting
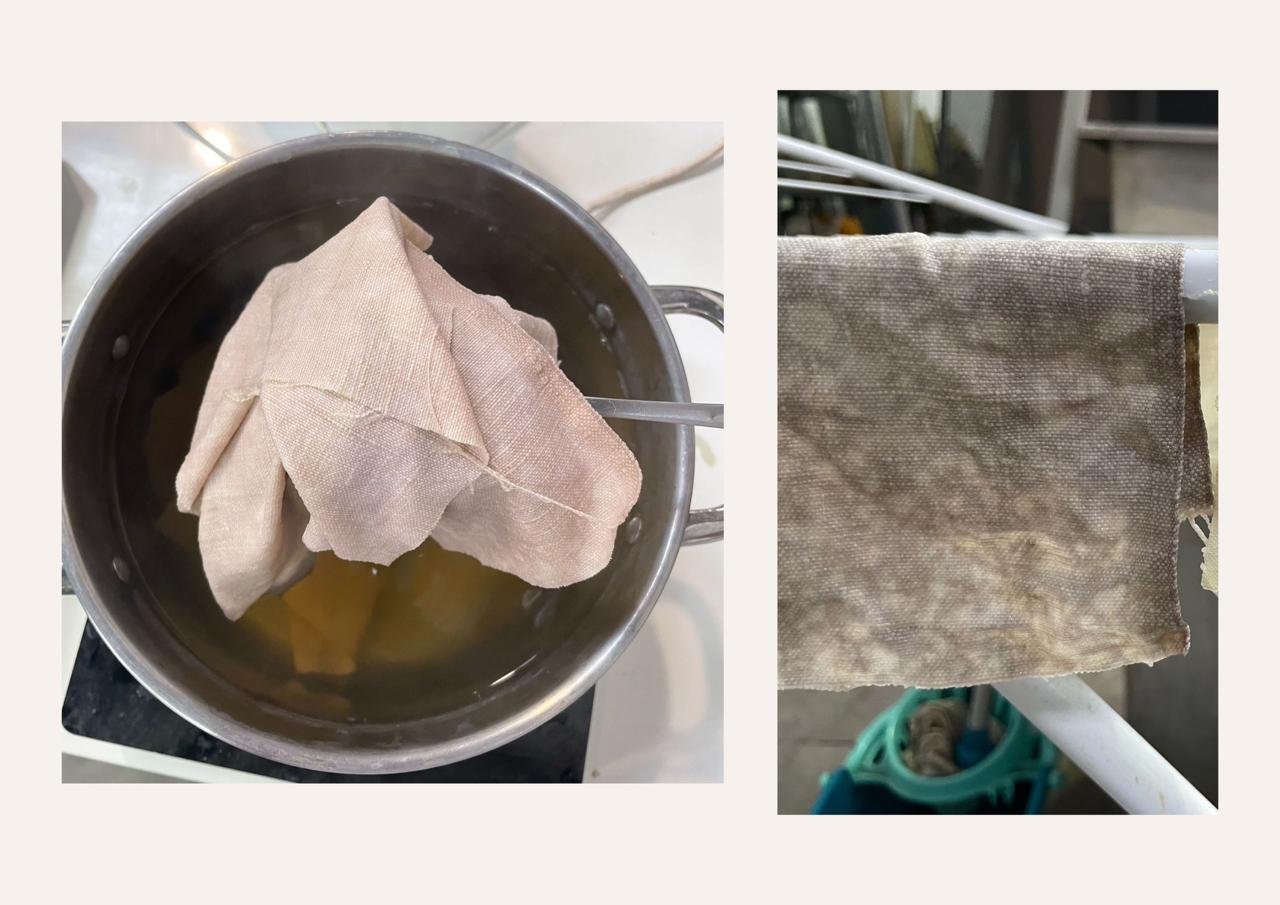
In the meantime, we had another pot on the stove with the wool and silk pieces. This pot was filled with tap water, 15% WoF of alum (44,85 grams). This was kept at around 70/80°C for 1 hour.
The same process was repeated for the cotton and the second batch of linens. The only change made was that the amount of alum was increased to 20% WoF. After those were rinsed, we hung them on the drying rack before starting a new day and step in the process.
Mordanting recipe
- 15% WoF of aluminium sulphate (alum)
- tap water until fabric is underneath water
- 1 hour around 70/80°C
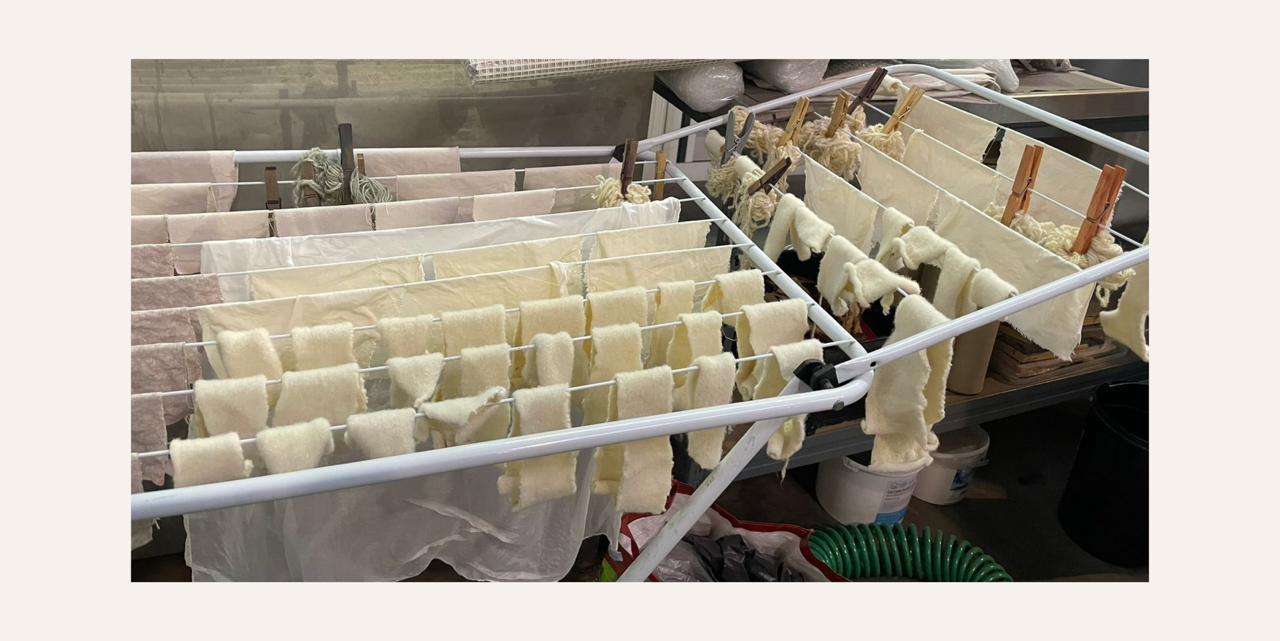
Dyeing
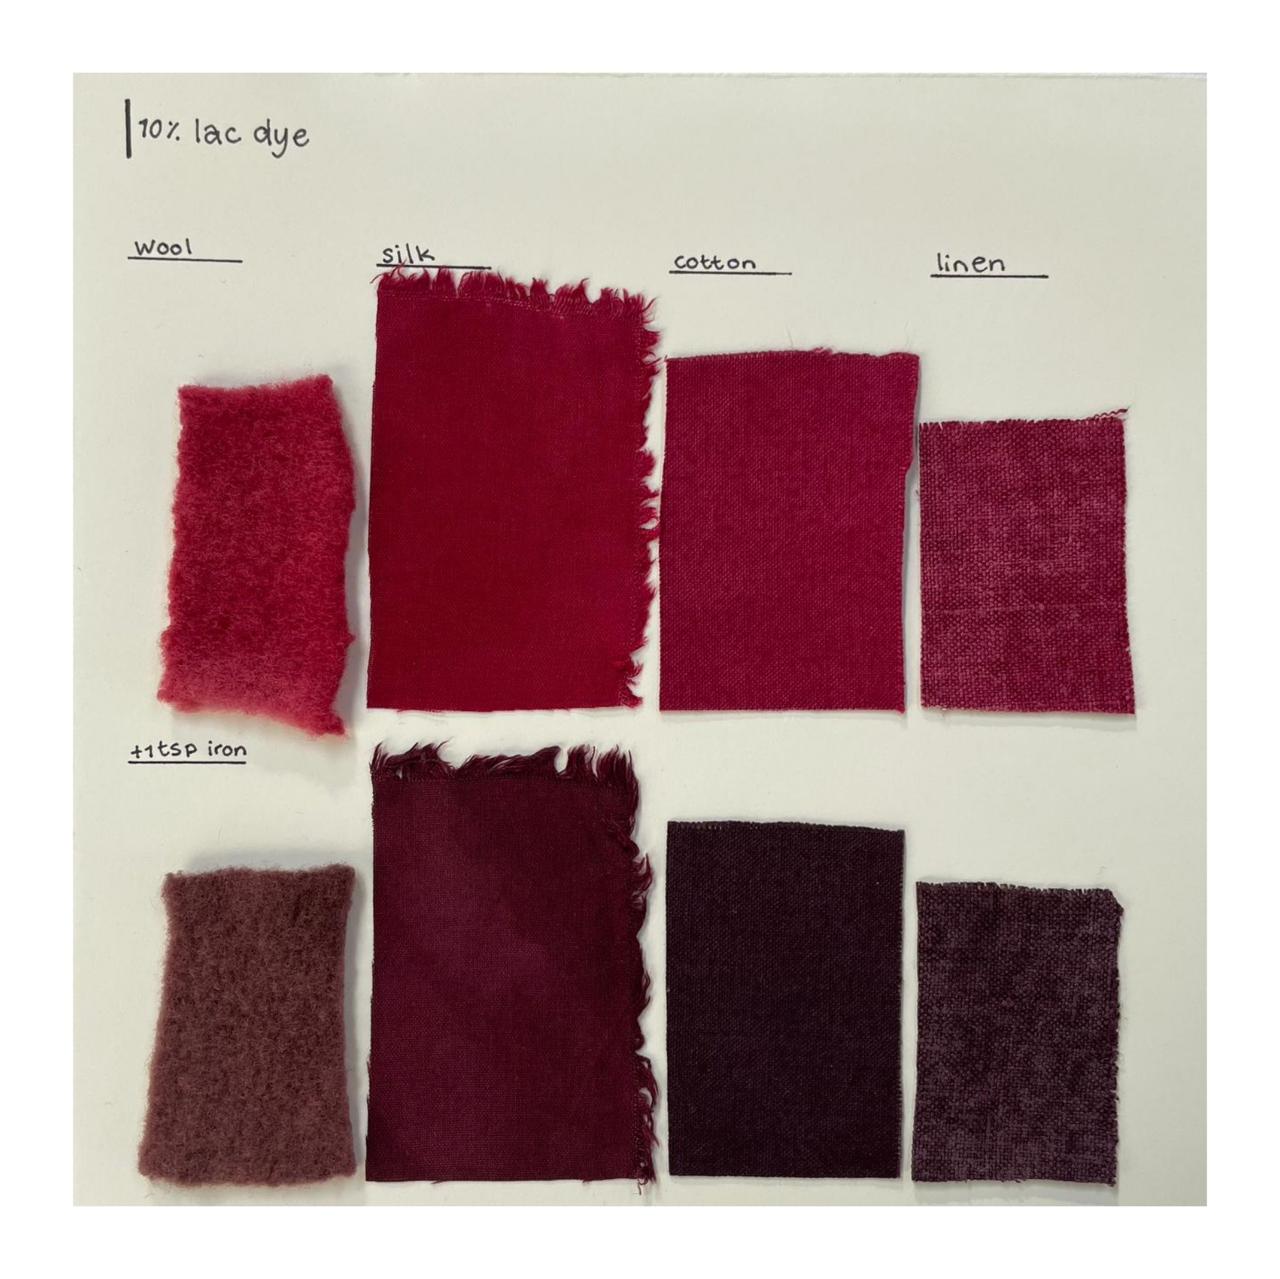
Before we left the day before, we prepped some of the dye baths. We needed to soak the birch leaves and the nettles. Because both of these were dry, we added 100% WoF to some tap water, enough to dye the fabrics in. The madder and lac dye needed some rest time as well, so we prepared them the day before dyeing. For each of these, we added 10% of WoF to enough tap water.
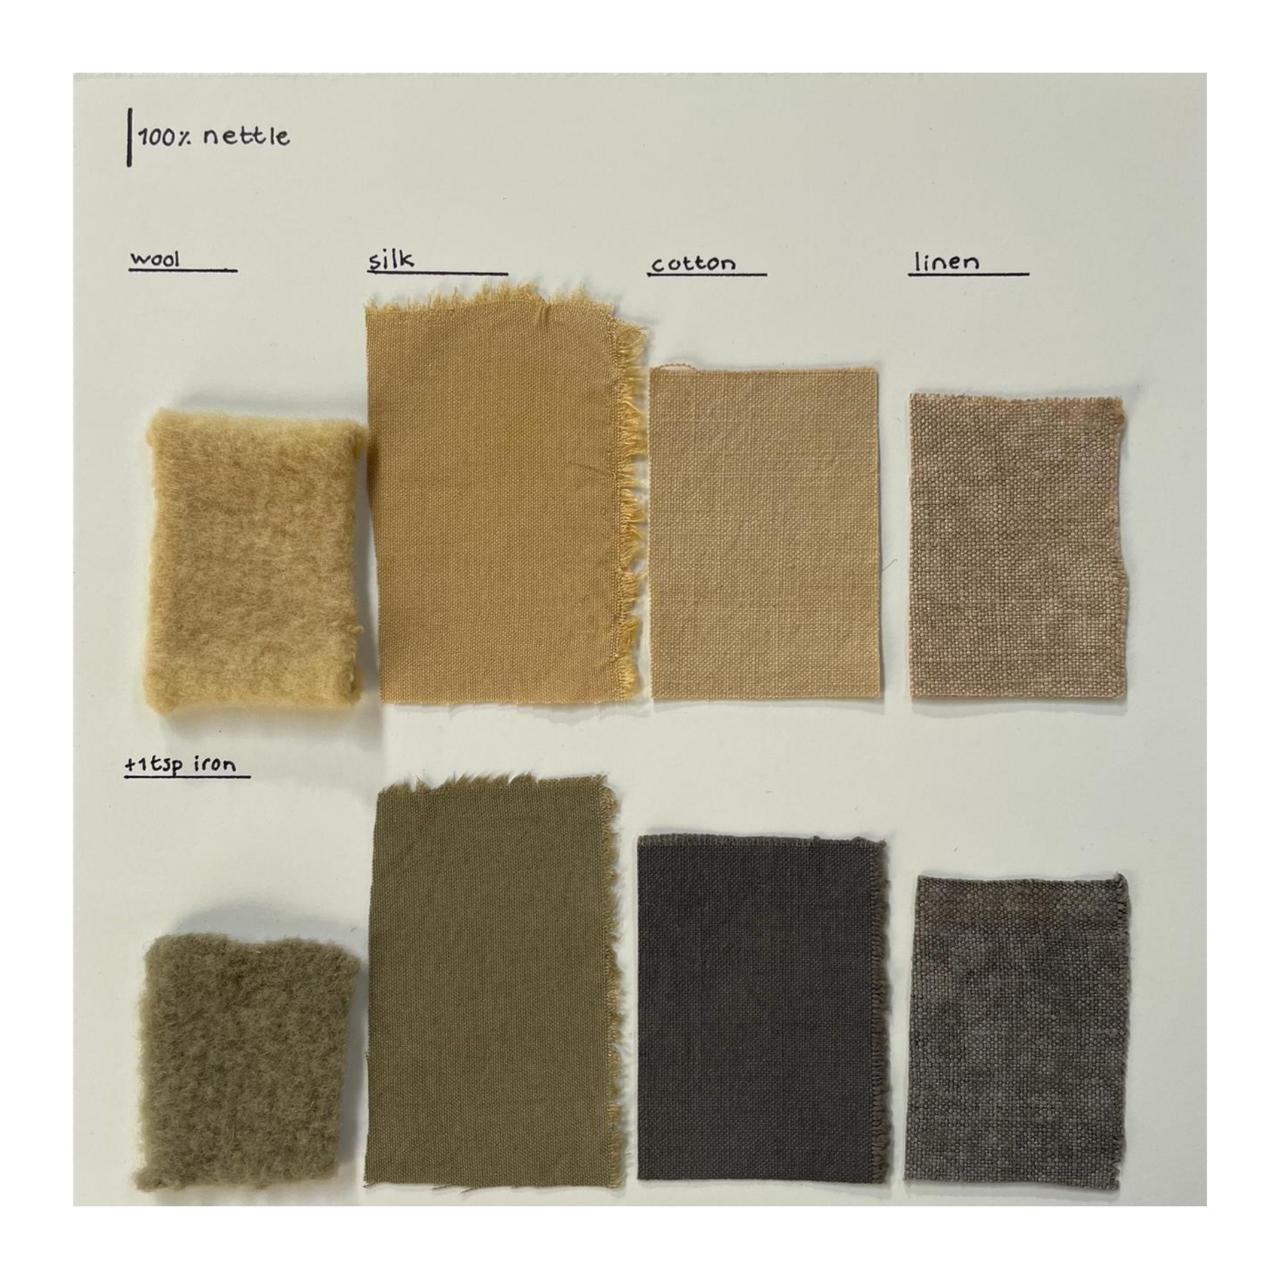
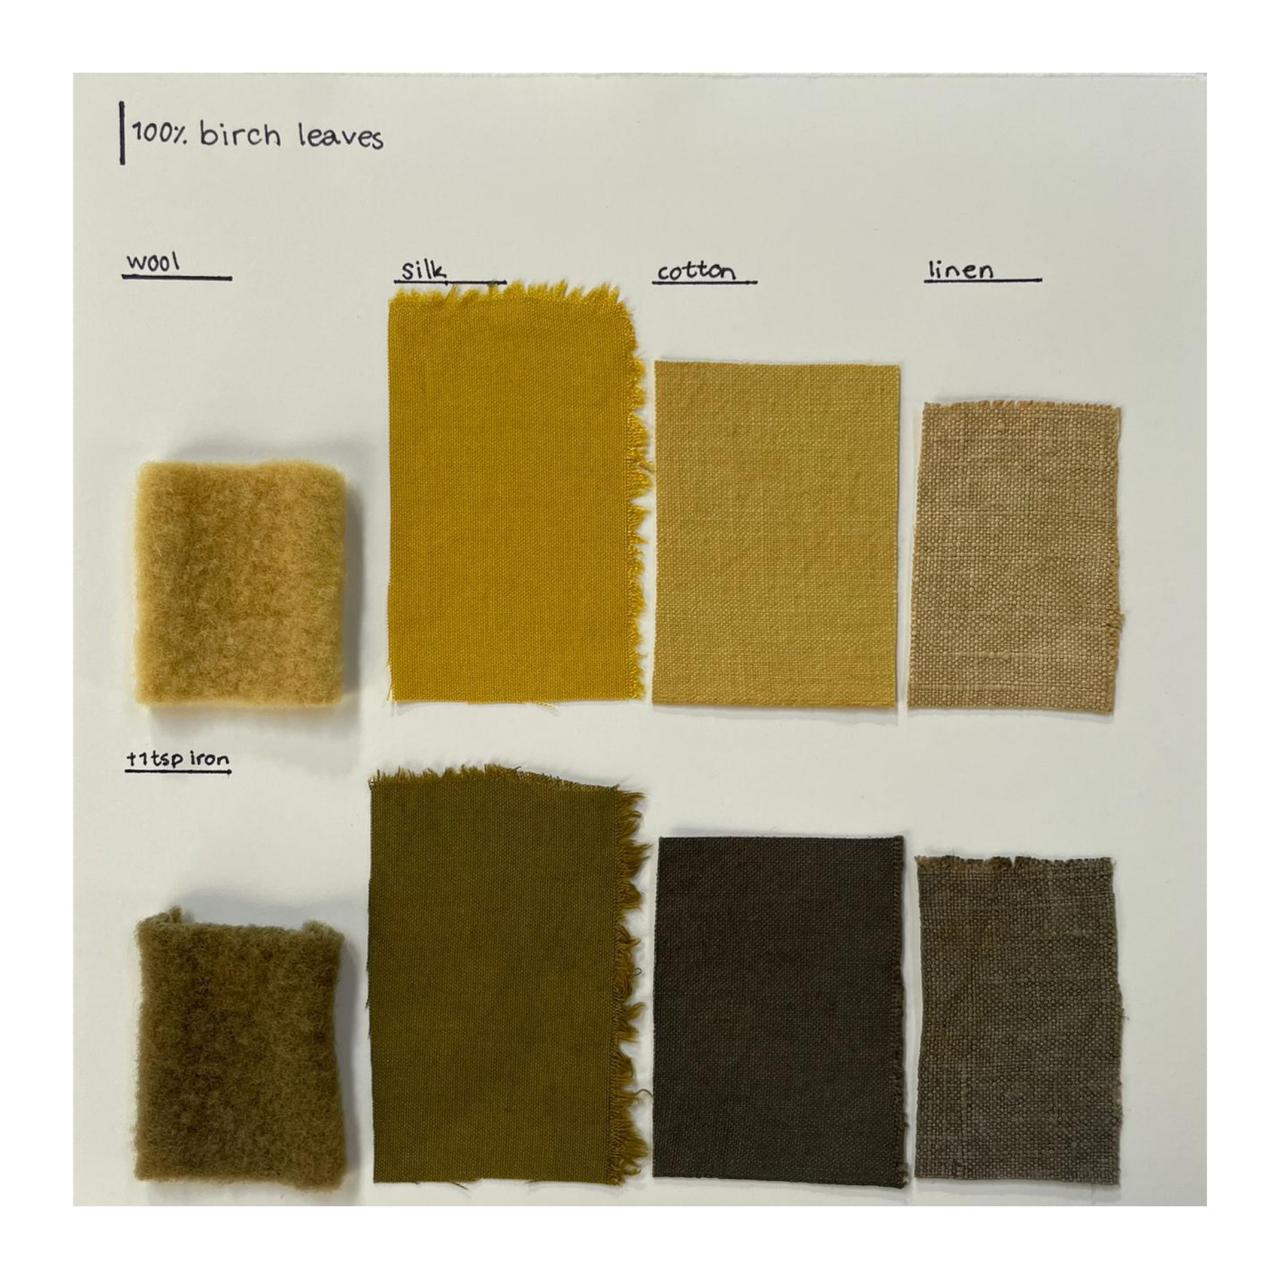
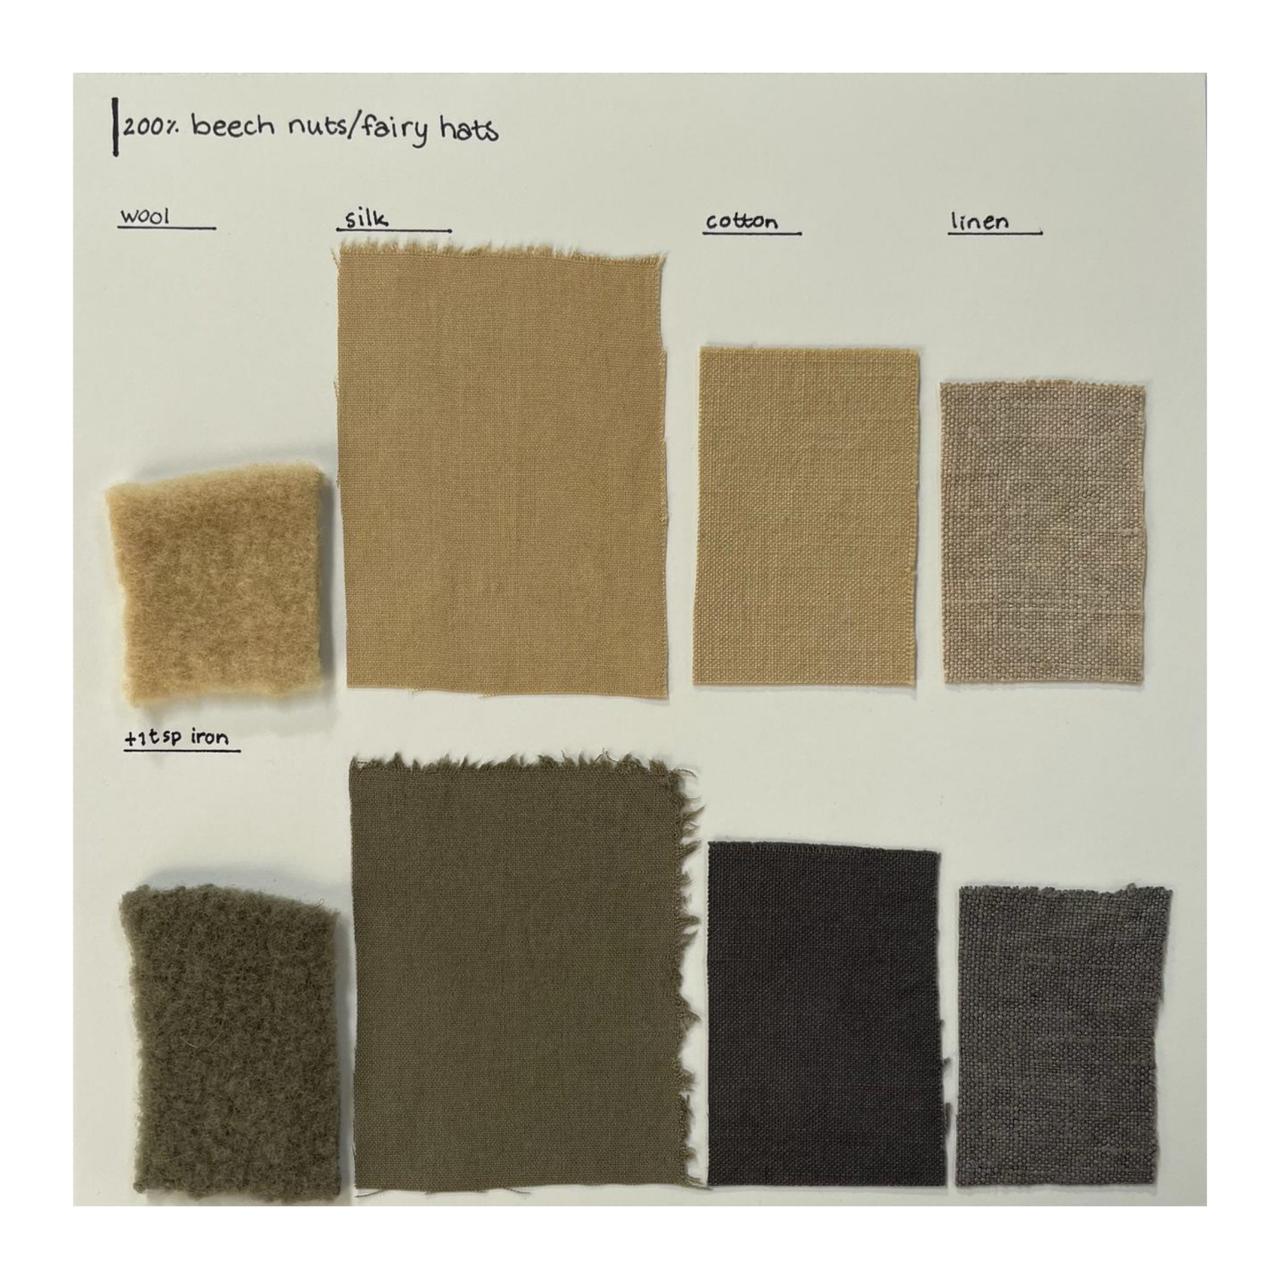
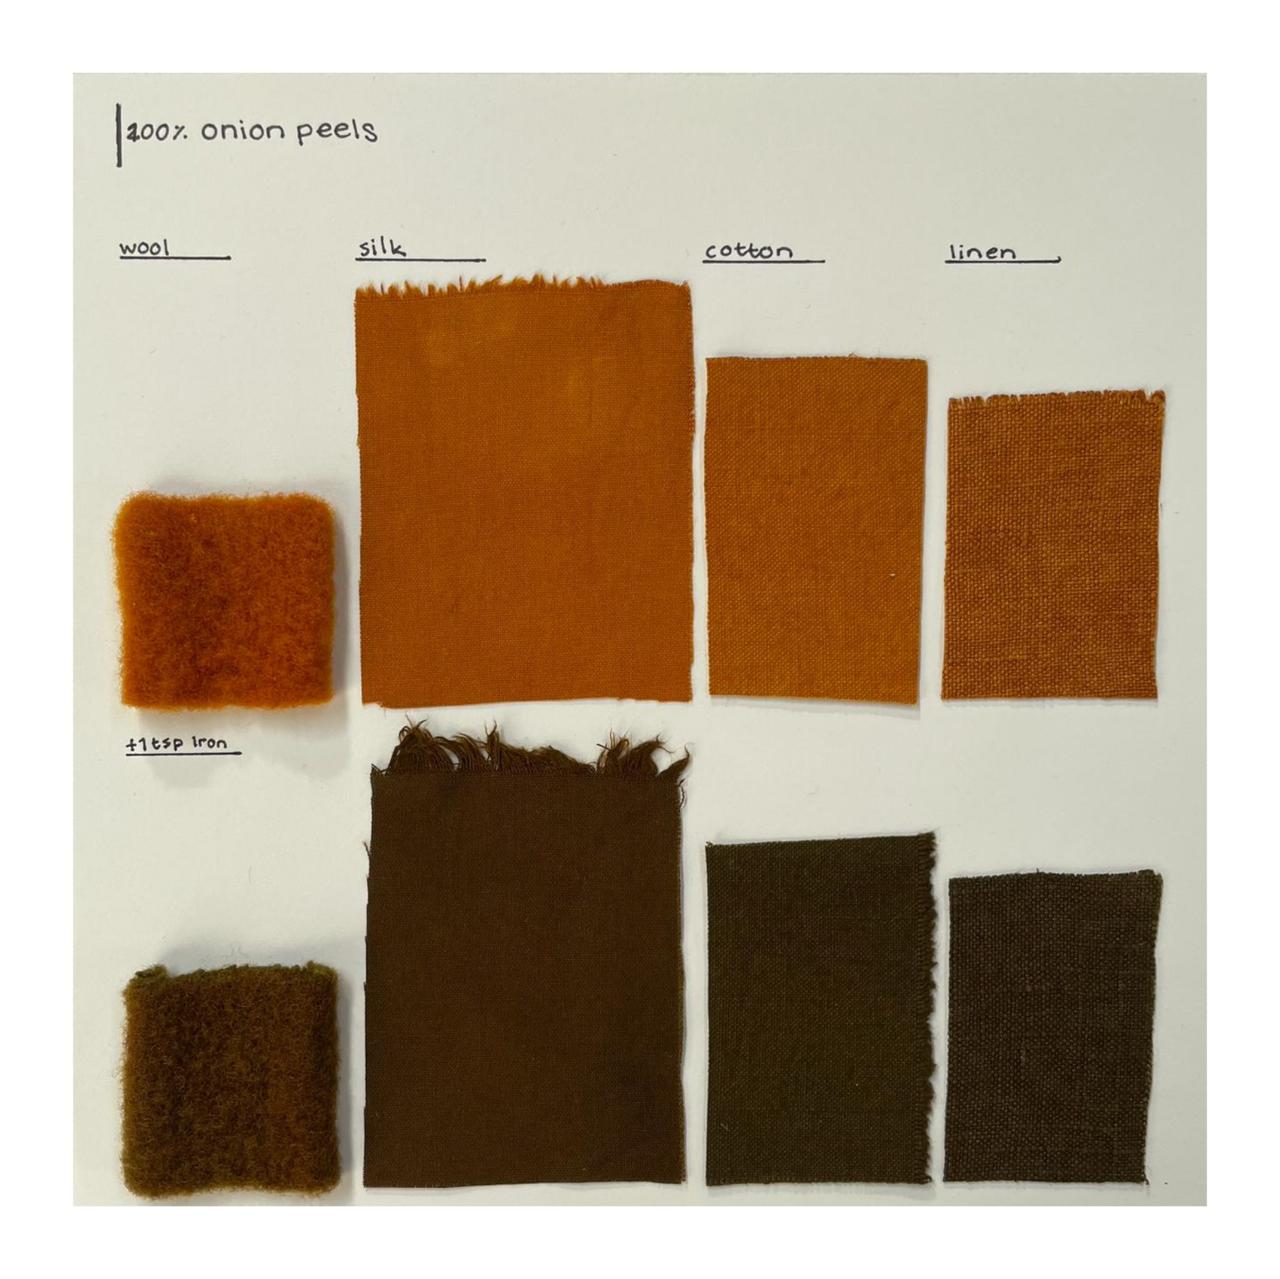
Thursday we made the birch leaves and nettles boil for over an hour so all the pigments could extract. Marion did take onion peels and beech nuts (what we called fairy hats, because of the look), with these products, we prepared two more baths. 100% WoF of onion peels and 200% WoF of the fairy hats. When the birch leaves and nettles bath had some more color, we strained the solid pieces, so only the liquid was left over. The baths were ready!
When the bath was around 70°C, we added ⅔ pieces of wool, 1 silk, 1 cotton, and 1 linen to the bath and stirred every couple of minutes for an hour. After an hour, we took the fabrics out, rinsed them, and placed them back on the drying rack.
This process was repeated for all the chosen dyes.
| Dyes | % WoF | Notes |
|---|---|---|
| 1. Birch leaves | 100% | |
| 2. Nettle | 100% | |
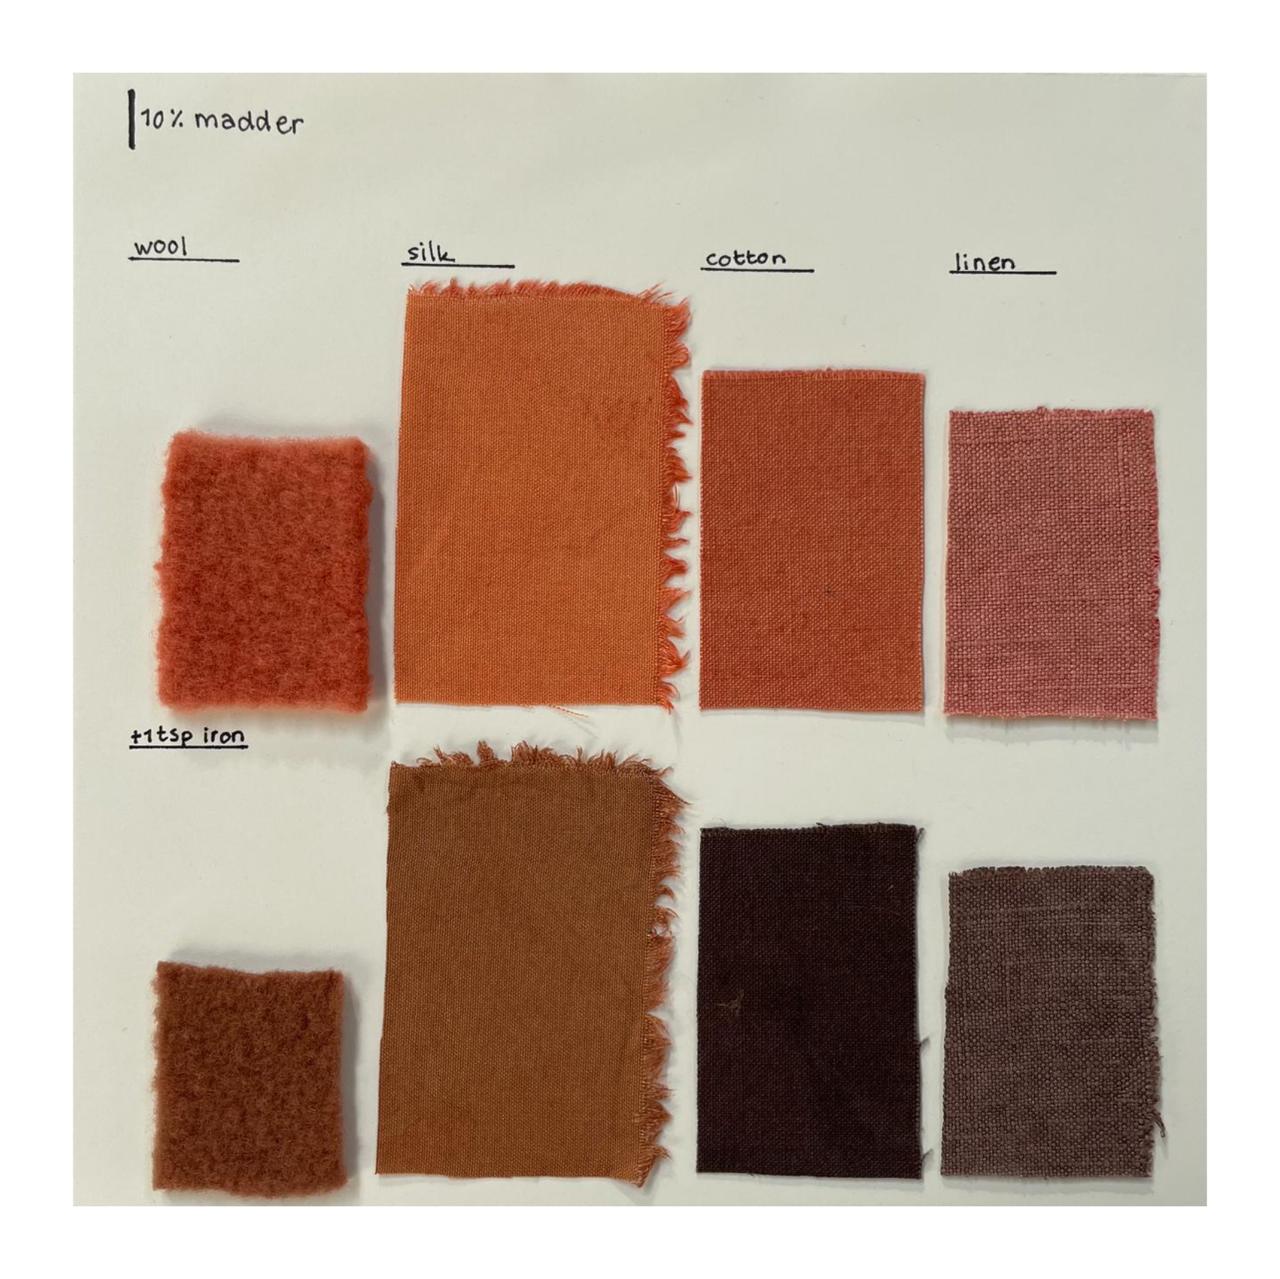
| 3. Madder extract | 10% | |
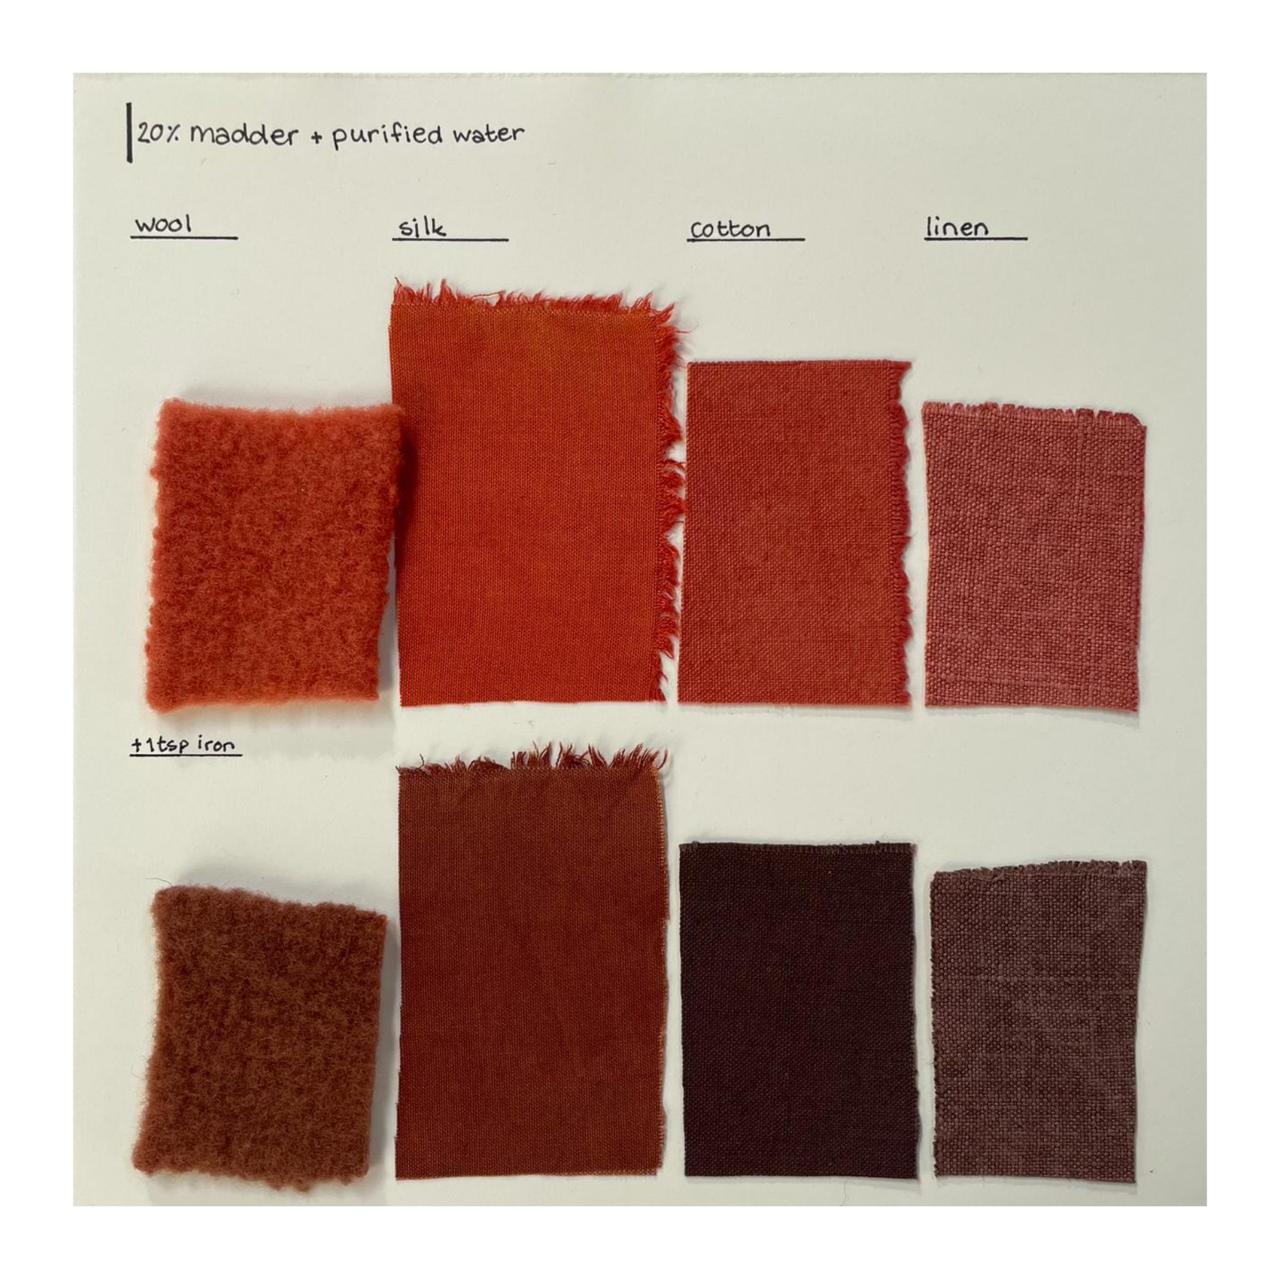
| 3. Madder extract 2 | 20% | + purified water |
| 4. Lac dye extract | 10% | |
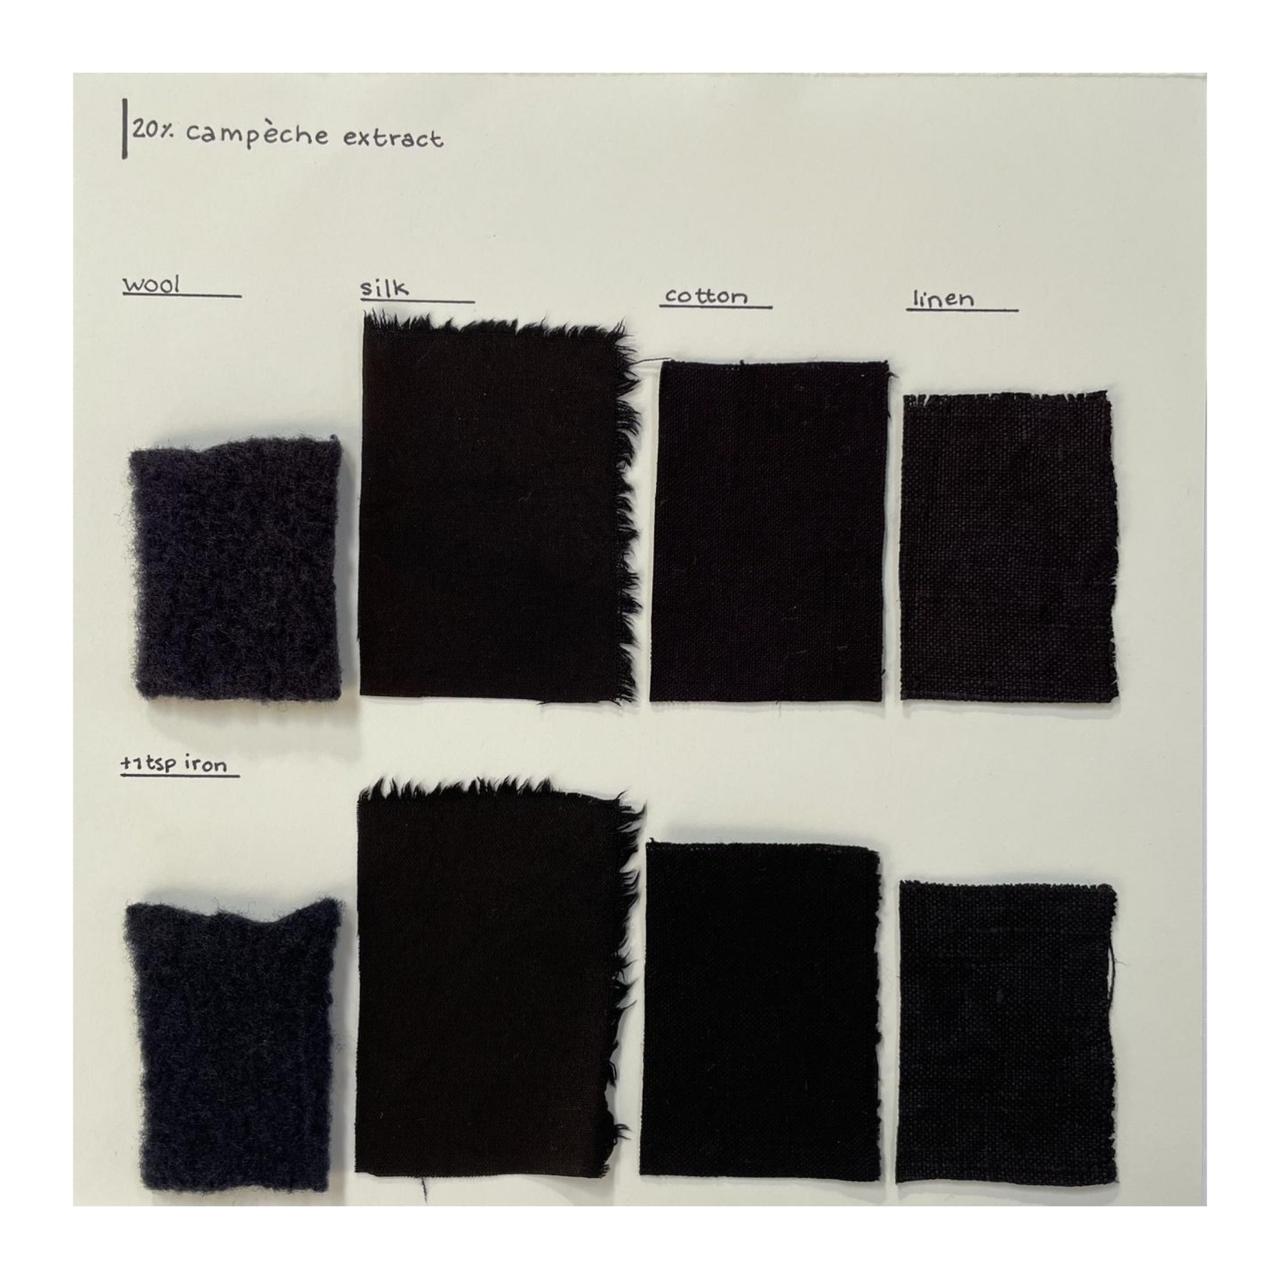
| 5. Campèche extract | 20% | |
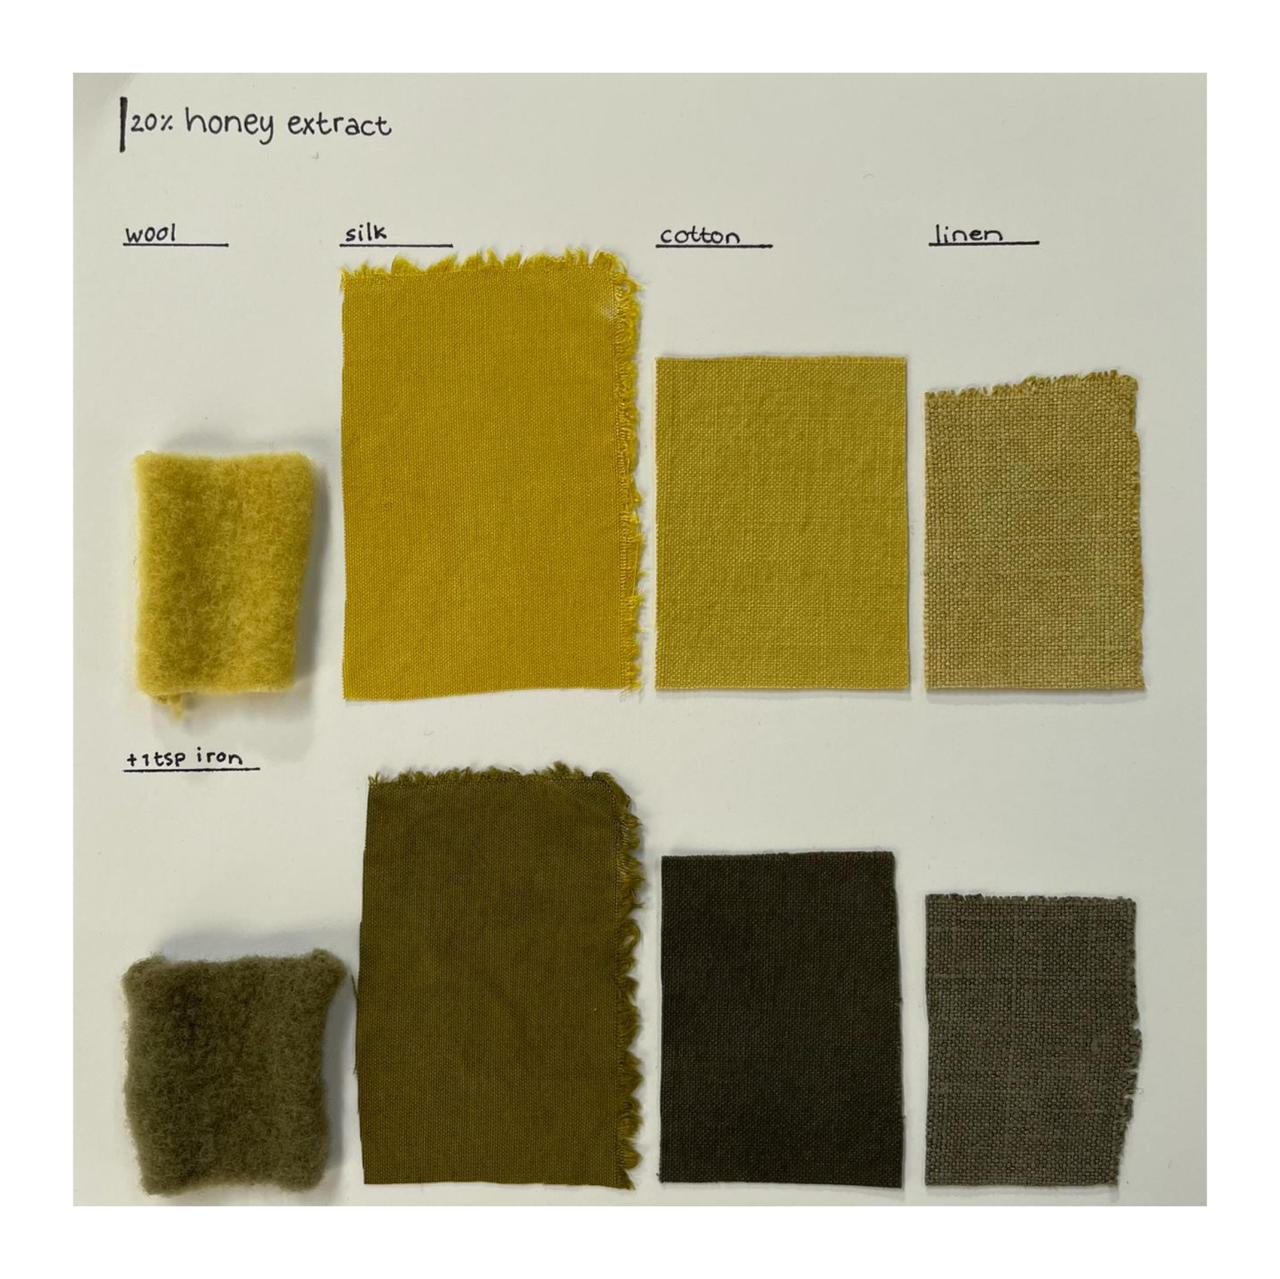
| 6. Honey extract | 20% | |
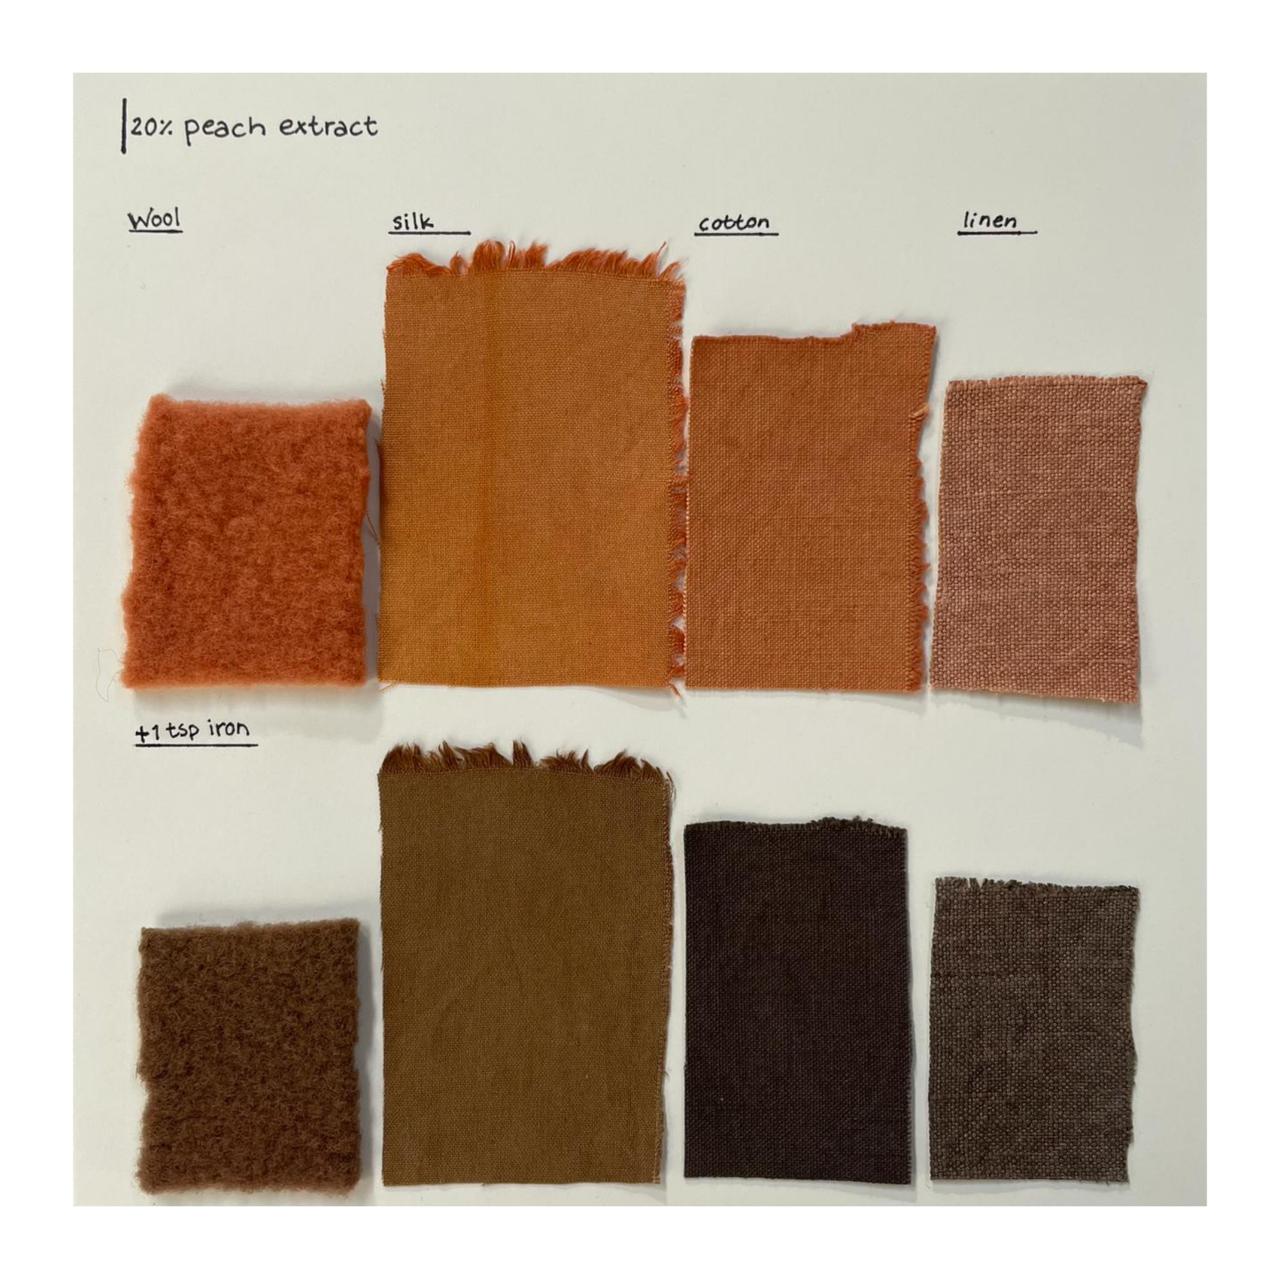
| 7. Peach extract | 20% | |
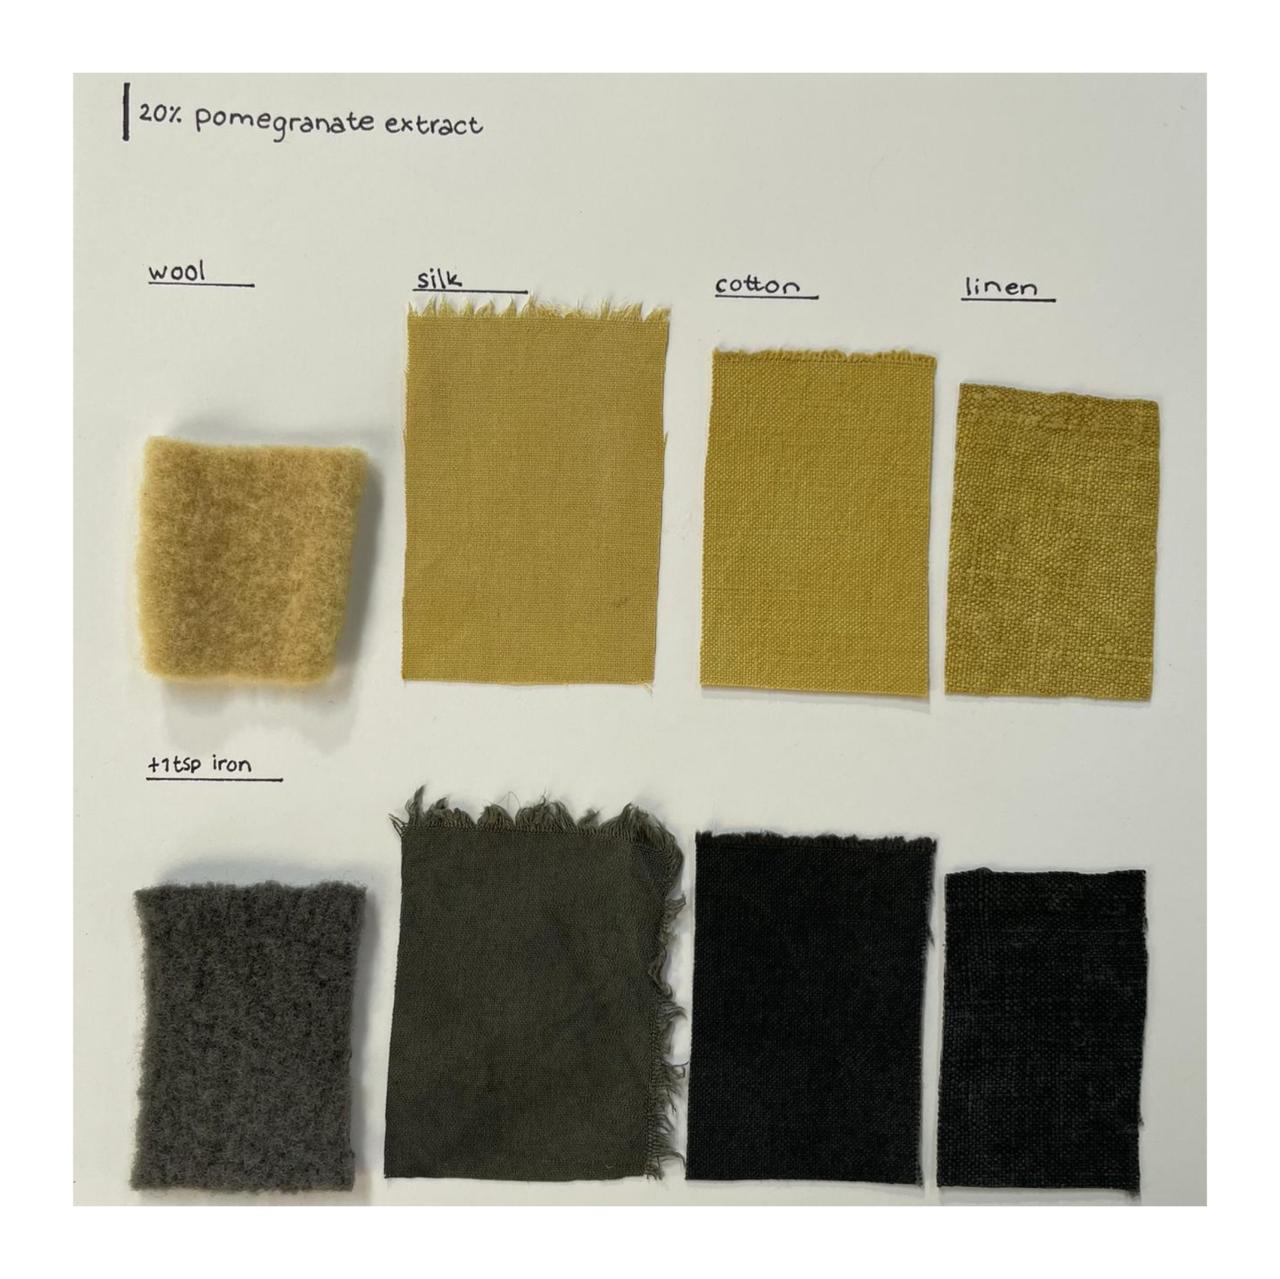
| 8. Pomegraanate extract | 20% | |
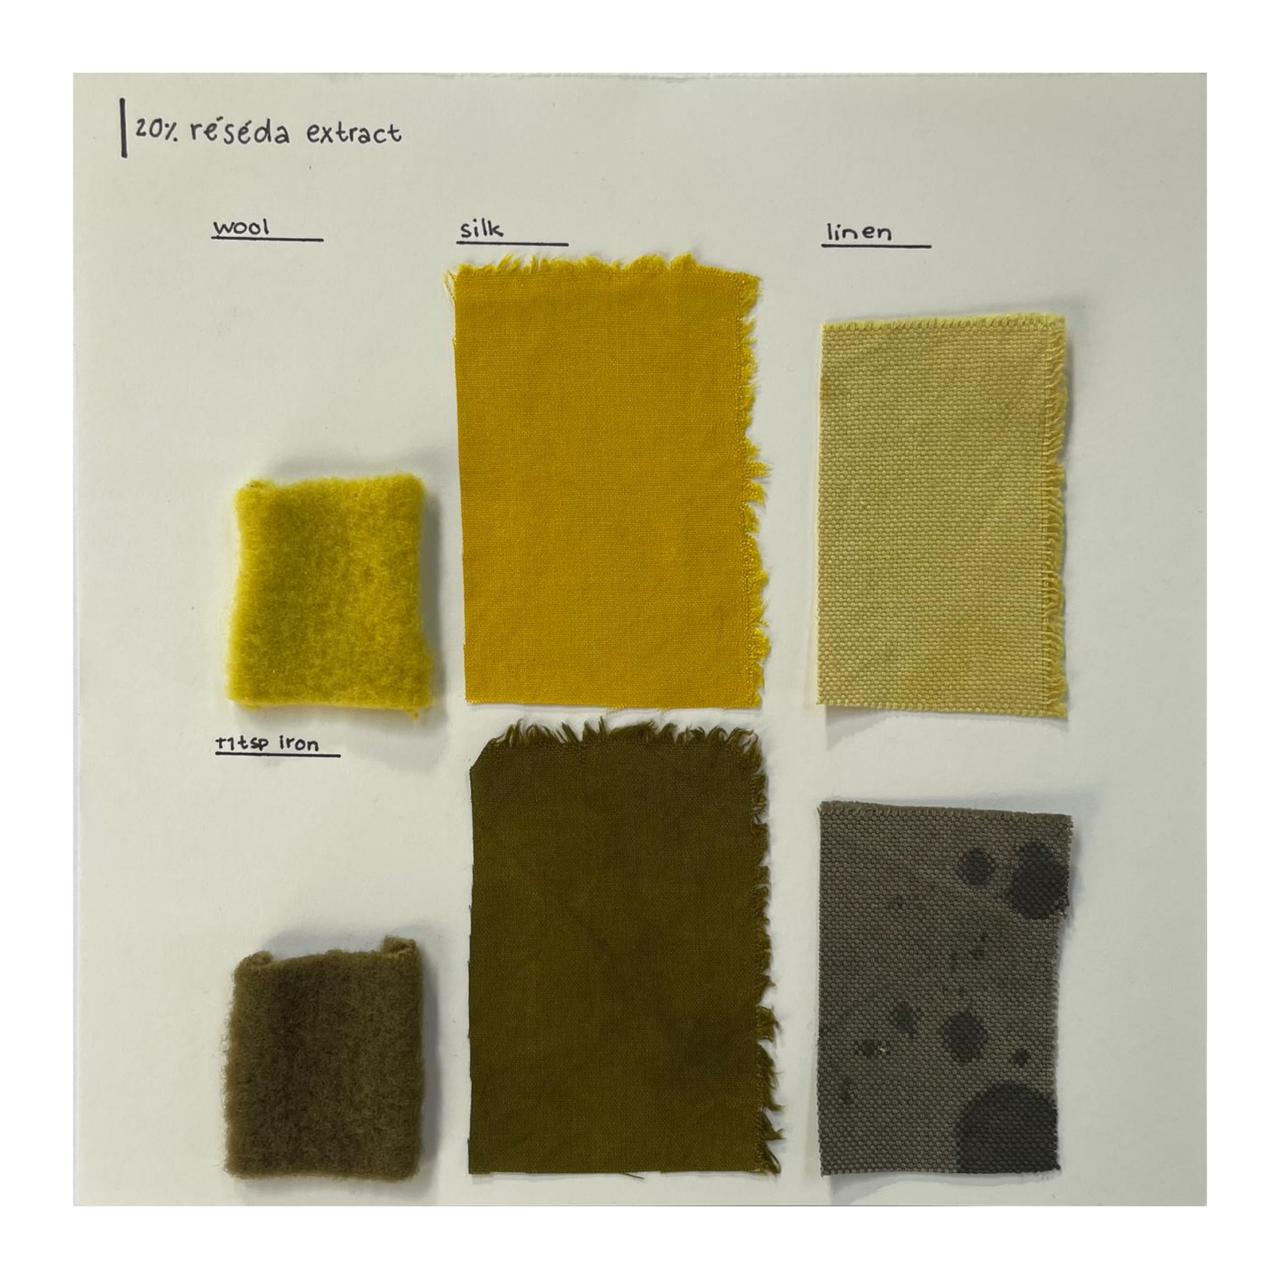
| 9. Réséda extract | 20% | Not enough cotton and linen |
| 10. Onion peels | 100% | |
| 10. Beech nuts/fairy hats | 200% |
Dye bath recipe
- 200% WoF when ingridients are wet (prep them day before, so they can sit for a while)
- 100% WoF when ingridients are dry (prep them day before, so they can sit for a while)
- 20% WoF when ingridients is extract
- 10% WoF for lac dye and madder (prep them day before, so they can sit for a while)
- tap water until fabric is underneath water
v - Keep dye baths around 70°C
- add fabrics for 1 hour
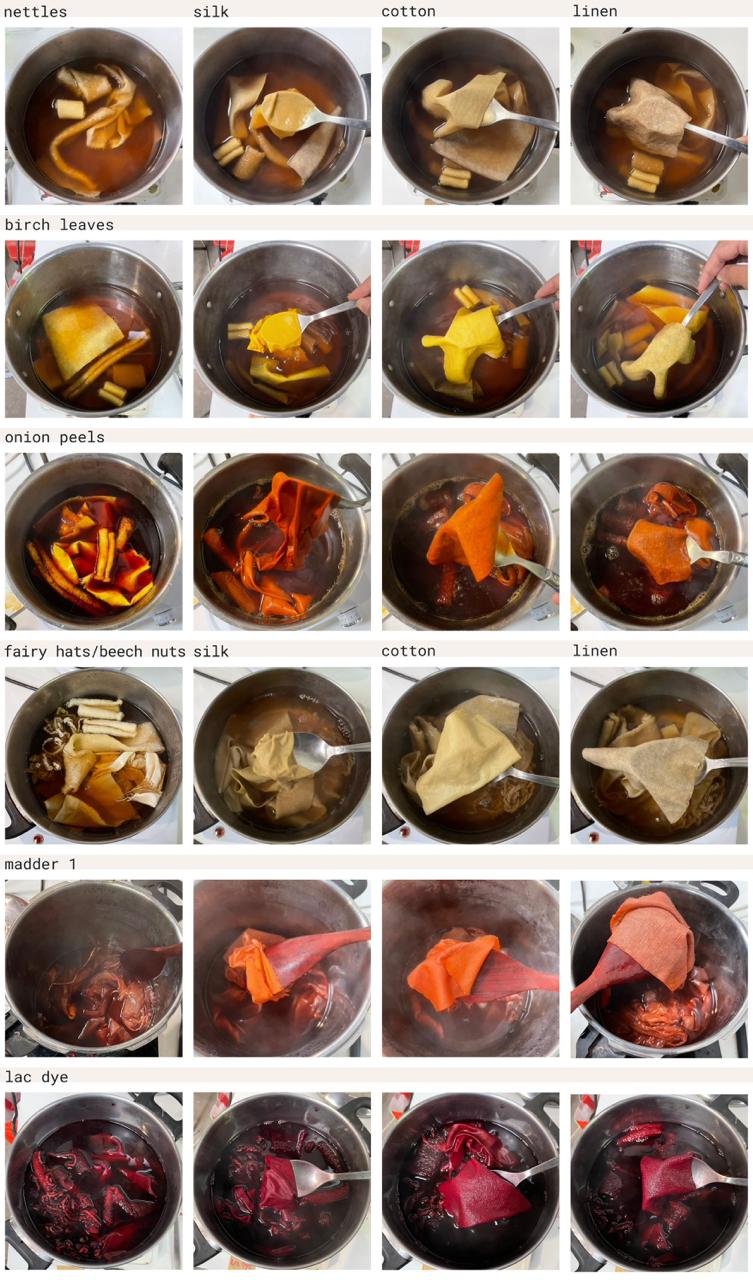
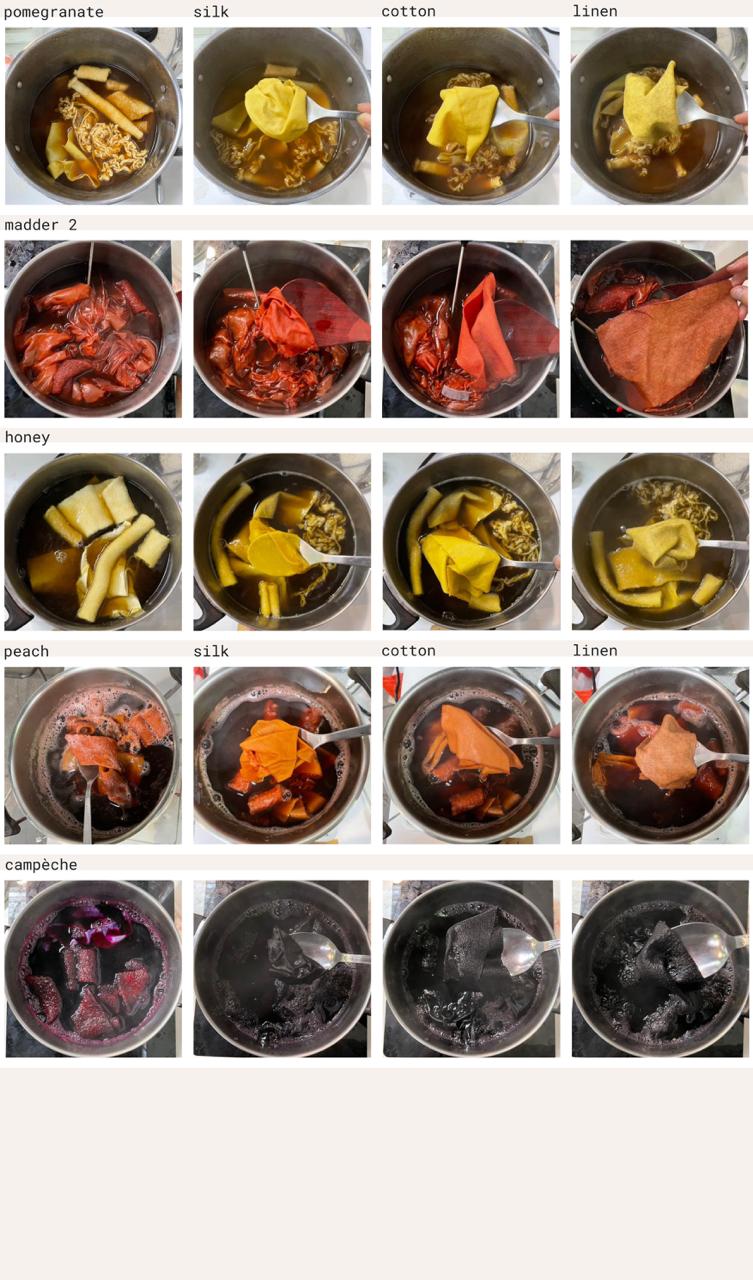
The madder was expected to turn out red, but as shown in the picture, it gave a pink color. We tried again by increasing the WoF to 20% and swapping out the tap water for purified water. This made the color darker but sadly not the red we were expecting. It’s just like Svetlana said in the lecture: you can follow a recipe, but you’re never sure about what the result will be. And that’s quite exciting to me, because the result will always be a surprise.
With this second madder test and the extra fairy hats, we didn’t have enough cotton and linen pieces scoured, engaling, and mordanted for 12 dye baths. That we discovered when we came to the last dye bath, the reseda extract. Luckily, we had the linen from the first batch, enough wool and silk, so we dyed those pieces.
Iron bath
For every bath where we took out the fabrics, we added 1 tsp of iron. We cut the rinsed pieces in half and put them in the bath for 5 to 10 minutes. Again, we rinsed them and put them as far as possible from the other pieces so they wouldn’t change color because of the iron. We made sure we cleaned everything well before touching iron-free fabrics and baths. Because the color changes fast when in contact with iron.
For the first baths, the birch leaves and nettles, we didn’t save the bath, so we needed another way to iron dye them. The same for the last couple of baths that we wanted to save for making inks, pigments, and printing paste. We made a bath of less than a liter of tap water with 1 tsp of iron. We heated this a bit so the iron would dissolve and dipped in the order of lightest color to darkest. So, we started with birch, reseda, peach, and last, Campeche. Nettles we did before, with a bit of the dye bath saved for inks, pigments, and printing paste, and a bit of iron.
Iron bath recipe
- 1 tsp of iron(II) sulfate heptahydrate (iron)
- Enough dye bath to drown the fabrics
Other recipe: - Less then a liter tap water (heat up a bit to dissolve iron more easily)
- 1 tsp of iron(II) sulfate heptahydrate (iron)
Indigo vat
This dyeing process works very differently from the dyeing process explained before. Capucine made a couple months before two indigo vats, the first day we checked up on it and discovered one was moldy and needed to be thrown away. The other one we measured the pH, and it was basic/alkaline, and that was promising for some blue colors. Capucine added some fructose after heating it and explained the way of stirring so that not much oxygen would enter the vat.
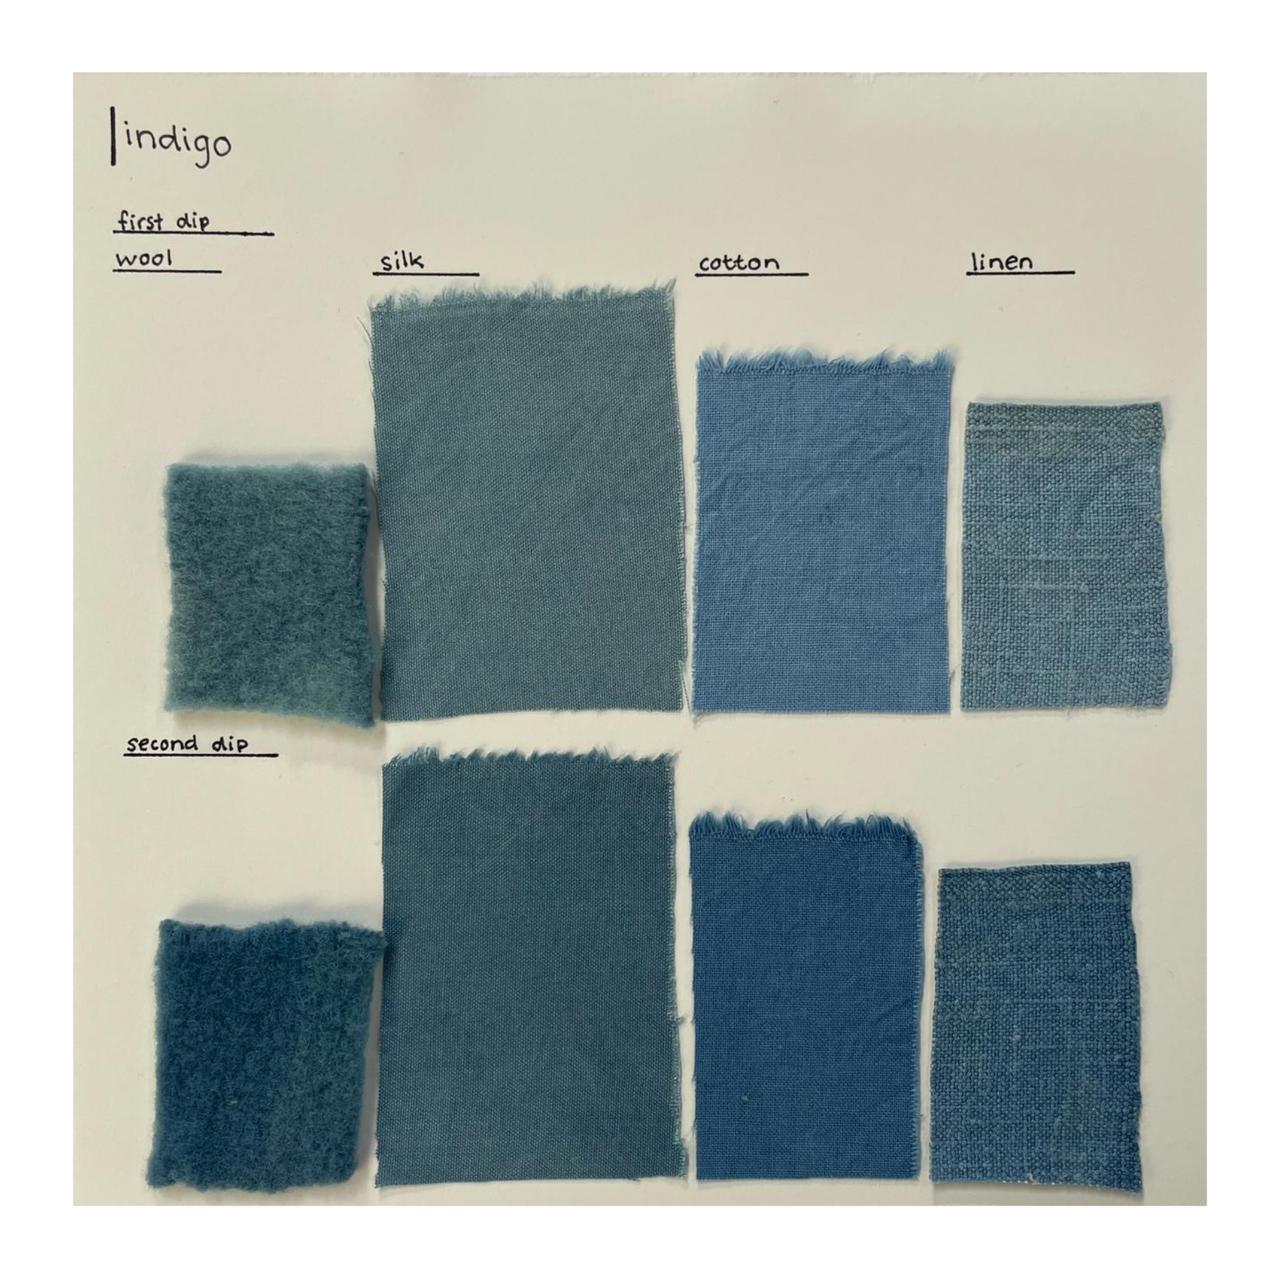
The next day we came back to it, and it needed a bit more ingredients. So in the morning Capucine added ⅓ pigment (20 grams), ⅔ lime (40 grams), and 3/3 fructose (60 grams, yesterday, 40 grams were already added, so today 20 grams) and stirred again while heating up. At the end of the afternoon, we tried dyeing the fabrics. For this, we removed a bit of the copper layer on top to prevent big spots on the fabric. We slowly dipped the fabric with our hands in the vat, here we moved around the fabrics a bit so the dye would be able to go everywhere. Here I may have dropped a piece of wool, but I’m not sure anymore if I started with two or three pieces. We kept the fabrics in the vat for 5 minutes and then took them slowly out and unfolded them quickly. We rinsed the fabrics and let them rest. After 5 minutes, we repeated the process one more time.
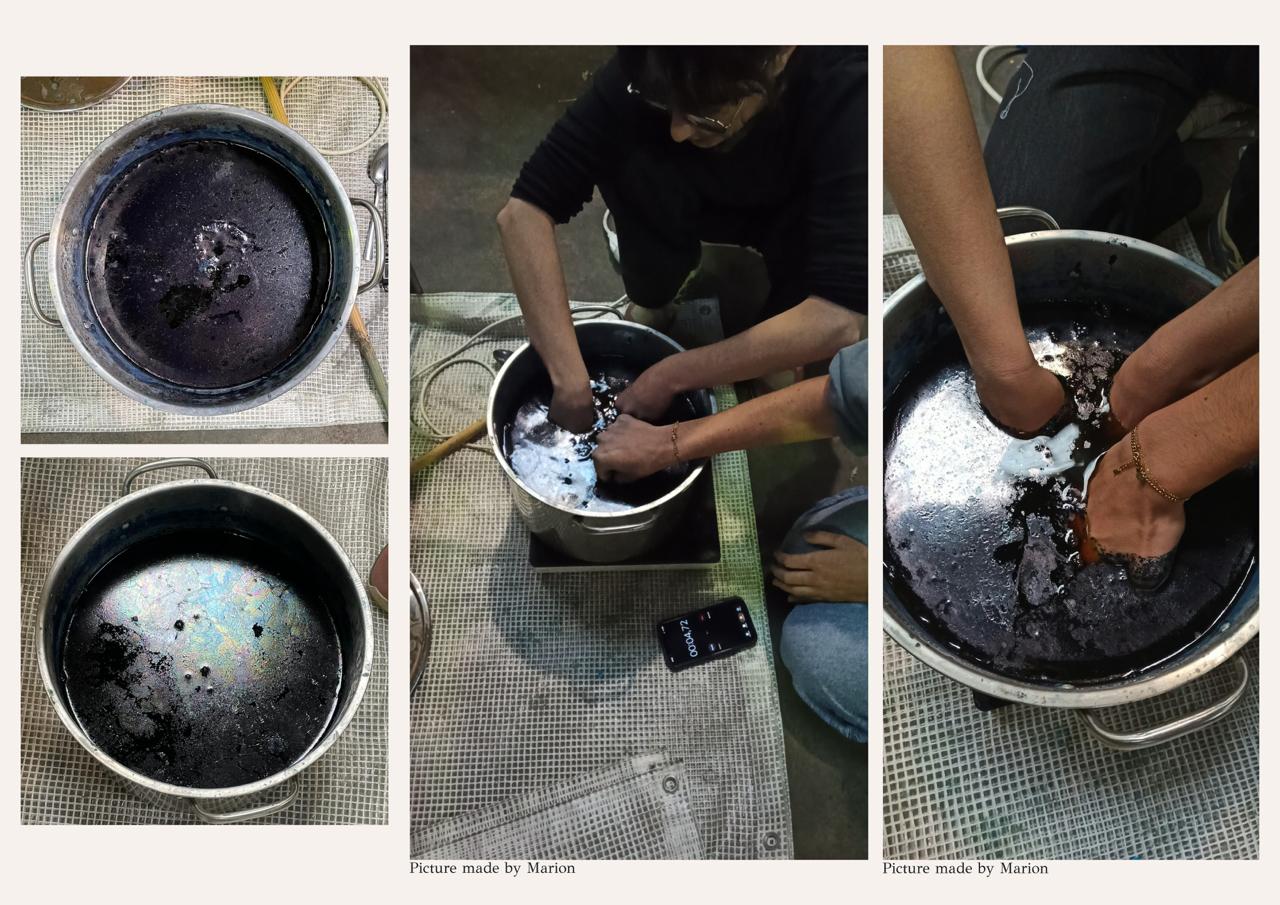
For the night, we placed the fabrics in a vinegar bath to lock in the color. The vinegar bath consists of ⅓ vinegar and is topped off with tap water. The next day, we rinsed them and let them dry.
Inks, pigments, and Printing paste
The last day we used the otherwise thrown-away dye baths to make inks, pigments, and printing paste.
Inks
To make the inks, we tried two different methods. The first was to add 30% arabic gum directly to the dye bath. We did this slowly so it would dissolve well, but even then it was very hard to dissolve. That’s why we tried another way. We slowly added a tablespoon of the arabic gum to some lukewarm water until it all dissolved. From this solution, we added 10 drops to 60 mL of dye bath to make the ink. Only the reseda ink was made with the first method. The peach, onion, old beetroot, and fairy hats were made using method two.
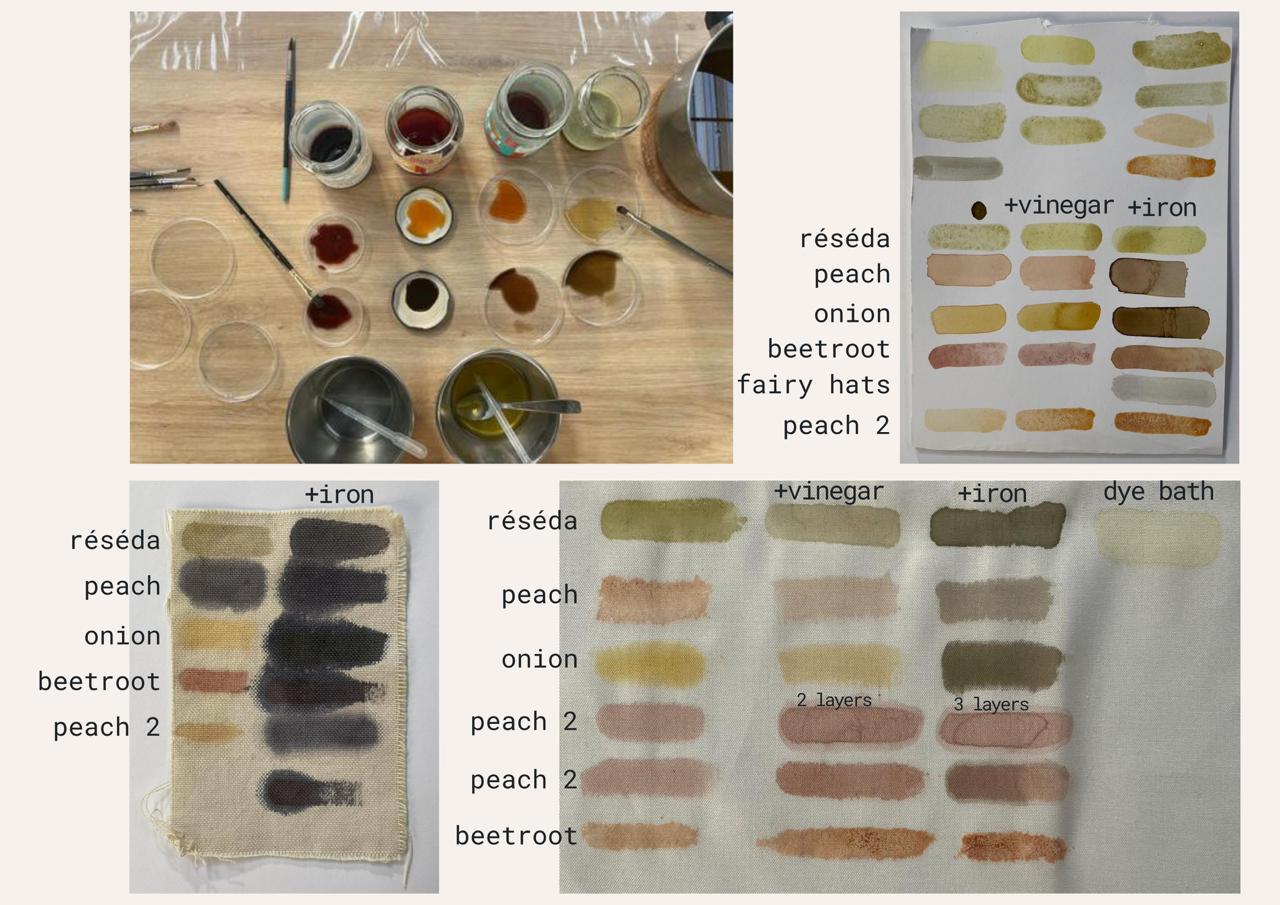
Ink recipe
- 30% of liquid arabic gum (add slowly)
- dye bath
Other way: - 1 tsp of arabic gum (add slowly)
- lukewarm water
- 10 drops of this solution to 60 mL of dye bath
v
Pigments
We made pigments of the peach, onion, and reseda dye bath. To create the pigment, we added 20 grams of Alum and 5 grams of soda carbonate to 200 mL of dye bath. After weighing all the components, we dissolved the Alum and soda carbonate in separate bowls of water. Then it’s important to first add the Alum solution to the dye bath and stir afterwards. Then add the soda carbonate and stir a bit as well, but keep in mind foam will form, so there is a possibility your cup will overflow.
This solution, you will let it set so the pigment can drop to the bottom. I came back after the weekend to strain the solution through a coffee filter and let it dry so the pigment can be stored. Mine is still drying, so I don’t have the pigments yet.
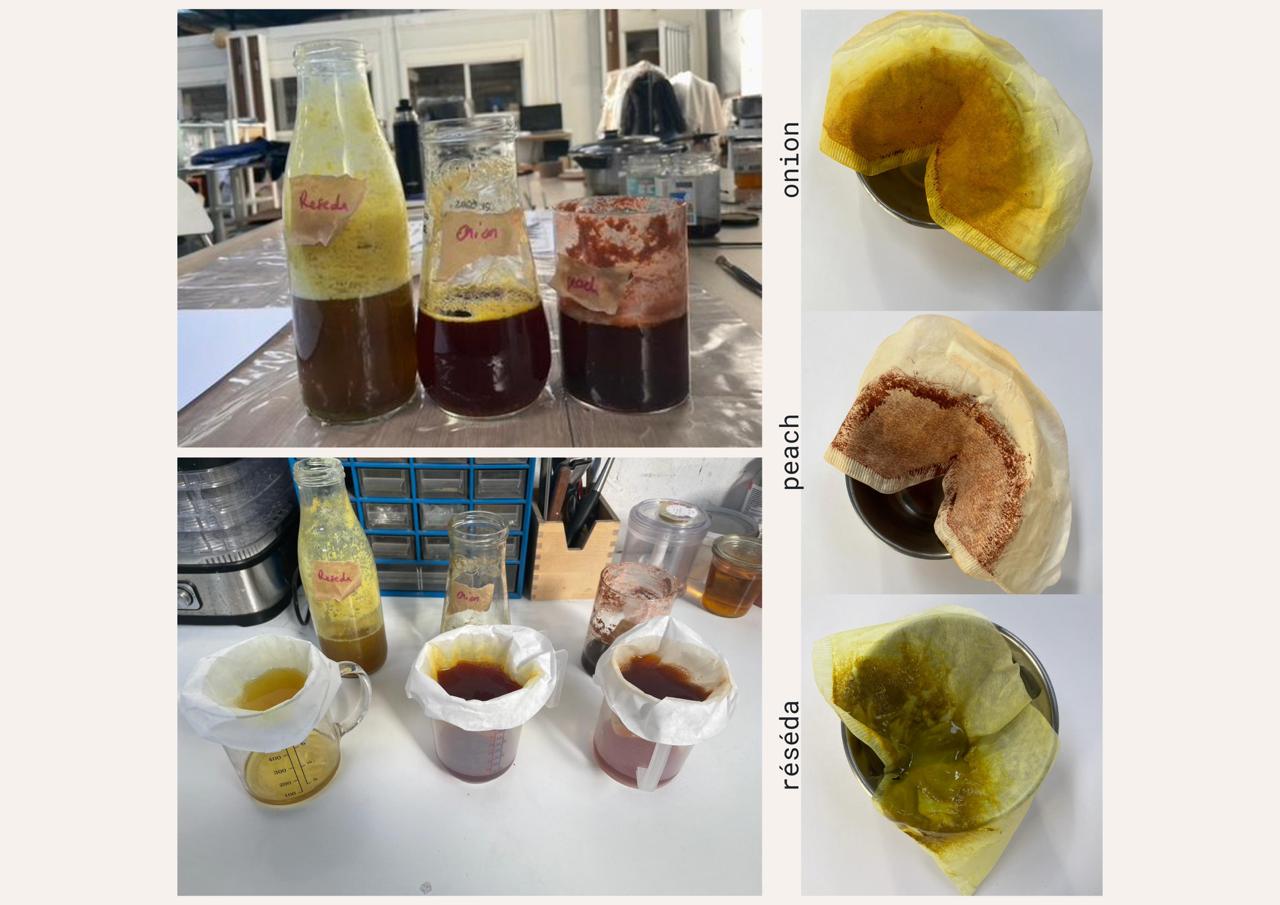
Pigment recipe
- 20 grams of aluminium sulphate (alum)
- 5 grams of soda carbonate
- 200 mL of dye bath
Printing paste
To use the leftover dye baths as printing paste, we needed to save 50 grams of dye bath. To the dye bath, we added 50 grams of iron and 1% (so 5 grams) of thickener, this can be gum for printing on textiles and rice flour for printing on paper. We added a bit less than 5 grams of gum to the solution, and this created a thick liquid that we could use. With the frame and a sort of scraper, we printed some rectangles and figures on the textiles.
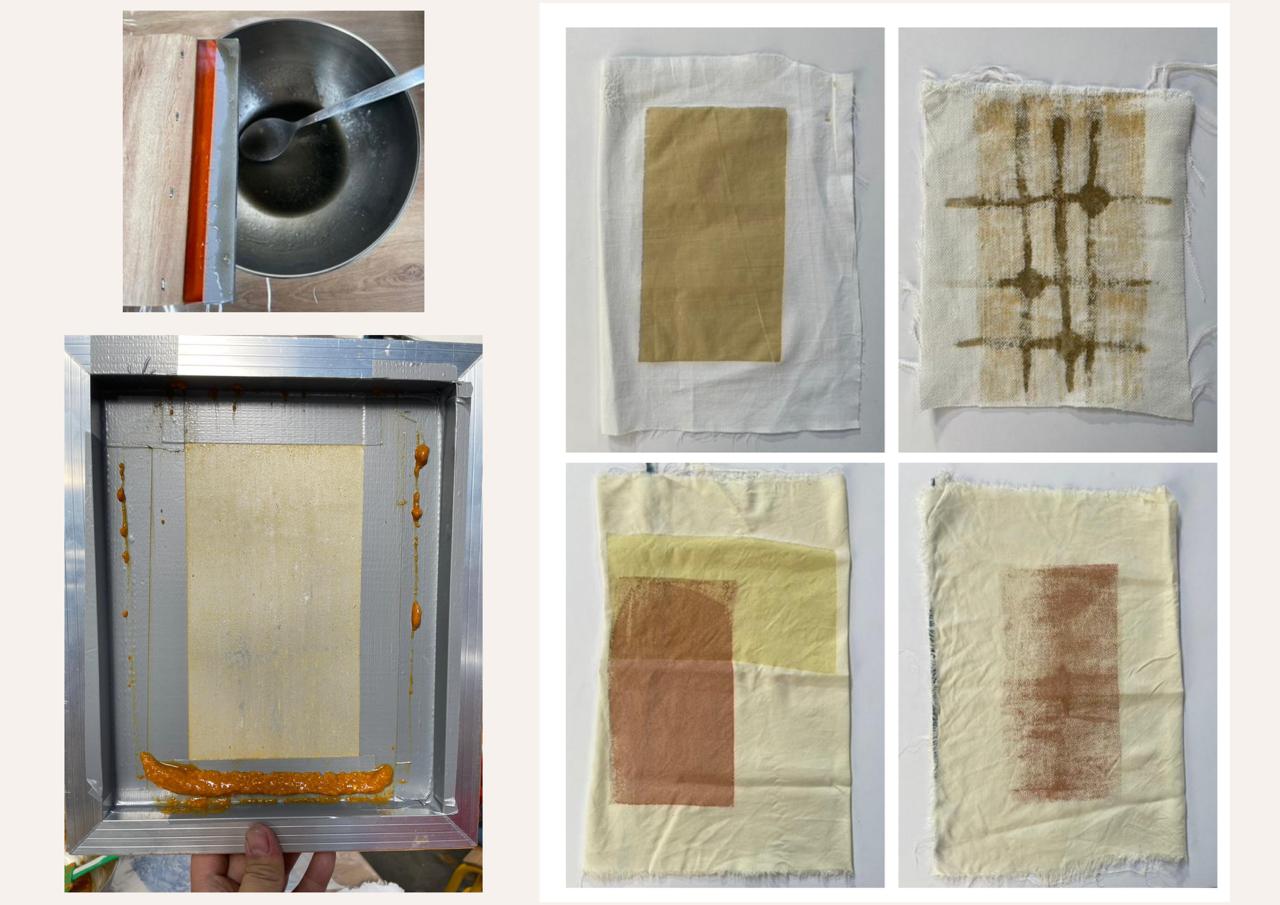
Printing paste recipe
- 50 grams of dye bath
- 50 grams of iron(II) sulfate heptahydrate (iron)
- 1% (5 grams) of thickener
Results
I enjoyed this week a lot and was very amazed by the results. All the colors we produced, all the recipes I learned and the fun I had with Capucine and Marion. Here is an overview of all the items we dyed.
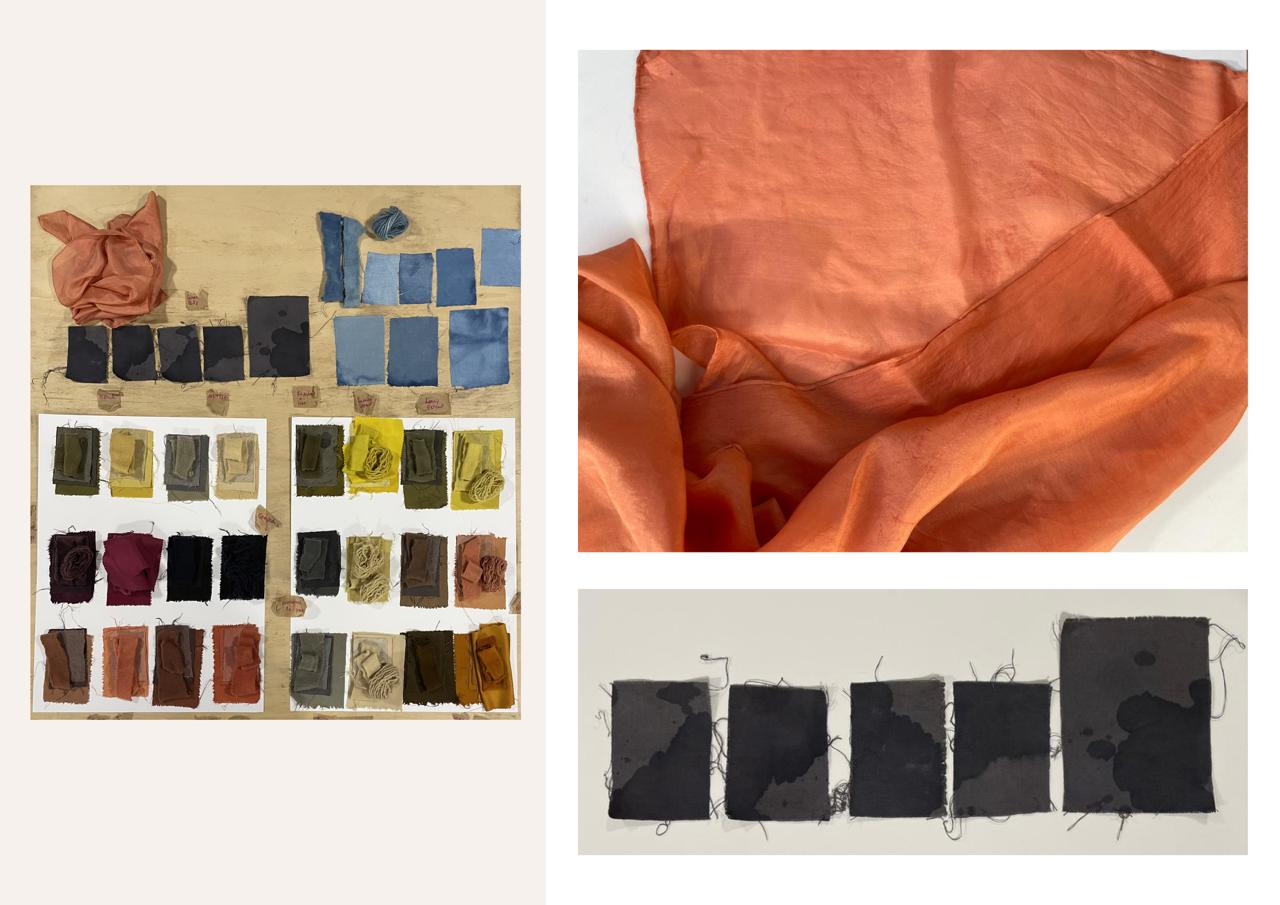
To make a nice presentation of the colors I ironed all the pieces and cut them in four pieces to share with Capucine, Marion and Le Textile Lab. I arranged the ironed and cut pieces on a piece of white paper. Every dye bath got it's own paper with all the different fabrics, the natural dye bath and the one with added iron. This proces I did as well for the indigo pieces. The top pieces were once dipped in the vat and the bottom pieces twice.