BioFabricating Materials
Ideation & Inspiration
I was considering using biomaterials in lighting applications for my final project, so I used this week as an opportunity to test the translucency and form-holding abilities of a few base recipes. I tried to create the clearest and most glossy finishes that I could, and to see how clear the natural colors would end up, I tested all recipes without added dye/pigment. I see lighting as a great application for experimenting with biomaterials because final pieces end up in a controlled, dry, environment and are rarely handled. With lighting, uneven material thickness, texture, and warping can also become a feature of the design rather than an issue to work around.
During the global lecture, I was drawn to translucent organic forms, both as rigid structures and stretched over armatures.

Render of glassy, organic, structure ('Serpentine Lace' by Scarlet Yang, 2020)
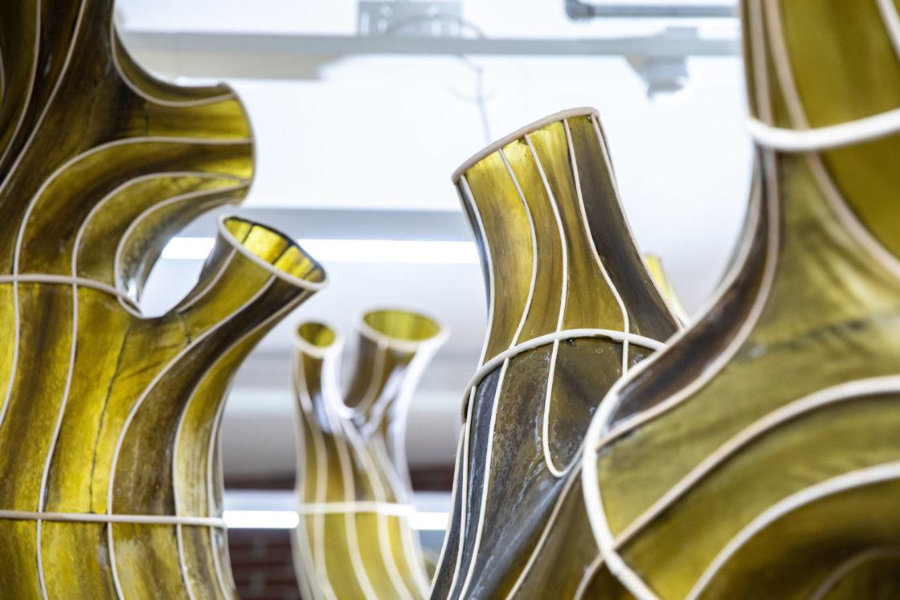
Algae stretched around armature ('Hidaka Ohmu' by Julia Lohmann, 2020)
Researching biomaterials in lighting applications, I found a few projects and products using biomaterials as light sculpture forms and for color/diffusion purposes.
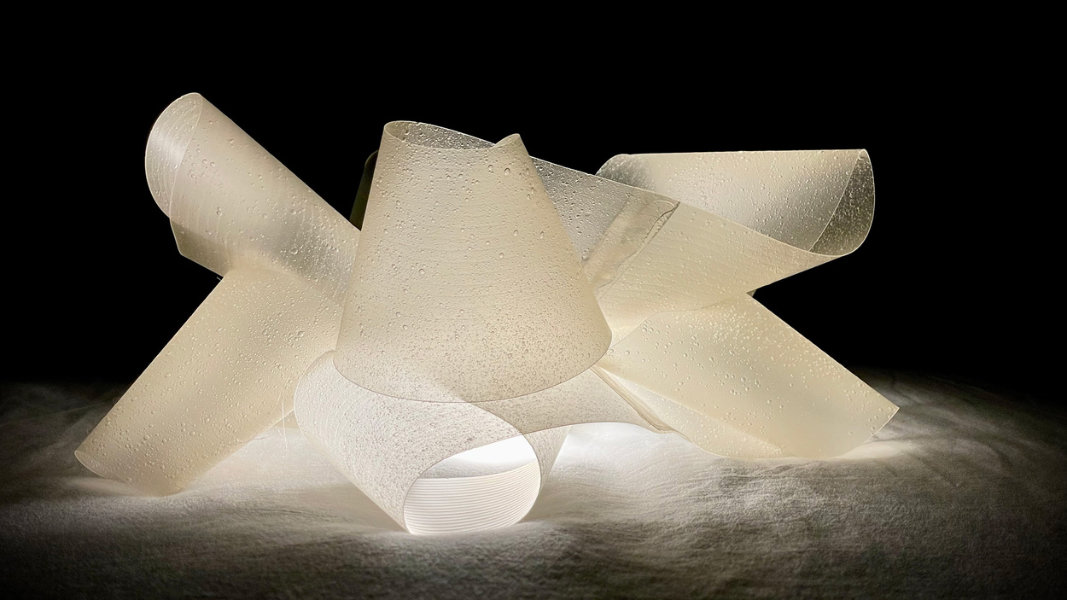
Simple gelatin bioplastic curls ('Bioplastics Light Design' by Armie Masathienvong, 2021)
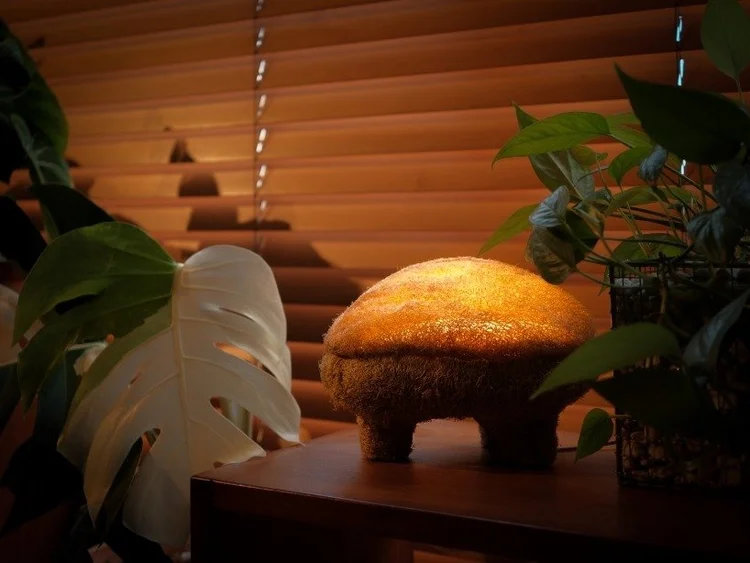
Mycelium grown in luffa for porous structure ( 'Gourdo' by Justin Wan, 2026)
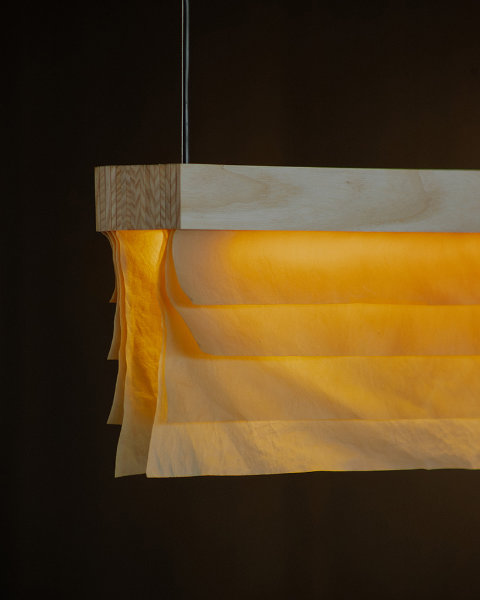
Diffusion through stacked layers of bio-cellulose ('Cenit' lamps by Natural Urbano)
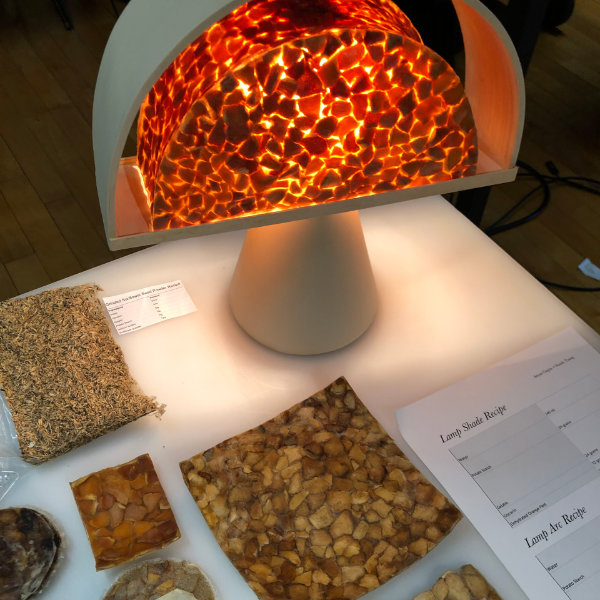
Stained glass effect from orange peels ('O-range' by Aryan Gupta & Sandy Tsang)
Resources
- Kombucha leather processing: Week 4 of 'Biomaterials You Can Make at Home', RISD Nature Lab
- Recipe Demos: Fabricademy Biomaterials Recipe Tutorial, 2022
Grown Material - Bacterial Cellulose/Kombucha Leather
Our lab had a large quantity of no longer productive SCOBY that Pigeon Cove Ferments, a local kombucha brewery, had provided for a Fab26 workshop over the summer, so I was able to skip the growing step and move right into processing the SCOBY into bacterial cellulose. Anastasia Pistofidou had previously begun washing the SCOBY but the water had yet to run clear, so I still needed to go through the washing step before drying.
Salvaging the SCOBY - SKIP IF YOU'RE SQUEAMISH
After its initial washing process, the SCOBY sat in a not fully airtight container for a few months before I started working with it, and in that time it developed a fruit fly infestation. Kombucha contains a lot of sugar which, along with its acidity, attracted flies. Luckily it wasn't moldy, and since the bin contained many pieces of SCOBY, I set out to salvage the underlayers which didn't seem to have larvae.
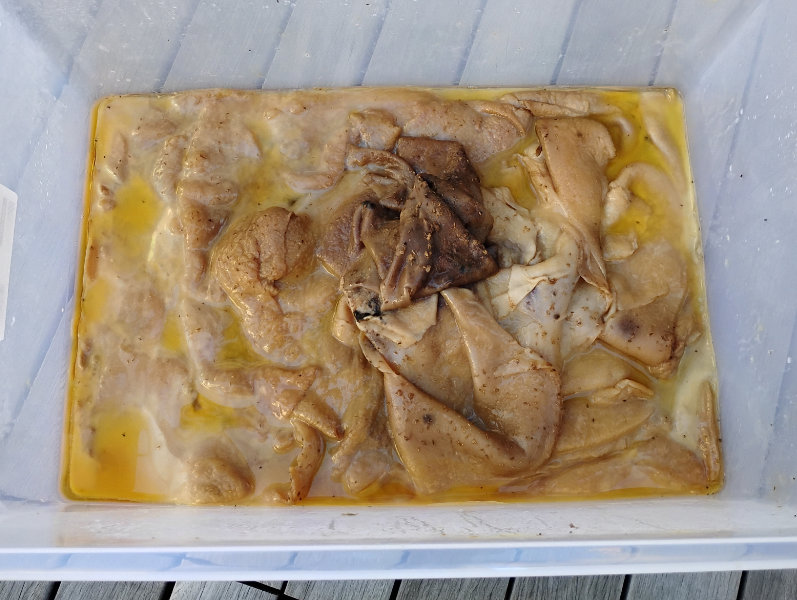
I prepared a few makeshift fly traps of vinegar with dish soap, then I set up outside for the transfer. I brought out a second container with water, then opened the container of SCOBY, folded the top layers over, and pulled out pieces from the lower layer, transferring them to the fresh water container. The kombucha smell was overwhelming even breathing through a mask outside, and paired with the blubbery texture of the SCOBY and thought of all the maggots, I barely got through the transfer. I WILL NEVER DO THIS AGAIN.
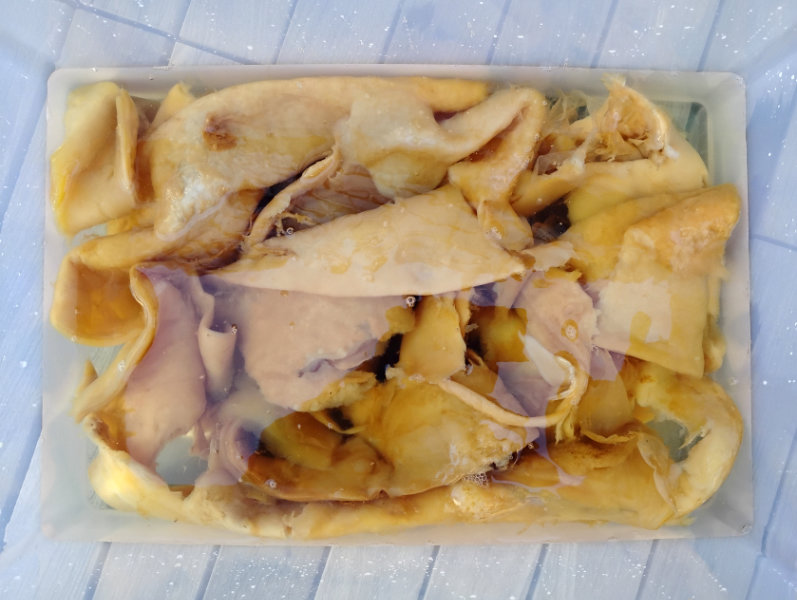
Washing
Anastasia had recommended washing the SCOBY and soaking it overnight with 1-2% sodium carbonate, hand soap, bleach (removing brown tones), or even scented laundry detergent. I purchased a laundry detergent for delicate fabrics with fewer harsh chemicals and planned to wash with it to mask the kombucha smell, but I ended up going with dish soap, as per the Nature Lab guide1 I found, because it seemed like it might have more biocidal properties [unsubstantiated] and helped ease my nerves around the fly infestation issue.
Rinse:
- Under running water, wash each piece of SCOBY with dish soap
Wash:
- Fill a container with water, add a fair amount of dish soap, then mix the soap in until suds form
- Add the SCOBY and agitate by hand, about 10min
- Check if the water is clear, then drain and rinse each piece
- Mine still had a bit of color, so I did a second wash at the beginning of the soak
Soak:
- Add more dish soap on top of the SCOBY pieces and cover with water
- Second wash: agitate the SCOBY by hand in the sudsy water
- Make sure the water and soap suds cover the SCOBY (don't attract flies), then leave to soak overnight
- After soaking, scoop out 1L of the water and check the color
- Drain and rinse out all the soap
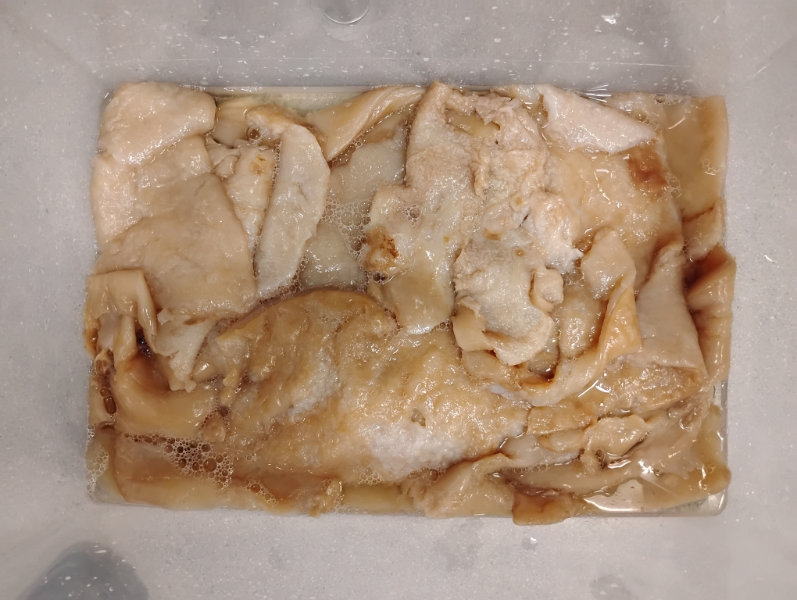
For Sheets: Drying & Plasticizing
Referencing the Nature Lab guide1 and Anastasia's suggestions, I went through the steps to process SCOBY into kombucha leather by I drying the larger SCOBY pieces and brushing them with glycerin to increase flexibility. To test forming the leather, I draped a few pieces over a form once they were partly dry but still pliable.
- Set up a drying station by standing a board of unfinished plywood up at an angle against the wall with a drip tray underneath
- A warm, dry, room helps the SCOBY dry faster, raise the room temperature and place the setup in a warm spot or add airflow. I pointed two fume extractor fans, with the carbon filters removed, at the board to create airflow.
- Place the SCOBY pieces on the board and allow the excess water to drip down
- Leave to dry overnight, then brush the surfaces with glycerin on both sides, flip the SCOBY sheets over, and leave to dry for another day
- Repeat the glycerin brushing and SCOBY flip once day until fully dry
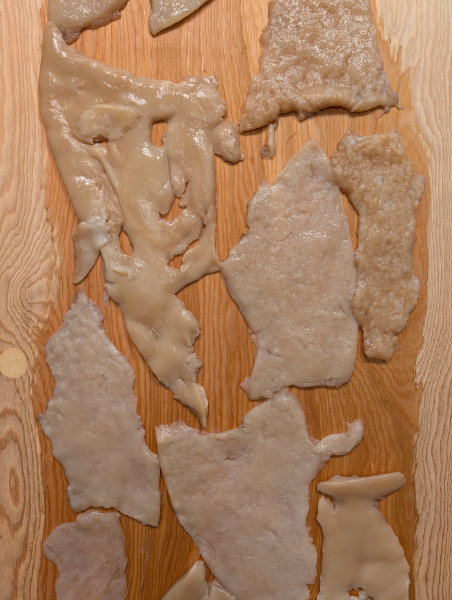
Left to dry
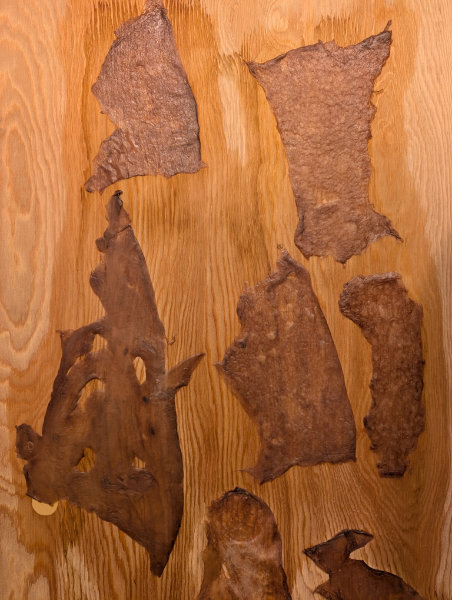
Dried on board, but still mushy & sticky
Final Results
The glycerin-brushed bacterial cellulose leather pieces stayed sticky, stretchy, and mushy even after drying over the weekend. The pieces didn't dry well in our wet lab, so it's possible that adding glycerin one day in sealed the surfaces and slowed the drying process even further.
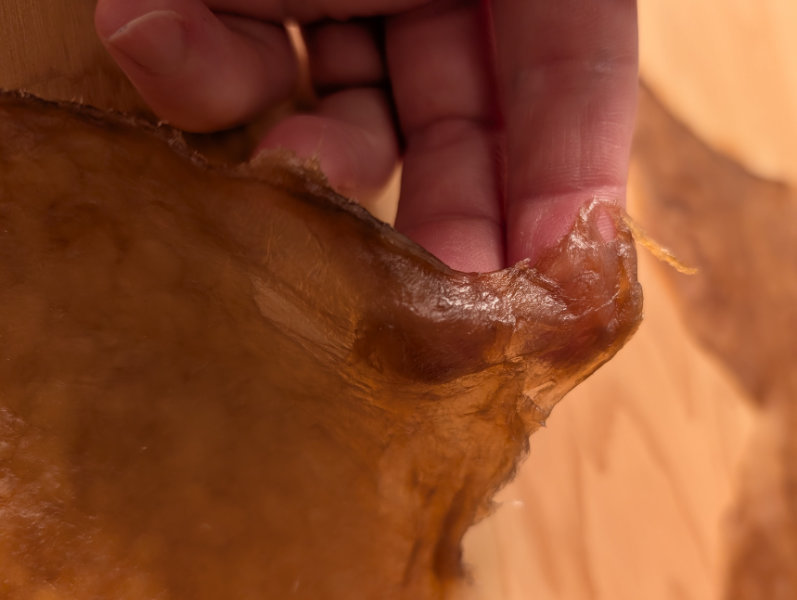
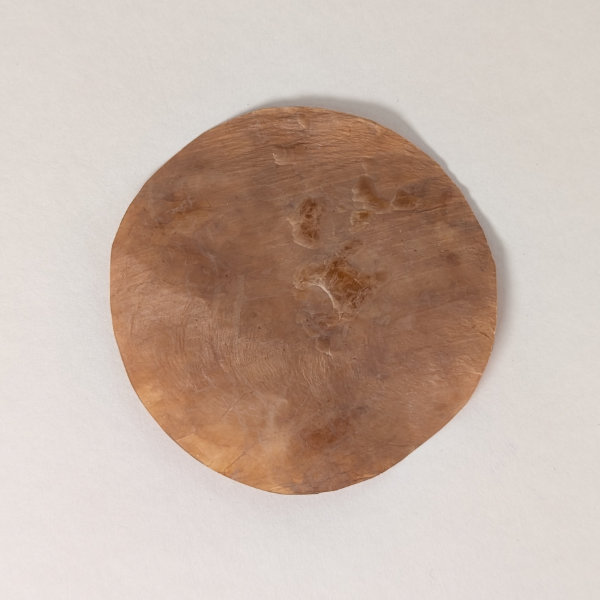
I left a few SCOBY pieces without glycerin to see how they would compare, and while some seemed to absorb glycerin dripping from the brushed pieces, one of the thin SCOBY pieces dried out to a thin brown paper-like sheet.
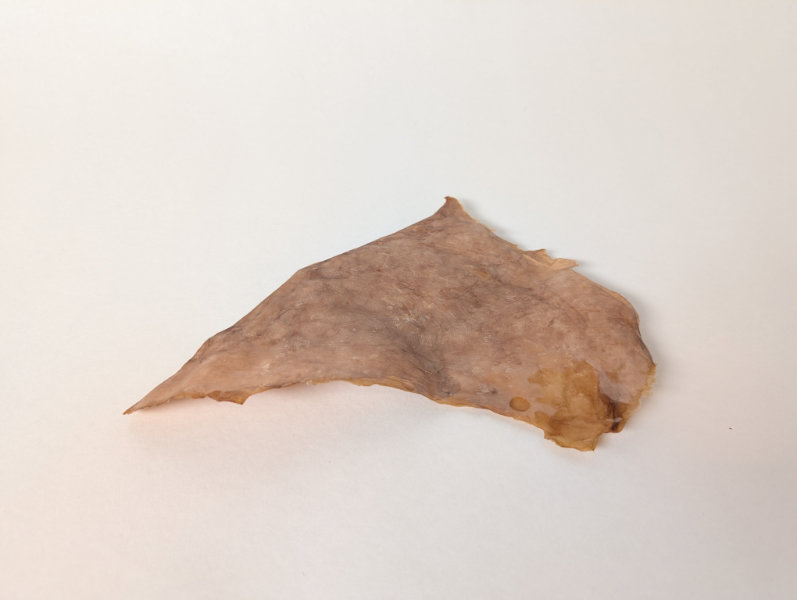
For Small/Damaged Pieces: Blending & Casting
There were a lot of smaller SCOBY pieces left over from the washing process, so Anastasia suggested blending the bacterial cellulose with alginate and casting it as a pulp, similar to the paper-making process.
Pulp Blend:
- Transfer excess SCOBY to a blender and blend into a smooth pulp
- Strain the excess water through a strainer and/or cheesecloth
- I tried two methods: manually squeezing the water to form a crumble, and just allowing some water to drain, leaving a pulp
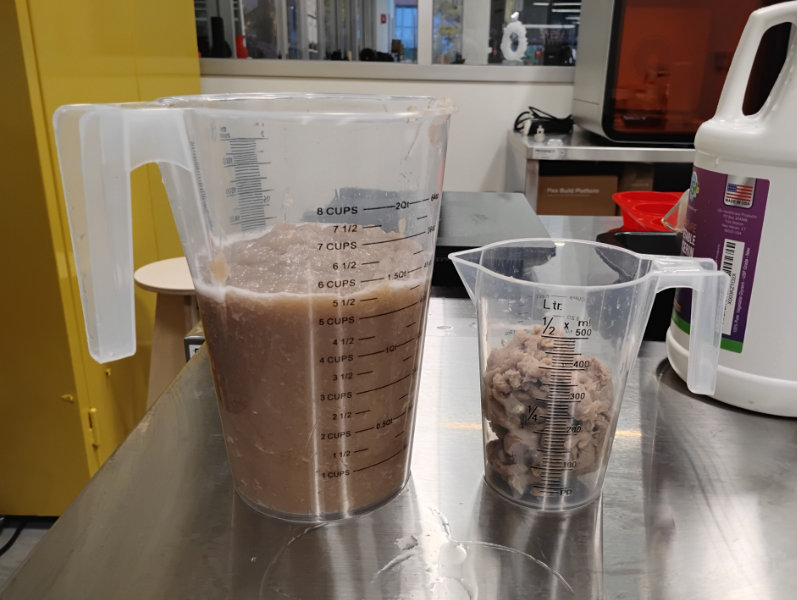
Wet and crumbled pulp
- I tried two methods: manually squeezing the water to form a crumble, and just allowing some water to drain, leaving a pulp
- Measure out your ingredients: for every 100g bacterial cellulose pulp, add 1g sodium alginate and 5g glycerin
- Blend everything together
Prepare a curing agent by mixing together a 3% calcium chloride solution (dissolve 3g calcium chloride per 100mL water) and transfer to a spray bottle.
Casting:
- Lightly spray a paper-making tray or screenprinting screen with the calcium chloride solution
- Pour the pulp blend into the tray, then carefully spread it smooth with a spatula or by hand
- Spray the top surface with calcium chloride solution
- Using a paper towel or tightly woven plant fiber fabric, pat the surface dry
- Leave to dry
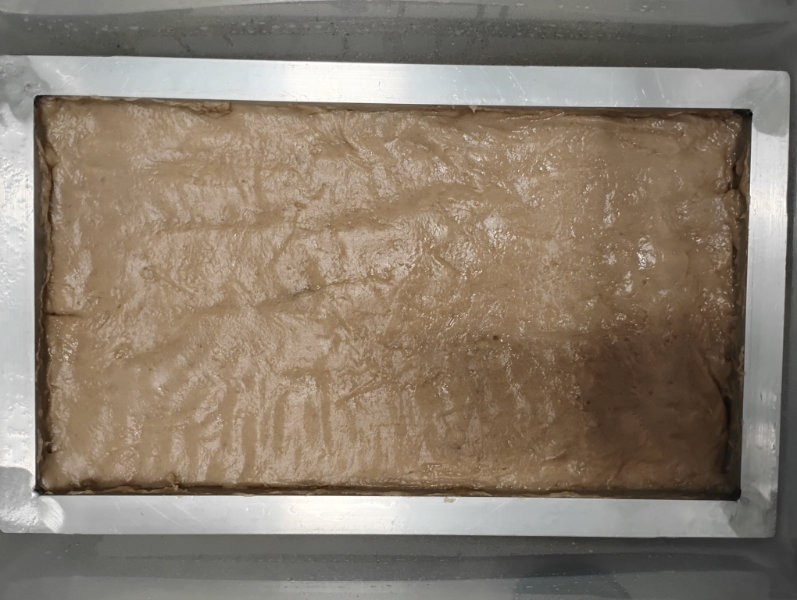
Cured sheet in frame
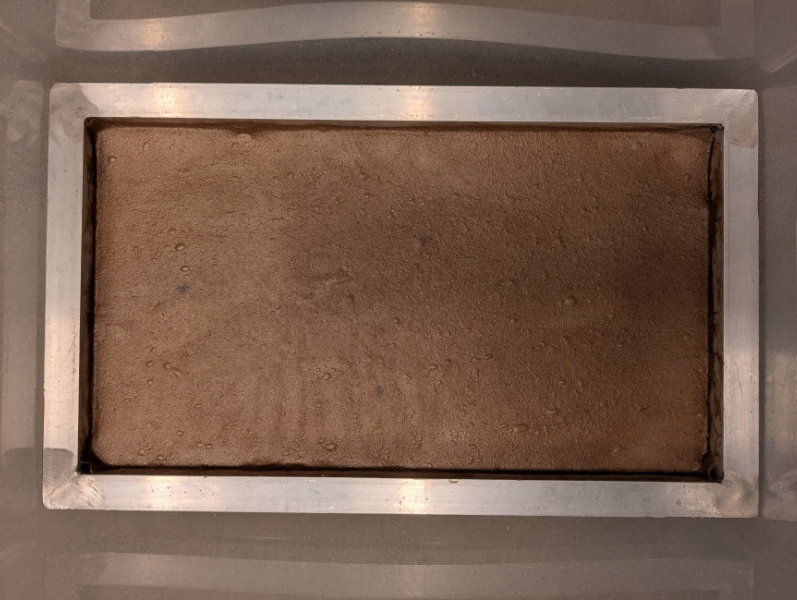
Dry sheet in frame
Final Results
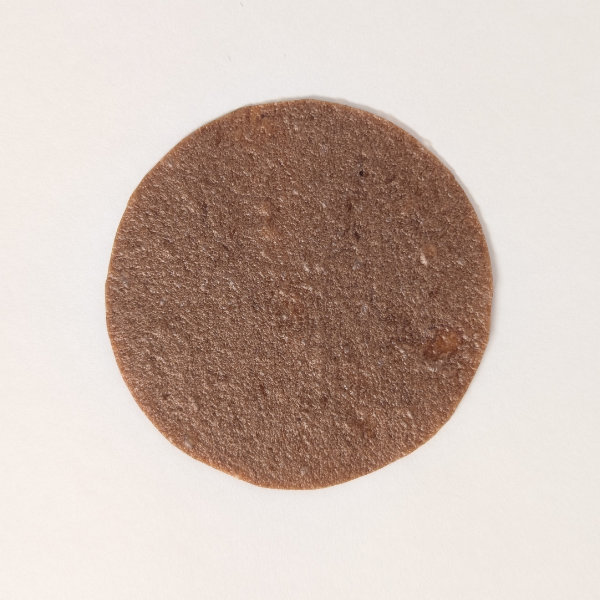
Surprisingly, the blended bacterial cellulose pulp successfully dried down to a leather-like, rubbery, sheet. A few black spots that looked like mold developed during the drying process though. Had I bleached the SCOBY, the resulting sheet would have been whiter, and the removal of sugars could have prevented mold growth.
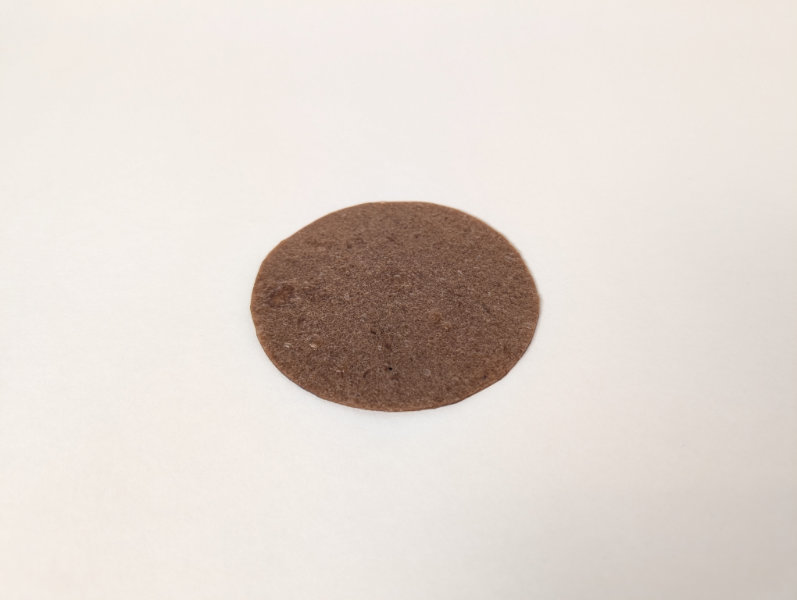
Dried piece of blended bacterial leather
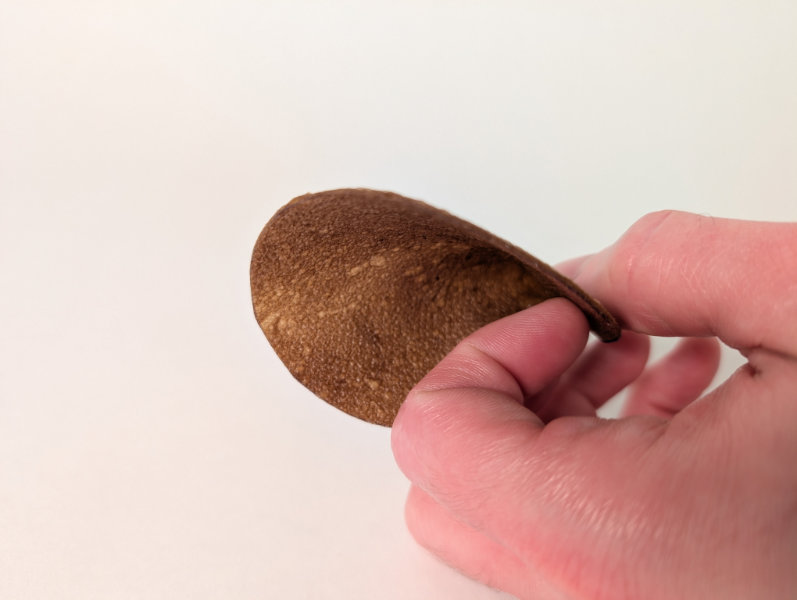
Thickness and flexibility
Crafted Materials
Gelatin Bioresin
I had worked with gelatin bioplastic a few times before, so I was excited to try out the gelatin bioresin recipe2 from the global lecture and see how the texture would compare to the standard bioplastics I had made previously. I doubled the recipe and generally followed the provided directions.
Ingredients (double recipe)
- 96g gelatin powder (measured 96.07g)
- 16g glycerin (measured 16.07g)
- 480mL water (measured 481.13mL)
Process
- Warm the water in a pot to 60°C
- Stir in the glycerin
- Slowly pour in the gelatin, a bit at a time, while whisking gently to dissolve
- Whisk until smooth, trying not to introduce bubbles
- Bring to a boil and hold to 5-10min (I did 8min)
- Skim the bubbles and scum off the top of the pot
- While hot, pour into molds
- If you want to form samples over a buck, cover the buck in oil, glycerin, or mold release to prevent sticking (I didn't do this)
- Once cooled and gelatinized, samples may be demolded and draped over forms for a 3D effect
- Leave to dry, flipping flat samples at least once a day to prevent mold growth
I poured the gelatin mixture into multiple molds at different thicknesses: silicone muffin molds, plastic petri dishes, a custom 190mm acrylic disc mold, and for the excess, a cake pan.
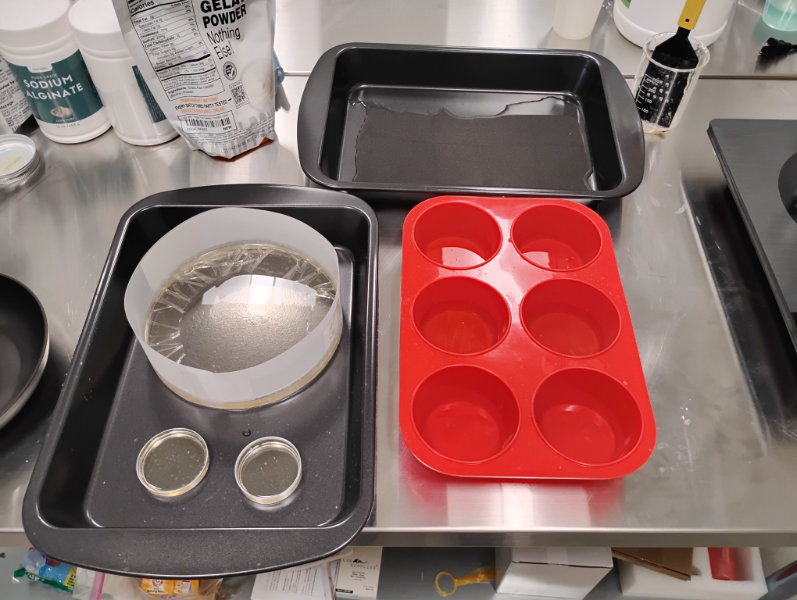
Once the mixture jellified, I removed some of the pieces from their molds, leaving flat samples to dry and draping larger sheets over forms for added dimension.
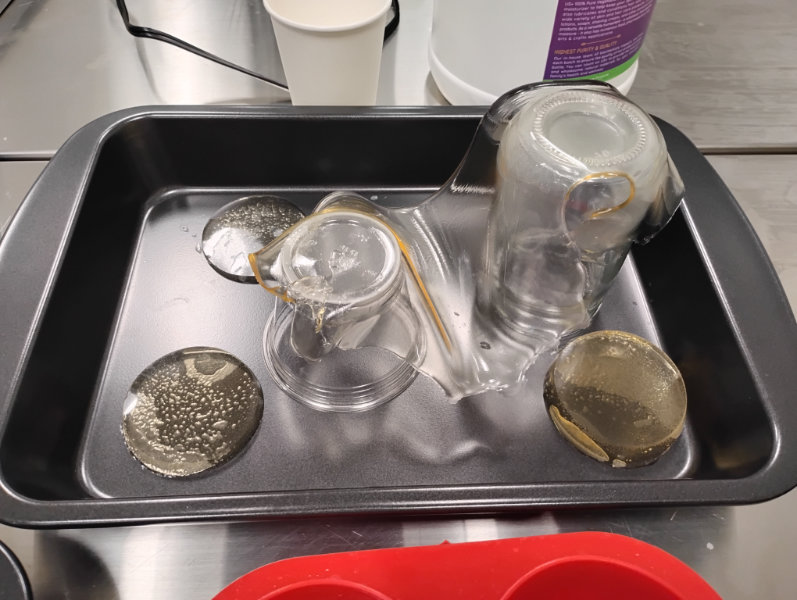
Final Results
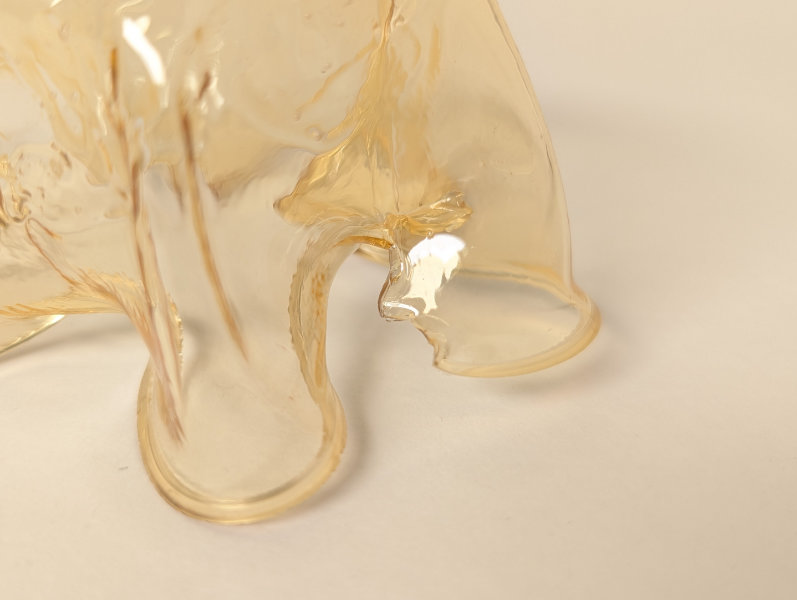
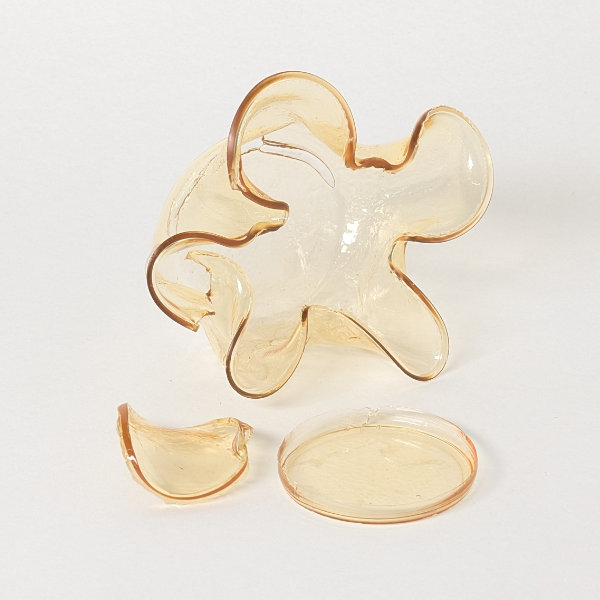
Once dried, the gelatin bioresin recipe produced hard, glassy, samples with just enough flex to not shatter immediately on impact. The drying process resulted in significant warping due to the centers staying wet as the edges dried and shrank, so it might be a good idea to look into sandwiching small samples between drying racks/mesh to keep them in place. I also noticed some surface texture with thicker samples, while thin pieces were almost perfect.
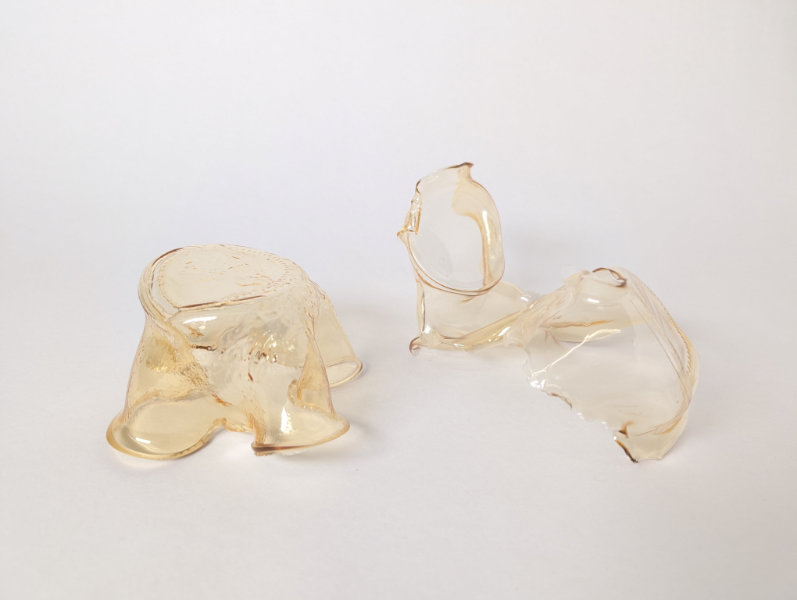
3D forms
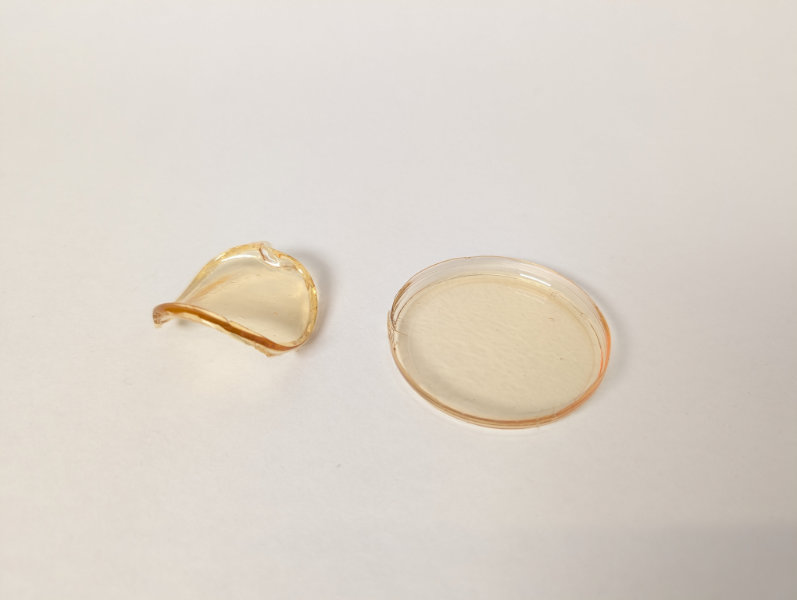
2D samples (left: removed from mold to dry; right: dried in petri dish)
Thicker gels (5mm) tore while draping/shaping, resulting in visible tears on the final pieces.
Notes
While boiling, the mixture had a tendency to bubble up quickly and risk boiling over, so I ended up lifting the pot off the cooktop each time it started bubbling. Eventually enough water boiled off to reduce the bubbling and I could see what was going on in the pot without foam blocking the view.
I wanted to keep my samples as clear as possible while also being able to drape the bioresin over an upside-down glass jar for a 3D result, so I made a quick smooth-surface mold from a 190mm diameter, 6mm thick, acrylic disc and heat-resistant film walls. I poured the mixture 5mm thick, and once it had gelatinized, I peeled off the mold walls and could easily peel the bioresin layer off the acrylic. Without mold release, the bioresin stuck to the glass jar and I ended up removing it part way through the drying process.
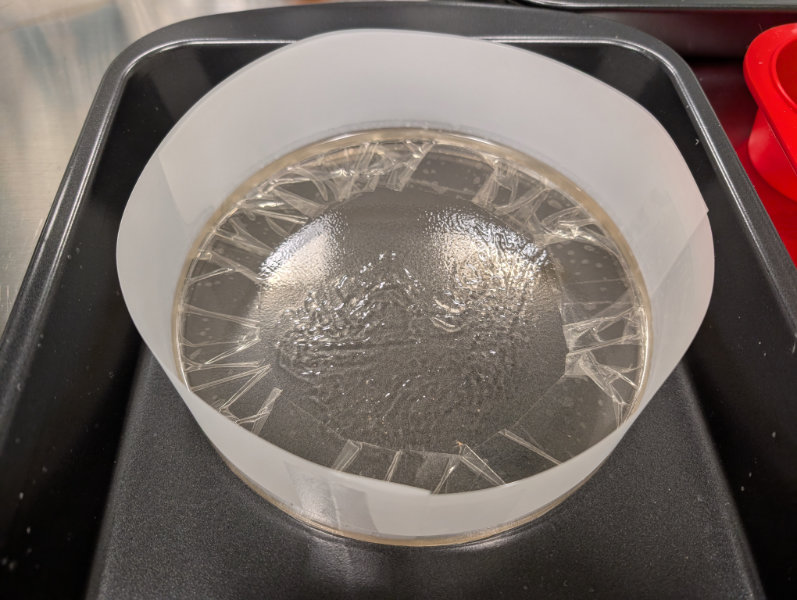
Poured flat
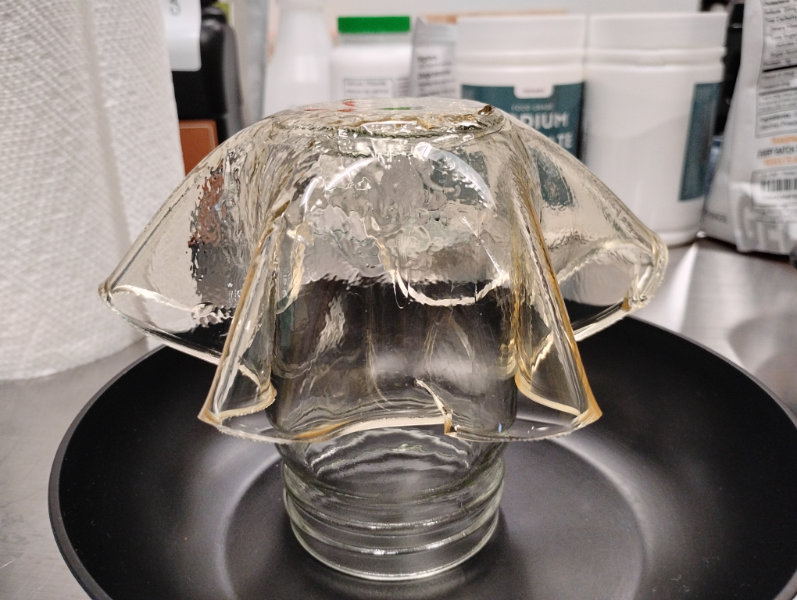
Draped over jar to dry
I left my gelatin bioresin without added colorant and the result was very translucent, almost clear, with a slight yellow tint. With this result in mind, if I were aiming for clear, I would tint the mixture slightly purple to balance out the natural yellow.
Alginate Bio-Sheets
I was really looking forward to exploring alginate bioplastic recipes, as it seemed to have the best material properties for products. Although LEDs produce nowhere near as much heat as incandescent and halogen bulbs, their heatsinks can still get quite hot and having a heat-resistant material for lighting would be helpful for reducing the potential for warping of the material. Water resistance isn't as necessary for lighting, but it could be nice to have. Just as with the gelatin-based materials, I wanted to test transparency, so I followed the alginate flexible biosheet recipe from the 2022 Fabricademy bioplastic recipe tutorial3.
Ingredients
- 12g sodium alginate (measured 12.03g)
- 40g glycerin (measured 39.95g)
- 400mL water (measured 403.11mL/g)
- Curing agent: 10% calcium chloride solution (10g calcium chloride per 100mL water)
Process
- Blend together the alginate, glycerin, and water to form a smooth gel
- For this small batch, I used an immersion blender
- Cover the surface of the mixture and let sit overnight in the refrigerator for air bubbles to dissipate
- Spray 10% calcium chloride solution on molds
- Pour the alginate mixture into the molds, carefully spreading smooth with a spatula and/or mold rotation
- Allow the alginate to sit for a few minutes, then spray the top with more calcium chloride
- Wait for the alginate surface to cure, then pat dry with paper towel
- I waited 10min for a thicker cured surface, but I probably should have only waited 30sec-1min
- Transfer to a dehydrator and dry at 60°C
- For thin strands, 1h was enough, but larger pours ran for 15h
- Remove from molds and wipe off any oily residues
I cast the base alginate recipe in plastic petri dishes, on a cleaned cutting mat, and in an embroidery hoop with stretched tightly-woven cotton fabric. On smooth surfaces pre-sprayed with calcium chloride, the alginate immediately pulled away from the mold and could not be spread. With the pre-sprayed fabric, the alginate started shrinking and pulling away from the edge in some areas, while other areas stayed in place.
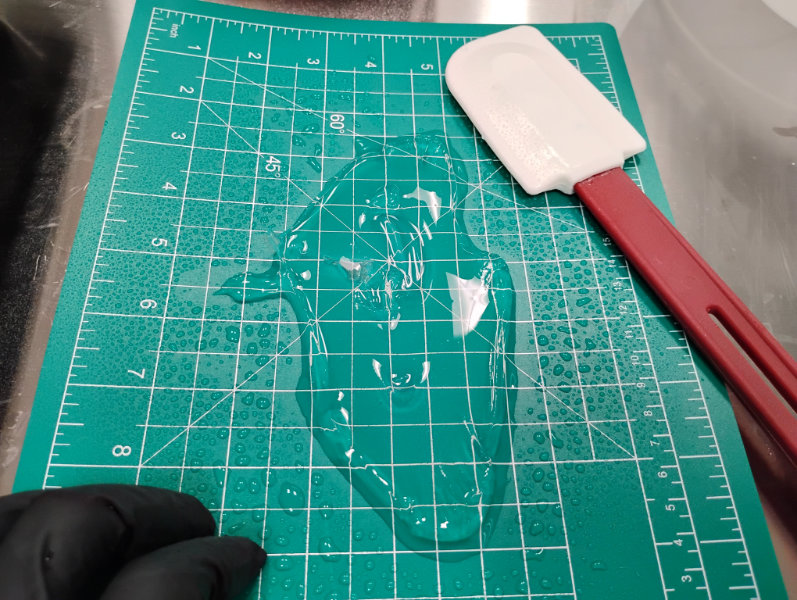
Sliding, unspreadable, blob on cutting mat
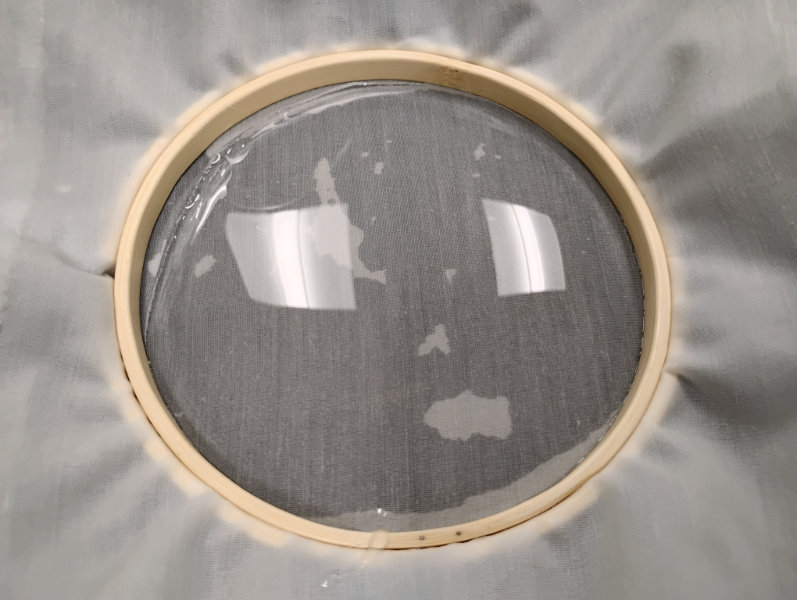
Pulling away from embroidery hoop
Final Results
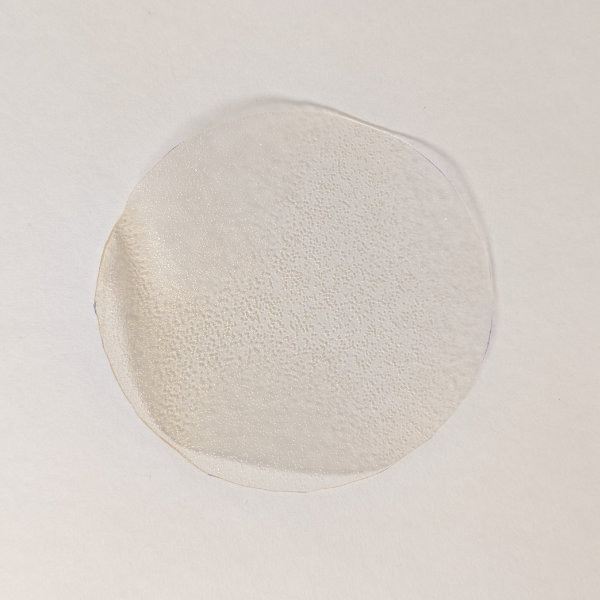
After drying, the final alginate samples were mostly colorless, with only a slight warm tint. The drying process left a matte surface, and the material was filled with microbubbles. The pieces shrank significantly while drying, resulting in major contraction and deformation. The thin fabric-cast sheet ended up flexible a little rubbery, while the thicker pieces were tougher and not really bendable. I also noticed an oily substance on each surface that felt like glycerin and transferred to my fingers when handled. Overall, this recipe did not produce a predictable or translucent result and probably wouldn't have worked to draping, so it wouldn't be a great material for the lighting applications I had in mind.
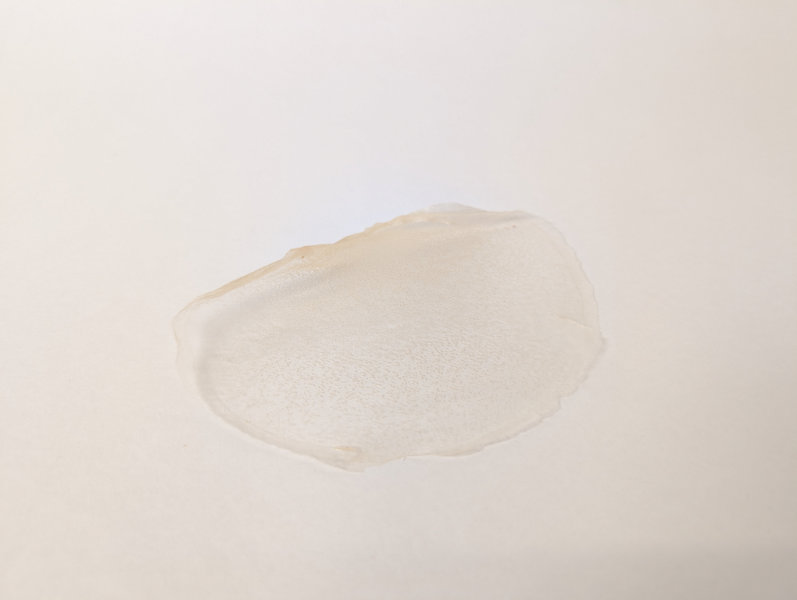
Sheet cast on fabric
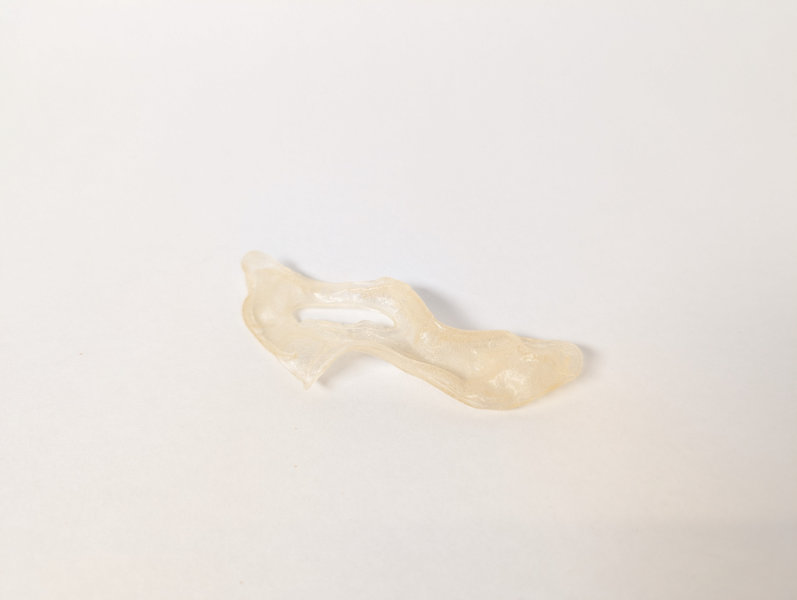
Warped blob cast on cutting mat
Notes
The microbubbles in the alginate biosheets formed by air incorporated in the blending process. Because the recipe stays pourable until cured with the calcium chloride, bursting the bubbles in a vacuum chamber before pouring or placing the poured samples in a pressure pot before curing could help reduce bubbling.
Variations
Using the same batch of the base flexible alginate biosheet recipe, I tried out few material variations.
Alginate Strands
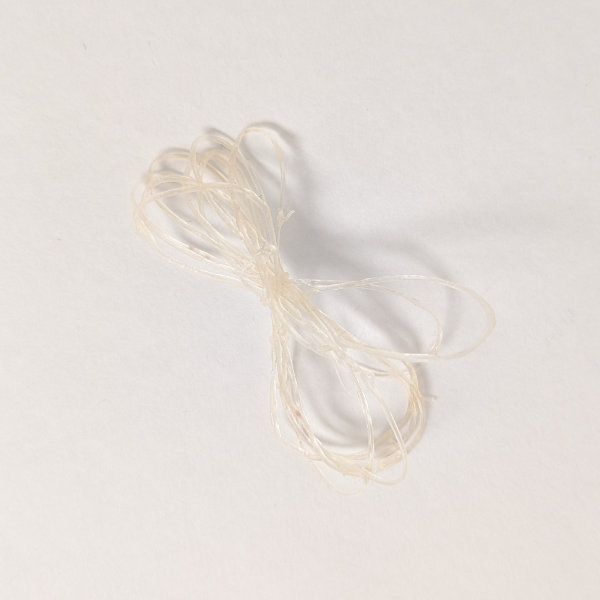
To make alginate strands, I filled a small squeeze bottle with the alginate mixture and squeezed it out into a bowl of 10% calcium chloride solution. After curing for 10min, I rinsed the strands with water before leaving them in the dehydrator for 1h. To create thicker strands, I cut the tip of the squeeze bottle larger.
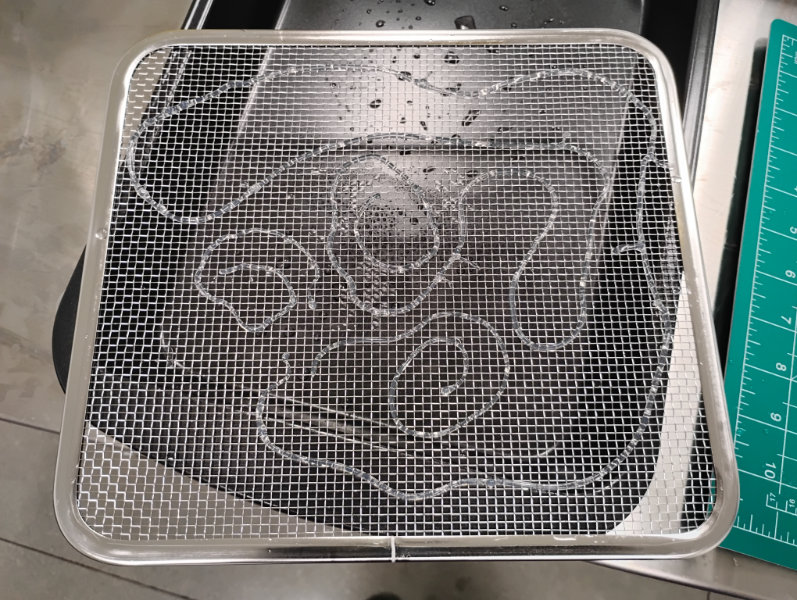
Thin strands before drying
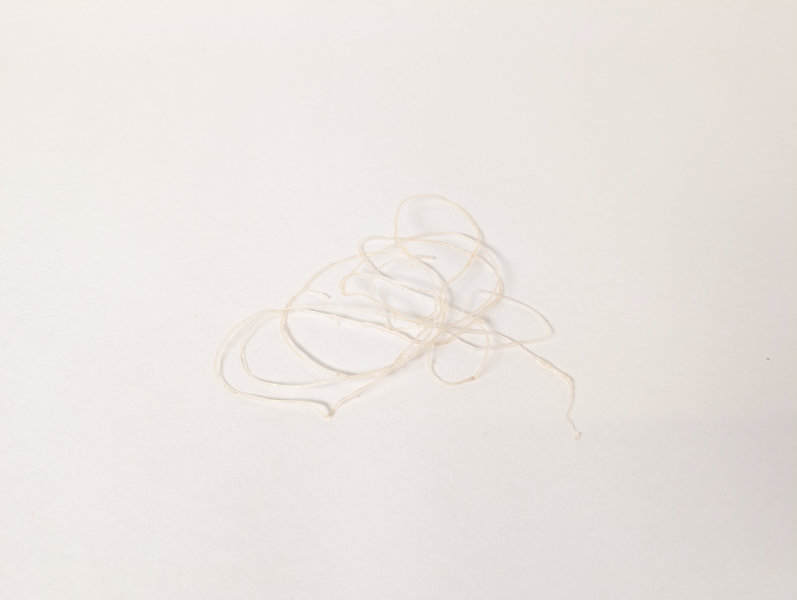
Thin strands after drying
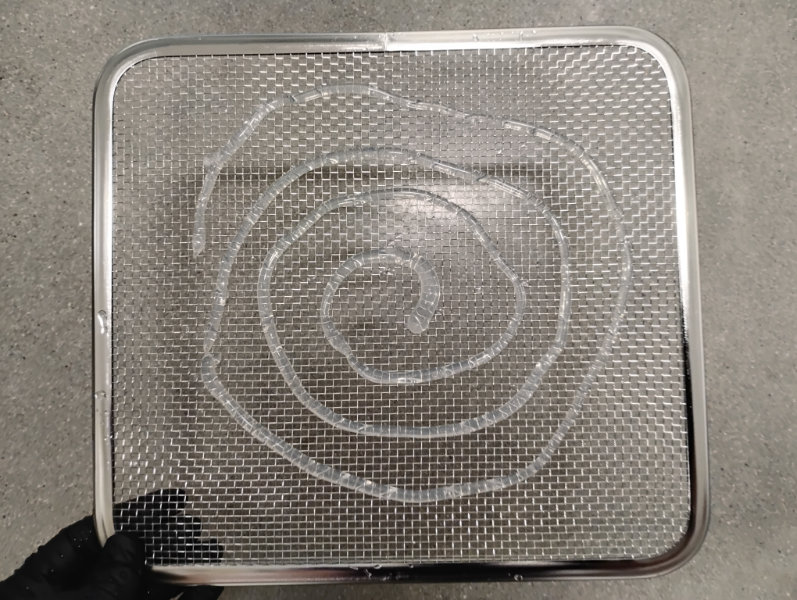
Thin strands before drying
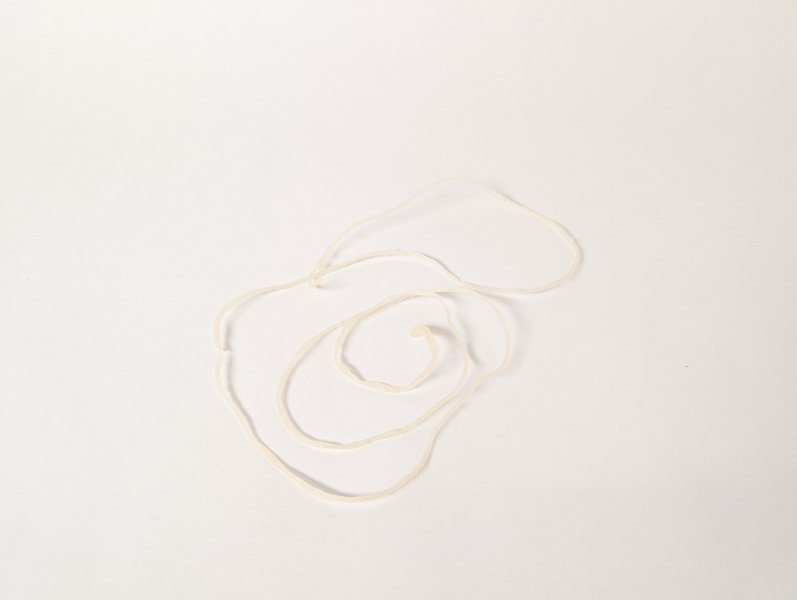
Thick strands after drying
The resulting alginate strands were significantly thinner than they started, with a yellow tint and uneven, slightly crunchy, surface. When pulled, they exhibited only slight elastic deformation before permanent stretching.
The calcium chloride didn't cure the alginate instantly, so sometimes the flow would overlap and fuse together before curing. To prevent unintentional fusing and form a single strand, I spiraled the pour out from the center.
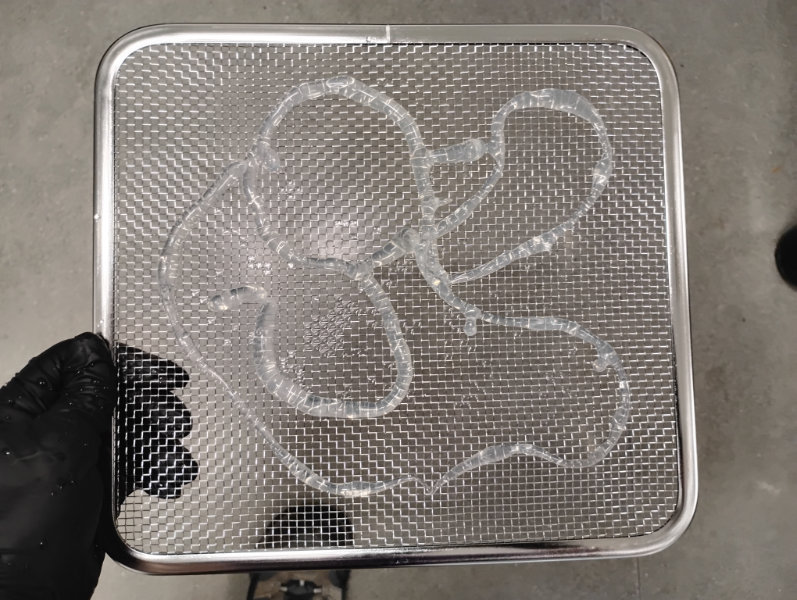
I cured the strands for 10min to strengthen them and prevent popping when removed, but this was probably a mistake. The longer cure time likely resulted in the crunchy strand texture and it would have been better to only leave the strands in the calcium chloride solution longer enough to seal the surface.
Bacterial Cellulose-Alginate Composite
I had a fair amount of bacterial cellulose crumble left over from blending and straining the SCOBY, so I decided to combine it with left over alginate biosheet mixture. Working with the flexible alginate biosheet mixture, I added the bacterial cellulose crumble at a ratio of 1 part bacterial cellulose : 2 parts alginate mixture, by weight. (25g bacterial cellulose : 50g alginate mixture).
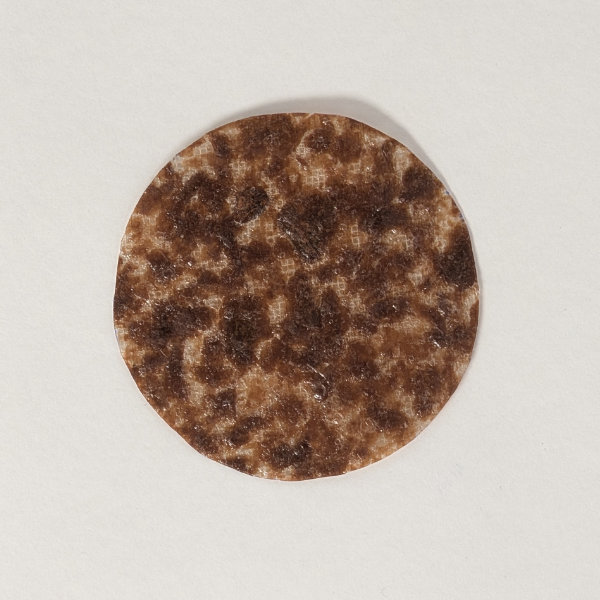
For my first attempt, I mixed the crumble in with a spoon, trying to break up the pieces as much as possible. I stretched non-stretch sheer fabric on an embroidery hoop, spread the alginate mixture on the surface, then cured both sides with 10% calcium chloride solution, waited 10min, and patted the surfaces dry. Once cured, I dried the sample in a dehydrator at 60°C for 15 hours. I thought the mesh alginate would grab the mesh well and waiting to cure the mixture might prevent peeling, but the result was the mesh embedding into the mixture and curing in place. The final surface was a little crackly, with the alginate areas being a lot more flexible than the papery crumble bits.
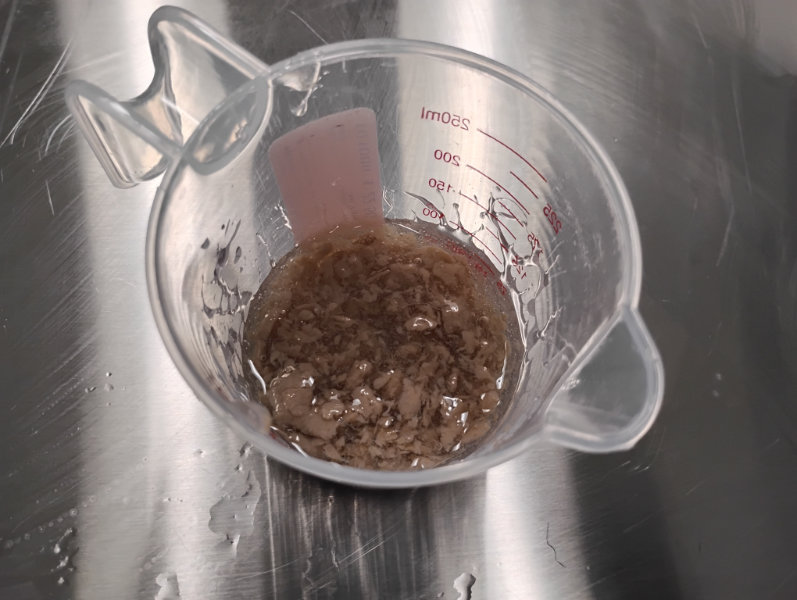
Broken up crumble mixture
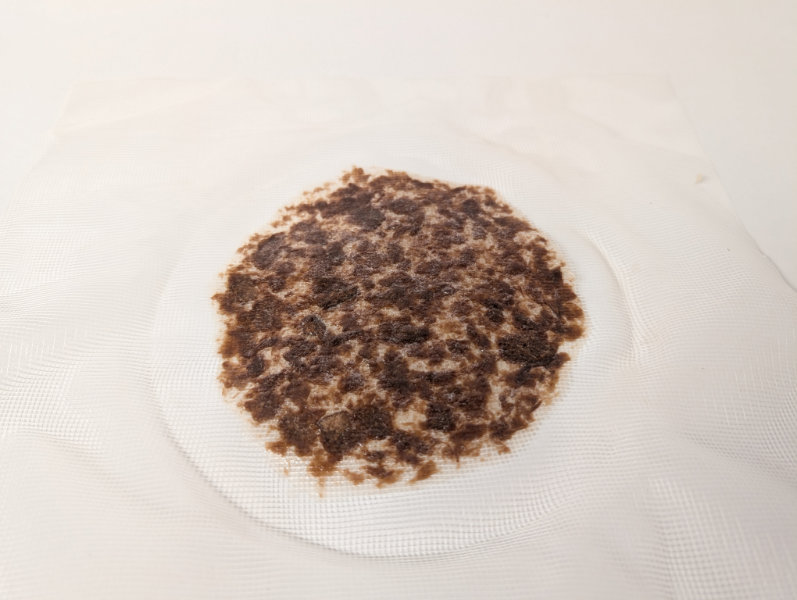
Broken up crumble sheet (fused to mesh)
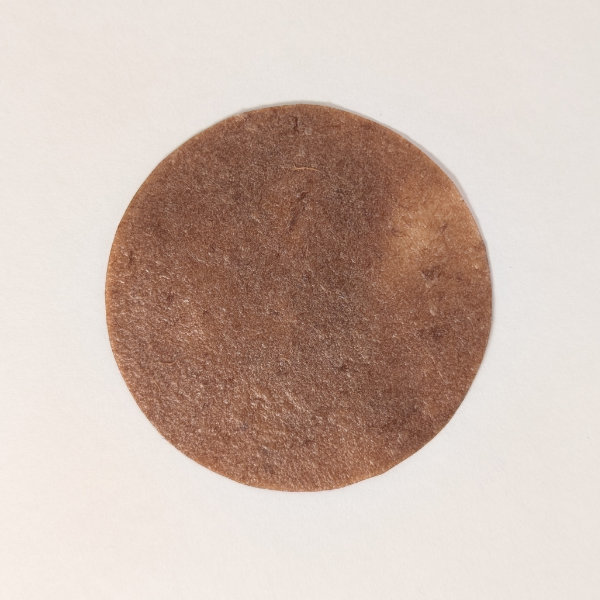
For my second attempt, I blended the crumble in with an immersion blender, creating a homogenous mixture. I was still looking for a good balance of adhesion and easy release from the mold, so I stretched a slightly textured natural linen on an embroidery hoop, then holding the hoop upright, lightly sprayed the surface with 3% calcium chloride solution. I put the hoop down in a pan and spread the alginate mixture on it, then cured with the calcium chloride solution, waited 10min, and patted the surface dry. Once cured, I dried the sample in a dehydrator at 60°C for 15 hours. Once dry, I was able to peel the sample off the fabric, but it took some of the fabric fluff with it and contained an imprint of the woven texture. The final material was a little more rigid than a purely alginate sheet, but still fairly flexible.
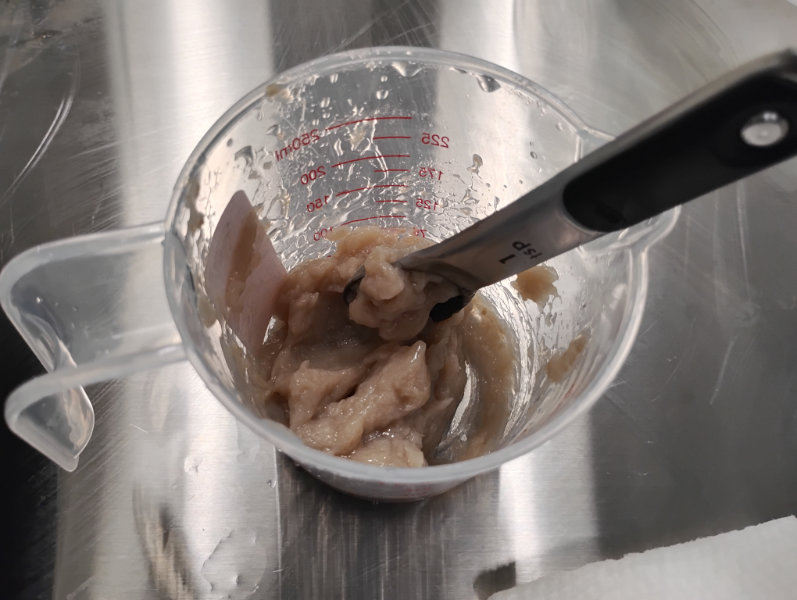
Blended mixture
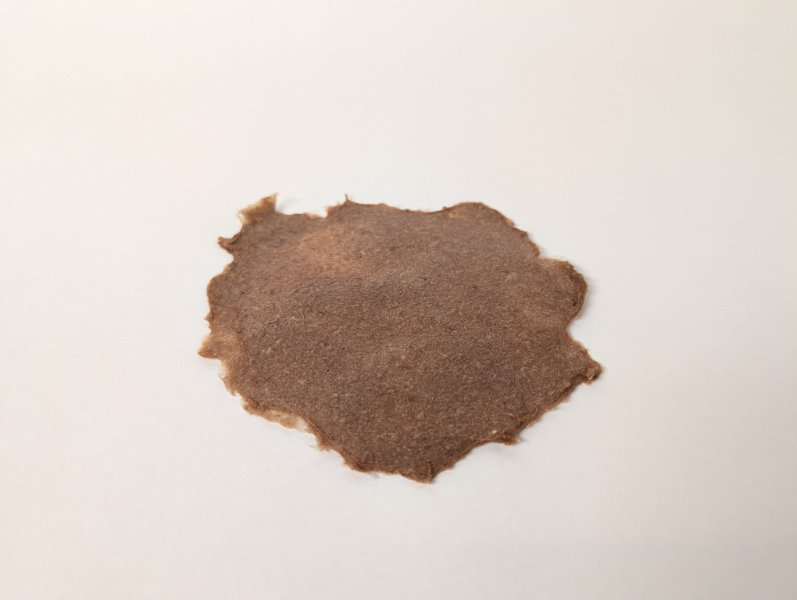
Blended bacterial cellulose-alginate composite sheet
Material Samples
-
Bacterial Cellulose Paper (no glycerin)
-
Blended Bacterial Cellulose Leather/Rubber
-
Gelatin Bioresin
-
Flexible Alginate Biosheet
-
Flexible Alginate Biosheet Thread
-
Bacterial Cellulose-Alginate Composite (stirred)
-
Bacterial Cellulose-Alginate Composite (blended)
Reflection & Thinking Towards the Future
Thinking about future applications of the materials from this week, the gelatin bioresin is the only recipe I would consider working with again. While prone to tearing and not particularly heat resistant, I was quickly able to achieve the hard, glassy, results I was going for. In the future, I could try tinting the color and experimenting with what pour thicknesses produce the best final product. I had high hopes for the alginate-based bioplastics and their heat resistance, but the severe warping/shrinking and matte finish did not leave a good impression. If I continue working with biomaterials for lighting, I would like to try different recipes to see if I can find something more glassy and controllable, but this week's testing didn't result in anything I would move forward with. The kombucha leather, although an interesting concept, was just such a tedious and gross process that I don't ever want to go through it again. I'm glad that I had to opportunity to try it once, but for me, even just the fly attraction while drying is a risk not worth taking.