BioChromes
Goldenrod
Overview
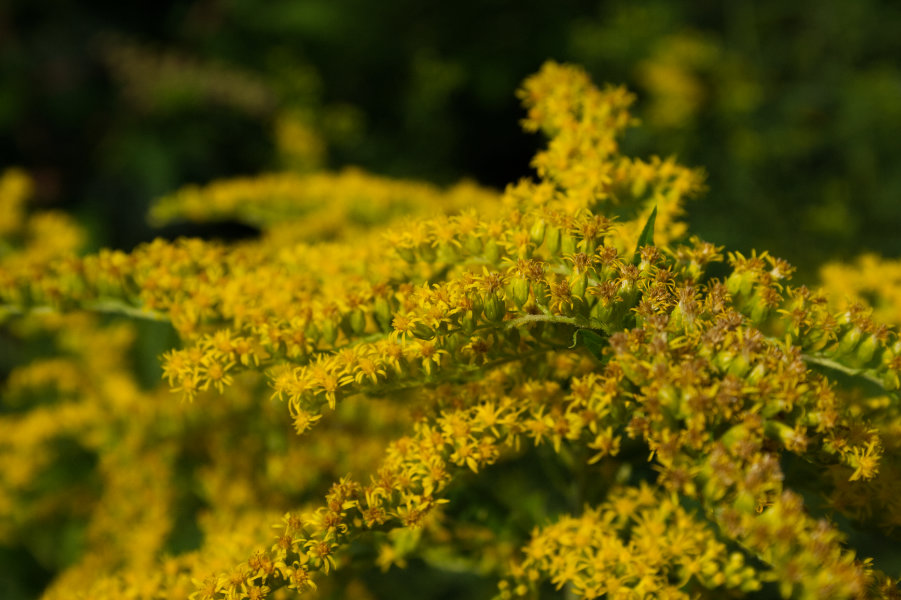
Goldenrod is a native plant in New England and grows wild all around us, including along the road just down the street from my home. It's been used as a medicinal plant and herbal tea ingredient1, in addition to our use of the plant for natural dyeing. When used for dyeing, goldenrod produces yellows and greens.
This Documentation Covers Goldenrod Dyeing
As the purpose of this week was to introduce us to the concept of natural dyeing and have a chance to experiment with colors, our node worked as a group to produce 3-4 colors and their various shades. As a team, we worked with goldenrod, logwood, madder, and woad. The documentation below covers goldenrod. Kim Ducharme documented madder and Pam Intun documented logwood. After dyeing, we realized that the dried woad leaves we had used required a different type of dyeing process, closer to indigo, so we left it out of the modification process.
Dye Matter Cultivation in Massachusetts
In my quick research, I didn't find any small natural dye businesses/studios in the Boston area, but there are a few dye gardens. At our lab, Fab Hub Kendall, we're also looking into creating our own dye garden in the planter boxes outside our offices.
- The Garden at Elm Bank: The Massachusetts Horticultural Society's Garden at Elm Bank contains a teaching herb garden in which lies a dye garden. The garden is maintained by the New England Unit of the Herb Society of America.
- SMFA: Tuft's School of the Museum of Fine Arts (SMFA) in Boston now has their own dye garden[^article] where students learn to help with upkeep and can participate in natural dyeing workshops.
- Osamequin Farm: Closer to the border with Rhode Island, Osamequin Farm not only has a dye garden but also hosts natural dyeing workshops to teach the public about the process.
Inspiration
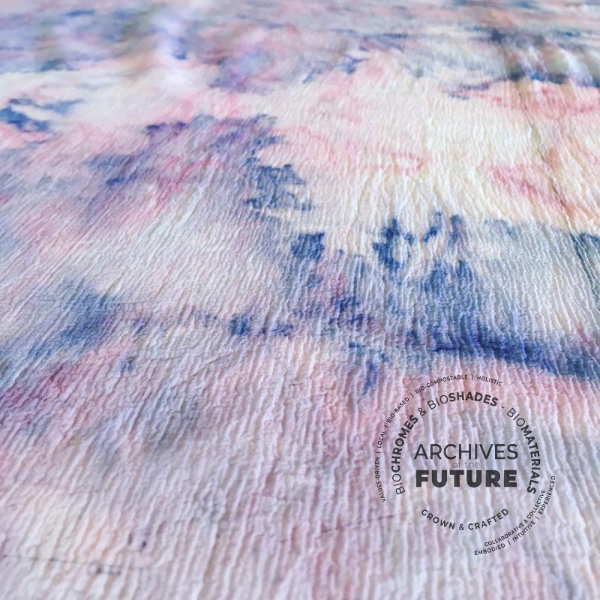
I didn’t have any specific inspiration for this week, as we were just going through the dyeing process and making swatches. While I didn't have a chance to work with bacterial dyes this week, they were what I was most drawn to during Cecilia Raspanti's lecture. The concept of bacteria growing in whatever direction they want and co-creating patterns with the dyer was a new way of thinking about the dyeing process, so I would love to learn more about bacterial dying and try creating patterns myself in the future.
Gathering Resources
We started the week by trying to figure out what ratios and processes to use for scouring, mordanting, and dyeing the fibers we had on hand. Each source we checked was incomplete in some way, missing chemical/dye ratios, water measurements, or directions, so we took notes on a few and modified what we found based on tips we heard during the week's lectures.
Our primary resource was the Botanical Colors website, which provides directions for scouring and mordanting with different chemicals, as well as having recipes for specific dye matters and generic plant-category guides.
Fiber Preparation
Sizing
- Cut fabrics into 10-20 cm square swatches, creating enough for 6 swatches of each fiber per color
- We planned to work with 4 colors and had 2 fabric fibers, cotton and linen, so we cut 30x 10x10cm squares of each fiber and ended up with 6 extra swatches per fiber
- Cut lengths of yarn to make small bundles that will go in the dye baths, creating enough for 6 bundles of each fiber per color
- If you have small skeins, back-calculate your longest possible length from the shortest skein
- We had 4 colors and our shortest skein was 57.5m, so 57.5m / (4 colors * 6 bundles) = 239.5cm maximum length. We ended up going for 230cm to be safe
- We cut yarn from 2 fibers, wool and silk, creating 28 bundles per fiber to have extra
- If you have small skeins, back-calculate your longest possible length from the shortest skein
-
Wrap and secure yarn bundles
-
For each length, wrap the yarn around your palm or 4 fingers until 1 palm-width is left hanging
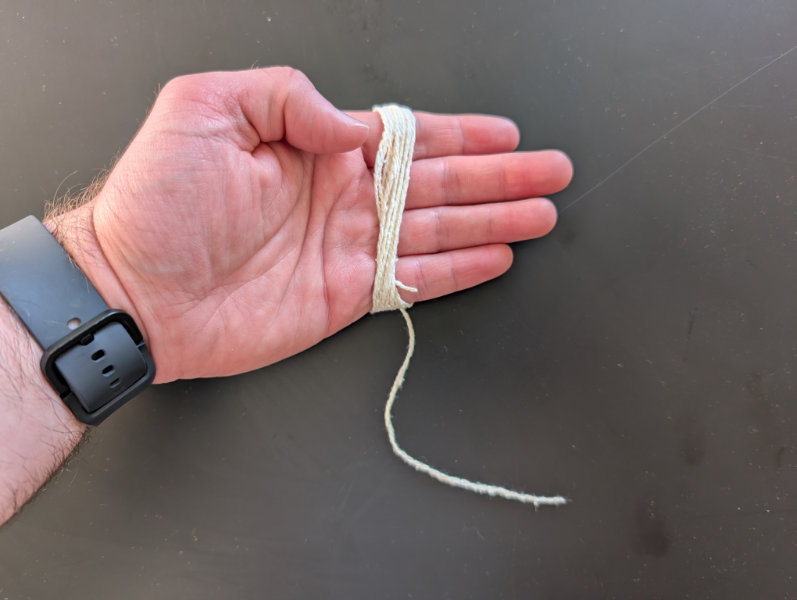
Wrapped around palm -
Cut off the hanging yarn, then slide the bundle off your hand
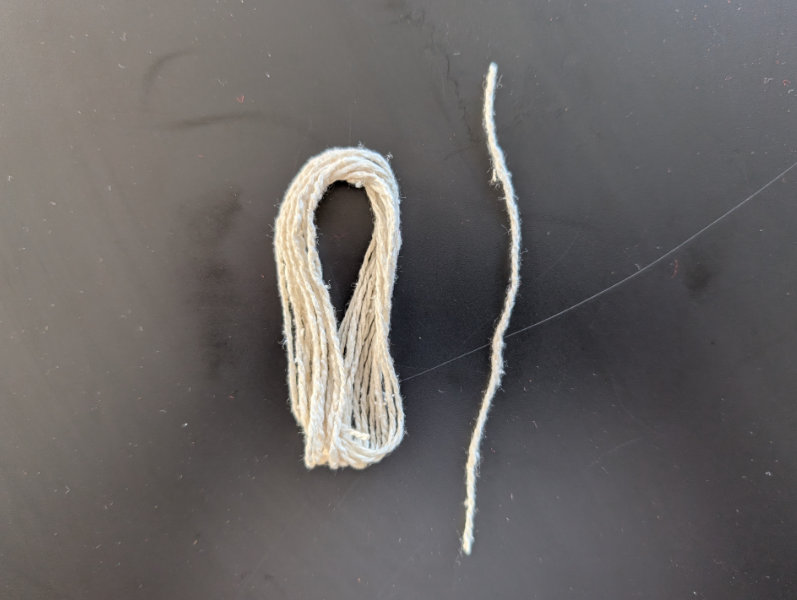
Wrapped yarn and tie separated -
Tie the short cut-off around the center of the bundle and secure with a tight double knot
- Some fibers, like our wool, require more careful tightening to prevent the material from tearing
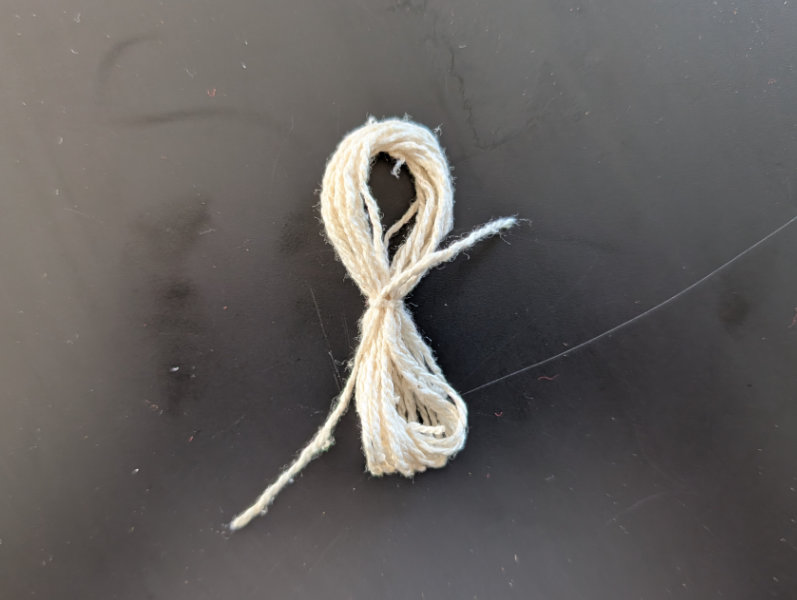
Tied yarn bundle
-
-
Calculate Weight of Fiber (WoF)
- Create individual piles of each sample type
- For us this was cotton fabric, linen fabric, wool yarn, and silk yarn
- Weigh each pile, recording the weight and number of samples
- Group your samples by fiber type, creating separate piles of cellulose-based and protein-based fibers
-
Calculate and note the combined weight of (1) all protein-based fibers, and (2) all cellulose-based fibers
- We initially recorded our results in a table and later switched to a spreadsheet that could be used to update future calculations as needed
Cellulose-Based Protein-Based Cotton Fabric: 48.11g Wool Yarn: 20.47g Linen Fabric: 68.00g Silk Yarn: 20.34g Total: 116.11g Total: 40.81g
- Create individual piles of each sample type
Scouring
Cellulose-Based Fibers
- Measure 1% WoF sodium carbonate (soda ash)
- For 116.11g WoF, we calculated needing 1.16g soda ash and measured out 1.17g
- Pour 0.47L water into a pot
- Transfer a small amount of water from the pot into the soda ash and stir to dissolve
- Bring the pot to a simmer and pour in the dissolved soda ash
- Add fiber samples to the pot and simmer for 1 hour, stirring gently
- Rinse samples in cold water, squeeze out the excess water, and hang to dry
Protein-Based Fibers
- Gently clean fiber samples in lukewarm water with a bit of dish soap
- Rinse out all soap
- Squeeze out the excess water and hang to dry
Tannins (Cellulose Only)
For cellulose-based fibers, adding tannins to the fiber before dyeing can help the dye take and produce vibrant colors. We planned to use oak gall powder as our tannin source but did not receive our shipment in time, so we moved forward without tannins.
Mordanting
Our lab had aluminum sulfate as a mordant, so we followed Botanical Colors' directions for mordanting with aluminum sulfate2, with a few modifications based on what we gathered from lectures and talking to Anastasia.
Cellulose-Based Fibers
- Weigh 20% WoF aluminum sulfate (alum)
- For 116g fiber, we calculated needing 23.22g alum and measured 23.32g
- Transfer the alum to a heat-resistant container
- Boil 0.24L water and pour into the alum container, stirring to dissolve
- Fill a dye pot with water, then pour the dissolved alum into it. We used 2.84L water
- Add the fibers to the pot
- Slowly bring the water to 80°C, then hold for 45min, stirring occasionally
- Take the pot off the heat and cool briefly
- Remove the fibers, rinse with room temperature water, squeeze out the excess liquid, and hang to dry
Protein-Based Fibers
- Weigh 12% WoF aluminum sulfate (alum)
- For 40.81g fiber, we calculated needing 4.9g alum and measured 5.02g
- Transfer the alum to a heat-resistant container
- Boil 0.24L water and pour into the alum container, stirring to dissolve
- Fill a dye pot with water, then pour the dissolved alum into it. We used 2.84L water
- Add the fibers to the pot
- Slowly bring the water to 70°C, then hold for 45min, stirring occasionally
- The original recipe listed 80°C but Svetlana Khachatryan recommended sticking to 60-70°C for protein-based fibers, so we tried to stay around 70°C
- Take the pot off the heat and cool naturally to room temperature
- Remove fibers, rinse with room temperature water, squeeze out the excess liquid, and hang to dry
Dye Bath Preparation
WoF Calculations
Before creating the dye bath, you need to calculate the total WoF to be used in a single dye bath (color):
-
Calculate WoF per sample by dividing the previously measured pile WoF by the number of samples in the pile
WoF for Piles of Samples Per-Sample WoF Cotton Fabric (x30): 48.11g Cotton Fabric (swatch): 1.60g Linen Fabric (x30): 68.00g Linen Fabric (swatch): 2.27g Wool Yarn (x28): 20.47g Wool Yarn (bundle): 0.73g Silk Yarn (x28): 20.34g Silk Yarn (bundle): 0.73g -
Calculate the total WoF per bath/color by multiplying each per-sample WoF by the quantity of samples to dye, then summing the values.
- We had 4 fiber types and 6 samples per fiber per dye bath (for different shades), so each dye bath had 24 samples, 6 of each fiber
- Cotton: 1.60g * 6 samples = 9.60g
- Linen: 2.27g * 6 samples = 13.62g
- Wool: 0.73g * 6 samples = 4.38g
- Silk: 0.73g * 6 samples = 4.38g
- 9.60g + 13.62g + 4.38g + 4.38g = 31.98g total WoF per dye bath
- We had 4 fiber types and 6 samples per fiber per dye bath (for different shades), so each dye bath had 24 samples, 6 of each fiber
We created a spreadsheet3 in which to do our calculations. If you change the inputs to match your own samples, the results will be recalculated accordingly.
Goldenrod Preparation
- Weigh out your goldenrod. Aim for 100-300% WoF, but if you only have matured goldenrod (gone to seed), use 300-400% WoF [^3]. Our goldenrod had gone to seed and we used 225% WoF, as this was all the plant matter we had
- For us, this was 31.98g fiber * 2.25 = 71.96g goldenrod, and we measured 72.4g
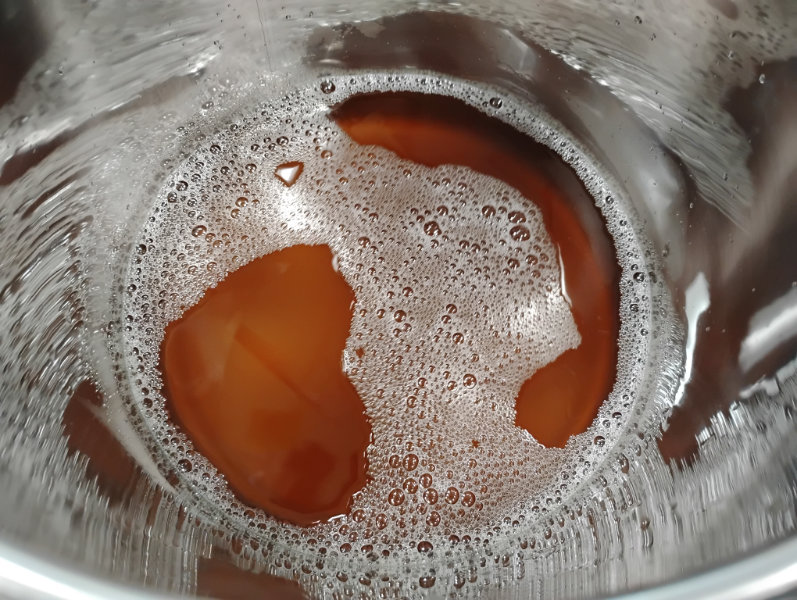
- Fill a pot with 2.84L water and submerge the goldenrod in it
- Bring the temperature up to 70°C and hold for 45min, stirring occasionally
- After 45min, remove the pot from heat and allow to cool naturally to warm or room temperature
- Using tongs, remove the large stem pieces from the pot
- Pour the contents of the pot through a cloth to filter out the solids, squeezing out the final liquid
- We used a stretchy mesh and prepared linen to use as a second filtering step in the event that we needed it
Dyeing
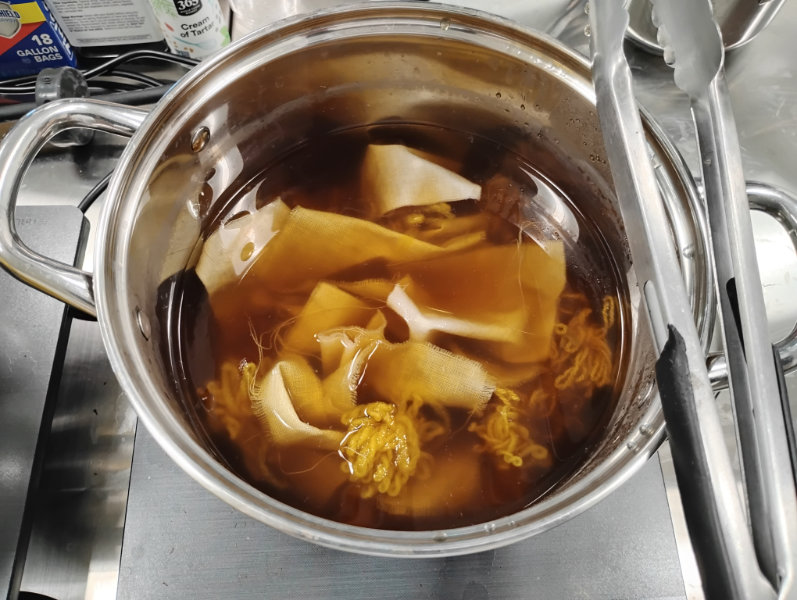
- Add fiber samples to cooled down dye bath
-
Bring the temperature up to 70°C and hold for 1 hour, stirring occasionally
Dyeing in process -
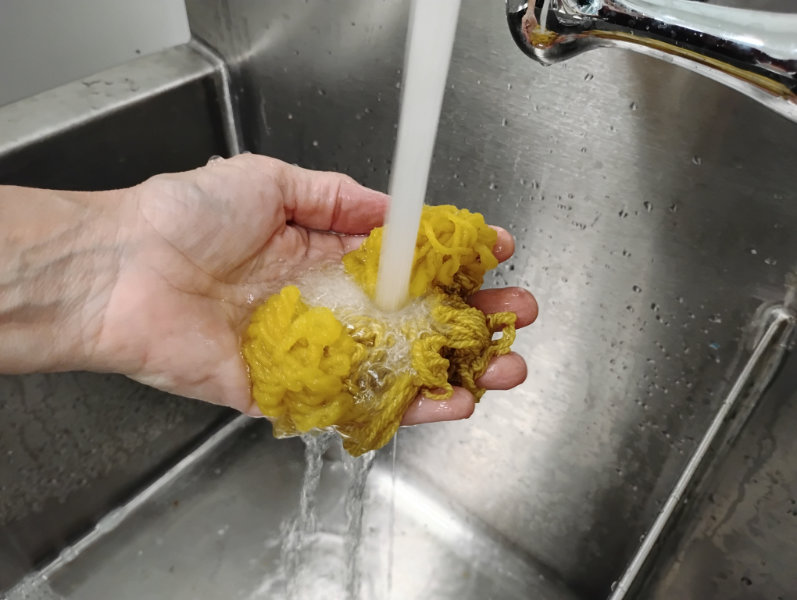
After 1 hour, remove the pot from heat and follows the process below for sample removal:
- Cellulose-based fibers can be immediately removed from the dye bath, rinsed in lukewarm water, squeezed to remove excess liquid, and hung to dry
- For protein-based fibers, or all fibers if time permits, allow the dye bath to cool naturally to room temperature before rinsing and drying
- We needed to cool that bath quickly, so we transferred the dye bath back and forth between two pots to temper the fibers while quickly lowering the temperature
- For our process, we left 1 of each fiber in the dye bath overnight to see if a long soak would change the result
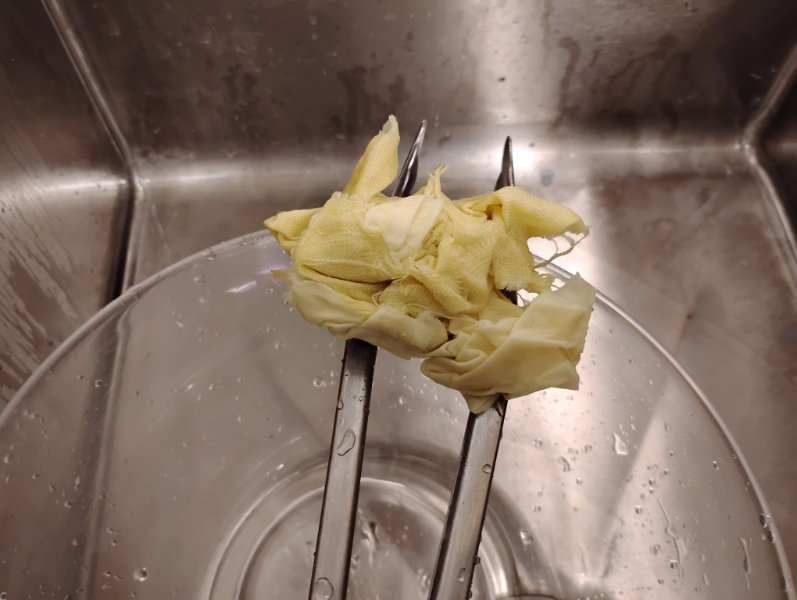
Cellulose-based fibers after rinsing
Rinsing protein-based fibers
Modifications
Modifier Preparation
Before testing and applying modifiers, we created solutions from the crystalline/powder forms. We came to our modifier to water rations through trial and error, so you may find a different maximum dilution while testing.
For aluminum sulfate (alum)
- Dissolve 2g aluminum sulfate per 10mL water
For sodium bicarbonate (baking soda)
- Heat 100mL water in a small saucepan (doesn’t need to boil, but should be hot)
- Slowly add 2.25tsp sodium bicarbonate in increments of 0.25tsp, stirring to dissolve in between pours
- Our final 0.25tsp didn’t fully dissolve, so we recommend trying a total of 2tsp
- Leave out to cool
- Sodium bicarbonate may start to precipitate out of the solution. You can stir the mixture before use or just take from the clearer liquid. This isn’t that precise of a process
Iron liquor should be prepared in advance to git it time to strengthen. Kim prepared our solution about a week in advance.
- Place rusty iron into container of equal parts water and vinegar. We used 0.5L water, 0.5L vinegar, and 0.66 kg rusty metal
- Let sit for 1-3 weeks. We used a 1-week solution, but 2-4 weeks gives higher iron concentrations
- If your iron liquor solution has had time to properly strengthen, it may be helpful to create a diluted solution for modifications
Petri Dish Testing
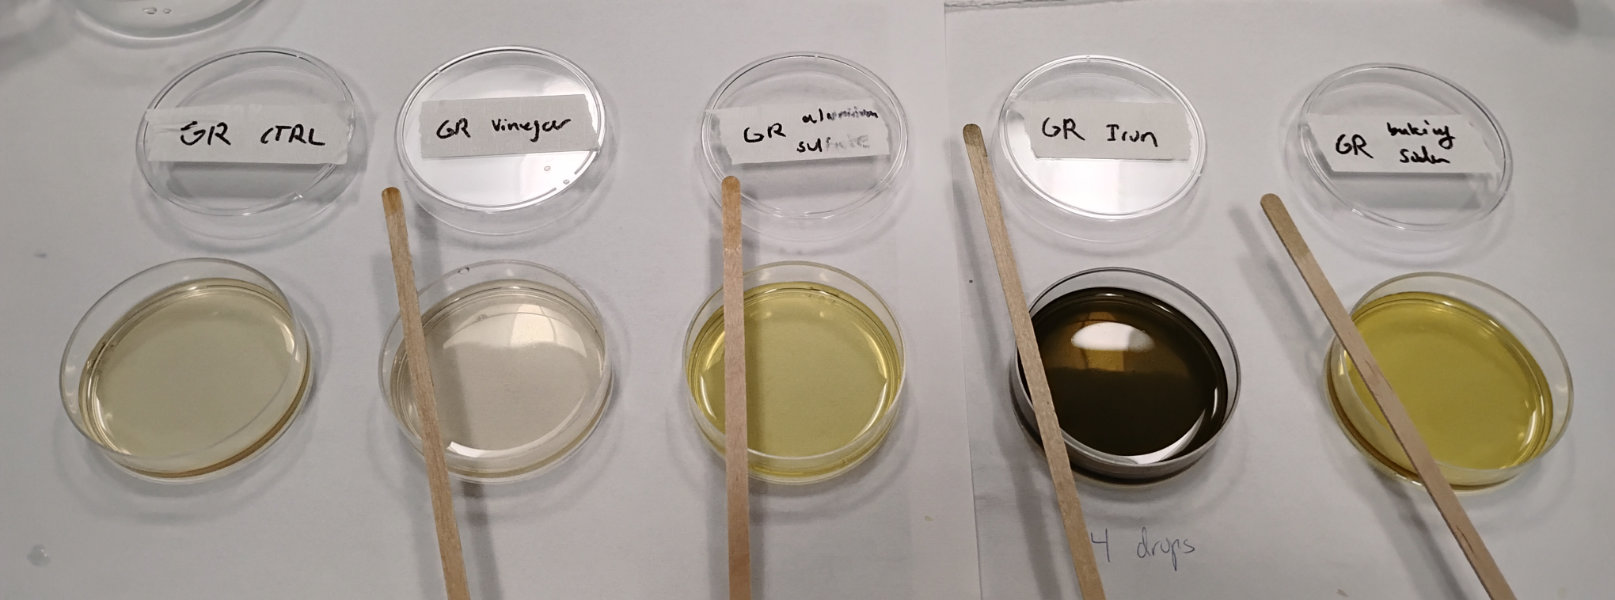
To see how different modifiers would affect the dye before committing to the full modification process, we tested out modifiers in petri dishes with only a small amount of dye bath in them and observed how they changed the color.
- Arrange and label petri dishes for all modifications to test, as well as a control
- For us this was 5 per dye: control, vinegar, aluminum sulfate, iron liquor, and sodium bicarbonate
- Measure and pour 5mL of dye bath into each dish, swirling to coat the entire bottom surface
- Using a pipette, add modifier solution to the corresponding petri dish, 1 drop at a time
- Ideally, wait to see if oxidation changes the color before adding another drop
- In our lab, we added at least 2-4 drops at a time unless we saw an immediate change after a single drop
- Stir in between additions
Applying Modifiers
- Choose modifiers to use, based on petri dish testing
- For goldenrod, we saw significant changes with sodium carbonate (alkaline, brighter yellow) and iron liquor (iron + acidic, gray-green that continued to darken as it oxidized)
- Vinegar barely had any effect, while aluminum sulfate produced unexpected results (acidic but brightened the yellow like a base), so we decided not to move forward with these modifiers
- If needed, prepare larger quantities of modifier solution
- Divide used dye bath into separate pots for each modifier, plus leftover control (non-modified)
- We had 1.5L of dye bath and 2 modifiers, so we split the dye into 3x 0.5L
- Bring the pot up to 70°C
- Add modifier
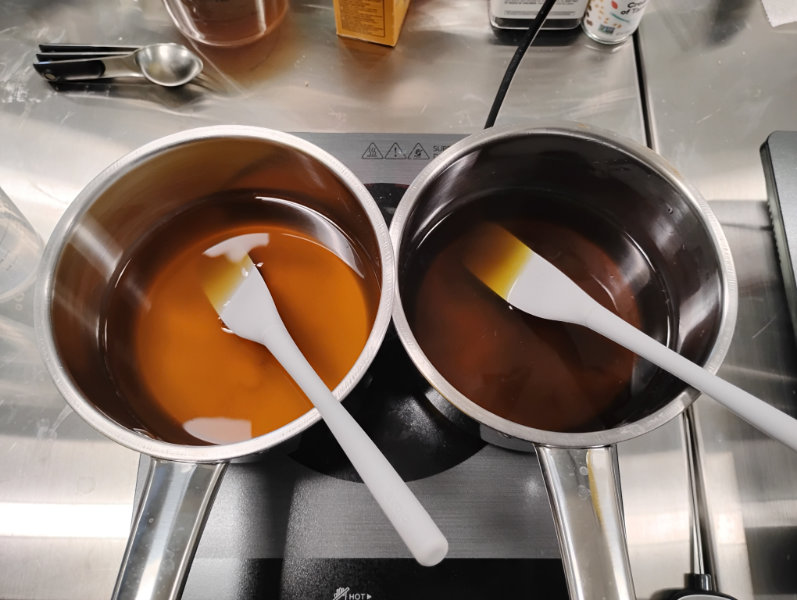
- For sodium carbonate
- Add sodium carbonate solution to the dye bath, stirring in 0.25tsp at a time until desired color is reached
- We added 0.5tsp total
- Because the color just brightens, it can be difficult to tell how much to add
Left: unmodified; Right: baking-soda
- Add sodium carbonate solution to the dye bath, stirring in 0.25tsp at a time until desired color is reached
- For Iron liquor
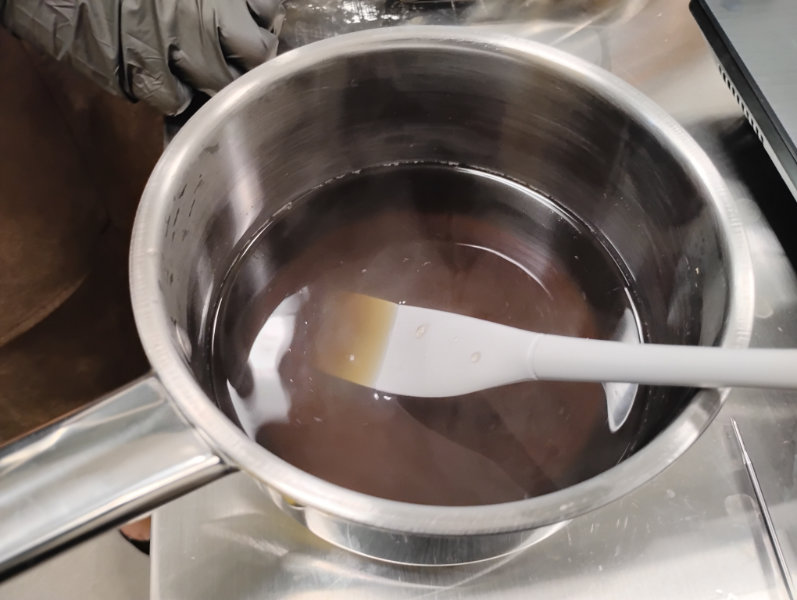
- Add iron liquor solution to the dye bath, stirring in 0.25tsp at a time
- We only added 0.25tsp and thought we might have gone overboard, so perhaps a smaller quantity at a time would be better
Iron bath
- We only added 0.25tsp and thought we might have gone overboard, so perhaps a smaller quantity at a time would be better
- Wait for solution to oxidize before adding more, as the color will darken significantly over time
- Add iron liquor solution to the dye bath, stirring in 0.25tsp at a time
- For sodium carbonate
- Remove from heat and allow to cool to room just warm or room temperature
- Add fiber samples to the dye bath, then bring the temperature back up to 70°C and hold for 30min, stirring occasionally
- Remove from heat and allow to cool naturally to room temperature
- Remove samples from dye baths and rinse with room temperature water, the hang to dry
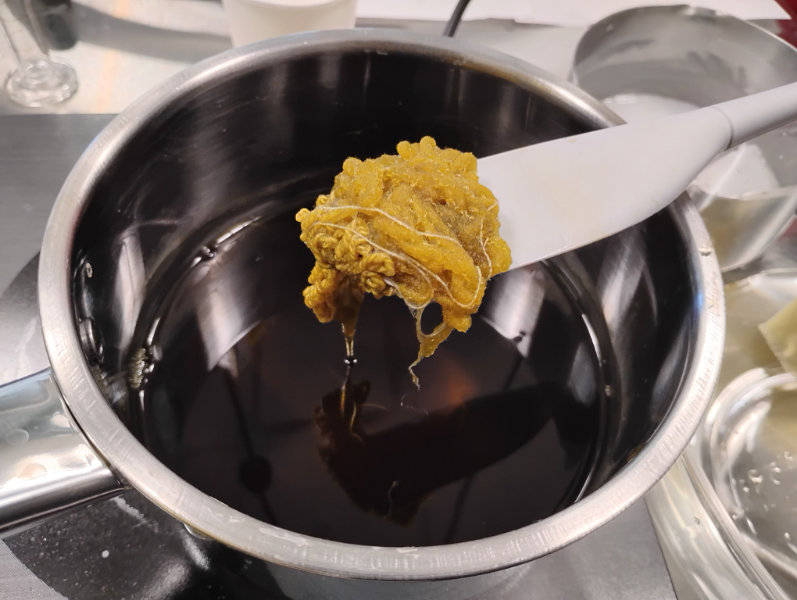
Baking soda modified
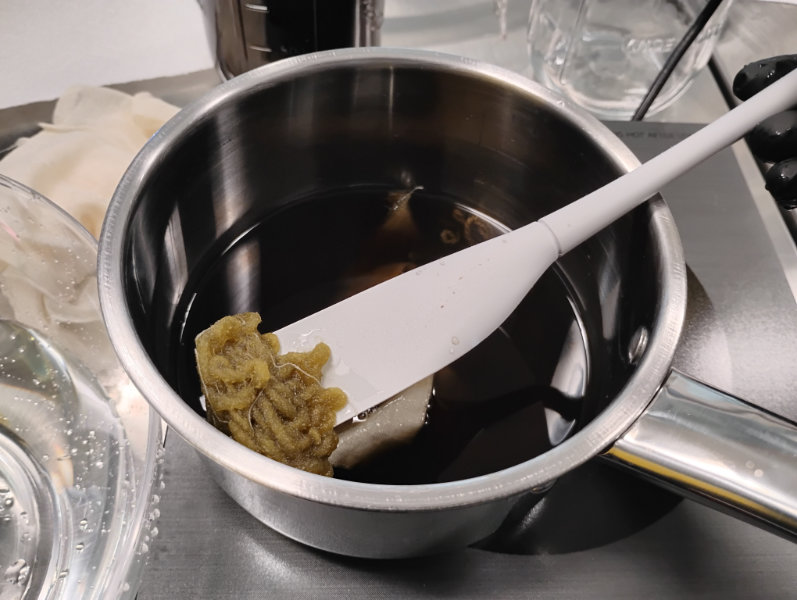
Iron modified
Pigment Precipitation
Our team didn’t get a chance to process our leftover dyes, either concentrating down into inks or precipitating out pigments. However, at the end of the week, Kim took the more pigmented (logwood and madder) unmodified dyes home and precipitated out lake pigments on her own. See Kim's documentation for more information.
Final Results
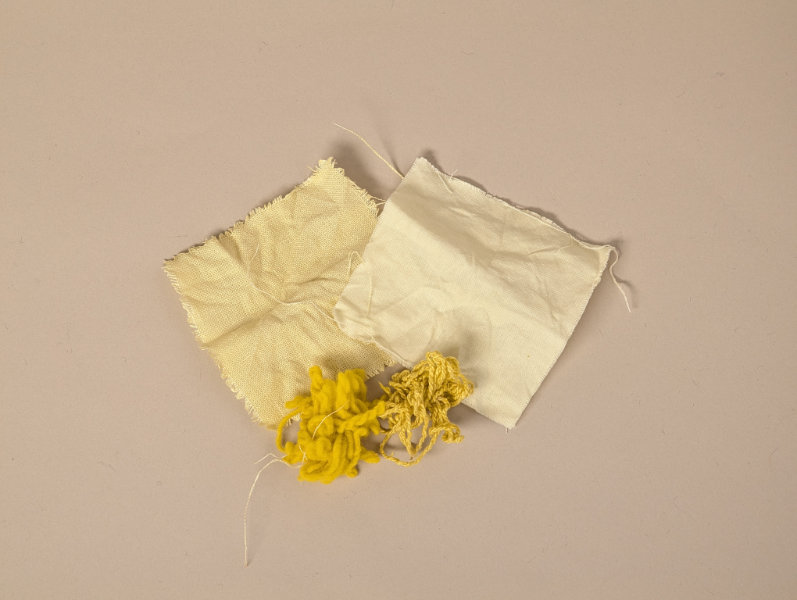
Out of the all the dyes our team worked with, I found goldenrod to be the most interesting because, rather than purchasing dye matter like we did for the other colors, the goldenrod was harvested locally past its flowering period (gone to seed), yet the dye still produced a vibrant color, at least on protein-based fibers. Since we didn't have a tannin source to work with earlier in the week, the cellulose-based fibers understandably didn't take to the dye as well.
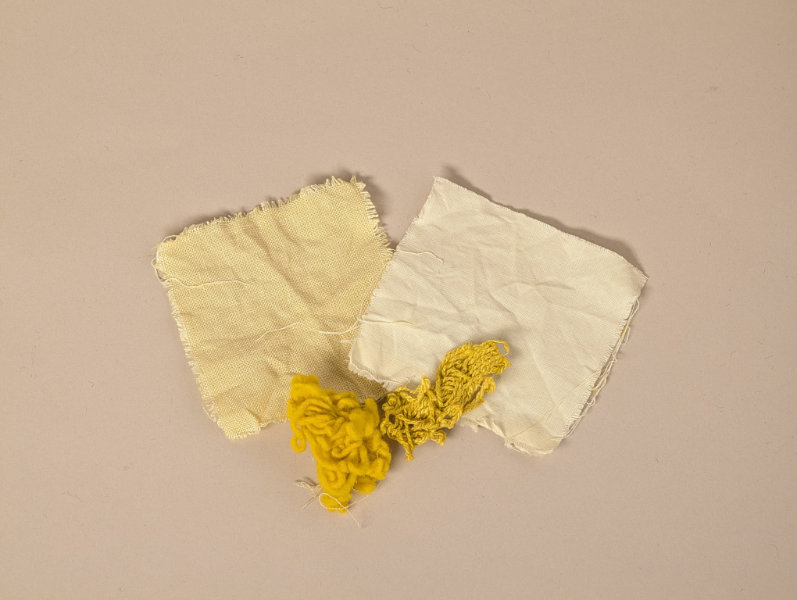
Sodium carbonate results (slightly brighter)
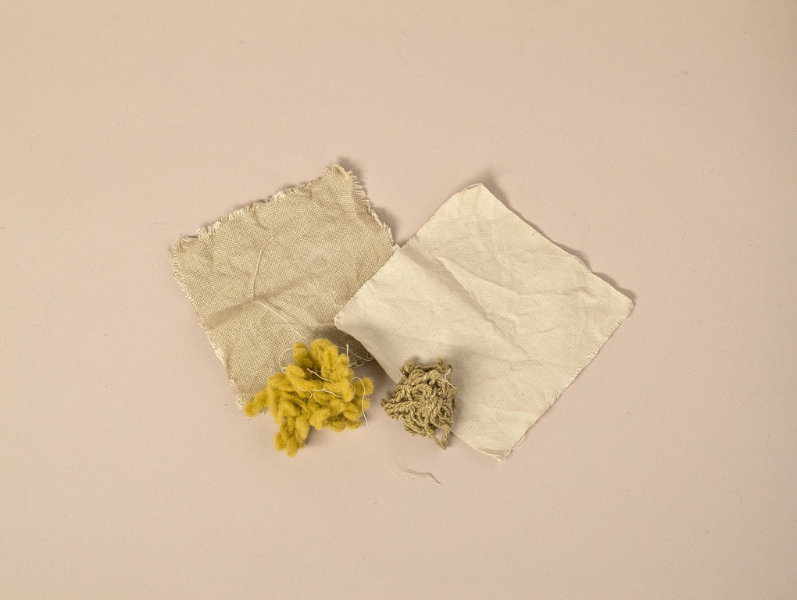
Iron liquor results (green tint)
When it came to modifications, the goldenrod mostly responded to the iron liquor, which caused a gray-green tint that resulted in a yellow-green color on protein-based fibers and more of a taupe on the cellulose-based fibers. A longer initial dye bath didn't have any visible effect, while the sodium carbonate modification had a very subtle brightening. Perhaps the sodium carbonate would work better as a single dye step rather than a second bath though.
Reflection and Thinking Towards the Future
I was surprised by how well goldenrod worked as a dye, especially since we were expecting more greens from stems given the lack of yellow flowers left. Working with locally-sourced dye matter was a lot more satisfying than I would have thought, and I would be interested in trying out the process on cellulose-based fibers with added tannins to get a better sense of how bright the dye can get on more common fabrics.
Working together as a team in the lab was a refreshing change, but it was also difficult formatting shared documentation in a way that would work well for each member of the group. We all had different schedule and working styles, so for the next groupwork week, it might be a good idea to sit down and discuss what works best for each of us.
The main challenge this week was getting access to materials and recipes. We didn't have all the materials we needed early in the week, so tannins, purchased dye matter, and bacterial dye arrived a day or two after we needed them. We couldn't keep up with the week's schedule because we spent so much time trying to piece together our own recipes from websites and lecture recordings, so we ended up not getting to precipitation and testing bacterial dyes. Given that we were following existing processes rather than designing our own projects for the week, it would have been beneficial to have received written recipes from the teaching team with the correct ratios and directions, that way we could just go into the lab and start learning about dyeing.