Soft Robotics
Ideation & Insiration
I find soft robotics and intriguing and mesmerizing to watch, but the act of creating them has just never been a major draw for me, even with multiple opportunities to participate in the field. I chose to keep this week's work as simple as possible, just trying out existing designs for heat pressed vinyl and molded silicone inflatables.
During the global lecture from Lily Chambers and Adriana Cabrera, I was drawn to applications of inflatables and soft robotics in installation art and lighting applications, including heat-activated lampshades that bloomed like flowers.
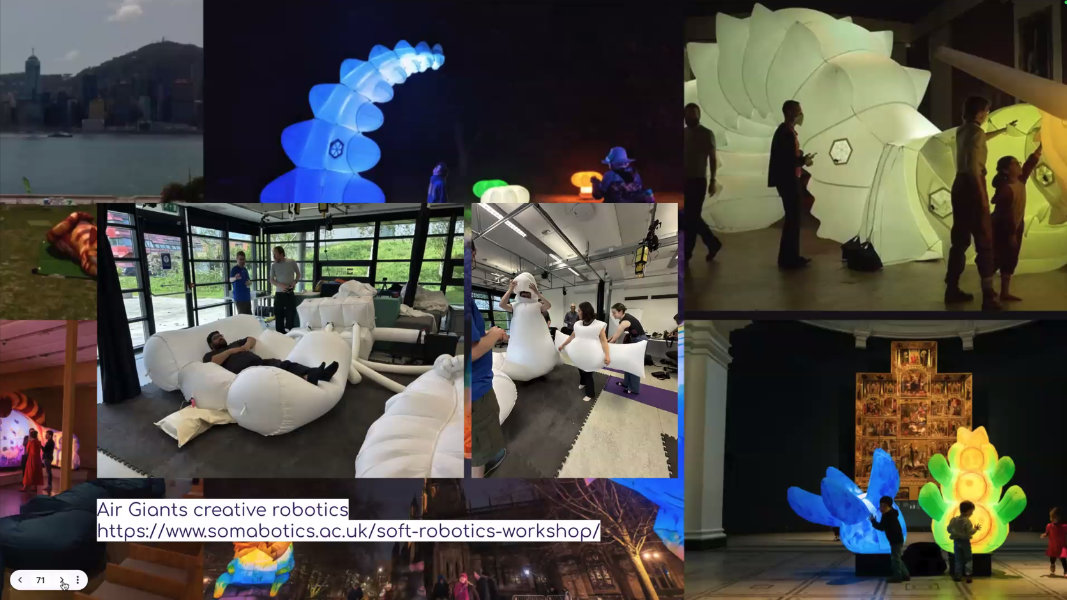
Lit inflatables in global lecture (presented by Adriana Cabrera, 2026)
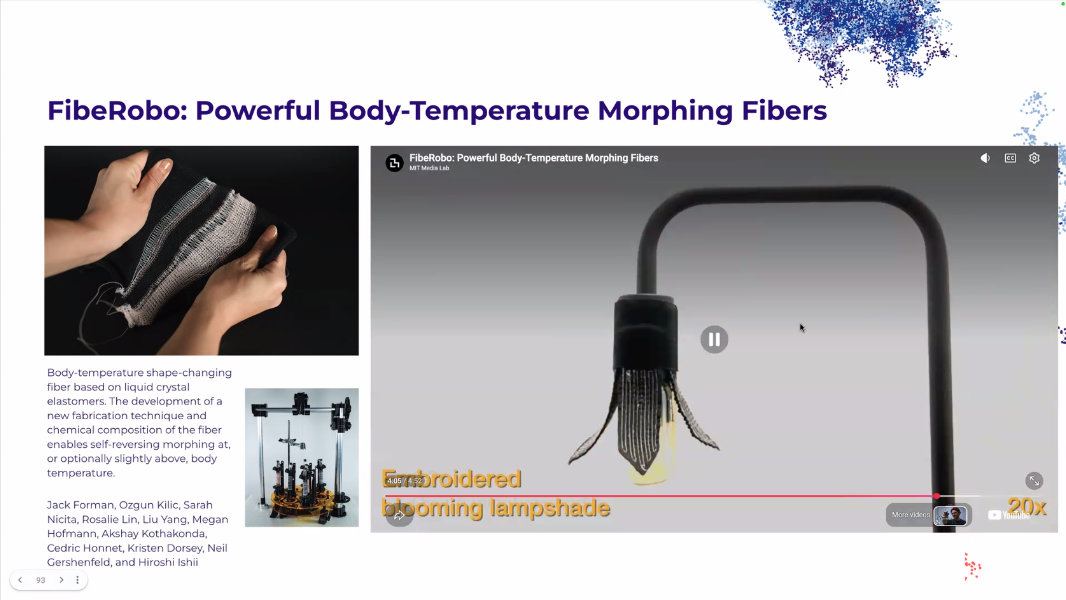
Blooming lamp in global lecture (presented by Adriana Cabrera, 2026)
Moving into my own research online, ENESS, an Australian art and technology studio that creates inflatable installation art experiences. Their works are often light from within, glowing with animated color sequences, and sometimes have the added element of LED matrix eyes or water spouts to respond to people pushing or walking past the sculptures.

I also stumbled C. Matthew Szösz's 'Inflatables' project, where the artist creates inflatables out of glass, frozen in time after the first inflation. The artist's process is similar to our basic heat-pressed vinyl inflatables, where a barrier material prevents bonding during the heating/pressing process, but in this case, the pieces are made of fused glass with ceramic paper barriers.
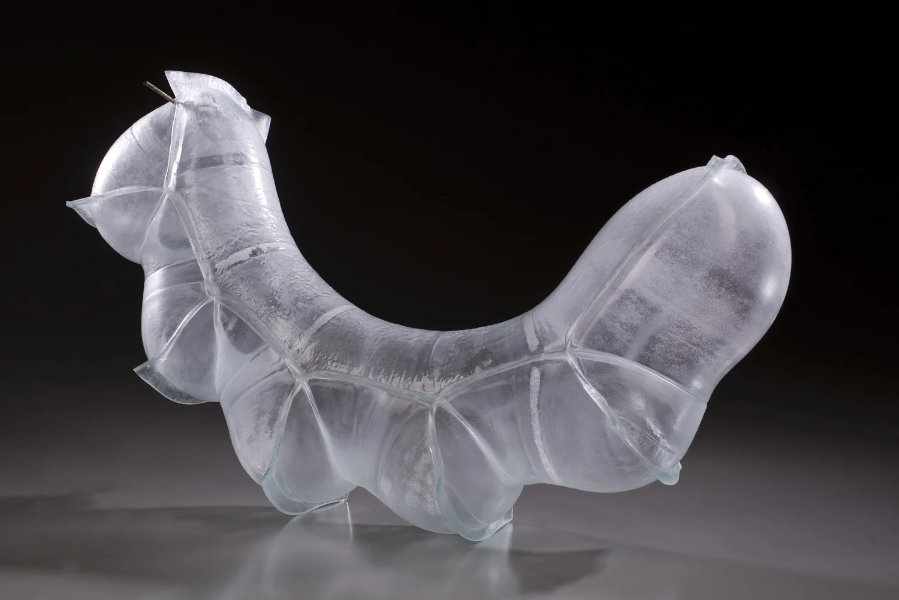
Inflatable no.33 (C. Matthew Szösz)
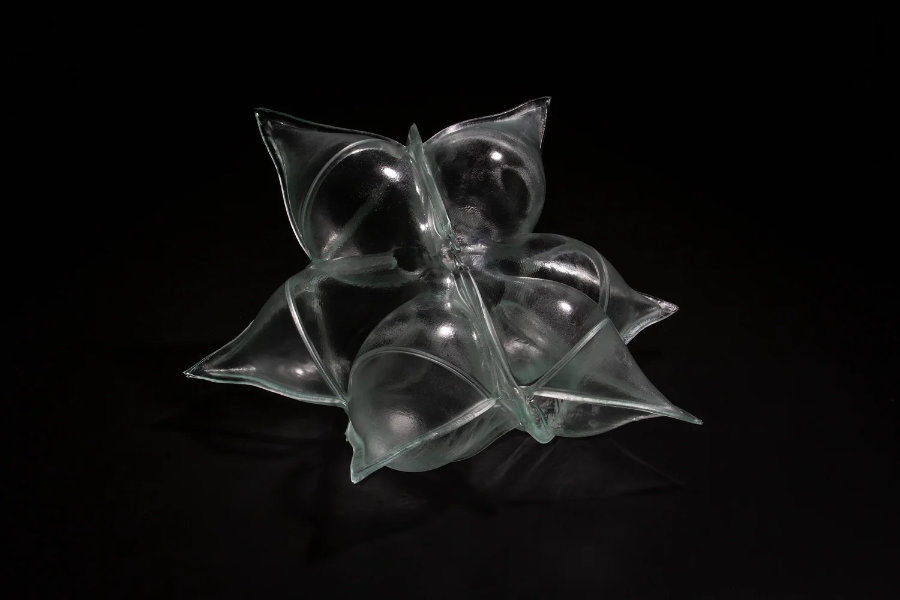
Inflatable no.87 (C. Matthew Szösz)
Tools
- Vector Pattern Design:Affinity Designer 2
- Vinyl Cutting: Roland CAMM-1 vinyl cutter with Inkscape & Roland CutStudio
- Heat Pressing: xTool WonderPress
- Laser Cutting: xTool P3 laser cutter with xTool Studio
- Silicone Casting: Kitchen scale for measuring and Vevor 5 gallon vacuum chamber with 3.5 CFM pump for degassing
- Inflation: VOLLYC Nano 5 rechargeable pump
Pressed Vinyl
Hand-Drawn Pillow Practice
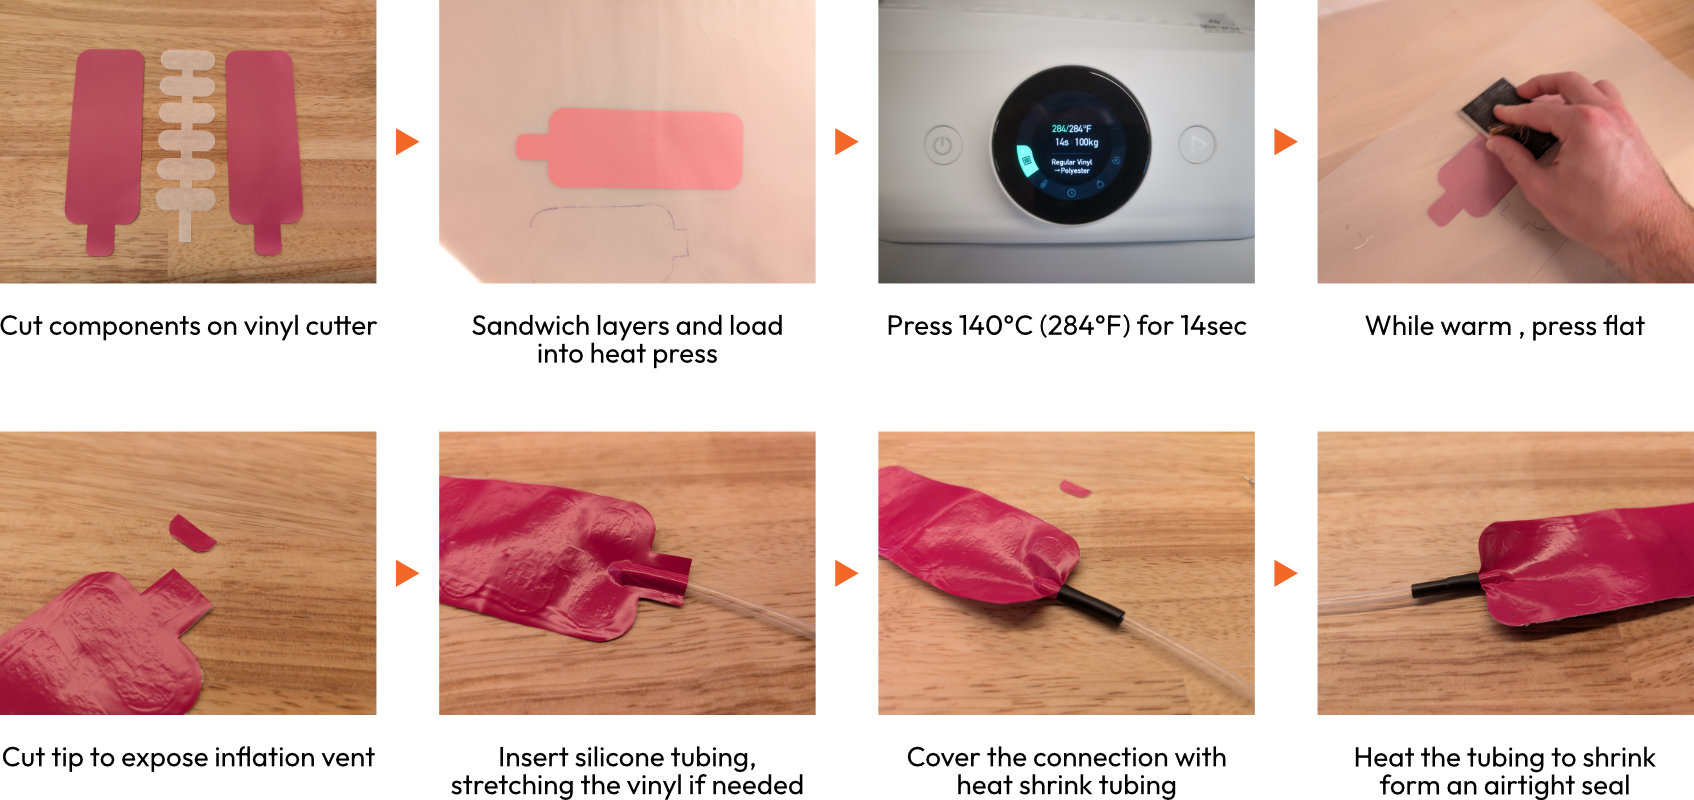
To start, I followed Adriana Cabrera and Lily Chambers' thermo transfer vinyl inflatables guide1 to make a basic pillow. I didn't have parchment paper, so I used the heat-resistant transfer film from our DTF printer instead, which was significantly more rigid than parchment paper. I drew a rounded rectangle with air spout on the transfer paper, then traced it onto heat transfer vinyl, leaving a border of about 5mm. After cutting out one piece of vinyl, I used it as a guide to cut the second piece, then sandwiched the transfer paper between the two vinyl layers, adhesive sides facing each other. I then put the sandwich in heat press between two pieces of transfer paper, then pressed at 140°C for 14sec at 100kg pressure, according to Saskia Helinska's 'Unflatables' documentation2. After pressing, I removed the vinyl transfer film and pushed a short piece of 4mm silicone tubing into the stem, securing it with heat shrink tubing.
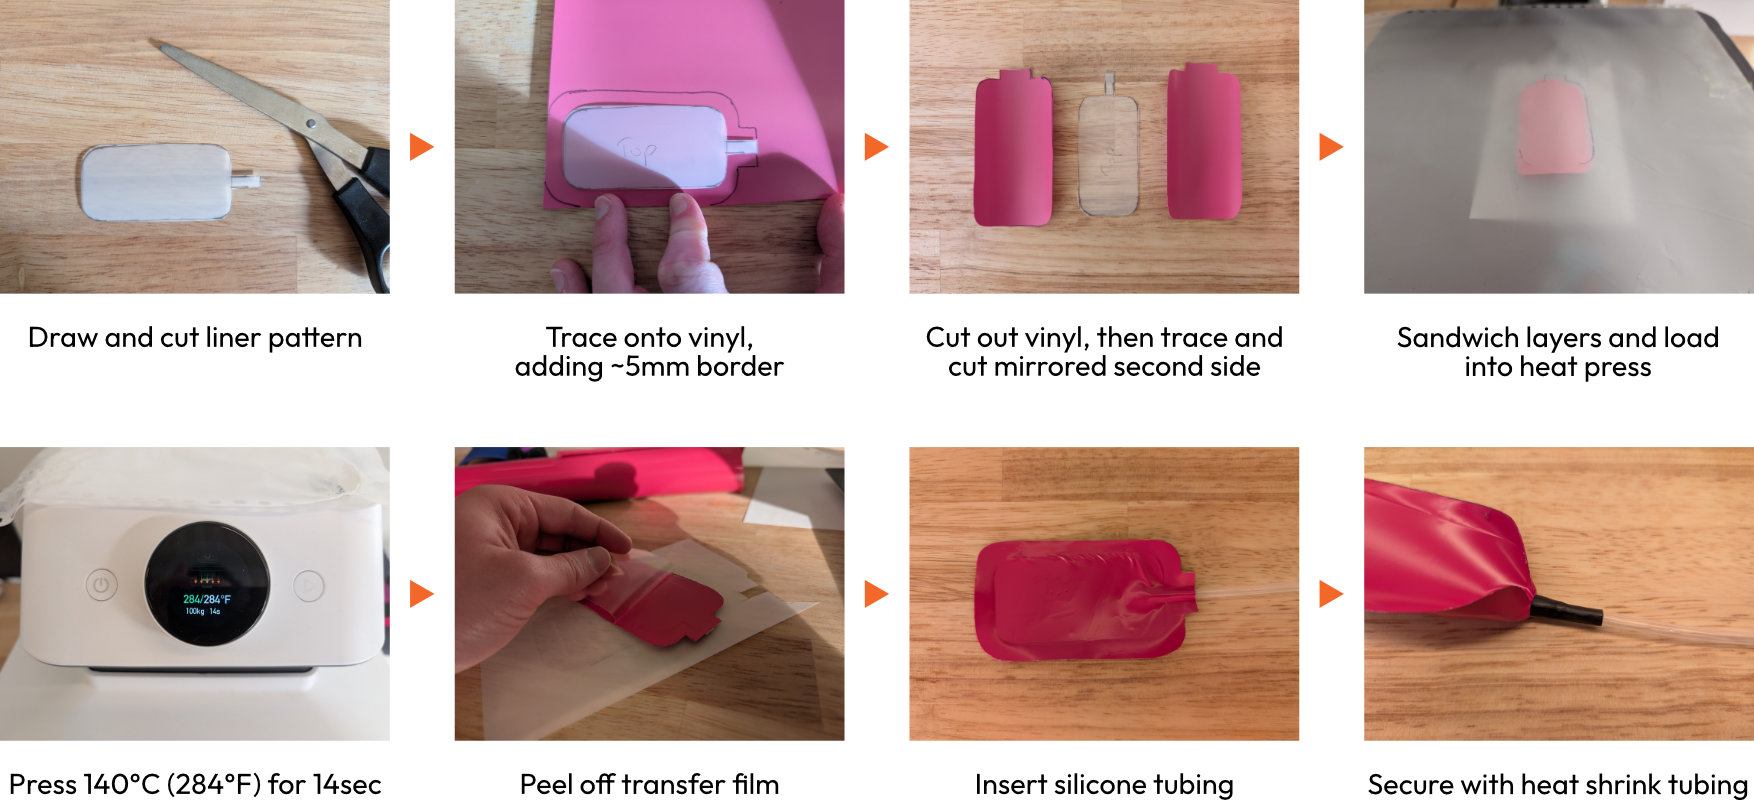
The vinyl I had was matte on one side and glossy on the other, with the glossy layer actually being transfer film. The matte/exposed side was the one with heat-set adhesive. With the transfer film removed, it was difficult to tell which side was which. Before working on a complex design, I would suggest pressing an easily replicable design to make sure you have the vinyl in the correct orientation.
The pillow buckled significantly when inflated, likely due to the thick transfer paper inside. I was surprised to see it hold air though, as I expected the seal around the tubing to fail and leak.
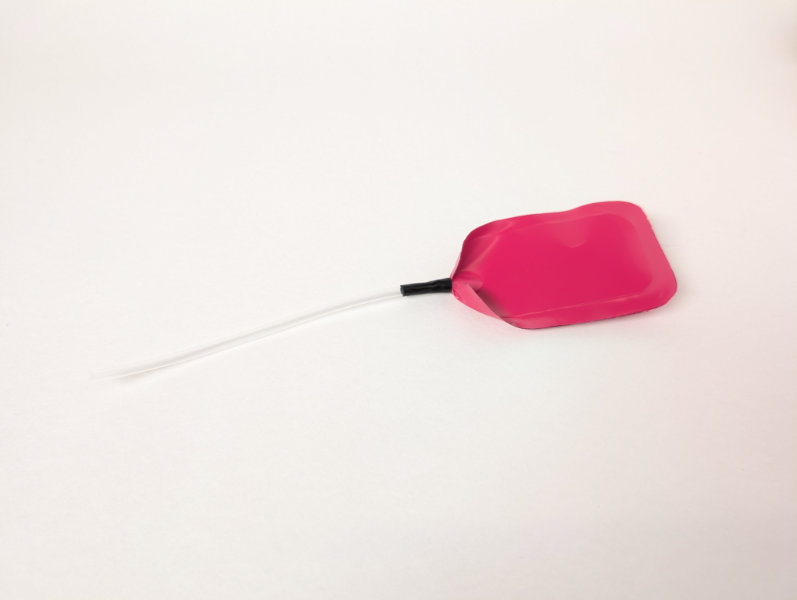
Pillow deflated
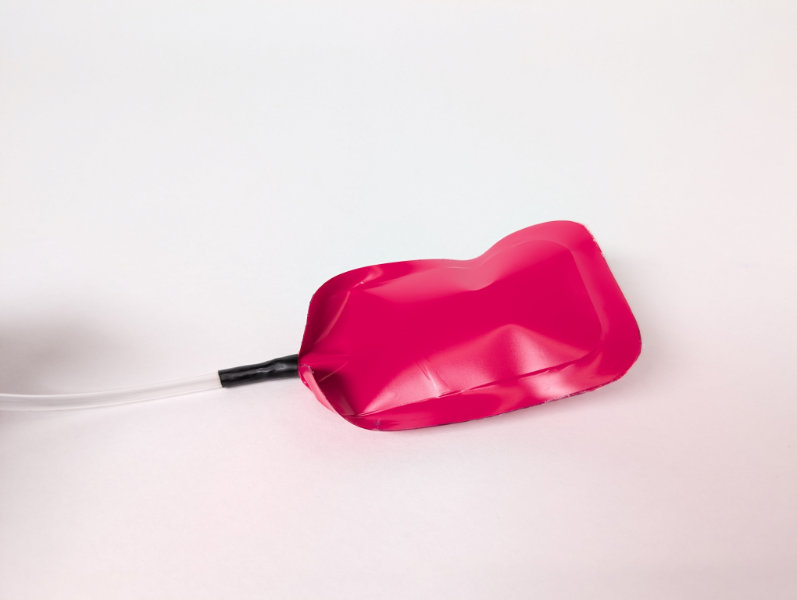
Pillow inflated
Vinyl-Cut Pattern
Moving on to a real segmented design, I recreated the first chamber pattern from the thermo transfer inflatables guide1 in Affinity Designer to see the design would perform. To make sure the 4mm silicone tubing would fit into the piece after pressing, I squished it flat to measure the widest width at 6mm. While designing the pattern, I then used 6mm [later 8mm] for the width of the main channel connecting all chambers.
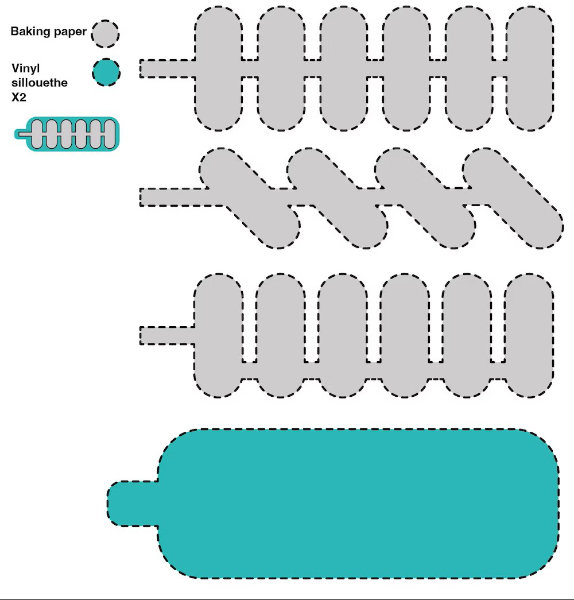
Original pattern (Adriana Cabrera, 2023)
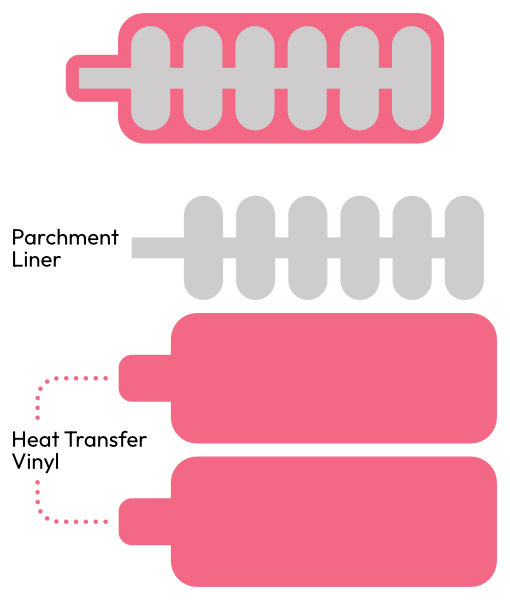
Recreated and adjusted pattern
In order to get an accurate, repeatable, cut, I used lab's vinyl cutter, a Roland CAMM-1, to cut the heat transfer vinyl pieces and a parchment paper liner. The machine's software could not read DXF files or the newer version of EPS that Affinity Designer exported, so I opened the my cut DXFs in Inkscape and used the Roland CutStudio extension to get the files into the machine's software.
The vinyl cutter was designed for rolls of material, so I had to use a few workarounds to get my materials working properly with the machine. The heat transfer vinyl was rolled up with the backing facing out and the cutter was designed for the backing facing in, so I had to load the material into the cutter upside-down and hold it down to prevent curling as the machine attempted to detect the edge of the material. To get the parchment paper in the machine, I stuck it down to an tacky cutting mat from a smaller Brother vinyl cutter and then loaded the cutting mat into the machine. The automatic edge detection led to the parchment paper bubbling, so I chose not to 'properly' load the material in. When I went to cut, the machine gave an error of unloaded material, but as soon as I made a selection, it started cutting.
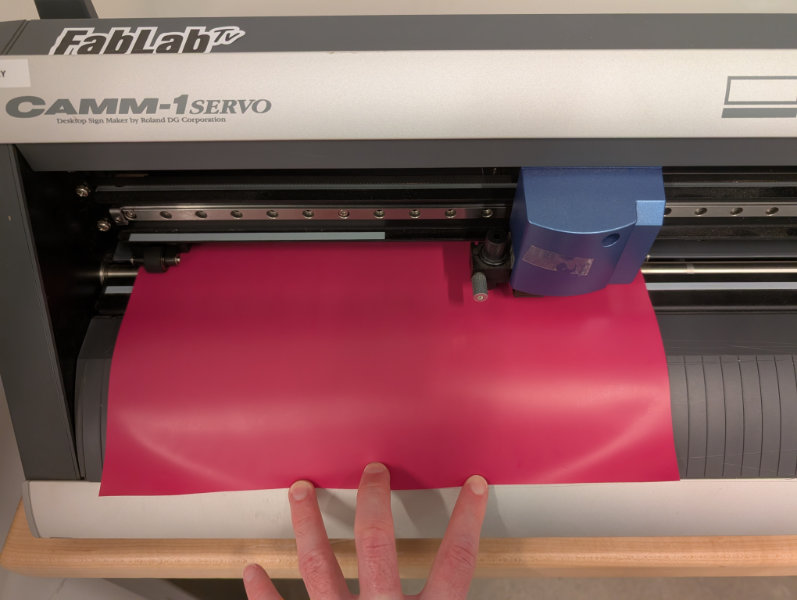
Holding down curled vinyl
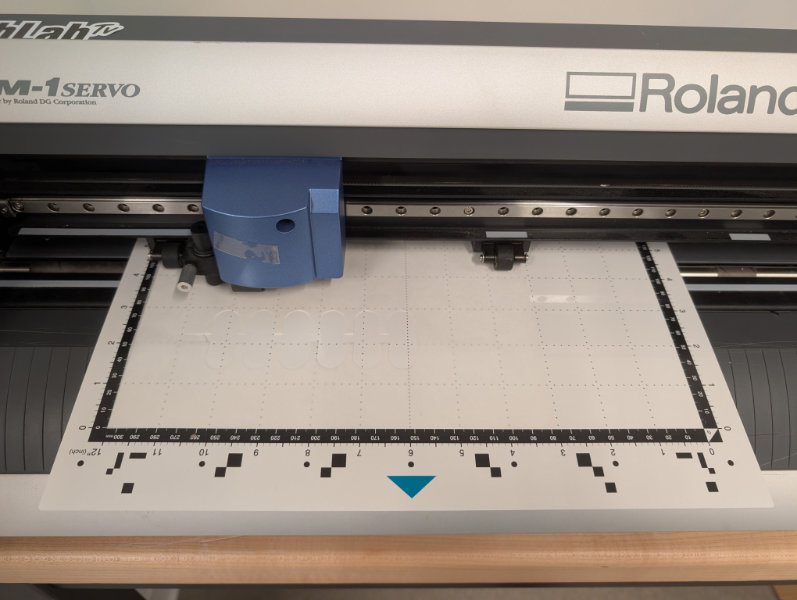
Improperly-loaded cutting mat for parchment
Once I had the pieces cut, I sandwiched them together and pressed in the heat press. While the piece was still hot from pressing, I applied pressure with a flat object (magnet) to flatten out the creases.
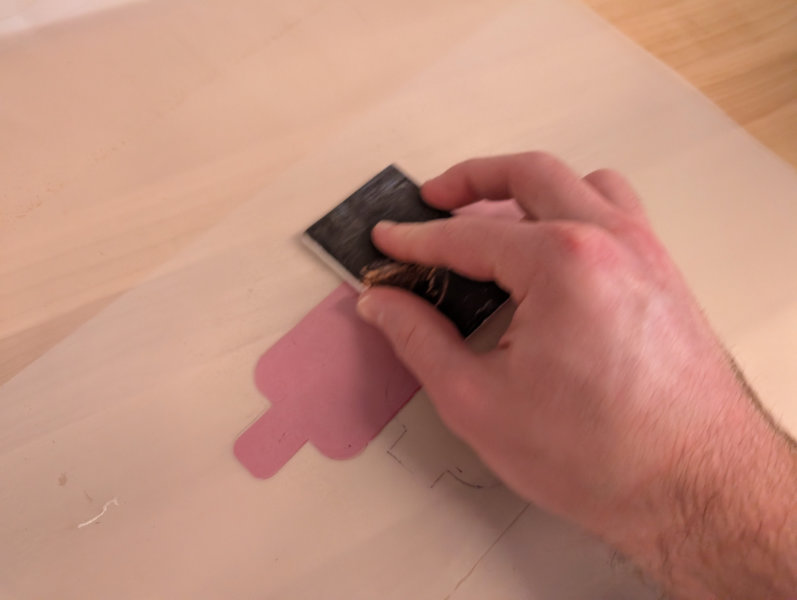
When I tried to insert the silicone tubing for inflation, I found that it didn't fit even after stretching the vinyl out. My fix was going through the cut and press process again with a slight modification of increasing the main 'spine' channel to 8mm wide.
When I tried to inflate the piece, only the first pocket inflated and it seemed like the vinyl had started to fuse to the parchment. By manipulating the piece while blowing into the inflation tube, I managed to slowly open up the pattern, one pocket at a time. When inflated, the vinyl creased along the main 'spine,' causing the main pockets to crinkle up in different directions. A wider 'spine' could reduce folding.
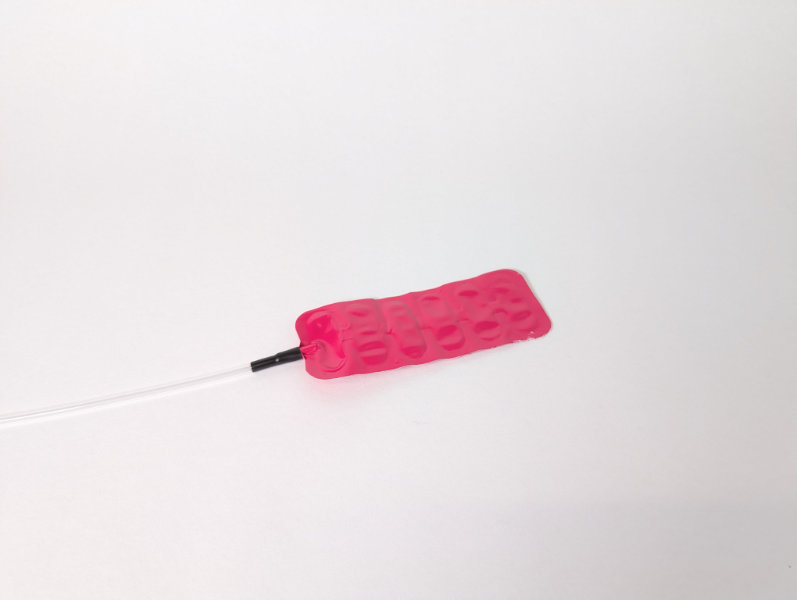
Segmented pressed vinyl deflated'
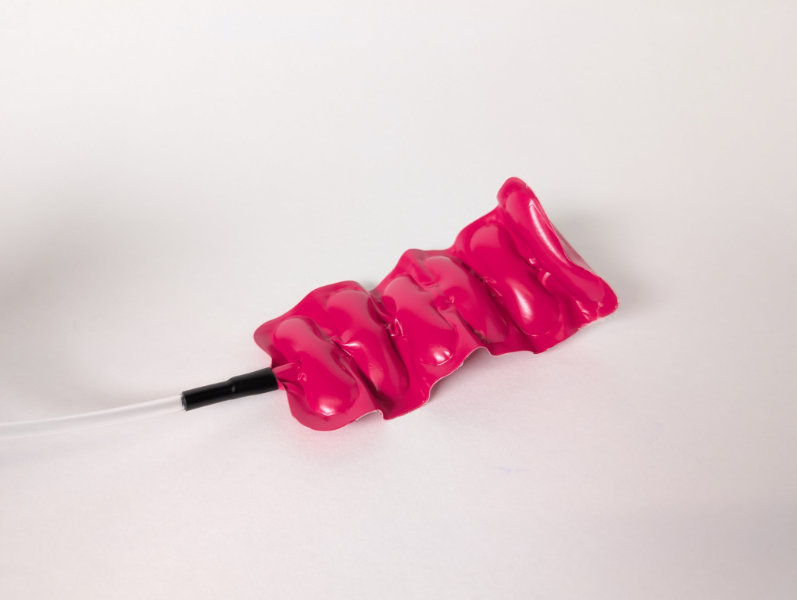
Segmented pressed vinyl inflated
Pressed vinyl inflation demo
Cast Silicone
Laser-Cut Mold
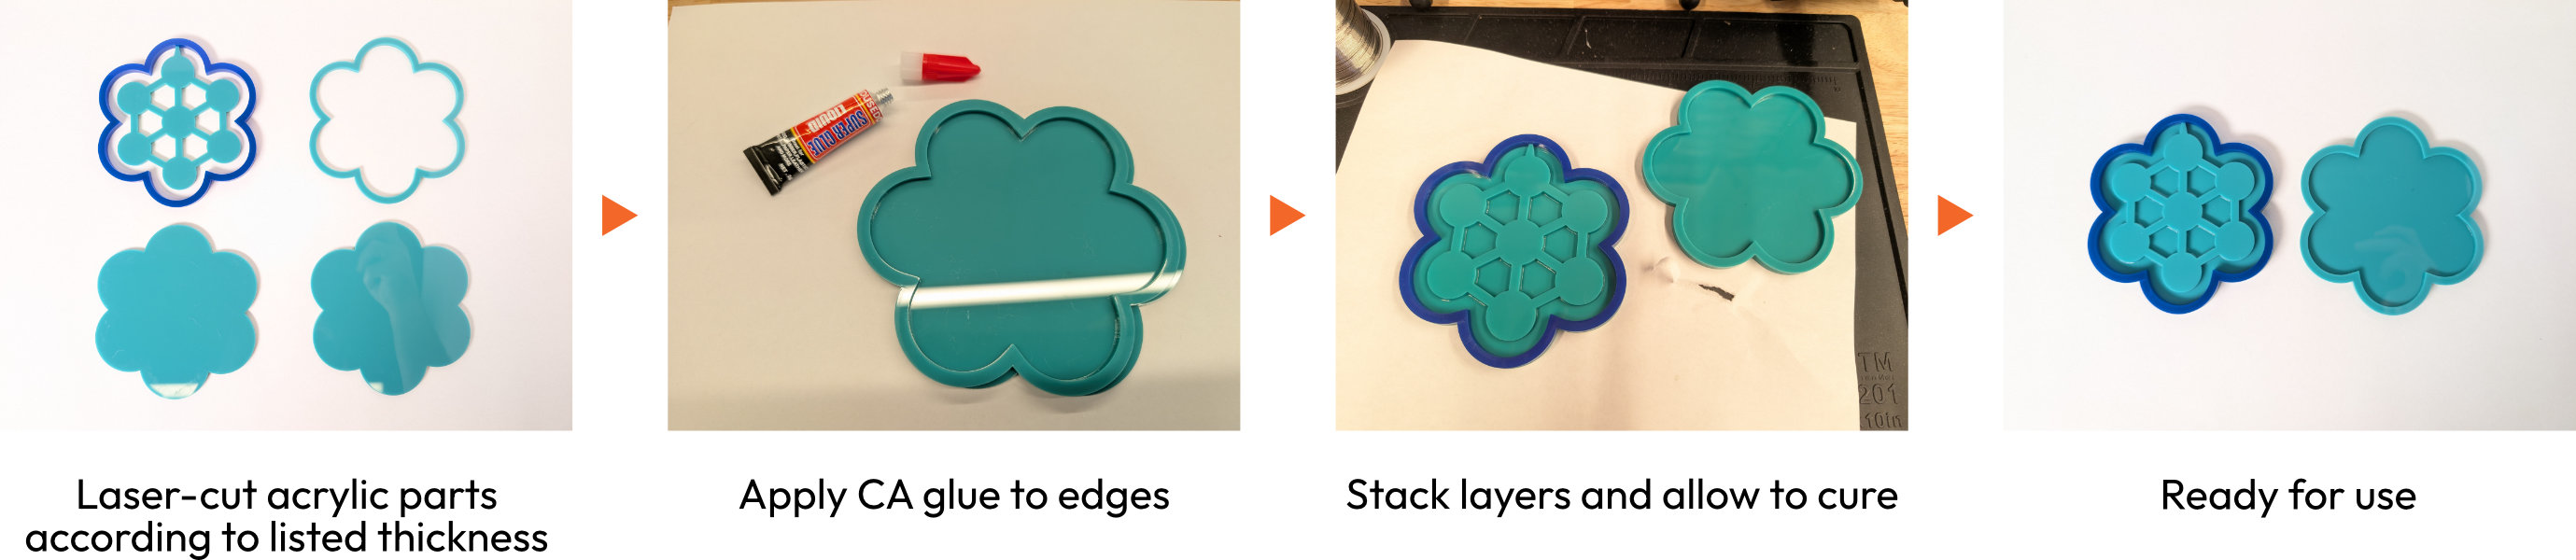
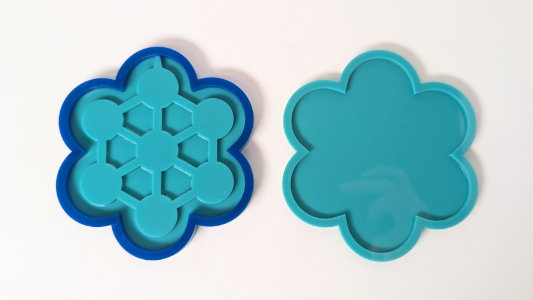
I had worked with 3D printed molds and silicone casting a bit before, so I decided to try out a laser cut mold for my cast inflatable. Anastasia Pistofidou shared a folder with cut files for soft robotics molds and I selected a flower/hexagon design to cut out in acrylic.
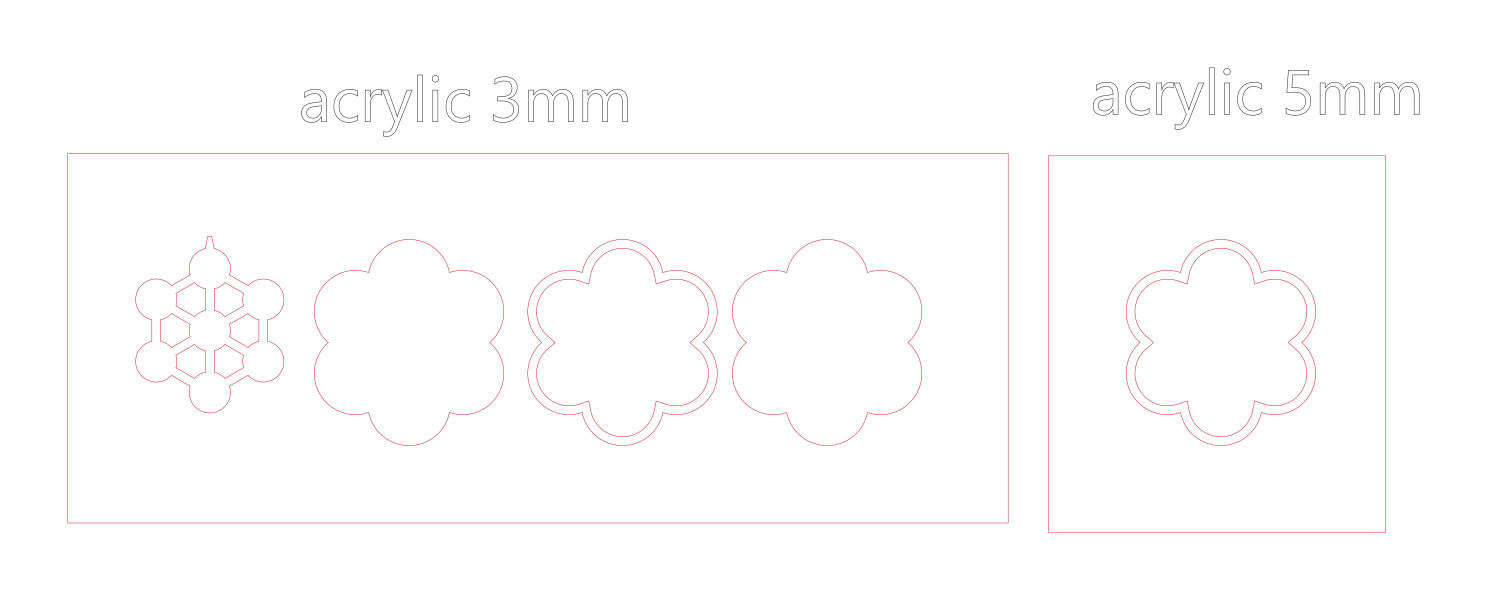
I cut the pieces from 3mm and 6mm acrylic, corresponding to the 3mm and 5mm labeled sections of the file, then washed each part and glued them together with CA glue. The 5 or 6mm piece raised the height of the pour over the height of the pattern insert, it was necessary. We didn't have any CA glue catalyst/curing spray, so I left the pieces to dry overnight.
Silicone Casting
I was working with a design that needed to be cast in two steps: an initial pour to make the two sides of the part, and then a second 'glue' application to adhere the two halves and seal the air pockets. I used Smooth-On EcoFlex 00-30 and generally followed the casting instructions included with the silicone3, setting up a level surface, measuring equal parts A and B by weight, mixing for 3min, degassing in the vacuum chamber, pouring slowly/knocking the mold to release air bubbles, and letting the mix cure at least 4h. I had been taught to make at least 100mL, or 100mL extra, when working with small silicone pours because you lose some onto cups and stir sticks. Measuring the volume of my molds with water, around 85mL, so I made sure to mix at least 185mL.
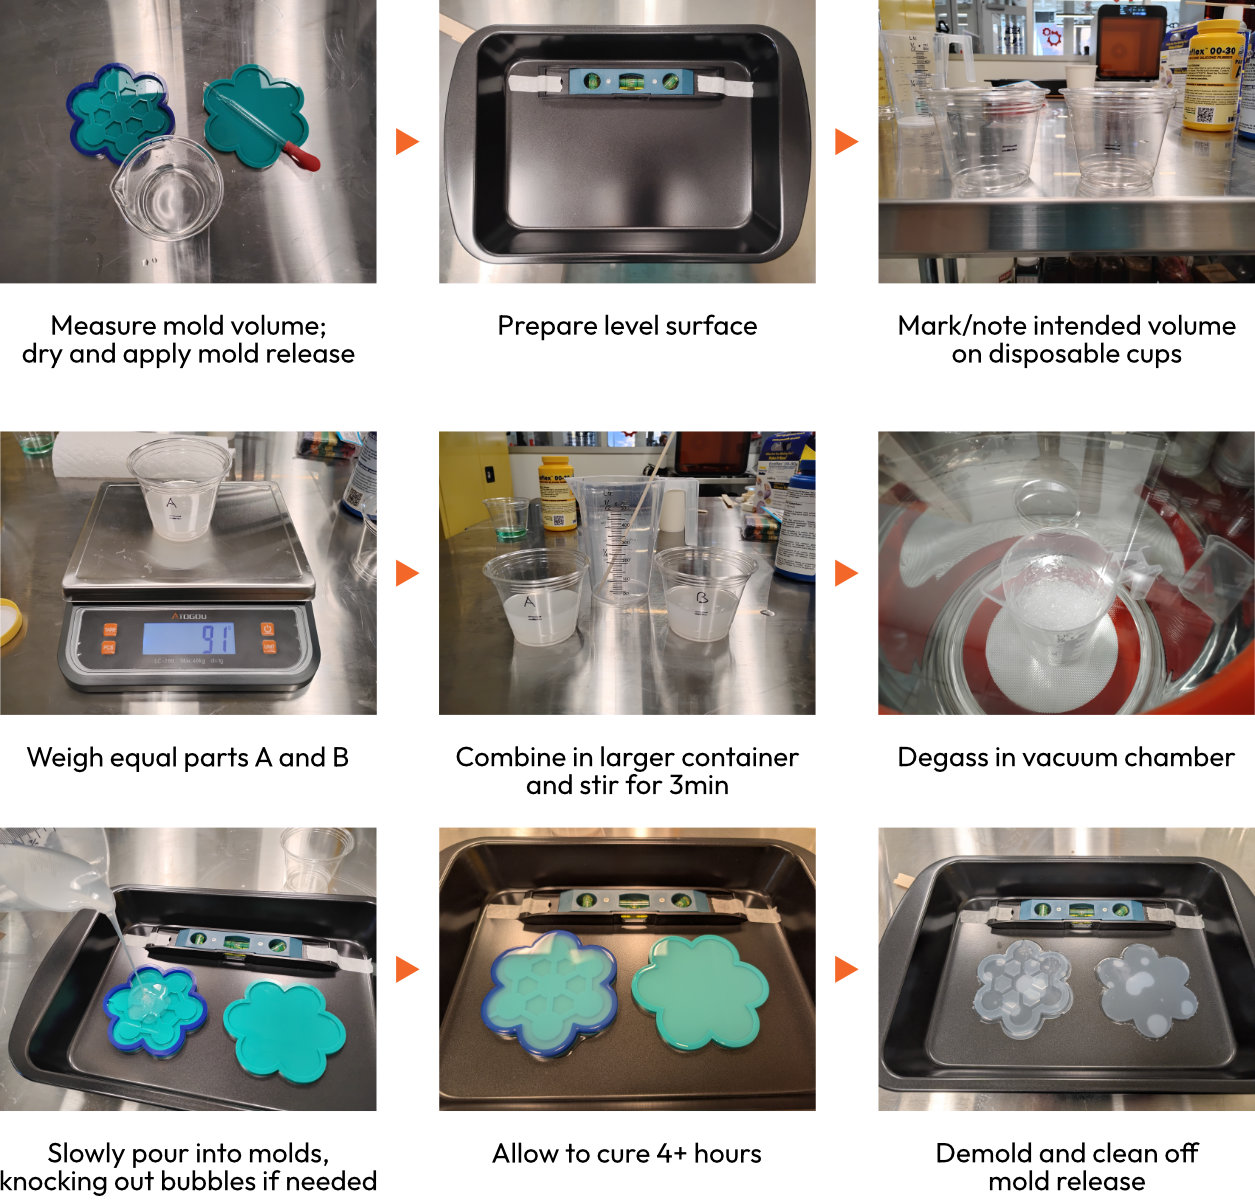
After the initial silicone pours had cured, I demolded them and tried to remove the mold release. I ended up washing 3 times with dish soap, washing in 70% isopropyl alcohol, shaking the alcohol off, and then leaving the molds to dry. Our mold release, Smooth-On Universal Mold Release, turned out to be silicone based and probably bonded to the initial pours.
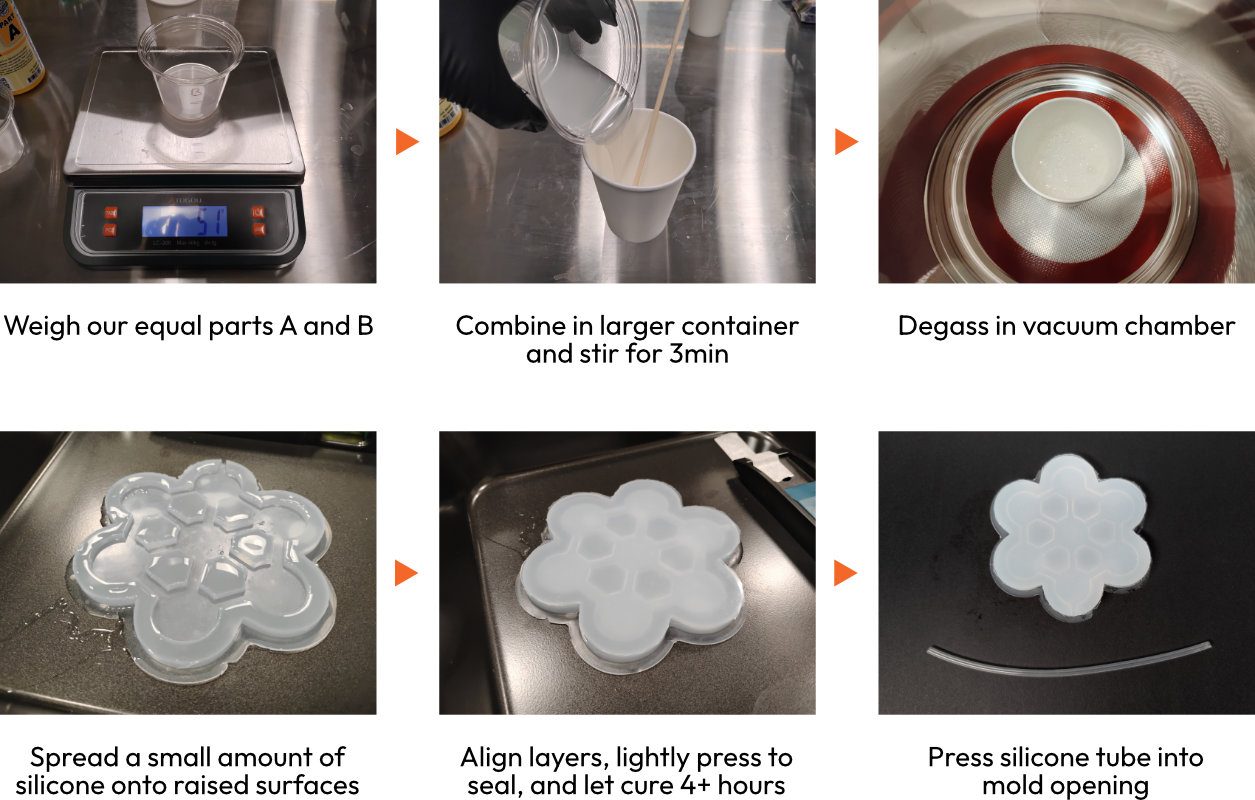
After curing overnight, I checked on the final piece and realized that the layers were easily separated. When I attempted to inflate the silicone, it started to expand before popping and leaking out the side. Afterwards, I could easily separate the layers and it looked like the silicone adhering the two halves hadn't even cured. The extra material poured into a saucepan did cure, so perhaps the mold release couldn't be washed off fully and caused problems?
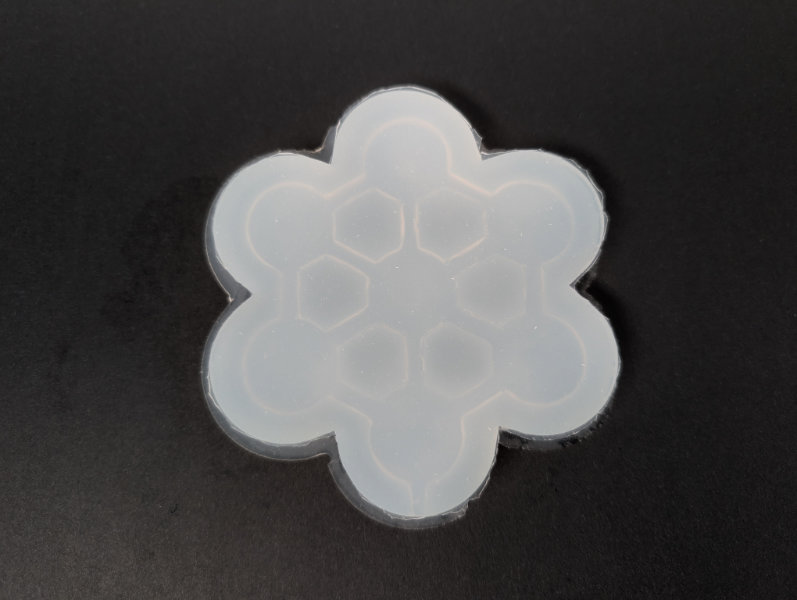
Silicone inflation attempt
I knew that silicone was difficult to adhere to itself before going into this week, but I thought that, if it was often done in the Fabricademy program, maybe it would be easier than I expected. Doing a bit of research on adhering platinum-cured silicone, I confirmed my initial impressions. EcoFlex 00-30 leaches softener, so it needs to be cleaned with acetone right before having more silicone poured onto it4. Even then, it's difficult to glue with more silicone, and the purpose-made adhesive, SilPoxy, is quite expensive. I even found a discussion where an intern at a medical device company was trying to find any possible alternative to SilPoxy because so few products worked well5. In general, silicone is used in a single pour, as once it vulcanizes, it doesn't stick to or react with much.
Reflection & Thinking Towards the Future
Having had a few experiences with molding and casting in the past, I was surprised by how well the laser-cut molds and initial silicone pour went this week. EcoFlex 00-30 had a long working time and was thin enough to make bubble removal and detail-filling easy. The process of adhering two vulcanized silicone pieces together, however, didn't go well and I'm still not sure exactly what went wrong. Using the wrong mold release, washing with detergents, and letting the cured pieces sit after cleaning all could have contributed to the second pour not adhering. For my final project, the only technique I can see myself needing to repeat from this week is a single silicone pour for mold-making, which I'm now comfortable doing with our setup. If I were to make inflatables again, I would interested in working with TPU sheets to see how they compare to the heat transfer vinyl method.
Fabrication Files
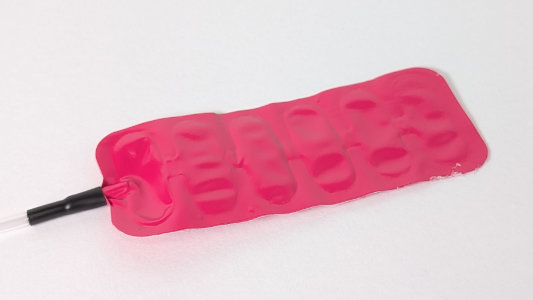
References
-
Reference: Adriana Cabrera and Lily Chambers; "Making Inflatables with Thermo Transfer Vinyl"; softrobotics.io; 2023 ↩↩
-
Reference: Saskia Helinska; "Unflatables"; Fabricademy Documentation; 2022 ↩
-
Reference: Smooth-On; EcoFlex 00-30; smooth-on.com ↩
-
Reference: Asked by Blake Bradley; "Joining platinum silicone?"; Stan Winston School Forums; 2017 ↩
-
Reference: Asked by sparkyspitchfork; "INTERN IN NEED : Silicone-to-Silicone Adhesive !"; r/AskEngineers; 2022 ↩