6. Textile as Scaffold#
This week’s tasks are building on previous weeks - to create a mould to form a textile scaffold over. We can incorporate the things we learnt about bioplastics here, use more traditional fabric and resin mixes, or combine concrete and textile. As long as we understand that textiles can enhance the qualities of a material. We’re also creating crystals using a variety of media - from sugar to alum.
We began with a lecture by Anastasia, covering the current situation with these materials and the technical and physical parameters of our tasks. My intention this week was to grow tempeh over a mould (inspired by hearing that Henk is making his own tempeh at home) made from scanning the circular part of the Waag building (love the texture of the different materials) and to grow crystals on lace.
crystals#
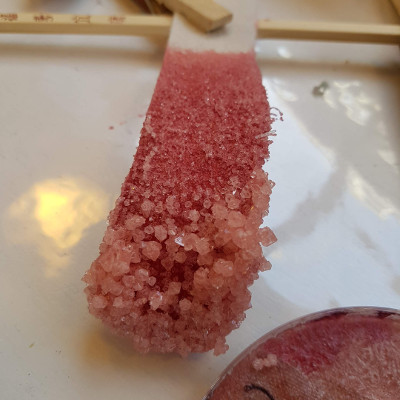
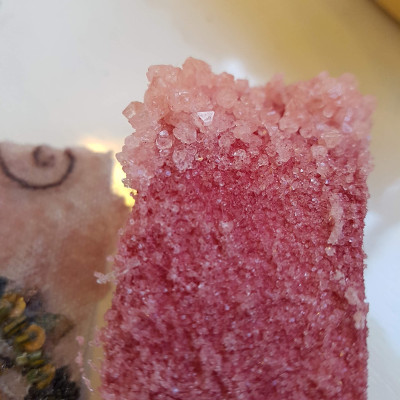
So the first thing we did locally was to make some crystal solutions - similarly to the dye week, we set up some large pots of boiling water. Cecelia showed us some great samples of previous efforts, where people had grown crystals on various materials like fleece and loosely woven or gridded synthetic and natural materials. The crystals were various colours, but she said that the colours often fade, apart from the black ink bought from a Chinese supermarket. Apparently, the crystals focus light and that speeds up the fading process.
Although we all did it together, we all selected different materials to drape into different batches. It took ages to saturate the solutions - although there are recipes for this, it seems that results are so variable that you just have to wing it on the day. A hot solution draws up more of the media more quickly than a cold solution, hence boiling large pots of water.
my crystal experiments#
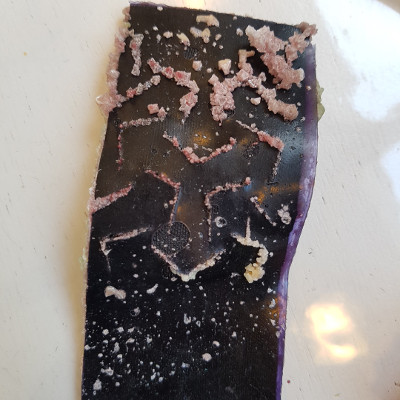
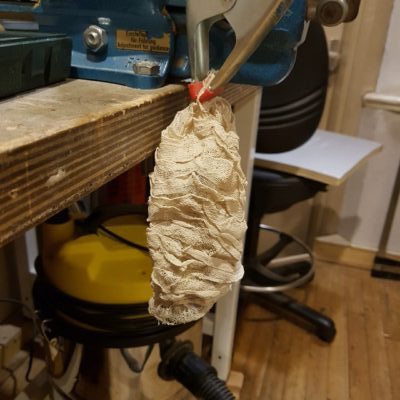
- the silicone-neoprene material that I created in week 3 using the auxetics generator from Fab Lab ULB. In some ways, this is a material for this week’s project already made because it’s a composite and then as a bonus I’ve added the crystals. I was hoping that the crystals would attach to the fabric (because nothing attaches to silicon…) and start pushing open the cuts in the materials, distorting it. You can see below how that came out below. It worked as I imagined, though I will probably rinse it a little bit to see.
- a rabbit fur felt, 2mm thick. Very happy with how that came out.
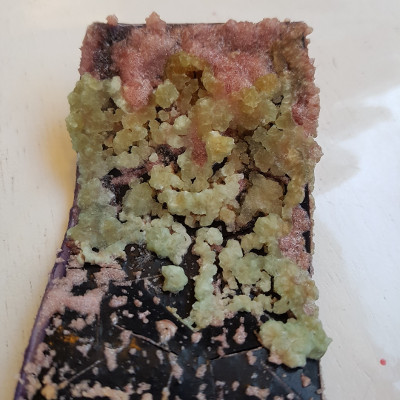
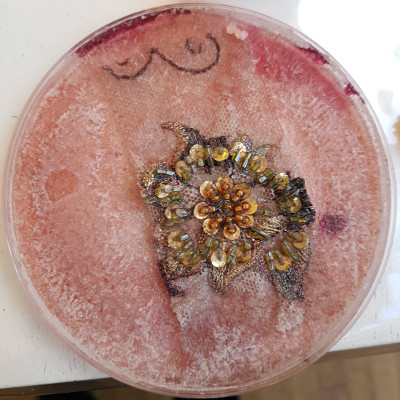
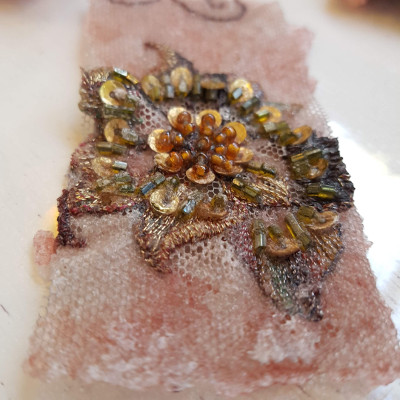
- some amazing embroidered mesh fabric (just a thin strip because it felt too precious to waste). I had it in a petrie dish, and combined the alum and the epsom salts together, so the crystals are a little confused.
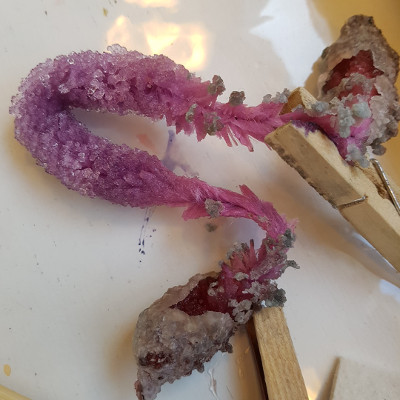
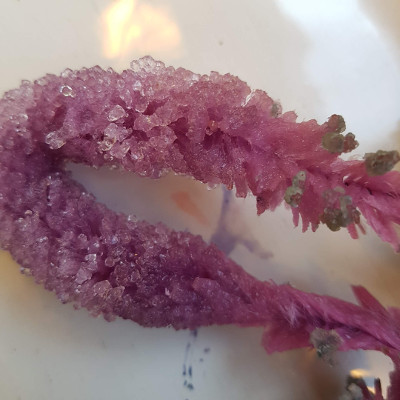
- a fluffy pink ‘pipecleaner’ that kids use to make things. I dipped it in two different colour alum solutions. The first one I dipped the legs in, and now they have a strange skin over them now, but the centre one looks great. Again, a rinse might help…
3d mould for the scaffold#
scanning#
A few things had been taken to Dutch Design Week and it took a little while to find a kinect scanner but we found one. I chased up a power extension and just before it rained Cecilia and I spent 3 minutes scanning a bit of the building. The STLs that came out were nice but… there was something that didn’t fit well for me. I spent a bit of time in Fusion, converting meshes and playing around in the sculpting environment but I wasn’t convinced.
image2surface#
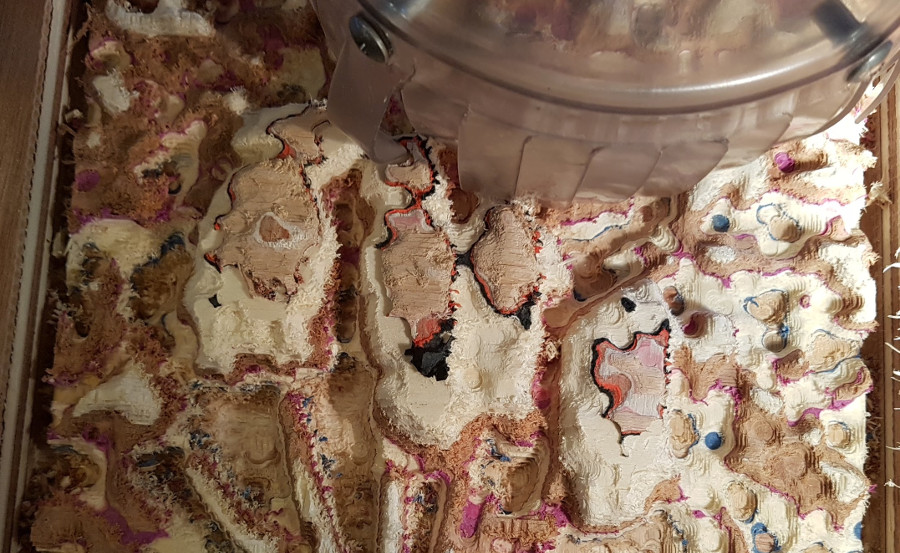
So, because I planned to make tempeh, I thought that it would be more suitable to make a mould of a photo of mushrooms that I took when I went to DDW.
I found an Add in for Fusion 360 called image2surface which I decided to test out. There is an Instructable that I followed a bit, but the installation section is better in the original documentation because it’s more up to date. So, if you’re going to install it, follow the first link above. You can see below the beautiful patterns that came from the generator. It generates a quad mesh that is easily interpreted by Fusion, so you don’t have to follow many steps afterwards to create something that you can throw on the large format milling machine.
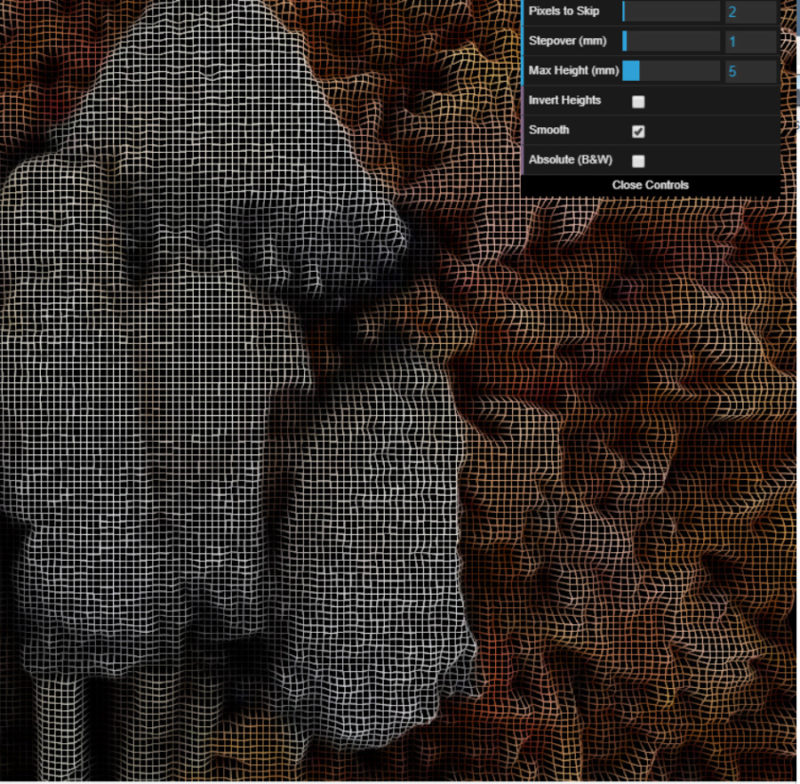
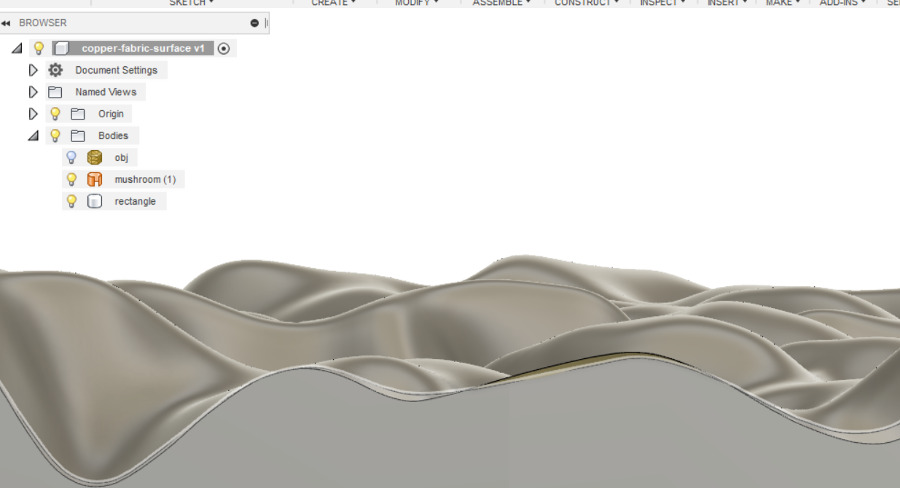
So here is the original photo of the mushrooms and the model surface that came from that. I like the shapes the leaves make, more than the mushrooms, but I decided to leave in the mushrooms as a contrast…

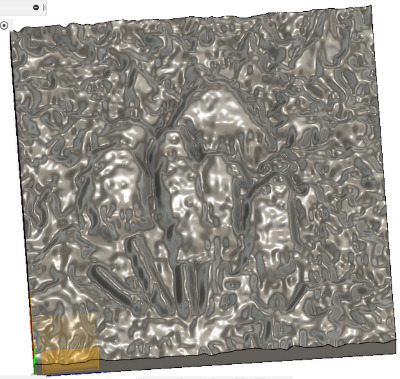
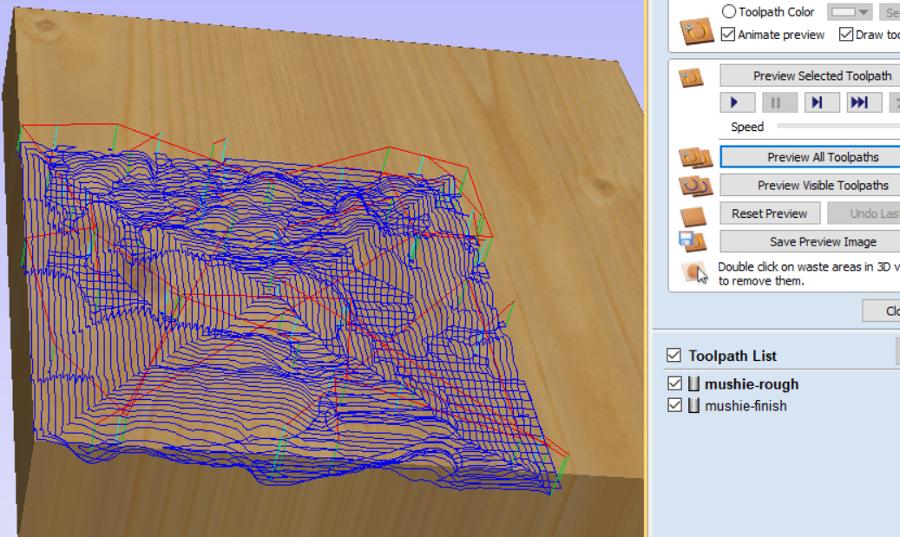
I created a box and used the surface I’d created to replace the top face, and Tah-dah! It was done. I exported it as an .stl and generated some toolpaths in VCarvePro to see whether there would be any issues with machining it, and it looked good.
material tests#
testing the tempeh#
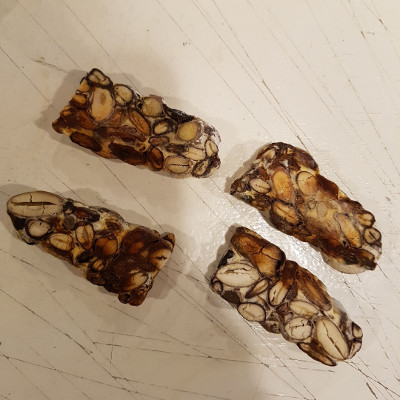
Henk kindly brought some of his homemade tempeh in for me to test, and I left the slices on the windowsill over the weekend to dry. They dried into quite solid blocks, but grew a little mould on the bottom surface, so I had to microwave them to kill the mould. I’m not experienced with microwaves and there were no visible signs or icons on it, so I pushed buttons until it started. They came out a bit roasted, as you can see below, after 40 seconds, so I think I pressed a wrong button. Anyhow, still a positive test. I’m going to carry on…
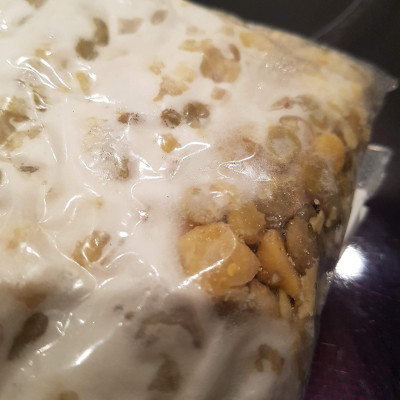
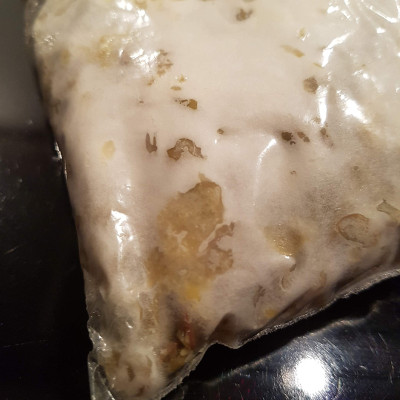
I took the spore home this weekend and cooked up two batches of tempeh. One was the experiment for the textile scaffold and the other I thought I’d eat. There are no photos of the scaffold experiment - I made it too moist and it went mouldy so I threw it away. The food, however, turned out beautifully. You can see below a corner of the tempeh hasn’t covered the chickpeas, lentils and cashews that I cooked and roughly chopped.
The instructions I followed are here - only used this NZ site because I was curious to see whether we can get the spores in New Zealand. There are plenty of other sites around the globe that explain how to make tempeh. As a material and a process it has me thinking about a final project…
testing a paper plywood#
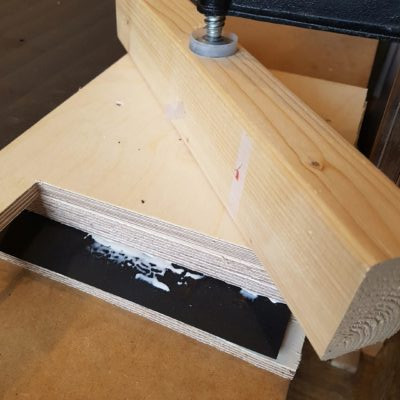
I decided to find scraps of plywood around the Lab and laminate these together with coloured paper to see if I can make an interesting mould, so I spent a bit of time doing that, and glued up two different blocks. I’m a bit doubtful about the first one, but I think the second one will be good, but not quite as colourful.
And while I was waiting for that to dry, I did an experiment with…
Once I’d run the stl through Cut 3D, I had two little problems with the shopbot - the monitor broke just when I wanted to begin. We checked the cord, vacuumed the connections etc but it was definitely the monitor. Henk found me a replacement one, so I installed it. The second problem was the ramps were too high on the shopBot, making very jerky turns and affecting the quality of the cut. I reset the ramps to the default setting, from 50mm/sec to 10mm/sec. It made a much smoother cut once I’d done that. I set up the shopbot with a 4mm upcut bit, ensuring that there was enough length on the bit to clear 24mm, as that was the depth of the cut in the model.
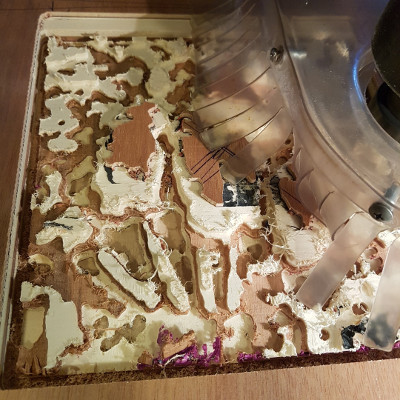
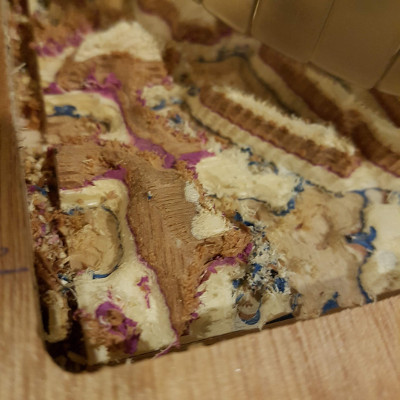
It’s still fluffy, but I’m happy you can see the colours from the paper coming through. This was the sample that I was doubtful about, so I’m fairly pleased. The settings I used for the two toolpaths were pretty standard, I suppose. The photos below show what I did, the one on the left for the roughing , the other for the finishing. You’ll notice the main differences are:
-
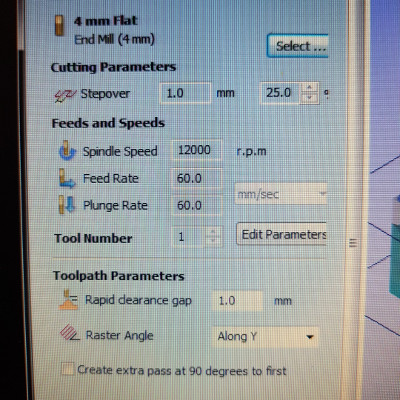
the pass depth. In the roughing toolpath is 4mm (the width of the millbit) and the stepover is 1.5mm (Cut 3D won’t let you go more than 40%) whereas in the finishing the pass depth is 0.5mm (you can guess that from the machining allowance you’ve chosen in the roughing toolpath) and the stepover is 1mm.
-
the plunge rate between the 2D roughing path and the 3D finishing path. There’s no need to go as slowly in the Z axis when you’re doing a 3D path or you’ll warm up the mill-bit without any bonus result whereas you want to plunge a little more slowly in a 2D roughing toolpath because you’re clearing a lot more material.
The similarities are that they both working on the Y axis. On the shopbot, the Y axis is the axis that holds the spindle carriage, so there is less possibility of ‘jitter’ than if you’re running on the X axis.

As there was no-one else waiting for the shopbot, I decided to run a second pass at 90 degrees to the first with a stepover of 0.6mm. I’ve never noticed any difference when running a sceond pass within the original finishing pass, but I generated a new toolpath, dropped the Z axis height by 0.2mm and that worked nicely. You can see below the photo I took when I was halfway through, so the left side of the mould is yet to have a second pass and is much more fluffy than the right.
I didn’t have a chance to work on the birch ply sample, which should finish more smoothly because it’s a hardwood, because I got caught up in other projects, so I might do something similar back in New Zealand.
something that looks like plaster#
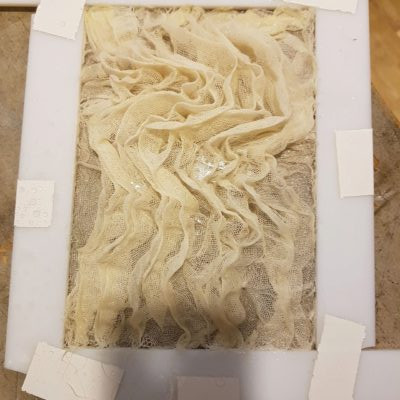
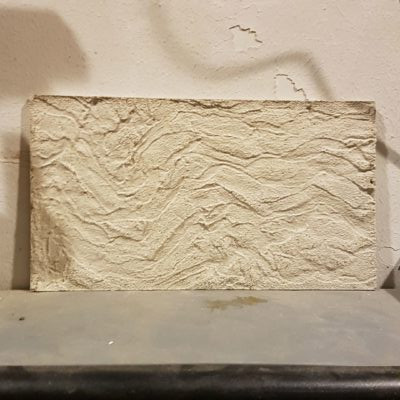
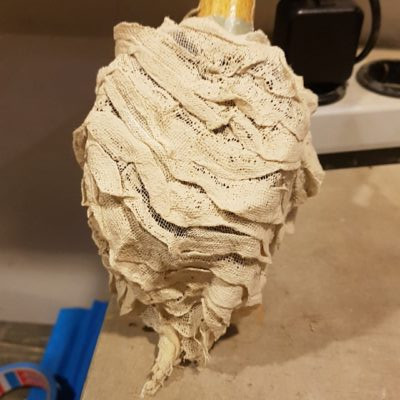
I made up a fabric sample from muslin/cheescloth and used it to print onto the plaster and then afterwards shaped it and left it to dry.
In my early research & experiments for my proposed final project, I also made a composite material from natural beeswax and calico, which I used for two purposes.
composites in other weeks#
-
if you go to my tempeh research page you can read about more tempeh testing as a composite material, as well as read about the wax fabric tests on my e-textiles II page and the wenduino research page.
-
in OS hardware week I made a mould and cast a composite in it for our Multi Purpose Machine.
-
my final project has a composite element in it.
bonus section#
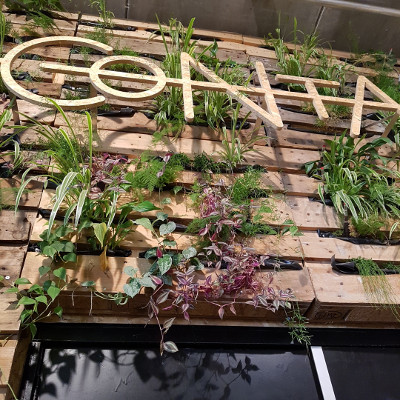
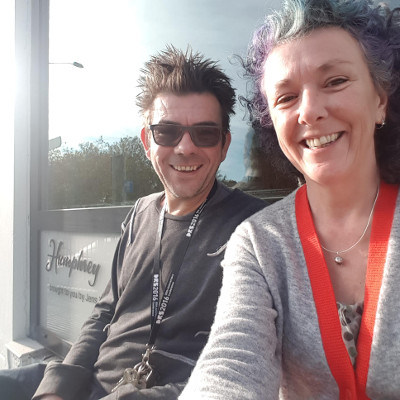
This week I caught some trams and went to visit Alex Schaub at Contact Amsterdam. Super nice to see Alex in his new Lab and to see all the awesome things going on there. In particular, I loved the green wall and seeing the milling machine called Humphrey - a collaboration between Jens Dyvik and Alex.

And I went to an exhibition at the Lloyd Hotel. More chintz! And an awesome dress by Anastasia Starostenko, from the Textiel Factorij.
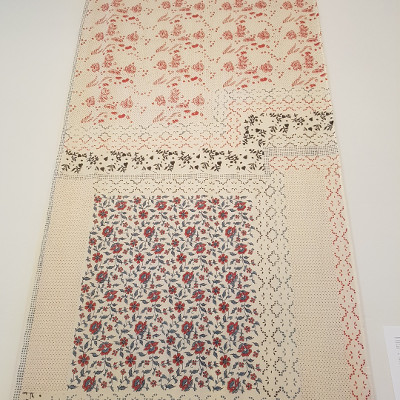

“Button Masala Chintz is a second part of the New Chintz project made in collaboration with Indian fashion designer Anuj Sharma, who developed a technique, Button Masala, which allows creating garments, furniture, shoes and accessories without sewing tools but by constructing shapes using only buttons and rubber bands.”