3. Circular fashion#
A great lecture by Zoe Romano about seamless garments and zero waste. As I mentioned in State of the Art week I’m interested in the zero waste ideas so it was particularly good to hear about it from her perspective. Our task this week is to make a garment that is created with interlocking modular components. I have a few ideas about basic garments to begin with - you’ll remember that I visited the Costume Museum when I first arrived, so I might do a Kraplap-type garment.
Ernesto Thayhat‘s work on the TuTa was interesting - and when Cecilia mentioned that he’d also worked with Sonia Delaunay I was even more intrigued. We’ll see what comes of the week’s experiments…
I’m particularly interested in the idea of easy repair and adjustments when producing materials and garments in this way.
I have a place to live!
things for the future#
-
Amanda Ghassaei’s Origami Simulator
choosing an idea and trying it#
So, even though I have an idea about what garment I’d make, I started with the modular component. We looked at the samples in the Textile Lab and discussed the issues associated with each, as well as browsed through Cecilia’s pinterest board on the subject. As always, I come away from a session like that feeling inspired but at the same time feeling like it’s all been done already and how can I find my space here.
I faffed around with my latest mannequin model for a while to cover up that I had no idea where to begin. If you look back at Digital Bodies week you will see that I decided to do a third one. In Fusion I was removing teeth and hair from the model I’d made in MakeHuman.
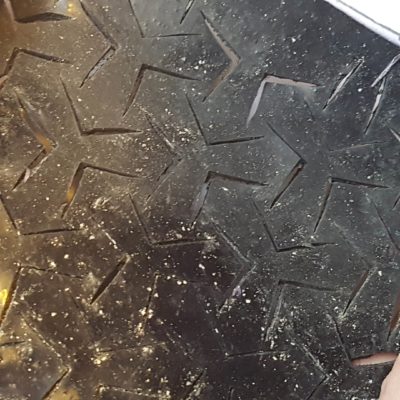
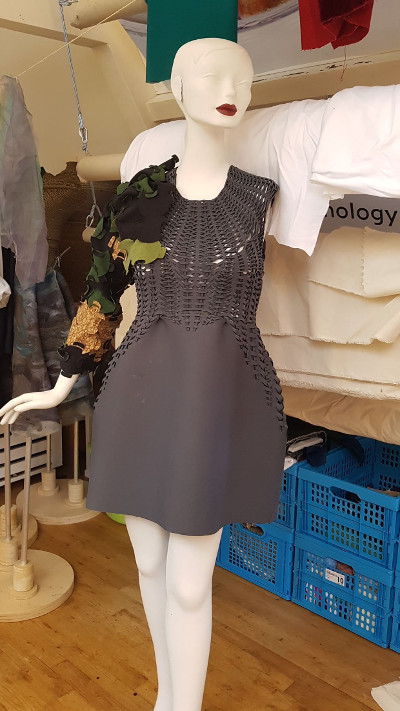
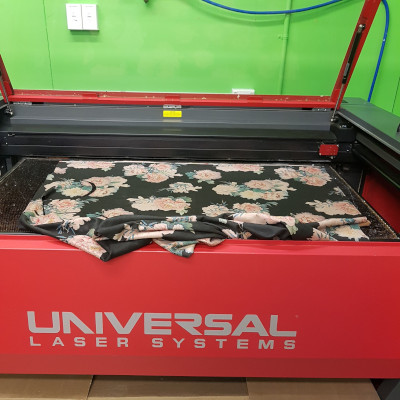
Finally (after a coffee), I picked up a pencil and drew a quick shape on paper that looked like a tennis ball and started cutting it up with scissors. It worked well, so I decided to move to cutting multiples on the laser cutter, still working in paper. I’m working in Illustrator at the moment, because it’s what the laser cutter recognises, so I feel as though I can iterate more quickly with it.
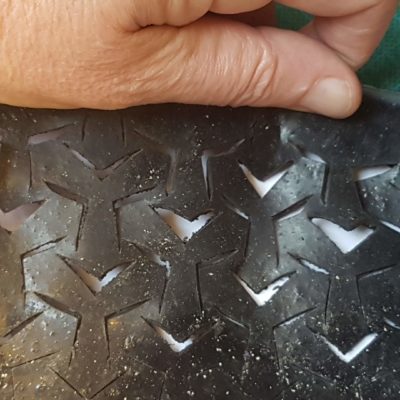
I saw that it was worth pursuing, and though Cecilia warned me that it would work differently in fabric, I cut two pieces in neoprene so that I could understand that difference for myself. Then I adjusted the form to make it better for the fabric and cut some more tests.
I liked the contrast of texture and colour with the materials - I prefer a simple form at the moment so that I can emphasise these.
welcome to Fab Lab León#
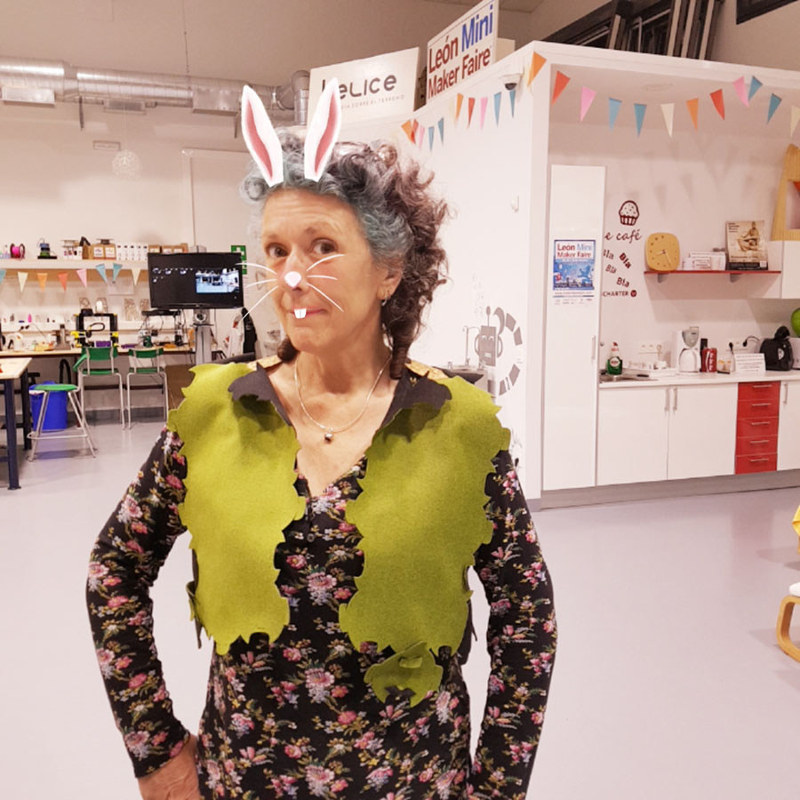
Where I learnt how to vogue…and once again, that making something imperfect is often more educational than making something that is perfect. I know what I will do differently next time, but I’ve had the best week ever. I spent it at Fab Lab Leon with Nuria and others, playing in their wonderful lab. Nuria accidentally (so she says…) took this photo of me with bunny ears. Also, I was around two people (Nuria and Adrian) who believe very strongly in documentation, so a lot of the photos below were taken by one of them. Thank you both!!!
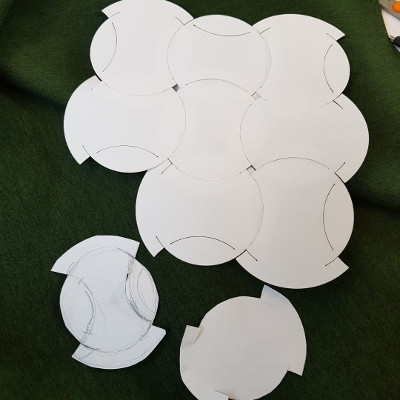
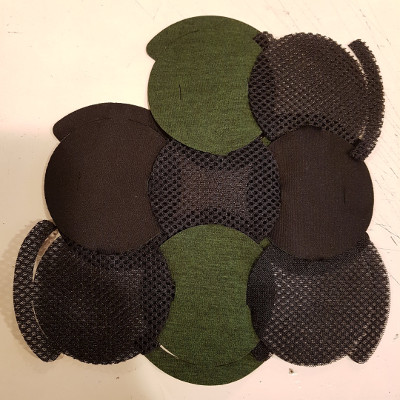
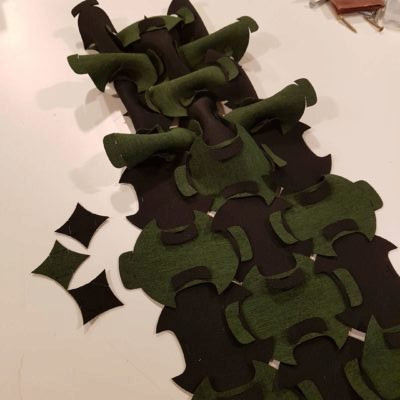
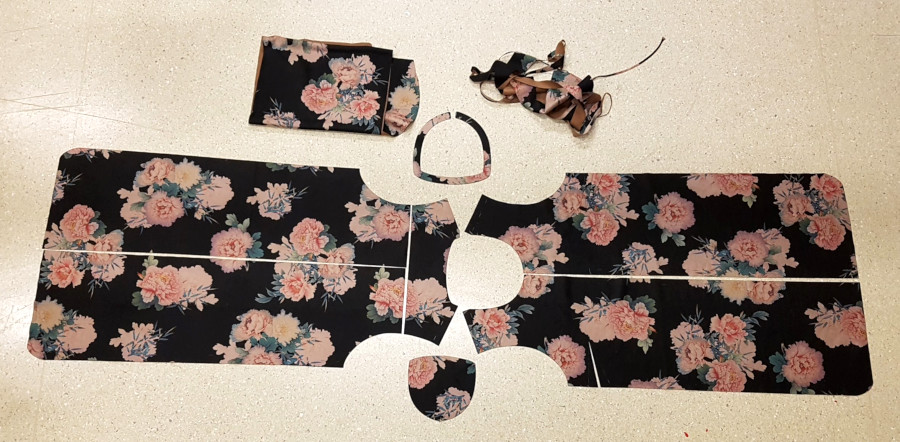
the components of the garment#
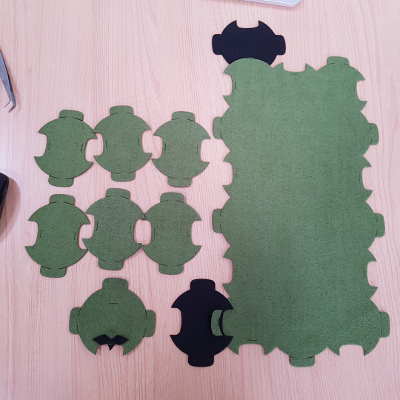
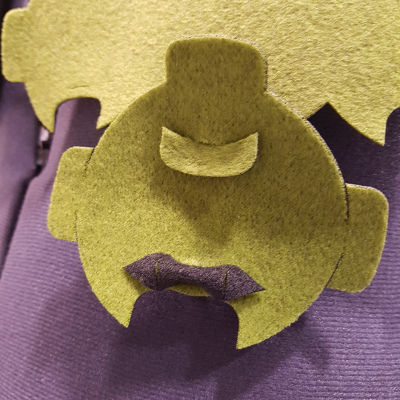
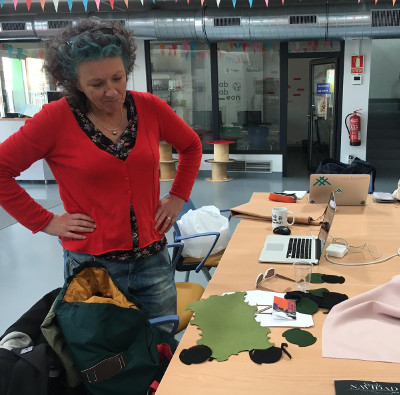
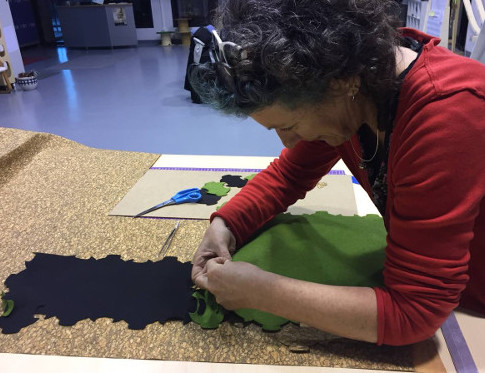
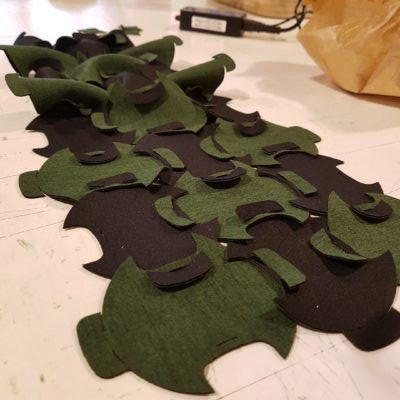
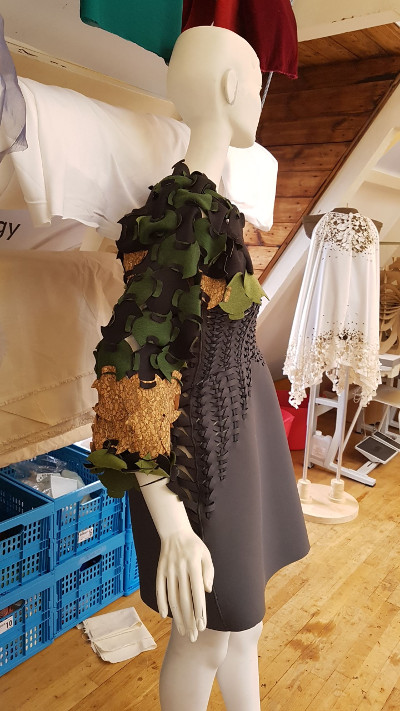
Here are the components beginning to be laid out - I didn’t bring the neoprene with me to Spain, so we went to an amazing fabric shop in Leon and bought this similar looking material which had different qualities. It was a wool-synthetic mix, a bit fluffy and soft. I also got some cork material with a synthetic woven backing which you will see in some of the images later. In the image you can also see that I cut one module incorrectly - it’s the one that looks like a face, with a moustache made from the second component that I made using the space in between the modules in the layout.
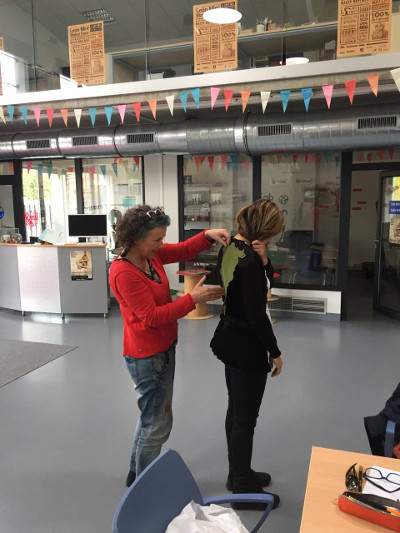
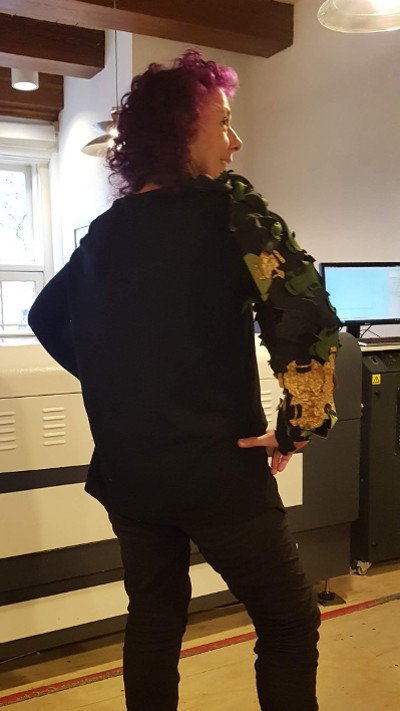
I tried out the larger components on Nuria and then moved to a mannequin.
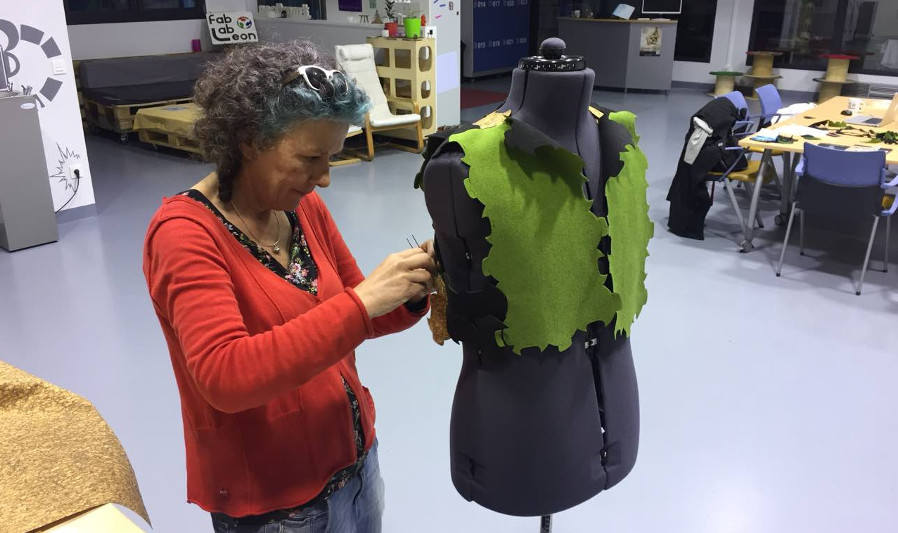
You can also see me with a doubtful look looking at the modules joined to the larger component - I was thinking about the time it would take to put it all together and wondering whether I had a good plan and if it was worth spending the time to discover that it wouldn’t work.
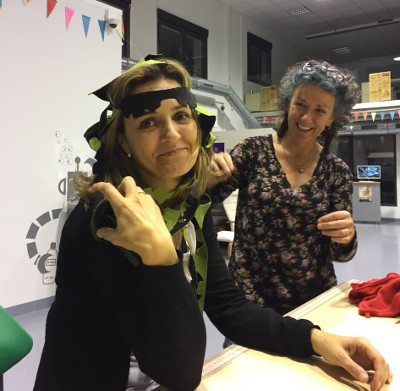
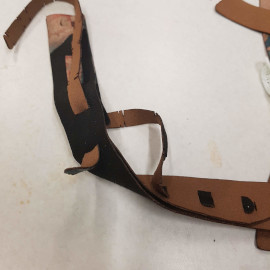
…and Nuria convinced me that I was on the right track by styling a hippy headband from the leftovers…
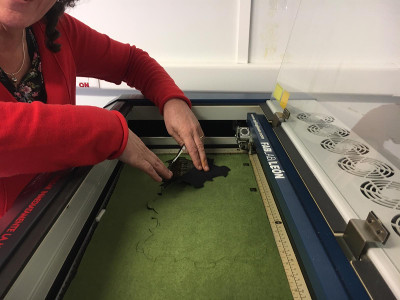
laser cutting goodness#
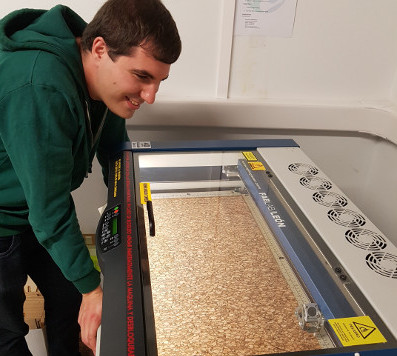
I spent quite a bit of time on their epilog laser, which was a lovely machine and recently with a new bed so it was level and flat. Adrian was super excited to see what I was doing, helped me set up and stayed to see the results. You see him here when we were cutting the cork fabric, and me testing the cut of the wool synthetic fabric.
assembling the garment#
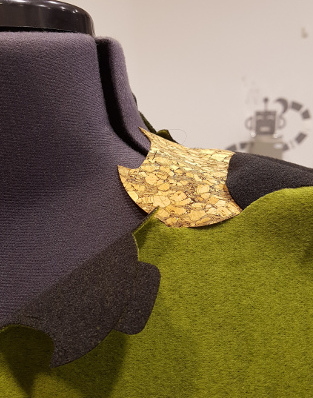
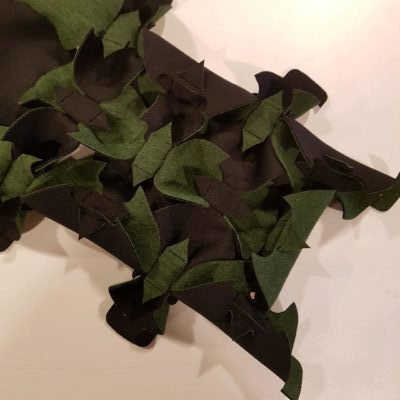
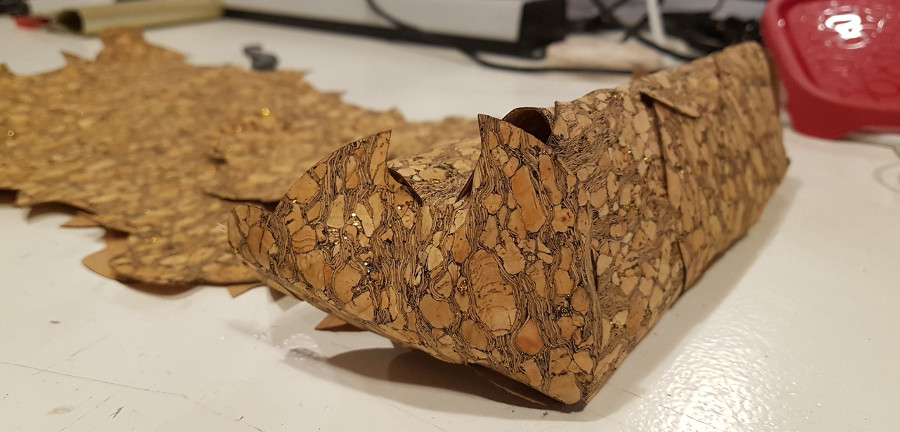
Putting it all together was fun and less time consuming than I thought it would be. I used a pair of tweezers as though they were a crochet hook to pull the tabs through the slots sometimes, but mostly just used my hands. The cork wasn’t flexible at all and doesn’t match the other material but I was interested in how it would work. I think it needs to be on its own and had a little play with it the other day to create a more formal shape, which you can see further down the page.
sharing my documentation#
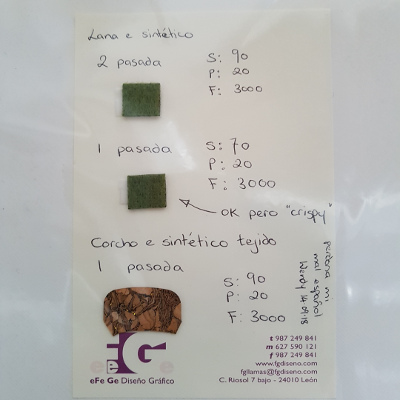
I spent a little bit of time documenting for Fab Lab Leon, because I’d used a new material. They have a great folder of fabric settings that I could add a page to, so I did, in my best spanglish - I also forgot that and is a y en espanol, not an e, as it is en portugues - I hope it could be useful.
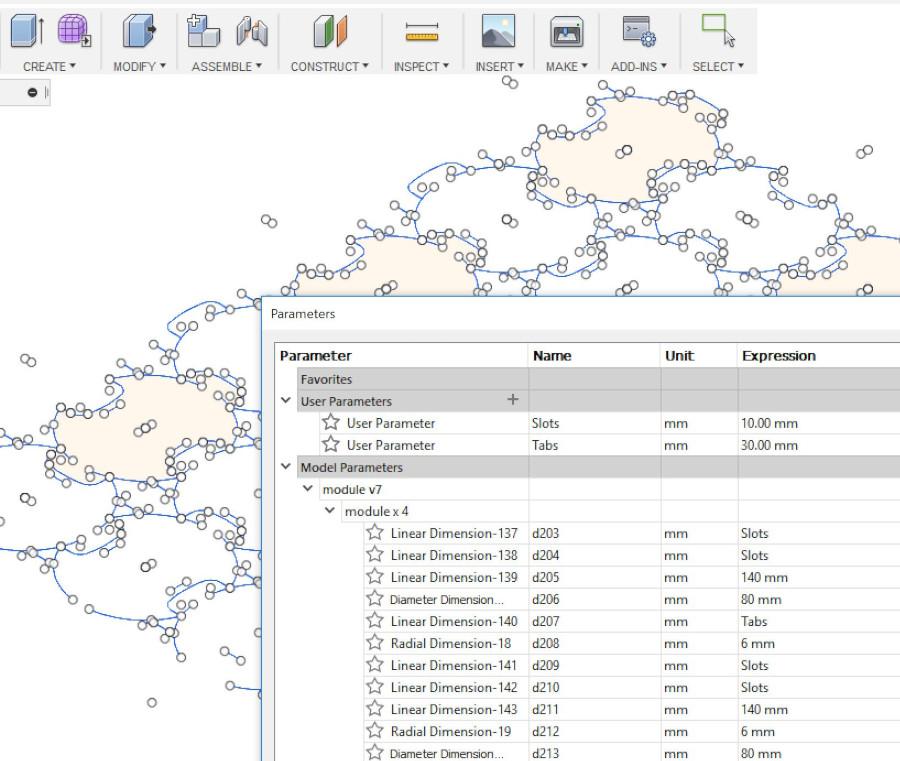
parametricising the file#
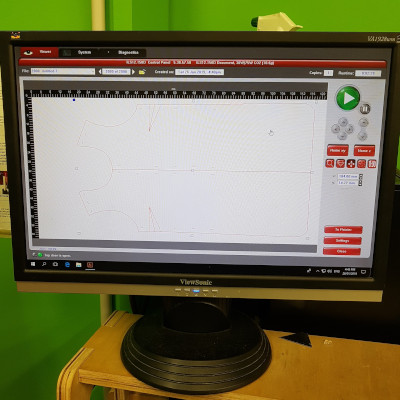
I created a new version of the file in Fusion 360, which worked ok, so I exported what I’d made into Illustrator and tweaked it a bit before cutting more modules on the laser cutter.
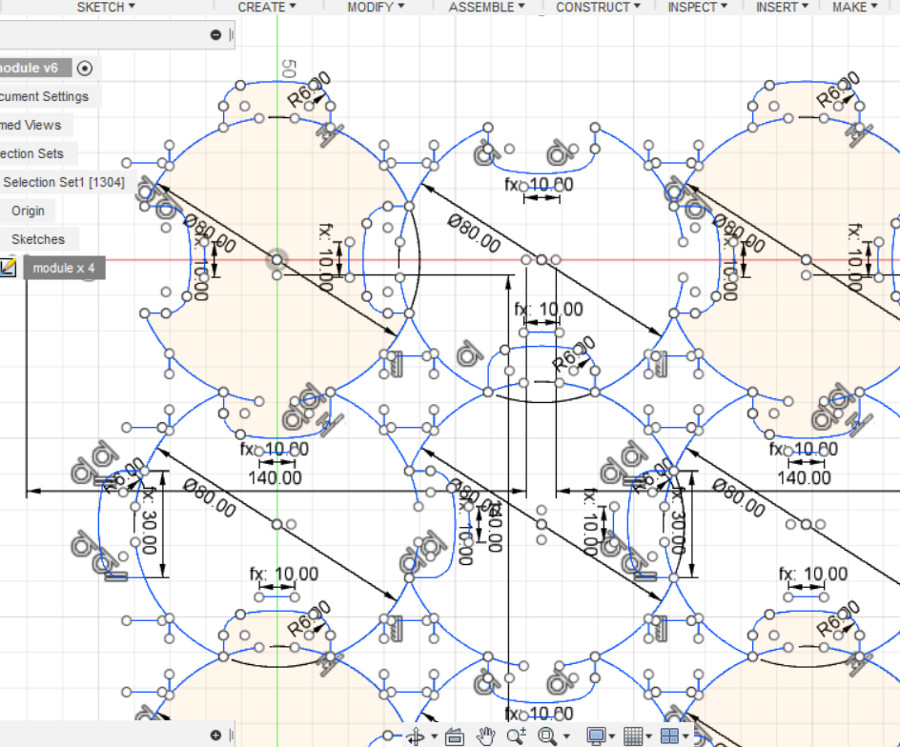
And the outcome of all those maths equations, is this slightly more 3D system. I’m using the little module (the moustache) to pull the larger module towards itself. I found that I wasn’t all that convinced by my own garment and that I preferred to think about the system within the context of upholstery - the idea that I referred to in the first week, and actually the form is reminiscent of the original experiment I did with 3mm wool felt.
the second version#
When the little module is pulling the larger modules, the spaces between open up more than I imagined they would. Initially I kept that negative space (about 8mm square) because I liked it. Now I think I’ll move the slots to close that up. Luckily it’s now a parametric file, so that should be easy.
And the expanded version of this is potentially a bolero-type garment with sleeves and all of the materials together.
And here it is on a mannequin
And a little experiment with it forming a box/bag structure with only the cork fabric.
the third idea#
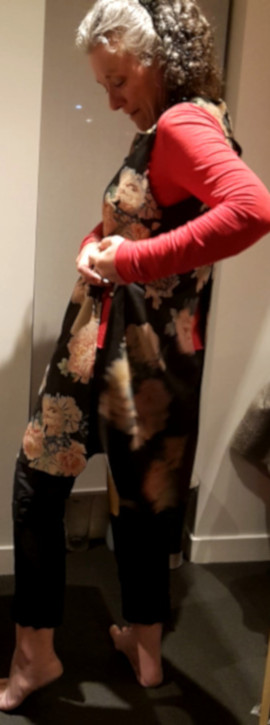
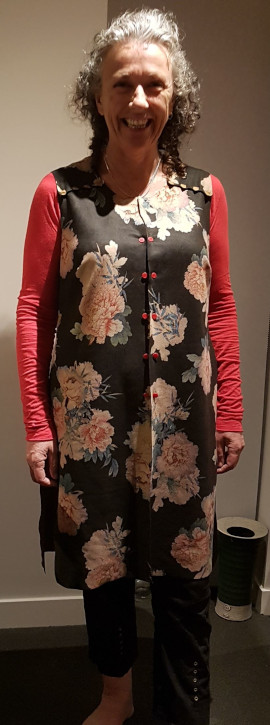
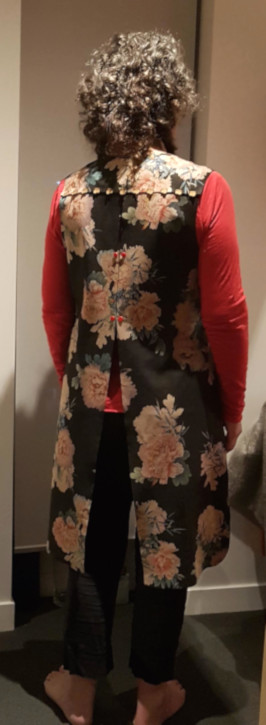
Bella gave me some fabric when she went back to Germany, so I decided to make a simple garment out of it. It’s an overdress based an an existing overdress that I already have. The existing one is a much lighter fabric, whereas this is a polyester knit and quite heavy. It seems to drape well, so I thought I’d give it a try, though I was aware that I’d need to be thoughtful about the type of connections I created as well as where the connections are in the garment.
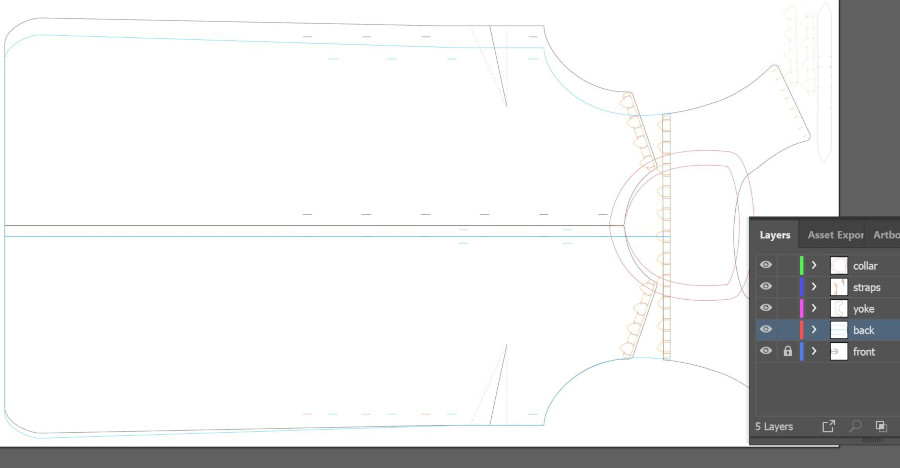
I took some measurements from the existing garments at particular points. As I was using Illustrator on the laser cutter anyway, I drew up my file in Illustrator, and then checked the armhole shape against a photo of the existing garment for the proper curve. It all looked pretty good, so I decided to cut it out - normally I’d do some toile tests first, but I was feeling fairly confident that I had it all under control…
I tested the joining method that I wanted to use. After a couple of tests, it worked well, holding the weight of the fabric enough, so I made the extra element and joined the yoke to the two back pieces with the ‘strap’.
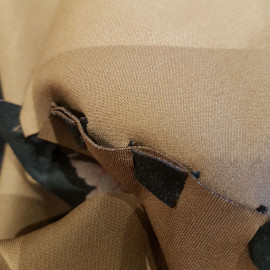
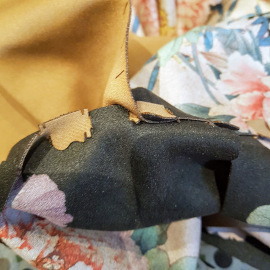
I’m taking advantage of the plain colour on the back side of the material for two reasons. I slightly messed up the alignment of the flower pattern even though Bella warned me about it so I’m using it to distract your eye from the slight misalignment, and to show off the detail of the ‘sewing’.
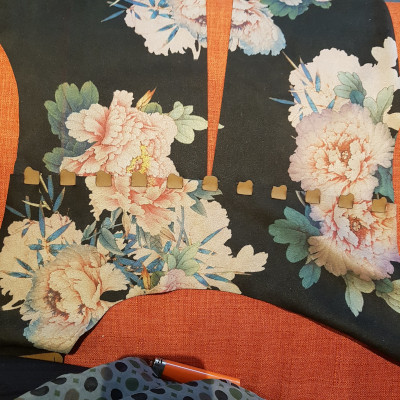
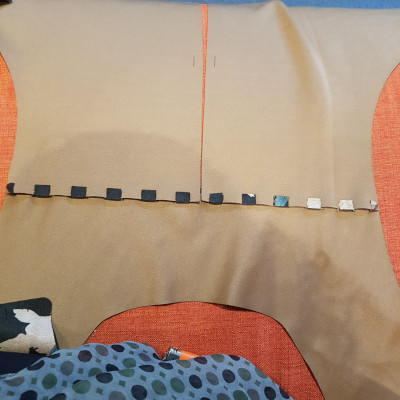
Initially, I made the yoke so the that front and the back joined at the top of the shoulders, but I had a chat with my cousin who is not only an enthusiastic and talented crafter and seamstress, but is a structural engineer. She suggested that I shift the strain elsewhere, so I re-cut the yoke accordingly. You might be able to see the difference between the Illustrator drawing below and the layout image earlier on, but you will definitely see it when you get to the final photos…
And actually, before we go any further, I confess: I did sew the breast dart. I tried a few ways of connecting this area but it just ended up lumpy so I gave up.
To connect the last parts of this garment, I used the clasps I designed for 3D printing, which I have been able to print using a red filament rather than the original white filament.
if you see a sofa walking towards you…#
…it’s probably me,wearing my modular garment.
I am utilising simple modular connectors in my final project, so you might want to take a look there as well.
download zipped files#
and visit my project at the Open Source Circular Fashion site.
bonus section#
On Thursday afternoon this week, I got on a plane to Bilbao. I was pretty excited about this adventure - I’ve wanted to visit Bilbao ever since I did my Fine Arts degree, because the Guggenheim was opened while I was studying. I also knew that a permanent exhibition of Richard Serra‘s work is there, and an exhibition of work by Joana Vasconcelo was current. I arrived in time to spend a couple of hours at the museum. I took a couple of photos without realising that I wasn’t allowed, but I don’t think that my photos will ruin the experience for you, so here you are - besides, the pieces I didn’t photograph are even more interesting, so go, go, go!
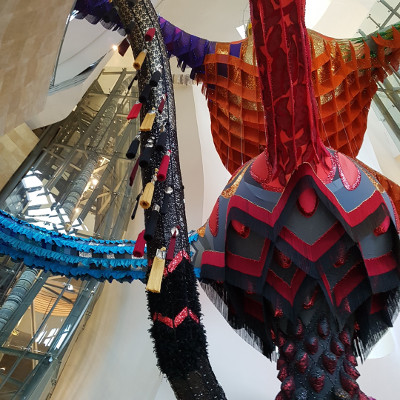
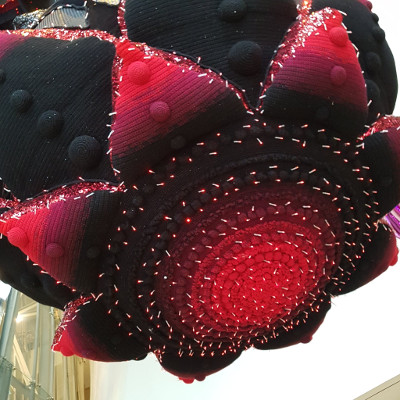
I was absolutely gobsmacked by the scale of this work, winding through the interior of the building, but also by the enormity of craft and skill it represented, as it was the largest and most complex and varied textile craftwork I’ve seen.
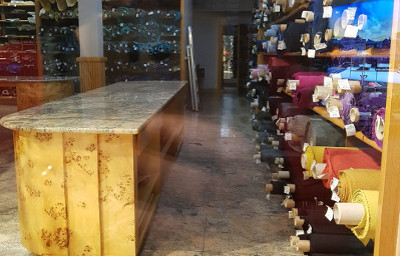
After a night in Bilbao, which included fireworks and wandering the old city (where I saw an enticing store which was, sadly, closed)

I caught a train to León and was met with a warm welcome by the most awesome Nuria and we proceded to have a great time, enjoying León, and playing at Fab Lab León.
bonus - auxetics#
I did a little experiment with the neoprene I used in the modular project. I saturated it in silicon (Smooth on Sorta-clear, 18 shore hardness) and then used the Fab Lab ULB auxetics generator to create an SVG to cut.
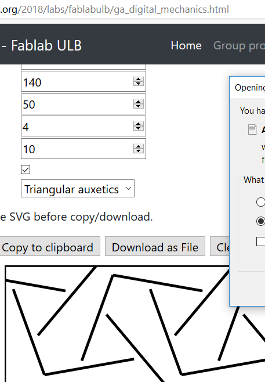
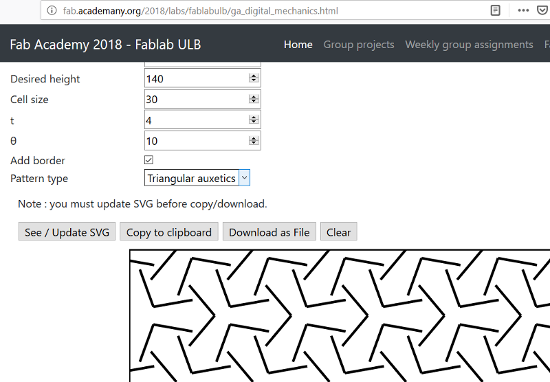
It kind of worked, but I ran out of time on the laser cutter - had an awesome recitation to attend.