1. State of the art, project management and documentation#
The first week of Fabricademy! We gathered a few hours before class - so we could meet each other and Cecilia, the mentor at TextileLab Amsterdam. We had a tour of this amazing building and met other people who inhabit this space as well as saw what is in different spaces and how they are used. We also learnt about the ‘history’ of the building. I say ‘history’ because everyone seemed to have their own opinion…but everyone agreed that experimental dissections of murderers took place here centuries ago.
We spent some time talking about the difficulty of finding accommodation in Amsterdam.
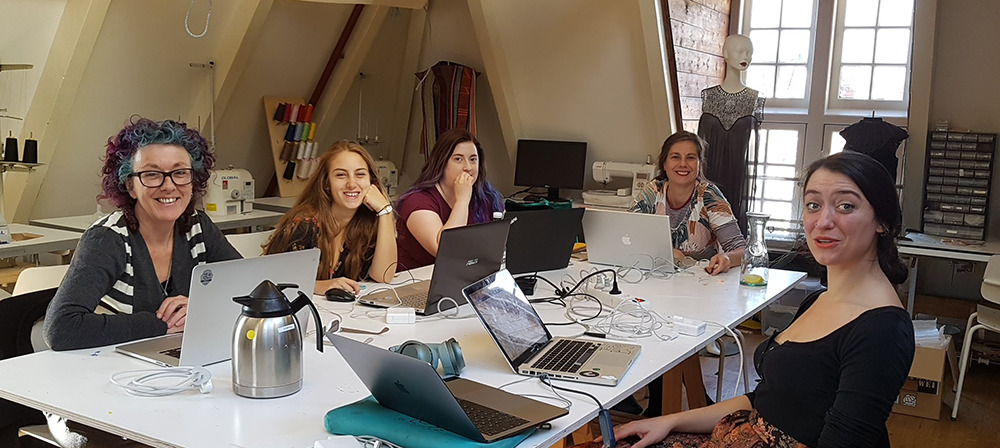
There are four of us here this year; myself (NZ), Irene (Italy), Jessica (Ireland) and Teresa (Holland). This is us starting on our websites, which is our first task, and then we need to propose a final project. You will see below that I have no idea what I will do for my final project - I imagine that it will develop as I continue on my Fabricademy journey. So the ideas are pretty sketchy so far.
It’s always interesting going to a new city - you end up in places you wouldn’t go to in your own city. The other day I found myself in what seemed like the high street of Amsterdam. Full of the big brands, with enormous shops full of consumer goods. I walked and walked, as you do in a new place, and started to feel as though I was walking in circles. But I wasn’t, it was just that those same big brands had more than one shop in this street.
When I was doing my exegesis for my Master degree, I found and used a phrase as part of the title: “An Embarrassment of Riches”. I found myself thinking of it as I walked down this street, and remembered that the phrase was used by Simon Schama when writing about the Golden Age in Holland in the 17th century. We live in an age of such overabundance that the people of the 17th century couldn’t begin to imagine. Once again, as I did when beginning my Master project, I find myself wondering what meaningful projects I can do that don’t contribute to this embarrassment.
documentation#
Having been involved with Fab Academy since 2013, I have seen a lot of students (including myself) struggle with generating a website from scratch, so I was pleasantly surprised to discover that Fiore Basile had kindly generated a website template for us. Of course, we were welcome to generate our own, but the emphasis in Fabricademy seems to be on other content. I chose to use the template as it is, and I’m finding it really well designed. I’ve used markdown for a while now, and I’m continuing to use this to create and format my content. I could use html as well with this template but I find it distracts me from writing the content. I like how we have a sidebar of links - whatever we add one or two hashtags (#) in front of will become a link. This makes it really easy to navigate for someone who is looking for particular information.
As a Fab Academy instructor I appreciate that for evaluation purposes, and also I appreciate that as someone doing new things trying to find what I’ve done in the past on my own website. Adding images and links is easily done, and if I wanted to I could choose a different colour scheme by going into the mkdocs.yml and changing the theme. I have left it as ‘cosmo’. At some point I need to modify that yml file so that I have a license at the bottom of every page, but I haven’t got around to choosing one yet.
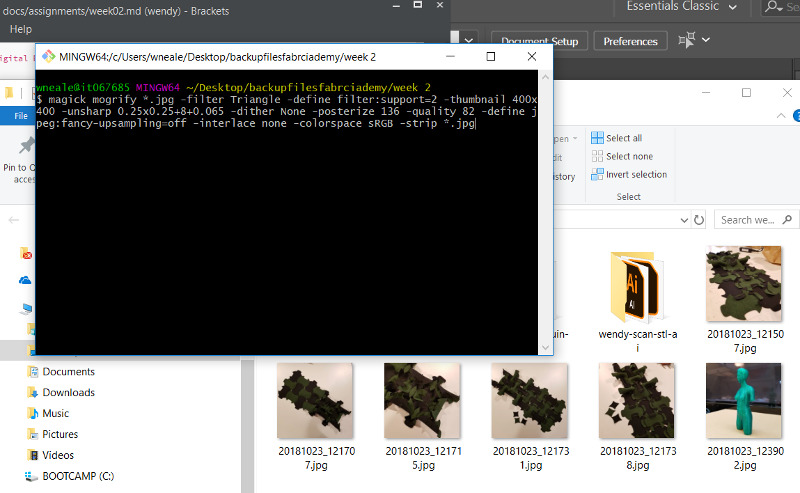
There is the option to use the web IDE to update, but I’m used to doing it via git bash and having a local copy of the documentation so I’m doing that. I had previously installed bash and brackets and had an existing user profile on fabcloud. All I had to do is generate a new set of ssh keys and clone the existing repo from fabcloud in git lab. If you want to do that, there are plenty of existing instructions for that on the Fab Academy site.
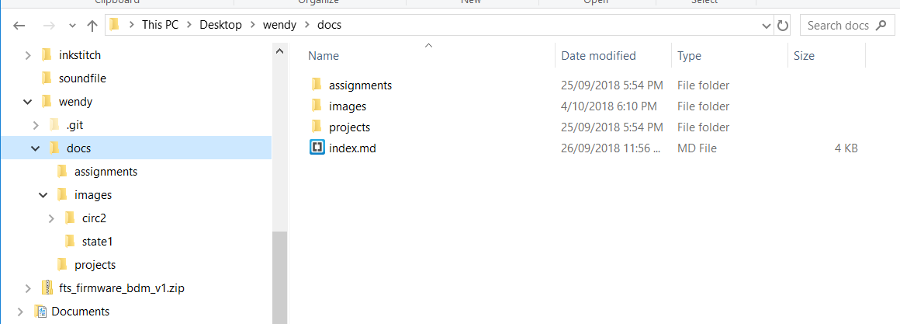
This created a folder on my desktop, which I open using Brackets and then edit directly. Brackets is one of many text editors, it’s open source and I like to use it more than others I’ve tried.
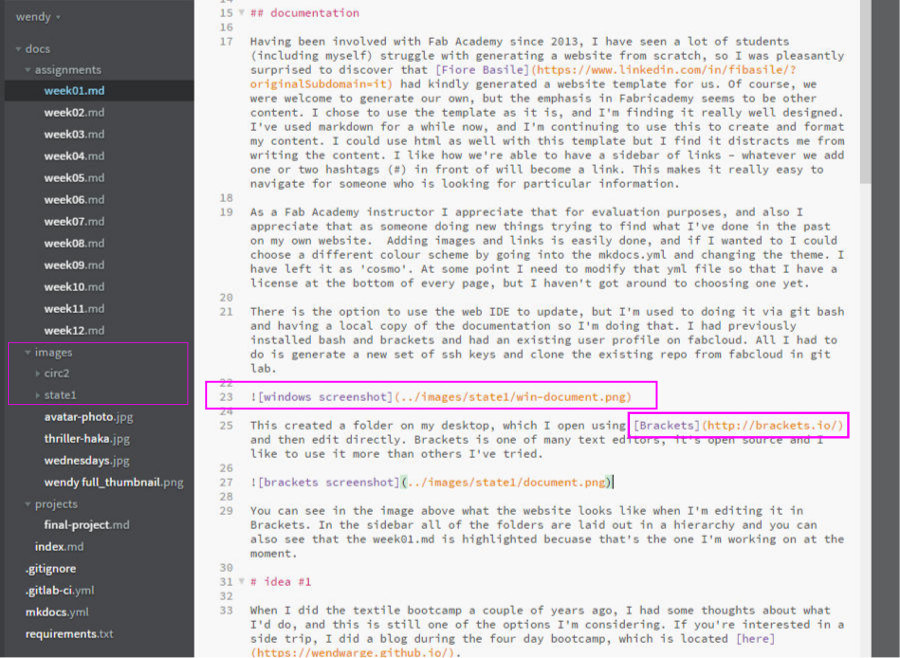
You can see in the image above what the website looks like when I’m editing it in Brackets. In the sidebar all of the folders are laid out in a hierarchy and you can also see that the week01.md is highlighted because that’s the one I’m working on at the moment. You will also see the magenta rectangles I’ve added to point out how I’m able to link to other websites and how I link to images. When you add an exclamation mark (!) in front of the square brackets, it means that whatever you’ve writen inside those brackets will be invisible but if someone with visual impairment is reading it, they will hear that text. I try to improve my text in there so that it’s useful for people who can’t see my website but are reading it.
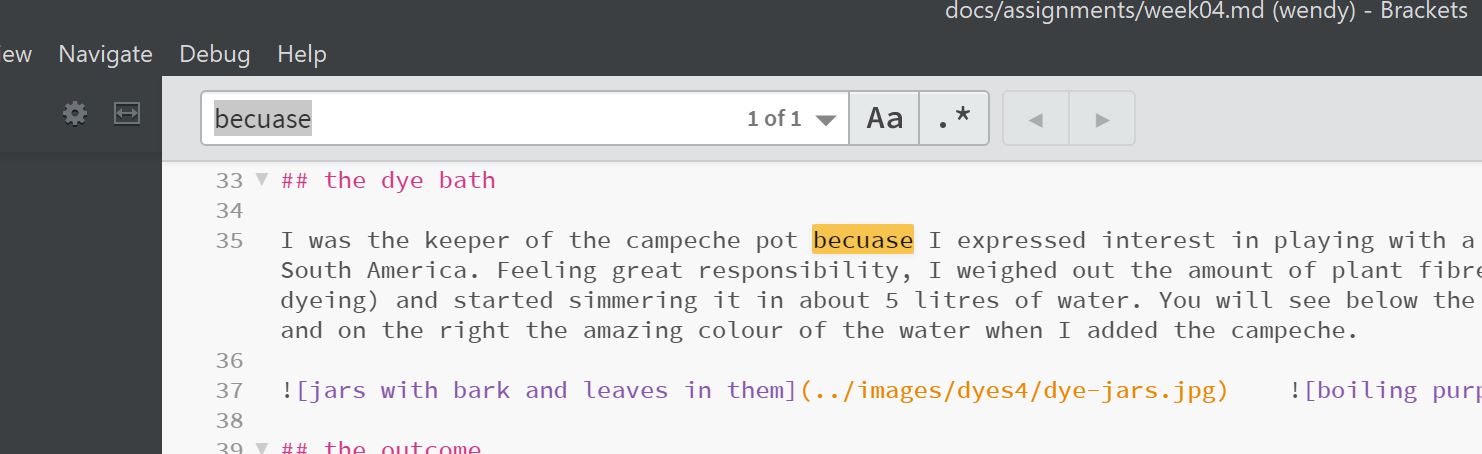
Also, there are some words that I always mispell. As with a lot of software, you can Ctrl-f to open a finder window - I use it to search my documents for typical mispellings, like ‘becuase’.
The other thing I’ve pointed out with a magenta rectangle in the first Brackets screenshot, is that inside the images folder I’ve added folders for the weeks I’ve documented so far. I already have many images, and it’s a way of keeping them organised. I haven’t chosen a great naming convention, but at least it’s short - I’m not going to change it. If I had documentation recommendations for anyone beginning this course, they would be to:
- resize and compress your images to save space in your repo
- organise your images in weekly folders
- include a sidebar link every week to your download files for easy navigation
- link to everything and everyone you refer to in your documentation the first time you mention them
resizing images#
Every week, one of the sidebar links in my website is called ‘bonus section’ which is where I will put random bits of experiences and comments about ongoing issues. Resizing images is one of my experiments at the moment - trying to discover what is the best way to do this for me.
If you go to this page in my documentation you will see that I found a fairly useful tool for batch resizing.
idea #1#
When I did the textile bootcamp a couple of years ago, I had some thoughts about what I’d do, and this is still one of the options I’m considering. If you’re interested in a side trip, I did a blog during the four day bootcamp, which is located here.
inspiration#
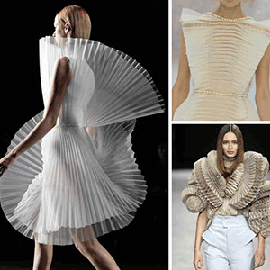
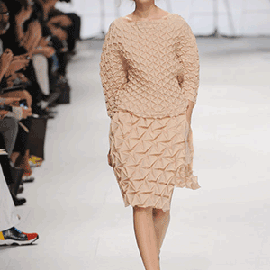
I love the pleating work by the Lognon Atelier,
Issey Miyake’s folded fabrics and Polly Verity’s paper sculptures.
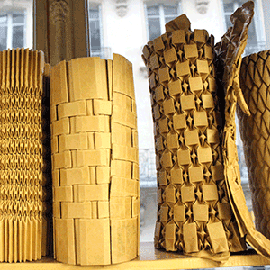
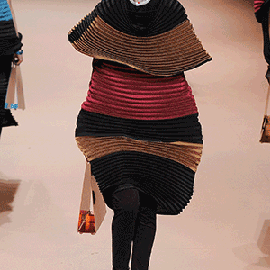
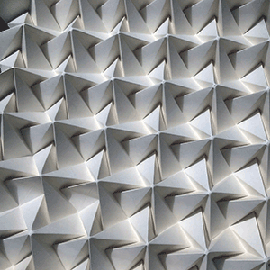
Texture and pattern have always played a big part in my work.
intention#
To explore folding and weaving techniques until I understand how I can modify & apply those forms to create a component-based parametric upholstered surface. Using 3D forms that lock together to create pockets of air as cushioning instead of the usual upholstery foam. I’m not sure how I’d add an electronic element to this project - any interaction I’ve thought of so far seems contrived and pointless.
research#
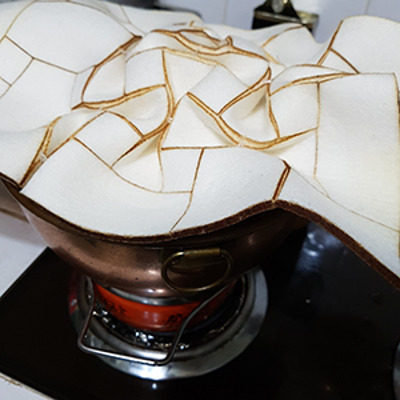
I did some experiments after the bootcamp with 3mm thick wool felt, partially cutting it on both sides using the laser cutter
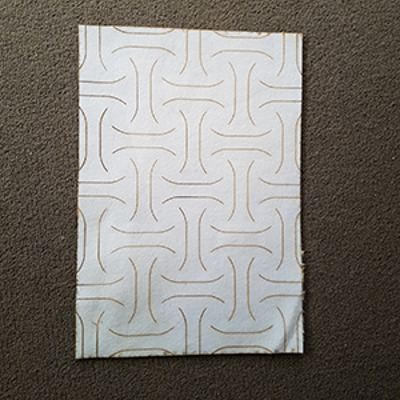
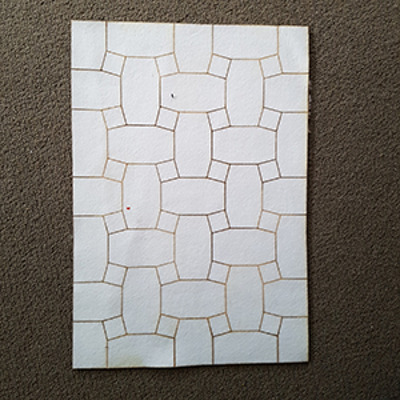
and forming & tacking it into place before steaming it to set it in place.

If you check out what I did in Circular Fashion week, you will see that I did a little more experimenting with this idea.
idea #2#
inspiration#
I find the work done by Jess Rowland interesting visually, because of the repetitive patterns of her copper speakers, but would prefer to make different types of sound.
Jess Rowland - Laptop Performance from Jess Rowland on Vimeo.
handy links#
intention#
To explore embedding soft speakers on a garment or an interactive wall covering that allow the wearer/viewer to control or ‘conduct’ the sound through movement (with magnets on their hands).
research#
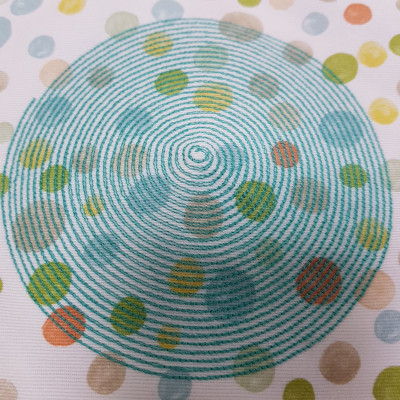
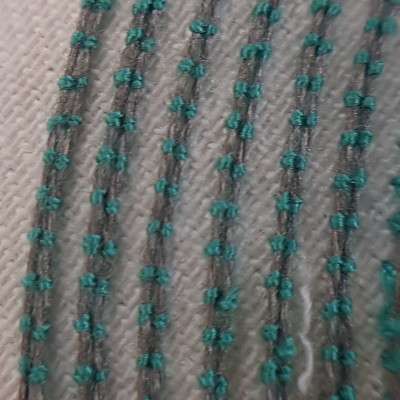
I generated a vector spiral and turned it into a digital embroidery file using inkskape and the inkstitch plug-in, and then ran the file as a .DST on the embroidery machine. I did this with two kinds of conductive thread in the bobbin, and the ‘purer’ thread worked the best when testing the sound. The sound still wasn’t very impressive, and I think that I understand why now.
Cristohper Ramos Flores, a composer based in Wellington, hosted a workshop at Fab Lab Wgtn recently and showed us how sound works with different media or surfaces. We learnt that surfaces must be under tension for sound to travel in the necessary waves. We also had an interesting time, when the speakers we made weren’t being very loud, and we attached one end of a kebab stick to the magnets we were using and held the other end in our teeth - the bones in our heads amplified the sound! It was like magic…
I did a little test in E-Textiles week to see how I could make a tiny speaker.
idea #3#
inspiration#
The loosest idea… As I mentioned previously, I like to combine the digital and the handmade. Making has played such an important role in my life - allowing me to design through experience of materials and processes, connecting to other people, and a tool for dealing with difficult times in my life. An example of this is this little toolkit I finished a couple of years ago (after a 10 year hiatus) during a time when I was sleeping really poorly due to stressy things.
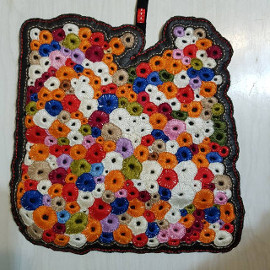
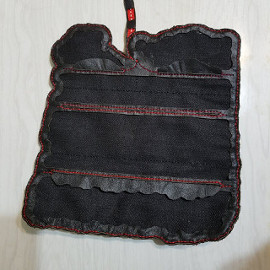
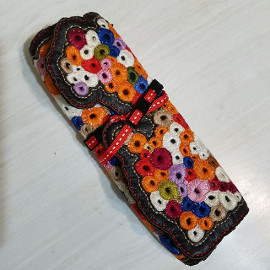
I started embroidering this when I was travelling to work from Waiheke Island on the ferry, which took about 40 minutes. When I moved to Wellington, I forgot about it, but resurrected it during a Crafternoon with some friends. When I was satisfied with the embroidery, I traced it to create the shape of the toolkit and created a pattern for the leather and dark denim. The pattern included regualr little holes so that I could handsew the toolkit with a level of evenness I wouldn’t get using a sewing machine or by freestyling (my own lack of skill on both counts). It was great to get this finished!
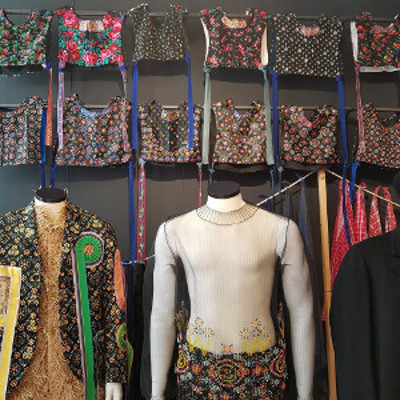
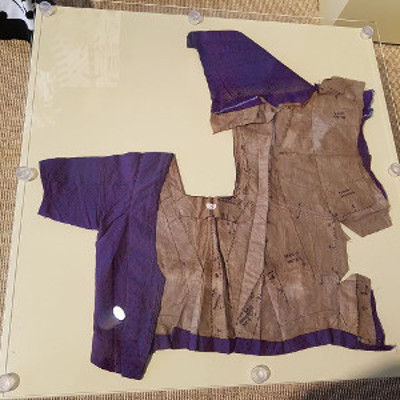
On the first day I was here in Amsterdam I visited the Costume Museum and was pleased to actually see one of the garments I’ve got an image of above. The fabric patterns of the traditional garments were combined so well, layers were very important, and the way the garments were constructed from whole cloth was very inspiring. A few images below…
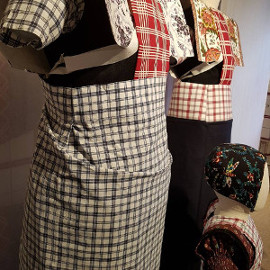
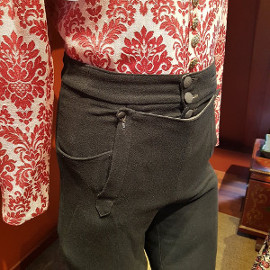
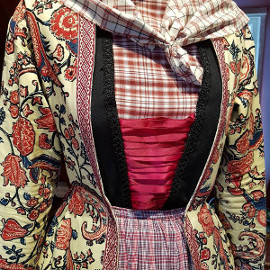
Holly McQuillan and Timo Rissanen’s book Zero Waste Fashion Design references this kind of garment construction, and it’s interesting to note that in the past it was done because materials were scarce and now we’re doing it because of overabundance.
intention#
To create a zero waste series of garments that connect to each other/fold/button to make a range of possibilities for different purposes. Adding pockets, layering, aprons, joining shirts to pants/skirts - not modular in the intention, but probably modular in the application. Once again, no idea how to integrate a meaningful electronic interaction into this idea.
idea #4#
inspiration#
The wierdest idea - as a smoker, I’ve been looking forward to living in a country that is more relaxed about smoking than my own country. However, everywhere I go in Europe I see cigarette butts on the ground. Although the filters are cellulose-based, the treatment that turns them into ‘tows’ makes the filters not biodegradable (unbiodegradable?). I’ve been looking at what solutions have been put into action elsewhere, and it’s not inspiring. I wonder whether I can do something… I need to talk to a plastics expert. Pop down to Eindhoven and see the Precious Plastic people? Cigarette filter filament? (comes in one colour - tobacco-stain beige) Can’t stop laughing, must stop laughing, tears in eyes, stomach hurts… it could be a winner.
idea #5#
inspiration#
Making tempeh in Textile Scaffold week, I started to think about it as a food and as a material, but also that in the past it wasn’t made in plastic bags, but in banana leaves instead. Also, it was quite difficult to find a suitable place to keep it warm without an incubator. Can I make a kit for people to make tempeh so that they can make their own incubator and not use plastic bags either?
actual real final project#
Please go to my Final Project page to see what I finally decided to do.
bonus section & recitation#
We had an interesting recitation by Cecilia Sanchez about her work with e-cuerpo. I was on a bus from Glasgow to Edinburgh so I didn’t get to see it all but I hope to find the video of it soon.
Documentation: I’m using a variety of ways to resize & compress my images - downloading them from facebook (great compression) / taking them from whatsapp (also good) / using gimp. I will try out some of the tips I found here too.