3. Circular fashion
The objective of this week was to design a modular element, which can interlock itself, in different ways to constitute the shape of a garment, without any seams.
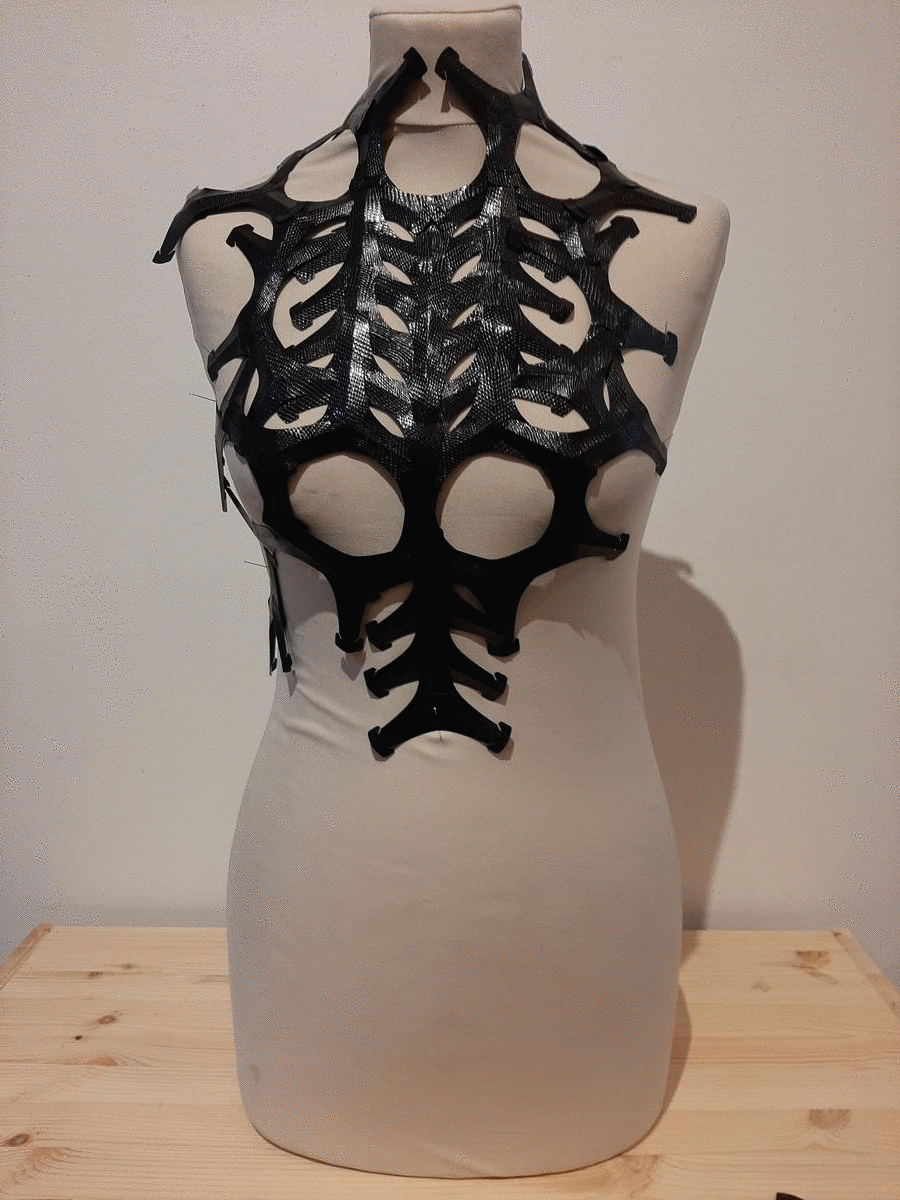
FINAL ASSEMBLY
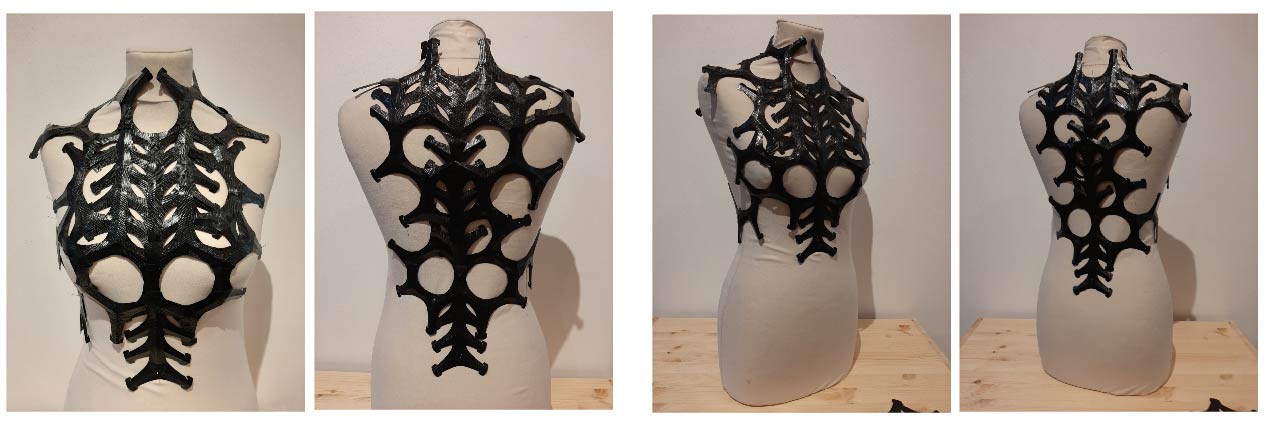
( No more modular elements !)
FIRST INSPIRATION
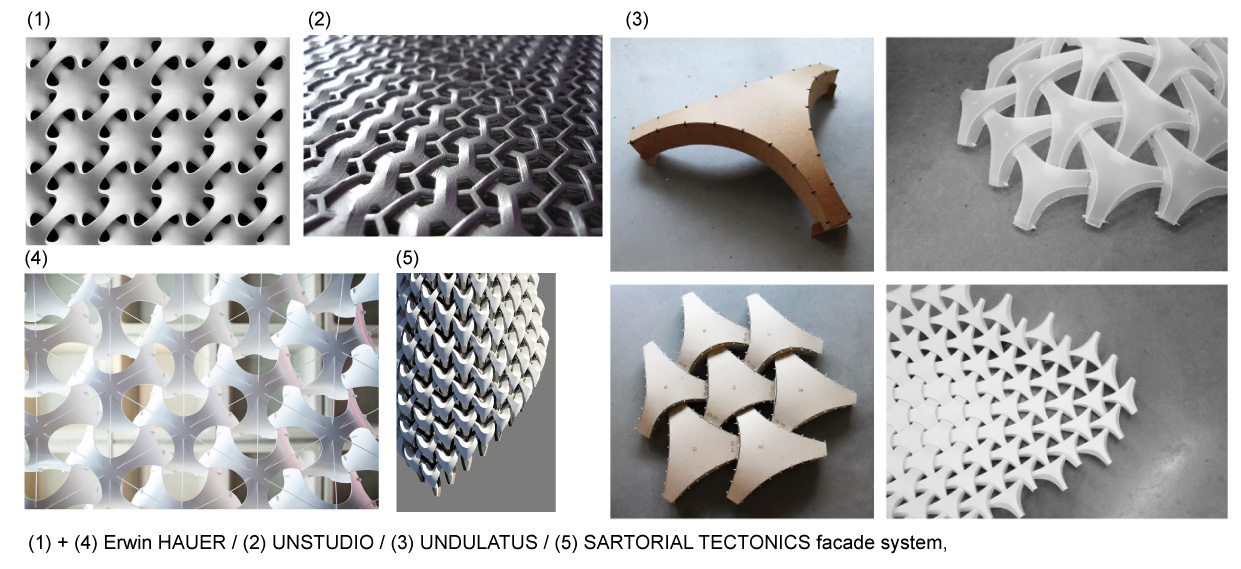
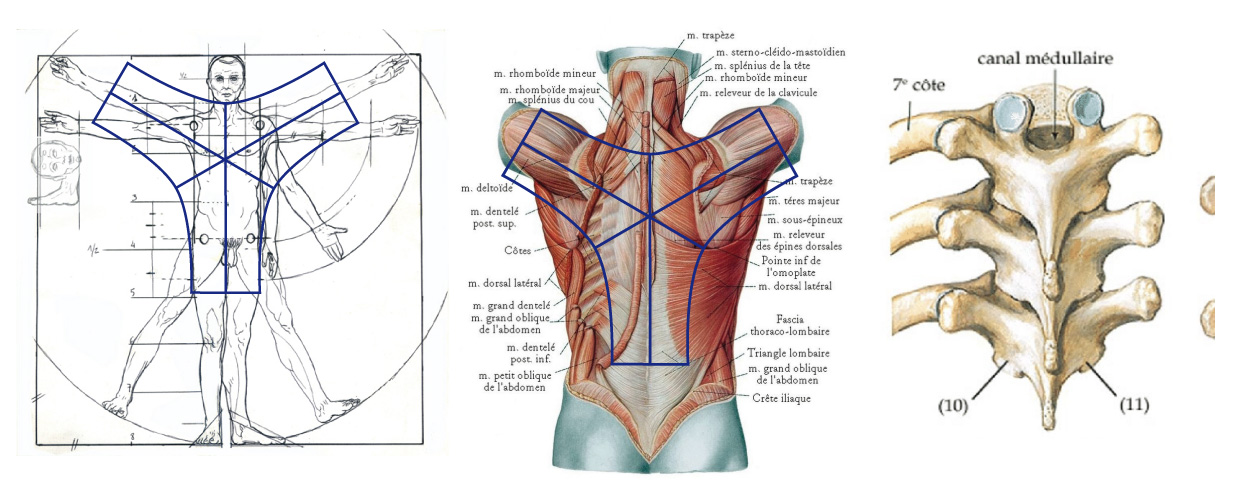
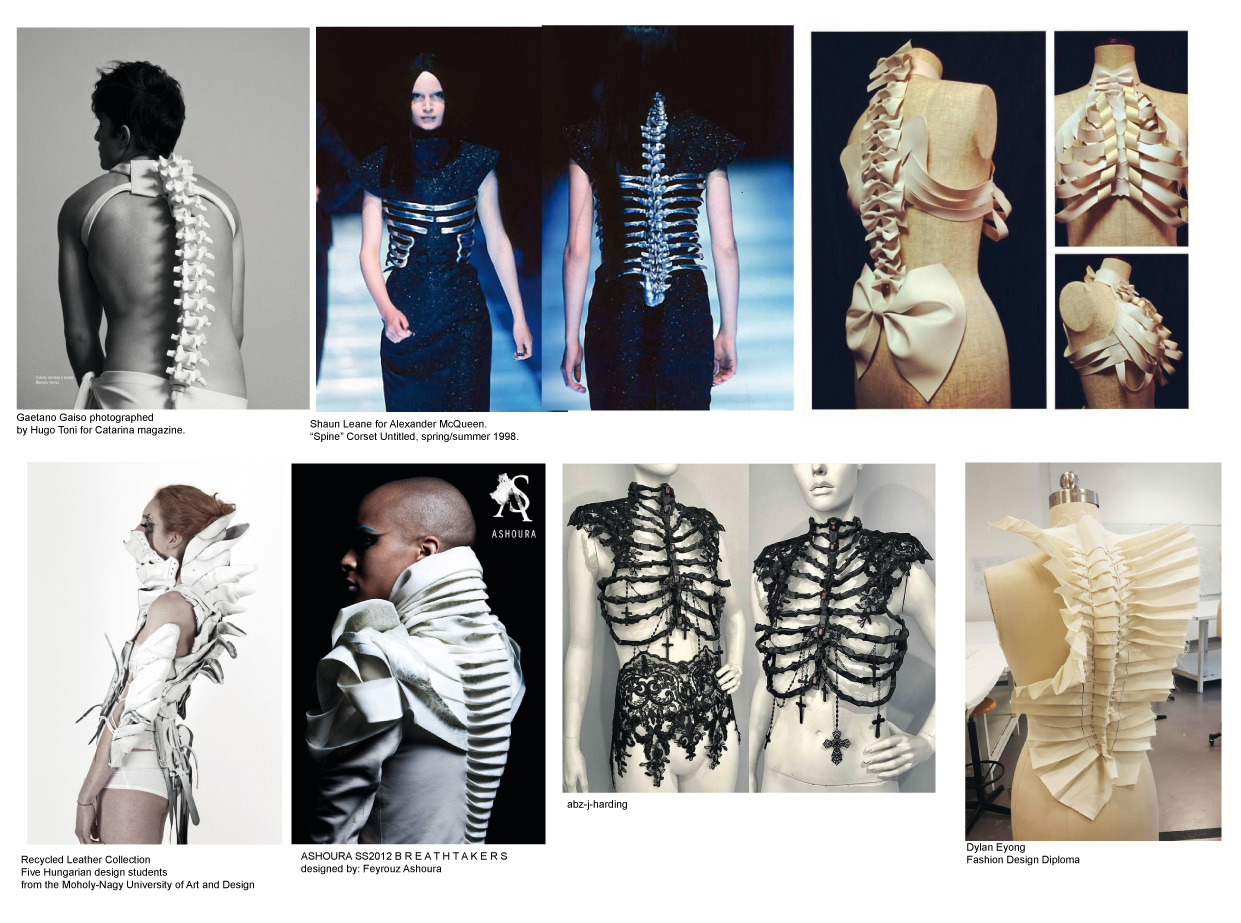
I started by looking for visual documents that could inspire me… and quite quickly, my attention was focused on realizations coming from the architectural world, with a module rather derived from the triangle.
CHRONOLOGY OF MY EXPERIMENTATION
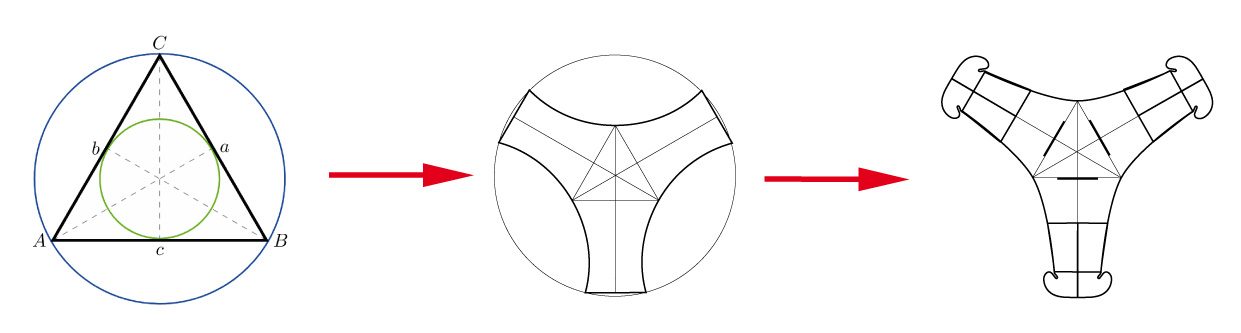
1_SEARCH OF THE SHAPE
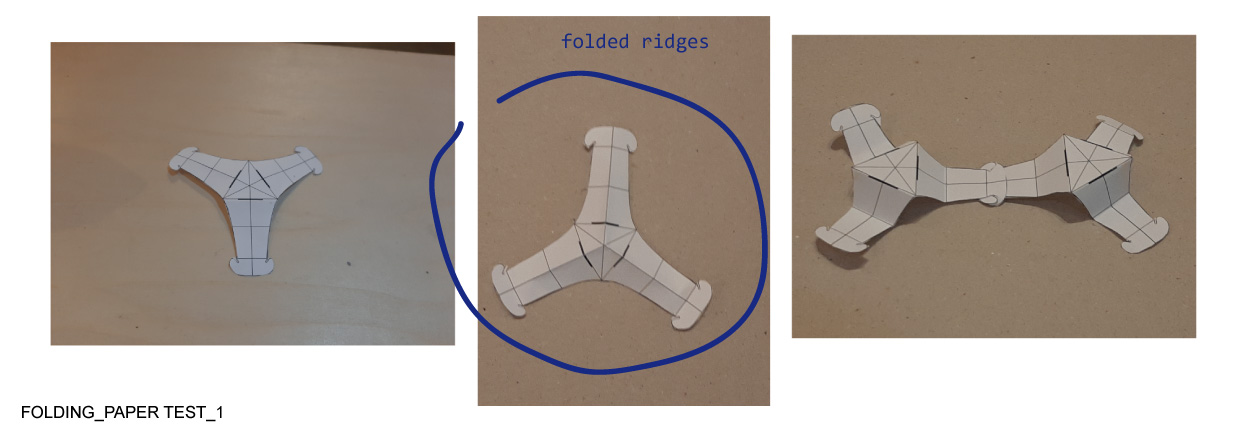
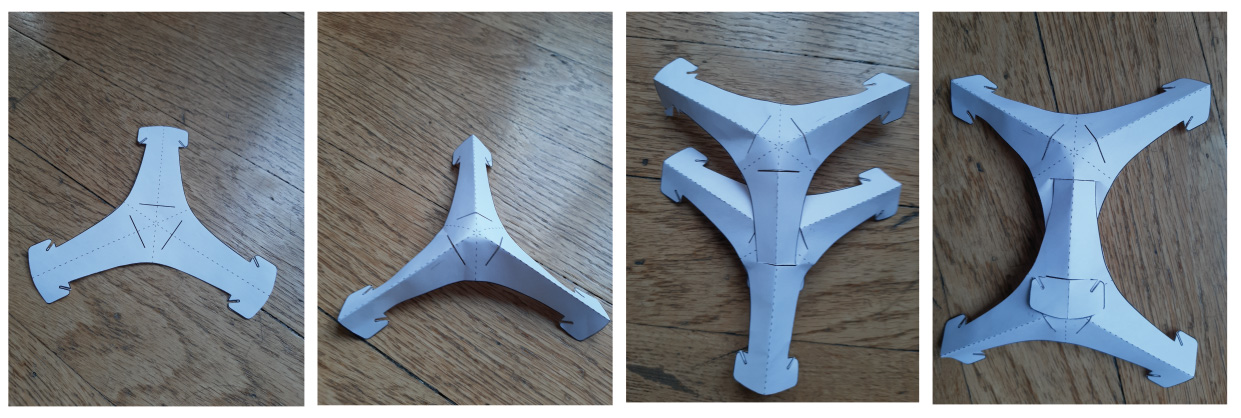
So I started from the shape of a triangle, a homothetic trident, developing the shape at the ends, so that each module could interlock with the others. It was also necessary to solve the possibility of a variety of different hook positions, by the ends with notches or slots.
In addition, I also quickly wanted to bring a possibility of volume, by folding some parts.
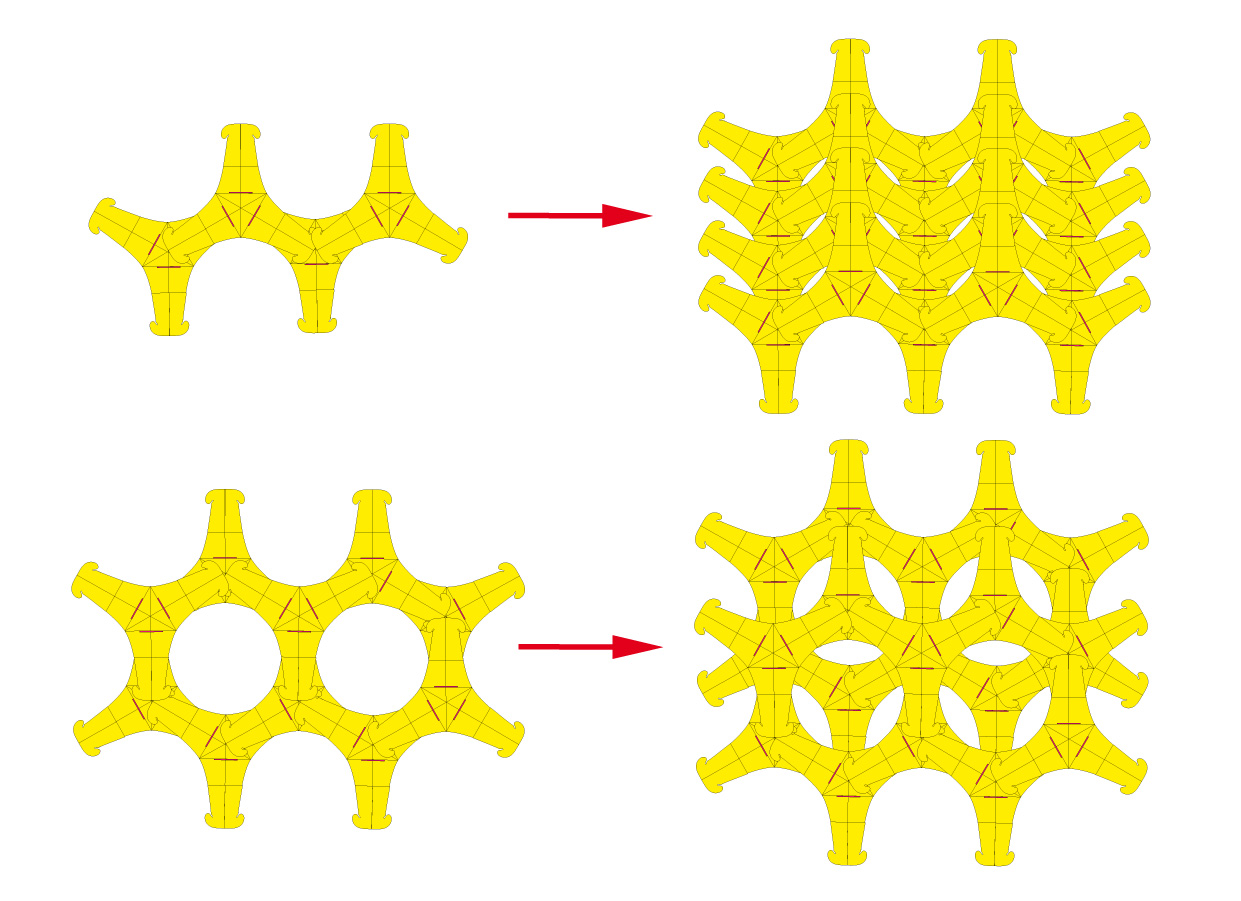
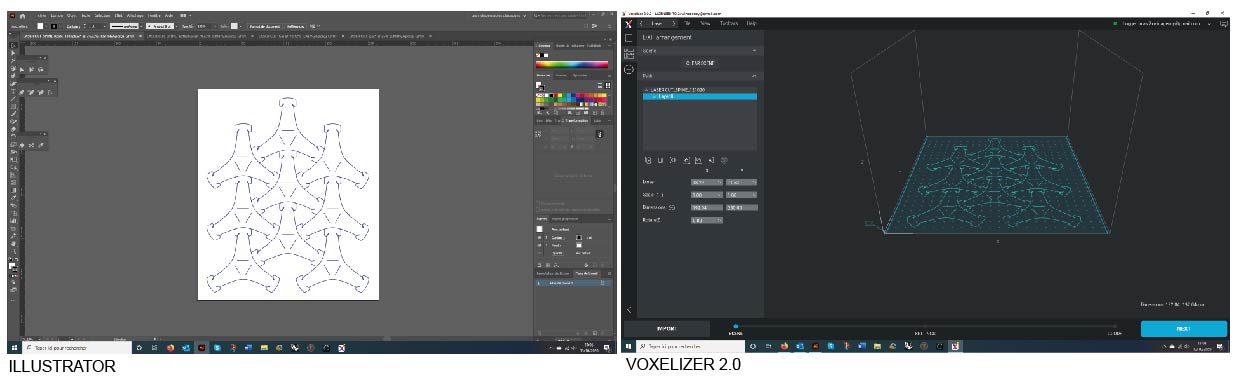
2_COMPOSITION RESEARCH
Using the ILLUSTRATOR software, I looked at what the accumulation of modules could do…
3_FIRST PAPER TEST
The paper test gave me the opportunity to:
- Confirm multiple combinations.
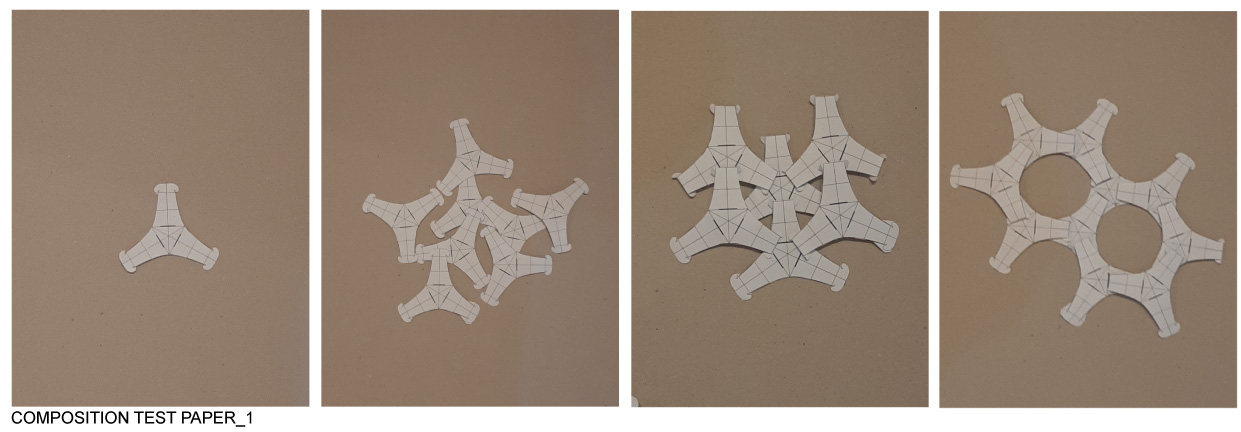
- To bring volume, by bending some parts.
- List the different possible assemblies.
CONCLUSION
The shape is efficient, with 3 ways to combine and edges giving volume. The following improvements are required:
- Enlarge the head of the extremity a little and give it a better shape.
- Slightly increase the length of the detents to solidify the assemblies.
4_SECOND INSPIRATION
Then realized that I had forgotten a bit about the goal of getting closer to a clothing shape……and by putting the elements on the jacket,
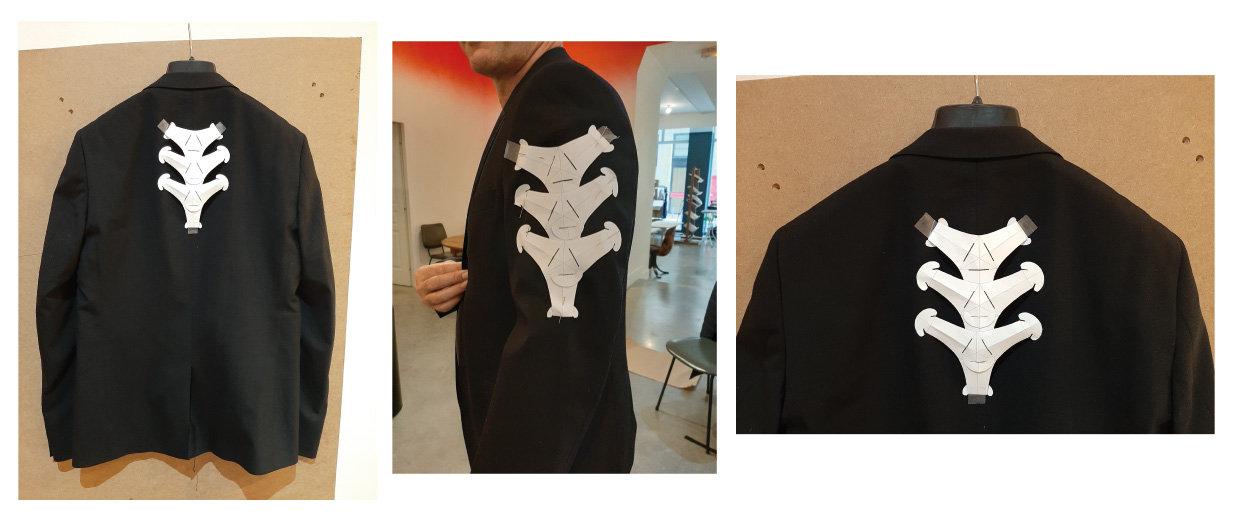
The idea then came to me that I could develop like an outer skeleton, with its dorsal crest, like a protective harness,
5_SECOND PAPER TEST
A second test to make sure everything works!
6_FABRIC SELECTION
Influenced by the inspiration documents of the beginning, I had thought of a support type POLYPRO but finally, I find a LIZZARD paper aspect would fit well with the spirit of the project.
7_LASER CUT
Before cutting, I made sure to find the best placement (ILLUSTRATOR) in order to have the least material loss. Then I used the ZMORPH 3D PRINTER in laser cutting mode.
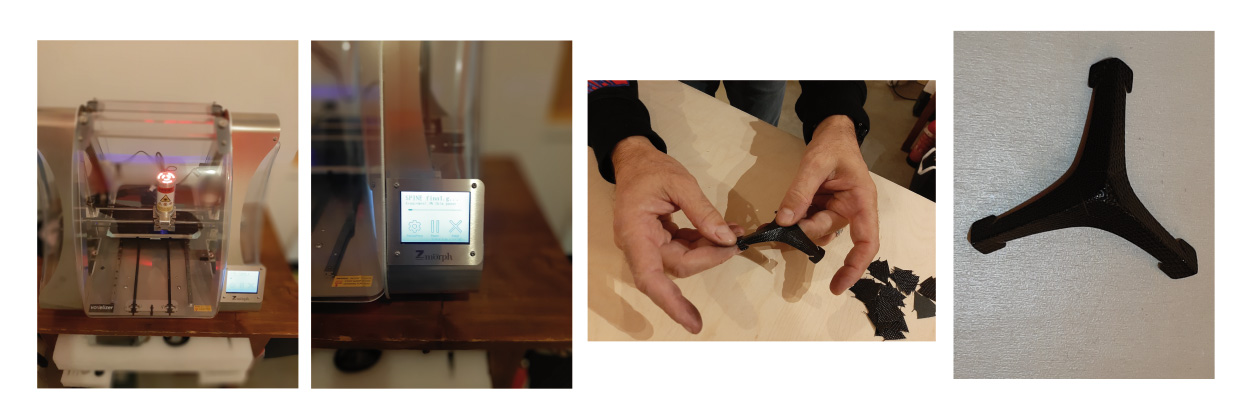
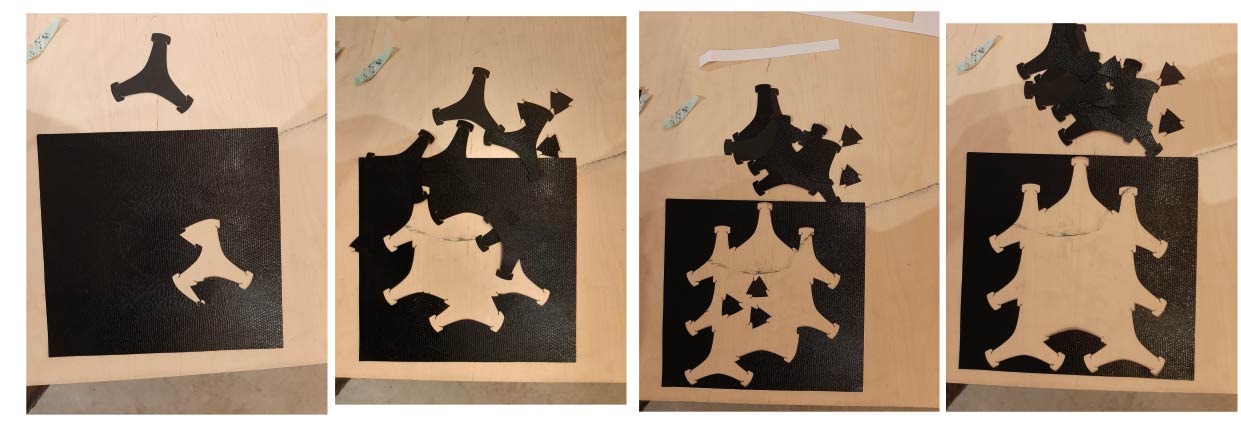
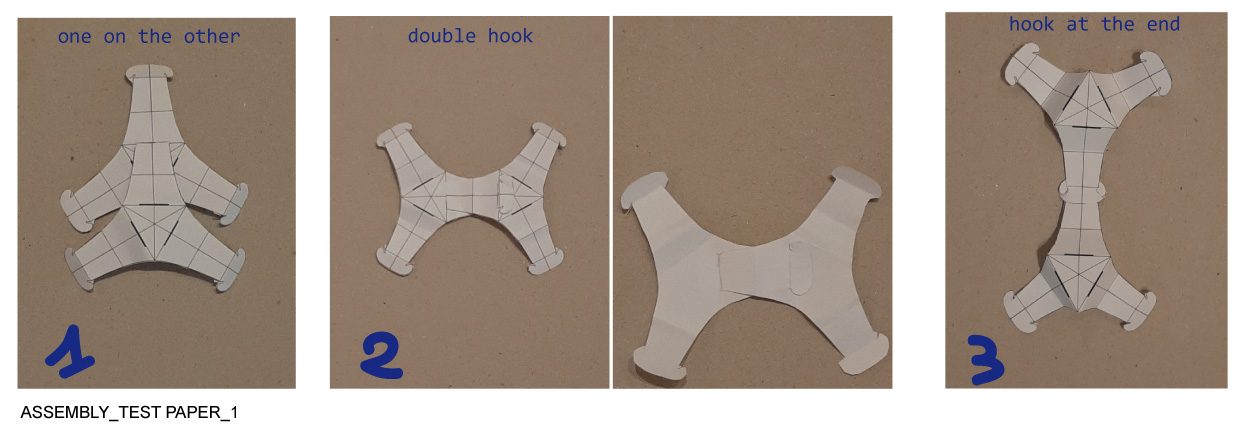
8_ASSEMBLY
I started this step without knowing what the final assembly would be..............