8. Open Source Hardware - From Fibers to Fabric
THE OBJECTIVE OF THE WEEK
This week, we explore the open source hardware field in general and focuse on its potential in the area of textile. We tought how to update obsolete machines for producing textile, how to take advantage of digital fabrication and open source technology to come up with an open source machine for knitting, weaving and invent new techniques.
What is exciting is the possibility and the ability to develop a new machine that allows to open and invest a new fields of experiments and creations.
The question of recycling waste and especially its use as raw material interests me more and more. And it is indeed, an activity where the tools and machines are to be imagined
The new creations come from the new material, which can only exist thanks to the new machine.
INSPIRATION
In particulary, three projects caught my attention
PRECIOUS PLASTIC
A team of Dutch designers PRECIOUS PLASTIC have developed a device to transform plastic waste into new, beautiful and useful objects. They created a community, called Precious Plastic, which is doing the same all over the world.

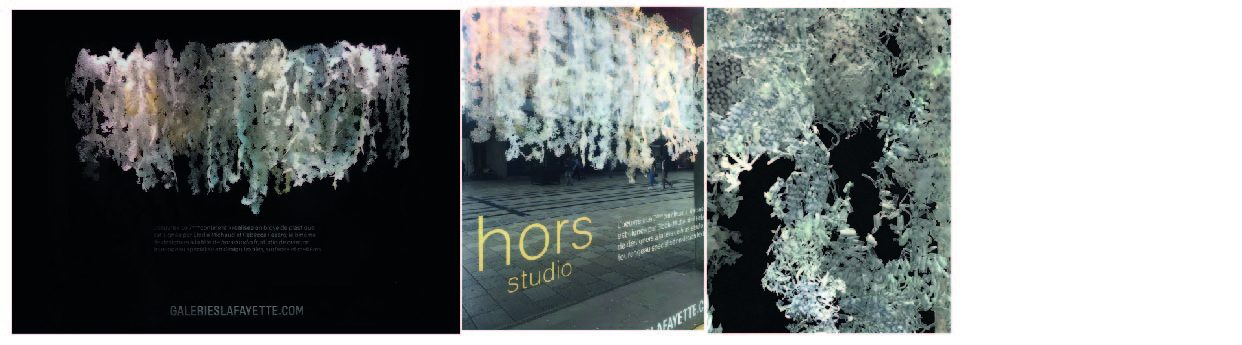
HORS-STUDIO
By confronting tradition with new technologies, HORS-STUDIO questions the fields of textile and decorative language. They are particularly attached to the choice and treatment of materials, their refinement, and approaches the projects in a transversal way at the border between design, fashion, lifestyle, graphics and space.
Several of their projects have been designed from recycled waste, such as:
L’écume which is a panoramic wallpaper combining digital printing and an innovative flocking made of neoprene powder, obtained after grinding used surf suits.
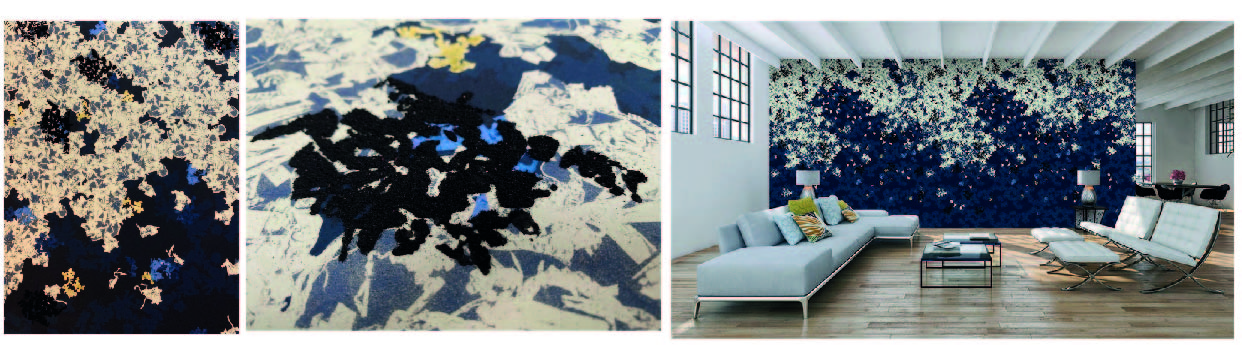
Le 7ième continent is created with crushed plastic: Hors-Studio invests the territory of the recovery of our waste by taking a polluting material,
OUR PROJECT
After consultation with Diane, we decided to design an additional machine tool developed by pauline last year, during its final Fabricademy 2019-2020 project. She created a machine that draws generated patterns on textile, with gelified iron liquor. The textile can then be dyed, giving the drawn parts a different colour than the rest of the fabric.The machine has 3 different axis. The current toolhead works like a ballpoint pen: when pressed against the fabric, the ball goes up, letting the iron gel run out.
FIRST STEP
We decided that before designing a new toolhead for the machine, we should try to create a hand-held extruder, that we would later adapt for themachine. We found this BIOGUN, which seemed like a good start.
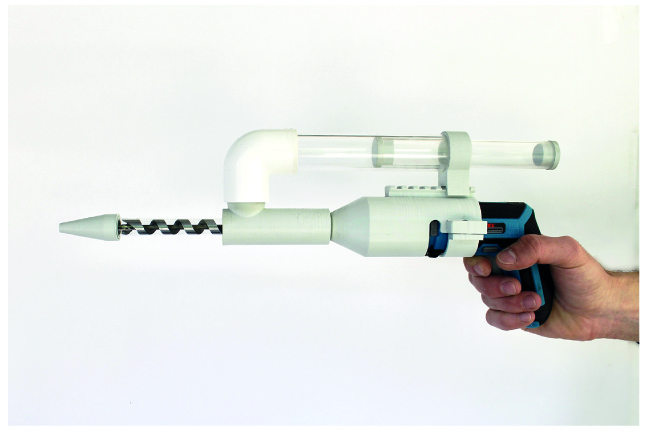
We read the whole documentation, watched the assembly videos with great care, and then realised his 3D pieces were not available to download...
Well, we had similar drill, and a bunch of tubes, so we started taping everything together, in order to test it.
GUN_V.0

The pieces
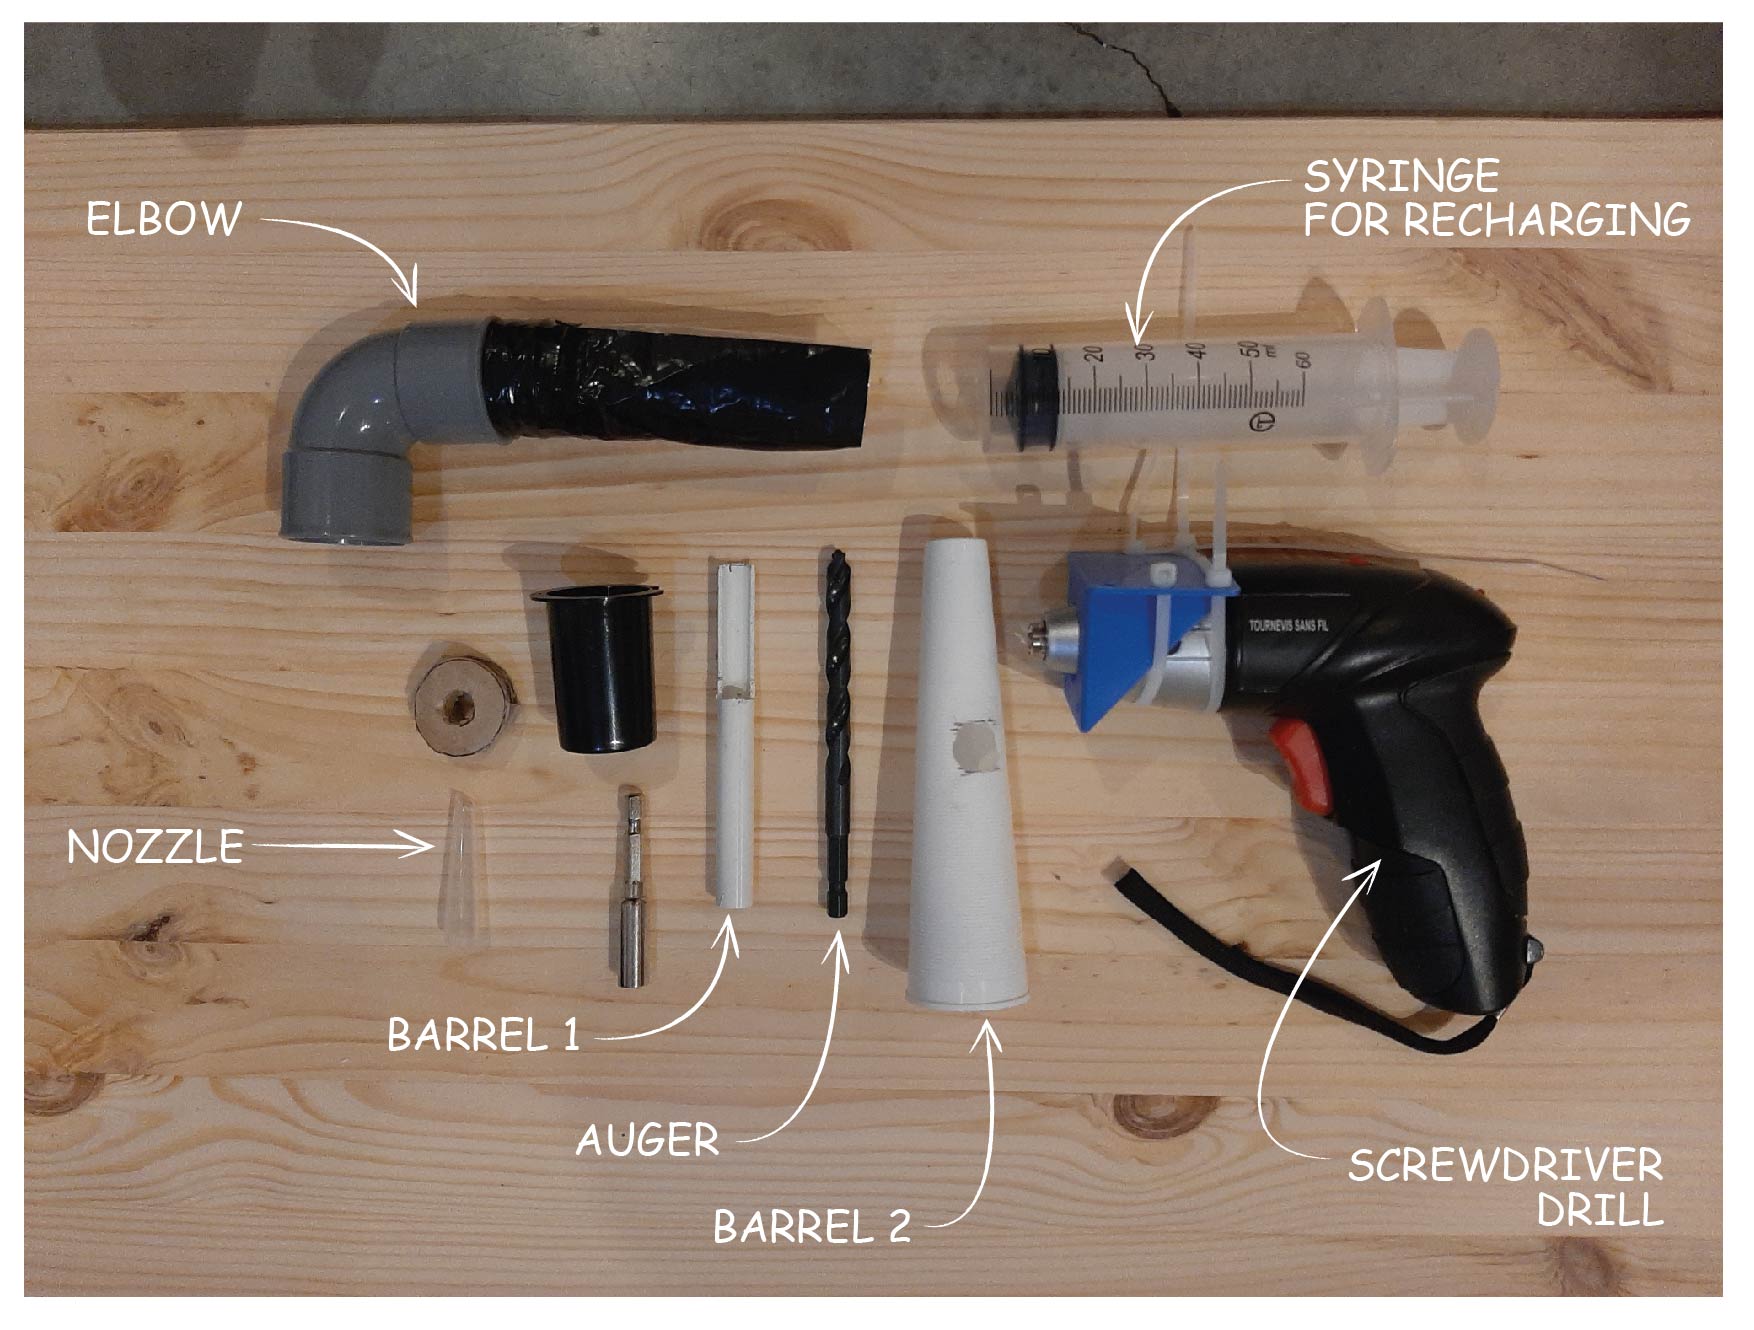
The assembly

We tested this with a mix of clay and water, just to have some sort of paste texture. After a 1st attempt which is not conclusive, Version V.0 allowed us to identify several areas of weakness and improvement that needed attention:
1/Problem_the leaks
We had leaks in upper receiver (in the elbow connection from the tank and the main axis). Our assembly was not strong enough, not of good quality and sufficiently waterproof.
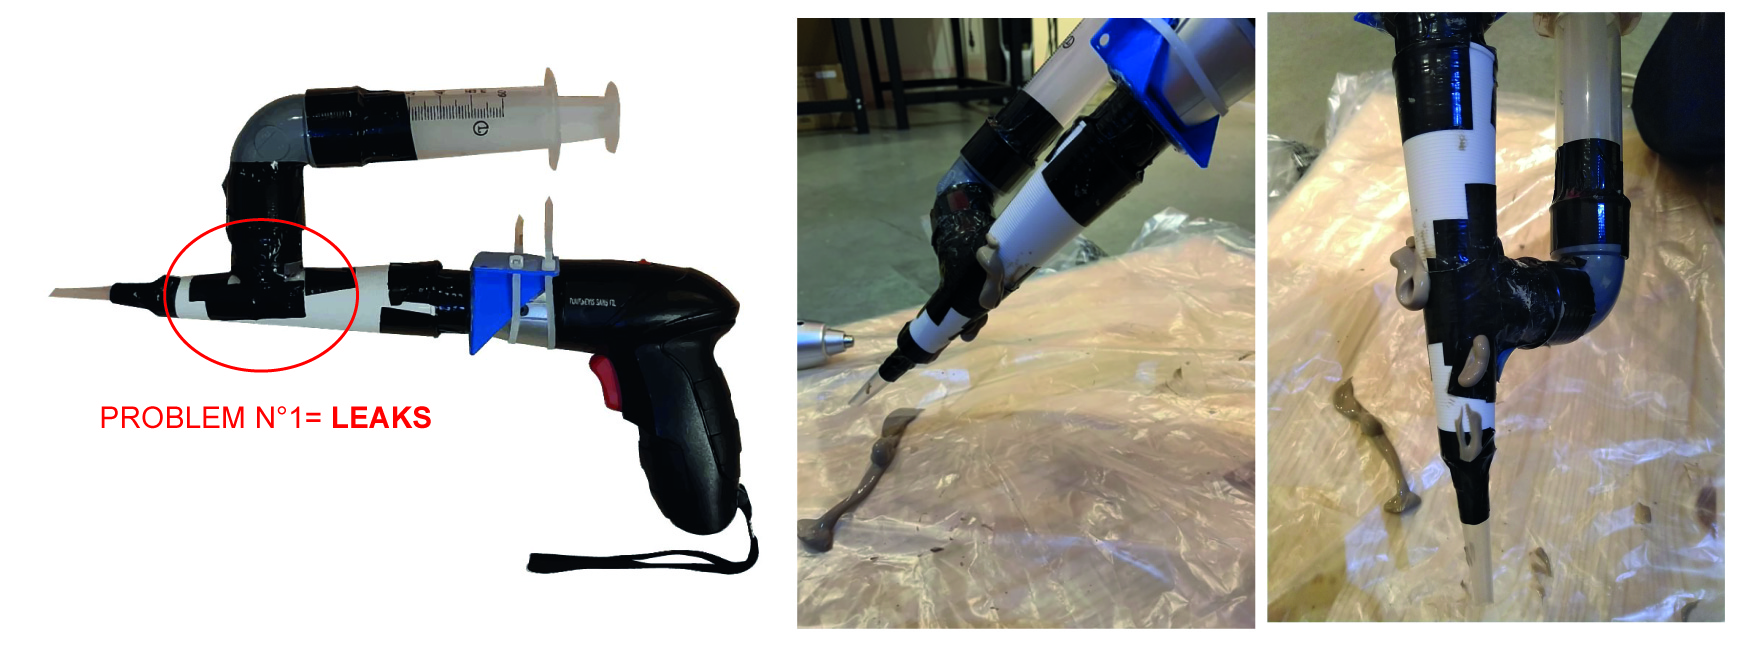
This connection will be made in one piece (piece_3), which will avoid any possibility of leakage
2/Problem_the Solidity
The magazine needs to be better fixed to the gun, to avoid moving and weakening the assembly. It should be better to bring a ring fixed on the top of the gun (extra part).
3/Problem_The flow
In the end, no paste came out of the nozzle (considering the leaks and possibly a lack of pressure). However, after disassembly, we could see that it had some paste on the auger.
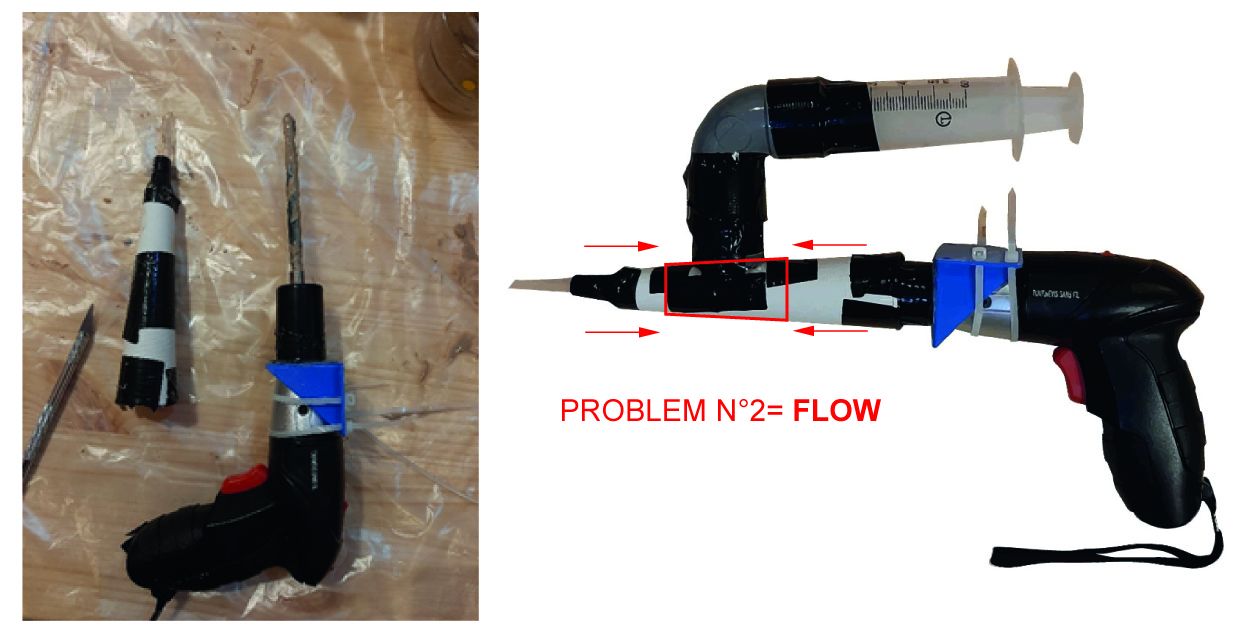
the cavity just before the wick (upper receiver), which receives the paste, must probably be reduced.
GUN_V.1
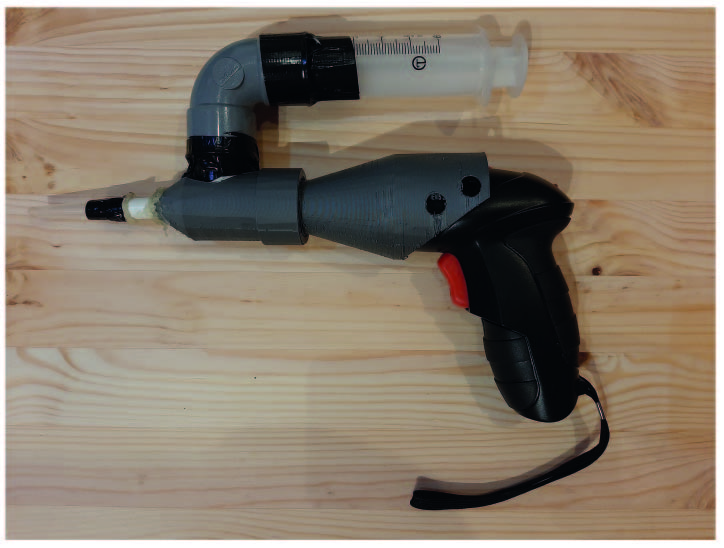
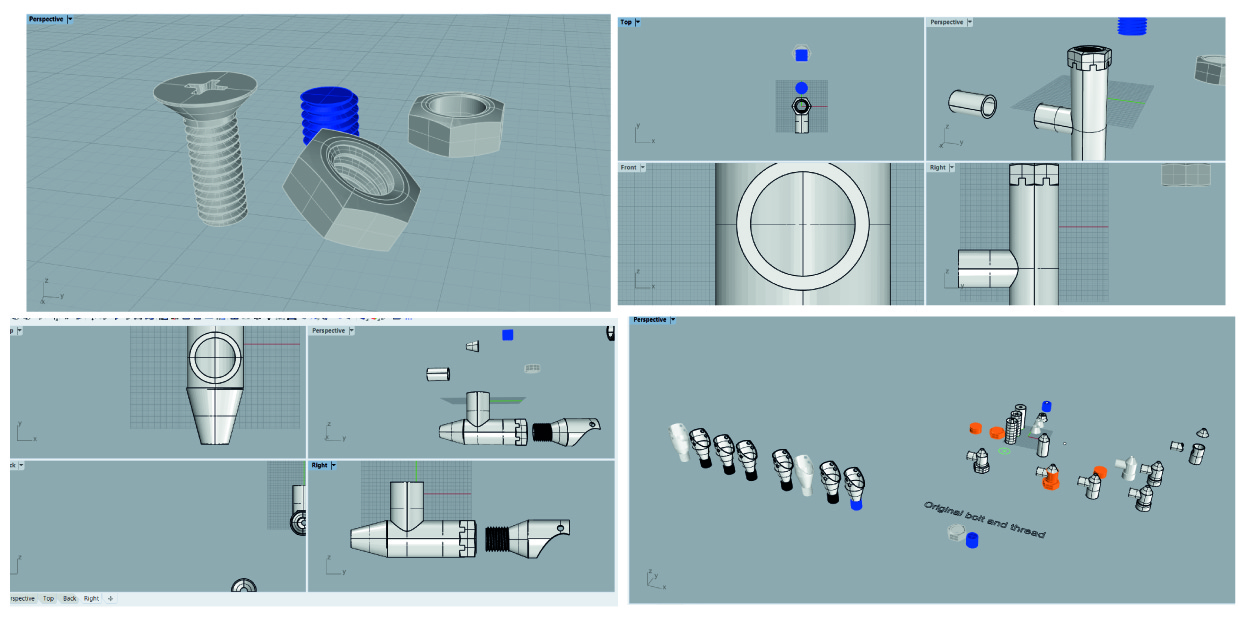
Designing the new 3D pieces
The 3D pieces from our example were not available (and we would have had to tweak them anyway because our drill and tubes were not the exact same size), so we decided to design our own with Rino 3D. This was a bit ambitious considering our knowledge of Rhino, and the time we had, but this is going to be the first iteration of the processus, and it will enable us to go a step further in testing this hand-held bio-extruder (and learn more Rhino!).
We decided to keep some of the pieces we already had, and design only two main pieces for now:
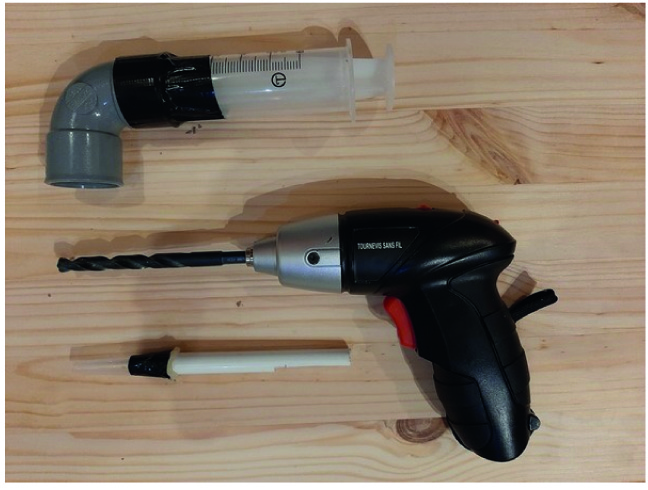
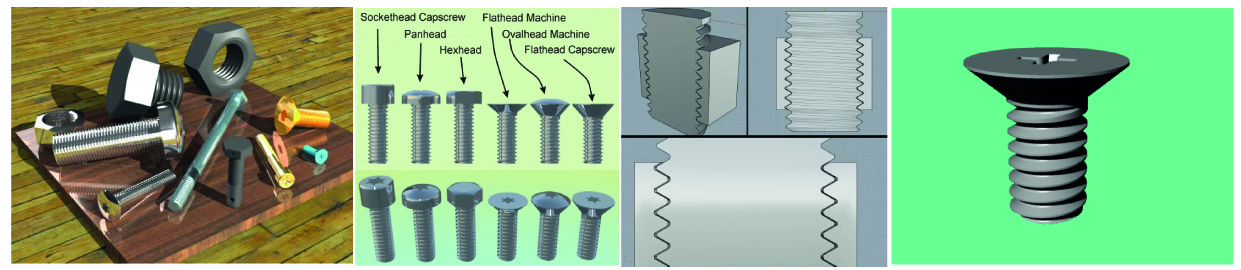
Using Rhino, we created these 2 tubes, one going over the drill, one going over the drill bit. The two tubes connect with a bolt and screw, that we generated using the BoltGen plugin.
We had several iterations in Rhino, trying to measure our drill and material the best we could.
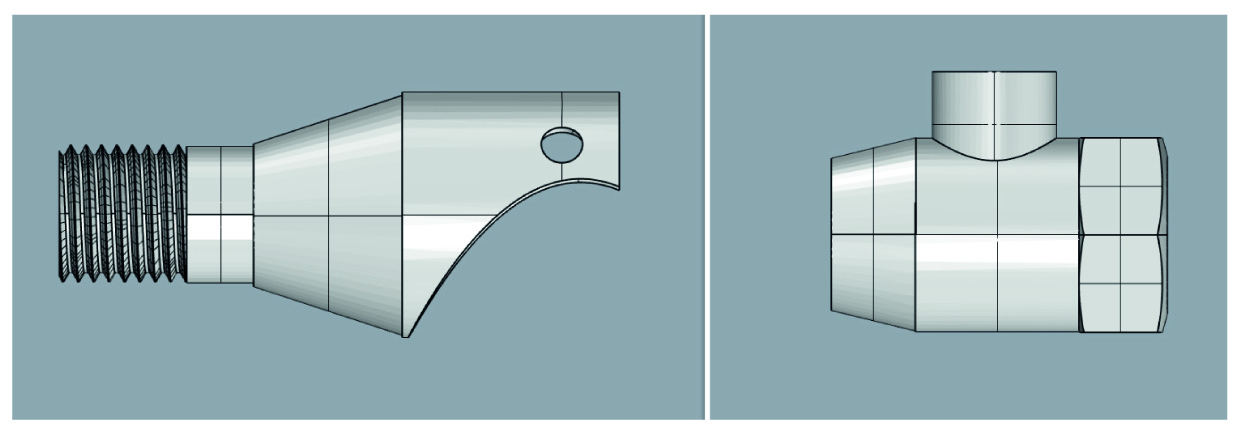
In the end, here are the pieces we ended up with:
Printing 3D
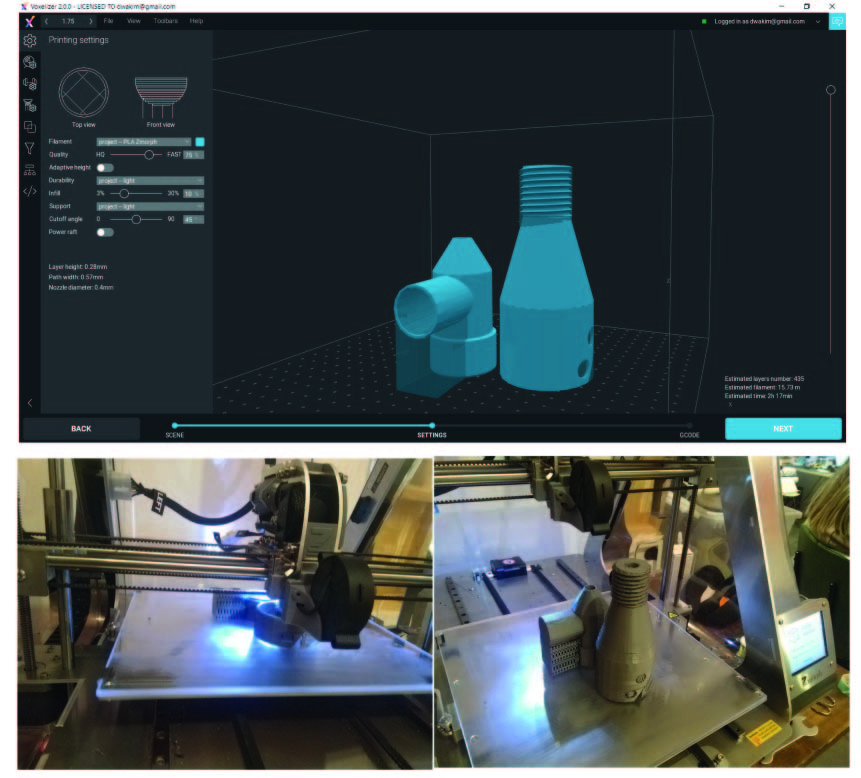
After the 3D printer, we see several concerns and problems:
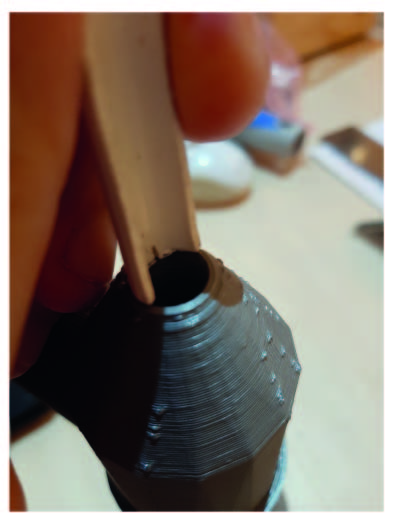
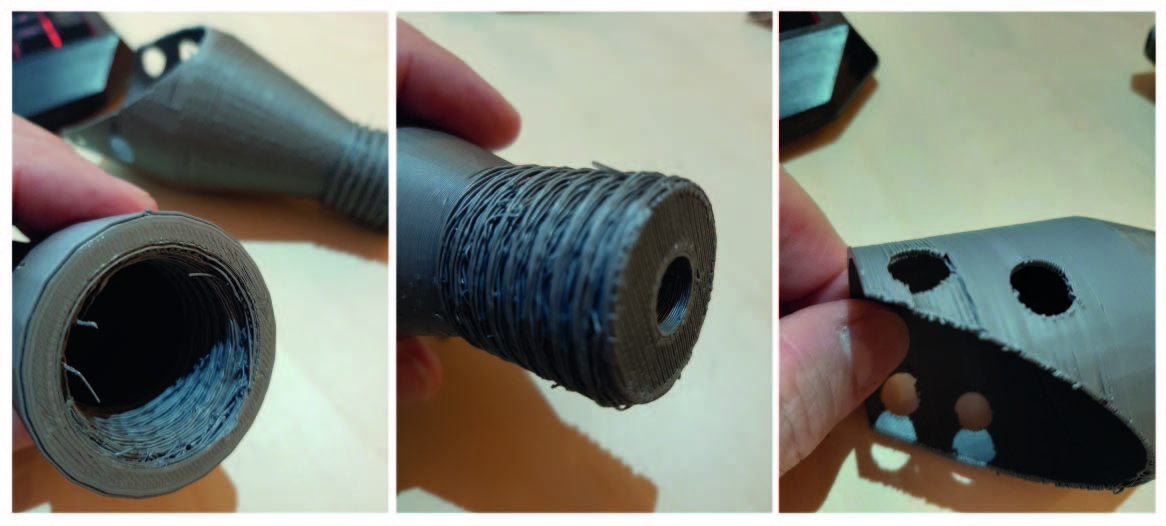
1 / The need to empty the inside of the tubes, which is not easy !
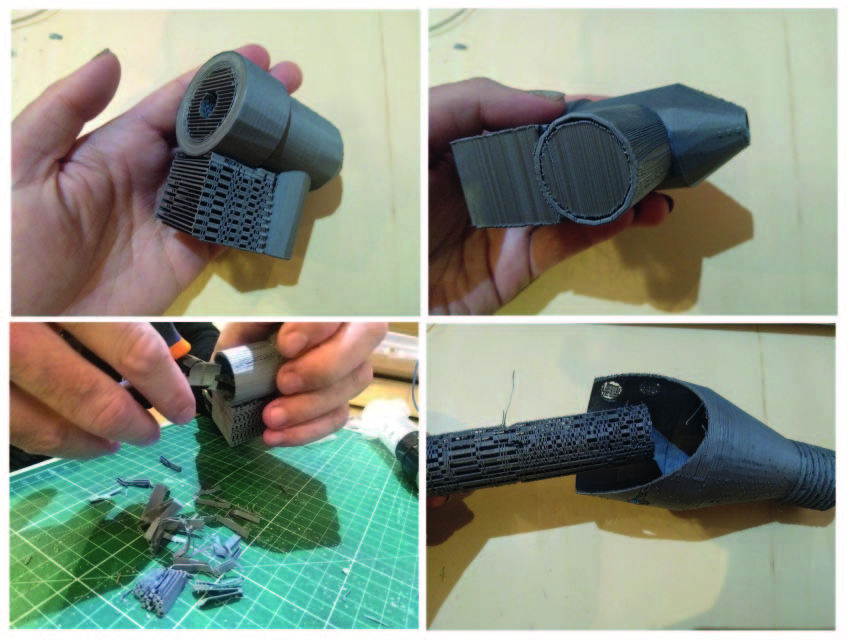
2 / The fragility of some parts is probably due to the thickness a little bit too low !?
3 / The screw thread that does not work, given the poor print quality !?
4 / The hole provided for the passage of the wick is too small and the barrel_1 can not be inserted.
5 / The diameter of PIECE n°1 which must fit into the elbow is slightly too small.
After assembly, the 2nd attempt with GUN.V1 is not conclusive too, with the approximatly the same problems
1/Problem_the leaks
New leaks at the elbow joint and part 1 appear very quickly.

2/Problem_the Solidity
Some parts are not resistent to pressure
3/Problem_The flow
During the test, we discovered a small plug of glue, corresponding to a scrap of the fixing with the glue. But surely there remains the problem of the wick which should not be catchy enough, wide enough