5. E-textiles 
Week 05. +-+
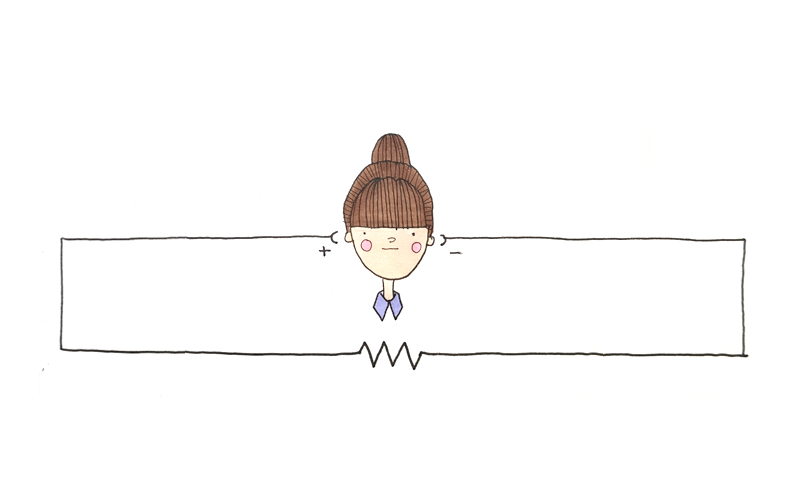
This one, was my first meeting with current an electricity. All a knew about it was just to plugin my computer...
That been isaid, I was expecting this week to be "not the best one" of Fabricademy, but surprisingly, I had a lot of fun playing with electrons, current, voltage, conductive materials, aligator clips and leds. I also learnd a lot from Liza Stark´s lecture and I absolutely loved the way that Emma Pareschi had to make everityng simple and easy in her tutorials. Those girls in electronics really rock it :) !
I am Happy to say that I could manage to do almost everything: I experimented with both sensors, Digital and Analog, I integrated them into a product -a transitional object- and finally got to experiment with Arduino. Unfortunatelly I coludn`t make the analog sensor work into the Arduino. I am still looking for the error, but think it maybe was because of the resistors I had at home. I will keep trying!
Starting the game: Trying to understand how electronics and textiles work togheter
I begun by understanding what things I needed to work with, and to explore this whole new universe. Here´s a pic of the materials used this week. I was amazed by conductive fabric and thread, and all the possibilites that they offeres. I also met Velostat, and used it to build the preasure sensor. I learned basics things such as how to light a led with a 3V battery (wich may sound silly for anyone, but for me it was THE success!!!).
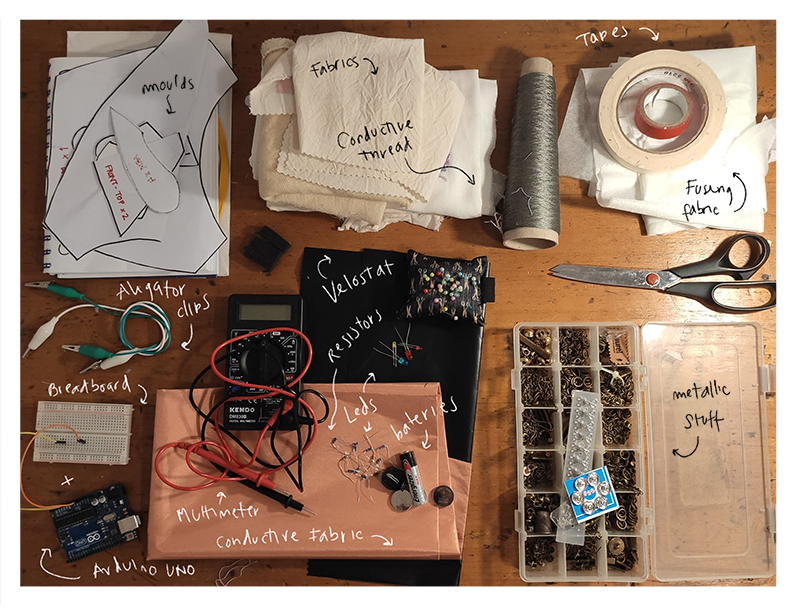
I even realized that I had a Multimeter at home (that before this week, I didn´t know what was for). Great surprise. Unfortunately, it had no Continuity mode, which in Emma´s tutorial looked as a very useful thing.
Before deciding what to do for the assignment, I started to work with the materials, trying to undartand them. I also had a bunch of "metallic" jewellery parts, so it was fun to bet which one was conductive and wich ones was an impostor!

Developping the concept: A Transitional object with lights and preassure sensor.
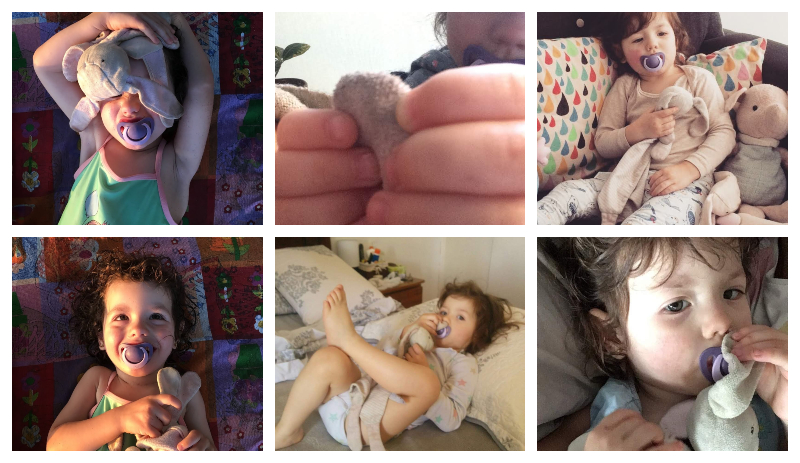
Olivia, my doughter, has had a transitional object (a bunny named "Pina") since she was born. Pina was handmade by me, an does everything with her. I already made her 4 -one after the other- because as she takes Pina everywhere: she losted it three times. Everytime that this happens, is the worst chaos imagniable.
In 1953, Donald Winnicott introduced the term transitional object to describe those blankets, soft toys, and bits of cloth to which young children frequently develop intense, persistent attachments. Winnicott theorized that such T.O. attachments represent an essential phase of ego development leading to the establishment of a sense of self. Subsequent psychological theorists have linked the T.O. to the processes of: separation-individuation; ego and body ego development; the birth of memory, libidinal object constancy, and the capacity for symbolization, creativity; and the capacity for object relations and empathy.
Olivia uses Pina a lot to get calm when she is anxious or worried by something. As you can see in the pictures, she tends to press the bunny´s ears and take them near to her nose in order to calm down.
So I starfed to question... What if I could knew how anxious she is, through Pina´s ears? Could I find a pattern between anxiety/fear and the preasure she is making at Pina´s ears? Can this resource be helpful for parents in order to understand and hold/accompany their children through different stages of their development?.
Analog sensor.
This is were the analog sensor comes in: a preasure sensor on Pina´s ears can collect information on how much preasure does it get, when does this preasure happens. Then it can be related to the child´s feelings in order to help him to get comfort.
Digital sensor
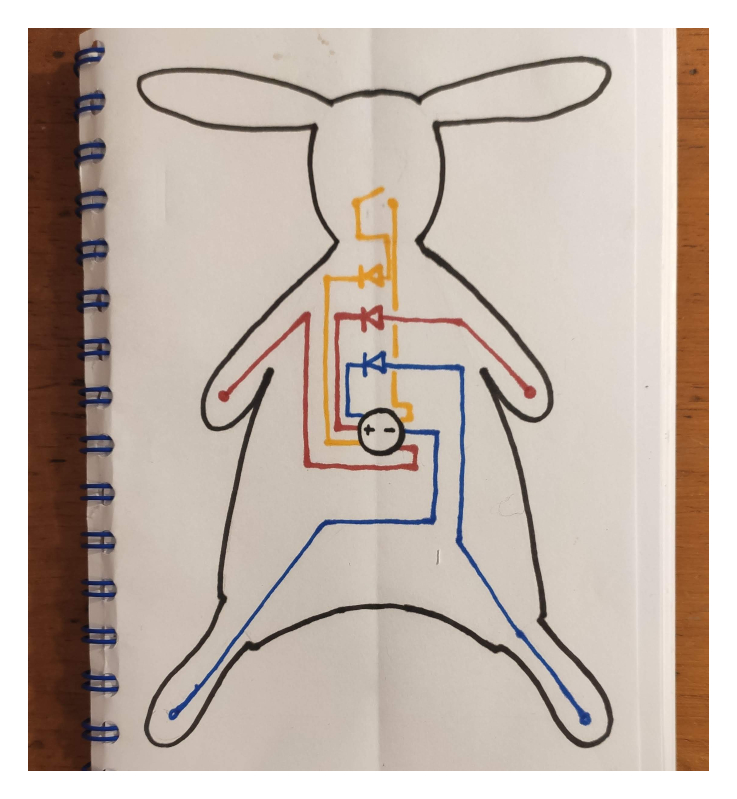
To add some more condiment to this transitional objectI added some circuits that give light. These toys usually go to bed with the infant. Light may give them a sense of security. Besides, they experiment and learn through their toys, so I created different functions on the same bunny related to different learning incomes.
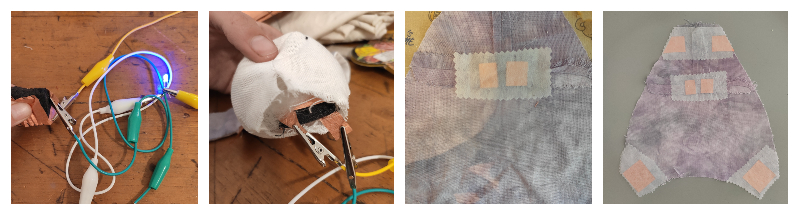
-Red light - Arms:it turns on by joining metallic buttons.
-Blue light - Legs: in turns on by completing the name OLIVIA, embroidered in each leg with the conductive thread. This may also help Children to rcongnize their written names and learning to spell them.
The process: Building "Pina"
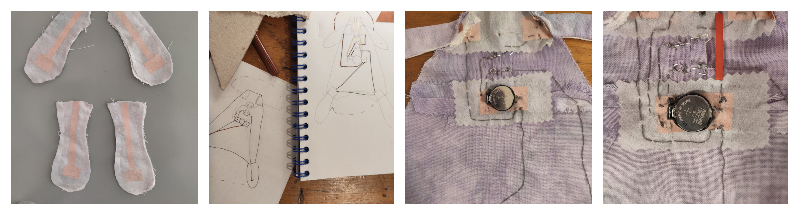
1.
I started by making a "quick an dirty" prototipe of the bunny in order to understand how it was going to place the elements. I Didnt´t draw it before so I had to start from zero more than once. Finally, I understood that I should have done it. Lesson learned!
I tried to understand how fabric + conductive thread + conductive fabric worked togheter. The thread was stronger than I imagined. Honestly, I underestimated it!
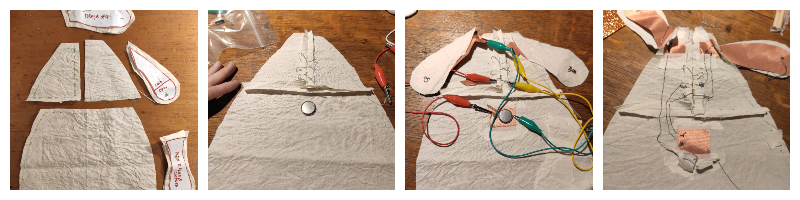 2.
2.
I then started with the bunny itslef. I choose some linen that I had from Biochromes assignment and I decided to dye it with Campeche I still had in a bottle. Long live to natural dyes!
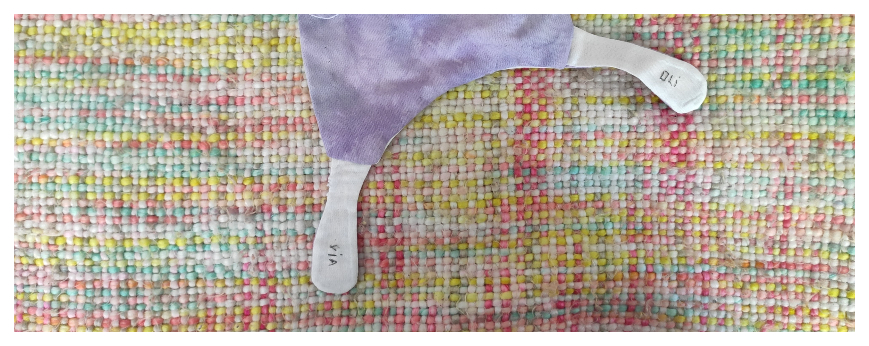
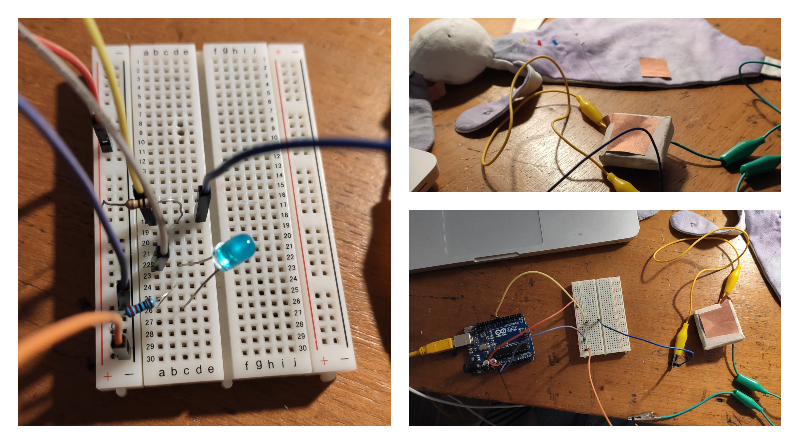
I continued by doing the sensor for the ear. I left two rectangles of conductive fabric out, in order to be able to conect the sensor with the Arduino. The fabrics -and the Velostat betwwen them- were attached to the linen with fussing fabric.
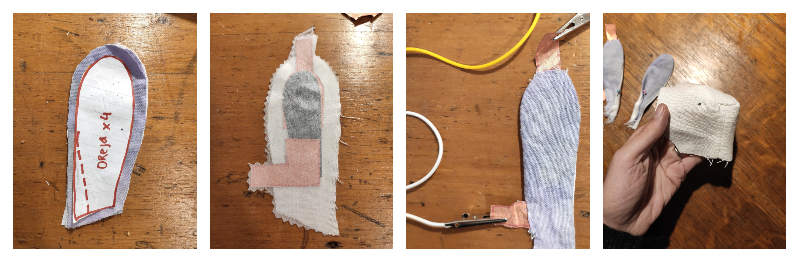 3.
3.
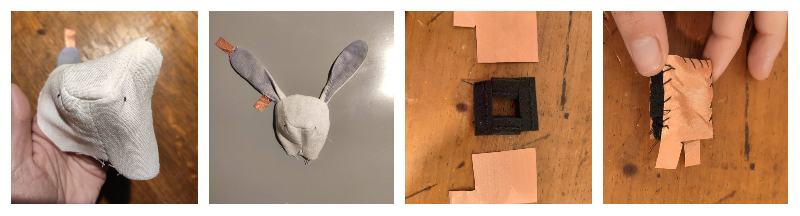
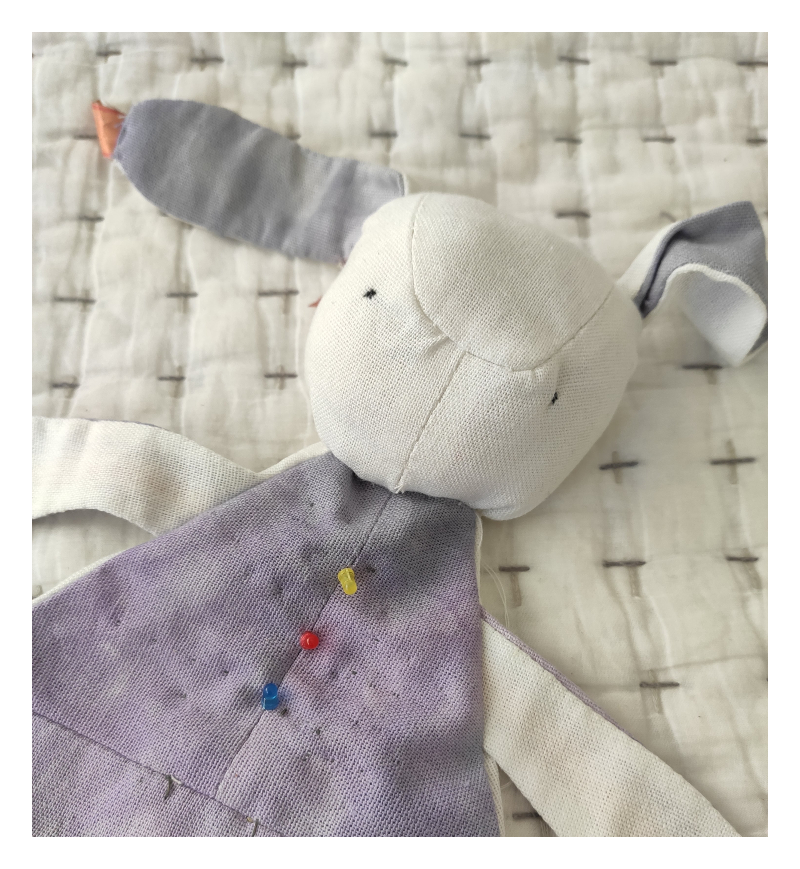
Consequently, I developed the head and its momentary sensor. I used some "guata" between the sensor and the linen in order to hide the sensor´s shape.
 4.
4.
Then, I started with the body. I Carefully placed conductive fabric in every place needed: Arms, legs, shoulders, knees and bellow the battery holder. After that, I connected them with the conductive thread.
5.
I made "Bridges" with tape in order to avoid some of the paths to touch the other ones.
6.
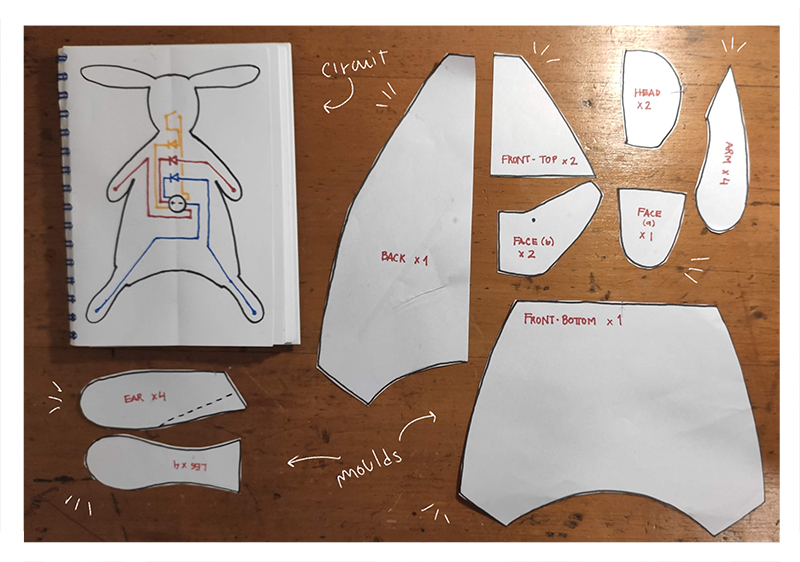
Circuit and moulds
Final results

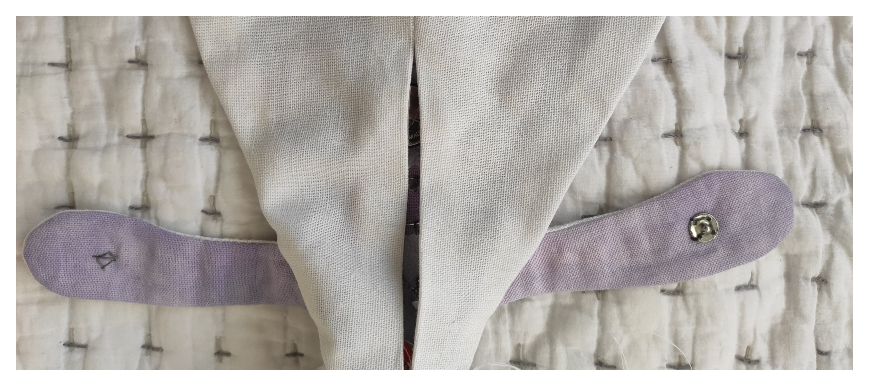

Ear:
Head:
Arms:
Name:
Ardunino game. (over!)
It was quite hard for me to follow Arduino. At the beggining, "someone" was in my lap during the first 40 minutes of the tutorial, and I got lost. Then, on the weekend I could give it a try again. I could make everything on Emma´s tutorial of digital sensors. Then, when the analog one came, I went crazy. Anyway, it was an interesting exersise to understand how Arduino works and to "try to find the error"
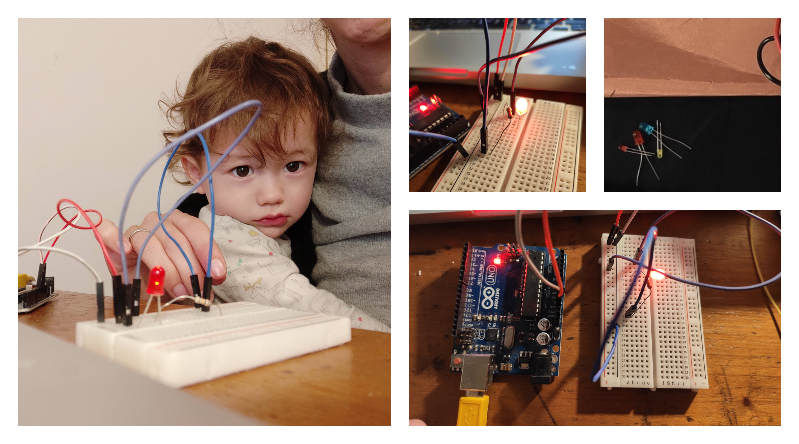
Digital sensor
Here there is a gif where you can see how I could conect the momentary sensor to the arduino and get 000000-111111 recording!
Analog sensor.
I really tried hard but I couldnt make it. I belive that it was because I had only 220 resistors instead of the 5k needed. I Decided to try with 8 resistors of 220 ohms (to see if adding some more resistors I could made it)... But I couldn´t. My results when connecting the sensor to the Arduino, showed a straignt line with a few variations (as seen in the picture). In others cases, as shown at the GIF, the visor behaved in that strange way.
I will find a 5k resistor and give it a new try. (You can also see in the pictures diffetent ways in wich I placed the resistors).