6. BioFabricating Materials 
Week 06. (or... How to make new material an not die trying)
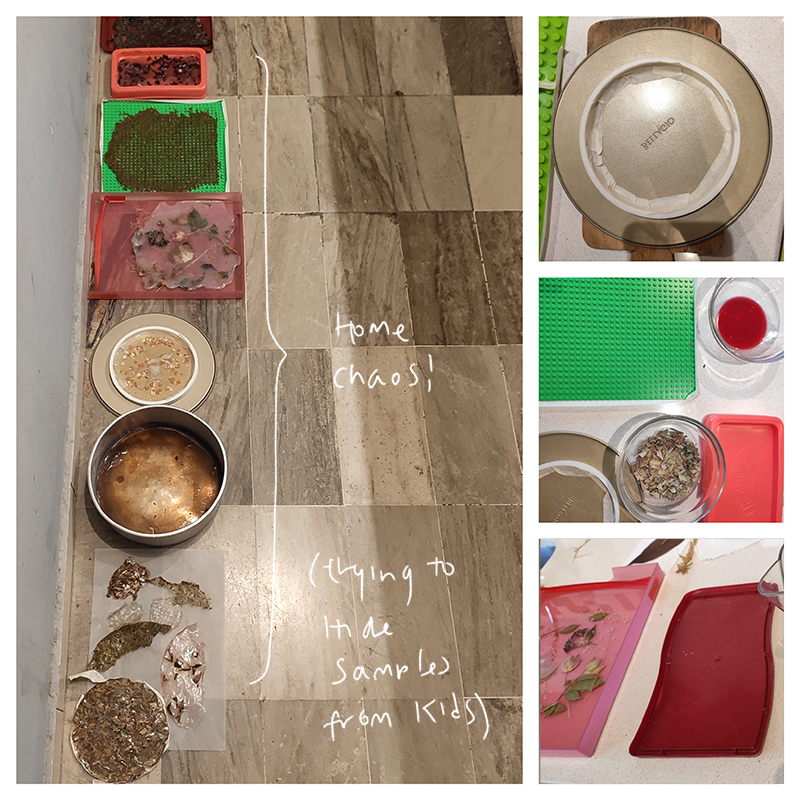
I was expecting to love this week. In fact, I was absolutely sure that I was going to love it. But Fabricademy is all about surprises, so honestly, it was much harder than I imagined. It was crazy for me to make bioplastics and grow materials at home -with children- and living in a 65 square meters apartment.
That been said, I kept going excited as nothing was more motivating than listening to Suzzane Lee and her inspiring work on biofabricating materials. I particularly recomend listening to her militant speech.
Process 
I realized that having a wide surface to work, and having room -with enough light and air- to dry materials, is fundamental to work comfortable and to have good results. I can say that I achieved "decent" results, but I am not as happy with them as I was during the previous weeks.
So, some of the main lessons learned:
-The whole process is SLOW (at least for me, that I casted one surface at a time as I did not have room and equipment to make more than one recipy in the same pot)
-It is very iportant to place the materials in a room with enough air and light. If not, it will take ages to dry. Uruguay is an extermely humid place, so here, this is particularly relevant.
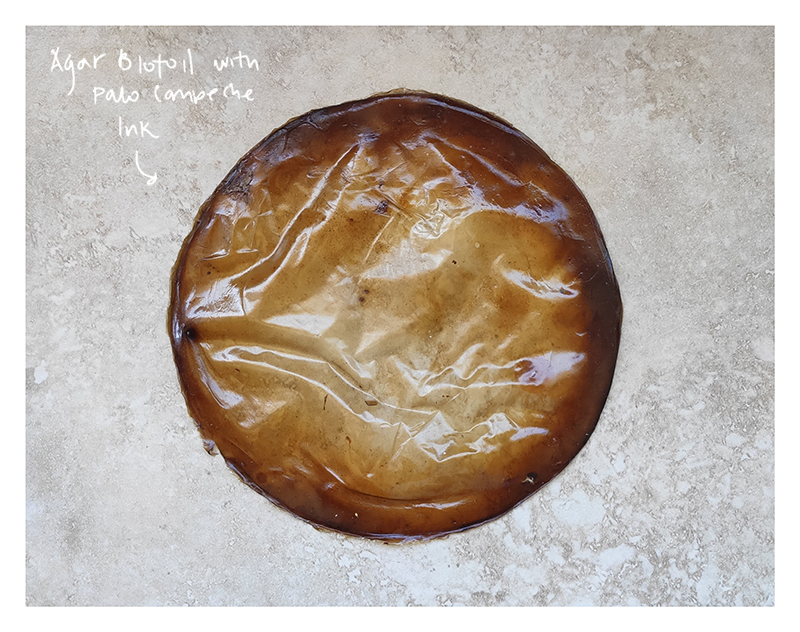
- DO NOT take the material from the surface before it is dry. It may make your bioplastic to curve and shrink in an uneven way.
- Bioplastics shrink! So, do not forget to cast in a mould that is bigger than your desired final size.
Bioplastics 
Bioplastics are not just one single material. They comprise of a whole family of materials with different properties and applications. According to European Bioplastics, a plastic material is defined as a bioplastic if it is either biobased, biodegradable, or features both properties.
Collection 
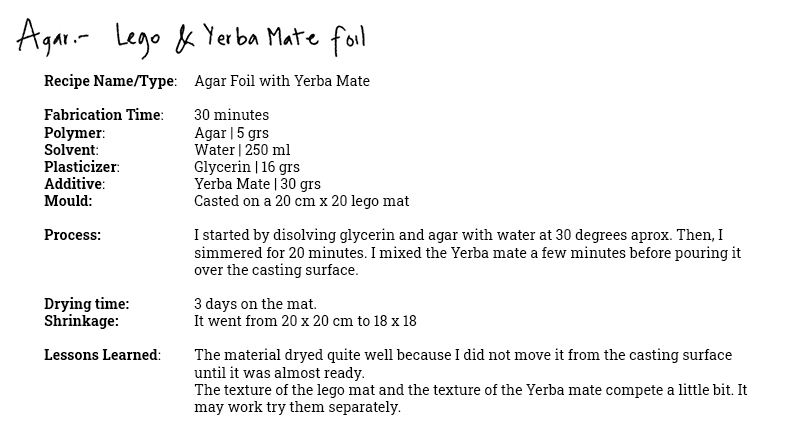
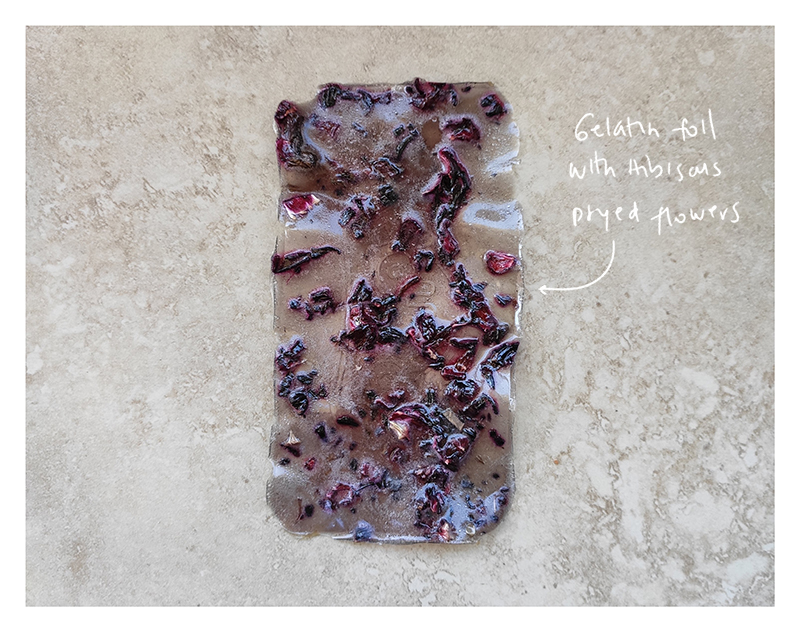
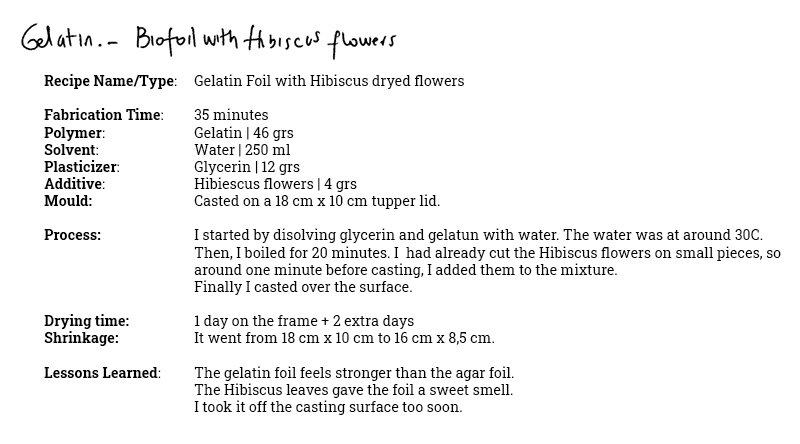
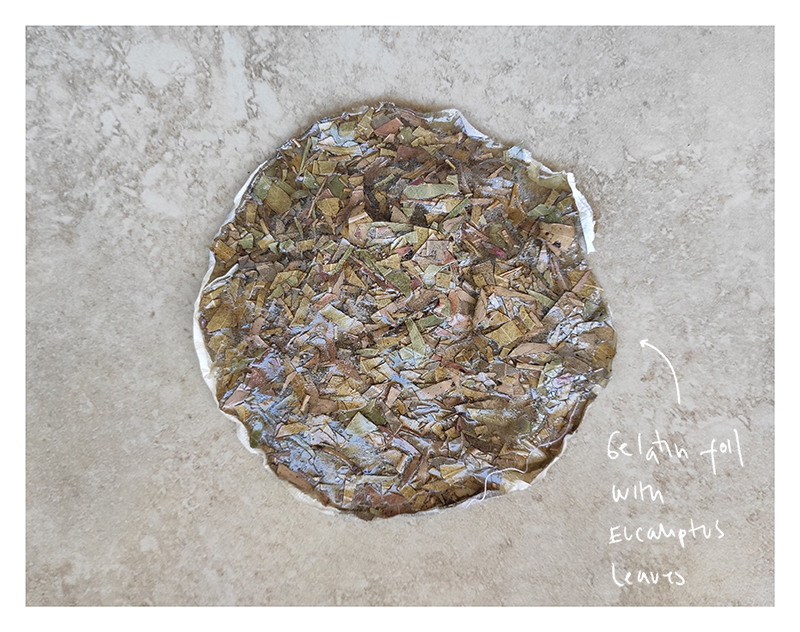
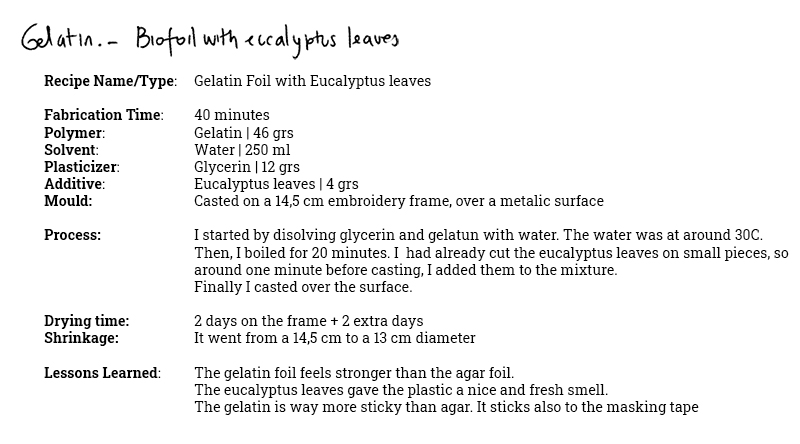
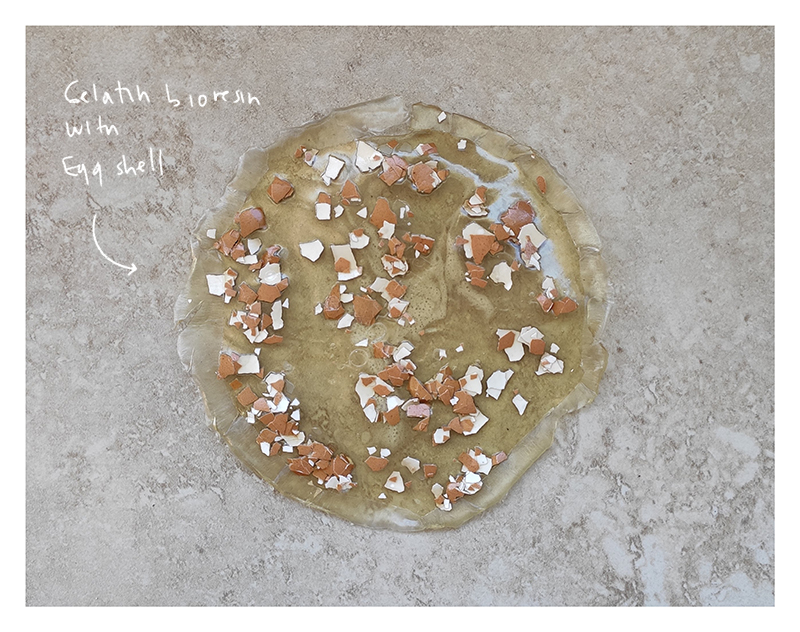
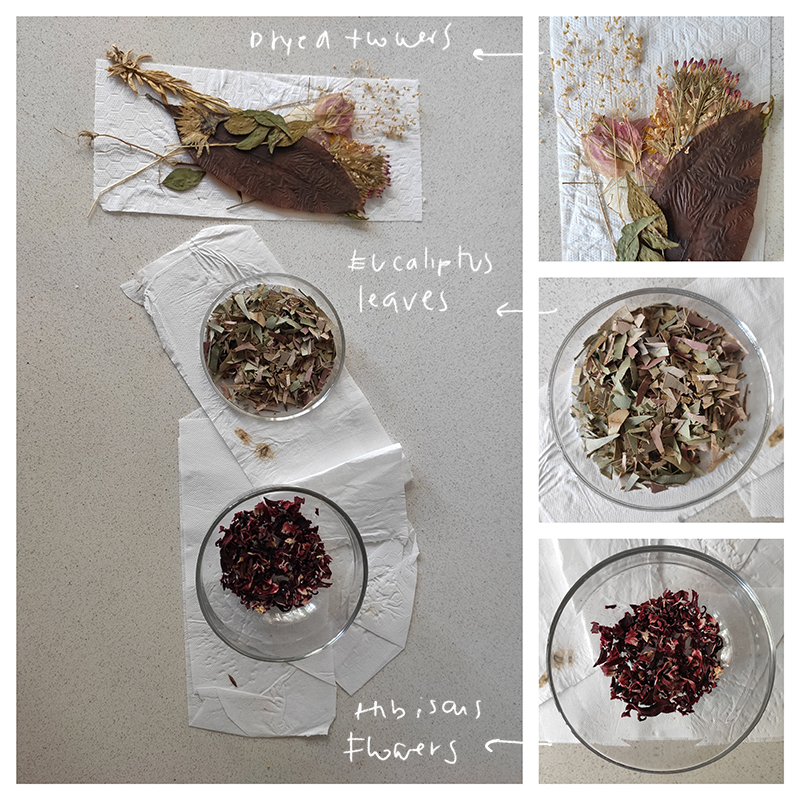
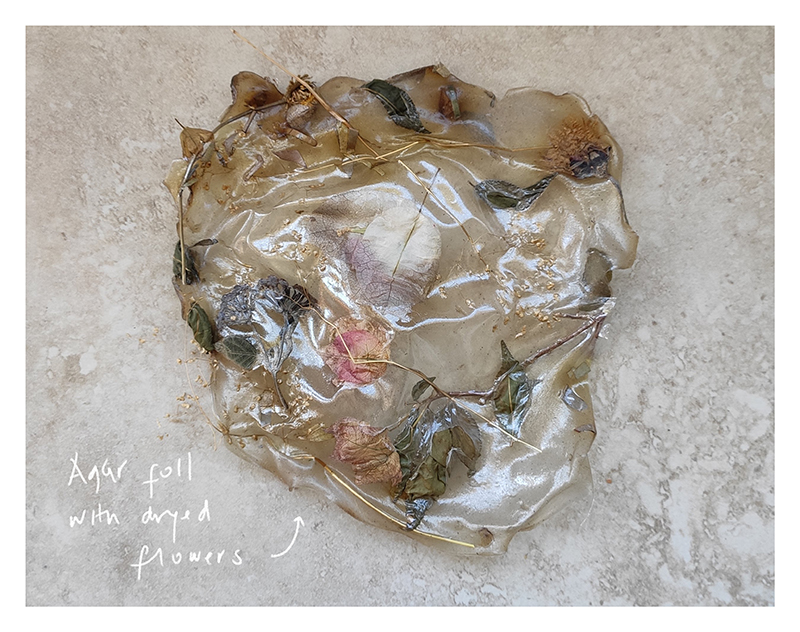
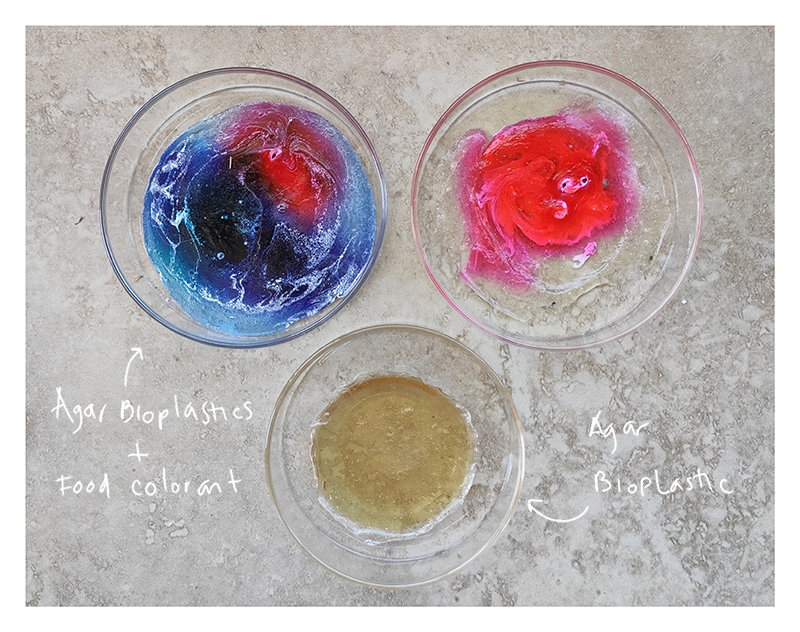
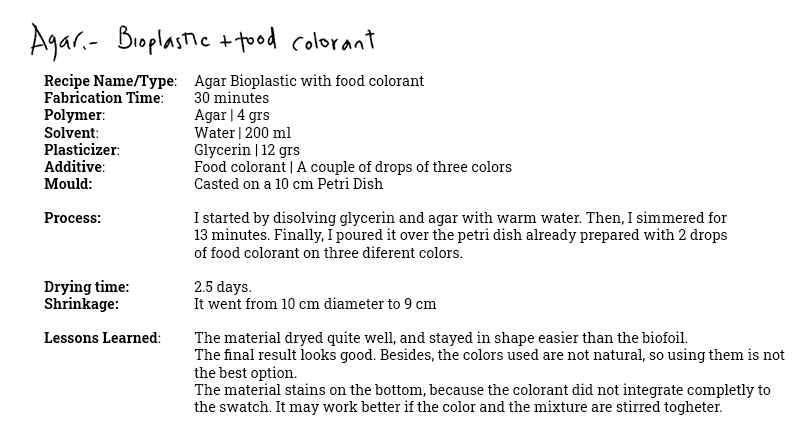
I could find easily in Montevideo Agar and Gelatin - not Alginate-, so that was why I decided to go on with those two. I found it easier to work with Agar, as the Gelatine was extremely dirty and hard to clean. But Gelatin samples dryied faster than Agar ones.
These are the results of my experimentation with Agar and Gelatin:
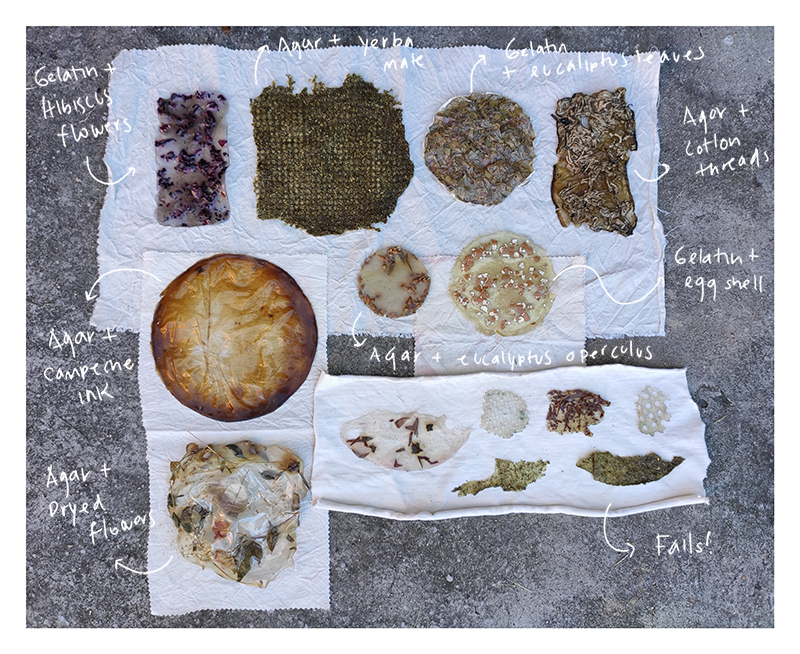
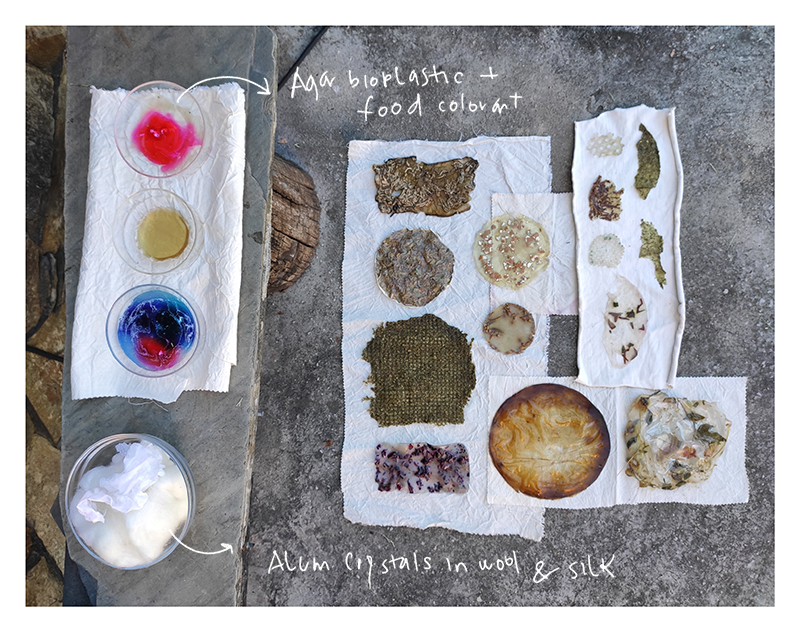 Below, I will go through all the recipies I have done, with the detailed information and the Lessons learned.


Fails 
I had some fails that are documented here:
1. Small Casting
As I was not able to watch the tutorials live, I decided to try "to do what I could" by reading the slides. I made the first recipe and divided the whole amount on small portions in order to try different shapes and moulds. As you may imagine, not only those surfaces were not enough big, but also they shrinked a lot.
 2. Crystal Bioplastic
As you will see below, I tryed to grow crystals. I had some "leftovers" so I thought it was a good idea to try to make a crystal bioplastic. Of course it didn´t work, I should have imagined, it WAS OBVIOUS.
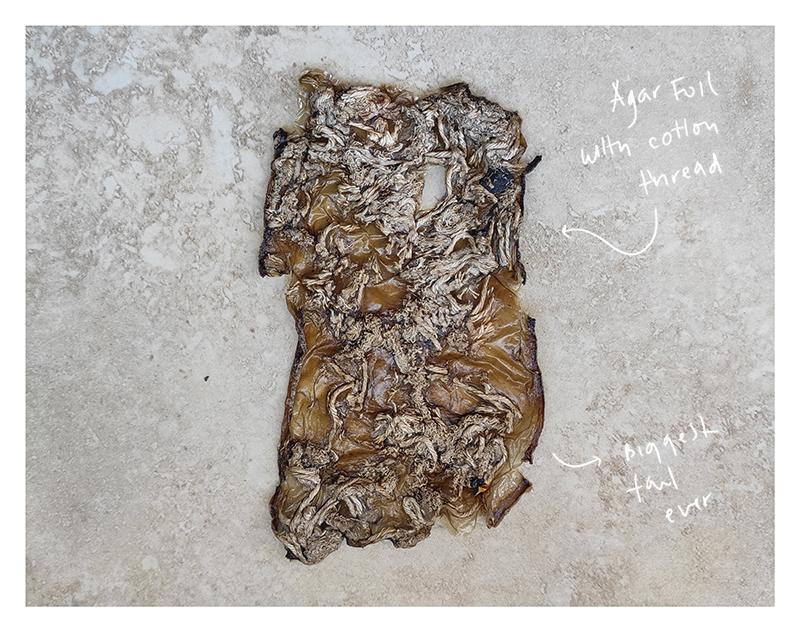
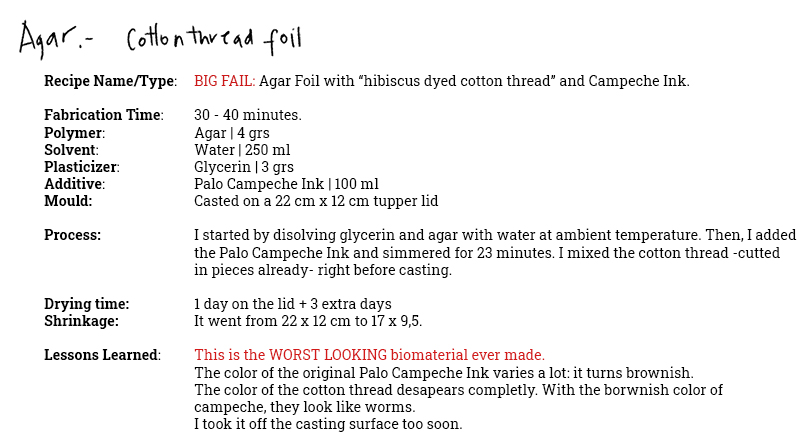
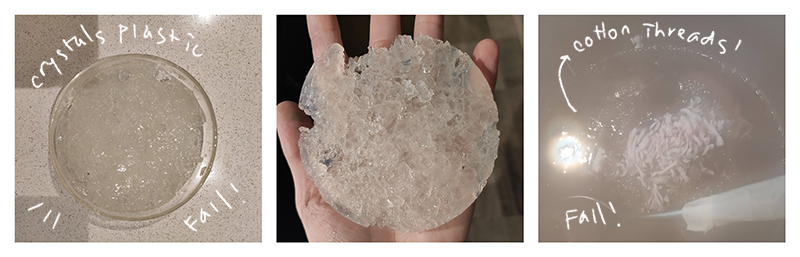 3. Cotton Threads and palo Campeche
As I showed before I am proud to say that this is THE WORST BIOMATERIAL EVERMADE. I know I already said it, but I need to reinforce the concept :-)
Grown materials 
Crystals 
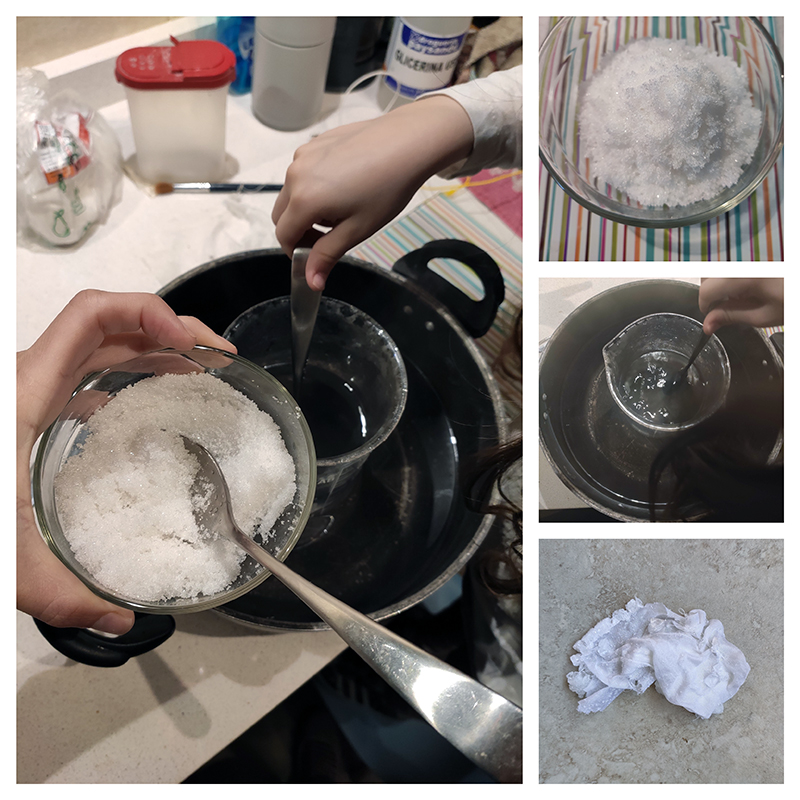
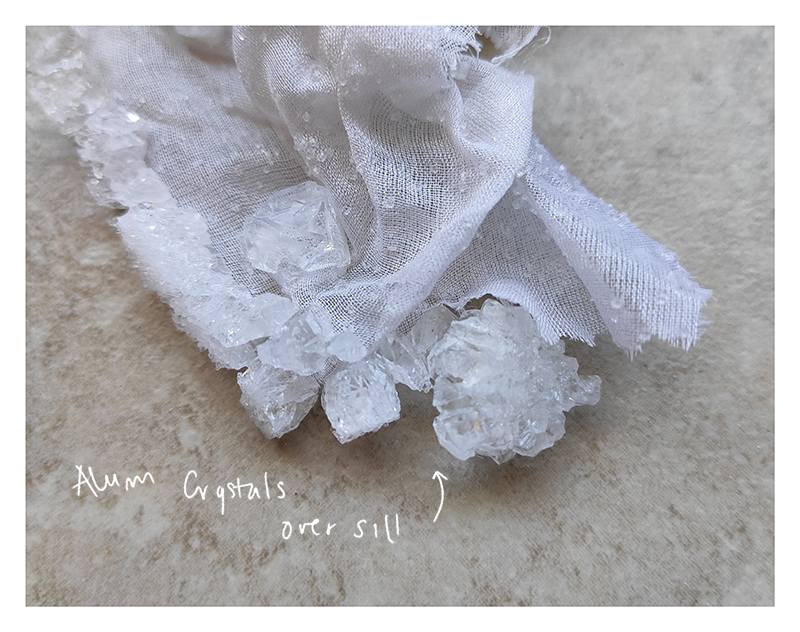
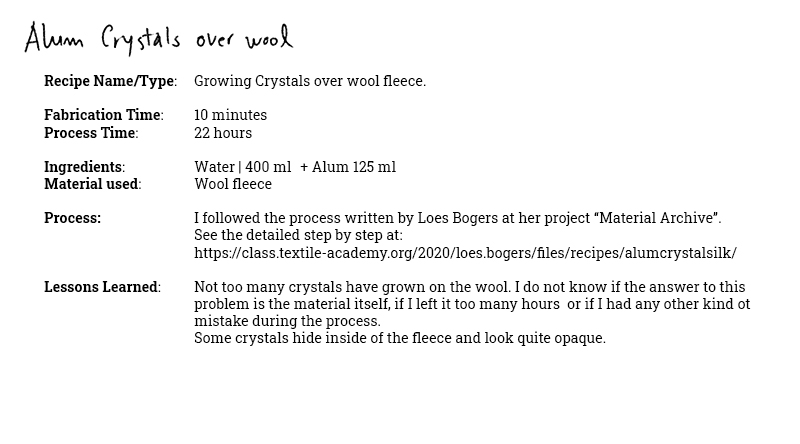
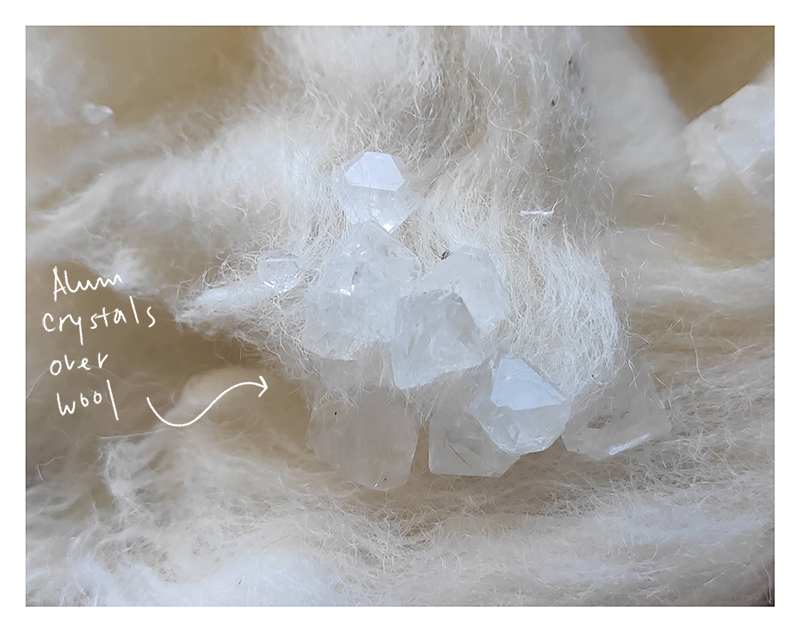
When I started Fabricademy, I was really excited with beeing able to grow crystals. I thought we would do it this week so I was surprised we didn´t. Going through the amazing project of Loes Bogers I saw the recipe and I didn´t hesitate to give it a try.
I finally realized that growing crystals was supposed to be part of "Textile as Scafold" week, but as it is a "grown material" I think it may be accepted ;)
Kombucha 
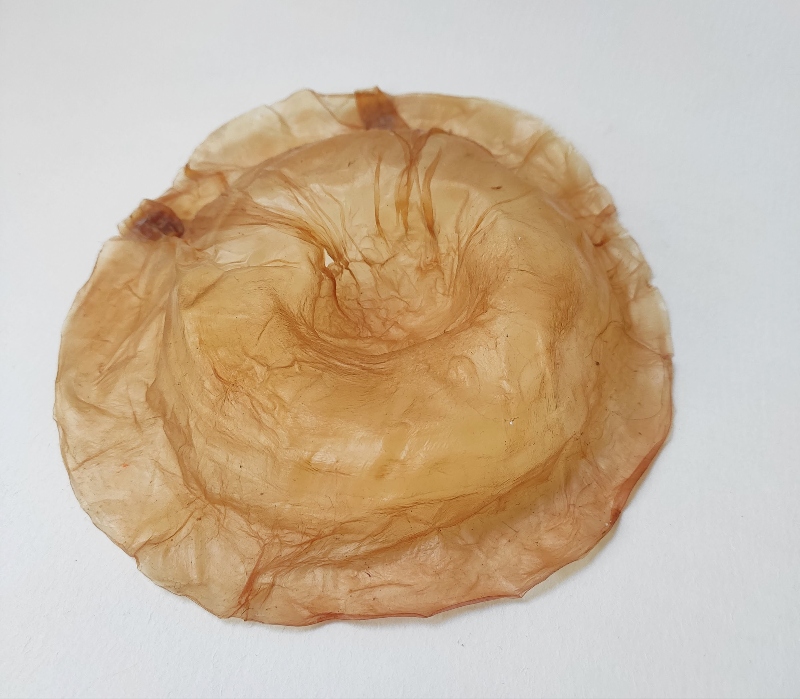
The process of growing kombucha took a few weeks but it was definitely worth it. I loved watching little by little the almost invisible advance of cellulose transforming into a wonderful biodegradable material.
I fortunately got the SCOBY from an Instagram friend: An uruguayan awesome cheff, named Florencia Curcio. She, generously, donated it to us.
1. Preparation
As I had two little SCOBY, I decided to try to grow two different kombucha leathers: one from black tea, and another one from ibiscus tea (I love the color that ibisco gives to everything)! I followed carefully Lorena Trebbi´s recipie.
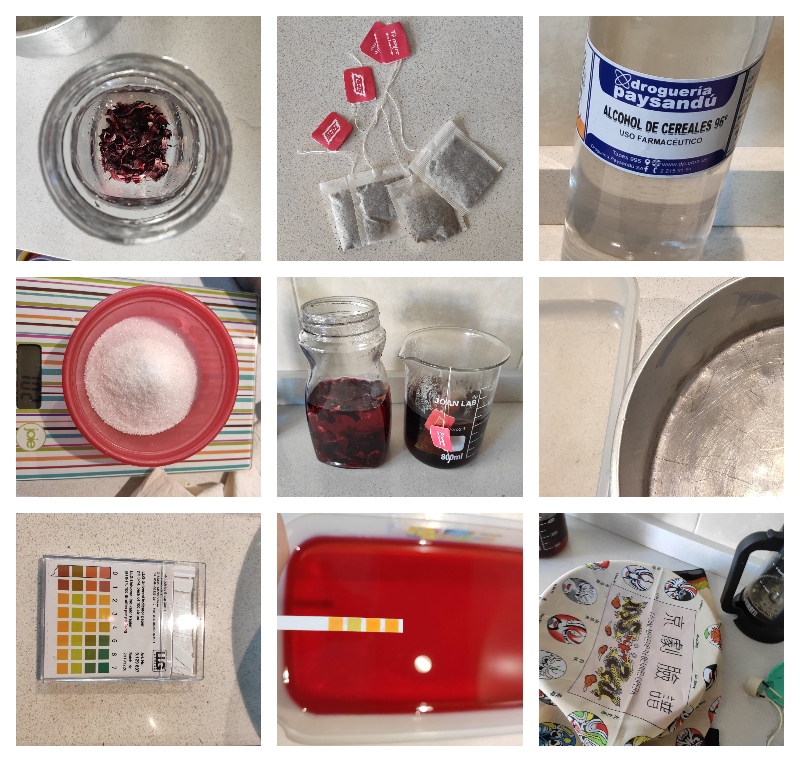
2. With a liter of water for each one, I made the black tea and the ibizco tea and waited until they were at room temperature.
3. I put 100 grs of white sugar on each container.
4. I placed the scoby in the bottom, whit a stone on top to keep it from floating.
5. I measured the PH of each liquid, and and then poured apple vinegar until I reached the value needed (between 2 and 3).
6.I Covered each container with a piece of breathable fabric and...let the kombucha grow...!
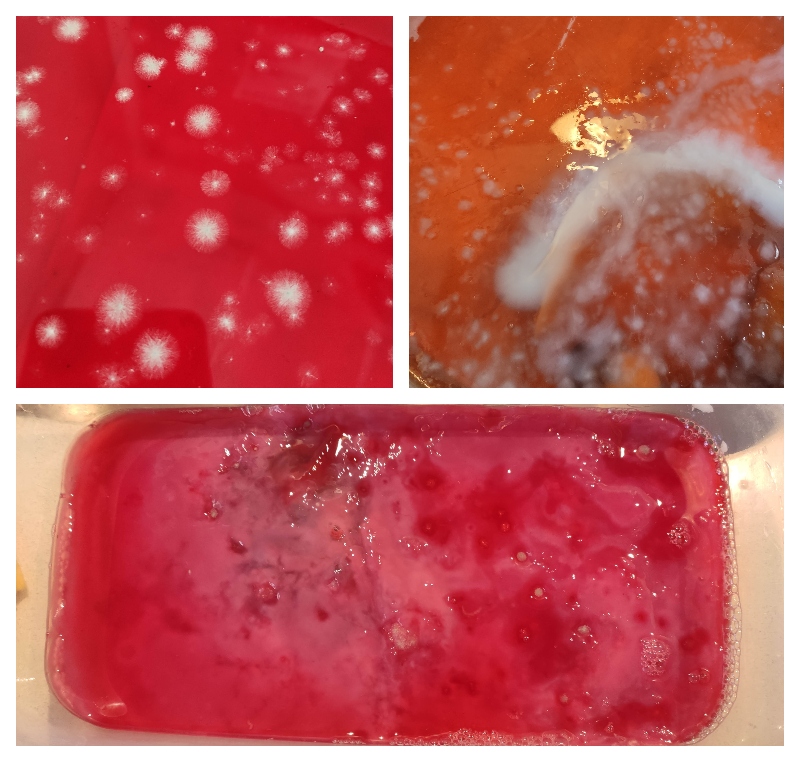
2. Process
Four days after my two babies beeing there under the fabric, some white/green spots (snowflakes-like) started to grow on top. I poured some vinegar over them, and it seemed to work quite well: they stop growing and it looked like they were eaten by the cellulose!
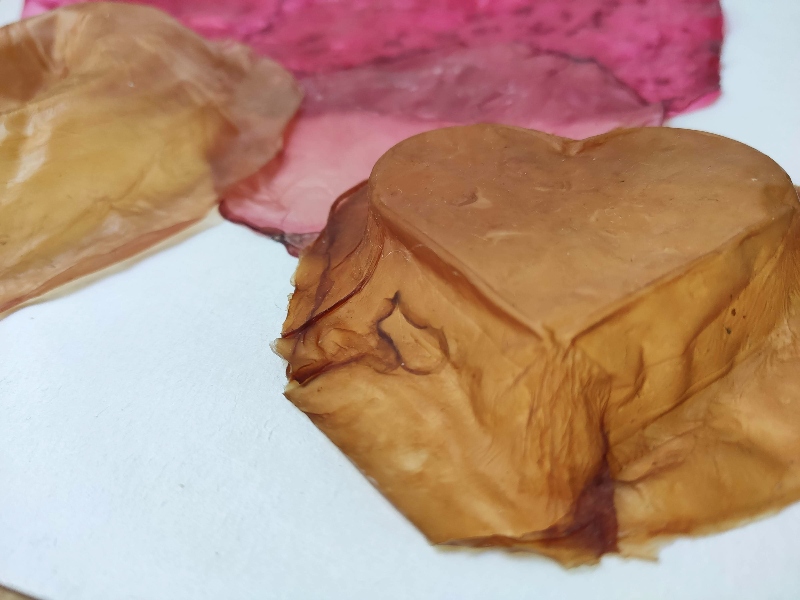
3. Harvest
On day 14, I decided to harvest the kombucha leather. Besides It was a little soon (the material I got was quite thin), I wanted to experiment with it for "Textile as Scaffold" week, so it was worth it :)

4. Final results
I really loved the final resultls!!! (You can see more pictures at my "Textile as Scaffold" week documentation)
Final note: Three months after drying the material, I went to take a look on it and was wet and very sticky. Uruguay is a really humid country so some strategies to conserve the shape and material propierties may be needed!