10. Wearables
Week 10.

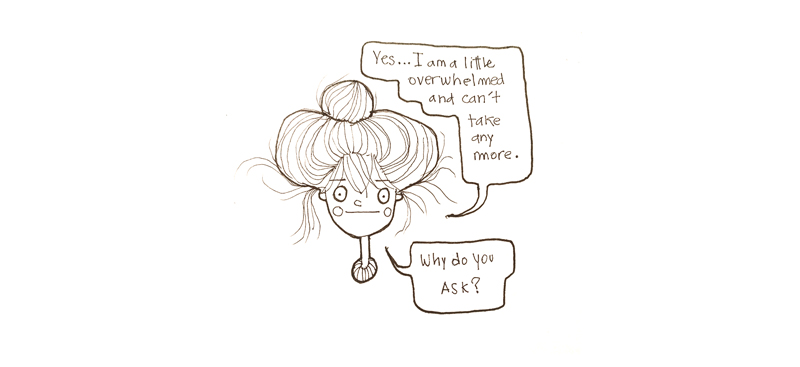
This week was pretty hard for me (back then in november, when this assignment started, but also months later in may, when I went over this week again trying to complete it)
First of all I couldn´t find in Uruguay most of the fundamental (and interesting) stuff for this assignment. In our country, we do not have flexinol, thermochromic Ink, Optical Fiber, Copper tape, DFPlayer-mini... I couldn´t also find the required mosfet. The most exciting thing found was -just TWO- Flora pixels.
:_(
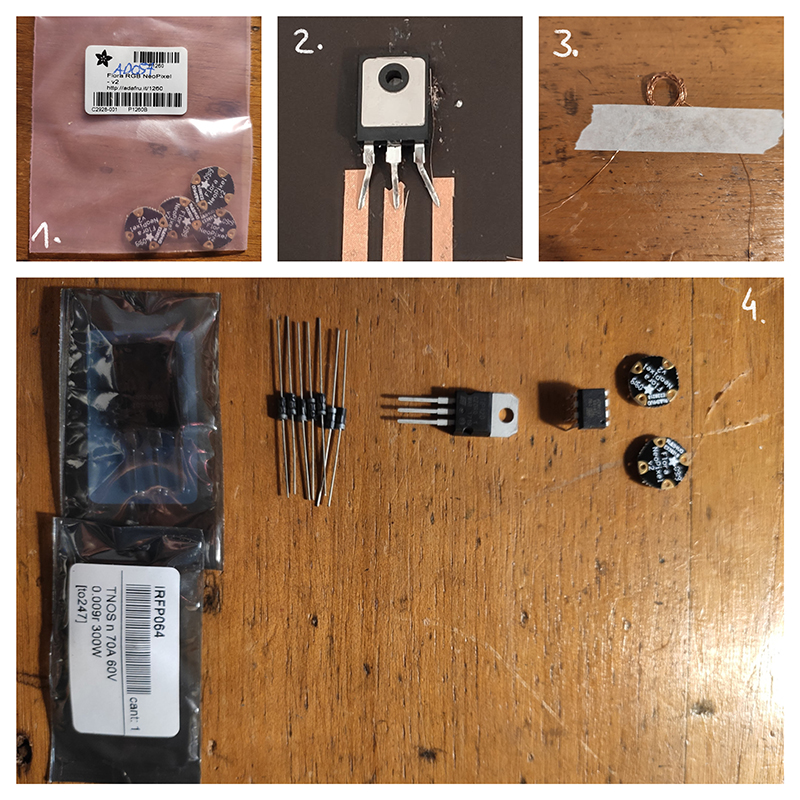
Below you can see my findings:
-Attiny 85
-TIP 120 Transistor
-Diode 1N4001
-TMOS n 70 to 60V
Then, most of the things I tried to experiment, didn´t work when connected to the Arduino through the "alternative Mosfet" circuit. Being a single node makes it difficult to solve specific technical problems without having the advice of experts in the electronics field, so I wasn´t sure if the problem was the sum of substitute elements or other unknown problem.
Anyway, It is not time to cry now, but to show what I´ve done. I will divide this week in two sections: The first one shows all my failed attempts, and the second one, the ones that worked.
Not the best week in terms of results but a lot of effort put here.
Failed Attempts
1. Bunny pillow + "Hell Horse" autopsy
I thought it was a good idea to keep adding features to "Pinaeno the bunny", my daughter´s transitional object wich I made on week 5.
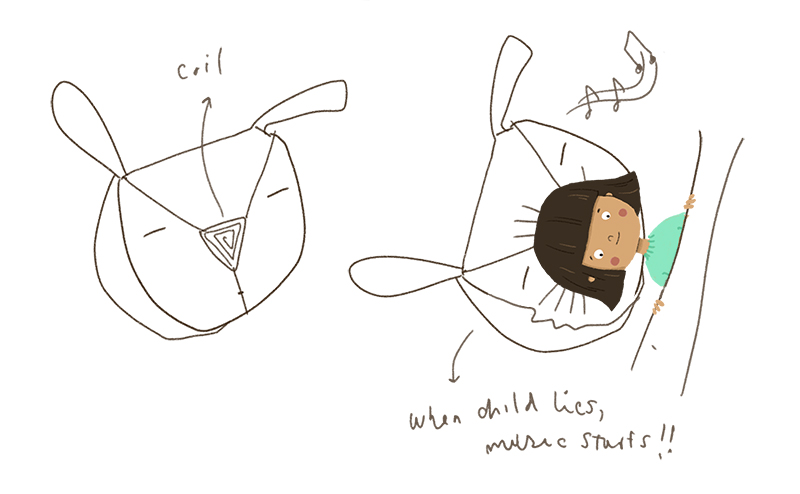
I wanted to make a new product: a pillow of the bunny that when trying to fall asleep, emitted her favorite music.
The strategy I had in mind was to make a coil in the nose of the rabbit (on the surface) and on the inside (separated by polyphon or wadding) the magnets. In this way, when Olivia´s head was over on the pillow, the spiral would make contact with the magnets. That would close the circuit and the melody would sound.
Inside, I'd put the circuit suggested by Emma in her presentation, and connect it to a DF Player.
But none of this happened, since in the first place, I was unable to find a DF Player to buy.
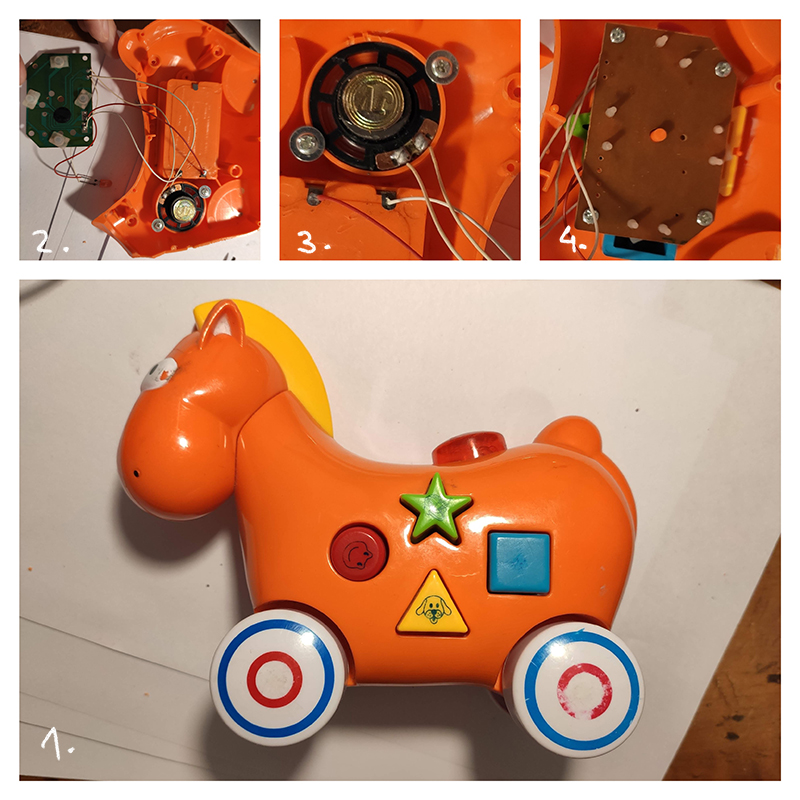
Therefore, I went to my second idea: hacking a toy with music. Since I could not find anything with a delicate sound, I decided to go on with a cheap toy that my children (luckily) no longer used. The "hell horse", as I call it, had the most excruciating sound I ever heard. You can check it by yourself:
The plan, logically, changed: the new product (with that sound from hell) would now be something quite bizarre. It didn't seem like a bad idea anyway, Fabicademy allowed crazy projects.
Everything was going according to plan and I started the "hell horse" autopsy.
I left everything on my desk very delicately, and stopped for a few hours. The next day, there was NOTHING there. I found a couple of pieces on the ground, but others never appeared. I thought I was dying right there, and I cried for a whole day.
Here: the suspects for the crime. We will never know...
The shiest CoiL
You don't have to be a fortune-teller to know that I DIDN´T GET A SINGLE SOUND to come out of the sound circuit.
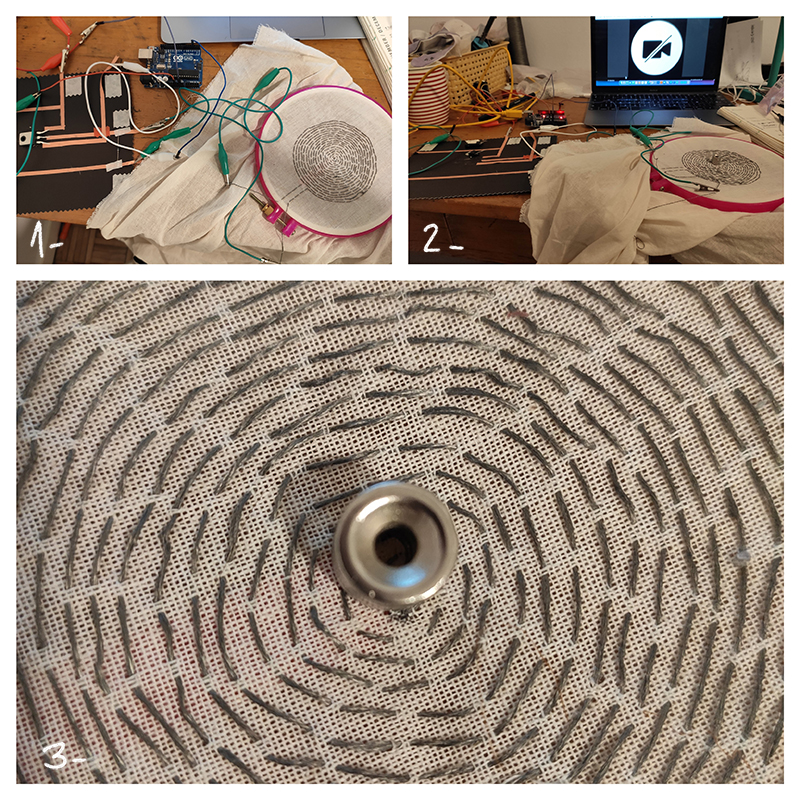 (I used conductive yarn and cotton canvas)
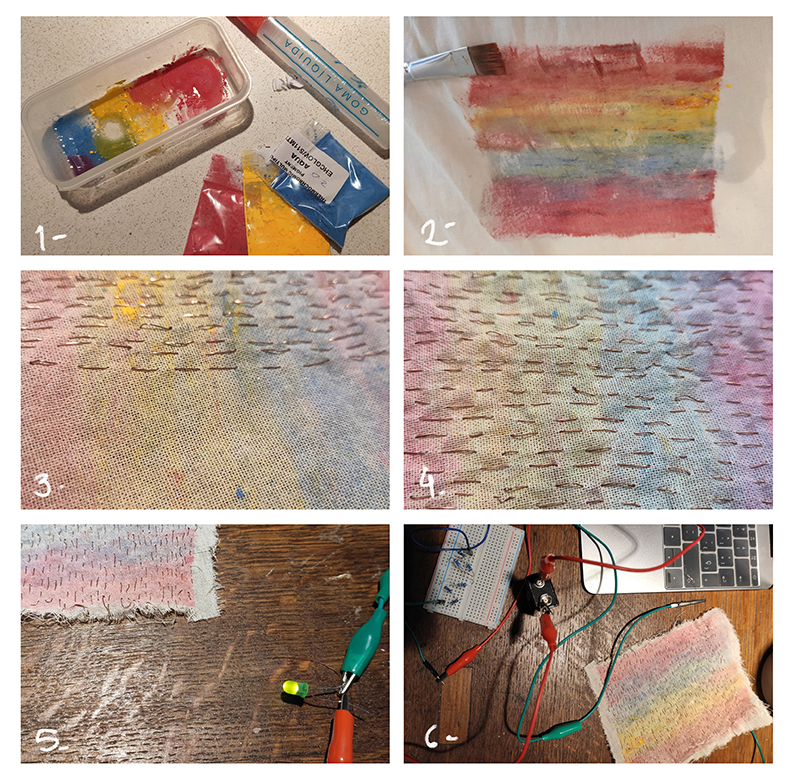
Thermochromic ink
I had all my hopes on Thermochromic Pigments. They arrived in Uruguay a week after this task was over, so I immersed myself in this adventure in 2021. It should be said that I find them extremely magical and that I was very excited about the hole process.
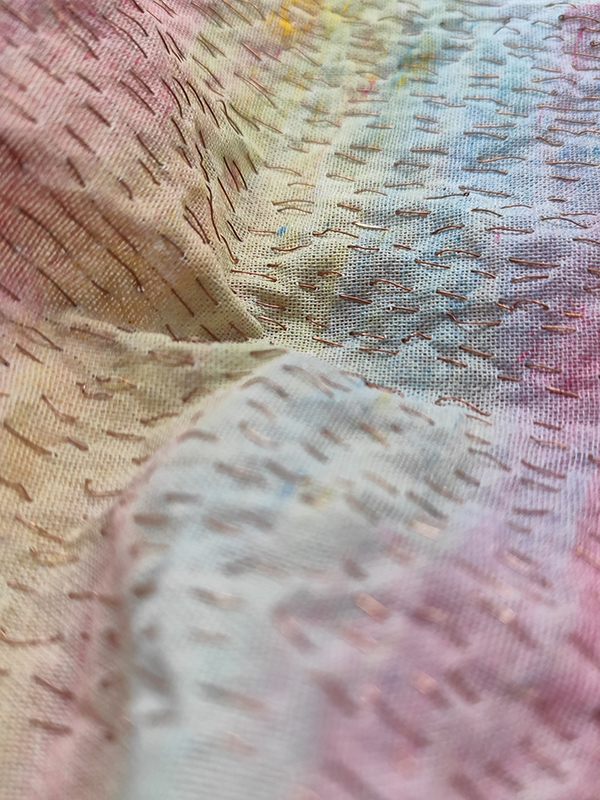
First I made the paint with the pigment and painted a canvas swatch with various colors. Once it was dry, with a hair dryer in "heat", I saw the swathc magically going blank and I was super excited. That been said, I didn't stop until I had embroidered the entire fabric with a carefully crafted copper wire.
By using an LED light, I checked that the circuit was continuous. I approached the circuit suggested by emma in her presentation for thermochromic, but I already knew that it could fail since I did not had all the necessary elements. And yes, It did: it failed. I could't make it once and then neither after one, two, three, ten tries. I tried by adding length, adding resistance... I had no way to make it change color. SAD. I think it might be the lack of the right transistor...but who knows...
Happy ending stuff
The Bunny II; a second Chance
Inspired by the flipping dots and the movement they generate through the magnet, I decided to try again a new version of the rabbit.
In week 5, I had been wanting to make the rabbit movable ears with flexininol. As I could not find the material in Uruguay, the idea was discarded. So, some time later, I thought it was a good plan for now: moving ears with another system.
I decided to try the Flipping dots. First, I tested one with a copper wire. Good news, mission accomplished: it works!!
Now I needed to make it work in a rabbit. I modified the pattern of the previous bunny, looking for a flat volume. The ears were made in four layers: Two of organza through which the copper wire passed inside, and two in cotton, where I placed two neodimium magntets per ear.
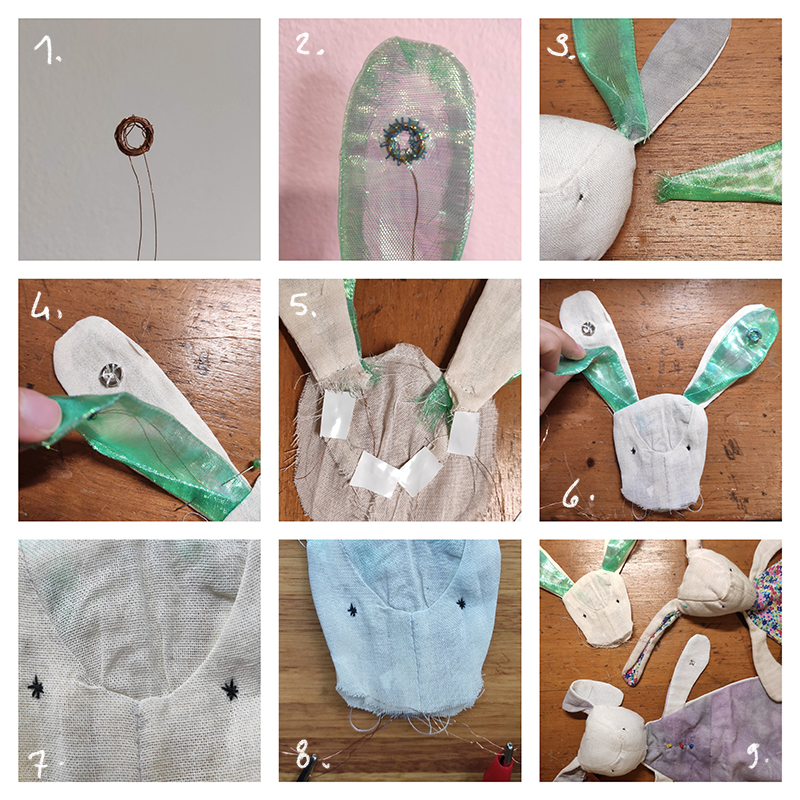
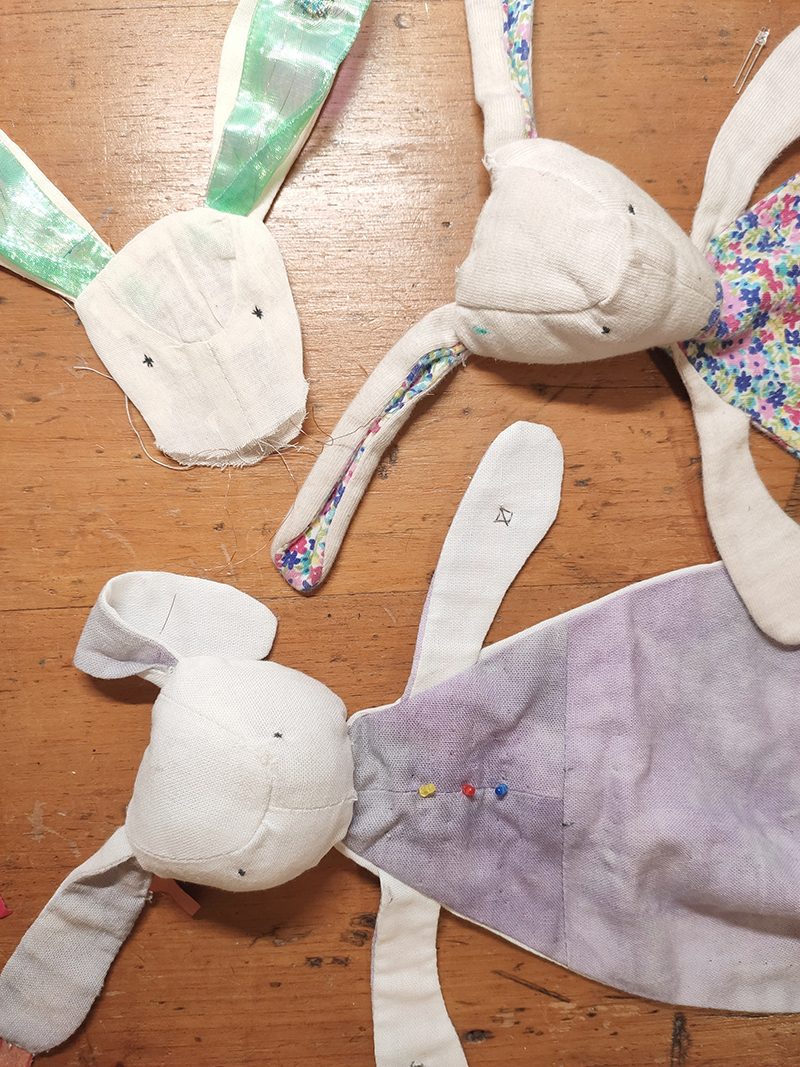
I like how it finnally turned out!
In this last image, there is a portrait of the three "Pinaeno". The flowery is the original (it has nothing linked to etextiles, it is a simple attachment doll). The lilac is the one that has different functionalities associated with light, and finally the one with the green ears is the moving one.
:)
Flora Pixels
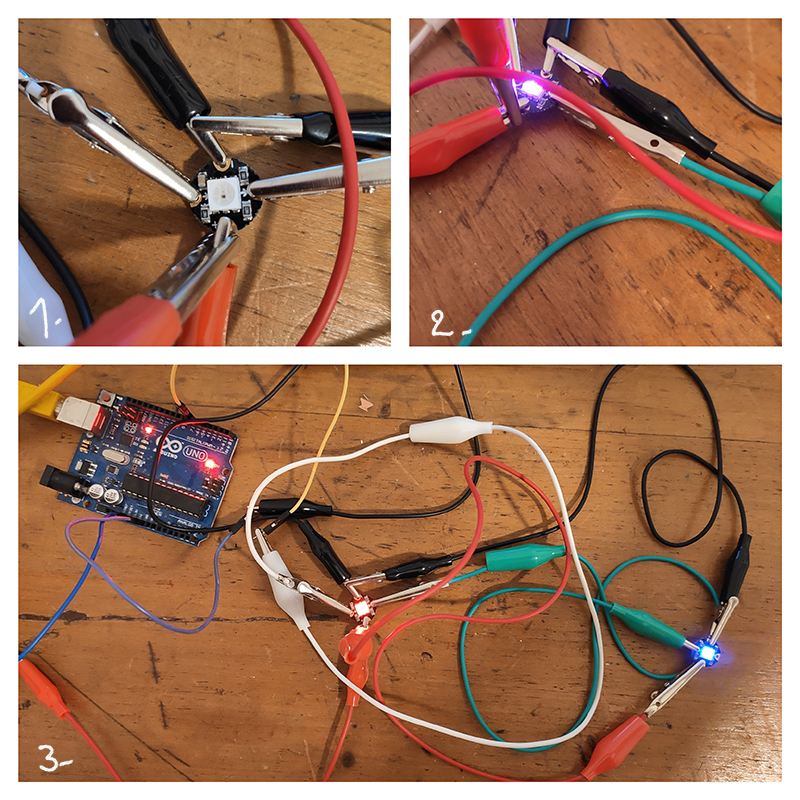
While I wasn't going to make a product anymore, I needed to see SOMETHING connected to the Arduino in action. Now it was the turn of the Flora Pixels.
You won't see anything wonderful in this instance, but at least Emma's tutorial this time worked with my components.
Here I leave the code for making a rainbow with neopixels. For sure, it may be waaaaaaay much more interesting with more than JUST TWO Flora pixels ... !!!!
  #include <Adafruit_NeoPixel.h>

// Which pin on the microcontroller board is connected to the NeoPixels?
#define PIN             6  // For Circuit Playground Express

// How many NeoPixels are attached to the board?
#define NUMPIXELS      2

// When we setup the NeoPixel library, we tell it how many pixels, and which pin to use to send signals.
// Note that for older NeoPixel strips you might need to change the third parameter--see the strandtest
// example for more information on possible values.
Adafruit_NeoPixel pixels = Adafruit_NeoPixel(NUMPIXELS, PIN, NEO_GRB + NEO_KHZ800);

int delayval = 500; // delay for half a second

// variables:
int sensorValue = 0;         // the sensor value
int sensorMin = 1023;        // minimum sensor value
int sensorMax = 0;           // maximum sensor value
const int sensorPin = A0;    // pin that the sensor is attached to

int pixelHue = 0;
int pixelHue_delta =0;

void setup() {
  Serial.begin(9600);
  pixels.begin(); // This initializes the NeoPixel library.

   // turn on LED to signal the start of the calibration period:
  pinMode(13, OUTPUT);
  digitalWrite(13, HIGH);

  // calibrate during the first five seconds
  while (millis() < 5000) {
    sensorValue = analogRead(sensorPin);

    // record the maximum sensor value
    if (sensorValue > sensorMax) {
      sensorMax = sensorValue;
    }

    // record the minimum sensor value
    if (sensorValue < sensorMin) {
      sensorMin = sensorValue;
    }
  }

  // signal the end of the calibration period
  digitalWrite(13, LOW);
}


void loop() {
   int i;              // loop variable
   int value;          // analog read of potentiometer
   int display_value;  // number of NeoPixels to display out of NUMPIXELS

   // Read PIN value and scale from 0 to NUMPIXELS -1
   value = analogRead(A0);
   value = map(value, sensorMin, sensorMax, 0, 1023);
   value = constrain(value, 0, 1023);
   Serial.print(value);
   Serial.print(", ");
   display_value = int(value  * NUMPIXELS / 1023);
   Serial.println(display_value);

   // For a set of NeoPixels the first NeoPixel is 0, second is 1, all the way up to the count of pixels minus one
  pixelHue_delta = 65536/(NUMPIXELS+1);

   for(i=0; i<display_value; i++){
        pixels.setPixelColor(i, pixels.gamma32(pixels.ColorHSV(i*pixelHue_delta)));
        Serial.println(i*pixelHue_delta);
   }
   for(i=display_value; i<NUMPIXELS; i++) {
      pixels.setPixelColor(i, 0, 0, 0);    // turn off all pixels after value displayed
   }

   pixels.show(); // This sends the updated pixel color to the hardware.

   delay(delayval); // Delay for a period of time (in milliseconds).
Also I had successs with the digital sensor :)