9. Textile as scaffold
Week 09.
Submerged on crystals.
This week we entered into the world of textile composites, crystals, and molding. I have to confess that I was a bit overwehalmed at the beggining: I didn´t know were to start! Besides, I extremely loved growing crystals and I also enjoyed molding my kombucha babes from week 06. I definetly got the worsts results with leather (in molding and making composites). I also could not go on with the CNCMilling: too many unforseens there.
Below I will ride you into this week´s experiences.
Composites
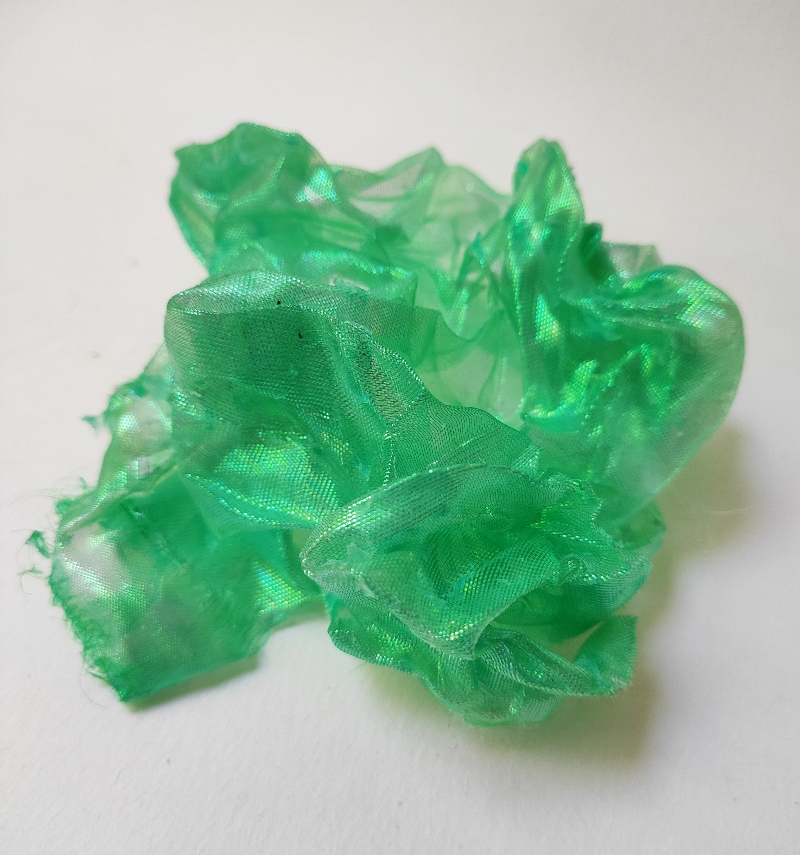
Polyester Fabric + Agar Composite.
I followed [Loes Bogers recipie at her Archiving New naturals site](https://class.textile-academy.org/2020/loes.bogers/projects/archiving_new_naturals/.
I think her project is amazing! Is really clear on the information of each recipie, the step by step and is very useful for begginers.
 I was expecting much better results on this experiment!. I tried the Agar with one single layer over a jar, with two layers over a petri dish, and with one single layer of fabric wrapped over itself. A few days after aplying the composite to the textile, it mantains its shape but it is not as hard as I imagined it might be. It makes a "paper like" kind of noise when touched.
 I put each fabric inside the pot with agar, and then left it dry in the mould. For the one wrapped, I left it one day wrapped, and then I opened it and let it dry for a couple of days more.
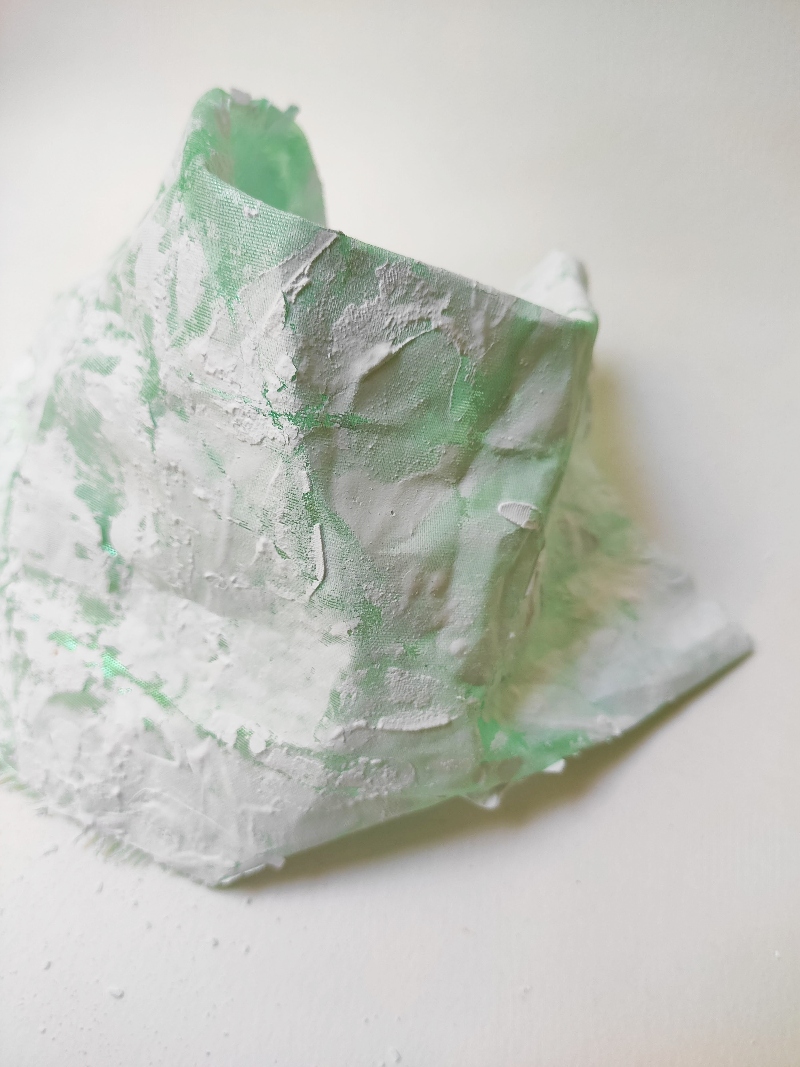
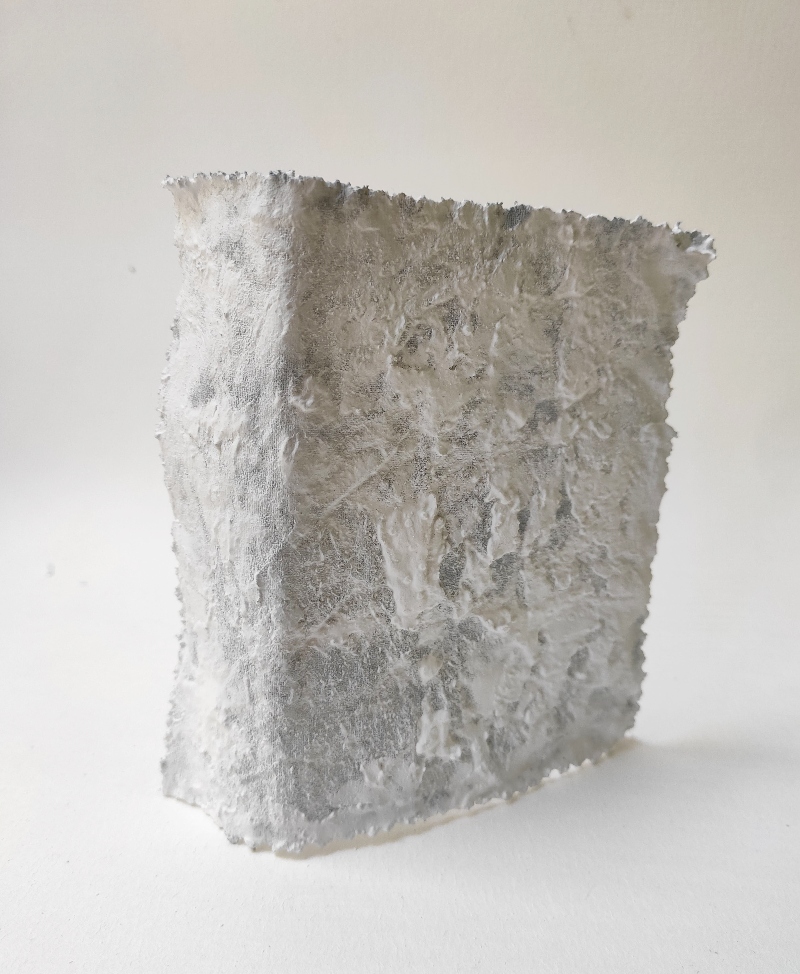
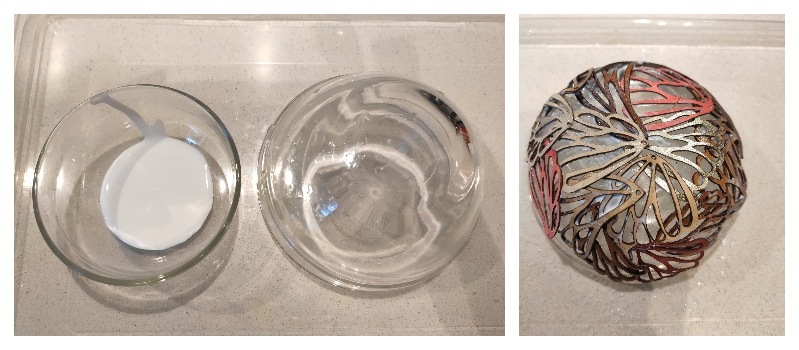
Polyester Fabric and 100% cotton canvas + Cast.
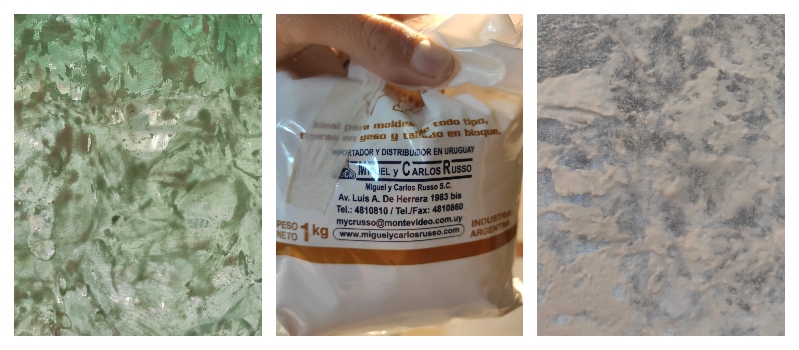 I had some Cast at home and I needed to try with it. I didnt know much what to do, so I improvised (i had never used it before). I used a paintbrush to spread the cast over the fabrics and the leather. The final result is a stiff material, but quite temporal as it tends to break when you fold it.
Crystals
I had already tryed to grow crystals on week 06, so this was my second atempt. I couldnt stop! I decided to go for Alum Crystals because they are quite fast, and I wanted to try with different techniques, colors and materials. I followed once again, Loes Bogers recipie
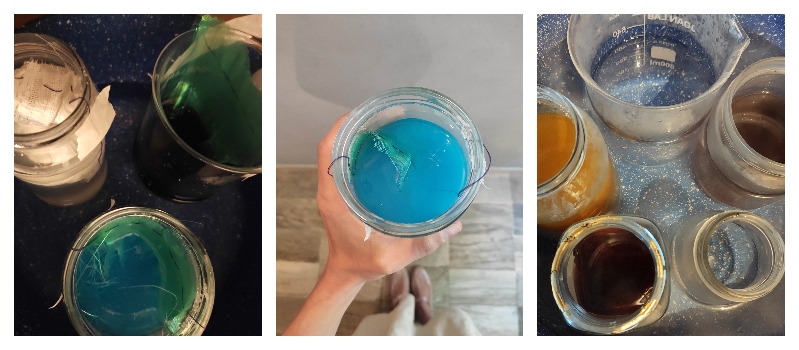 All of my samples, were left between 16 and 20 hours "resting".
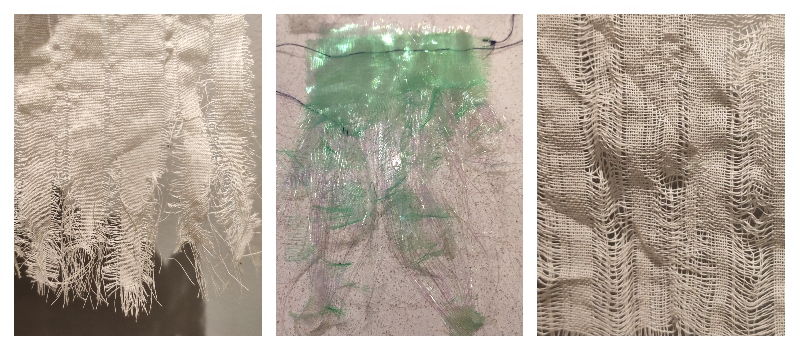
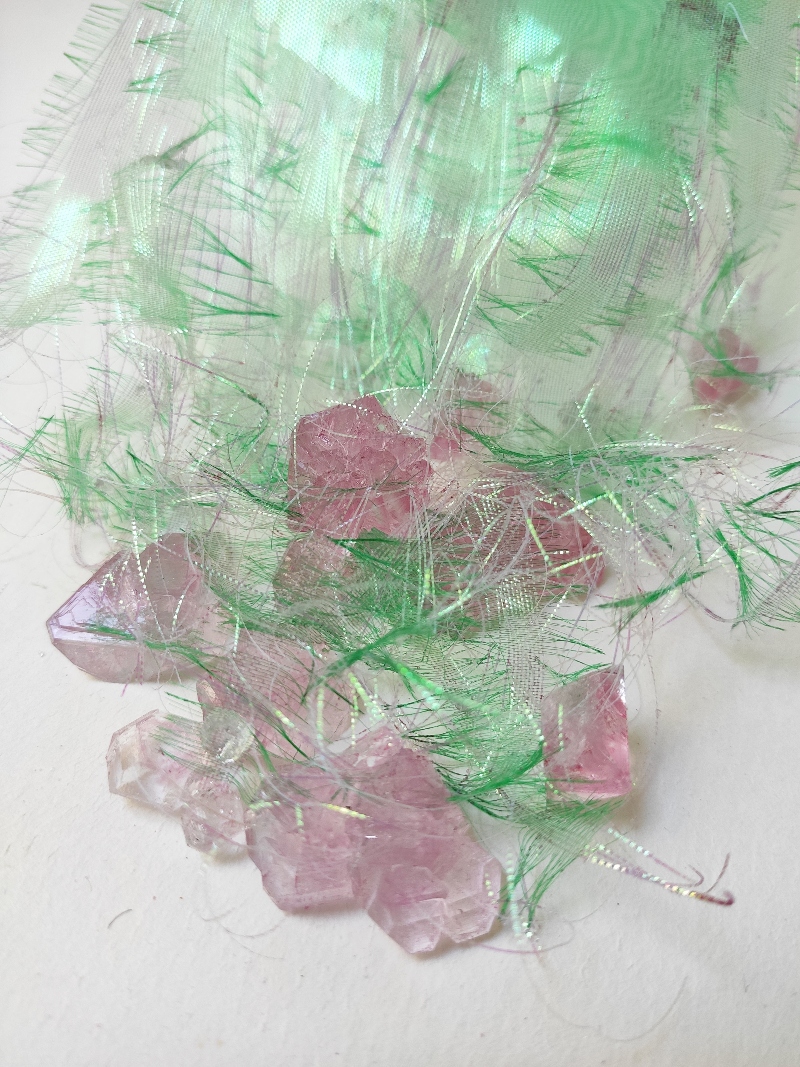
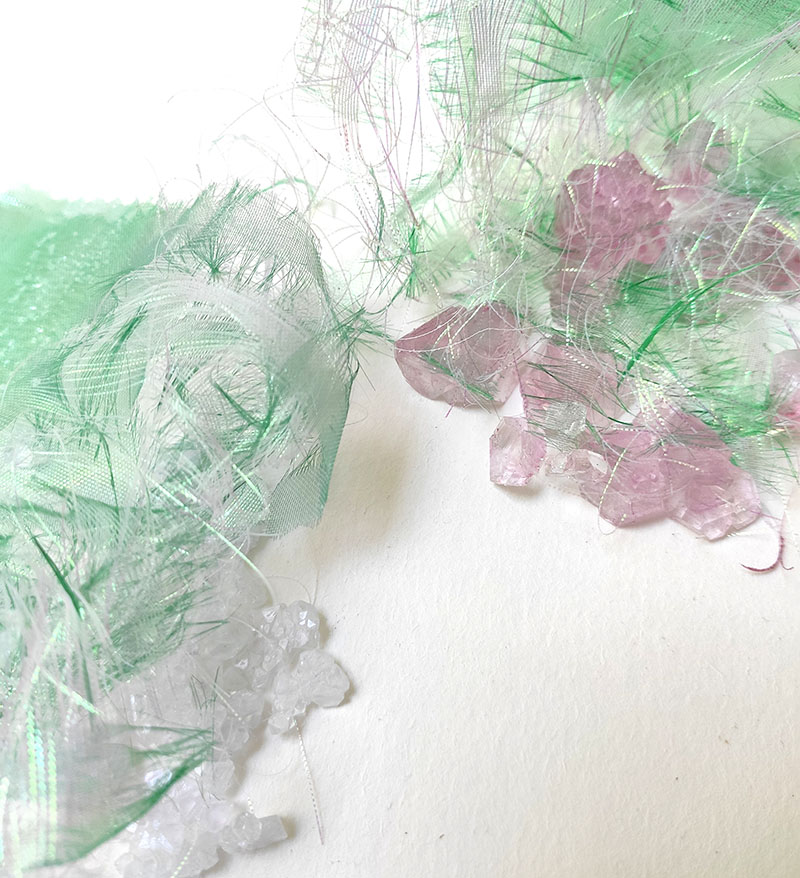
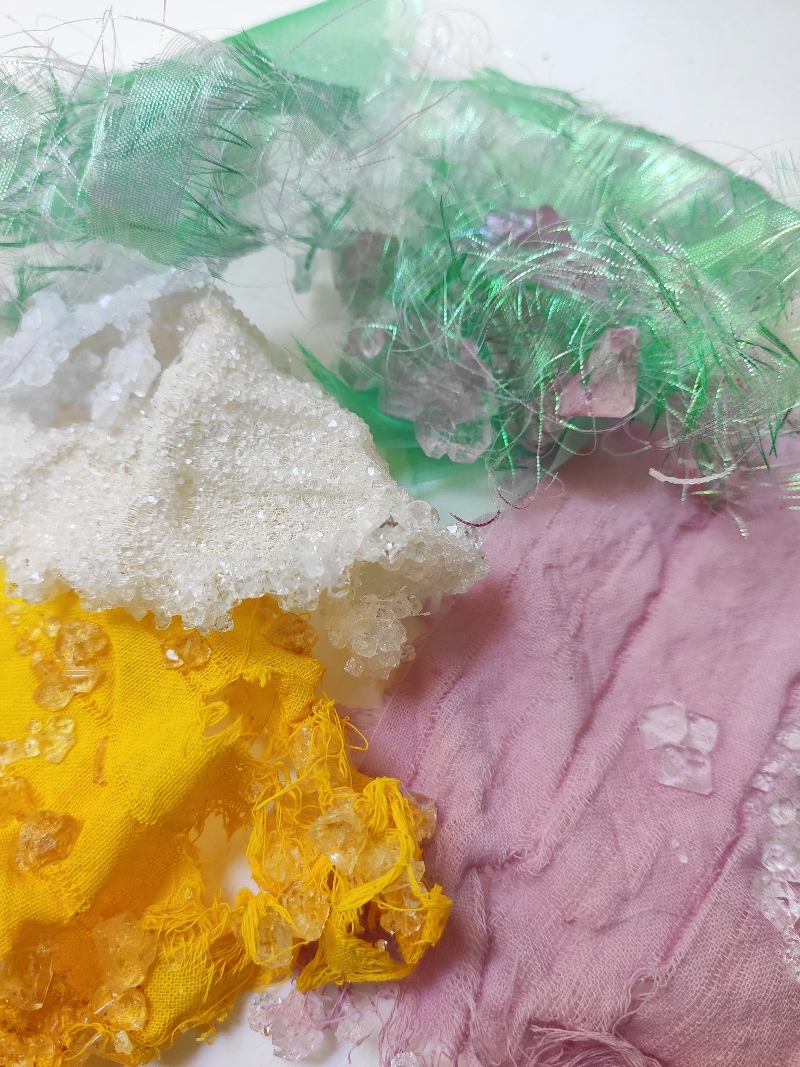
Polyester Fabric + Food colorant.
I pulled some threads out, so I could get a hairy surface that would allow the crystals to fix to the fabric easily. I put two layers of fabric togheter. I added some purple food colorant which turned blue after the Alum melted. Finally the crystals were transparent, buuuuu!
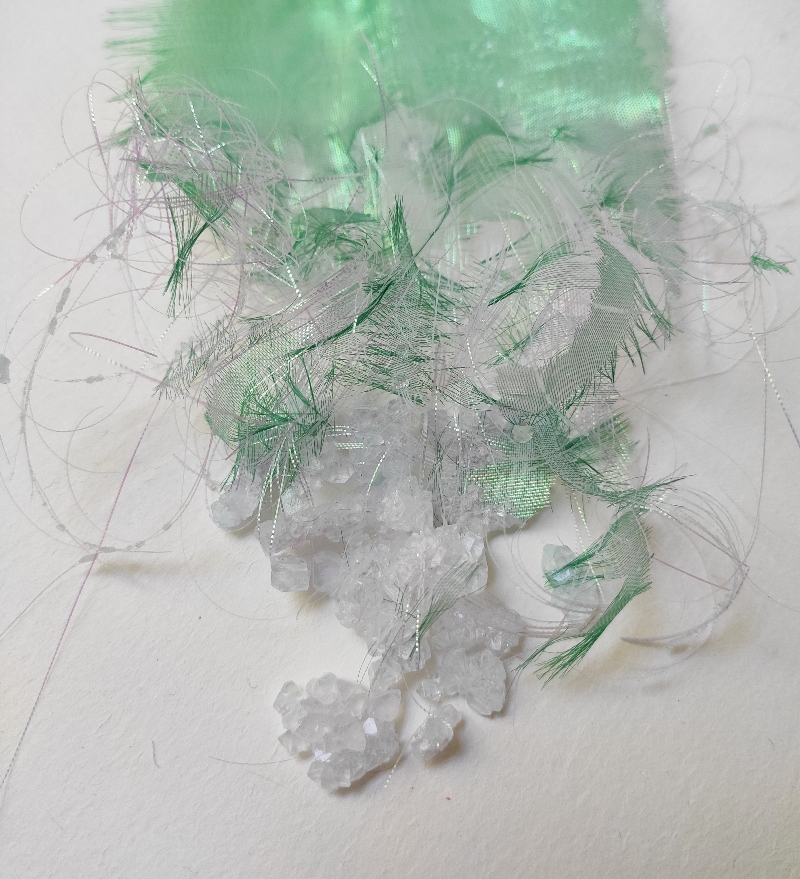
Polyester Fabric + Hibiscus.
I also pulled some threads out and put the fabrics togheter. As the textile is synthetic, the hibiscus dye did not colered the fabric but dyed the crystals, so it looks quite interesting.
Cotton canvas.
In every cotton canvas sample,I pulled some threads out, in order to get a lighter fabric in some spcific places, to understand if anything different happened (Spoiler alert: nothing!!)
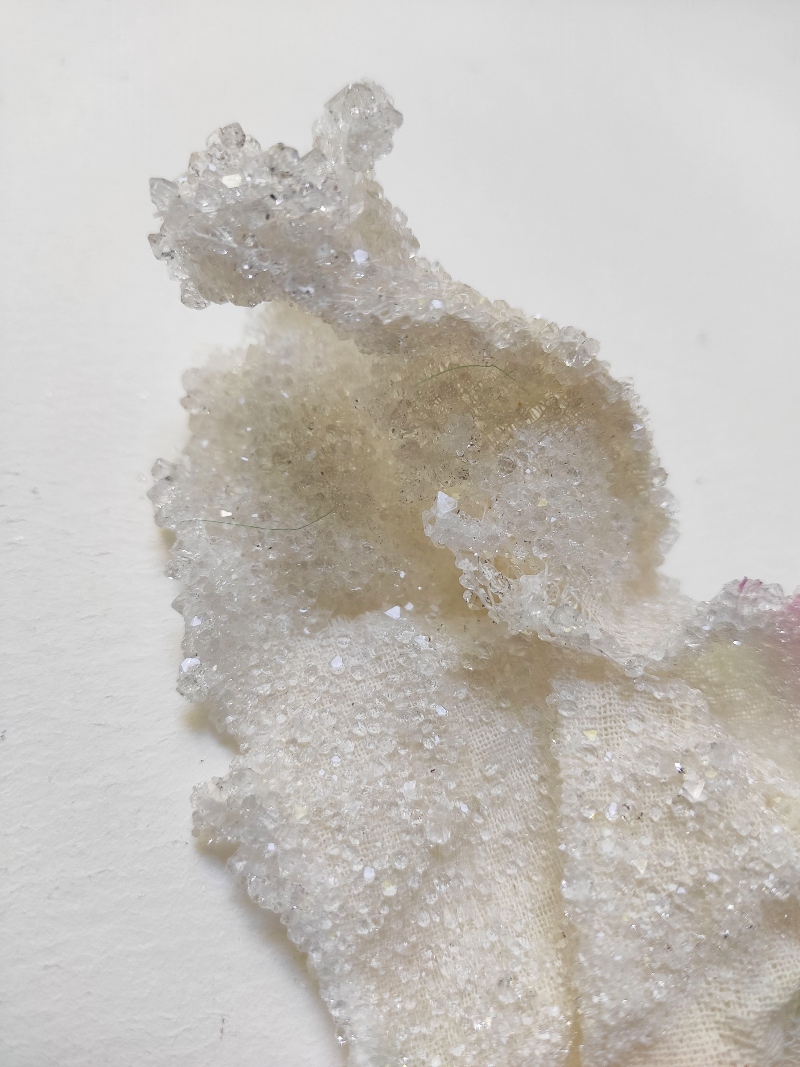

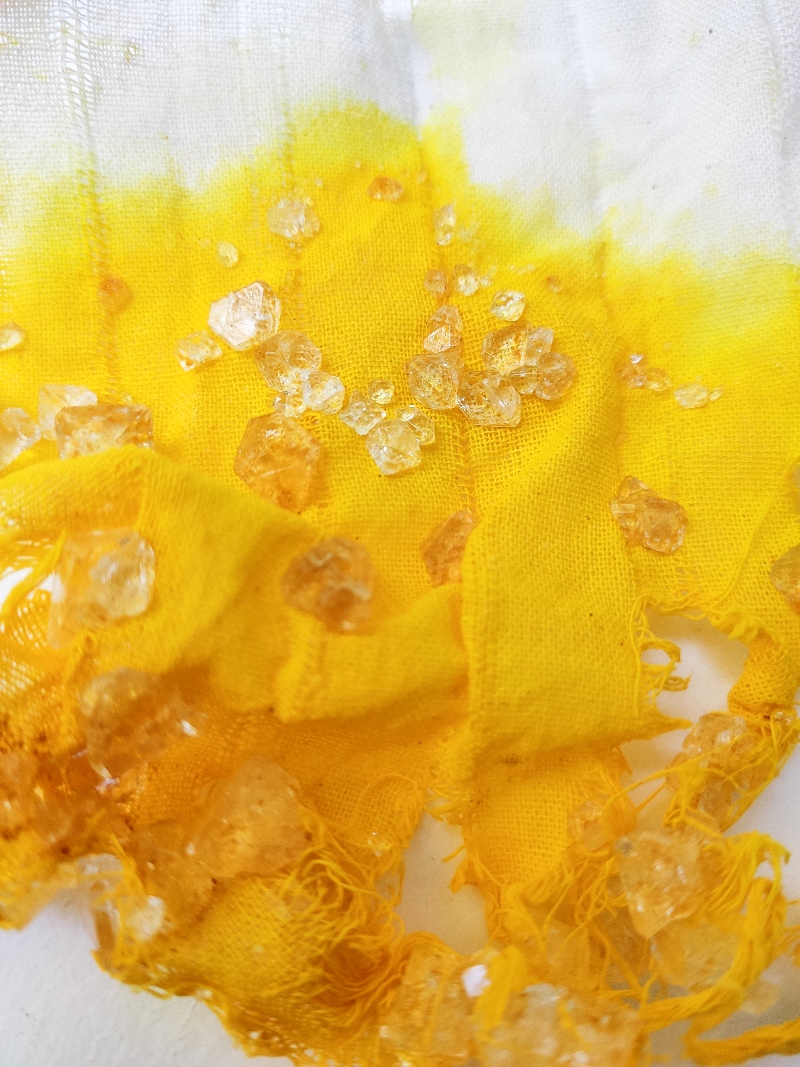
Cotton canvas + Turmeric.
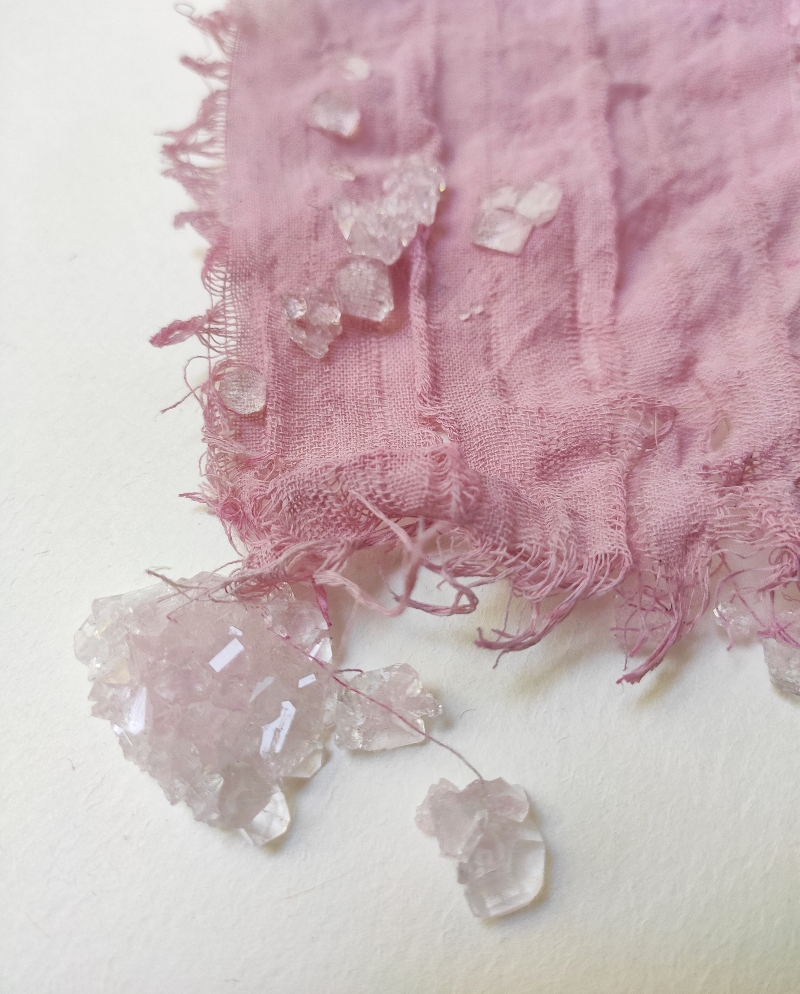
 Cotton canvas + Hibiscus.
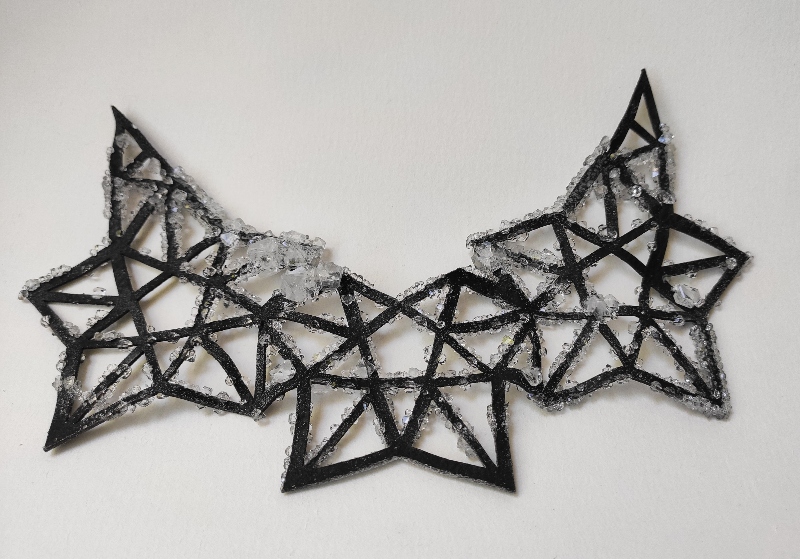
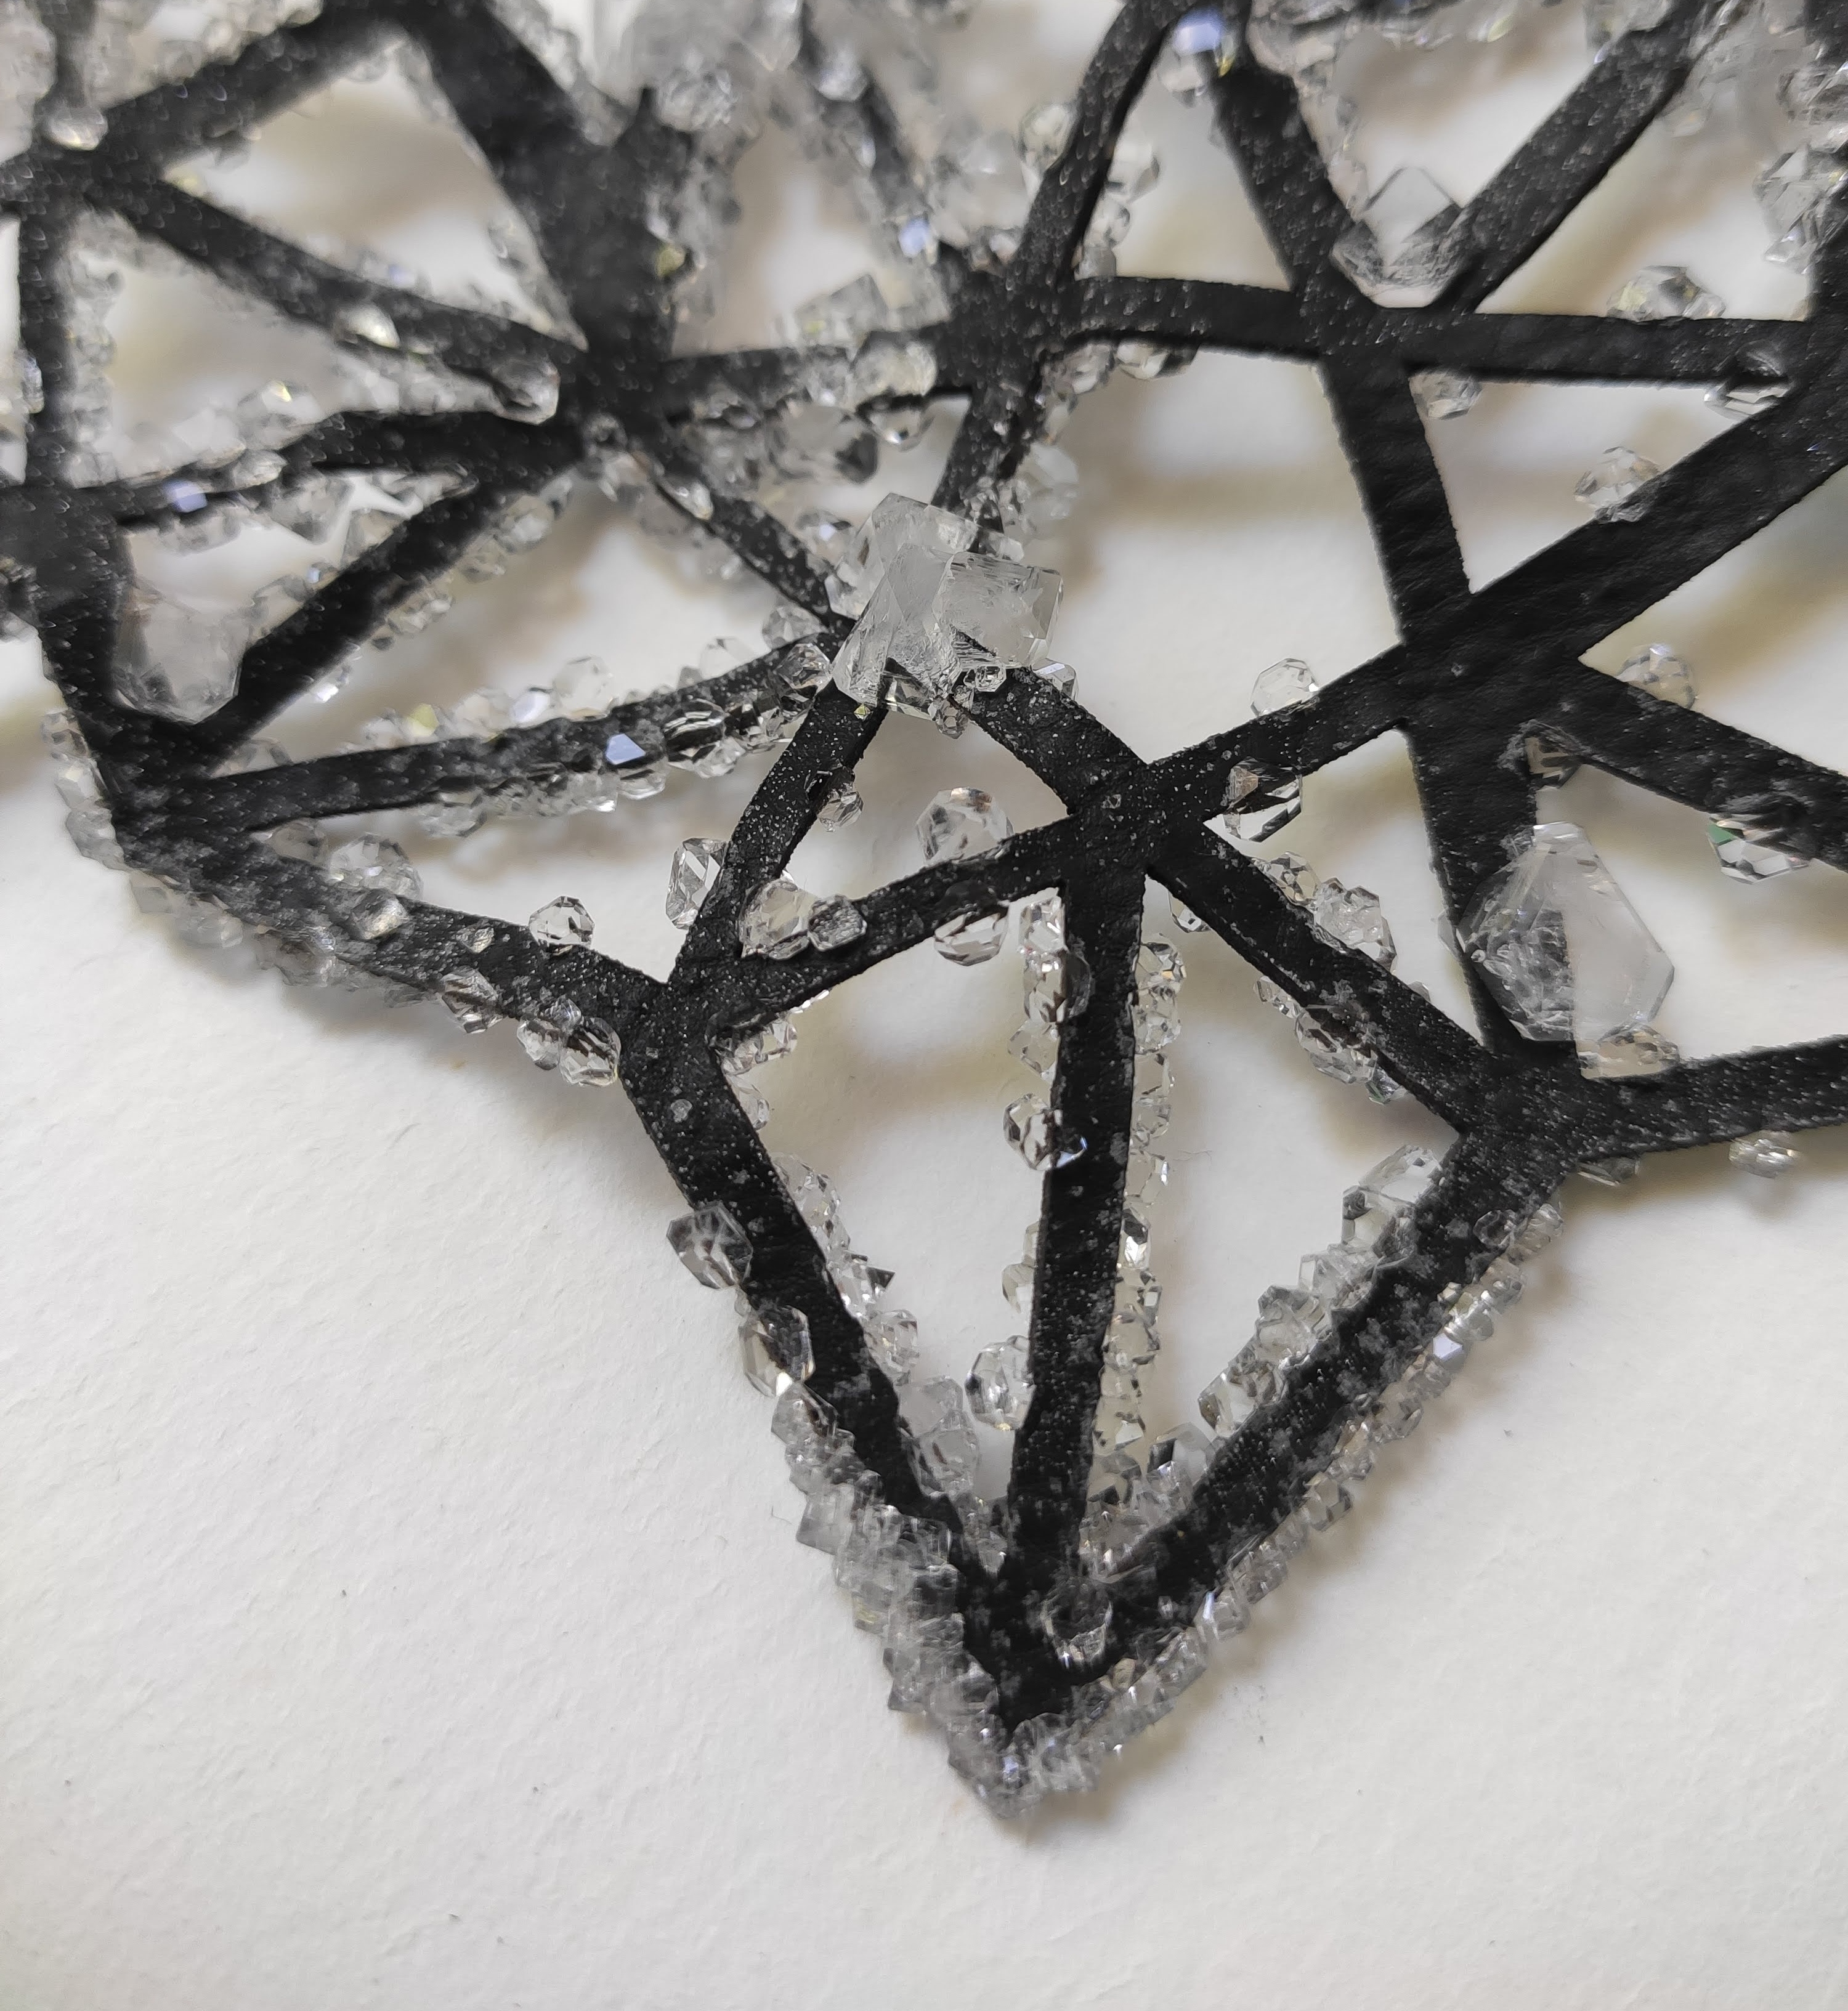
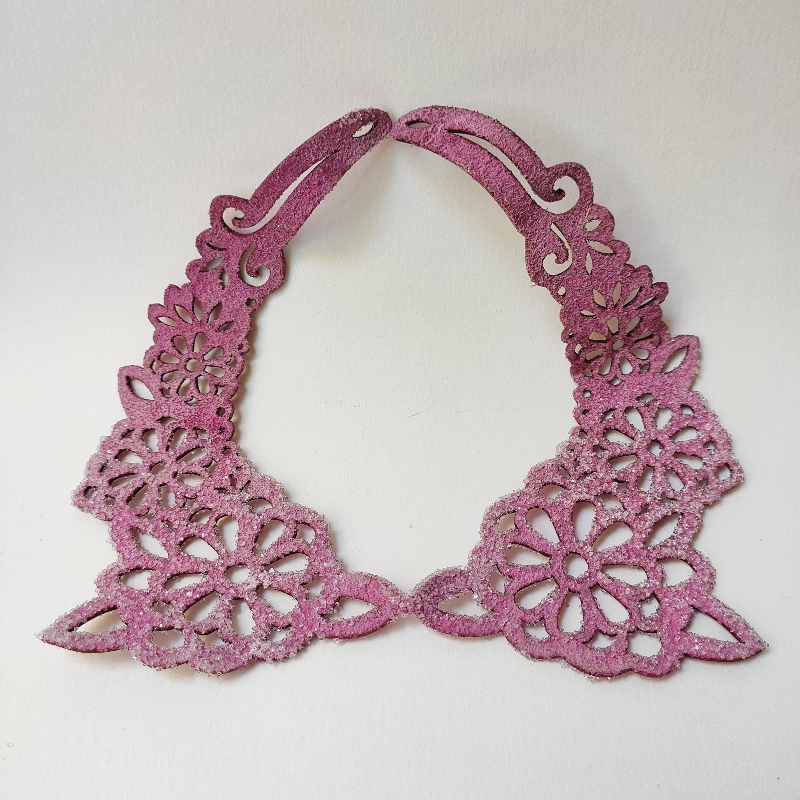
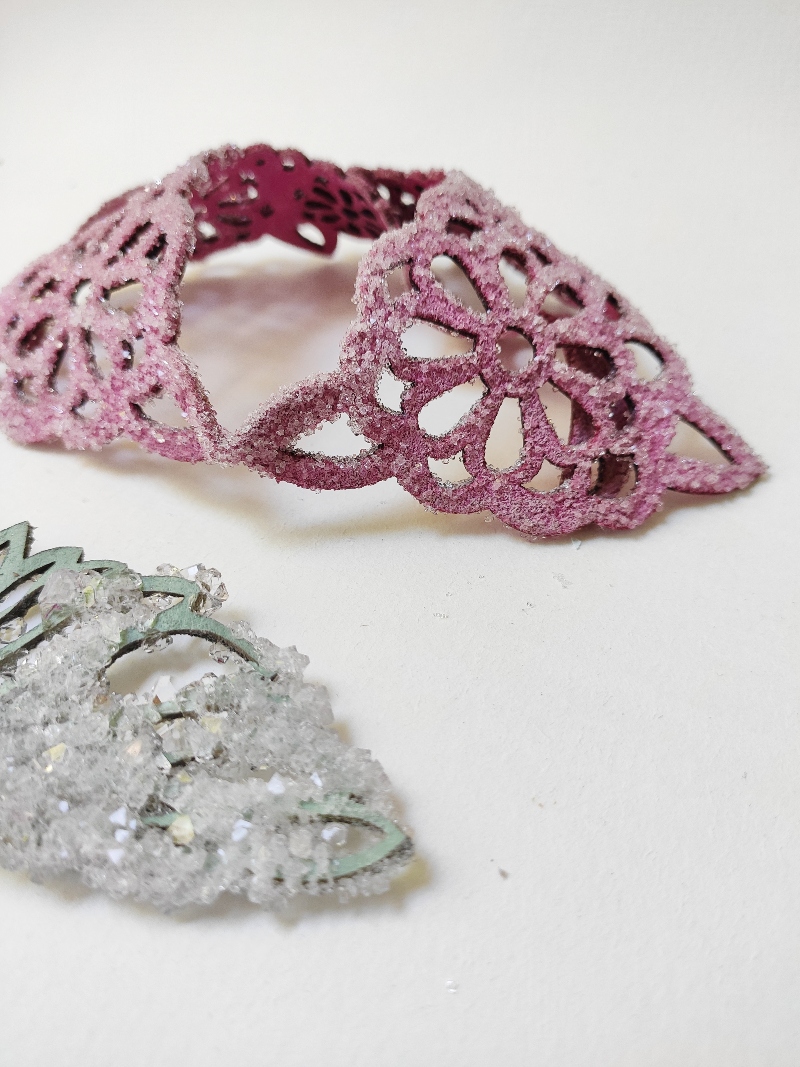
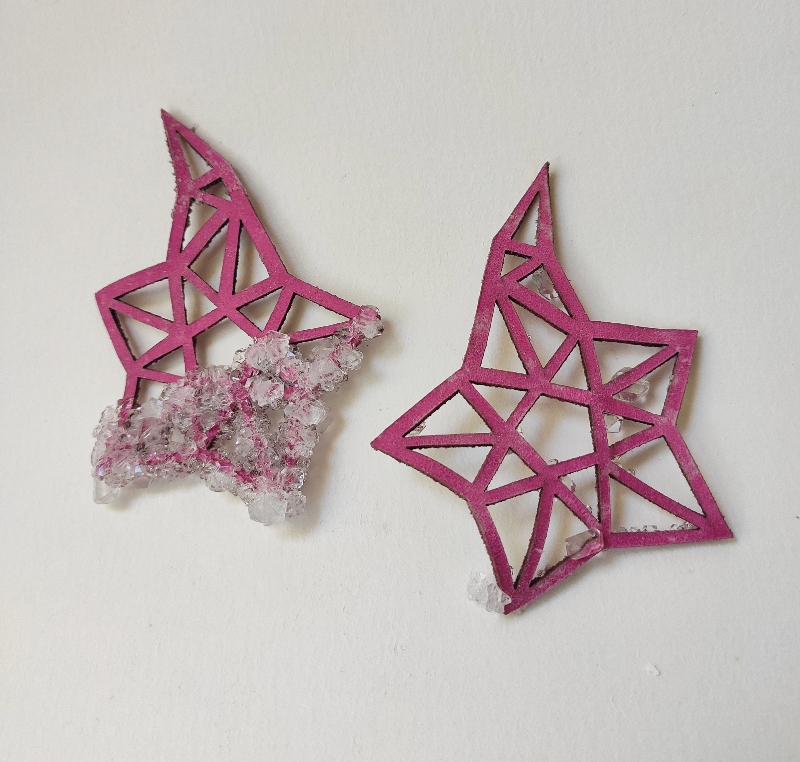
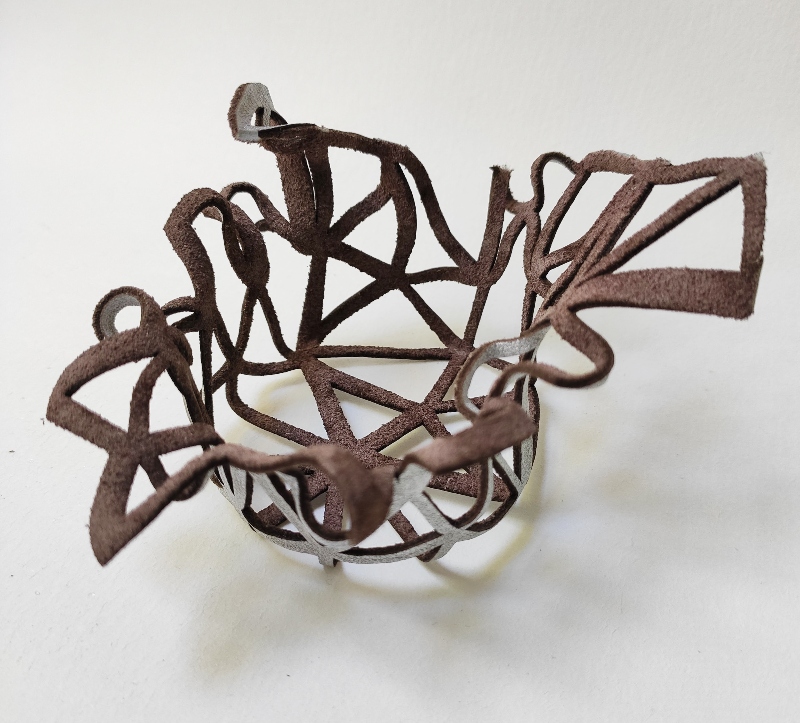
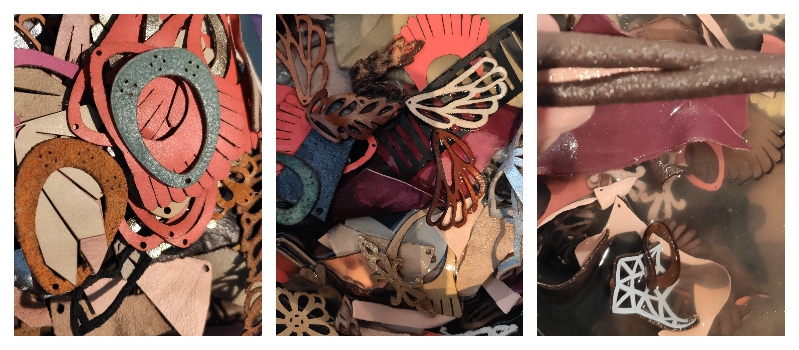
Leather jewelery.
I decided also to try with some remains of laser-cutted leather that I had since Laurel (my old jewelery entrerpreneurship) stopped working. The results were quite surprising, as I could not predict how crystals would grow on each sample. For example, I put to grow two earings in the same pot. One earing was full of crystals but only in one half (even though it was completly submerged), and the otherone, did not get much crystals at all.
I also noticed that more crystals grew better in the back side of the leather: it might be because of its velvet (micro-hair) typology.
Molding
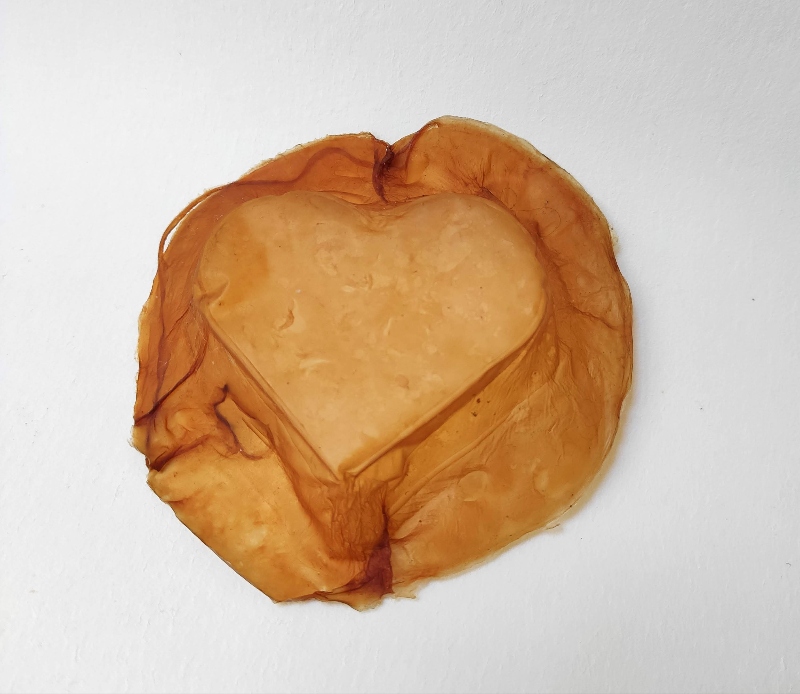
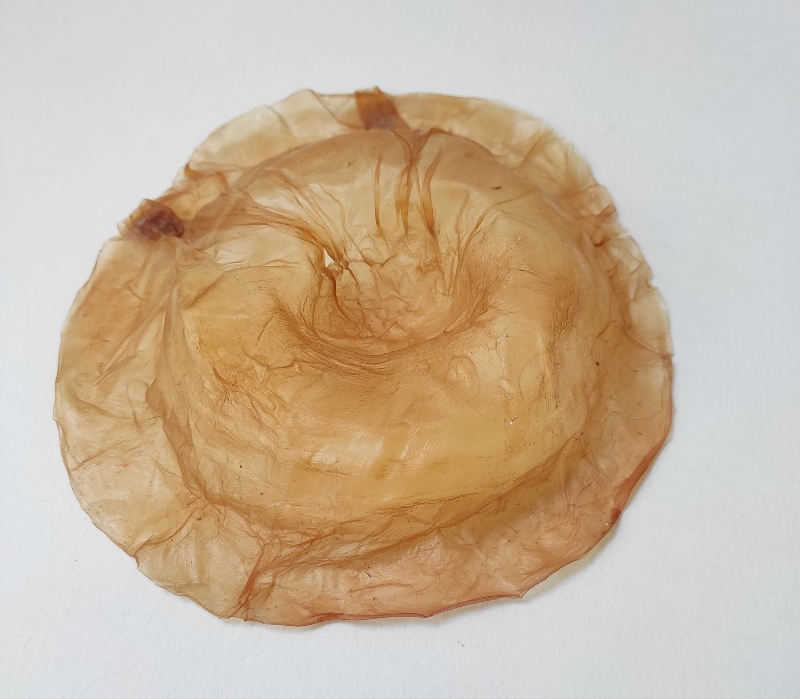
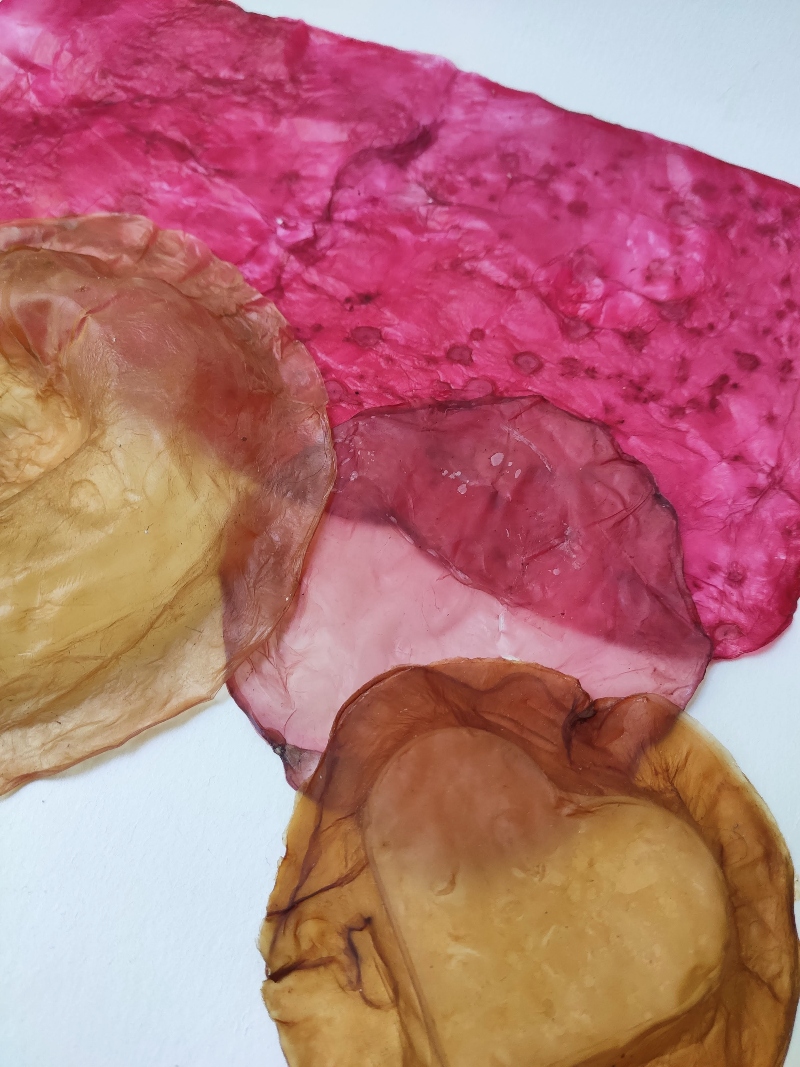
Kombucha.
Besides it was a little too soon, I harvested my kombucha.
I thought it was a great opotunity and I tried to dry it in a different shape than lying flat. I had two Kombucha leathers: one from black tea, and the otherone from hibiscus tea and also two SCOBY (one on each leather). I decided to dry in a mold one SCOBY and one kombucha leather. It is quite thin, but is still resistant.

 Leather jewelery.
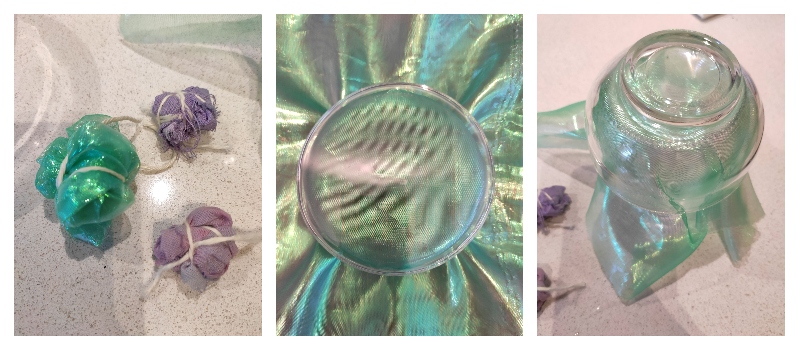
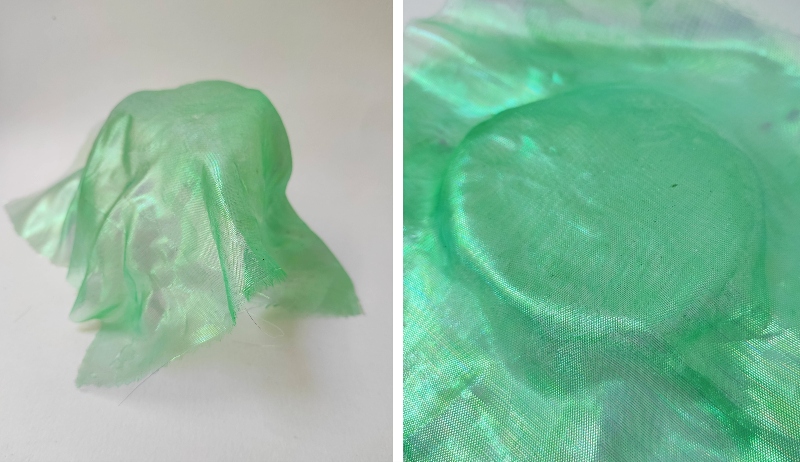
 As I will explain on on the "Awful Fails" section, after boiling during one hour some leather remains, only one piece (the bigger one) survived. I molded it on a jar, and secured it with a hair tie. I was surprised with the results, It looks and feels pretty hard, and its shape is harmonious.
Leather
This part of the assignment did not went well at all!. To start with, I still do not have access to my lab. But If I had it, our CNC milling machine is broken, so no much difference here. Same thing happened with FabLab Montevideo´s CNC milling: it was not working.
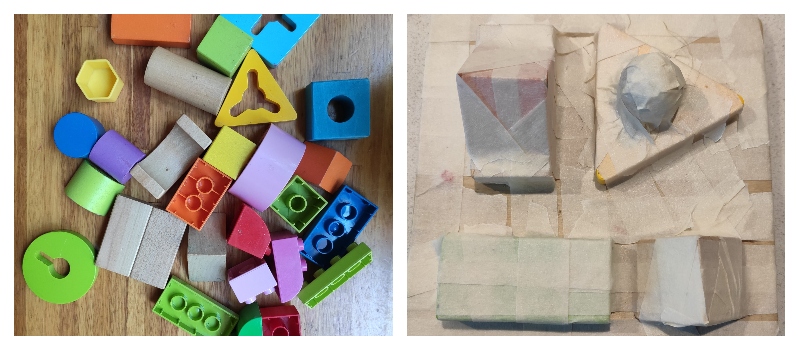
I tried to find a lab or a furniture studio that could give us the service, and it was impossible: at this time of the year they are in their peak of work, so nobody will take small jobs. Consequently, I decided to make my own mold with what I had at home: my children´s food made out of wood.
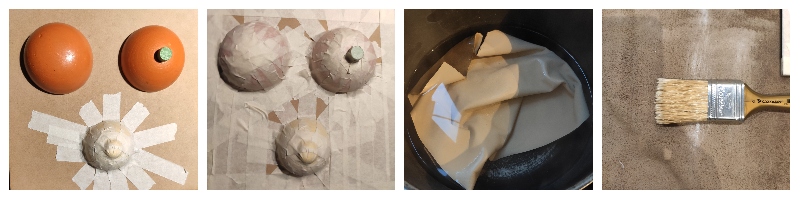
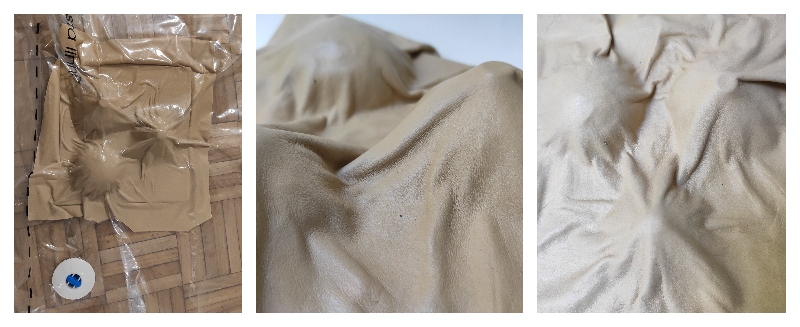
After making the mold, I poured boiling water over a 40x40 cm piece of leather, of aproximately 1 milimiter th¡ckness. I left it rest during 2 hours. Then I took it off, and with a paintbrush, I put white glue on its back.
The following step was placing the leather over the mold, and after pouring some olive oil over the top, started to massage it. Soon I realized that it wasn not going to be an easy task. I alternated vacuum bag with massage, but my vacum bag was not working very well as it was a 150cm wide (way to big).
After some hours of this process, I left the piece outside to dry...And It dryied completly D_: , while I still was in the middle of the process!! So I honestly, do not like the results.
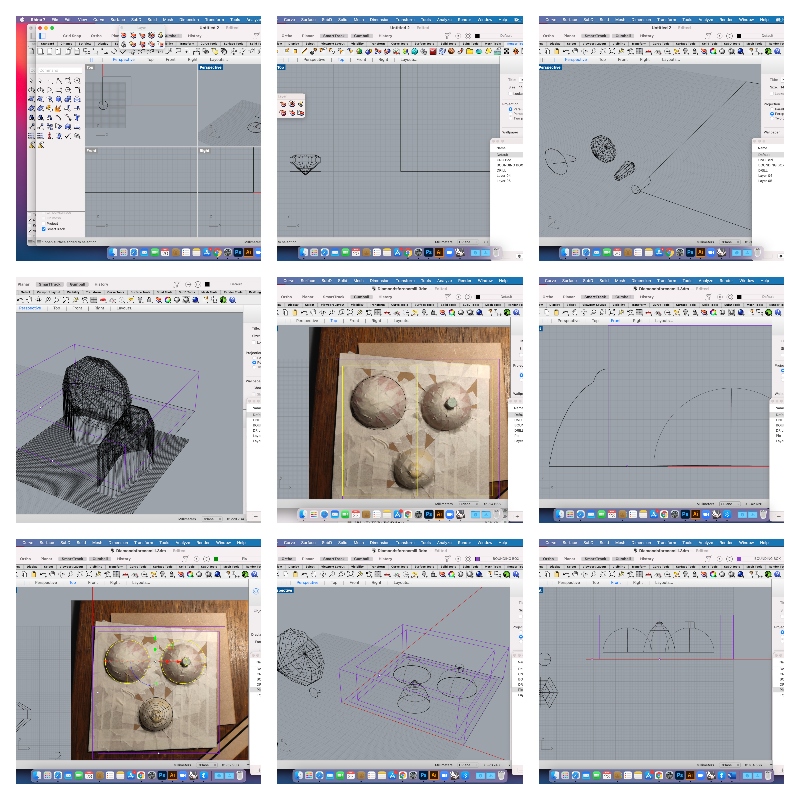
Finally, I watched Anastasia´s Rhino CAM tutorial so I could prepare the file and understand the software. I tried to build some crystals from scratch, but then I realized it was a better idea trying to reproduce the mold already made with the wooden toys.
When I went to Food4Rhino to download the software, I had the worst news: no software for MAC!! So, in the end, I could not finish the file: i got quite lost when I had to ineract with a software without being able to actually making it.
BONUS TRACK: Dumbest Fails
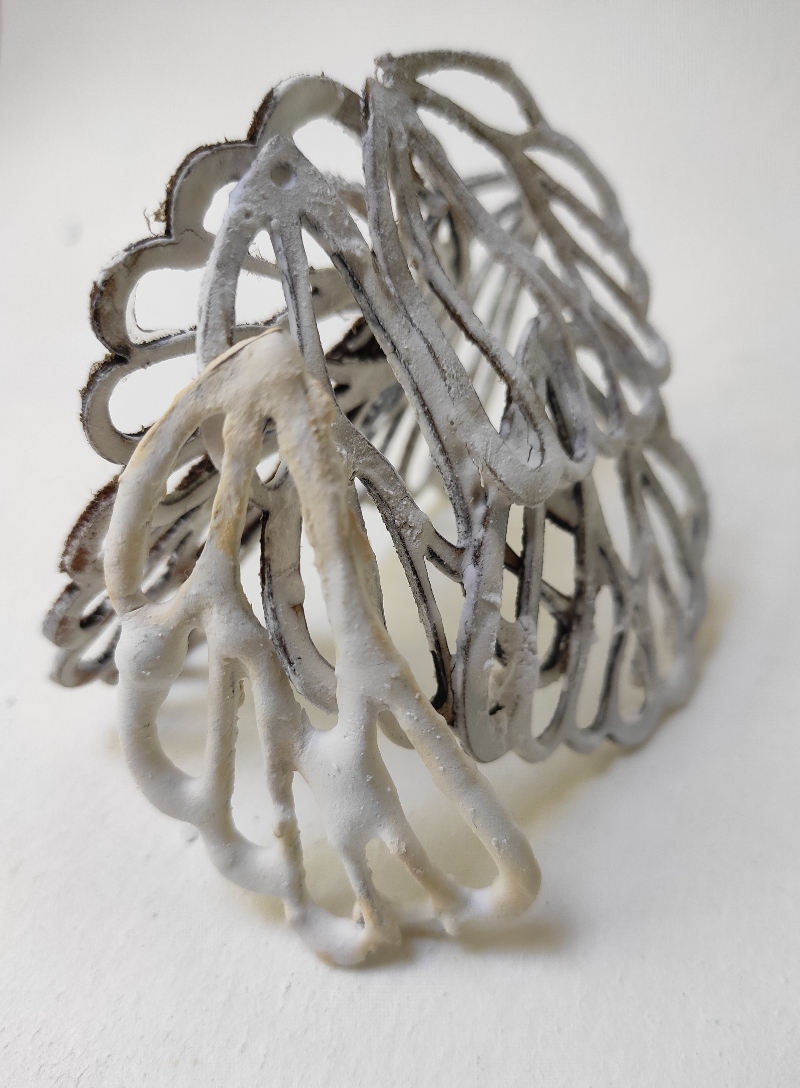
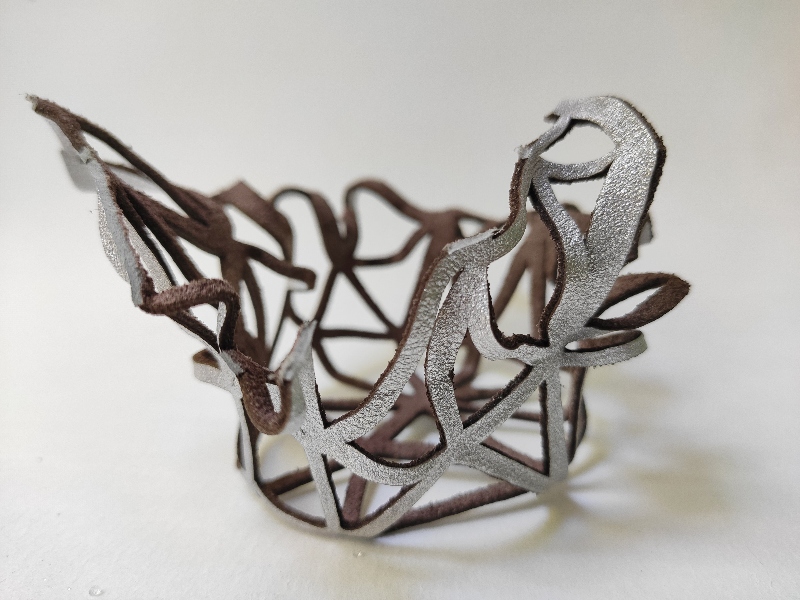
Leather waste + glue.
 As I have a lot of leftovers/remains/samples, I wanted to make a composite of leather..buuuut, things did not went as expected and everything looked terrible. My first attempt was to make a "lacey" flexible composite of this wings. I had the great idea of using glue to fix the wings to the glass mold. Long story short: it got stuck there like a rock and had to throw everything away.
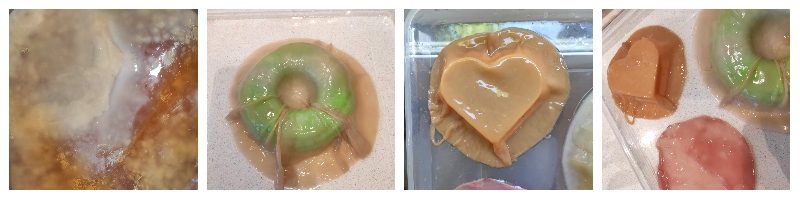
Leather waste composite, that "I was going"to make with gelatine.
Going on witn the leftovers, I tried to make a composite of leather and -resin- gelatine. I boiled during 1 hour a big pan of leather pieces (?). I really do not know why DID I BOILED THE LEATHER. But as expected, I ruined almost everything.
Mini Mold
I spent a while selecting and making a cute mold with legos and wooden blocks. But then, when I had the wet leather with me, I realized that I had some "impossible" shapes and also that it mas to small to be able to work in a comfortable way (it was a 15x15cm mold).