2. Digital bodies
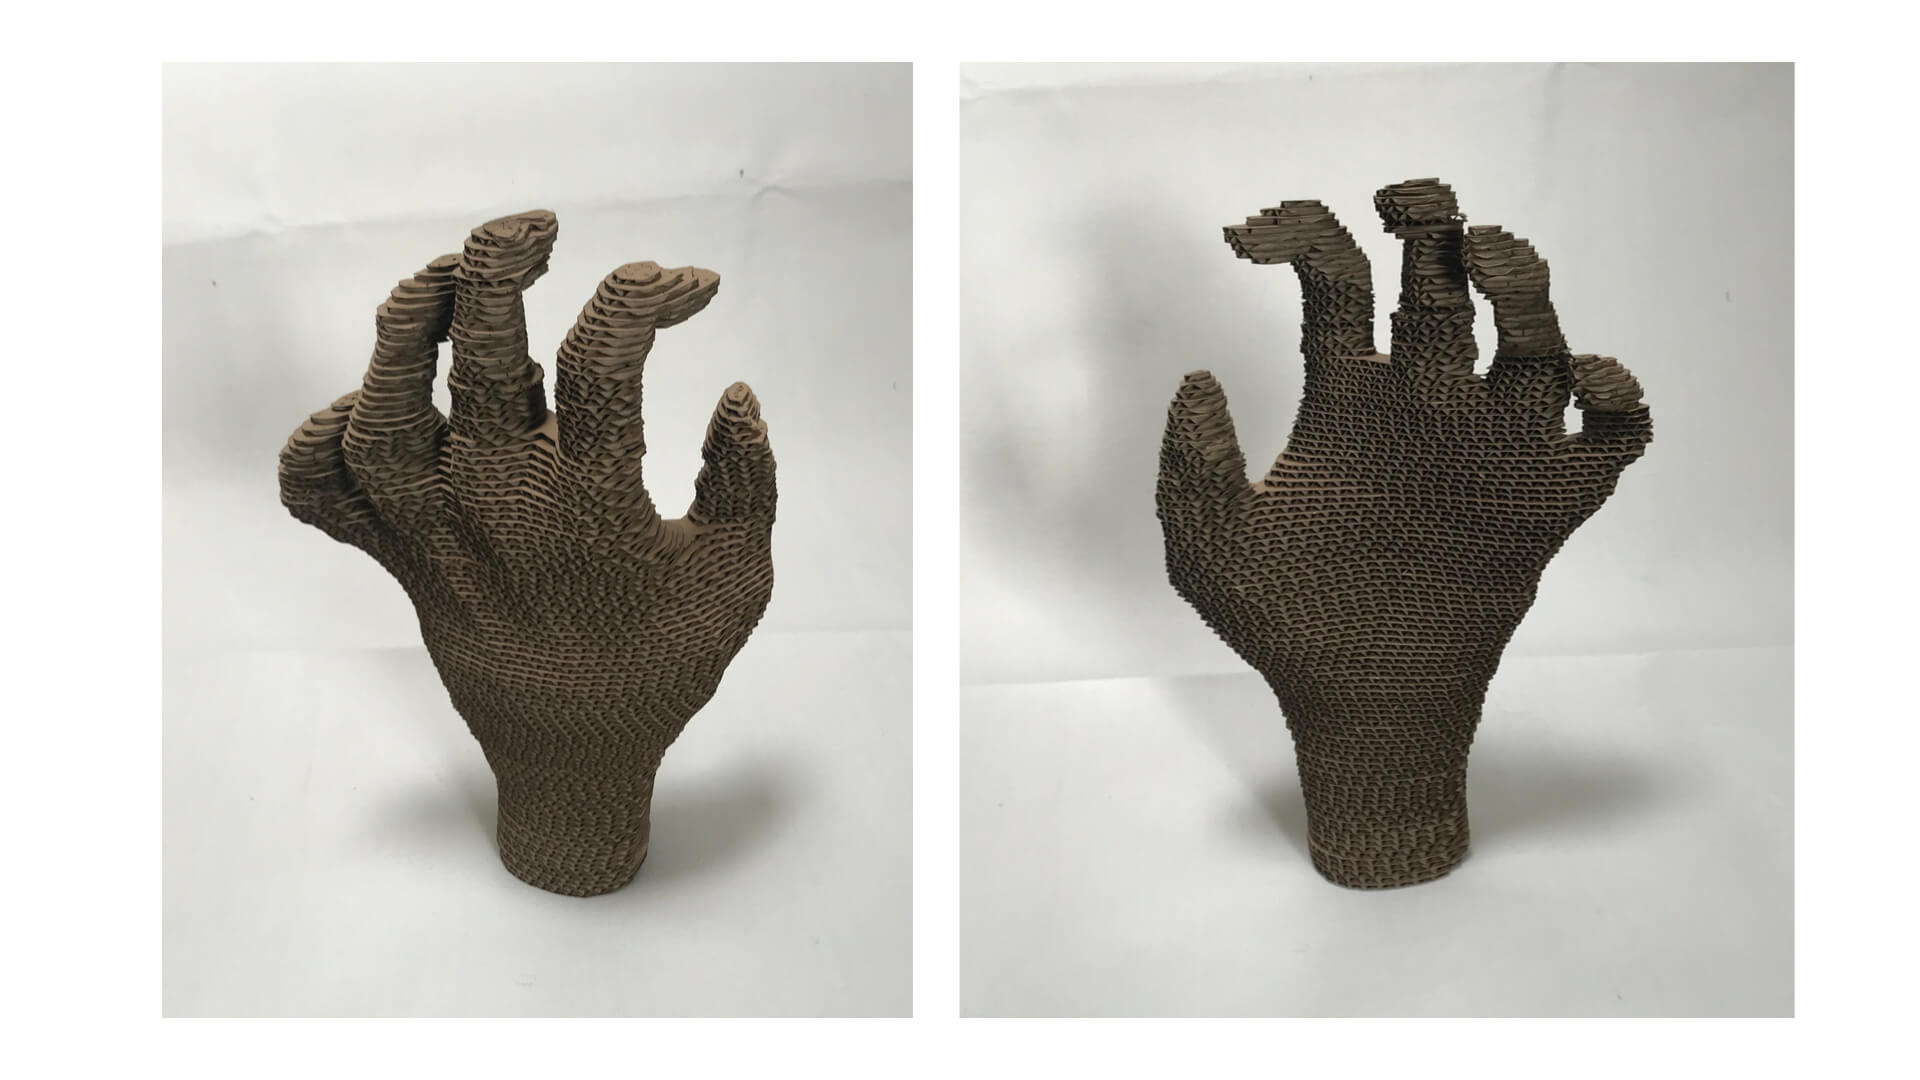
The end result!
This week is about digital bodies, scaning, manipulating and translating flat pieces to a 3D model. I thought it would be nice to focus on the hands, in line with my former art practices, but this was discouraged yesterday for being too complicated. Thereafter I thought about measuring the roundness of a torso and particularly these areas that protrude.
Inspiration
 Because I'm creating a 3D hand from 2D carboard pieces, I immediately though of 1920s German Expressionist films, such as Das Cabinet des Dr Caligari and Orlac's Hands both directed by Robert Wiene and still a great source of inspiration.

A close friend reminded me that my hand resembles the ones of Zadkine's statue in Rotterdam.
Documentation
We downloaded Makehuman, Rhino and Slicer beforehand and I had a little play with Makehuman last night. When I opened the laptop this morning my funny digital body disappeared for a while and this appeared:
I think it has a funky aesthetic to it
MakeHuman
When I started, I remembered I had worked with MakeHuman before. Just playing around a little, it wasn't hard at all. Some of the explained features, however, where new to me and extended the possibilities. The programme proved extremely baised and a Note to Self here is to once write a brief article about this, if I find the time and if this hasn't been done before...
But let me start by posting an image of the export settings.
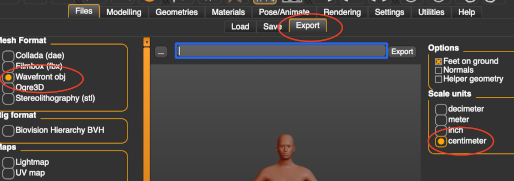
The Mesh Format needs to be Wavefront obj and the size set to centimeter
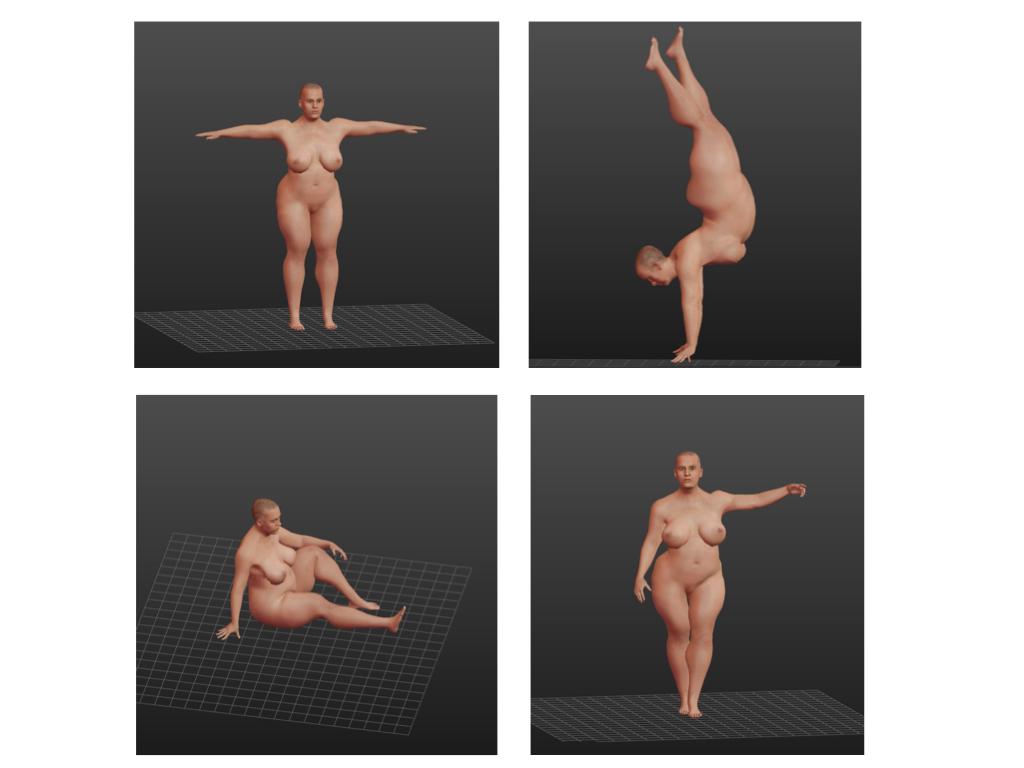
Old yet muscled body I wanted to create an older body, plus size but with a muscled body. I needed to use the 'age' button, however, to give her a firm body. Even though I tried moving the muscle controls, nothing worked better than shifting the age drastically down. Good thing that in real life some exercise does have its effect on bodies.
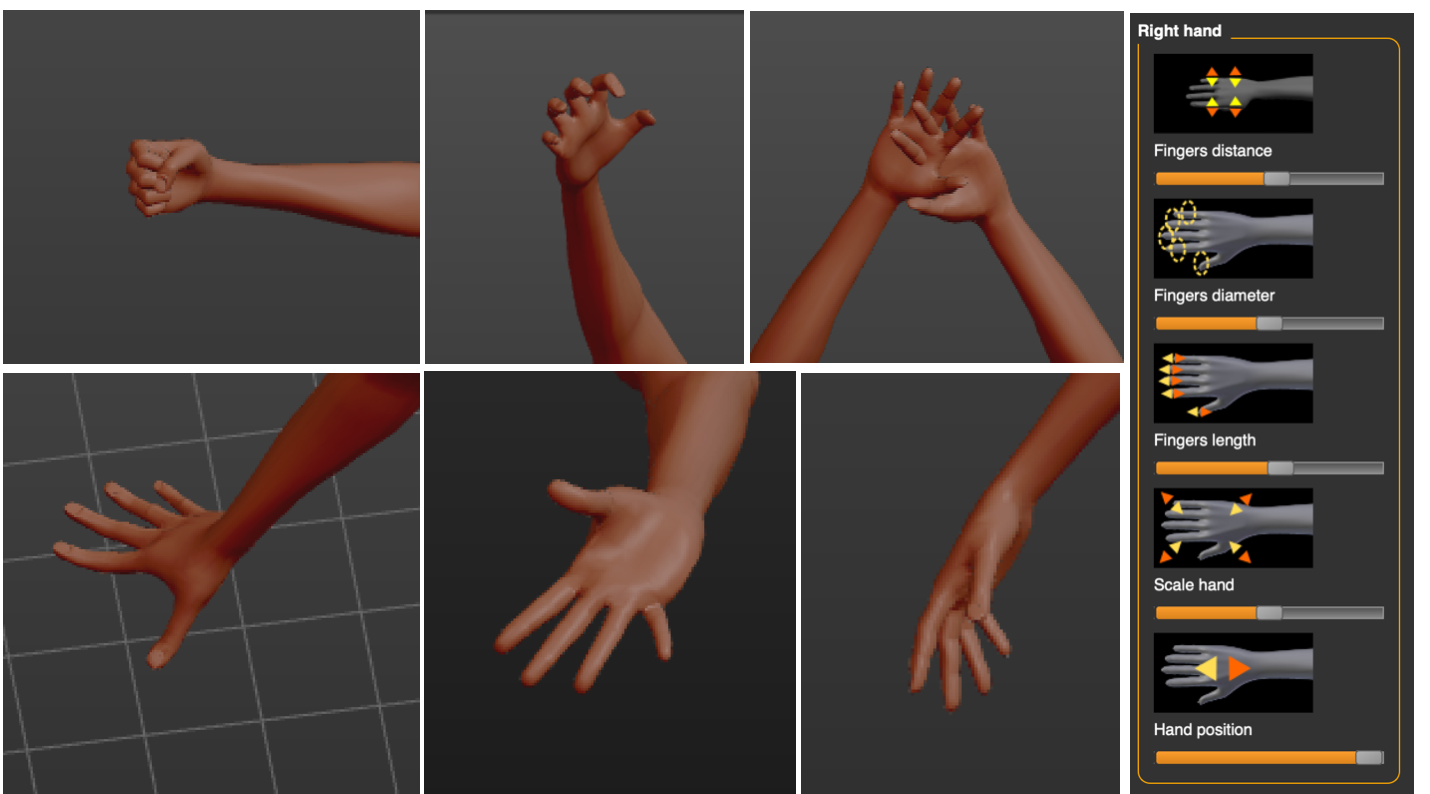
Hands I wanted to laser cut a hand, which I could then use to display my hand extension art work on. Whereas you can't really move the position of the fingers in the general mode, but the different poses provide you with different hand positions also. I made screenshots of several of them and choose to use Fight02. This is the claw-like hand in the middle of the top row below, which can now be exported as an Wavefont obj file to be further edited on Rhino.
Rhinonono
Rhino was definitely more complicated to master than MakeHuman. Since I don't often work with apps such as Photoshop, many symbols and actions were completely new to me. We started by creating a cube, which we could move around. Then we created another cube that we placed over the first one. This little exercise helped us to rotate, cut one solid with another which we would need to do to create a torso, and, in my case a single hand rather than a full body.
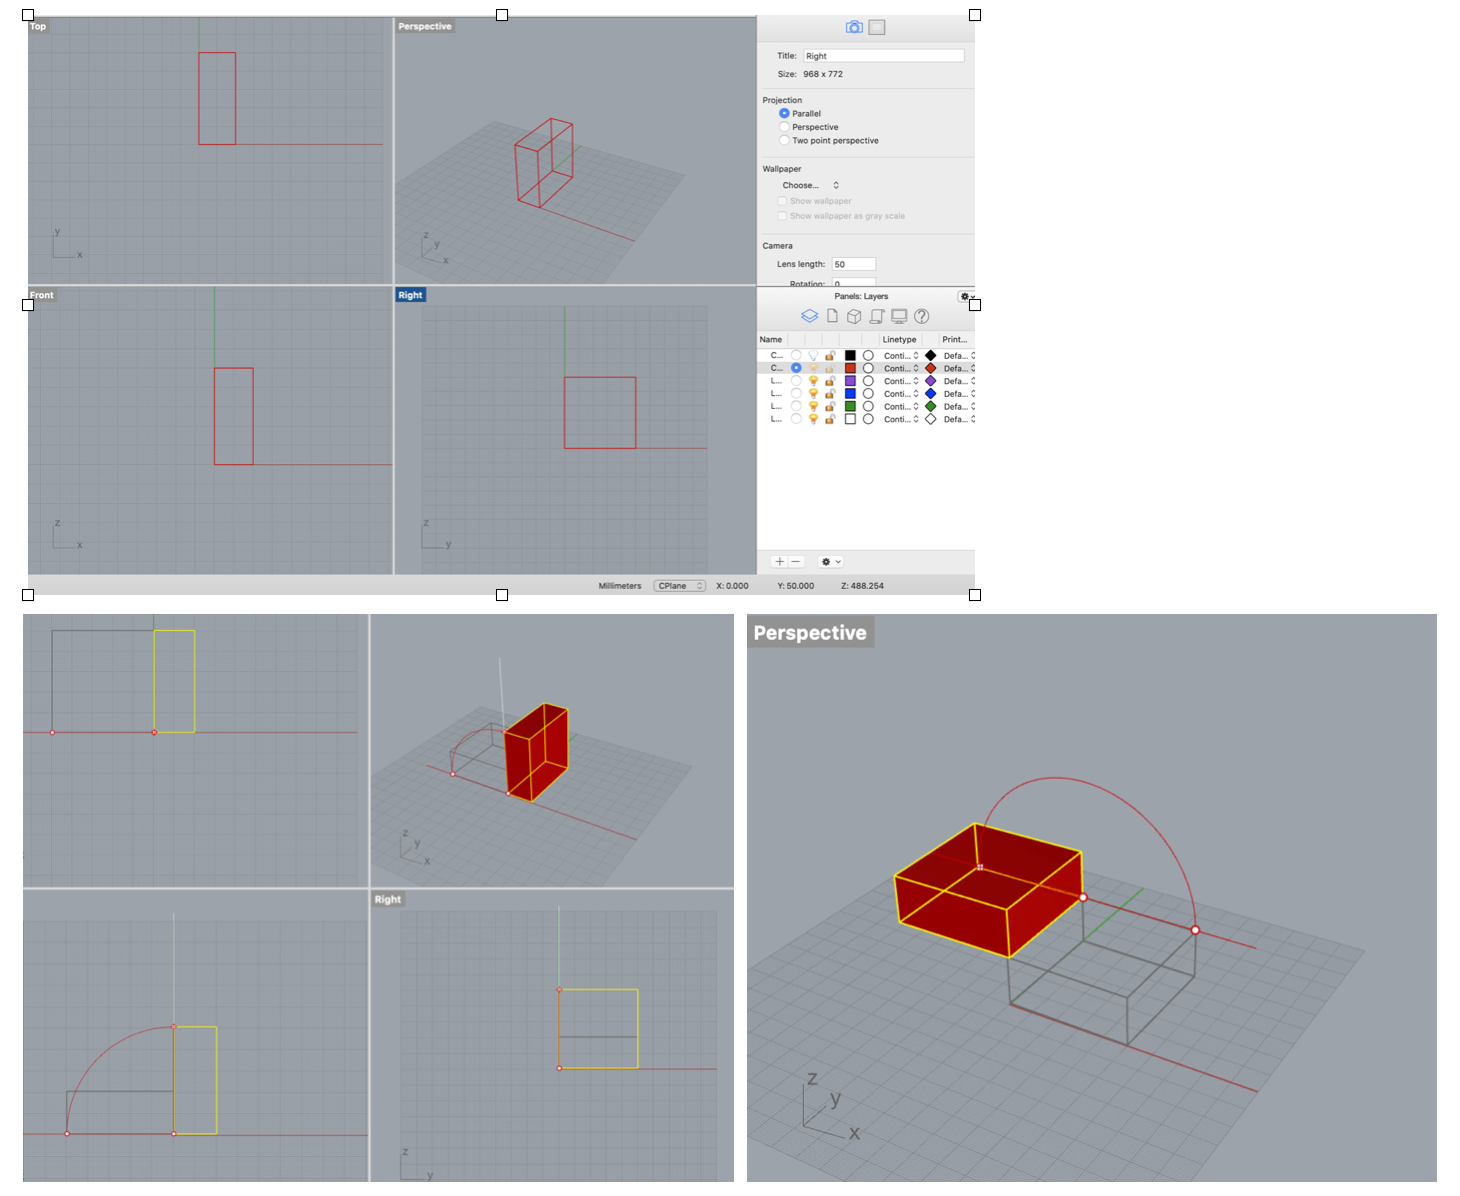
Creating a shape, moving it with the Move Command and rotating it with the Rotate Command. Some essential Rhino operations...
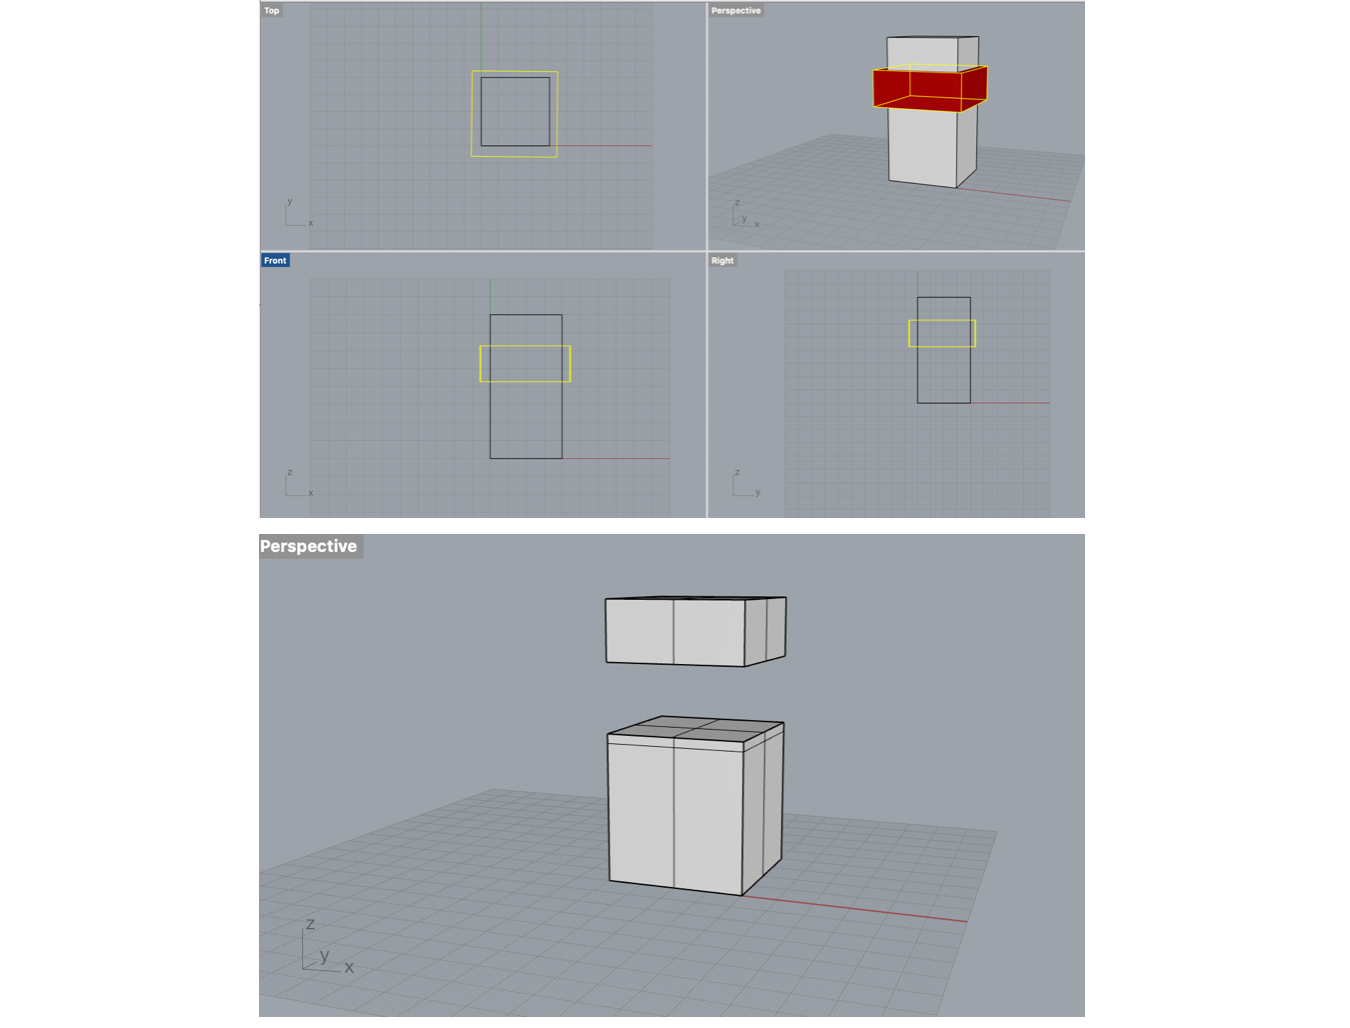
Cutting solids with the Boolean difference command.
Rhino Torso
Next step was to import the MakeHuman Wavefont obj file of the Old Woman with a Strong Body into Rhino. Then create a flat cube which can be used to cut off the head, arms and legs of the Old Woman, to create a torso. I quite like the result and think it is a welcome change to the standard skinny fashion torsos out there.
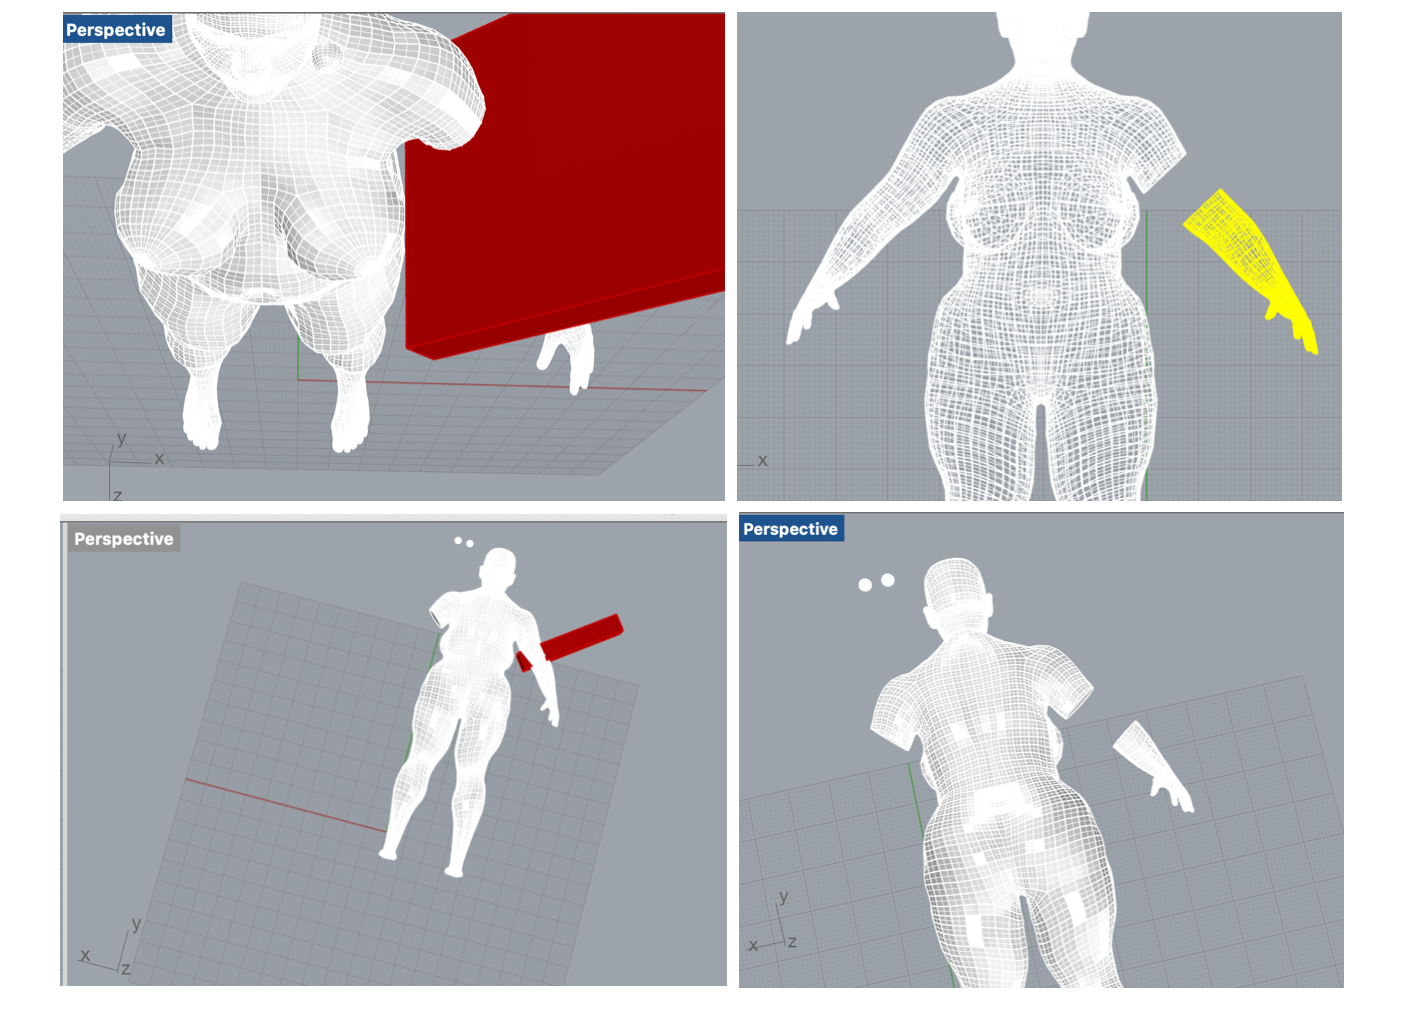
Cutting off arms with a red cube.

There go her legs and head.
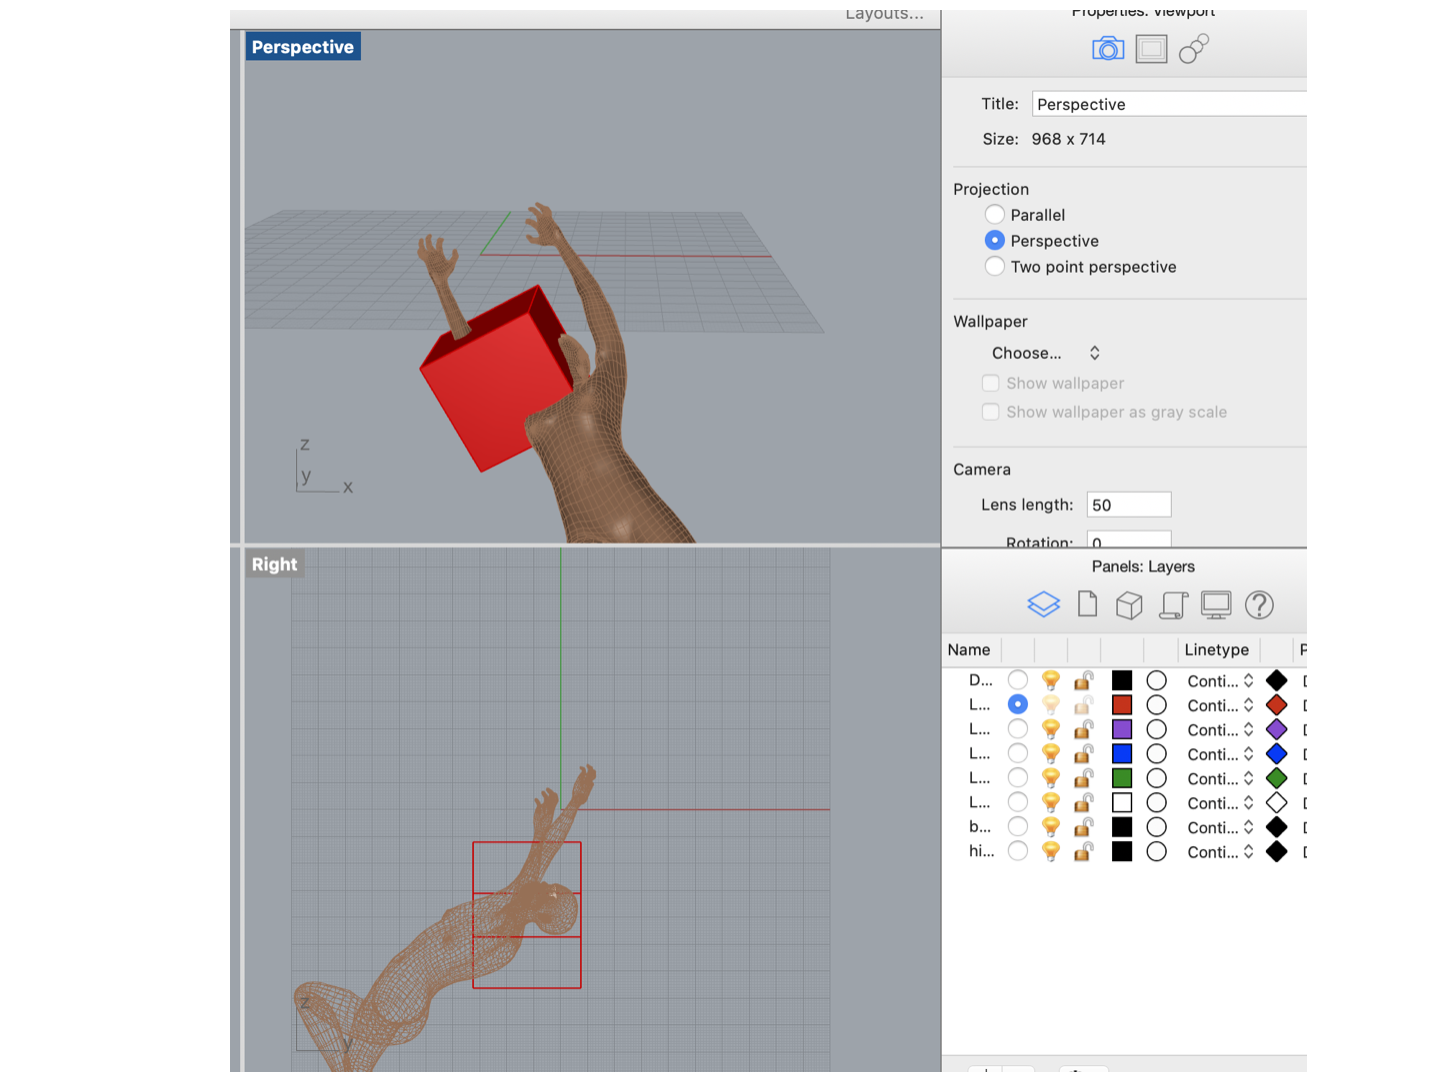
Rhino Hand
I wanted to create a new hand in Rhino after I found out that in MakeHuman poses the hands were in different positions than in the general starting human. But I encountered a problem. When I opened Rhina, I would see the starting screen with the six layers on the bottom right. Then when I use file and open and choose the obj object from Makehuman, it does open the file in Rhino, but I'm left with only one layer. Hmmm.
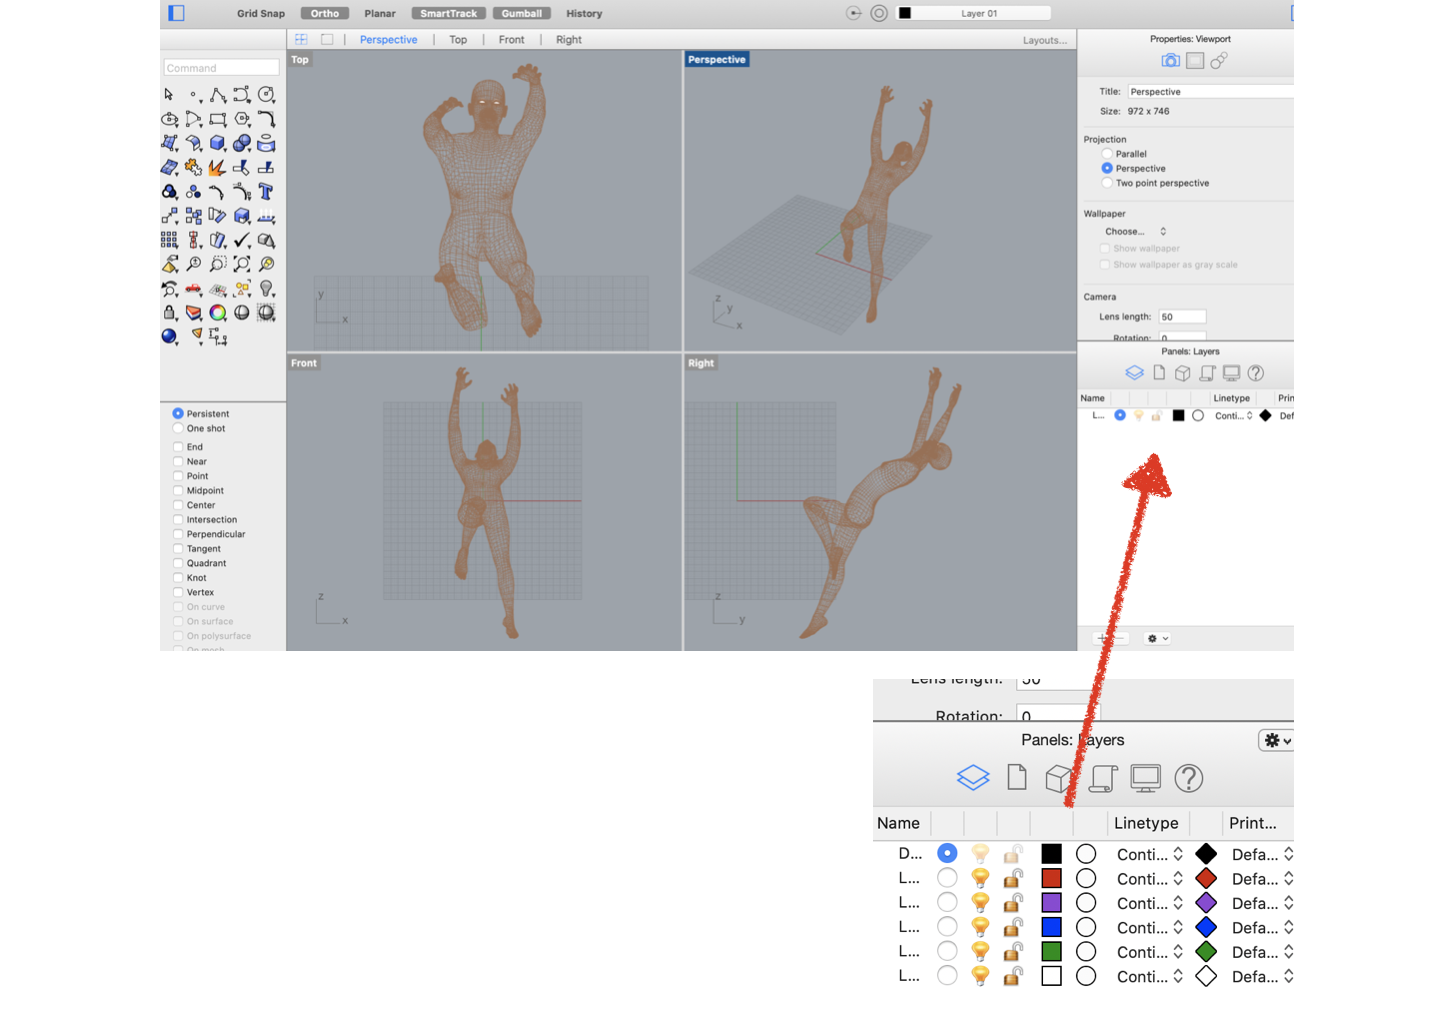
So I must have forgotten how to import the MakeHuman file. Think it is time for some tutorial watching...
Couldn't find the right tutorial and encountered more problems, but I did find out how to create a second layer myself for my box.
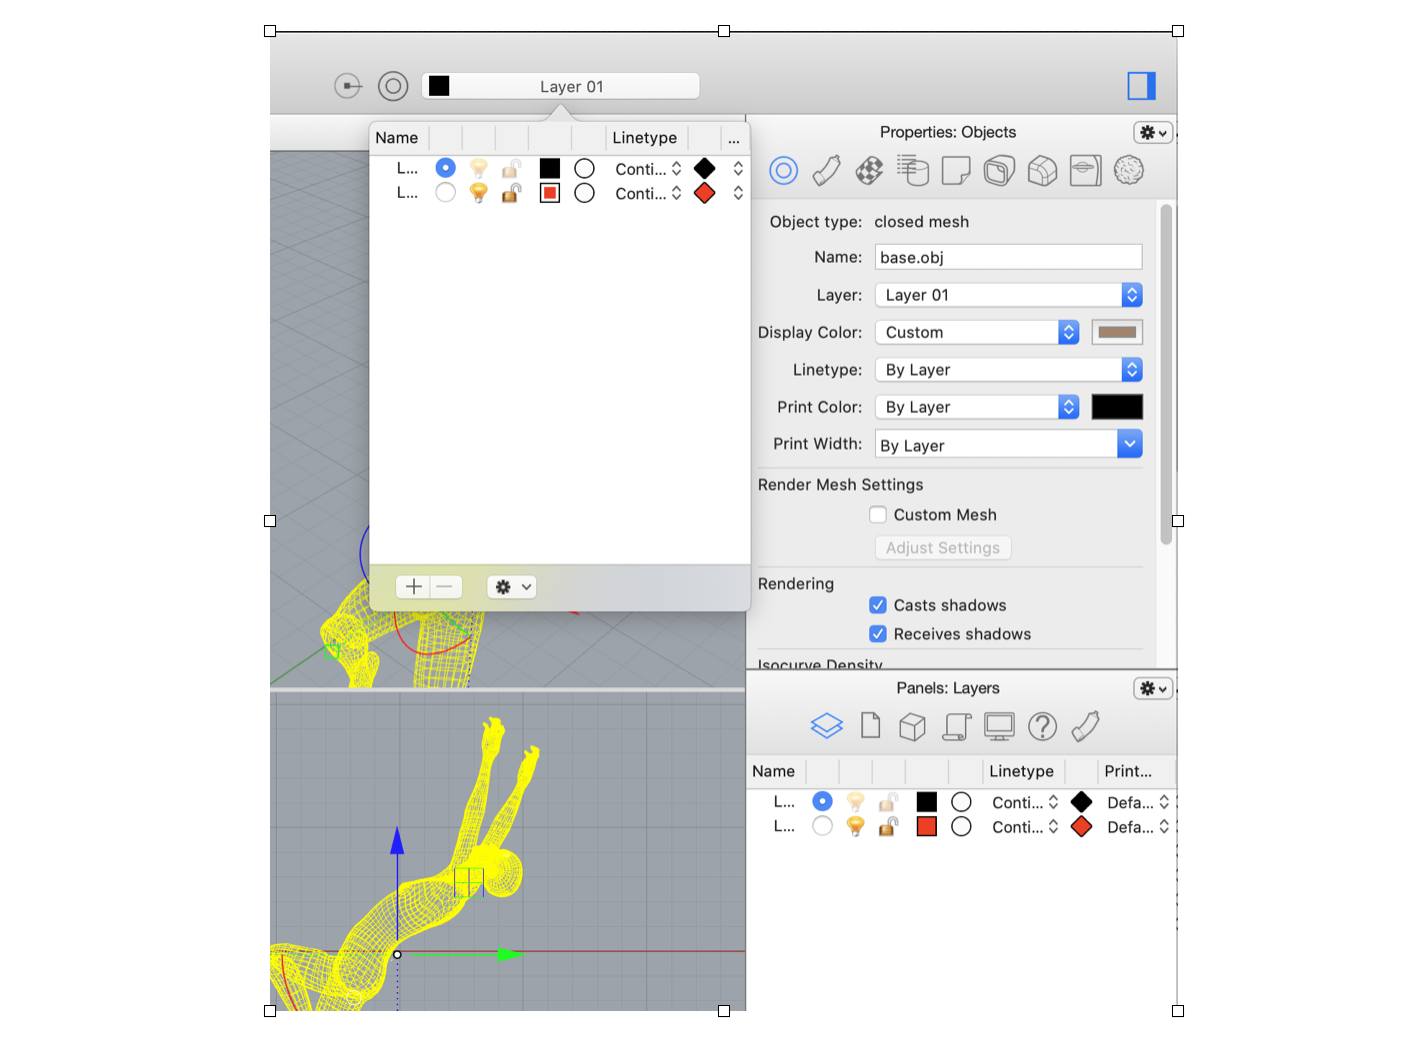
Should not forget to make sure the place markers are hidden before I make a screen shot...
When I had everything in place and ready to do the Boolean Difference cutting, I couldn't select the body any longer. If there's a moment on Monday to compile a list of steps, I will include it here, so that future students can find a quick fix.
Then, at a sudden moment, there were layers again:
Last step in the process is exporting the Rhino file make sure to select the obj extension so that we can take it to the following step: creating a plan in Slicer
Slicer
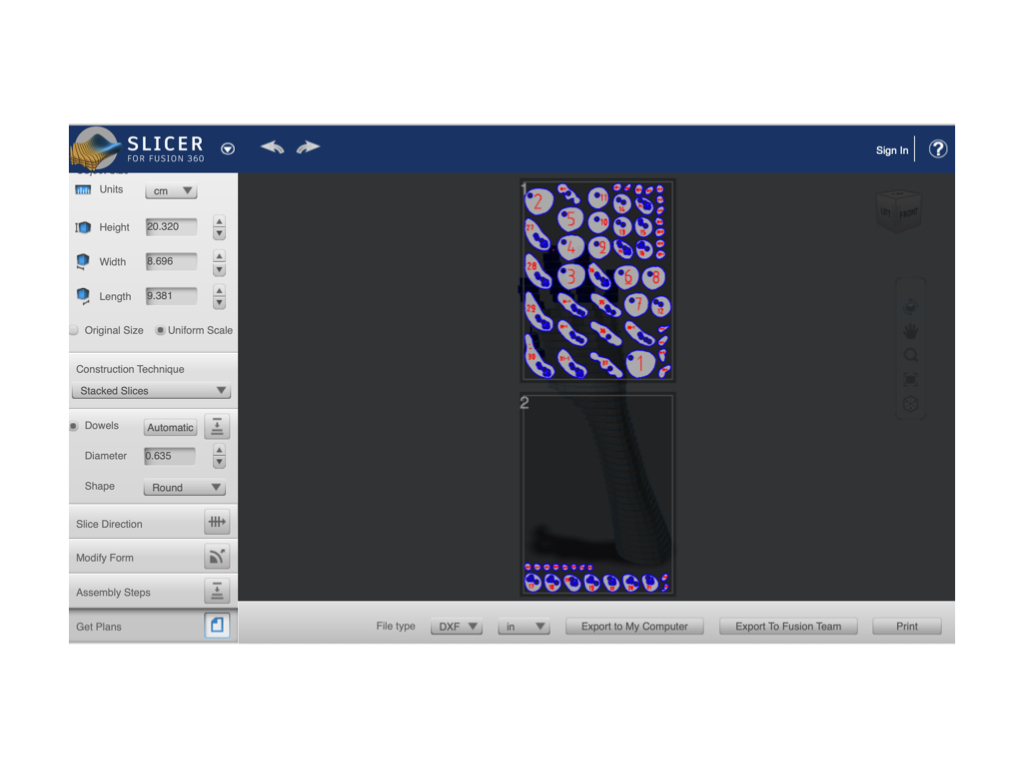
We downloaded and opened Slicer and after some of the struggles with Rhino, this seemed a friendlier more intuitive programme. In this programme, the 3D model of the torso, or hand, can be sliced into several different models that are translated into a 2D plan that can be cut out of cardboeard with the laser cutter. We aim for about 3 to 4 sheets of cardboard to be used per project.
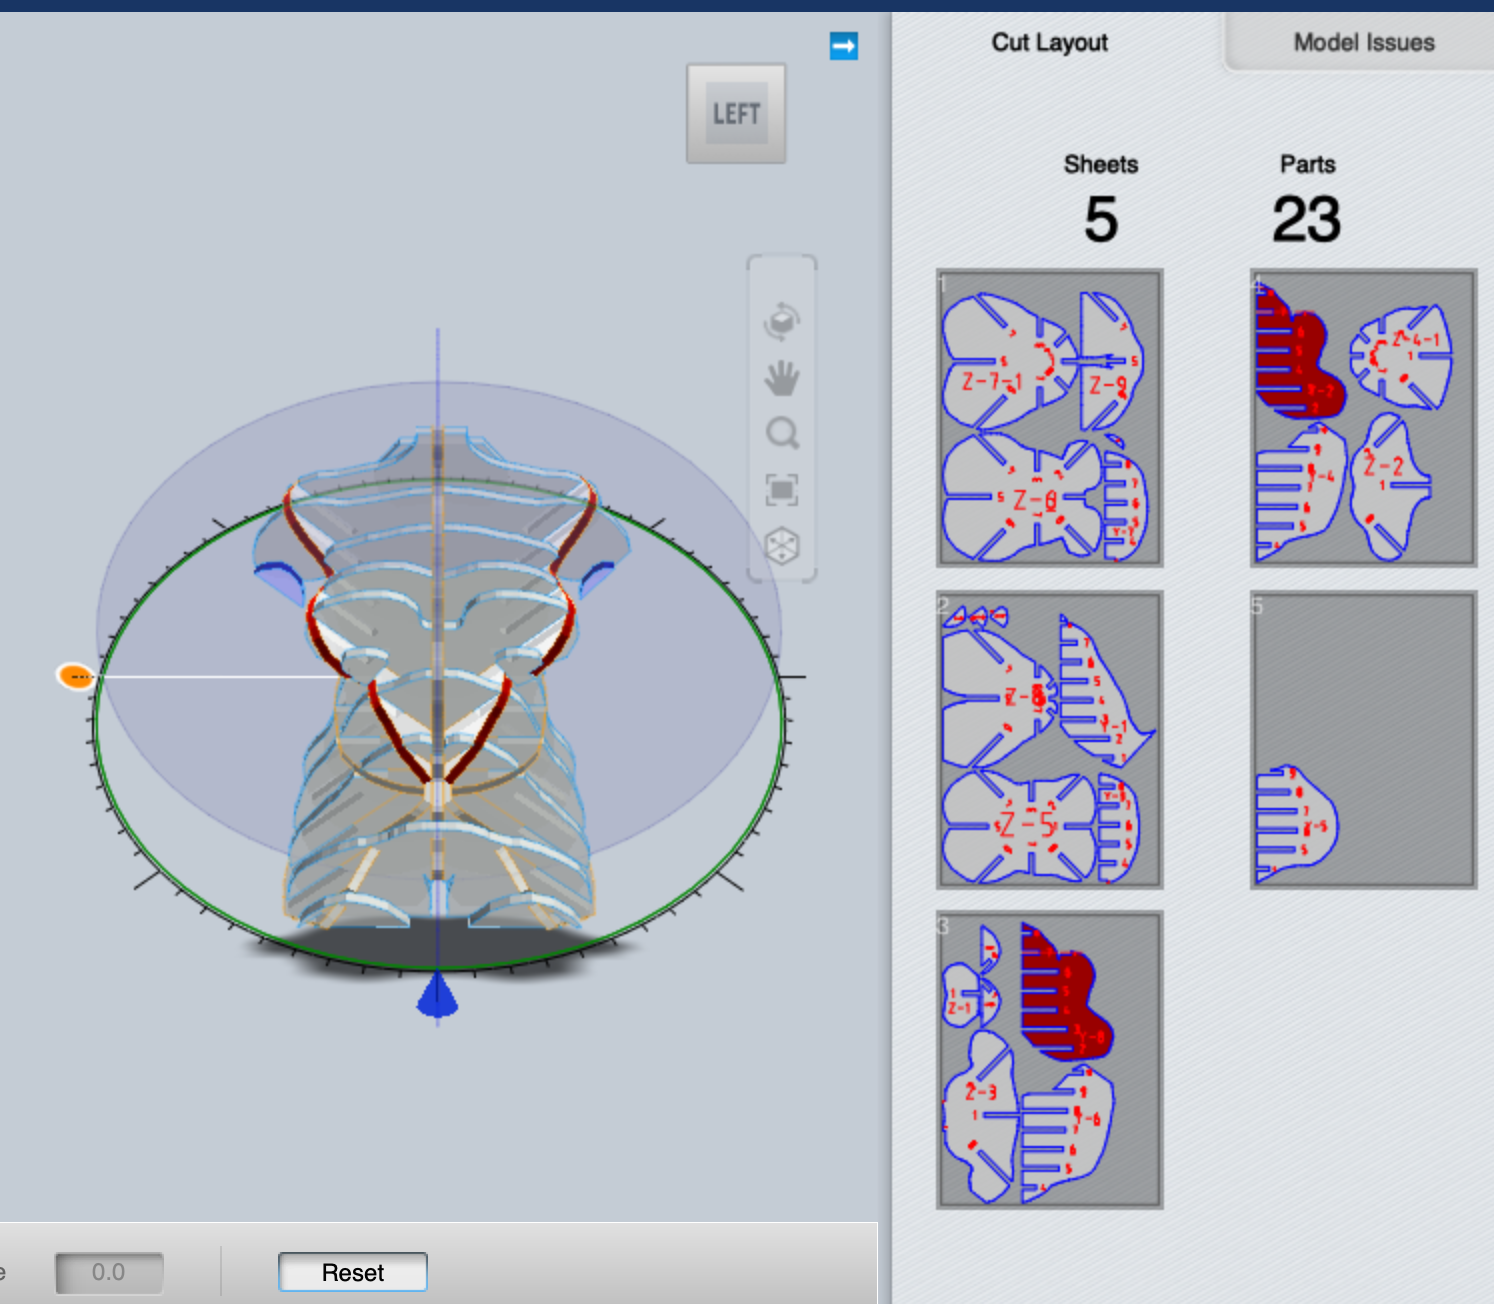
Slcing a torso In slicer you can select different slicing tools. The radical slicing one gives you the most interesting shapes, I think. Because the torso I created is quite large, it proved really hard to stay within the 4 sheets of cardboard. The one I liked best needs 5 sheets, but let's see what we find on Monday when I'm scheduled for laset cutting.
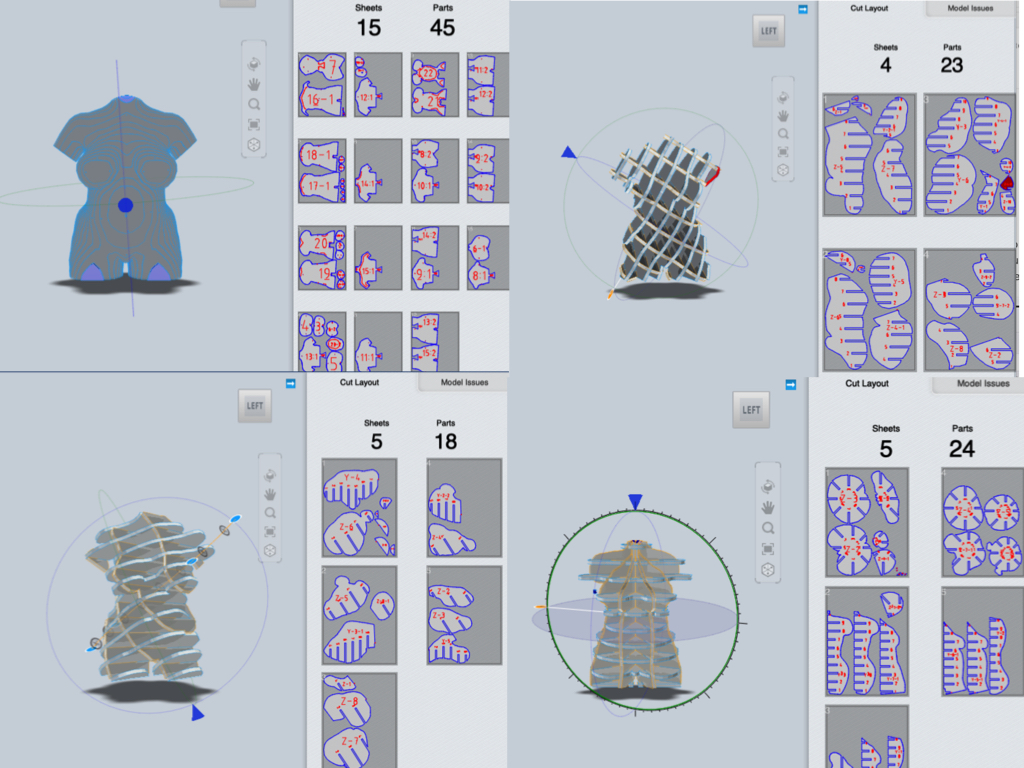
The torso stacked, interlocked, curved and (not so) radical slices.
I exported the file below to dxf and downloaded the plans to my computer.
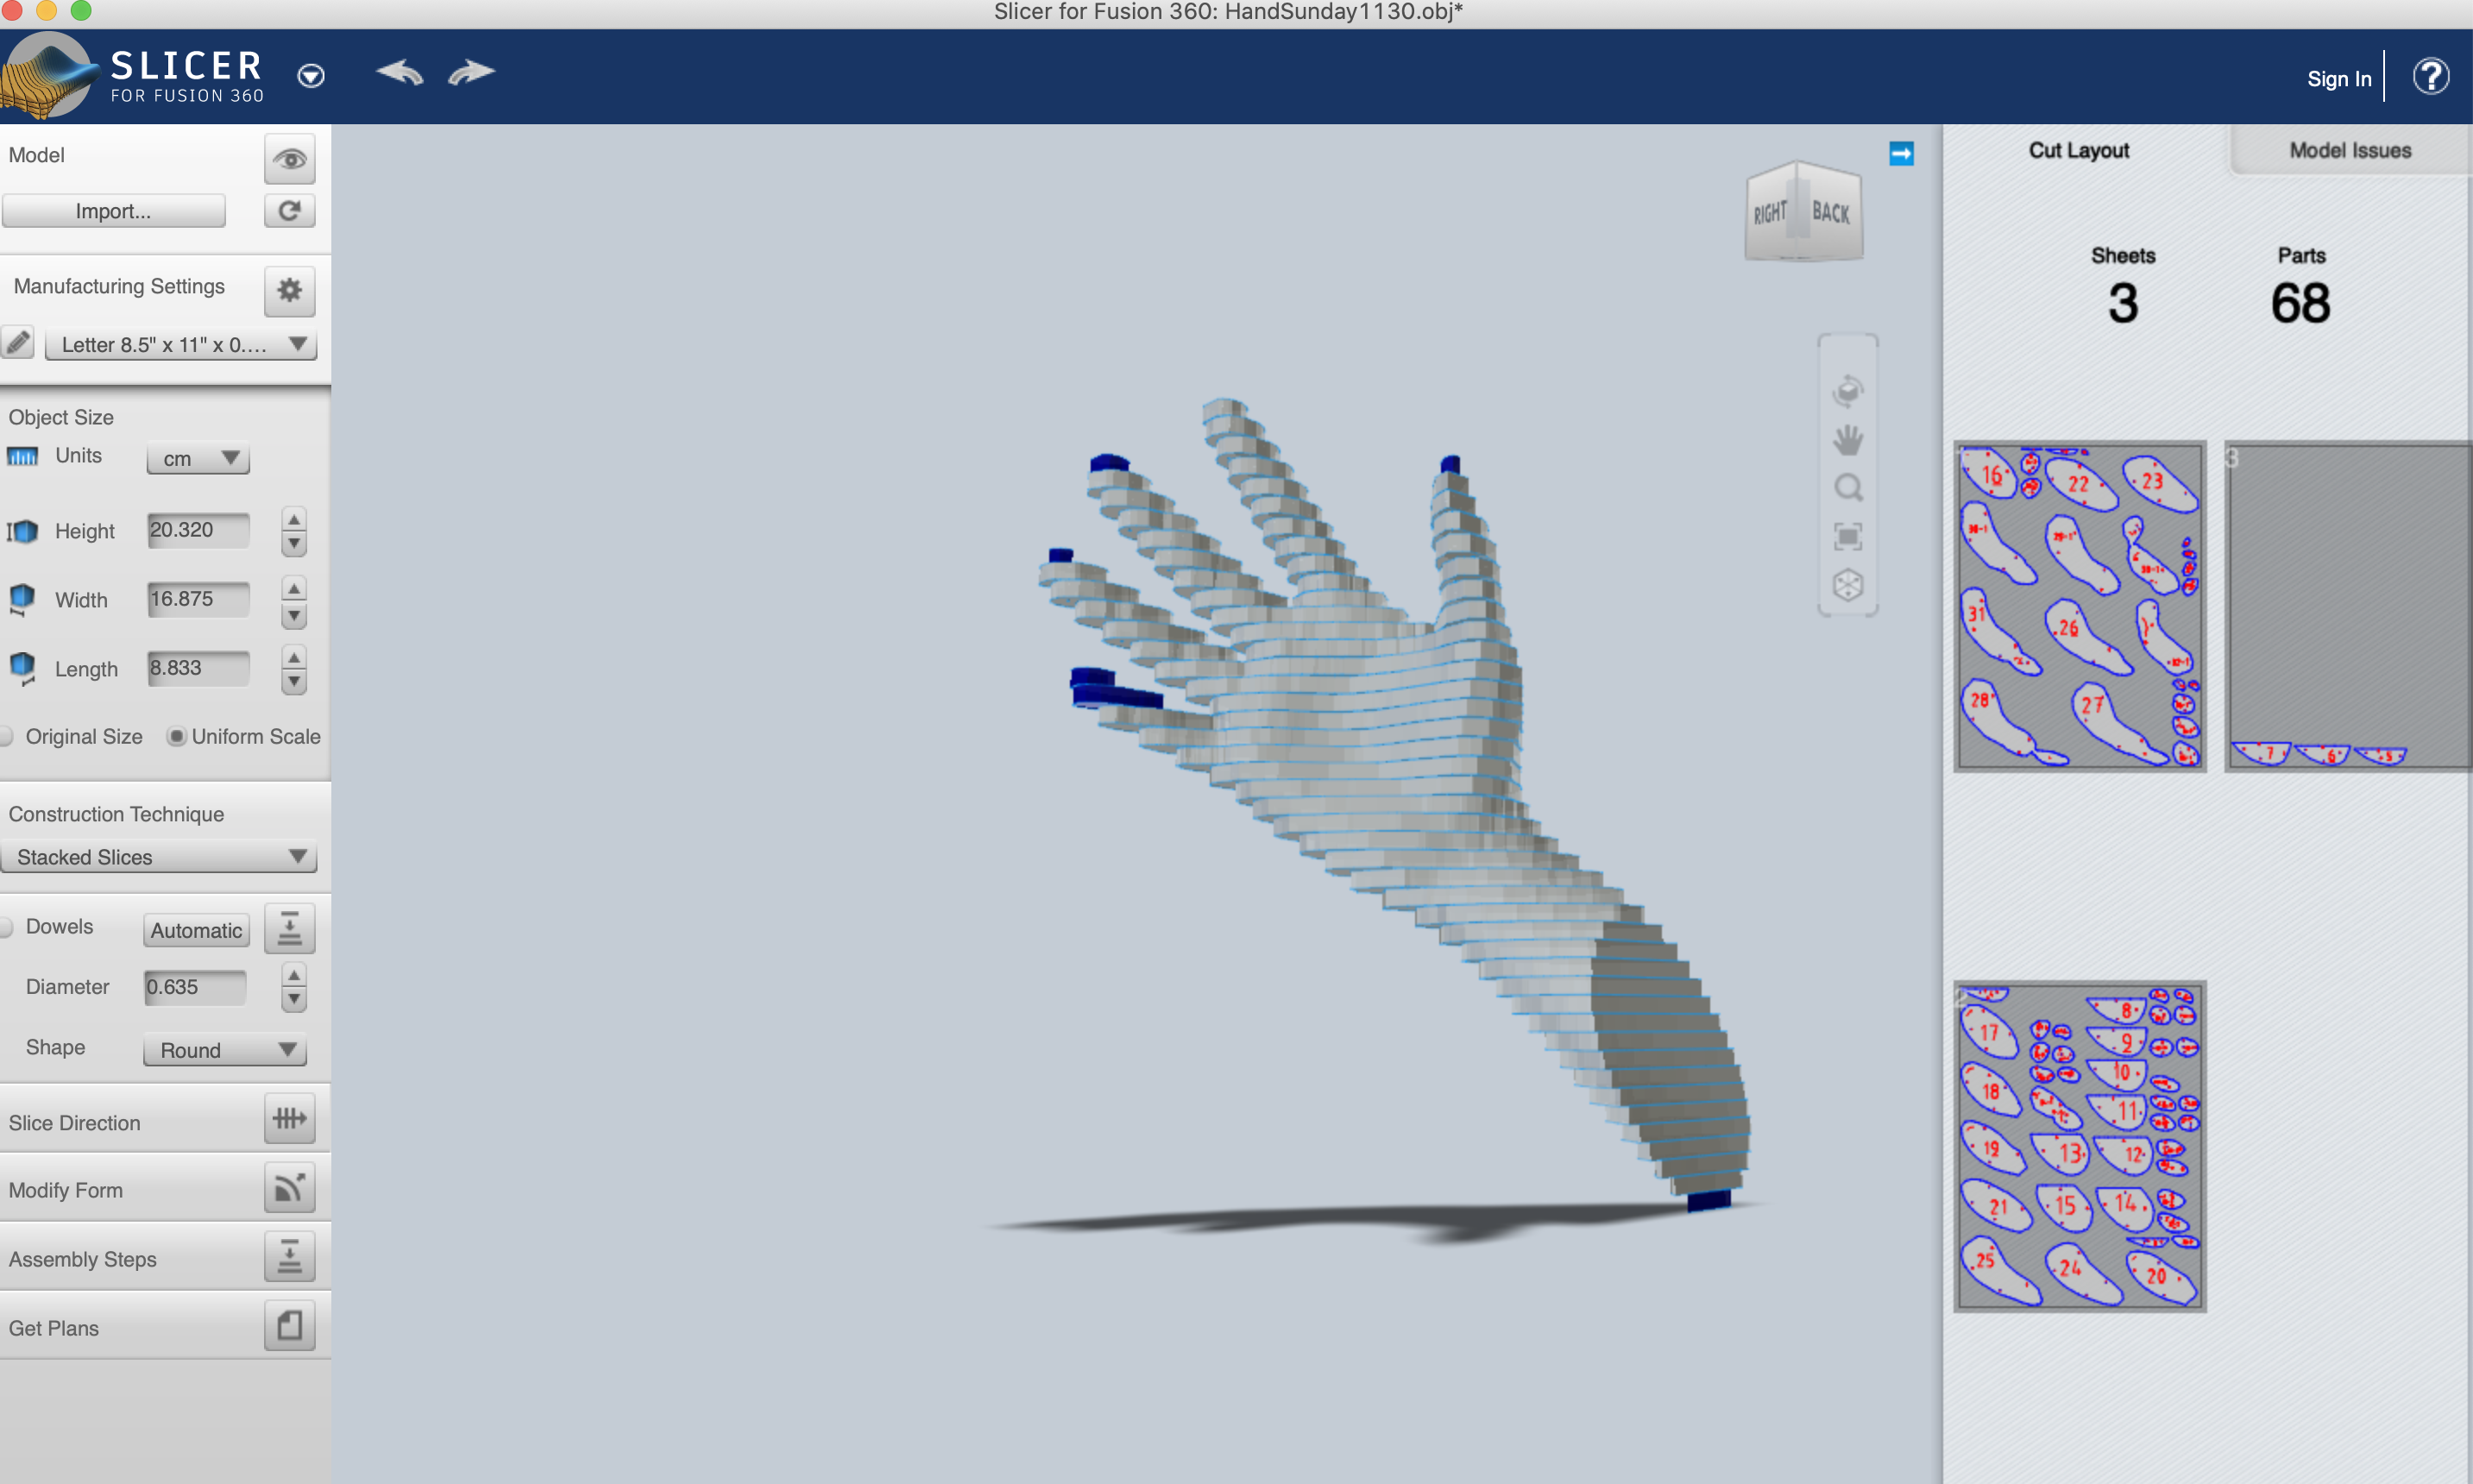
Slicing a hand I wasn't sure about the hand, because I encountered some problems in Rhino and wasn't sure what exactly happended. On the first try the saved obj file wouldn't open. I then went back to Rhinonono - I find it a terribly comlex programme - and saved the hand as Polygon Mesh Object and this worked. Yes!

Made another hand in Rhino, from the standard MakeHuman model. This one has got straighter fingers, which may turn out better in Slicer. I like the direction of the slices in this one:
 Maybe I should play around with Slicer a little more and see what the slice direction command may do.
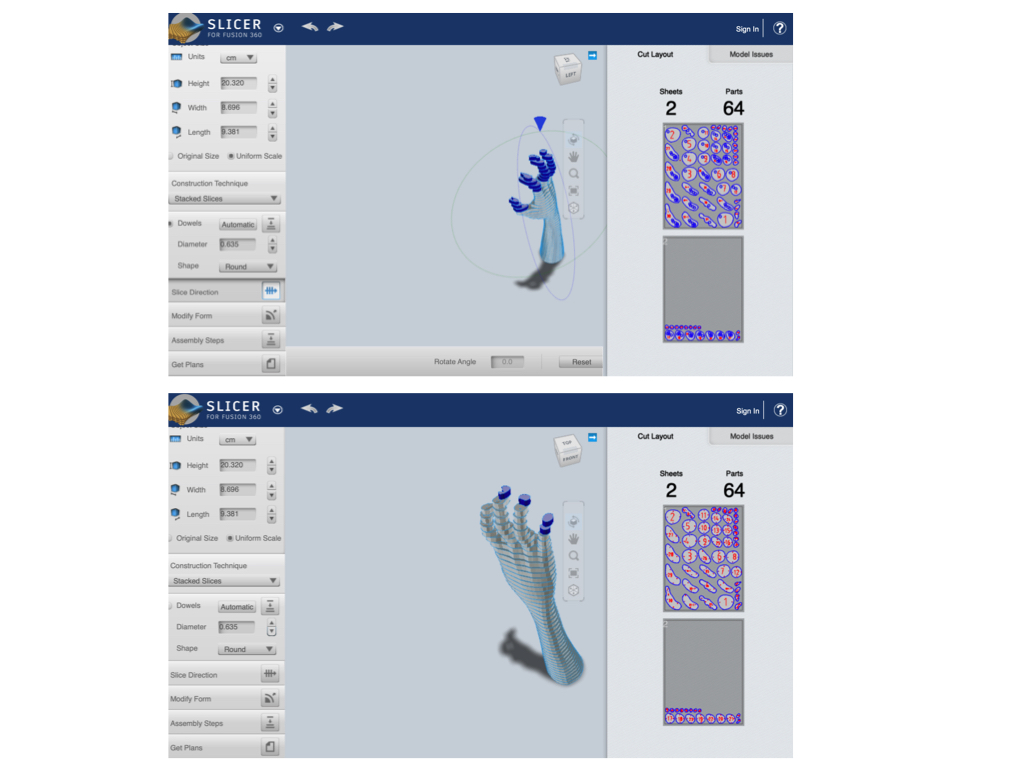
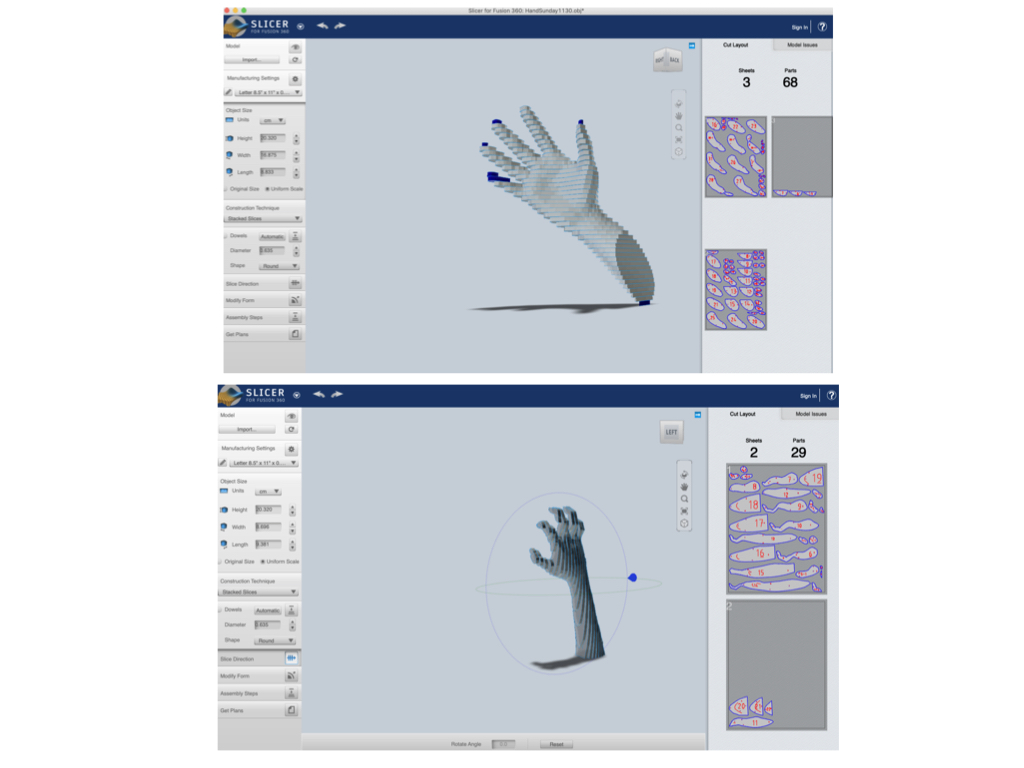
I'm laser cutting on Monday so let's decide later which exact one I'll use.
Laser Cutter
Test File
For the laser cutter test file some more Rhinono needed to be done. This time it was 2D so that was a relief. Here we go:
- In Rhino work from TOP when doing 2d objects
- For the test file create a 1 cm square and copy-paste untill the required number of test squares is reached.
- Turn OTRO on to prevent other than 90 degree rotation
- Export as DXF and save on memorystick
- Go to laser cutter and log in to Fablab, Fabricademy 2020 (files) and create own folder
- Move file to there
- Continue on the laser cutter
Laser Cutting
I must admit that I really got the hang of using the laser cutter when cutting the modular pieces in week three. But for future reference I will copy-paste the reminder I posted there here as well:
Laser Cutter Reminder:
- Have Rhino file on external stick and locate
- Open Lasercut 53 (Blue icon in lower bar)
- File import
- Select file
- Change setting
- Download
- Delete all
- Downloag current
Turn laser 1 and 2 on:
- Press escape on laser (will remove previous anchors and settings)
- Press anchor (mostly left top corner related to the size of your cut)
- Press enter (will enter the anchor spot)
- Press test (and make sure your material covers the area)
- Turn on ventilator (crucial)
- Turn key for switch 3 (actually activating the laser)
- Press start (gogogo yeah!)
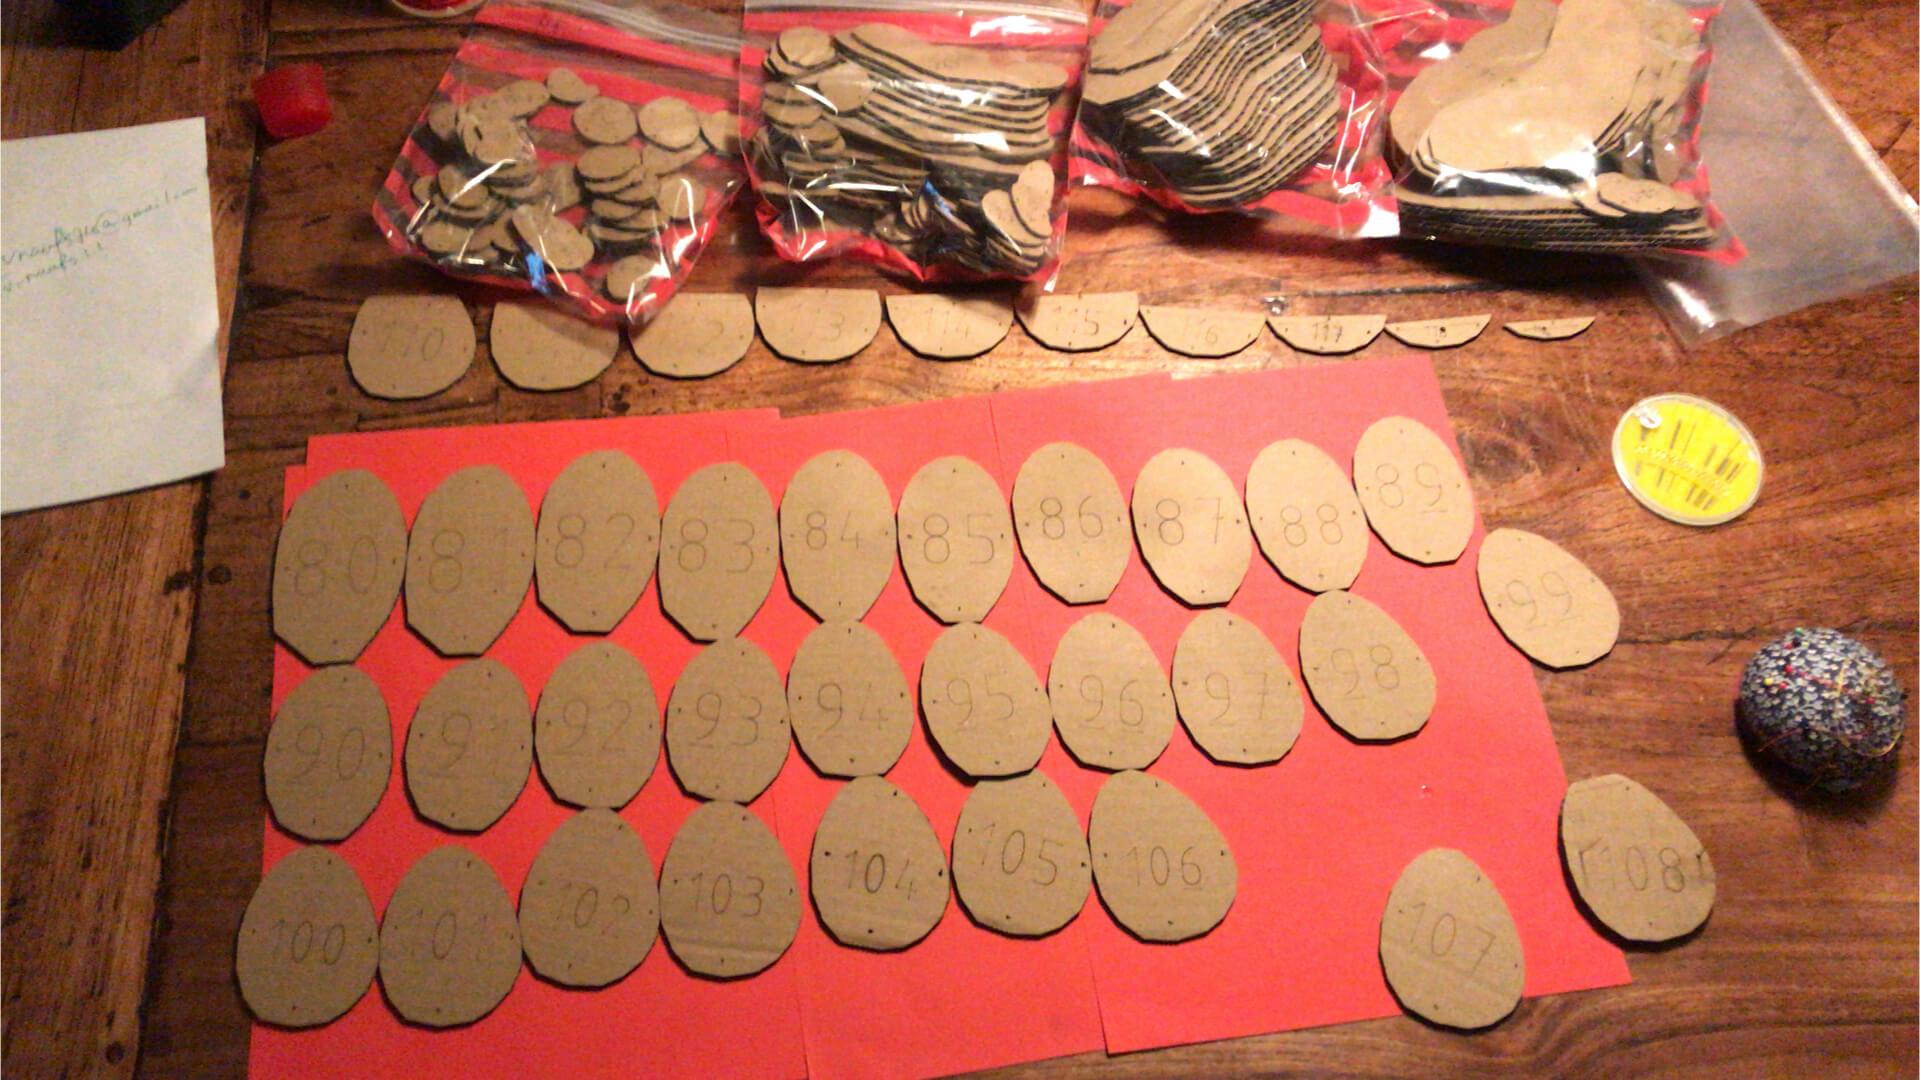
There were some problems with the file for the laser cutter. I, however, wasn't the only one experiencing these. Somewhere, something must have gone wrong in the 3D process, surely beyond our newly acquired skills to repair. It was late when we left the lab on Monday, but I did get to take home about 120 slices of a hand.
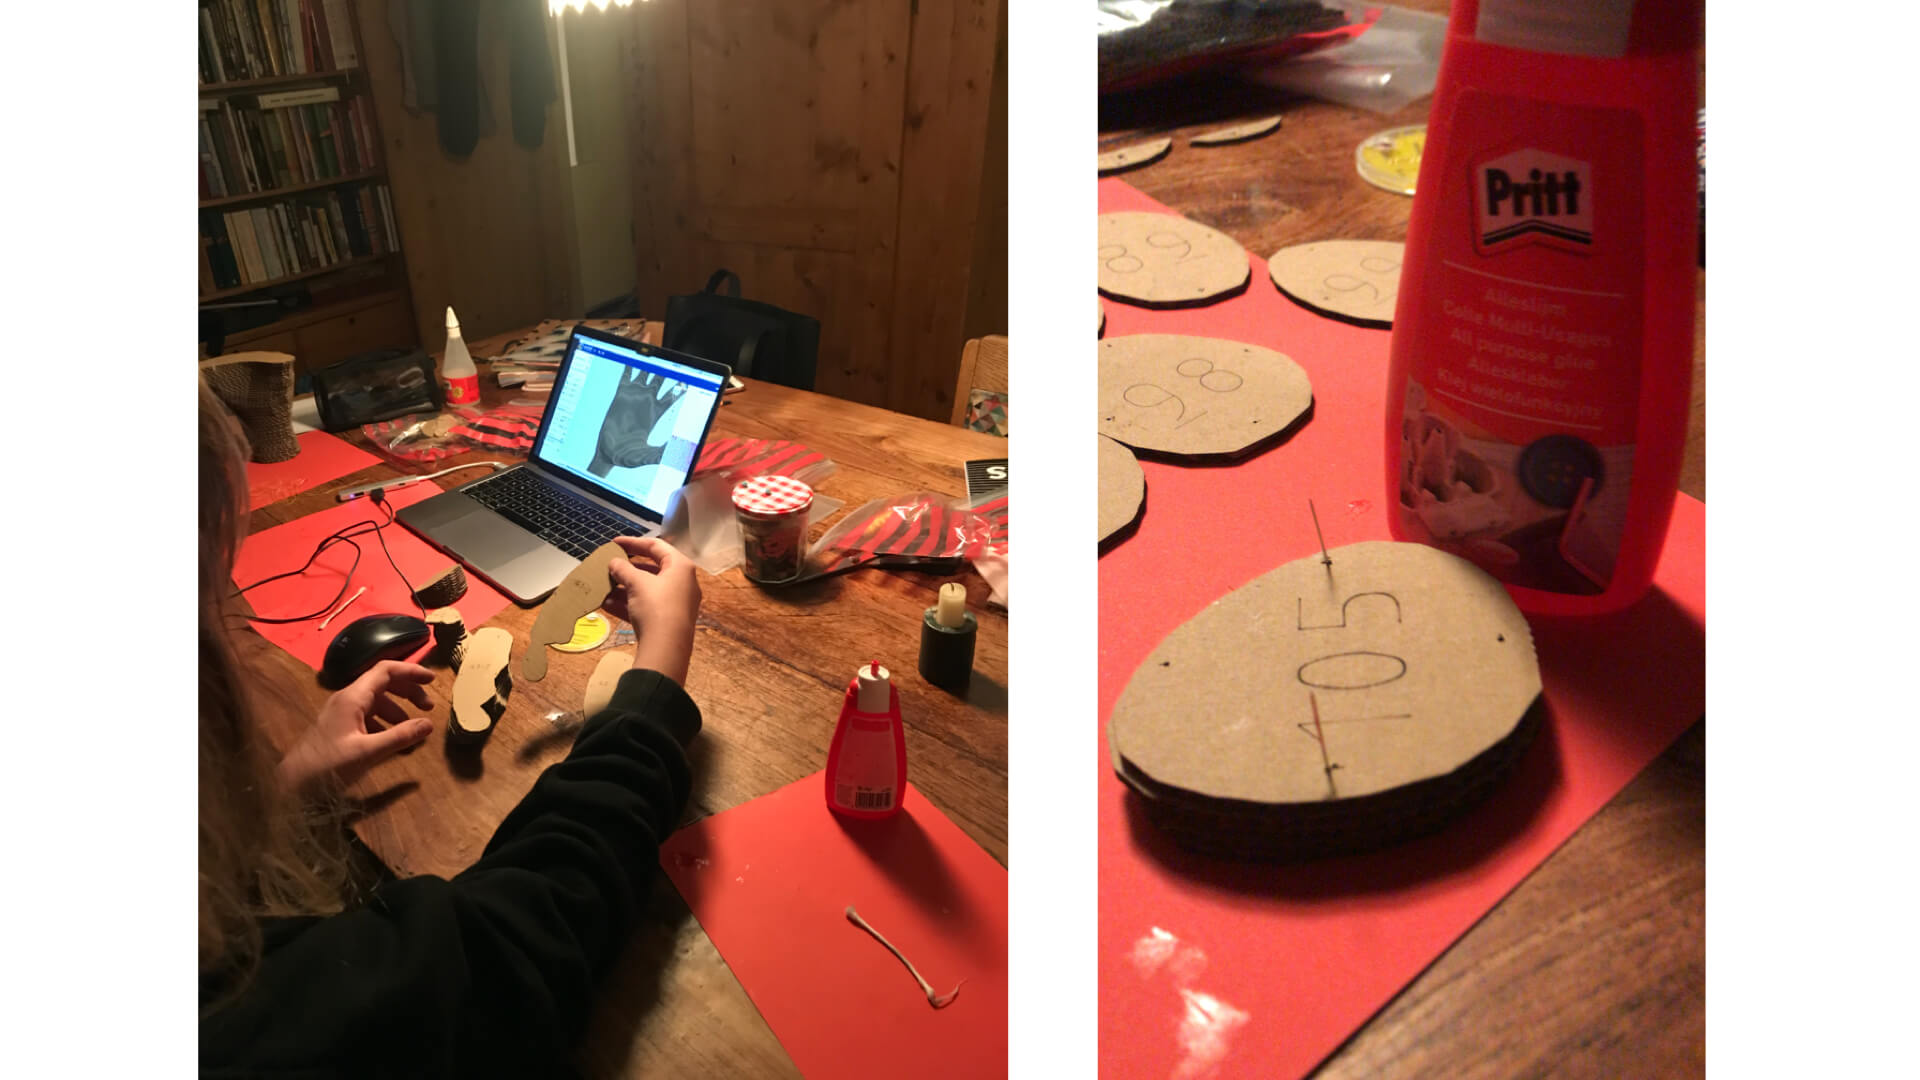
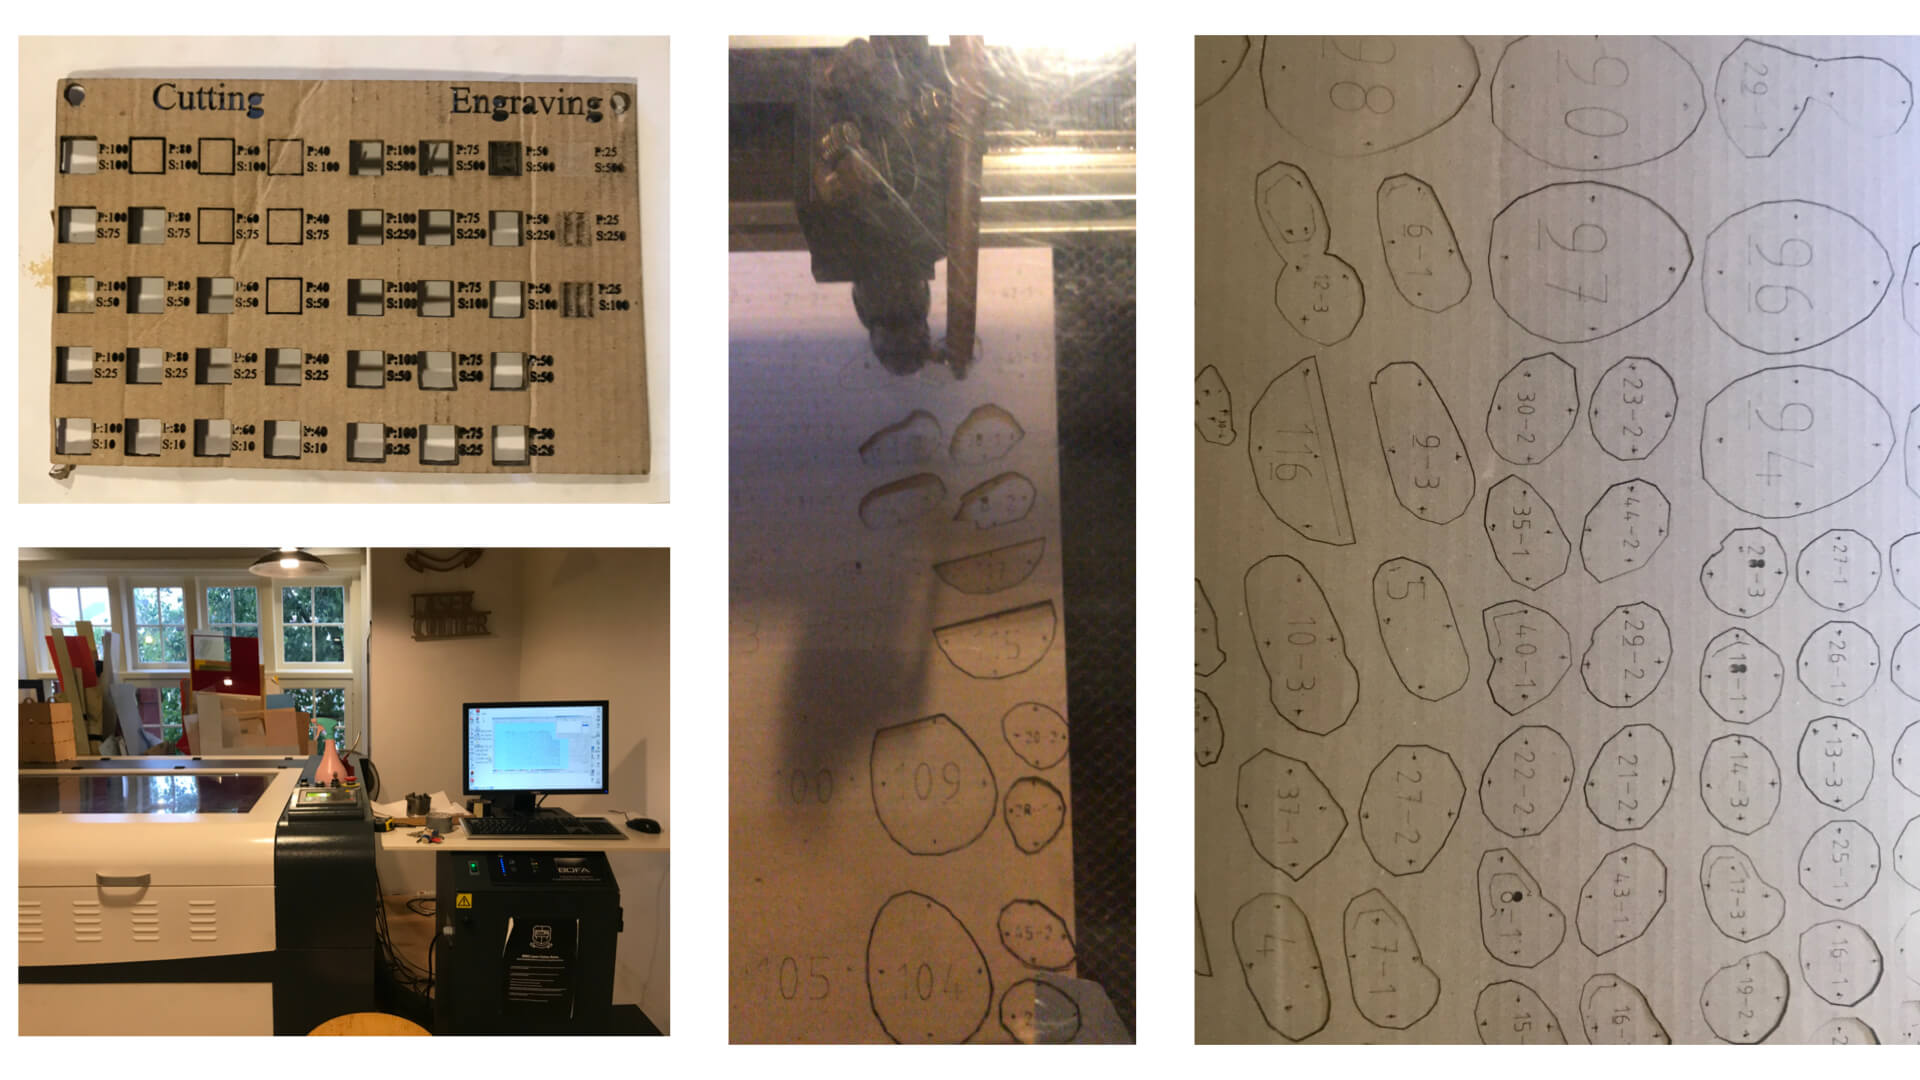 We (my daughter helped out and stayed up too late) started assembling the hand but had to stop once we recahed the fingers because it became one big puzzle from then on. When we first thought each finger would have its own number (e.g. 34-2/35-2/36-2), but the numbers alternate when a 'new' finger comes into the layer. We did succeed a few days later (see above).