6. BioFabricating Materials
End Results
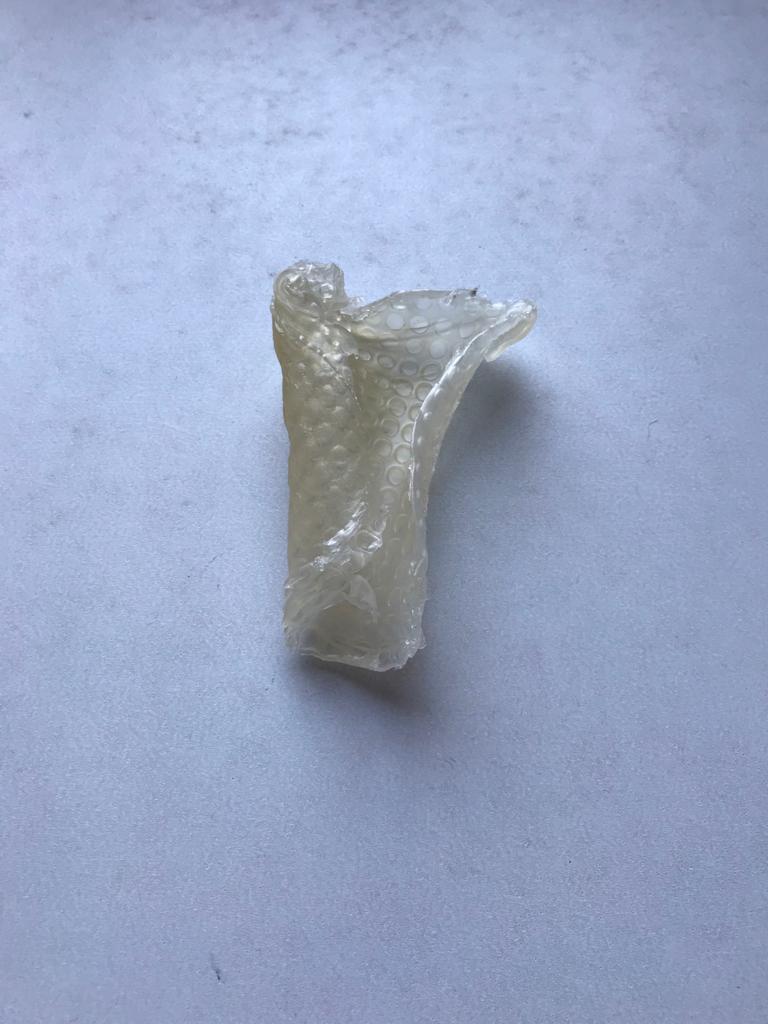
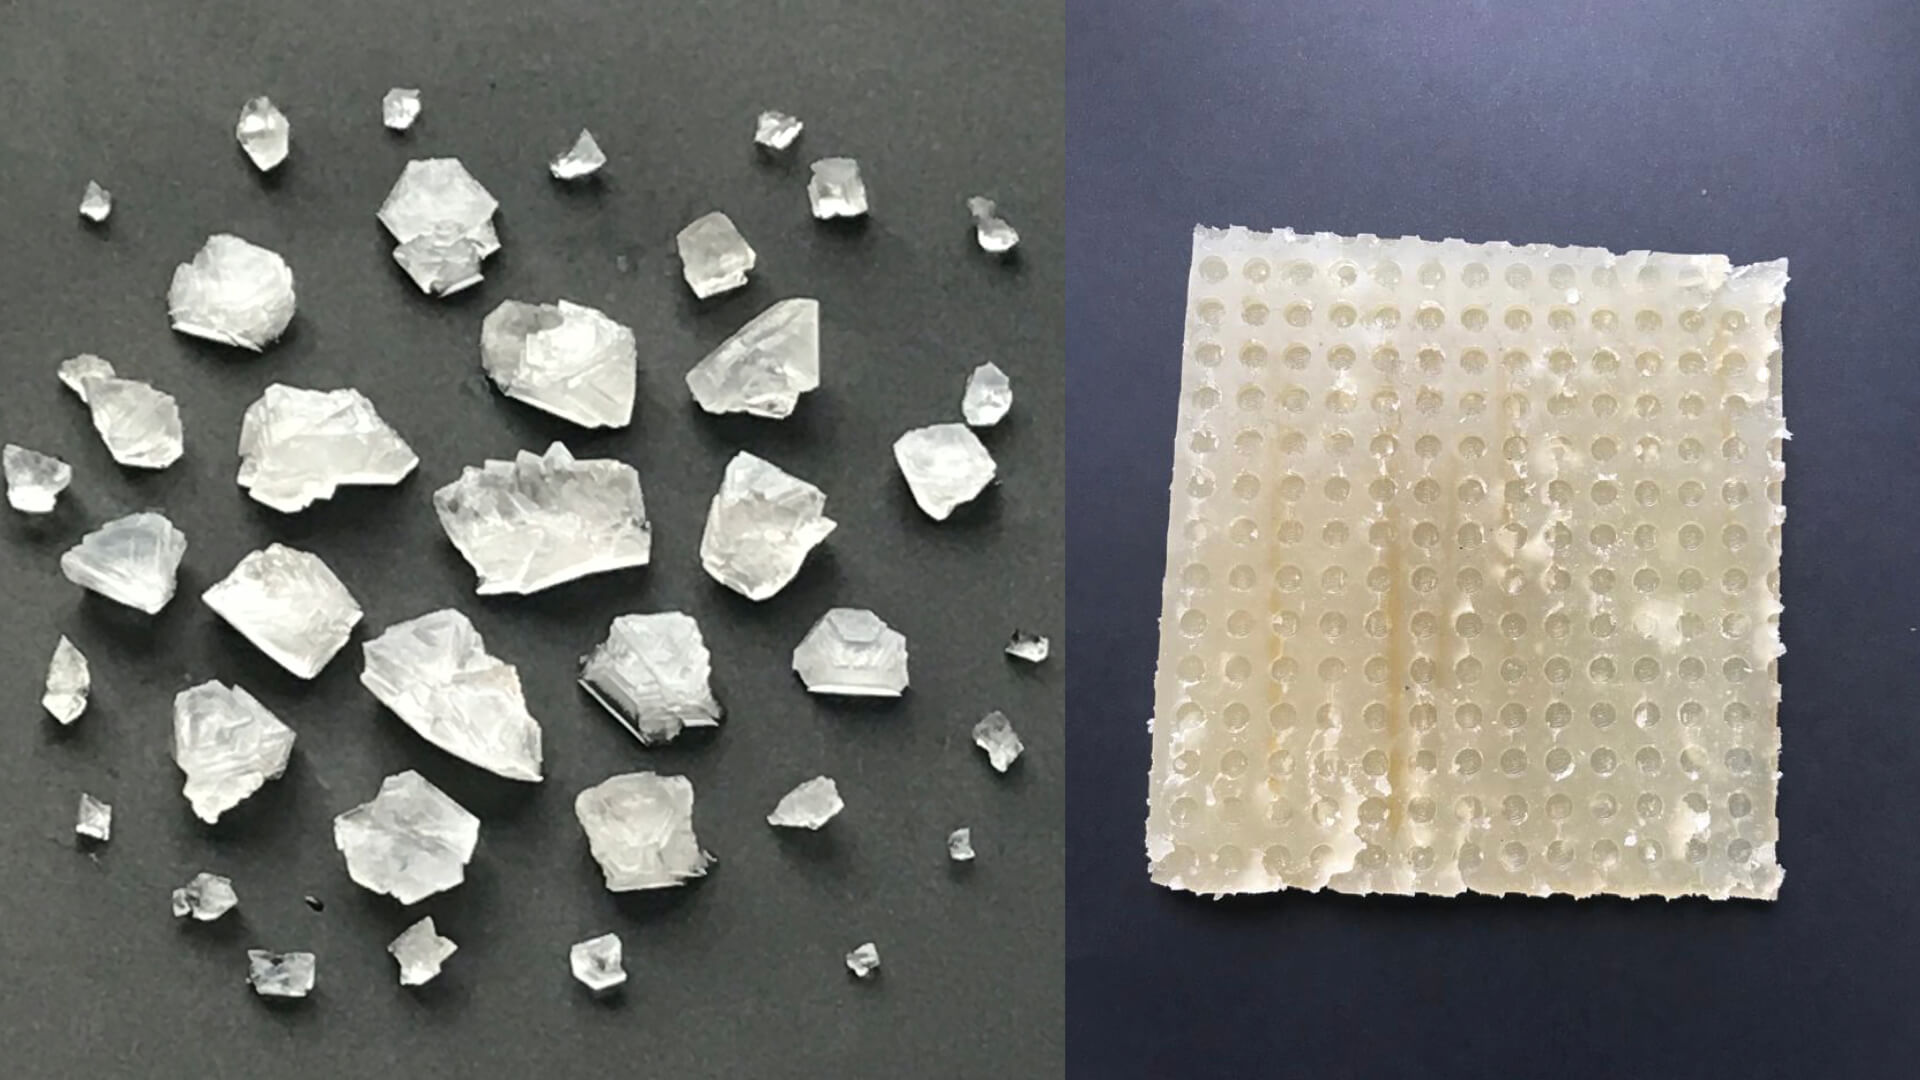 My grown crystals and crafted starch based rubber as first 'end' results
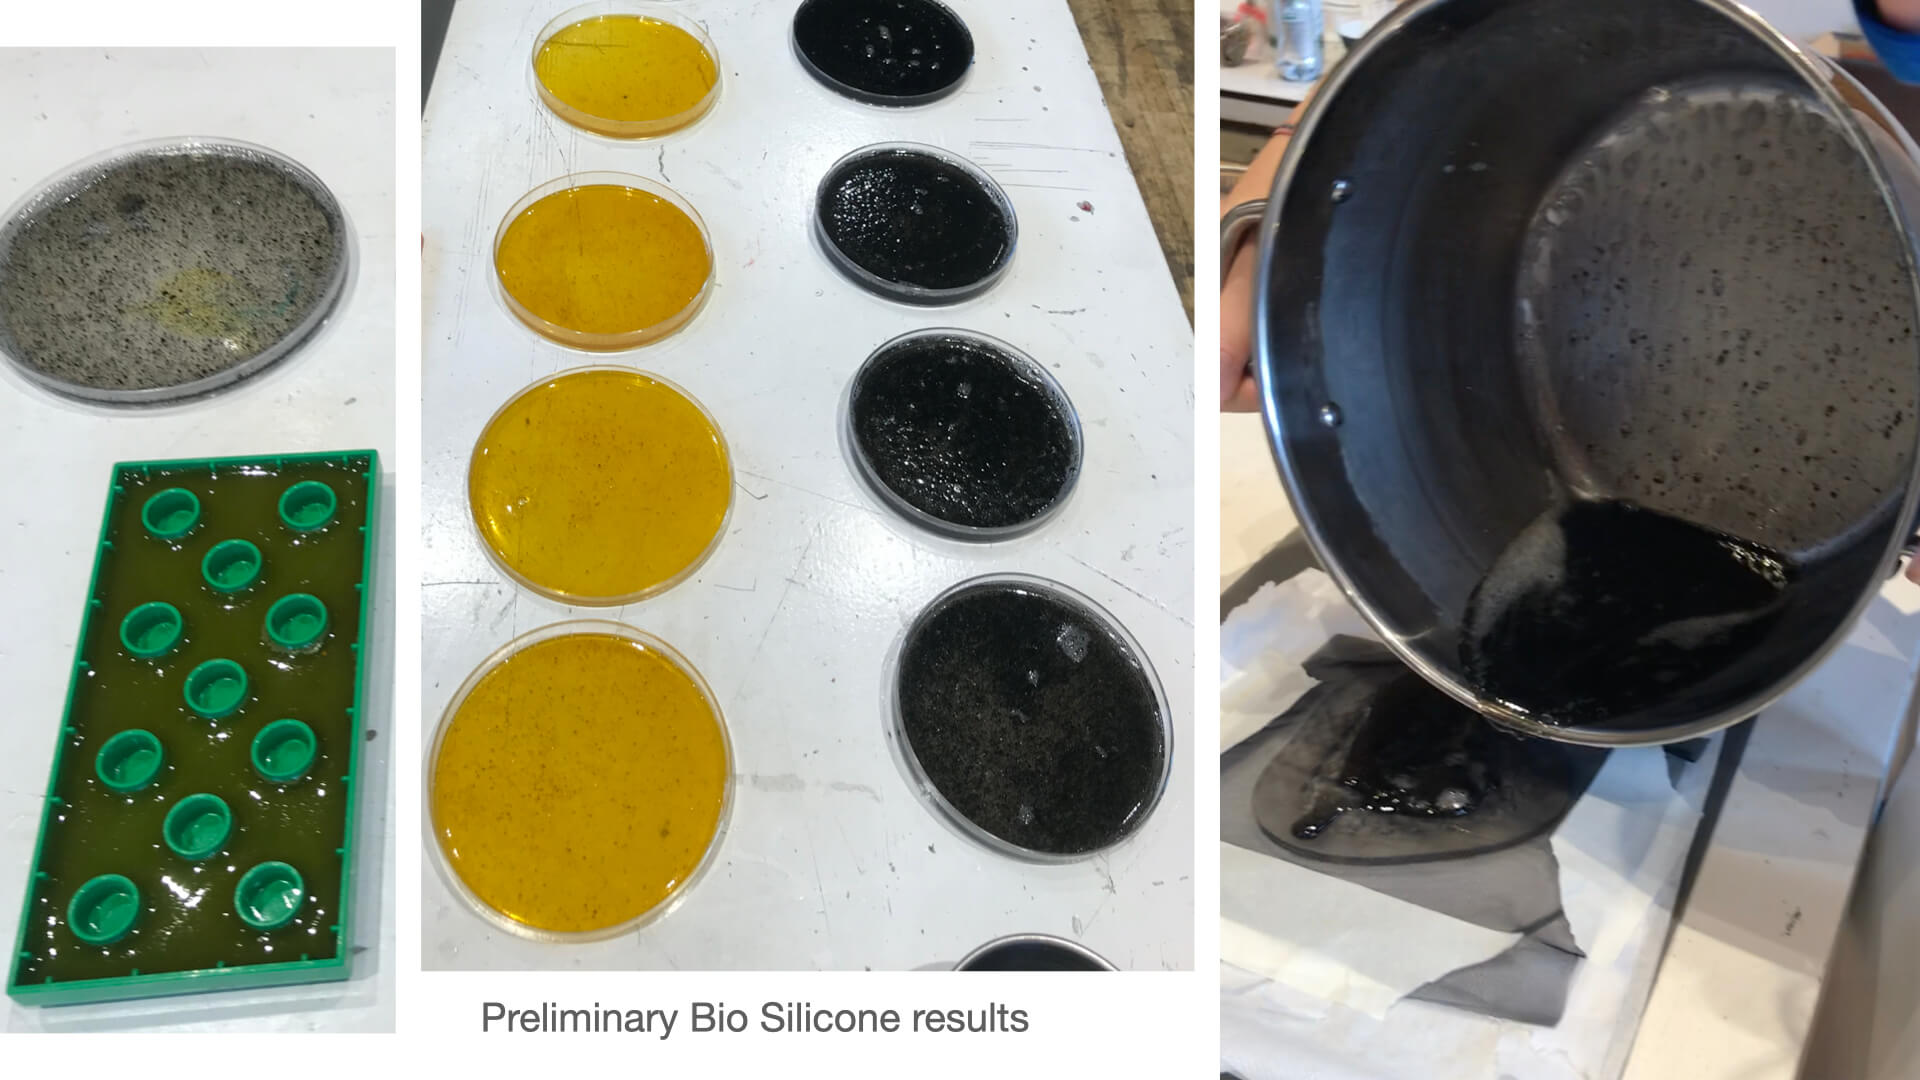
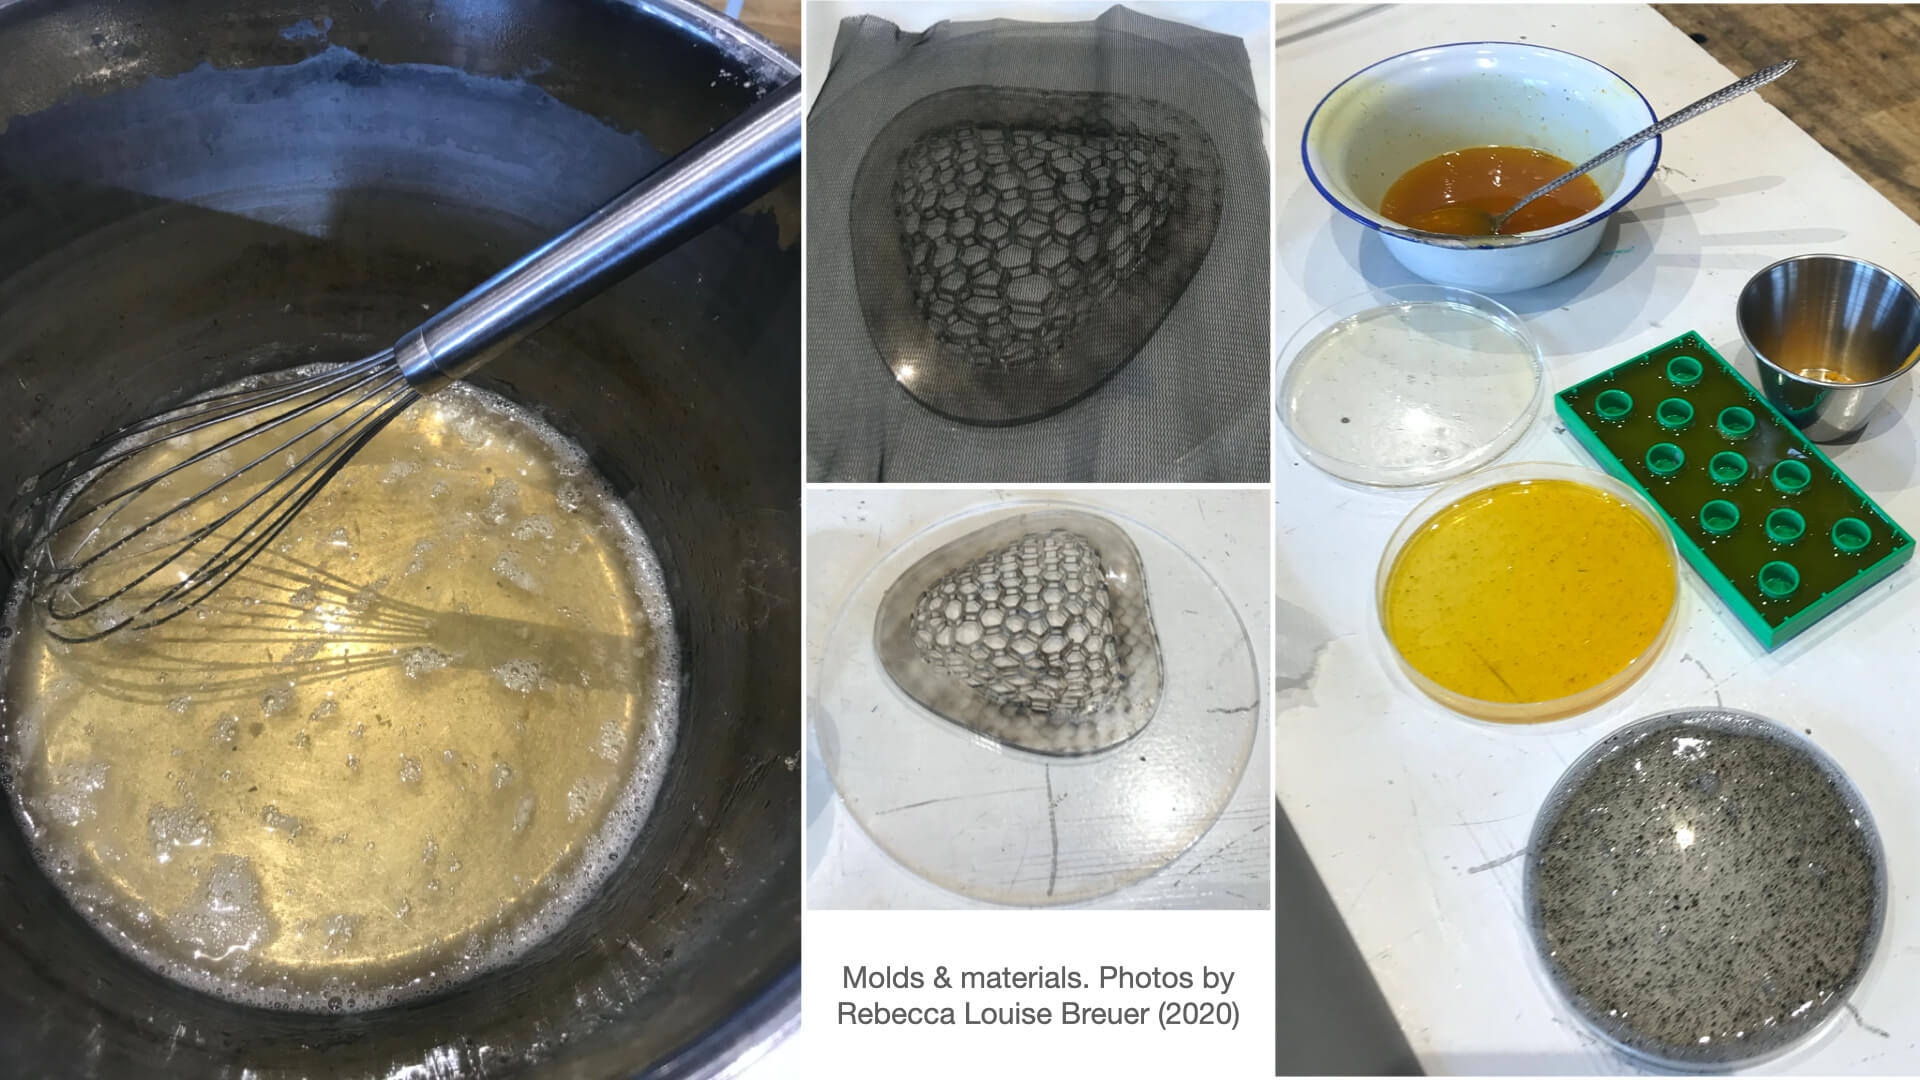
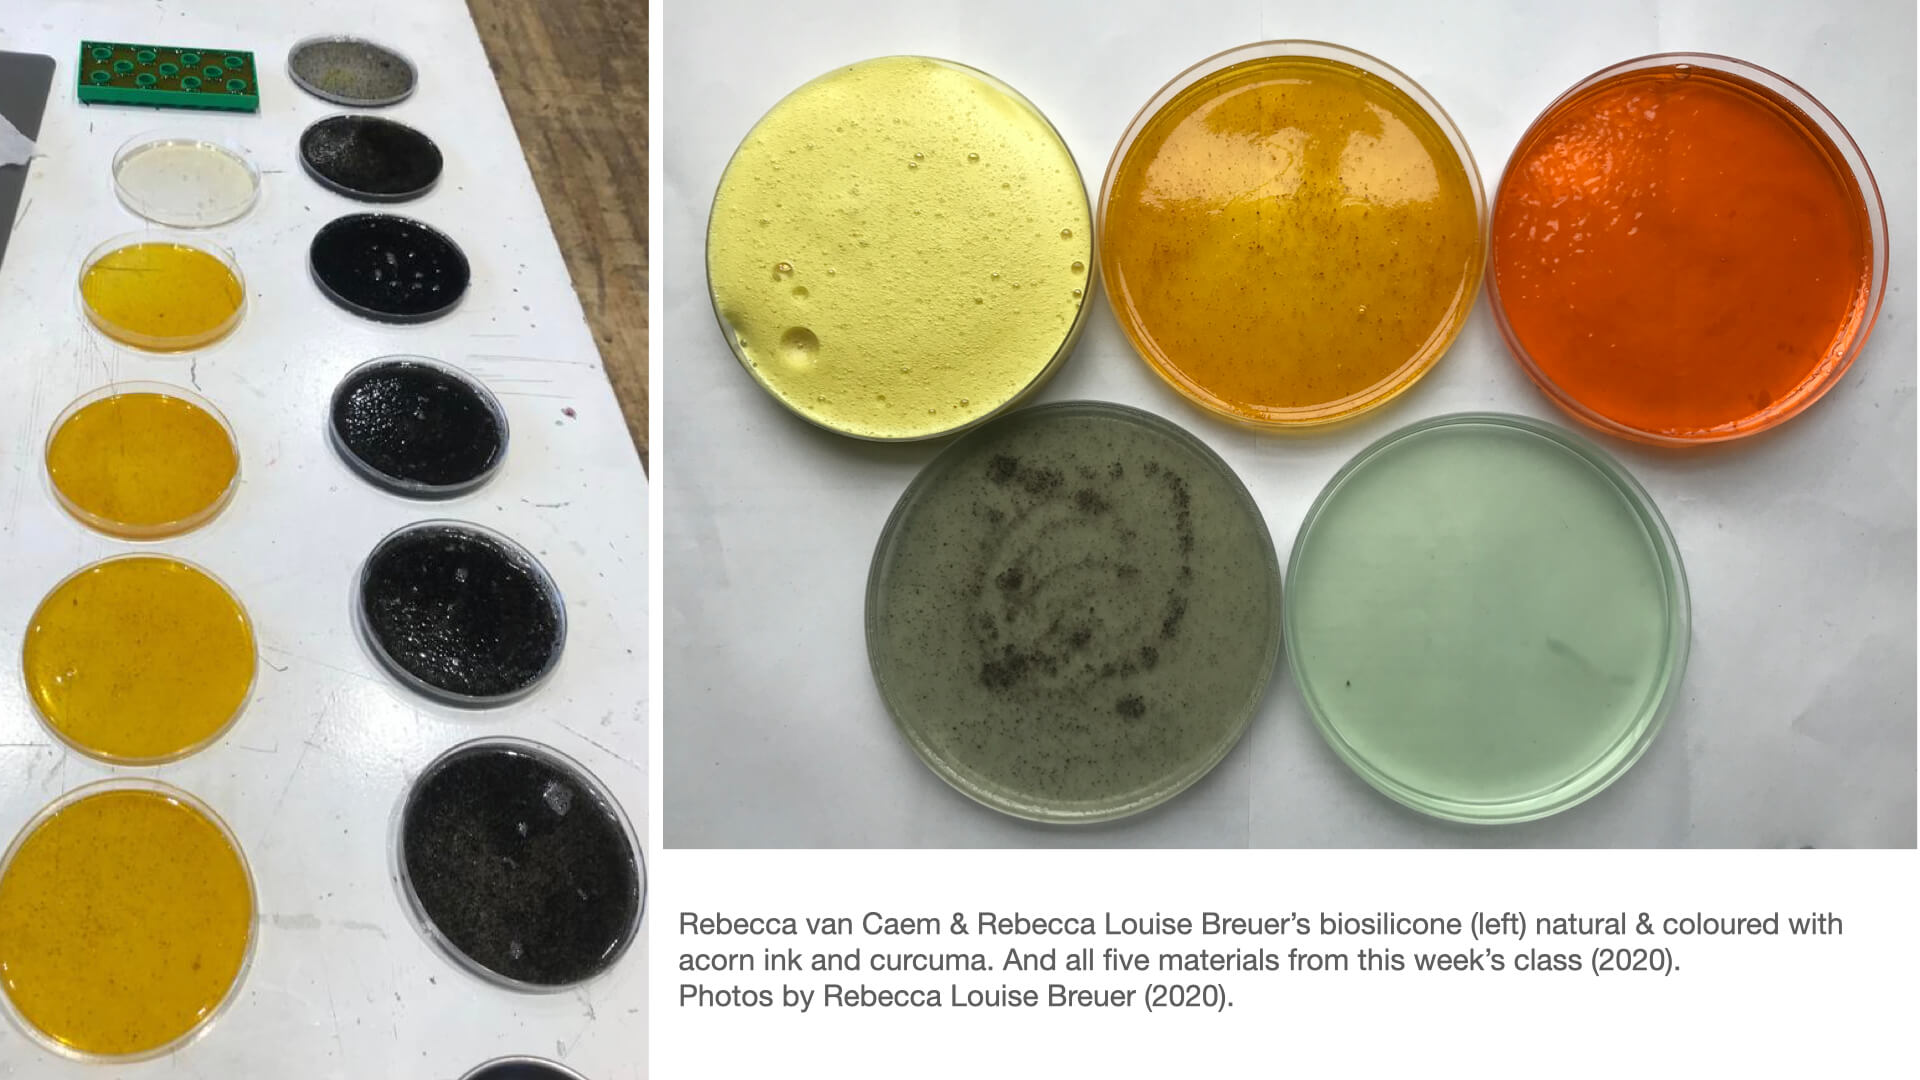
Bio Silicone with acorn pigment casted in a mold
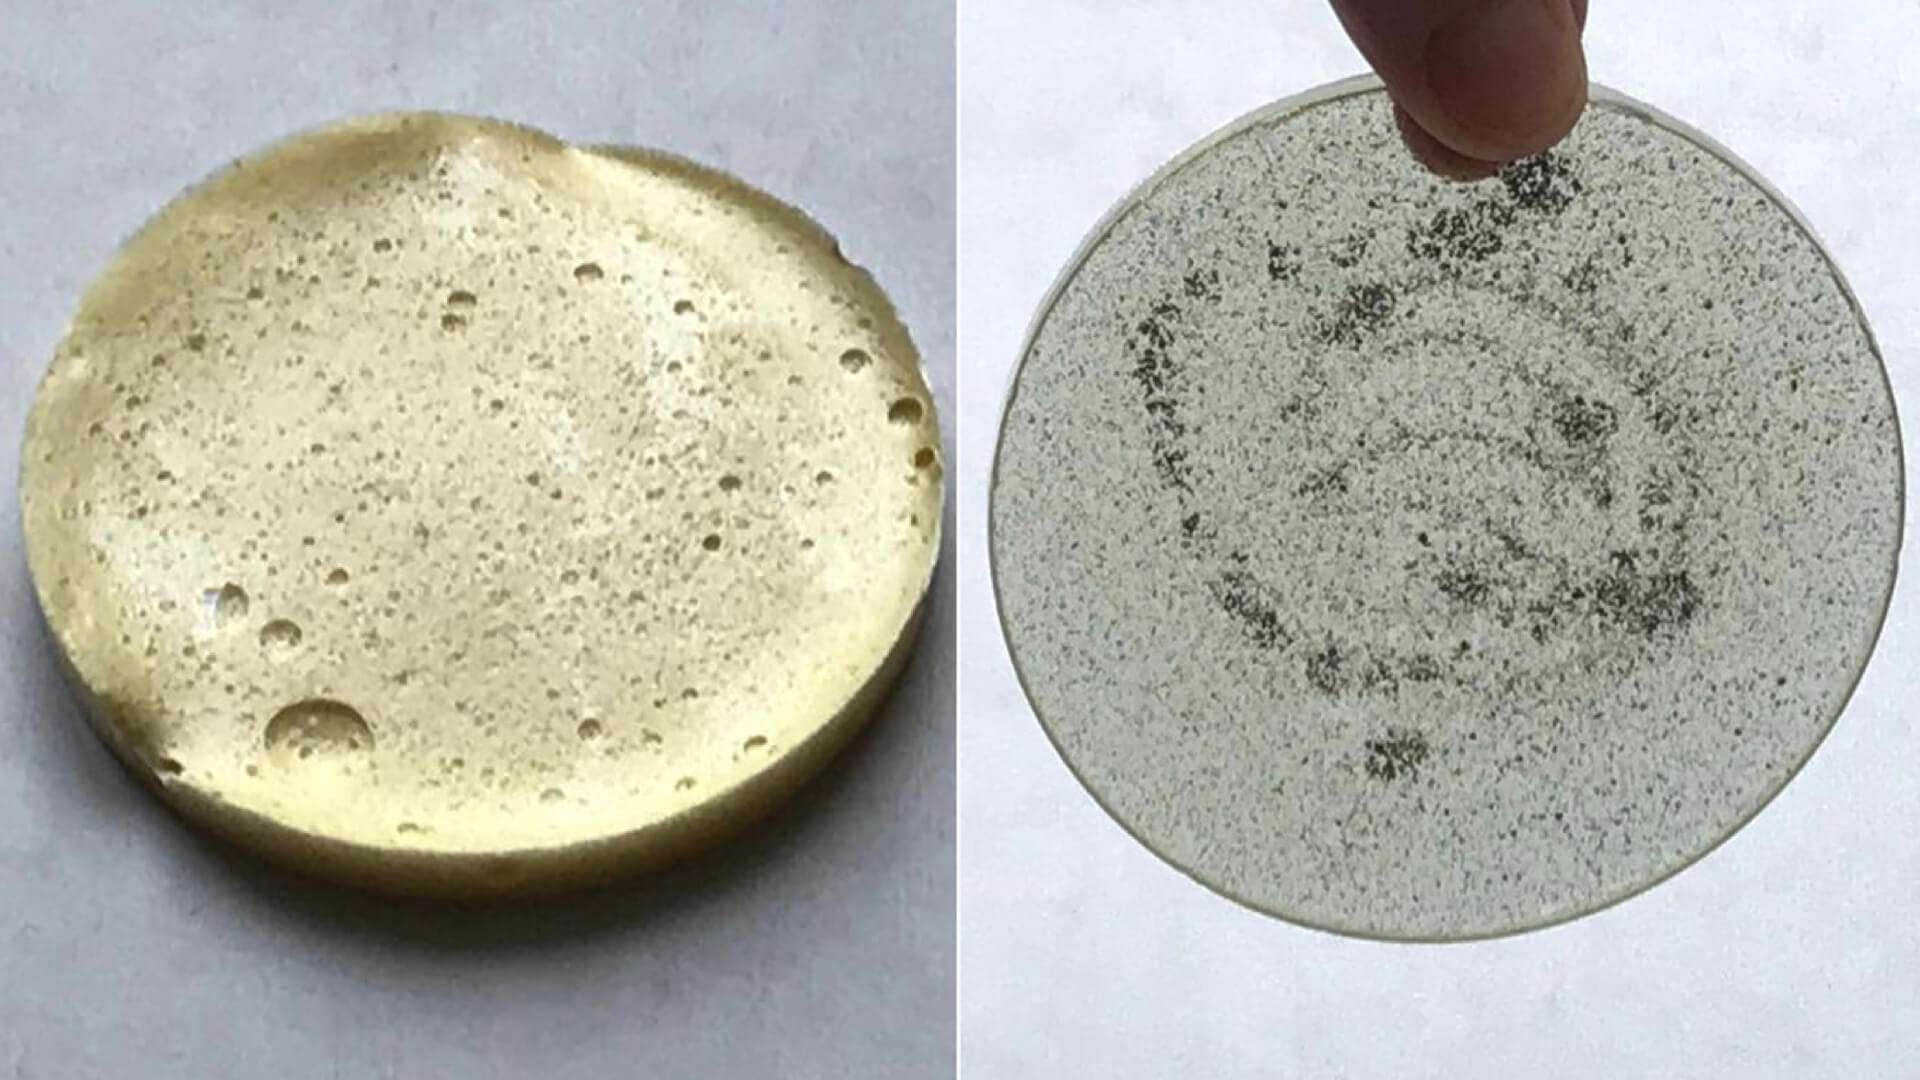
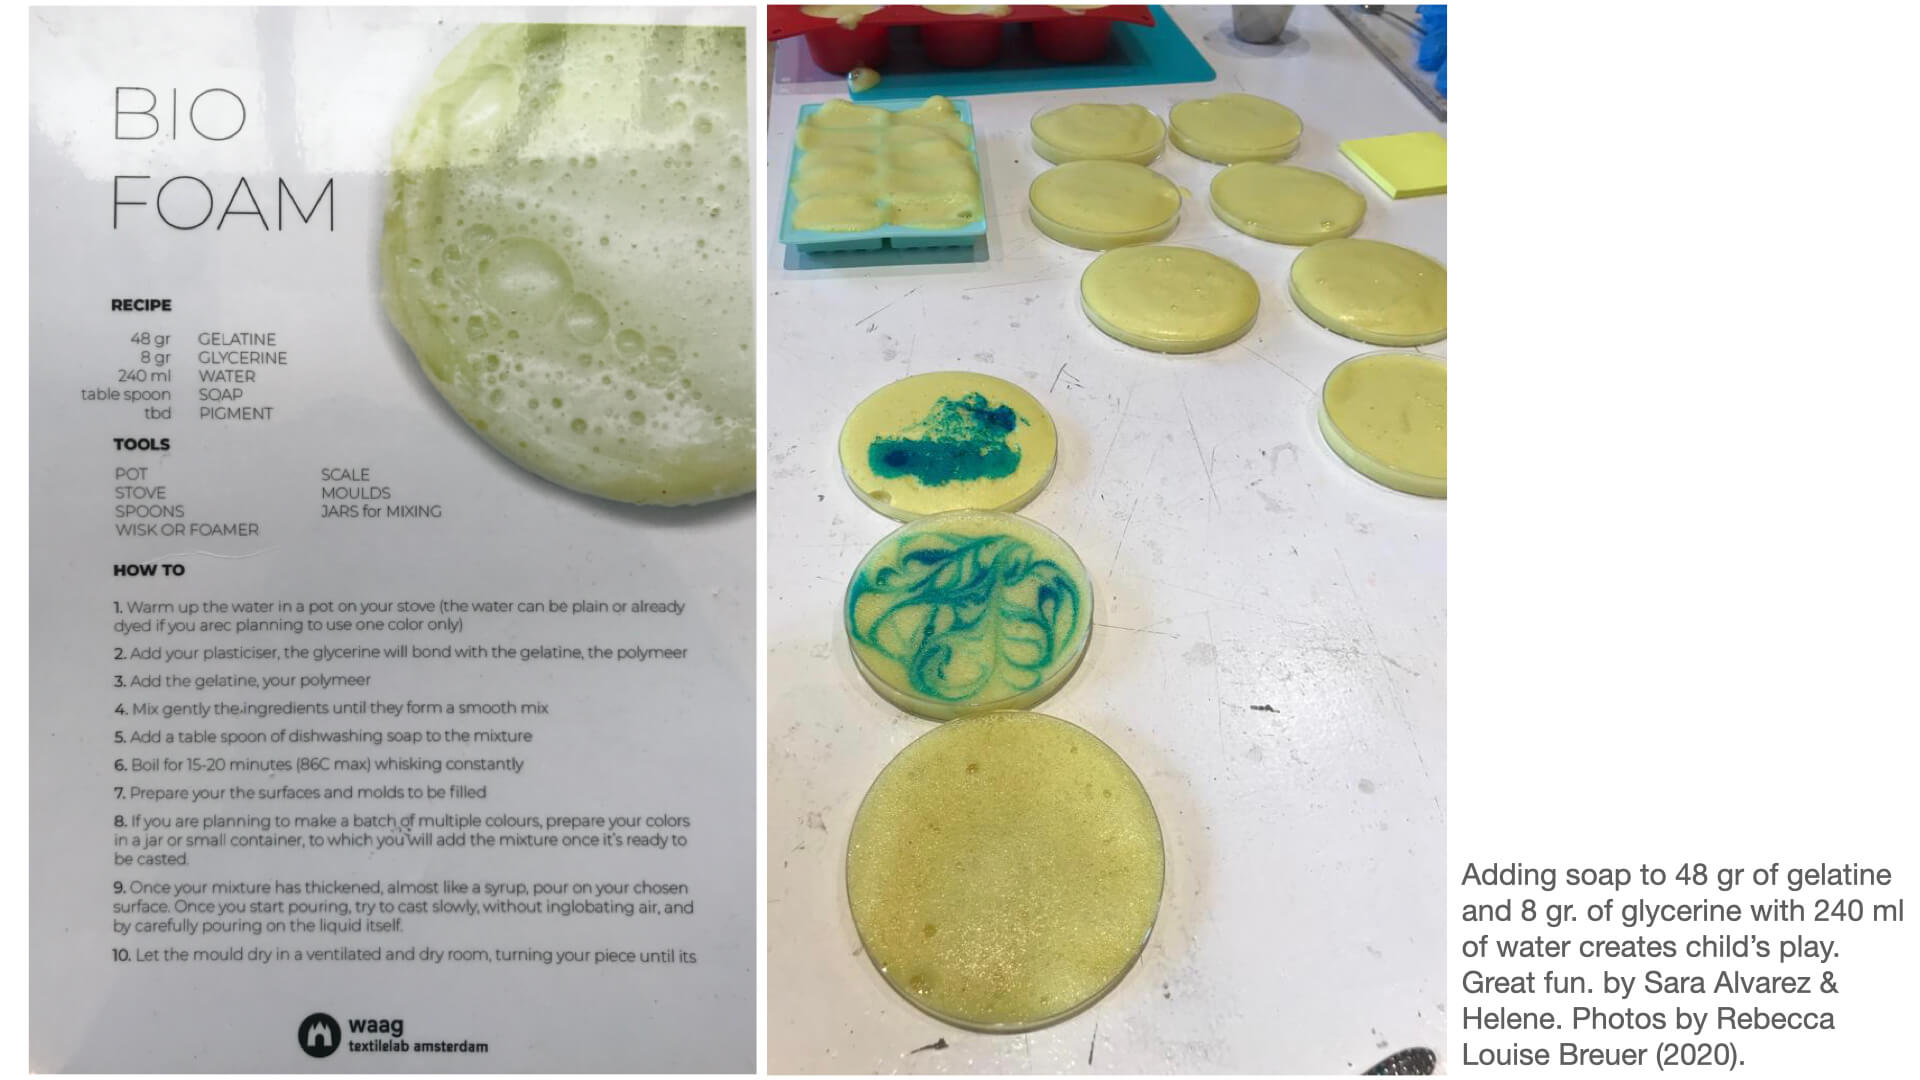
Bio Foam (left) and Recycled Bio Silicone (right)
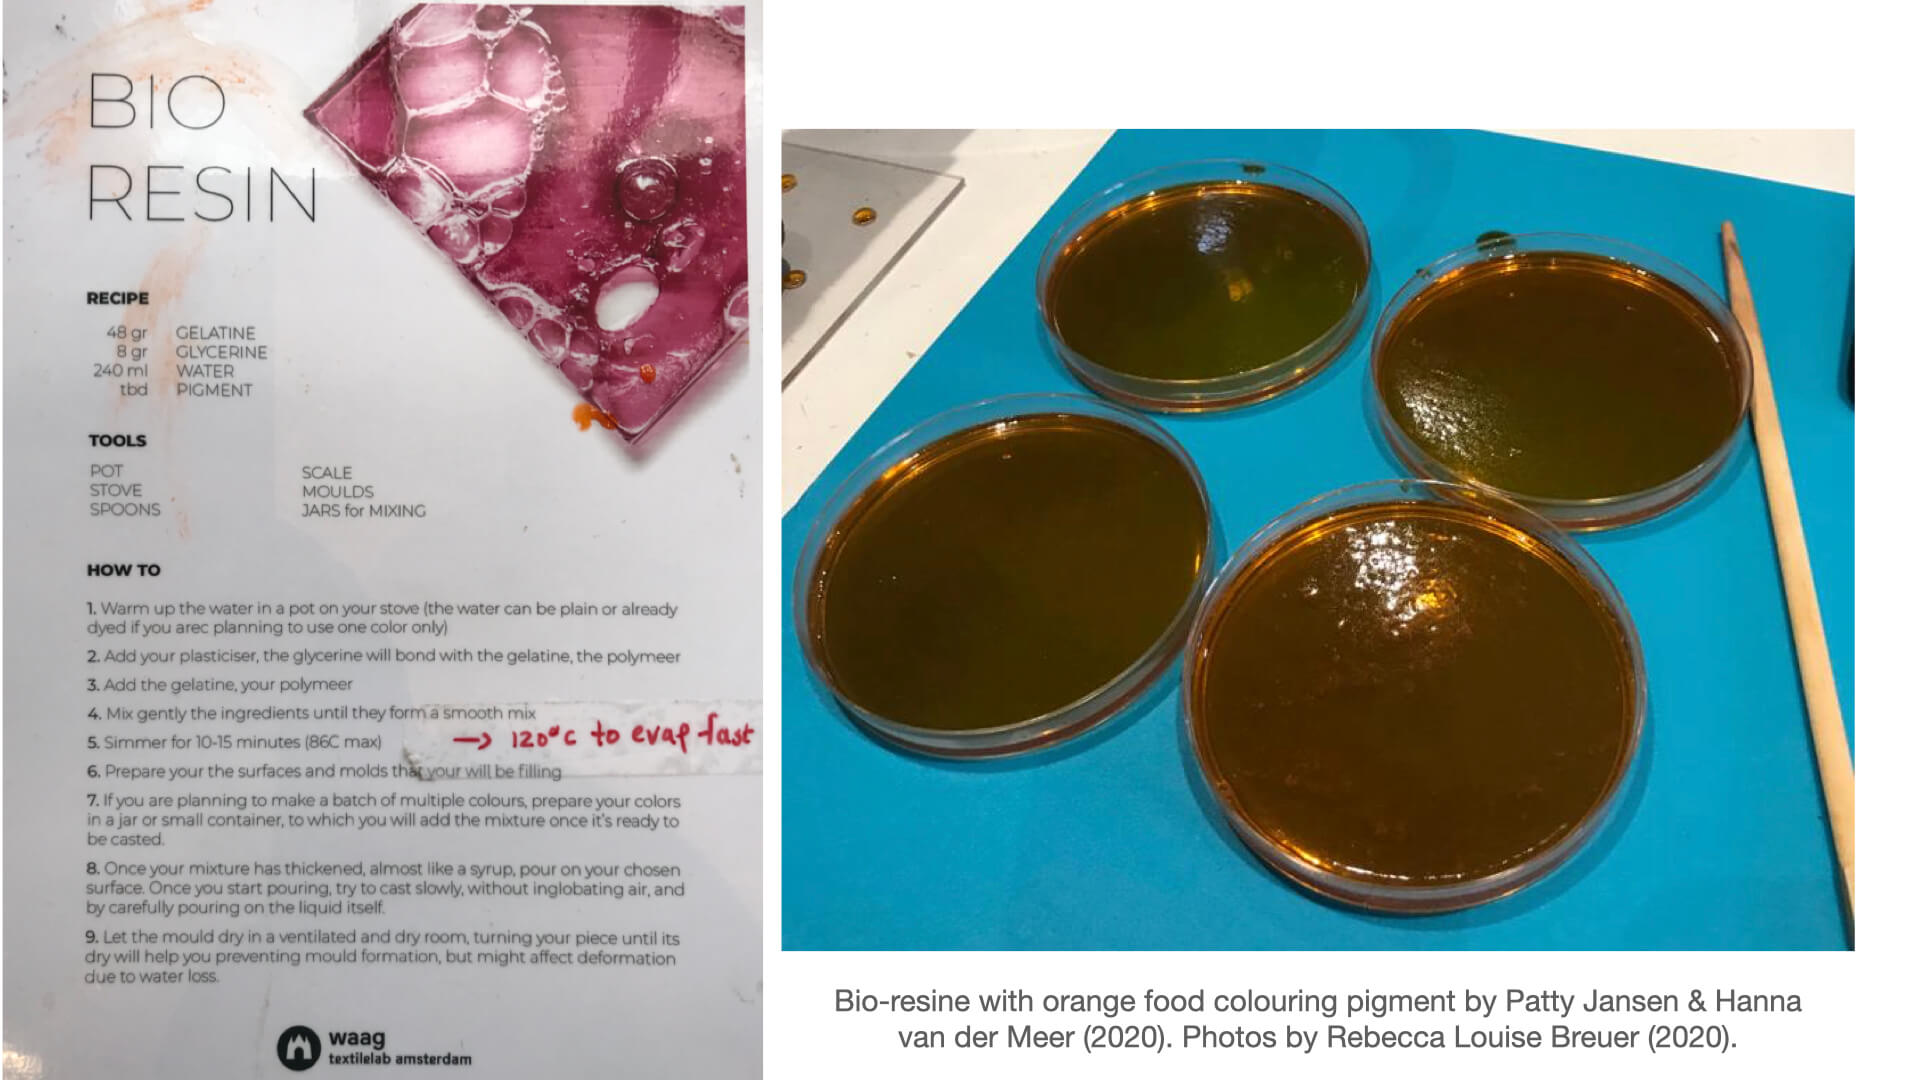
Bio Silicone with Curcuma pigment (left) and Bio Resin with food colouring
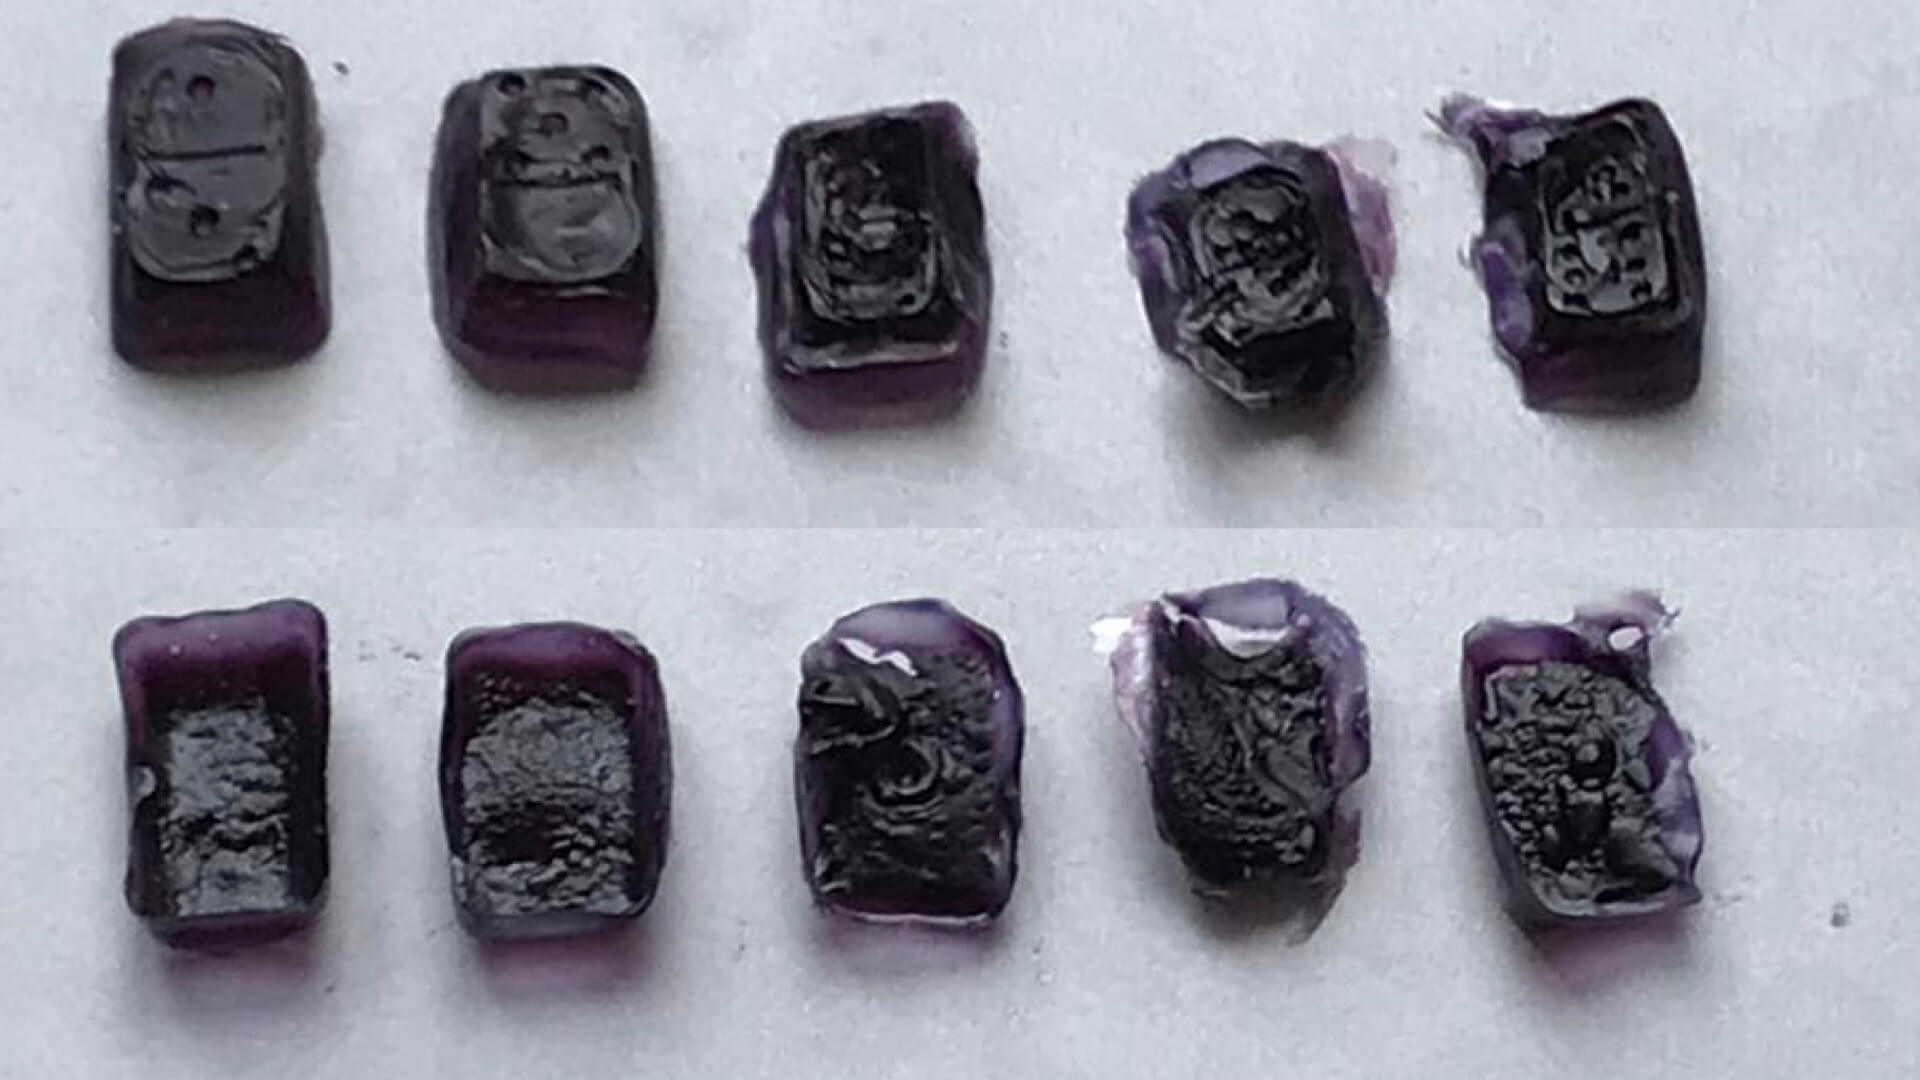
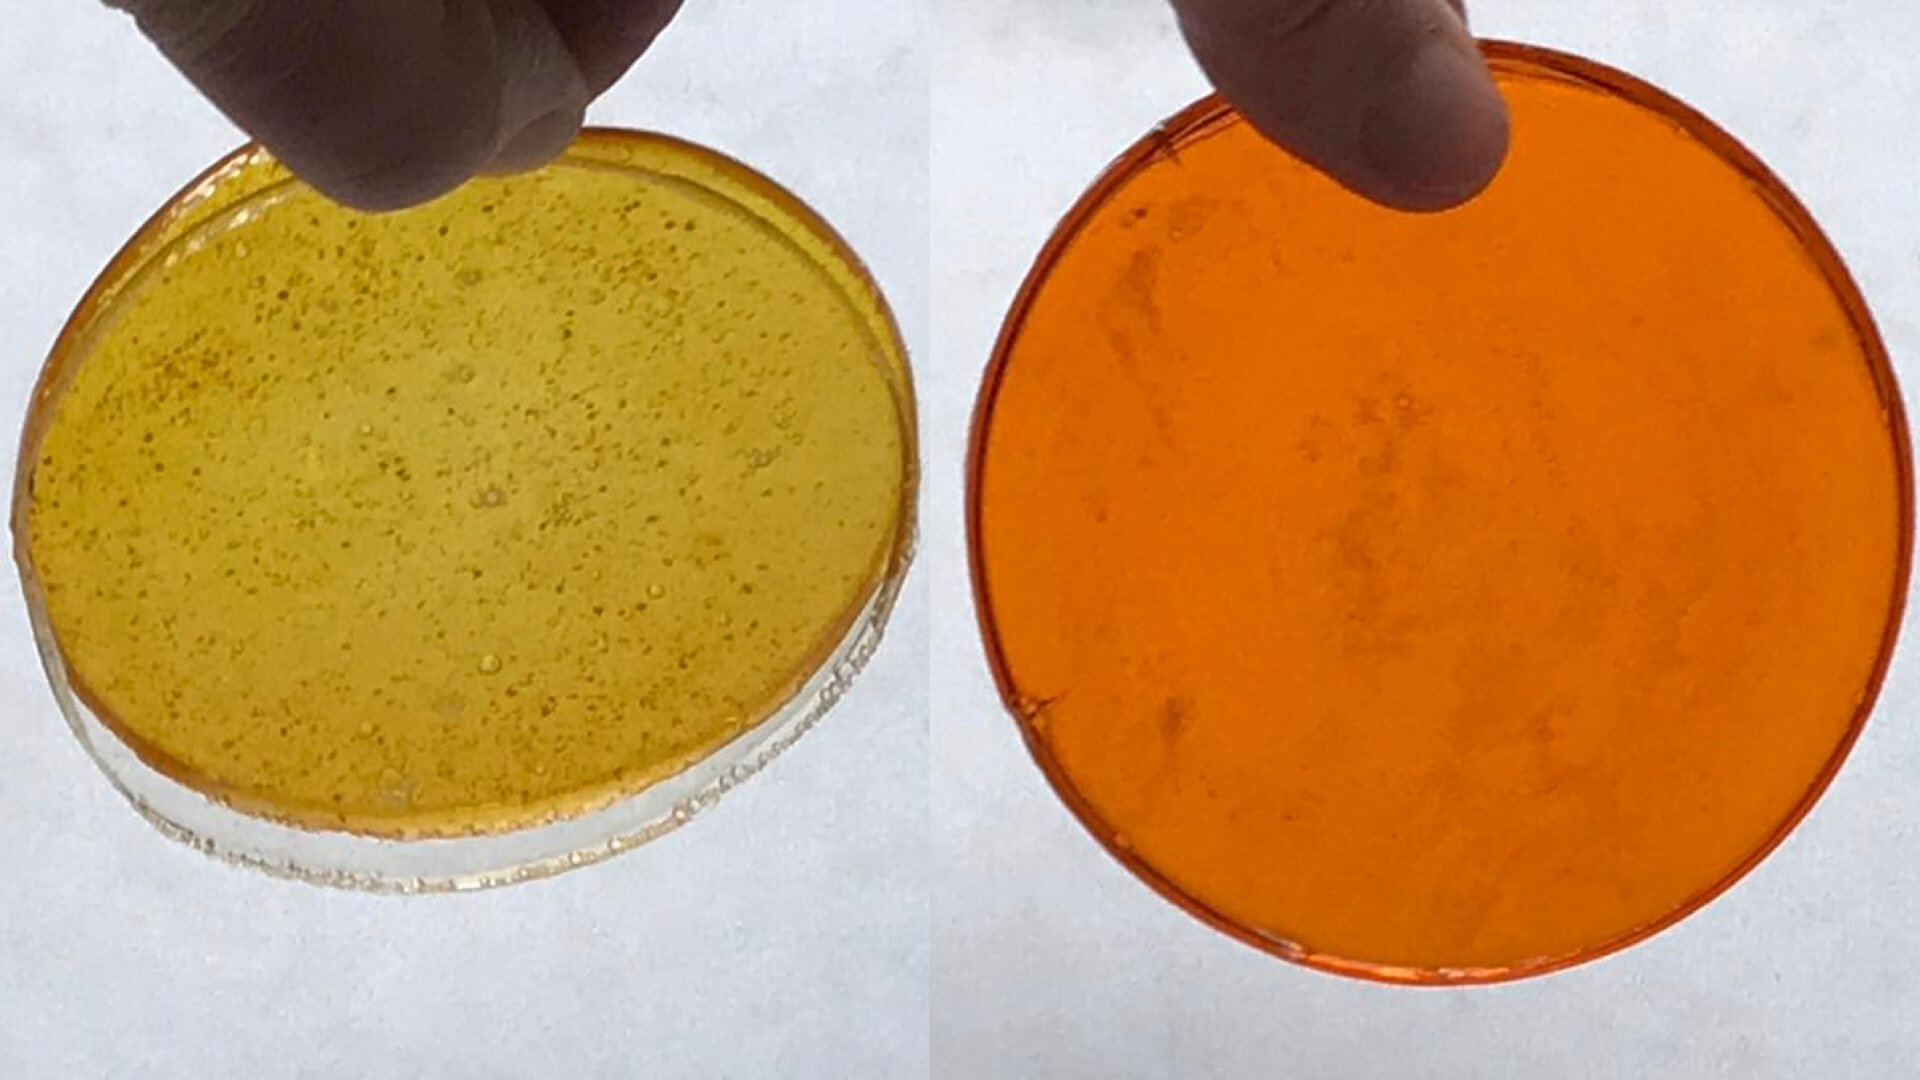
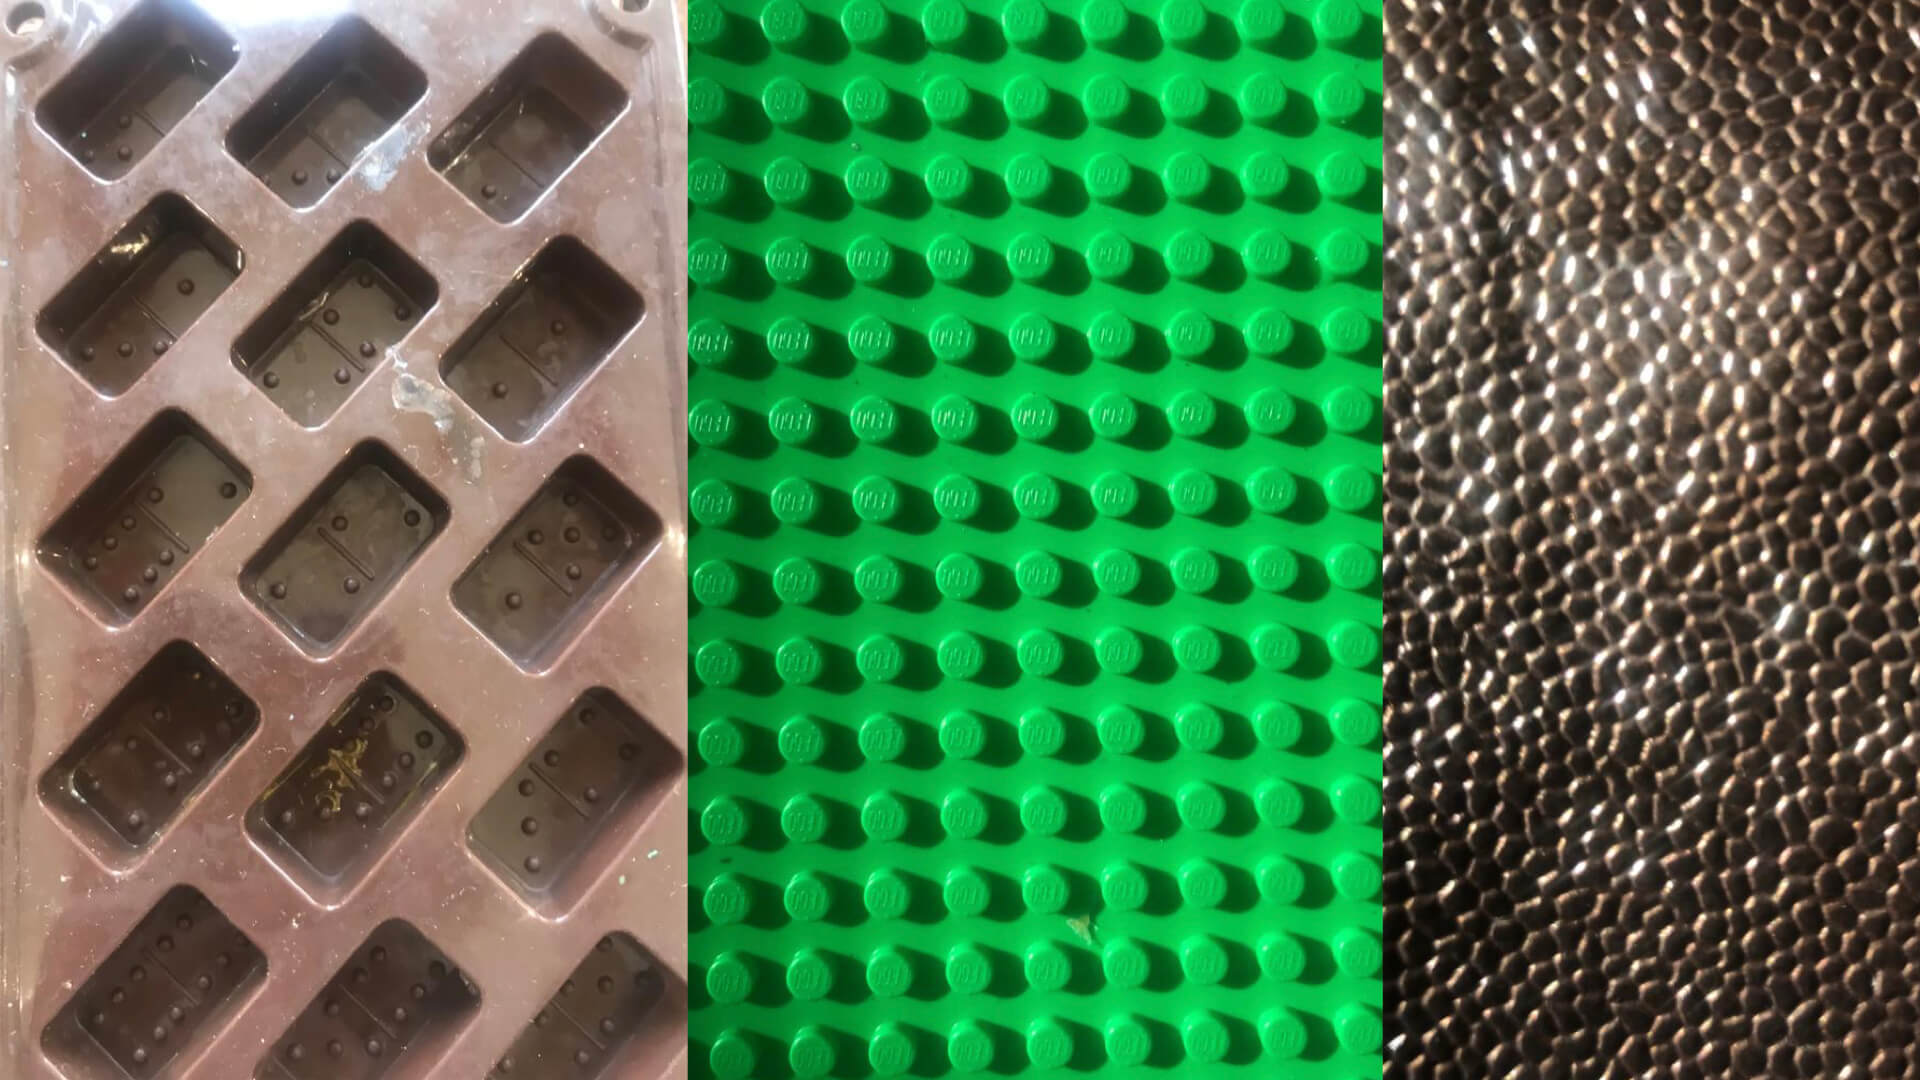
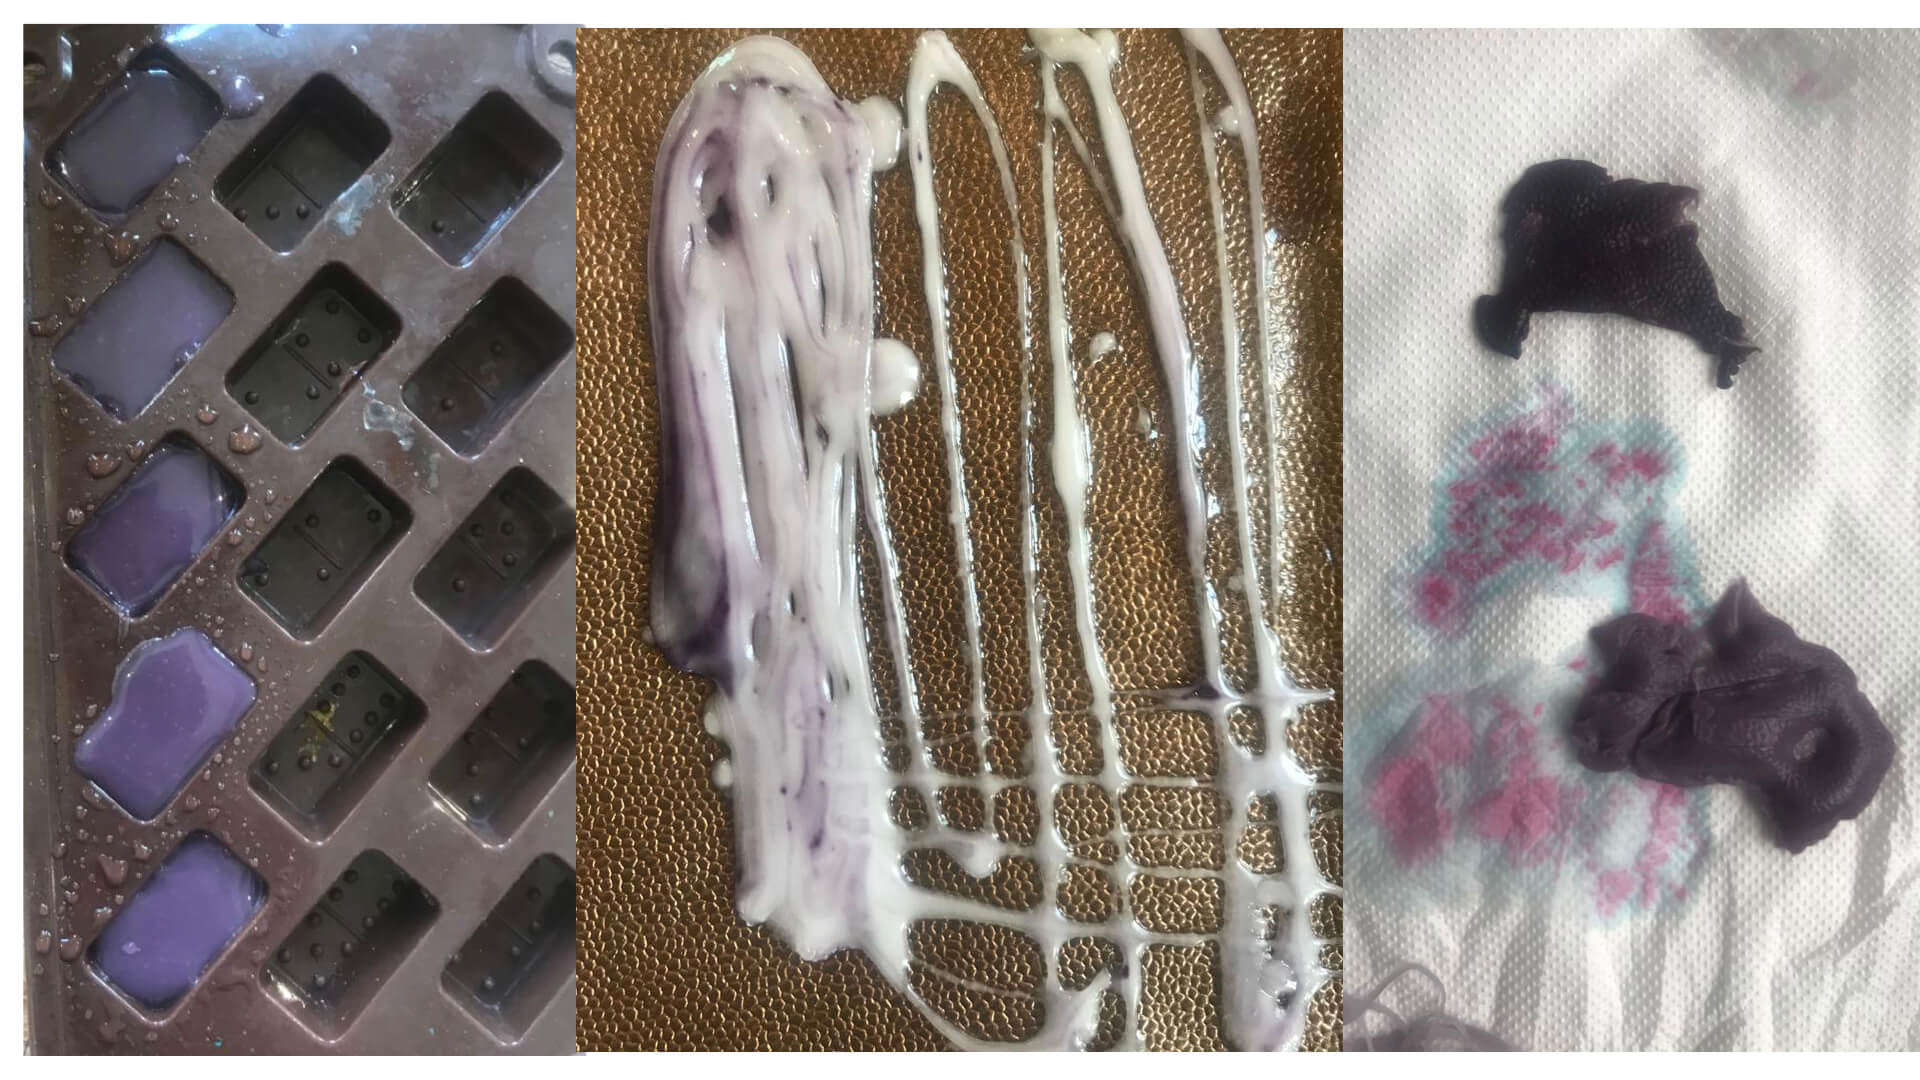
Alginate Bio Plastic with food colouring cast in domino mold (top and bottum)
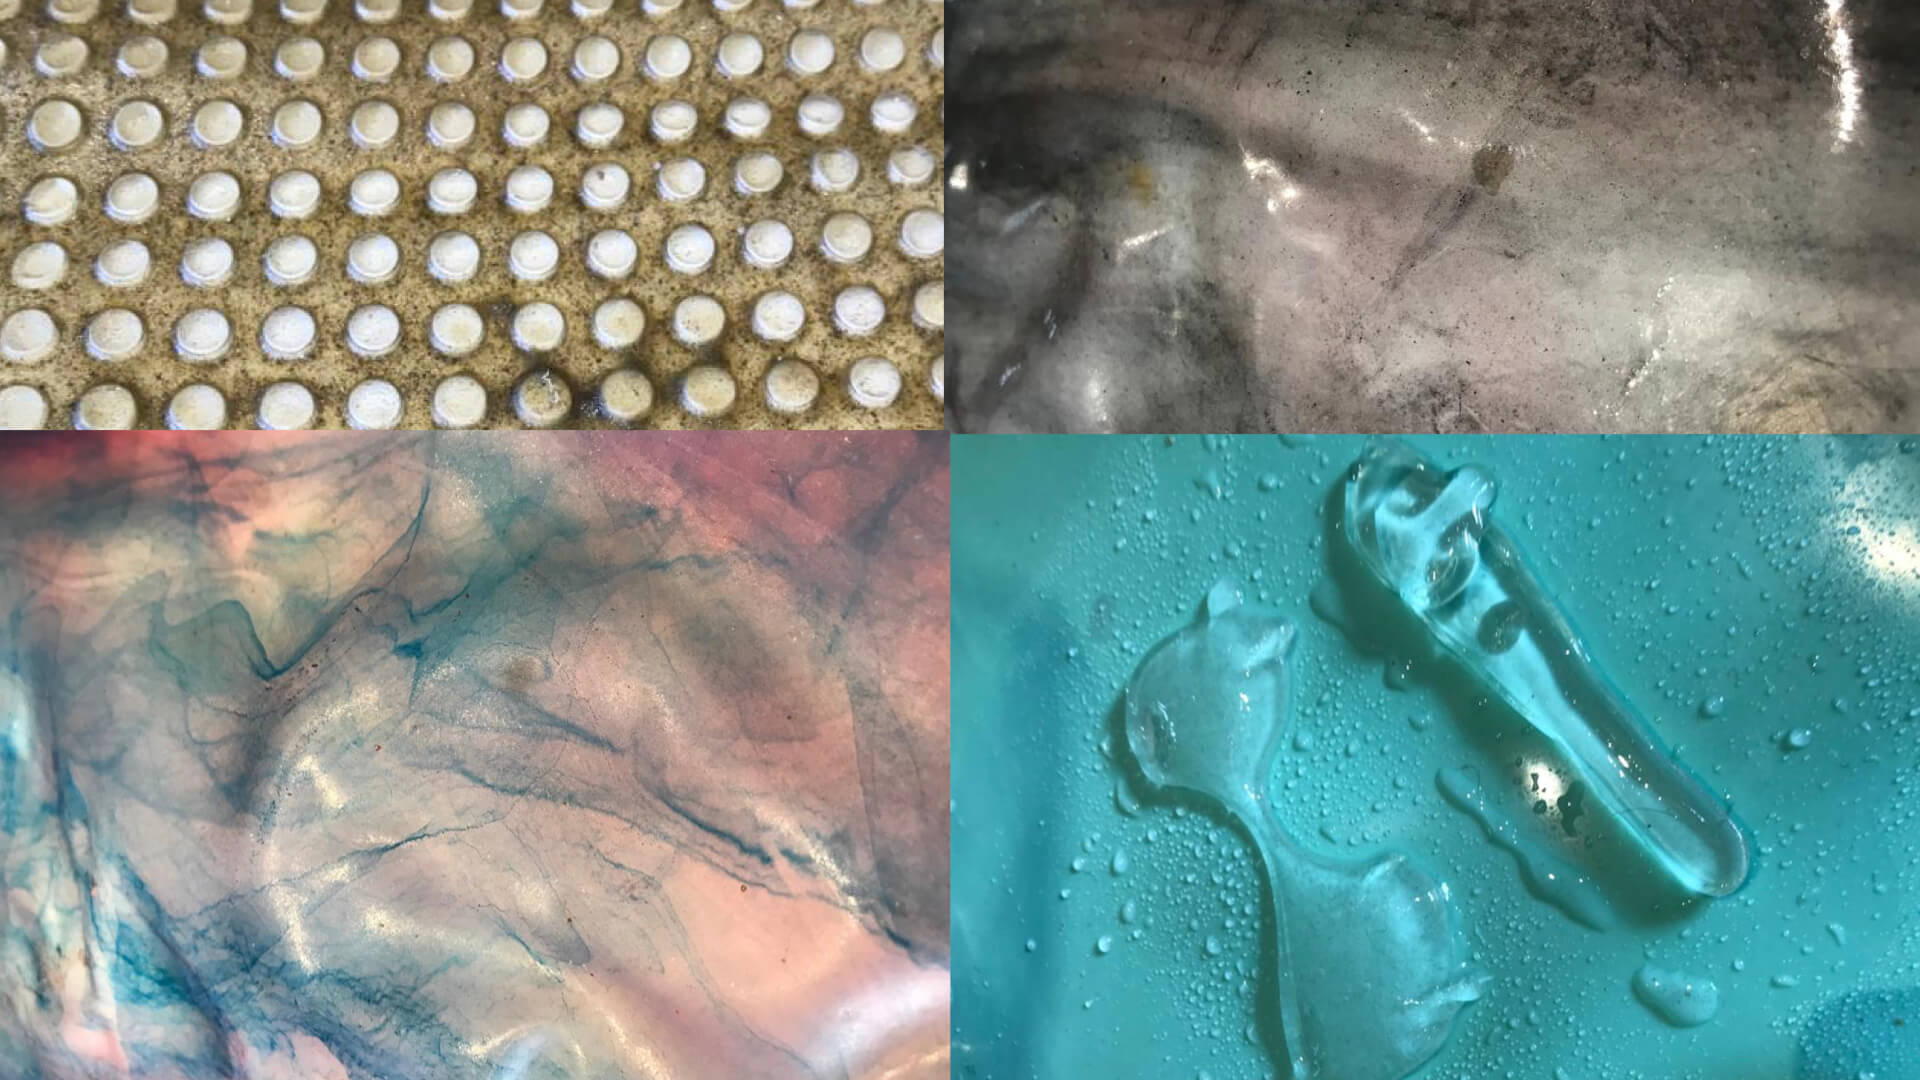
Alginate Bio Plastic with food colouring
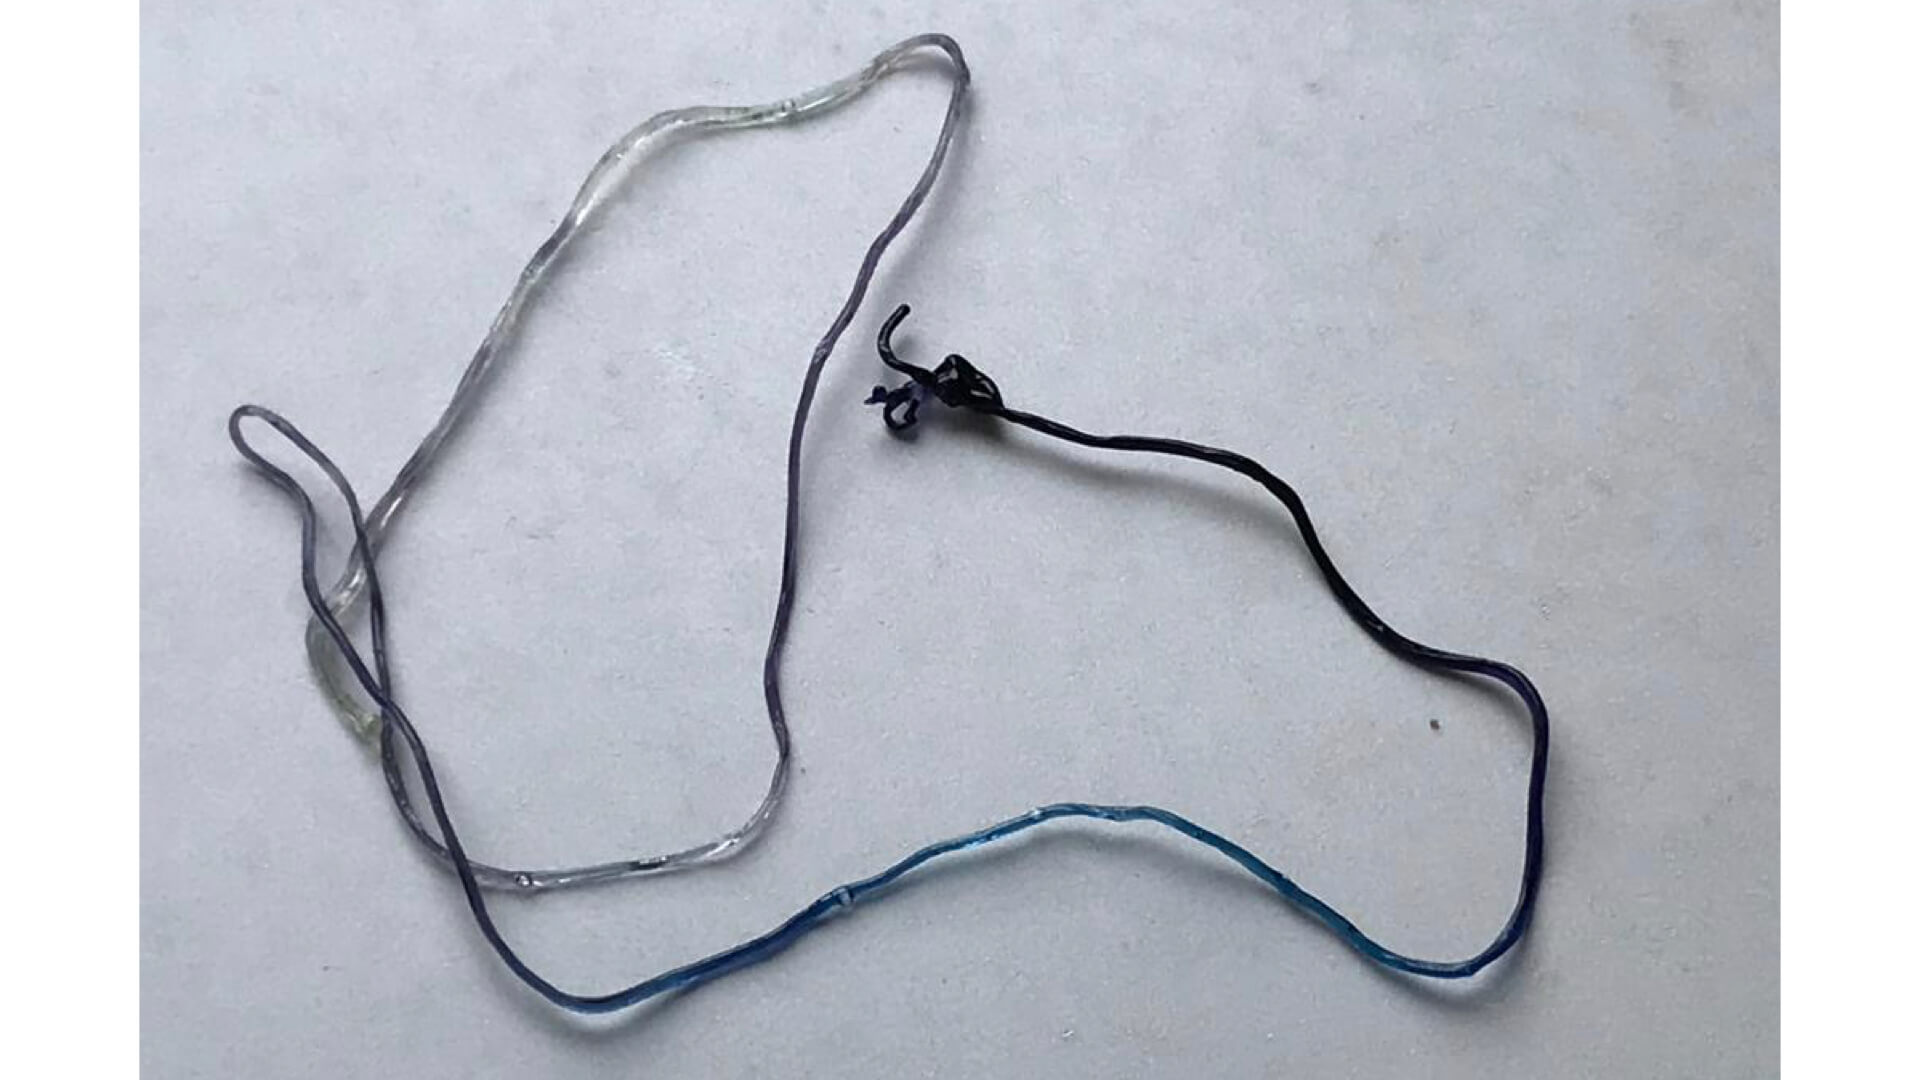
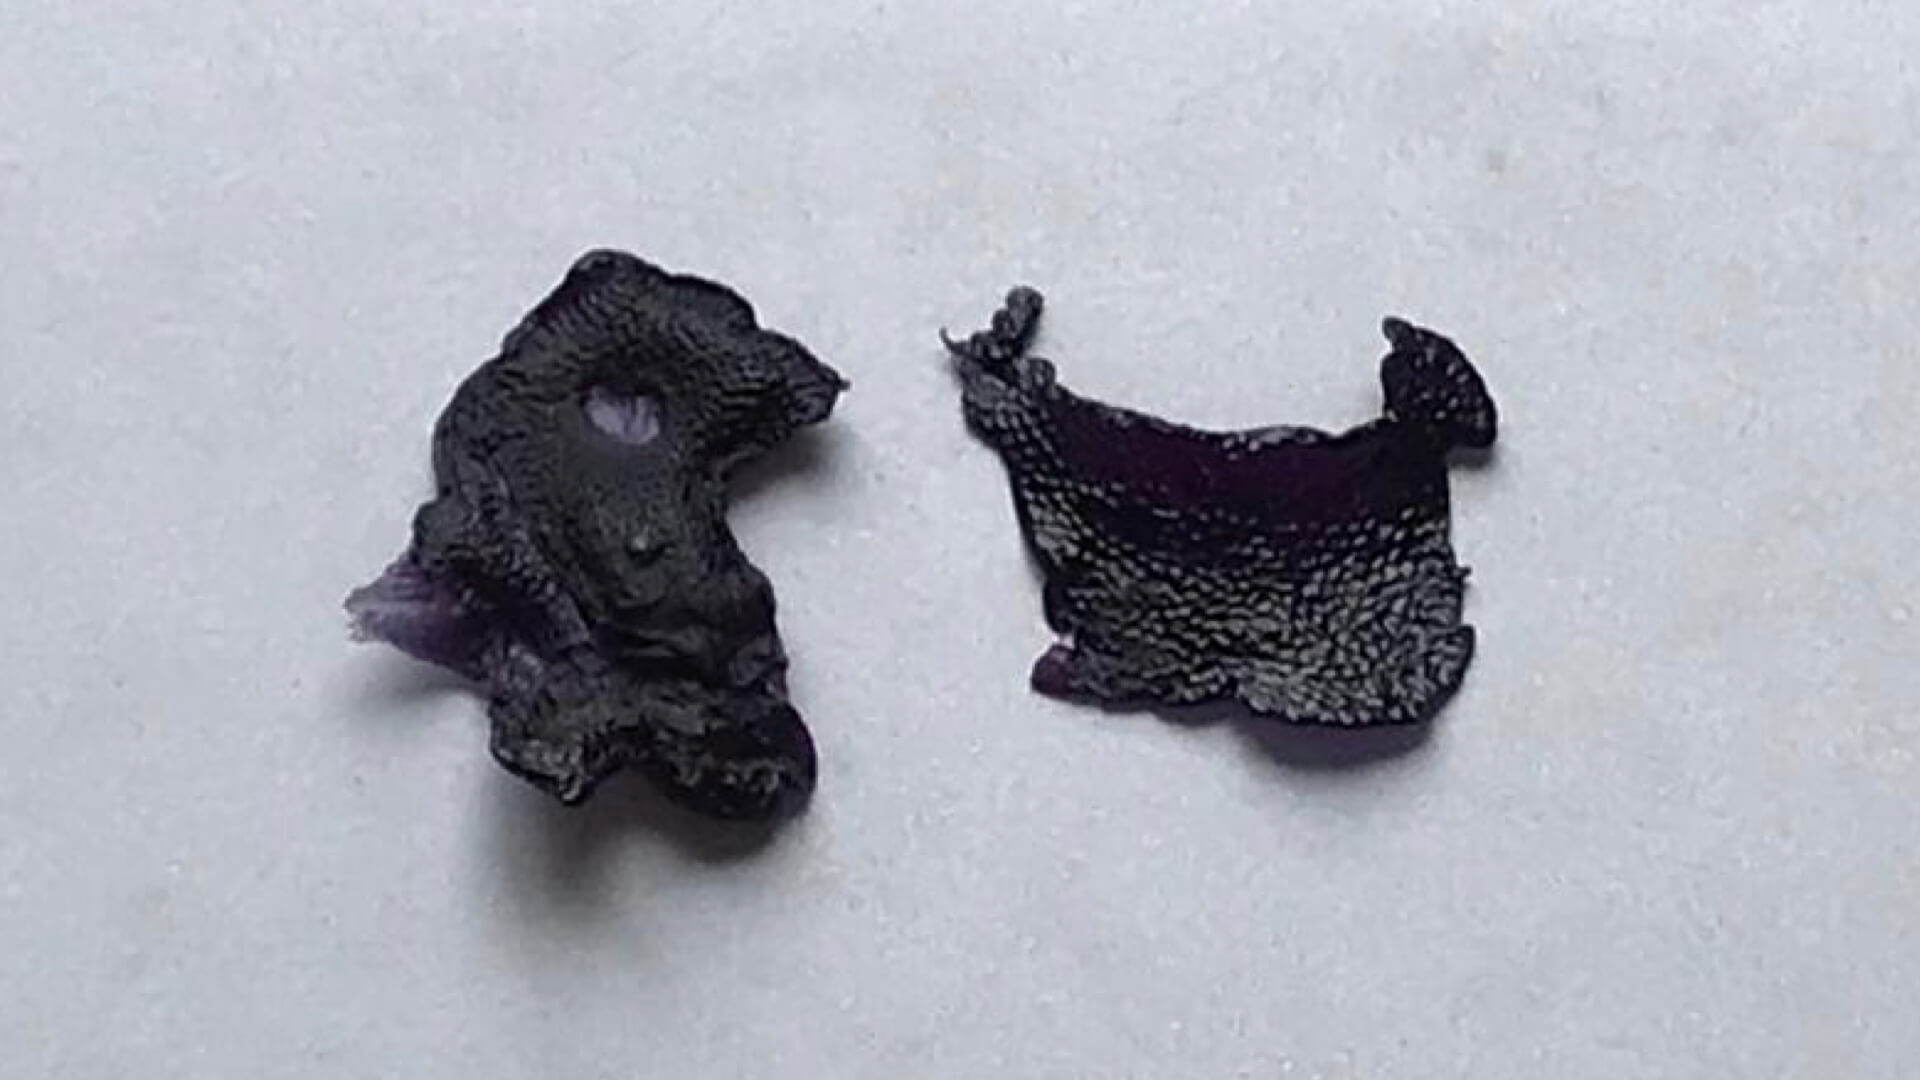
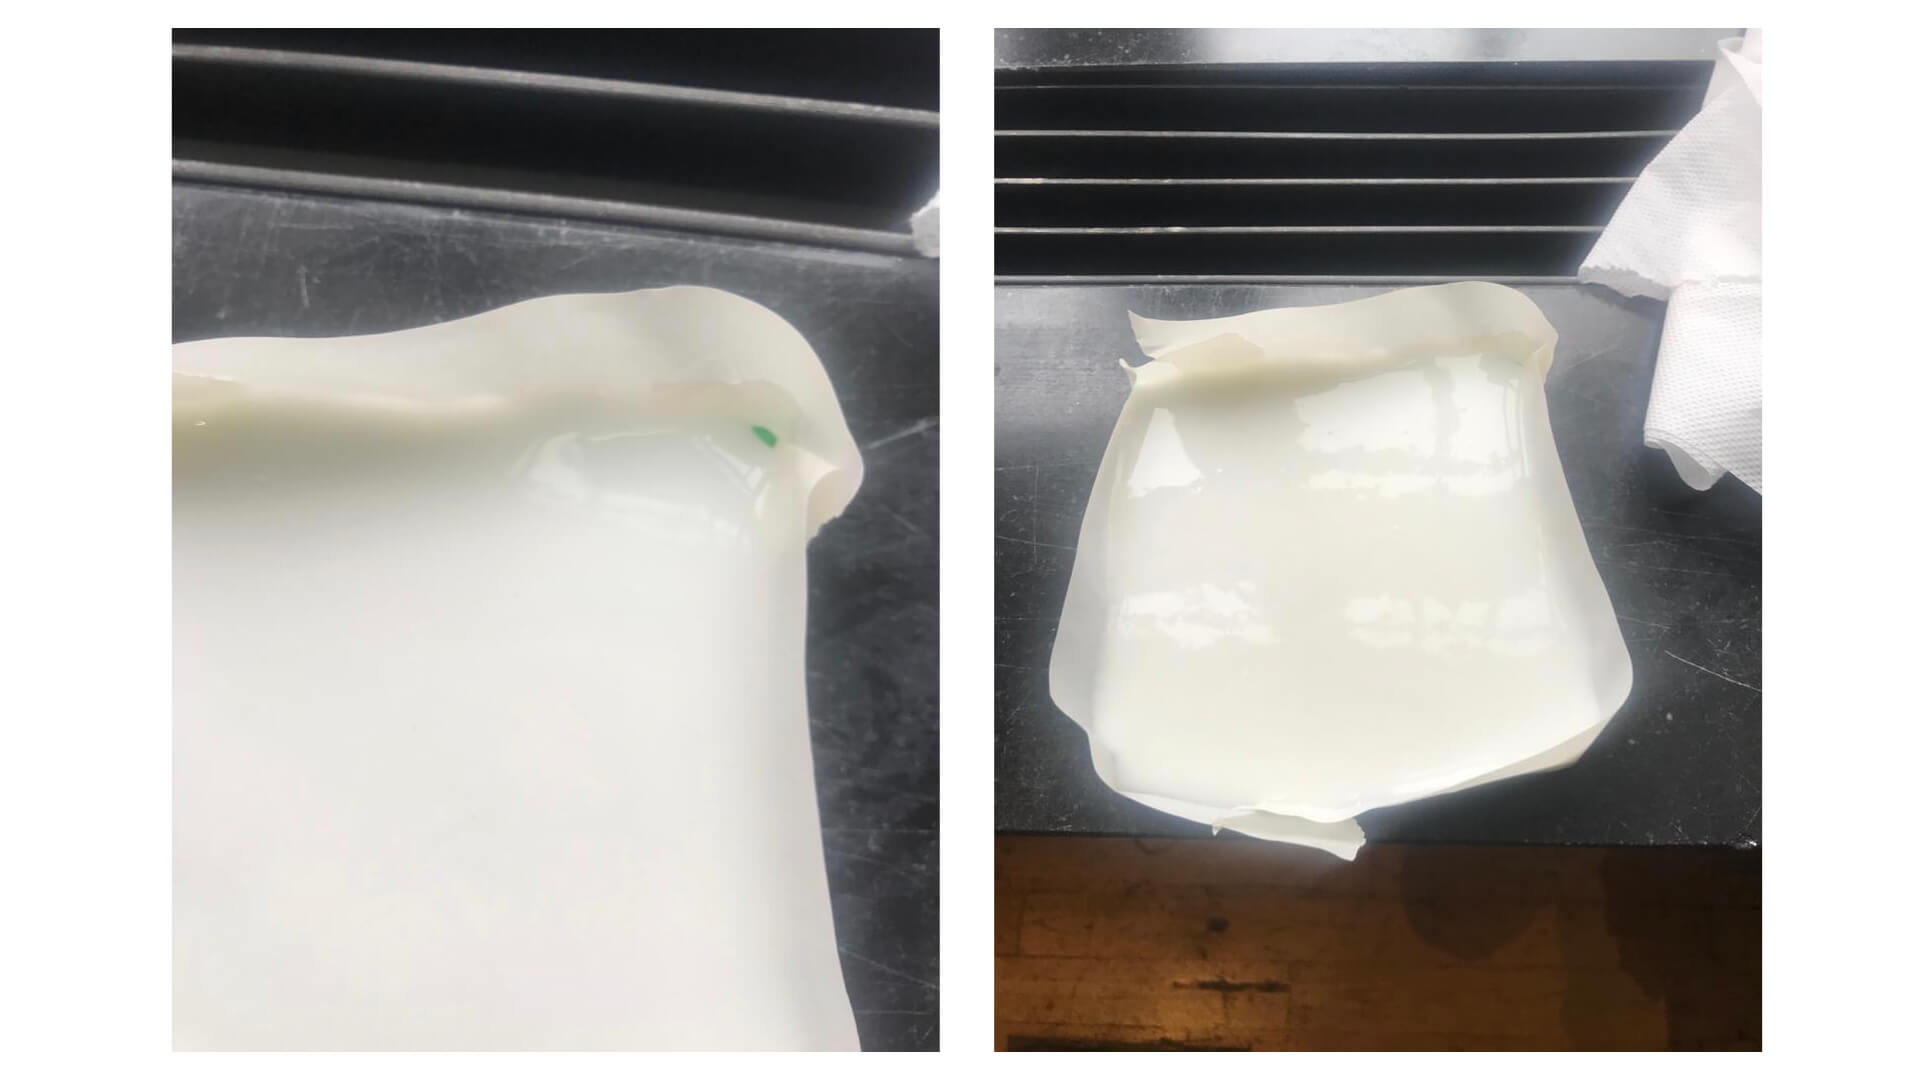
Alginate Bio Foil with a few drops of food colouring added to the syringe
The Alginate Bio Plastic on the Lego plate went all curly when I wasn't watching...
Inspiration
Intuitively, I like the projects in which something is actually done with the bio materials best. I think the material research is extremely valuable, but research into how we can create bio materials that are suitable for particular and extended use may spark a wider audience. Think about how to make water soluable material water resistant; which parts of existing designs can be replaced by bio materails; and which unexplored uses may there be.
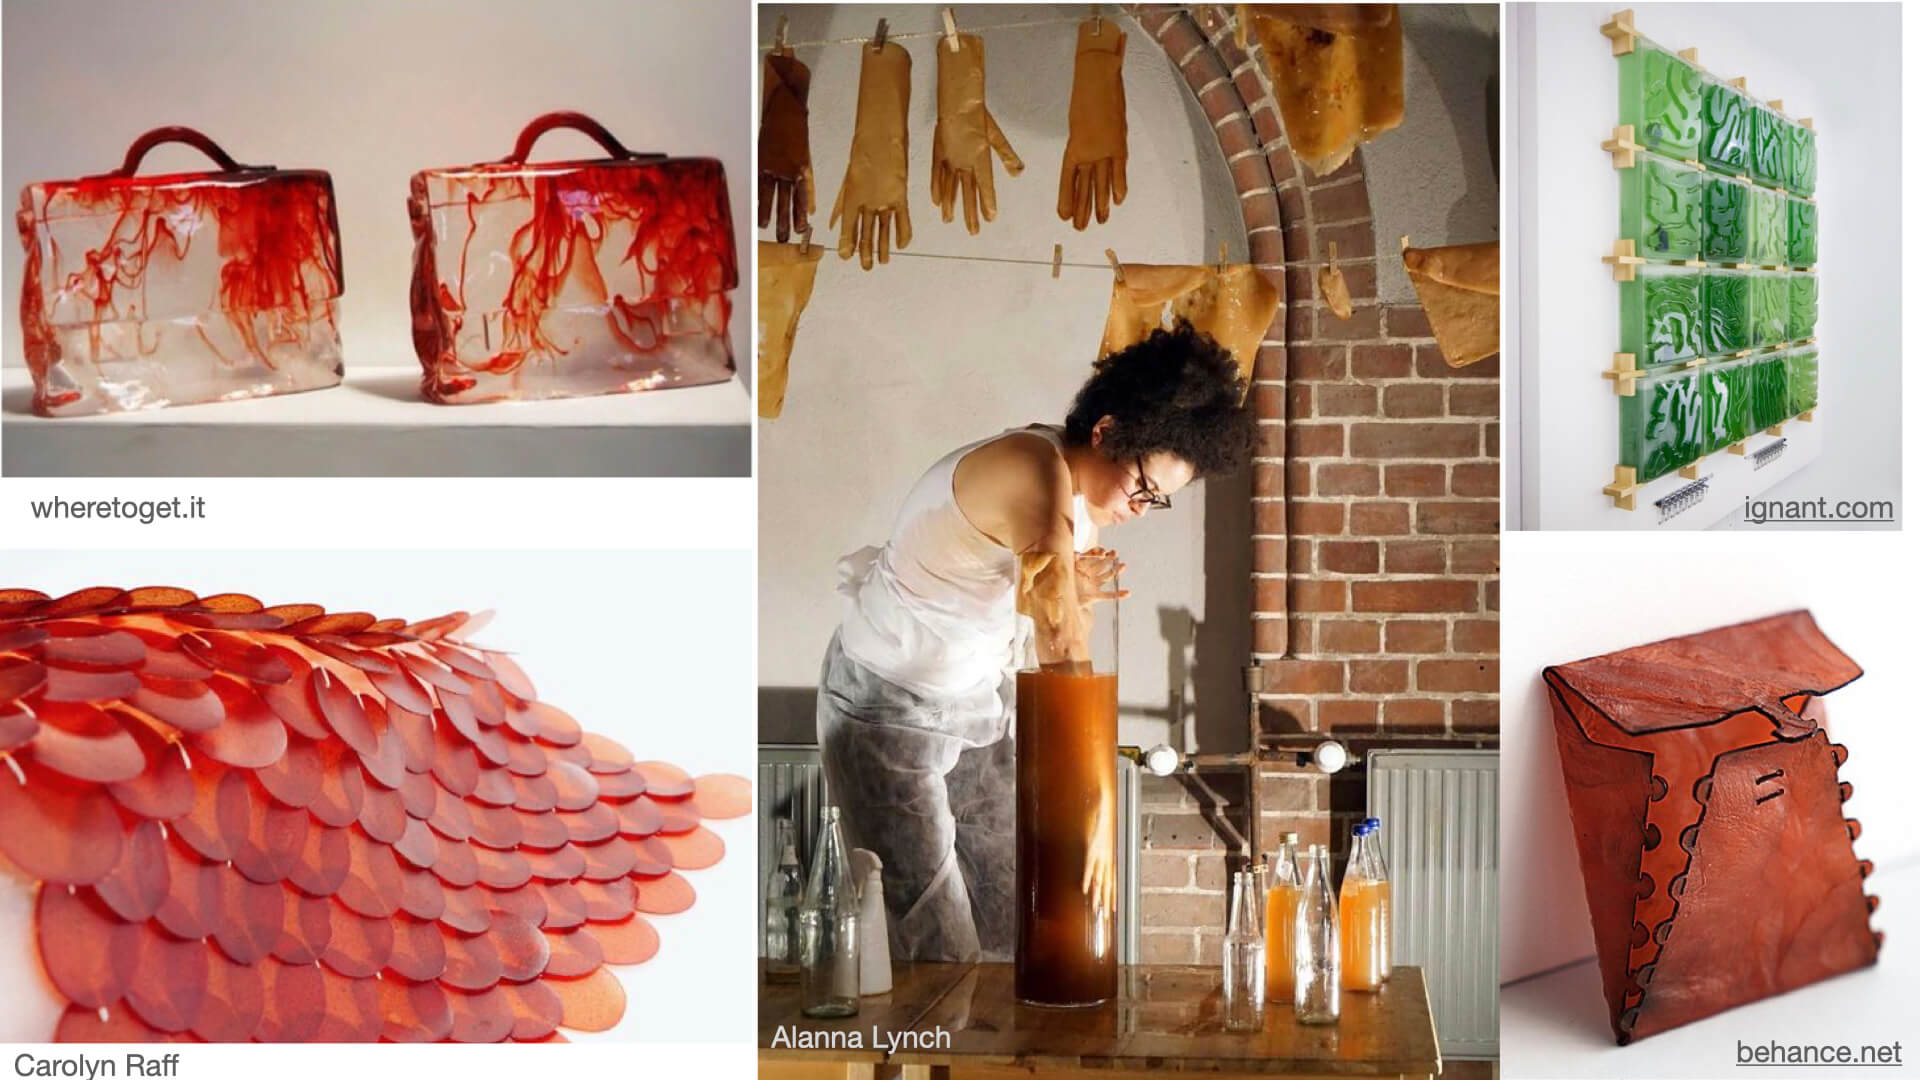
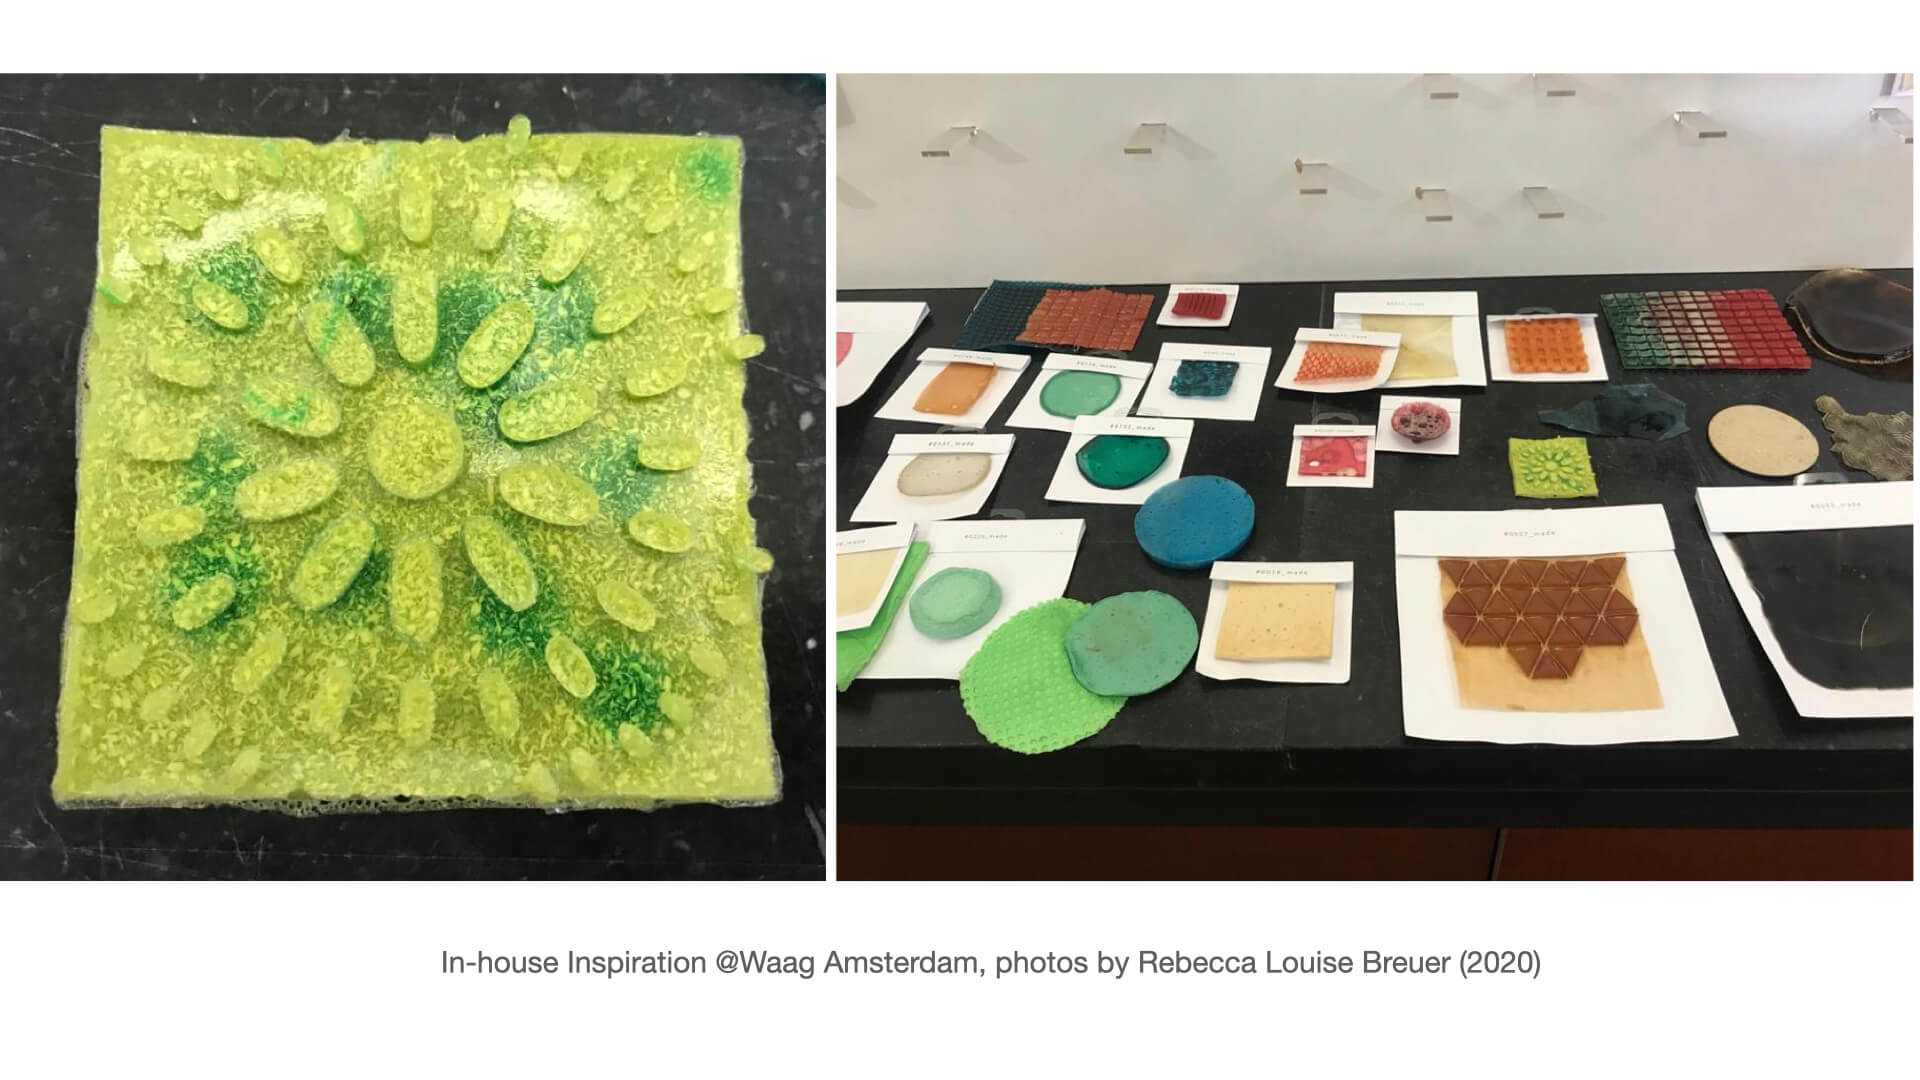
Some inspiring molds and texture
And some pretty examples
Research
I also questioned the usability of these experiments and would like to do some more research into this. The argument made by Bea during Loes' recitation about building upon existing knowledge (her example was directed at making larger quantities of a material), I find interesting and valuable. I intend to read some more about this and write about some possible standpoints, benefits and critiques.
Reminders to self:
- https://zenodo.org/record/1344486/files/Fab14-3.3-Cabrera-etal.pdf a tip by Adriana Cabrera during Loes' session.
- Material connections (business)
- Matterfact? Industry focused
- Atlas of bio-materials
An article Carolina Delgado and I wrote is to be found here
Documentation
Awesome Alginates
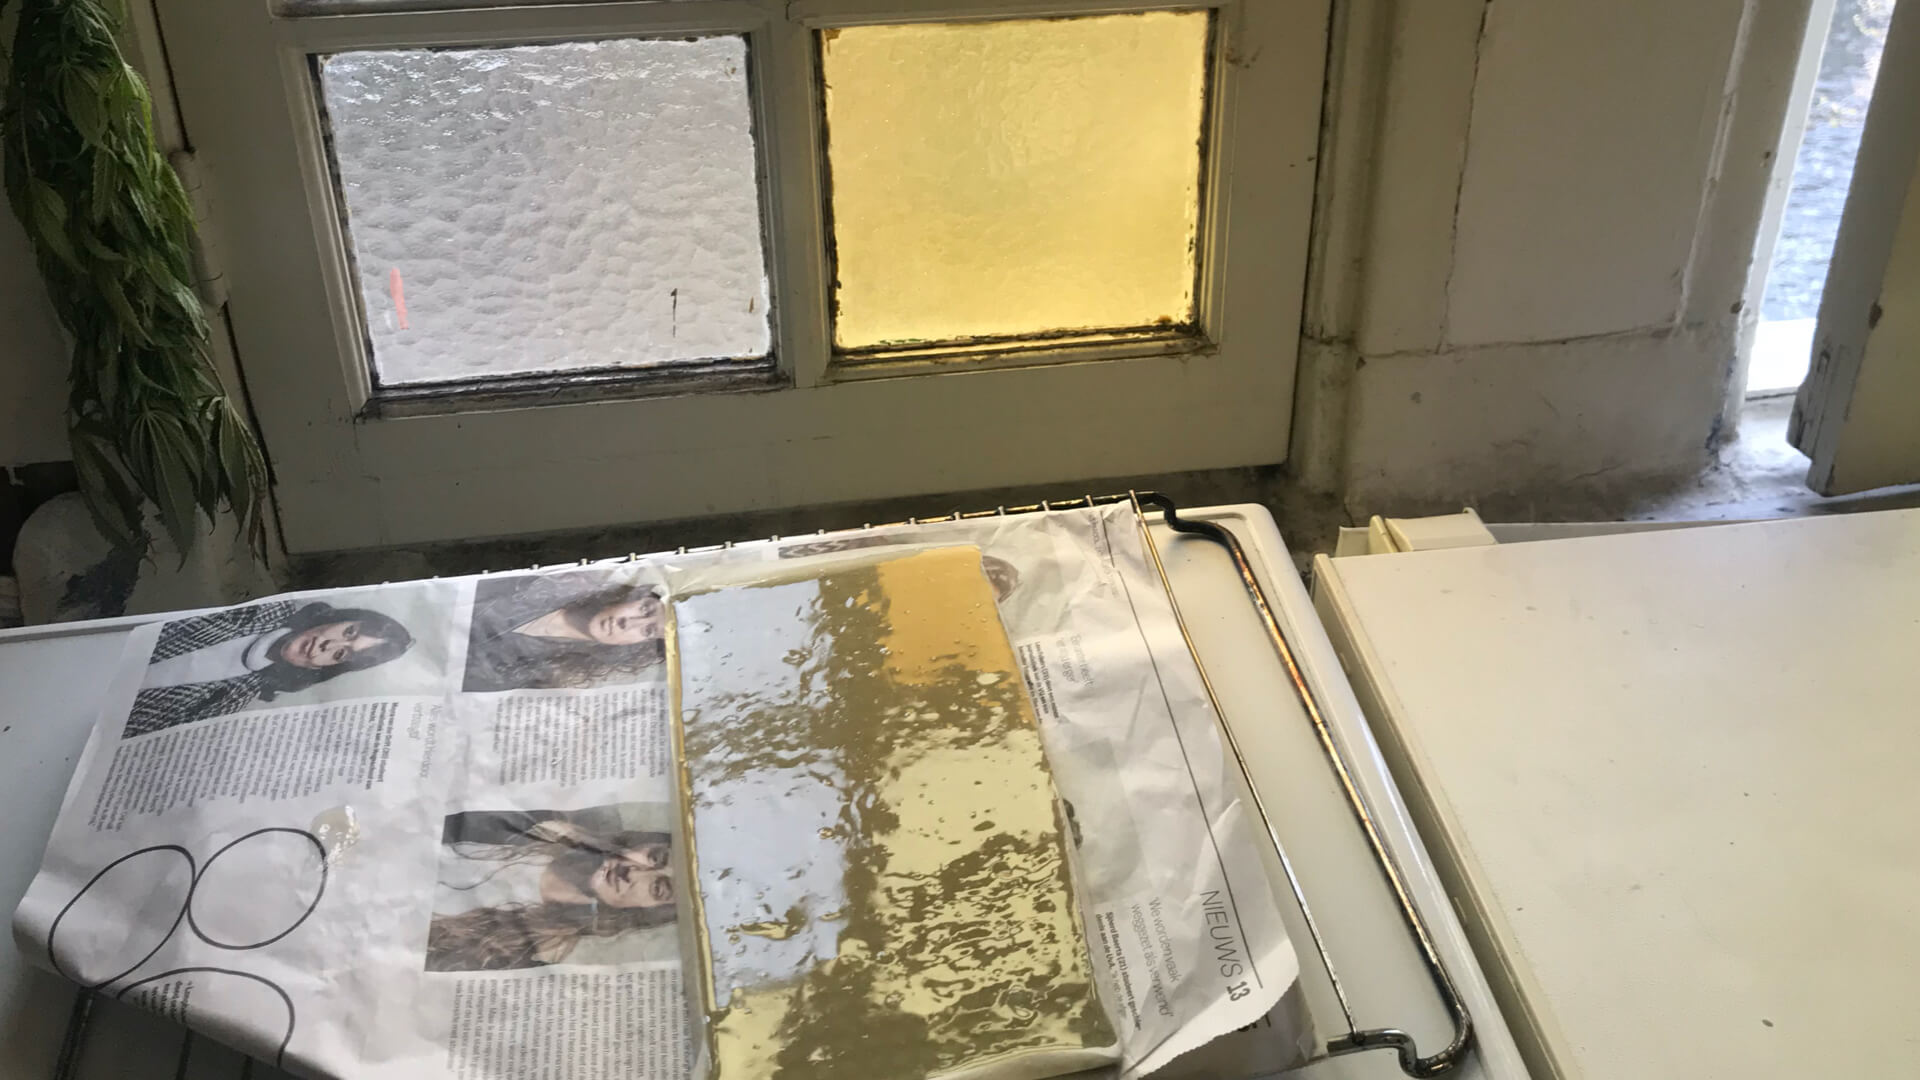
We started off by mixing different recipes to make alginate and then experimented with different materials for casting and curing.
We used to recipe for bio plastic to do some initial experiments with and the transperant bio foil recipe to create the 'vein' (see below).
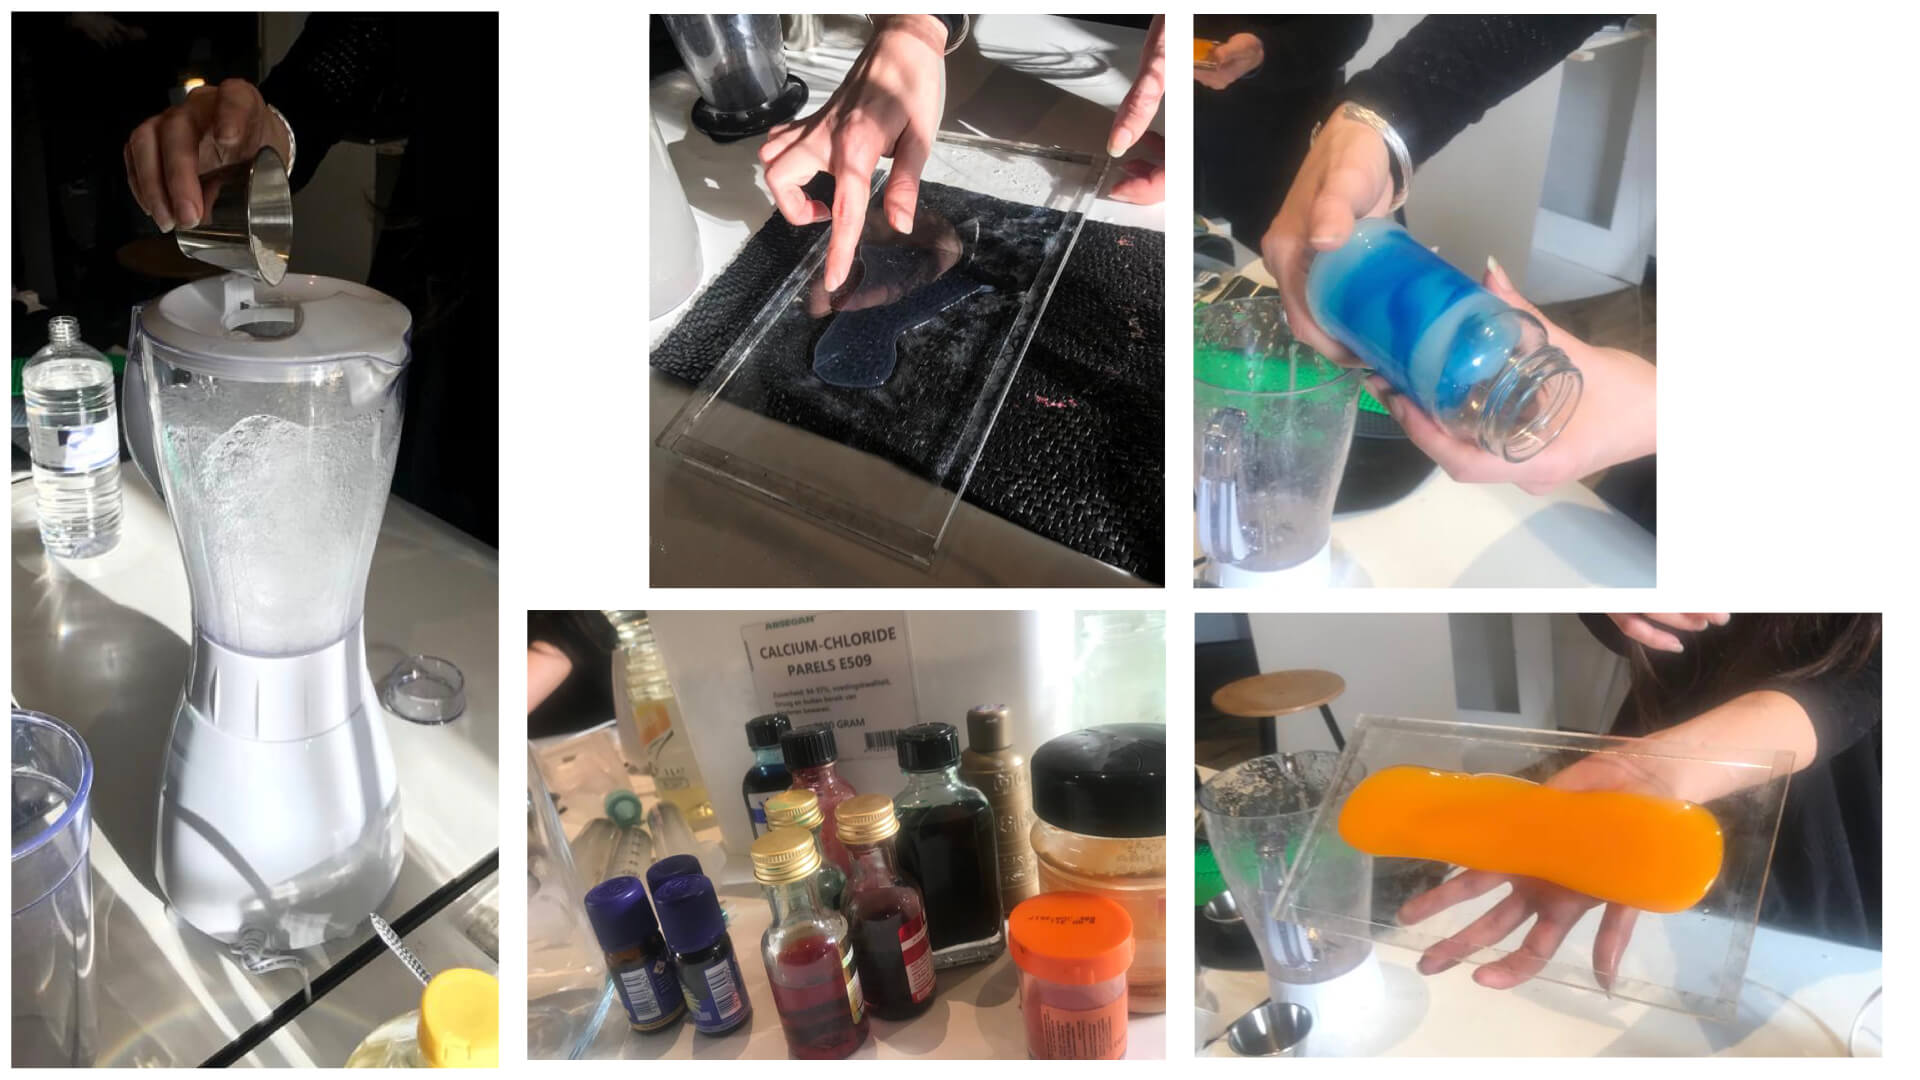
The set-up in the lab and brewing a broth of alginate with sunflower oil to create a sturdy paste
Some very first try-outs
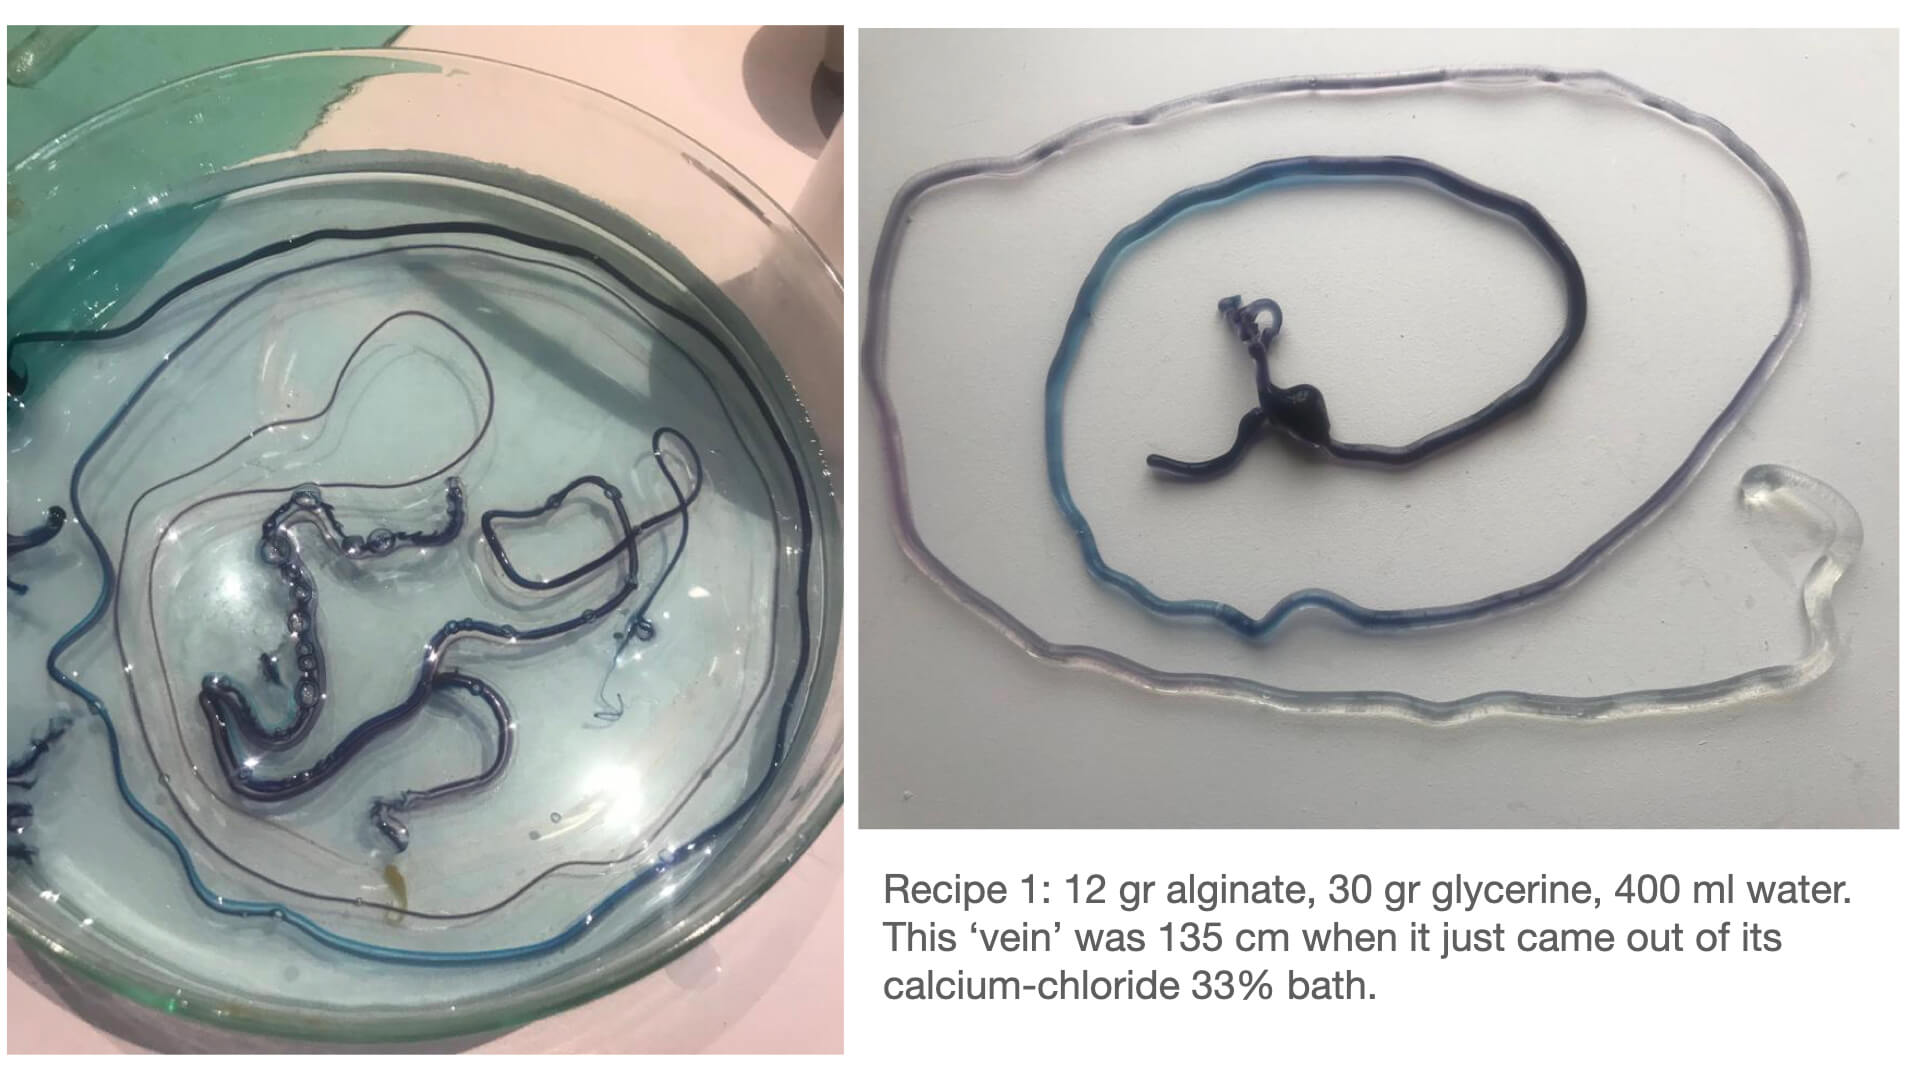
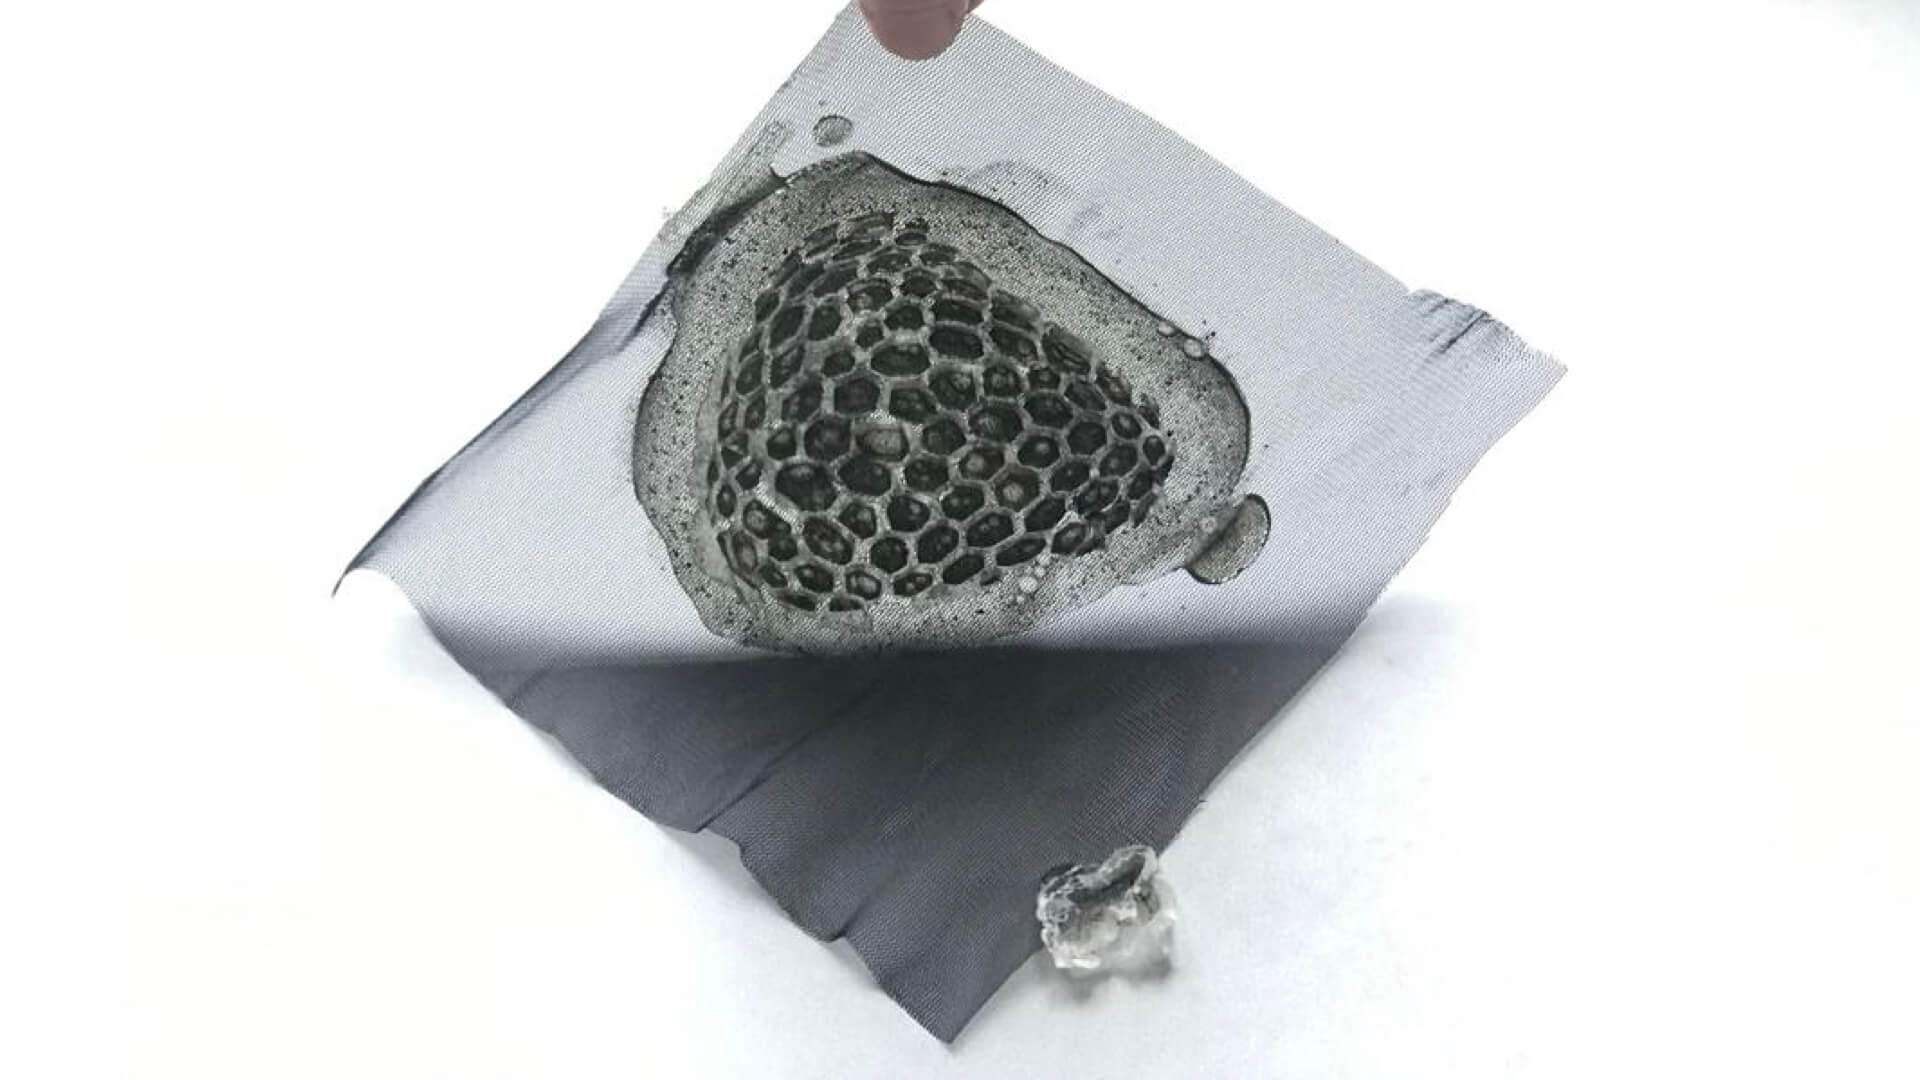
I really enjoyed making this vein by using a syringe to push the alginate into a 33% Calcium-Chloride bath.
One tiny corner of a lego mat still visible, the rest is covered by a layer of bio-plastic. This will take some time to dry completely.
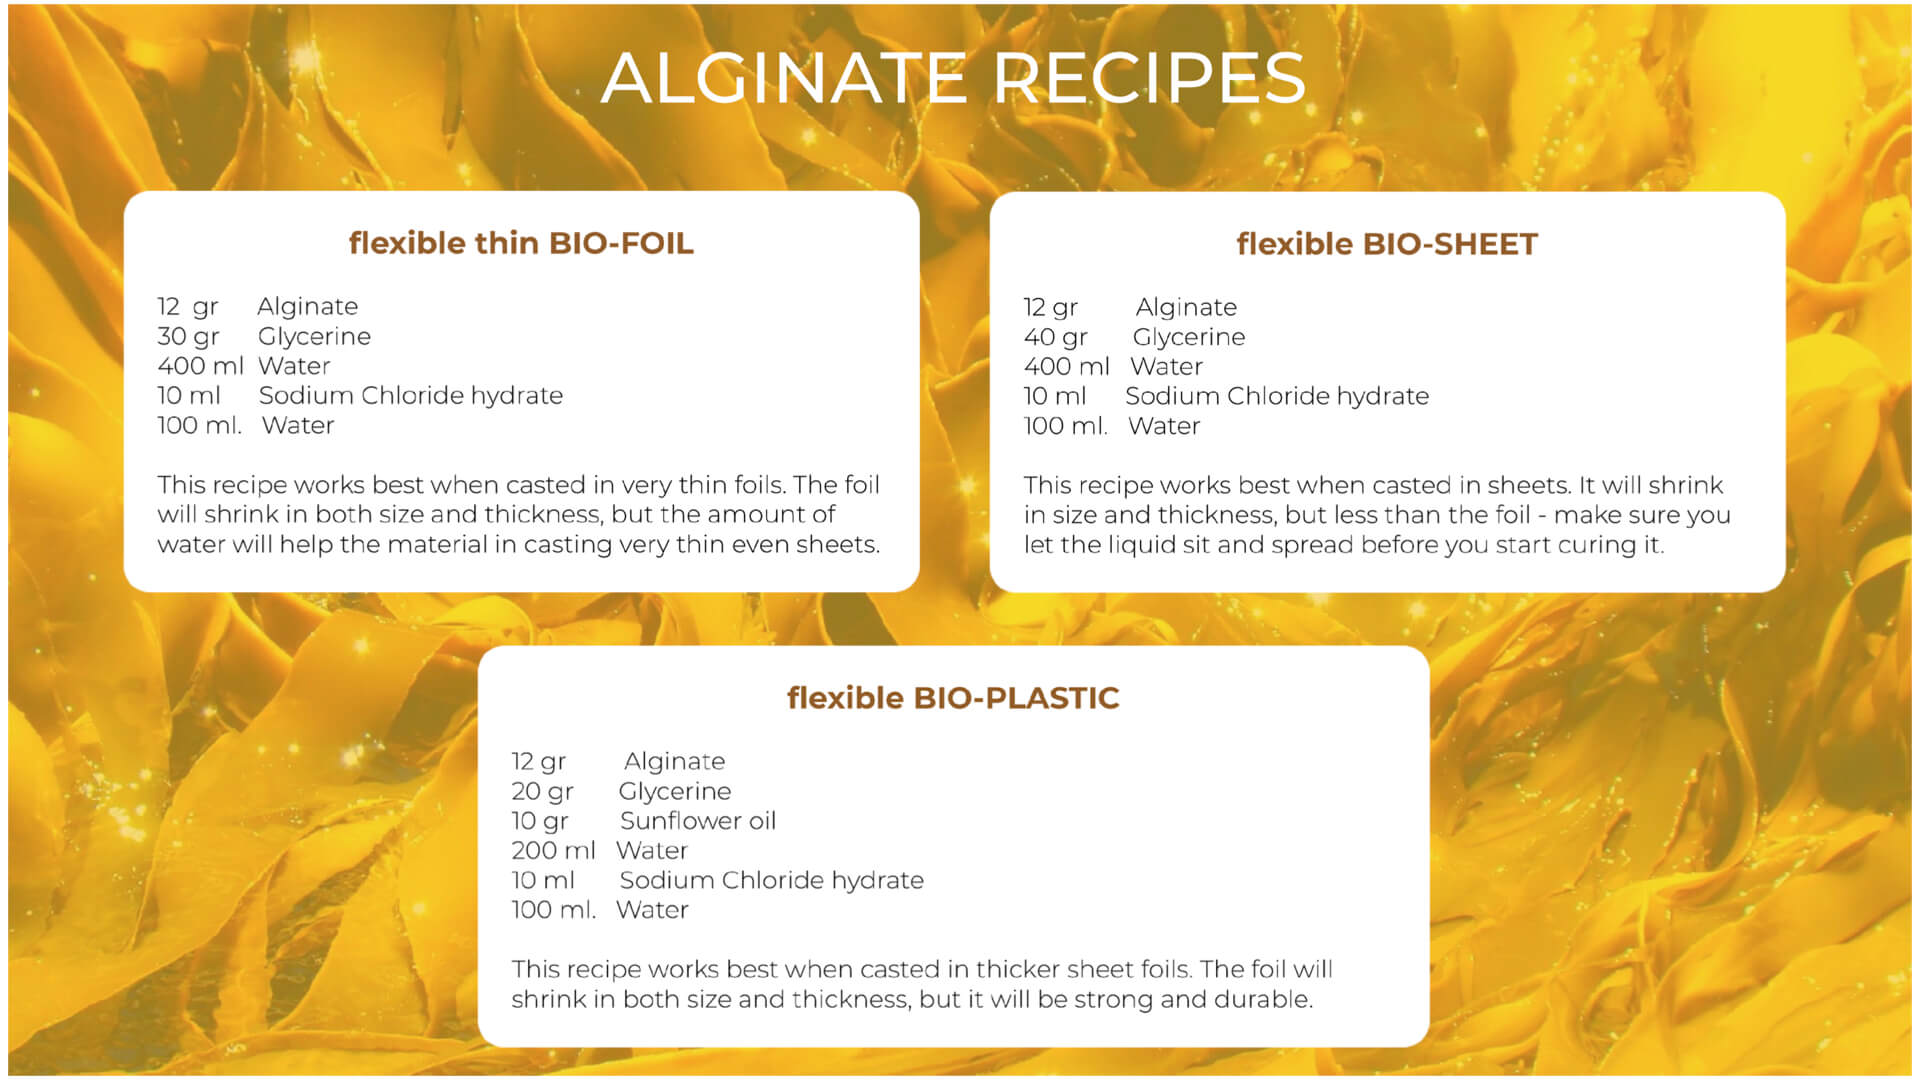
ALGINATE RECIPES
Bio Foil
- 12 gr aliginate
- 30 gr glycerine
- 400 ml water
- 10 ml sodium chloride
- 100 ml water"
Measure ingredients and combine water, alginate and glycerine in a blender. Dissolve the sodium chloride in the 100 ml of water (or in a larger quantity in a ratio of 1:10) and keep in a spray bottle. For casting in a 'bath' (as I did for the 'vein') use a 33% sodium chloride concentration.Bio Plastic
- 12 gr aligate
- 20 gr. glycerine
- 10 gr sunflower oil
- 200 ml water
- 10 ml sodium chloride
- 100 ml water
Measure ingredients and combine water, alginate and glycerine in a blender. Add the sunflower oil to create a mat white substance that can consequently be coloured as a vast material. Make sure to. mix slowly and not 'burn' the blender since this less fluid mixture has much more consistency
NB: Alginate designs will shrink quite a bit. Mine also lost quite a bit of their flexibility, causing the 'vein' to dry in the way it was left to do so.
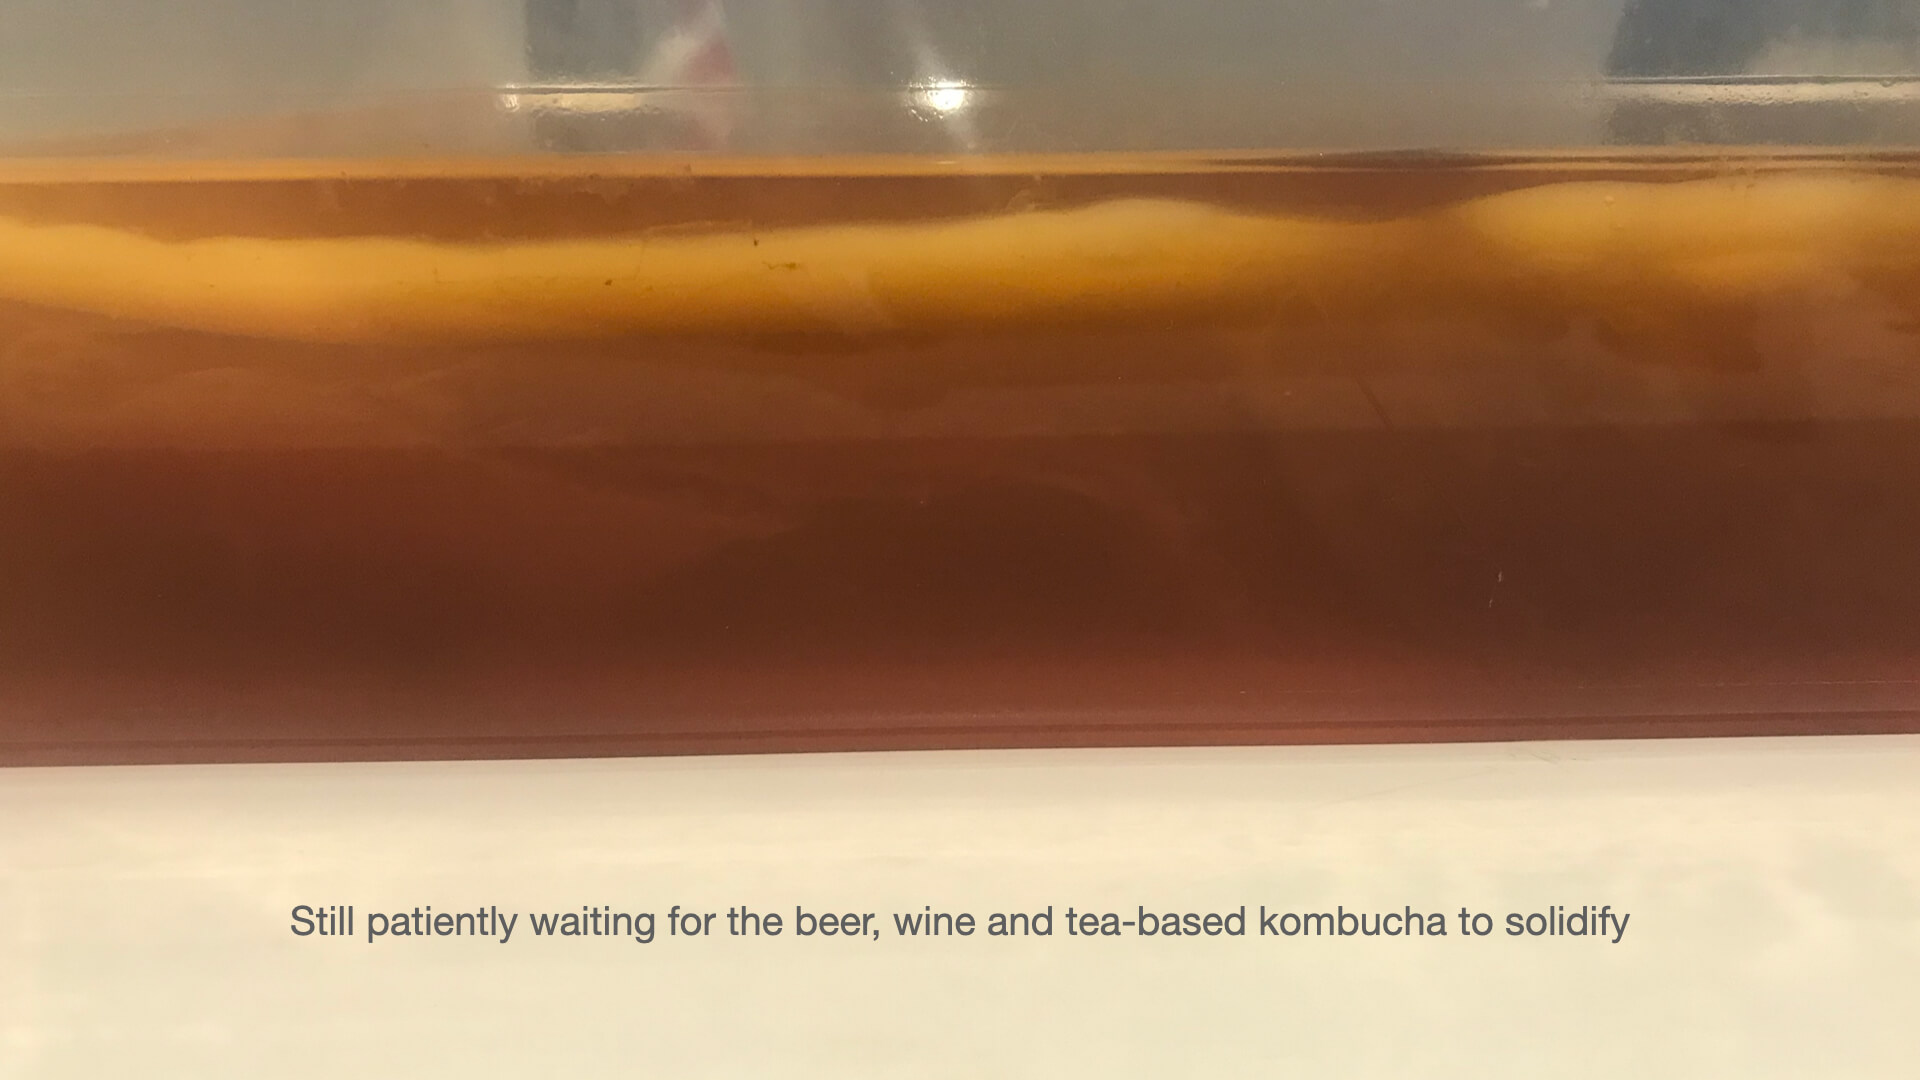
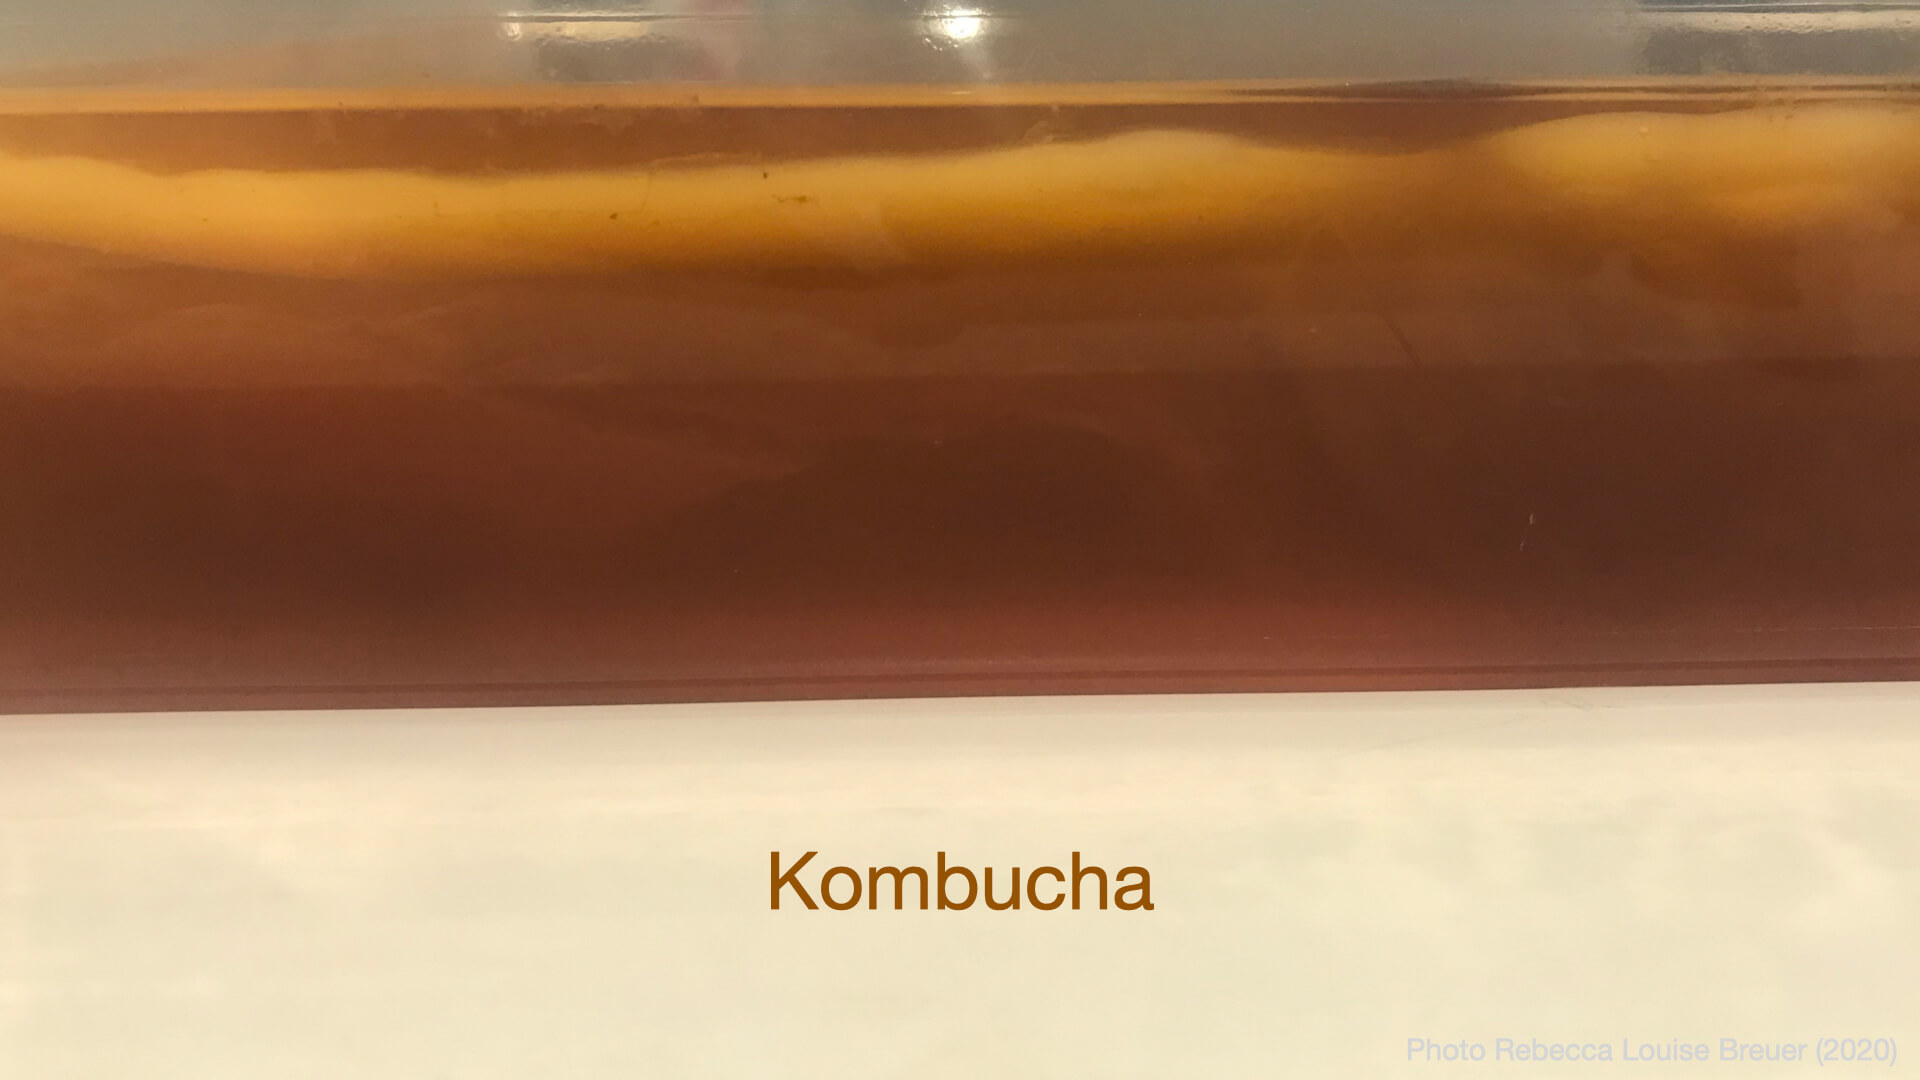
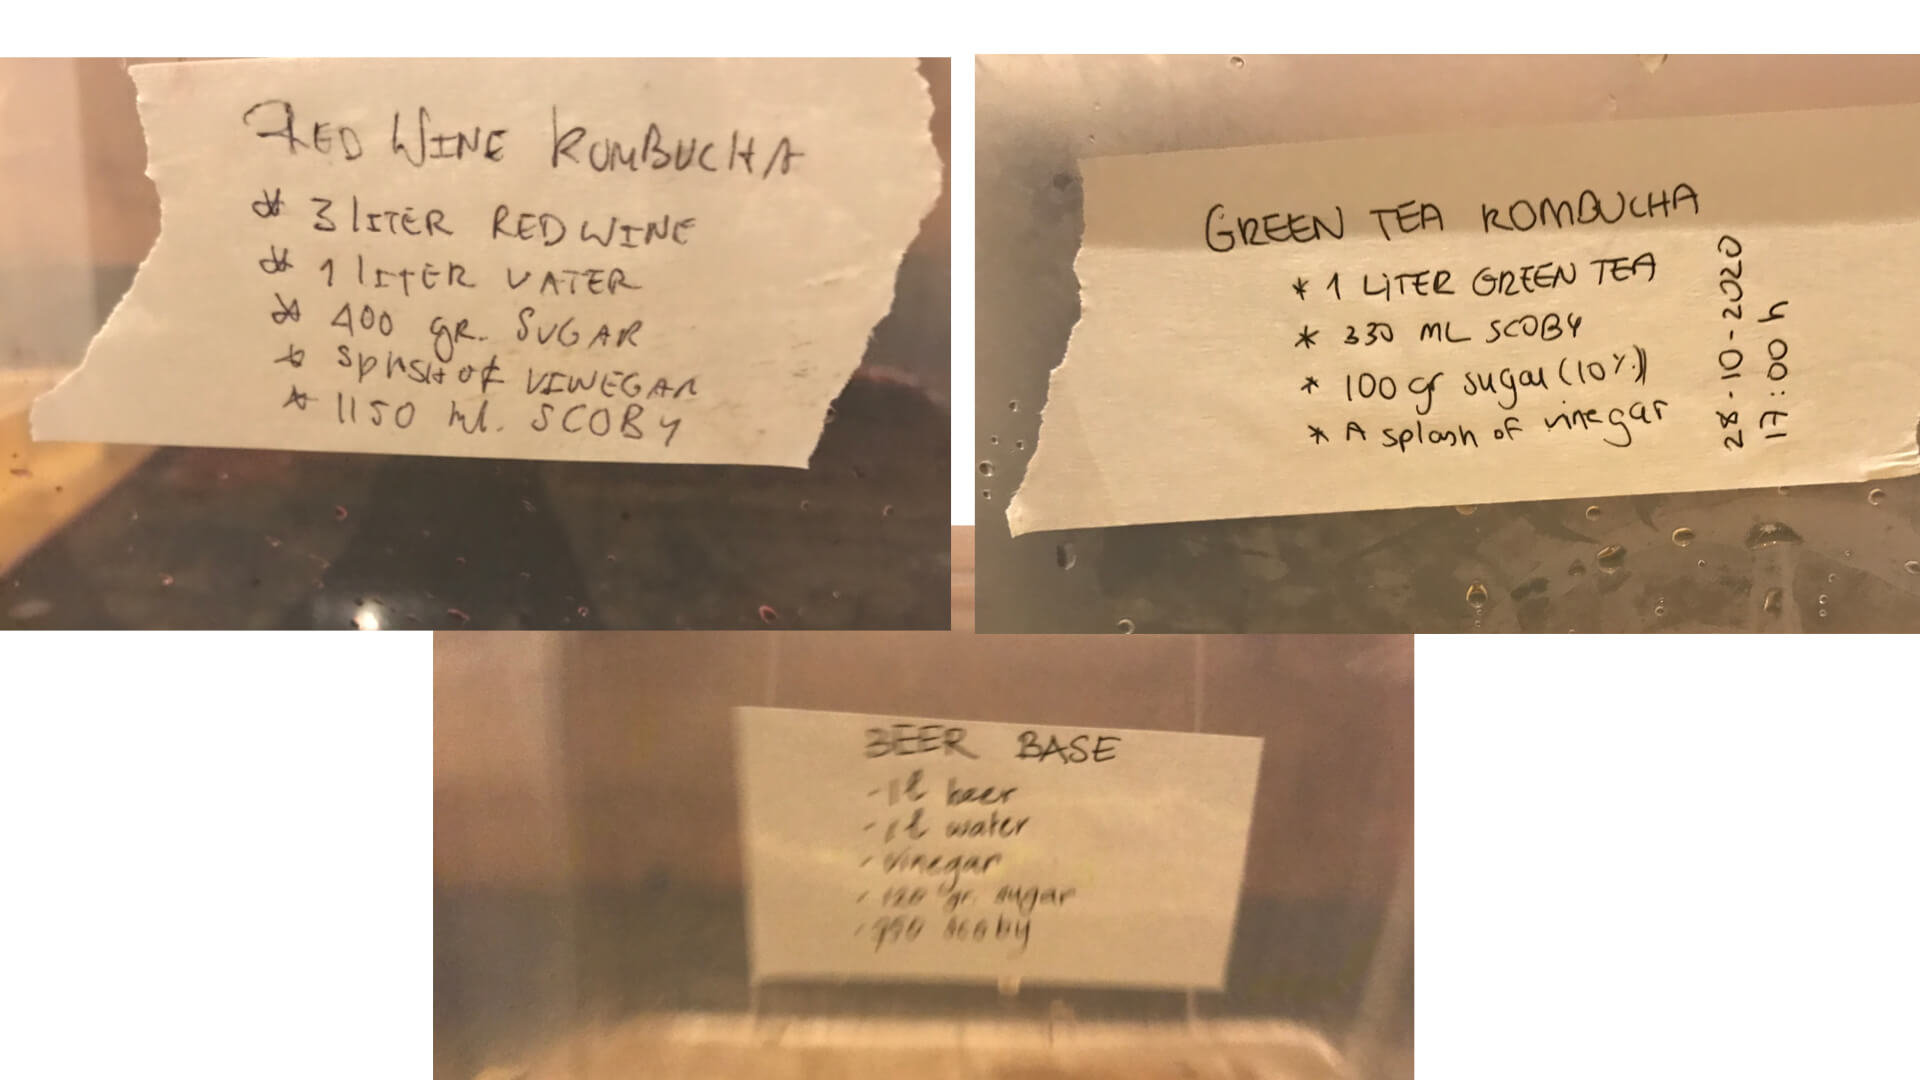
18+ Kombucha
There was a starter culture present at the Waag, from which we first harvested the quite thick layer that had developed in this bath. The scoby, both bits of the intial layer as well as in liquid form are perfect for initiating new projects. Inspired by Lorena Trebbi, we collectively started three new cultures. One with a beer basis, one with a red wine basis and one traditional tea based recipe.
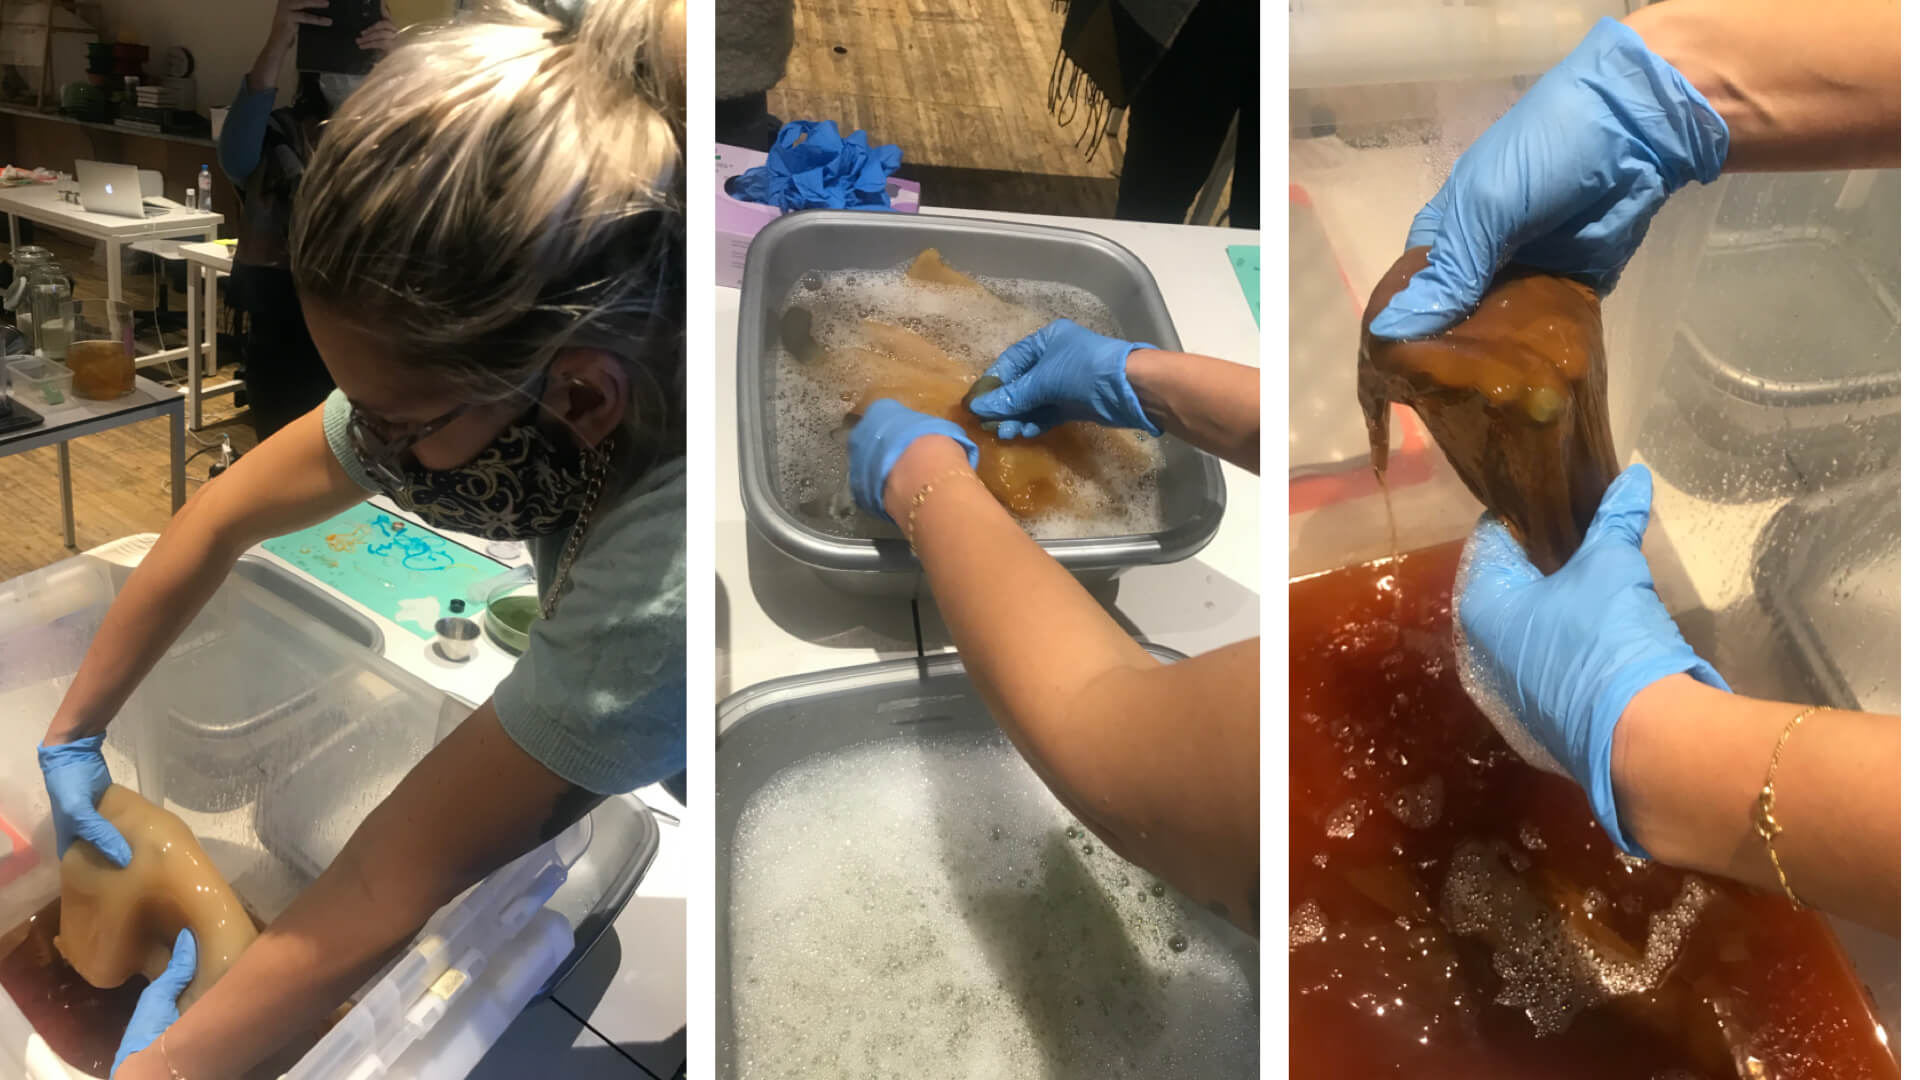
Harvesting the existing layer for drying and further use.
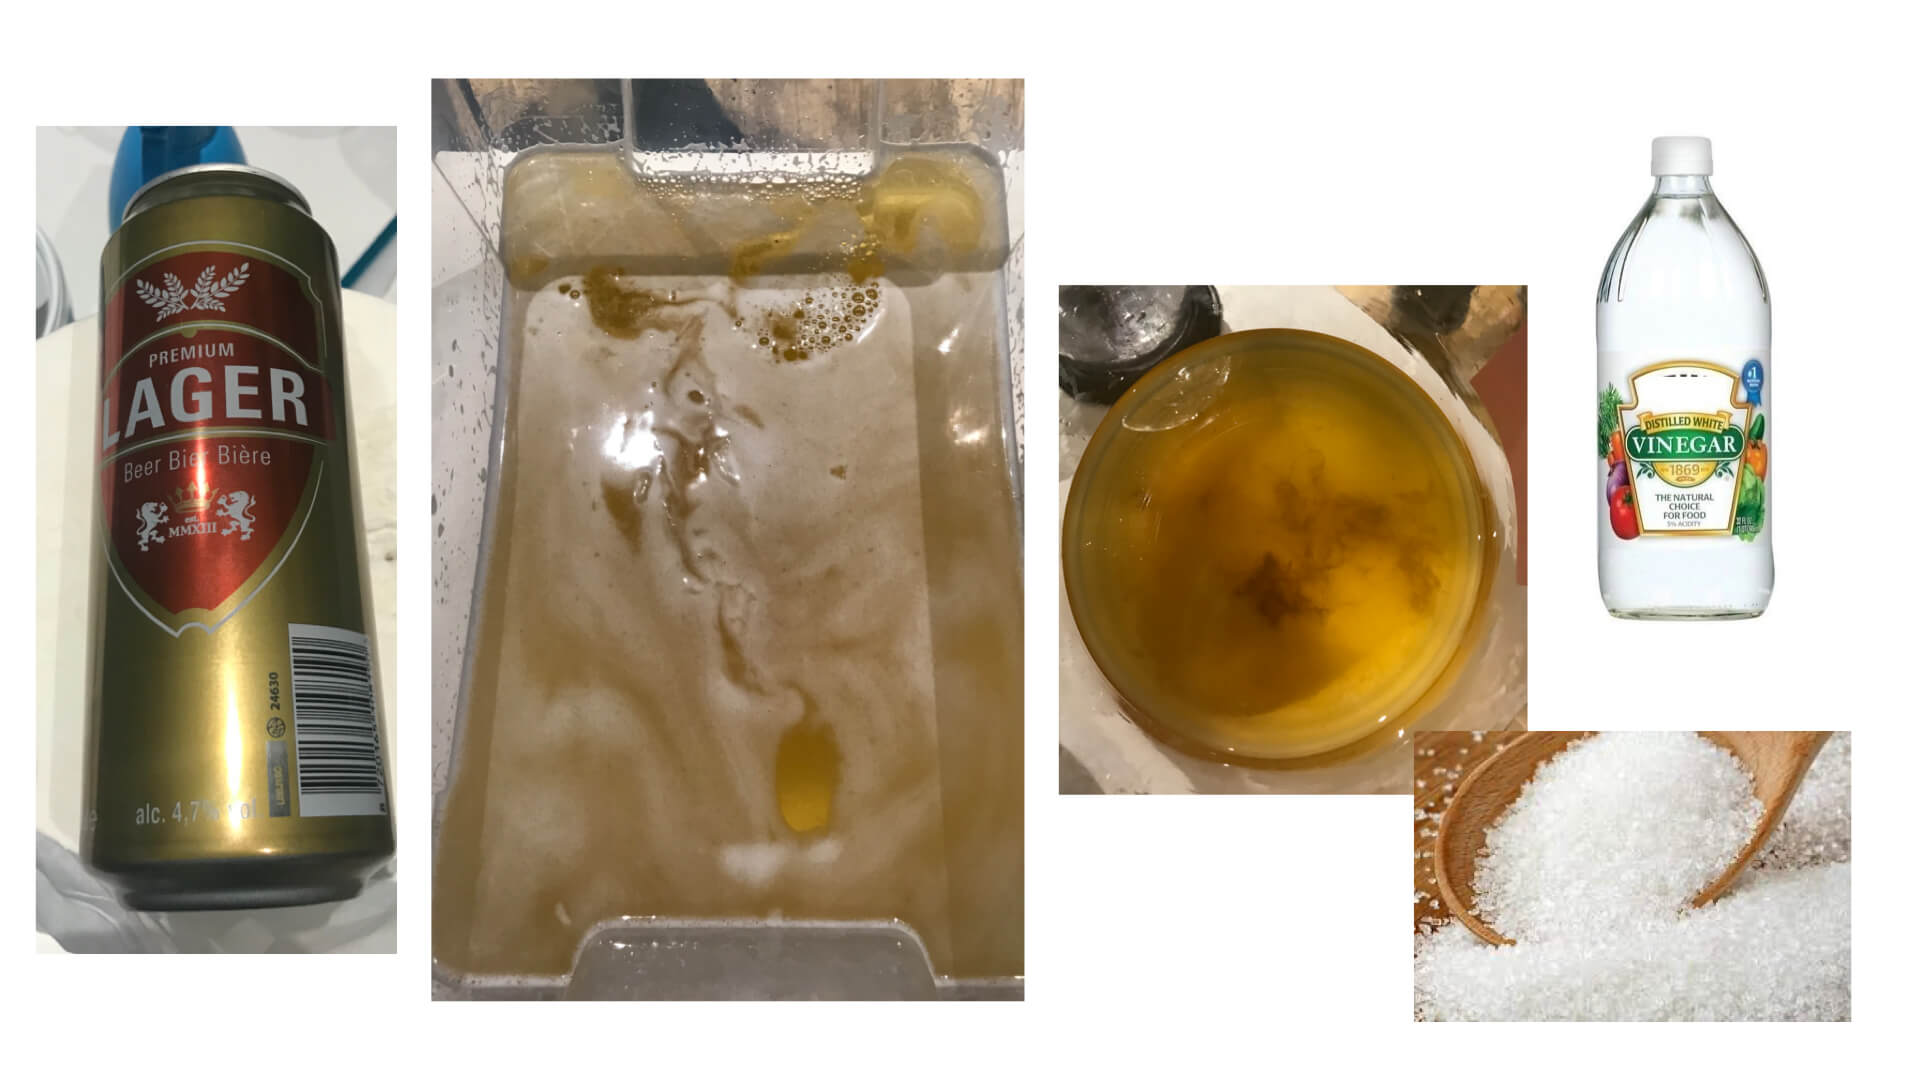
The beer-based kombucha I prepared (see recipes below)
Our three varieties of kombucha, left alone and peaceful to grow-grow-grow
KOMBUCHA RECIPES
Tea-based Kombucha
- 1 l water
- 3 teabags
- 100 gr sugar (or 10% of the water)
- 10% vinegar (test with PH-strip to reach between 2.5 and 3.5 PH)
- 330 ml Soby (liquid and solid remains)
Measure ingredients and combine water (tea), sugar, and vinegar (measure PH) in container with a large surface. Add scoby and store in a dry, warm place where the mixture is left untouched. Whatch grow, havest and rinse after weeks and when the layer has a consistency of, at least a centimeter.Beer-based Kombucha
- 500 ml beer (pilsner a.k.a. lager - we doubled this and following amounts)
- 500 ml water
- 100 gr sugar
- vinegar (measure PH)r
- 700 ml scoby
Measure ingredients and combine water, beer and sugar in a container with a large surface. Add as much vinegar needed to obtain a PH level between 2.5 and 3.5, which was quite an amount in our case (1000ml beer, 150ml vinegar). Add scoby and store in a dry, warm place where the mixture is left untouched. Whatch grow, havest and rinse after weeks and when the layer has a consistency of, at least a centimeter.Red Wine-based Kombucha
- 0.75 l red wine (we tripled this amount)
- 150 g sugar
- 1150 ml scoby starter
Combine wine and sugar in a container with a large surface. Add scoby.
NB: We had the least scoby in the tea-based kombucha, an avarage in the beer-based one and the remaining amount in the red-wine based kombucha. It will be interesting to see whether this payed its part or not.
Home Cookin' Bio Silicone at Waag
Do you remember the smell of a wet dog? In a car? With all windows closed and the heater on? Well, this is how I would characterise the smell of gelatine at a temperature of about 80 degrees Celcius, when dissolving in water. Some, I heard, liken it to puppy pee. The large, hairy, wet dog I experience isn't quite as cute, but I may, in due time, just get used to it...
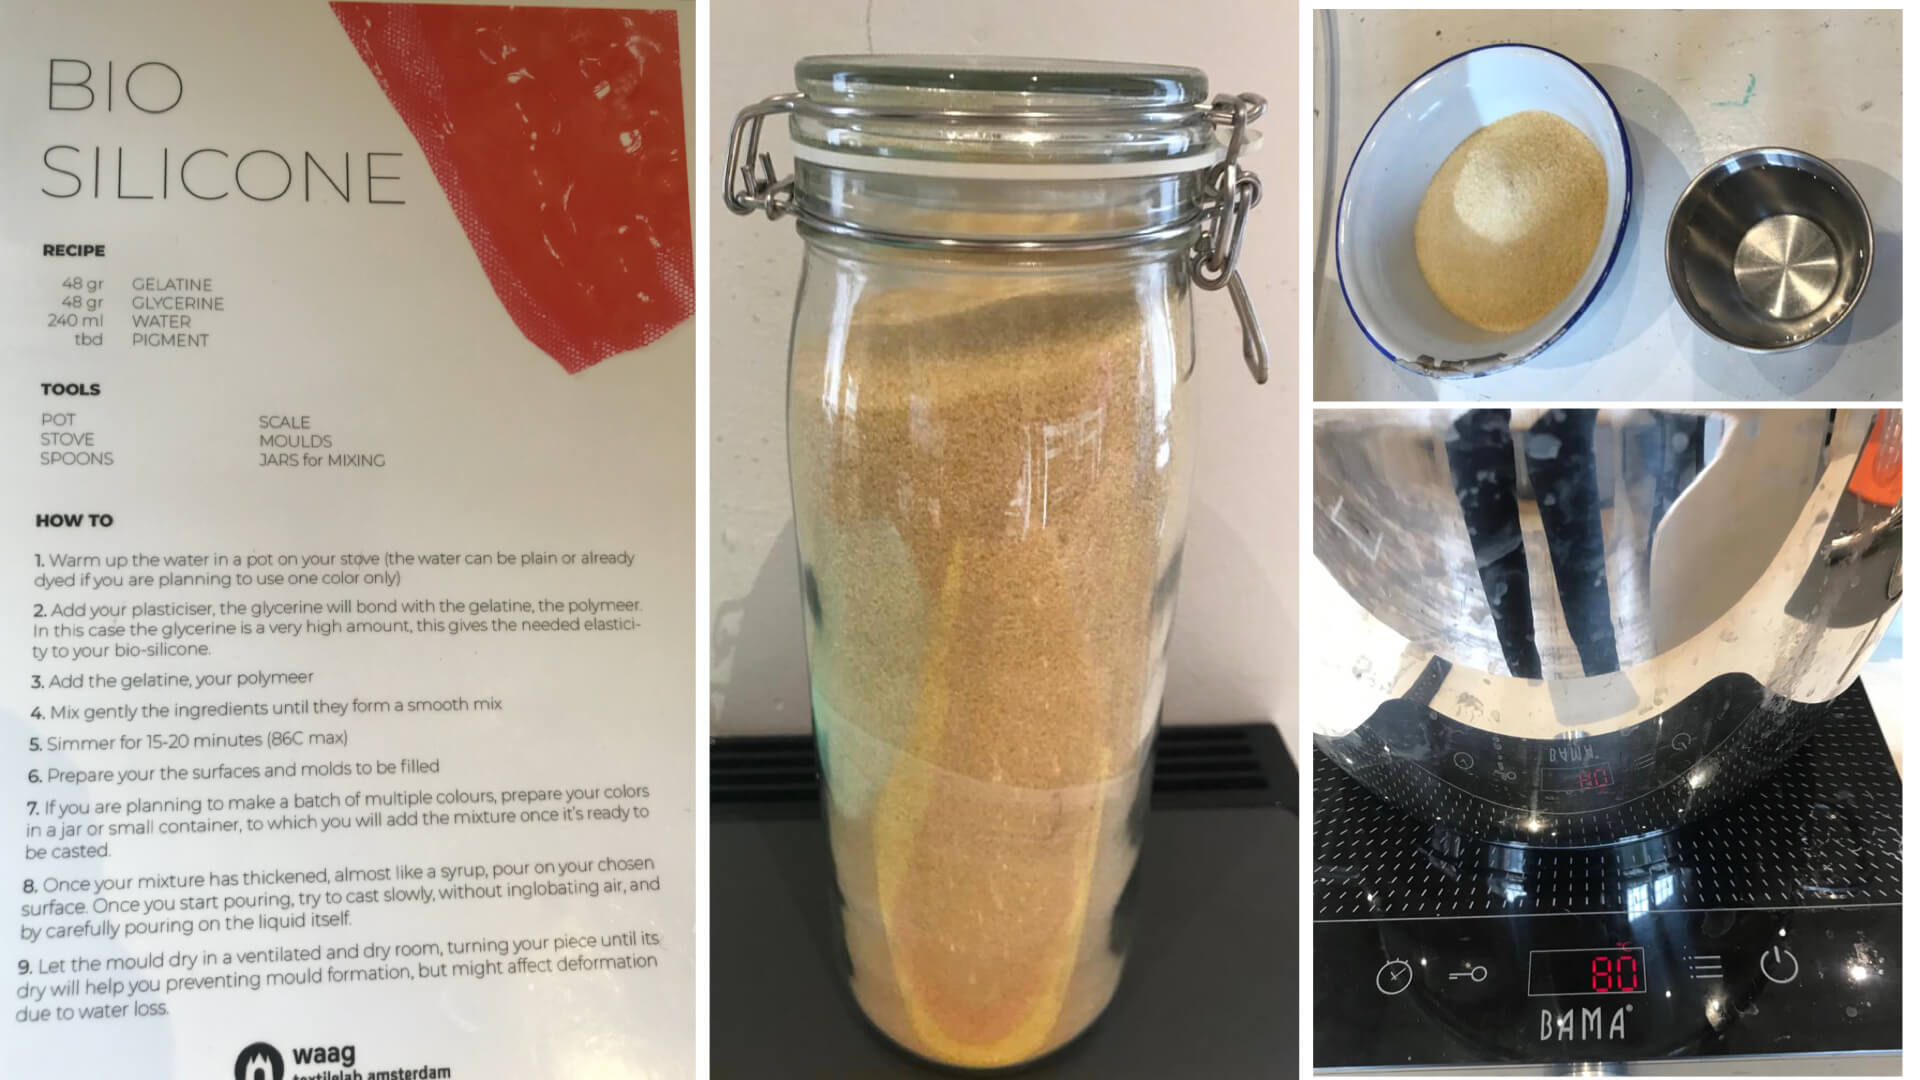
BIO SILICONE RECIPE
- 96 gr gelatine (powder)
- 96 gr glycerine (fluid)
- 480 ml water
- pigments: curcuma (yellow) and home-made acorn (black)
Home Cookin' at Home
I decided to make some more materails during the weekend. I took some alum, gelatine and glycerine home and used two of Loes Boger's recipes, one for growing crystals (on silk) and one for starch based rubber.

Preparing for the growing of crystals: water, lots of alum, silk and a 'au bain Marie'.
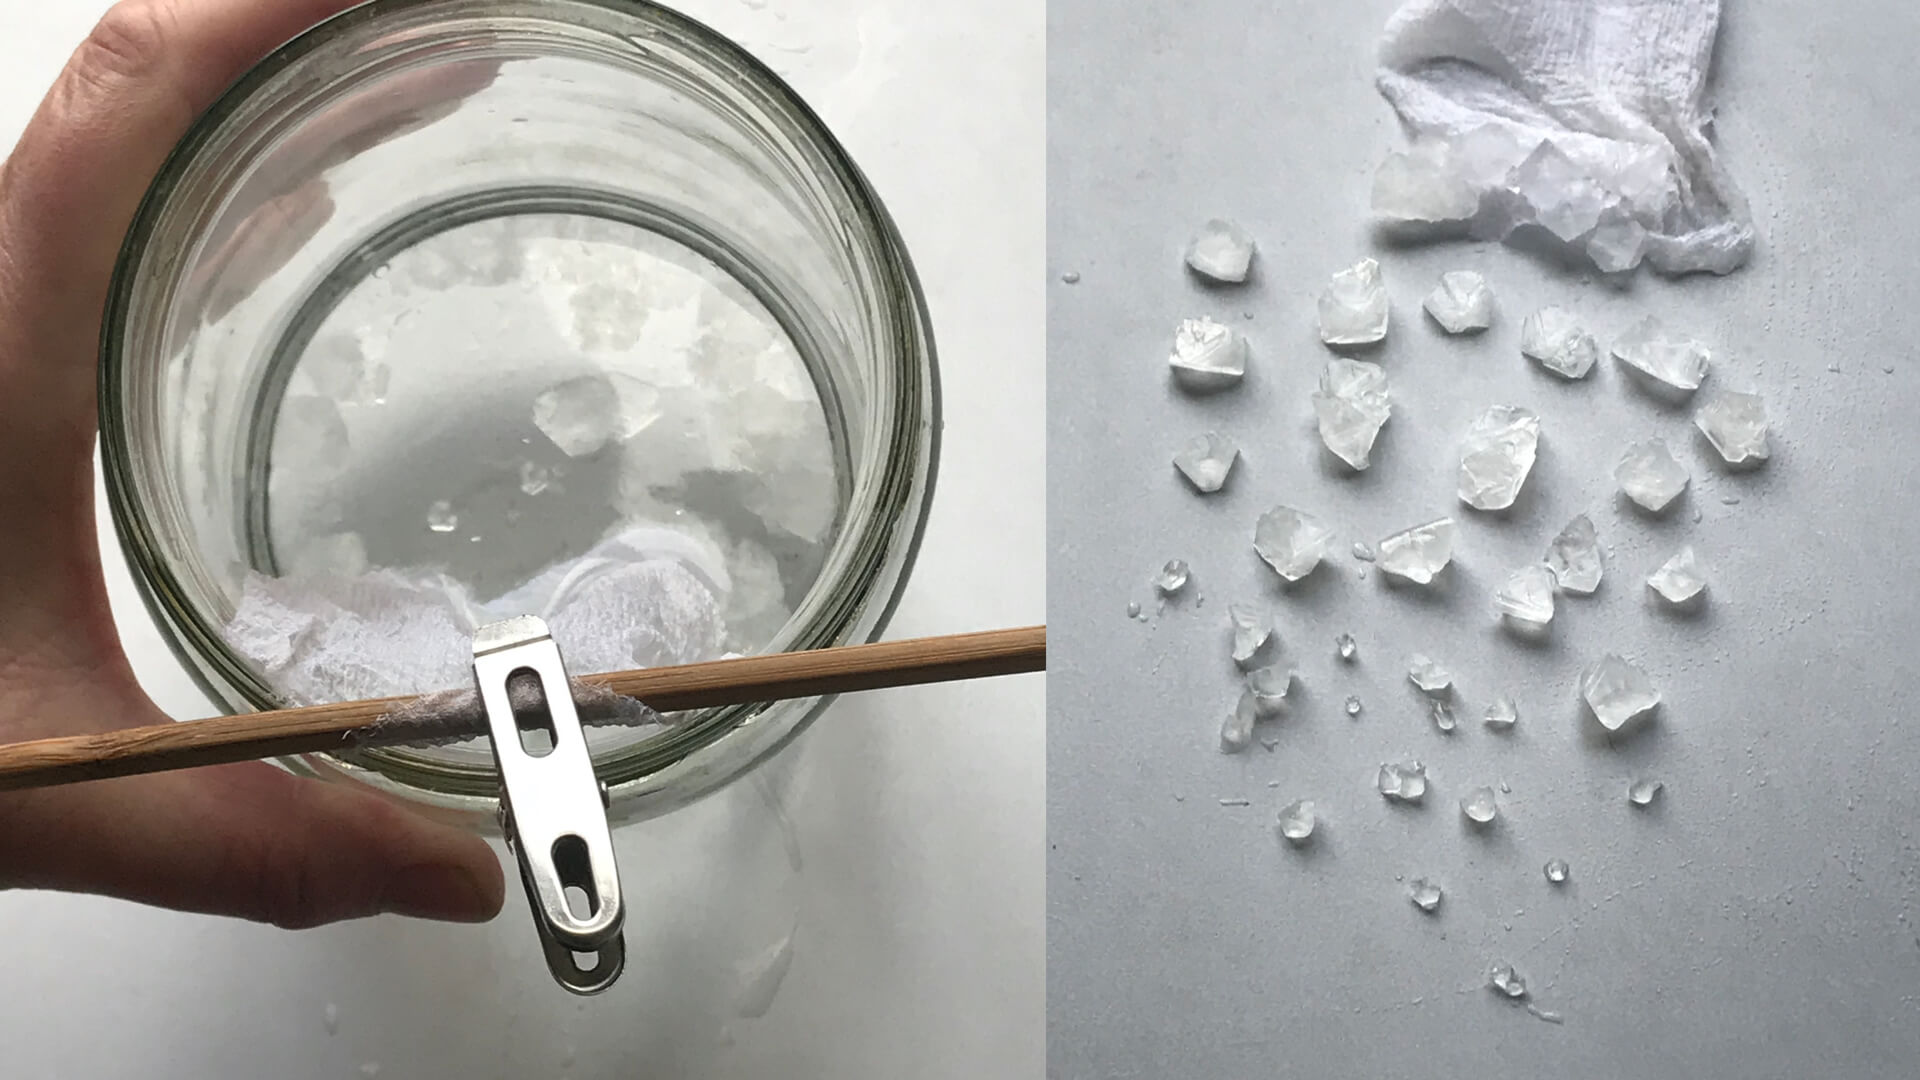
About three hours later... My crystals were quite large and only a few stuck to the silk.
Alum crystals
- 125 g alum
- 400 ml water
- silk
- 1000 ml water for au bain Marie.
I boilt a kettle of water, measured 400 ml in a high glass container and dissolved 125 gram of alum in it by stirring. I poured the remaining boilt water in a pot. Fixed the silk to the top of the glass container, making sure it wasn't touching the bottum or sides, and paced the glass container in the pot with the boilt weater to cool slowly. I started seeing crystals after a few hours, but left them to settle for six hours before 'harvesting' the crystals. Loes' recipe and elaborate description can be found here.
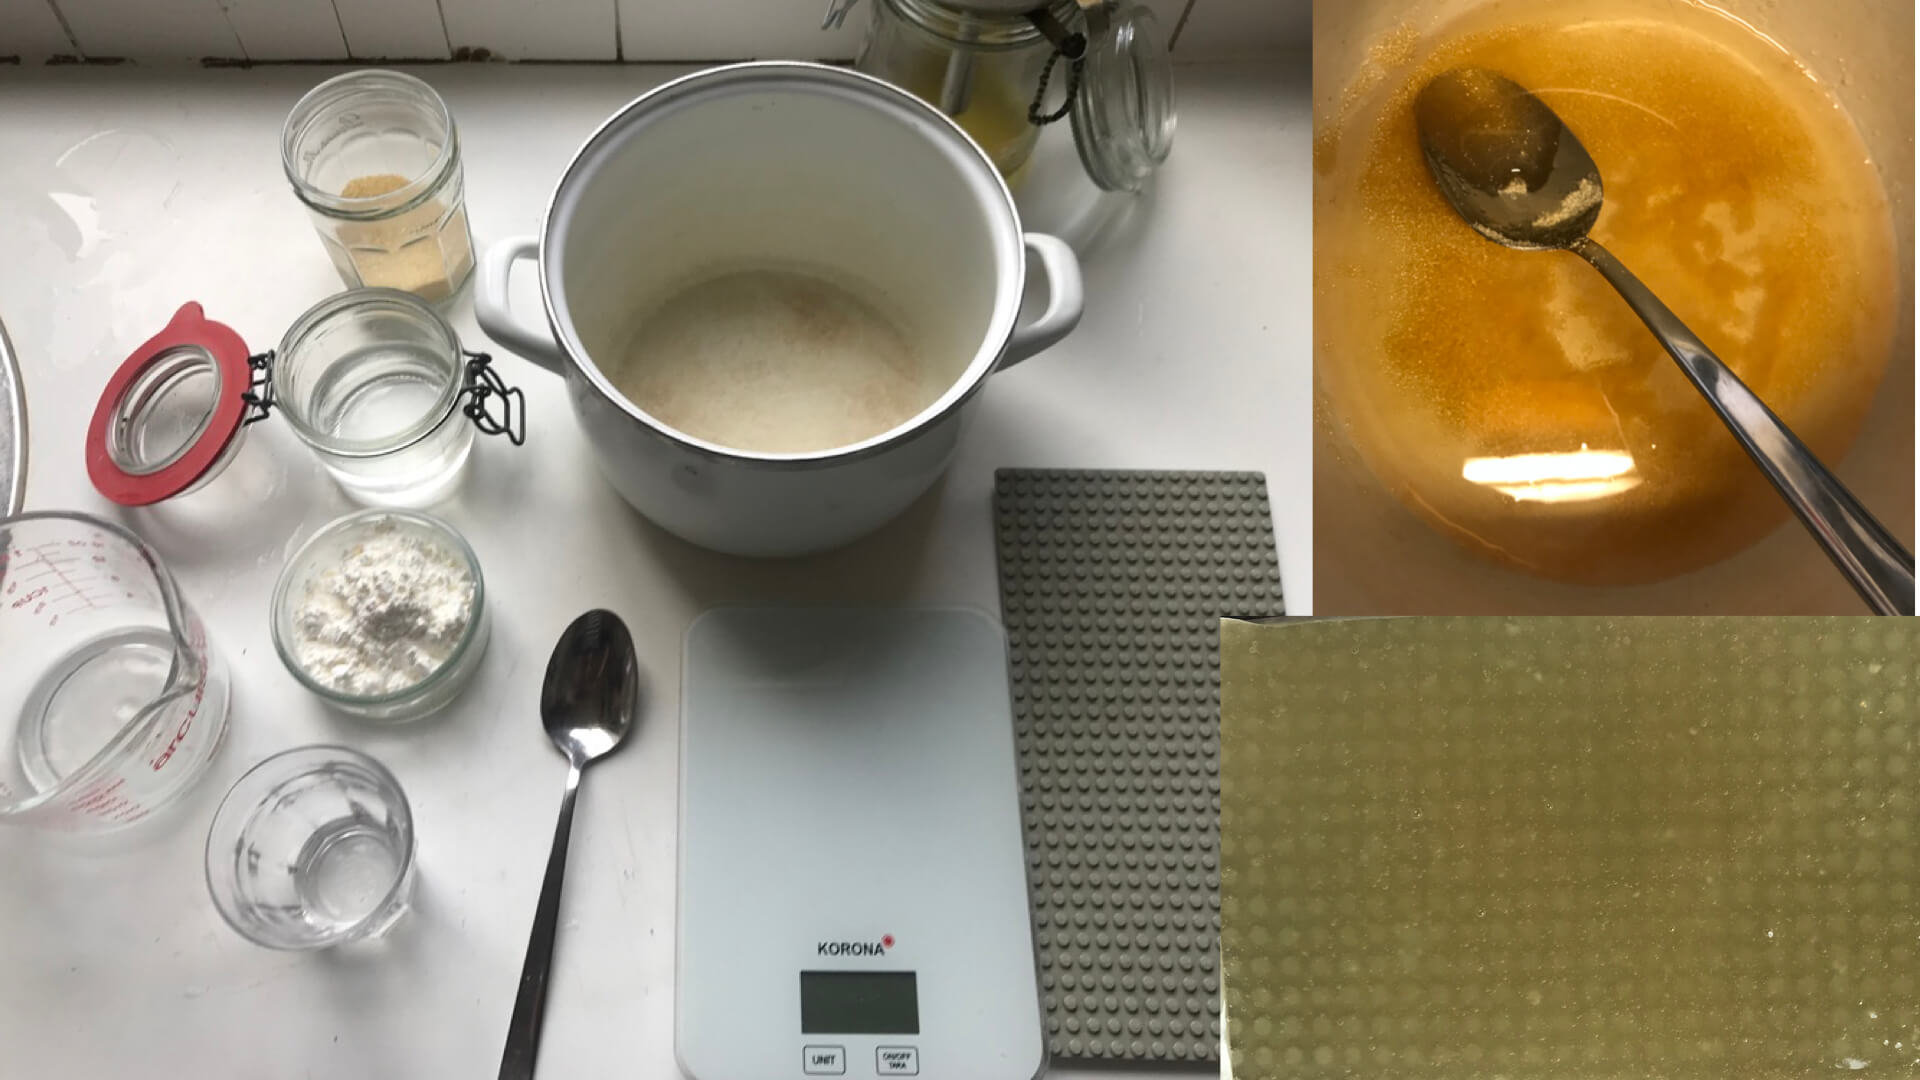
Next was the starch based rubber. I bought an old pot at a second hand store, found some Lego in my storage (again) and weighed all the ingredients to start cooking. Loes' recipe was a little confusing since it mentioned both potato and corn starch. I only had the latter in my pantry, so used that. And it also didn't indicate when to add the vinegar, so I just added it right at the end.
I was surprised at how thick my layer had become. There was also no need to place any books on top as it didn't curl up at all, probably due to its thinkness.
Starch based Rubber
- 50 g gelatine
- 50 g glycerine
- 50 g corn starch
- 100 ml water and quite a bit extra to dissolve the starch
- 15 g vinegar
Boil a kettle of water an pour 100 ml in a pot. Dissolve the gelatine and add the glycerine. Dissolve the corn starch in an extra amount of hot water (I found that I needed quite a bit). Make sure there are no starch lumps in the mix. Add to the water and stir well. Add the vinegar and cook at 80 degrees for about 10 minutes while stirring. You should get a thick an white sticky paste. Cast onto a surface (I used Lego) and leave in a cool place to dry (I placed it near the window). After four hours of drying, I carefully peeled the rubber from the mould. See the cut result at the start of this page. Loes' recipe can be found here.
Useful links from the presentation on Tuesday
- biodegradable plastics
- Collagen
- Kitchen Knife
- Worms eating plastic
- Materiom: Nature's Recipe Book, a beautiful and inspiring site
- Loes Boger's recipes