12. Soft robotics
End Results
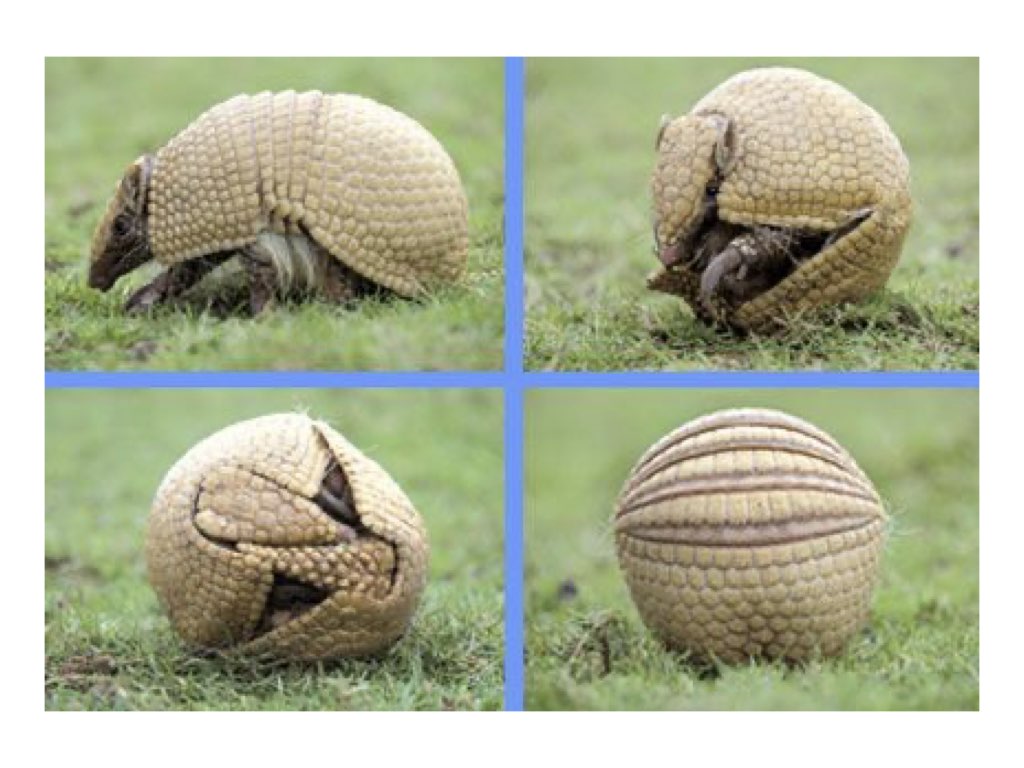
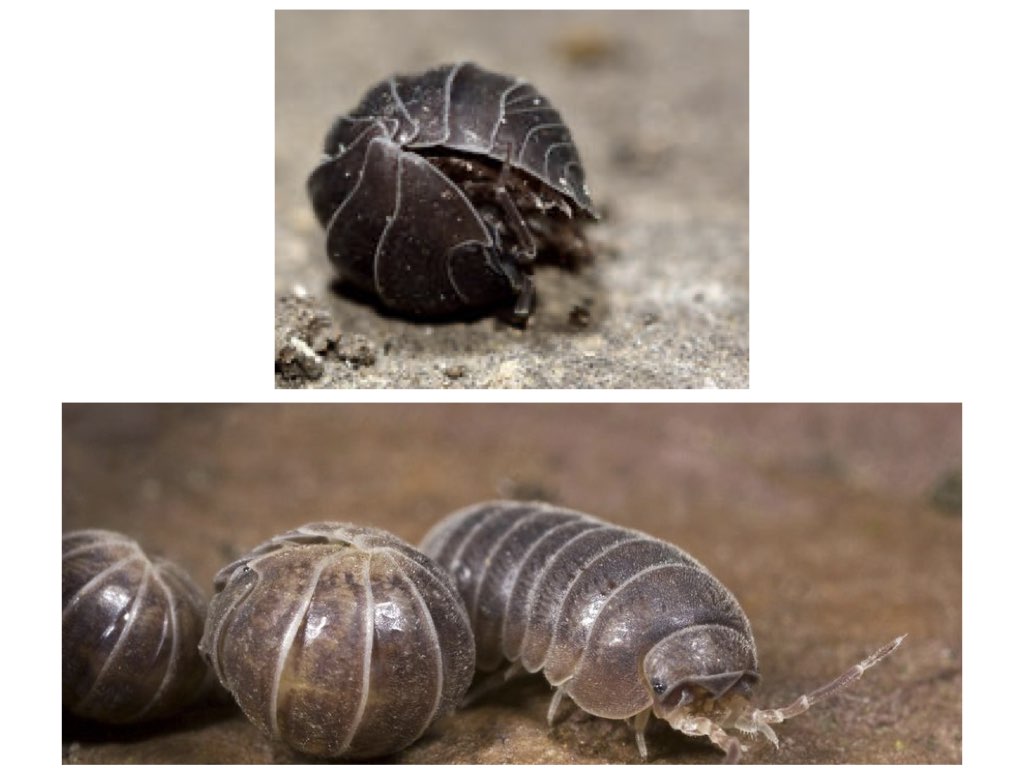
Inspiration


Documentation
Creating the Mould in Rhino
Even though there had been a lovely, really clear and funny instruction video by Bea about how to create Rhino files for the laser printer to use with Rhino files and PPU fabric, we all seemed to nervous about our pitches to really start working on them. It was a strange atmosphere that seemed to affect everybody in the room and little was done. After the long, long day and a night of unrestful sleep, many of us woke up still a little tired. Nevertheless, we cranked up the spirits and started creating our Rhino designs for both the silicon mold as well as the PPU laser cutter files.
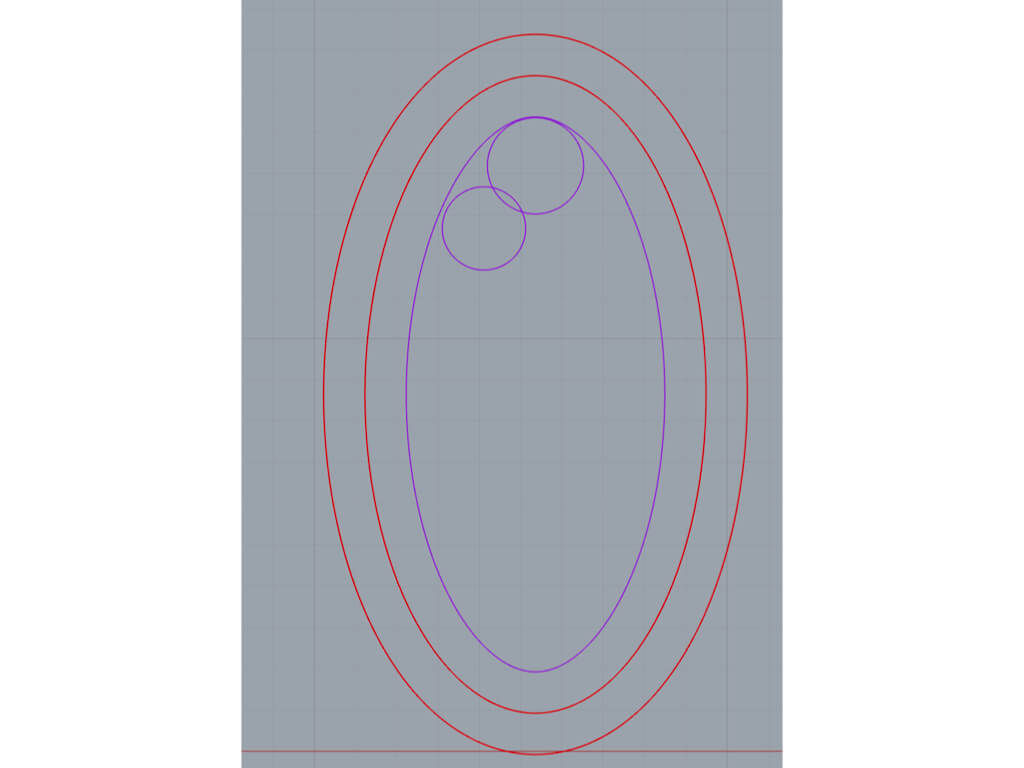
I decided I wanted to do something with spheres. And tried to make as many screenshots of the process as needed. Tis is (see below) what my desktop looked like afterwards. But I noticed that I was quite familiar coming back to Rhino and felt much more confident than the first time. TIP: drag all the screenshots into a folder you have created for them and they will be nicely in order for you to publish.
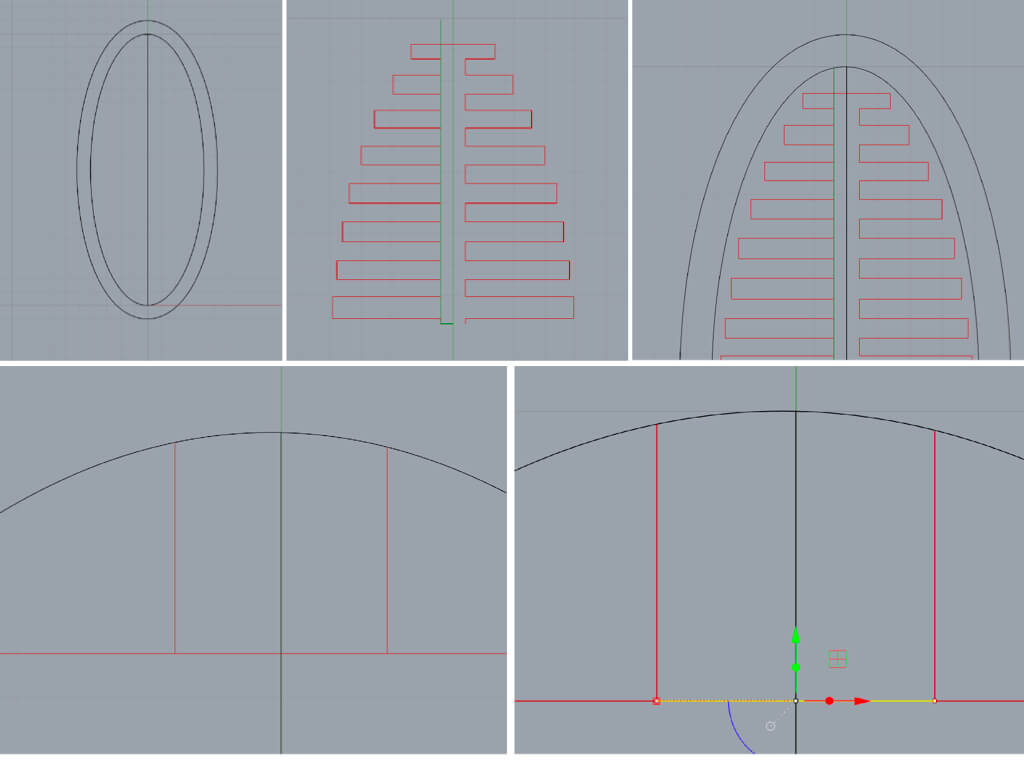
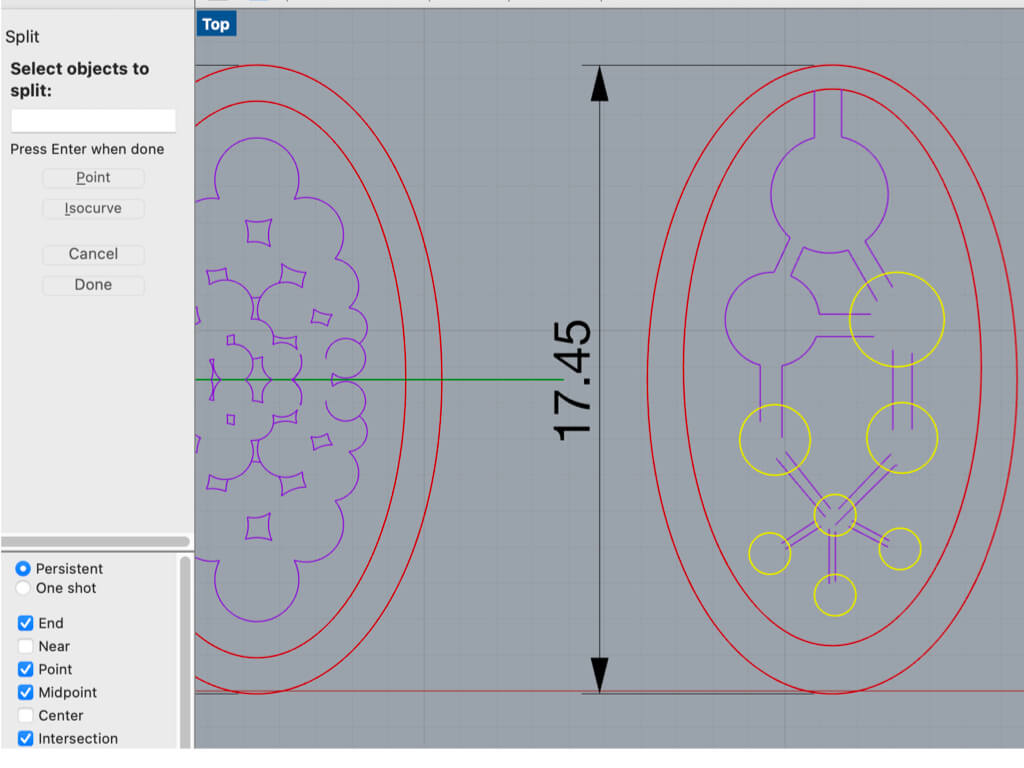
I created the outer shpere, then used the 'Offset' command with a 1 (in cm) limit to create the edge. Then, in another layer, I started on my design, which I mirrored left-to-right and thereafter top-to-bottom. I added the vent to let the air in, but this didn't really work out. I should have zoomed in more to see what exactly I was doing. Moreover, I realised that the space between the areas in which the air would flow was too thin to hold. Growing more confident with Rhino with the minute, I decided to copy only the base and edge layer and start anew (see below).
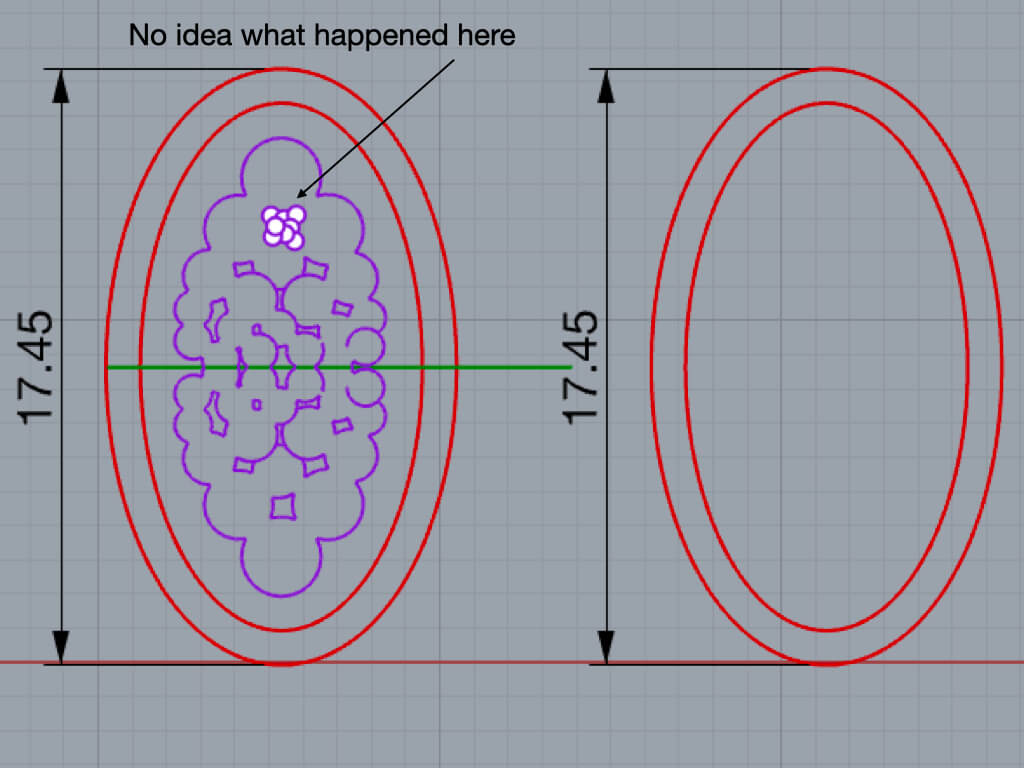
Not sure what went wrong here... let's start a new model
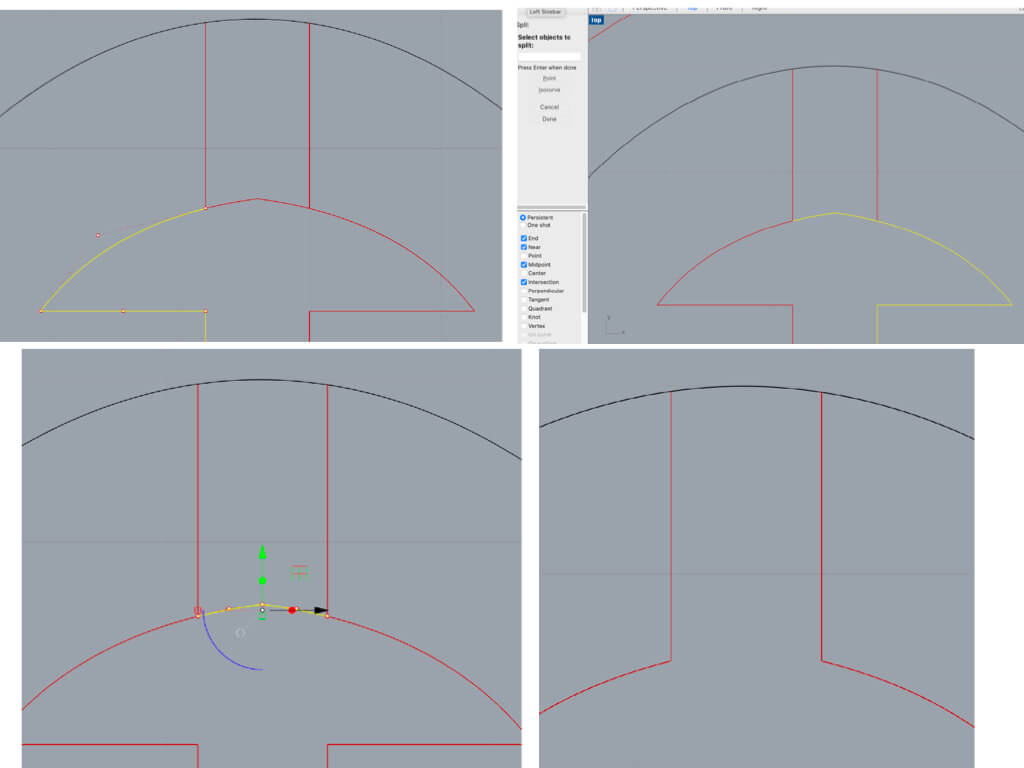
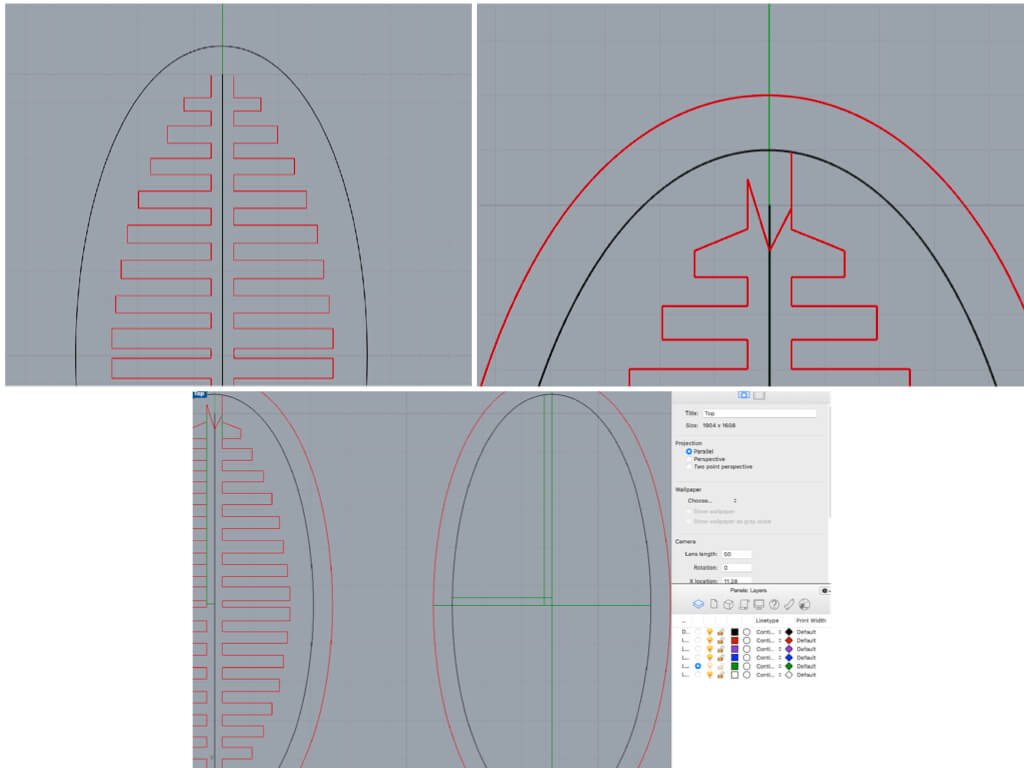
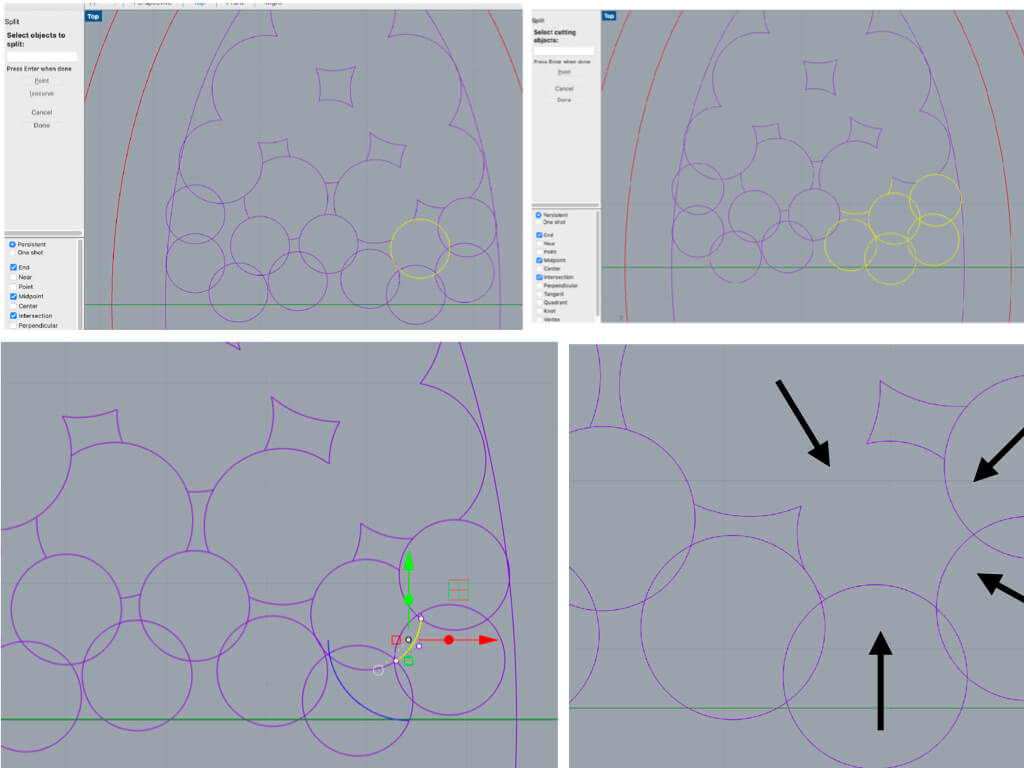
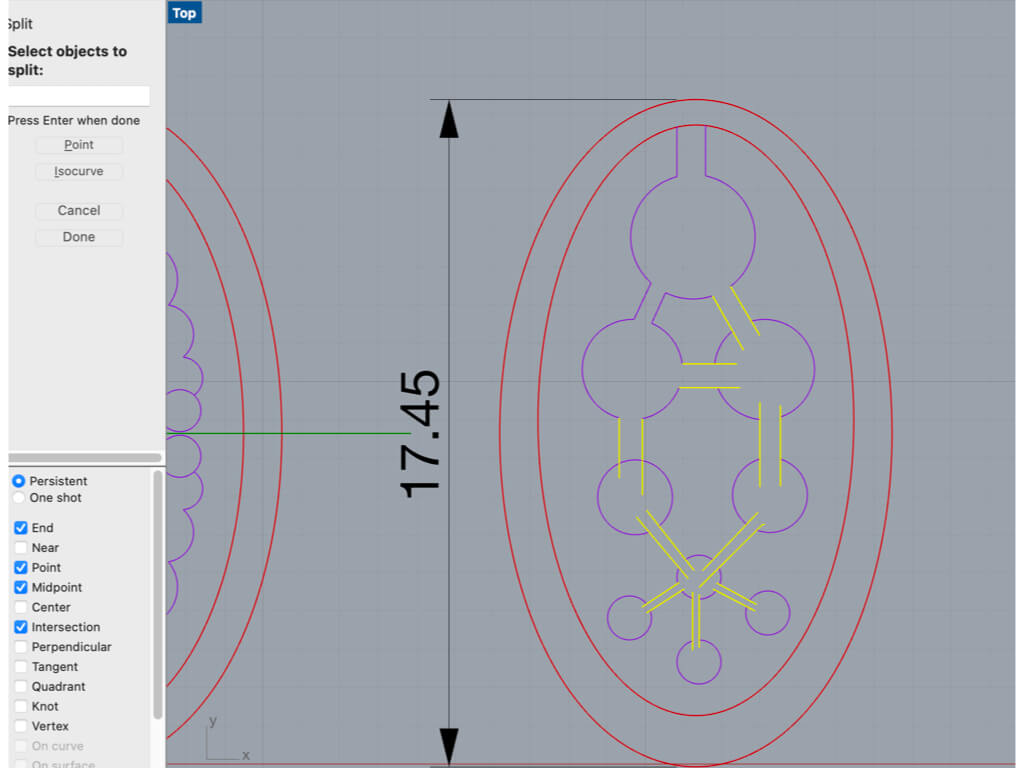
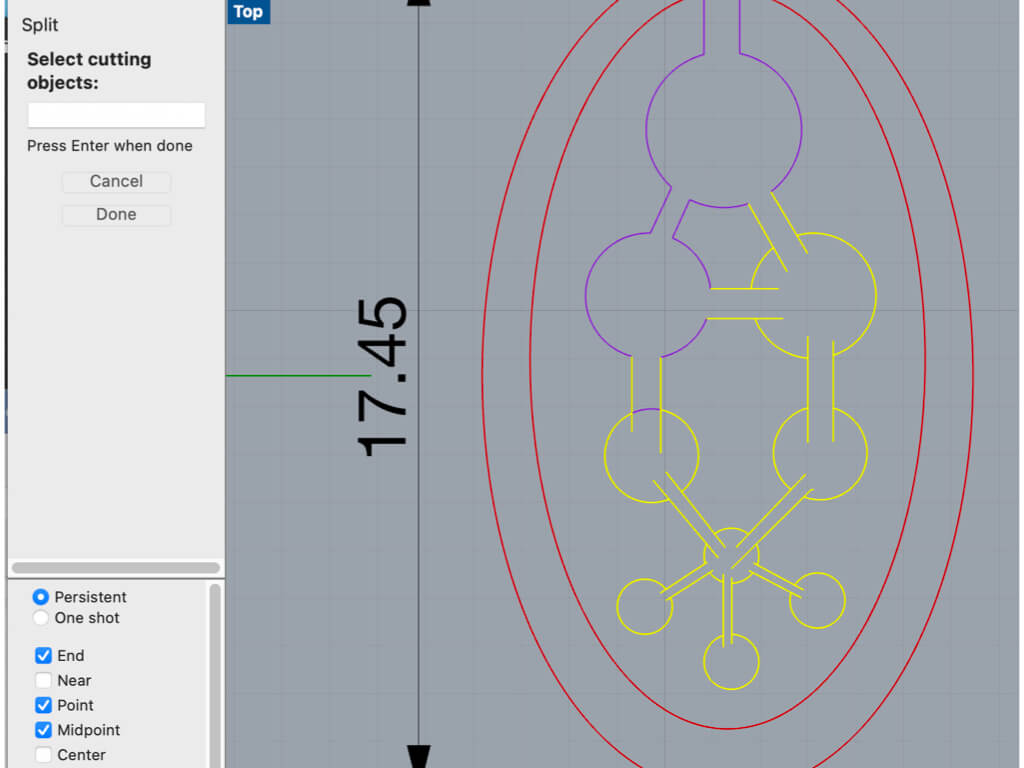
Creating the air-opening using the 'split' command
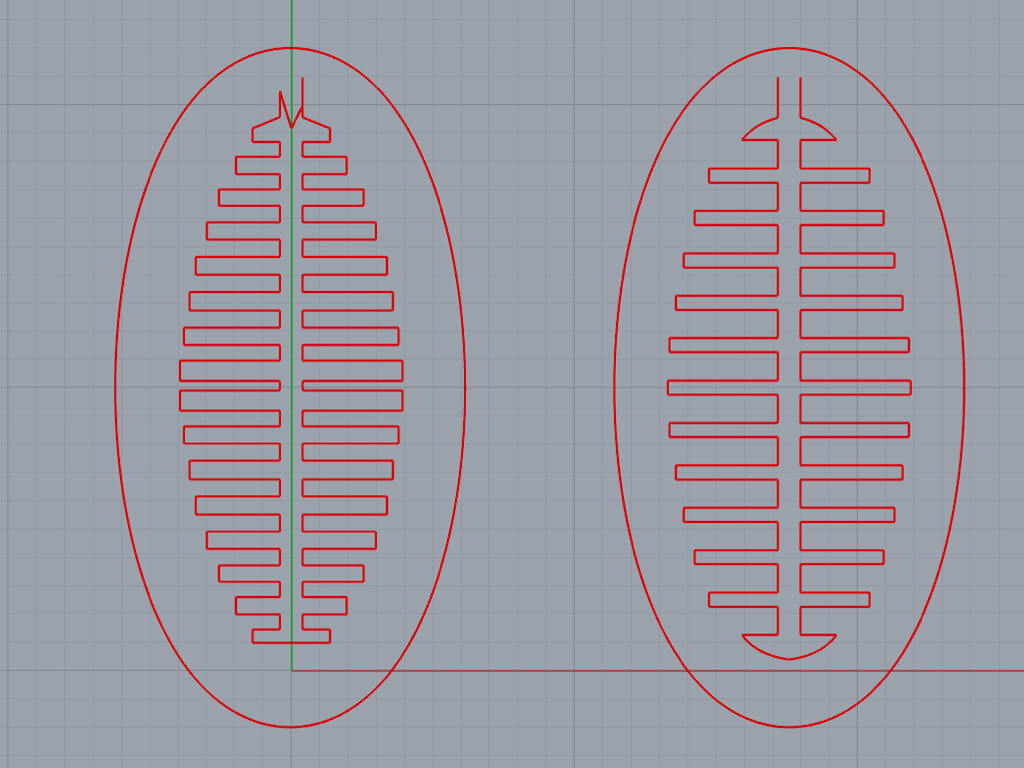
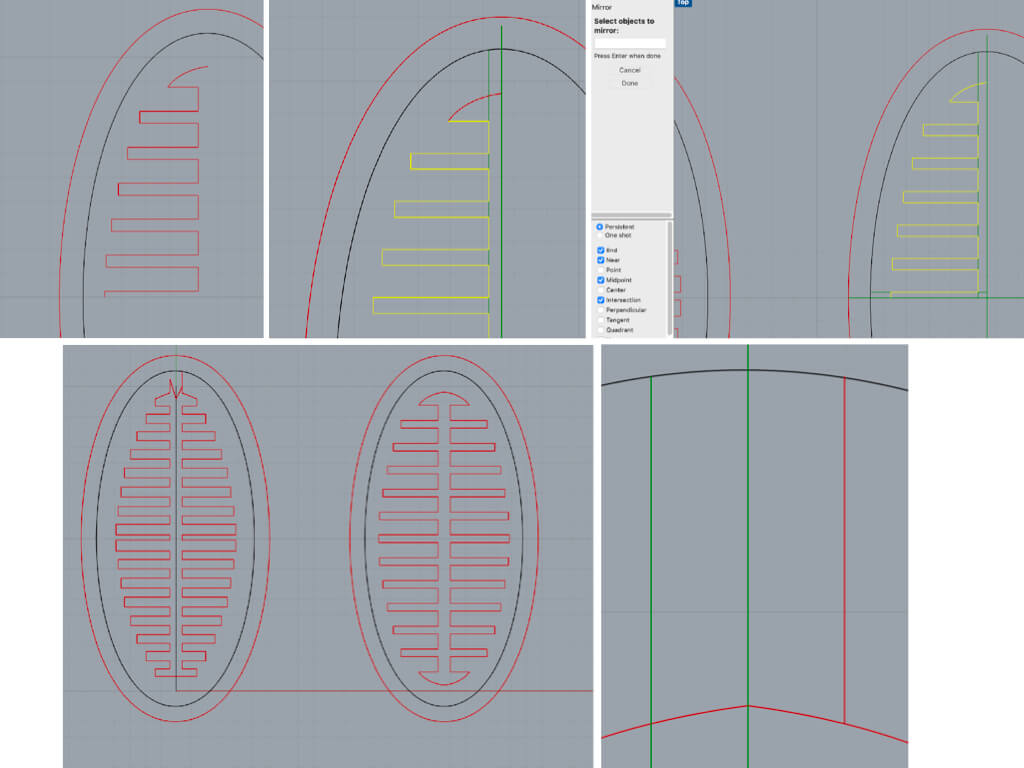
Final model with more spacing and using the 'mirror' command (right)
Trying some different models


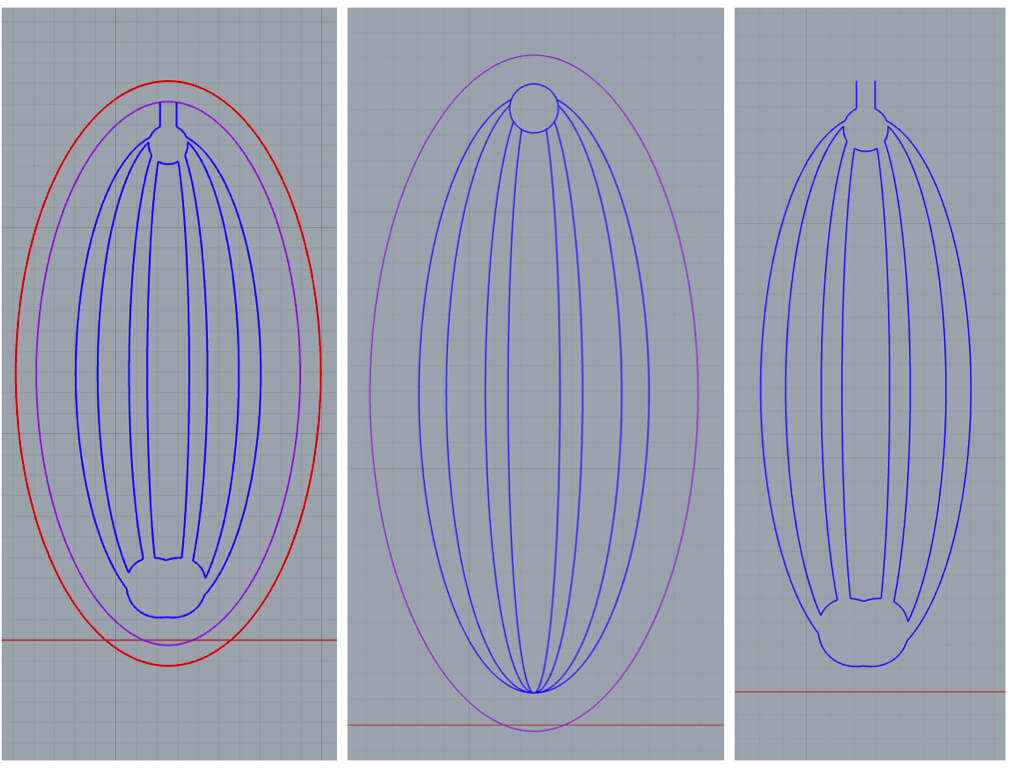
I was clearly having fun with Rhino, but this design most probably has too little closed off spaces

And yet another design. I didn't print this one so I'm not sure whether the curves can be made like this using the split option
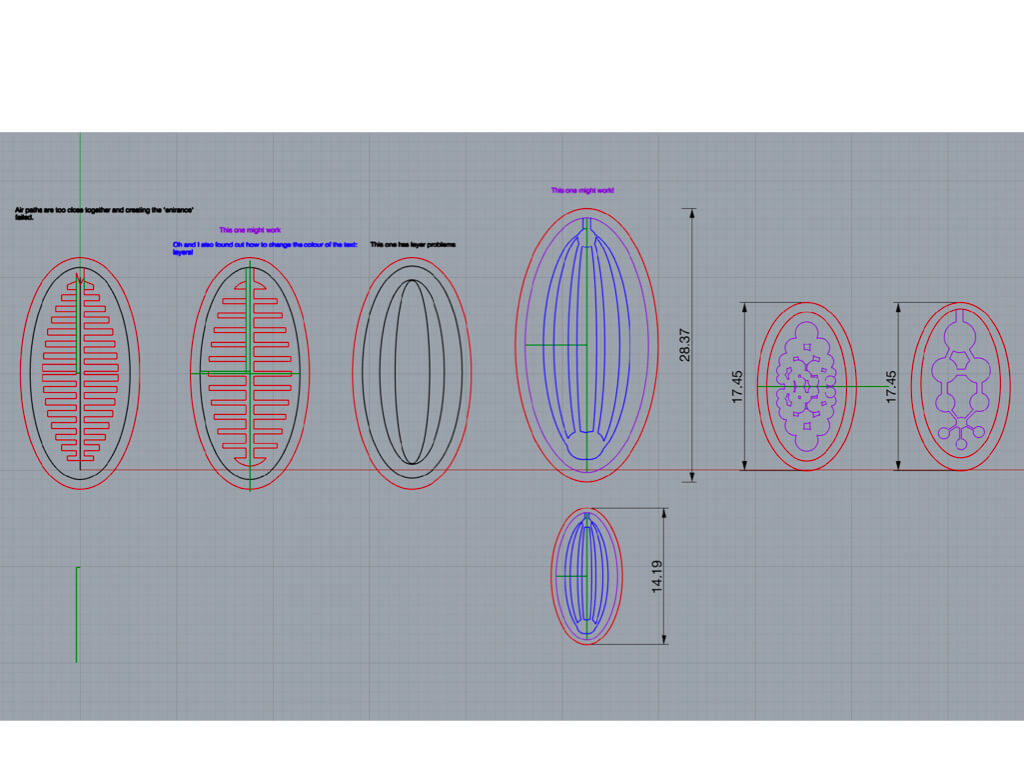
All designs I made using layers
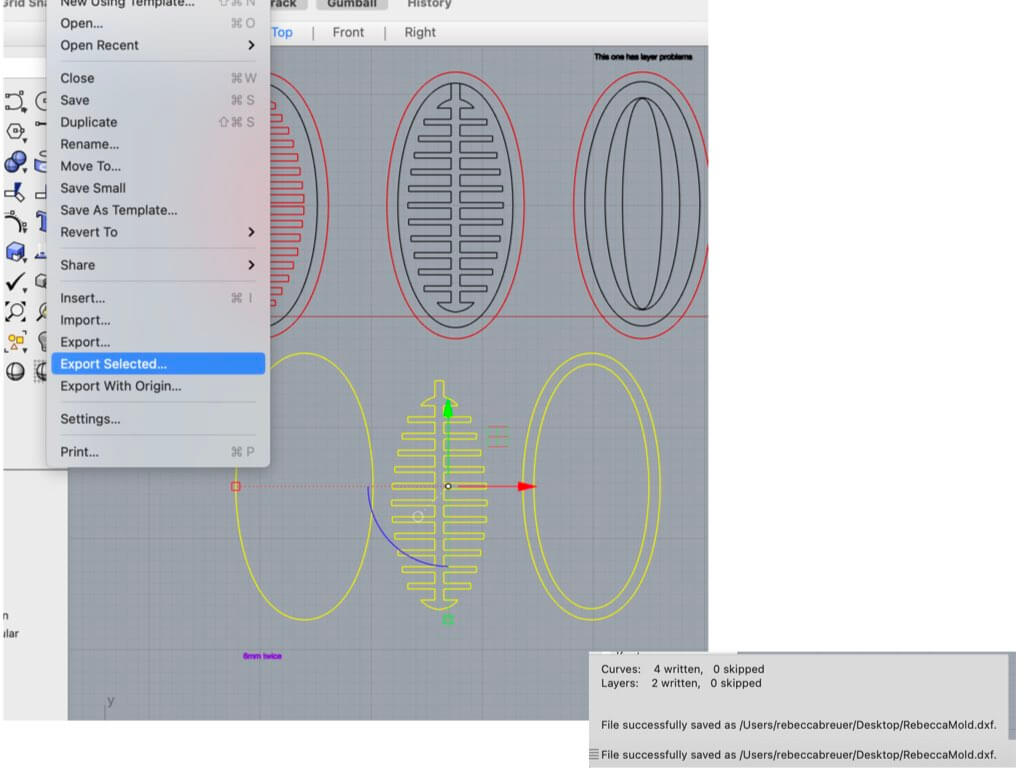
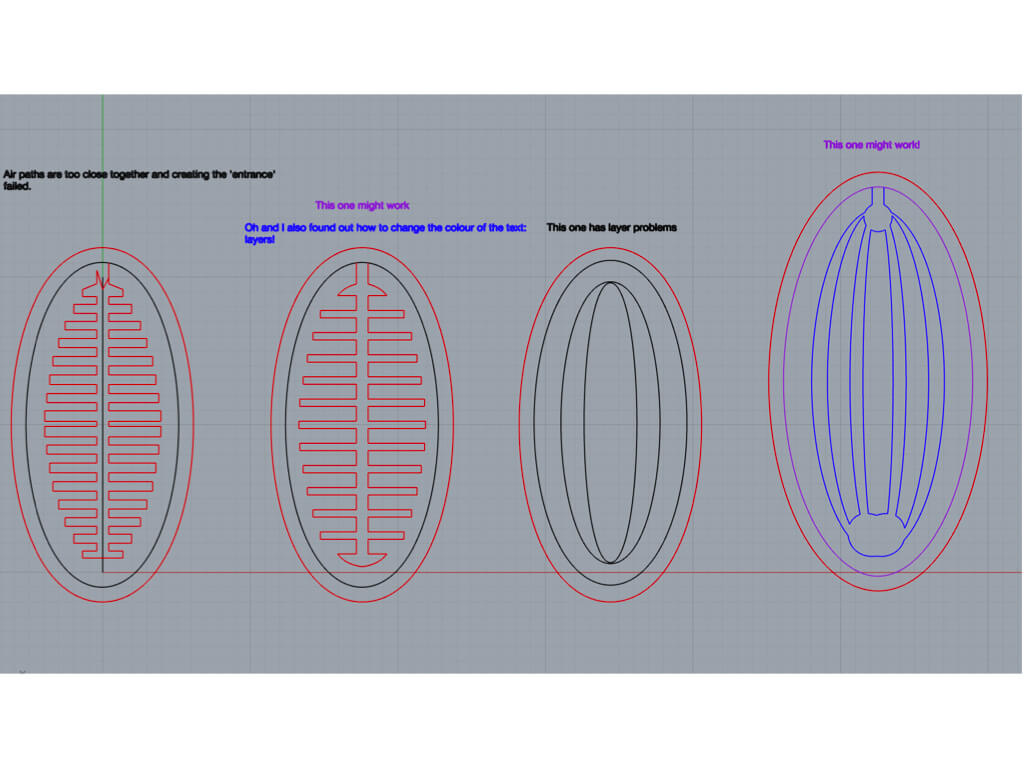
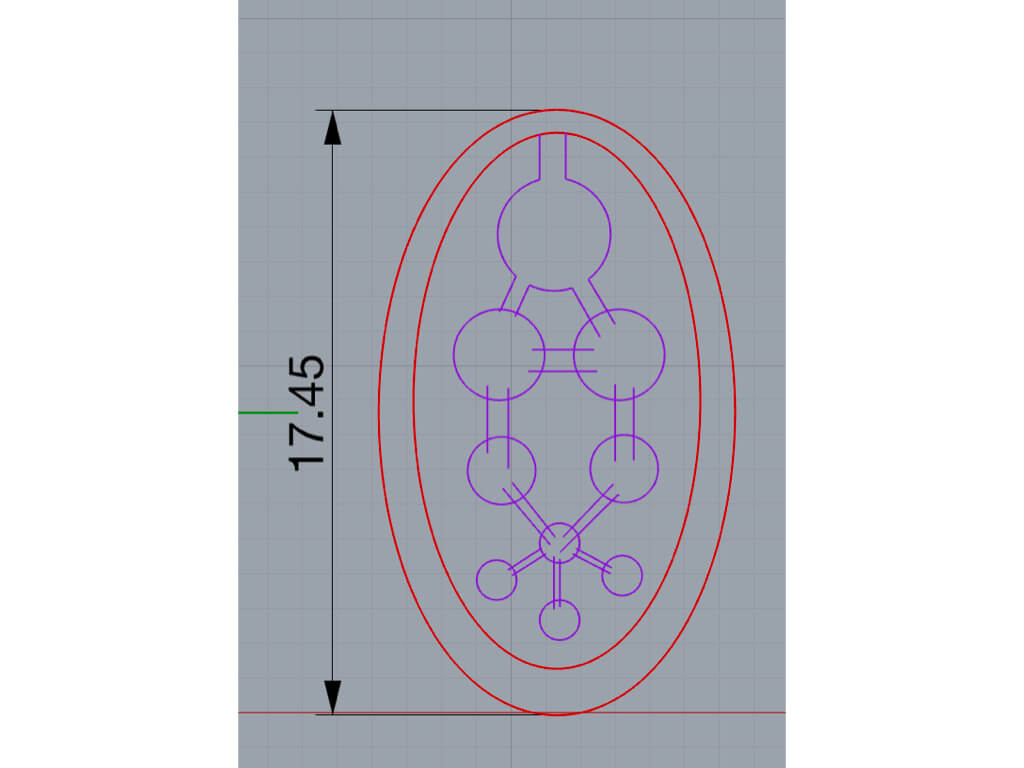
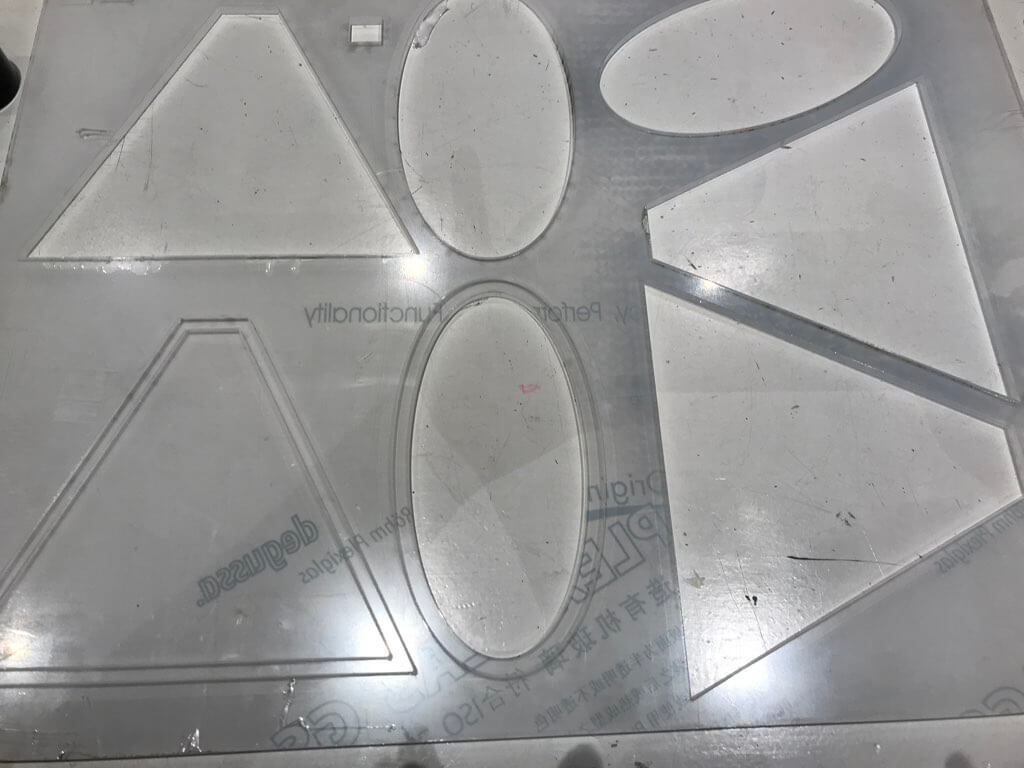
Getting ready for the laser cutter! The base and the edge will be cut twice, the design (in the middle) only once.
Laser Cutting
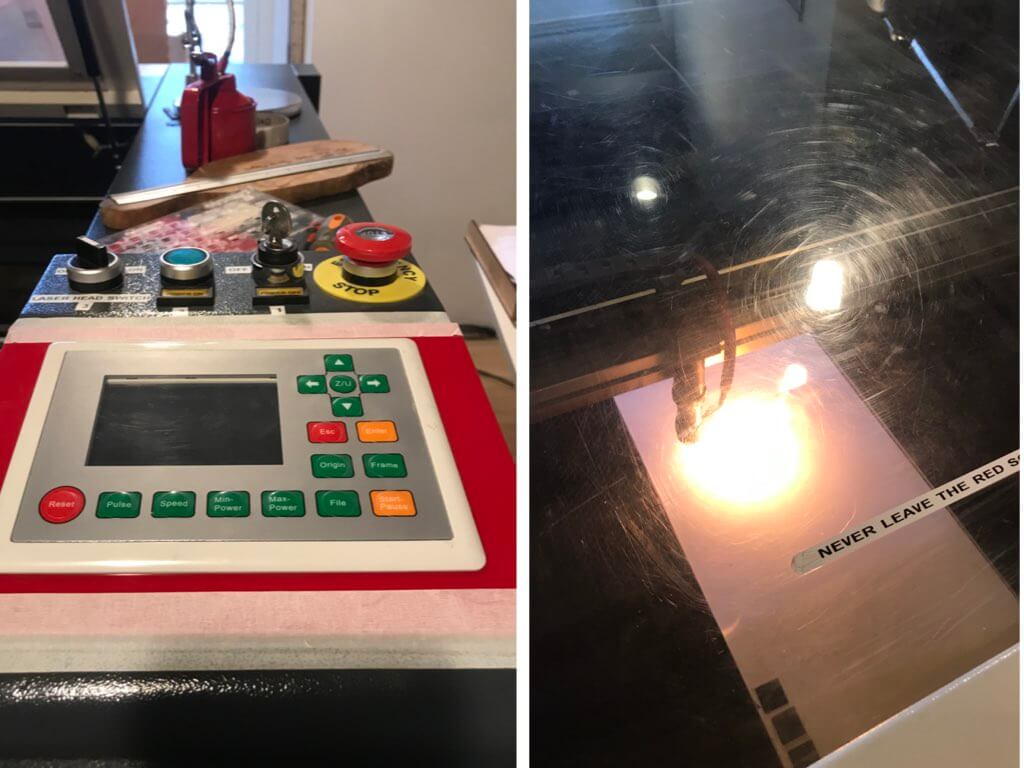
Henk had installed new software for the laser cutter which makes our old documentation obsolete, unfortunately. But the new driver was quite easy to understand and all actions are done on the computer, rather than on the laser cutter panel. During the first tests, however, we suddenly saw quite large flames coming from the laser head. I yelled: 'fire' and hit the emergency stop-button. Later it turned out that there was something wrong with the settings of the head...
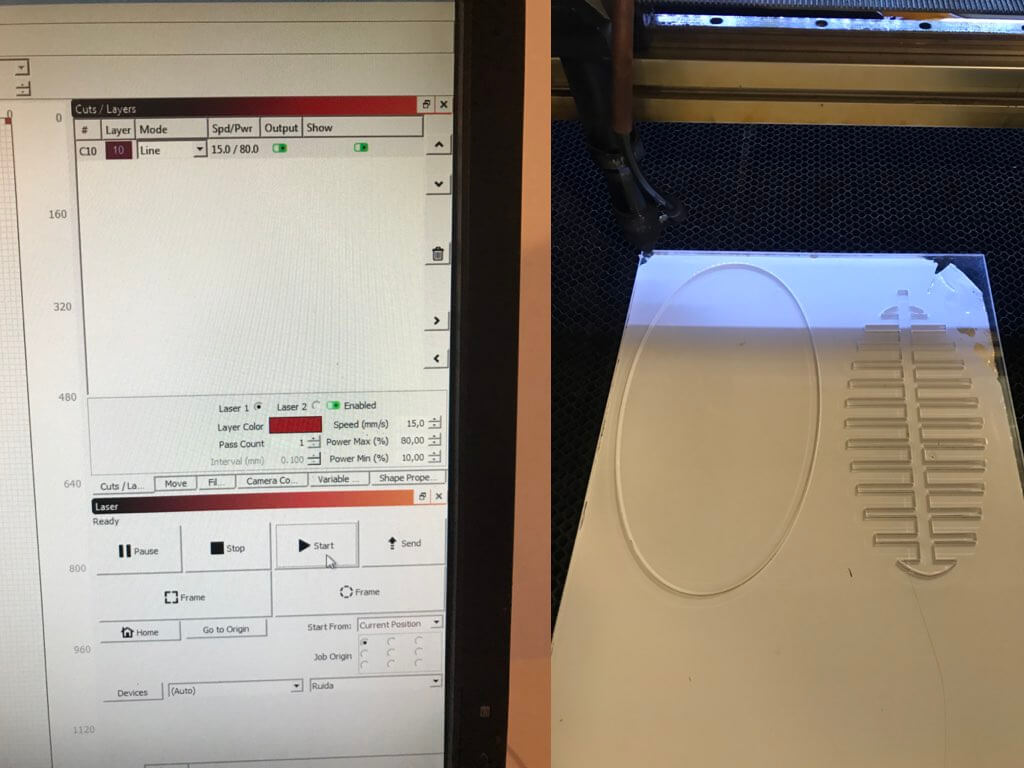
We decided upon a speed of 15, power 80% (now called 'Power Max') and corner power of 10 (now called 'Power Min')
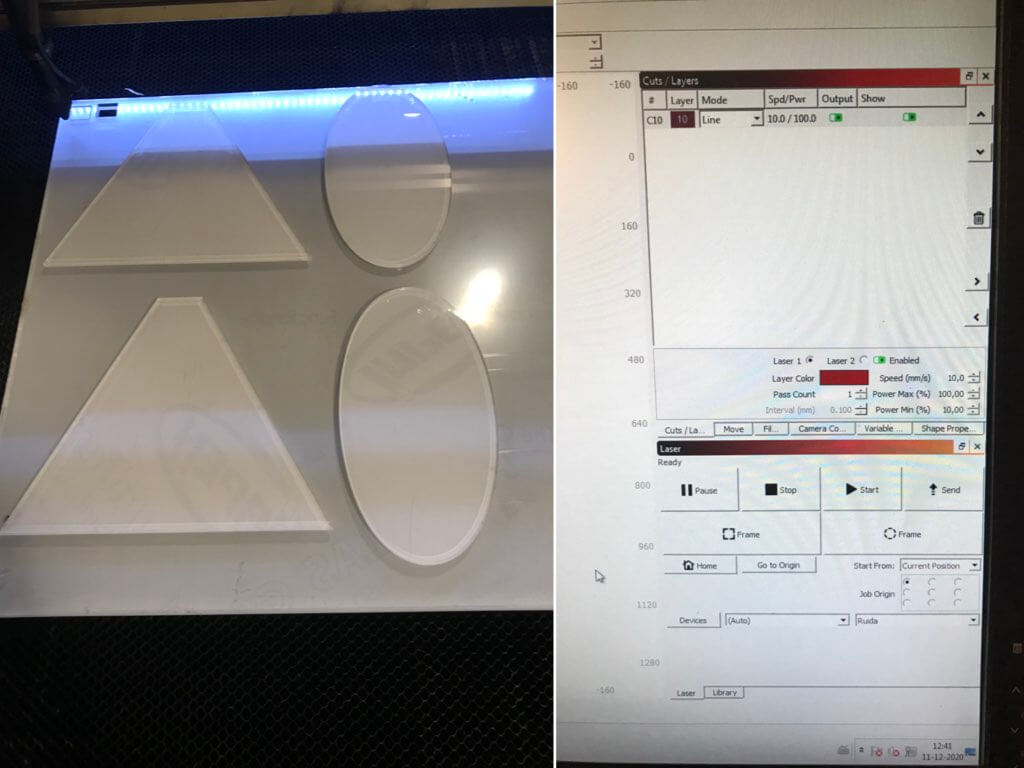
Whereas the thinner plexiglass cut really nicely, the thicker one proved more troublesome. With a speed of 10 and power of 100 part of the edge had cut, but a second sample of the same edge hadn't cut at all. I think there must be something with the bed of the laser cutter. Which, I think, isn't that strange since most people cut in about the same place. Next time I'm using it, I will place my material somewhere odd, like in the far right top corner, for instance.
Silicon

Super-glued the plexiglass together and ready to start to make the silicon mixture.
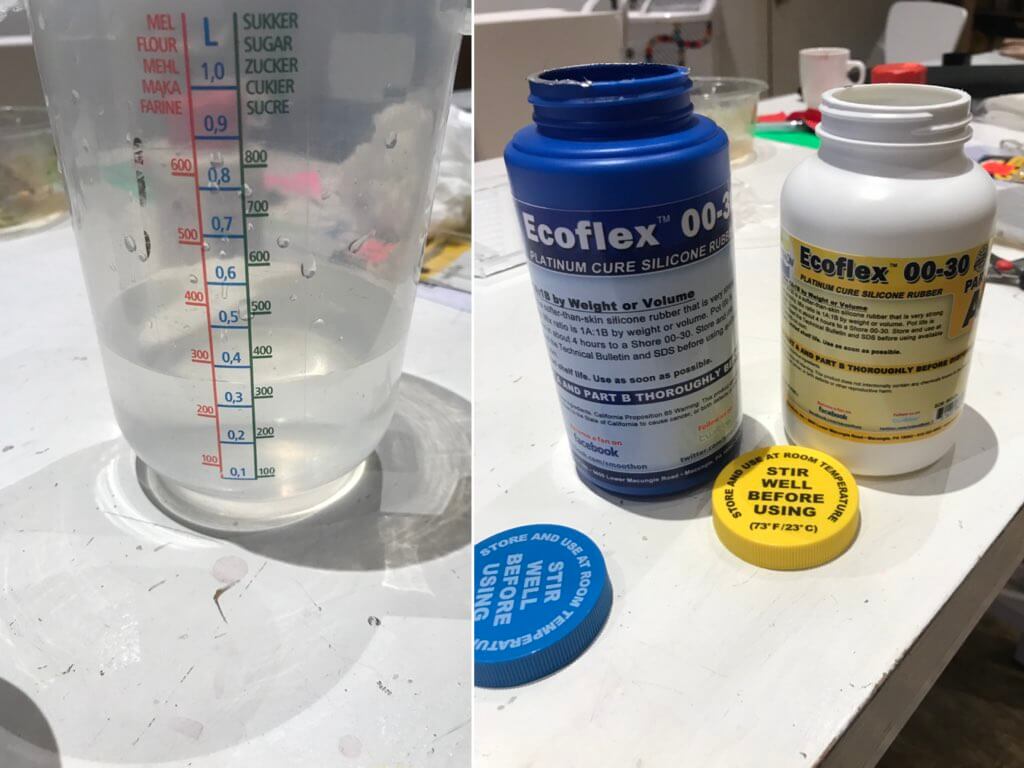
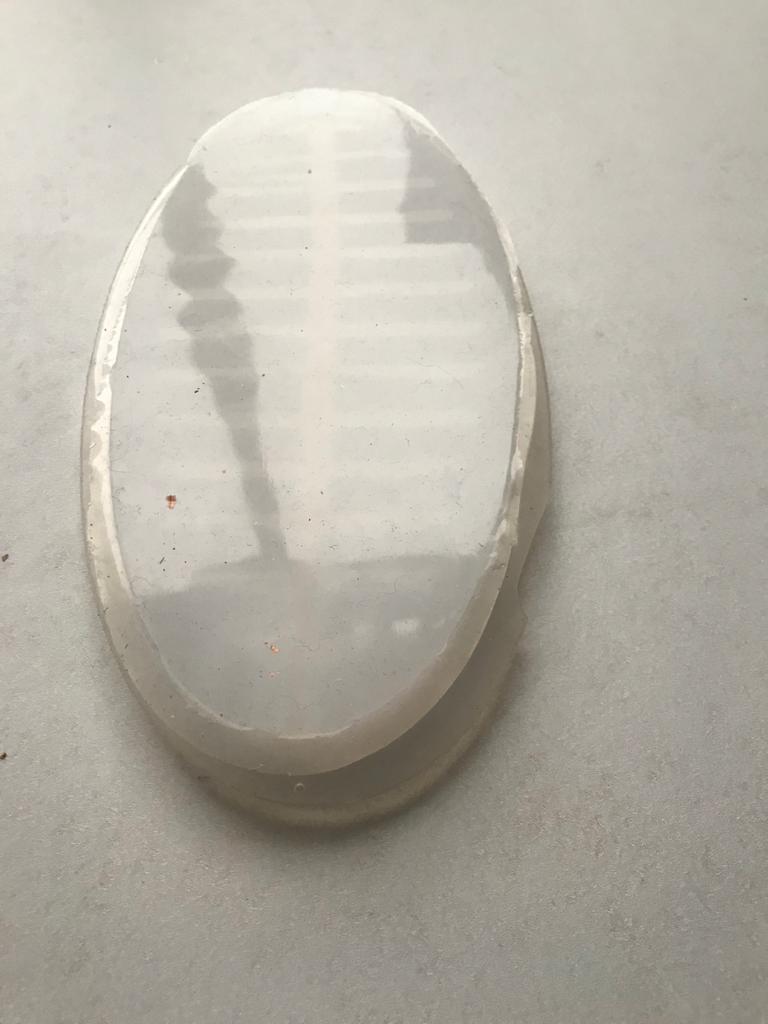
We filled the mould with water to determine how much silicon we would need to make.
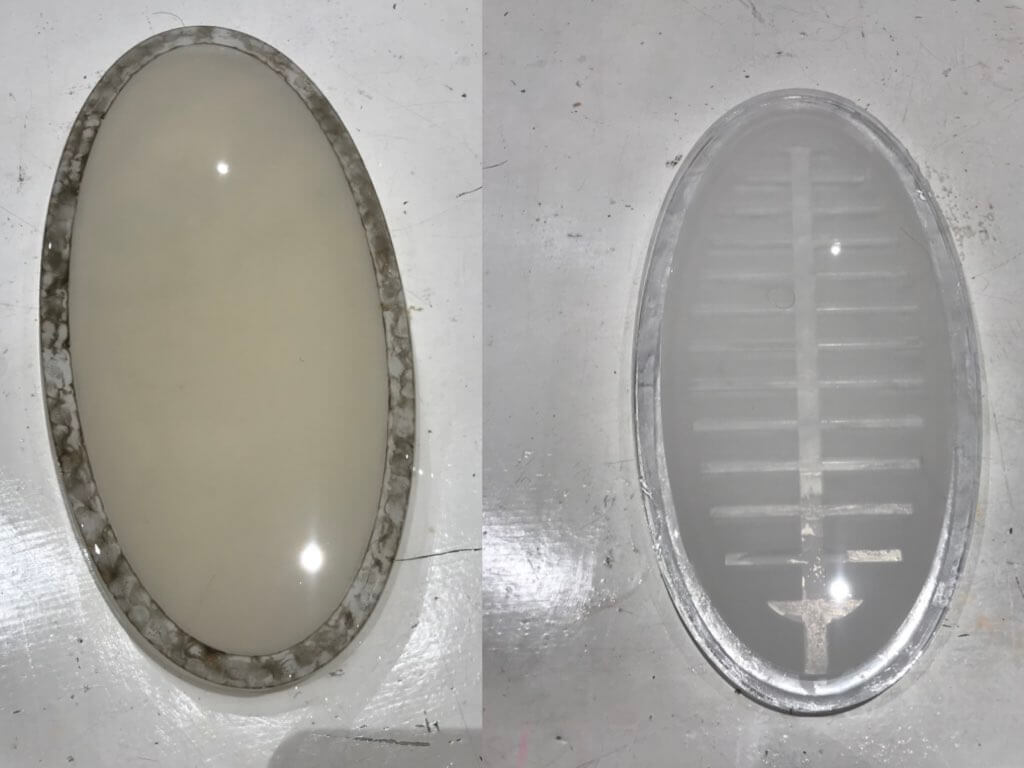
And left the silicon to settle over the weekend. Apparantly we shouldn't have made the base as thick as the edge would let it be. I'm not sure whether this caused the design to not inflate or that it was the lack of a strong enough pump. Let's try again after the holidays.
Vinyl and TPU inflatables
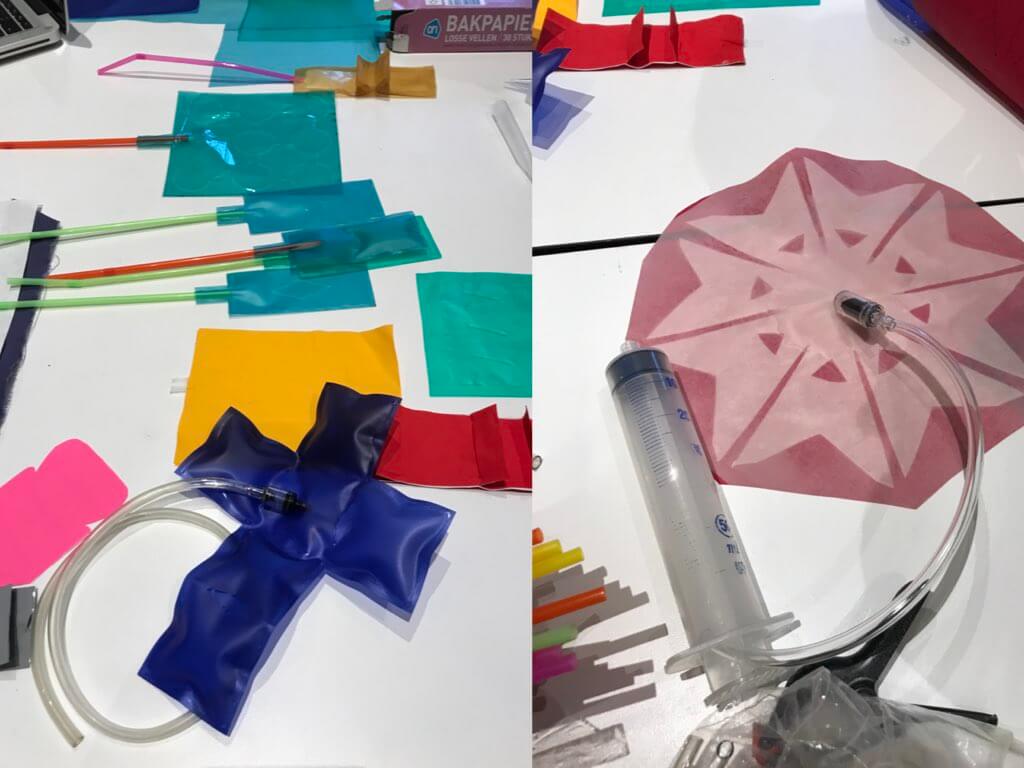
Some examples of inflatables made with vinyl or TPU
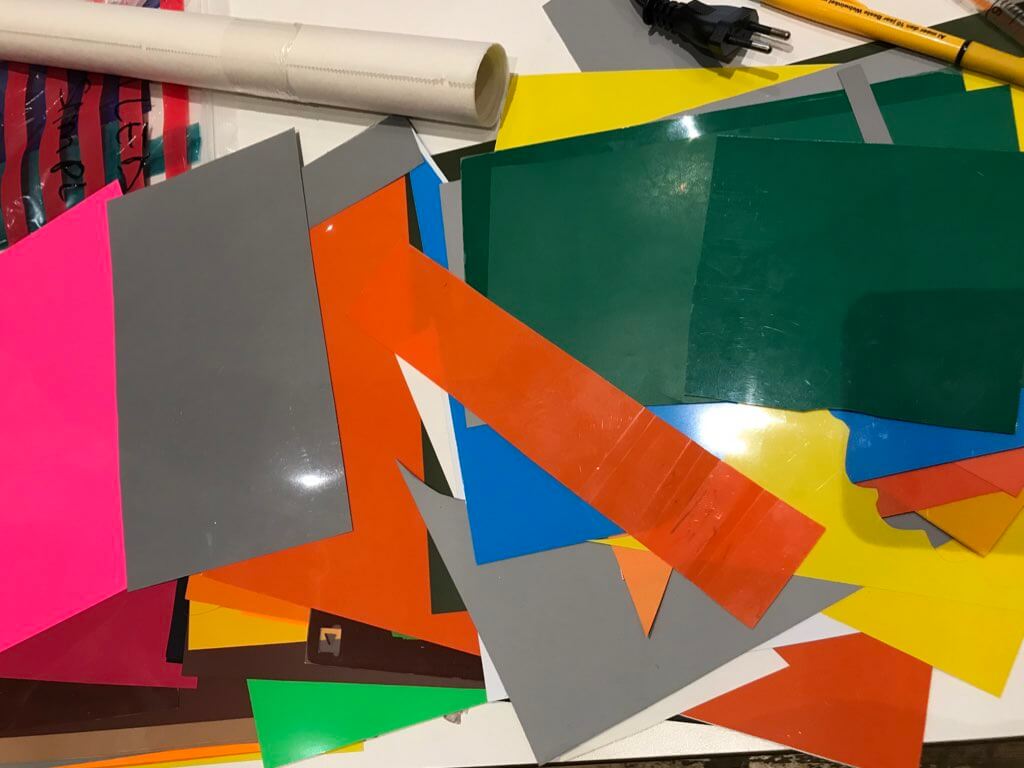
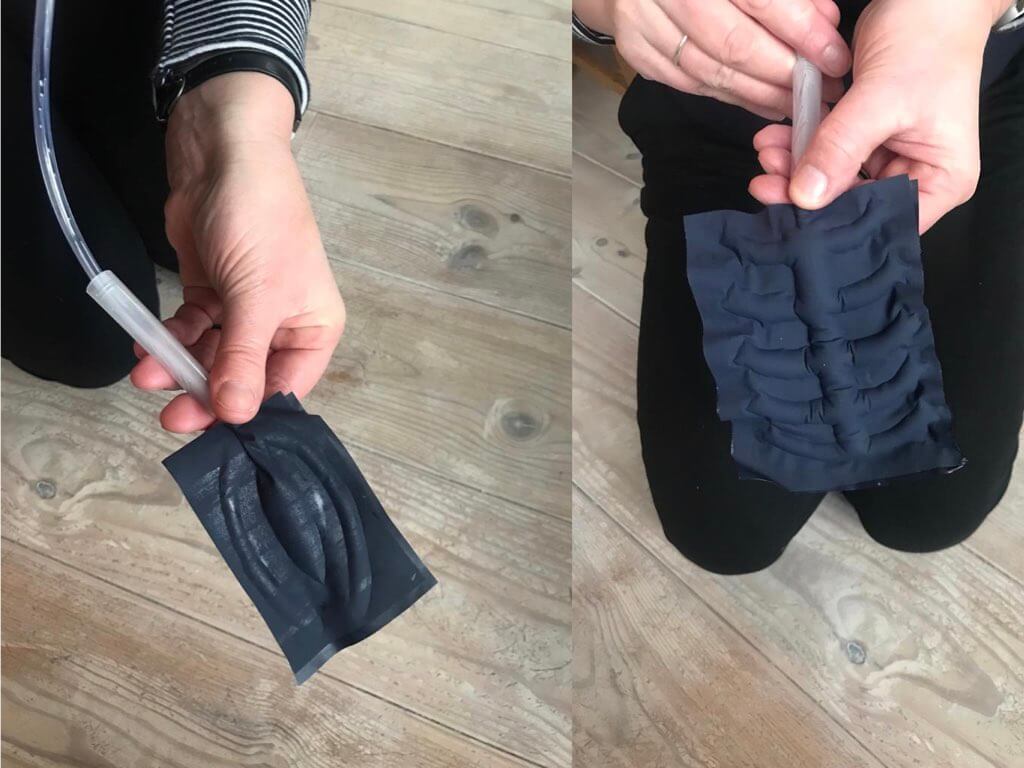
Bright vinyl

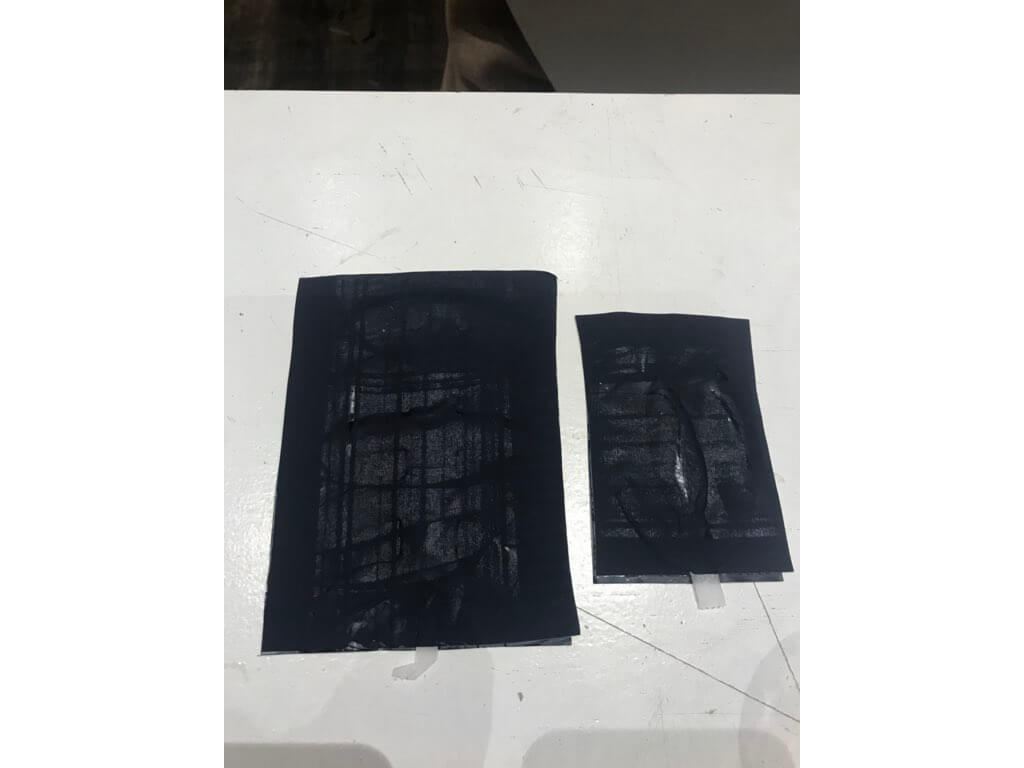
I chose a purple-black piece of vinyl and had a really hard time getting the shiny part off. Also some of the glue seemed to have stayed on the vinyl. Perhaps it has become warm or has passed the use-by date?
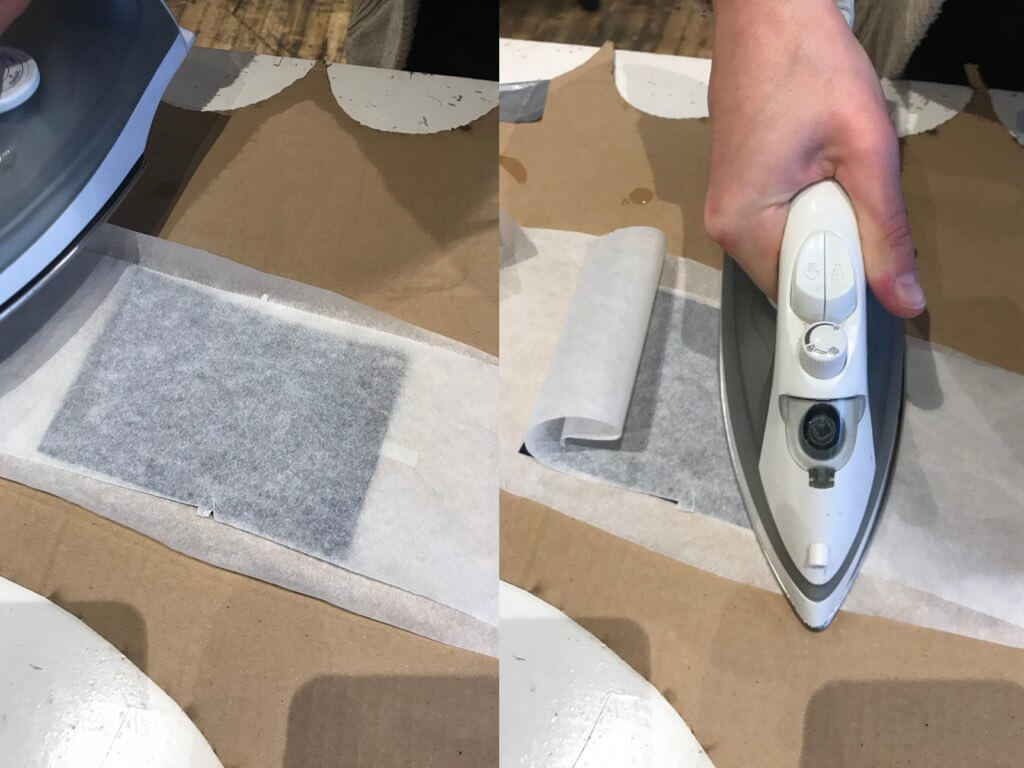
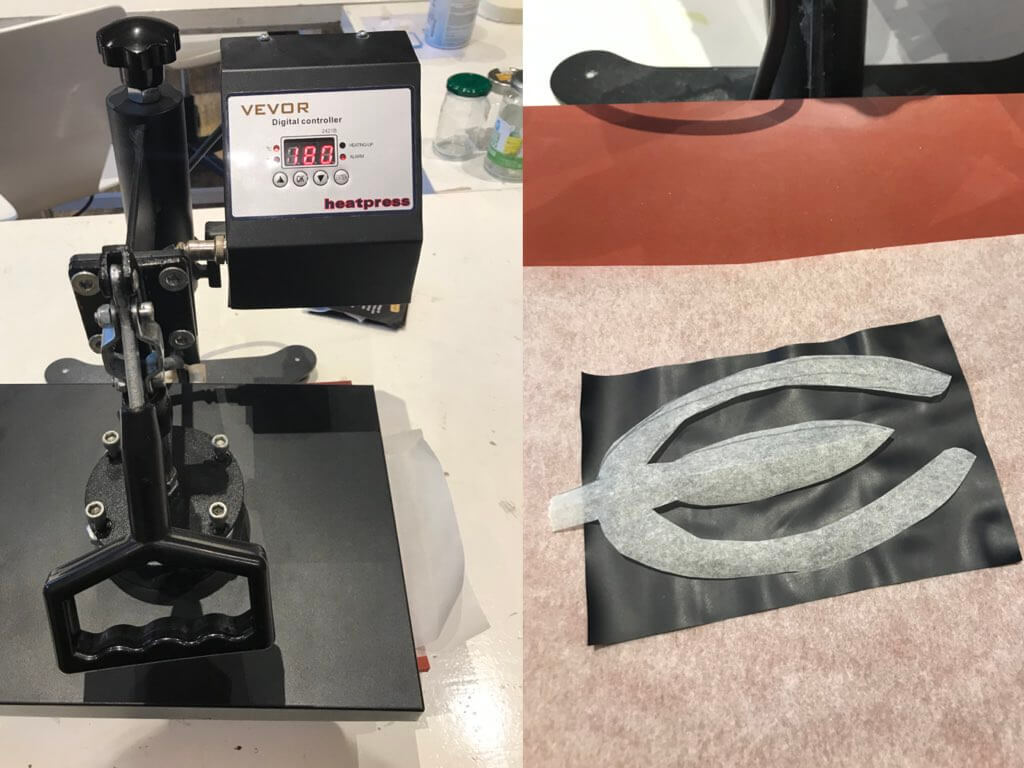
I only realised two designs and used both the iron and the hot plate to 'glue' the two sides together.
The PTU settings for the printer didn't work out, due to the new settings. It proved really difficult to weld without cutting the material. I may give it a try later or use the iron for some tests.