7. Computational Couture
End Results
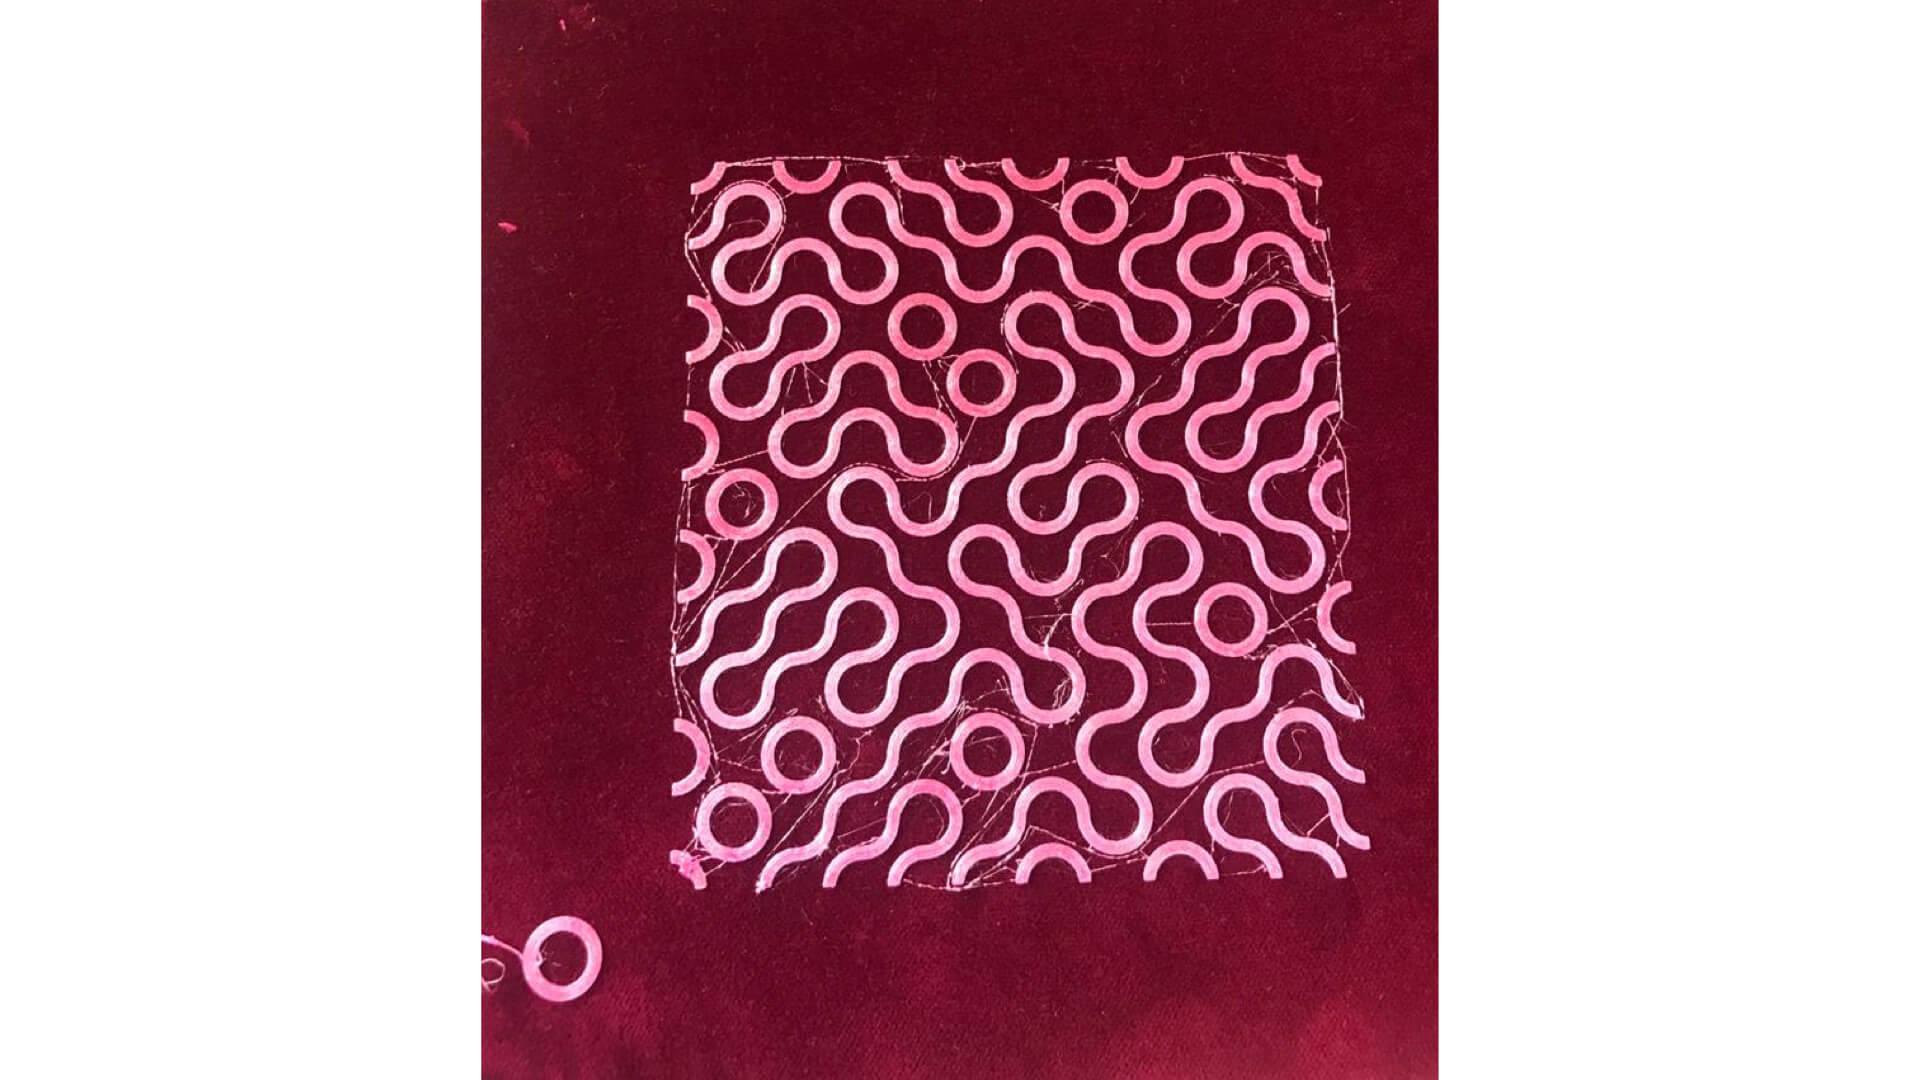
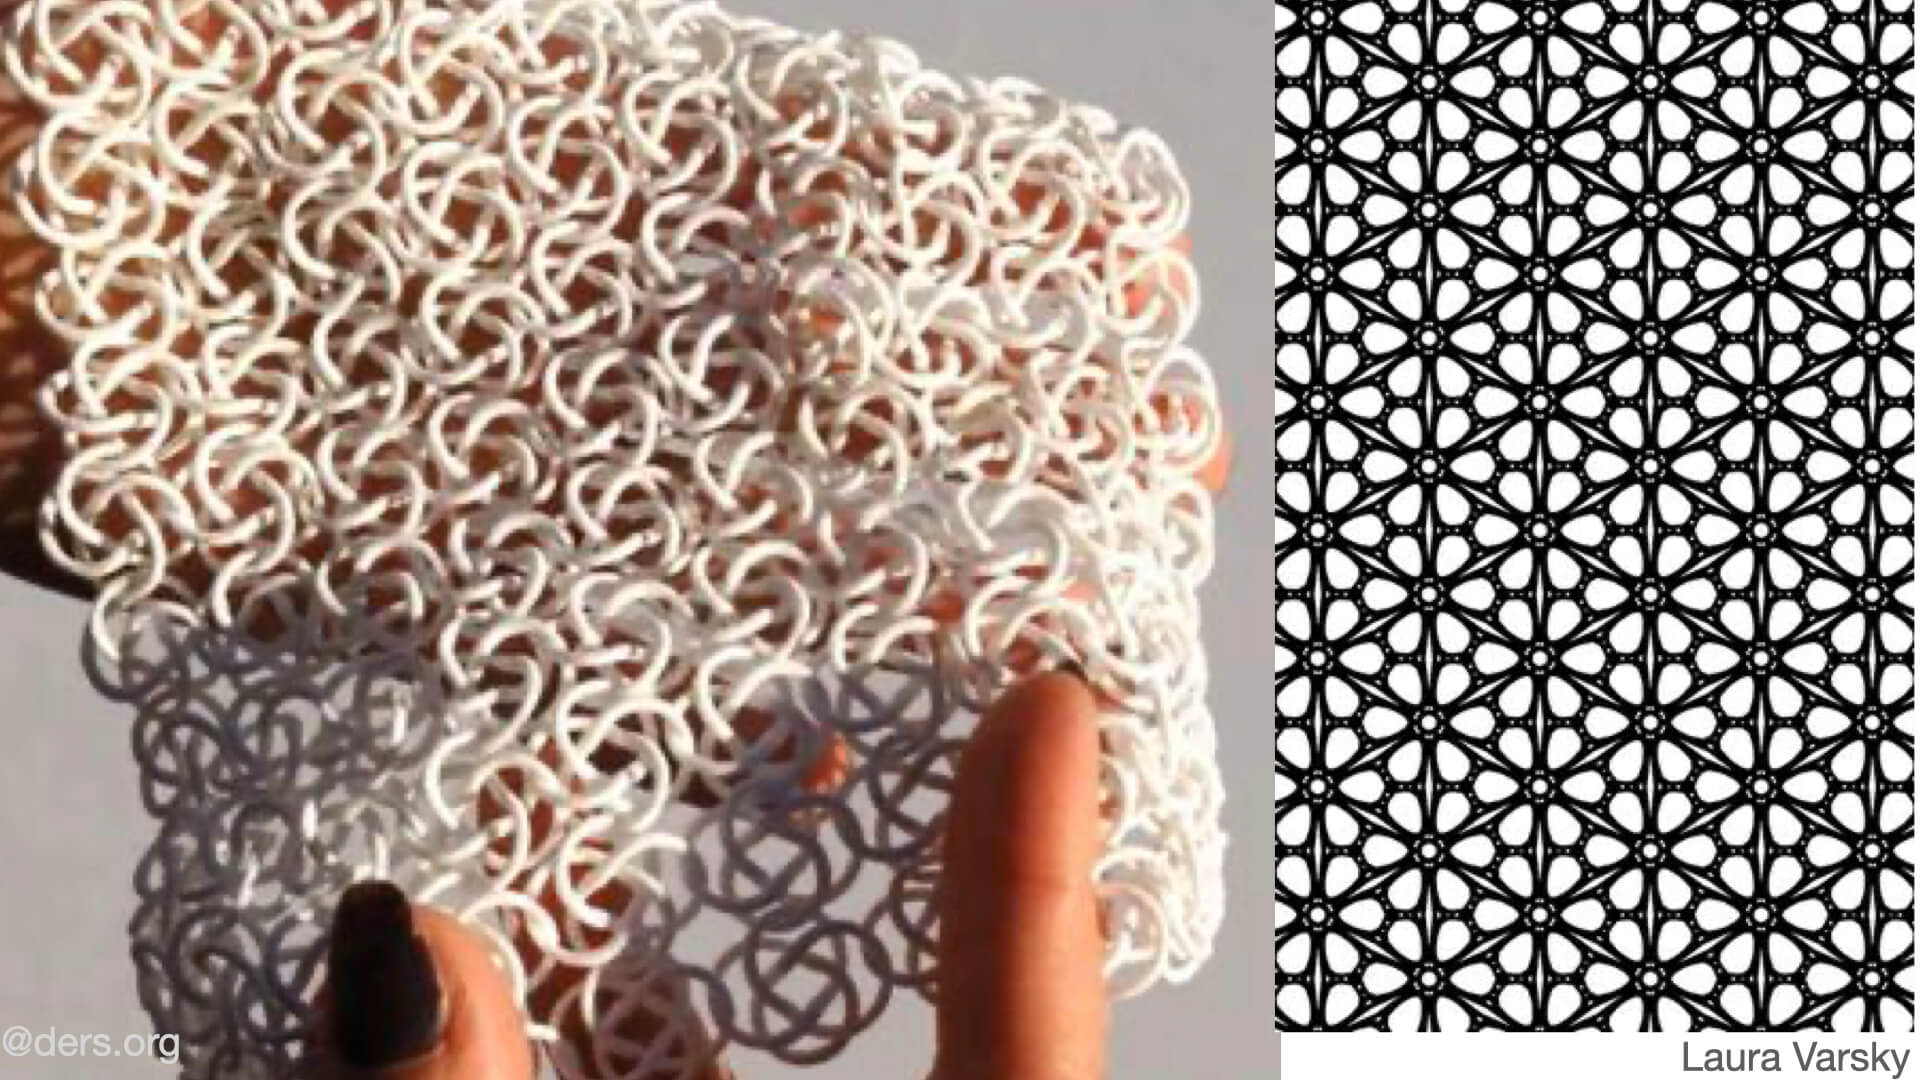
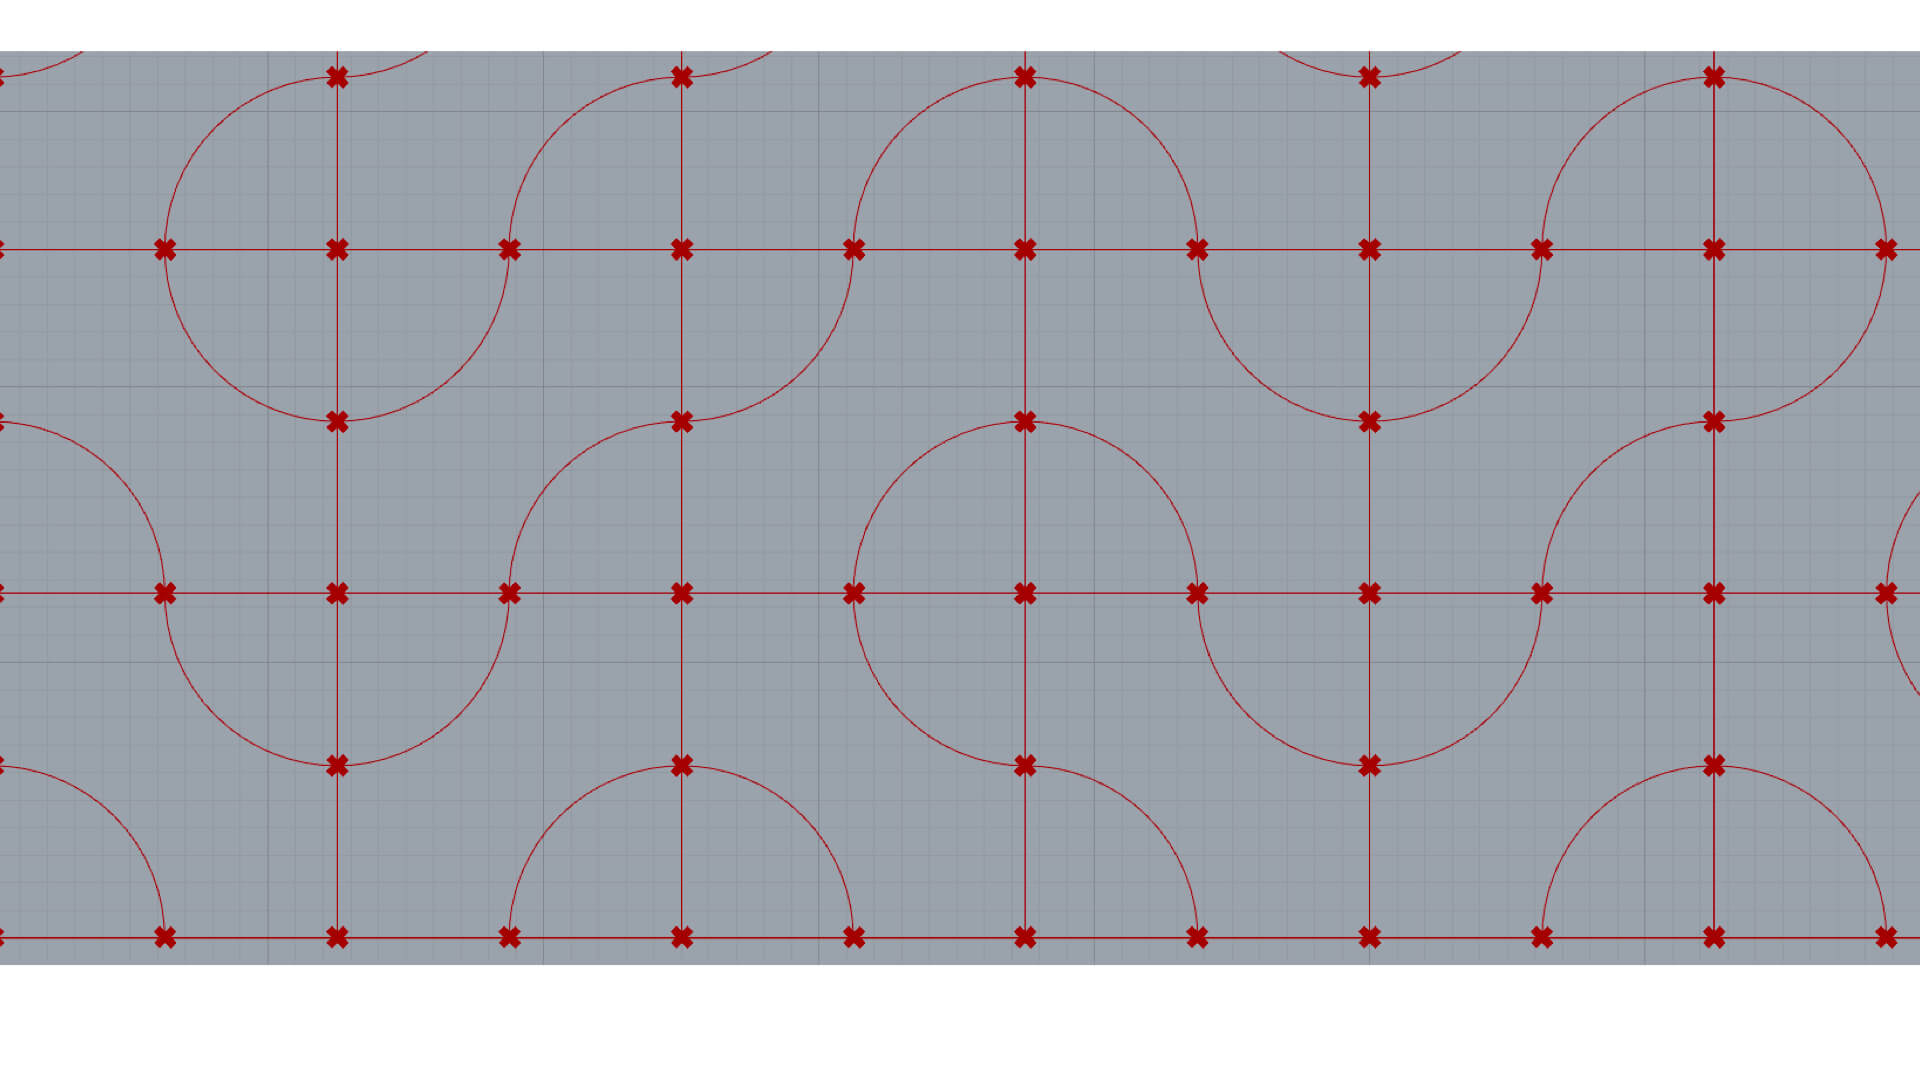
My Truchet tiles pattern just finished in time
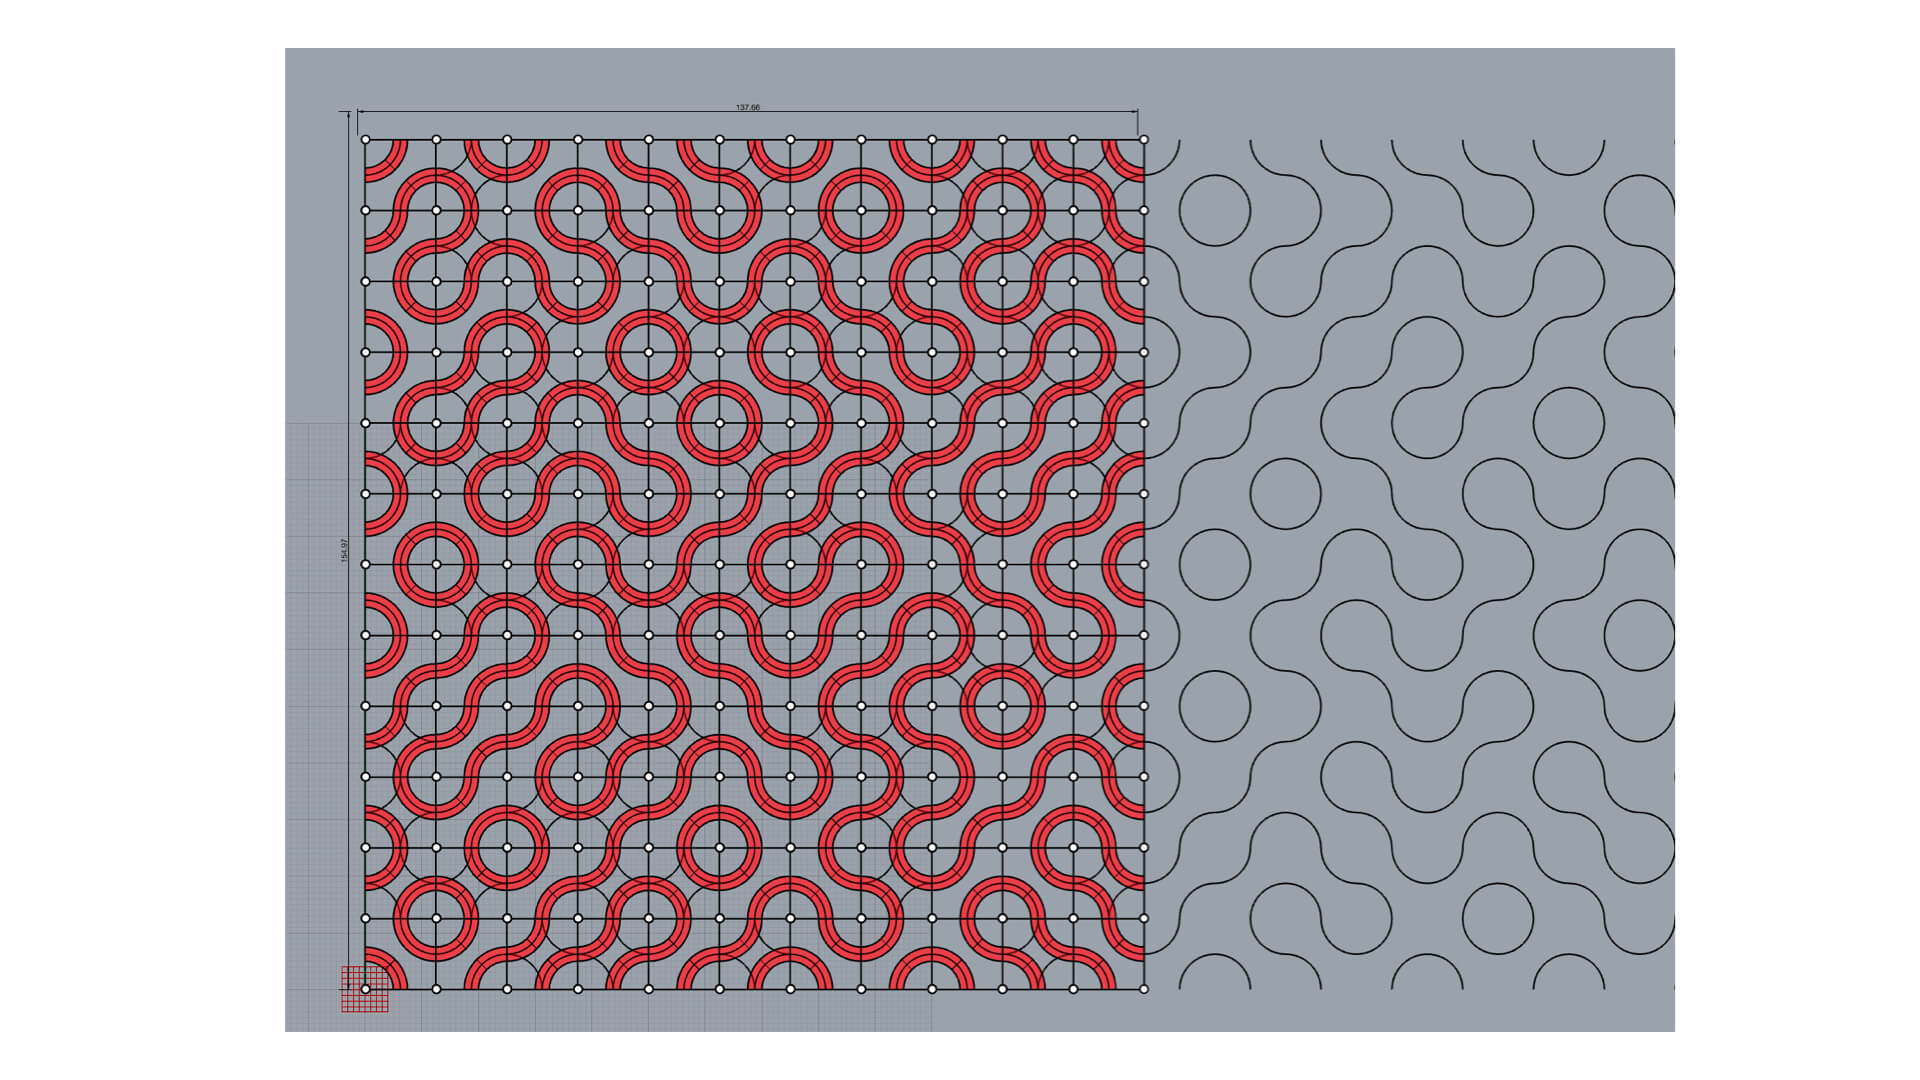
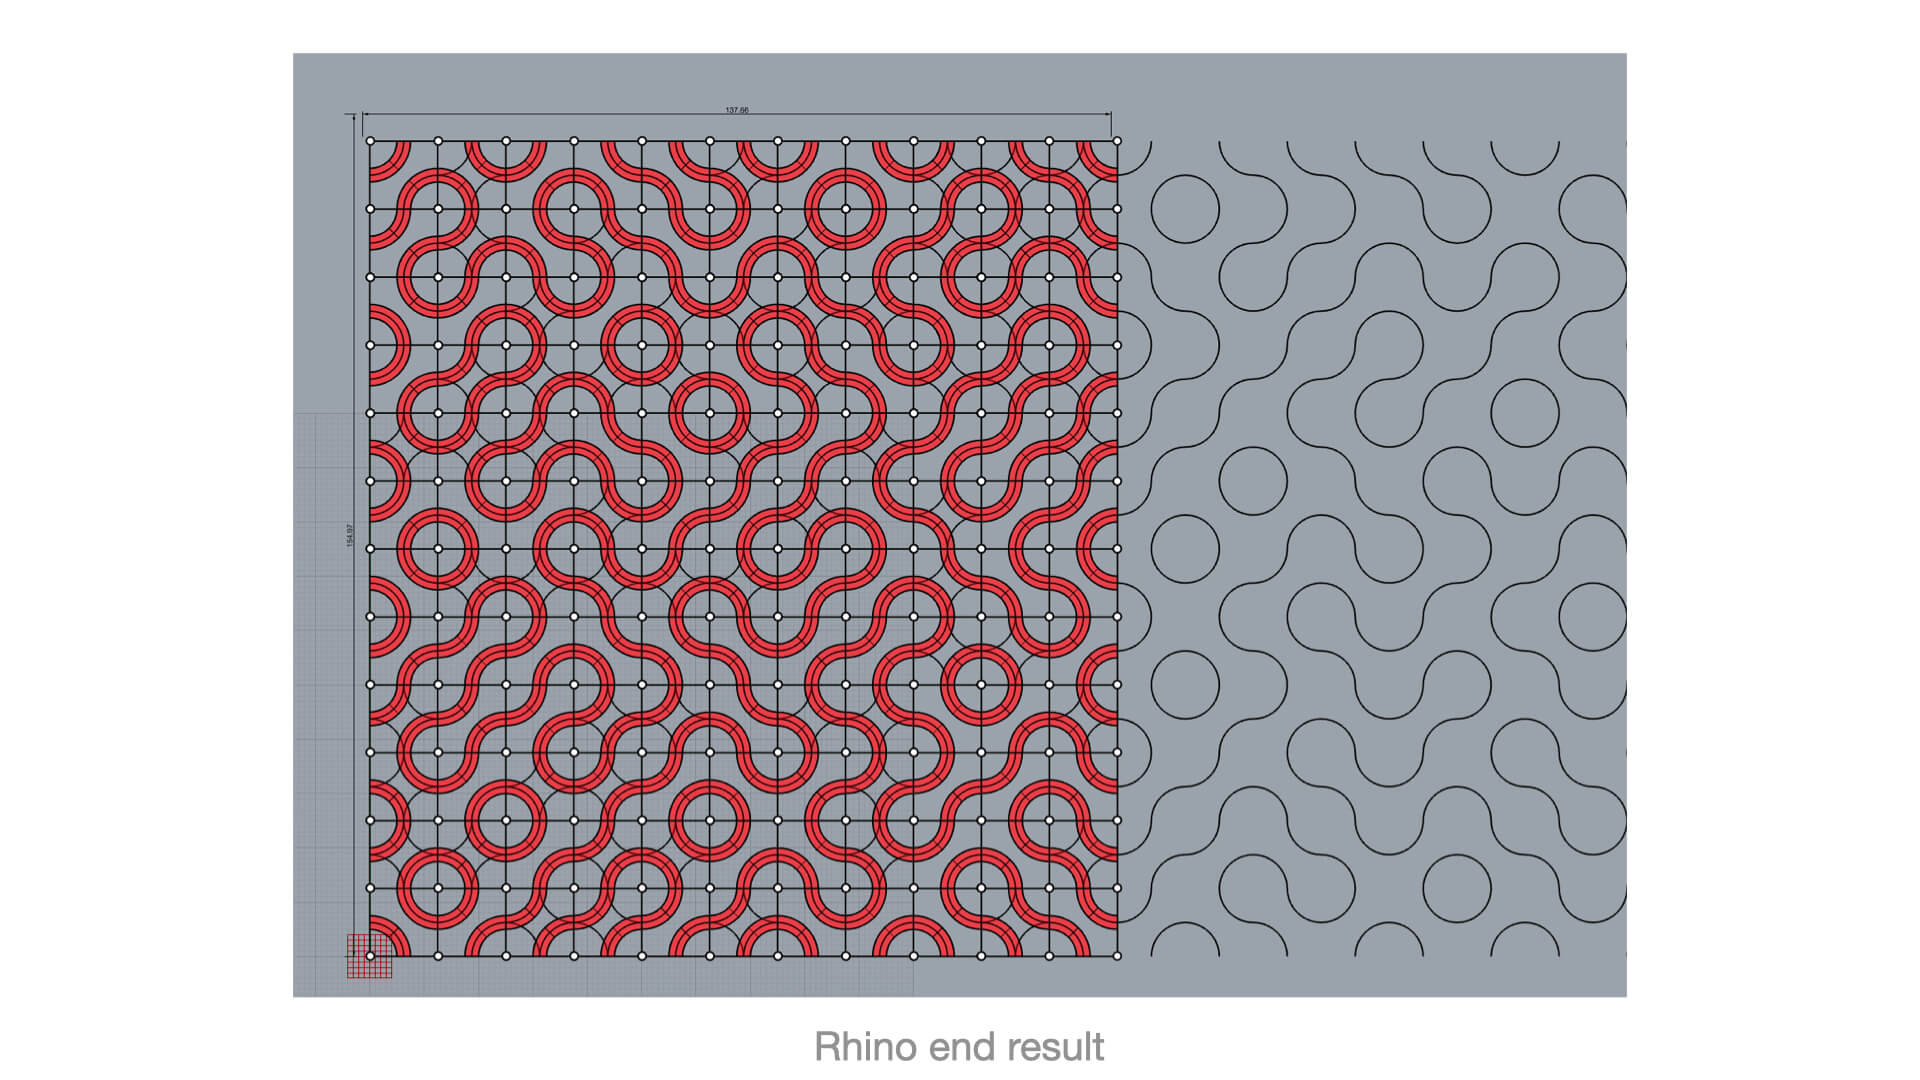
The final Rhino design
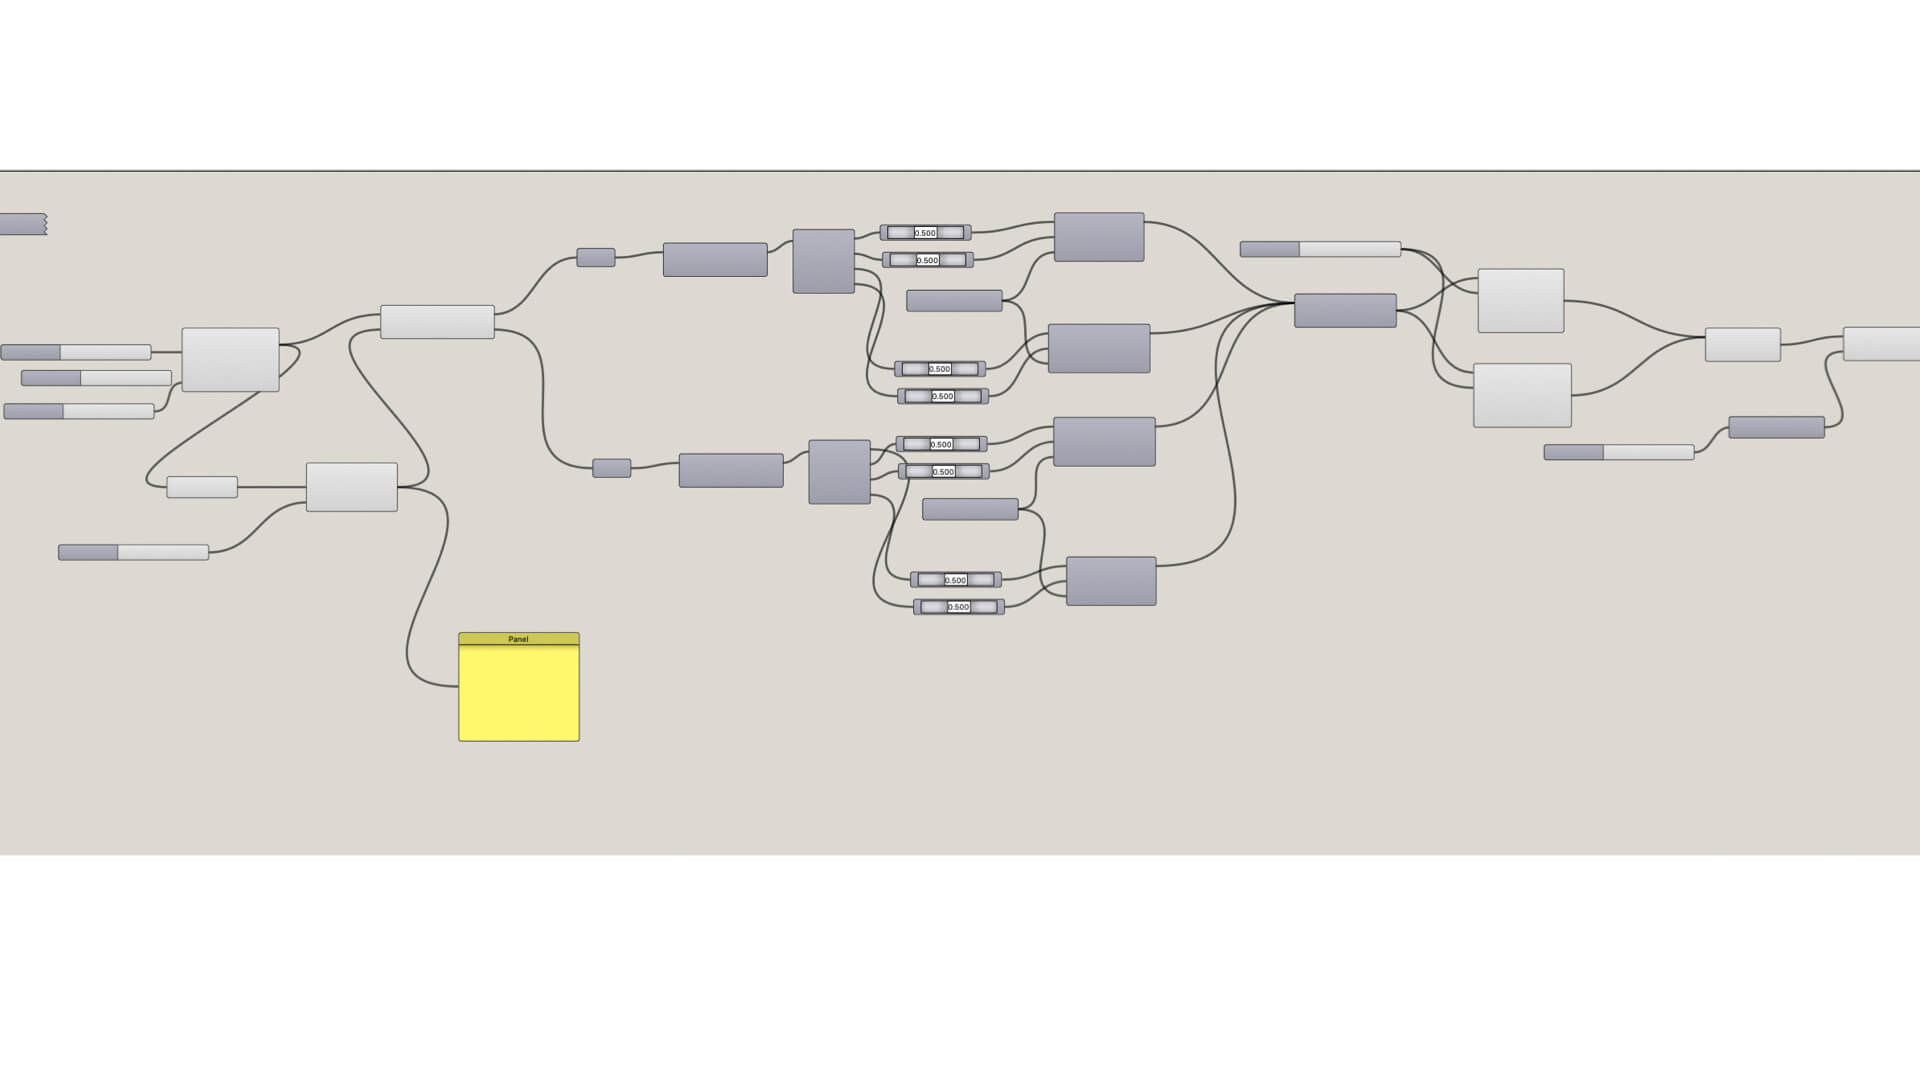
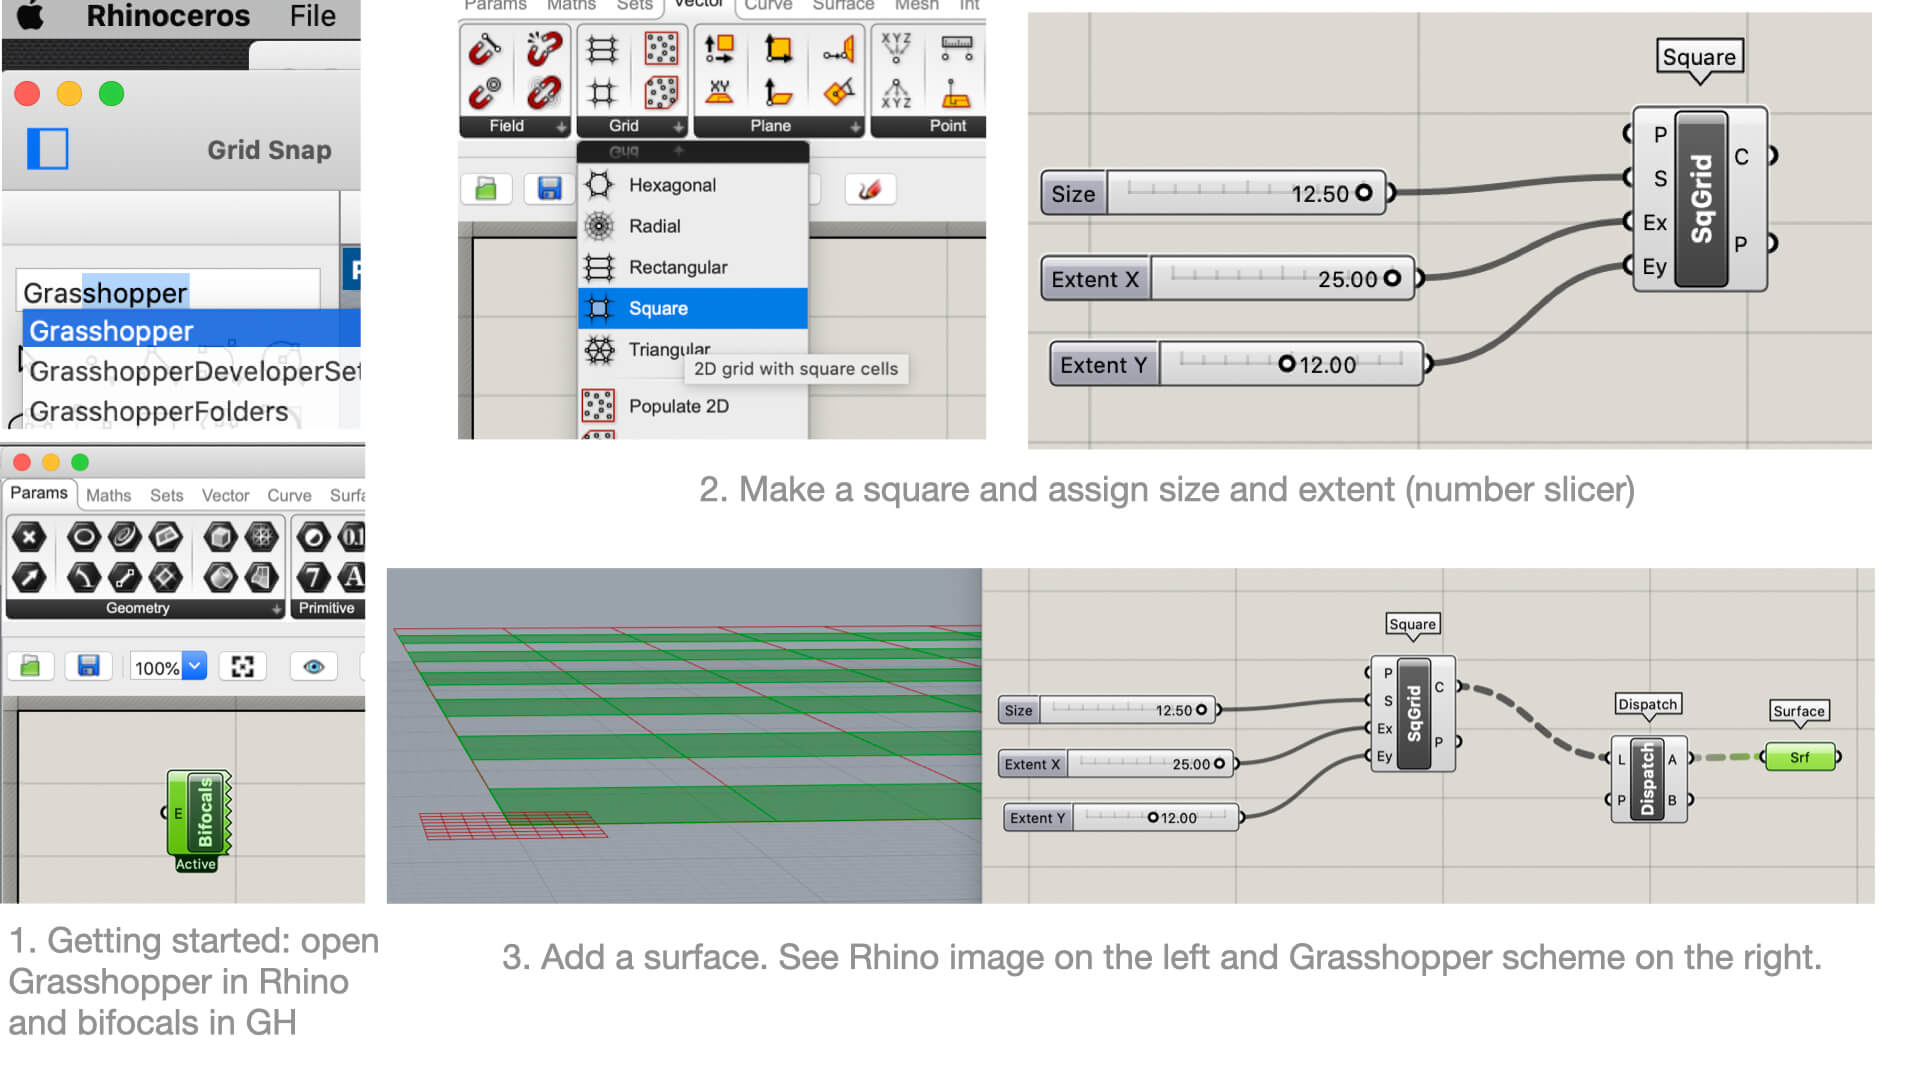
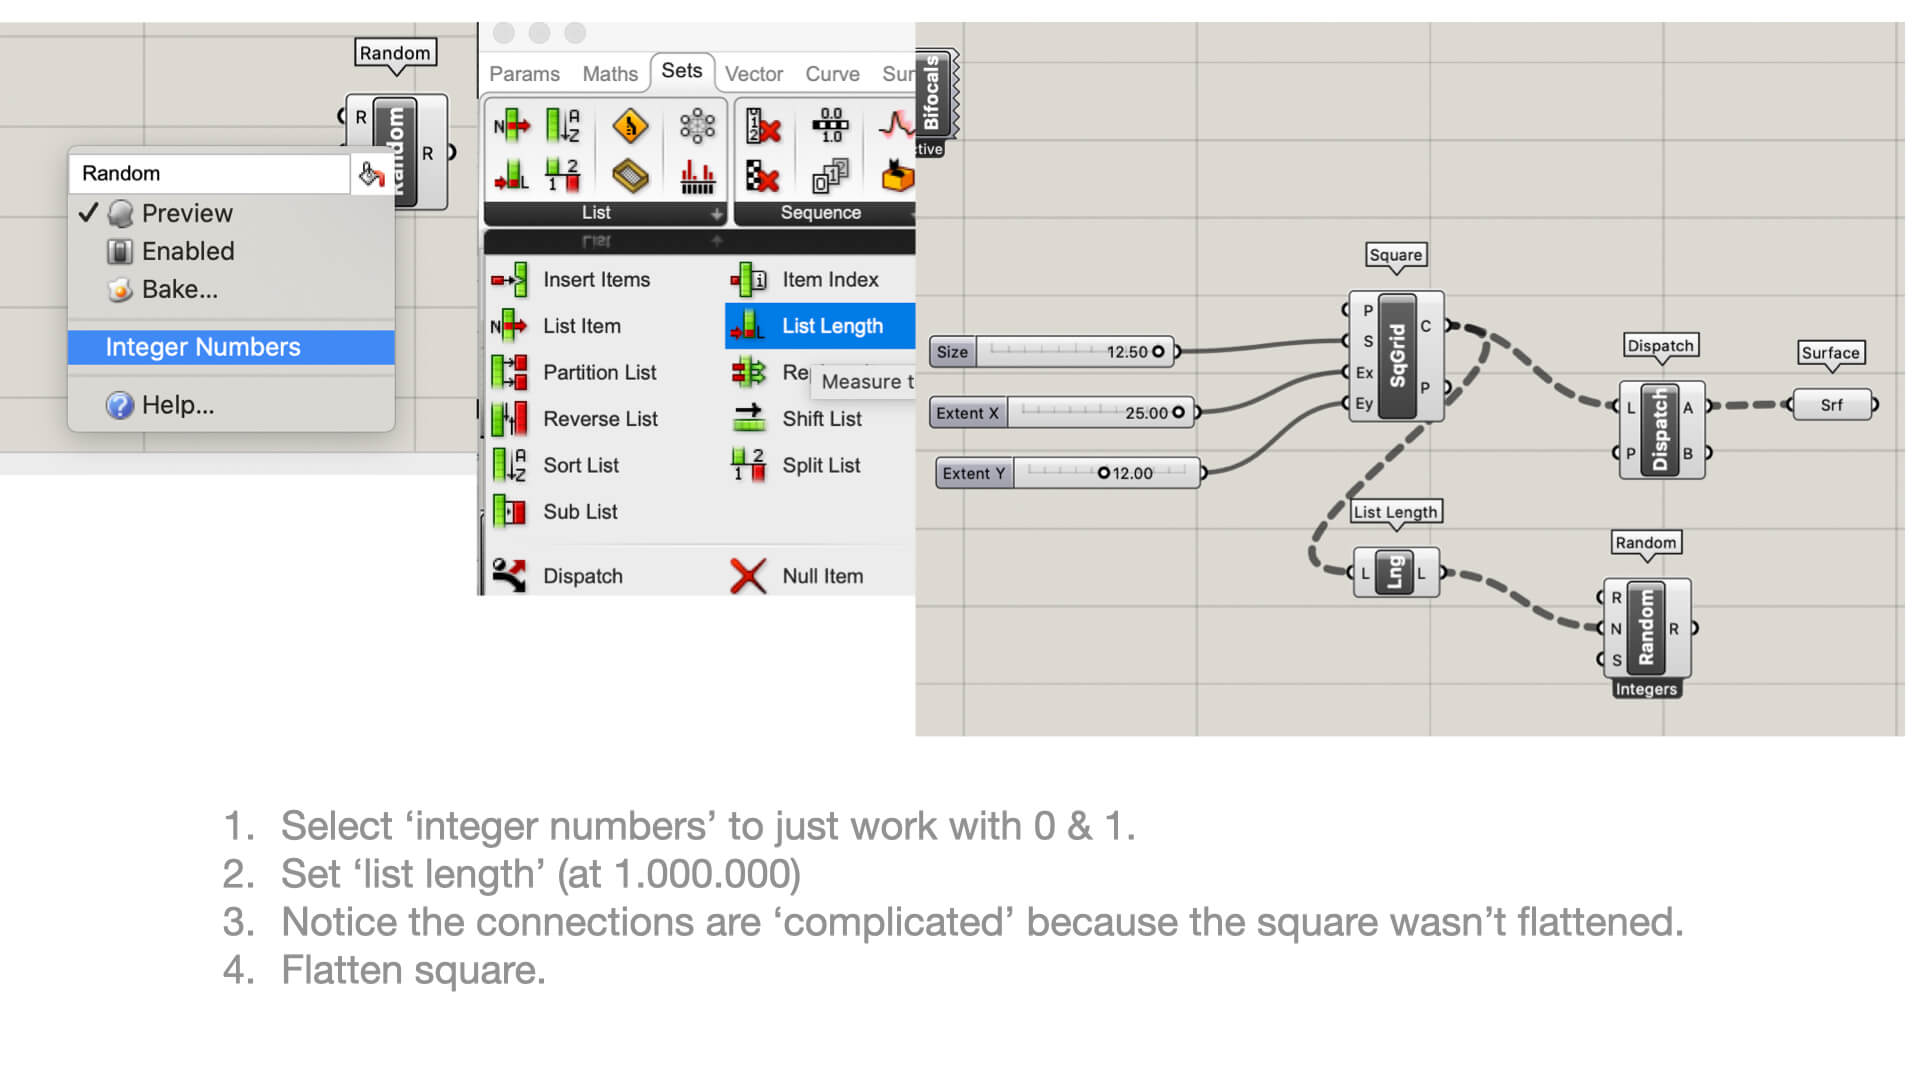
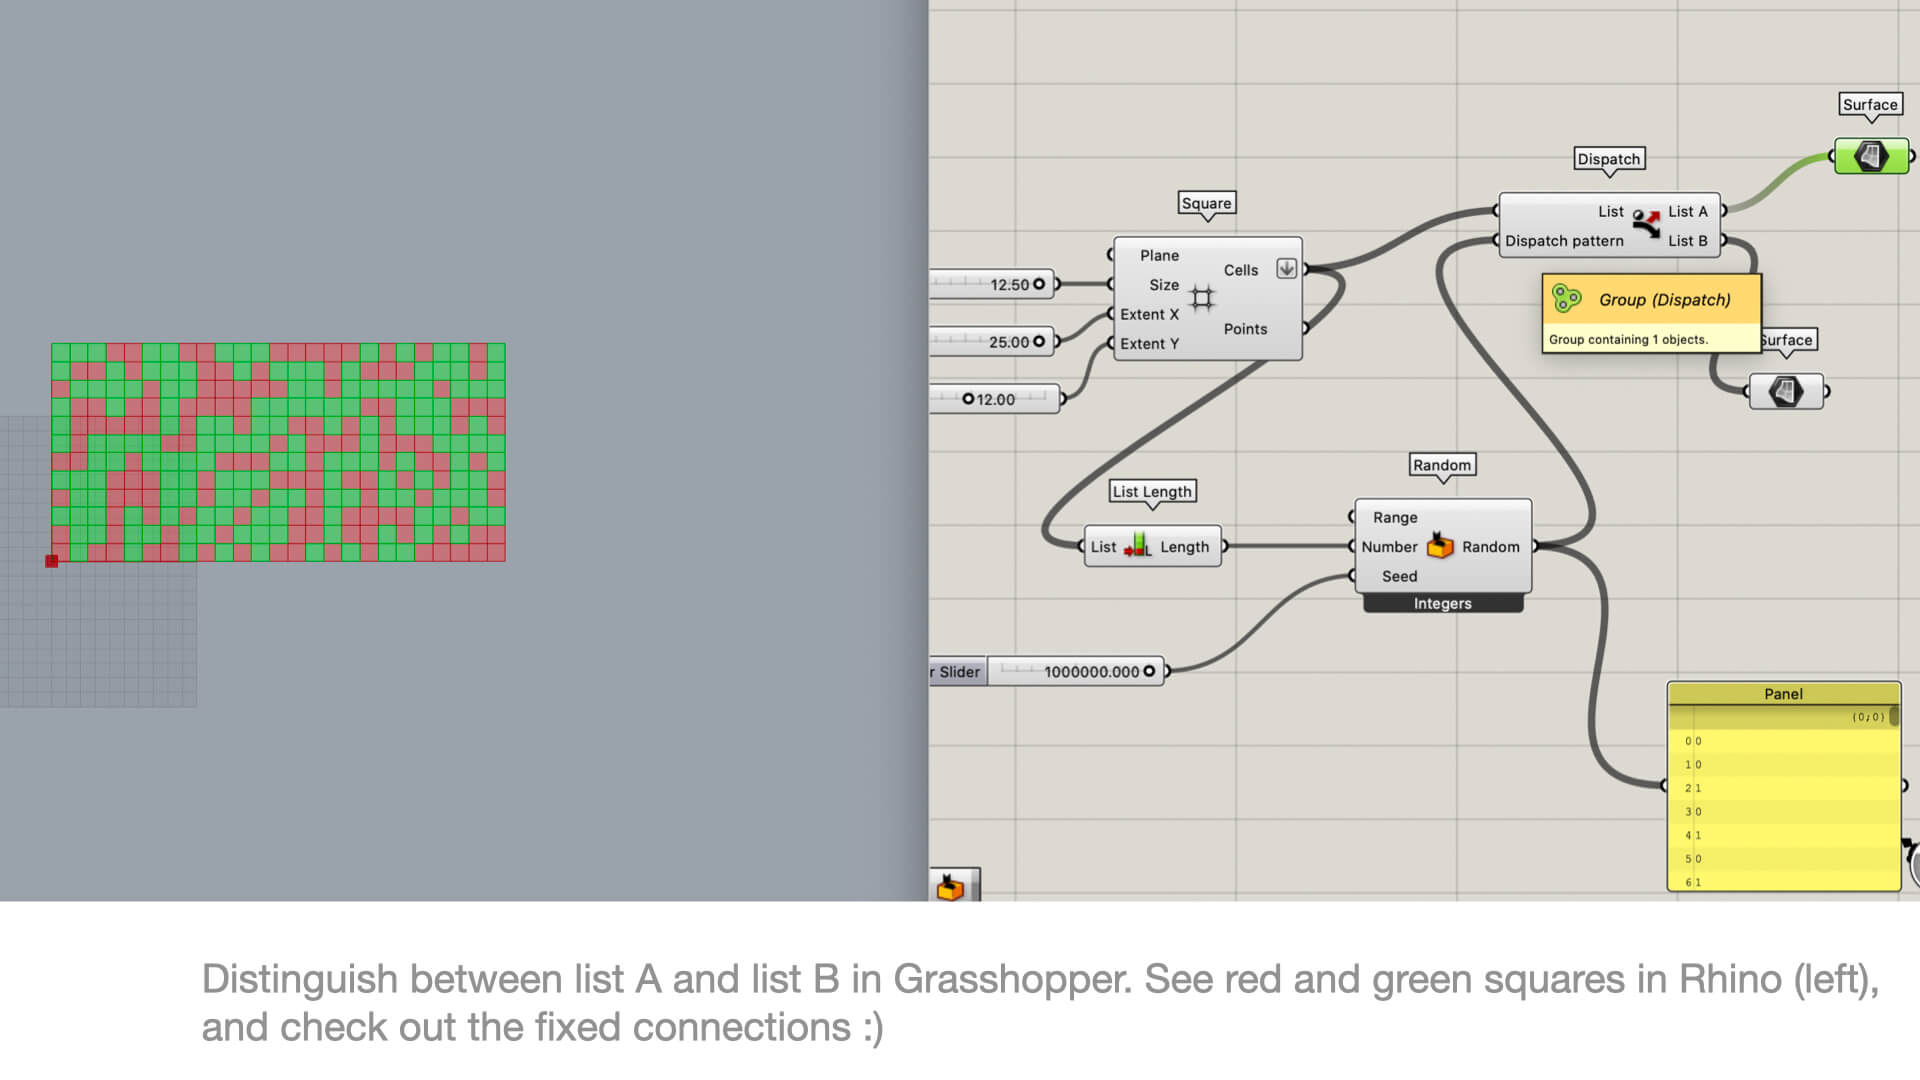
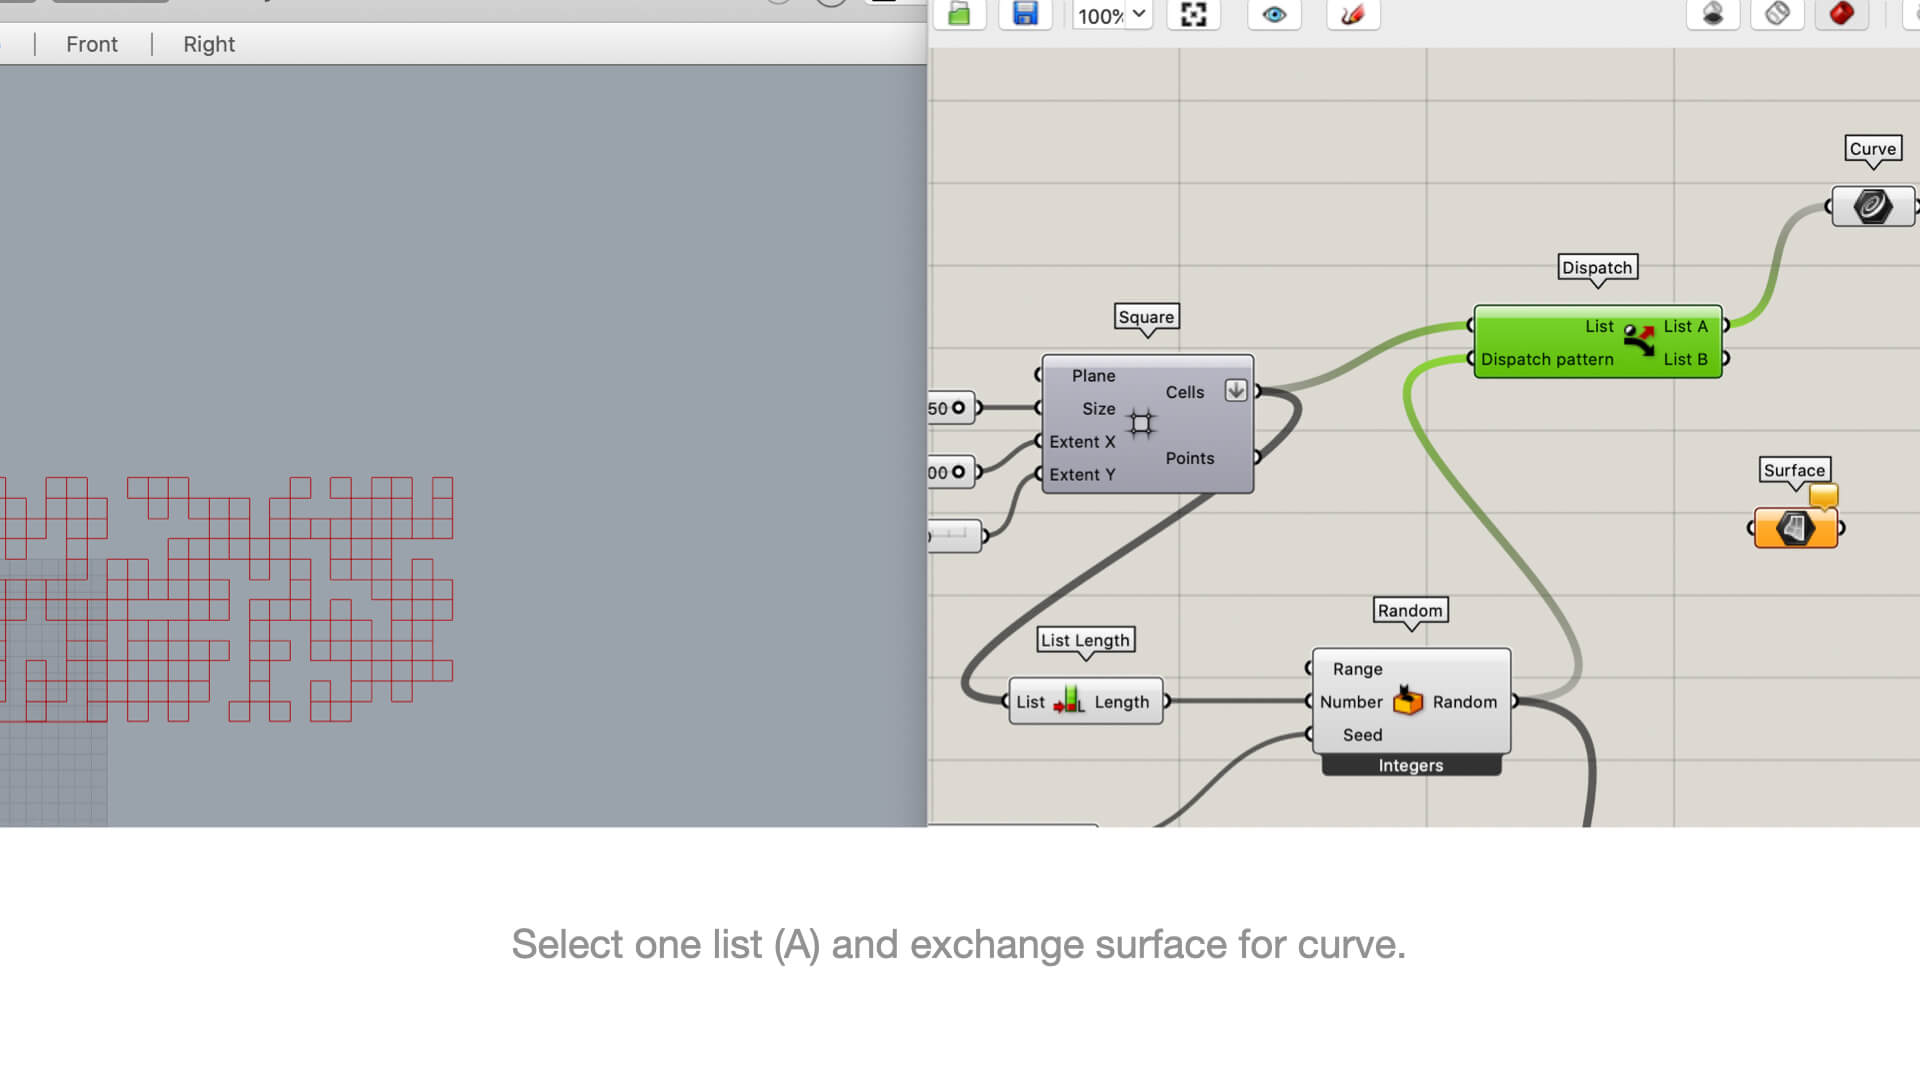
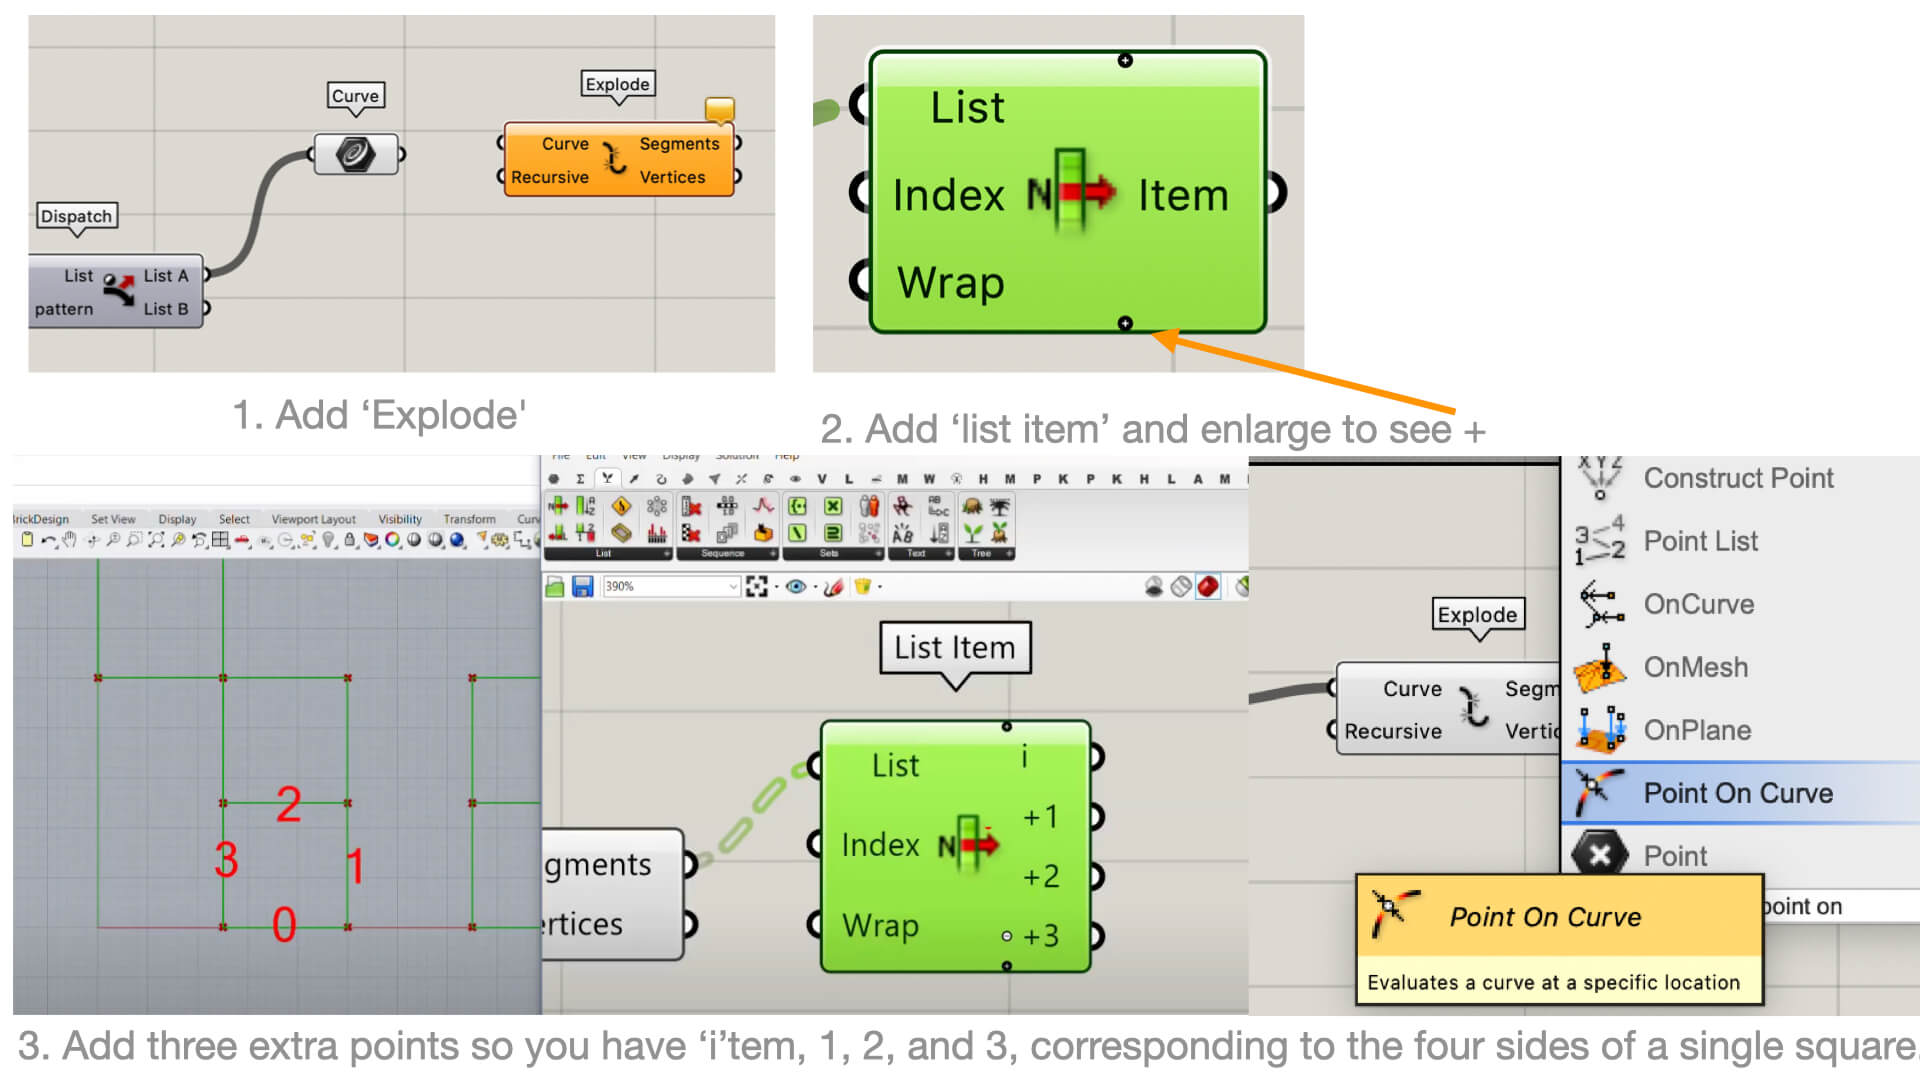
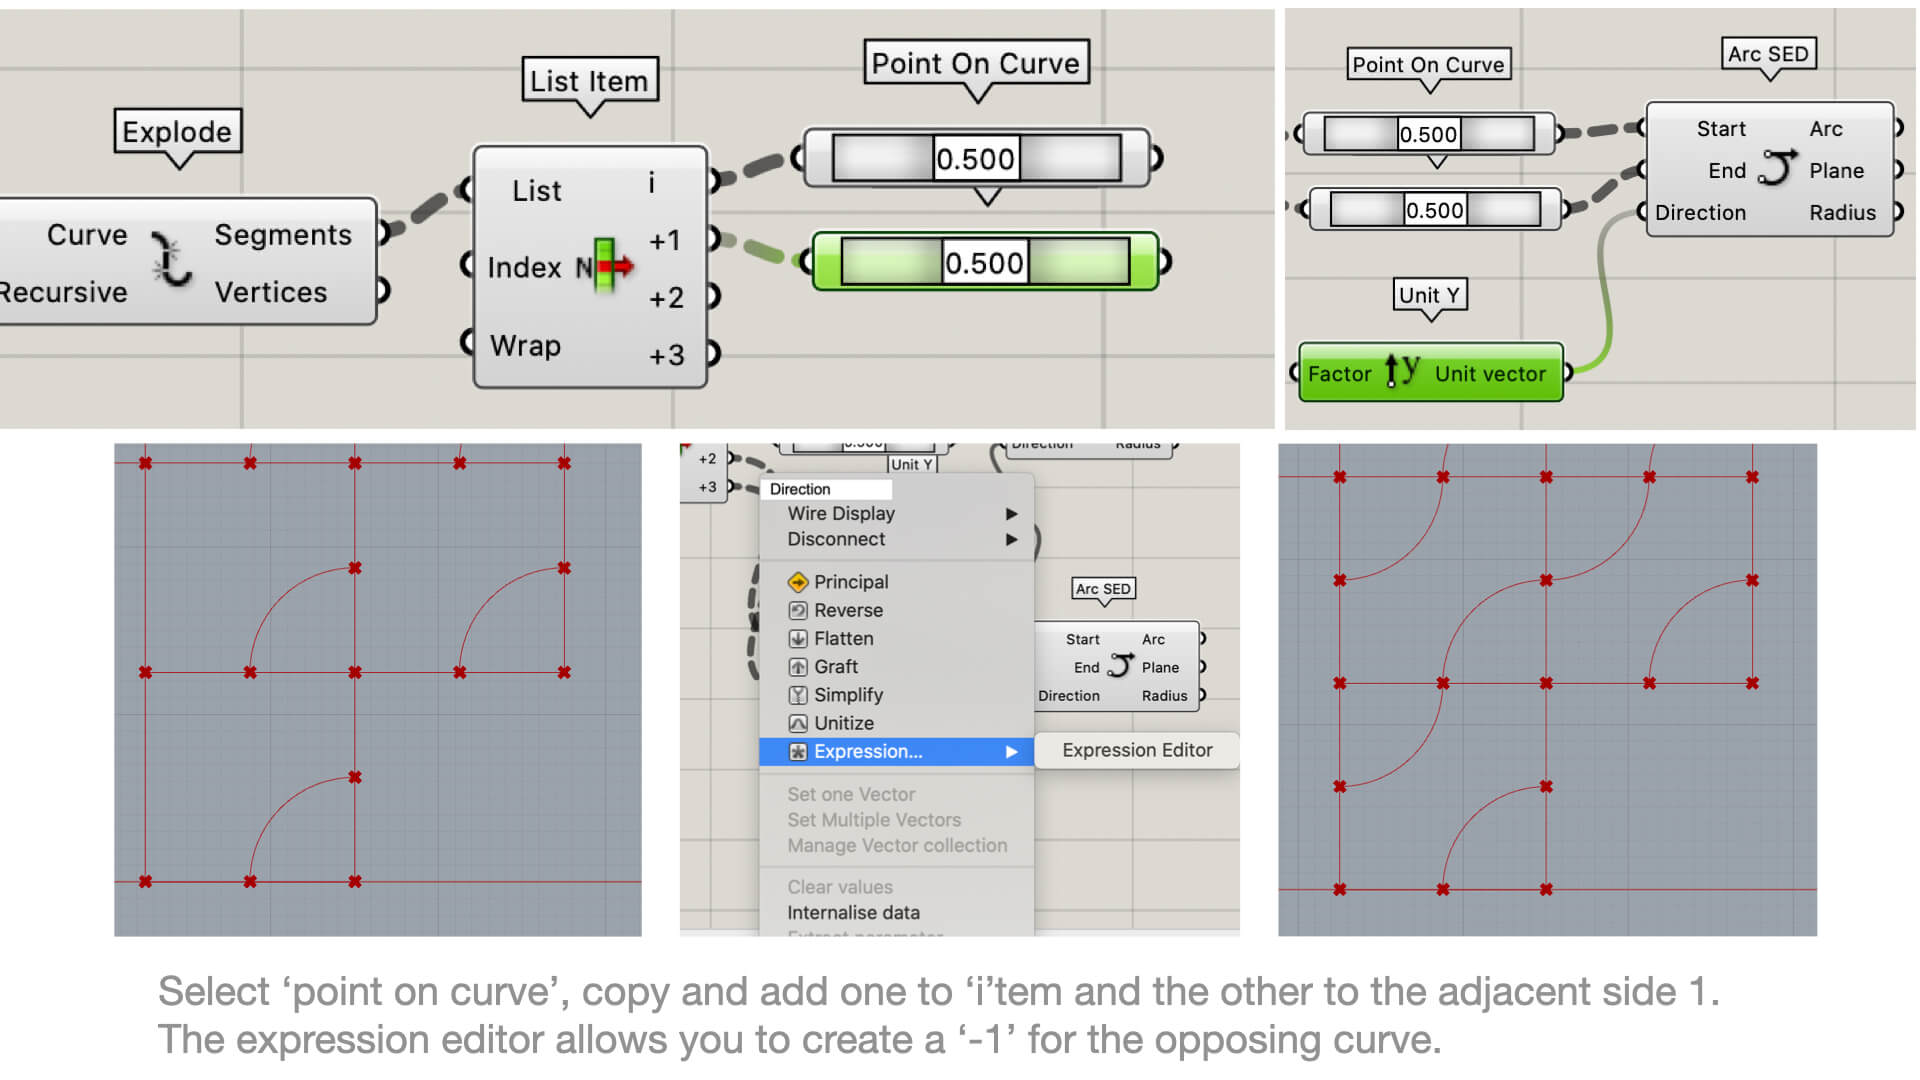
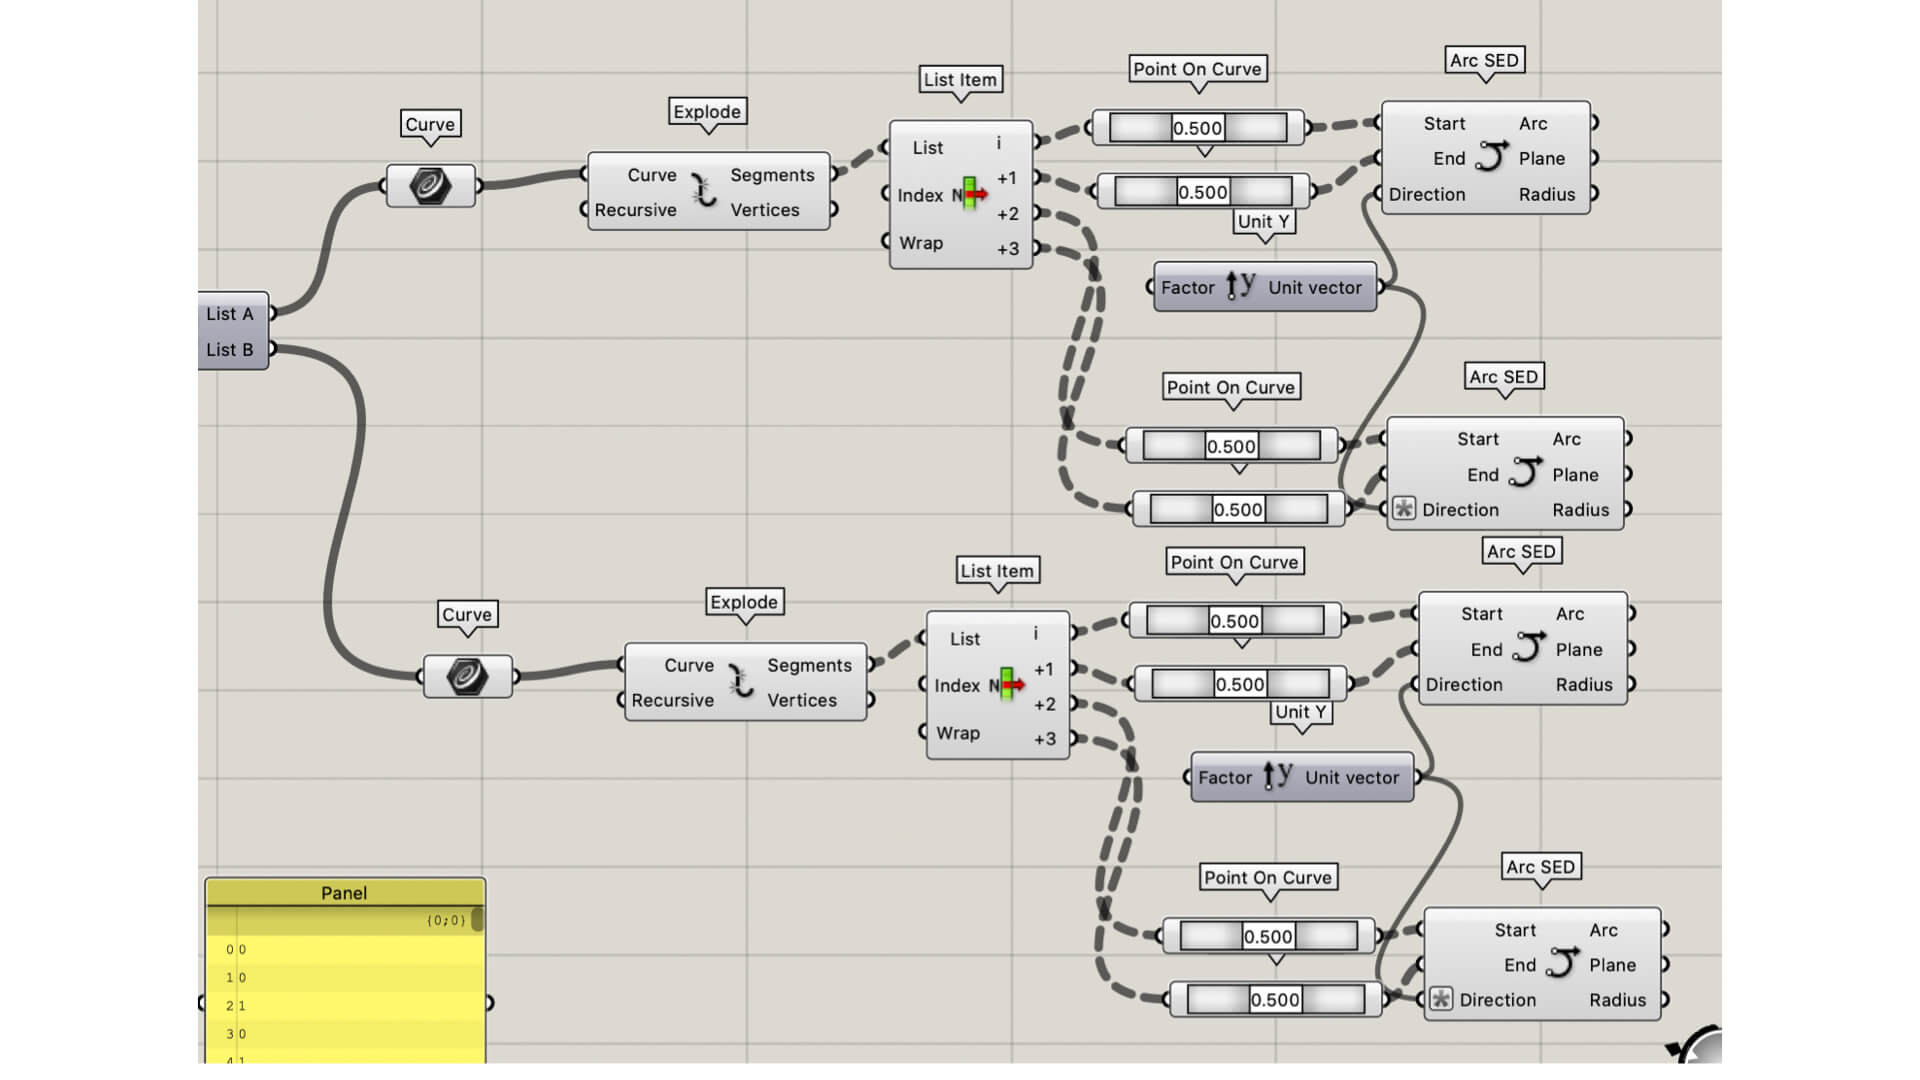
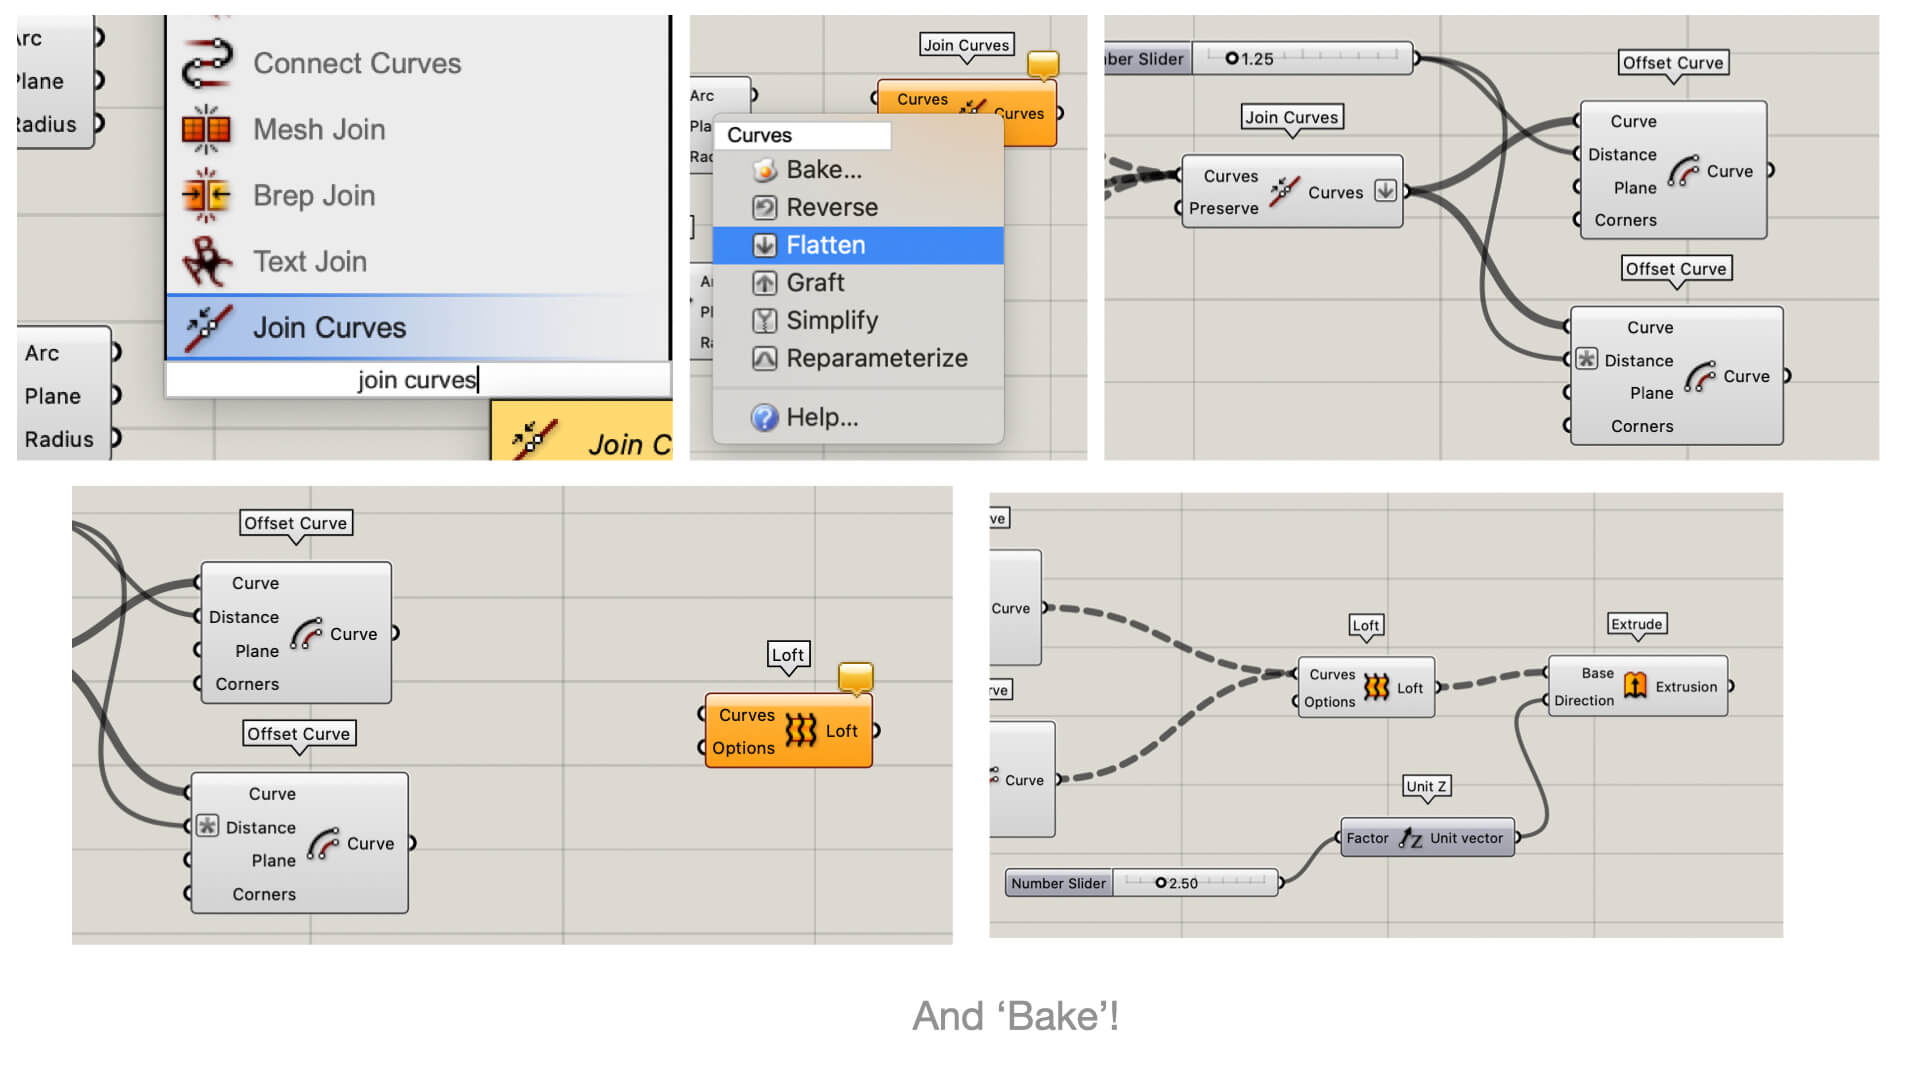
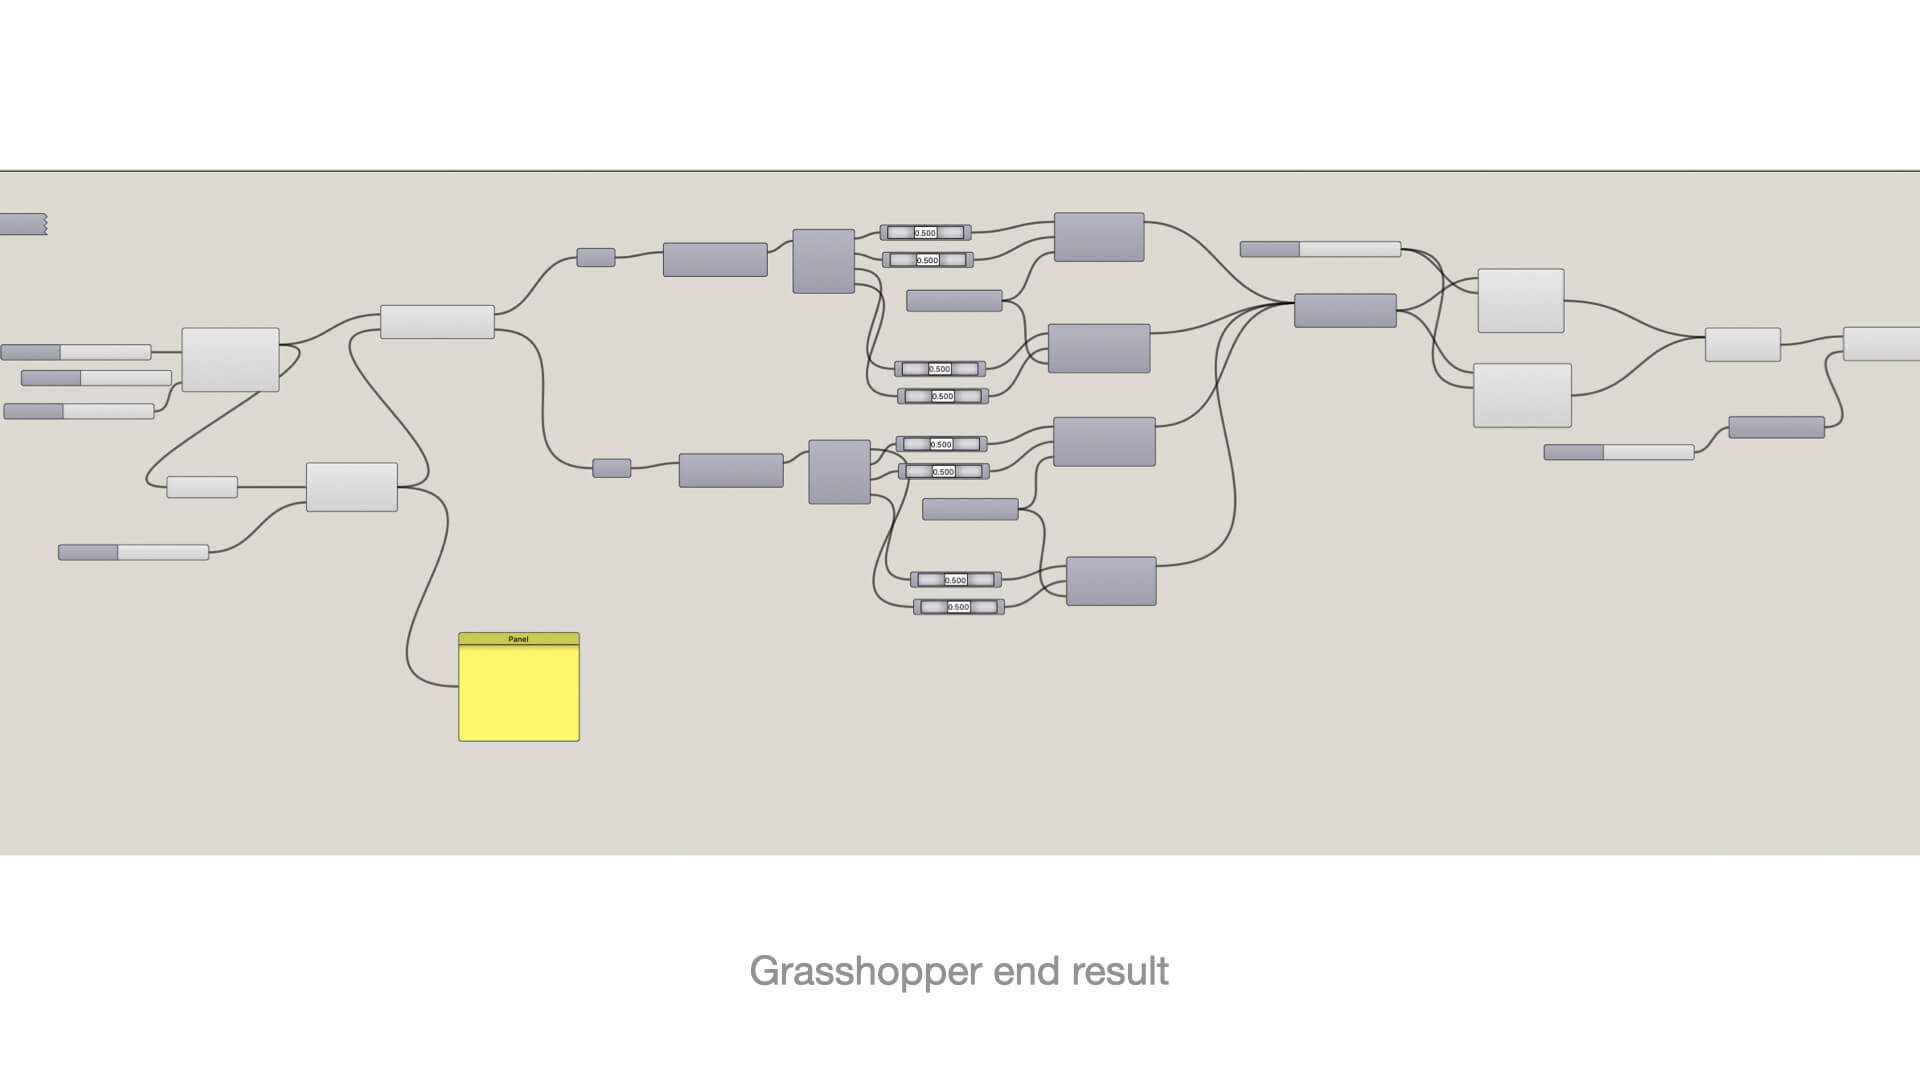
The Grasshopper build for the two images above
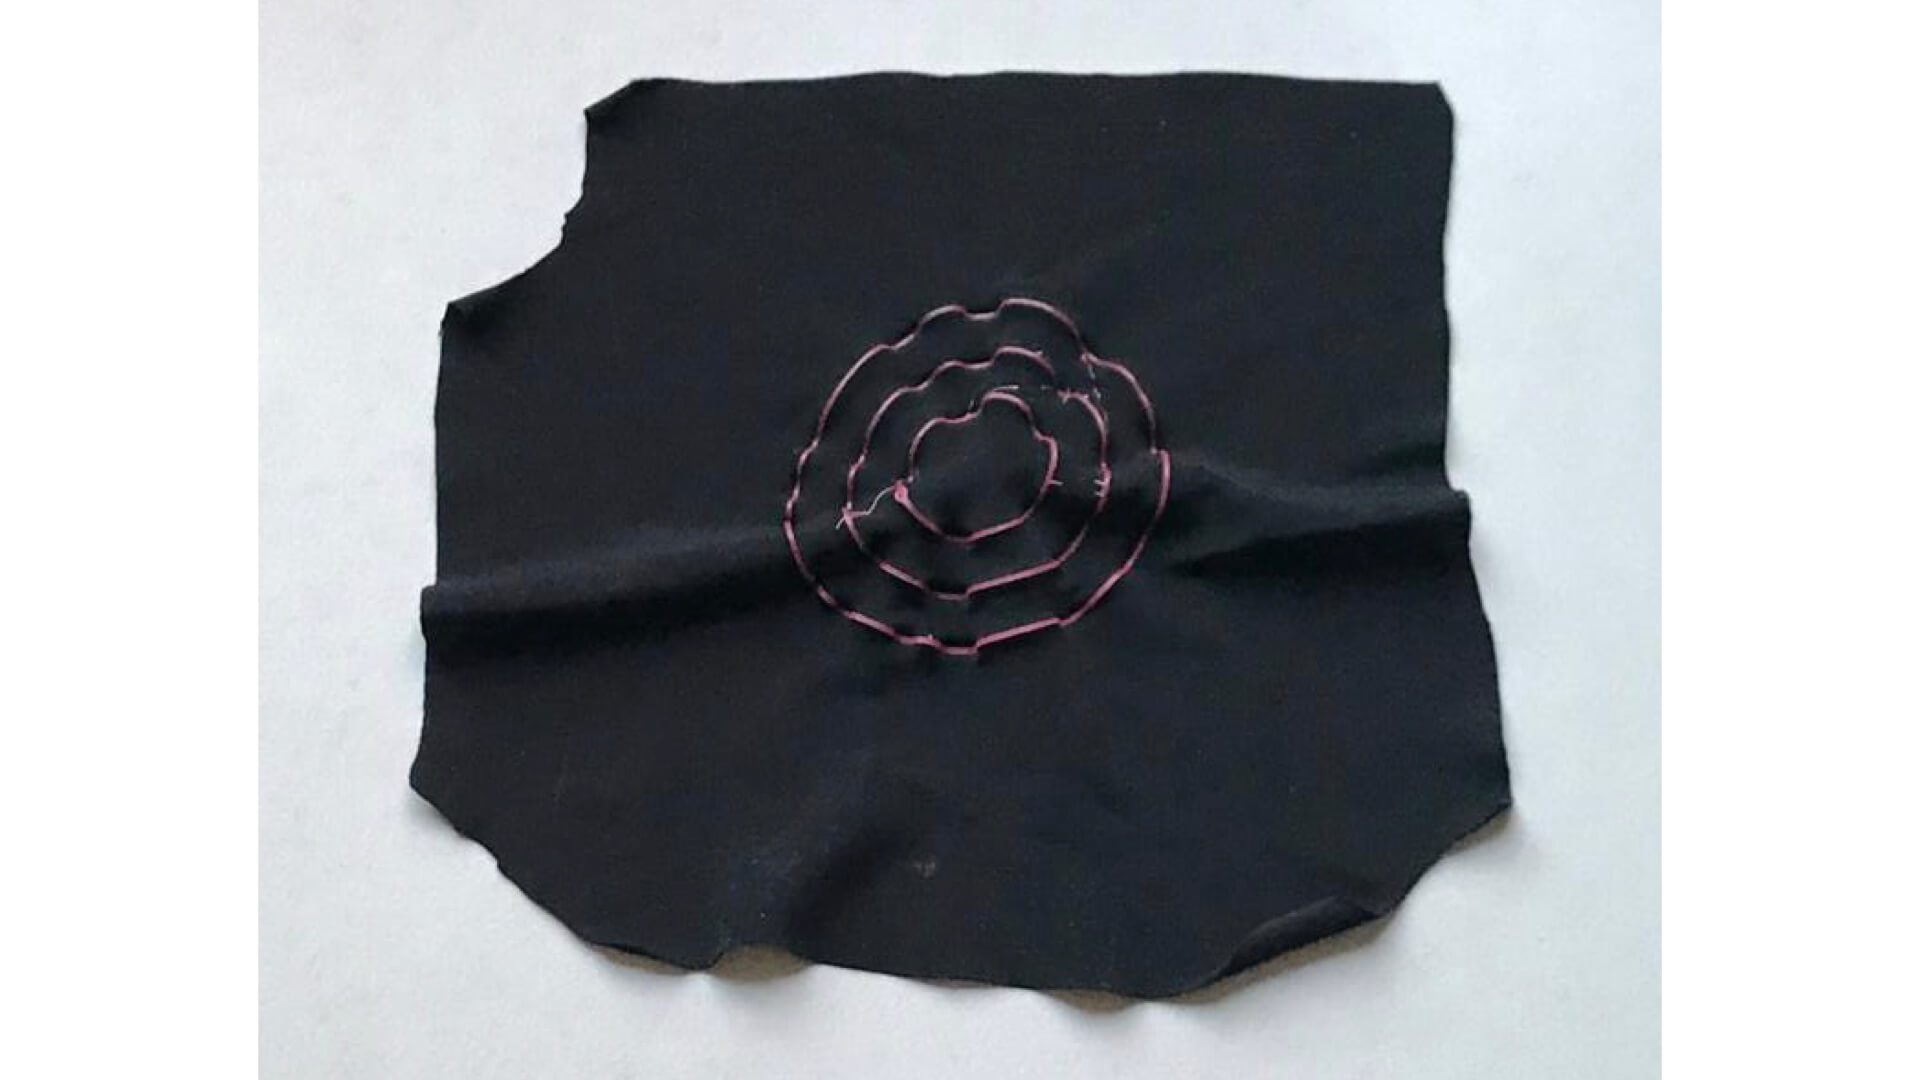
The final of the first day of testing.
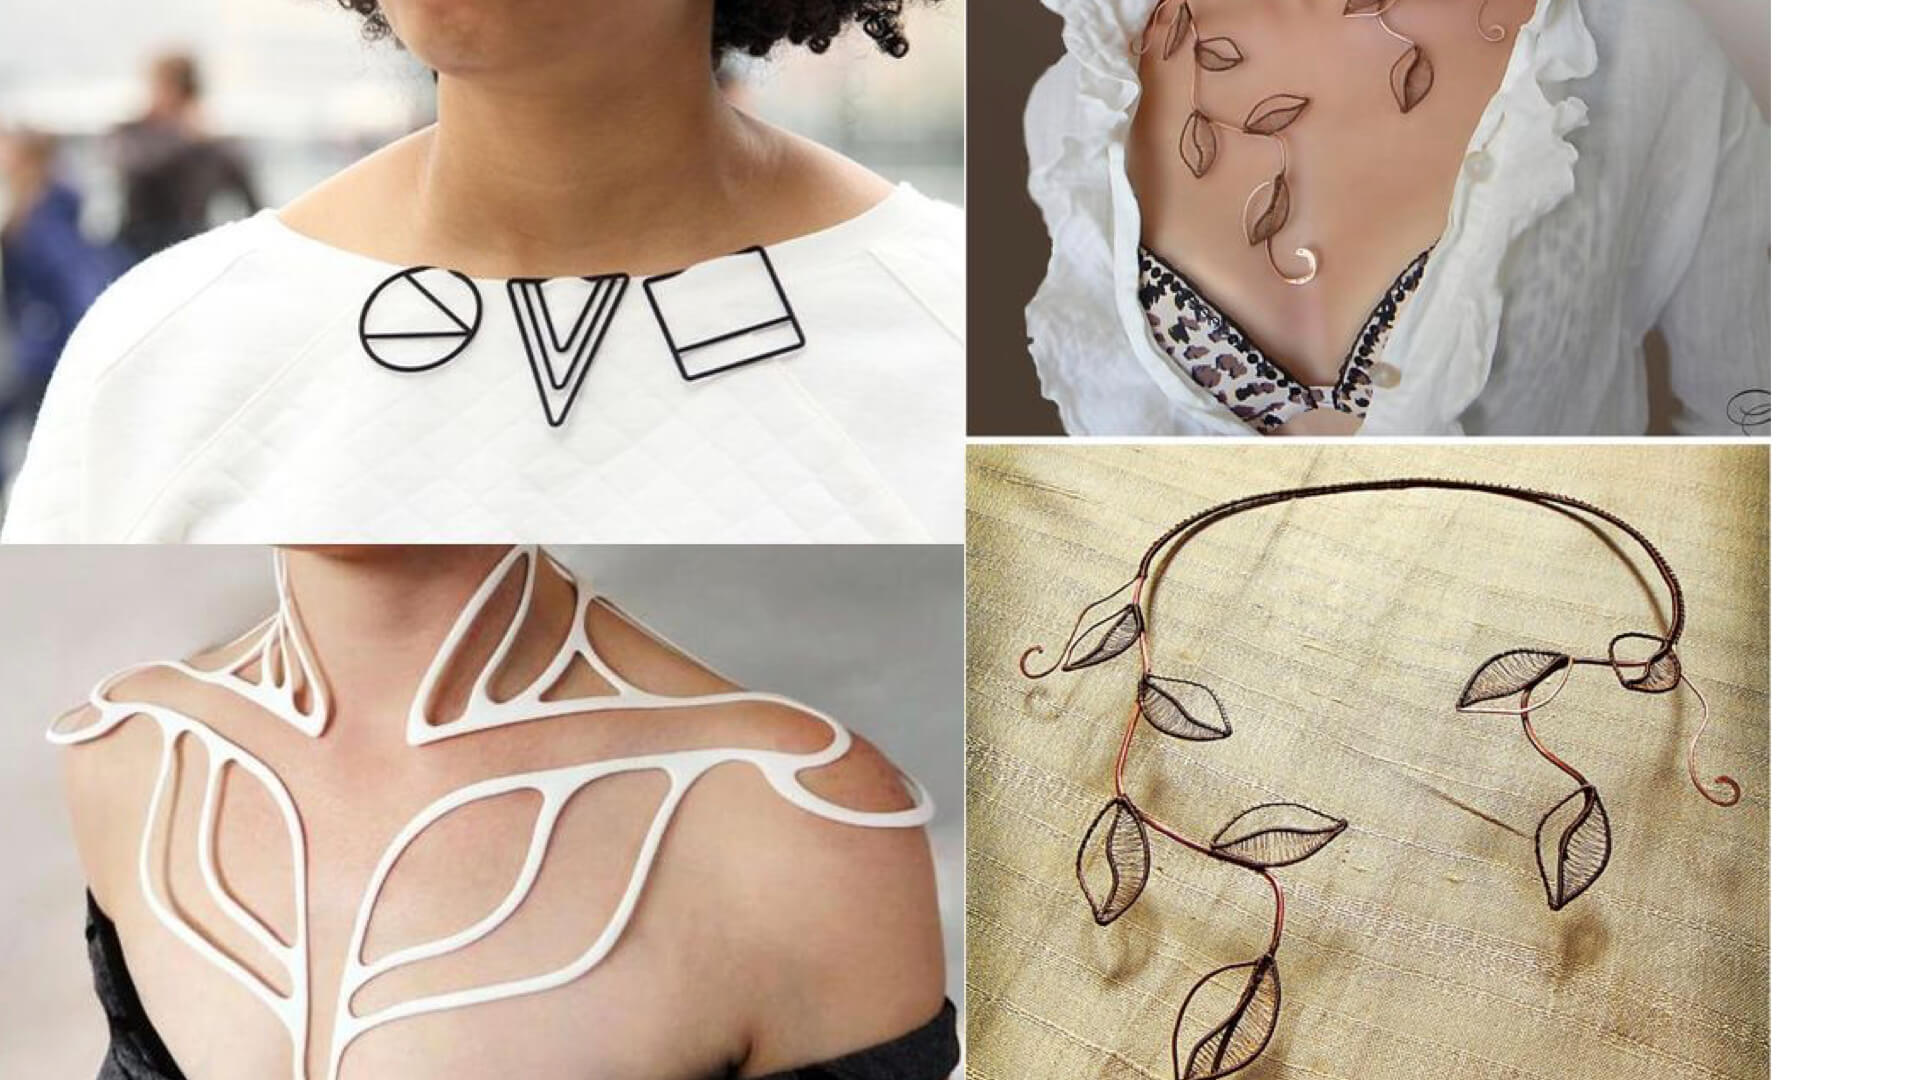
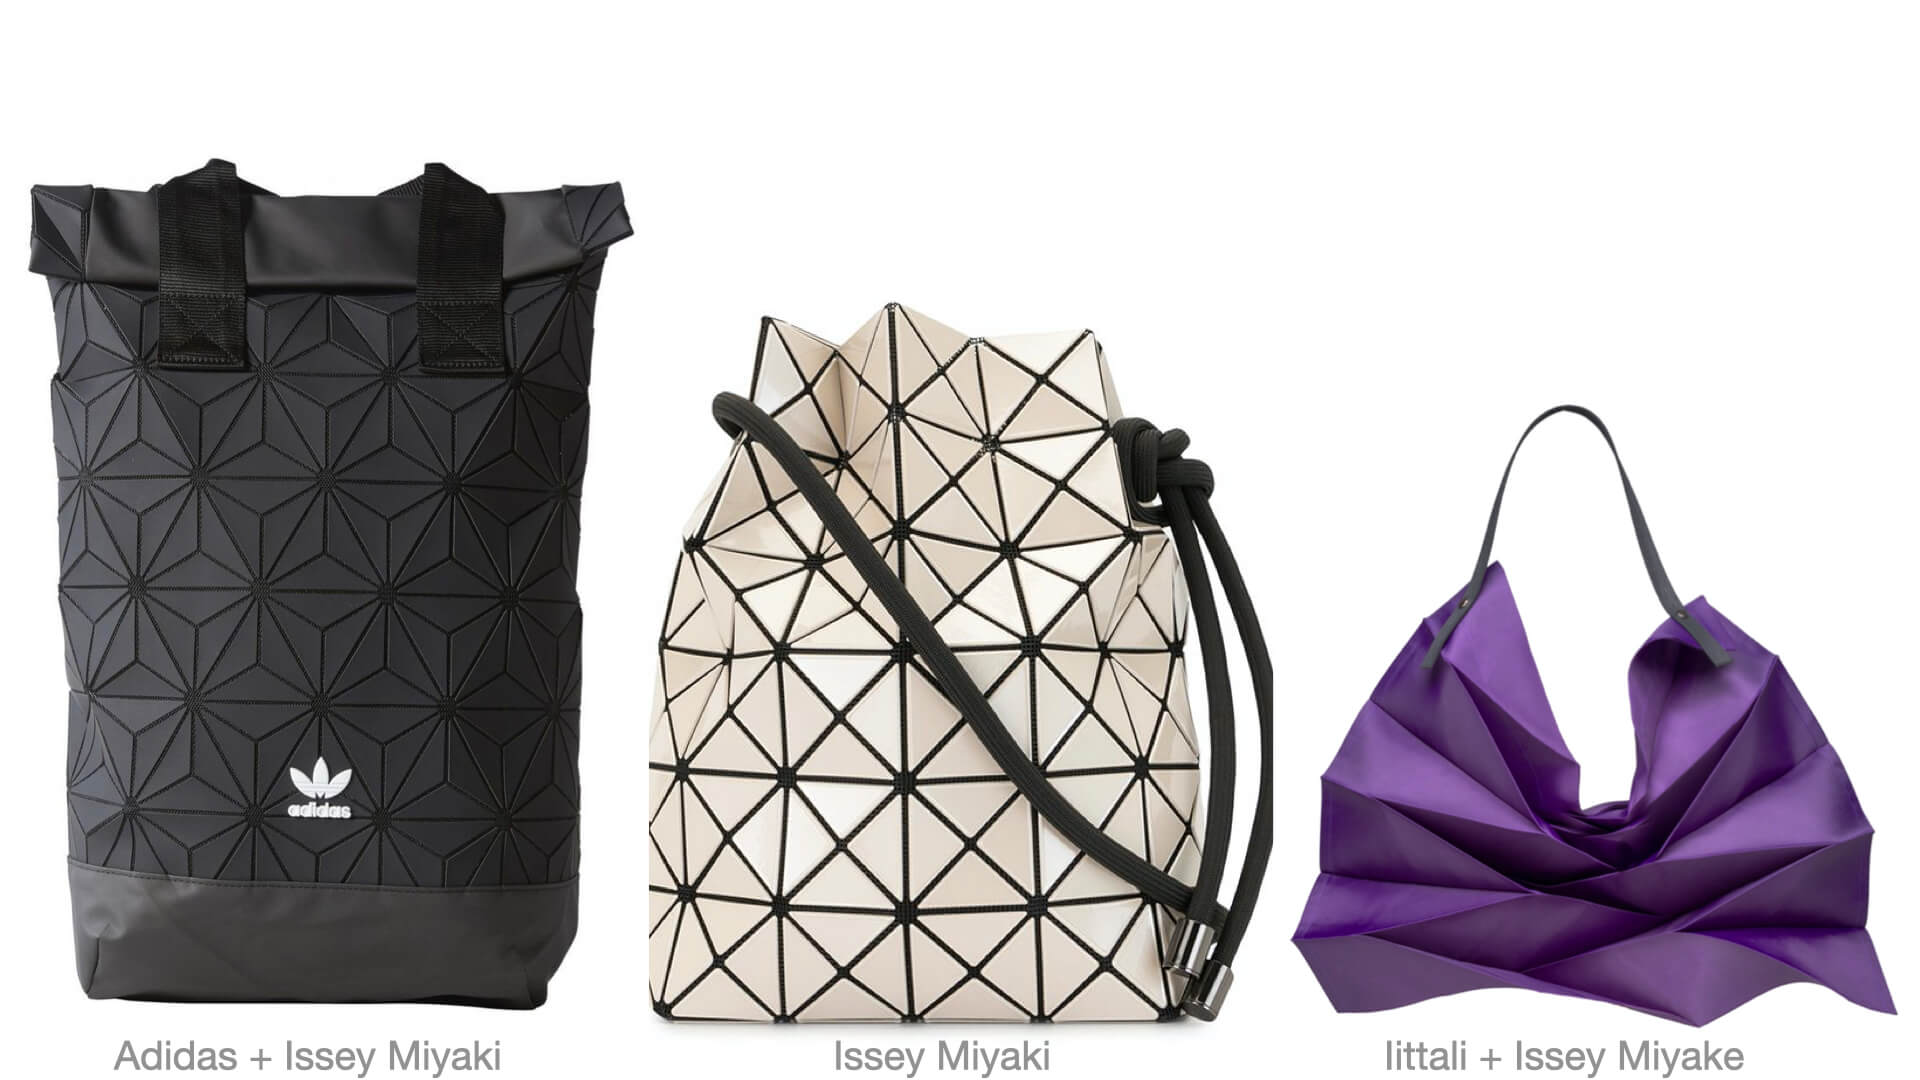
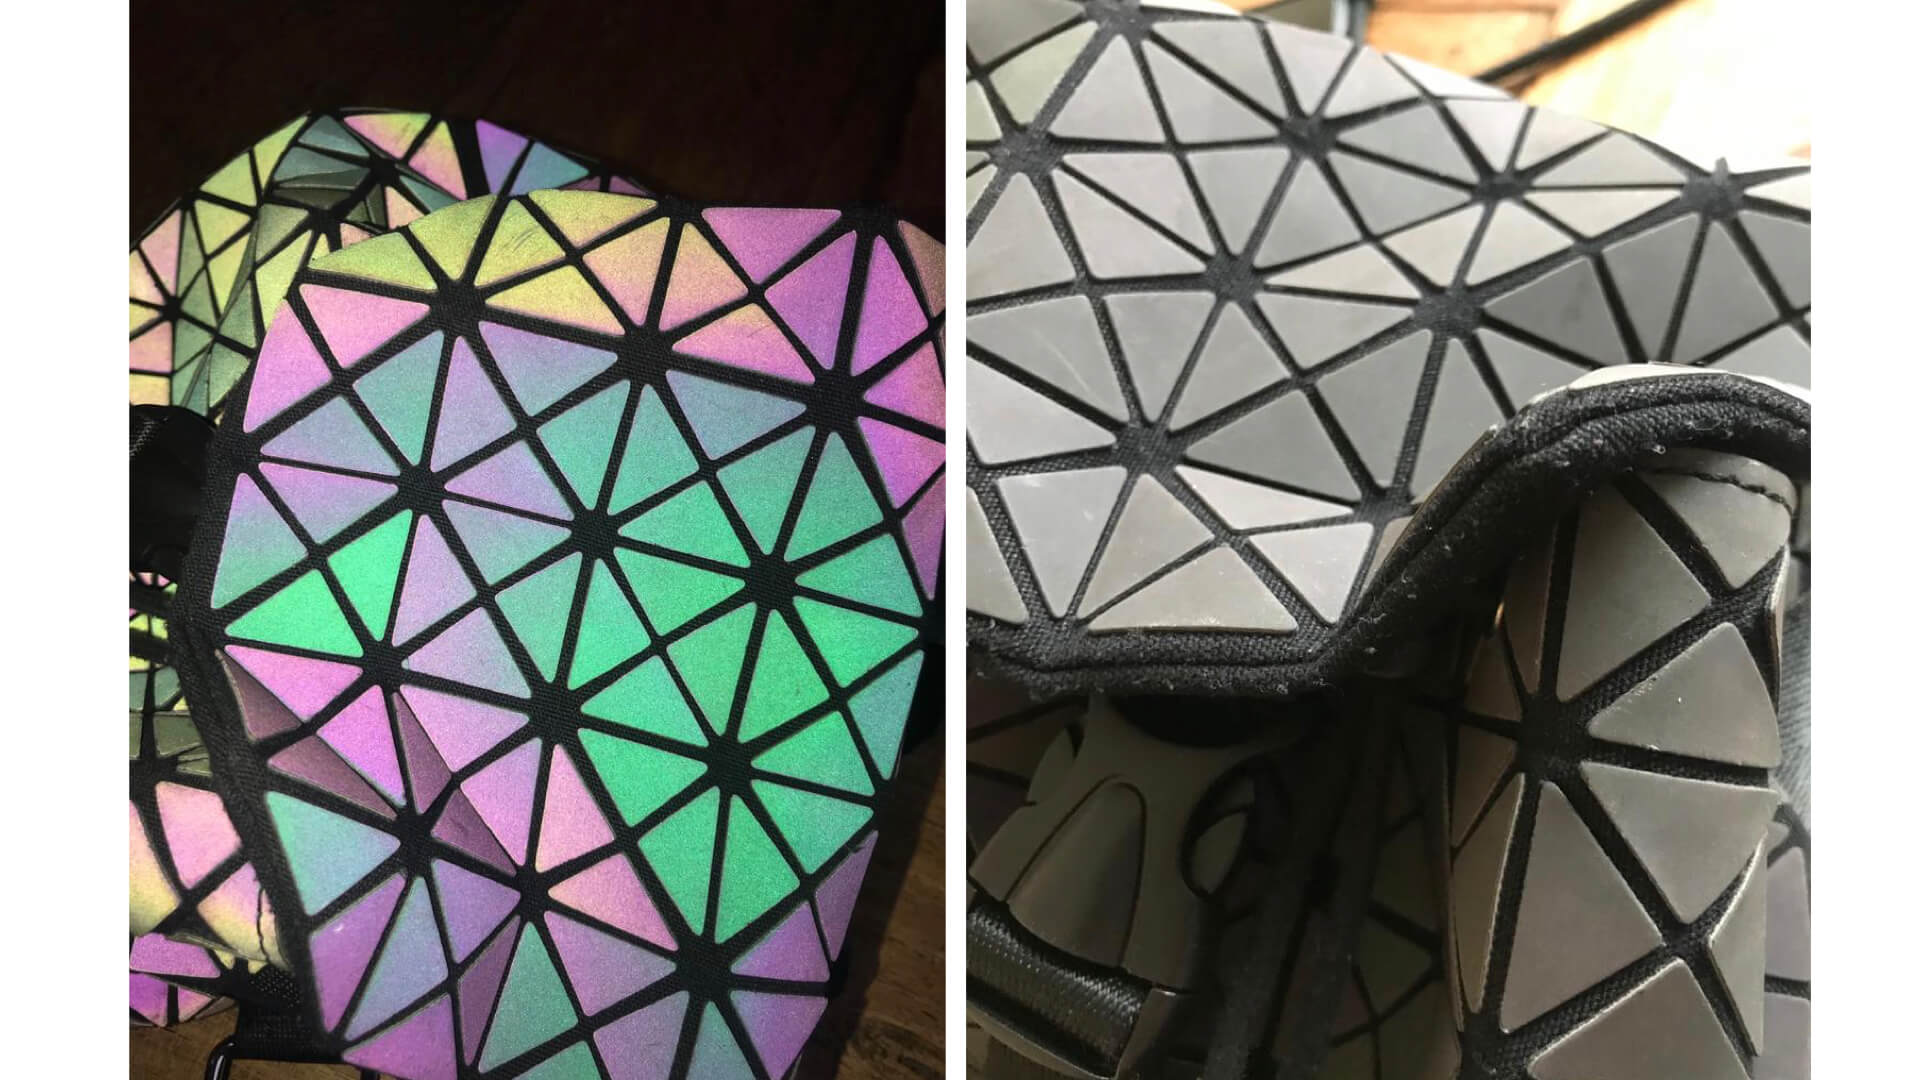
Inspiration
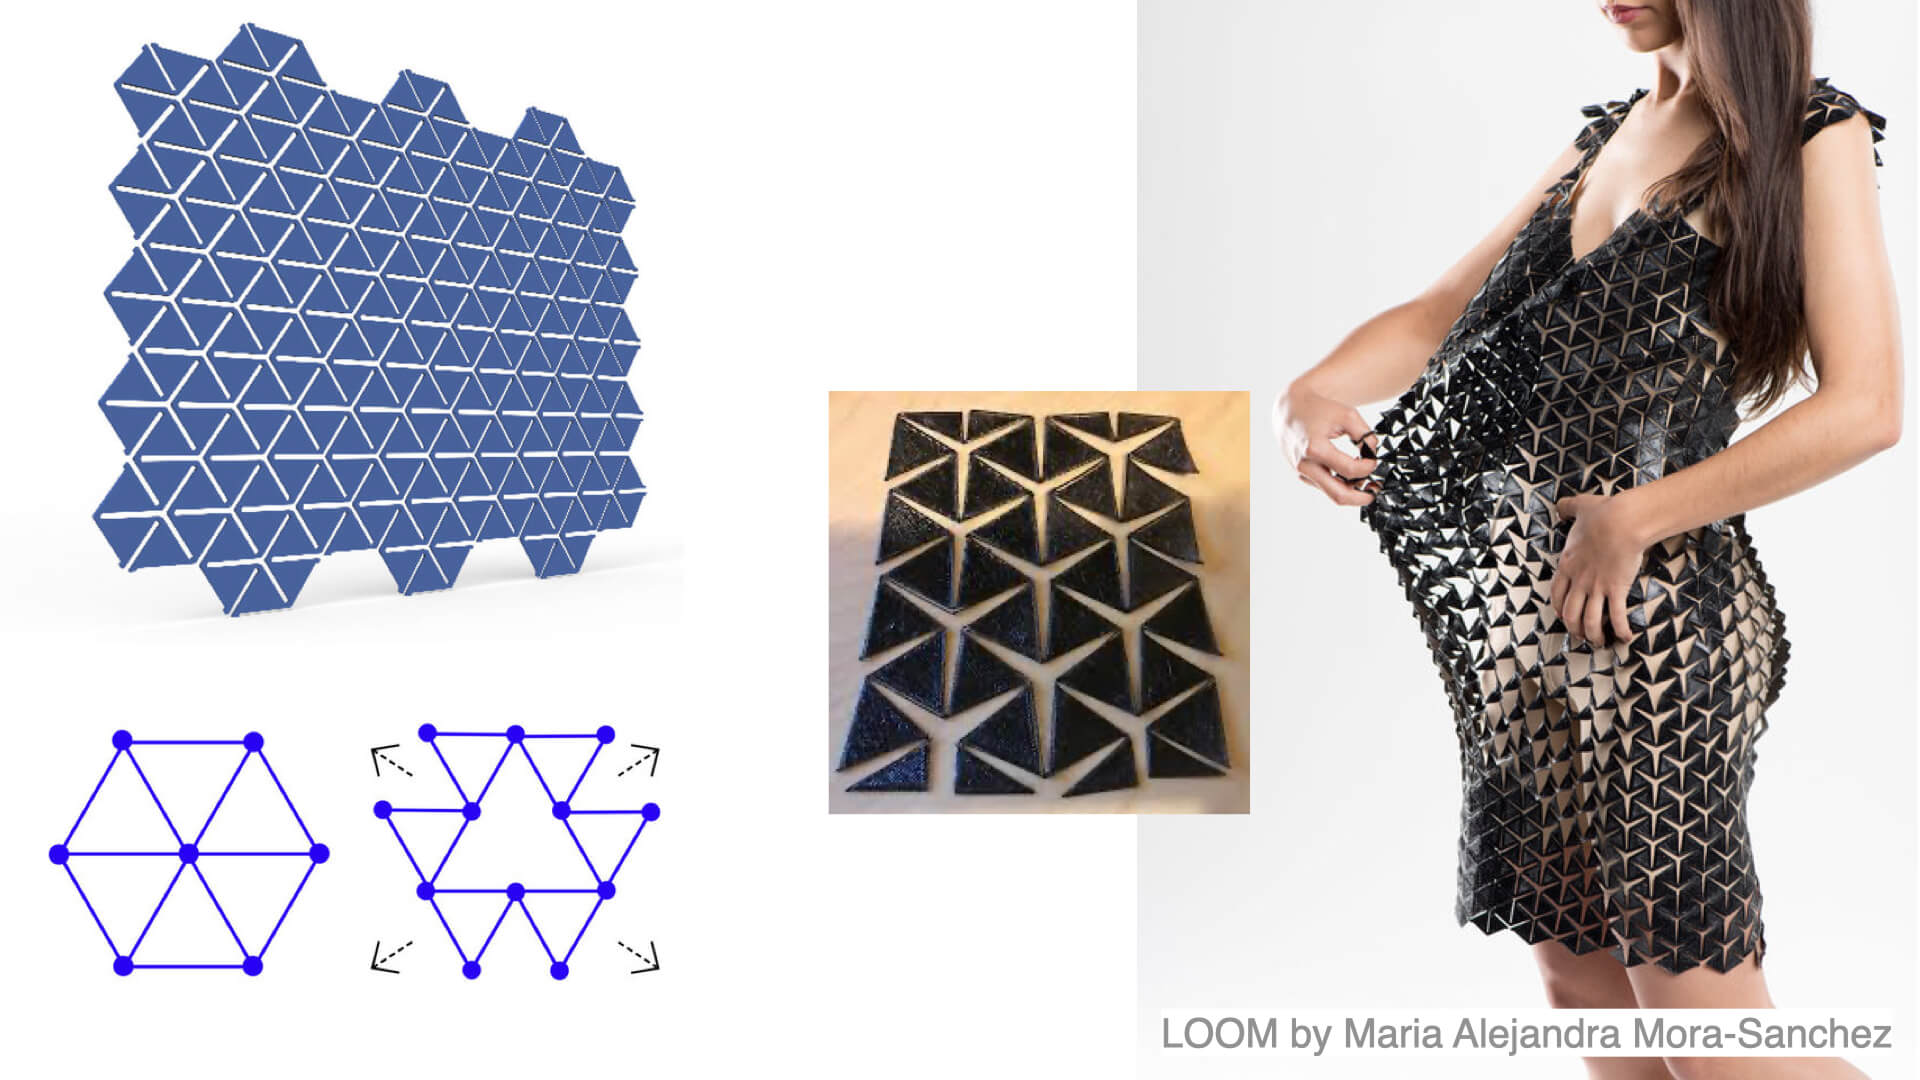
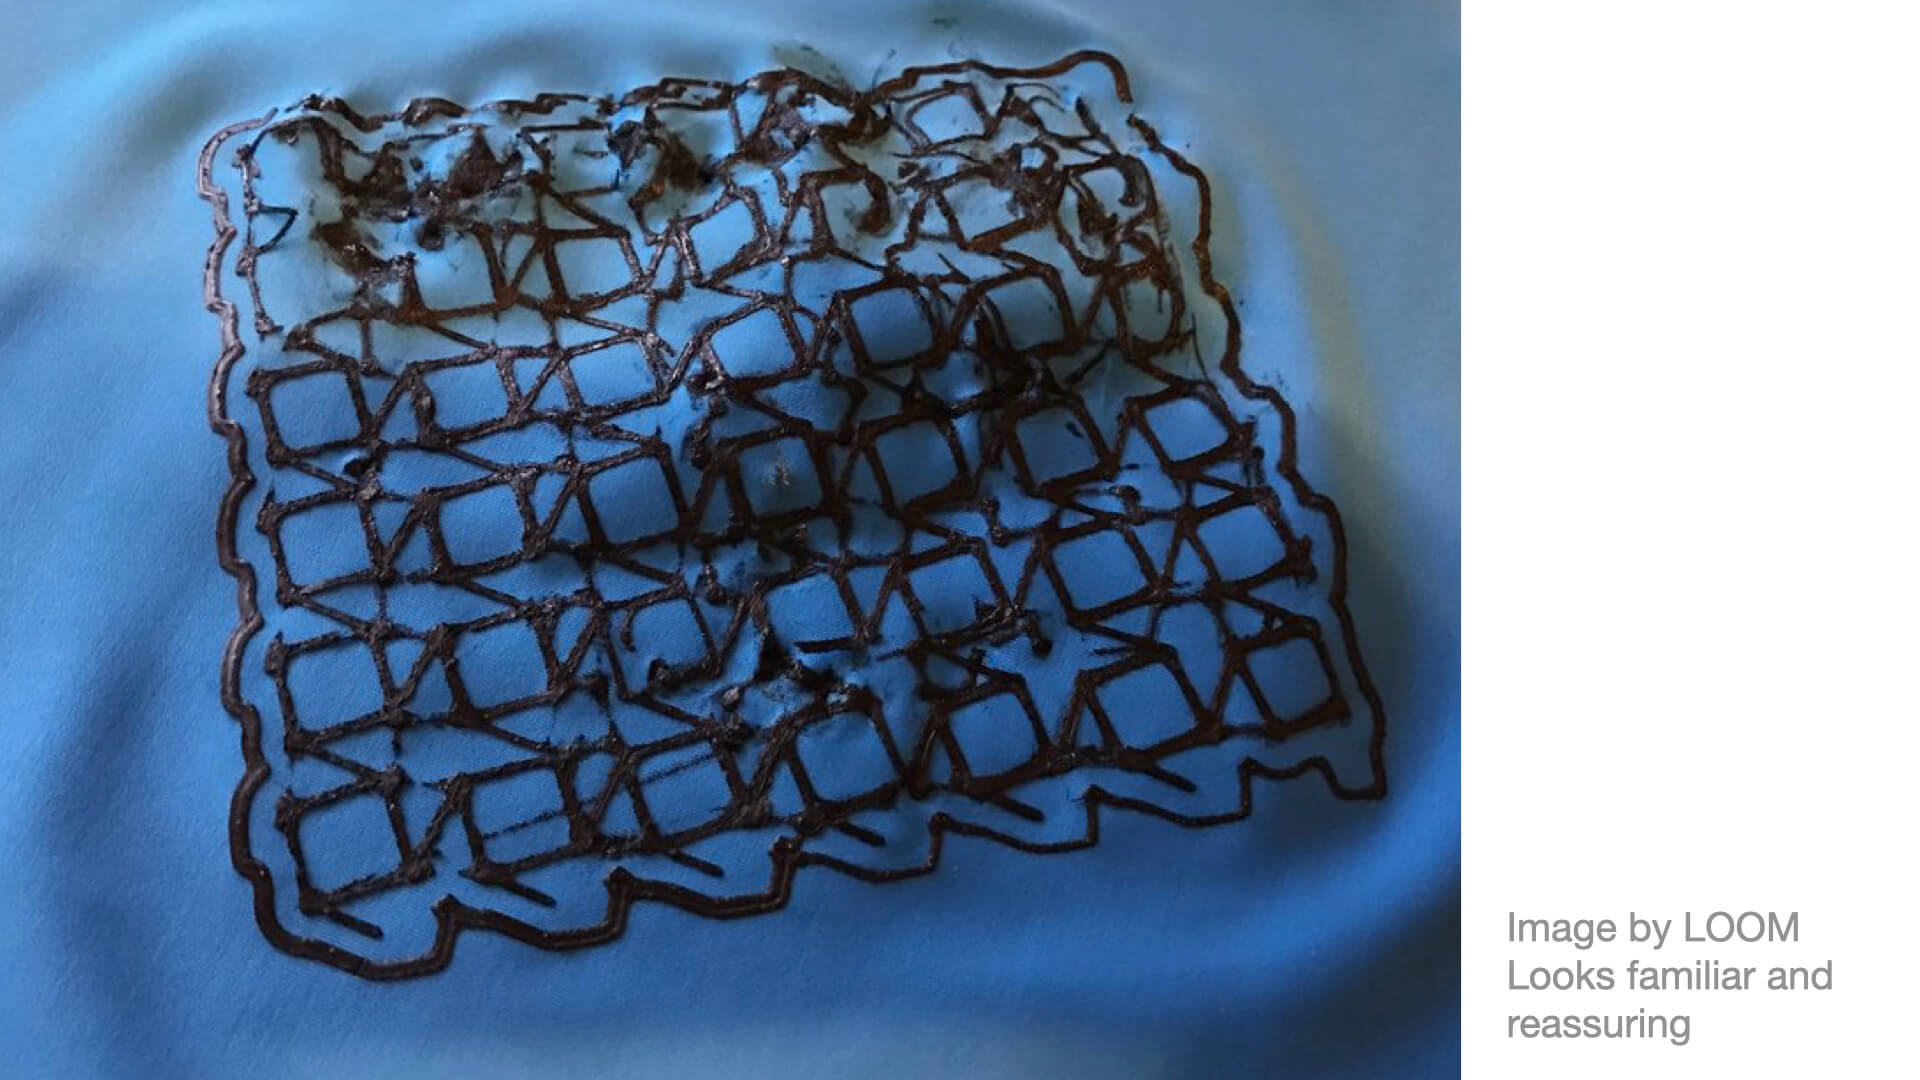
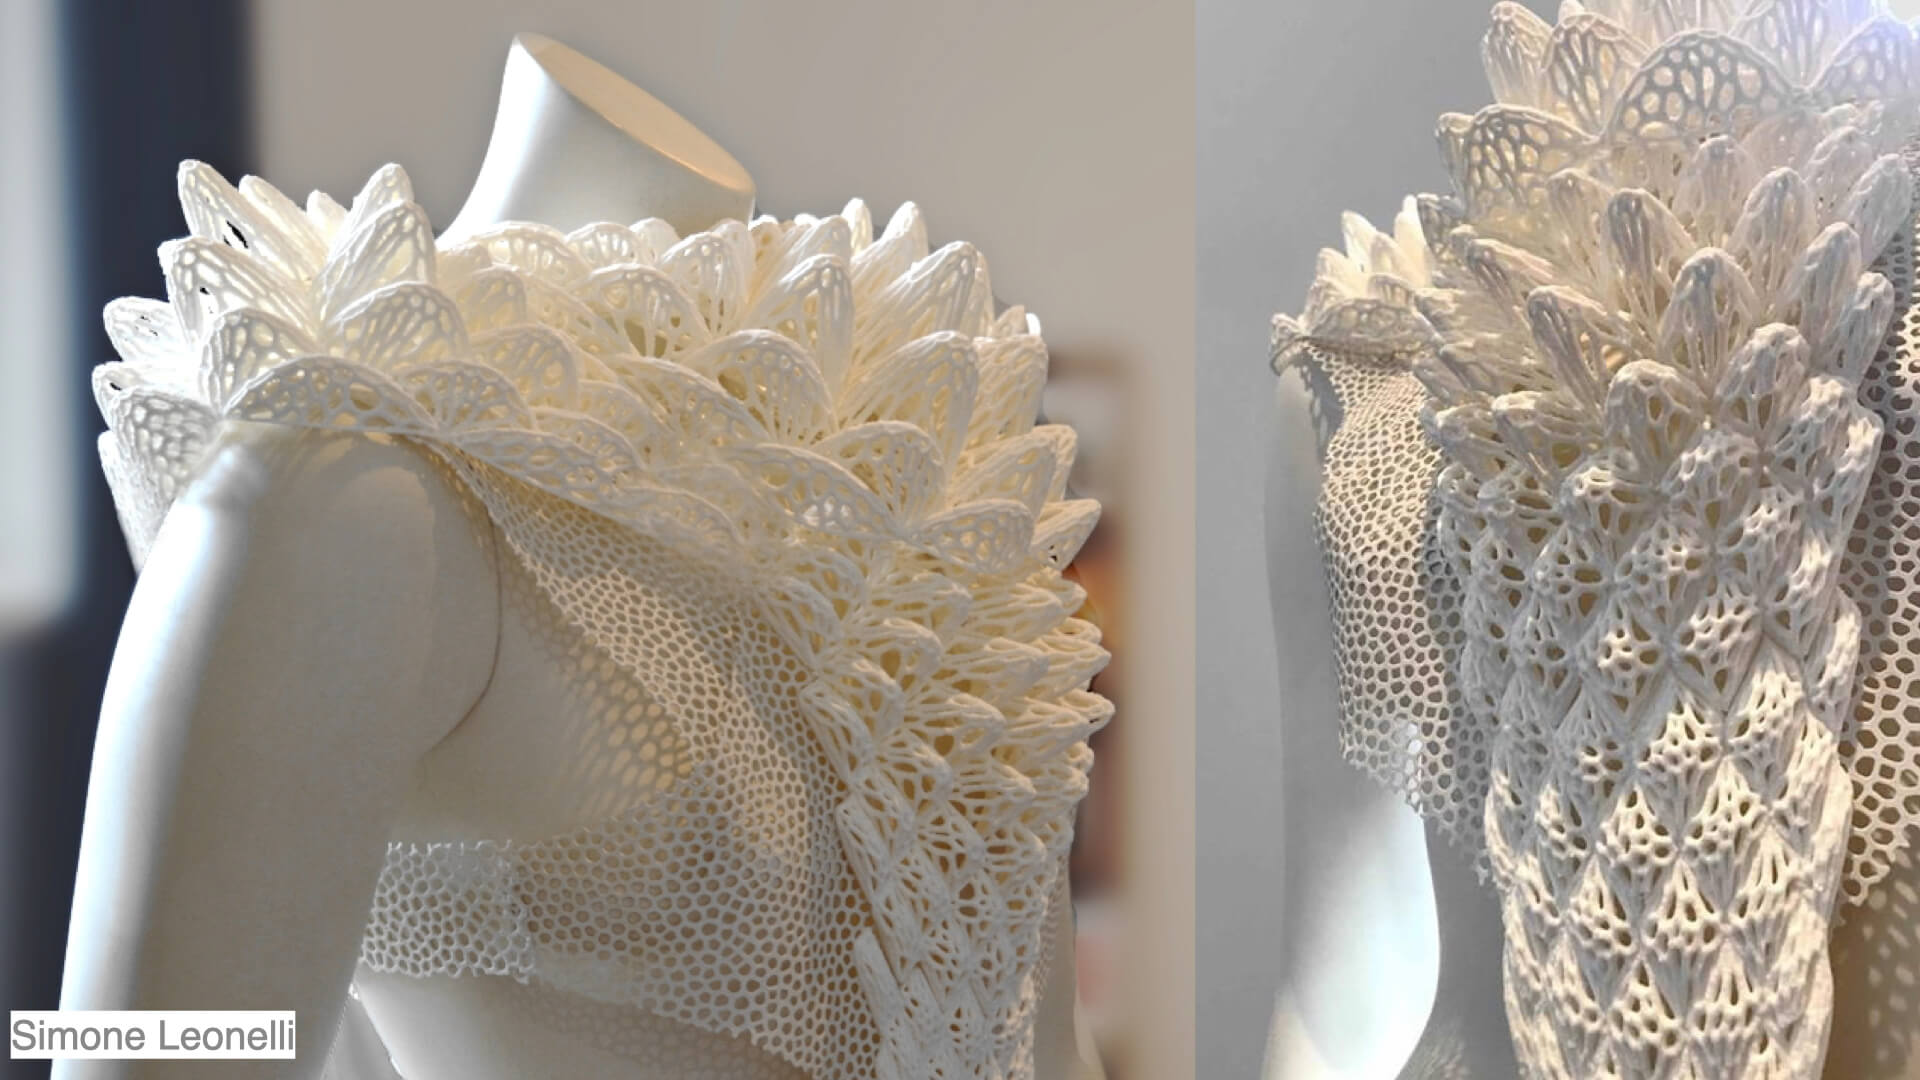
One of the thngs that I learnt this week is that it is extremely difficult to create computational couture. Anything below cannot be mastered within the time span of a week. It takes lots of time, practice and skill to accomplish anything like the examples below. Baby steps we made, nothing more.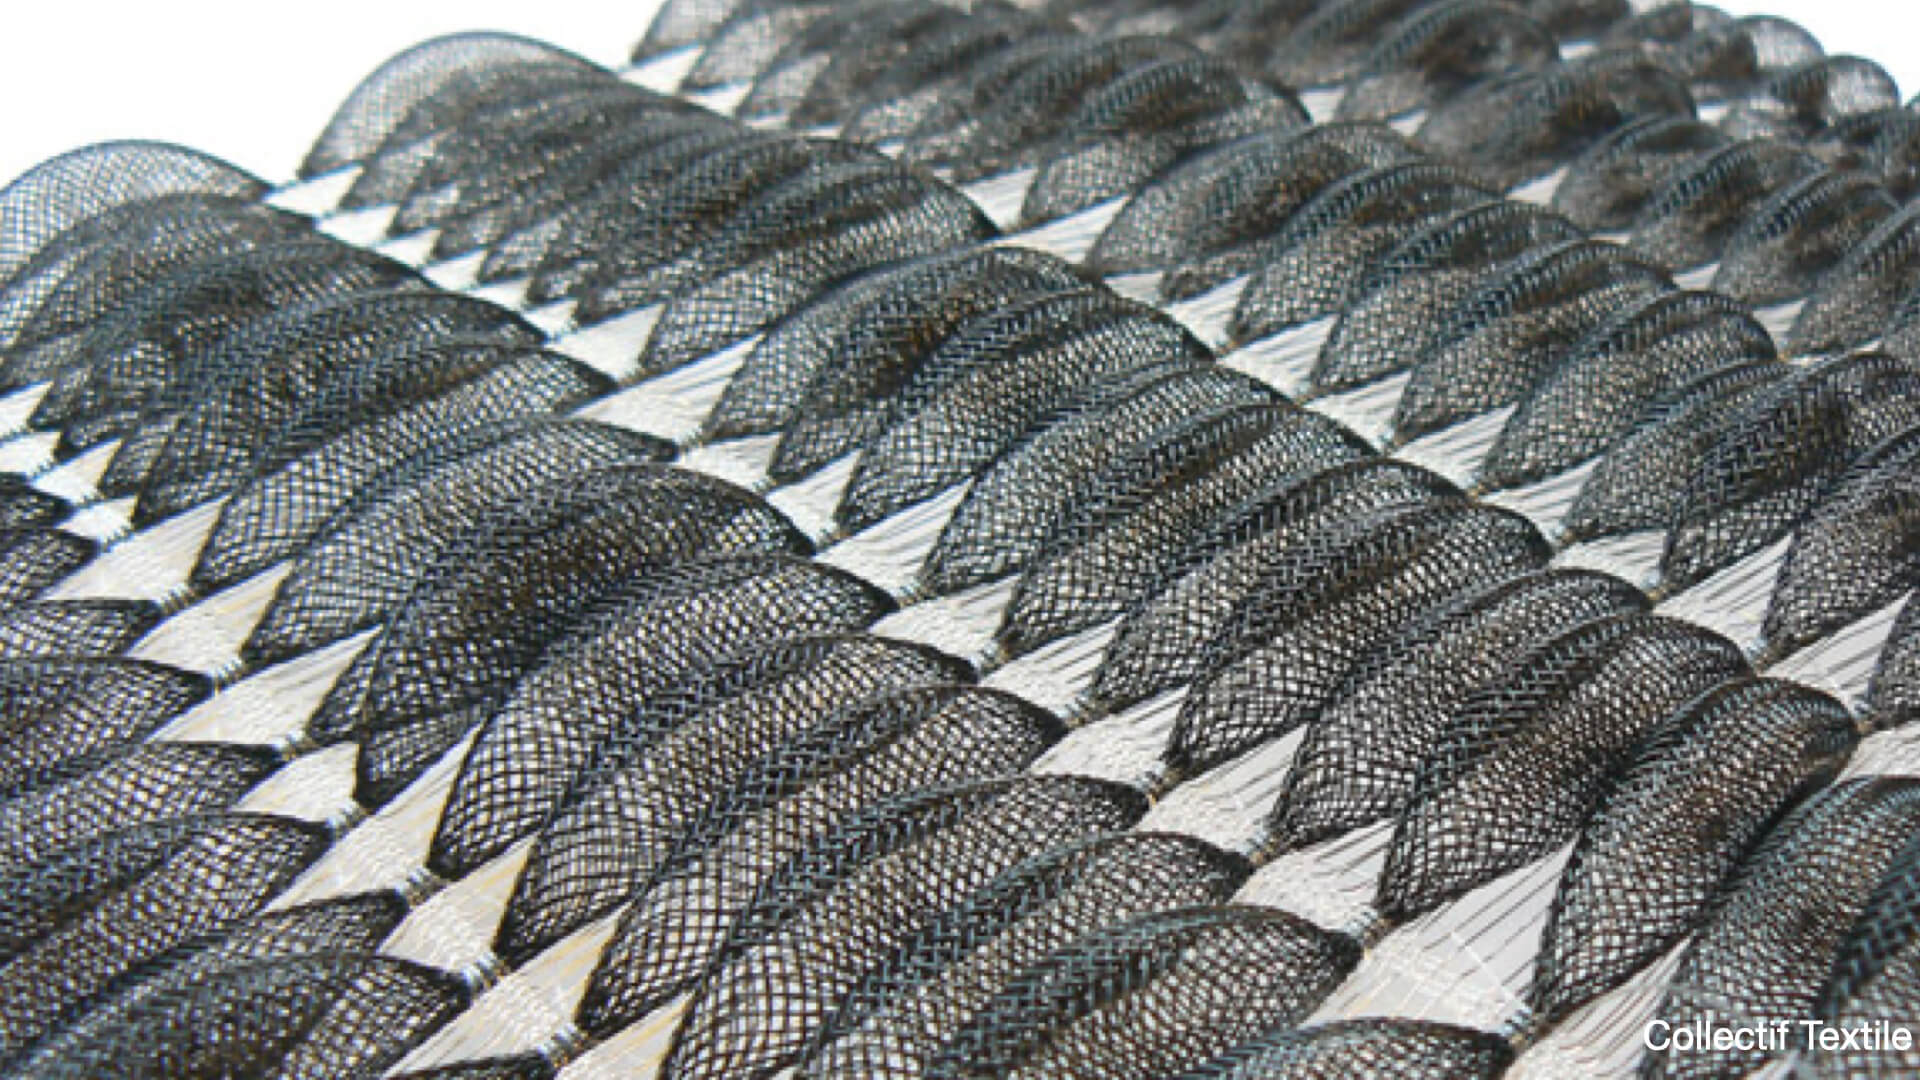

Documentation
The Grasshopper tutorial was rather overwhelming. It being transmitted from elsewhere and projected on a large screen at Waag, made it really difficult to see the commands (we were unfamiliar with) and execute as the instructions progressed. At a certain moment we collectively gave up and decided to watch the tutorial at a later stage. After realising there were 5 hours and 45 minutes of tutorials to watch, I gave up once again and started looking for a more efficient way to learn the Grasshopper basics I needed for printing on textiles.
Test printing
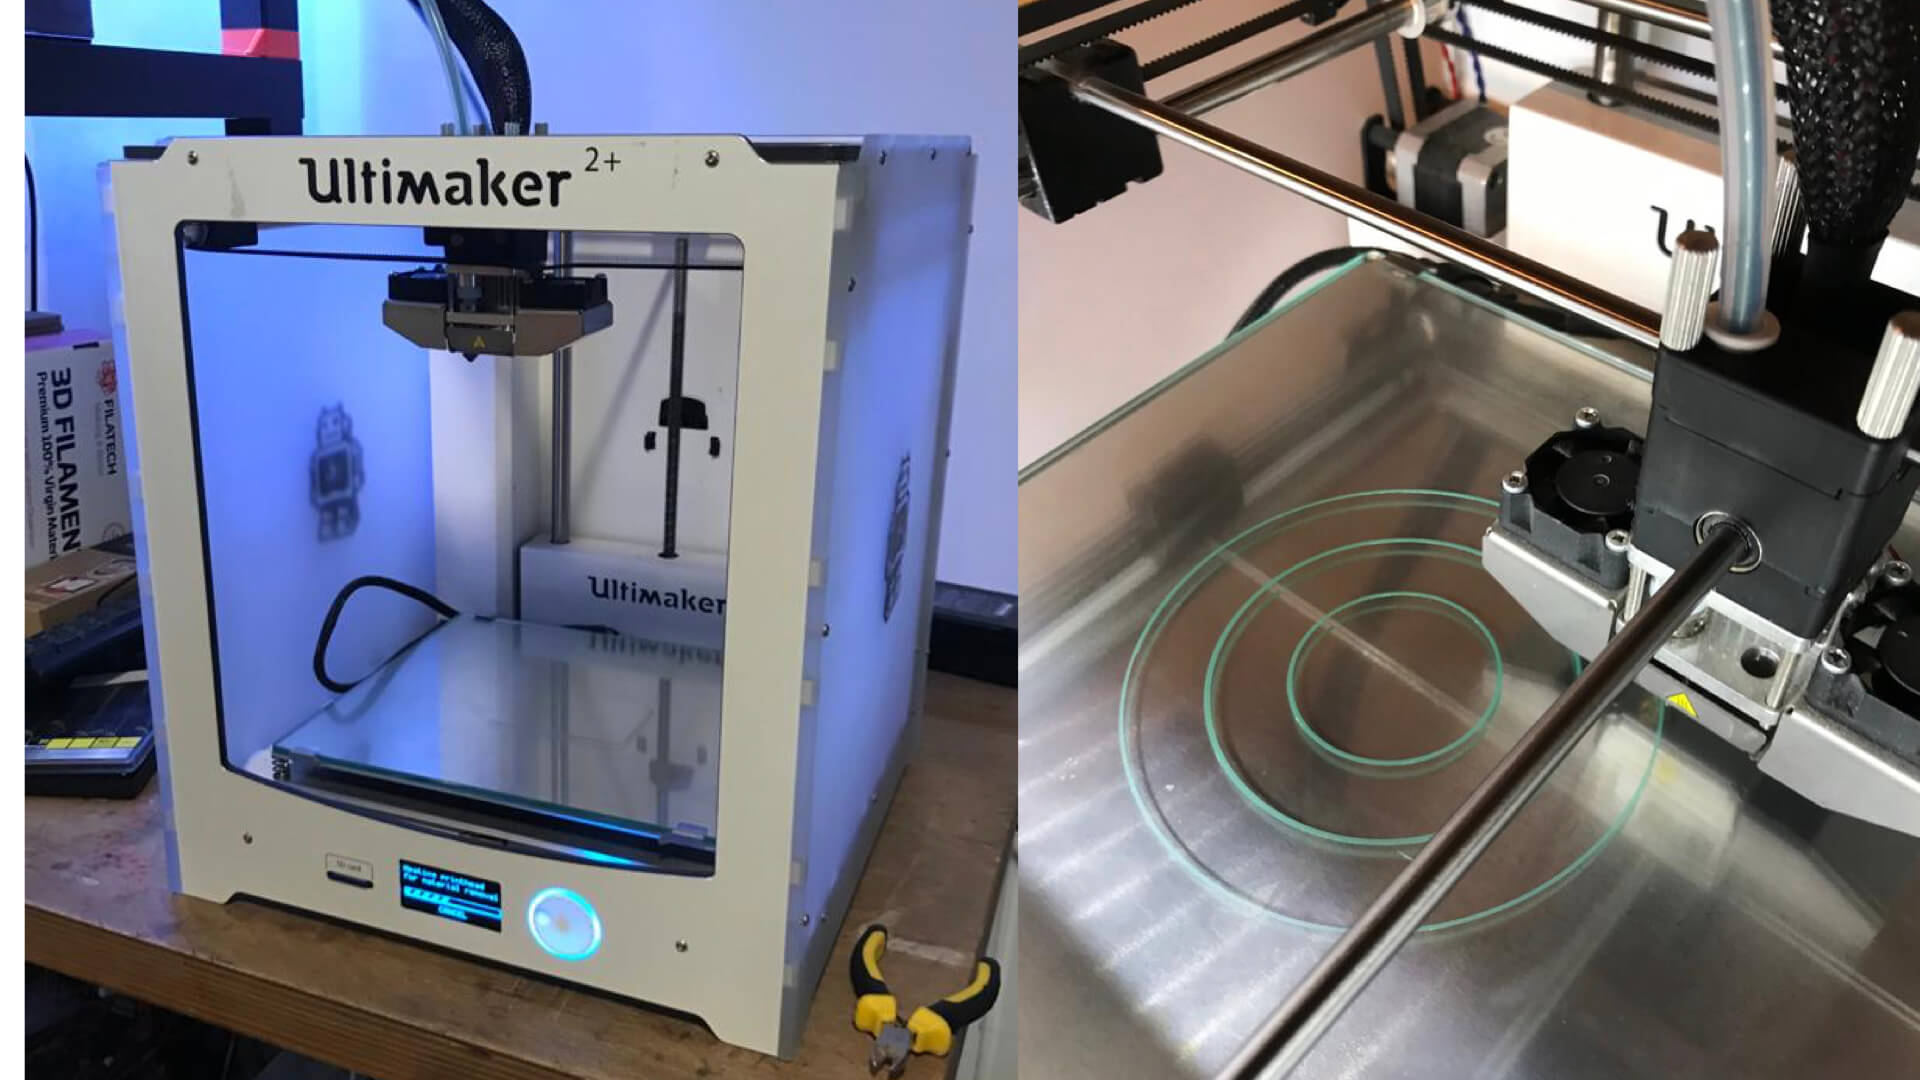
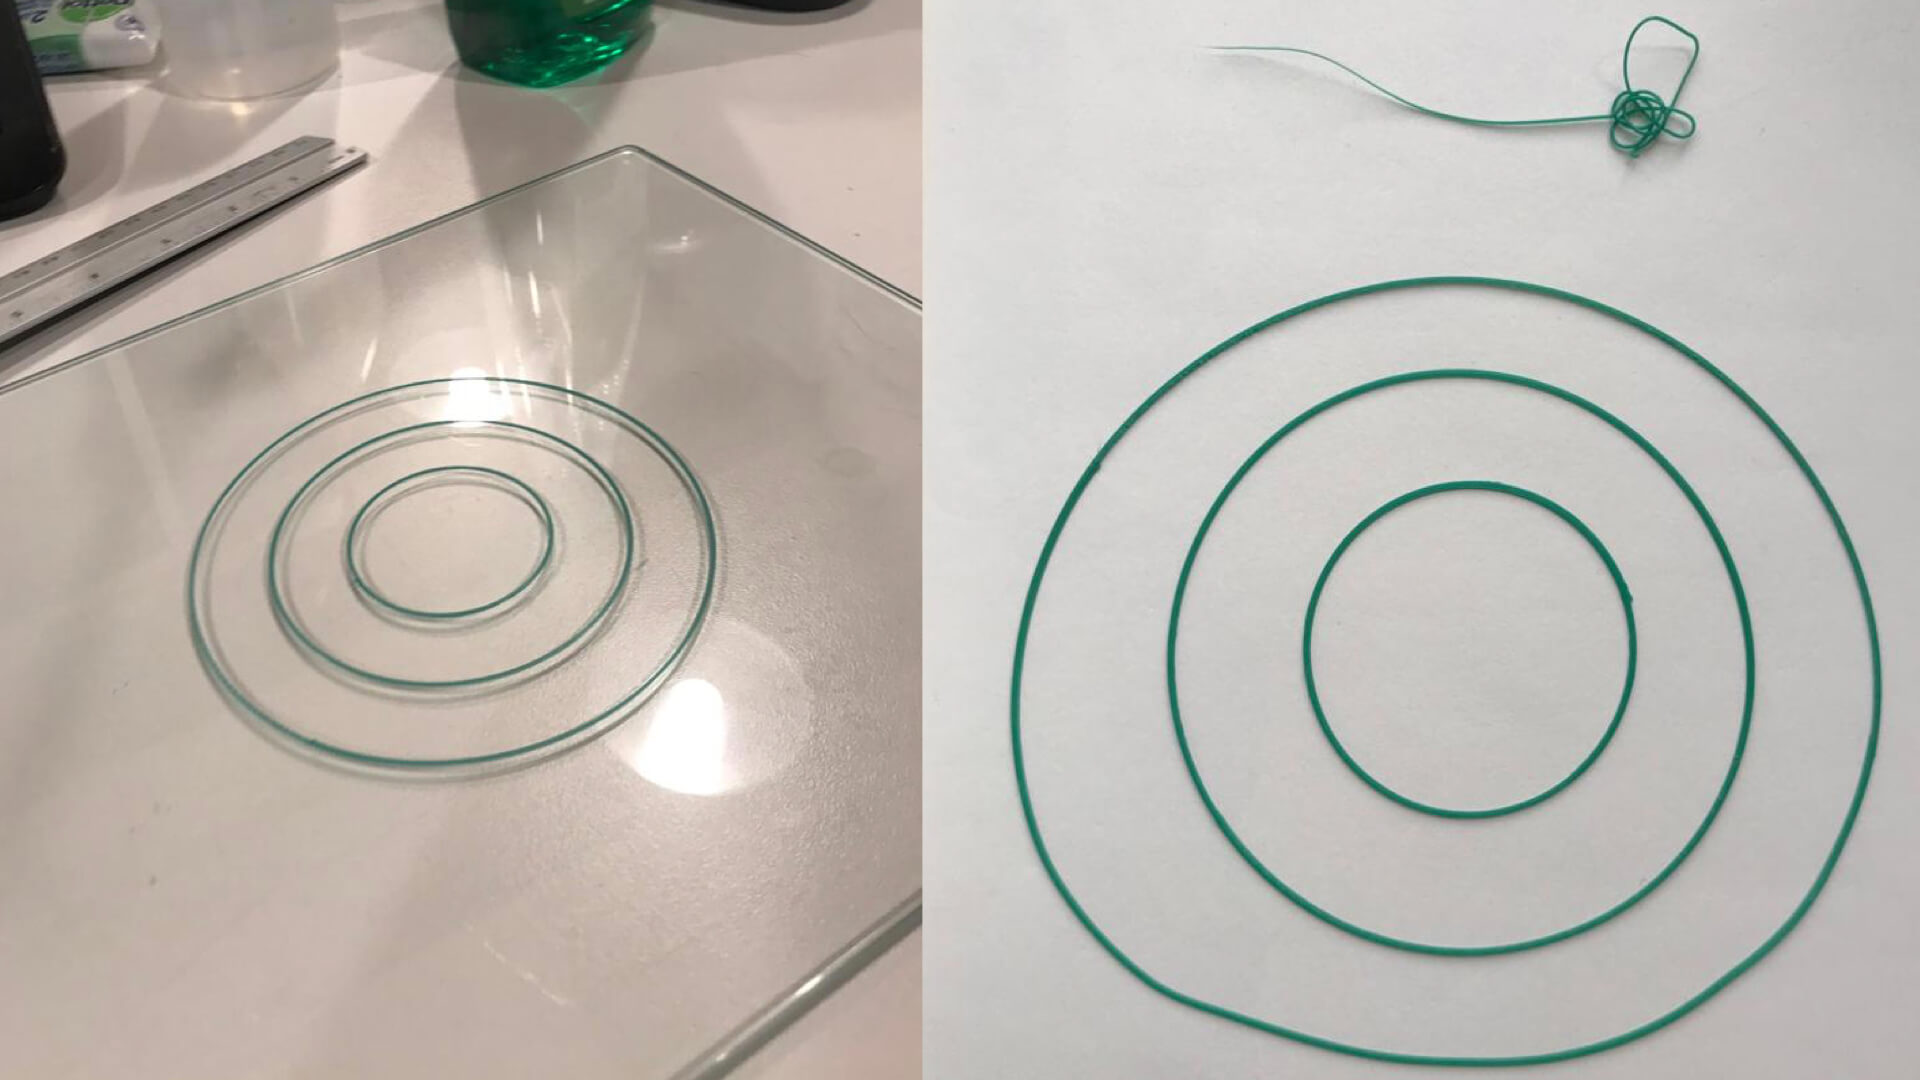
There were some problems with the Prusa printer (nozzle blocked?) so we concentrated on getting the cute little Ulitmaker 2+ to work. The filaments (printing matrerial), however, were not known, so we needed to figure out which one to use. We started with the green filament on the printer bed, without fabric, just to see how this would turn out. I immediately realised that this filament was rather sturdy and perhaps also not flexible enough to make the streched fabric 'shrink'.
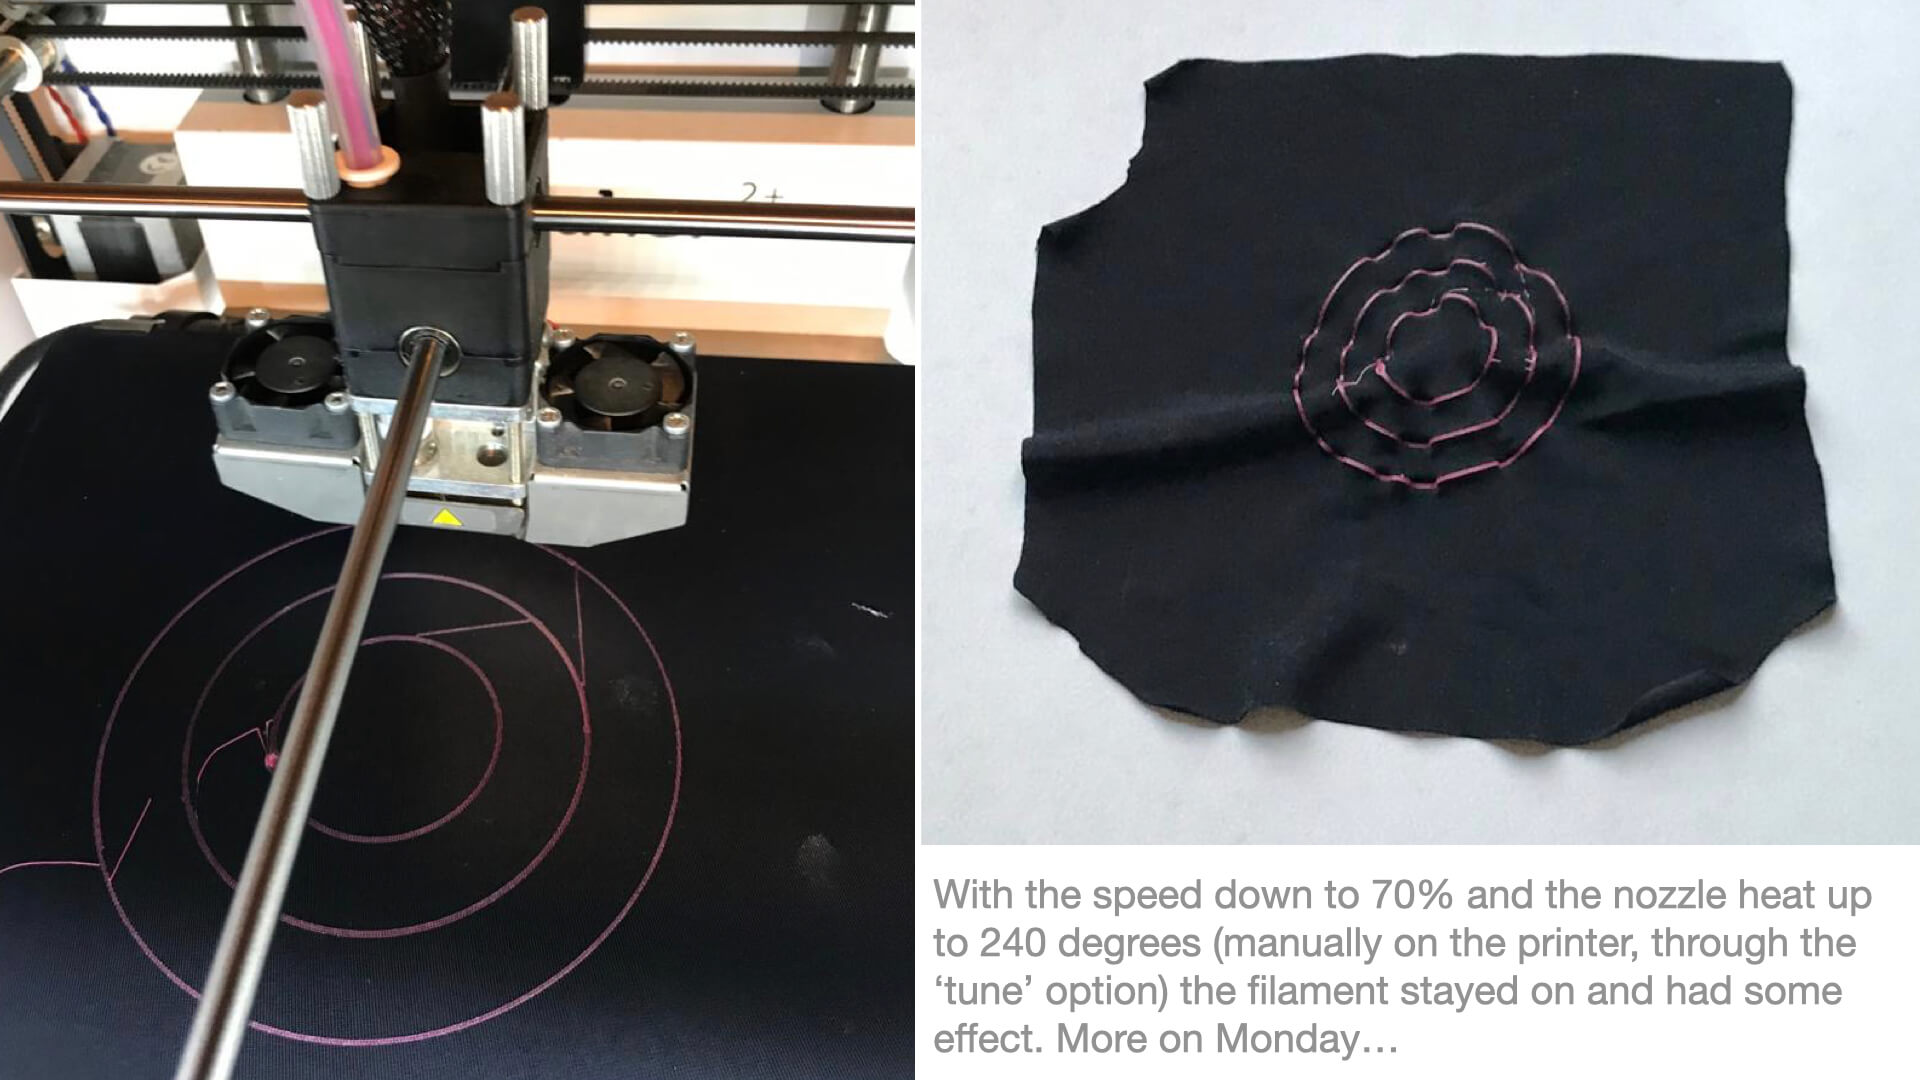
I thus used a more flexible pink filament and printed the three circles on a extremely streched synthetic jersey. The result is okay, I think, but not that spectecular yet.
Mastering (ahum) Grasshopper
During the weekend, I sat down, determined to get myself going with Grasshopper. I felt very demotivated, however, because the tutorial I had started to watch provided instructions for a rather complicated 3D shape. Since I was going to print on fabric, I felt I was in need for a different tutorial. Some searching online brought me to the, almost, 2D tile examples. I chose the Truchet Tiles and was very proud of myself when I found that I succeeded in building a series of these tiles in Grasshopper-Rhino. Below, you find the step-by-step builds that I made in Grasshopper, using this thirteen minute tutorial, which took me just over two hours to complete...
I then openend the file in the Ultimaker Cura and saved, dreading the hours I would be sitting next to the, nevertheless still very cute, Ultimaker.
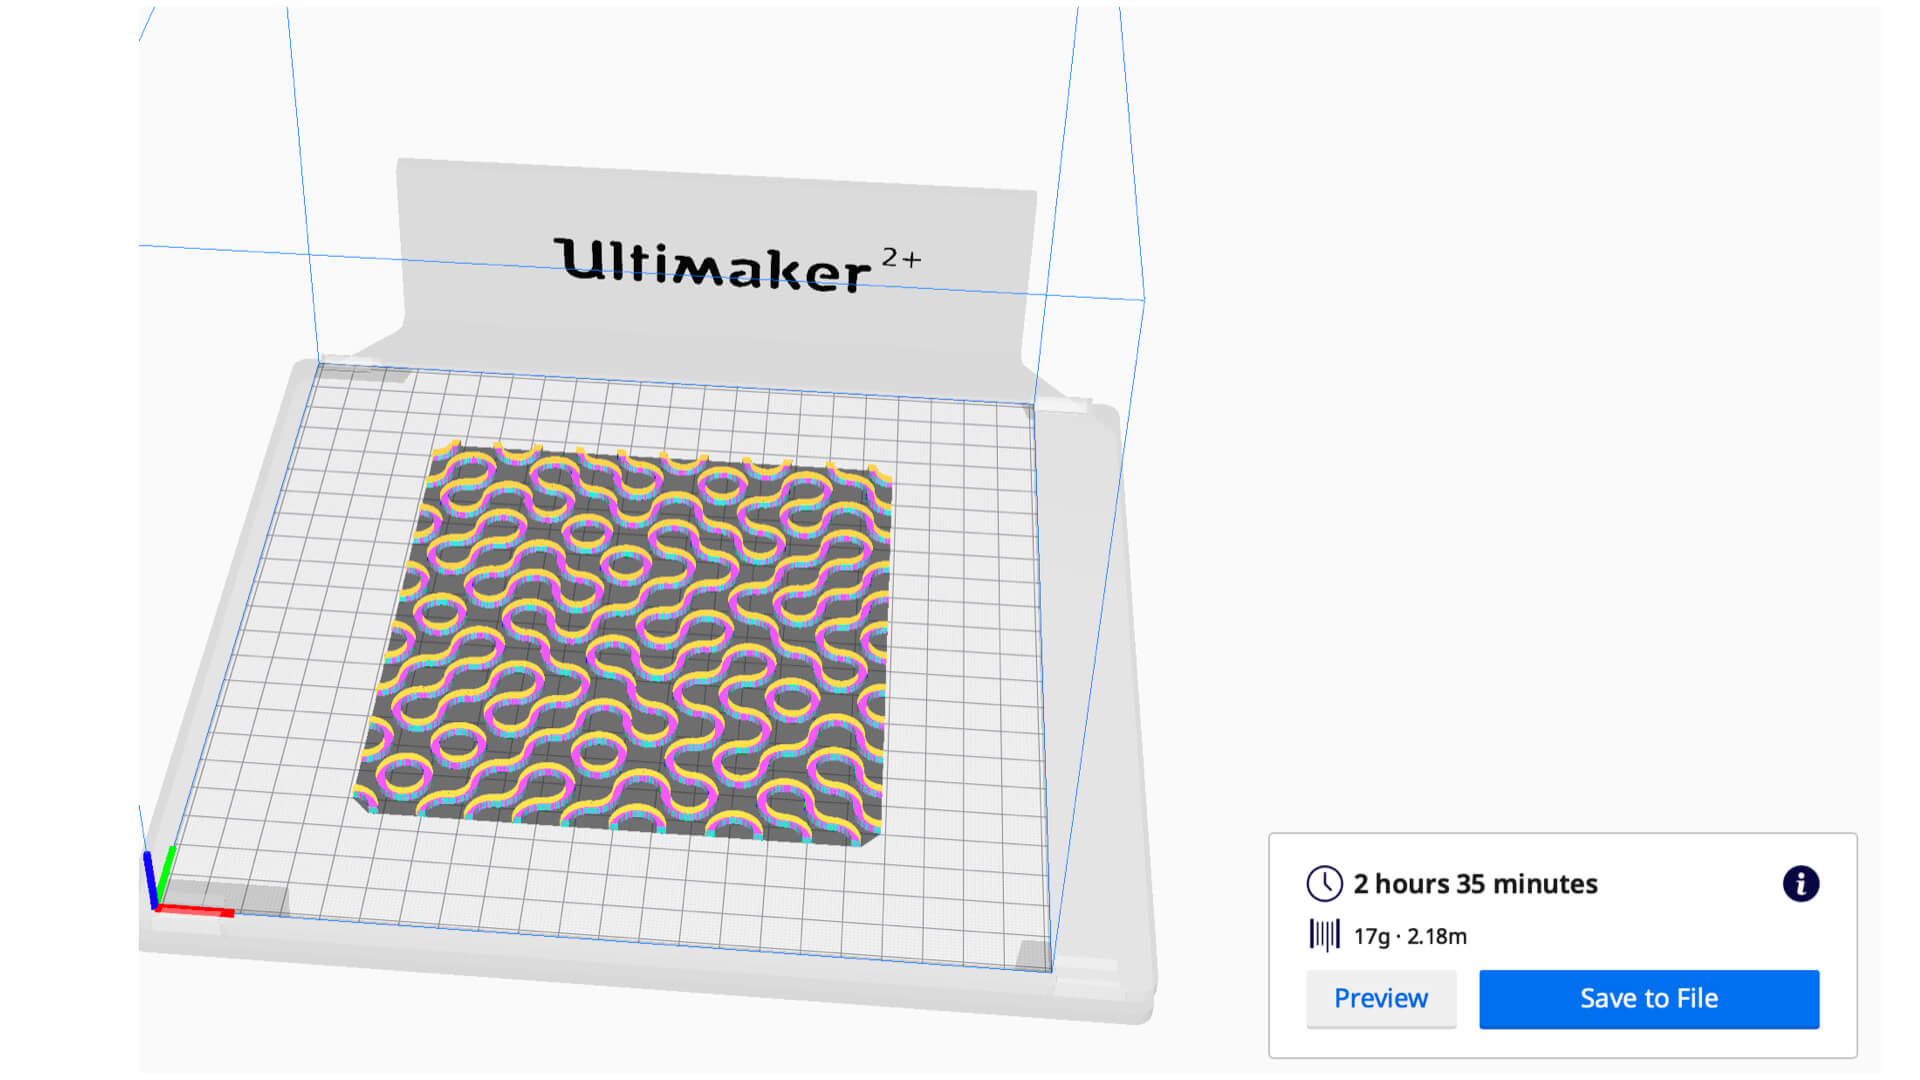
Friends and helpers are luckily never far at Waag, so Tuesday afternoon, as this 'week' was almost ending, I managed to get some help in downsizing my files and was left with a mere 35 minutes of printing.
I selected some pretty red velvet and securely attached it to the bed with tape. Not forgetting to cut away the side corners. The velvet is rather thick and not cutting the corners off at the back, would have surely caused calibration problems.
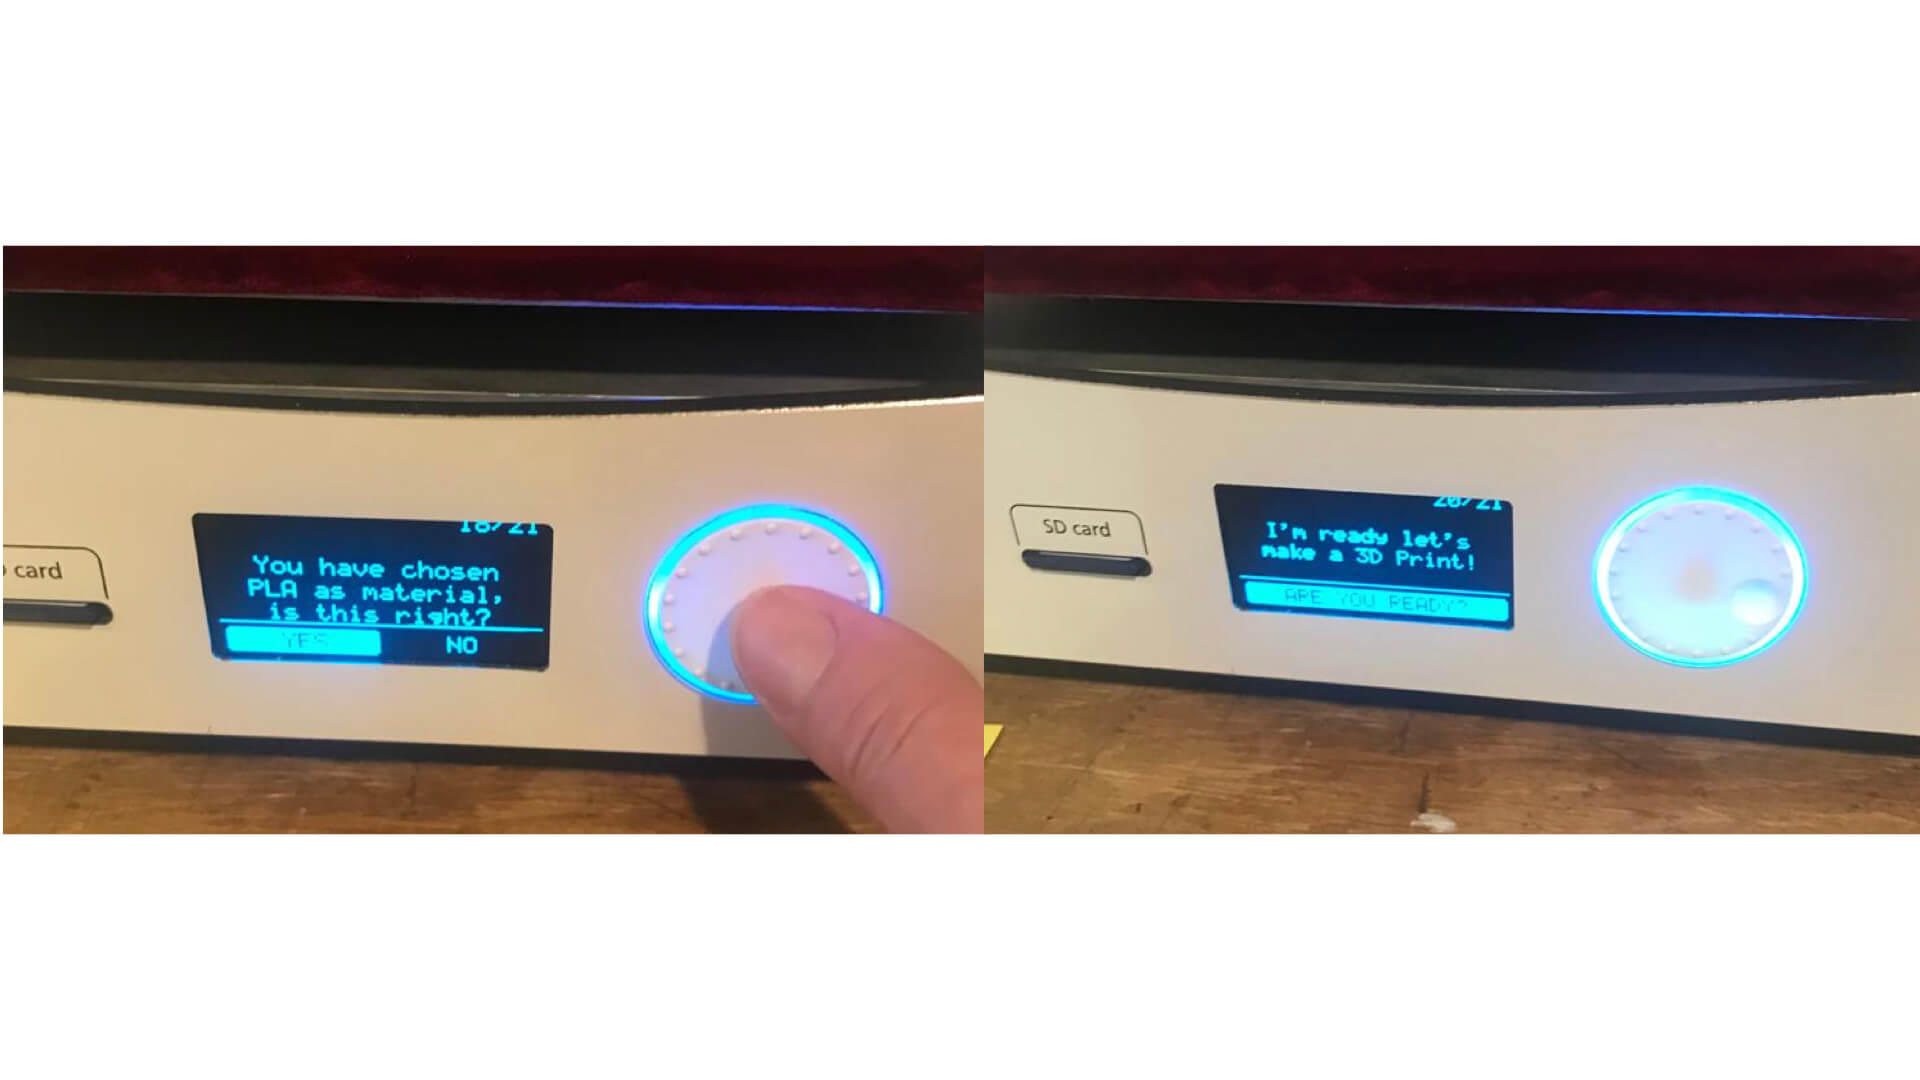
I then went on to calibrate the machine for this thicker fabric by going to the 'maintenance' command in the menu. Then 'build plate' and 'continue'. The machine guids you through the process of calibrating and I must say things were right straight away. Ready to go!
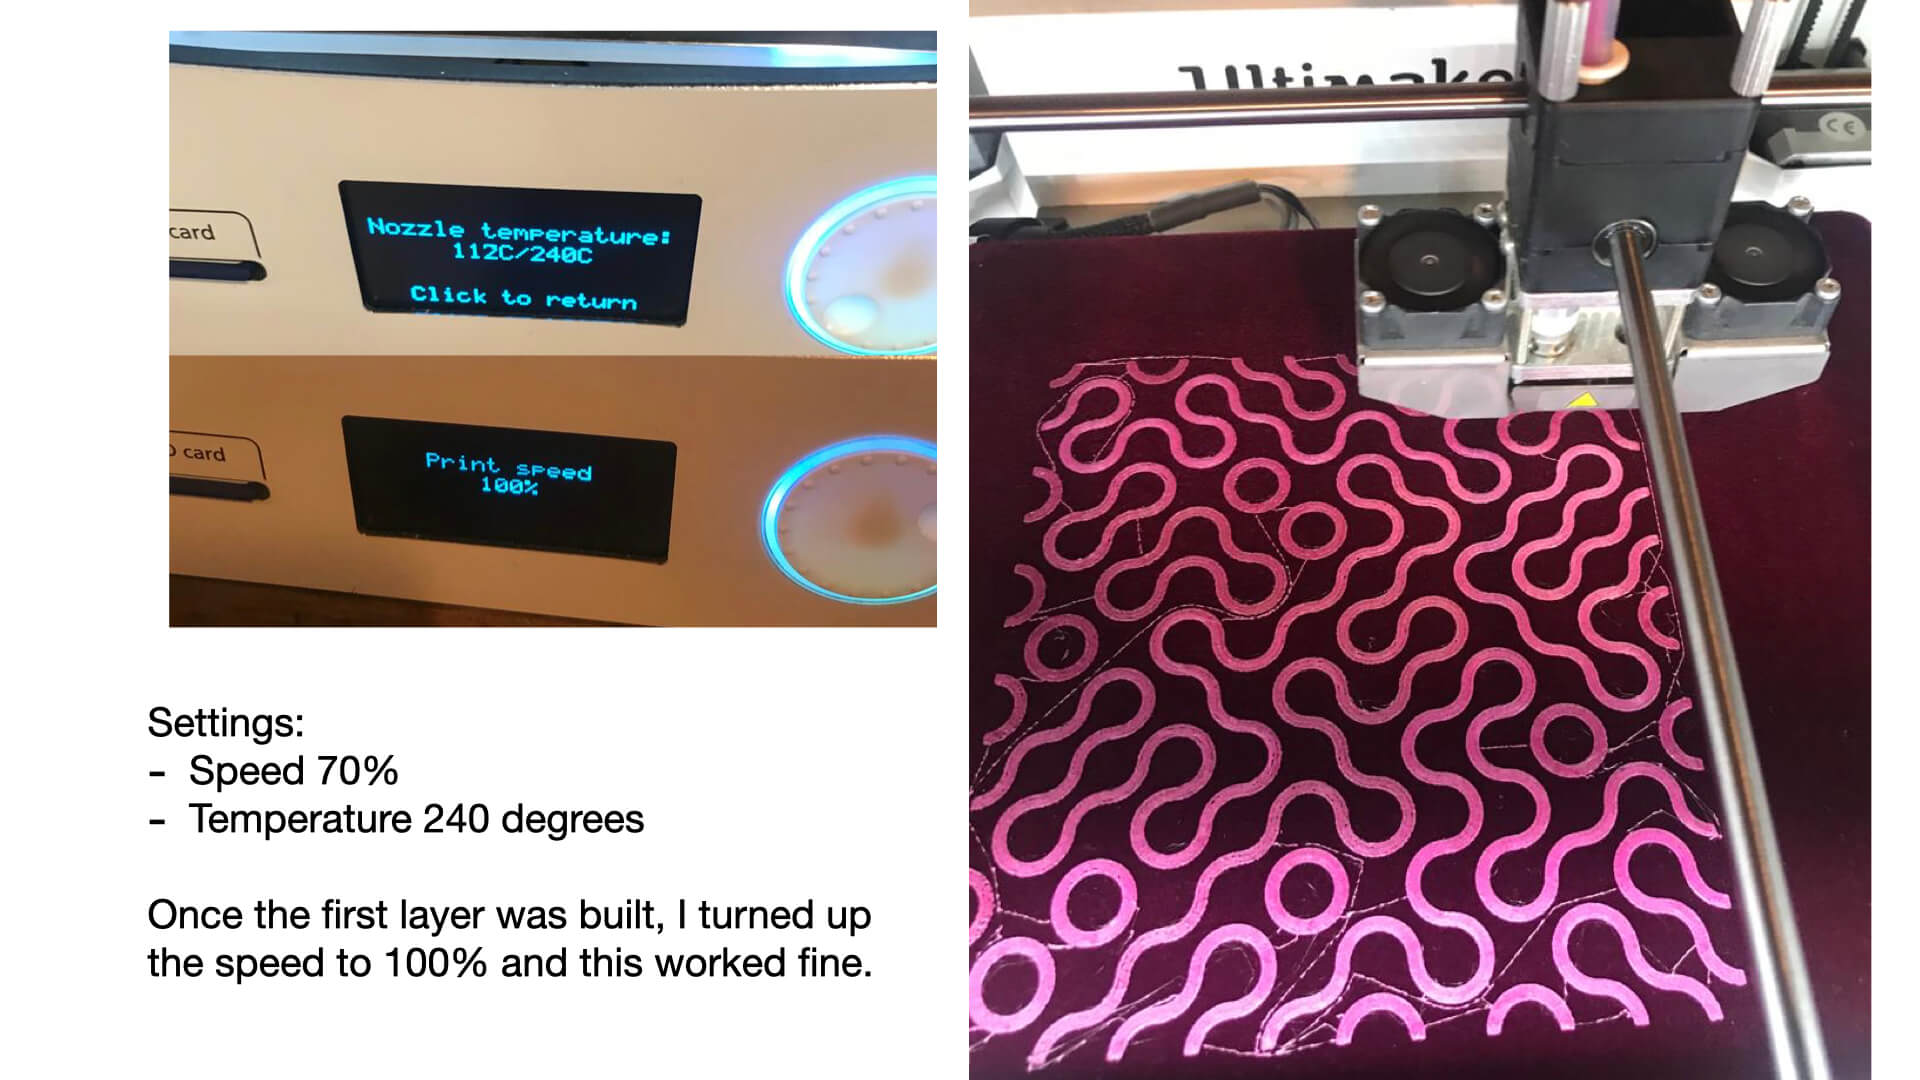
I made a test in Rhino by copying one circle and through Cura I printed this in the corner of the velvet I had attached to the printer bed. This wworked out fine. I set the speed to 70% and the temperature to 240 degrees and it seemed fine.
I was confident this test was good and moved on to printing the final design. Think the pink on red looks really great. Now, all I need to do is conduct some research into these magical tiles that always create a beautiful pattern in whichever horizontal or vertical direction you move them.
Printing Tiles

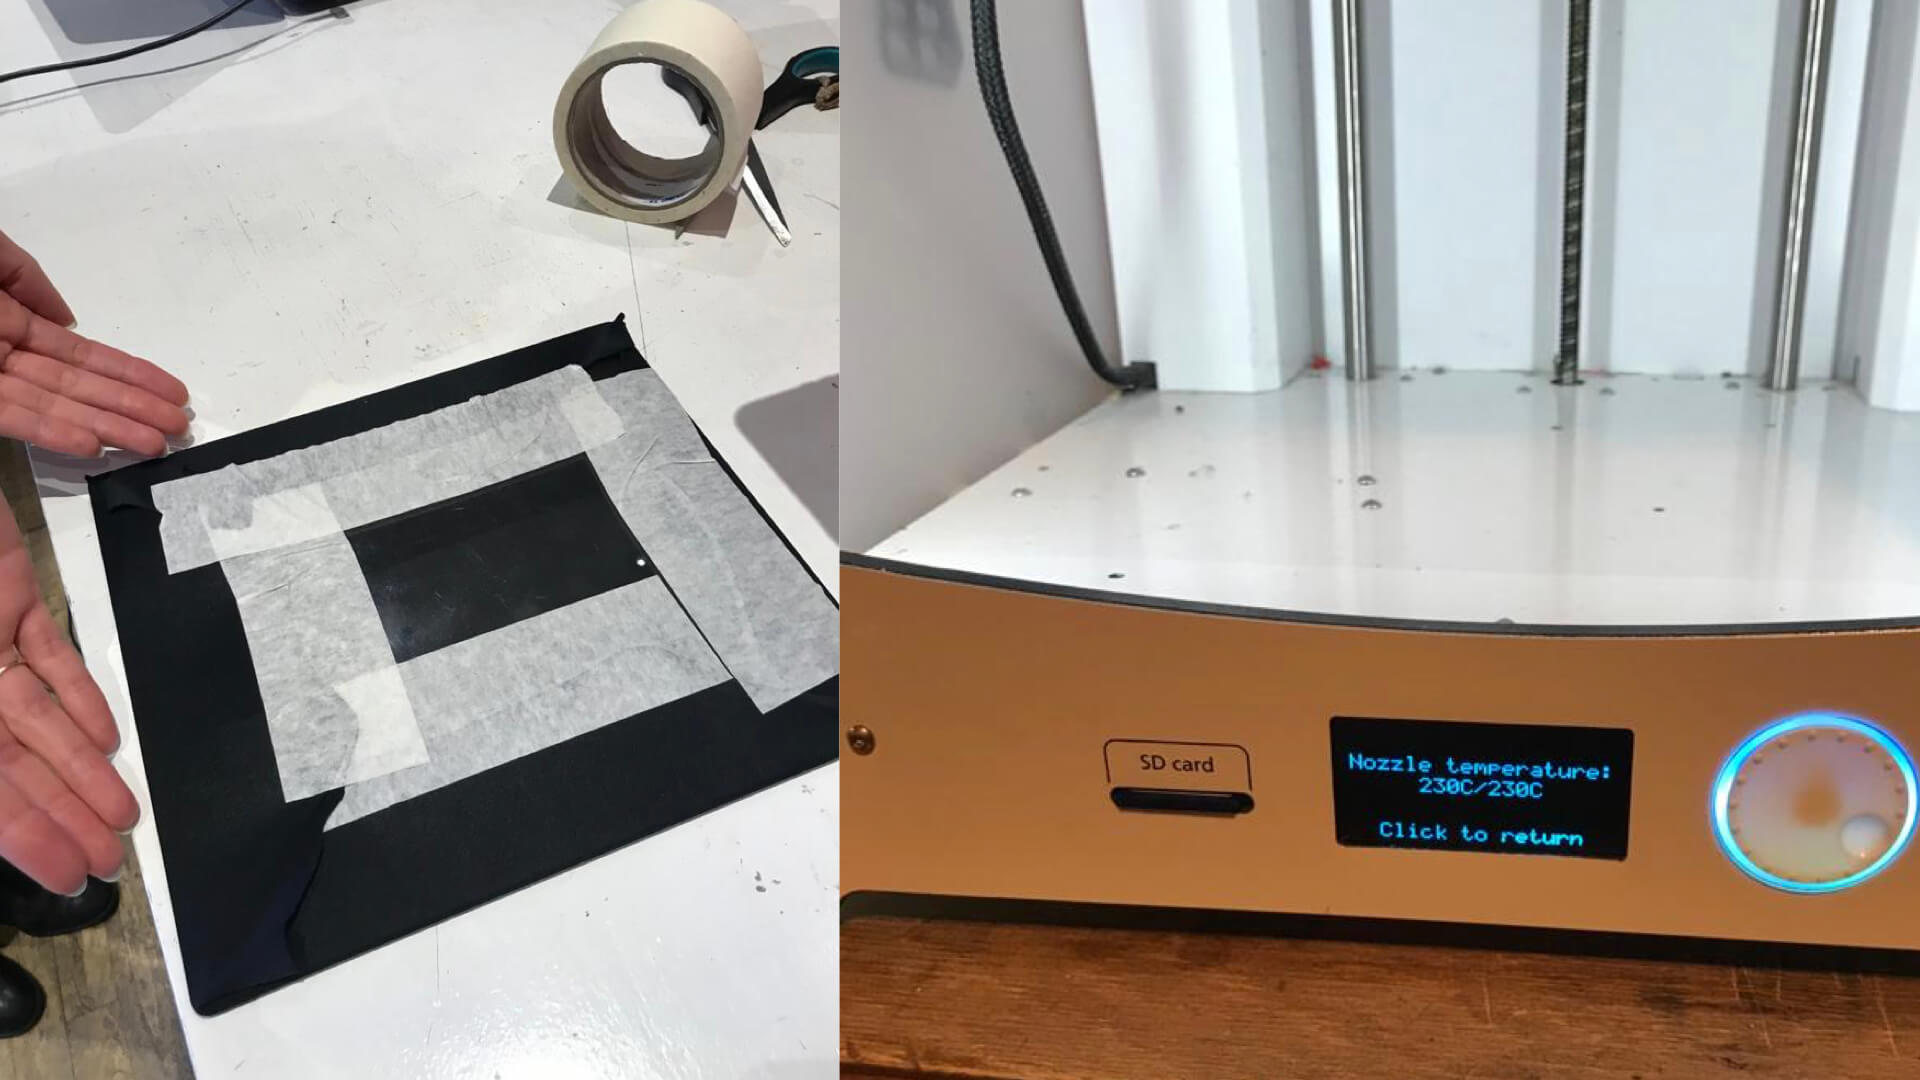
First I taped the velvet to the printed bed (top left), then I loaded the filament at the back of the machine, and calibrated the machine for this rather thick fabric.
And he we are, almost done. Looks pretty, I think!
Research
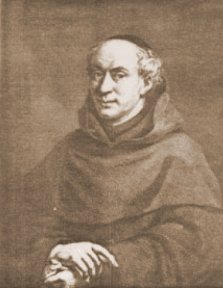
This is Jean Truchet (1657 - 1729) a.k.a. Father Sébastien, a Dominican priest living in France and he was experienced in maths, hydraulics, ghraphics, typography and he created many inventions.
In 1704 Truchet describes his idea of the tiles in his Mémoire sur les combinations. In this brief article, Truchet describes how he was ordered to visit a castle called Motte St. Lyé near Orléans where he came across 'several ceramic tiles that were intended for tiling the floor of a chapel and several other apartments' (Truchet 1904).
 The man above is Cyril Stanley Smith (1903-1992). He was a British metallurgist and attended MIT where in 1961 he starting working as a professor in both the Humanities and Metallurgy. In his "The tiling patterns of Sebastian Truchet and the topology of structural hierarchy", Leonardo, 20 (4): 373–385, Smith caused the Truchet tiles to become popular again. In his article, Smith includes an English translation of Truchet's original French text as well as his drawings (see below). My close friend and librarian Fred Goudswaard, found me the full article and below I will summarise it and display the original Truchet drawings of the tiles.
Smith describes that Ernst Gombrich, renowned German art historian, reproduced some figures from a book by Douat, a Dominician priest. Gombrich emphasises that 'the intellectual inspration behind this book was entirely that of a fellow priest, Sébastien [Jean] Truchet' (Gombrich, 1987).
A pattern of tiles illustrated by Douat in 1722. (courtesy of the Bibliothèque Nationale, Paris)
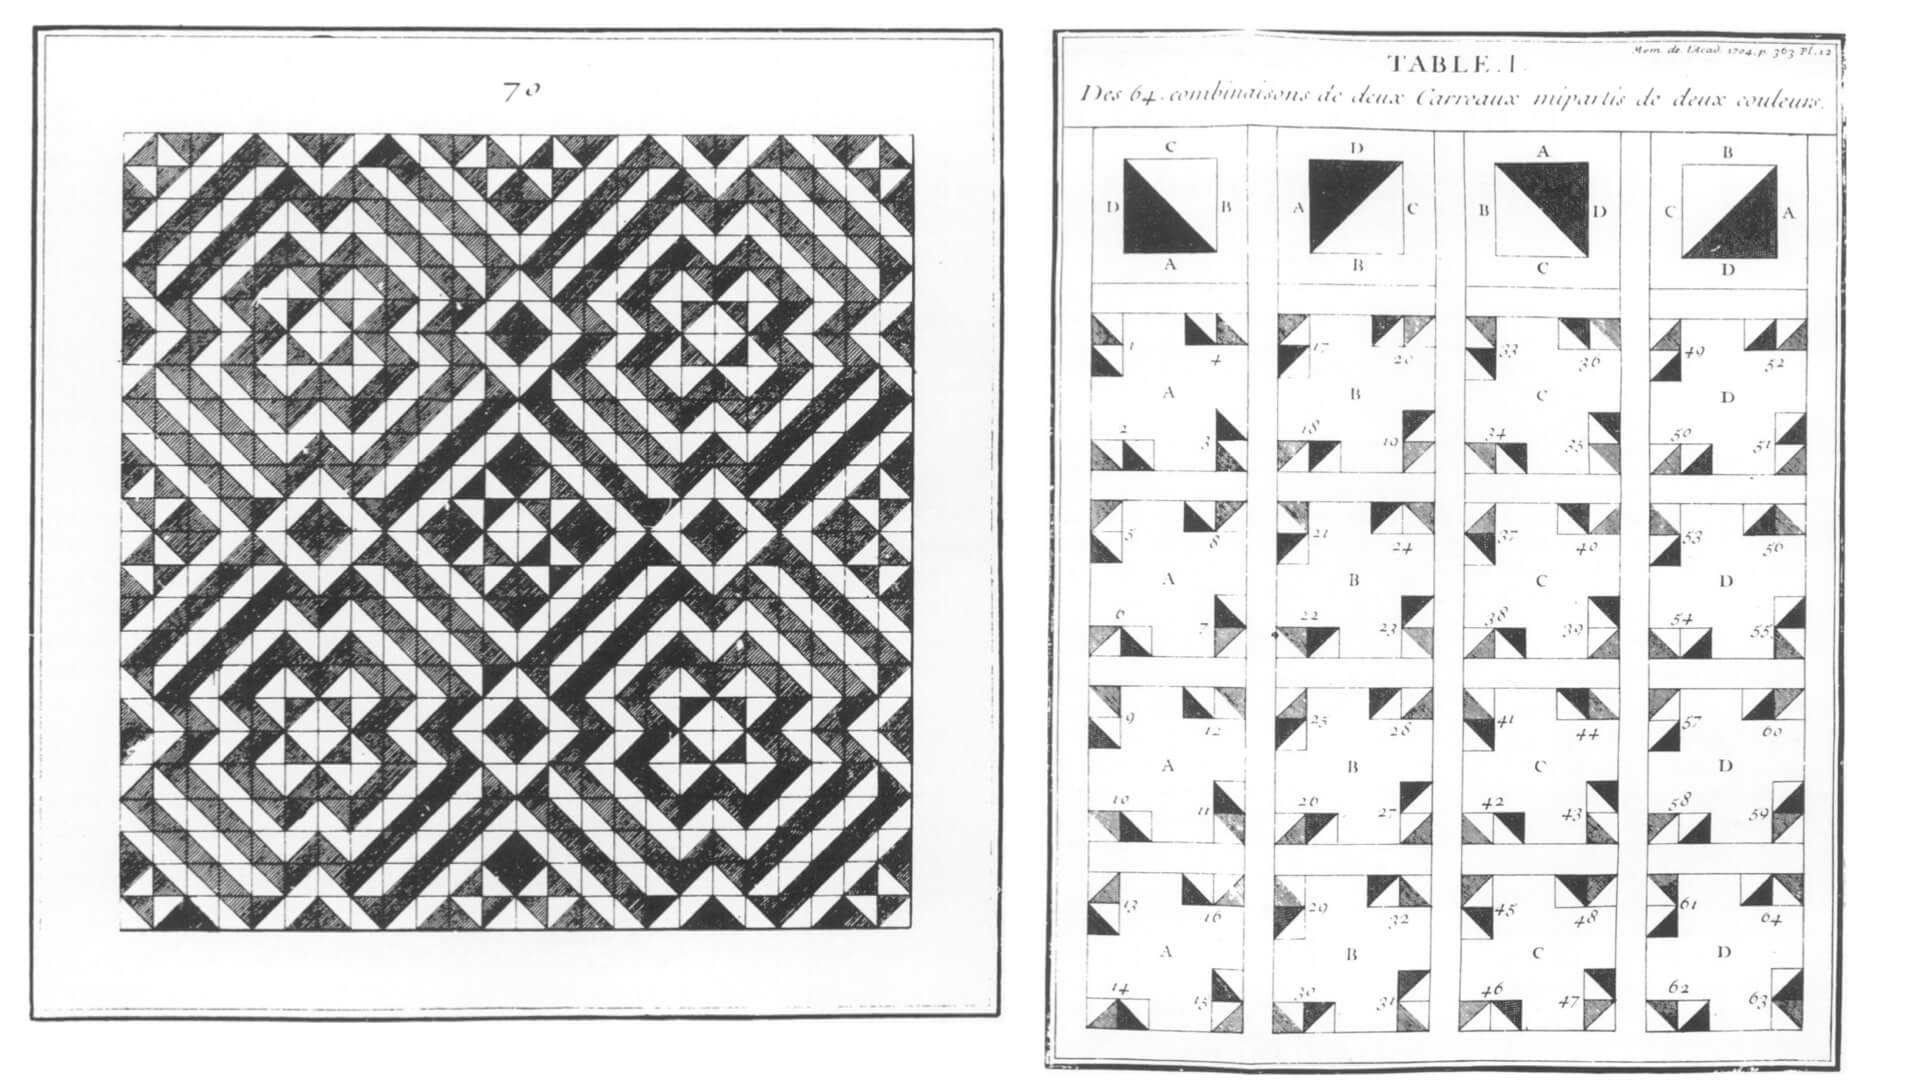
Smith incorporates Truchte's full article, translated in English, in his 1987 article and includes Trucet's illustrations as provides below. First, Truchet writes, he found that the bi-cloured tiles could be positioned in 64 different combinations.
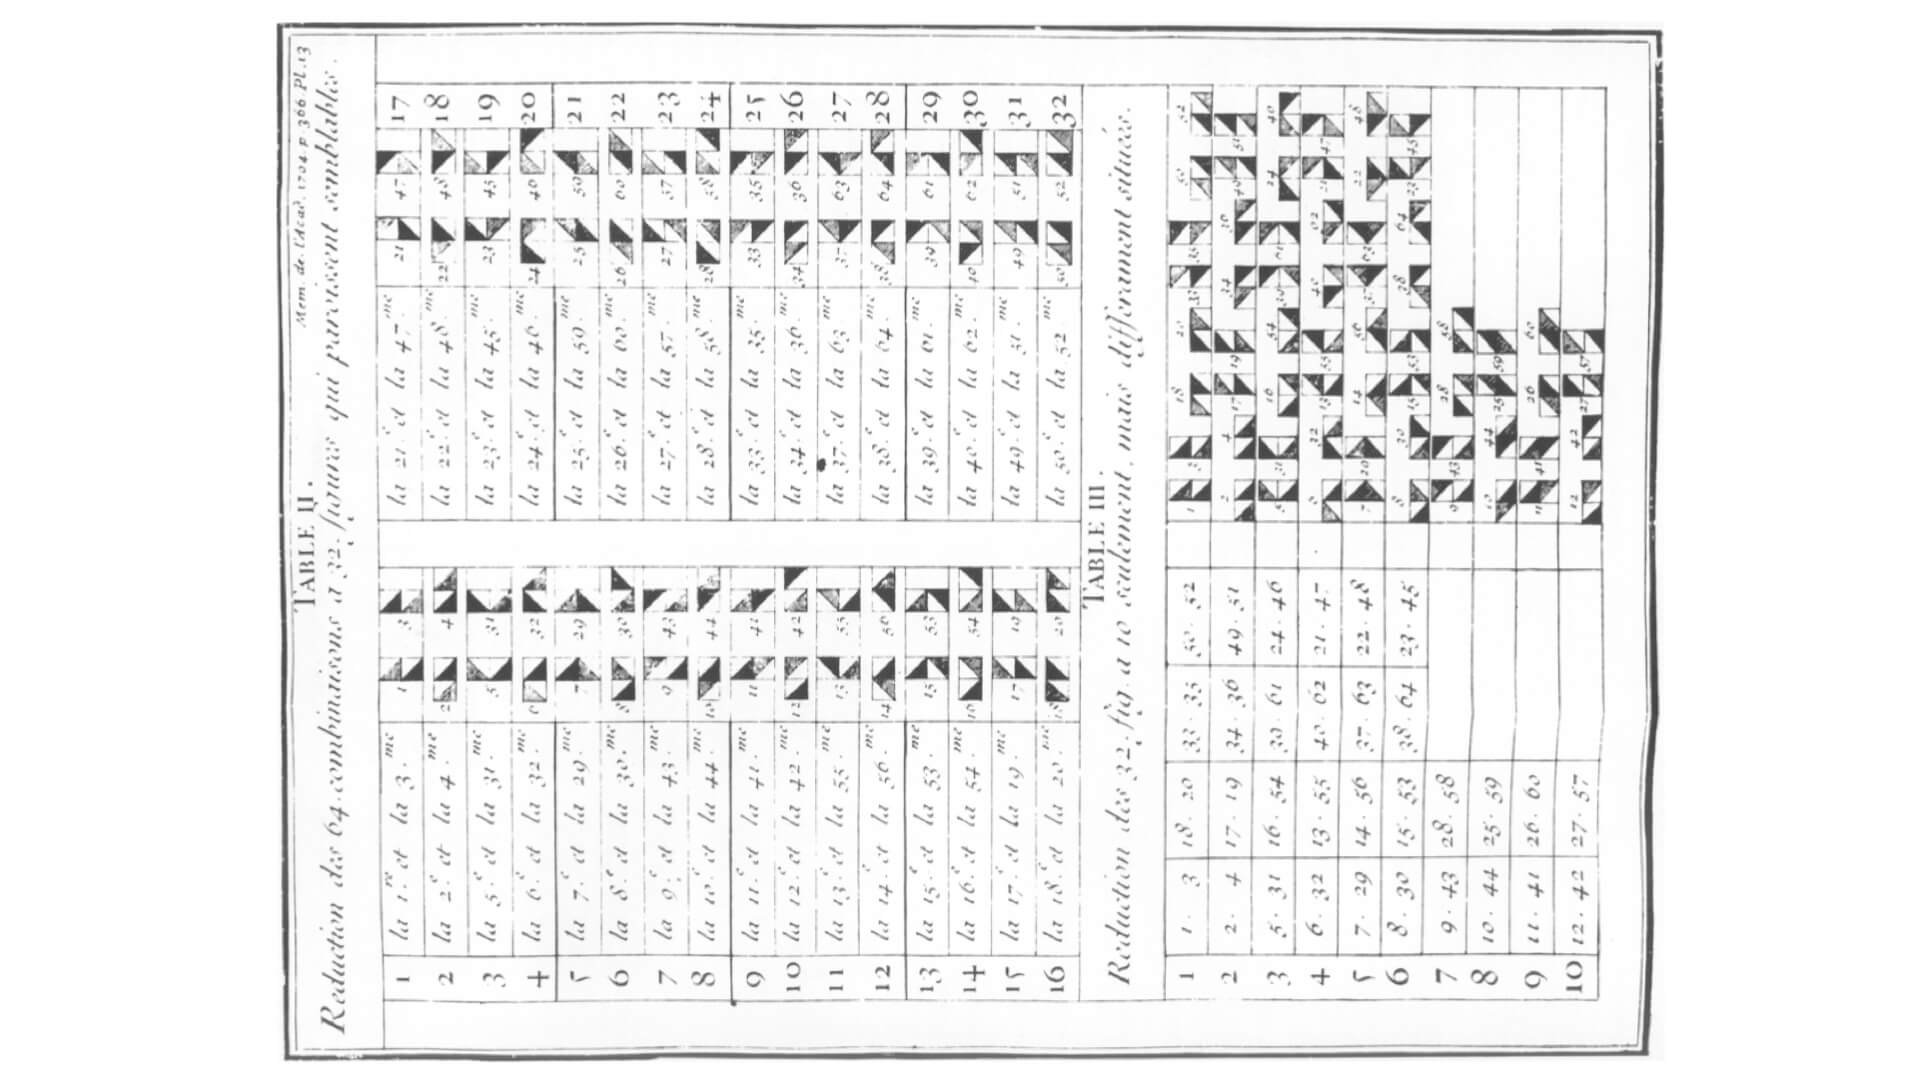
Truchet's table with bi-colored tiles and their placement in different orientations (Courtesy of Burndy Library, Norwalk, Connecticut).
He reduces these to '32 different ones because each pattern is repeated twice in the same location' (1704).

Left, Truchet's plate 1, showing the simplest patterns. Right, Truchet's plate 2. (Courtesy of Burndy Library, Norwalk, Connecticut)
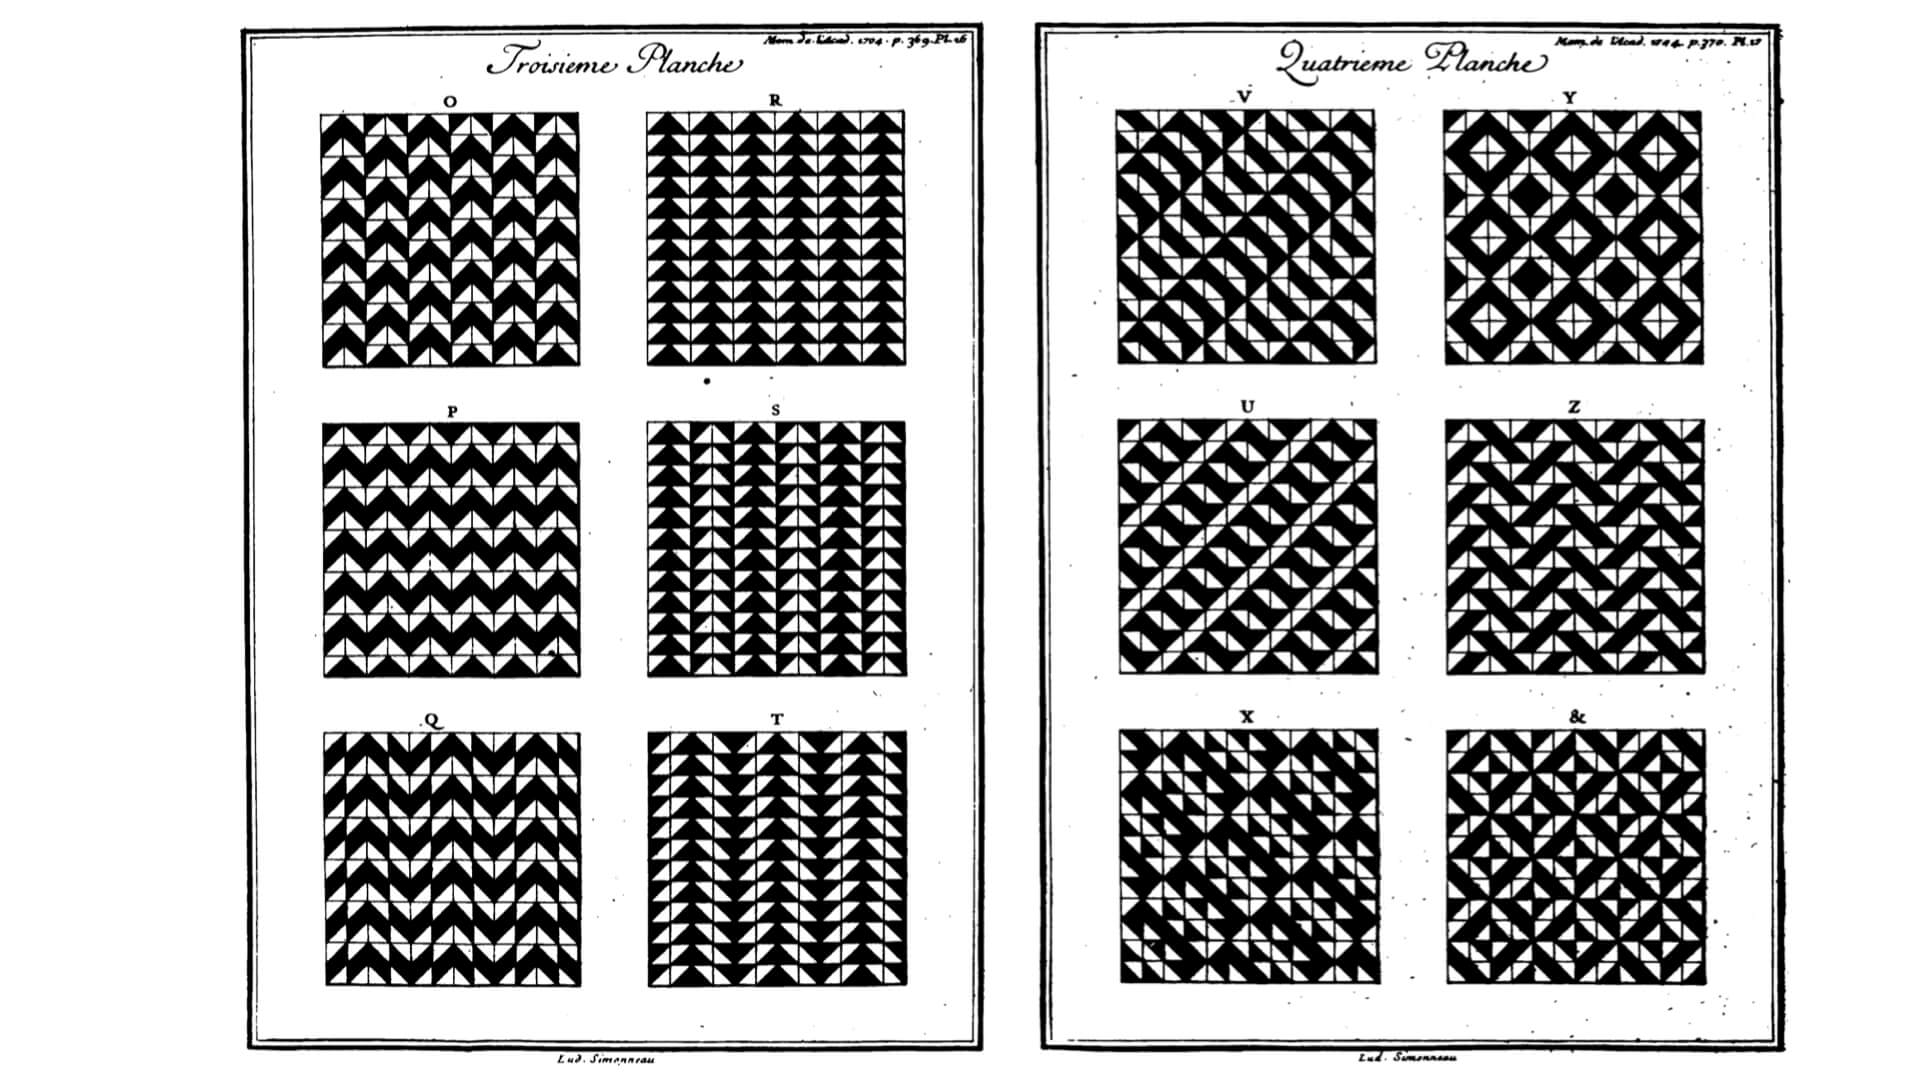
Truchet's plate 3 and 4. (Courtesy of Burndy Library, Norwalk, Connecticut)
After providing the reader with a translation of Truchet's original 1704 article, including the original drawings, Smith starts his appreciation of the works by commenting that Truchet's works are of 'considerable importance' and likens the work to that of Pascal, Fermat and Leibniz, 'being at the forfront of mathematics at the time' (Smith, 1987).
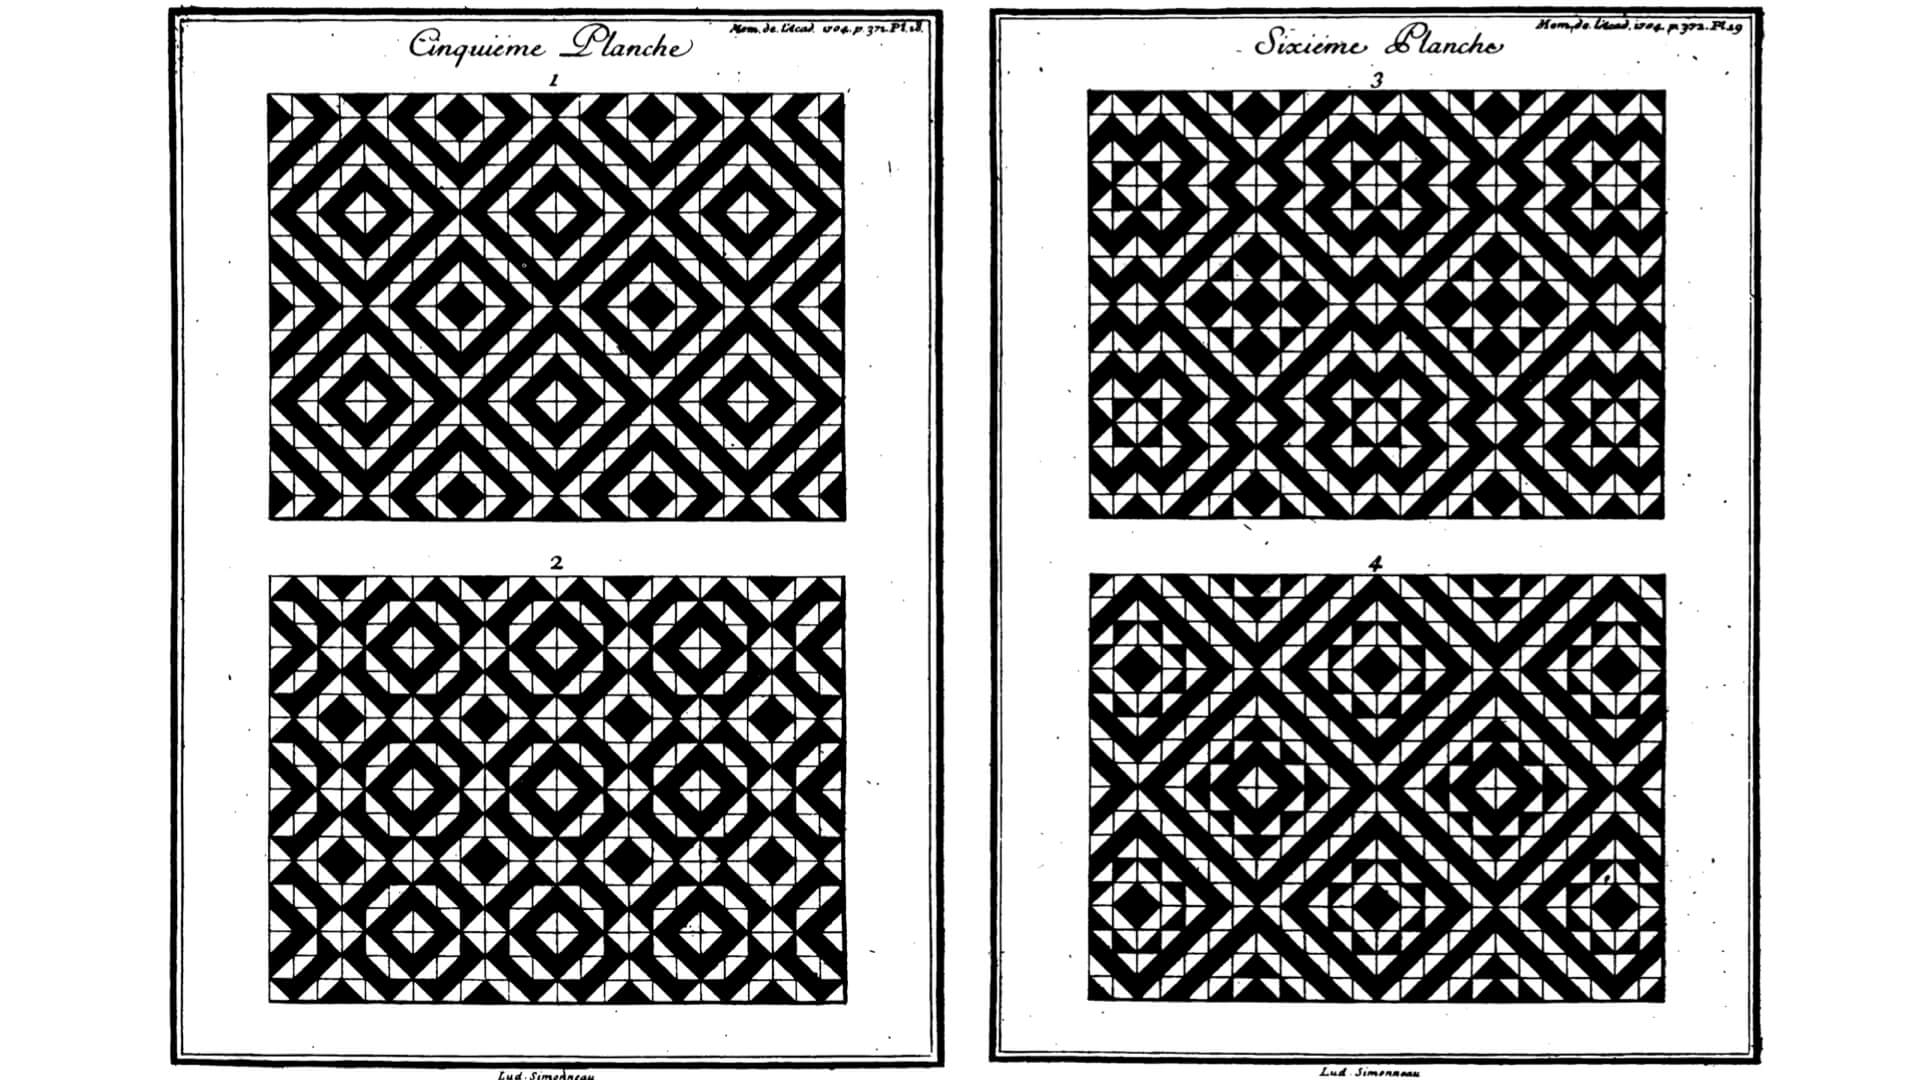
Truchet's plate 5 and 6. (Courtesy of Burndy Library, Norwalk, Connecticut)
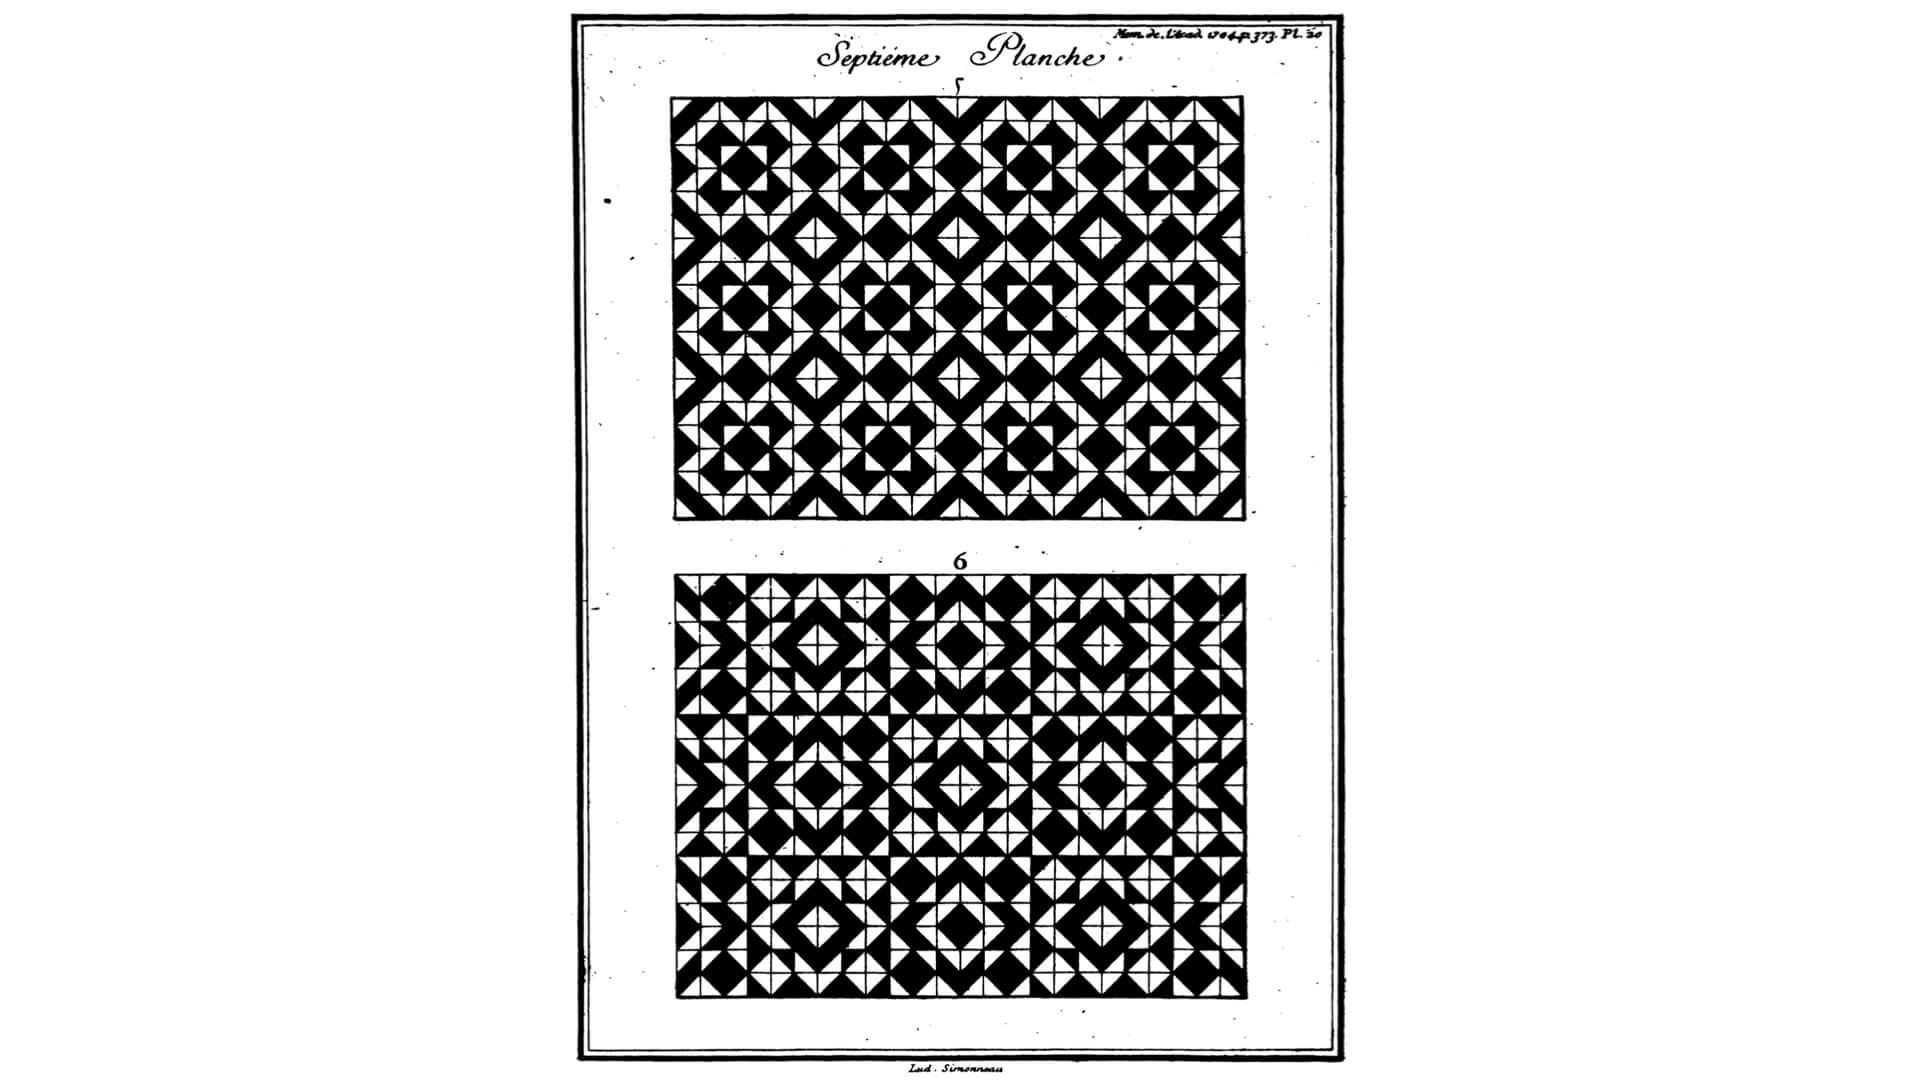
Truchet's plate 7. (Courtesy of Burndy Library, Norwalk, Connecticut)
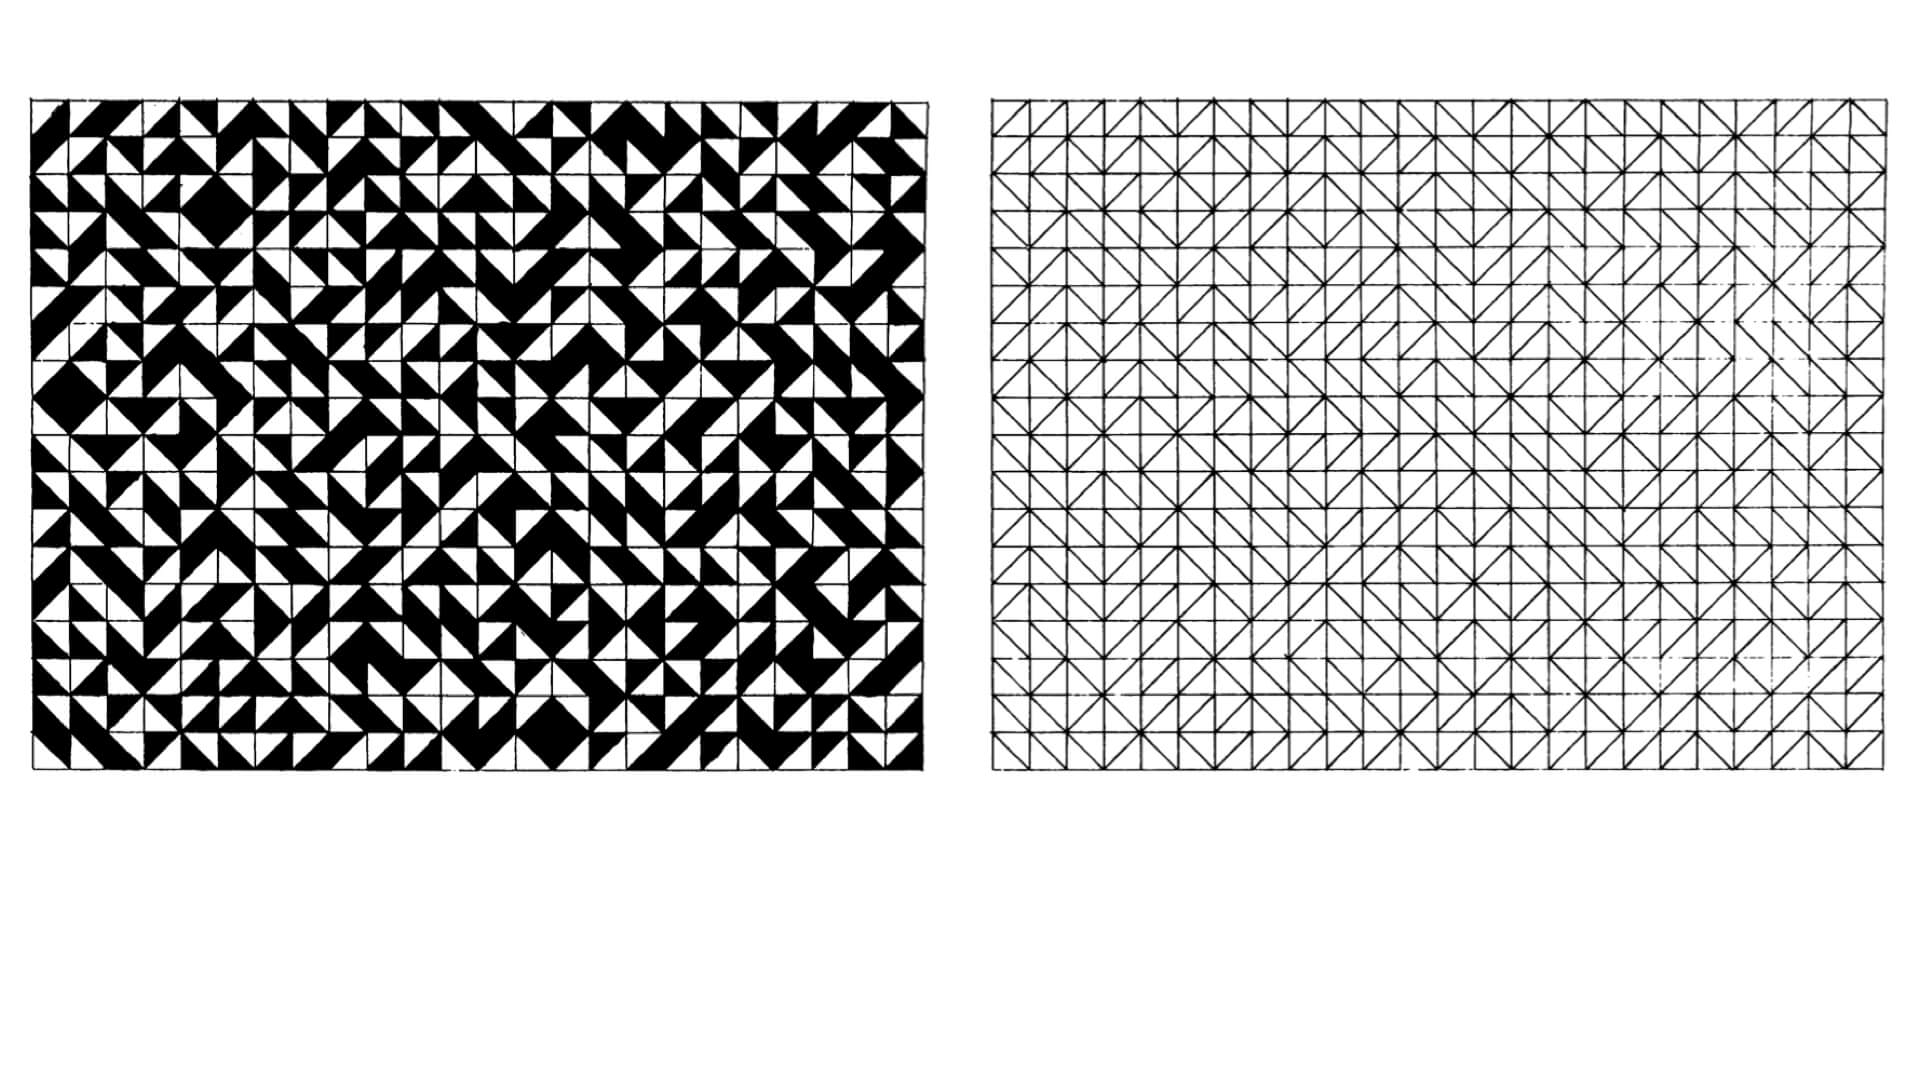
Above, an array of Truchet tiles oriented at random and the same with color omited. (Courtesy of Cyril Smith, Project Muse)
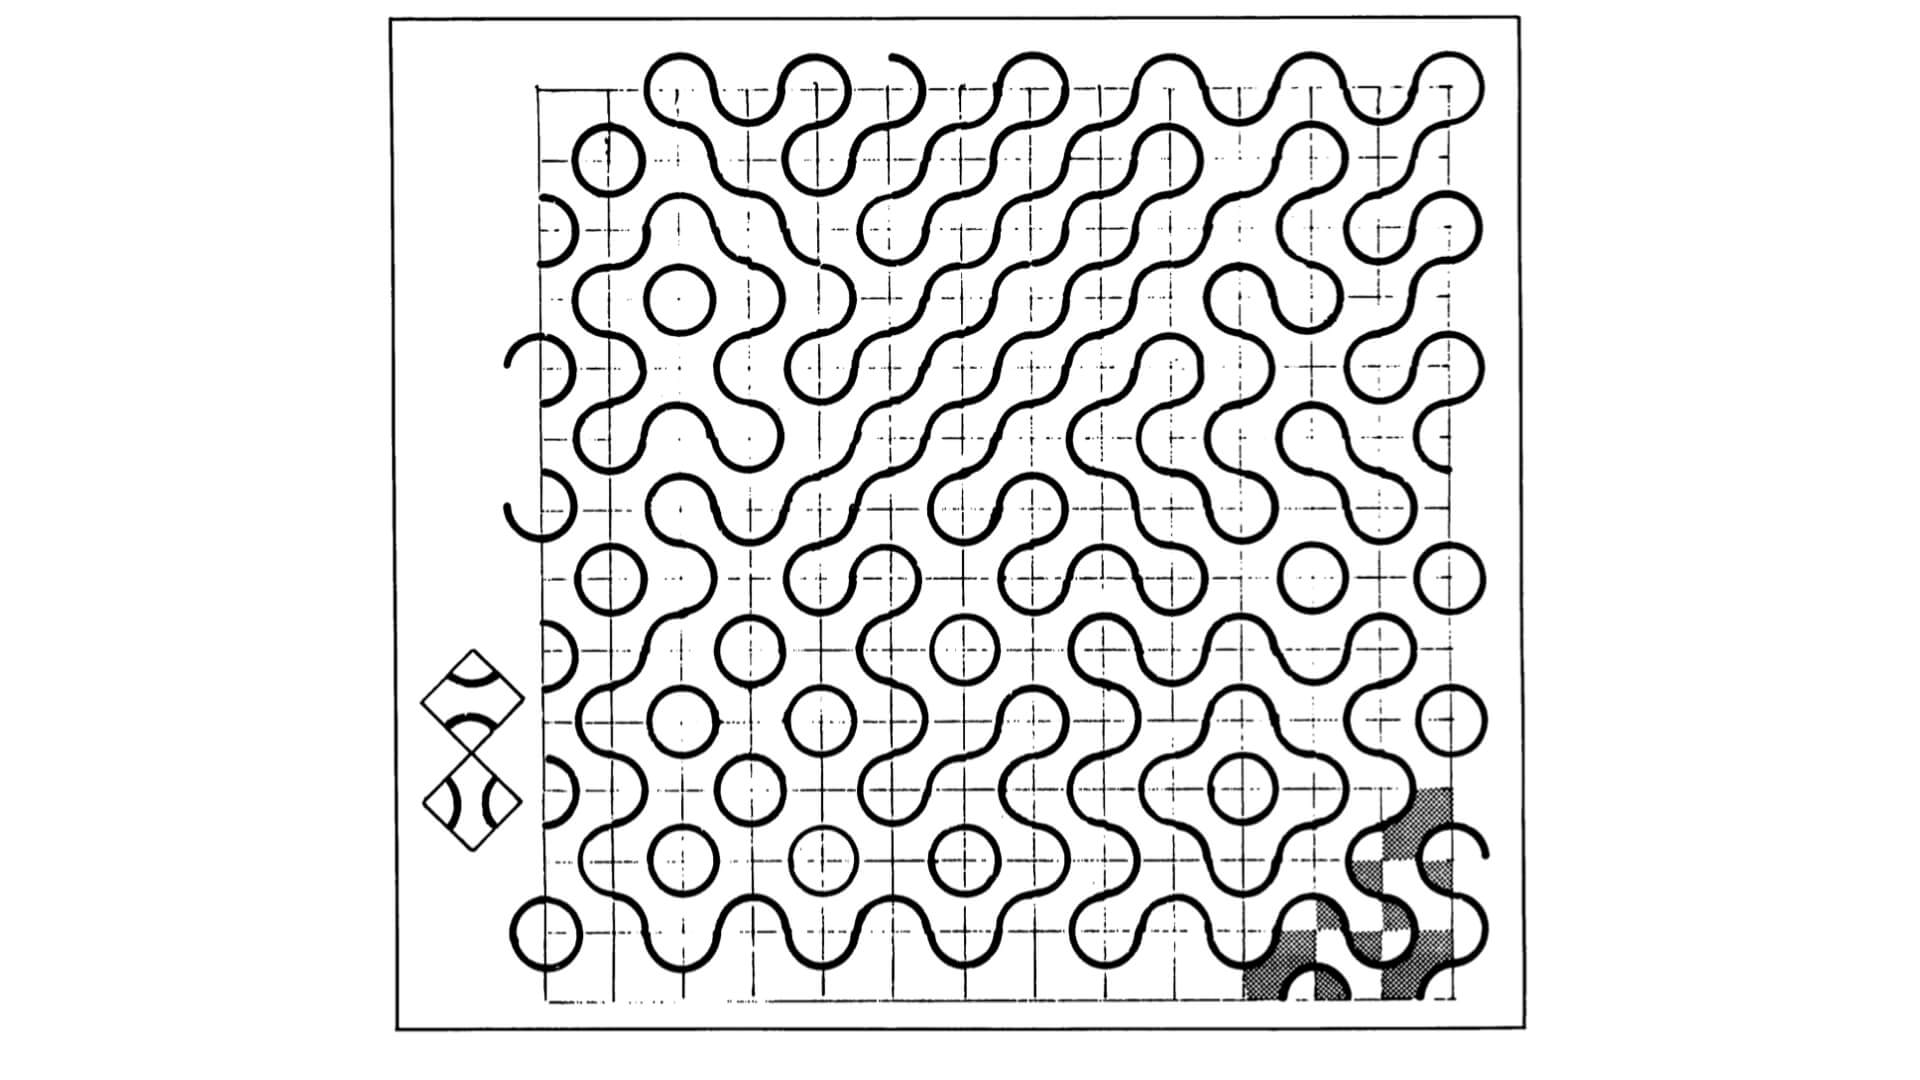
Above, 'an orientable square tile with substractural lines that join to produce continuous clossures and exclusively quadrivalent internal vertices and to generate a hierarchy of closues and continuity regardless of how they are oriented' (Smith, 1987).