9. Textile as scaffold
End Results
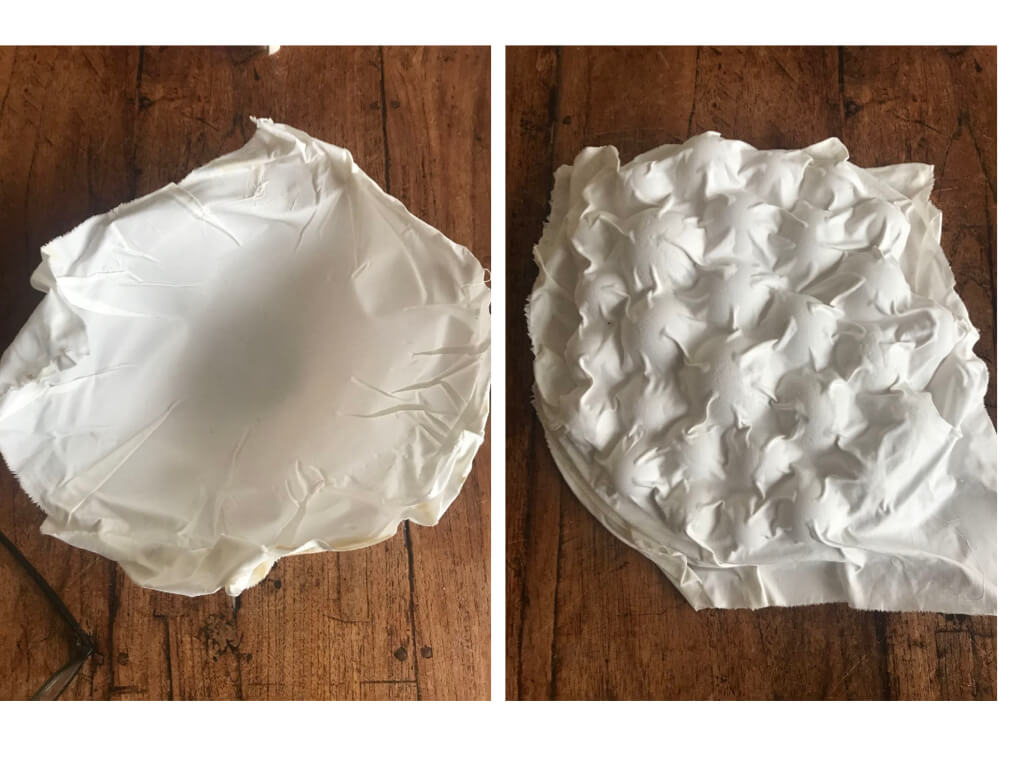
During this week we used textiles to ‘house’ crystals and to mould onto a milled piece of foam. Due to some circumstantial situations as well as the CNC milling machine breaking down, I didn’t mill my own piece and used marbles, a bowl, wallpaper glue and white cotton fabric to create some moulded textiles. I, however, did watch Sara using the milling machine and thank her for sharing her notes with me.
Research
Schrödinger’s crystals
 This is Austrian physicist Erwin Schrödinger (1887-1961). If his name rings a bell, that is probably because you have heard of Schrödinger’s cat (1935). In this experiment a cat is placed in a sealed box with a bottle of poison, which will break if an atom in the box decays, which has a 50% chance of happening within an hour. For us, as onlookers that cannot see in the box, there is an indeterminate state. And one could say that the sealed box ‘contains equal parts of the living and the dead cat’. Only when we open the box, we will see either a dead or an alive cat, yet before doing so the situation remains indeterminate. How exactly this relates to quantum mechanics, I will sort out later. You might, however, like to know that Schrödinger earned him a Nobel prize in 1933 with his work on Quantum mechanics. And he and Albert Einstein (1879-1955) had many discussions about this thought experiment, for which Einstein is known to have used gunpowder rather than poisonous gas (Wikipedia). I’m a cat-lover so these guys can think and experiment whatever they like as long as they don’t involve an actual cat.
The brief video below explains the thought experiment well, even though you may want to watch it several times.
I, however, didn’t want to discuss Schrödinger’s cat, but Schrödinger’s crystals. In his 1944 book titled What is Life?, Schrödinger discusses different ‘states’ of matter. Without diving too deep into the matter, it is interesting what he has to say about crystals. Schrödinger contests the idea that molecules can be either gas, liquid or solid (58). Instead, he suggests that:
molecule = solid = crystal
gas = liquid = amorphous
This entails that all molecules are crystals and solid. “The reason for this is that atoms forming a molecule, whether there be few or many of them, are united by forces of exactly the same nature as the numerous atoms which build up a true solid, a crystal. The molecule presents the same solidity of structure as a crystal” (60). In other words, atoms that make up molecules do so in structured manners and must thus be regarded as crystals. We, thus, are surrounded by crystals without even realizing it. Let’s grow some!
Documentation
Growing crystals
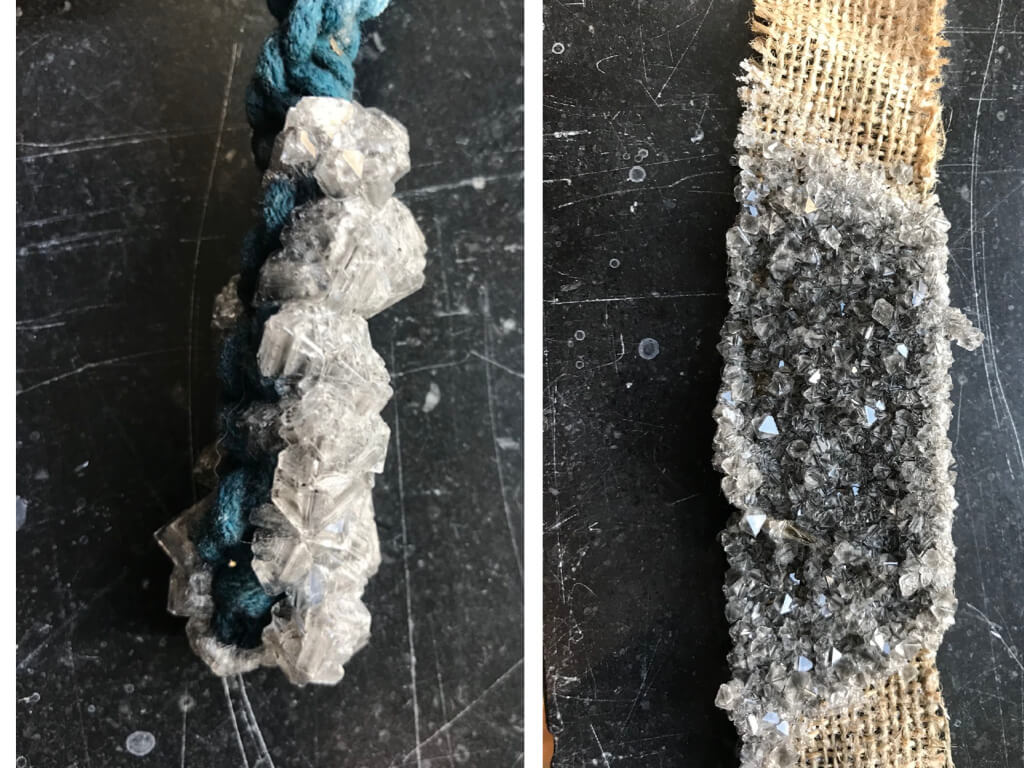
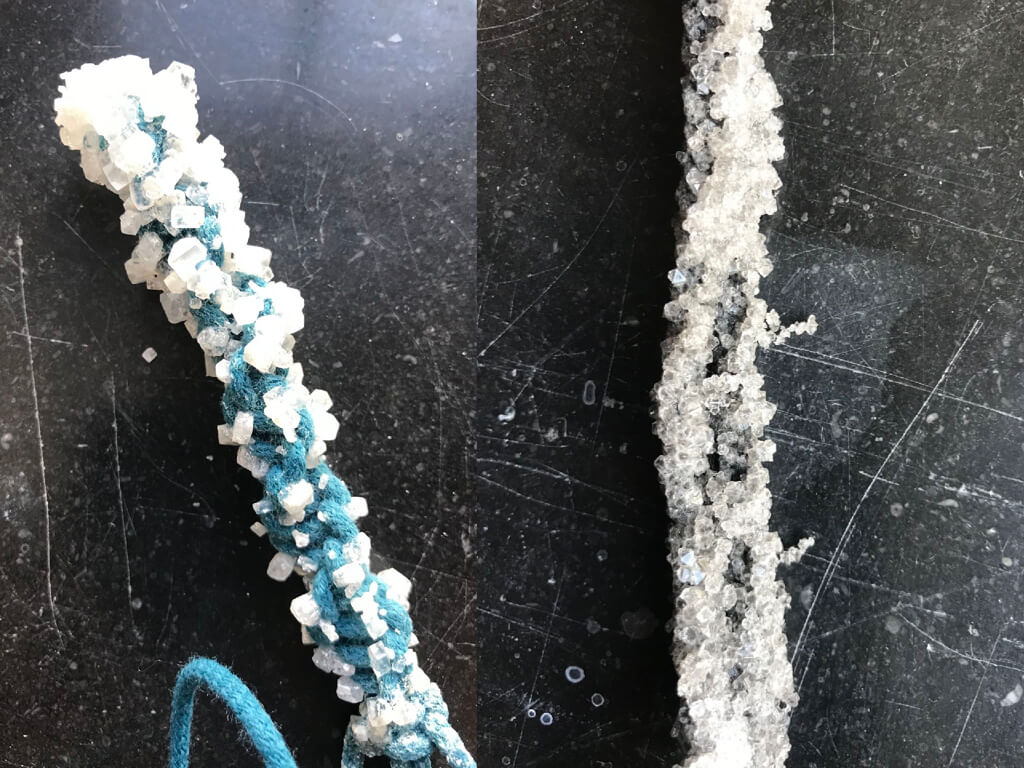
Textile that is suitable for growing crystals ideally has an open weave like silk, jute or lace. I guess that it also needs to absorb the water with the absorbed alum in it so this would make it preferable to use natural fibers, rather than synthetic ones. By letting the water cool off slowly, the crystals become stronger. If the water cools off too quickly, the crystals become brittle.
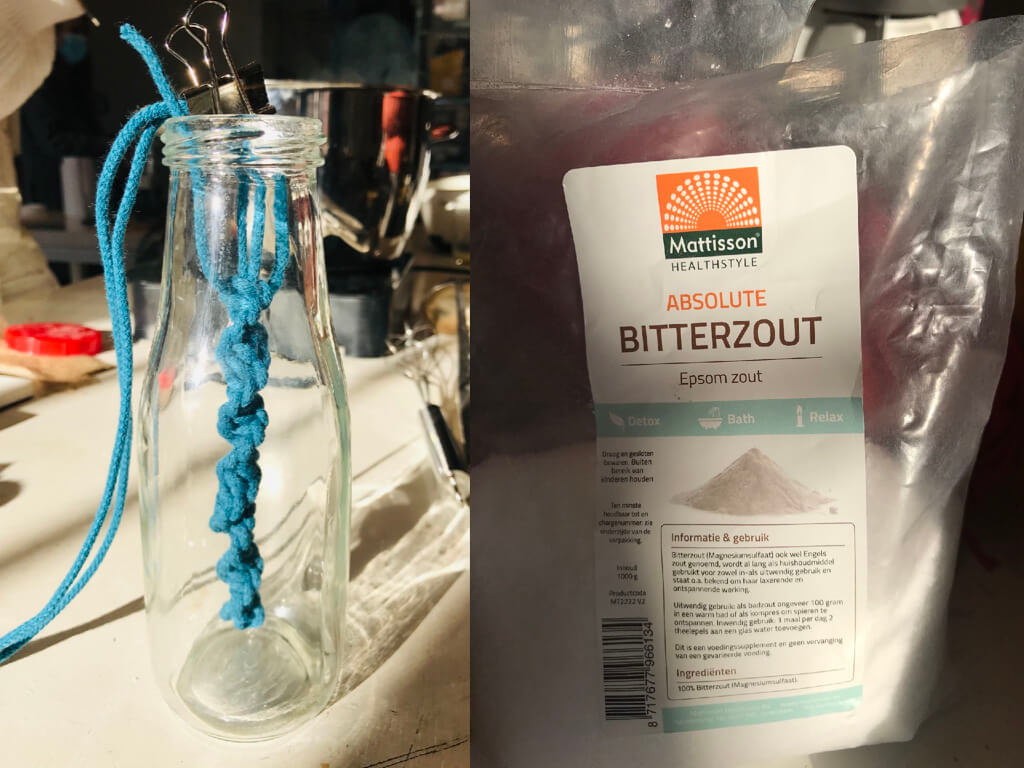
Recipe with alum
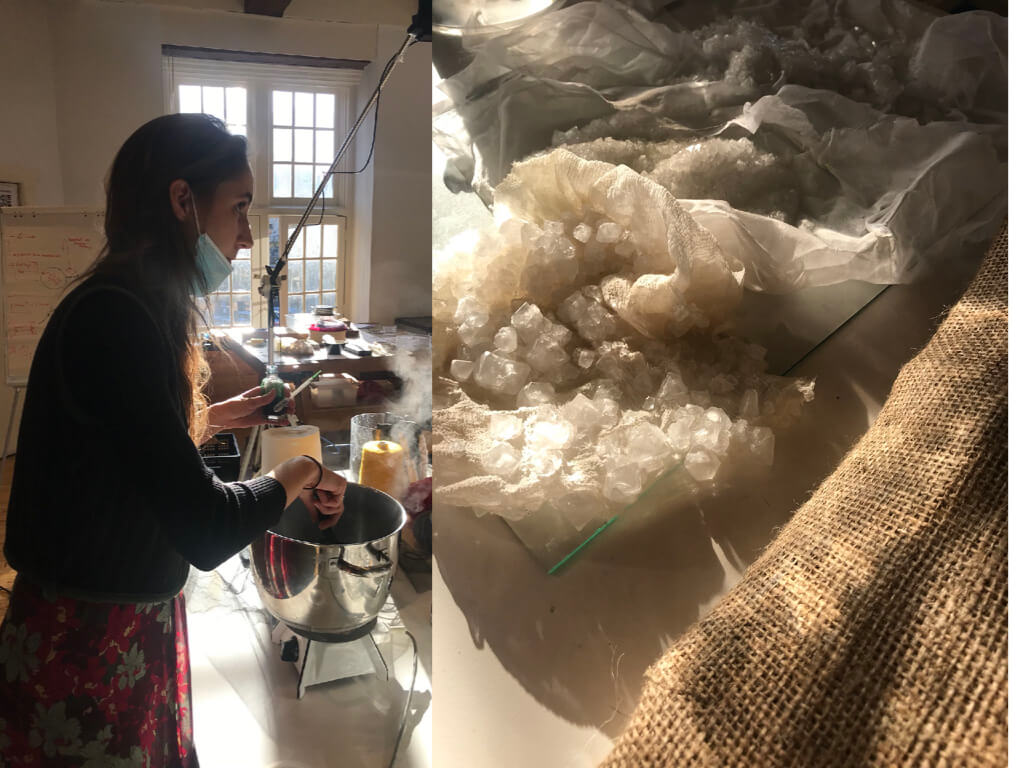
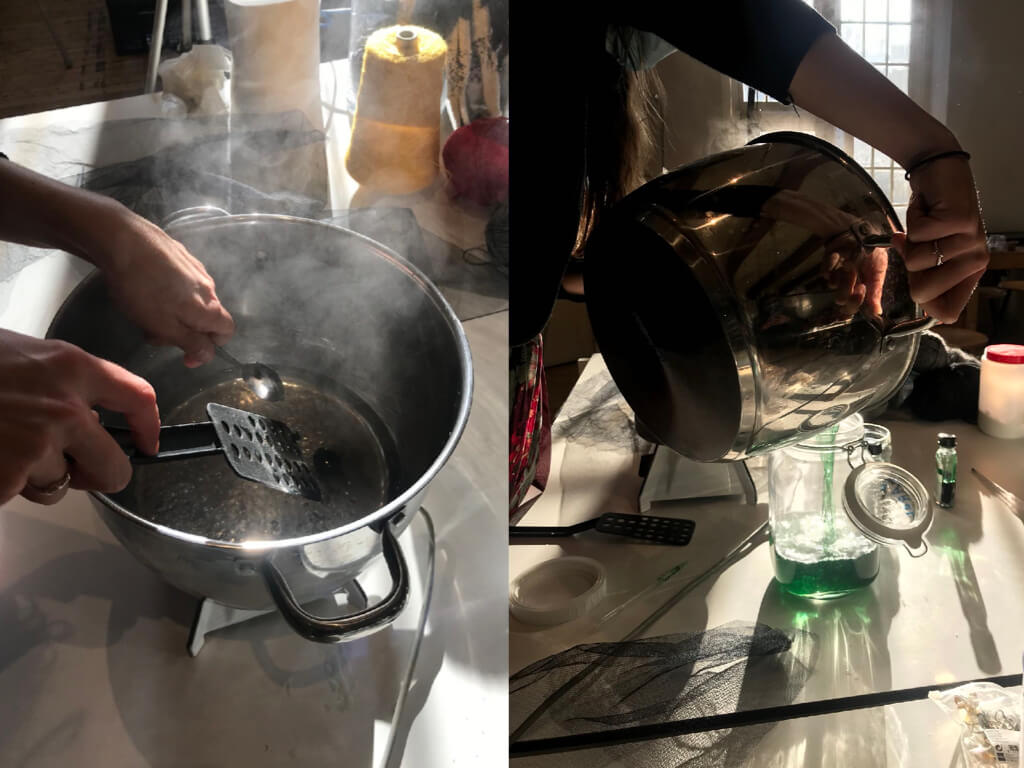
- Boil water in a pan.
- Add alum until the water is saturated and no more alum absorbs. We started with 100 g of alum to 1 l of water but ended up using about 450 g for a liter of water.
- Hang a piece of fabric in a jar and make sure it doesn’t touch the sides.
- Leave in a place where the water remains still, otherwise the crystals will easily fall off the fabric.
We used Borax for making crystals and added yellow food colouring. This didn't really show up in the end result. The black crystals that were grown using conductive paint were, however, amazing.


Some tips:
- If crystals have fallen off, you can reheat the mixture to dissolve them and they will regrow.
- If you heat the crystals afterwards, in an oven, for instance, they will become a translucent white.
- You can add colourants to the water, such as food colouring or conductive paint (1 tablespoon per 100 ml of water).
- You can place crystals on a piece of soaked fabric and more crystals will grow around it.
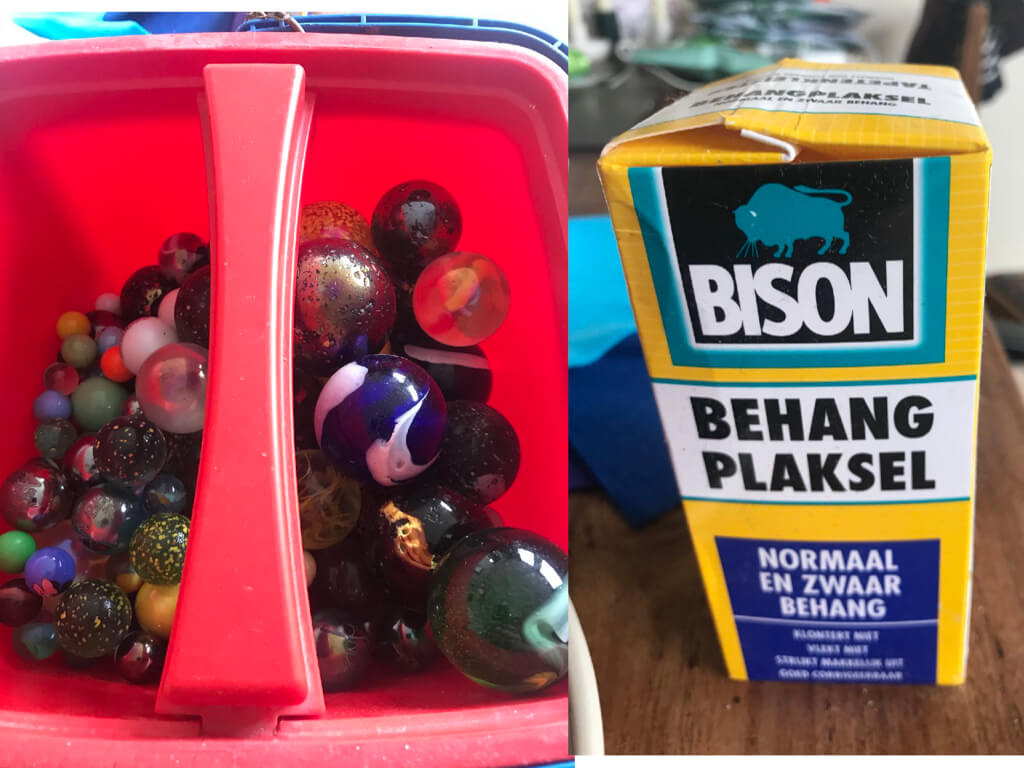
Mold Making
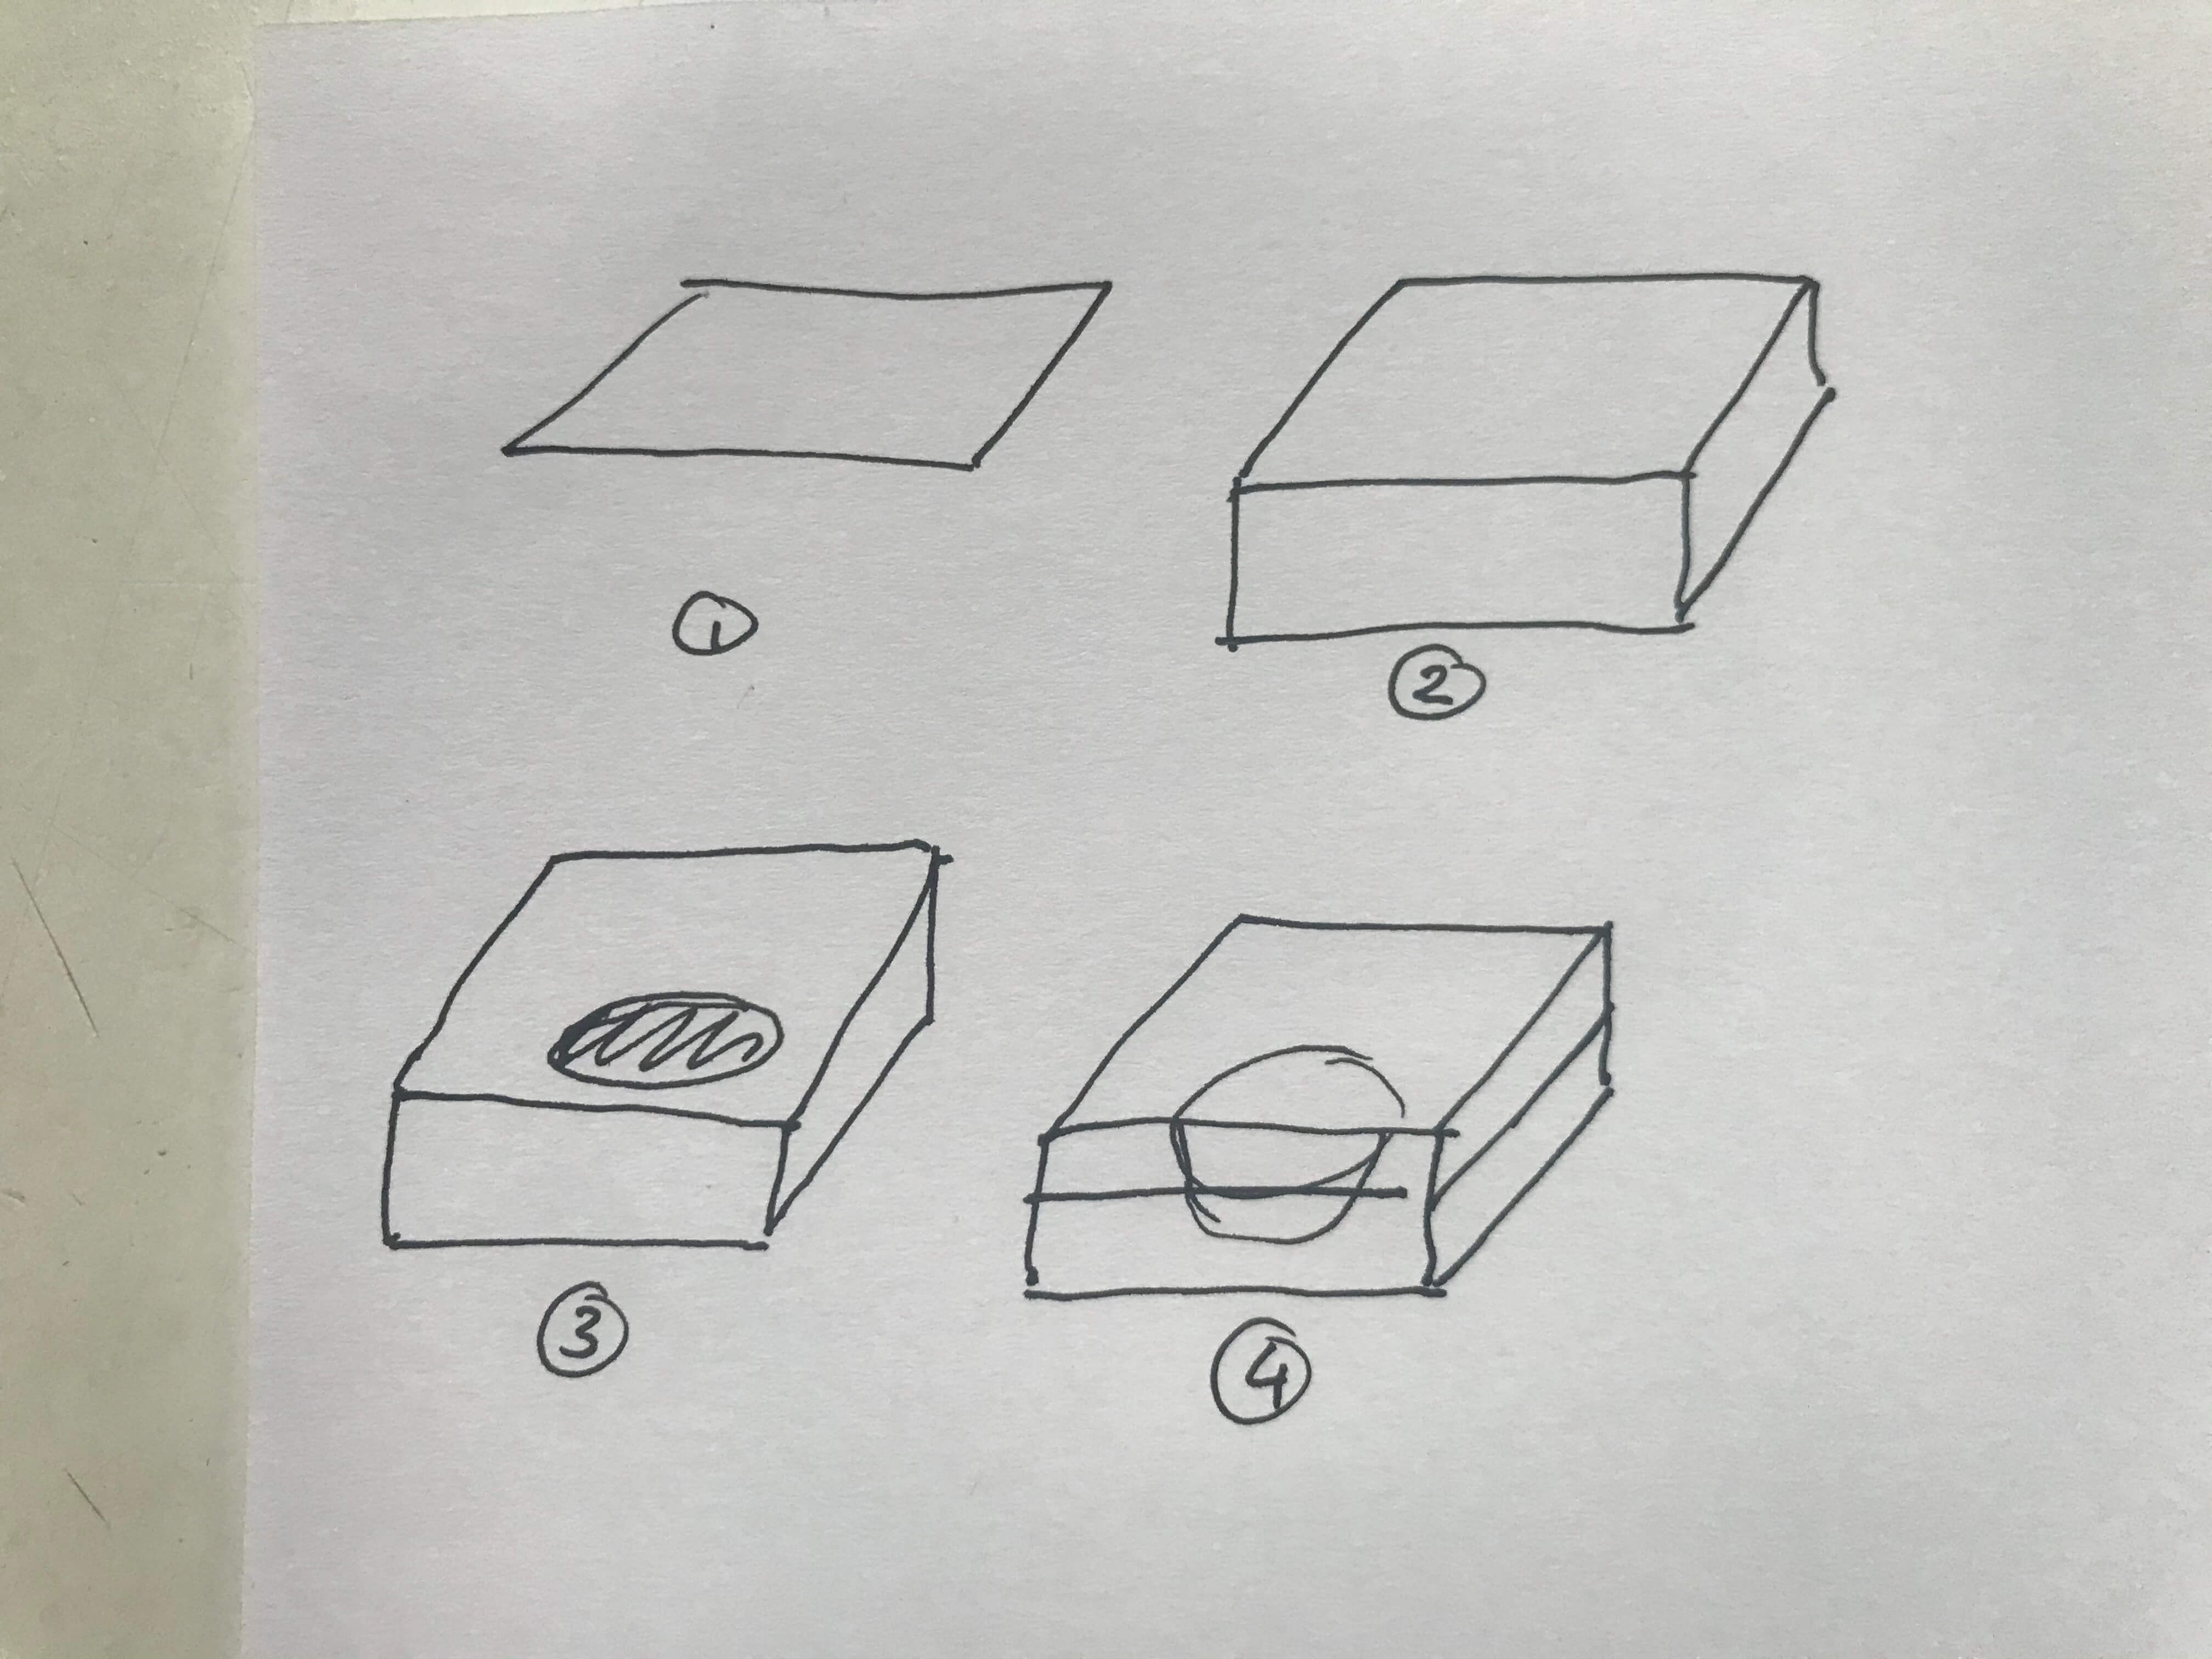
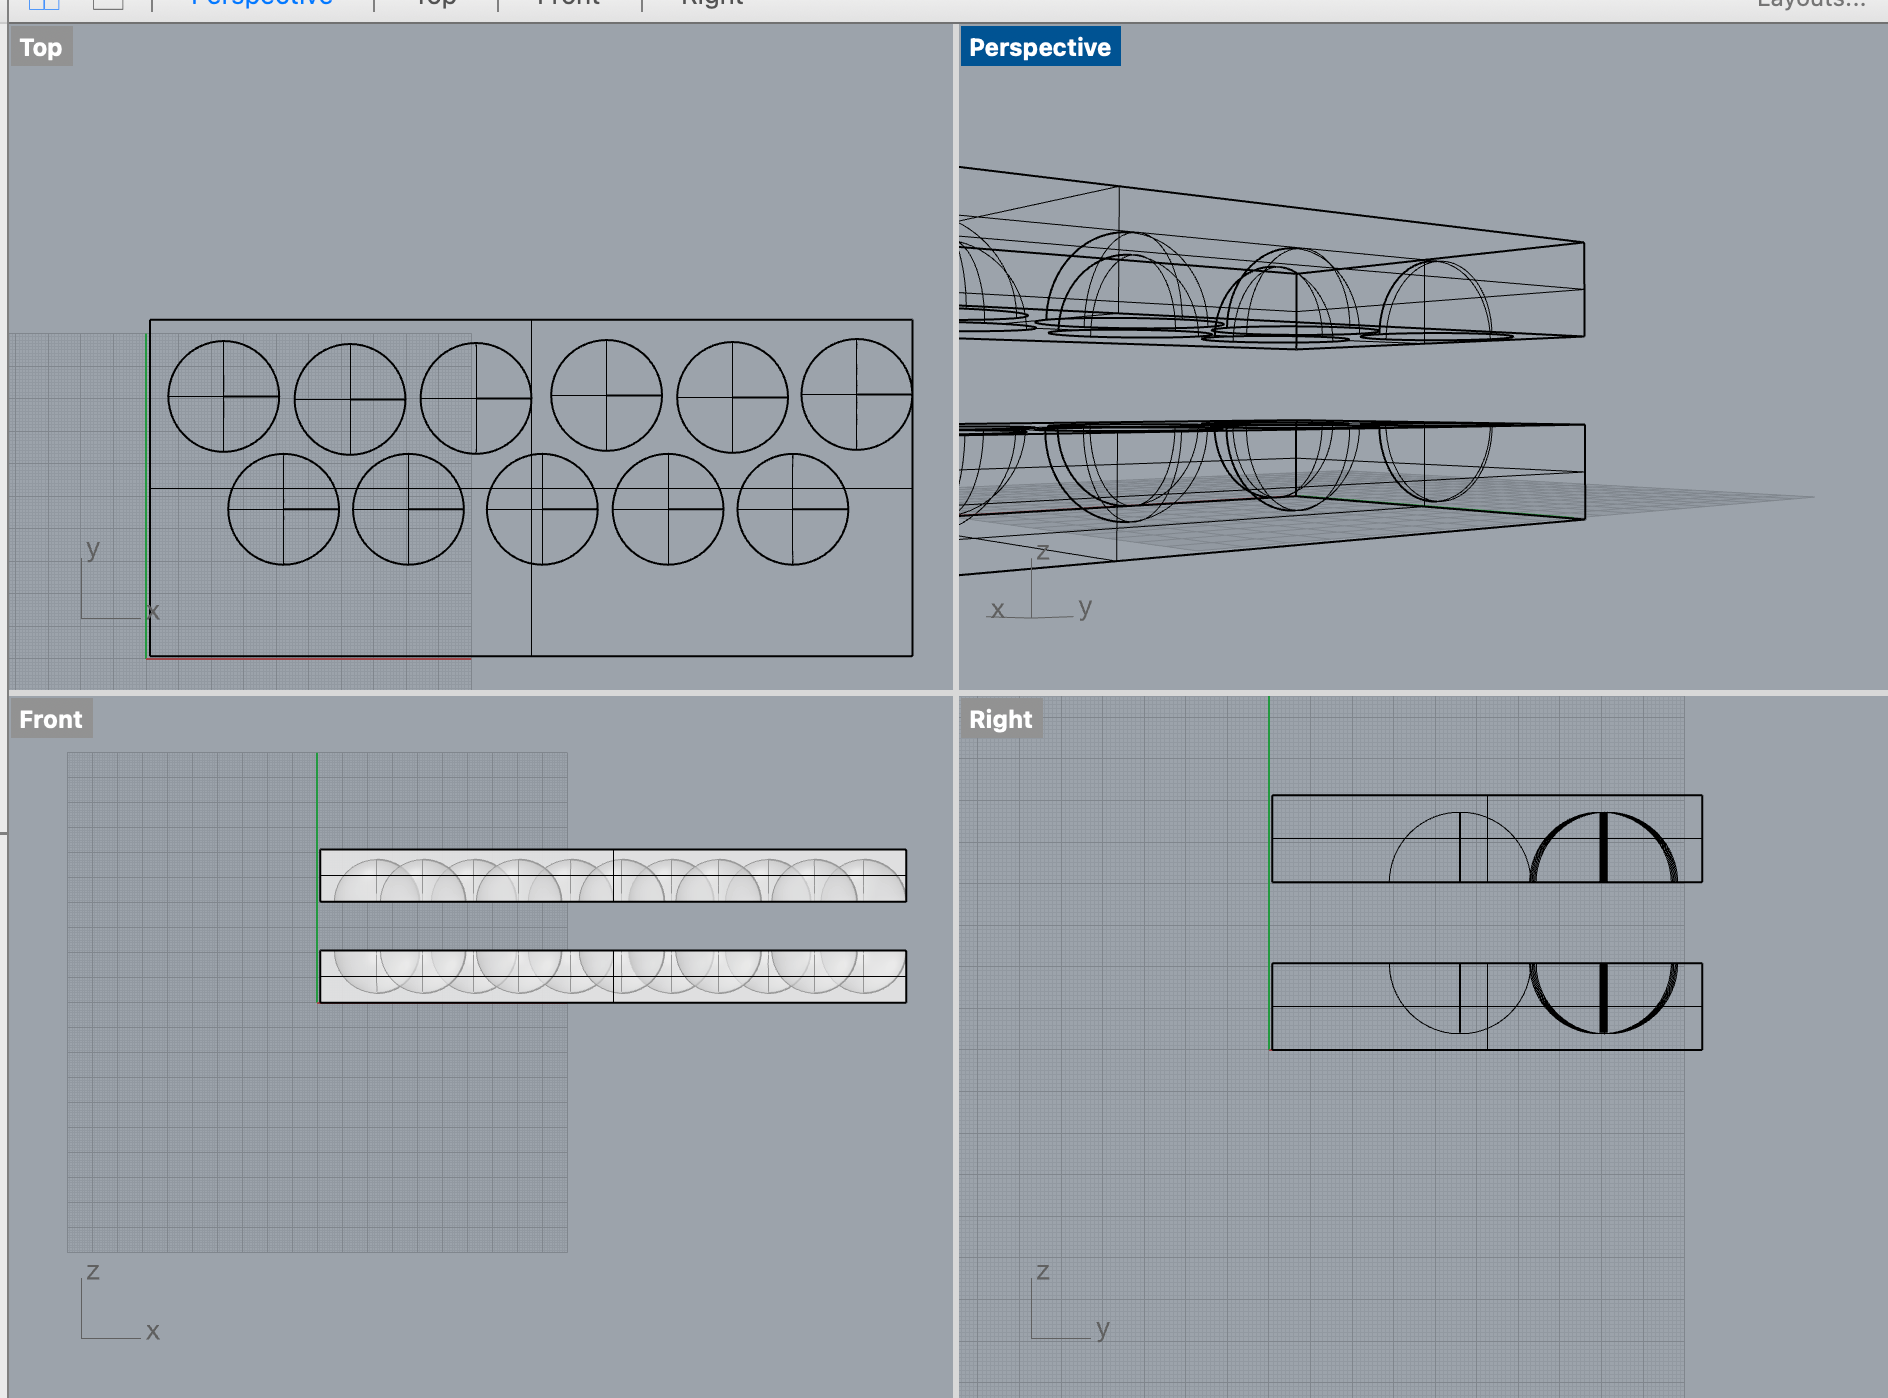
1. In Rhino, draw a curve (a circle, square or polygon)
2. Extrude 3 cm (the thickness of the foam we’ll be using) and ‘extrude’
3. Create a shape and place it inside the extrusion and use ‘Boolean Diff’.
4. Split into two parts using ‘SrfPt’ (surface point) and ‘split’
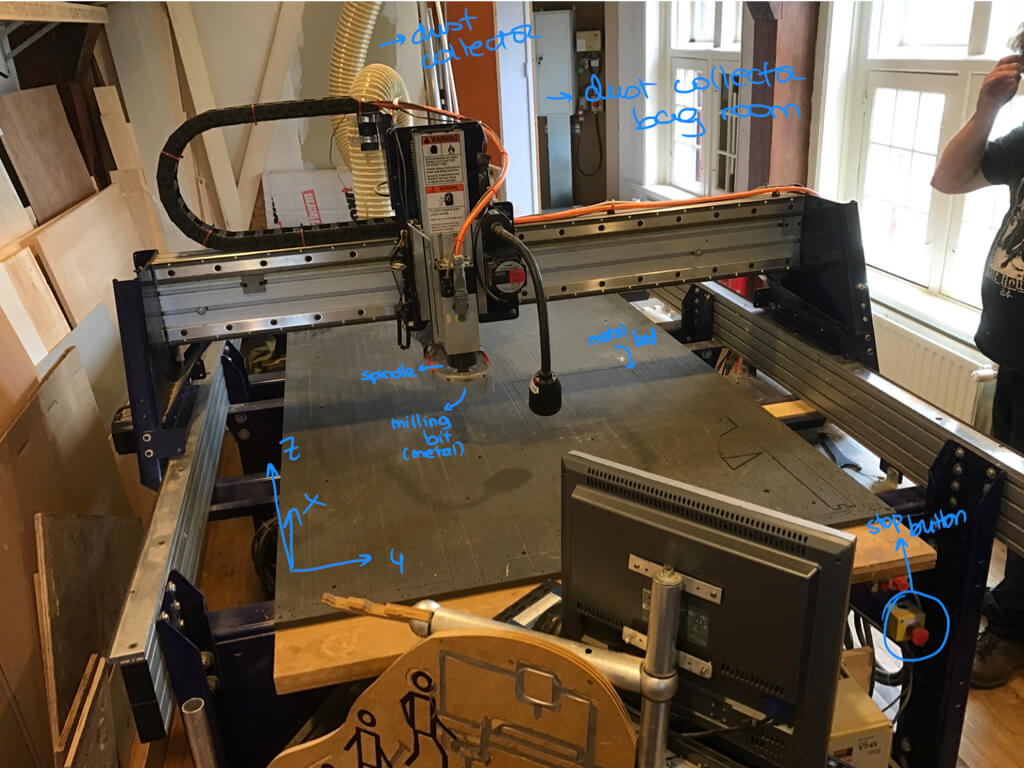
CNC Milling
The CNC milling machine is basically a drill attached to a frame with three axes. It is also a dangerous machine that can cause serious fires without warning you that you’re making a mistake. Make sure that the bed is clean and don’t touch the machine when it is moving.
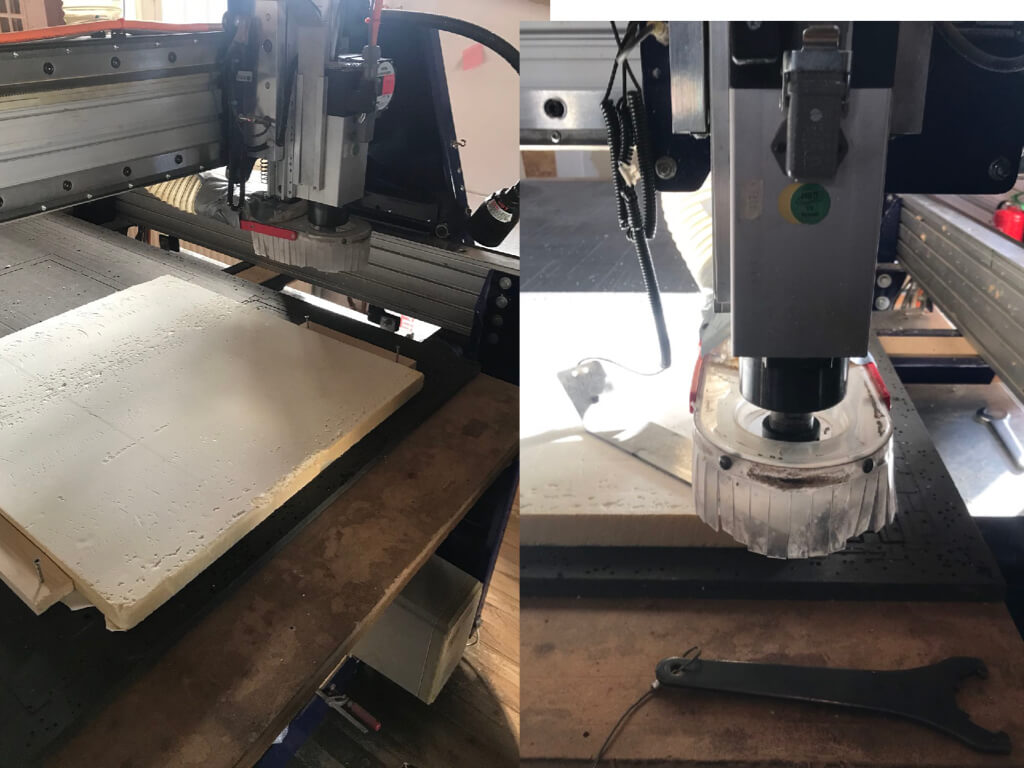
You need to fix the material you want to mill in place. We use two wooden slats placed aside the material that we screw onto the bed. The machine must never hit the screws since sparks can occur that can set the dust collecting bag on fire.
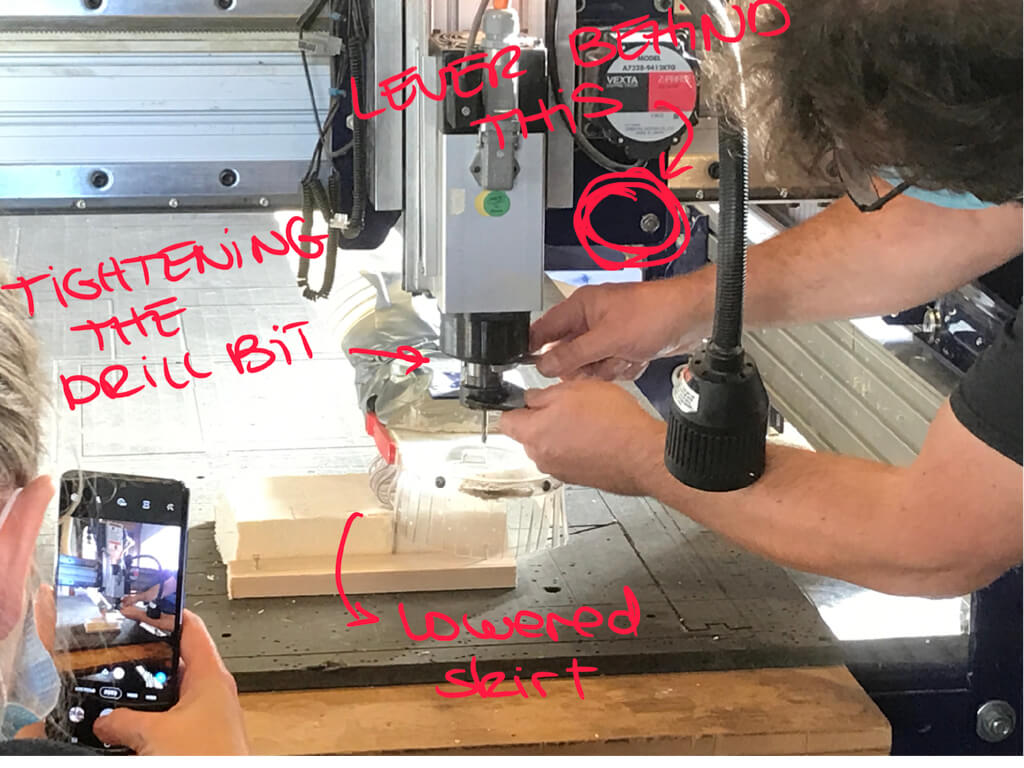
Another dangerous part is changing the milling bit (the drill head). The tool for taking the head off is therefore attached to the key you need to turn to turn on the machine.
After you have finished using the machine the room needs to be vacuumed and properly cleaned.
SOFTWARE
The CNC milling machine takes a STL document and translates it into a G-code. We started by using the Vcarve shopbot edition, but changed to Partworks because Vcarve wasn’t cooperating:
1. Open the programme and create a new file.
2. Select material. We’re using foam of which we need to remove the metal film that is attached to it. Measure the material you are using precisely
3. Set the anchor point in the software (0,0)
4. Select modelling resolution to standard
5. Select the material from the dropdown menu
6. ‘Import file’ to import the 3D file to be milled
7. Place the model in the material you want. The software will tell you in case of errors. If you select ‘fit to material’ it will scale the model to fit the scales of your material.
8. Roughing tool path settings. This phase will remove big parts of the material.
- Select the milling bit
- Select stepover (50% is recommended)
- Select spindle speed (10.000 rpm for foam). To discover the right number you need to test but hard materials need a slower rate than softer materials.
- Plunge rate is 120 for foam. The denser the material the slower it should be.
9. Finishing toolpath, this will smoothen the surface.
10. Cut out toolpath, this we’re not using.
11. Preview machining.
12. Save the file. If you’re using two bits (one for roughing and another for smoothing) you’ll need two separate files and use the dimension of the milling bit as the file name.
OPERATING THE MACHINE
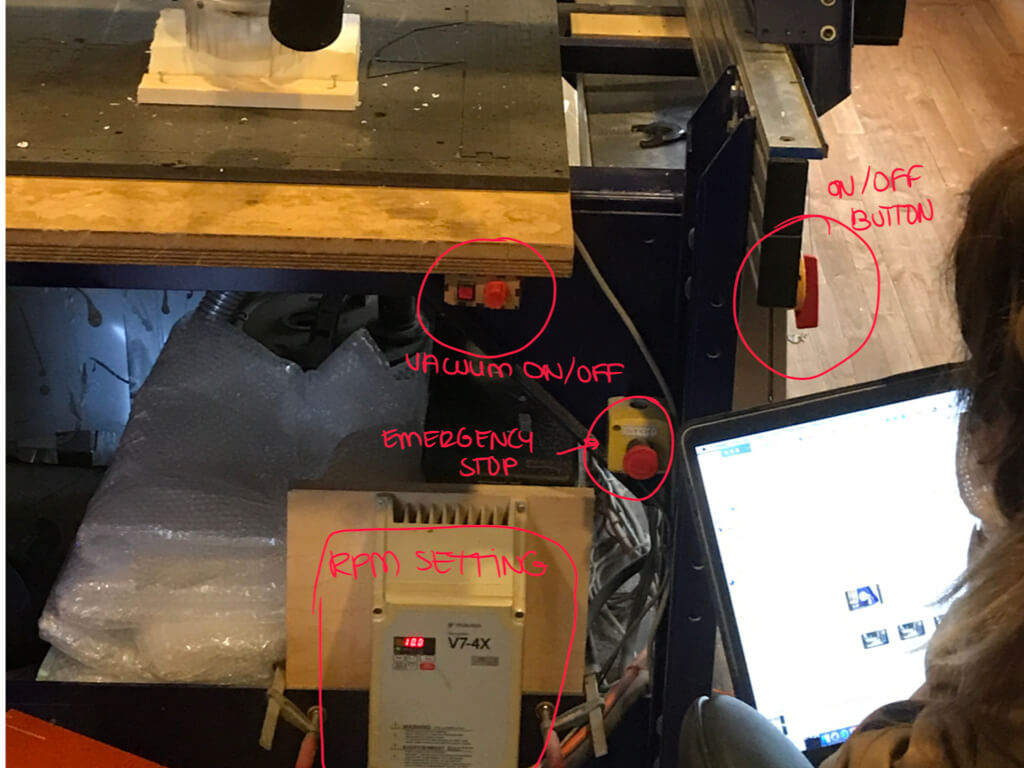
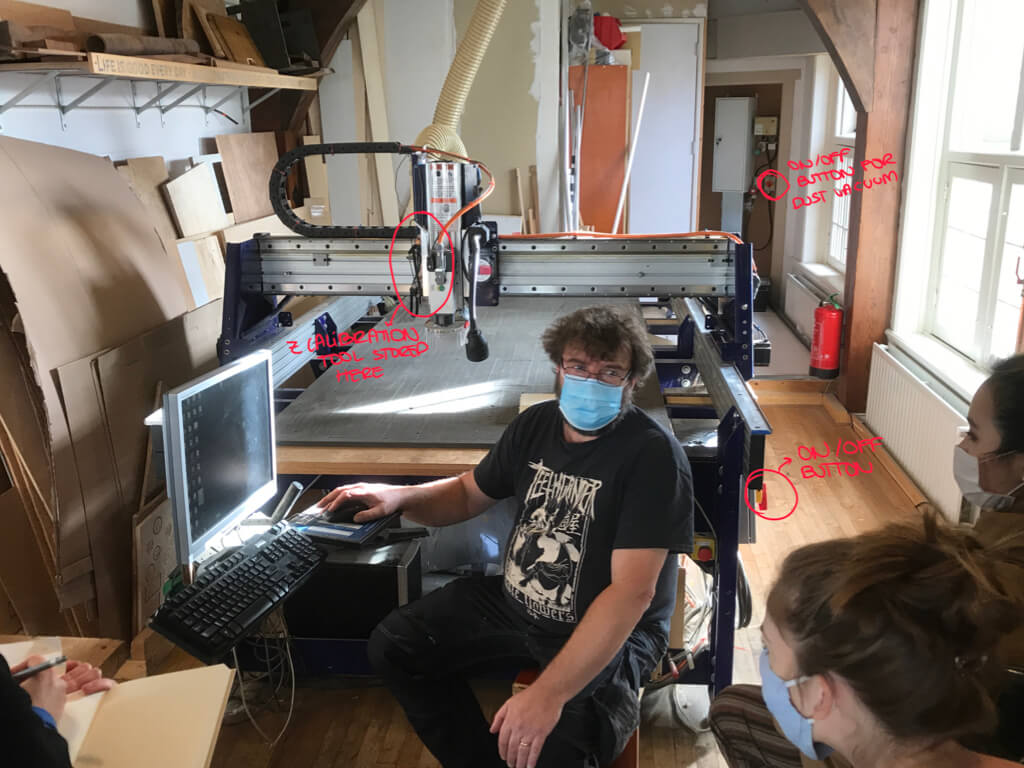
Photos and notes above thanks to Sara Alvarez
- Make sure that the bed is clean. If not it could ‘lift’ the material you’re drilling slightly and thus cause errors when milling.
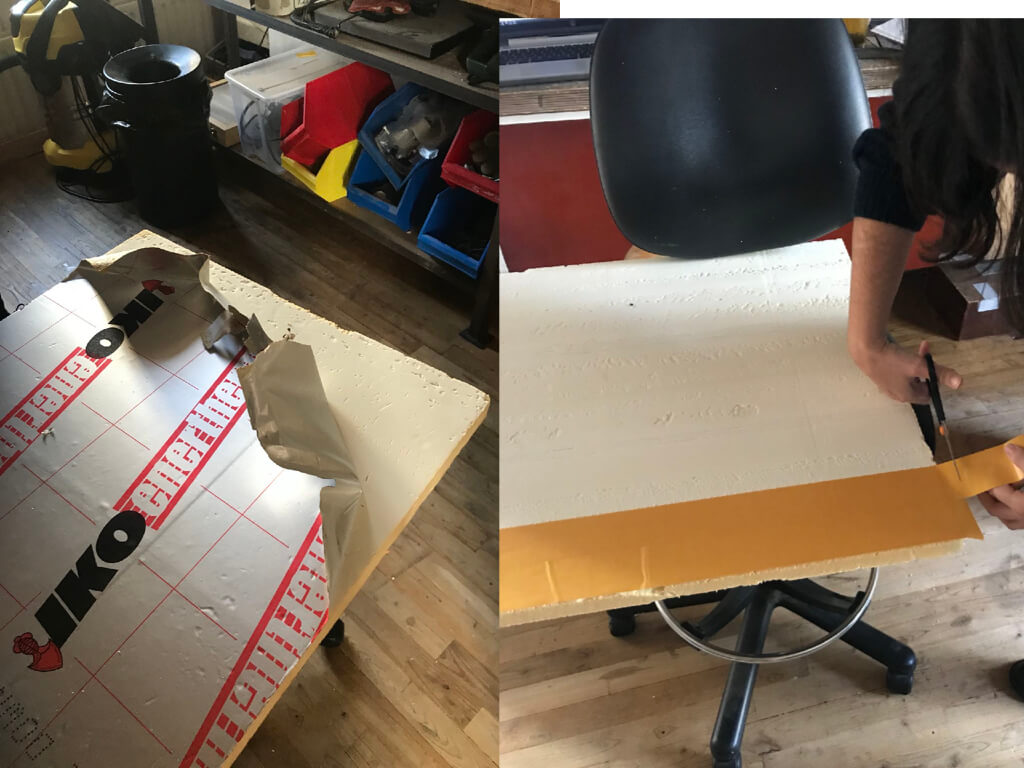
- Fix the material to the bed with double sided tape for foam; wood we would screw down. Make sure it is flat. Reinforce the foam with two slats of wood, screwed down alongside the piece of foam.
- Turn on the machine
- Open Shopbot software
- Press ‘k’ to open a control panel. Then you can move the axis of the machine with the arrows on the keyboard.
- Set the 0.0 of the machine. This is where the machine will start by selecting ‘button set zero x,y’ A loud noise will sound and the machine will start moving.
- Set the anchor by pressing ‘job home’ and moving the spindle to the starting place of the material with the keyboard.
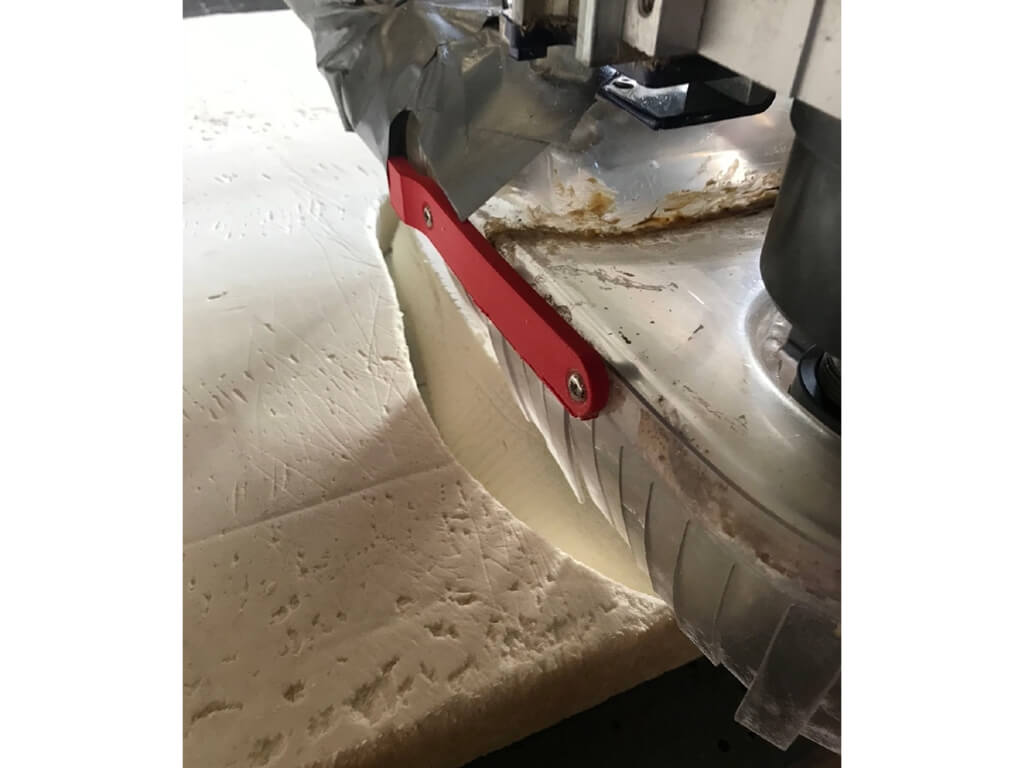
- Make sure the drilling bit is sticking out enough to drill as deep as you need. Pull up the plastic cover by using the lever at the back. Place the bit in and tighten. Place the cover back in place.
- Set the 0 for x,y on the software
- Set the Z height with the calibration tool. The metal plate has to touch the drilling bit, here it end. Press the button on the software, a loud noise sounds and the z-axis moves until it touches.
- Lift the Z-axis (press k on keyboard) and make a mock run.
- Put Z back in place, turn on the dust collector, then turn on the machine
- Set the rpm of the spindle (100 for foam)
- Turn on vacuuming
- Press ‘start’ on software and turn the key.
- When finished, turn off everything, remove the key and clean-up.
Alternative Molds
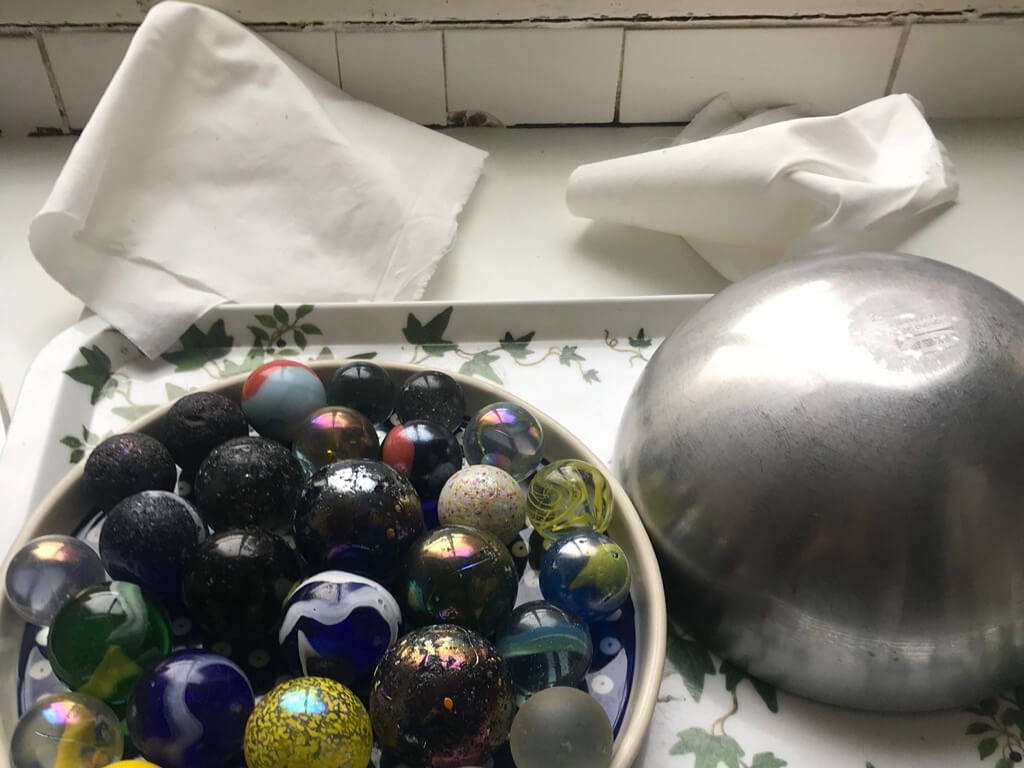
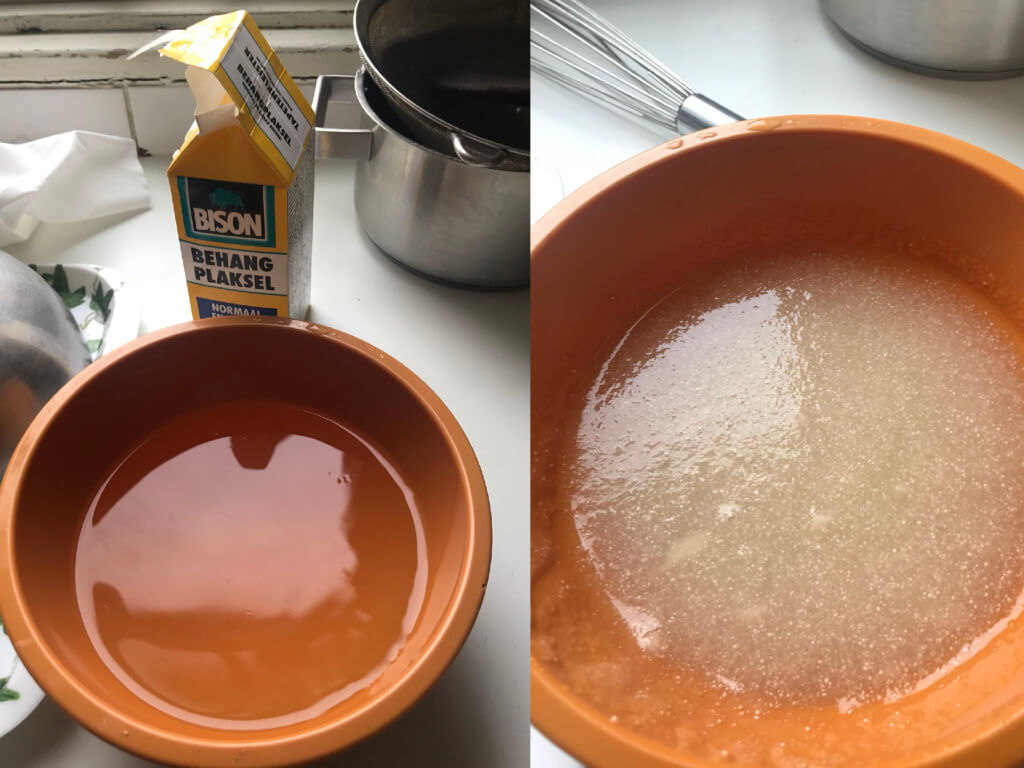
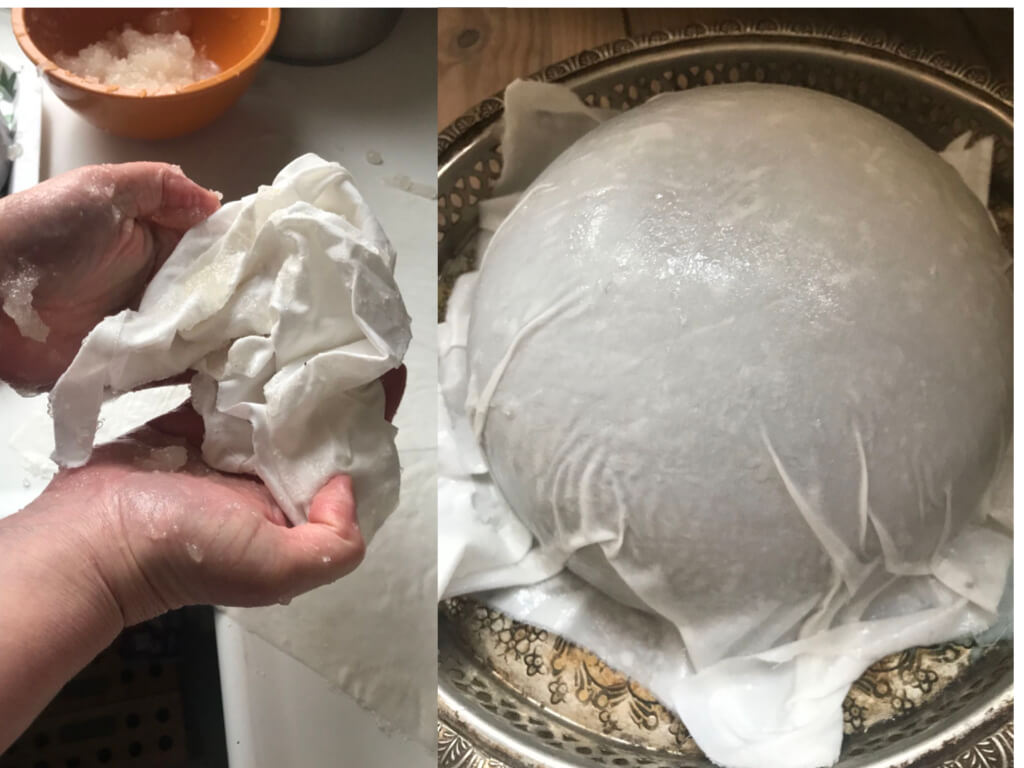
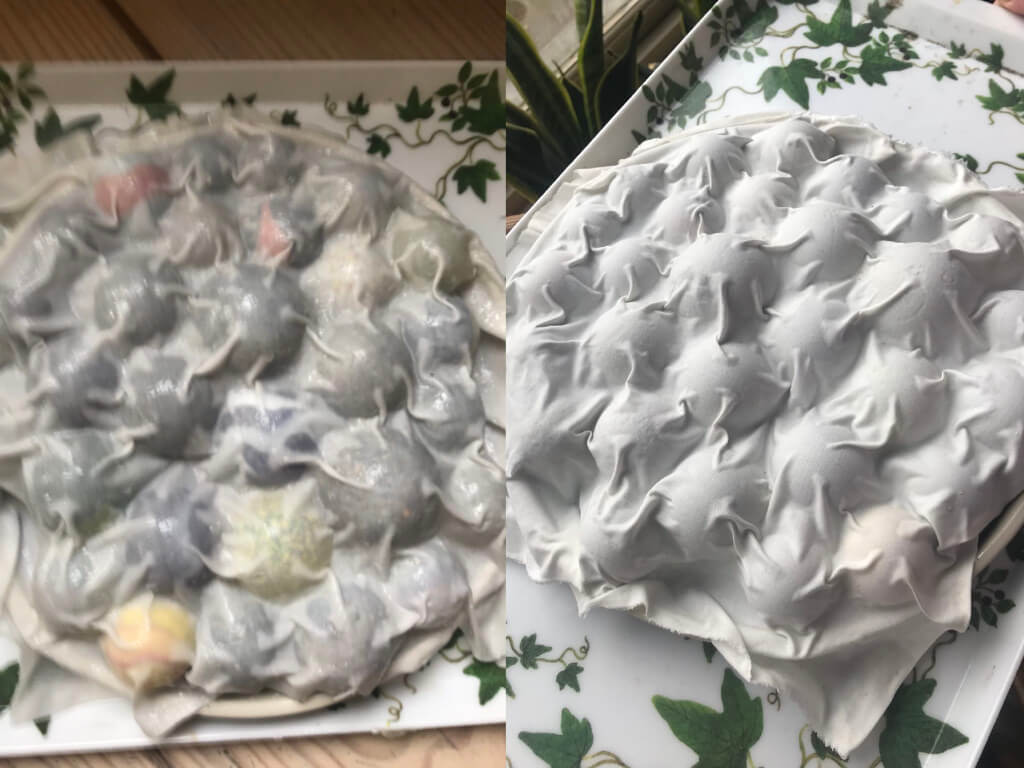
I didn't end up using the milling machine, since it broke down and took a while to fix. Instead I used an existing bowl, and a plate and large marbles as molds to cast unto. White cotton, some thick wallpaper glue and some time also works fine.
Useful links
- More about Schrödinger’s cat
- An article from the Guardian in which the dark and unsustainable problems one must associate with the current trend of supposedly healing stone crystals are highlighted