6. BioFabricating Materials
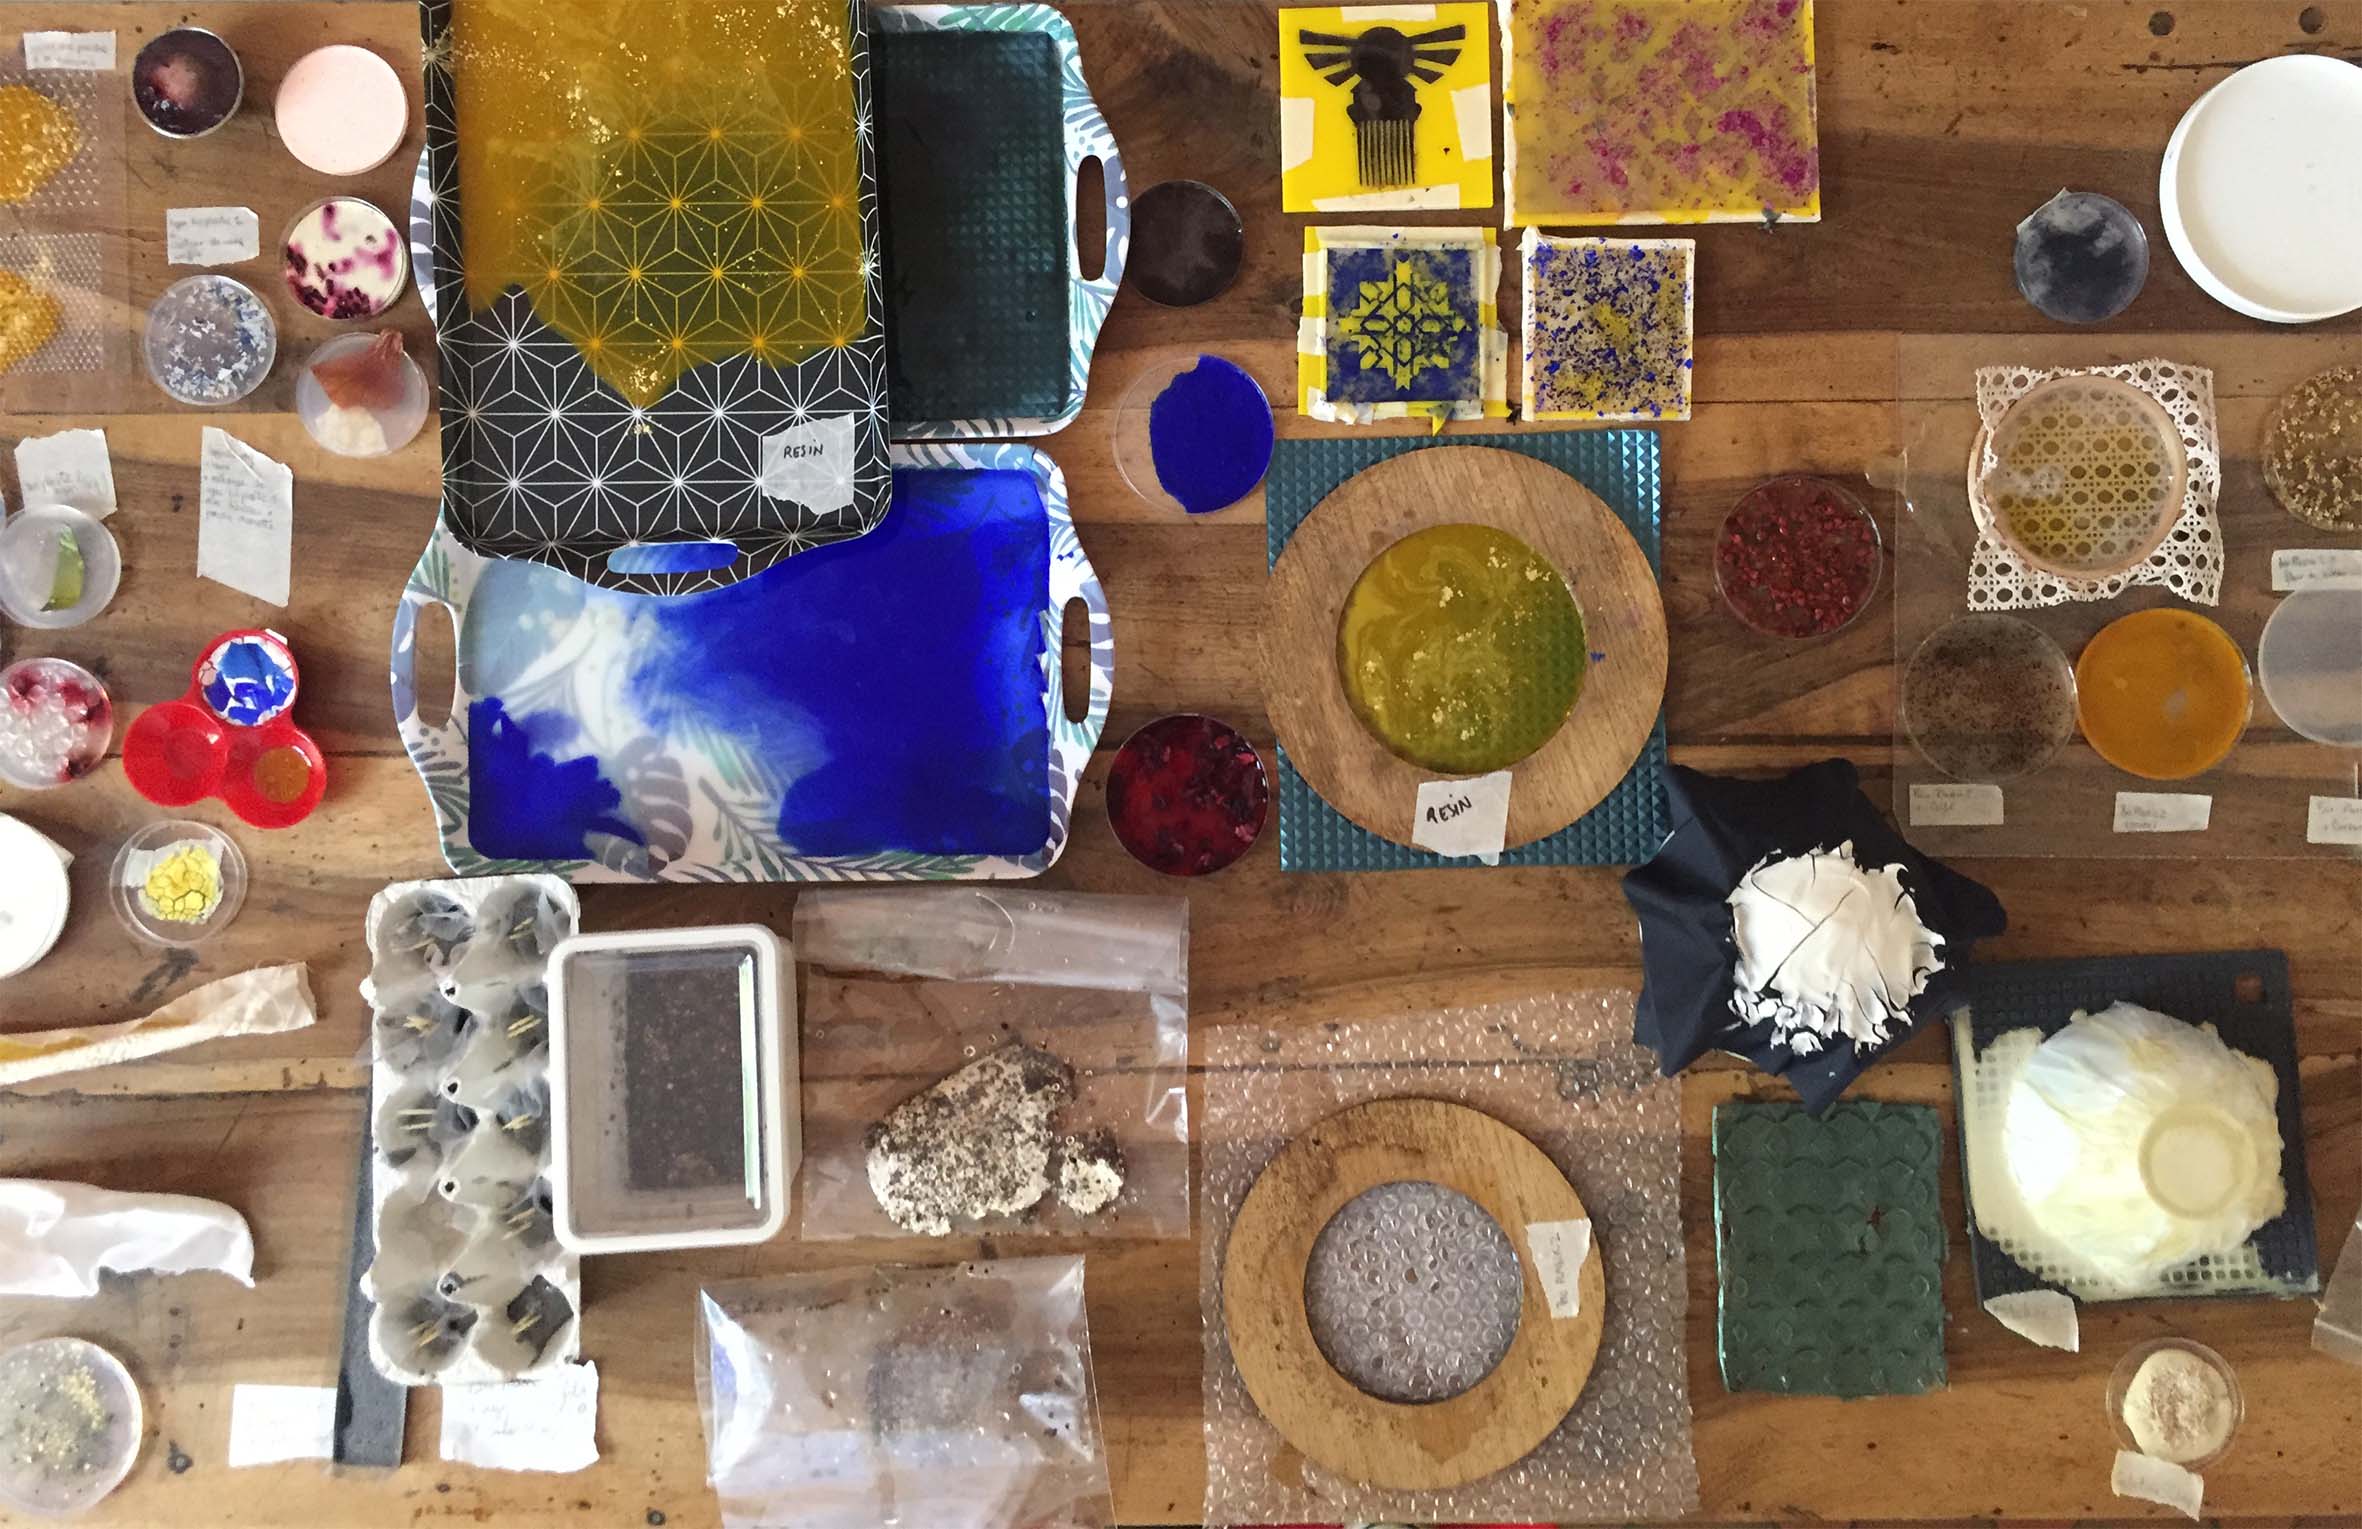
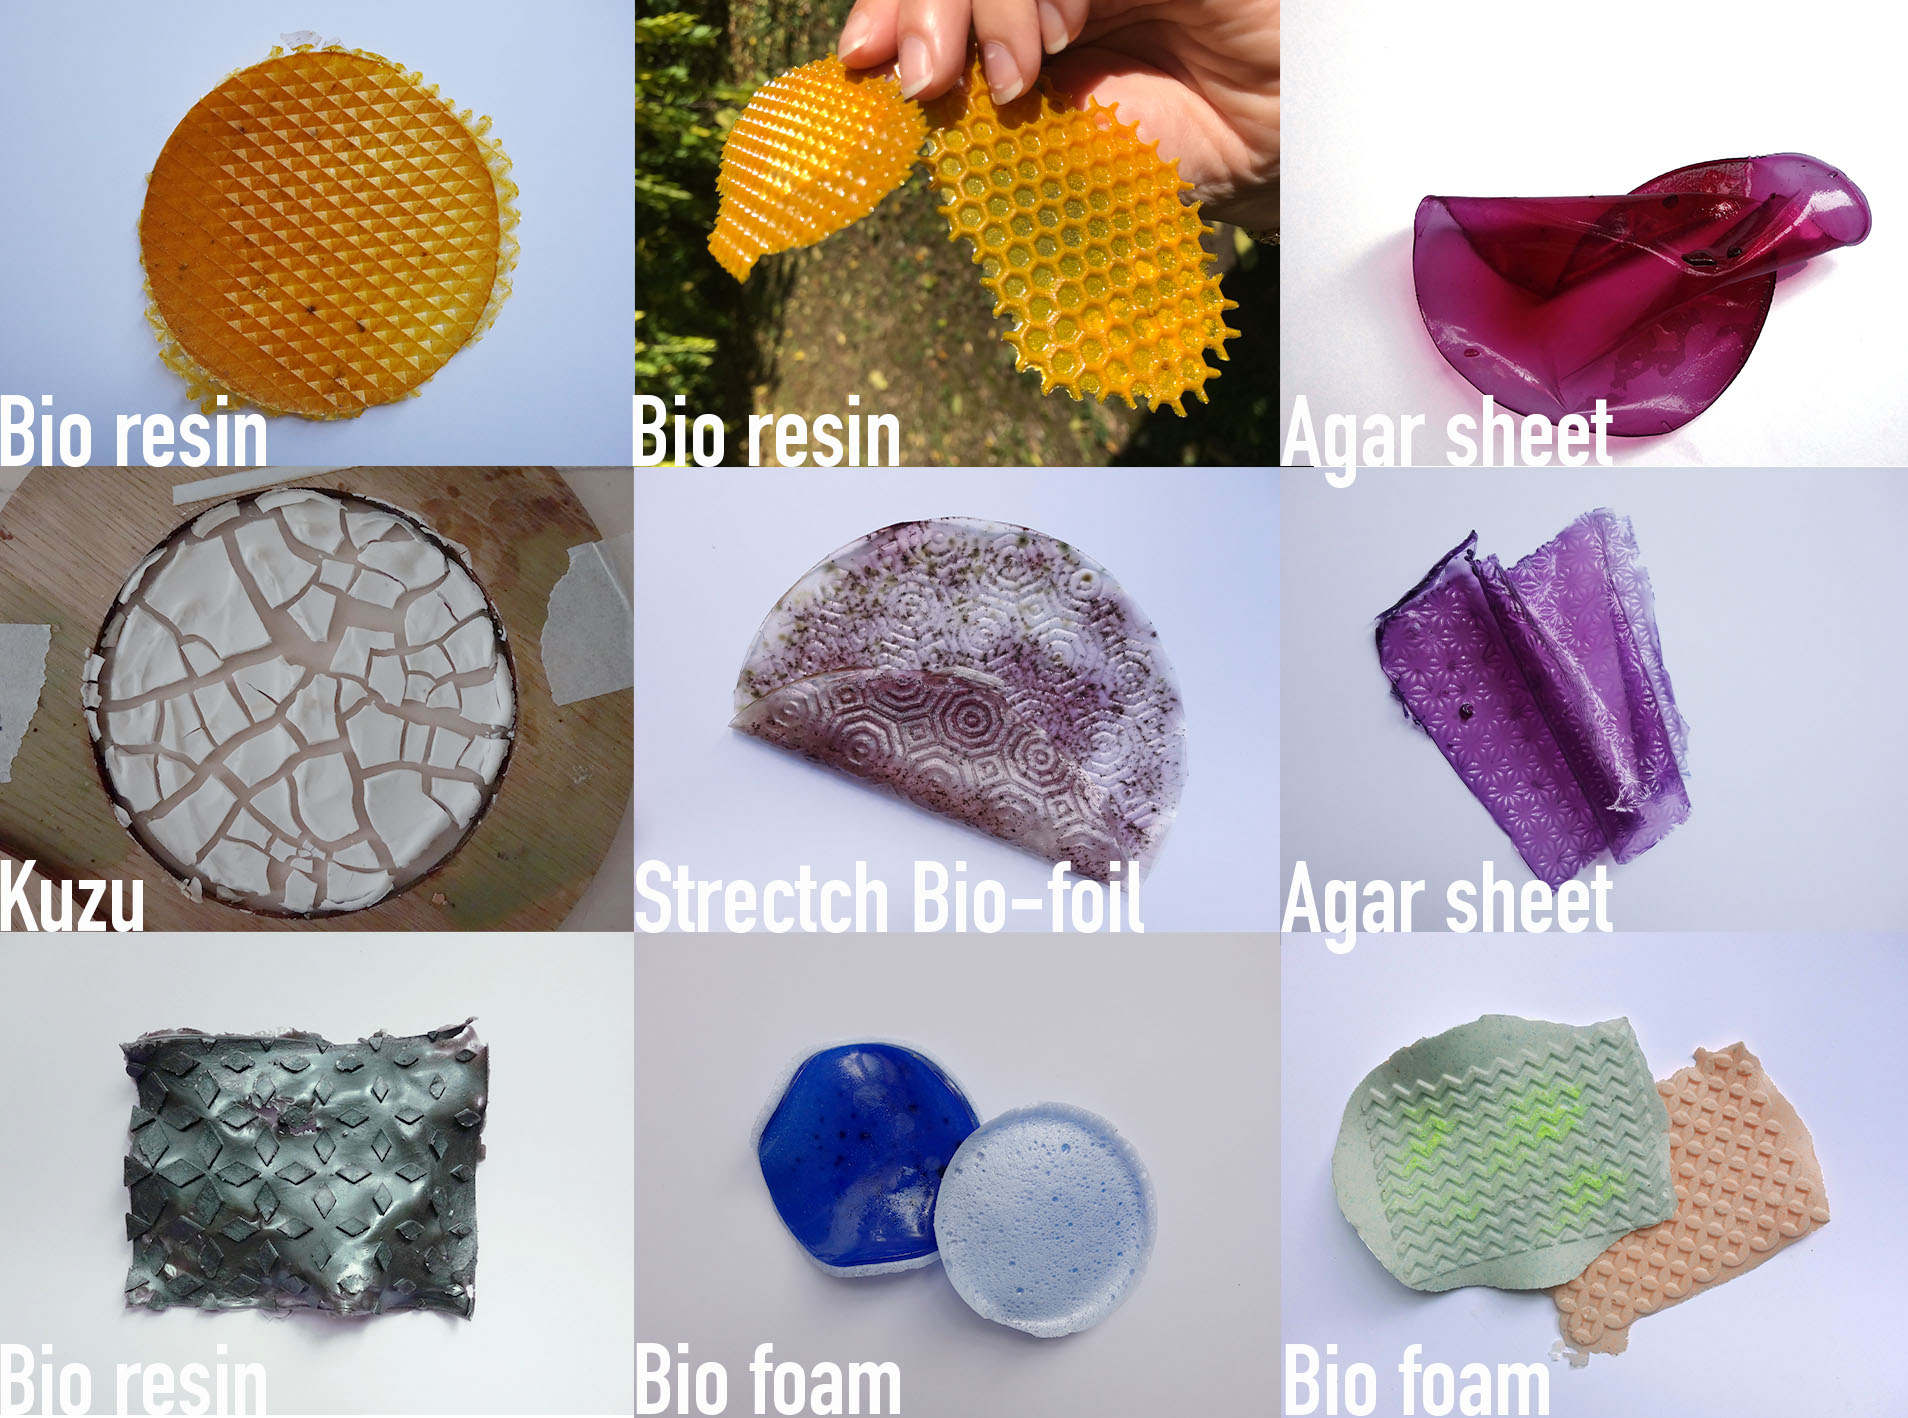
This week we made biomaterials. It's a new world for me and it's an amazing discovery. As week 4, we worked the 9 of us as a team.
All our samples are still drying.
References
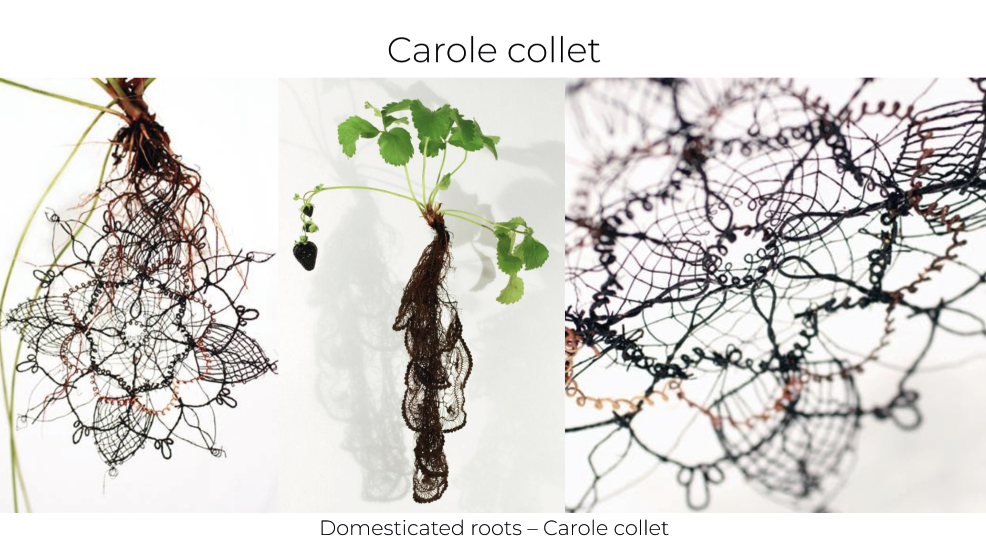
Domesticated Roots
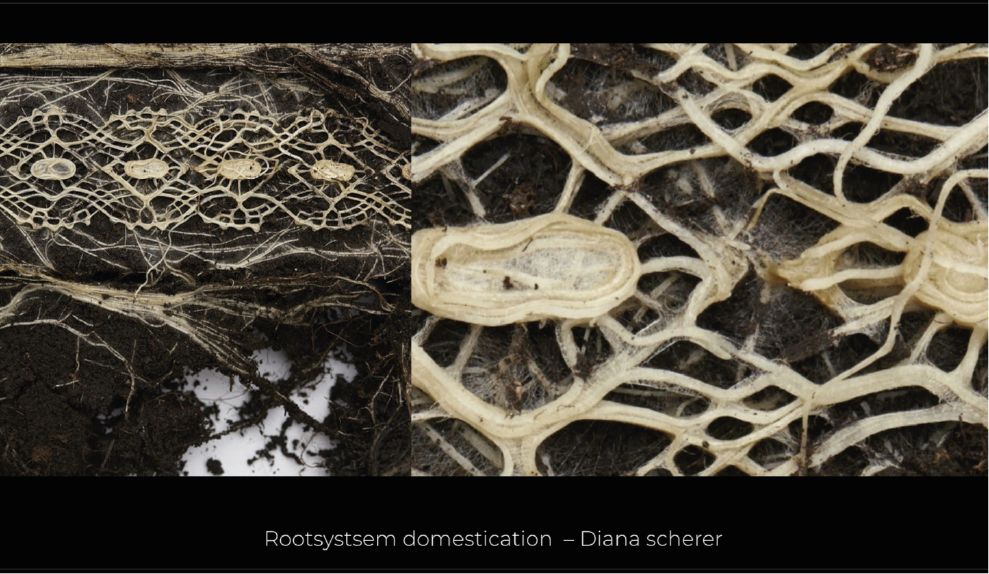
Rootsystem Domestication
Le jardin de Lug
The first one is Le jardin de Lug (Lug's garden) from Nemeton, a Biolab in Grenoble. The aim of the project is to grow stools from trees. It started in 2019 with the simple idea of growing furnitures directly from the ground. This method is called tree-shaping and it consists in growing young trees with rapid growth and guide them directly with props to the desired shape of the furniture. The trees are polawnias because they have a fast growth. I helped planting the roots two years ago. This is a stool and it will be "harvest" next year :
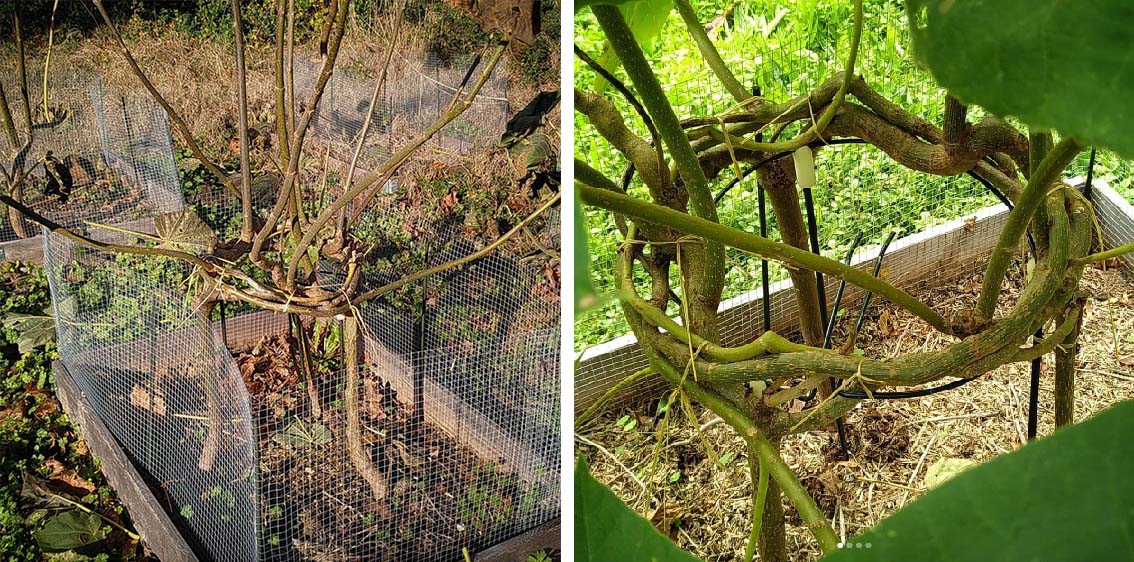 Pictures are from Nemeton
I like this idea of growing objects directly. It might seem like a long time to wait 3 years to get a chair. But we have to keep in mind that to make a "normal" chair, we have to wait years for the tree to grow, then we have to saw it, then make the chair, and it's also a very long process !
Arrosia
The second project is Arrosia. Camille Suarez and her team developp materials from the pin tree's resin Ecopin. Depends on how it is hitten and pocessed, this natural resin have the same proprety than some chimical resins. It's a fully recyclable and biodegradable material. They are working on applications such as sports/leasures, fashion, furnitures.
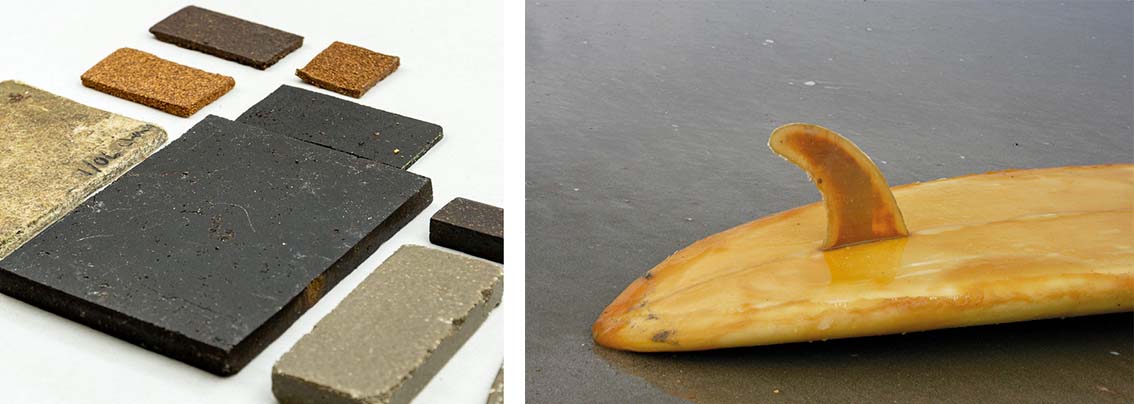 Pictures are from Arrosia
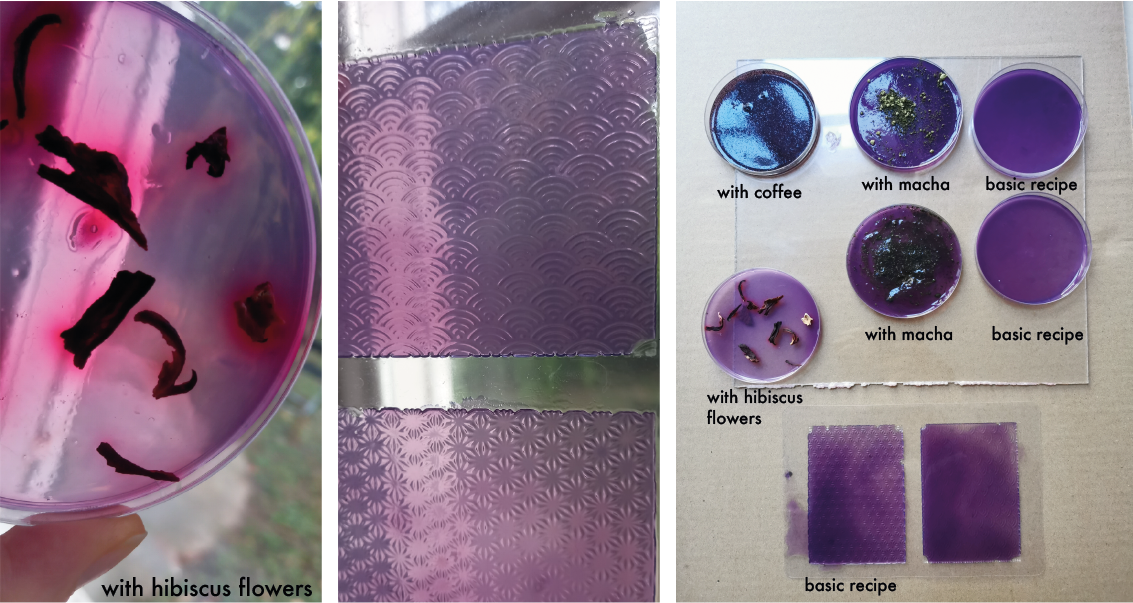
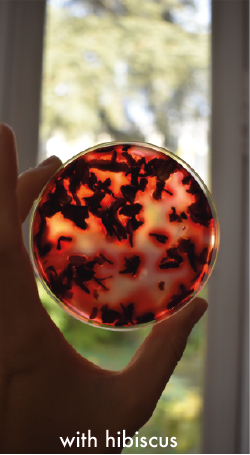
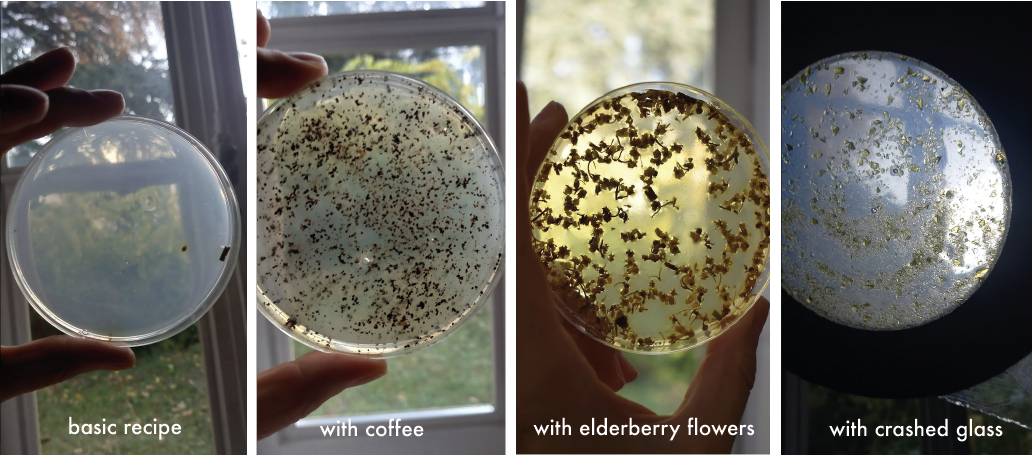
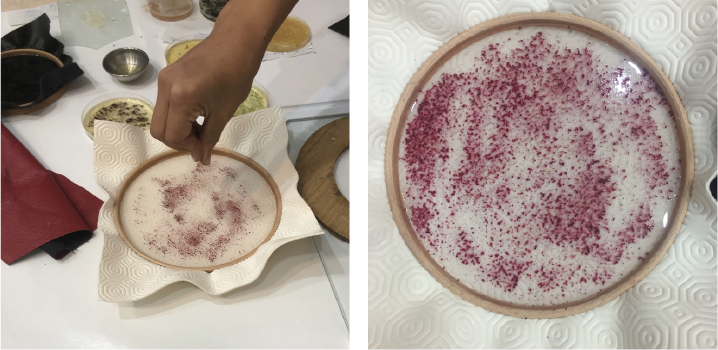
1.Agar Agar
Agar sheet
We used a recipe from Le Textile Lab Cookbook. We add 100mL of water and 150mL of red cabbage ink bath.
| Agar sheet | |
|---|---|
| Ingredients | Quantities |
| Agar | 5g |
| Glycerine | 15g |
| Water | 250ml |
| Pour in a thin layer on a plate or in a flat surface. |
Bioplastic 1
This recipe is from Fabricademy's course. The more glycerine added the more flexible the material will be.
| Bioplastic 1 | |
|---|---|
| Ingredients | Quantities |
| Agar | 4g |
| Glycerine | 25g |
| Water | 400ml |
| Warm up the water (max 80°C, 60°C is better), add glycerine, add agar. Mix until smooth. Simmer for 30 minutes, slowly move to 86°C max. It should have a honey texture. Poor in a mold. |
Bioplastic 2
This recipe is from Fabricademy's course.
| Bioplastic 2 | |
|---|---|
| Ingredients | Quantities |
| Agar | 4g |
| Glycerine | 17mL |
| Water | 200mL |
| Warm up the water (max 80°C, 60°C is better), add glycerine, add agar. Mix until smooth. Simmer for 15 minutes at 80°C, slowly move to 86°C max. Poor in a mold. |
Conductive Bioplastic
This recipe is from Elisabeth Lorenzi, Materiom.
| Conductive Bioplastic 1 | |
|---|---|
| Ingredients | Quantities |
| Agar | 2gr |
| Glycerine | 1mL |
| Salt | 5gr |
| Water | 240mL |
| Add agar with water and glycerine. Heat the mixture to 95°C or to just below boiling point. Keep stirring for a while. Allow the mixture to become some degrees cooler before putting it in a mold. It will get solid when it gets cool. It will take a few days to dry. |
| Conductive Bioplastic 2 | |
|---|---|
| Ingredients | Quantities |
| Agar | 4gr |
| Glycerine | 12gr |
| Salt | 10gr |
| Water | 250mL |
| Same recipe. |
 from left to right : basic, orange's peels, coffee, wool, annatto, coffe
These conductive bioplastics seem long to dry, maybe because of the salt which aborbs water.
Strectch Bio-foil
This recipe is from Fabricademy's course.
| Stretch Bio-Foil | |
|---|---|
| Ingredients | Quantities |
| Agar | 3g |
| Gelatine | 20g |
| Glycerine | 15mL |
| Water | 400mL |
| Cook +/- 45minutes at 80°C gives the best results. |
This material should be stretch... let's see when it'll be dry.
2.Kuzu
This recipe is from Materiom.
| Kuzu | |
|---|---|
| Ingredients | Quantities |
| Kuzu | 60 mg |
| Water | 120 ml |
| Glycerine | 10 mL |
| Vinegar | 10 mL |
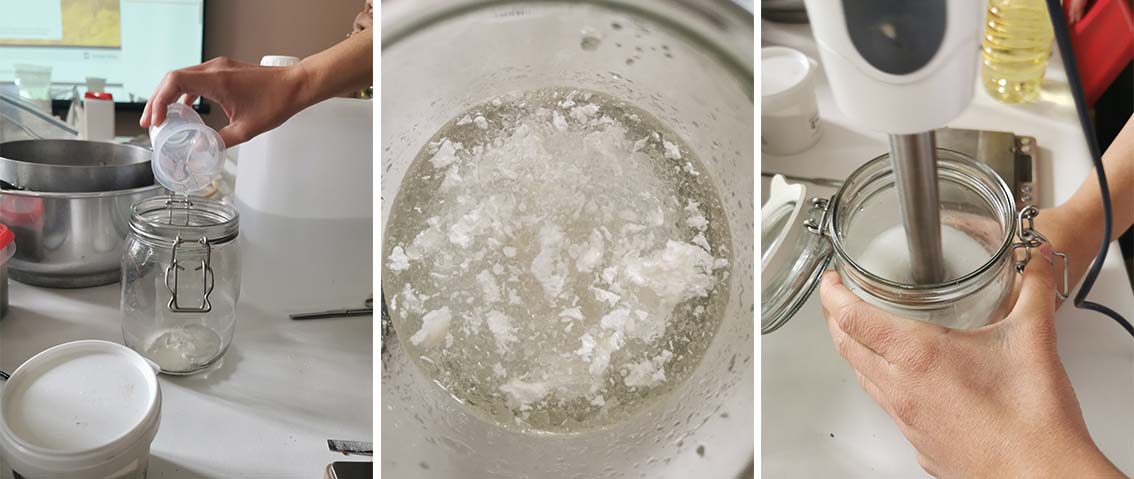
| Take a cooking pot (preferably steel container). Add kuzu and coldwater and stir until no lumps are present and kuzu is completely dissolved. Add glycerine and vinegar to the kuzu solution and mix well. Now, cook the solution under a low flame for five minutes, keep stirring (the whisk was a good toll for this step) the solution until it becomes a thick white paste. Transfer the compound from the cooking pot and spread it over a butter/ oil coated flat surface. |
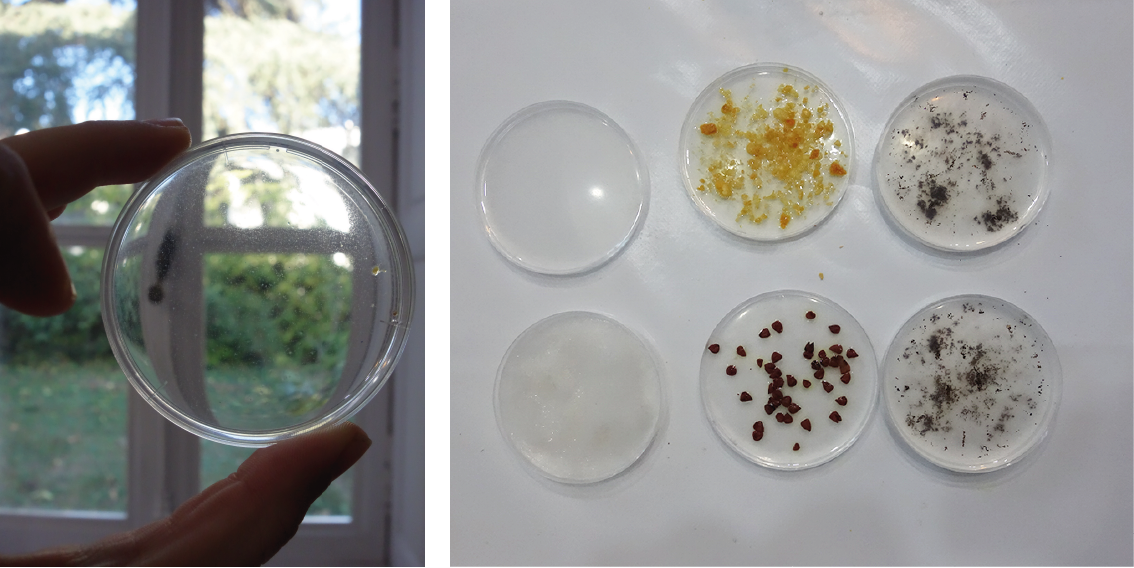
3.Alginate
| Flexible thin BIO-FOIL | |
|---|---|
| Ingredients | Quantities |
| Alginate | 12gr |
| Glycerine | 20gr |
| Sunflower oil | 10gr |
| Water | 200ml |
| Mix the alginate, with water, glycerine and oil with a mixer or blender. Let the mixture sit for several hours to let go of the air bubbles. Cast the mixture alginate onto a mold or textile surface. After a couple of minutes spray the casted alginate with the calcium chloride mixture. Be careful, the casted alginate will shrink. |
| Spread solution for curing | |
|---|---|
| Ingredients | Quantities |
| Sodium chloride hydrate/ Calcium Chlorure | 10ml |
| Water | 100mL |
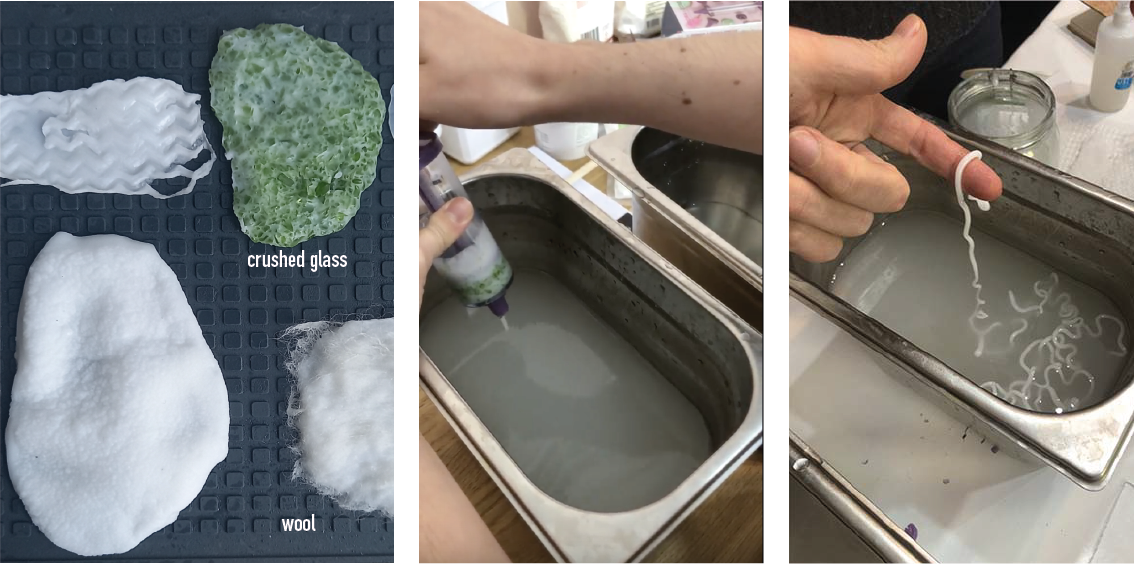
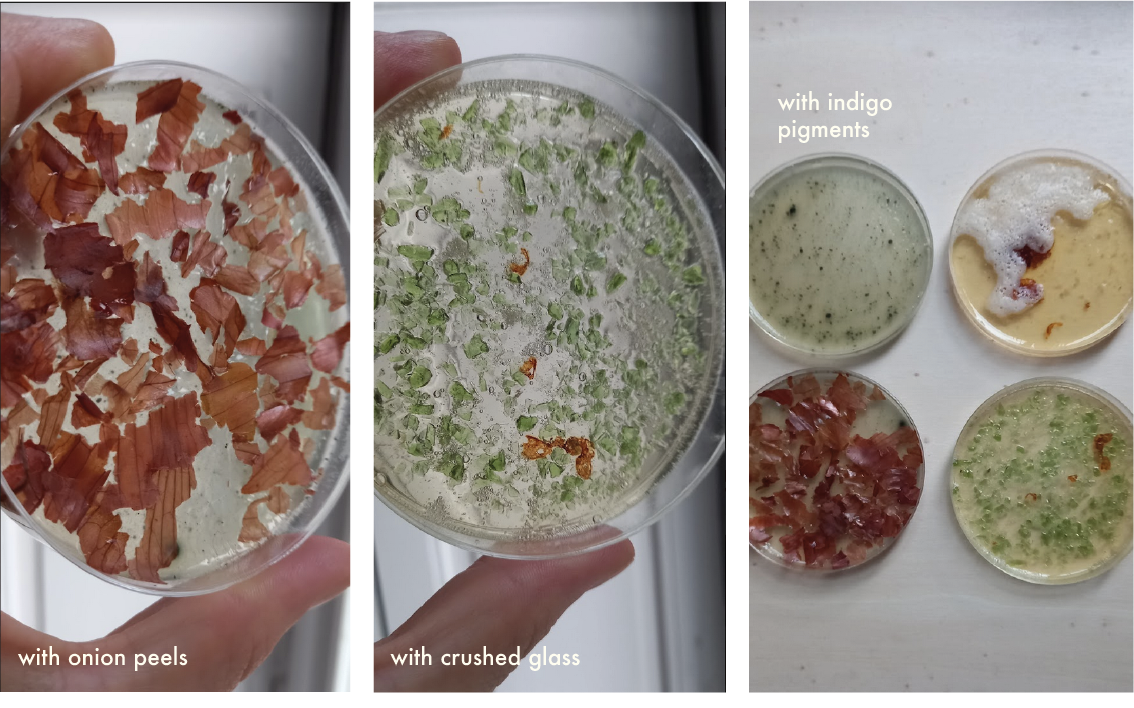
We added wool and glasses in the alginate. To make the threads, we put the alginate mixture in a syringe and pushed it directly into the solution of water and sodium chloride. Alginate has a soft and smooth texture. It is water resistant (it dissolves after few hours in alcaline Ph water) and heat resistant (up to 150°C).
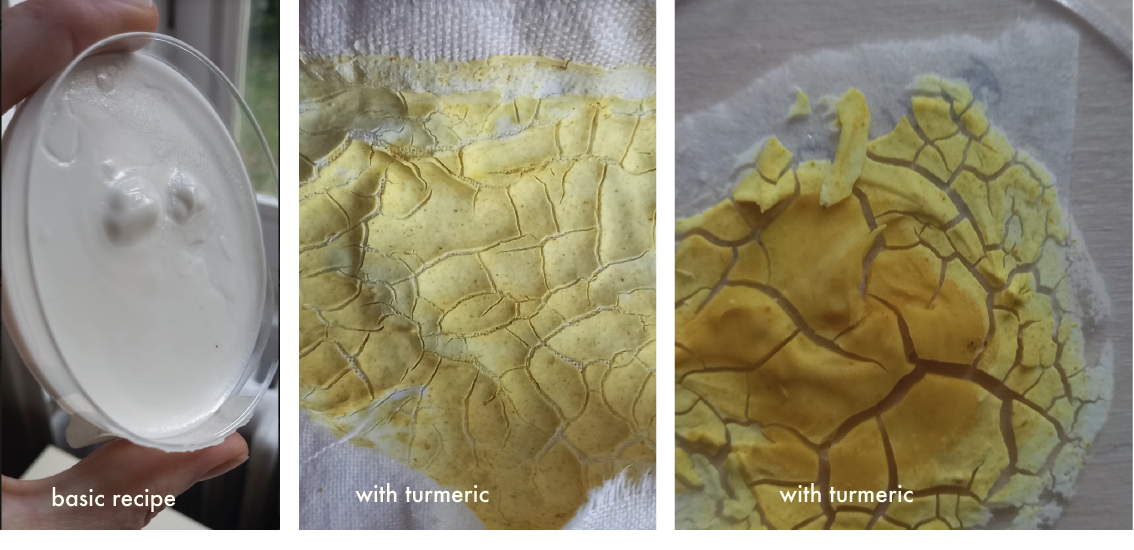
4.Gelatine
We tried the bio foam and the bio resin.
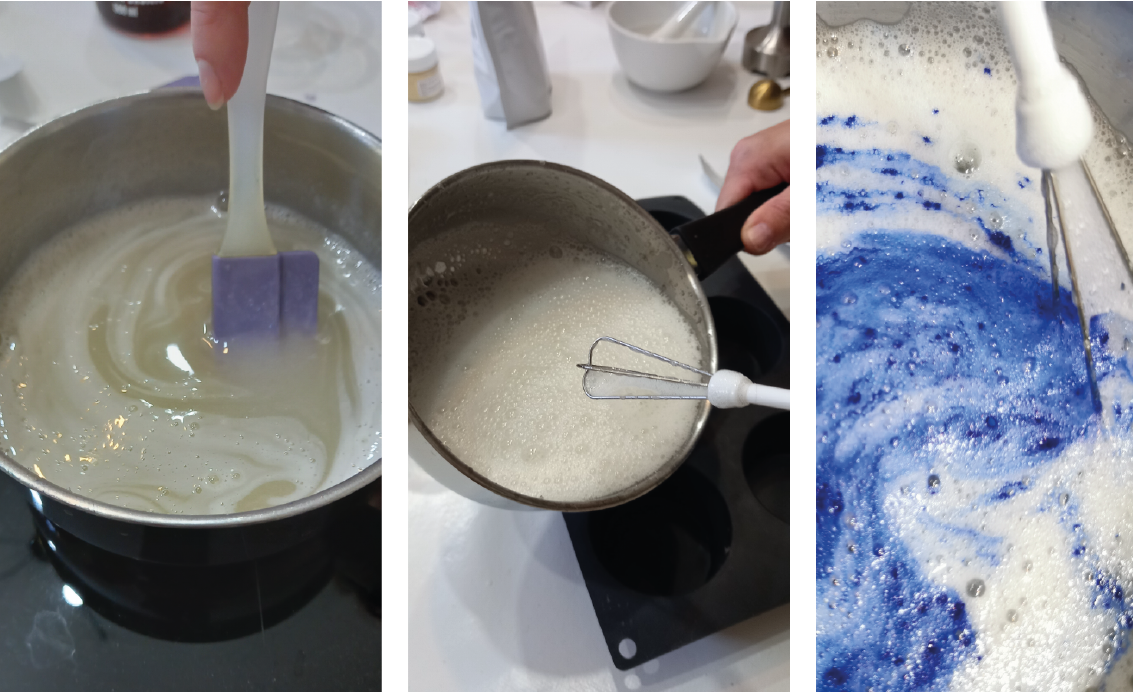
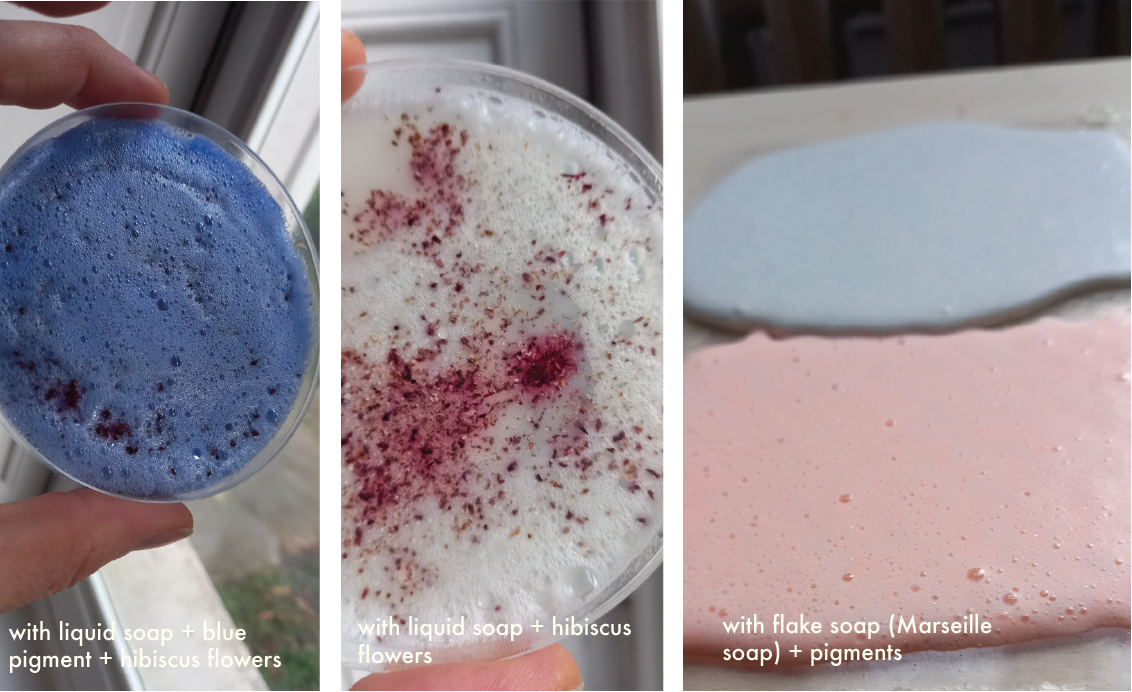
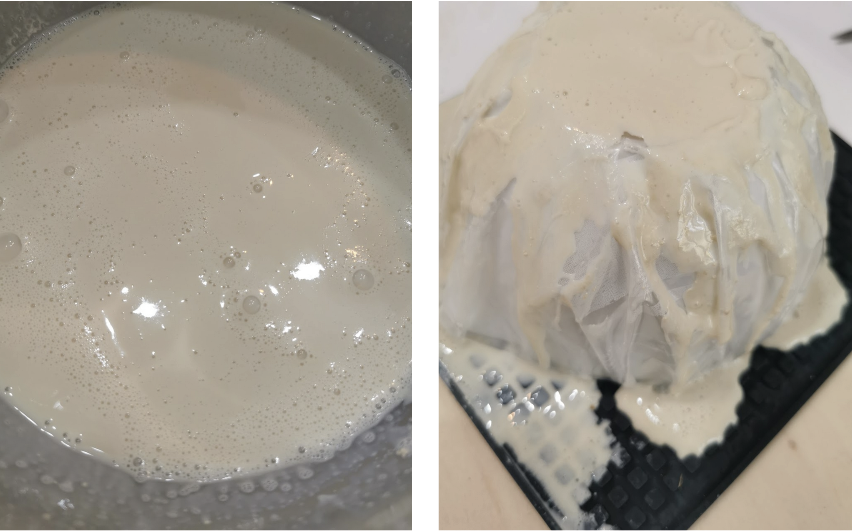
Bio foam
This recipe is from Fabricademy's course.
| Bio-Foam | |
|---|---|
| Ingredients | Quantities |
| Gelatine | 48g |
| Glycerine | 12g |
| Water | 240mL |
| Soap | 10mL |
| Warm up water. Add glycerine and gelatine while gently whisking. Mix slowly the ingredients with a mixer until smooth. Simmer for 20 minutes (max 86°C°). Pour while hot on a surface or a mold. |
Bio resin
This recipe is from Fabricademy's course.
| Bio-Resin | |
|---|---|
| Ingredients | Quantities |
| Gelatine | 48g |
| Glycerine | 8g |
| Water | 240mL |
| Warm up water. Add glycerine and gelatine while gently whisking. Mix slowly until smooth. Simmer for 20 minutes (max 86°C°). It should take a honey texture. Pour while hot on a surface or a mold. |
It should be a tough bioplastic.
Gelatine + clay
| Gelatine + Clay | |
|---|---|
| Ingredients | Quantities |
| Gelatine | 24g |
| Glycerin | 0g |
| Water | 120mL |
| Clay | 10g |
| Warm up water. Add glycerine and gelatine while gently whisking. Add clay. Mix slowly. Simmer for 20 minutes (max 86°C°). Pour while hot on a surface or a mold. |
5.Molds
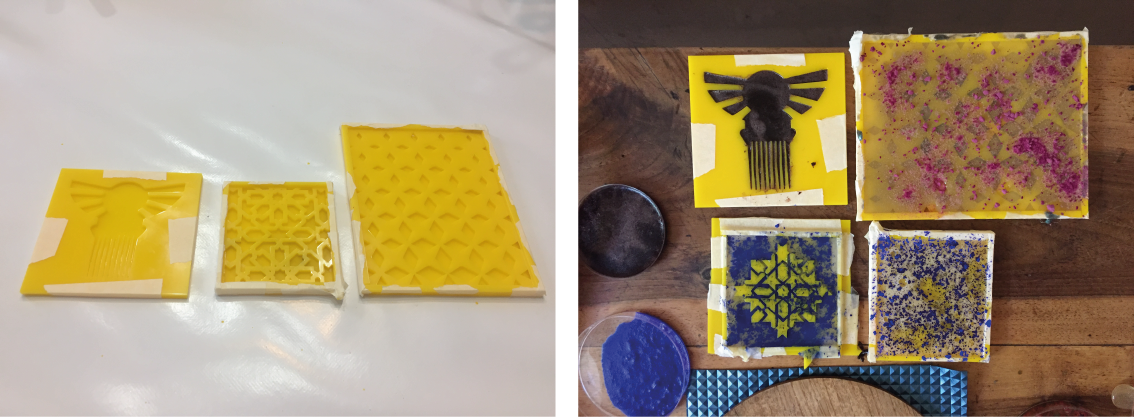
I decided to create molds to cast the bioplastics inside. I prepared my file on Illustrator and I used the laser cut. For each of them there are three parts : the bottom, the pattern and the frame.
The molds are cut in pmma, and the settings are :
- Power 95
- Speed 2,4
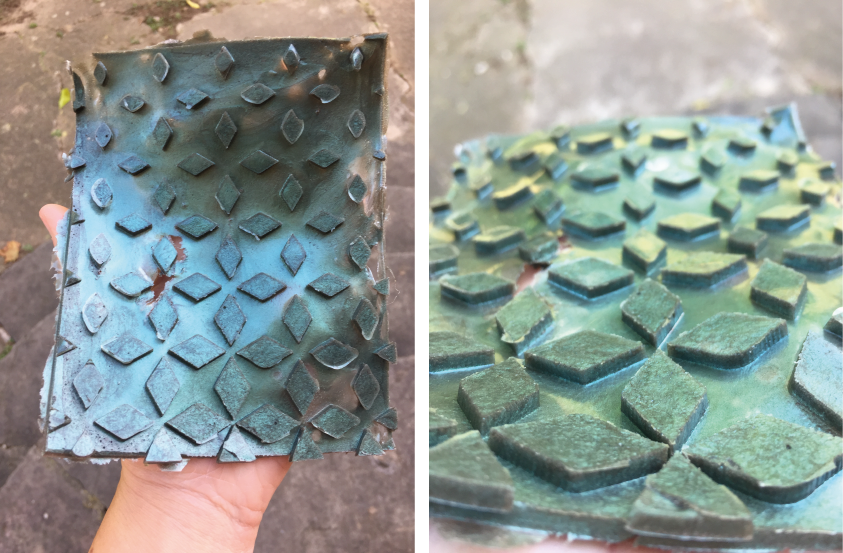
I wanted to make square tiles and a hair pin so I decided to use bio-resin from gelatin, for its resistance propriety.
The file to make the mold is here.
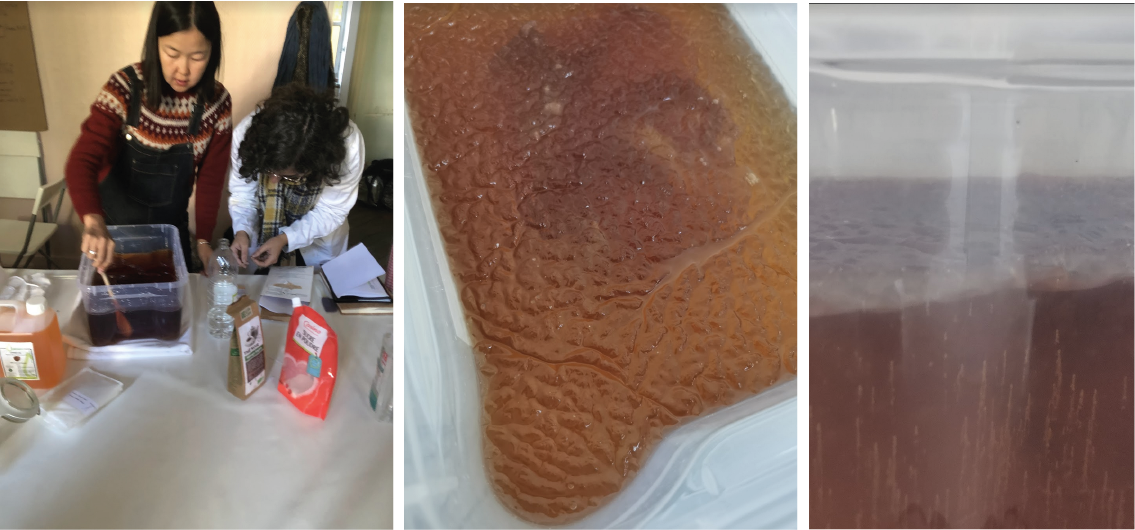
6.Kombucha
We started our Kombucha on Week 4 to be ready.
Part 1
We used a classical recipe with black tea to start with and later on we might make other recipes.
So here is the recipe:
For 1L of water - 1,5 to 3 gr of tea ( we used black tea,but it can be any tea, depending what color of material you want) - 100 gr. of sugar - Vinegar from 0 to 100ml (depending on PH of your liquid) - Scoby mother
In our case as we want a little bigger of a piece of Kombucha material, so we made 7 L of water.
For 7L of water - 21 gr of black tea (+ filter bag or tissu) - 700 gr of sugar - Vinegar - we added around 100 ml of vinegar untill it got to PH 3 - Scoby mother - 15cm ø
Steps:
Prepare all the ingredients, tools, utencils that you need at your workspace.
First we sterilise our equipment, especially the tray where you gonna grow your material and make sure that all is clean as Kombucha can get contaminated by various microorganisms aournd us.
We boil water in a pot and add tea into it and keep boiling a bit, in our case we didnt have extra pots, so we added boiling water directly in a plastic tray and then we added tea in a coffee filter bag closed with a thread that leaved dont go all over.
And then we add sugar and mix it well until it dissolves, the best to do add it while its hot, it will its work better.
Now its time to let it cool down untill room temperature, for us it took almost 2 hours for 7L of water. If we add Scoby into hot liquid it will most likely kill it, so we better wait.
When our liquid has reached the room temperature we meausure the PH with PH strips or PH meter, french tap water meauseres around PH 7. So we added around 100 ml of Vinegar until it got to PH 3.
And now when we set up good sweet, acicid conditions we can add our Mother Scoby, make sure you do it with gloves or desinfected hands.
We cover it with thin breatable cotton fabric that insects and dust can't get in, put elastic around that its well covered and can be easily open for our weekly check-ups.
Place it in a warm (ideally 30' degrees Celsium) temperature, we put it on a specail matrass for germination of seeds. The speed of growth depends on the temperature of the ambiance.
And the last important thing - dont move the tray while the Kombucha is growing, keep it in a dedicated place. The desired Kombucha material will appear in about few days - week as a thin layer.
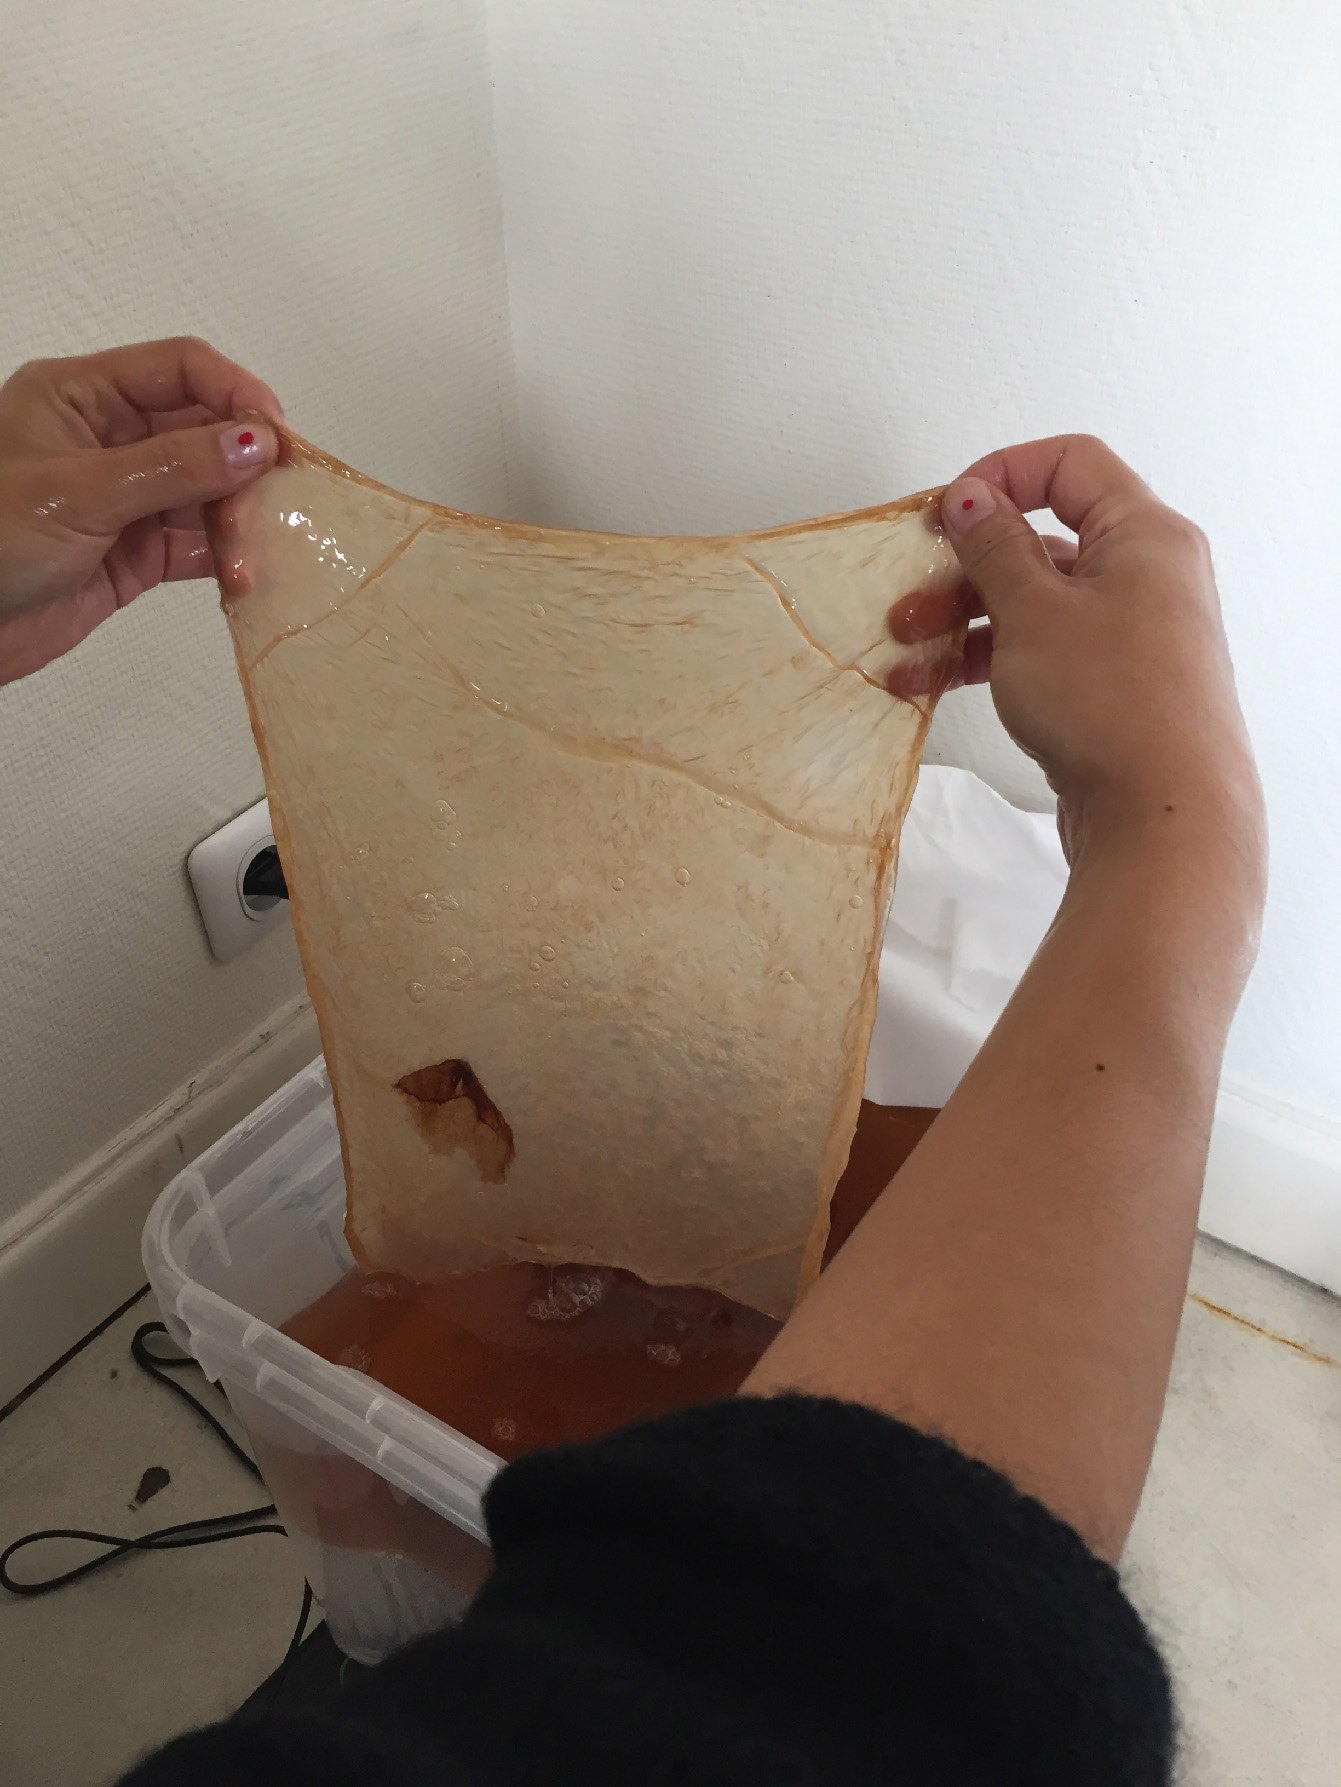
Part 2
After few weeks depending on your environment the Kombucha will start growing. In our case after 2 weeks it grew up to 1 cm, so we can wait 1 more week. What is the next procedure when we achieve the desired thickness? (Keep in mind that 1 cm of Kombucha will turn into almost 1mm after drying.)
When Kombucha reached about 1,5 cm (or less or more, depending on your needs) we can take it out with clean medical gloves. We wash it in soapy water to wash away the sticky sugary part and then we rince it in clear water. Now its the creative part - we can dry it on a flat surface or textured or even a specific form as Kombucha will take the form of the surface on which it is drying on. Of course the best if we could turn it every day or few days that it dries equally or to have a breathbale surface, but you can test it around.
And the liquid where the Kombucha was growing can be reused now to make more Kombucha, but we need to add sugar and tea accordingly. Always make sure that you keep all clean disinfecting to not contaminate Kombucha growth.
The Kombucha leather will be ready in about 1 week depending again on your environment.
7.Results
Unfortunately, a lot of our samples are moldy, but not all of them.